You love rooms that feel like a mood — moody, bold, and a little mysterious. These 25 dark aesthetic room decor DIY ideas give you exactly that: handmade pieces with texture, shadow, and personality that lean gothic, vintage, and modern all at once. If you’ve been searching “dark aesthetic room decor DIY,” this list is packed with doable projects that range from simple (no-sew pillow covers) to show-stopping (epoxy geode nightlights).
I start most of these with my go-to precision craft knife for clean cuts and use a low-temp hot glue gun for quick holds. Each project below includes a photo prompt for Pinterest, a clear material list with measurements, step-by-step instructions with drying and cure times, and display tips so your pieces read cohesive in a dark aesthetic room decor DIY setup.
Pick a project that fits your skill level, grab a playlist that matches the vibe, and let’s make your space hauntingly beautiful.
- Black Macramé Moon Wall Hanging
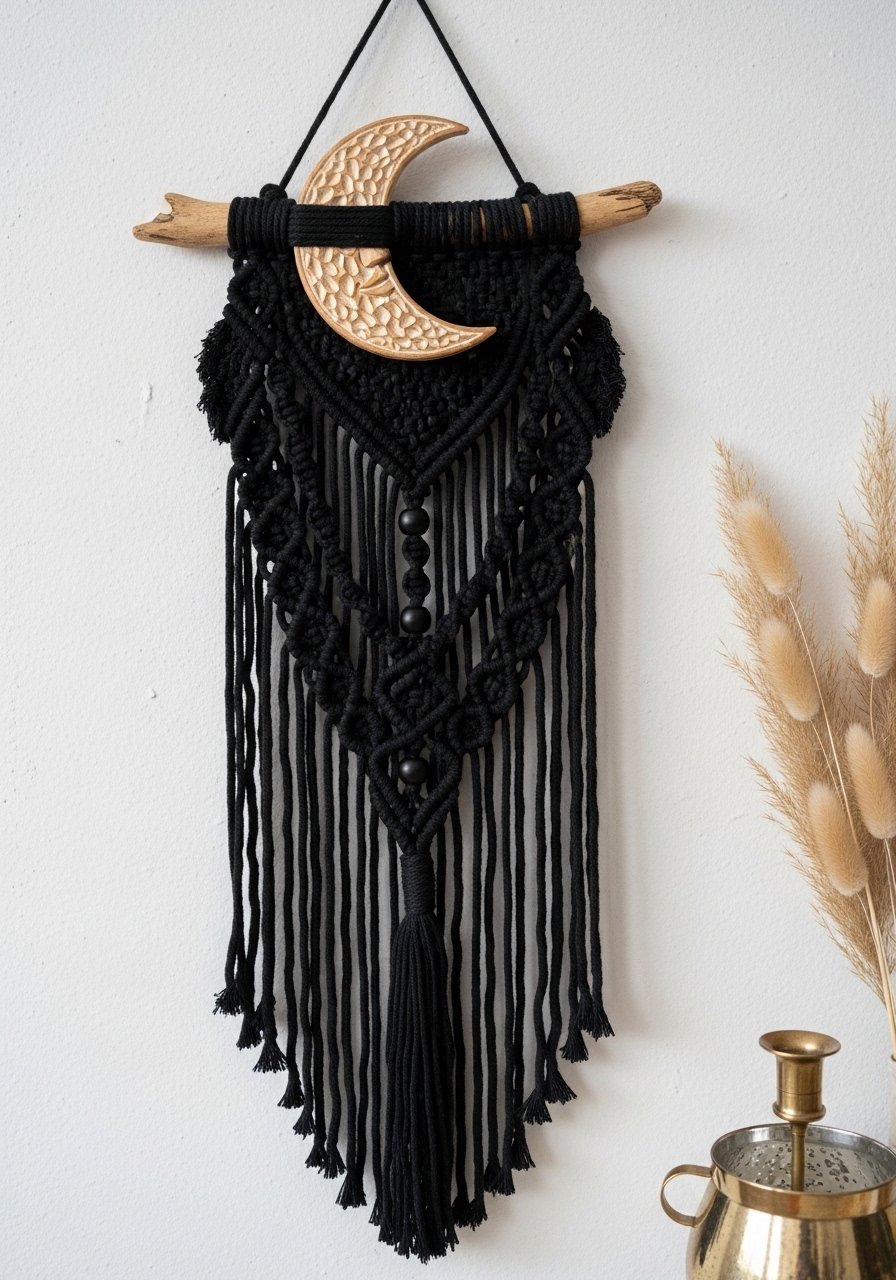
This oversized macramé uses black cotton cord for a soft, tactile wall piece. The moon-shaped wooden dowel and matte beads give it a celestial, dark aesthetic room decor DIY vibe. It’s great for beginners who want a statement piece without complex knots. The texture feels dense and cosy in your hands and looks dramatic on a pale wall.
Materials
- 5mm black single-strand macramé cord, 30 yards (pre-cut length options available)
- Wooden crescent dowel, 12" wide
- Matte black wooden beads, 10 x 12mm
- Scissors
- Measuring tape
- Comb for fringe
- T-pins or clipboard to hold while knotting
- Fabric stiffener (optional), 4 oz
Instructions
- Cut 12 cords at 6 ft each (for a full 12" hanging). Fold in half and loop them over the dowel using a lark’s head knot.
- Create alternating square knots in rows: 1st row full, 2nd row offset. Repeat for 10 rows.
- Add beads by threading onto selected cords and locking with overhand knots.
- Make a centered macramé diamond using half square knots, about 6 inches tall.
- Trim fringe to a tapered V shape. Use a comb to brush the ends for fullness.
- Optional: Lightly mist with fabric stiffener and let dry 30–45 minutes for a firmer silhouette.
How to Display or Gift It
- Hang centered above a bed or over a dark velvet chair for contrast.
- Add a small brass hook or small wooden easel for studio display if gifting.
- Store flat in a garment bag if making ahead.
- Tie a little black ribbon and dried lavender for a gift-ready finish.
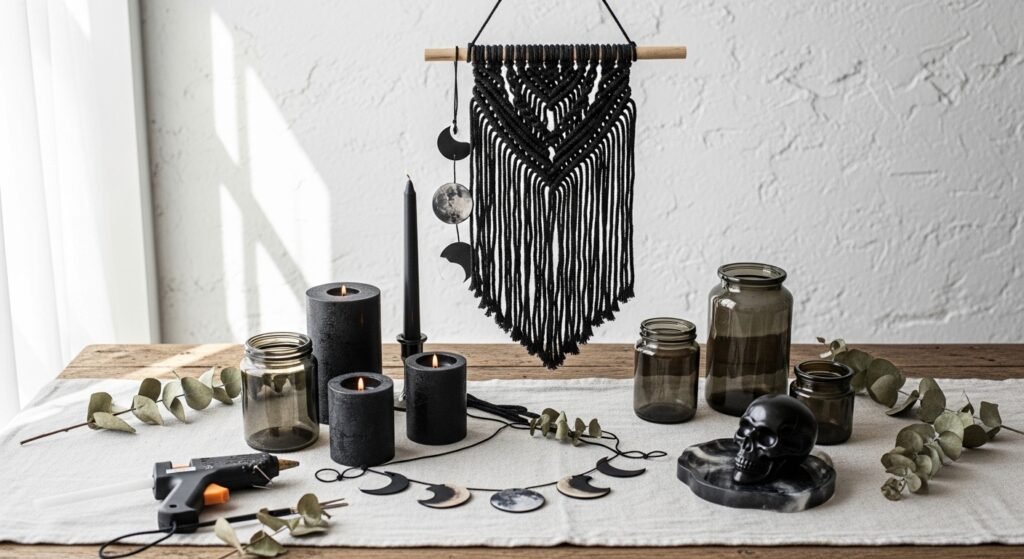
- Moon Phase Paper Garland (Black & Gold)

This lightweight garland gives instant gothic charm. You cut crescents from cardstock, add gold leaf or paint edges, then string them on black twine. It’s fast, dramatic, and perfect for shelves or across a headboard. Beginners will like that the shapes are forgiving.
Materials
- Matte black cardstock, 8.5 x 11", 10 sheets
- Gold paint pen, 1 mm tip
- Black waxed twine, 10 ft
- Fiskars circle punch set or template and craft knife
- Precision craft knife
- Cutting mat
- Ruler
- Small binder clips to hold while gluing
Instructions
- Use a circle punch or trace a 3" circle and cut 14 circles.
- For moon phases, cut crescents from circles using a craft knife; vary sizes to create new and waning moons.
- Edge each crescent with a gold paint pen, letting lines dry 5–10 minutes.
- Punch two tiny holes near the top of each moon and thread onto twine. Space moons 2–3 inches apart.
- Tie small knots to hold each moon in place.
- Hang and adjust spacing; paint touch-ups dry in 10 minutes.
How to Display or Gift It
- Drape the garland over a mirror or between shelving units for vertical interest.
- Gift rolled in a kraft tube with black tissue paper and a paint pen tucked inside.
- Make multiples and layer for dense visual texture.
- Gothic Apothecary Jars (Labeled)

Turn thrifted jars into witchy apothecary decor. Distressed labels and black wax seals give a vintage, mysterious feel. This project is excellent for recycling glass and makes a moody display on a shelf or vanity.
Materials
- Assorted glass jars, 4–6 pieces, small to medium (250–500 ml)
- Aged kraft labels, 6 (3 x 2") or tea-stained paper
- Black sealing wax sticks, 1 pack
- Glue gun (low temp)
- Black acrylic paint, matte
- Fine-tip marker for labeling
- Distressing ink pad (brown)
- Small paintbrush
Instructions
- Clean jars and remove labels. Paint lids matte black with 2 coats, drying 15 minutes between coats.
- Tea-stain paper labels (steep tea for 5 minutes, blot dry) then stamp or hand-letter names (e.g., “Night Bloom,” “Ash”). Let ink dry 10 minutes.
- Use distress ink around label edges for an aged look.
- Attach labels with a dab of craft glue and press firmly for 30 seconds.
- Melt black sealing wax and drip onto lid center. Press a small coin or seal while wax is warm; let cool 5–7 minutes.
- Fill jars with dried botanicals, black sand, or tiny LED lights.
How to Display or Gift It
- Arrange on a wooden tray with a nameplate.
- Wrap sets in kraft paper and tuck in a small wooden tray for gifting.
- Swap contents seasonally (dried flowers in fall, tiny ornaments in winter).
- Resin Skull Trinket Tray

This one’s a weekend resin project that yields a striking accessory tray. You’ll encase a small skull charm and metallic flake in black-tinted epoxy. Resin can be fiddly, but the payoff is a high-impact, glossy piece.
Materials
- Clear epoxy resin kit, 8 oz (includes resin & hardener)
- Silicone oval tray mold, approx 4 x 6"
- Small resin skull charm, 1
- Black pigment paste, tiny amount (0.5 g)
- Gold metallic flakes, pinch
- Mixing cups & wooden sticks
- Nitrile gloves
- Heat gun or torch for bubble pop
Instructions
- Measure resin and hardener 1:1 (follow kit directions). Mix for 3 minutes, scraping sides.
- Add a small pinch of black pigment; stir until even. Pour a thin base layer (about 2 mm) and let sit 10 minutes to de-gas.
- Place the skull charm in the mold. Pour remaining resin to cover charm, leaving 2–3 mm from the top. Sprinkle gold flakes.
- Use a heat gun for 5–10 seconds to pop bubbles. Let cure 24–48 hours (full cure 72 hours depending on kit).
- Demold gently. Sand edges with 320-400 grit sandpaper if needed. Buff to shine.
How to Display or Gift It
- Keep on a dresser, bookshelf, or bedside table with rings and keys.
- Bundle in black tissue and kraft box for a gothic gift.
- For storage, a small gift box keeps the glossy finish safe.
- Blackwashed Floating Shelf with Hidden LED Strip
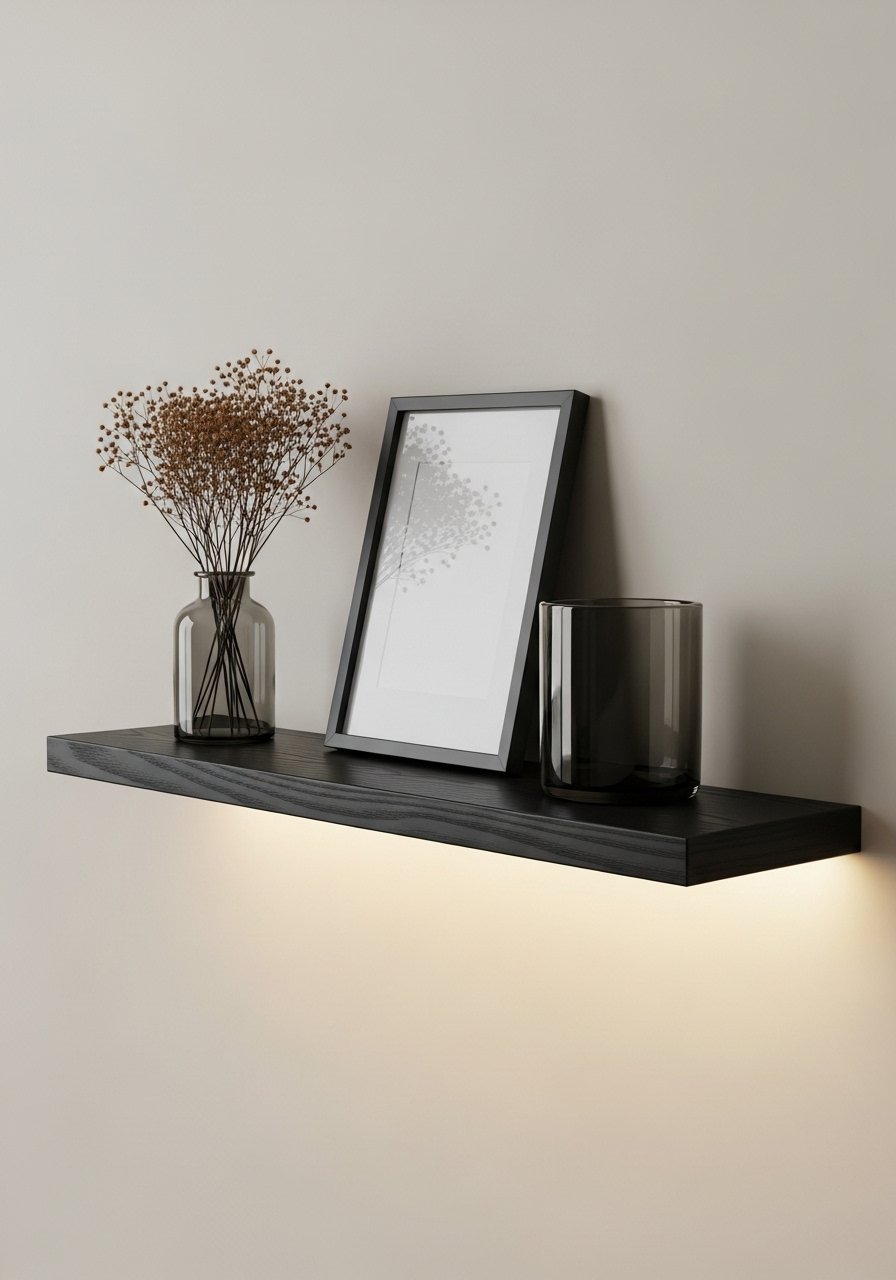
This floating shelf is simple but dramatic when paired with warm LED backlighting. The blackwash technique keeps wood grain visible and feels rustic-chic. Great for displaying other dark aesthetic room decor DIY pieces.
Materials
- Unfinished floating shelf, 24" x 6"
- Black wood stain (water-based), 4 oz
- Foam brush
- Warm white LED strip, 3 meters
- Sanding block (120 grit)
- Mounting hardware (screws & anchors)
- Rag for wiping stain
Instructions
- Sand shelf lightly with 120 grit to remove splinters. Wipe dust.
- Apply a thin coat of black stain with a foam brush following grain. Wipe excess with rag within 2 minutes for a blackwash look. Let dry 1–2 hours.
- Attach LED strip along underside centered; peel adhesive backing and press firmly for 30 seconds. Test lighting.
- Mount shelf per hardware directions, ensuring level.
- Arrange decor; LED will create halo lighting against the wall.
How to Display or Gift It
- Use as a vignette shelf for candles and small frames.
- Pair with a battery-operated LED strip for renters.
- Make multiples staggered for a gallery vibe.
- Dark Marble Painted Plant Pots

Transform plain terracotta into moody marble pots. You use acrylics and a dry brush technique for veining. They’re lightweight, dramatic, and perfect for succulents or small indoor plants.
Materials
- Terracotta pots, set of 3 (3", 4", 6")
- Acrylic paint: matte black, white, metallic gold
- Flat foam brush and detail liner brush
- Sealer (matte spray), 1 can
- Paper palette
- Painter’s tape
Instructions
- Prime pots with one coat matte black; dry 30 minutes.
- Dip a dry foam brush lightly in white and drag across surface in thin, irregular veins. Work quickly; white should be translucent.
- Use a liner brush to add fine white lines for detail. Add sparse gold accents for shimmer.
- Let paint dry 20–30 minutes between layers.
- Spray two light coats of matte sealer, drying 15 minutes between coats. Cure 24 hours before watering plants.
How to Display or Gift It
- Cluster pots on a dark tray for a botanical corner.
- Wrap the base in kraft paper and twine for gifting.
- Store pots stacked inside each other in a craft storage bin when not planted.
- Velvet Pillow Cover with Pin Tuck Rows
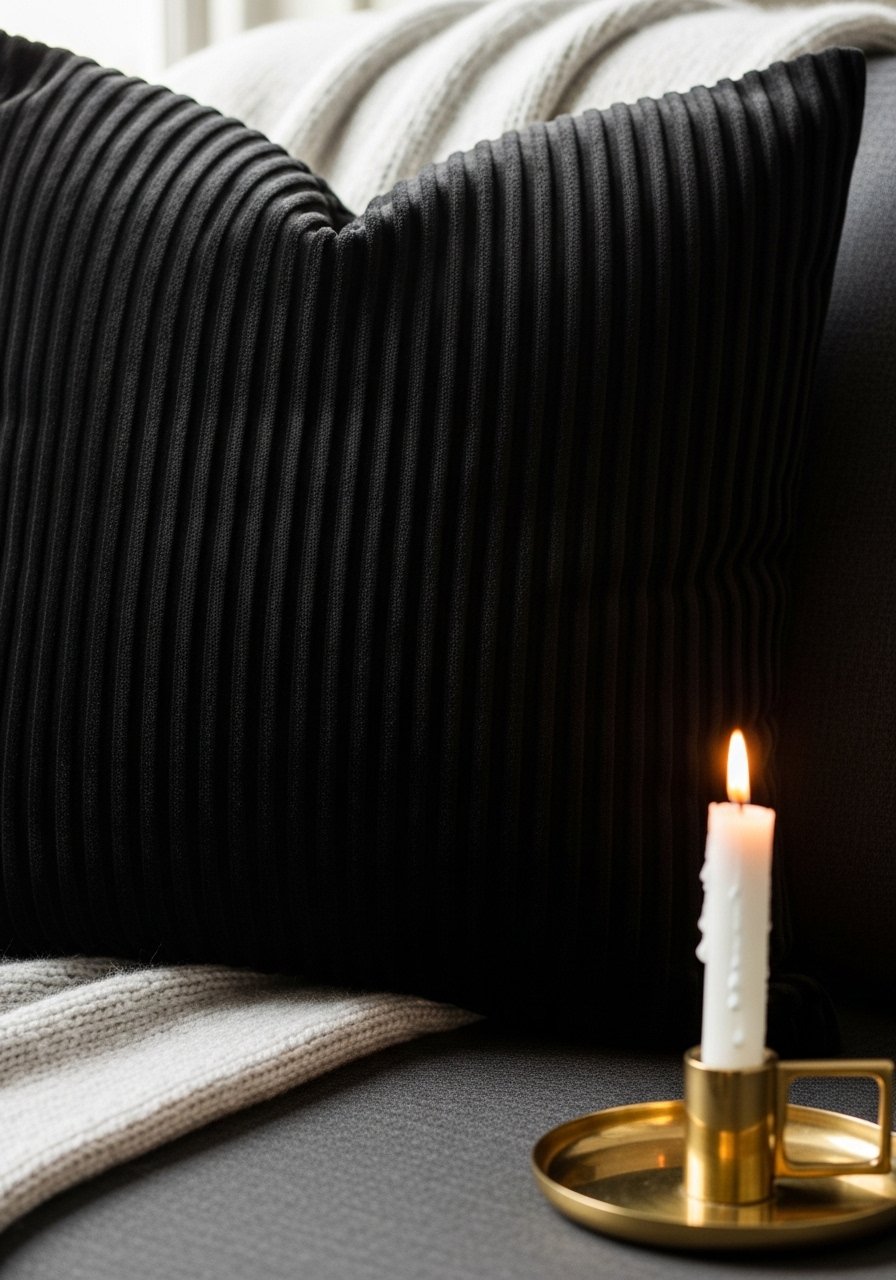
A sewn velvet pillow adds luxe texture to a moody room. Pin tucks create linear shadow that reads gothic and modern. It's a beginner sewing project if you can run a straight stitch.
Materials
- Black velvet fabric, 1/2 yard (54" wide)
- Pillow insert, 18 x 18"
- Sewing machine (straight stitch)
- Pins, chalk or fabric marker
- Thread (polyester black)
- Seam ripper (optional)
Instructions
- Cut two 19 x 19" squares (allow 1/2" seam).
- Mark pin tuck lines across the front piece every 1.25 inches. Pin fabric folded at each tuck and sew along crease using a small stitch length.
- Press tucks flat with low heat and a pressing cloth.
- With right sides together, sew three sides at 1/2" seam. Insert pillow insert.
- Finish with a hidden slip stitch or sew the fourth side closed on the machine.
- Trim threads and steam lightly to set.
How to Display or Gift It
- Pair with a textured knit throw and a small brass tray.
- Gift with a matching zipper kit in a small sewing kit.
- Make multiples in different tuck widths for a layered couch look.
- Hand-Painted Dark Botanical Art Prints

Paint stark silhouettes of botanicals in black ink on cream paper and add gold highlights. Framed in matte black, they become gallery-worthy pieces with minimal supplies.
Materials
- Watercolor paper, 8 x 10", pack of 10
- India ink (black), 30 ml
- Gold ink or metallic pen
- Round brushes (size 2 and 6)
- Black 8 x 10 frames, 3
- Pencil and eraser
Instructions
- Lightly sketch botanical shapes. Keep lines bold and minimal.
- Fill silhouettes with India ink using a size 6 brush. Let dry 10 minutes.
- Add gold highlights sparingly with a metallic pen. Dry 2–5 minutes.
- Flatten under heavy books for 1 hour if paper buckles.
- Frame using a mat for professional look.
How to Display or Gift It
- Group three frames above a console.
- Wrap prints in tissue and place in a frame gift box for gifting.
- Rotate prints seasonally for a fresh wall.
- Black Ombre Wine Bottle Vases
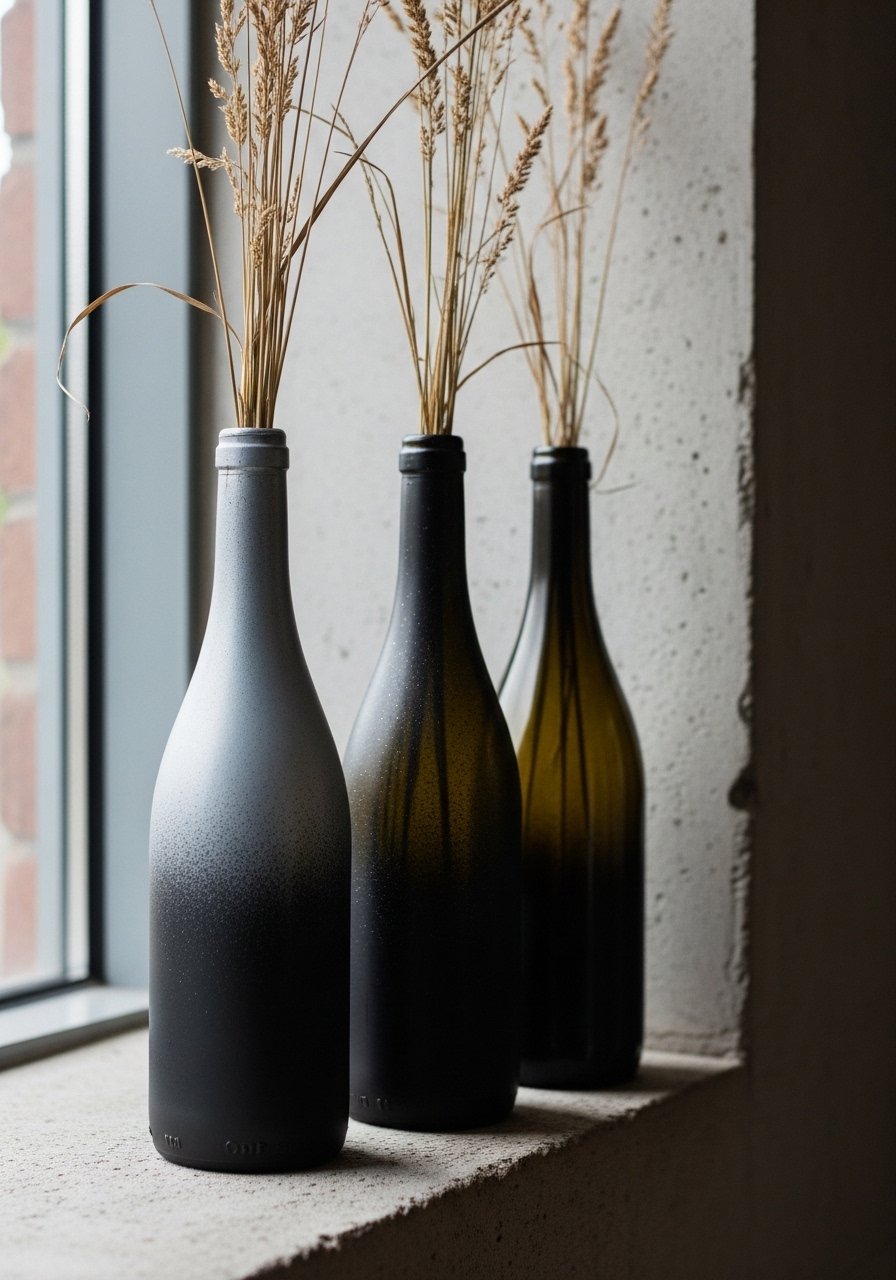
Upcycle bottles into vases with spray paint ombre. The matte finish and natural dried stems create a broody, editorial look.
Materials
- Empty wine bottles, 3 (cleaned)
- Black matte spray paint and gray fade spray (2 cans)
- Masking tape
- Protective gloves and mask
- Dried pampas grass stems, 3–5
Instructions
- Clean bottles and remove labels. Let dry.
- Tape bottle neck if you want a clean rim. Spray base with matte black in short bursts; hold can 10–12 inches away.
- Lightly mist with gray spray from top down for a gradient. Let dry 15 minutes between layers. Total dry 60 minutes.
- Add dried stems.
How to Display or Gift It
- Cluster on a mantel or windowsill with a vintage book stack.
- Wrap in kraft paper and deliver as housewarming gift.
- Store extras in a craft organizer (link hidden in text).
- DIY “Spellbook” Covered Notebook
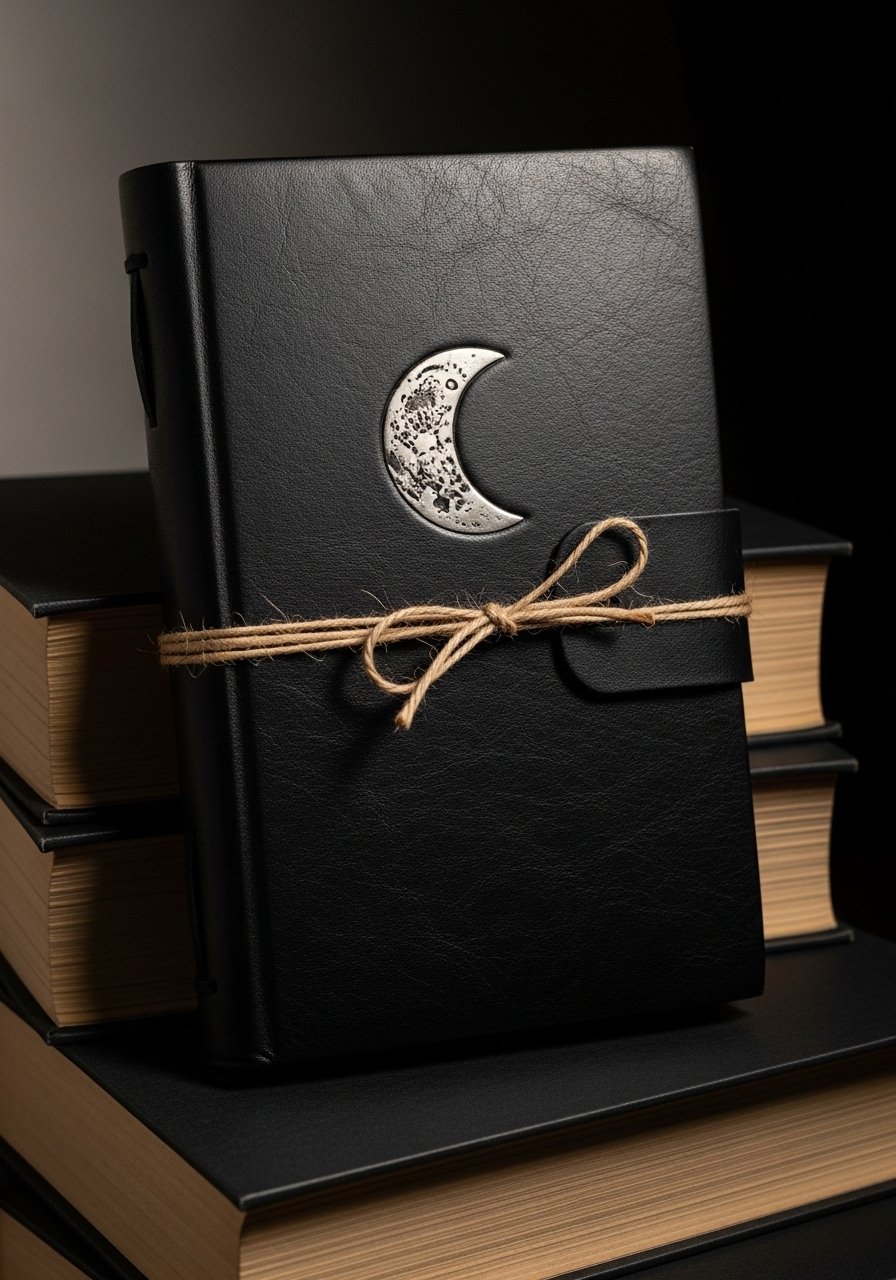
Make a faux antique journal for notes or as a prop. Distressed edges and a custom stamped cover make it feel like it’s been on your shelf for decades.
Materials
- Blank hardcover notebook, 6 x 8"
- Black leatherette fabric, 10 x 12"
- Antiquing ink pad (brown)
- Gold leaf pen for edges
- Strong craft glue (E6000)
- Twine for wrapping
Instructions
- Cut leatherette to cover notebook with 1" overhang.
- Glue cover using a thin bead of E6000 and smooth with a bone folder. Let set 1–2 hours.
- Rub antiquing ink around edges and corners for wear. Dry 10 minutes.
- Add gold edge highlight with a gold leaf pen. Dry 5 minutes.
- Wrap with twine for display.
How to Display or Gift It
- Place in a stack with a small wax seal on the twine.
- Keep on a bedside table as a journal.
- Gift in a kraft gift box with a fountain pen.
- Dark Terrazzo Coasters with Matte Finish
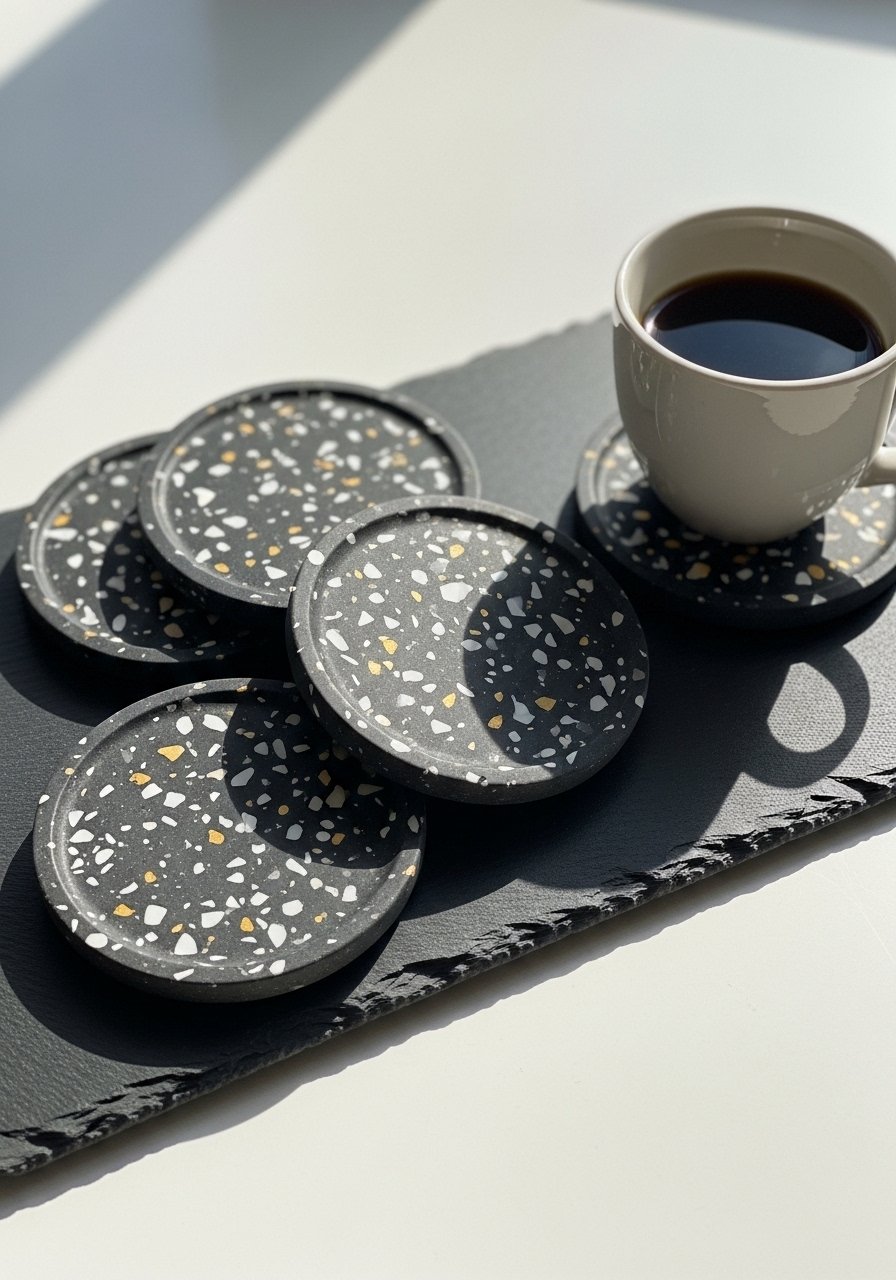
Terrazzo is trendy and translates well to a dark palette. These cement coasters use terrazzo chips for contrast and a matte sealer to keep them understated.
Materials
- Quick-set cement mix, 1 lb
- Silicone round coaster molds, 4 x 4"
- Terrazzo chip mix (glass & stone chips), 2 oz
- Mixing cup & stick
- Matte sealer spray, 1 can
- Sandpaper (220 grit)
Instructions
- Mix cement per package for small batch (approx 1 cup water to 2 cups mix; check brand).
- Stir in terrazzo chips. Pour into molds, tapping to release air.
- Let set 30–60 minutes until firm to touch. Demold and cure 24 hours.
- Sand edges smooth and spray two coats matte sealer, 15 minutes between coats. Full cure 48 hours.
How to Display or Gift It
- Stack tied with black ribbon and a small kraft tag.
- Keep in a coaster holder on coffee table.
- Make sets in different sizes for matching trays.
- Dark Dreamcatcher with Tassels and Beads

This dreamcatcher leans gothic with lace, matte beads, and long tassels in black and deep plum. It’s tactile and makes a delicate-yet-dark statement.
Materials
- Metal hoops, two sizes: 6" and 4"
- Black lace trim and black cotton thread
- 3mm black macramé cord, 10 yards
- Matte black beads, 30
- Tassel hook or needle
- Hot glue gun
Instructions
- Wrap each hoop in lace with hot glue at seam.
- Weave webs using cotton thread, tying a small knot at center. Add beads sporadically.
- Attach small hoop inside the larger hoop with thread knots.
- Make tassels from macramé cord and attach to bottom of larger hoop. Glue bead caps if desired.
- Trim tassels to a gentle V.
How to Display or Gift It
- Hang near a bedroom window or above a bed.
- Gift in a long kraft tube with tissue.
- Store flat in a tall craft tube.
- Spiderweb Painted Canvas (Textured)
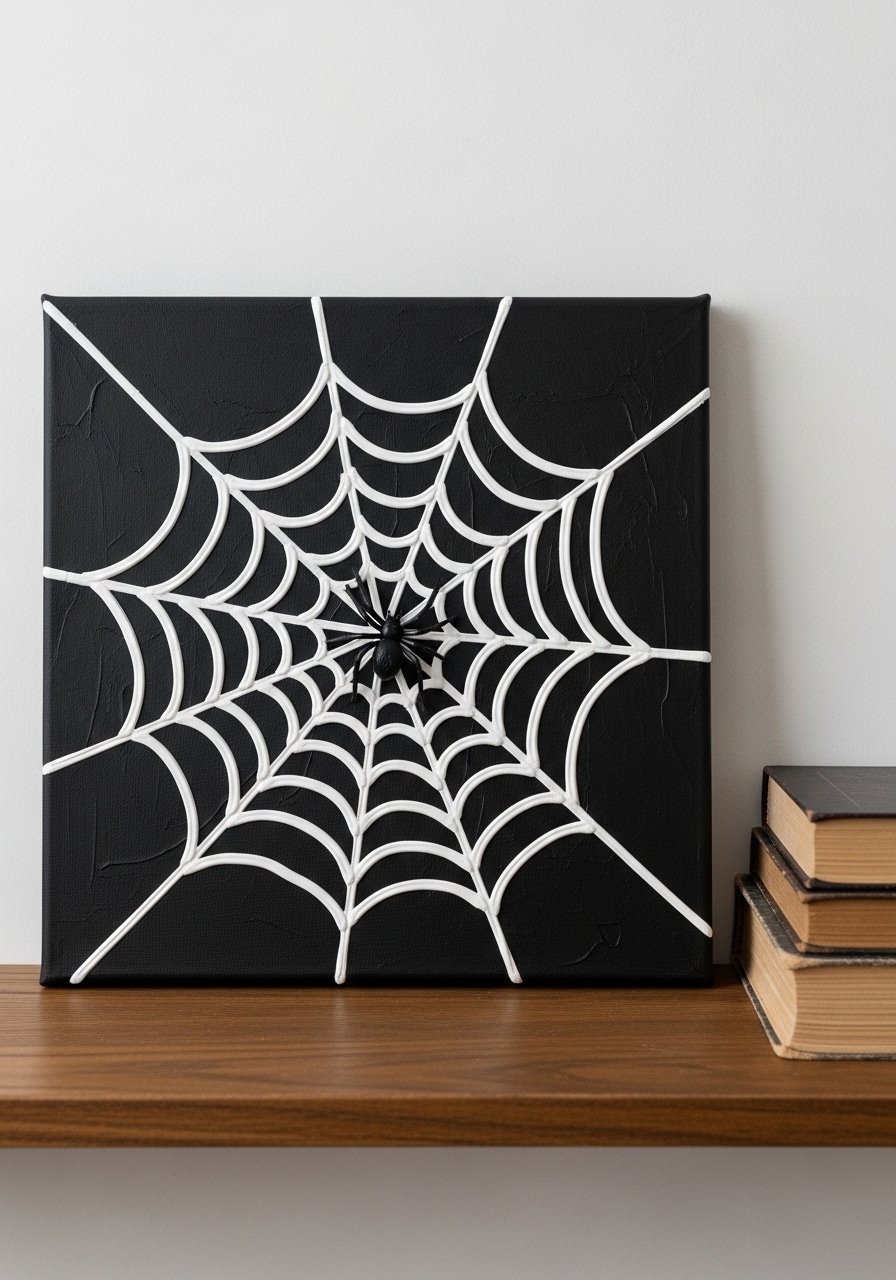
This textured canvas uses modeling paste for raised web lines and stark contrast for an eerie effect. Easy to make and bold in any gallery wall.
Materials
- 8 x 8" gallery canvas
- Modeling paste, 2 oz
- Acrylic paints: black and titanium white
- Palette knife for spreading paste
- Fine detail brush
- Small faux spider (optional)
Instructions
- Paint canvas matte black and let dry 20 minutes.
- Using a palette knife, draw web lines with modeling paste. Keep lines tapered for natural look. Dry 1–2 hours.
- Dry brush white over raised lines to highlight; wipe excess with a rag. Let dry 30 minutes.
- Attach faux spider with a dab of glue if desired.
How to Display or Gift It
- Add to a small gallery wall with dark frames.
- Send as a Halloween-season gift with a small canvas wrap.
- Store flat in a padded portfolio when not displayed.
- Smoked Glass Jar Lanterns with Copper Accent

Convert jars into smoky lanterns with copper accents for an industrial gothic feel. Battery LED candles keep them safe and renter-friendly.
Materials
- Smoked glass spray paint, 1 can
- Empty glass jars, 3 medium
- Thin copper wire, 5 ft
- LED tealights, 3
- Pliers for wire shaping
- Rubbing alcohol for cleaning
Instructions
- Clean jars with rubbing alcohol and let dry.
- Spray interior or exterior lightly with smoked glass spray; two light coats, 15 minutes drying between coats. Full cure 24 hours.
- Wrap copper wire around necks, create loops for hanging. Twist ends neatly with pliers.
- Place LED tealights inside and test glow.
How to Display or Gift It
- Hang clustered at varying heights or line along a hearth.
- Gift with a set of LED candles in a battery tealight pack.
- Store spare wire in a small craft box.
- Moon Phase Wall Clock (Black Face)

Customize an affordable clock with painted moon phases to make a functional art piece. Quick paint, quick assembly, long visual impact.
Materials
- Blank clock kit with 10" face (battery-operated)
- Acrylic paint: matte black & gold
- Small round stencil (1" dots)
- Painter’s tape
- Battery (AA)
- Fine brush
Instructions
- Paint clock face matte black with two thin coats, drying 20 minutes between coats.
- Use stencil to mark moon phase positions around rim. Paint gold moons with fine brush; dry 10 minutes.
- Install clock mechanism per kit instructions. Insert battery and test.
- Hang and adjust time.
How to Display or Gift It
- Place in entry or above a reading nook.
- Pack with bubble wrap in a small mailer box if gifting.
- Make multiple faces in different metallics for a gallery cluster.
- Black Painted Book Stack (Faux Hardcover)

Paint thrifted books for a sleek, mysterious stack. Gold handwritten titles add personality and the stack is perfect as a sculptural object.
Materials
- Thrifted hardcover books, 3 (similar heights)
- Matte black acrylic paint, 2 oz
- Gold leaf pen or gold paint pen
- Foam brush
- Sandpaper (fine)
Instructions
- Remove dust jackets and sand book covers lightly.
- Apply two thin coats of matte black paint, drying 15 minutes between coats.
- Add gold titles or symbols with a pen once paint is fully dry (30 minutes).
- Stack and press for 10 minutes to settle.
How to Display or Gift It
- Use as risers for decor or for a bedside lamp.
- Wrap trio in kraft paper and gift with a gold paint pen.
- Store in a dry, cool place to avoid warping.
- Apothecary Mirror with Wire Spider Accents
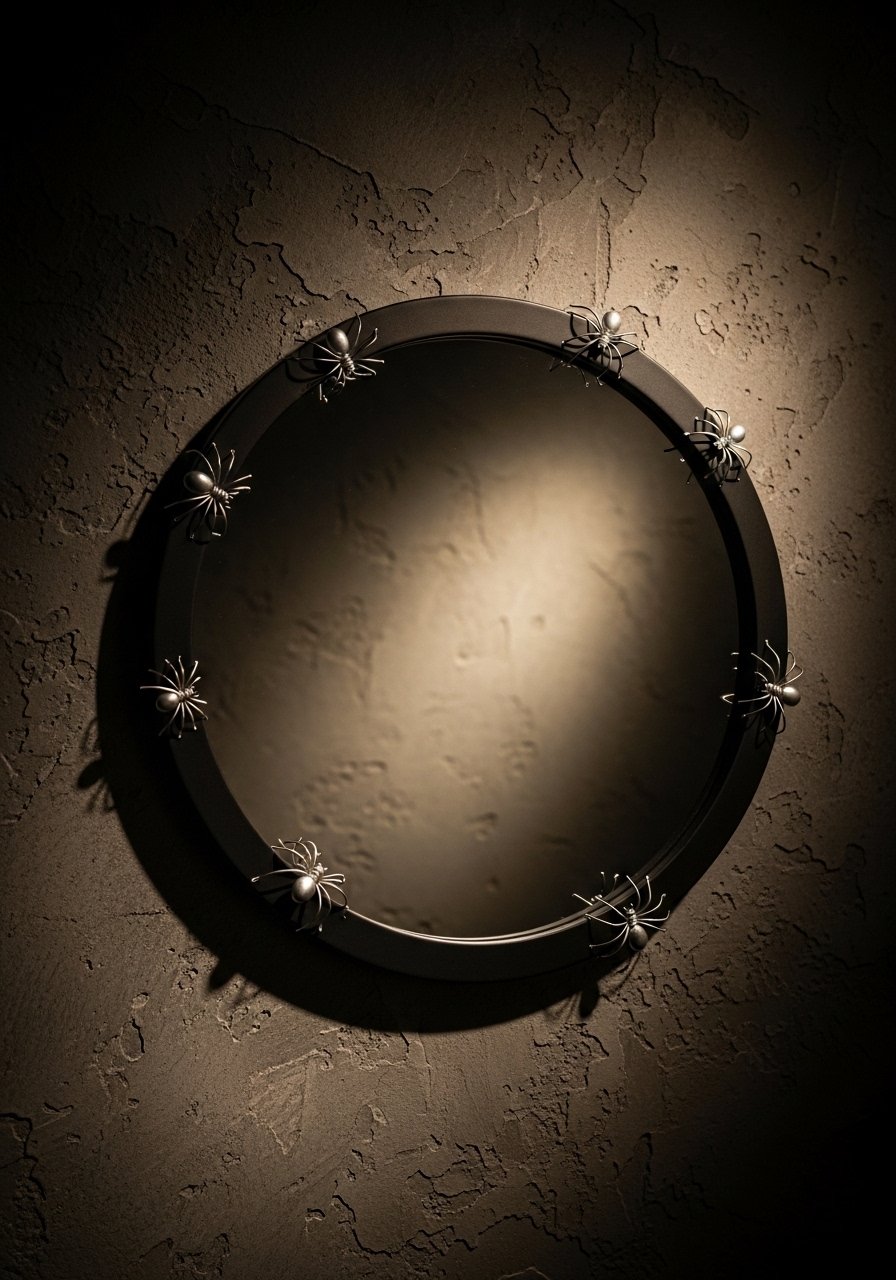
Add handmade wire spiders to a simple mirror for a subtle macabre touch. The mirror refracts light and the accents cast creepy-cute shadows.
Materials
- Round mirror, 12" with thin frame
- Black craft wire, 18 gauge, 1 spool
- Wire cutters & round-nose pliers
- Black spray paint (if framing needs change)
- Small mounting adhesive dots
Instructions
- If needed, spray frame matte black and let dry 30 minutes.
- Shape spiders by creating a small body (loop) and eight legs with pliers. Make 3–5 spiders in different sizes.
- Attach spiders with adhesive dots, placing some legs over the frame for depth.
- Hang mirror; check that spider legs don’t scratch wall.
How to Display or Gift It
- Hang in a hallway or powder room for a surprise detail.
- Pair with a mirror hanging kit for safe installation.
- Gift as a unique housewarming present with protective wrap.
- Black-Dyed Linen Curtains with Raw Hem

Dye plain linen for dramatic window treatments. Raw hem keeps the look modern and imperfect, which suits dark aesthetic spaces.
Materials
- Linen curtain panels, prewashed, 84" length
- Black fabric dye (fiber-reactive), 1 pack
- Large plastic tub or bucket for dyeing
- Rubber gloves
- Salt (if using specific dyes), 1 cup
- Clothesline or hanger
Instructions
- Mix dye per package in a tub with hot water (temp per dye instructions). Add salt if directed.
- Submerge curtain panel, stirring for 30–45 minutes for even coverage. For ombre, partially dip and move slowly.
- Rinse in cool water until runs clear. Wash separately on gentle cycle and air dry.
- Leave a raw hem or fray edge deliberately for texture.
How to Display or Gift It
- Hang on matte black rod and pair with a weighted hem for drape.
- Include care instructions if gifting; wrap in a fabric gift bag.
- Make double layers (black outer, sheer inner) for depth.
- Resin Geode Nightlight (Black & Purple)

Create a dreamy geode nightlight with resin and mica powders. The LED base keeps it safe beside the bed and the layers glow with warm mystery.
Materials
- Small silicone dome mold, 3" diameter
- Epoxy resin kit, 8 oz
- Black pigment and purple mica powder
- Tiny LED base (battery)
- Mixing cups & stir sticks
- Heat gun
Instructions
- Mix resin per kit instructions and pour a thin black base layer. Cure 12–24 hours depending on resin.
- Add mixed purple mica layers, pouring slowly to create banding. Use heat gun to remove bubbles.
- Let fully cure 48–72 hours.
- Mount on LED base and test glow.
How to Display or Gift It
- Place on bedside table for soft ambient light.
- Gift in velvet pouch with an instruction card.
- Store carefully in a small padded box.
- Faux Taxidermy Horns Painted Black
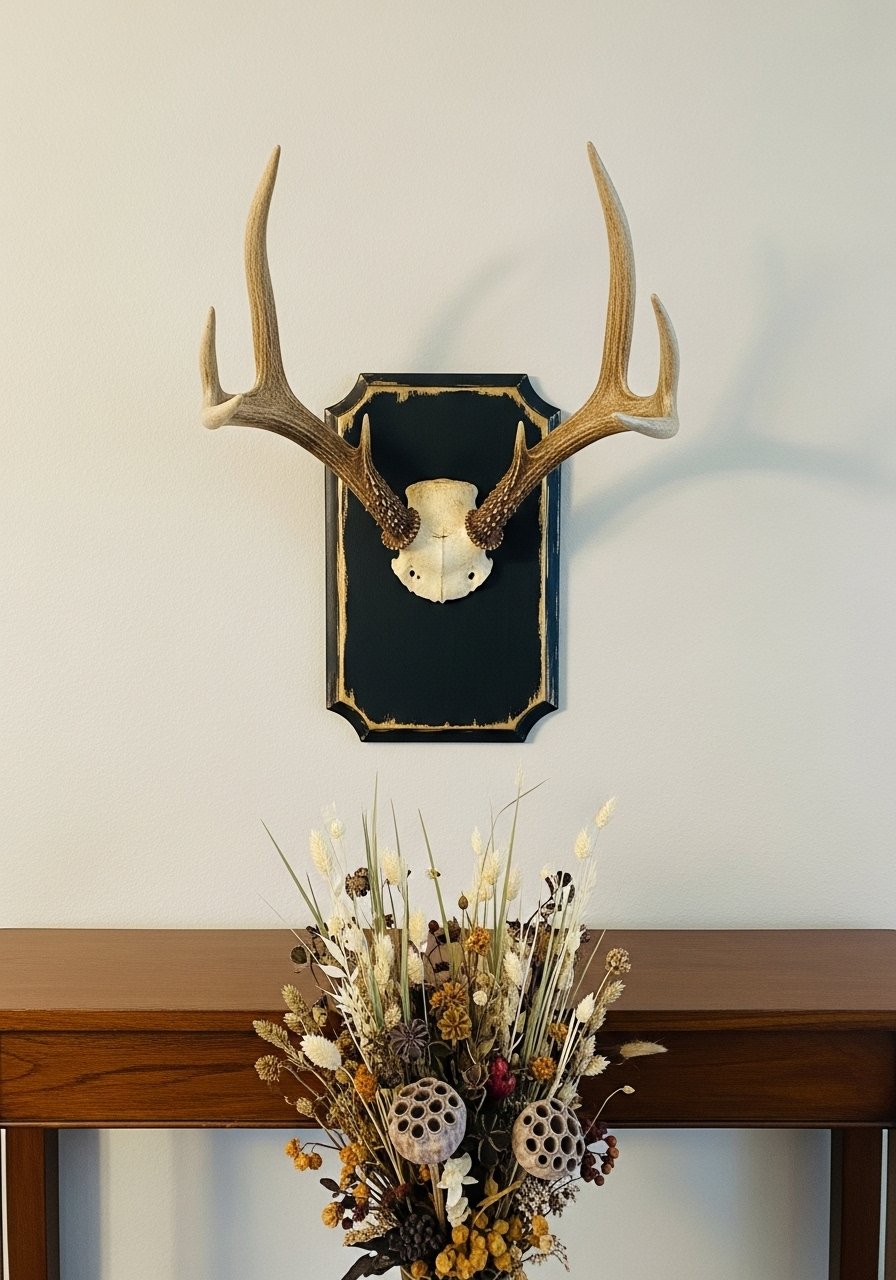
Faux antlers painted matte black have a sculptural, moody presence without any real animal parts. Mount on a plaque for instant focal art.
Materials
- Faux antlers (resin), pair
- Small wooden plaque, 6 x 8"
- Matte black spray paint
- Gold dry-brush paint for highlights
- Screws & drill for mounting
- Mounting hooks
Instructions
- Paint antlers and plaque matte black; two coats with 15 minutes dry time between.
- Lightly dry-brush gold on raised edges for dimension.
- Mount antlers to plaque using screws and epoxy if needed. Cure 24 hours.
- Hang using appropriate wall hardware.
How to Display or Gift It
- Center above a console or bed for a bold anchor.
- Package in a long kraft box with padding for shipping.
- Offer as a housewarming gift in a long craft mailer.
- Blood-Red Dried Floral Wreath with Black Base
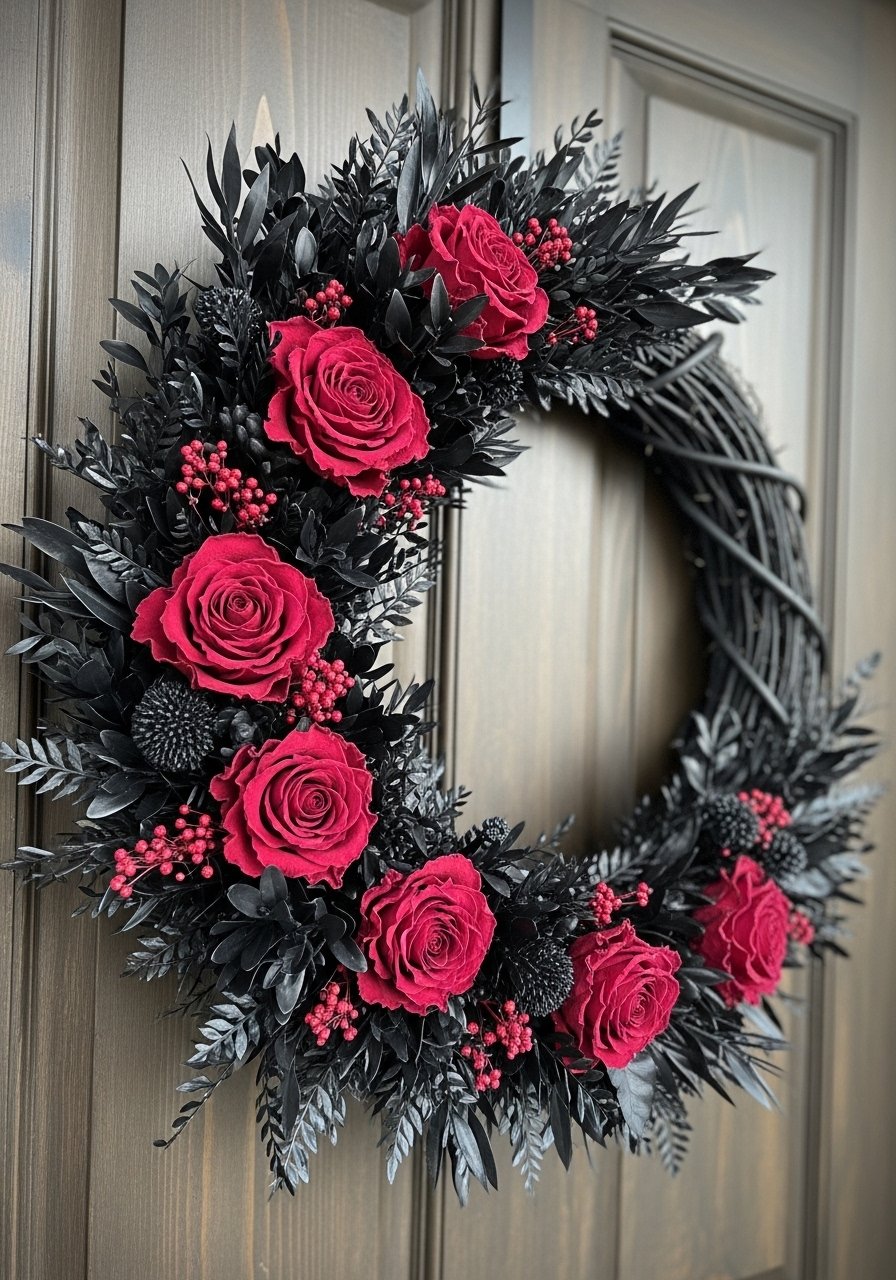
A dark floral wreath uses dyed dried flowers and black foliage for dramatic seasonal decor. The color contrast is striking and photographic—perfect for Pinterest.
Materials
- Grapevine wreath base, 12"
- Dried roses (dyed deep red), 12 stems
- Black preserved eucalyptus, bunch
- Floral wire & hot glue
- Scissors
Instructions
- Attach eucalyptus to base in a clockwise direction with floral wire.
- Tuck dried roses into eucalyptus and secure with hot glue.
- Fill gaps and trim for a compact silhouette. Let glue set 10 minutes.
- Hang with a black ribbon.
How to Display or Gift It
- Use as door decor or over a fireplace.
- Store flat in a wreath storage box to prevent crushing.
- Gift in a wreath gift box or wrapped in kraft.
- Mini Altar Tray with Incense Holder
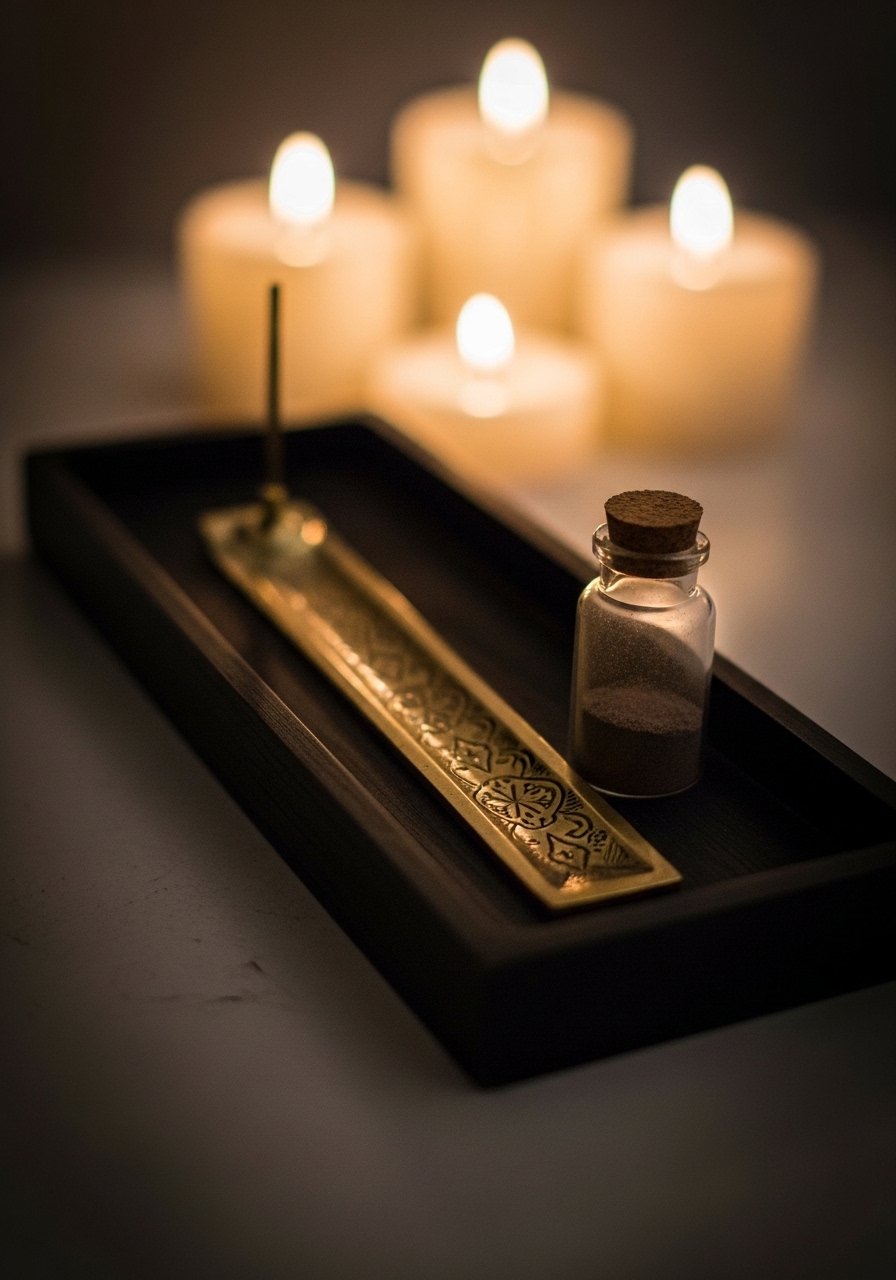
This tray curates small ritual or display items: crystals, incense, and candles. Staining keeps wood grain visible for a luxe dark look.
Materials
- Small wooden tray, 6 x 9"
- Black wood stain, 2 oz
- Incense holder (brass or black ceramic)
- Tiny apothecary jar
- Foam brush
- Clear sealer
Instructions
- Sand tray lightly and stain with a thin coat; wipe excess. Dry 1–2 hours.
- Seal with clear matte sealer, 15 minutes between coats.
- Arrange incense holder and mini jars. Use foam pads under items to avoid scratches.
How to Display or Gift It
- Place at an altar corner or dresser.
- Gift with a small incense sampler in a tray gift set.
- Store small items in labeled apothecary jars.
- Smudging Wand with Black-Dyed Tassel
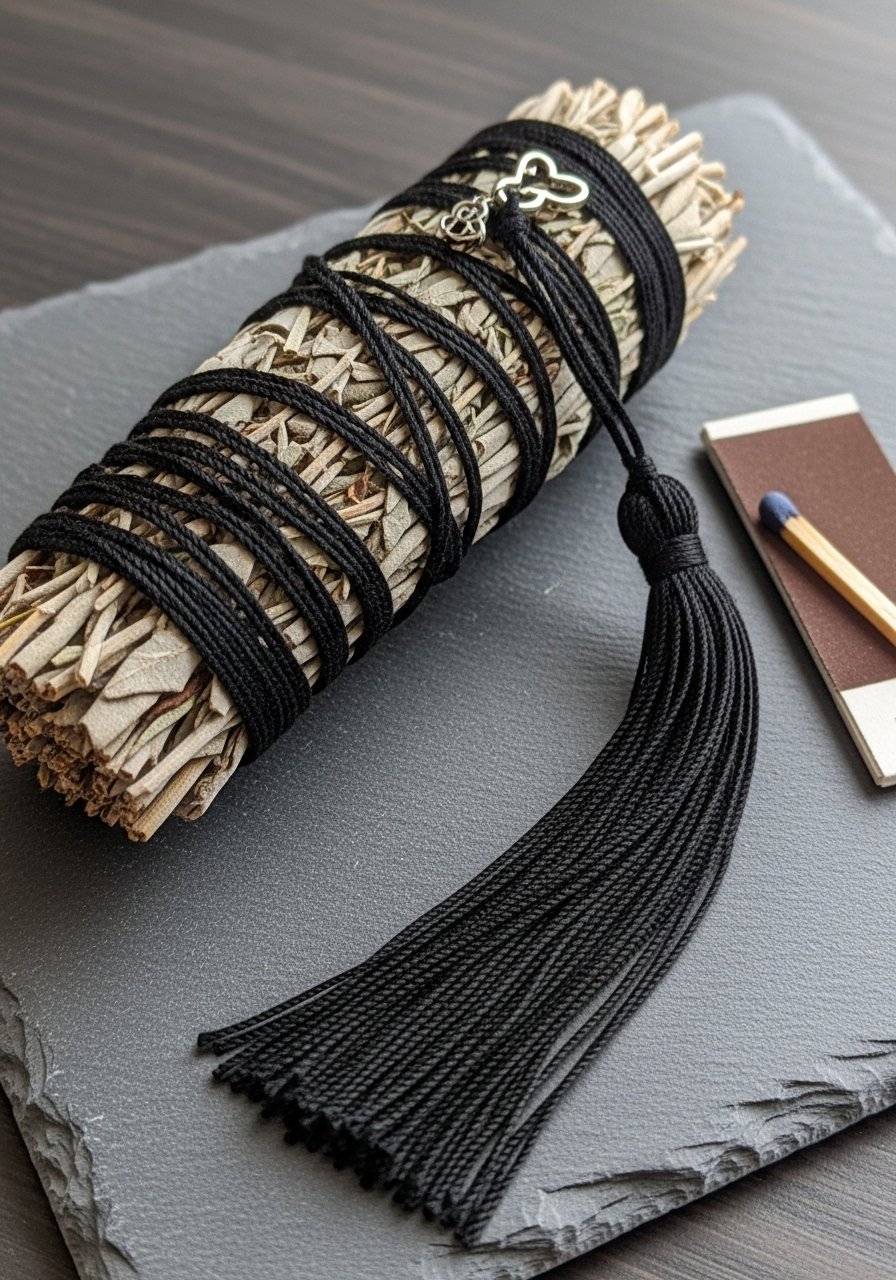
Make a sleek smudging bundle using white sage wrapped tightly with black thread and finished with a tassel. It reads clean and witchy without over-the-top embellishment.
Materials
- White sage bundle, 4–5"
- Black embroidery floss, approx 10 yards
- Tassel making kit or cardboard template
- Small charm (optional)
- Scissors
Instructions
- Wrap sage bundle tightly with black floss, knotting securely at the base.
- Make a tassel with floss and attach to the bundle base with a knot.
- Add charm if desired. Let sit 24 hours before burning to ensure tight wrap.
How to Display or Gift It
- Keep in a small velvet pouch and pair with a match strike book.
- Store in a small box to avoid shedding.
- Make sets with different tassel colors for gifting.
- Shadow Box of Pressed Night-Blooming Botanicals

Press flowers with dark petals (or dye them) and arrange in a deep frame for a preserved, haunting art piece.
Materials
- Shadow box frame, 8 x 10"
- Pressed flowers and leaves, enough to fill composition
- Black matboard for backing
- Acid-free glue dots or archival adhesive
- Tweezers
Instructions
- Press flowers for 1–2 weeks in a flower press or heavy books.
- Mount black matboard inside shadow box. Arrange pressed botanicals until composition pleases you.
- Use glue dots to attach pieces; tweezers help with placement.
- Close frame and avoid direct sunlight to prevent fading.
How to Display or Gift It
- Group several shadow boxes for a botanical wall.
- Gift with an explanation card about the pressing process.
- Store in a flat portfolio to protect.
- DIY Smoked Tea Light Holder Trio
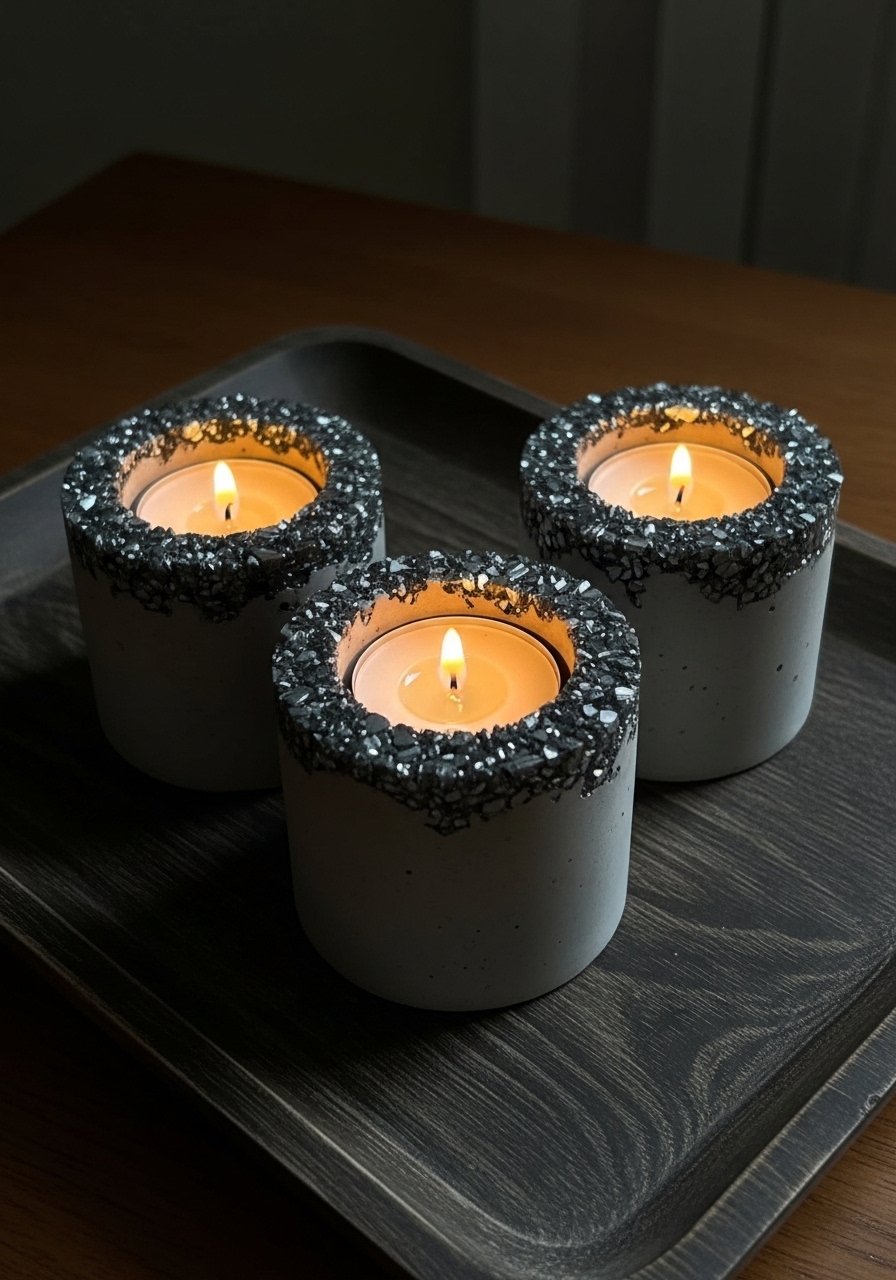
A concrete pour into small molds creates tactile holders finished with smoked mica for shimmer. Perfect for low, layered lighting in a moody room.
Materials
- Fast-setting concrete mix, 1 lb
- Small silicone molds (cylinders), 3
- Black mica powder, small pinch
- Disposable cups & stir sticks
- Sanding sponge
Instructions
- Mix concrete per package instructions for small batch. Stir in mica powder until evenly distributed.
- Pour into molds and tap to remove bubbles. Let set 30–60 minutes until firm. Demold and cure 24 hours.
- Sand rough edges and wipe dust. Place tea lights in shallow recesses.
How to Display or Gift It
- Arrange as a trio on a dark tray and light for ambiance.
- Gift wrapped in tissue inside a small candle box.
- Store safely to avoid chipping.
You’ve just browsed 25 dark aesthetic room decor DIY projects designed for moody, bold interiors. There’s a little bit of everything: textiles, resin, paint, wood, and found-object makeovers. Try one tonight, or pin a half-dozen to plan a full room refresh. Which project are you most tempted to make — a resin skull tray or the velvet pillow? Share this list with a friend who loves shadowy decor, and if you’re going to stock a single tool that helps across most of these projects, a temperature-control hot glue gun will change how clean your finishes look — no more stringy glue or burns.
Happy crafting — I can’t wait to see what you make.