You know that feeling when you walk into a bedroom and every surface whispers calm? These 26 aesthetic bedroom decor DIY ideas are made to give you that dreamy, cozy vibe while letting your handmade style shine. Each project is practical, budget-friendly, and created for real makers—no mystery techniques, just clear steps, real drying times, and finishing tips.
I'll show projects across cottagecore, boho, Japandi, and modern farmhouse palettes. You'll find macramé, painted wood, framed textiles, resin accents, and soft textile crafts—each one labeled for skill level and time. I start many pieces by cutting vinyl or paper with my Cricut Explore cutting machine, but I also include no-machine alternatives for every project. Grab a hot glue gun and a few basic paints and let’s make your room feel like the coziest place in the house.
- Macramé Hanging Planter — Aesthetic Bedroom Decor DIY
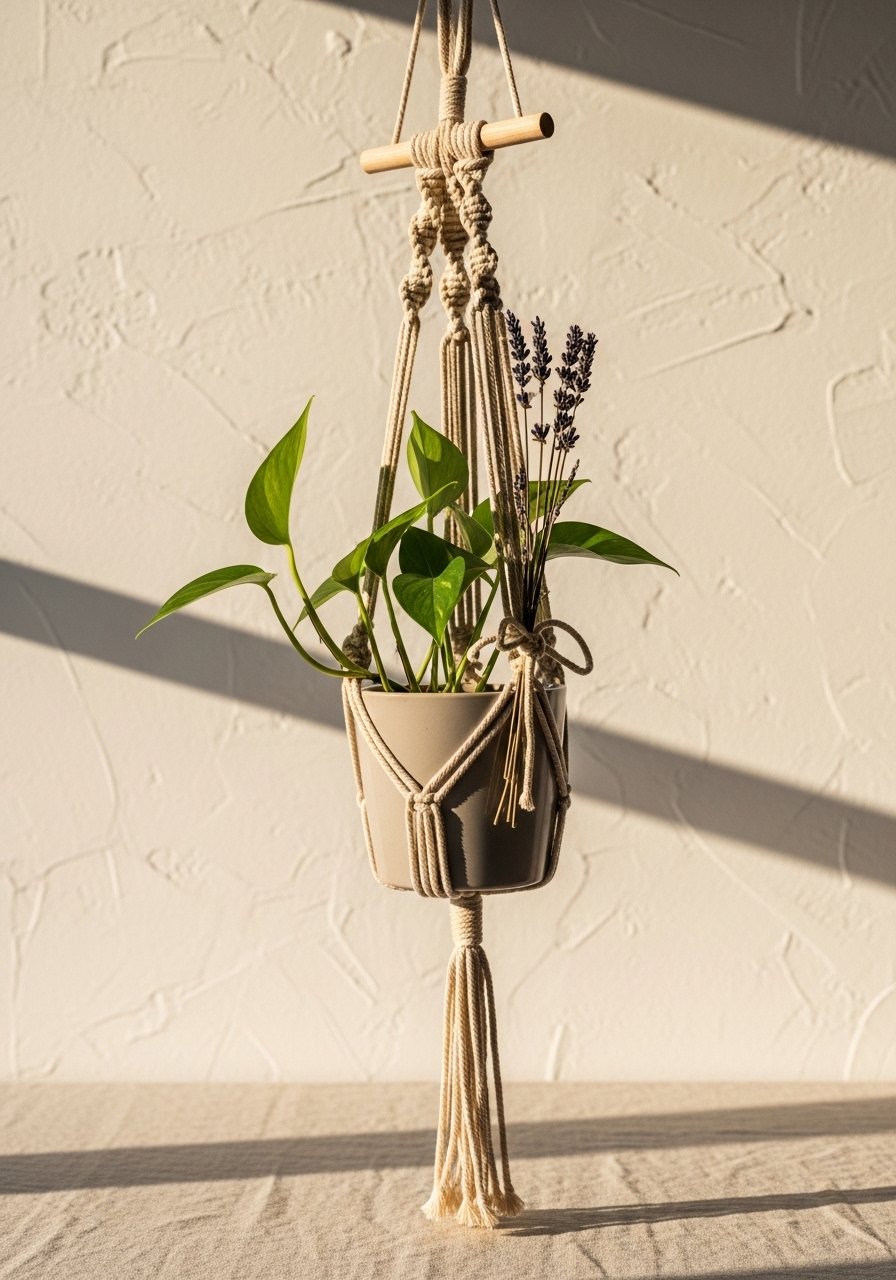
This classic boho piece adds texture and life to any wall. The planter hangs soft and sculptural, perfect for trailing plants. It’s beginner-friendly and tactile—knots feel satisfying under your fingers and the finished cord contrasts beautifully against a plaster wall. I use 3mm single-strand macramé cord and an inexpensive wooden dowel for support; a macramé cord bundle makes enough for several projects.
Materials
- 3mm macramé cord, 10 yards (cream)
- Wooden dowel, 12" length
- Small 3–4" nursery pot (plastic)
- Scissors
- Tape measure or ruler
- Pencil for marking
- Small wooden beads, 10mm (optional)
Instructions
- Cut 4 lengths of cord at 60" each. Fold to find midpoints.
- Attach cords to dowel using lark’s head knots across the dowel.
- Braid or square-knot in tiers—start with 4 square knots, then separate into 2 groups.
- Form a net by tying overhand knots 6–8" down from the top row at 2" intervals.
- Place the pot in the net to measure length; add one final gathering knot 4" below pot base.
- Trim ends to a neat fringe, or add beads threaded before final knot.
- Check: pot hangs level and knots are tight with no slippage.
How to Display or Gift It
Hang near a sunlit window or layered with small framed prints for a boho gallery corner. Tie a dried sprig of lavender to the dowel for scent and style. For gifting, tuck the planter and pot into a kraft bag with care instructions. Store extra cord in a craft organizer box to prevent tangles.
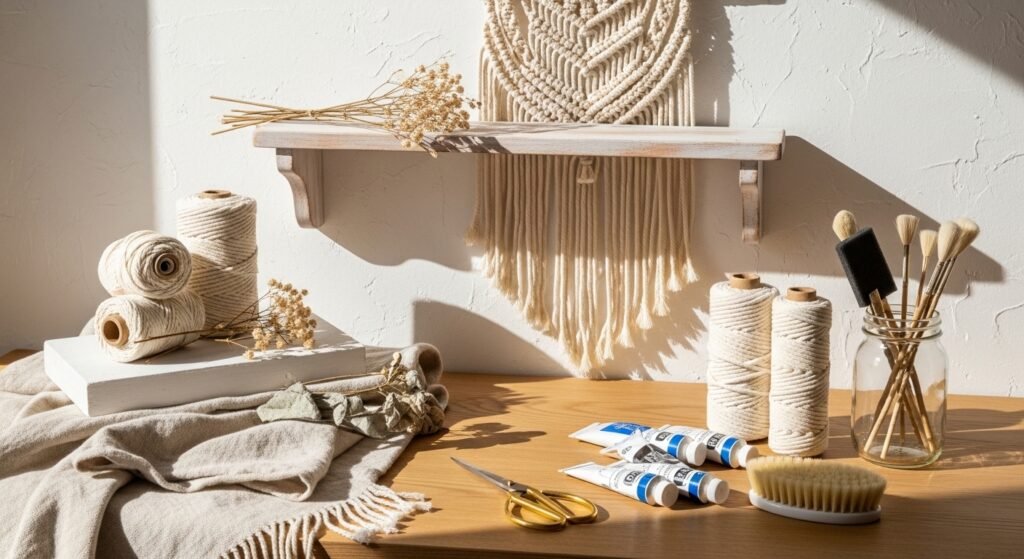
- Painted Floating Shelf with Soft Ombre
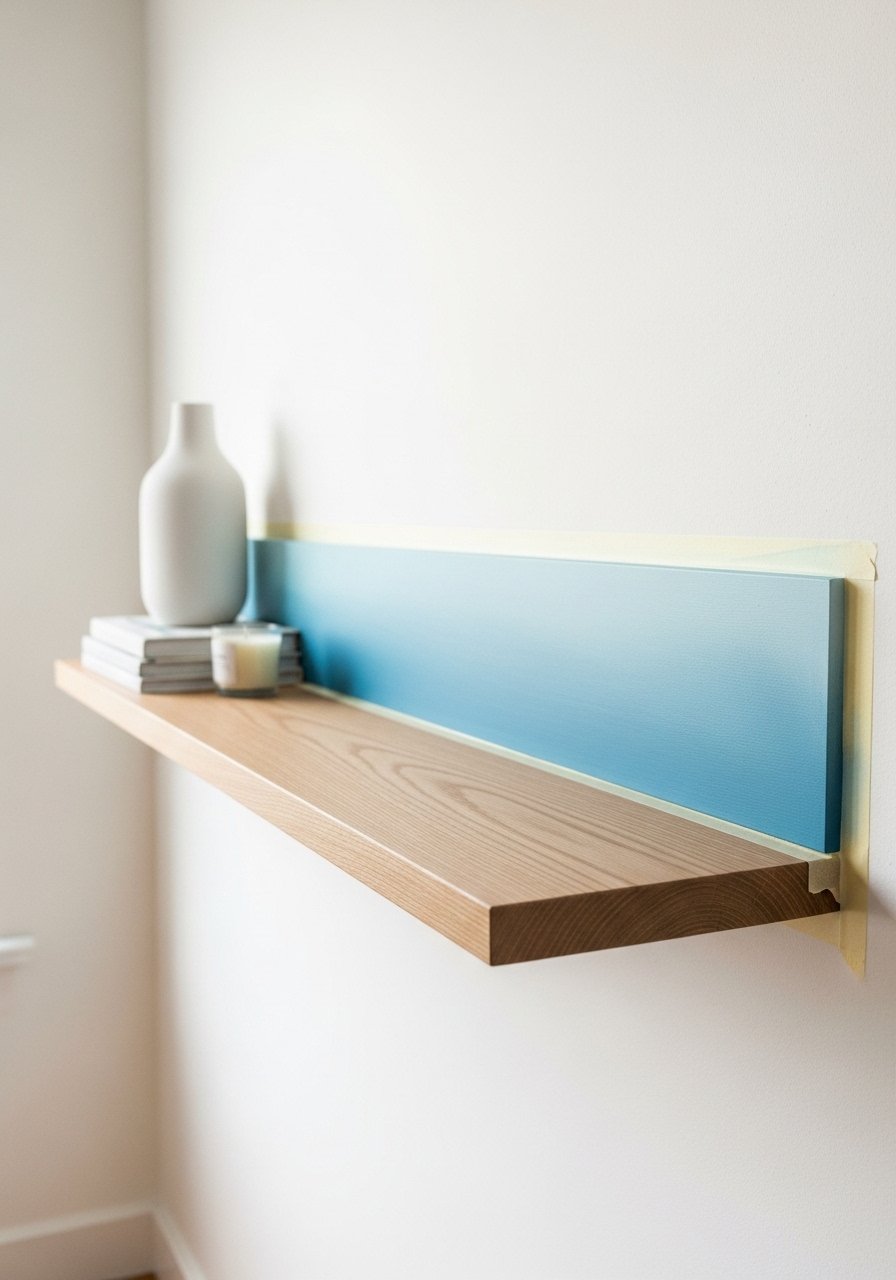
A painted floating shelf gives you storage plus a statement. The ombre effect is subtle and modern—perfect for Japandi or soft cottagecore rooms. Painter’s tape keeps lines clean, and a foam brush gives streak-free coverage. I love using a small chalk paint starter set for matte, velvety finishes.
Materials
- Pine board shelf blank, 24" x 6" x 1"
- Wall mounting bracket set for floating shelves
- Sandpaper, 120 & 220 grit
- Chalk paint in 3 shades (light to dark)
- Foam brush
- Painter’s tape
- Clear wax or matte sealer, 1 coat
Instructions
- Sand shelf with 120 grit, then finish with 220 grit. Wipe dust.
- Apply painter’s tape across shelf in equal bands.
- Paint three bands from light to dark with foam brush. Two thin coats each.
- Wait 30 minutes between coats; final coat dry-to-touch 1 hour, cure 24 hours before handling.
- Remove tape slowly at a 45° angle.
- Apply 1 thin coat of matte wax or sealer. Cure 24 hours before hanging.
- Mount per bracket instructions, use a level to ensure straightness.
How to Display or Gift It
Style with a potted plant, candle, and a small stack of books. Pair with a matching small wooden frame. For gifting, gift-wrap with kraft paper and tie a ribbon. Store extra paint jars upright in a stackable craft drawer.
- Boho Tassel Headboard
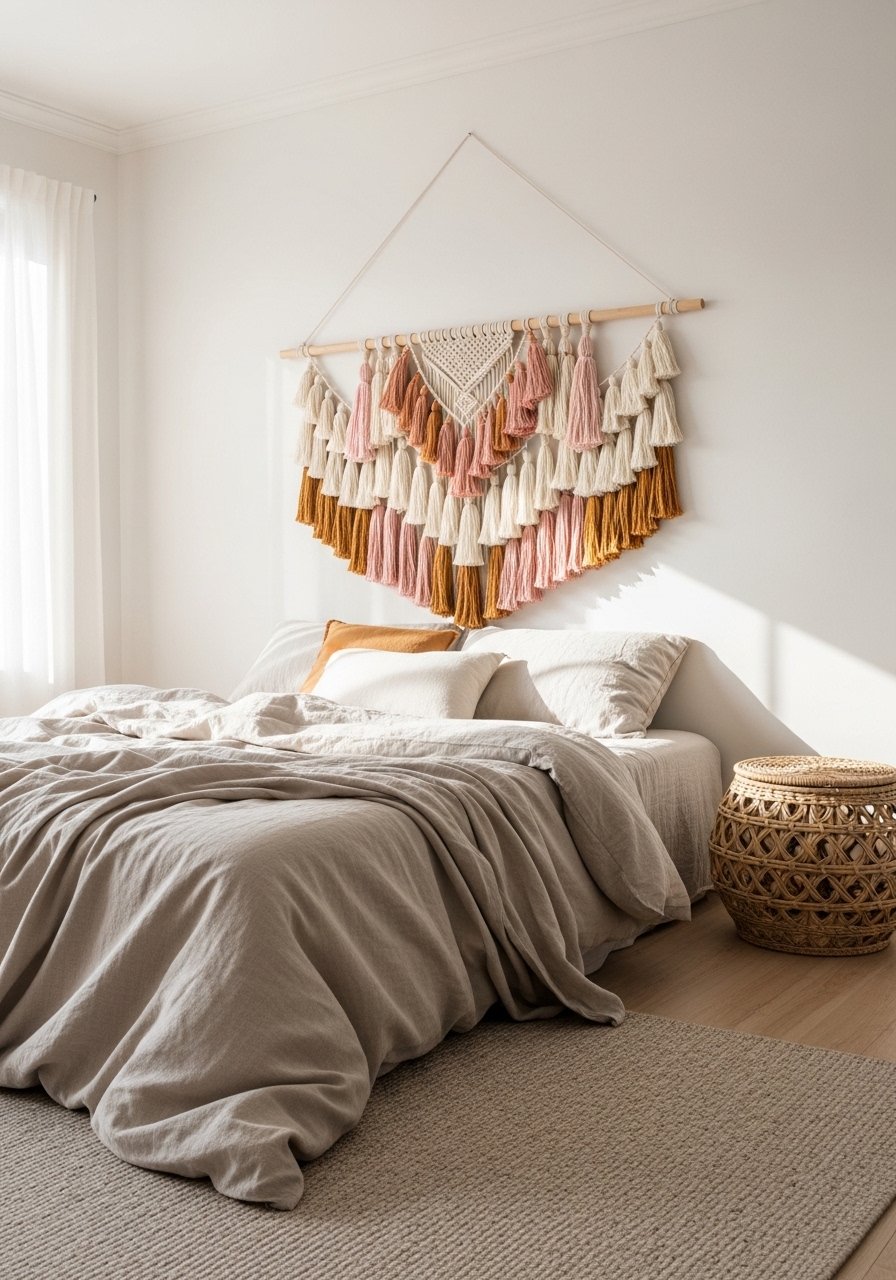
A tassel headboard reads cozy and handmade without committing to carpentry. It frames the bed softly and brings layered texture that’s perfect for boho or cottagecore. You can make a full-length headboard or a smaller statement strip. A yarn bundle in coordinating colors gives consistent weight.
Materials
- Wooden dowel, 36" (or width of bed)
- Yarn (worsted weight), about 800 yds total in 3 colors
- Scissors
- Measuring tape
- Hot glue gun & sticks
- Twine for hanging
Instructions
- Cut yarn into tassel lengths: 16" folded gives 8" finished tassels. Make 30–40 tassels for a 36" dowel.
- Fold each bundle and tie the top tightly with a small piece of yarn.
- Trim bottoms evenly.
- Attach tassels to dowel by looping the knot over the dowel and securing with a dab of hot glue.
- Space tassels closely for a full look. Add variation in lengths for a textured edge.
- Hang via twine tied to each end of dowel. Check that tassels hang uniformly.
How to Display or Gift It
Position above the bed or a gallery wall. Add a small crocheted cushion to echo texture. If gifting, roll gently and place in a kraft box with a tissue wrap. Store excess yarn in a clear craft tub.
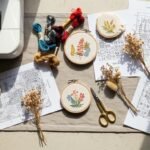
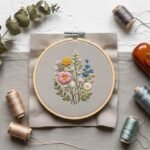
- Framed Pressed-Flower Art with Linen Mat

Pressed-flower frames bring delicate cottagecore charm. The linen mat adds artisanal texture and makes cheap flowers look museum-grade. You’ll get crisp, flat petals that last for years if dried and sealed properly. I press flowers between sheets for 2–3 weeks; a flower press speeds this up—try a flower press kit.
Materials
- Glass frame, 8" x 10"
- Linen mat board for 8×10
- Fresh small flowers and leaves
- Parchment paper or flower press
- Tweezers
- Clear archival adhesive or glue dots
- Bone folder (optional)
Instructions
- Pick flowers at their driest (late morning). Trim stems.
- Press flowers for 10–21 days in a press or between paper with heavy books.
- Once flat and dry, arrange on linen mat. Use tweezers to avoid oils.
- Affix with tiny glue dots or archival adhesive—use very small amounts.
- Close frame, ensuring no loose petals touch the glass (use spacers if needed).
- Leave sealed 24 hours before hanging to let adhesive set fully.
How to Display or Gift It
Group three frames in a vertical column or create a small shelf vignette. Tie a ribbon for gifting and include care notes (avoid humidity). Keep extra pressed flowers flat in a photo storage box.
- Painted Terracotta Candle Holders with Gold Rim

These add a cozy glow with a designer twist. Matte paint gives a café-chic finish, while a metallic rim reads luxe. Terracotta takes paint well after a light sanding and primer. A fine-tip gold paint pen helps you get razor-clean edges—use a gold paint pen set.
Materials
- Terracotta pots (3 sizes), 2–4"
- Chalk paint in 2 colors
- Sandpaper 220 grit
- Painter’s tape
- Gold paint pen or leaf paint
- Tea light candles (LED options)
- Foam brush
Instructions
- Sand pots lightly, wipe dust.
- Apply one coat of chalk paint; let dry 30 minutes. Apply second coat.
- Tape a thin strip near the top for the gold rim.
- Paint rim with gold paint pen. Wait 15 minutes, remove tape.
- Cure painted pots 24 hours before placing candles.
- Use LED tea lights to avoid soot and extend life.
How to Display or Gift It
Cluster on a bedside tray or sill. Wrap a small set in tissue and tuck into a kraft box for gifting. Store extra candles in a mason jar set.
- Minimalist DIY Macramé Wall Hanging

Clean lines and neutral cord make this macramé piece ideal for Japandi and modern minimalist spaces. It’s compact, calming, and textural without being fussy. A macramé cord 5mm set provides sturdy loops and a substantial feel.
Materials
- 5mm cotton macramé cord, 25 yards
- Driftwood or wooden dowel, 18"
- Scissors
- Measuring tape
- Comb for fringe
- Lark’s head and square knot skills
Instructions
- Cut 8 cords at 100". Fold and attach to dowel with lark’s head knots.
- Work alternating square knots for 6 rows.
- Leave a negative space band, then repeat knots for texture.
- Gather fringe and comb to align lengths. Trim even.
- Hang and steam lightly (optional) to remove any kinks.
How to Display or Gift It
Works well above a low dresser or reading nook. For gifting, roll with kraft paper and include a small comb. Keep spare cord in a craft tote bag.
- DIY Fabric-Covered Bulletin Board

This fabric pinboard doubles as art and function. Choose linen or vintage florals for cozy cottagecore, or crisp canvas for minimal rooms. A staple gun ensures a flat stretch—try a manual staple gun for neat edges.
Materials
- Cork board, 16" x 20"
- Fabric, 1/2 yard (linen or cotton)
- Foam batting, 16" x 20"
- Staple gun & staples
- Scissors
- Ribbon or washi tape for edge trim
Instructions
- Lay fabric right side down. Place batting and cork board centered on top.
- Pull fabric taut and staple along the back edge every 1–2".
- Fold corners like wrapping a present and staple securely.
- Trim excess fabric. Add ribbon trim or washi tape to front edges if desired.
- Hang using D-rings or wire rated for board weight.
How to Display or Gift It
Style with muted pins, small prints, and dried sprigs. Pack in a rigid mailing box for gifting. Store extra fabric scraps in a fabric organizer box.
- Resin Starry Night Trinket Dish

Resin adds glossy, jewel-like accents to a bedside table. This tiny trinket dish is practical and dreamy. Use a measured resin kit and mix carefully to avoid bubbles. I use a clear epoxy resin kit and a heat gun for bubble removal.
Materials
- Silicone round mold, 3.5"
- Clear epoxy resin kit (measured)
- Alcohol ink (navy and black)
- Gold leaf flakes or gold mica powder
- Mixing cups and stir sticks
- Disposable gloves and mask
- Heat gun or small torch
Instructions
- Mix resin per kit: combine resin and hardener at 1:1 ratio (follow your kit). Stir slowly for 3 minutes.
- Add alcohol ink drops and swirl. Pour into mold to 1/4" depth.
- Add gold leaf and additional resin to finish; total pour no more than 1/4" per pour.
- Use heat gun for 5–10 seconds to remove bubbles. Cure 24–48 hours depending on kit.
- Demold after 48 hours; full cure may take 7 days for hardness.
How to Display or Gift It
Place by your bedside to hold rings and bobby pins. Wrap in tissue and tuck into a small gift box. Store molds clean and dust-free in a plastic container.
- Hand-Painted Minimal Print Set (3 small canvases)

Abstract mini-canvases are a beginner-friendly way to add color and cohesion. Work in a single palette for calmness. Use acrylics and a flat foam brush for smooth gradients. A small canvas pack gives consistent sizing.
Materials
- Three 6" x 6" canvases
- Acrylic paint set (earth tones)
- Foam brush and detail round brush
- Palette or paper plate
- Water jar and cloth
- Painter’s tape (to mask edges)
Instructions
- Tape canvas edges for clean borders if desired.
- Apply base color in one or two thin coats. Dry-to-touch 20–30 minutes.
- Layer abstract strokes, blending while paint is damp for soft merges.
- Add texture with dry-brushed highlights.
- Remove tape if used; allow full cure 24 hours before hanging.
How to Display or Gift It
Lean canvases on a floating shelf or hang as a small group. Pack in a rigid box for gifting. Keep extra brushes in a brush roll.
- Vintage-Style Lace Pillow Covers

Lace overlays and linen covers create romantic cottagecore or soft farmhouse pillows. You can sew simple envelope backs—no zipper needed. Use a sewing kit starter if you’re just getting started.
Materials
- Linen fabric, 1/2 yard
- Lace trim, 1 yard
- Pillow insert, 18" x 18"
- Sewing needle or machine
- Thread to match
- Scissors and pins
- Buttons for accent
Instructions
- Cut two linen squares 19" x 19" for seam allowance.
- Pin lace overlay to front square, stitch close to edge.
- Sew right sides together, leaving an 8" opening for insert.
- Turn right-side out, press seams, insert pillow.
- Slip-stitch opening closed or add envelope back stitching.
- Add button accents sewn into place.
How to Display or Gift It
Mix with textured throws and a knit cushion. Wrap as a pillow bundle in kraft paper for gifting. Store extra fabric in a fabric bin.
- Minimal Wire Wall Grid for Photos & Notes

A wire grid gives you display flexibility and an industrial-modern edge. Use binder clips or wooden clips for a tidy look. I mount mine with command-style hooks, but for permanence, use wall anchors. Check out a metal grid panel.
Materials
- Metal wire grid panel, 16" x 20"
- Small wooden clips, pack of 20
- Wall anchors & screws or adhesive hooks
- Ruler and pencil
- Level
- Optional string lights
Instructions
- Decide placement and mark anchor points with a pencil.
- Drill pilot holes and install anchors; mount grid with screws.
- Clip photos, notes, or postcards using wooden clips.
- Add a string of micro-LEDs for soft evening glow (battery pack hidden behind).
- Rotate images seasonally—easy refresh.
How to Display or Gift It
Lean above a desk or beside a vanity. For gifting, include a pack of clips and a set of tiny prints. Store spare clips in a small parts organizer.
- DIY Painted Rope Rug (Small Round)

A painted rope rug brings warmth and subtle pattern to a bedside. Use cotton rope and a spiral coil technique. Acrylic fabric paint bonds well; apply two coats for opacity. I use a thick cotton rope for stability.
Materials
- Cotton rope, 25 ft, 3/8" diameter
- Fabric acrylic paint in 2 colors
- Hot glue gun & glue sticks
- Foam brush
- Scissors
- Clothespins to hold coils while drying
Instructions
- Coil rope tightly, securing with hot glue every 2" on the underside.
- After forming full circle (~18"), paint sections with fabric paint using foam brush.
- Allow 30 minutes between coats; apply second coat if needed.
- Let rug cure 24 hours before use to avoid tackiness.
- Trim stray fibers and press flat if needed.
How to Display or Gift It
Use next to the bed or inside a cozy corner. For gifting, roll and tie with twine and include care notes. Store spare rope in a rope twine organizer.
- DIY Driftwood Mobile with Dried Flowers
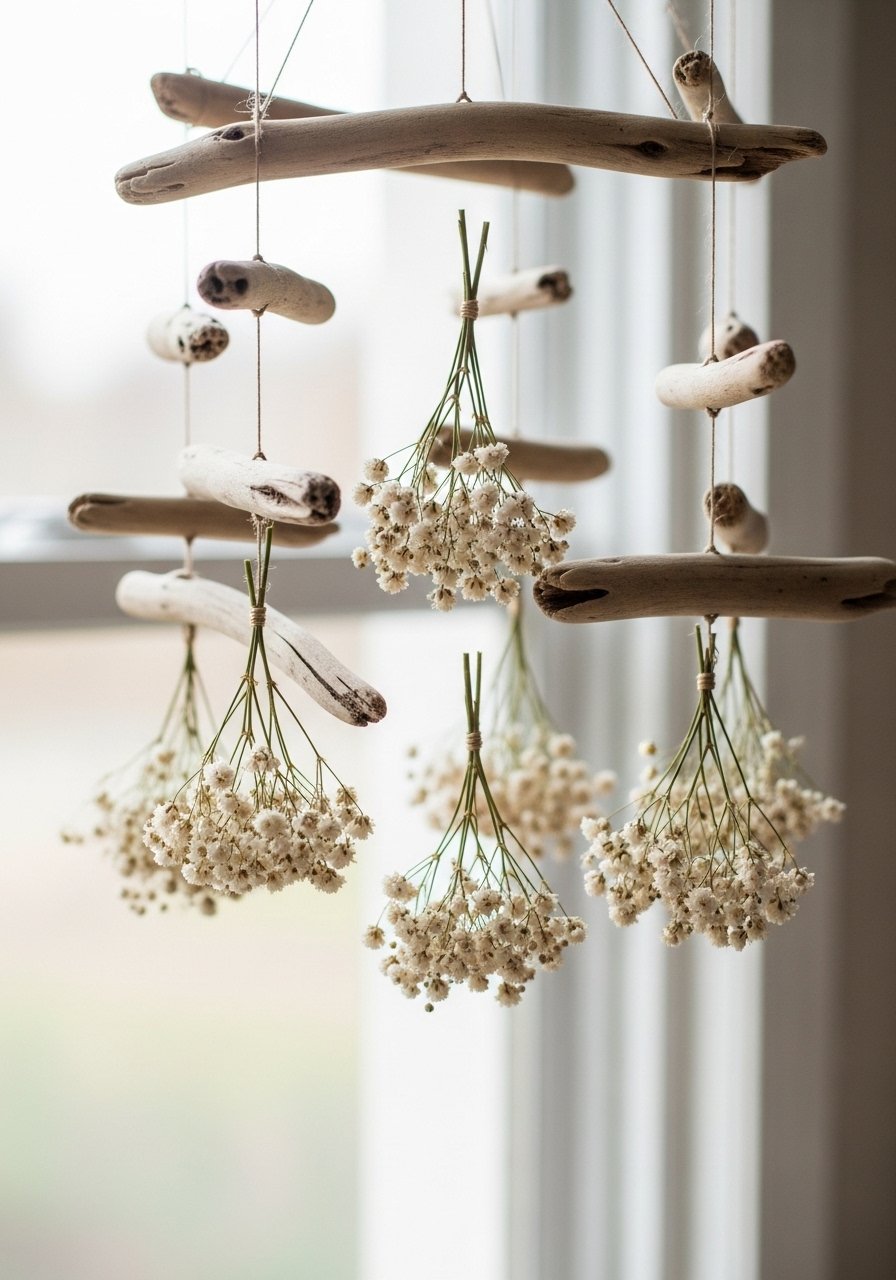
This airy mobile adds coastal-cottage charm. Dried flowers catch light and scent subtly. Use a light touch with adhesives; cotton twine and small beads keep it balanced. A driftwood craft pack is handy if you don’t want to beach-comb.
Materials
- Driftwood pieces (3–4), varying lengths
- Cotton twine, 10–15 yards
- Small dried flower bundles
- Small wooden beads
- Scissors
- Hot glue gun
Instructions
- Tie pieces of driftwood with twine to form a tiered mobile.
- Attach dried flower stems by wrapping twine around stems, knotting close to the twig.
- Add beads for weight balance and visual interest.
- Secure knots with a dab of hot glue.
- Hang and adjust lengths until balanced; trim excess twine.
How to Display or Gift It
Hang near a window where flowers catch light. Gift in a shallow box with hanging instructions. Store beads and spare twine in a compartment organizer.
- DIY Ceramic-Look Air-Dry Clay Vases

Air-dry clay lets you make tactile vases with no kiln. Finish with chalk paint or a matte varnish for a pottery-like look. I keep a small clay tool kit handy for shaping.
Materials
- Air-dry clay, 500g
- Sandpaper 220 grit
- Chalk paint (matte white)
- Soft brush
- Wax or matte sealer
- Water and sponge for smoothing
Instructions
- Shape clay into small vases around a simple mold or bottle. Smooth seams with water.
- Let dry 24–48 hours depending on thickness.
- Sand lightly for a smooth finish.
- Paint with chalk paint; two thin coats. Dry 30 minutes between coats.
- Seal with matte varnish; cure 24 hours.
How to Display or Gift It
Cluster on a shelf with dried stems. Pack carefully with tissue for gifting. Store leftover clay in an airtight bag to prevent drying.
- Woven Wall Pocket Organizer (Embroidery Hoop Loom)

Weaving into an embroidery hoop makes a compact, functional piece for small items or plants. The woven pocket adds softness and storage. Try a weaving starter kit if you want warp strings prepped.
Materials
- 12" embroidery hoop
- Wool and cotton yarn (various textures)
- Scissors
- Tapestry needle
- Small fabric for pocket backing (optional)
- Hot glue gun
Instructions
- Assemble hoop and warp with strong yarn.
- Use a tapestry needle to weave bands of yarn, changing textures and colors.
- Create a pocket by leaving lower warp loops and attaching a fabric backing with hot glue.
- Finish edges with fringe or tassels.
- Trim and tidy loose ends.
How to Display or Gift It
Use by the bedside to hold small items like glasses or a remote. Fold and place in a gift box for a handmade present. Store extra yarn in a yarn storage bag.
- Boho Mirror Frame with Seed Beads and Jute

Wrap a basic mirror with jute and stitch on bead accents for a tactile, boho mirror. Jute gives earthy texture; seed beads add subtle sparkle. Keep a hot glue gun handy for securing ends.
Materials
- Small round mirror, 12"
- Jute rope, 10 ft
- Seed beads in mix, 1 pack
- Strong thread or thin wire
- Hot glue gun & sticks
- Scissors
Instructions
- Wrap mirror edge with jute, gluing underside periodically for security.
- Stitch or glue beads in small clusters around the frame.
- Reinforce with glue where beads meet jute.
- Let glue set 30 minutes before hanging.
How to Display or Gift It
Hang above a dresser or style on a gallery wall. For gifting, wrap in tissue and place in a shallow box. Keep spare beads in a bead organizer.
- DIY Linen Canopy Corner (No-Sew)

A no-sew canopy creates instant softness. Use curtain clips and a sturdy hoop or embroidery hoop instead of sewing. A set of curtain clips makes installation simple.
Materials
- Linen curtain panel, 52" x 84"
- Embroidery hoop or ceiling ring
- Curtain clips
- Ceiling hook rated for fabric weight
- Ladder
- Command hooks if you prefer non-permanent
Instructions
- Attach fabric to hoop with curtain clips evenly spaced.
- Mount ceiling hook centered above bed; hang hoop by a twine loop.
- Drape fabric to create soft folds. Adjust clips for even fall.
- Secure low ends behind headboard or tuck into mattress for stability.
How to Display or Gift It
Pair with string lights for evening ambiance. Drape a lightweight throw for an extra cozy layer. Store the canopy in a garment bag when traveling.
- DIY Botanical Linen Drawer Sachets

Sachet bags scent drawers and add a small handmade touch to linens. Dried lavender lasts many months and is easy to refill. Use a dried lavender bundle for consistency.
Materials
- Linen fabric scraps, 6" x 8" each
- Dried lavender, 1/4 cup per sachet
- Needle and thread or sewing machine
- Twine or ribbon
- Scissors
- Funnel for filling
Instructions
- Fold fabric right sides together and stitch three sides, leaving top open.
- Turn right side out and press seams.
- Fill with 1/4 cup dried lavender via funnel.
- Sew top closed by hand or machine, or tie with ribbon.
- Leave to air for 24 hours so fragrance settles.
How to Display or Gift It
Tuck inside drawers or linen closets. Bundle a set of three and wrap as a small housewarming gift. Store extra lavender in a mason jar.
- Statement Painted Headboard Panel

A painted headboard panel reads custom and gives you dramatic room focus with minimal effort. Use chalk paint for velvety finish, painter’s tape for clean geometrics, and a brayer roller for even coverage. A foam brayer roller helps flatten paint without brush marks.
Materials
- Plywood panel, 48" x 30" x 1/2"
- Chalk paint in 3 colors
- Painter’s tape
- Foam brayer roller and foam brush
- Sandpaper 120 grit
- D-ring hangers for wall mounting
Instructions
- Sand panel lightly and wipe clean.
- Sketch geometric layout lightly with pencil.
- Mask areas with painter’s tape; apply paint with brayer in thin coats.
- Wait 30 minutes between coats; remove tape carefully once paint is dry to the touch.
- Attach D-rings and hang with studs or anchors rated for weight.
How to Display or Gift It
Pair with coordinating pillows and a simple bedside lamp. For gifting, create a smaller panel as an accent piece. Store unused paint in sealed jars upright in a paint storage rack.
- DIY Wool Pom-Pom Garland
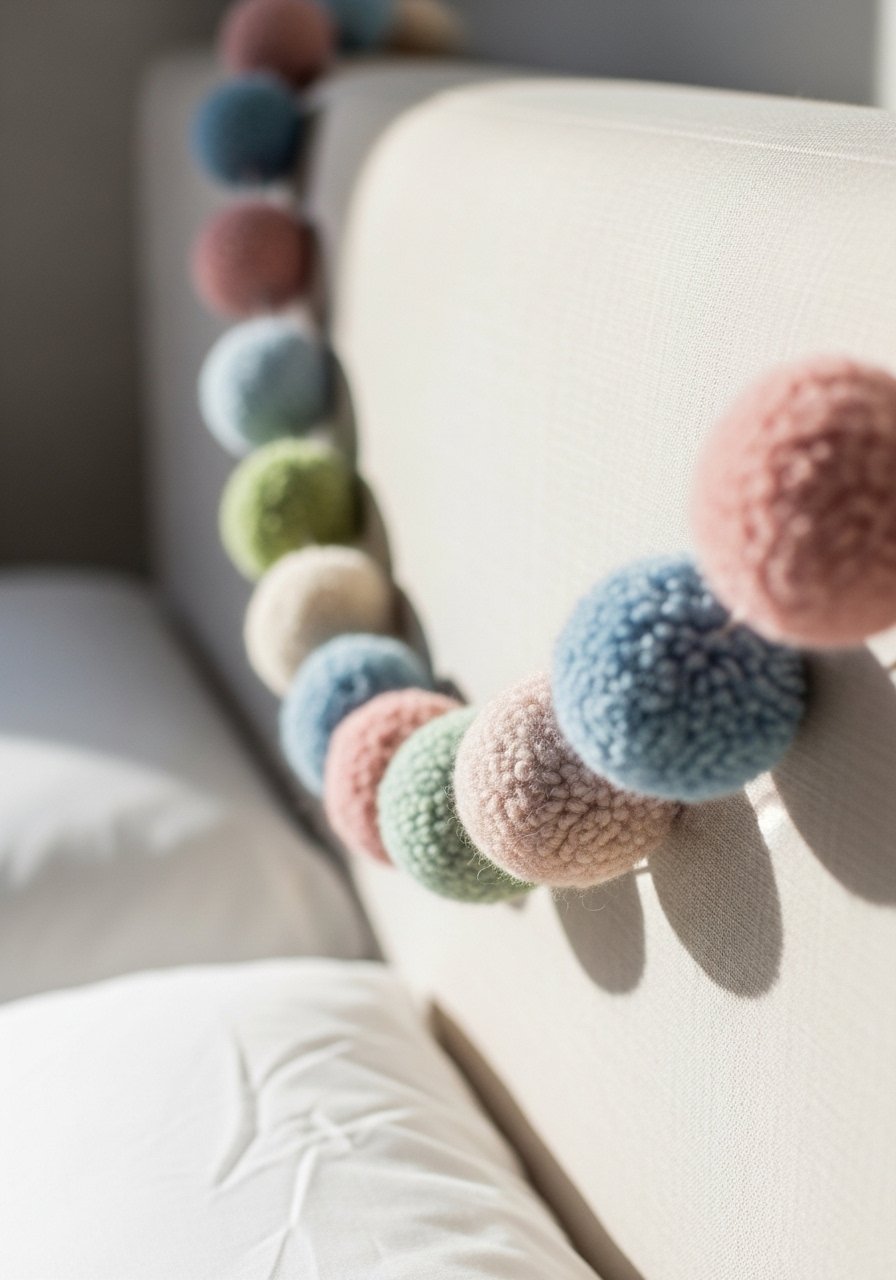
Pom-pom garlands are playful and soft. They add movement and color while being easy for beginners. A pom-pom maker tool makes quick, consistent shapes.
Materials
- Wool yarn in 4 colors
- Pom-pom maker tool
- Strong twine or thin rope, 6 ft
- Scissors
- Needle for threading
Instructions
- Wrap yarn on pom-pom maker and trim per tool instructions.
- Make 20–30 pom-poms depending on length desired.
- Thread pom-poms onto twine by sewing the tying tail through with a needle.
- Space evenly and knot ends. Trim tails as needed.
How to Display or Gift It
Drape across the headboard or window. Bundle as a cheerful housewarming gift. Store pom-pom garland flat in a gift box.
- Minimal Clay Wall Hook Tiles
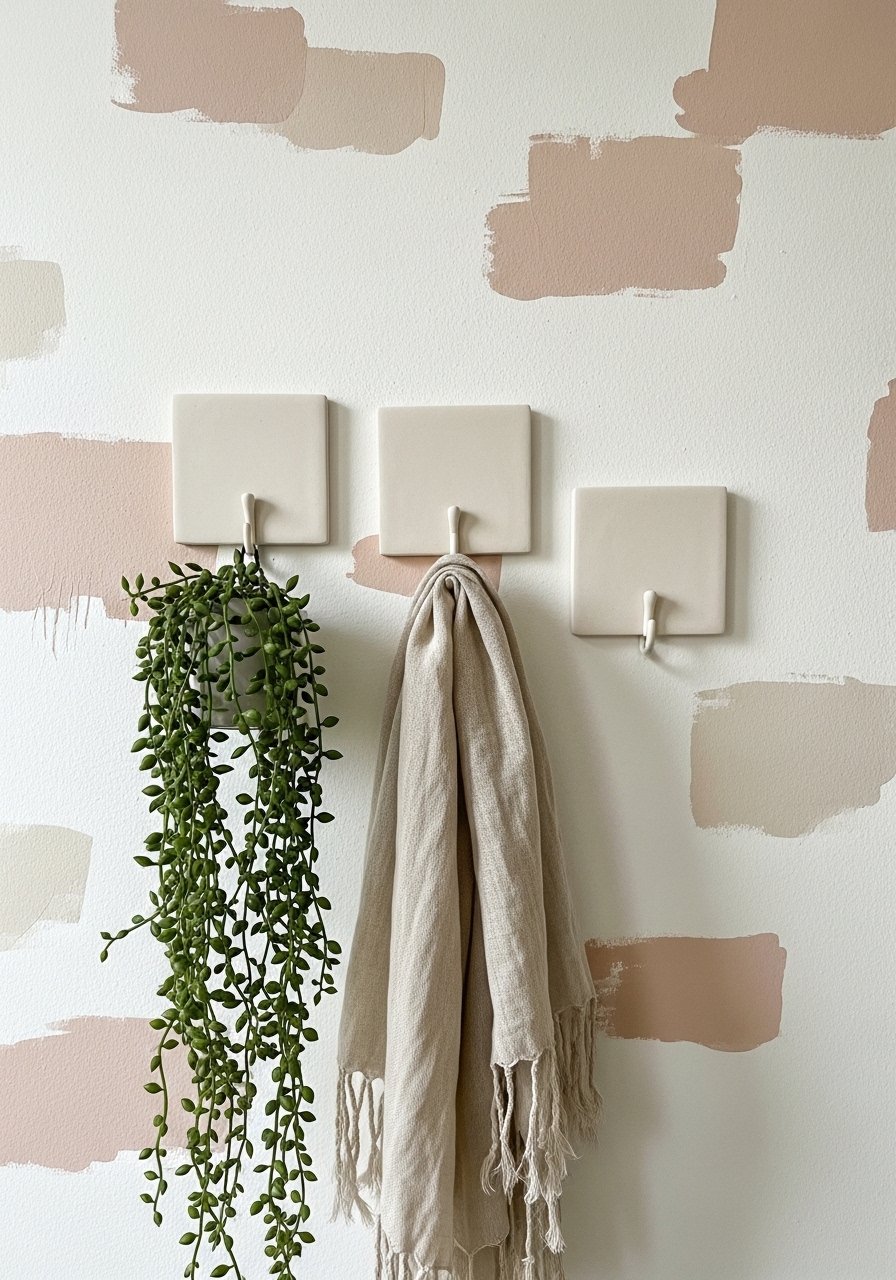
Make simple clay tiles and add hooks for functional wall art. The matte finish reads modern and handmade. Use a small hardware hook pack for consistent fit.
Materials
- Air-dry clay, 300g
- Small metal wall hooks, pack of 6
- Sandpaper 220 grit
- Chalk paint or acrylic, matte
- Super glue or E6000
- Ruler and blade
Instructions
- Roll clay to 1/4" thickness and cut into 4" squares.
- Press a small hole for the hook position. Dry 24–48 hours.
- Sand edges smooth, paint matte if desired. Dry 30 minutes between coats.
- Glue hook into the pre-formed hole; let adhesive set 24 hours.
- Mount on wall with adhesive strips rated for weight or small screws.
How to Display or Gift It
Arrange in a grid near the bed for necklaces or scarves. Wrap individually in tissue for gifting. Store spare hooks in a small hardware box.
- DIY Velvet Book Covers for Decorative Stacks

Velvet covers turn ordinary books into luxe decor. They’re easy to make with hot glue and a simple wrap technique. Use a velvet fabric remnant bundle for variety.
Materials
- Velvet fabric, enough to wrap book
- Hot glue gun
- Scissors
- Ruler
- Ribbon or twine for decoration
Instructions
- Measure book: add 1.5" to width and height for seam allowance.
- Cut fabric and fold edges under; secure with hot glue.
- Wrap book tightly and glue seams on back.
- Add ribbon or a small dried sprig on top.
How to Display or Gift It
Stack on a nightstand with a candle and small dish. Wrap a set as a unique hostess gift. Keep leftover fabric in a fabric zip bag.
- DIY Painted Mason Jar Vanity Organizers

Mason jars are cheap and perfect for organization with a painted finish that matches your room. Use chalk paint and seal for daily use. A mason jar set is useful for multiples.
Materials
- Mason jars, 3
- Chalk paint in gradient shades
- Painter’s tape
- Matte sealer
- Twine or ribbon for accents
- Foam brushes
Instructions
- Tape off sections for ombre or block colors.
- Paint thin coats; dry-to-touch 20–30 minutes between coats.
- Remove tape carefully. Apply matte sealer once paint cures 24 hours.
- Tie twine around necks and fill with brushes.
How to Display or Gift It
Group on a vanity or shelf. Fill with small items and tuck in a small tag for gifting. Store extra jars in a kitchen storage rack.
- DIY Soft Linen Pouf (No-Sew)
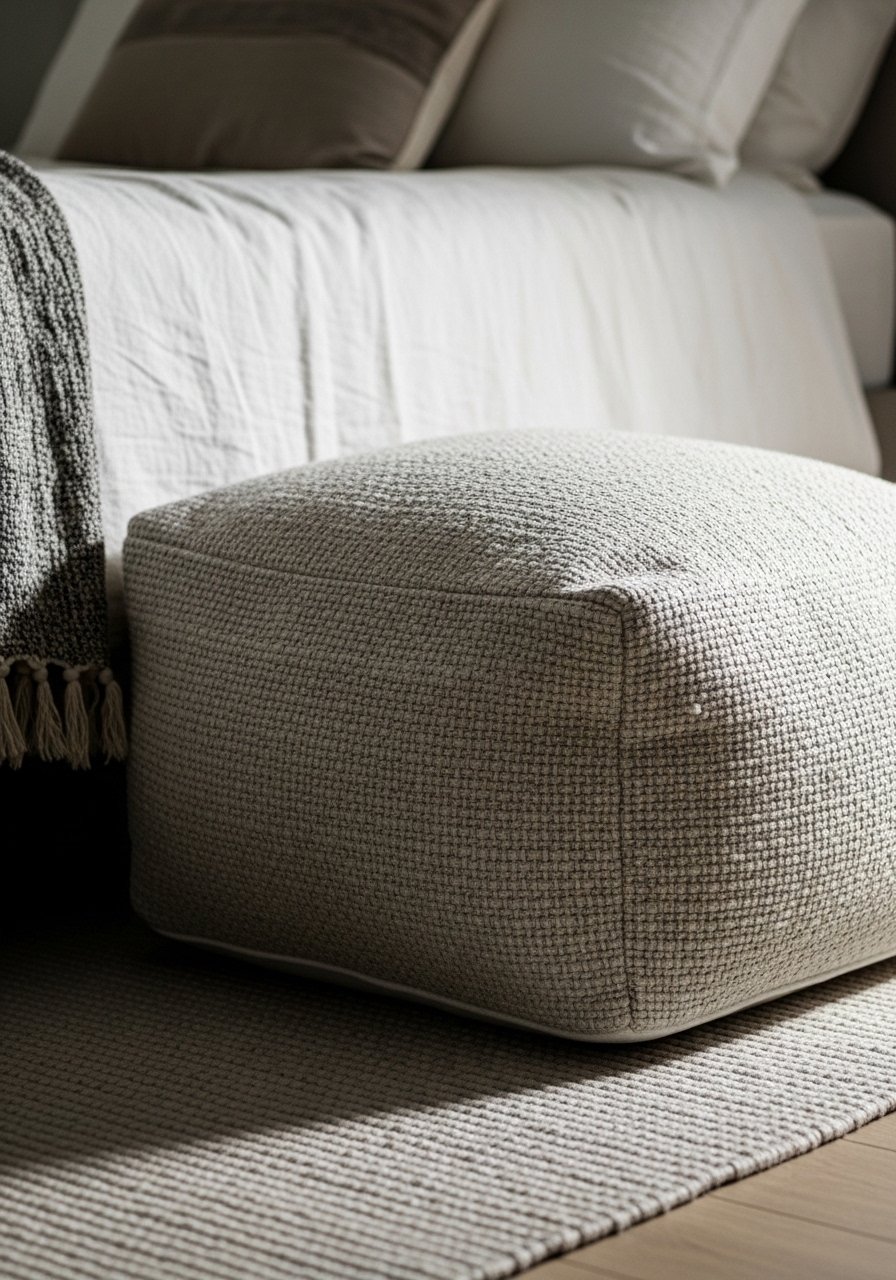
A pouf adds low seating and texture. This no-sew version uses sturdy fabric and a braided rope closure. Fill with old cushions or fiberfill. A large fiberfill bag keeps costs down.
Materials
- Heavy linen fabric, 1.5 yards
- Thick cotton rope, 10–15 ft
- Fiberfill or old pillow stuffing, about 6–8 lbs
- Hot glue gun
- Scissors
Instructions
- Cut two circles of linen 18" diameter and a side strip 60" x 10".
- Hot-glue or fold and glue the side strip to one circle to form the base, leaving top open.
- Fill liberally with fiberfill to desired firmness.
- Attach top circle and finish seam by gluing rope around the seam for decorative closure.
- Let set 30 minutes before use.
How to Display or Gift It
Place at the foot of a bed or in a reading nook. For gifting, offer deflated with filling instruction and a sealed pack of fiberfill. Store extra fiberfill in a storage bag.
- DIY Rustic Photo Ledge with Hidden Shelf

A shallow ledge gives room for changeable art and small decor. The hidden shelf holds postcards or a candle. Use a small miter saw or hand saw for clean cuts.
Materials
- Wood plank, 36" x 4" x 3/4"
- Saw (hand or power)
- Sandpaper 120 & 220 grit
- Chalk paint (whitewash)
- Wood screws and wall anchors
- Wood glue
- Small trim piece for front lip
Instructions
- Cut plank to length and sand smooth.
- Attach a 1" front lip using glue and small nails to create a ledge.
- Paint with whitewash technique—dilute chalk paint with water and wipe for a worn look.
- Let dry 24 hours before hanging.
- Mount with screws into studs or anchors.
How to Display or Gift It
Fill with small frames, ceramics, and plants. A great housewarming present—wrap in kraft paper with twine. Store leftover trim in a small lumber rack.
- Hand-Stitched Cozy Bedside Banner
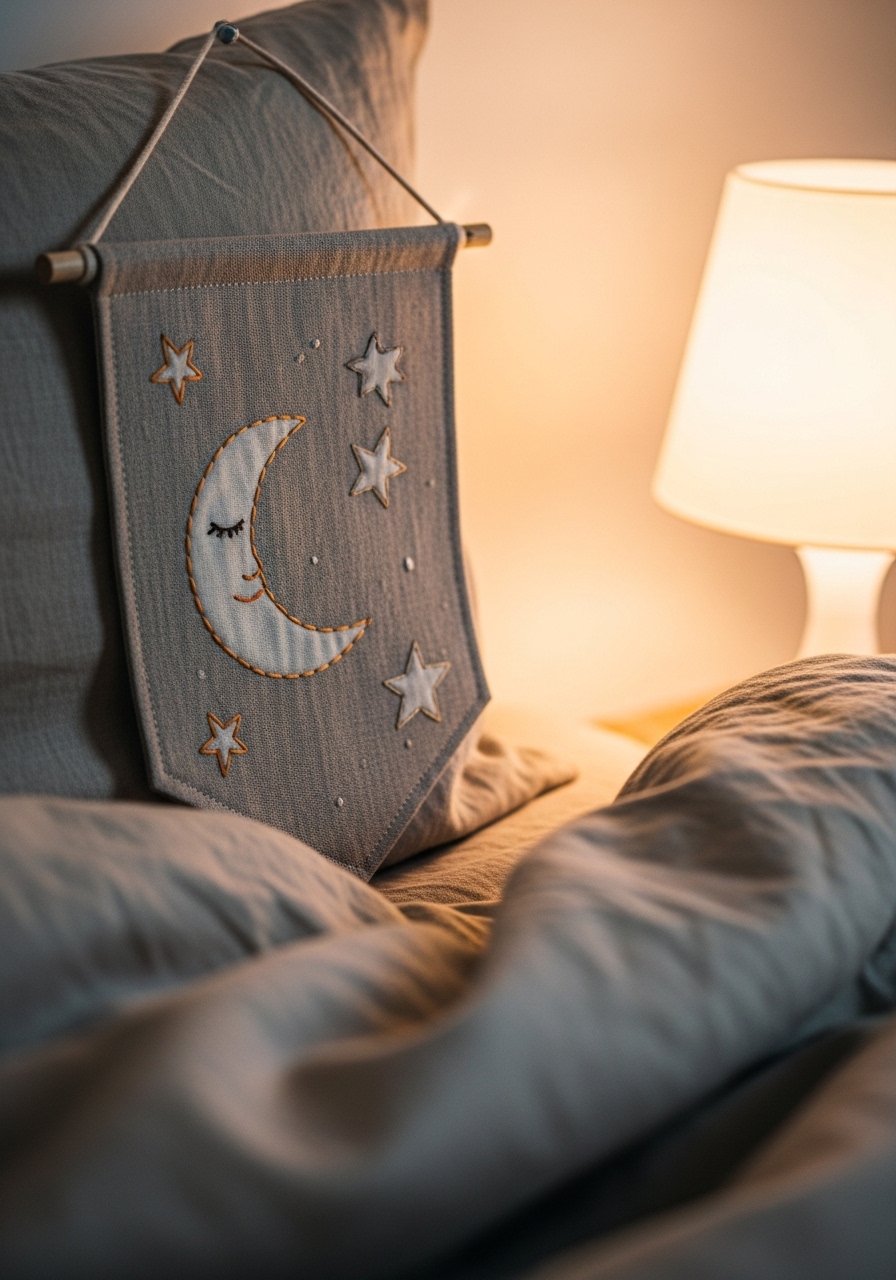
A stitched banner brings a handcrafted focal point. Minimal embroidery makes it beginner-friendly and deeply personal. Use an embroidery starter set for needles and hoops.
Materials
- Linen fabric, 10" x 12"
- Embroidery floss (3–4 colors)
- Small embroidery hoop, 6"
- Needle and scissors
- Wooden dowel, 10"
- Twine to hang
Instructions
- Hoop fabric and sketch simple moon/star motifs.
- Use backstitch and satin stitch to fill shapes.
- Remove from hoop and trim edges, leaving 1" for seaming.
- Fold top over dowel and stitch to form a sleeve for hanging.
- Tie twine to dowel ends and hang.
How to Display or Gift It
Hang above a bedside table or as part of a gallery. For gifting, include floss and a short note. Store spare floss in a thread box.
Thanks for scrolling through these 26 projects designed for aesthetic bedroom decor DIY that feel cozy, wearable, and truly you. You’ve got everything from quick 30-minute upgrades to weekend projects that create big visual change. Pin the projects you love so you can find them later, and try one small piece this week—start with something simple like a painted jar or a sachet and see how it shifts your space.
Which project are you trying first? Share a photo or save this list for a rainy craft day. And if you want one tool that’ll make a lot of these easier, a temperature-controlled hot glue gun changed how my finishes look and cut down drying drama across so many projects. Happy crafting—your bedroom is about to feel a whole lot cozier.