You toss open your windows to soft morning light, and suddenly your room feels like it wants to be gentler, cozier, more storybook. These 28 cottagecore aesthetic room decor DIY projects are the exact kind of whimsical, soft crafts that make a space feel like your own little wildflower-filled hideaway. Whether you're filling a bookshelf nook or styling a mantel, you'll find projects for beginners and makers who love slow, tactile crafting.
I use my Cricut Joy cutting machine for precise paper shapes and rely on a low-temp hot glue gun for quick assembly. Throughout you'll see practical measurements, drying times, and tips to avoid common pitfalls like sagging paint or resin bubbles. Ready to make something charming? Grab your tea, your favorite playlist, and let’s get crafting.
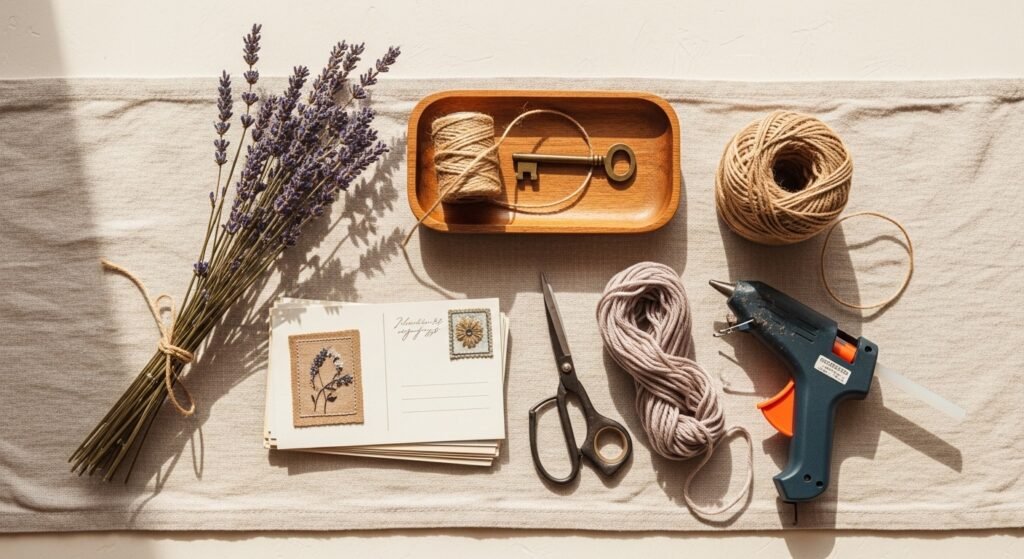
- Vintage Lace-Wrapped Glass Vase

Soft lace and recycled glass make simple vases look heirloom. This project feels delicate to the touch and adds a vintage texture to a shelf or bedside table. It's quick, budget-friendly, and perfect for beginners who want that lived-in cottagecore look. I finish seams with a dab of hot glue for a neat join; the low-temp hot glue gun keeps fabric safe.
Materials
- 1 recycled glass bottle or jar (approx 8–10 oz)
- 1/2 yard vintage lace trim (2–3 in wide)
- 1 yd natural jute twine
- Hot glue sticks (low-temp), 6 count
- Scissors
- Small dried bouquet (lavender or statice)
- Optional: small wooden bead (12 mm)
Instructions
- Clean and dry the bottle; remove labels and residue.
- Measure lace around the widest part; cut lace 1/2 in overlap.
- Apply a thin line of hot glue near one seam area and press lace in place. Work in 2–3 inch sections.
- Wrap twine around the neck twice and knot; add a dab of glue to secure.
- Tuck a wooden bead onto the twine if using; trim ends.
- Add dried flowers. Display after glue cools (about 5–10 minutes).
How to Display or Gift It
- Group two or three vases of different heights on a windowsill.
- Tie in a kraft tag and wrap in tissue for a thoughtful housewarming gift.
- Store extras in a craft organizer bin to avoid dust when not in use.
- Pair with a small wooden easel for bedside styling.
- Hand-Painted Cottage Tile Coasters

These ceramic coasters bring pastoral charm to coffee table corners. Chalk paint gives a soft matte finish that looks naturally aged. Use a foam brush for smooth coverage and a fine paint pen for tiny floral details. I like a coat of matte sealer for durability.
Materials
- 4 blank ceramic tile coasters (4 x 4 in)
- Chalk paint in sage, blush, cream
- Small foam brush (1 in)
- Fine-tip paint pens (black and white)
- Sandpaper (220 grit)
- Matte Mod Podge sealer, 1 fluid oz
- Felt pads (self-adhesive), 4 pcs
Instructions
- Sand tile edges lightly to remove flash and wipe clean.
- Apply a thin coat of chalk paint with a foam brush; dry 20 minutes.
- Add a second coat if needed for full coverage; dry 30 minutes.
- Use paint pens to draw small florals or gingham details; let dry 15 minutes.
- Brush on 2 thin coats of matte Mod Podge, allowing 15 minutes between coats. Cure 24 hours before use.
- Stick felt pads to corners to protect surfaces.
How to Display or Gift It
- Stack with twine and include a hand-written care note.
- Keep in a shallow wooden tray by the kettle.
- Store flat in a craft box between uses; avoid heavy stacking.
- Great as a hostess gift paired with herbal tea.
- Cottagecore Aesthetic Room Decor DIY: Pressed Flower Wall Art

Pressed flowers feel like bringing the garden indoors. This framed art has a museum-like delicacy while still feeling handmade. Beginners love the quiet, slow pace of pressing, and a bone folder helps flatten petals without damage. Use archival paper and a glass frame for longevity.
Materials
- Wooden frame with glass (8 x 10 in)
- Archival cardstock, 8 x 10 in
- Fresh wildflowers (not too thick)
- Heavy books or flower press (weights 2–3 lbs)
- Parchment paper (2 sheets)
- Bone folder or flat tool
- Tweezers
Instructions
- Pick flowers mid-morning after dew has dried.
- Place petals between parchment and position inside a heavy book or press. Use weights (2–3 lbs) if needed.
- Leave to press 2–4 weeks until fully dry and papery.
- Mount cardstock in the frame backing.
- Arrange flowers with tweezers and secure with tiny dabs of archival glue or photo corners.
- Close frame and wipe glass. Allow framed piece to rest upright 24 hours before hanging.
How to Display or Gift It
- Create a mini gallery wall using small wooden frames.
- Wrap for gifting in kraft paper and tie with twine and dried sprig.
- Keep framed pieces out of direct sun to prevent fading.
- Store extra pressed stems flat in a labeled folder.
- Pom-Pom Brook Rug for Nooks

A tiny pom-pom rug adds plush texture to reading nooks. It's satisfyingly tactile and simple to make with a pom-pom maker or card template. Use acrylic-wool blend yarn for durability and a craft rug mat to anchor pom-poms.
Materials
- Bulky yarn (acrylic-wool blend), 200–300 g total in 2 colors
- Pom-pom maker (medium) or cardboard template
- Non-slip rug mat (12 x 18 in)
- Sharp scissors
- Yarn needle
- Hot glue (optional for extra hold)
Instructions
- Make pom-poms using the maker, trimming for evenness, about 40–60 pom-poms.
- Trim pom-poms to about 1.25 in diameter for uniform look.
- Sew pom-poms through the center onto the rug mat, knotting securely.
- Fill the mat in rows; leave a small gap so edges stay plush.
- Optionally add a dot of hot glue to knots for extra hold; let glue set 10 minutes.
- Trim any uneven pom-pom ends.
How to Display or Gift It
- Place by a small chair or under a bedside tray.
- Roll gently for storage in a breathable fabric bag.
- Make matching cushion covers to pair as a set.
- Gift with a skein of the same yarn and a pom-pom maker.
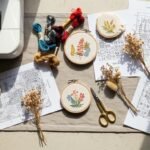
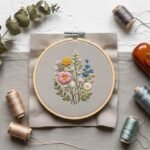
- Petite Embroidery Hoop Meadow

This mini hoop trio delivers handcrafted charm to narrow wall spaces. Linen gives a rustic base and French knots add dimensional wildflower texture. If you’re new to embroidery, I recommend an embroidery starter kit to get going.
Materials
- Embroidery hoops 4–6 in
- Linen fabric pieces 8 x 8 in
- Embroidery floss (6-strand), assorted pastels
- Embroidery needle set
- Small scissors
- Water-soluble fabric pen
- Mini hoop hanger or twine
Instructions
- Cut linen to hoop size with 2 in allowance.
- Sketch simple flower shapes with fabric pen.
- Transfer petals using a backstitch, leaves with a satin stitch, and centers with French knots.
- Keep stitches even; test tension on a scrap before starting.
- Trim fabric and secure excess at hoop back with a running stitch, knotting tightly.
- Add twine loop and hang. Press lightly if fabric is wrinkled.
How to Display or Gift It
- Cluster three hoops at varying heights near a bed.
- Attach a paper backing to the hoop for a polished finish.
- Package with an embroidery starter kit for a beginner crafter.
- Store hoops flat in a shallow craft drawer.
- Rustic Wood Slice Candle Tray

Natural wood slices bring forest warmth to nightstands. Seal the surface for spill protection and pair with unscented beeswax candles for a cozy glow. Sanding helps the finish soak in evenly.
Materials
- Wood slice (5–7 in diameter), 3/4–1 in thick
- Sandpaper set (120 and 220 grit)
- Water-based wood sealer or clear matte varnish, 2 oz
- Beeswax votive candle, 2 in diameter
- Small paintbrush (1/2 in)
- Soft cloth
Instructions
- Sand the top and bottom with 120 grit, finish with 220 grit.
- Wipe dust with a damp cloth.
- Apply one thin coat of sealer with brush; dry 1–2 hours.
- Lightly sand with 220 grit between coats; add a second coat and dry 2 hours.
- Center candle on slice. Avoid burning candles unattended on wood; always place on heat-safe surface.
- Replace sealer every 12–18 months if used often.
How to Display or Gift It
- Use on mantels or as part of a layered centerpiece.
- Wrap in kraft paper with a bundle of rosemary for gifting.
- Store flat in a dry place to prevent warping.
- Pair with a set of candles and a small match tin.
- Soft Linen Throw Pillow with Hand-Stitched Edge

A hand-stitched edge turns a simple pillow into something handcrafted and calm. Linen softens with use and looks better with slightly imperfect stitches—ideal for cottagecore. A sewing machine speeds construction, but you can stitch by hand.
Materials
- Linen yardage, 18 x 18 in for one pillow
- Pillow insert (16 x 16 in, 18 in for a plumper look)
- Embroidery floss for blanket stitch
- Hand-sewing needles or sewing machine
- Thread to match
- Scissors
- Straight pins
Instructions
- Cut two 18 x 18 in linen squares.
- Place right sides together; pin edges leaving a 4 in opening.
- Machine stitch 1/2 in seam allowance, or hand-stitch with running stitch.
- Turn right side out and press edges flat.
- Using embroidery floss, blanket stitch around the edge; stitch about 1/4 in from the seam.
- Insert pillow form and close opening with ladder stitch. Trim threads.
How to Display or Gift It
- Layer with a knitted throw and a small pom-pom pillow.
- Wrap in tissue and tuck a dried lavender sachet inside for gifting.
- Store in breathable cotton bags when making ahead.
- Swap covers seasonally for a fresh look.
- Botanical Wax Tablet Sachets

Wax tablets perfume drawers and closets while looking like miniature landscapes. Use beeswax and scent with essential oils. They’re lovely at the bottom of a linen drawer or hung from a closet rod.
Materials
- Beeswax pellets, 8 oz
- Dried herbs (lavender, rosemary), small sprigs
- Citrus slices (dried), thin slices
- Silicone mold (oval or rectangular, 3–4 in)
- Essential oil (lavender or cedarwood), 10–20 drops
- Wooden skewers and heatproof melting pot
- Natural twine
Instructions
- Melt beeswax in a double boiler or melting pot until fully liquid (about 10 minutes).
- Add 10–20 drops essential oil and stir.
- Pour a thin base layer into molds; let cool 5 minutes.
- Arrange dried herbs and citrus on top and pour remaining wax to hold them in place.
- Insert wooden skewers for hanging shape if desired; allow to set 1–2 hours.
- Pop tablets from mold and tie with twine. Cure 24 hours before use.
How to Display or Gift It
- Hang in wardrobe corners or place in drawers between sweaters.
- Wrap in wax paper and tuck into kraft boxes for gifting.
- Avoid direct heat; store in a cool, dry place.
- Make a batch and keep extras in a craft organizer.
- Mini Wreath of Dried Wildflowers

A petite dried-wildflower wreath has pastoral charm and lasts seasons. Hot glue secures small stems to a grapevine base. It's lightweight and looks lovely above a bedside or on a door knob.
Materials
- Mini grapevine wreath base (6 in)
- Dried flower bundles (assorted), 3–4 stems each
- Florist wire (20 gauge)
- Hot glue gun and sticks
- Pruning shears
- Ribbon for hanging
Instructions
- Trim stems to 2–3 in lengths.
- Layer small bundles and secure with florist wire.
- Tuck bundles into the grapevine base and hold while applying a small glue dot.
- Continue around the wreath until covered, leaving a small gap if desired.
- Add a ribbon loop and trim excess stems.
- Let glue fully set 10 minutes before hanging.
How to Display or Gift It
- Hang on the inside of a cupboard or on a mirror.
- Wrap in tissue with a small care note for gifting.
- Keep away from damp areas to avoid mold.
- Store flat in shallow boxes between seasons.
- Cottagecore Aesthetic Room Decor DIY: Painted Wooden Bookends
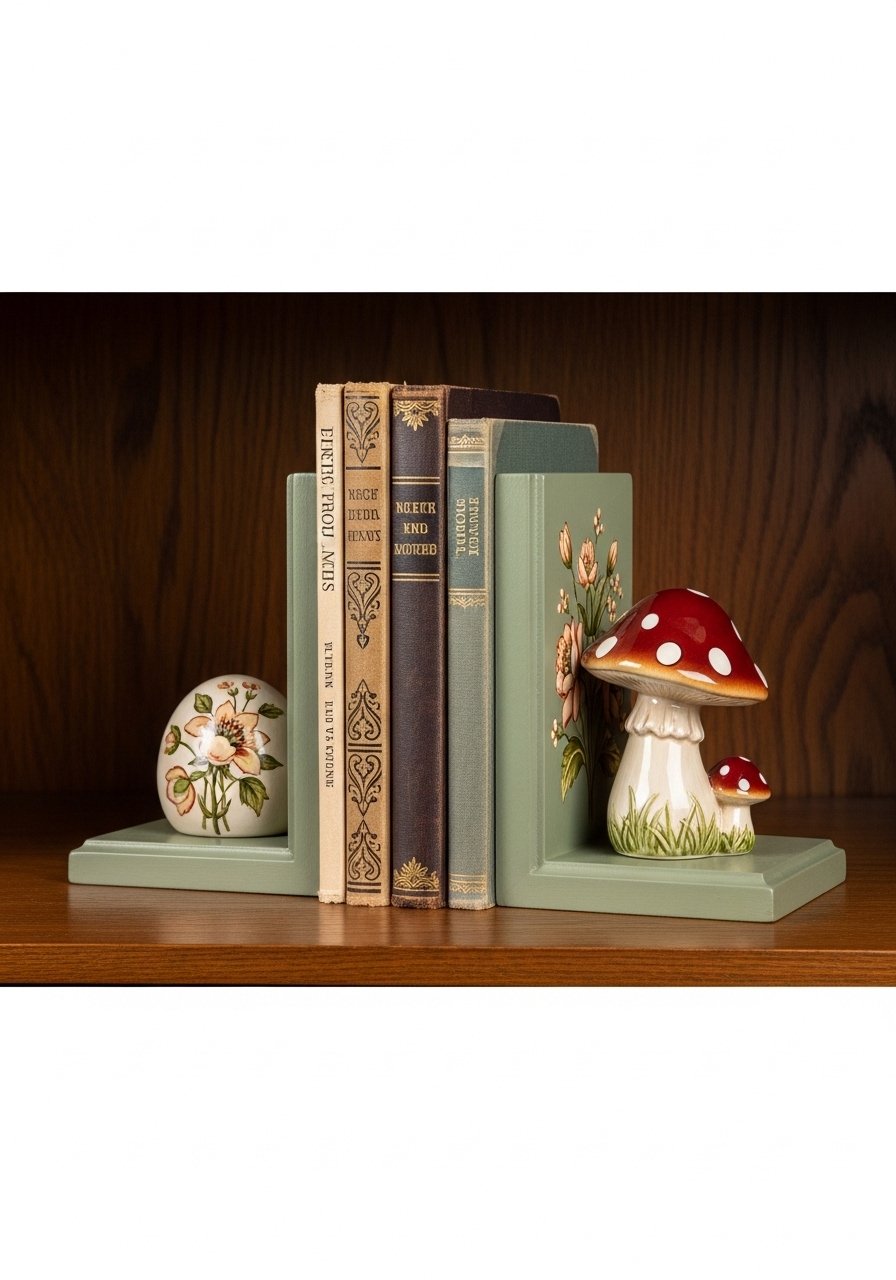
Hand-painted bookends add personality to shelves and help curate a cottagecore vignette. Chalk paint is forgiving, and a brayer roller gives a smooth base if you’re applying vinyl stencils. These are beginner-friendly and make thoughtful gifts.
Materials
- Wooden bookend blanks (5 x 4 x 4 in pair)
- Chalk paint (sage and cream), 2 oz each
- Fine detail brush set
- Sandpaper (220 grit)
- Matte varnish spray, 1 can
- Painter's tape
- Optional vinyl stencil and brayer roller
Instructions
- Sand blanks lightly and wipe dust away.
- Paint a base coat with chalk paint; dry 30 minutes.
- Use stencils or freehand florals with detail brushes.
- Allow painted details to dry 1 hour, then apply 1 light coat of matte varnish.
- Let cure 24 hours before placing books.
- Test stability and add felt pads to bottom if needed.
How to Display or Gift It
- Pair with thrifted books for a curated shelf.
- Wrap individually in kraft paper with twine.
- Store in a dry place; avoid heavy stacking.
- Consider making a set in different colorways.
- Linen-Bound Field Guide Notebook
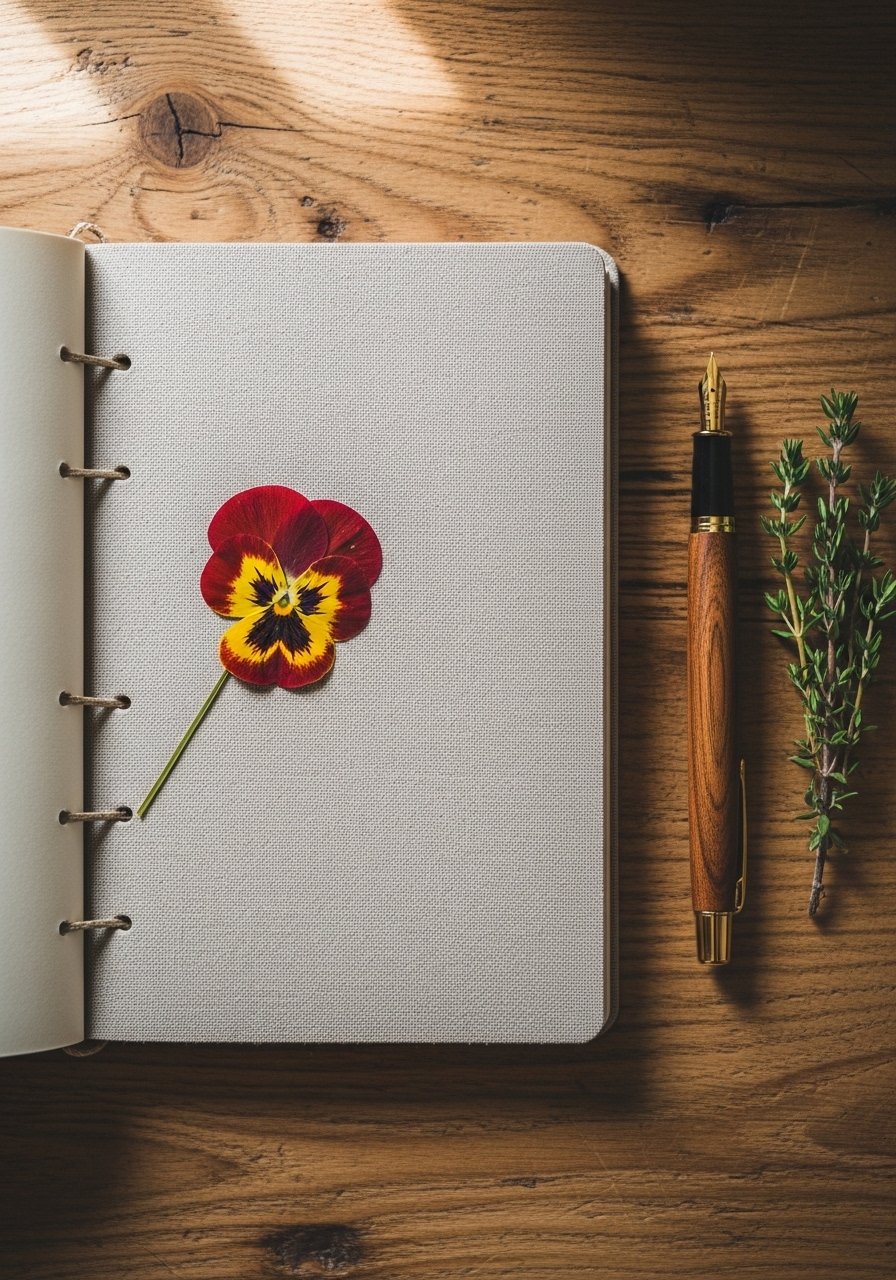
A linen-bound notebook is both practically useful and beautifully tactile. Use heavy paper for sketching or journaling and stitch the spine with a simple pamphlet stitch. A bone folder helps create crisp folds.
Materials
- Linen fabric scrap (10 x 12 in)
- Folded paper signatures (5 sheets, 8.5 x 11 folded to 5.5 x 8.5)
- Bookbinding thread and needle
- Heavy cardstock for cover, 5.5 x 8.5 in
- Bone folder
- Craft glue
Instructions
- Cut linen and wrap cardstock, gluing neatly and smoothing with a bone folder.
- Fold paper signatures and clamp together.
- Mark three evenly spaced sewing stations along the spine.
- Stitch using pamphlet stitch and tie off securely.
- Trim any excess thread and press flat overnight.
- Add a pressed flower tucked into the first page as a finishing touch.
How to Display or Gift It
- Keep on a bedside table for morning pages.
- Wrap with ribbon and pair with a fountain pen as a gift.
- Store flat to avoid spine stress.
- Make multiple as a set for friends.
- Macramé Hanging Plant Pocket (3mm Cord)
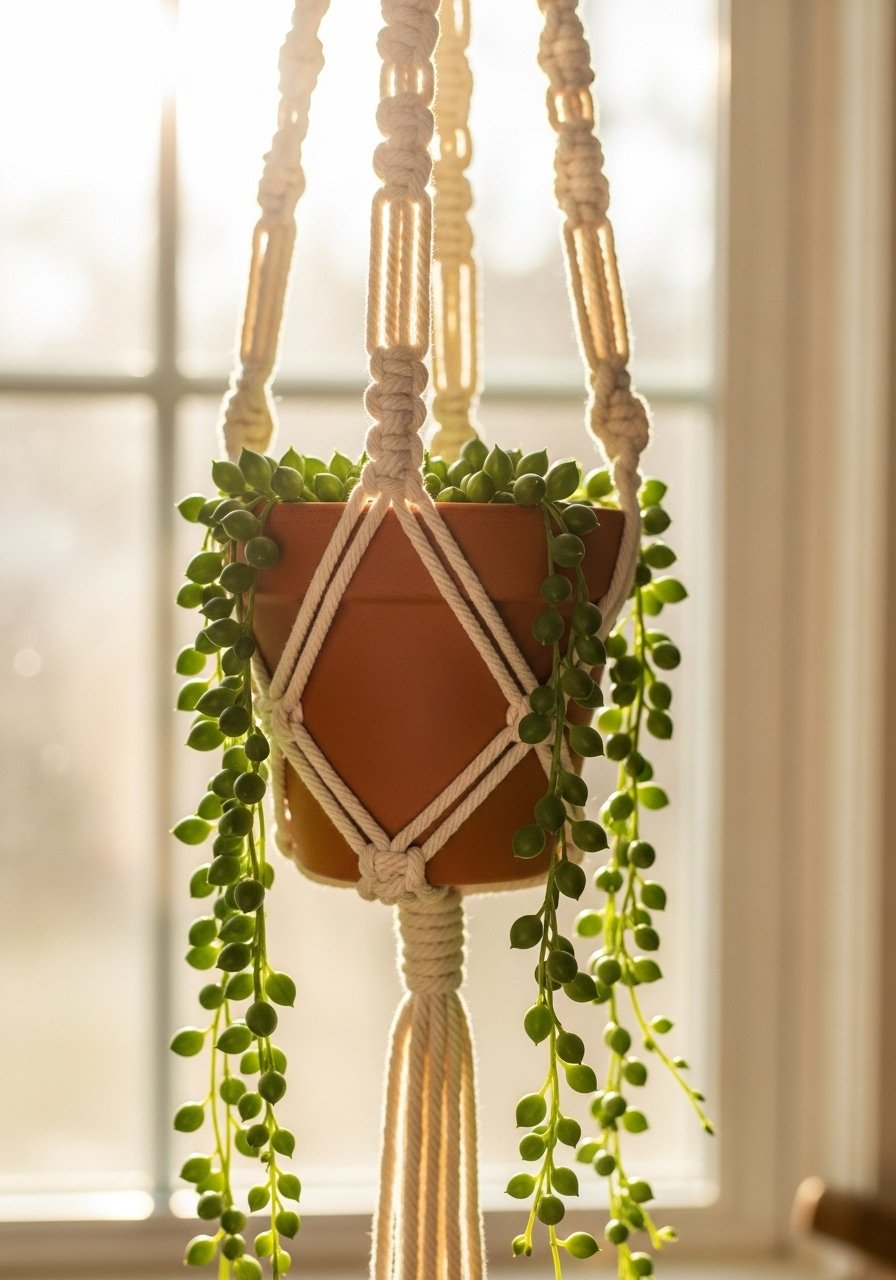
This mini macramé pocket is breezy and soft—perfect for tiny houseplants. I use 3mm single-strand macramé cord for a delicate drape. Even beginners can master square knots with a video tutorial.
Materials
- Macramé cord 3mm, 20 yards
- Mini terracotta pot (2–3 in)
- Wooden dowel or driftwood (6 in)
- Measuring tape
- Scissors
- Optional macramé board and pins
Instructions
- Cut 8 cords at 2.5 yd each.
- Attach cords to dowel with lark’s head knots.
- Work rows of square knots leaving 3 in gaps for pot support.
- Create a gathered base with overhand knots and trim excess cord.
- Insert pot to check fit and adjust if needed.
- Hang and allow knots to settle 24 hours before adjusting plant.
How to Display or Gift It
- Hang near east-facing windows where plants thrive.
- Gift with a small succulent in kraft packaging.
- Store rolled gently in a box to keep knots tidy.
- Make a matching set of different sizes.
- Tea-Stained Vintage Sheet Bunting

Tea staining linens adds an instant antique look without harsh chemicals. The bunting brings cozy movement to a room and is washable if you reinforce edges. Use an old flat iron for crisp flags.
Materials
- Cotton sheets or muslin, 1/2 yard
- Tea bags (black tea), 6–8
- Bias tape or twine, 2 yd
- Sewing machine or needle and thread
- Scissors and ruler
- Iron
Instructions
- Brew a strong tea (6–8 bags in 2 cups boiling water), cool slightly.
- Submerge fabric until desired color (5–15 minutes). Rinse and air dry.
- Cut triangles 6 x 8 in and press edges.
- Sew flags onto bias tape or stitch twine into a channel.
- Press flags flat and stitch seam for added durability.
- Let fabric rest 24 hours to set color before hanging.
How to Display or Gift It
- Hang above a bed or across a mantel.
- Add tiny clothespins and photos for a personal touch.
- Store flat to prevent creases.
- Make multiple lengths for seasonal swaps.
- Clay Mushroom Figurines (Air-Dry)
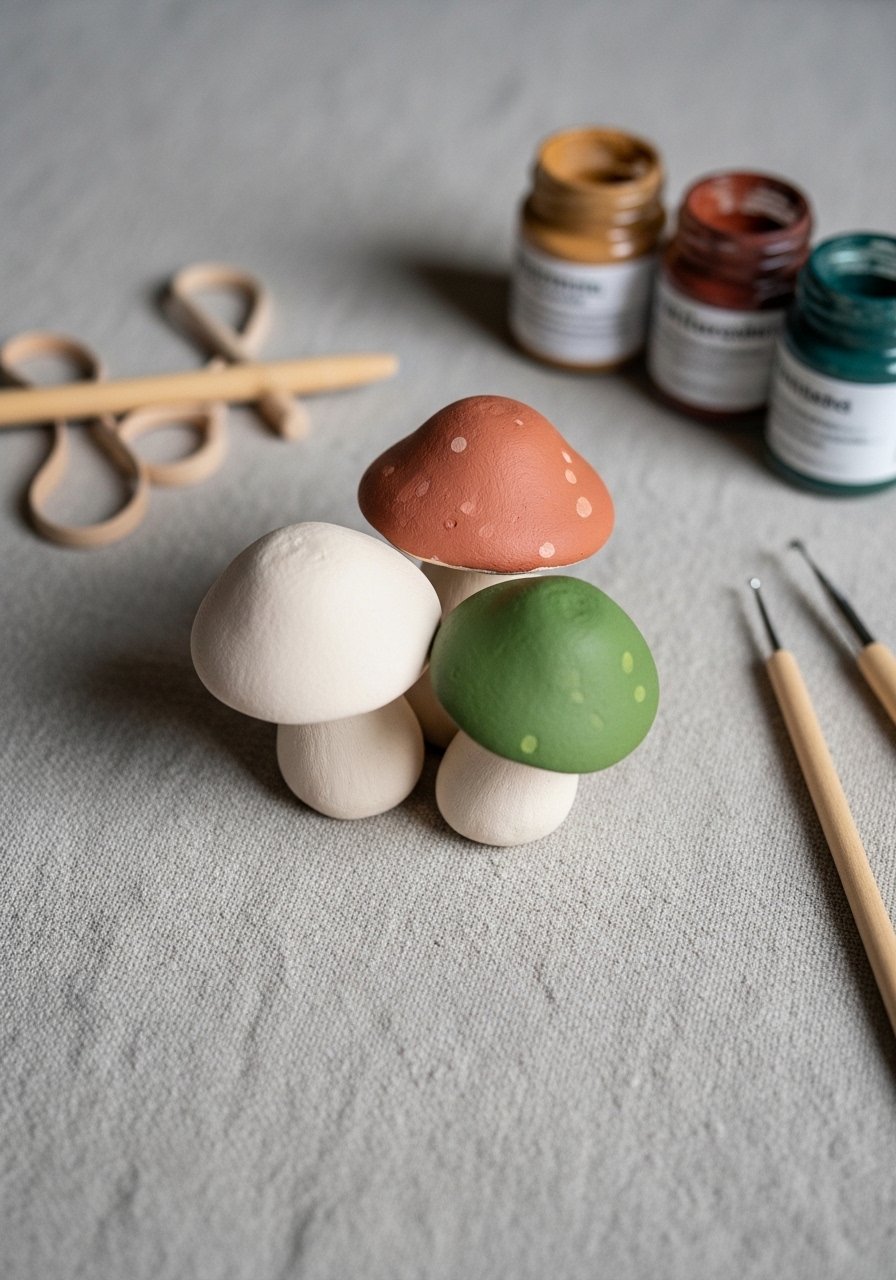
Tiny clay mushrooms give cottagecore whimsy to bookshelves and plant pots. Air-dry clay is forgiving for beginners and requires only light sanding and paint afterward. Seal with matte varnish for handling.
Materials
- Air-dry clay, 8 oz
- Clay sculpting tool set
- Fine sandpaper (320 grit)
- Acrylic paint in neutral tones
- Small round paint brush
- Matte varnish spray, 1 can
Instructions
- Shape cap and stem pieces, smoothing joins with a moistened finger.
- Blend seams and add texture with a toothpick or sculpting tool.
- Let dry 24–48 hours depending on size (1/2 in pieces dry faster).
- Sand lightly for smoothness and paint details.
- Apply 1 light coat of matte varnish; dry 1–2 hours.
- Place on a shelf or pot edge for decoration.
How to Display or Gift It
- Tuck on a bookshelf with tiny plant pots.
- Box in a small kraft gift box with tissue paper.
- Keep extras in a sealed container to prevent dust buildup.
- Paint matching sets for a themed vignette.
- Miniature Herb Drying Rack

A tiny herb drying rack is functional and pretty. This simple wall-mounted rack uses dowels and a shallow crate shelf. Drying herbs properly keeps their scent and color.
Materials
- Small wooden crate or shelf (12 x 4 x 4 in)
- Wooden dowels (3/8 in x 12 in), 3 pcs
- Drill with bit matching dowel diameter
- Twine for tying herbs
- Sandpaper
- Optional wood stain or chalk paint
Instructions
- Sand crate and dowels; stain or paint if desired and dry 1–2 hours.
- Drill holes on the underside of the shelf for dowel insertion.
- Insert dowels securely; test weight.
- Tie herb bunches with twine, leaving 3–4 in stems.
- Hang bunches spaced evenly to ensure airflow.
- Herbs will dry in 1–3 weeks depending on humidity.
How to Display or Gift It
- Mount in a sunny kitchen corner.
- Gift with a jar of labeled dried herbs.
- Store extra twine and tags in a craft organizer.
- Make several for neighborly herb swaps.
- Petite Resin Flower Tray (Epoxy)

Resin captures pressed flowers like glass. Use a clear epoxy resin and measure carefully—mixing ratio accuracy is key. Work in a dust-free space and allow full cure for a glossy, durable finish.
Materials
- Clear epoxy resin kit (2-part), 8 oz
- Silicone tray mold (rectangular, 6 x 4 in)
- Pressed flowers and gold leaf flakes
- Disposable mixing cups and stir sticks
- Nitrile gloves and respirator mask
- Heat gun for bubble removal
Instructions
- Ensure workspace is 65–75°F and dust-free.
- Mix resin and hardener per kit ratio (1:1 or as specified), stirring slowly for 2–3 minutes.
- Pour a thin base layer and wait 10–15 minutes to self-level.
- Position pressed flowers and add gold leaf; pour remaining resin to cover.
- Use a heat gun briefly to remove bubbles; avoid overheating.
- Let cure 72 hours before demolding. Sand edges if needed.
How to Display or Gift It
- Use as a jewelry tray on a dresser.
- Wrap in bubble wrap and tissue for shipping or gifting.
- Avoid placing hot mugs directly on resin surfaces.
- Store in a dust-free box while curing.
- Painted Glass Apothecary Jars

Painting the insides of clear jars creates frosted, muted color without chipping. It’s ideal for styling shelves and storing small craft supplies. Use a small funnel for filling after the paint cures.
Materials
- Assorted glass jars with lids (4–8 oz)
- Acrylic glass paint or chalk paint for glass
- Small funnel
- Painter’s tape (for masking)
- Soft foam brush
- Dried botanicals or buttons for filler
Instructions
- Clean jars thoroughly and let dry.
- Apply paint inside using a foam brush; rotate jar to coat evenly.
- Pour out excess and let cured paint set 24 hours.
- Add filler and attach kraft labels with twine.
- Seal lids and avoid dishwasher cleaning; hand wash gently.
- Replace paint coats every 12–18 months if fading appears.
How to Display or Gift It
- Group jars on open shelves or inside cubbies.
- Fill with bath salts and label for gifting.
- Store in a shallow organizer when not in use.
- Make a set in coordinating palettes for visual harmony.
- Cottagecore Aesthetic Room Decor DIY: Woven Wall Pocket (Mini Loom)
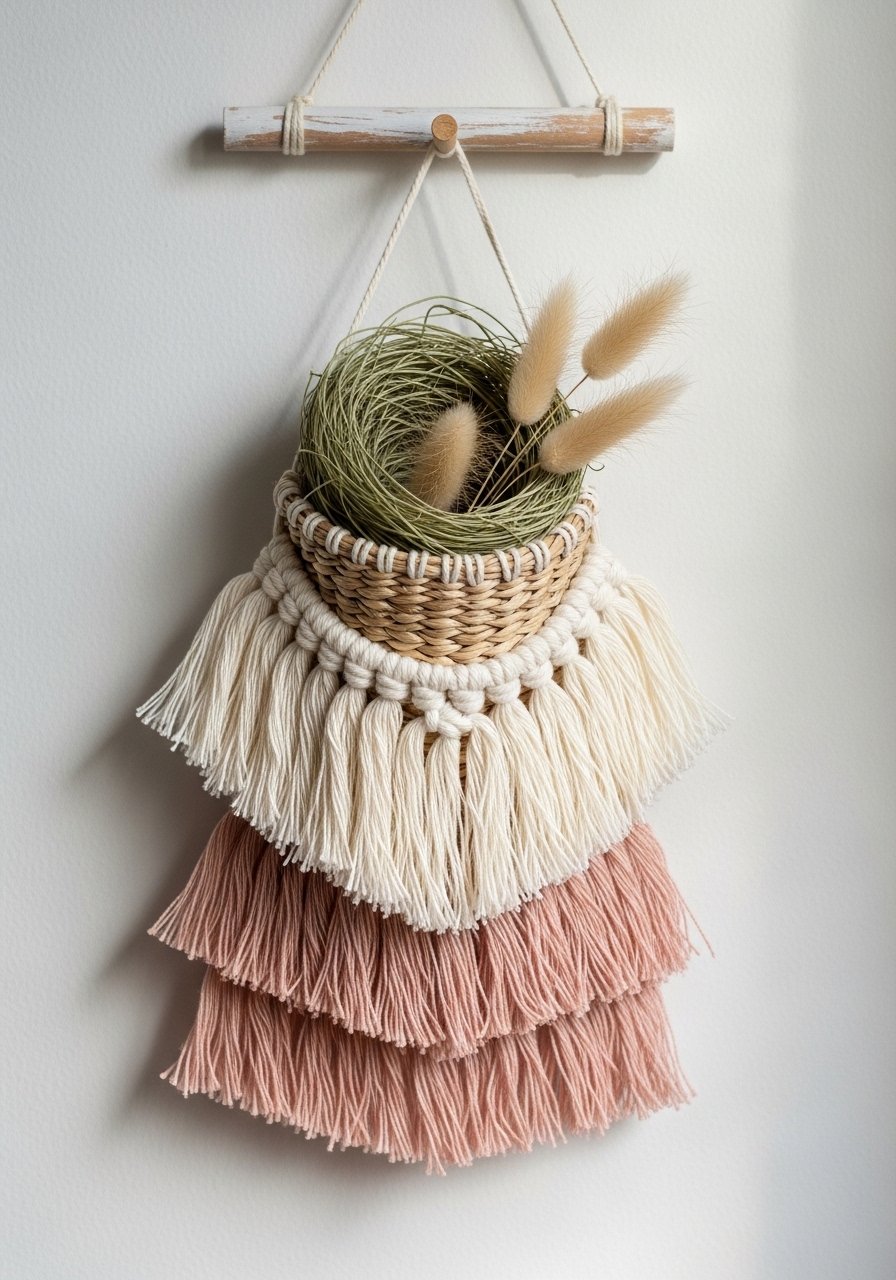
A mini woven pocket doubles as art and storage—perfect for holding dried stems or letters. Use a small handheld loom to weave wool and cotton blends for a soft, cottagecore texture. Fringe adds cozy movement.
Materials
- Mini weaving loom or cardboard loom (6 x 8 in)
- Warp thread (cotton), 10 yd
- Weft yarns in various textures, 50–75 g total
- Tapestry needle
- Scissors
- Wooden dowel (6–8 in)
Instructions
- Warp the loom evenly using cotton thread.
- Weave rows of weft yarn, alternating textures and colors.
- Create a pocket by leaving a woven flap and securing sides with a running stitch.
- Finish with fringe tied along the bottom and trim evenly.
- Slip off the loom and attach to the dowel; hang.
- Let the piece settle 24 hours before filling.
How to Display or Gift It
- Hang near a desk for pens or small notes.
- Gift with dried stems tucked into the pocket.
- Keep dust-free by gently vacuuming with a brush attachment.
- Make matching pieces in different sizes.
- Cottage-Patterned Washi Tape Gallery

Washi tape makes instant art—no mess, no drying time. Use patterned tapes in muted florals and plaids for a cottagecore palette. This is a great project for renters who can’t nail walls.
Materials
- Assorted washi tape in florals/plaids
- Small frames (4 x 4 in)
- Kraft paper or cardstock, 4 x 4 in
- Paper cutter or scissors
- Ruler
- Optional craft mat
Instructions
- Cut cardstock to frame size.
- Layer washi tape in stripes, diagonals, or chevrons.
- Trim edges neatly with a craft knife and ruler.
- Insert into frame and close.
- Arrange frames in a grid on the wall using removable adhesive.
- Swap tape patterns seasonally for a fresh look.
How to Display or Gift It
- Create a renter-friendly gallery without nails.
- Stack in a small craft drawer for swaps.
- Pair with matching notebooks as a gift.
- Keep extra rolls in a clear mason jar for display.
- Felt Mushroom Garland

A felt garland delivers woodland sweetness. Felt is forgiving and stitchless assembly with hot glue speeds things up. Make varied sizes for visual interest.
Materials
- Wool felt sheets (assorted), 6 x 9 in per mushroom
- Template for mushroom shapes
- Hot glue gun and sticks
- Twine or embroidery floss for stringing
- Scissors
- Optional stuffing (polyfill) for puffed mushrooms
Instructions
- Cut two mushroom shapes per piece from felt.
- Glue edges together, leaving a small opening if stuffing.
- Add a touch of polyfill if desired then seal.
- Glue a small loop or sew with embroidery floss for stringing.
- Space mushrooms on twine and knot between pieces.
- Hang and enjoy; avoid direct sun to prevent fading.
How to Display or Gift It
- Drape across a window or shelf.
- Wrap in tissue and place in a kraft bag for gifting.
- Store flat to keep shapes crisp.
- Make matching ornaments for seasonal decor.
- Repurposed Teacup Succulent Planters

Old teacups are perfect tiny planters. Add drainage gravel so succulents thrive. They add a soft, collected look to windowsills or grouped on a tray.
Materials
- Vintage or thrifted teacups
- Small pebbles for drainage, 2–3 tbsp per cup
- Succulent cuttings or small plants
- Cactus soil mix, 1/2 cup per cup
- Small spoon for filling
- Optional plant label stickers
Instructions
- Fill the bottom of the cup with 2–3 tbsp drainage pebbles.
- Add cactus soil and position the succulent.
- Firm soil gently and water sparingly (1–2 tsp post-planting).
- Place in bright indirect light; succulents need minimal water.
- Repot into a larger container if roots outgrow the cup.
- Avoid overwatering; allow soil to dry between waterings.
How to Display or Gift It
- Group on a shallow tray near a window.
- Pair with a tiny plant care card for gifting.
- Store extra soil and pebbles in labeled mason jars.
- Make a set of three in graduated teacup sizes.
- Hand-Lettered Herb Labels (Wood)

Wooden markers with calligraphy-style lettering look rustic and practical. Use a paint pen for crisp letters and sand the wood for a smooth surface before writing.
Materials
- Wooden craft stakes (4 x 1/2 in), 10 pcs
- White paint pen (fine tip)
- Sandpaper (220 grit)
- Stain or sealant (optional)
- Ruler and pencil for layout
Instructions
- Sand stakes smooth.
- Lightly mark plant names with pencil.
- Write names with a steady hand using a white paint pen.
- Allow ink to dry 10 minutes, then apply a light sealant if desired.
- Insert into pots and avoid water on the writing.
- Replace markers as plants grow or change.
How to Display or Gift It
- Bundle a set of markers with herb starter pots for gifting.
- Store extras in a small hinged box.
- Make themed marker sets (tea herbs, culinary herbs).
- Refresh paint every season if outdoors.
- Cottage Lace Lampshade Makeover

Covering a lampshade in lace filters light for a gentle glow. Use spray adhesive for even application and press fabric softly to avoid puckers. Make sure the shade isn’t touching the bulb.
Materials
- Plain drum lampshade (8 x 10 in)
- Lace fabric cut to size (1/2 yd)
- Spray adhesive (fabric-friendly)
- Scissors
- Trim or rickrack for edges
- Lint-free cloth
Instructions
- Measure and cut lace with 1–2 in overlap.
- Spray adhesive sparingly on shade in a ventilated area.
- Lay lace gently, smoothing from one side to the other to avoid bubbles.
- Trim excess and finish edge with rickrack glued or sewn.
- Let adhesive cure 24 hours before use.
- Use an LED bulb to reduce heat near fabric.
How to Display or Gift It
- Place on a bedside table for soft reading light.
- Wrap in tissue and a kraft box for gifting.
- Store shade upright to preserve shape.
- Use an LED bulb to minimize heat risk.
- Painted Terra-Cotta Wall Hooks

Small painted terra-cotta tiles with hooks give a custom hang spot for jewelry or scarves. Terracotta takes paint beautifully and feels earthy in a cottagecore palette.
Materials
- Small terra-cotta tiles (3 x 3 in), 3 pcs
- Brass cup hooks, 3 pcs
- Acrylic paint set (pastels)
- Small drill or masonry bit
- Matte sealer spray
- Wooden backing (optional)
Instructions
- Paint tiles with base coat; dry 30 minutes.
- Add floral details with a fine brush; dry 1 hour.
- Drill pilot holes and screw in cup hooks.
- Seal with a light coat of matte sealer; dry 1 hour.
- Mount tiles to wooden backing or directly to wall with hardware.
- Wait 24 hours before hanging items.
How to Display or Gift It
- Use by a bedroom door for necklaces and keys.
- Package individually as handmade gifts with a care note.
- Store tiles flat with tissue in between.
- Make a matching set for a closet door.
- Felted Wool Sachets

Felted sachets smell heavenly and prevent moths. Wool felting is forgiving, and dried lavender keeps drawers smelling like spring. These are quick to stitch and great for batch-making.
Materials
- Wool felt sheets, 4 x 4 in per sachet
- Dried lavender, 1–2 tbsp per sachet
- Embroidery floss and needle
- Scissors
- Optional small bell or charm
Instructions
- Cut two identical shapes from felt.
- Place 1–2 tbsp dried lavender inside and stitch closed with a blanket stitch.
- Tie a little charm if desired.
- Press gently and trim any loose threads.
- Let sit 24 hours for scent to mellow.
- Replace lavender every 6–12 months as scent fades.
How to Display or Gift It
- Tuck into drawers or hang in closets.
- Bundle several in organza bags for gifts.
- Store spare sachets in a sealed container to preserve scent.
- Make matching sets to refresh linens.
- Painted Branch Curtain Rod (Driftwood)
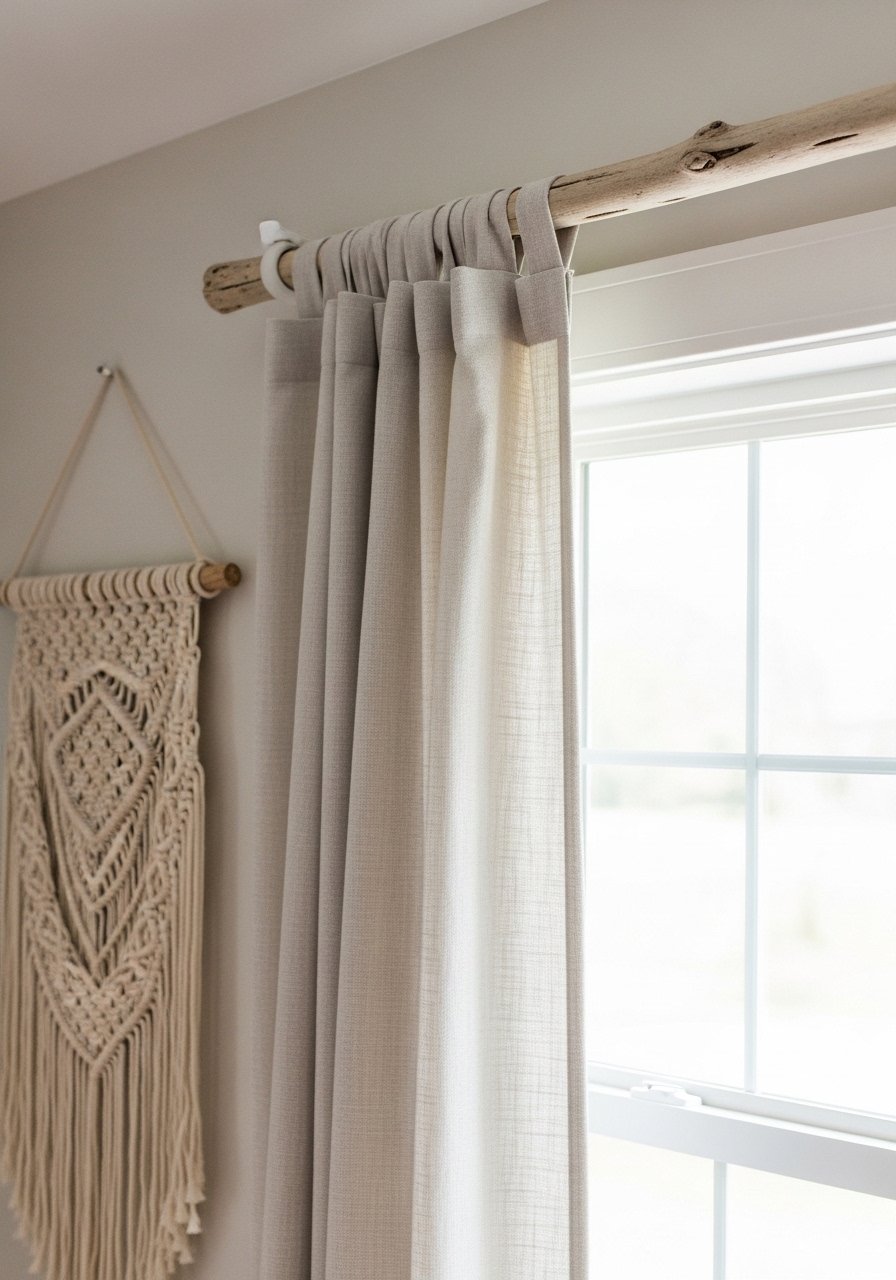
A painted driftwood rod brings outdoors in. Lightweight curtains hang beautifully from small rings or loops. Stabilize the rod ends with sturdy wall anchors.
Materials
- Driftwood or natural branch (36–48 in)
- Chalk paint (soft white), 2 oz
- Drill bit for pilot holes
- Curtain rings or DIY looped fabric
- Wall anchors and screws
- Clear sealant spray
Instructions
- Clean and sand branch; remove bark if loose.
- Paint with chalk paint; dry 30 minutes and add a second thin coat.
- Drill pilot holes at bracket points if needed.
- Seal with matte spray and install brackets with anchors.
- Hang curtains on rings or looped top.
- Check stability monthly and tighten screws if needed.
How to Display or Gift It
- Use for lightweight cotton or linen curtains.
- Gift with a sweet length of fabric or ties.
- Store extra brackets and anchors in a small container.
- Make multiple smaller rods for layered windows.
- Dried Flower Shadow Box
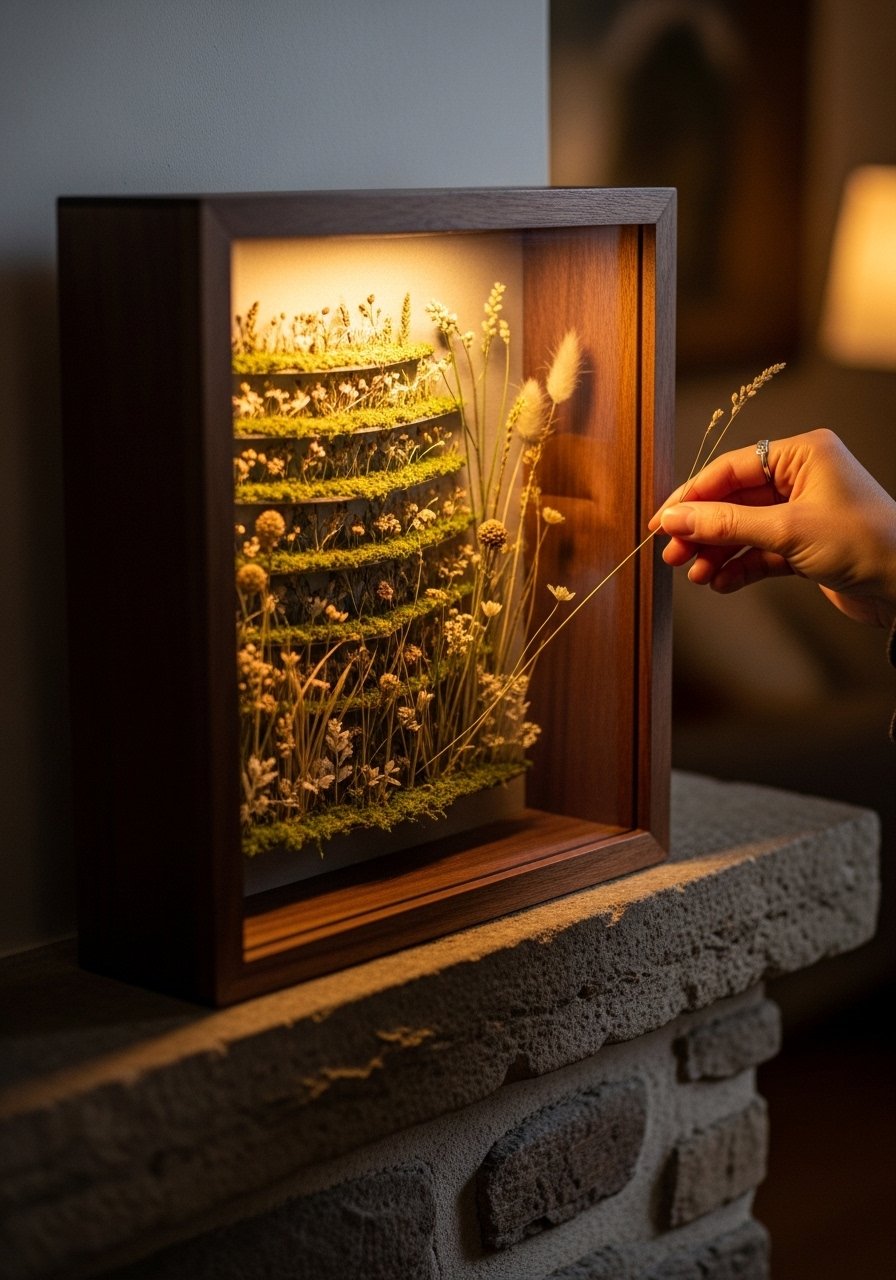
A shadow box lets you create a miniature landscape. Layer stems at varying depths to add dimension. Use archival glue and backboard paper to complement the palette.
Materials
- Shadow box frame (8 x 8 x 2 in)
- Dried flowers and grasses
- Archival glue or clear craft glue
- Acid-free backing paper (cream)
- Tweezers
- Small frame hanging hardware
Instructions
- Arrange backing paper and plan layout before gluing.
- Secure stems with small dabs of archival glue, starting from back to front.
- Use tweezers for delicate placement.
- Allow glue to dry 24 hours fully before closing frame.
- Seal edges and attach hanging hardware.
- Display away from direct sunlight to preserve colors.
How to Display or Gift It
- Prop on a mantel or hang as a focal point.
- Wrap in kraft paper and a small ribbon for a delicate gift.
- Store flat to protect the glass when transporting.
- Create a set of three for a gallery wall.
- Cottagecore Floral Window Garland (Fabric)

Fabric flower garlands are airy and cheerful, perfect for framing a window. Use scraps of vintage sheets or floral cotton for romantic movement. A hand-sewing needle is all you need.
Materials
- Floral cotton scrap pieces, 1/4 yd total
- Twine or thin ribbon, 4–6 ft
- Needle and thread
- Polyester stuffing (tiny amounts) for centers
- Scissors
- Optional wooden beads for spacing
Instructions
- Cut flower templates from fabric (approx 2.5–3 in diameter).
- Layer petals, stitch through center, add small stuffing to create dimension.
- Knot securely and space flowers along twine, adding wooden beads if desired.
- Make 12–15 flowers for a 4–6 ft garland.
- Hang with small hooks or tie ends to window frame.
- Store rolled gently in tissue when not in use.
How to Display or Gift It
- Drape across a cottage window or shelf.
- Bundle as a bridal shower craft gift.
- Keep rolled in a craft tube for storage.
- Make seasonal versions using autumn or spring florals.
You made it to the end—28 projects that range from quick and sweet to slow and meditative, all designed to fit a cottagecore aesthetic room decor DIY mindset. There’s a mix of fiber, paper, clay, and natural elements so you can pick projects that match your time and tools. Save or pin this list so you can come back when you want a weekend maker project or a last-minute gift idea.
Which project do you want to try first—pressed flowers, a macramé pocket, or a scented wax tablet? Share your photos or pass this list to a friend who loves soft, whimsical decor. And if you’re building a basic kit, trust me: a quality hot glue gun with temperature control and a self-healing cutting mat will make many of these projects more pleasant and faster to finish. Happy making!