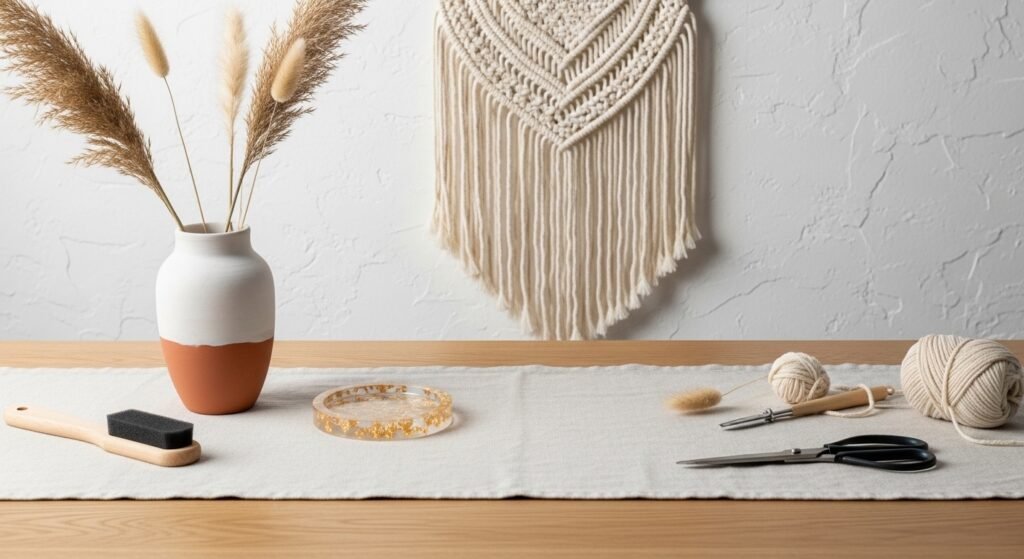
You know that feeling when a blank wall or a lonely corner makes your whole apartment feel unfinished? These renter-friendly projects solve that with low-commitment, high-style moves you can do in an afternoon. This list of 29 aesthetic room decor DIY for apartments focuses on removable, non-damaging solutions—think Command strips, tension rods, and leaning displays—mixed with timeless textures like macramé, plastery whites, earthy terracotta, and soft woven fibers.
You’ll find projects that suit cottagecore, boho, Japandi, and modern minimal looks. I mention tools you'll actually use—like my go-to precision craft knife for trimming and a temperature-control hot glue gun for tidy attachments. Every project lists exact materials, step-by-step instructions with drying times, and renter-friendly display tips so your landlord stays happy and your space looks like a magazine.
Ready to make your apartment feel intentionally you? Pin your favorites and grab a few supplies as you go.
- Mini Macramé Wall Hanging

This mini macramé is soft, tactile, and perfect for adding boho texture without drilling. It finishes with a neat wooden dowel and 3mm cord, so it’s light and easy to hang with a small Command hook. Beginners love the simple square knots and lark’s head loop.
Materials
- 3mm single-strand macramé cord, 20 yards
- Wooden dowel, 8 in (20 cm)
- Scissors
- Measuring tape
- Small Command hook
- Optional: wooden beads, 10–12mm, 4 pieces
Instructions
- Cut four lengths of cord at 120 cm each and two at 60 cm for tail fringes.
- Attach cords to the dowel using lark’s head knots across the dowel.
- Create square knots in two rows, spacing 1 in (2.5 cm) apart.
- Add a row of half-square knots to form a V-shape, then secure with a gathering knot.
- Trim the fringe to a gentle V shape; measure to keep symmetry.
- Brush the fringe with a stiff-bristle brush to fluff fibers.
- Clean the wall with rubbing alcohol, press the Command hook for 30 seconds, then hang.
How to Display or Gift It
- Hang above a bedside table or narrow console for instant texture.
- Tie a dried sprig (lavender or eucalyptus) into the dowel for scent.
- Gift in a kraft box with tissue paper and a small care card.
- Store flat or rolled in a fabric drawer organizer to avoid tangles.
- Hanging Canvas Plant Pouch
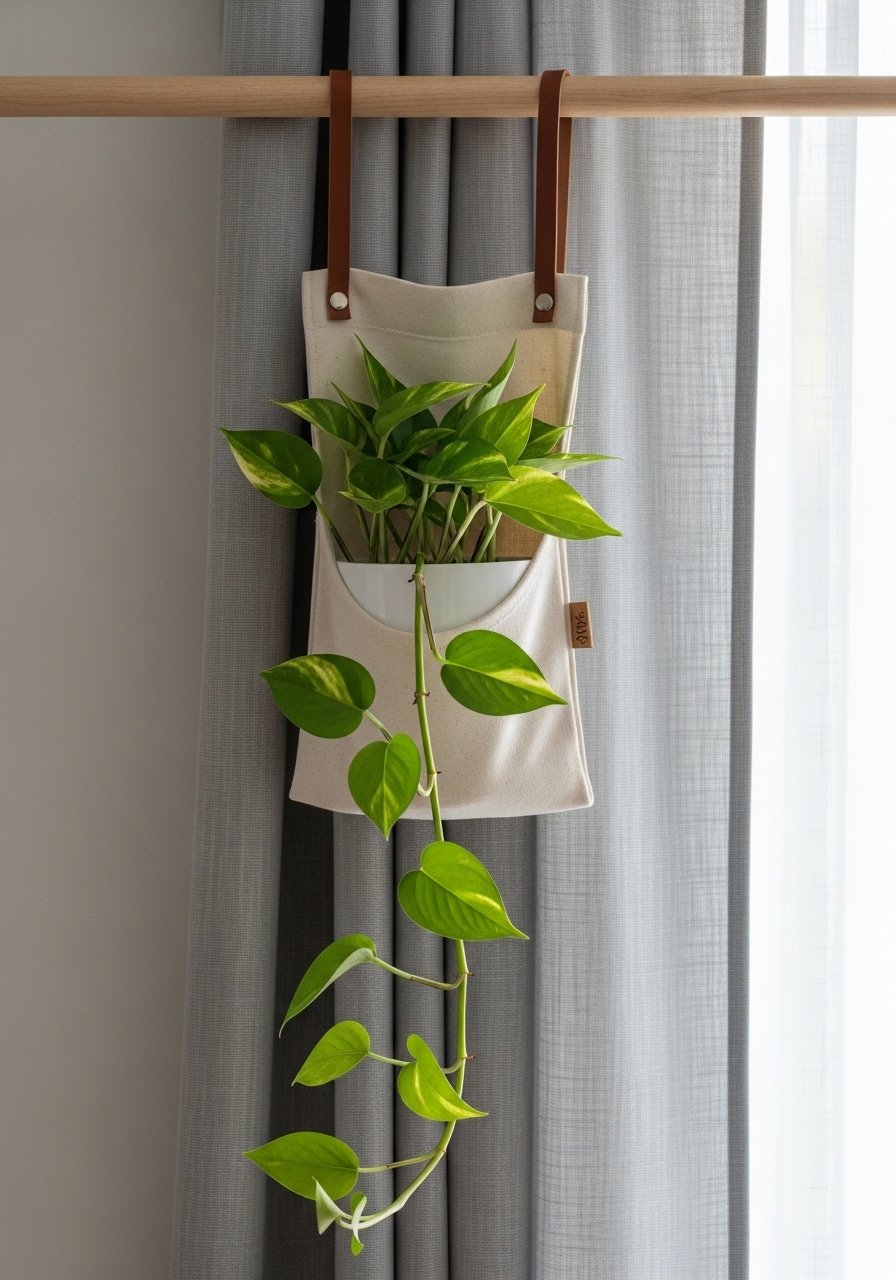
A textile plant pouch lets you add greenery without drilling shelves. The canvas gives a relaxed cottagecore feel; the pouch is lightweight so a tension rod or curtain rod handles it easily. Stitching is basic and forgiving.
Materials
- Unbleached canvas fabric, 12 x 16 in (30 x 40 cm)
- Cotton twill tape or leather strip, 2 x 12 in (30 cm)
- Sewing machine or needle and thread
- Scissors, ruler, pins
- Small plastic plant pot (4 in / 10 cm) with drainage
- Optional: fabric paint for a simple stamp
Instructions
- Fold canvas in half widthwise; stitch sides with ½ in (1.2 cm) seam allowance leaving top open.
- Fold top edge down 1 in (2.5 cm) and stitch to create a casing for the strap.
- Cut two 12 in straps; thread through casing and tie knots or secure with a small metal ring.
- Insert the 4 in plastic pot; tuck the plant in. Use a saucer inside to avoid drips.
- For color, stamp a simple motif with fabric paint and let dry 24 hours.
- Hang from curtain rod or tension rod; avoid overwatering.
How to Display or Gift It
- Group two or three pouches at staggered heights on the same rod.
- Wrap the strap knot with jute for a rustic finish.
- Pack a small watering glove and care tag if gifting.
- Geometric Washi Tape Accent Wall — aesthetic room decor DIY for apartments

Washi tape is a renter-friendly miracle for bold, temporary pattern. This geometric accent wall uses tape in muted palettes (think Japandi or soft boho). It peels off cleanly, so renters can play with scale without commitment.
Materials
- Assorted washi tape rolls, 10–15 mm and 15–25 mm, 6 rolls
- Painter’s tape for guides
- Measuring tape
- Precision craft knife
- Level or laser level
- Pencil and eraser
Instructions
- Plan a grid lightly in pencil, using a level. Mark starting points every 12 in (30 cm).
- Apply painter’s tape along edges you want crisp; press firmly.
- Lay washi strips following the grid; overlap corners slightly for strength.
- Trim excess with a precision craft knife along a metal ruler.
- Step back and adjust contrast by adding darker tape accents.
- Remove painter’s tape slowly after placement for crisp edges.
How to Display or Gift It
- Pair with a floating shelf below (leaning shelf recommended) for layered styling.
- For gifting, give a curated set of washi rolls in a clear box.
- Store leftover rolls in a stackable craft drawer.
- Removable Fabric Wallpaper Panel

Fabric panels create the illusion of wallpaper without adhesive. Use lightweight upholstery fabric and poster putty or decorative push pins for renter-friendly attachment. The fabric adds color and warmth, ideal for cottagecore and boho rooms.
Materials
- Cotton or linen fabric, 24 x 36 in (60 x 90 cm) panel
- Fusible interfacing, 24 x 36 in
- Fabric scissors, rotary cutter
- Poster putty or removable mounting putty, 1 pack
- Decorative push pins, 4–6
- Optional: fabric stiffener spray
Instructions
- Iron fabric and fuse interfacing on the back to add body.
- Trim to a neat rectangle with 0.25 in (6 mm) seam allowance.
- Attach poster putty to the panel corners and press gently to wall.
- For added security, use decorative push pins at top corners.
- If edges curl, apply a thin bead of removable double-sided mounting tape behind the top edge.
- Remove by peeling slowly and cleaning residue with a damp cloth.
How to Display or Gift It
- Layer panels vertically for a gallery effect.
- Roll and gift with a wooden dowel and twine for easy hanging.
- Store flat or rolled in a kraft tube between uses.
- Leaning Crate Corner Shelf

A leaning crate shelf gives the look of mounted shelving without drilling. Use lightweight pine crates or build a small ladder shelf that rests against the wall. Stain or paint to match Japandi or farmhouse palettes.
Materials
- Pine crate or DIY crate pieces, finished 12 x 12 x 10 in
- Sandpaper, 120 and 220 grit
- Wood stain or chalk paint, 0.5 pint
- Polycrylic sealer, 1 coat
- Felt pads for floor contact
- Screws and corner brackets if joining crates
Instructions
- Sand crate edges smooth with 120 then 220 grit sandpaper.
- Apply one coat of stain or chalk paint; let dry 2–4 hours.
- Add a second coat if needed; dry 2 hours.
- Seal with a thin coat of polycrylic; cure 24 hours before styling.
- Attach felt pads to the base to protect flooring and lean the crate at a gentle angle against the wall.
- Stack crates for height; secure with corner brackets if stacking but avoid wall anchoring.
How to Display or Gift It
- Style with light objects: books, a small plant, a ceramic dish.
- Add a battery LED strip along the back shelf for soft glow.
- Wrap in kraft paper and include felt pads when gifting.
- Painted Wood Round Wall Art

Simple painted wood rounds bring modern, minimalist shapes into your decor. You can stencil geometric shapes for a Japandi vibe or soft organic arcs for boho. Use chalk paint for a soft matte finish.
Materials
- Wood rounds, 8 in (20 cm) diameter, 3/8 in thick
- Chalk paint set or acrylics, assorted colors
- Foam brushes, small and medium
- Sandpaper, 220 grit
- Painter’s tape
- Small leather cord or twine for hanging
Instructions
- Lightly sand the wood round; wipe dust away.
- Apply a base coat of chalk paint; dry 1 hour.
- Use painter’s tape to mask geometric shapes; paint accent colors and dry 30–60 minutes.
- Remove tape and touch up edges with a detail brush.
- Seal with matte Mod Podge; dry 24 hours until firm to the touch.
- Attach leather loop with a small bead and hang with a Command hook.
How to Display or Gift It
- Group three rounds in a loose triangle for a gallery feel.
- Wrap in tissue paper and tie with jute for gifting.
- Store flat between sheets of clean cardboard.
- Magnetic Poster Hanger Photo Collage

Poster hangers are elegant and renter-safe. Use wooden magnetic bars and Command poster strips to make a rotating gallery. It’s perfect for prints, postcards, and Polaroids.
Materials
- Wooden magnetic poster hangers, pair 8 in
- Small prints or photos, various sizes
- Command poster strips, small pack
- Craft bone folder for smoothing
- Optional: lightweight mat boards
Instructions
- Select and crop prints to desired sizes.
- Align top edge in the wooden hanger, clamp and press magnets.
- Attach Command poster strips to hanger back and press firmly to wall for 30 seconds.
- Swap prints seasonally; use a bone folder to smooth any air bubbles on thin prints.
- If using mat boards, secure with a little removable mounting putty.
How to Display or Gift It
- Make a themed set (travel, family, botanical) and gift with a printed guide.
- Place small vignettes under the hanger on shelves.
- Store extra prints in a flat portfolio.
- Epoxy Resin Trinket Dish with Gold Flakes

Resin dishes are chic and tactile—great for rings or keys by the door. Use a clear epoxy kit and silicone molds for best results. Work in a ventilated space and allow full cure for durability.
Materials
- Clear epoxy resin kit (2-part), enough for 3 small molds
- Silicone round dish molds, 3 in diameter
- Gold leaf flakes, small jar
- Mixing cups and sticks
- Nitrile gloves, dust-free workspace
- Heat gun or flame torch for bubbles
Instructions
- Mix resin and hardener at recommended 2:1 ratio (follow kit) for 3 minutes; scrape sides.
- Pour a thin base layer into mold; let sit 5 minutes.
- Add gold flakes and a second thinner layer; pop bubbles with heat gun for 5–10 seconds.
- Cure 24–48 hours before demolding; full hardness at 72 hours.
- Sand any sharp edges lightly with 400 grit if needed.
How to Display or Gift It
- Style on an entry console for keys and sunglasses.
- Wrap in tissue with a small note for gifting.
- Keep extras in a lidded craft organizer until cured.
- Soft Yarn Wall Weaving — aesthetic room decor DIY for apartments

Yarn weaving is tactile and forgiving. This weaving uses chunky yarn, boucle, and simple rya knots for plush texture. Hang with a small Command hook for renter-friendly display.
Materials
- Assorted yarns (chunky wool, boucle, cotton), total 30 yards
- Wooden dowel, 12 in (30 cm)
- Weaving needle or shuttle
- Scissors, comb for fringe
- Tapestry loom (optional small 12 in)
- Command hook
Instructions
- Warp your loom with sturdy cotton string or use a simple stick loom.
- Weave a base using plain weave with a medium yarn.
- Create textured sections with rya knots for fringe and soumak for raised rope.
- Finish with a neat hem, tie off, and trim fringe evenly.
- Attach hanging cord to dowel and hang on a Command hook.
- Fluff fibers with a comb for maximum loft.
How to Display or Gift It
- Layer above a bed or console with a small macramé planter.
- Roll and gift in a kraft tube with a care note.
- Store loosely folded to avoid matting.
- LED Rope Light Shadowbox Sign

Make a soft neon-effect sign using battery-powered rope lights inside a shadowbox. It’s cozy, renter-friendly, and adds a nightlight vibe—great for boho or retro aesthetics.
Materials
- Shallow wooden shadowbox, 12 x 8 x 2 in
- Battery-powered LED rope light, warm white, 6 ft
- Hot glue gun and glue sticks
- Craft knife, ruler
- Decorative backing paper or fabric
- Double-sided tape
Instructions
- Cover the shadowbox back with fabric or paper; smooth with a bone folder.
- Arrange rope light into your desired shape; mark positions.
- Secure rope light with small dabs of hot glue every 2–3 in.
- Tuck battery pack behind backing or secure with Velcro.
- Close shadowbox and test LED; replace batteries as needed.
How to Display or Gift It
- Lean on a shelf or place on a bedside table.
- Add dimmer batteries for softer glow at night.
- Wrap with tissue and include spare batteries when gifting.
- Leaning Mini Ladder for Throws

A leaning ladder is a classic cozy accessory and doubles as storage. Make a mini version from dowels or buy a lightweight ladder—no wall anchors required.
Materials
- Wooden dowels, two 5 ft for sides and four 18 in for rungs
- Wood glue and small screws
- Sandpaper, 120 grit
- Wood stain or whitewash, 0.25 pint
- Felt pads for feet
Instructions
- Cut dowels to size; sand smooth.
- Mark rung positions evenly (rungs 6 in apart).
- Drill pilot holes and glue/screw rungs into side rails.
- Stain or whitewash; dry 2–4 hours between coats.
- Attach felt pads and lean against wall at ~10-degree angle.
How to Display or Gift It
- Drape throws or hand towels by room.
- Add a small clip-on basket for magazines.
- When gifting, include a rolled throw and ribbon.
- Mason Jar Hanging Sconces with Twine

These suspended mason jar sconces add romantic light without wiring. They’re lightweight so use small Command hooks or hang from curtain rods.
Materials
- Wide-mouth mason jars, 16 oz, 2–3
- Natural jute twine, 15 ft
- Tea light candles or battery tealights
- Small drill (for lid vent hole) or leave lid off
- Decorative filler (dried flowers, sand)
Instructions
- Wrap neck of jar with twine and secure with hot glue.
- Create a handle by knotting twine and looping around neck; test weight.
- Fill jar base with decorative sand or dried botanicals.
- Add a tea light or battery candle; if using real candles, leave lid off and place on a heatproof saucer.
- Hang from Command hook or curtain rod.
How to Display or Gift It
- Cluster at different heights for a romantic corner.
- Use battery tealights for safe gifting.
- Pack jars in a box with shredded kraft and a care note.
- Ombre Painted Terracotta Pots

Painted terracotta instantly tweaks old planters into modern accents. Ombre or dip-dye effects read cottagecore or modern boho depending on colors.
Materials
- Terracotta pots, 4 in, 3 pieces
- Chalk paint or acrylics in 3 shades
- Foam brush and small detail brush
- Clear matte sealer, 1 coat
- Sandpaper 220 grit
Instructions
- Sand pots lightly and wipe dust away.
- Apply a base coat of the lightest paint; dry 30–60 minutes.
- Blend mid-tone while base is slightly tacky: brush small strokes and blend into final shade.
- Add a final darker edge at the rim; dry 1 hour.
- Seal with matte sealer; cure 24 hours before planting.
How to Display or Gift It
- Cluster three on a windowsill for a cohesive vignette.
- Wrap a single pot in kraft and tie with twine for gifting.
- Store extra paint in small jars for touch-ups.
- Fabric-Covered Cork Boards with Removable Mounting

Cork boards are functional and aesthetic when wrapped in decorative fabric. Use removable mounting putty or command strips to keep them renter-friendly.
Materials
- Cork sheet, 12 x 18 in
- Decorative fabric, 14 x 20 in
- Staple gun and staples
- Removable mounting putty or Command strips
- Scissors, ruler
- Decorative push pins
Instructions
- Lay fabric face down and center cork on top.
- Fold fabric edges and staple to the back every 1 in.
- Trim excess fabric and check corners for neat fold-over.
- Attach removable mounting putty to four corners and center.
- Press firmly to wall; let set 30 minutes before pinning.
How to Display or Gift It
- Use for inspiration boards above desks.
- Wrap in tissue and box with a set of decorative pins as a gift.
- Store flat to prevent warping.
- Macramé Plant Shelf on Tension Rod
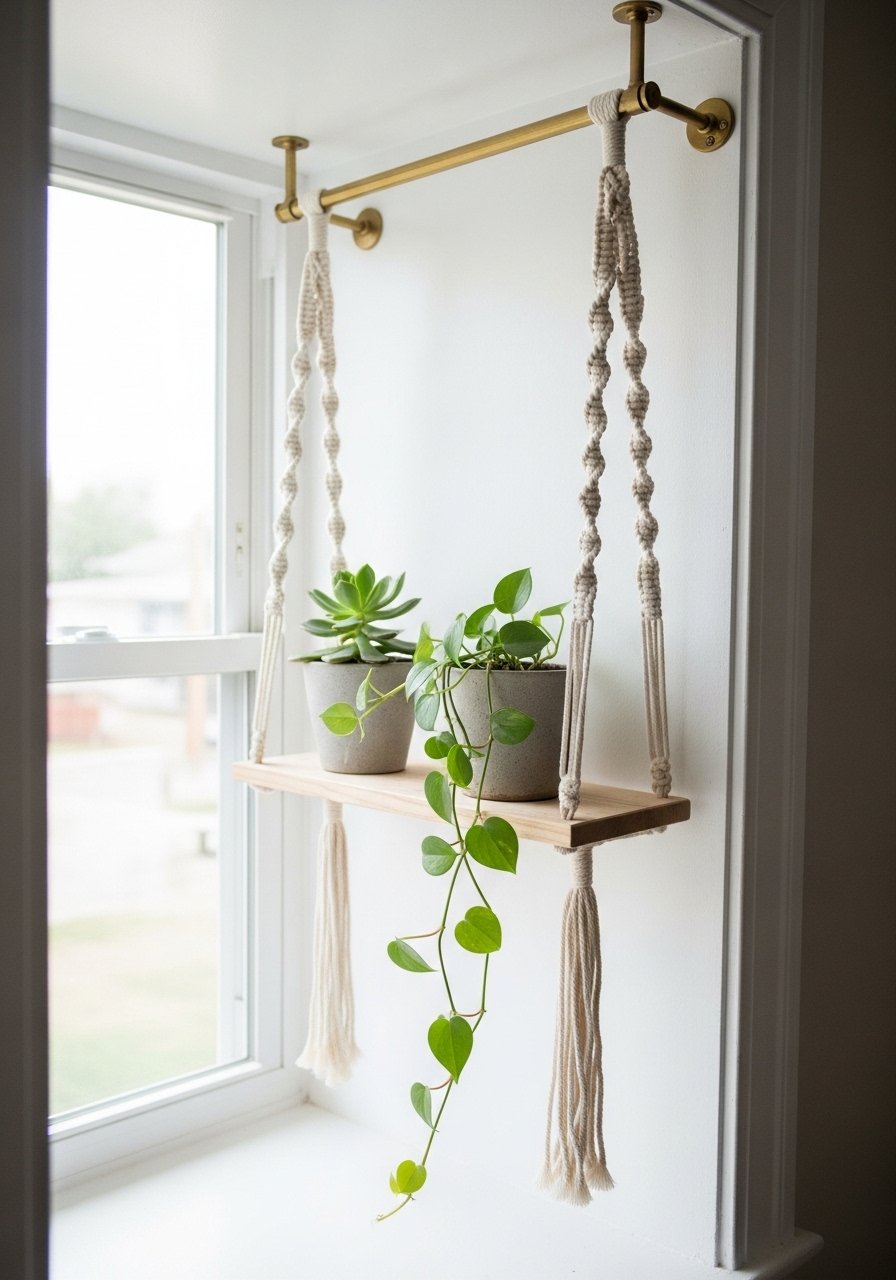
This shelf uses a tension rod across a window or nook to suspend a lightweight macramé shelf—no wall hardware. It’s airy and suits boho and cottagecore styles.
Materials
- Tension rod, 24–36 in adjustable
- Macramé cord, 5mm, 30 yards
- Small wooden shelf board, 12 x 6 in
- Fabric glue or wood glue
- Small potted plants with saucers, lightweight
Instructions
- Make a macramé hammock by knotting cords to support a wooden board.
- Secure knots and test with a small weight.
- Place board into macramé cradle and tighten.
- Install the tension rod in the chosen alcove; adjust for snug fit.
- Hang the macramé shelf from the rod and place potted plants (no heavy soil).
- Check stability weekly.
How to Display or Gift It
- Cluster a pair at different heights in a sunlit window.
- Gift with a small propagation kit.
- Remove plants in winter storage and keep shelf flat.
- Painted Book Stack with Colored Edges

Give thrifted books a cohesive look with painted spines and gilded page edges. It creates a curated shelf without buying new decor.
Materials
- Thrift books, 3–5, mixed sizes
- Chalk paint for spines
- Gold paint pen for page edges
- Painter’s tape, foam brush
- Drop cloth, rubber gloves
Instructions
- Clean book covers gently; protect pages with painter’s tape.
- Paint spines with chalk paint; dry 30–60 minutes.
- Apply a second coat if needed; dry 1 hour.
- Fan pages slightly and run a gold paint pen along edges; dry 30 minutes.
- Stack books for a visual anchor.
How to Display or Gift It
- Use as risers for decorative objects.
- Tie a stack with ribbon and a dried sprig for gifting.
- Store wrapped stacks flat to prevent warping.
- Boho Dreamcatcher with Beads and Feathers

A handmade dreamcatcher adds gentle movement and texture. This lightweight version uses a small hoop and neutral materials to fit many aesthetics.
Materials
- Embroidery hoop, 8 in
- Cotton embroidery floss, natural color, 20 yards
- Wooden beads, various sizes, 6–10
- Feathers, 6–8
- Hot glue gun
Instructions
- Wrap hoop with floss for a base.
- Create a web by knotting floss inside the hoop at 2 in intervals.
- Add beads threaded onto strands and knot them into the web.
- Attach feather tassels with hot glue to hanging strings.
- Trim and arrange for balance.
How to Display or Gift It
- Hang above a bed or near a window.
- Wrap gently in tissue with a small care card for gifting.
- Store flat or hung to preserve feather shape.
- Teacup Soy Candle
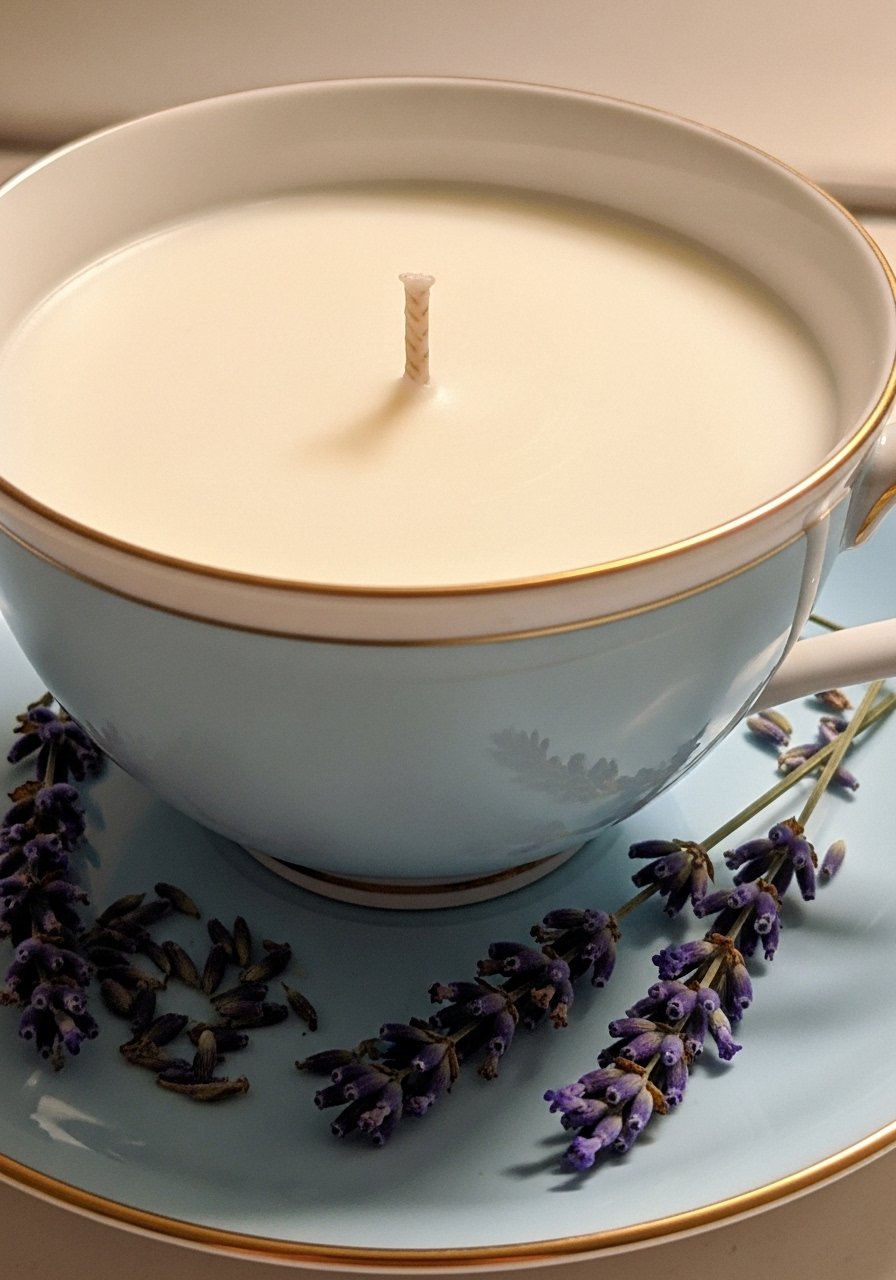
Hand-poured soy candles in vintage teacups make boutique-feeling decor and gifts. Soy wax burns cleaner; choose cotton wicks and test before gifting.
Materials
- Soy wax flakes, 1 lb (makes several small candles)
- Cotton wicks with adhesive tabs, size small
- Vintage teacups, 6–8 oz
- Fragrance oil (10% of wax weight)
- Double boiler or melting pot, thermometer
- Optional: wick trimmer
Instructions
- Melt soy wax to 170°F (77°C) in a double boiler.
- Remove from heat, add fragrance (10% of wax weight), stir 2 minutes.
- Affix wick to teacup base; center using a pencil or chopstick.
- Pour wax to ½ in from rim; cool 4–6 hours.
- Top up after sinkholes form; cure 24–48 hours before burning.
How to Display or Gift It
- Present on a saucer wrapped in cellophane with a ribbon.
- Keep trimmed wicks and burn in sight—never unattended.
- Store extras in a cool, dry place.
- Acrylic Pour Coasters

Acrylic pouring gives vibrant, fluid coasters. Use ceramic coaster blanks or silicone molds and seal with resin for durability.
Materials
- Ceramic coaster blanks or silicone molds, 4 in
- Pouring acrylic paints, small bottles
- Pouring medium, 8 oz
- Clear epoxy resin for topcoat
- Disposable cups and sticks
- Self-leveling sealer; dust-free curing area
Instructions
- Mix paints with pouring medium per bottle instructions.
- Layer colors in a cup and pour over coaster blank to create cells.
- Let paint settle 30–60 minutes, then seal with a thin coat of epoxy resin.
- Cure resin 24–48 hours; full hardness 72 hours.
- Sand edges if needed and apply felt pads.
How to Display or Gift It
- Bundle four with twine and kraft tag.
- Use a coaster holder or small wooden tray for storage.
- Keep away from heat during curing.
- Fringe Tassel Garland

A fringe tassel garland is playful and versatile. It adds movement over headboards, mantels, or doorways without hardware.
Materials
- Cotton yarn, various colors, 50 yards total
- Twine or rope, 6 ft
- Scissors, ruler
- Crochet hook (optional) for neat tassel heads
- Small safety pins
Instructions
- Cut yarn into lengths of 12 in for tassels.
- Fold and bind tops with a small yarn piece or using a crochet hook.
- Attach tassels to rope at 4 in intervals by looping and knotting.
- Trim tassel bottoms evenly.
- Hang with small removable hooks or tie on cabinet knobs.
How to Display or Gift It
- Drape across mantels, headboards, or shelves.
- Roll gently and gift with a matching ribbon.
- Store hanging to avoid tangles.
- Linen Curtain Tiebacks with Wooden Beads

Make simple, elegant tiebacks with a length of linen and wooden beads—no drilling. They add a refined touch to any window.
Materials
- Linen ribbon or remnant, 2 x 36 in
- Wooden beads, 20 mm, 6 pieces
- Scissors, lighter to seal edges
- Needle and thread
Instructions
- Thread beads onto ribbon, knotting in place as desired.
- Sew ends of ribbon together securely and finish seam.
- Trim and melt raw edges with a lighter to prevent fray.
- Loop around curtain and knot or loop through a bead to secure.
How to Display or Gift It
- Pair with a matching tassel and package in tissue.
- Use as a decorative wrap for a candle or jar gift.
- Store flat to prevent bead shifting.
- Painted Ceramic Vase Makeover — aesthetic room decor DIY for apartments

Update plain vases with chalk paint and stencils for a curated look. Chalk paint adheres well without sanding and gives a soft, modern finish.
Materials
- Ceramic vase, any small size
- Chalk paint set (matte), 3 colors
- Stencil or painter’s tape
- Foam brush and small round brush
- Matte sealer spray, 1 light coat
Instructions
- Clean vase and wipe with rubbing alcohol.
- Apply base coat of chalk paint; dry 30–60 minutes.
- Mask off shapes with stencil or painter’s tape; paint accent colors.
- Remove tape and touch up edges; dry 1 hour.
- Seal with a matte spray; cure 24 hours before adding water or stems.
How to Display or Gift It
- Style with dried botanicals for low-maintenance decor.
- Wrap in kraft paper and tie with twine for gifting.
- Store wrapped in bubble-wrap if transporting.
- Pressed Flower Shadow Box Frame

Pressed flowers preserve seasonal blooms beautifully. Use a shallow shadow box and acid-free paper to keep colors longer.
Materials
- Shallow shadow box frame, 8 x 10 in
- Pressed flowers, assorted
- Acid-free backing paper
- Tweezers, craft glue or archival tape
- Scissors
Instructions
- Press flowers between heavy books for 2–3 weeks until fully flat and dry.
- Arrange on acid-free paper and secure with tiny dots of archival glue or tape.
- Insert into shadow box and close carefully.
- Hang away from direct sunlight to preserve color.
How to Display or Gift It
- Make a set by region or season and gift in a neat box.
- Lean on shelf to create a layered look.
- Store duplicates flat to avoid bending.
- Stenciled Linen Pillow Covers

Stenciled pillows update living rooms quickly. Use fabric paint and a reusable stencil for crisp shapes. Covers zip off for easy washing.
Materials
- Plain linen pillow cover, 18 x 18 in
- Fabric paint, matte, small bottle
- Reusable stencil
- Foam brush or stencil brush
- Cardboard insert to prevent bleed-through
Instructions
- Place cardboard inside cover to protect backing.
- Secure stencil and dab paint with a foam brush; lift carefully.
- Repeat pattern as desired; let dry 1–2 hours.
- Heat-set with iron per paint instructions for permanence.
- Insert pillow and fluff.
How to Display or Gift It
- Mix patterns and solids on a sofa or bed.
- Wrap a cover around a pillow and include extra fabric paint in a gift bundle.
- Store covers folded in breathable fabric organizers.
- Mini Geometric Concrete Planter

Concrete planters have a modern, sculptural look. Use fast-setting concrete in silicone molds to keep them lightweight and small for windowsills.
Materials
- Quick-setting concrete mix, 2 lb
- Silicone geometric molds, 3 in
- Mixing cup and stick
- Vegetable oil for mold release
- Fine sandpaper, 220 grit
Instructions
- Mix concrete per package (usually water:mix ratio approx 0.5:1); pour into greased molds.
- Tap molds to release air bubbles; set 30–60 minutes.
- Demold after 1–2 hours and cure fully 24–48 hours.
- Sand edges if rough; seal with a concrete sealer if desired.
How to Display or Gift It
- Plant small succulents or faux plants for easy care.
- Wrap in kraft and include a tiny care card when gifting.
- Store molds clean and dry for repeats.
- Peel-and-Stick Mirror with Decorative Trim

Upgrade an inexpensive peel-and-stick mirror with a trim frame glued using strong double-sided tape. The result is chic and damage-free.
Materials
- Peel-and-stick mirror, 12 in diameter
- Thin wooden trim or applied molding, cut to fit
- Strong double-sided mounting tape
- Sandpaper, paint or stain (optional)
- Ruler, pencil
Instructions
- Clean wall surface with rubbing alcohol.
- Position mirror and remove backing, press firmly for 30 seconds.
- Paint or stain trim if desired; let dry 1–2 hours.
- Adhere mounting tape to trim and press around mirror edge.
- Check alignment and press for a secure bond.
How to Display or Gift It
- Place above a console or entry tray for last-minute checks.
- Package mirror and trim together with hanging instruction card for gifting.
- Keep spare mounting tape in a craft box.
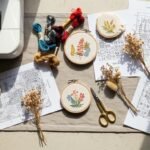
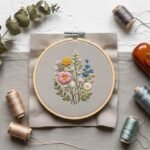
- Embroidery Hoop Mini Gallery

Hoop art is affordable and customizable. Mix simple embroidery with fabric collage for a curated gallery that’s light and easy to hang with Command strips.
Materials
- Embroidery hoops, 6 in diameter, 3 pieces
- Fabric scraps, cotton/linen
- Embroidery floss, assorted colors
- Needle, scissors
- Small hoop hangers or Command strips
Instructions
- Stretch fabric in hoop and trim excess.
- Transfer simple pattern and stitch using backstitch or satin stitch.
- Finish edges by folding fabric to the back and trimming.
- Hang with small Command strips or tiny nails if allowed.
How to Display or Gift It
- Group in odd numbers for visual interest.
- Frame a set in a shallow box for gifting.
- Store hoops stacked with tissue between them.
- LED Book Nook Shelf Insert

A book nook turns a bookshelf into a dreamy diorama. Use layered paper cuts and battery LEDs—no wiring or drilling.
Materials
- Black card stock and colored paper
- LED micro fairy lights (battery)
- Craft knife, metal ruler
- Foam board, 8 x 10 in for backing
- Glue dots or tack
Instructions
- Design layered paper scenes and cut with a craft knife.
- Glue layers onto foam board with small spacers for depth.
- Attach battery LED lights behind layers for glow.
- Insert into bookshelf gap; secure with tack if needed.
- Replace batteries seasonally.
How to Display or Gift It
- Make scenes personalized to the recipient’s favorite book or city.
- Gift in a narrow box with spare batteries.
- Store flat to avoid creasing.
- Upcycled Wine Bottle String-Lit Lamp

An easy upcycled lamp—string lights inside a cleaned wine bottle—creates soft ambient lighting without hardwiring. Cork the top for a finished look.
Materials
- Clean wine bottle, any color
- Battery string lights, 6 ft
- Cork stopper with hole or drill a hole in cork
- Decorative filler (sand, shells)
- Small wooden coaster for base
Instructions
- Clean and dry the bottle thoroughly.
- Insert battery string lights and arrange inside; add filler for stability.
- Feed battery pack into base or hide behind bottle.
- Use cork stopper with hole to finish; test lights.
- Place on a coaster to protect surfaces.
How to Display or Gift It
- Group bottles of different heights on a tray.
- Gift with a note and spare batteries in a box.
- Store lights untangled in a drawer when not in use.
Thanks for sticking with me through all 29 ideas! You’ve now got a range of renter-friendly, aesthetic room decor DIY for apartments—everything from soft textiles to glow-making lamps and plant solutions that won’t risk your security deposit. Try one or three depending on your weekend energy, and save this pin to come back when you’re ready to craft. Which project are you most excited to make: macramé texture or light-filled resin? Share with a friend who’d love a crafty afternoon.
Trust me, picking up a quality hot glue gun with temperature control changed how every single one of these projects turned out — less stringy mess, neater finishes, and faster assembly. Happy crafting!