If your fridge gallery needs a refresh or you want rainy-day projects that actually delight, these 28 painting craft ideas for kids are made for messy, colorful fun. You’ll find fast wins for toddlers and slightly more complex techniques for older kids, plus projects that double as heartfelt gifts. Each idea includes real materials, measured quantities, drying times, troubleshooting tips, and step-by-step instructions so you can jump right in.
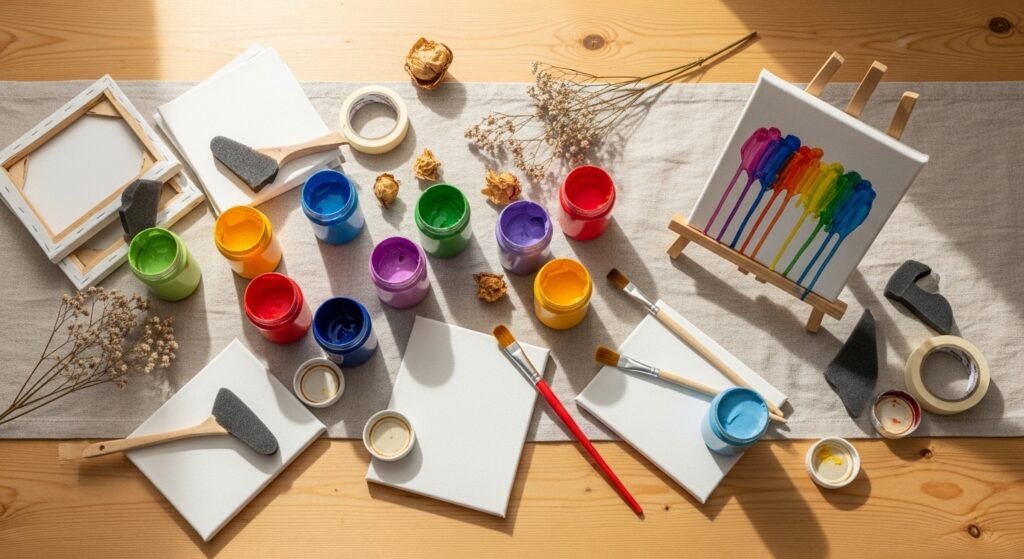
Keep a stash of washable acrylics and a roll of painter’s tape handy—those two items solve more problems than you’d expect. My go-to acrylic set dries to a matte finish in 20–30 minutes and holds up after sealing. If you prefer precision cutting for stencils, I run vinyl through my Cricut Joy cutting machine for perfect shapes in minutes. Ready for paint on hands, table, and smiles? Grab a multi-pack of foam brushes and let’s paint.
- Rainbow Finger-Paint Canvas
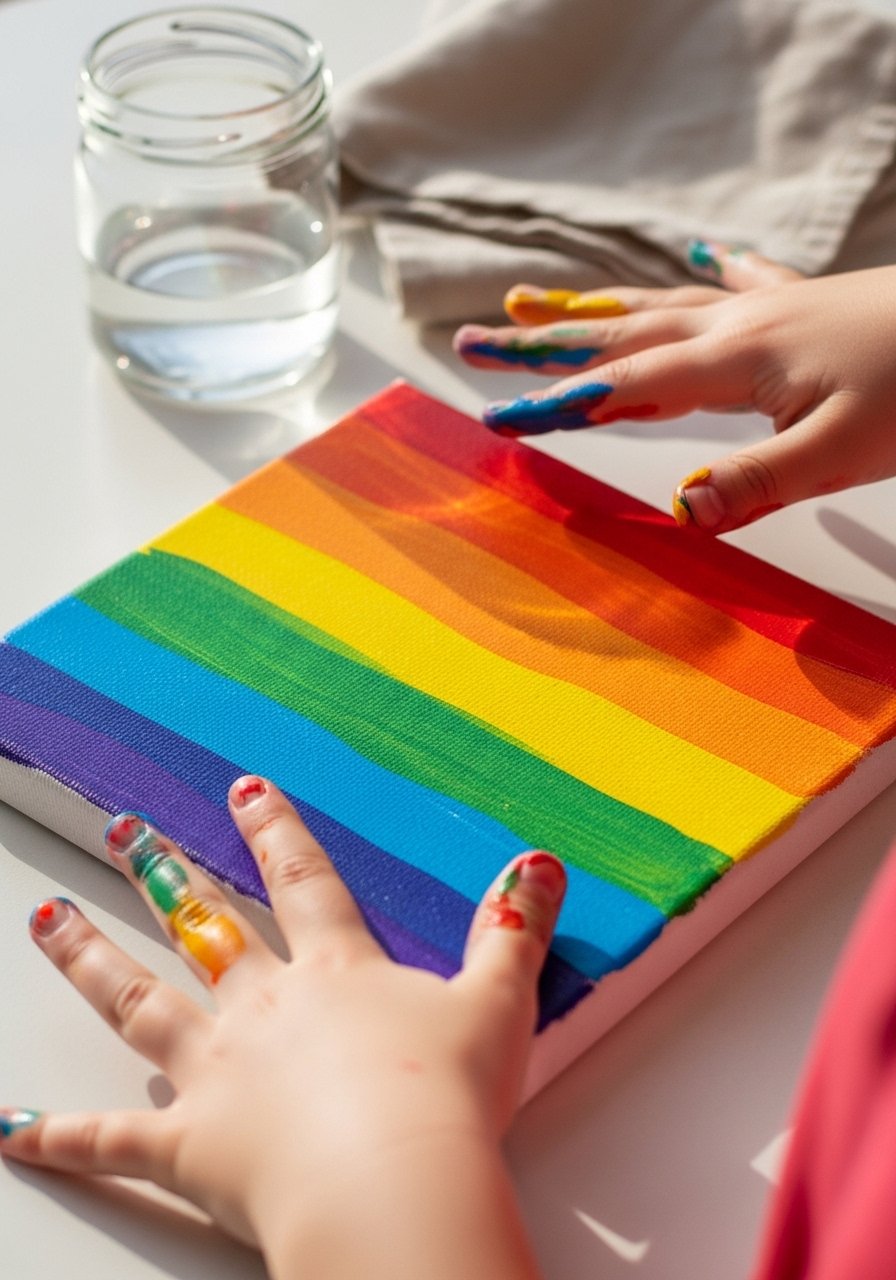
This classic is pure sensory play. The textures are thick, slightly glossy, and kids love pressing fingers to make arcs. It’s quick to set up and perfect for toddlers or preschool groups. Use washable finger paint for easy cleanup and a foam brush to smooth edges where needed.
Materials
- 8 x 10 canvas panel, 1
- Washable finger paint, 6 colors, 2–3 oz each
- Disposable palette paper or tray
- Foam brushes, 1-inch and 2-inch
- Wet wipes and an old smock
- Painter’s tape, 1-inch roll (optional for stripes)
Instructions
- Cover the work surface with craft paper. Tape the canvas edges if you want clean borders.
- Squeeze small puddles of paint onto a disposable palette.
- Demonstrate a rainbow arc on paper first, then let kids press finger tips into paint and pull a curved line.
- Layer colors so they slightly overlap for a blended look.
- Use a foam brush to even out any overly thick sections—acrylic blends best when still wet.
- Let dry 30–60 minutes depending on thickness; fully cured in 24 hours.
- Remove tape slowly for a crisp edge.
How to Display or Gift It
Frame the 8×10 canvas in a simple shadowbox for a bedside shelf. Wrap in kraft paper and tuck in tissue for a handmade gift. Store leftover canvases flat in a craft organizer until ready.
- Splatter Starry Night Plate
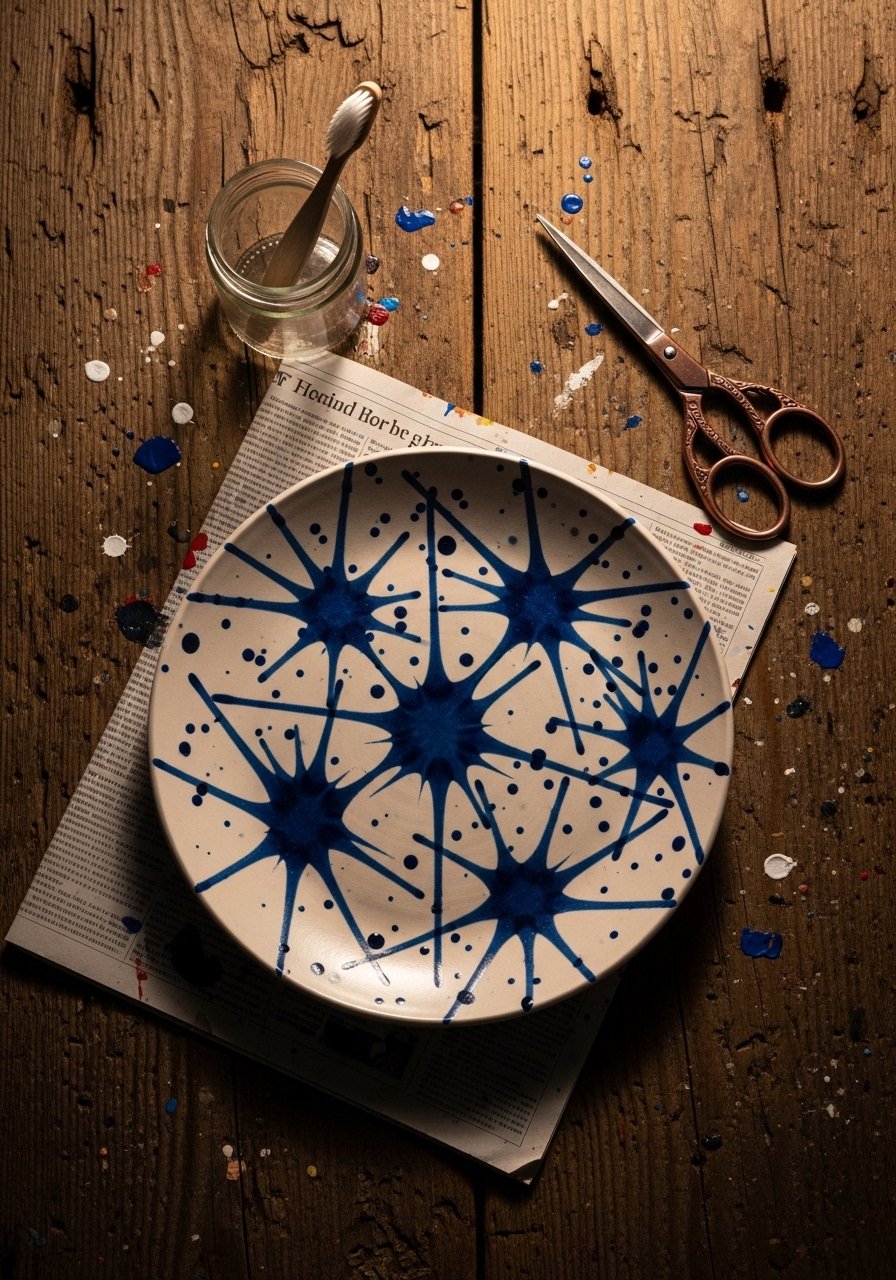
This messy technique feels dramatic without being hard. Kids fling paint with a toothbrush or flick with a stick to make star fields and nebulas. Works great on recycled paper plates for budget-friendly fun.
Materials
- Paper or foam plates, 1 per child
- Acrylic craft paint: navy, white, metallic gold, 1 oz each
- Old toothbrush or stiff-bristled brush
- Disposable gloves (optional)
- Newspaper to protect table
- Small cups of water for rinsing
Instructions
- Paint the plate a base coat of navy using a foam brush; allow to dry 20–30 minutes.
- Dip toothbrush bristles into white thinned with a drop of water.
- Hold the brush about 6 inches from the plate and pull bristles with your thumb to splatter small stars.
- Add metallic gold splatters for depth.
- Let dry 30 minutes; add a second coat of splatters if desired.
- Seal with a light coat of Mod Podge for display; dry 15–20 minutes.
How to Display or Gift It
Prop the plate on a small wooden easel for a shelf. Bundle a set of three in kraft boxes with tissue for a unique gift. Store stacked in a flat box between layers of tissue.
- painting craft ideas for kids: Balloon Stamp Garden
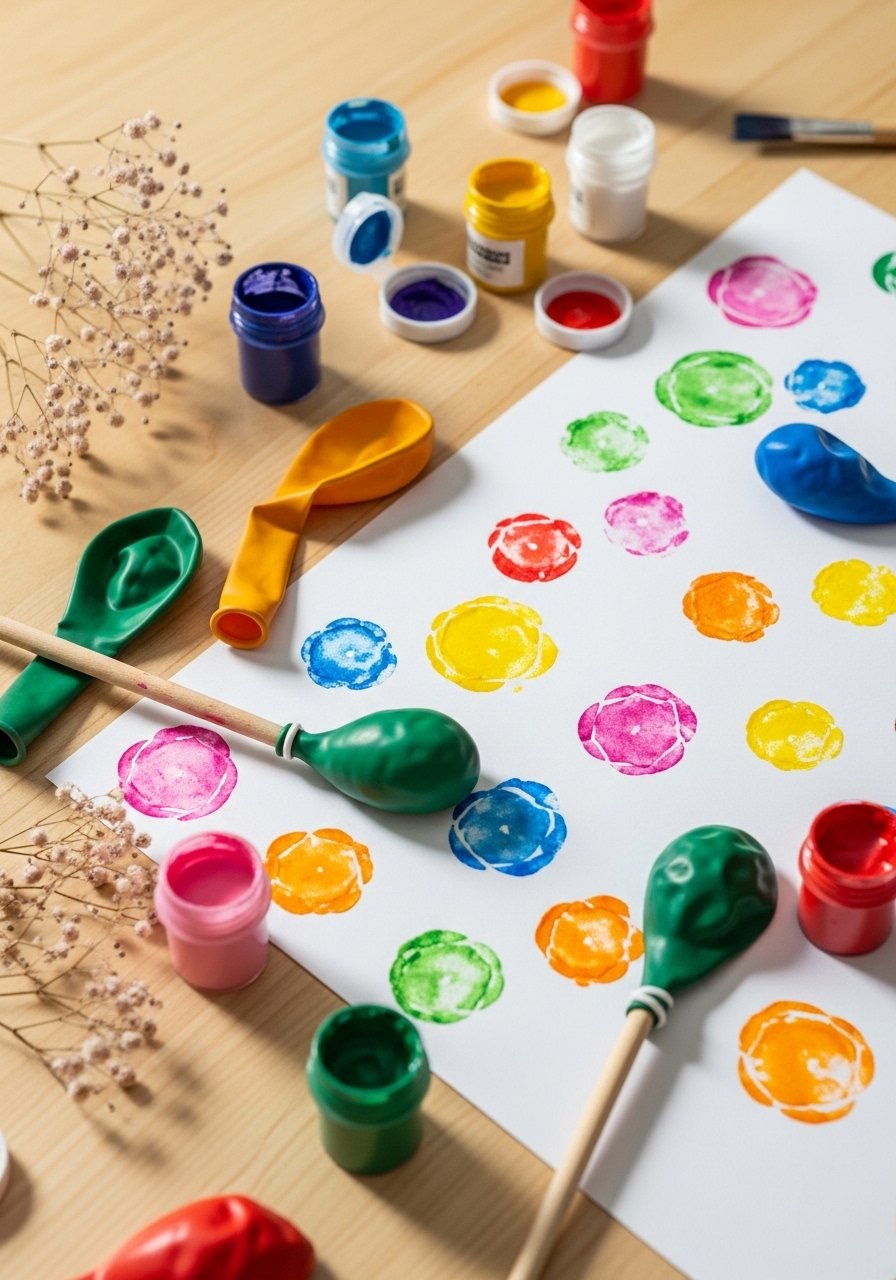
This project turns balloons into stamps for bold, rounded petals and centers. The texture is soft and slightly stippled. Great for group activities or cards.
Materials
- Cardstock or mixed-media paper, 8.5 x 11, 1–2 sheets
- Small latex balloons, 6
- Wooden dowels or craft sticks, 6
- Acrylic craft paint, 3 colors, 1 oz each
- Disposable plates for trays
- Painter’s tape (to secure paper)
- Hot glue gun to attach balloon to dowel (adult use)
Instructions
- Inflate balloons slightly and tie; glue to the top of a dowel with a dot of hot glue.
- Secure paper to table with painter’s tape.
- Pour paint onto disposable plates.
- Press the balloon into paint, then stamp onto paper to form petals.
- Build flowers by layering stamps and adding a dot center with a small brush.
- Rinse balloons between colors; let dry 30–45 minutes.
How to Display or Gift It
Trim to create greeting cards. Mount finished gardens on a stretched canvas and hang above a desk. Keep extra balloons in a small storage box.
- Bubble-Print Ocean Scene
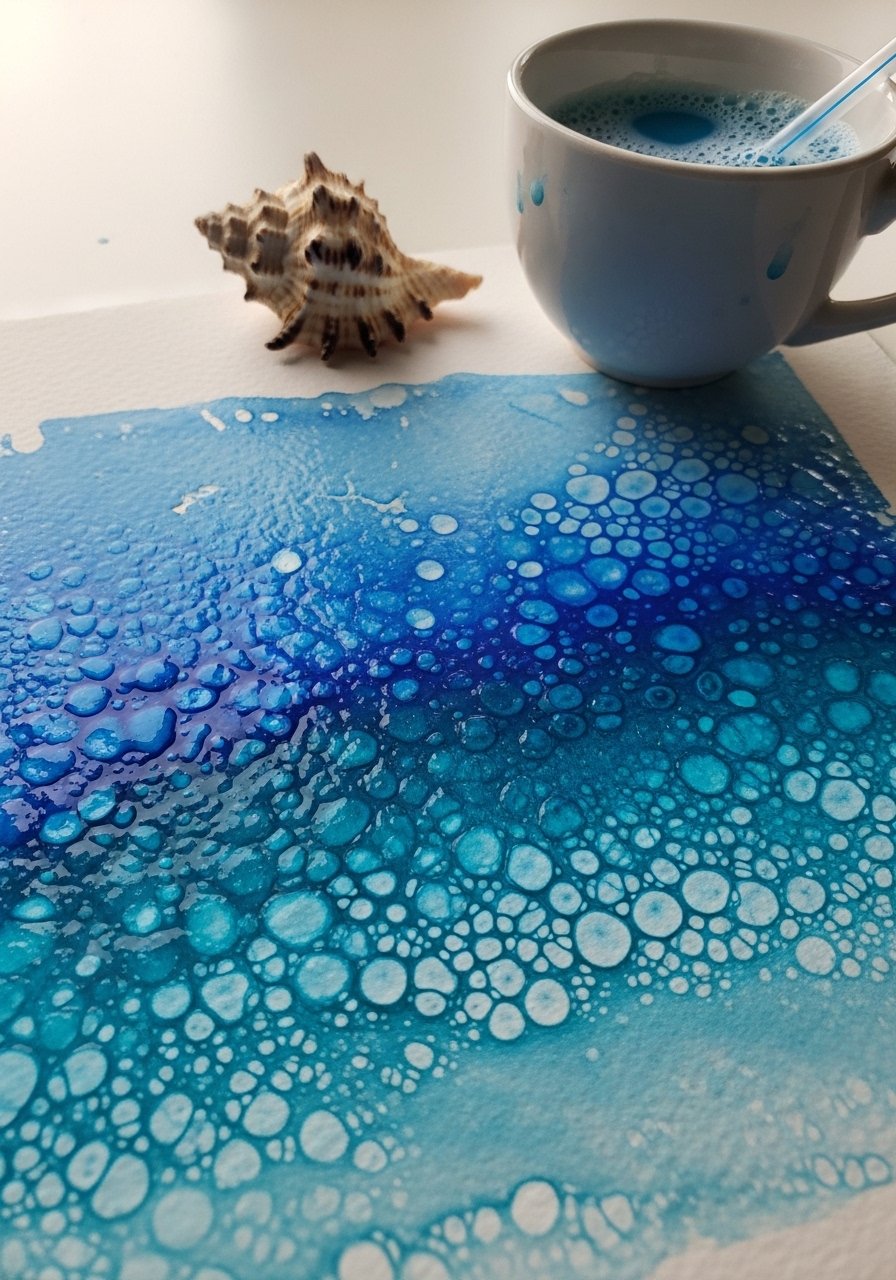
This fizzy technique creates translucent, layered circles—perfect for waves and bubbly textures. It’s sensory, safe, and fun for preschoolers with supervision.
Materials
- Watercolor or mixed-media paper, 9 x 12
- Liquid dish soap, 1 tbsp
- Acrylic or watercolor paint, blue/teal mix, 1 tsp each
- Small cups, 2
- Paper straws, 6
- Old spoon for stirring
- Absorbent cloth
Instructions
- Mix a cup of water, a teaspoon of paint, and 1 tbsp dish soap in a small cup.
- Stir to disperse color. Dip a straw in and gently blow to create bubbles that overflow.
- Gently press paper onto the bubbles to transfer prints.
- Repeat with different hues to layer effects.
- Let dry 10–30 minutes depending on saturation.
- Flatten under books if paper buckles.
How to Display or Gift It
Cut into tags or framed prints for a coastal theme. Pair with a jar of sand for beachy gift packaging. Store finished sheets flat.
- Nature Leaf Rubbing Prints
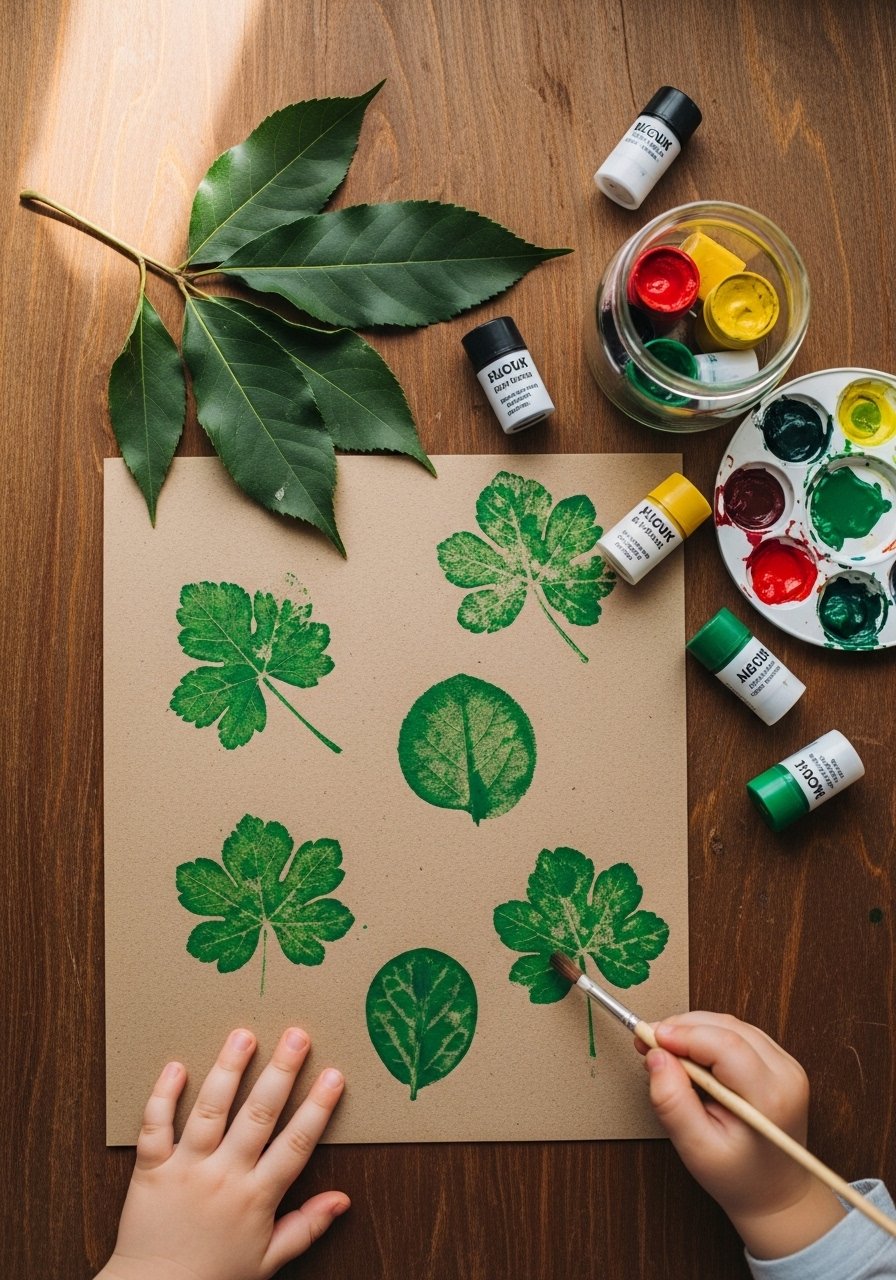
Combine paint and leaf textures for rustic cottagecore vibes. Leaves hold paint differently, giving crisp veins and organic edges.
Materials
- Heavyweight kraft paper or watercolor paper, 9 x 12
- Fresh leaves (assorted), 8–10
- Acrylic paint or gouache, green, ochre, 1 oz each
- Foam brushes
- Rolling pin or brayer roller
- Paper towels
Instructions
- Arrange leaves flat on the paper with veins facing up.
- Apply paint to a leaf with a foam brush.
- Place a second sheet of paper over the leaf and roll gently with a brayer to transfer the print.
- Lift to reveal detailed leaf impressions.
- Repeat using different leaves and colors.
- Let dry 20–40 minutes.
How to Display or Gift It
Trim and frame as a small gallery set. Use as wrapping paper for seasonal gifts. Store leaves pressed in a heavy book for reuse.
- Salt Watercolor Galaxy
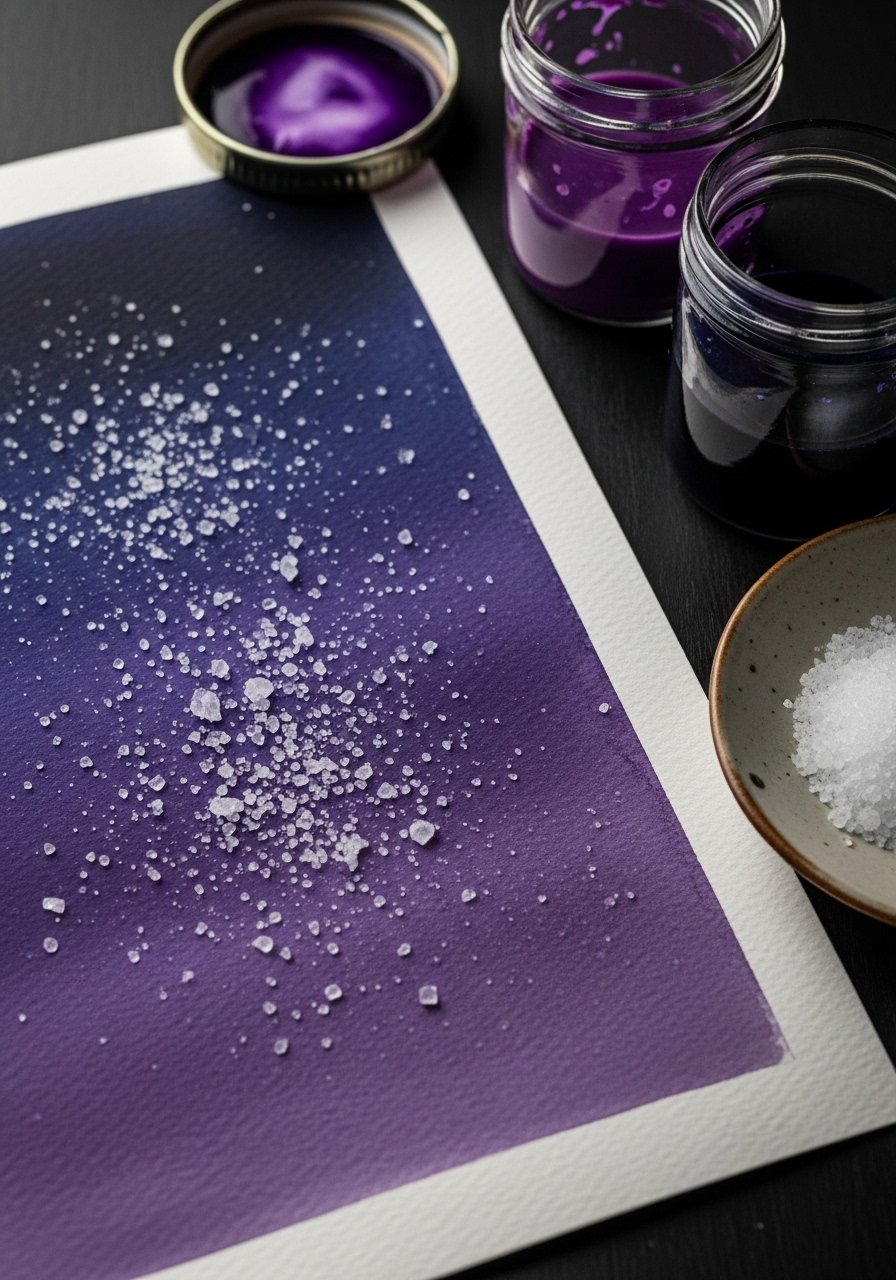
The salt pulls pigment into crystalline patterns—great for starry skies or abstract textures. It’s teaching-worthy: kids learn how salt affects wet pigment.
Materials
- Watercolor paper, cold-press, 9 x 12
- Pan watercolors, violet, indigo, black
- Table salt (coarse), 1–2 tsp
- Large round watercolor brush, size 12
- Small spray bottle with water
- Paper towels
Instructions
- Wet the paper slightly with clean water.
- Drop washes of indigo and violet, letting colors blend.
- While wet, sprinkle salt over sections where you want stars.
- Let dry completely 1–2 hours (depending on saturation).
- Brush off salt to reveal crystalline patterns.
- Add tiny white paint dots for extra stars if desired.
How to Display or Gift It
Mount on a black matte for dramatic contrast. Place in a clear sleeve and add to a homemade art book. Store flat in a portfolio folder.
- String-Pull Jellyfish Art
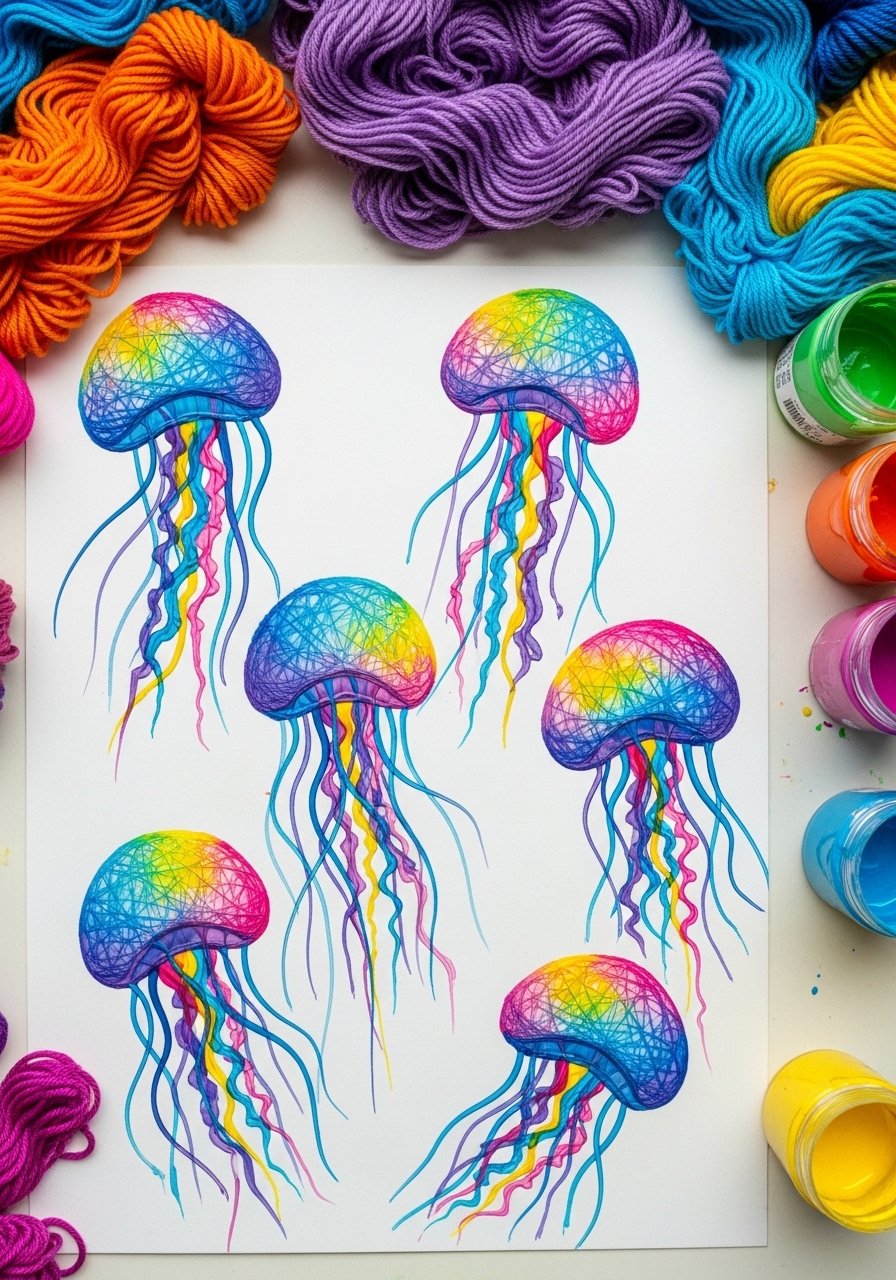
String pull painting creates organic tentacles and flowing forms with a satisfying drag motion. It’s tactile for older kids and yields surprising abstract results.
Materials
- Mixed-media paper, 9 x 12
- Cotton string or yarn, 12-inch pieces, 6–8
- Acrylic paint, thinned with water (50/50), 1–2 oz
- Tweezers or craft stick for pulling
- Disposable tray or plate
- Protective table cover
Instructions
- Dip a string into thinned paint and lay it on paper in a loop.
- Hold one end and slowly pull the string across the sheet to create stretched paint trails.
- Repeat with different colors and overlapping pulls.
- Use a craft stick to nudge shapes if needed.
- Let dry 30–60 minutes.
- Add details with a fine paintbrush after dry.
How to Display or Gift It
Trim into mini prints for gift tags. Mount on a canvas board for wall art. Keep unused yarn in a resealable bag to avoid tangles.
- Sponge Shape Stamping
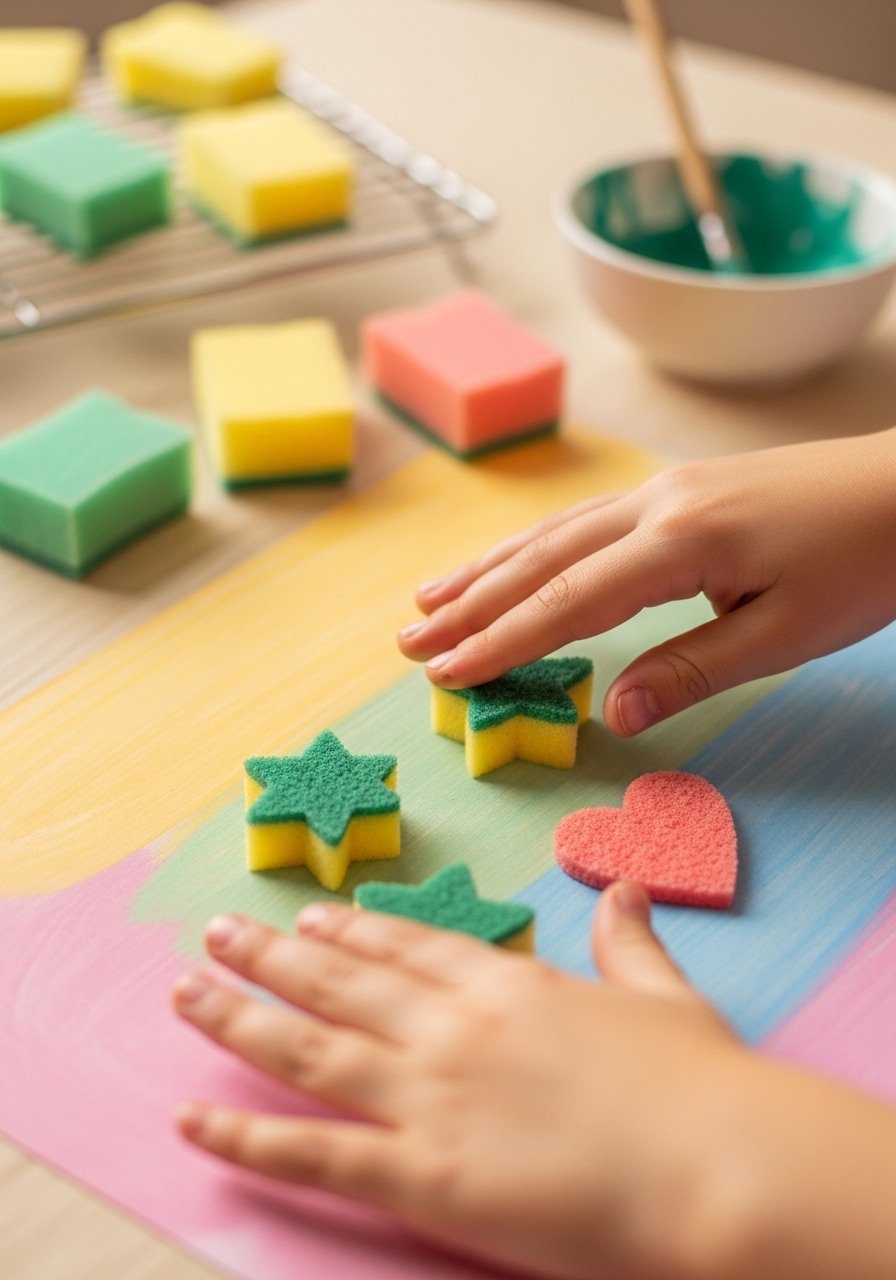
Sponge stamps give soft edges and are great for pattern play. Cut shapes for repeated motifs or let younger kids stamp freely.
Materials
- Foam craft sponges, 2-inch thickness, assorted
- Child-safe scissors or craft knife (adult use)
- Acrylic paint, 4 colors, 1 oz each
- Wooden craft sticks for handles, 10
- Paper plate palettes
- Paper to stamp, 8.5 x 11
Instructions
- Cut sponge into shapes (stars, hearts, circles).
- Glue the sponge to a wooden stick if desired.
- Dab sponge into paint—don’t overload.
- Stamp firmly onto paper to leave an even print.
- Rinse sponge between colors; press on paper towels to dry.
- Let work dry 20–30 minutes.
How to Display or Gift It
Create wrapping paper by stamping full sheets. Store sponges in an airtight container to prevent mildew.
- Tape-Resist Rainbow Boards
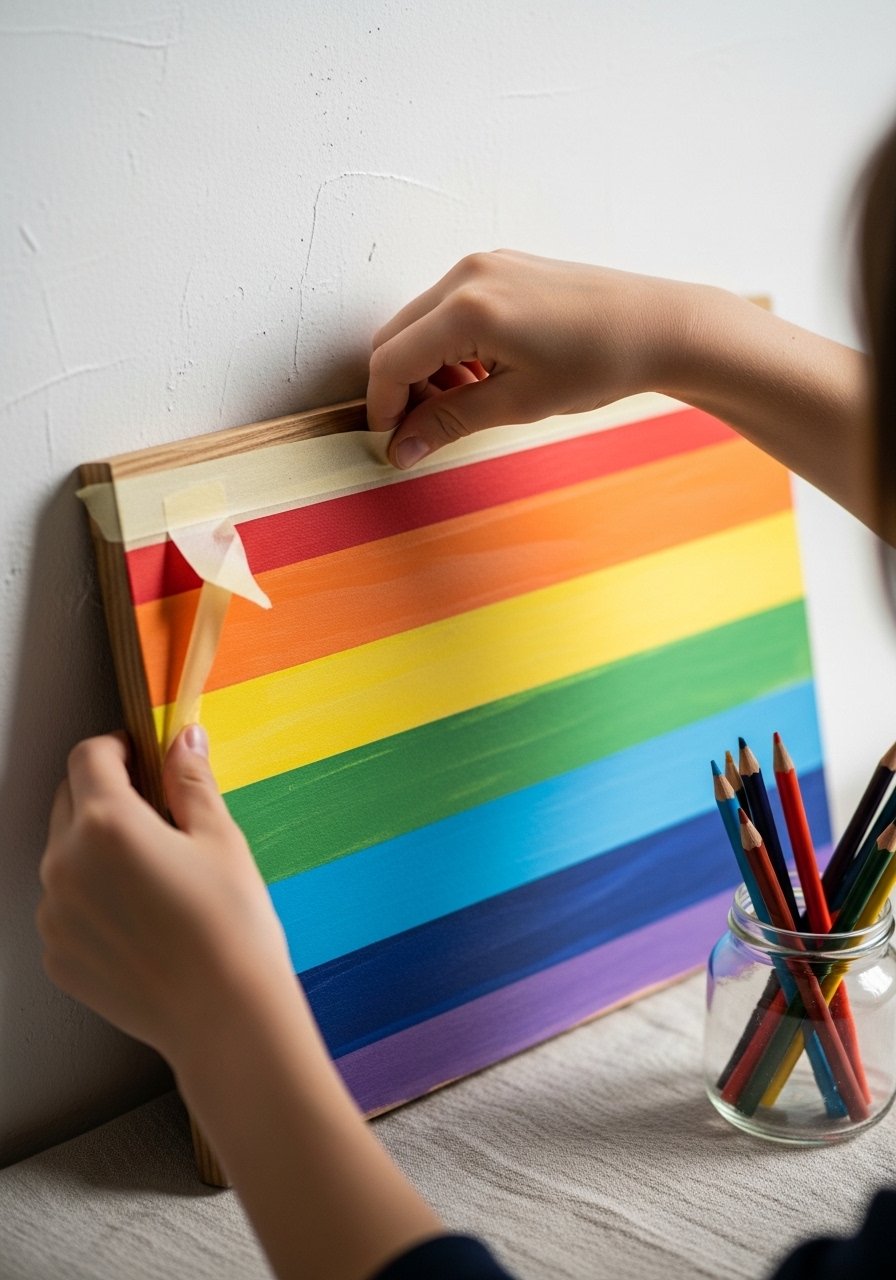
Painter’s tape gives satisfying crisp lines—a lovely intro to clean-edge painting. Kids will love the peel reveal.
Materials
- Wooden board or craft sign, 6 x 12
- Painter’s tape, 1-inch
- Acrylic craft paint, rainbow set, 0.5 oz per color
- Flat foam brush
- Sandpaper (120 grit) for prep
- Clear sealer spray (optional)
Instructions
- Lightly sand the board and wipe dust off.
- Apply painter’s tape in stripes, leaving gaps for colors.
- Paint each gap with a chosen color using a foam brush.
- Let paint dry 15–30 minutes until firm to the touch.
- Slowly remove tape at a 45-degree angle for a crisp edge.
- Seal with a light coat of spray sealer; dry 30 minutes.
How to Display or Gift It
Display on a small wooden easel. Wrap in kraft tissue and tie with twine for gifting. Store extra boards flat.
- Marbled Shaving Cream Prints
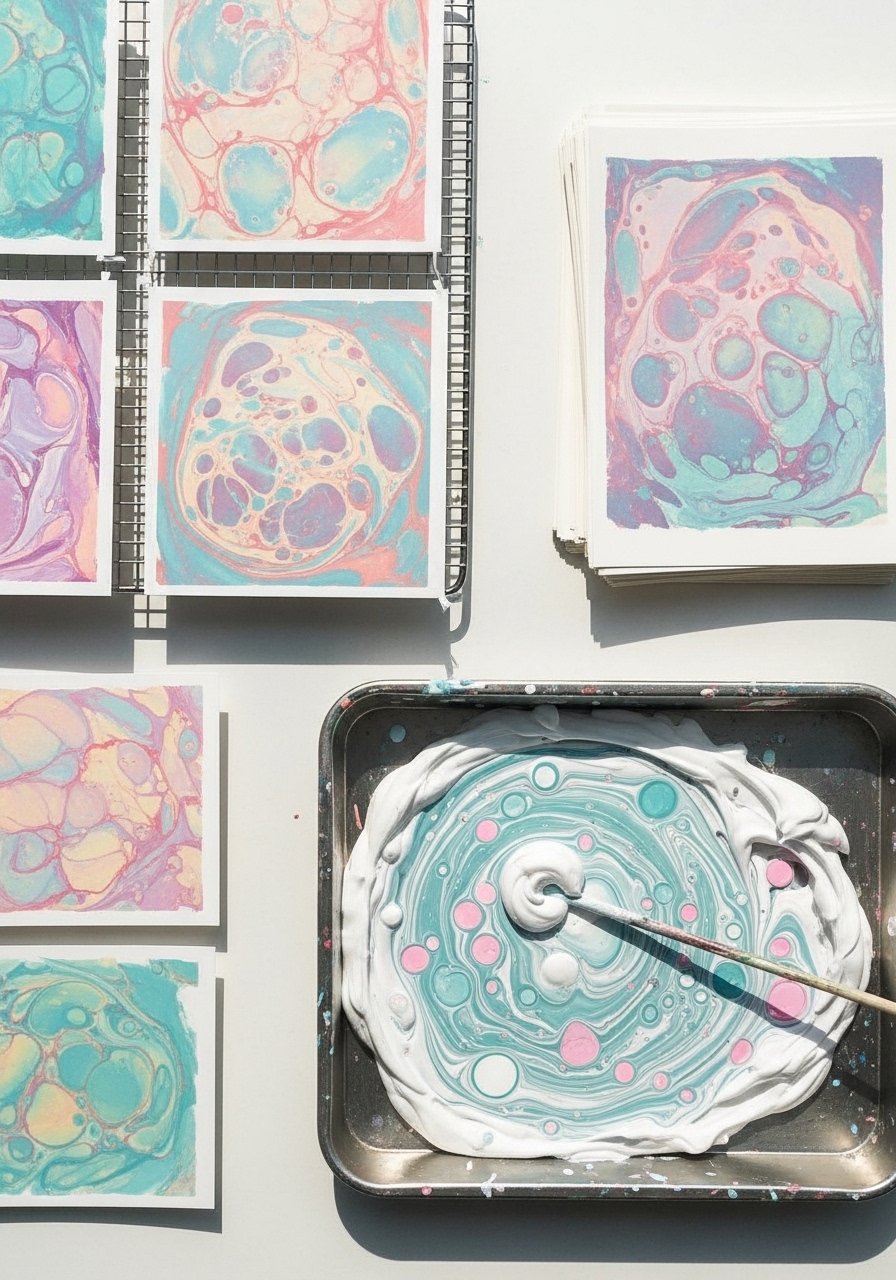
This messy marble method makes unique prints with a cloudy, whimsical look. It’s affordable and dramatic.
Materials
- Shaving cream (foam), 1 can
- Acrylic paint, acrylic ink, or liquid watercolor, 4 small drops per color
- Tray or baking pan, shallow
- Cardstock or mixed-media paper, 8.5 x 11
- Plastic scraper or ruler
- Gloves and apron
Instructions
- Spray shaving cream into the tray and smooth level.
- Drop small amounts of paint onto the foam surface.
- Swirl with a stick to marbleize.
- Press paper onto the paint side, lift, and scrape off foam with a ruler.
- Let prints dry 30–60 minutes before handling.
- Repeat for more marbled sheets.
How to Display or Gift It
Cut into bookmarks or gift tags. Keep prints flat under a book until fully dry.
- Rock Painting with Paint Pens
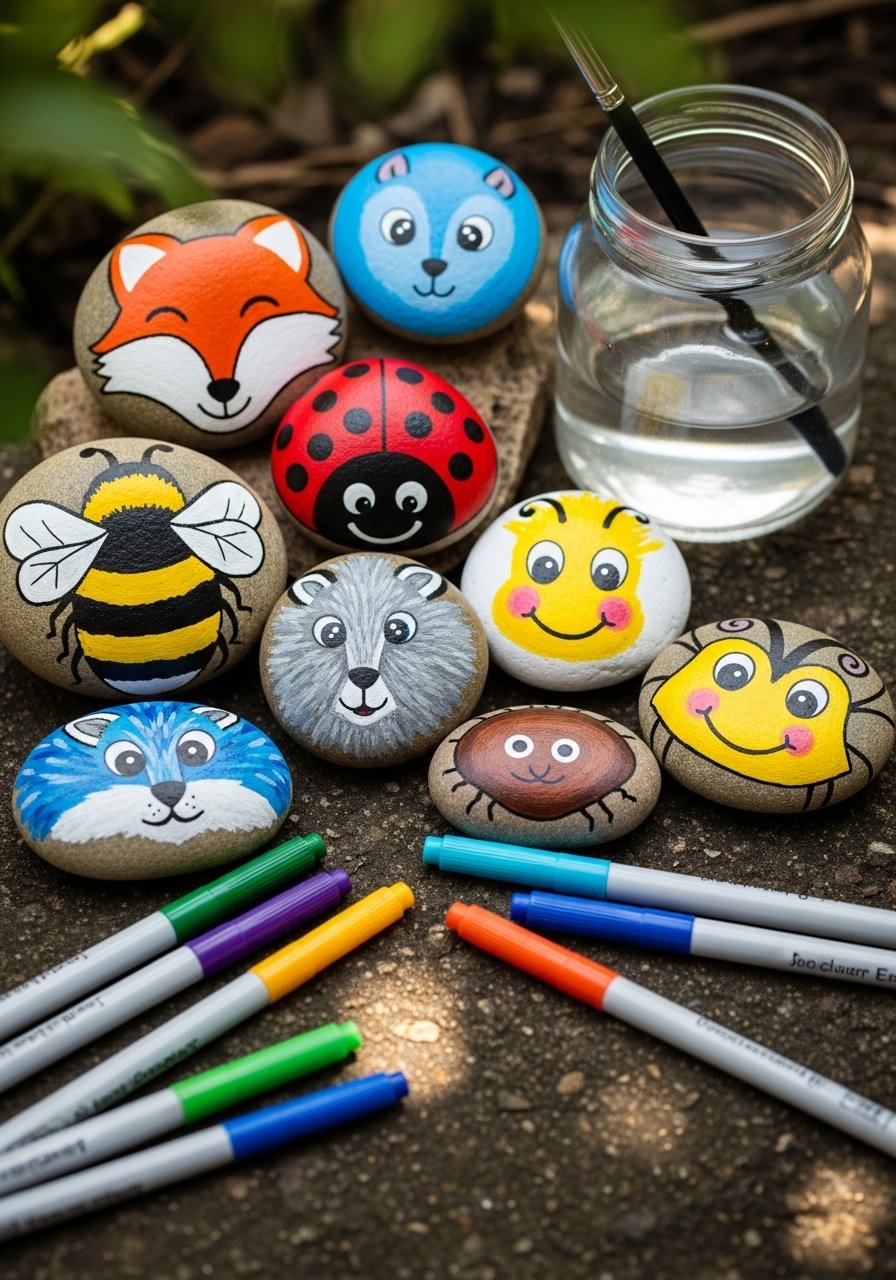
Rocks are satisfying tiny canvases. Paint pens give control for small details and are less messy than brushes.
Materials
- Smooth river rocks, washed and dried, 10
- Paint pens (assorted tip sizes), 1 set
- Acrylic craft paint, for base coats, 1 oz each
- Small foam brush
- Clear acrylic sealer spray
- Towel for drying
Instructions
- Wipe rocks clean and paint a base coat; let dry 20–30 minutes.
- Use paint pens to add faces, dots, and patterns.
- Layer details after base is dry.
- Let cure 24 hours for full adhesion.
- Spray with clear acrylic sealer in a ventilated area; dry 30 minutes.
- Test one rock first if outdoors to ensure seal quality.
How to Display or Gift It
Tuck painted rocks into potted plants or gift them in small kraft boxes. Store extras in a shallow craft drawer.
- painting craft ideas for kids: Salad-Spinner Spin Art
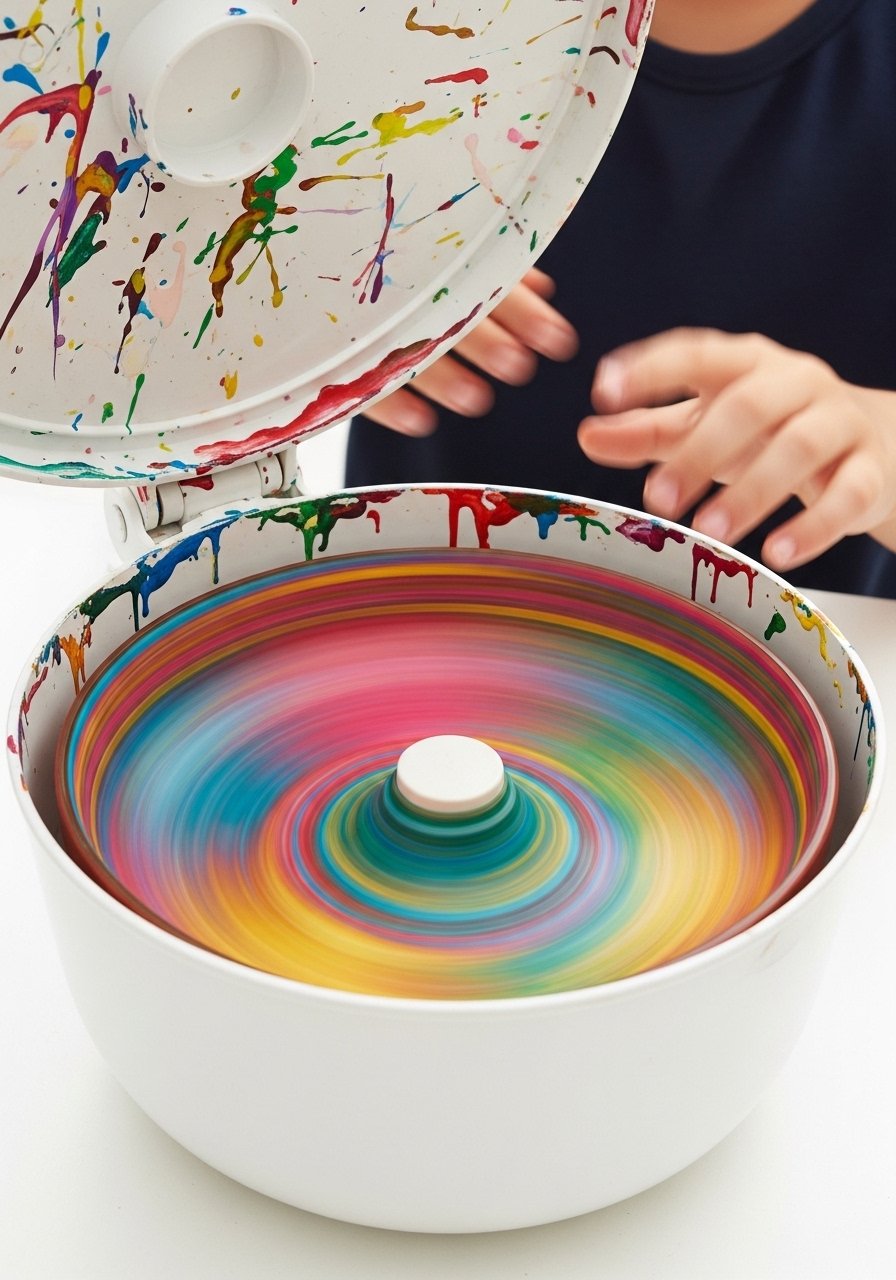
Spin art yields explosive, radial designs. Using a salad spinner is an easy, inexpensive way to get the effect.
Materials
- Salad spinner (clean), 1
- Mixed-media paper cut to spinner plate size
- Liquid tempera or thinned acrylic, 1–2 tsp per color
- Eye droppers or pipettes, 3
- Paper towels and apron
Instructions
- Place a paper circle on spinner plate and secure.
- Drop small amounts of paint near the center with droppers.
- Put lid on and spin gently. Experiment with speed for different effects.
- Open to reveal radial bursts. Repeat with new paper.
- Let dry 15–30 minutes.
- Clean spinner promptly to prevent staining.
How to Display or Gift It
Frame favorite spin art in round frames for a modern look. Store spinner in the kitchen for multiuse.
- Puffy Paint Puffy Clouds
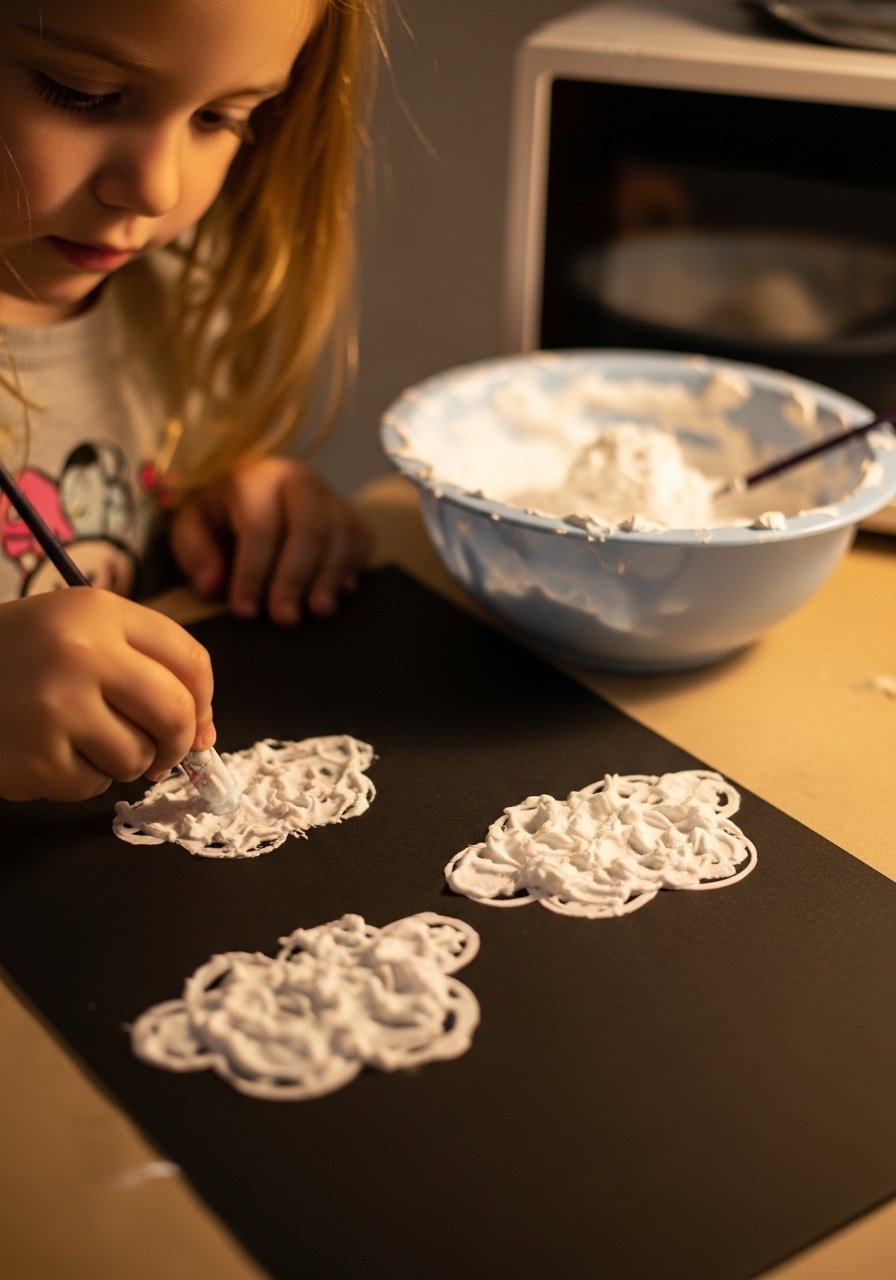
Puffy paint adds tactile dimension. It’s slightly raised when dry and irresistible to touch.
Materials
- White school glue, 1/2 cup
- Shaving cream, 1 cup
- White paint or acrylic (optional), small amount
- Black cardstock, 9 x 12
- Bowl and spoon for mixing
Instructions
- Combine equal parts glue and shaving cream; stir until smooth.
- Add a dollop of white paint if extra opacity is needed.
- Spoon mounds onto black cardstock and shape into clouds.
- Add small details with a toothpick.
- Let dry overnight; puffy paint firms up and becomes slightly springy.
- Avoid stacking while drying.
How to Display or Gift It
Mount on a string to create a mini cloud mobile. Store flat until fully dry.
- Cut-and-Print Stencil Animals
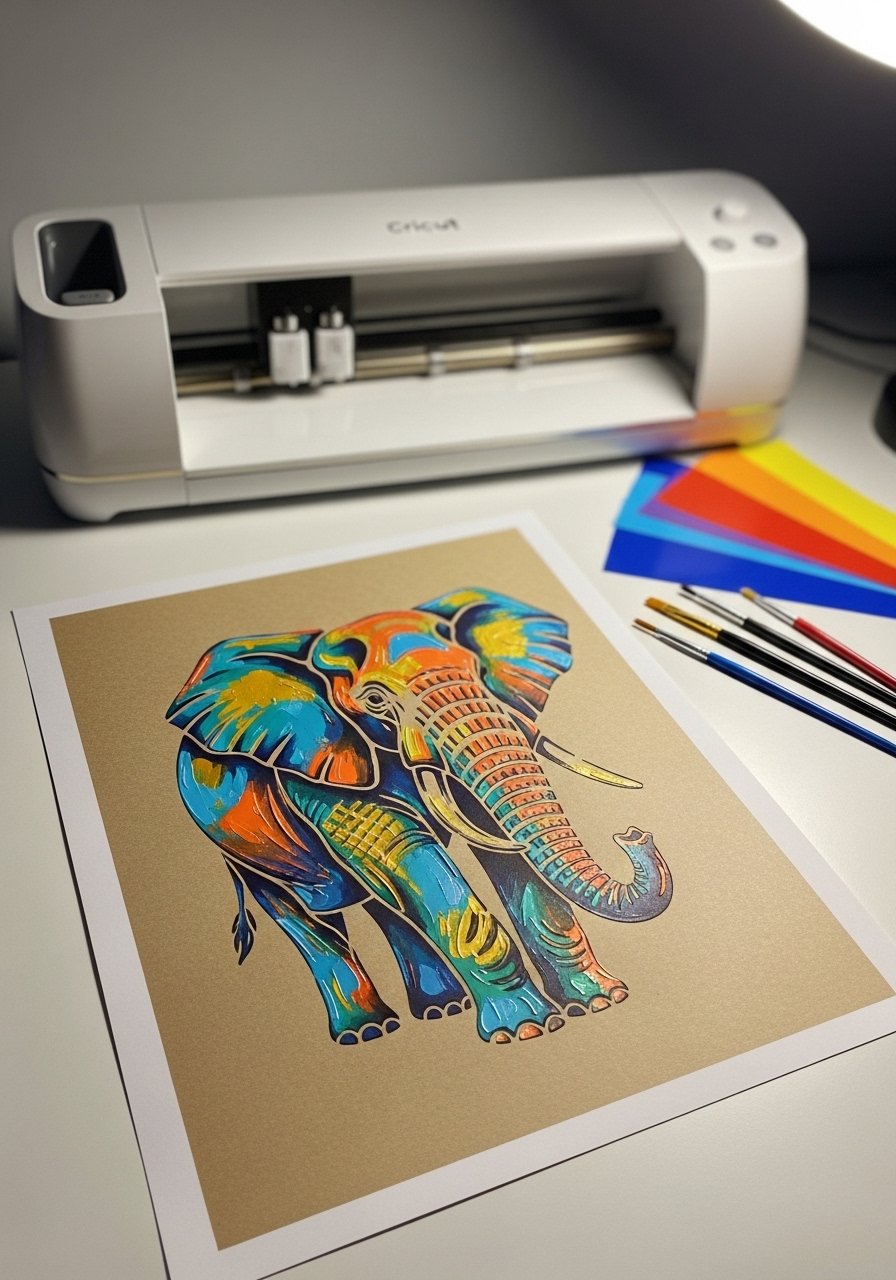
Stencil work teaches planning and layering. Using a cutting machine speeds up stencil creation for complex shapes.
Materials
- Stencil material or removable vinyl sheet, 6 x 6
- Craft knife or cutting machine (e.g., Cricut Explore), 1
- Acrylic paint, 3 colors
- Sponge dauber or foam brush
- Mixed-media paper, 9 x 12
- Low-tack transfer tape (if using vinyl)
Instructions
- Cut your animal shape in stencil material with a craft knife or your Cricut Explore cutting machine.
- Position stencil on paper and secure with low-tack tape.
- Dab paint onto the stencil using a sponge dauber for even coverage.
- Remove stencil slowly to avoid smudging.
- Clean and reuse stencil for patterns.
- Dry 20–30 minutes; fully cured 24 hours.
How to Display or Gift It
Layer multiple stencils for depth on a canvas. Store stencils flat in a craft organizer to keep edges crisp.
- Watercolor Resist with Glue
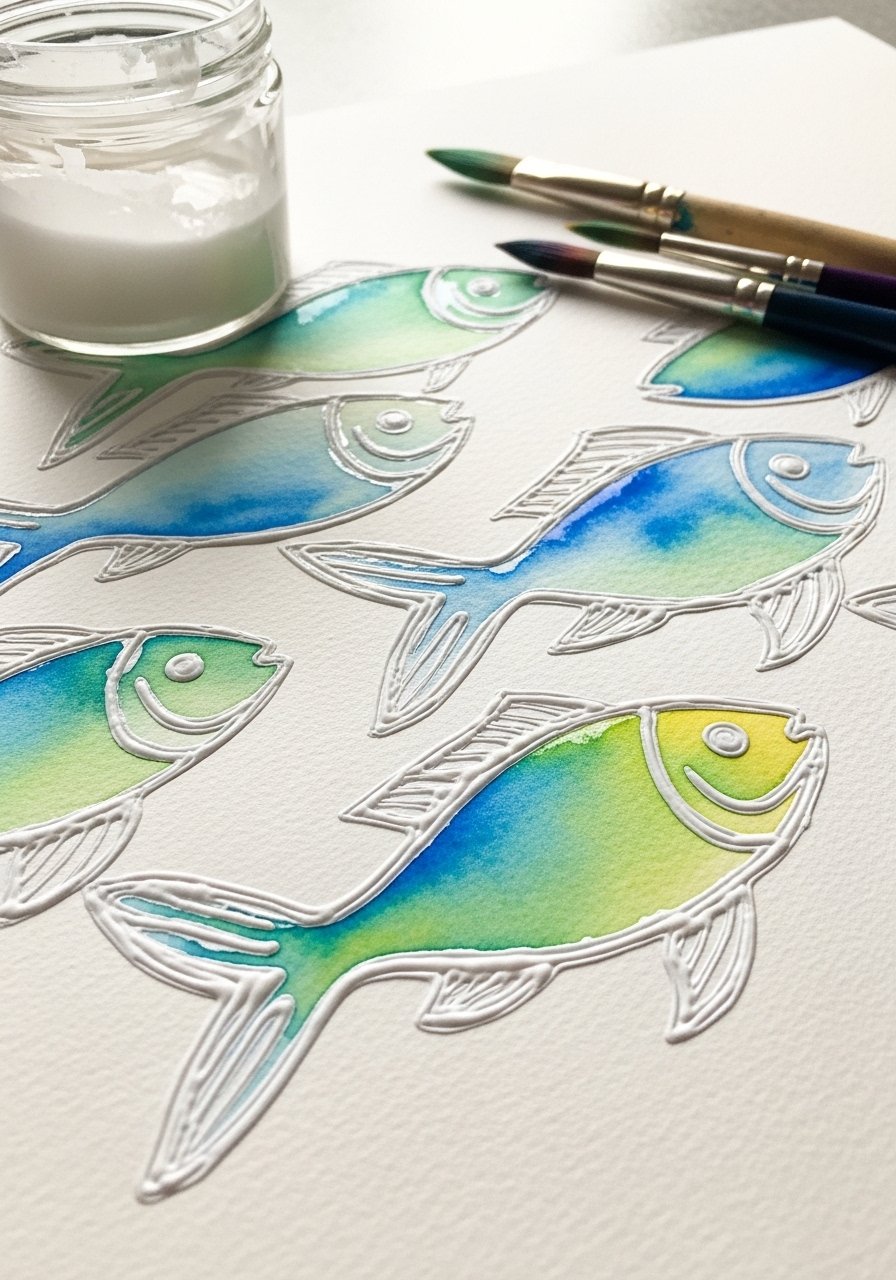
Glue resist is a great introduction to watercolor layering. It’s forgiving and rewarding once you peel back the contrast.
Materials
- Watercolor paper, 9 x 12
- White school glue in a squeeze bottle, 1
- Watercolor pan set, assorted colors
- Round watercolor brush, size 8
- Paper towel
Instructions
- Squeeze glue lines onto dry paper to form shapes; let glue dry 15–30 minutes until clear.
- Wet areas with a clean brush, then drop watercolor into the wells.
- Watch paint bead around the glue—this creates crisp borders.
- Add layers after the first dries for depth; final drying 1 hour.
- Rub gently with a fingertip to ensure glue is fully set.
How to Display or Gift It
Trim to postcard size and use as gift tags. Keep sheets flat while drying to avoid warping.
- Puffy Puffy Clay Finger Paint Buttons
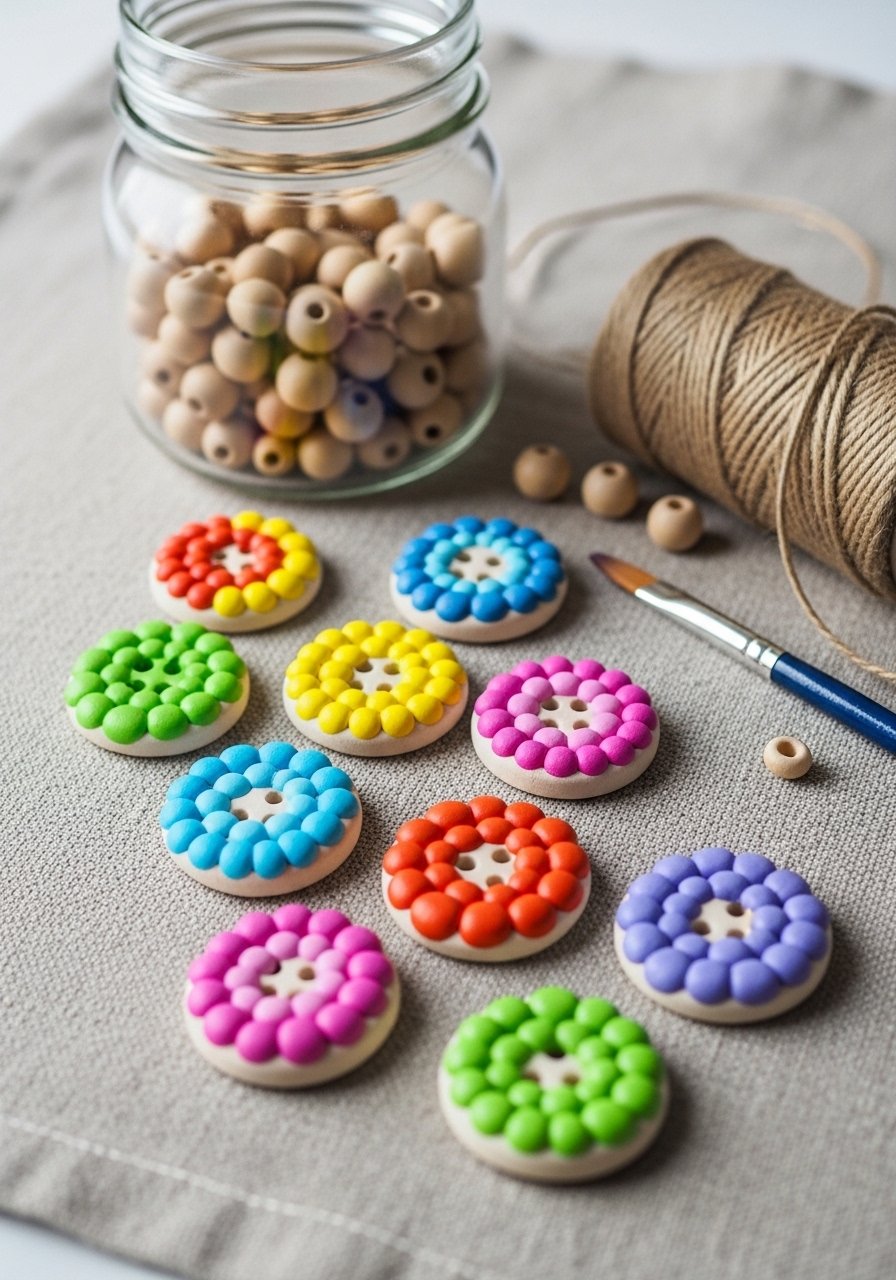
Combine air-dry clay with finger painting to make textured buttons or charms. Clay provides structure; paint adds color and fun.
Materials
- Air-dry clay, 8 oz
- Rolling pin or dowel
- Circle cookie cutter (1-inch)
- Acrylic craft paint set, small tubes
- Acrylic sealer spray
- Straw for button holes
Instructions
- Roll clay to 1/8-inch thickness.
- Cut circles with cookie cutter and poke two holes with a straw.
- Let dry 24 hours (thinner pieces may dry in 12–18 hours).
- Paint with acrylics; allow 20–30 minutes between coats.
- Seal with spray; dry 30 minutes.
- Thread onto twine or sew onto fabric.
How to Display or Gift It
Attach to a small gift box or make a button bracelet. Store finished buttons in a small compartment box.
- Tape-Maze Paint Resist for Fine Motor Practice
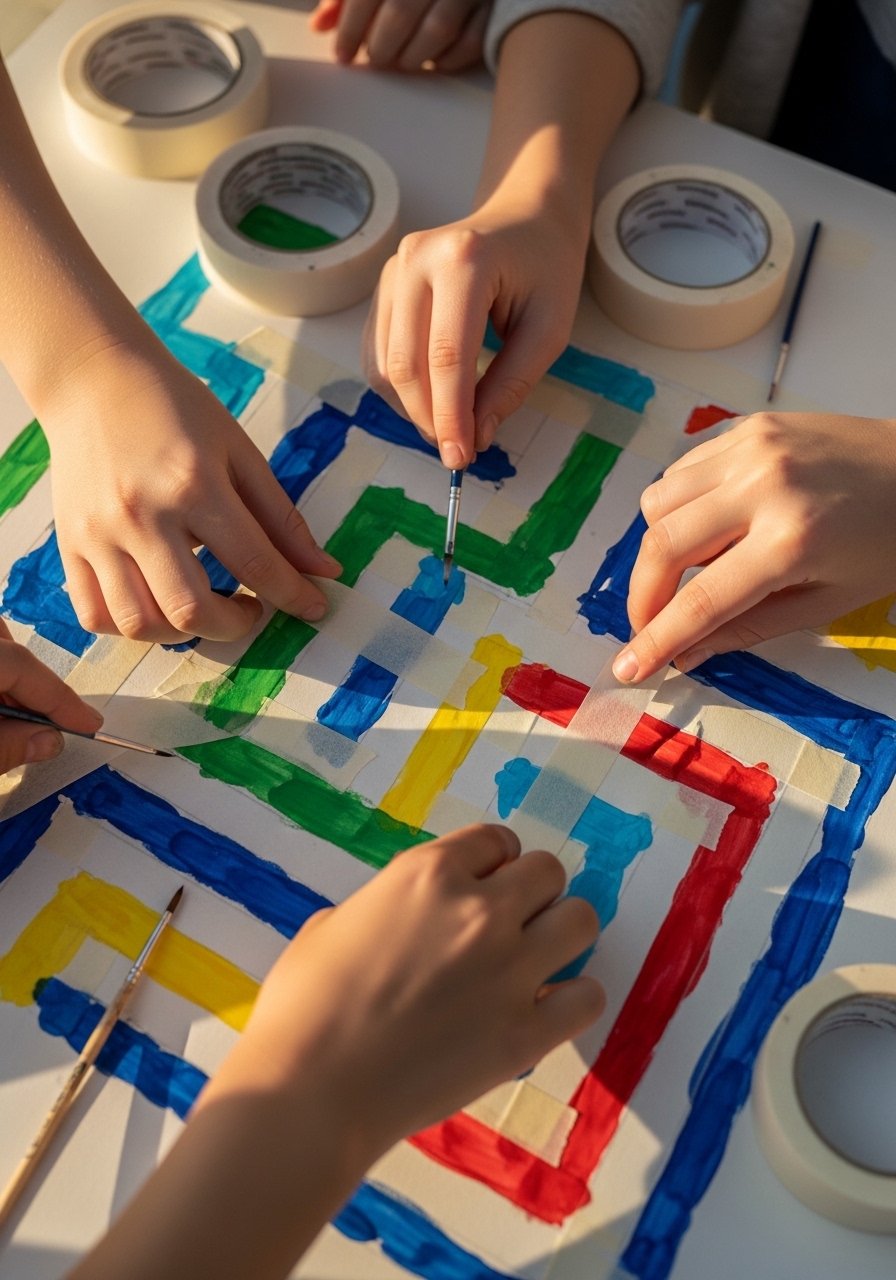
This project practices patience and control—kids paint within tape-created sections and peel tape for a satisfying reveal.
Materials
- Heavy cardstock, 9 x 12
- Painter’s tape, 1-inch
- Acrylic craft paint, multiple small pots
- Small detail brushes
- Ruler (for straight edges)
- Craft knife (adult use)
Instructions
- Lay painter’s tape across cardstock to create a geometric maze.
- Paint each section with different colors.
- Allow paint to dry 20–30 minutes to be touch-dry.
- Carefully peel tape to reveal crisp lines.
- Touch up edges with a fine brush if needed.
- Let fully cure 24 hours for handling.
How to Display or Gift It
Mount on a bulletin board for tactile play. Store finished work flat in a labeled folder.
- Squeegee Sunset Ombre Board

A small squeegee gives smooth gradients and a satisfying swipe texture. Great for older kids learning color mixing.
Materials
- Wooden sign blank, 6 x 12
- Foam squeegee or plastic scraper
- Chalk-style acrylic paints (sunset palette), 4 colors, 0.5 oz each
- Sandpaper (fine)
- Clear matte sealer
Instructions
- Sand the board lightly; wipe dust off.
- Apply a base coat of light peach; let dry 15 minutes.
- Dab paints across top to bottom in stripes.
- Use the squeegee to drag colors into an ombre, wiping excess on scrap.
- Repeat for a smoother gradient; dry 30 minutes.
- Seal with matte sealer; dry 30 minutes.
How to Display or Gift It
Lean on a mantel or small easel. Wrap with twine and a dried sprig for gifting. Store flat between layers of kraft paper.
- Collage + Paint Mixed Media Cards
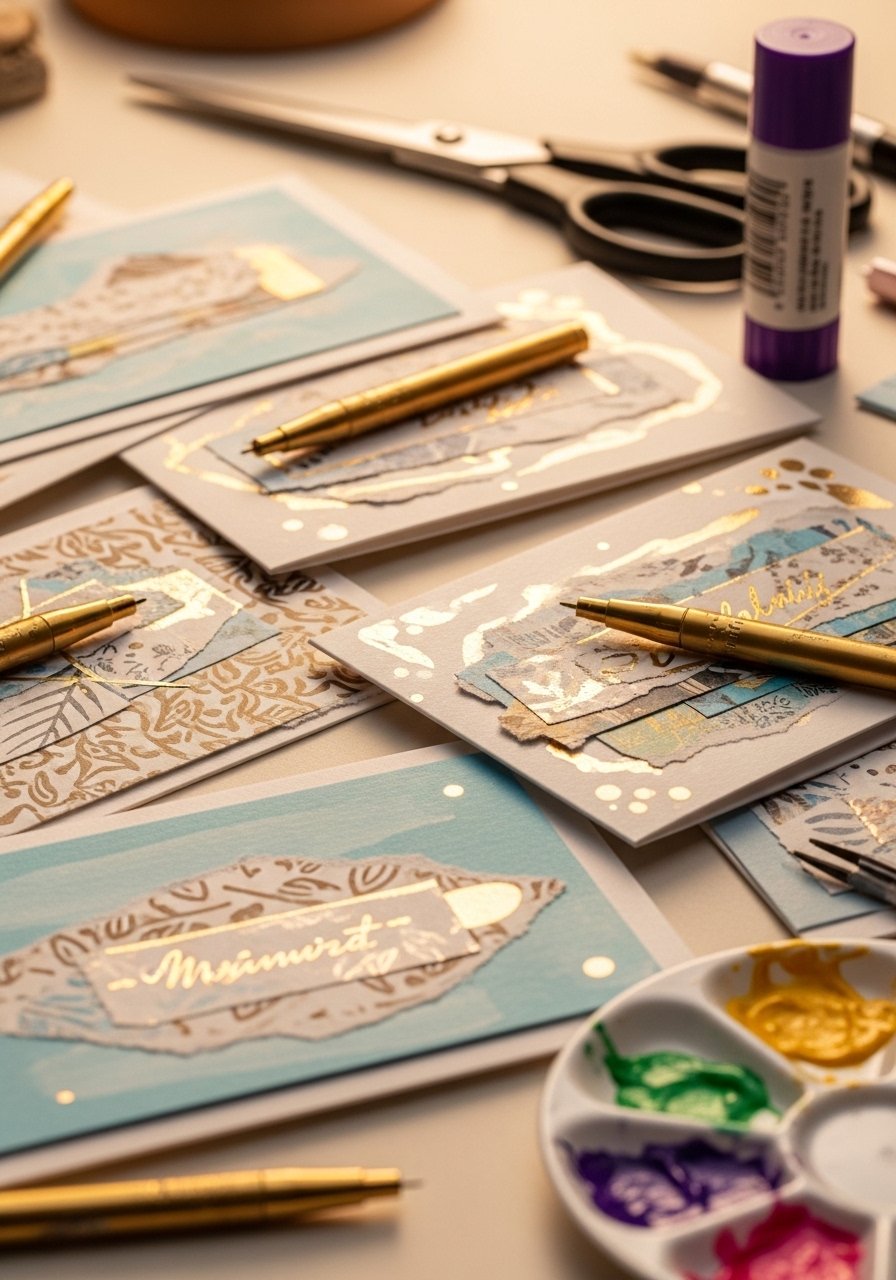
Mix painting with collage for layered texture. Kids can paint backgrounds then glue on cut papers and doodle details.
Materials
- Blank cards or cardstock cut to 4 x 6, 10
- Acrylic craft paint for backgrounds, 3 colors
- Patterned scrap paper or magazine images, assorted
- Glue stick or craft glue
- Scissors and small craft punches (optional)
- Metallic paint pen for accents
Instructions
- Paint card fronts in loose washes and let dry 15–30 minutes.
- Cut shapes from patterned paper.
- Arrange and glue shapes onto dried painted backgrounds.
- Add details and outlines with metallic paint pen.
- Allow glue to set 10–20 minutes.
- Write messages inside once fully dry.
How to Display or Gift It
Bundle five cards with ribbon in a kraft box. Store extra cards flat in a craft organizer.
- Puffy Foam Plate Flowers
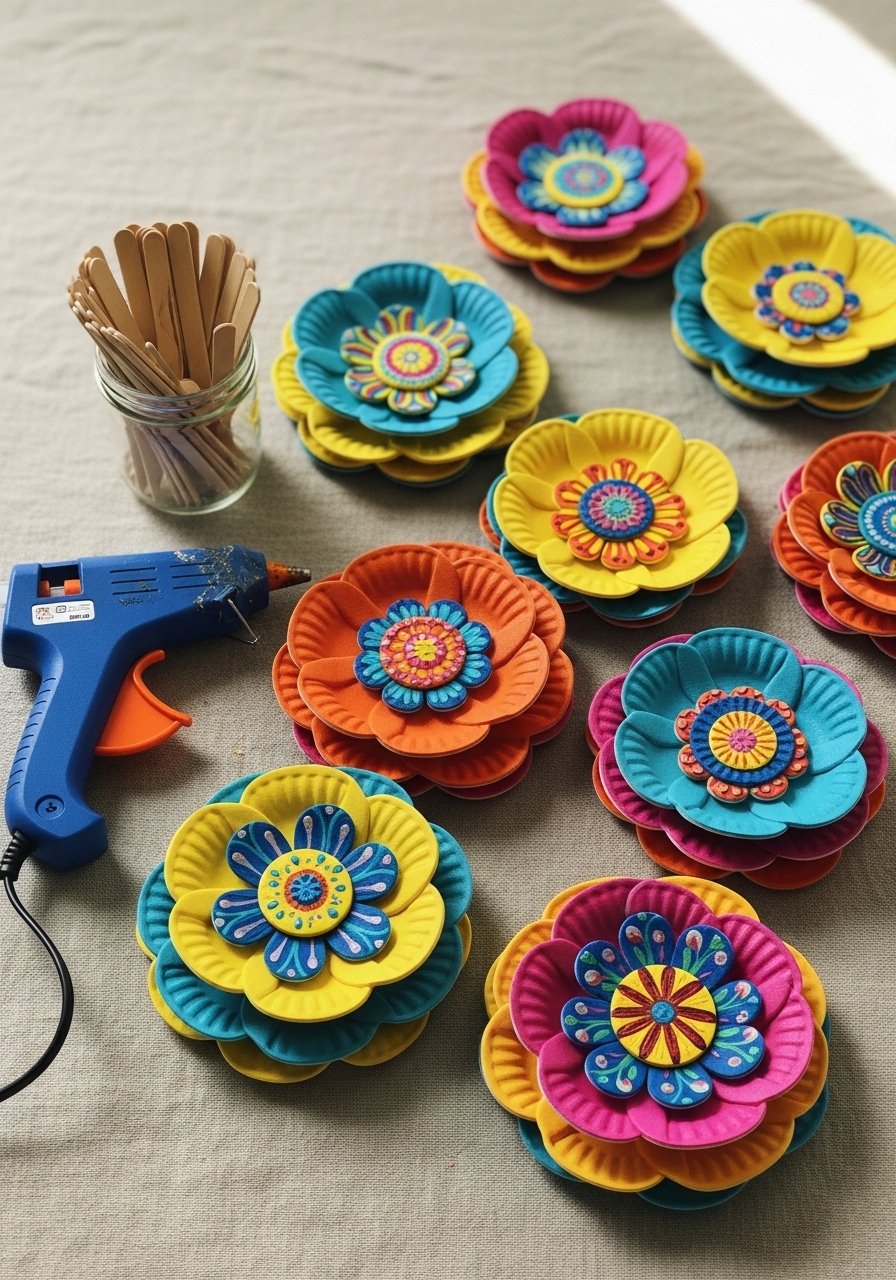
Turn foam plates into dimensional flowers using paint and glue. The result is cheerful and great for classroom displays.
Materials
- Foam plates, 6-inch, 3
- Acrylic paint (pastel set), 1 oz per color
- Wooden craft sticks for stems, 3
- Hot glue gun and low-temp glue sticks (adult use)
- Scissors and hole punch
Instructions
- Cut foam plate into petal shapes or fringe the edge.
- Paint petals and centers; let dry 15–20 minutes.
- Layer pieces and glue with a dab of hot glue.
- Attach craft stick stem with hot glue and let cool.
- Punch a hole in the base to secure in a display pot if needed.
- Allow glue to set 5–10 minutes.
How to Display or Gift It
Group several into a small jar filled with decorative stones. Wrap in cellophane for a cheerful gift.
- painting craft ideas for kids: Salt Crystal Fireworks on Canvas
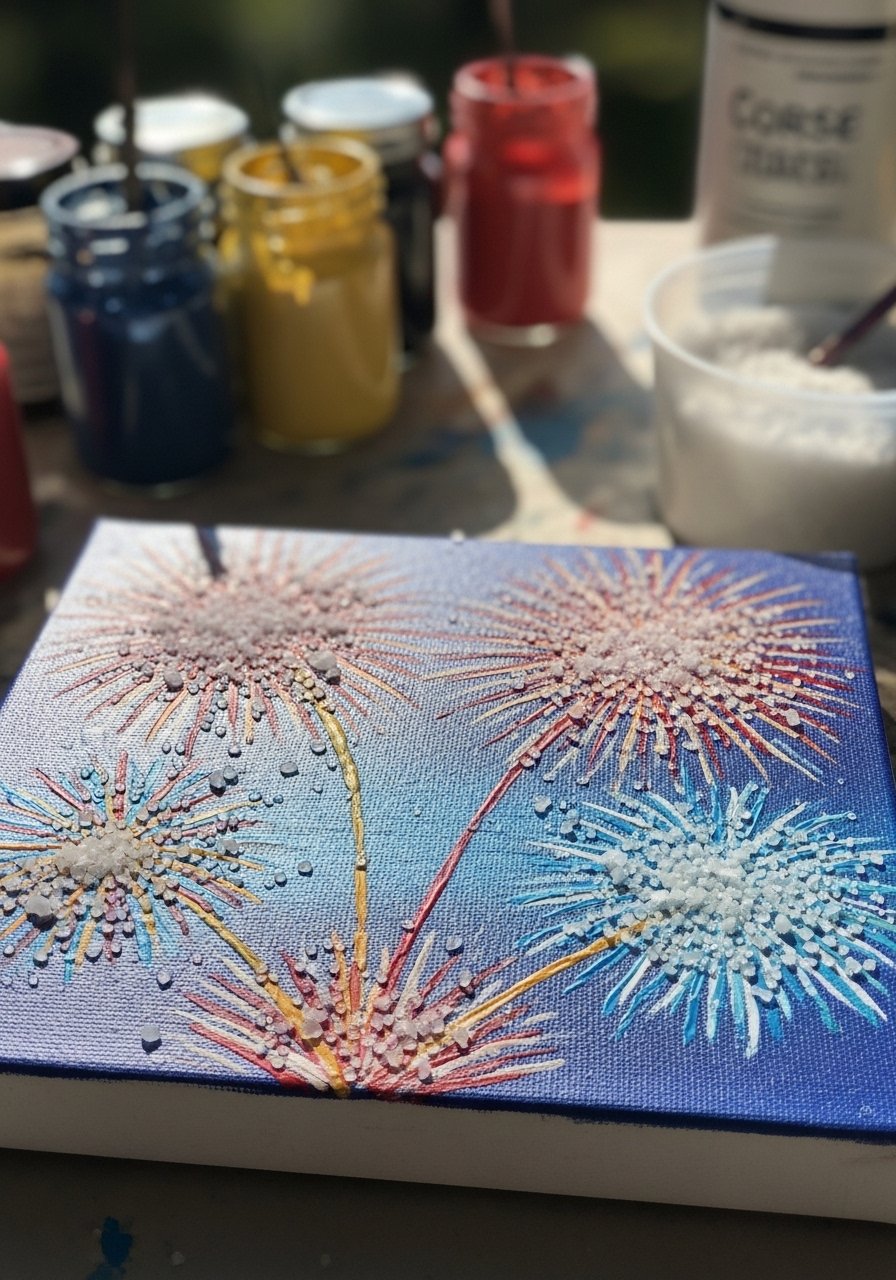
Add coarse salt to painted fireworks to create sparkling crystal edges—great for New Year or Fourth of July crafts.
Materials
- Mini canvas, 5 x 7
- Acrylic paint tubes (red, blue, gold), 0.5 oz each
- Coarse table salt, 1–2 tsp
- Small fan brush for splatter
- Palette knife or toothpick
- Clear sealer spray
Instructions
- Paint thin lines radiating from a center point with acrylics.
- While paint is still tacky, sprinkle coarse salt along lines.
- Let dry 1–2 hours until salt is embedded and paint no longer tacky.
- Gently shake off excess salt.
- Optionally add tiny metallic dots with a paint pen.
- Seal with a clear spray to lock crystals; dry 30 minutes.
How to Display or Gift It
Cluster multiple mini canvases on a small gallery wall. Store canvases flat until the sealer cures.
- Fruit Stamp Party Invitations

Fruit stamps are low-prep and produce organic, repeating shapes—perfect for invites or menu cards.
Materials
- Apples, potatoes, or okra pieces, cut in half, 6
- Acrylic paint (washable), 4 colors
- Blank invitation cards, 4 x 6, 10
- Small palette or plate
- Knife for cutting fruit (adult use)
Instructions
- Cut fruit halves and pat dry.
- Dab paint onto the cut surface.
- Press evenly onto card to transfer patterns.
- Repeat with different colors and fruits.
- Let dry 20–30 minutes.
- Add handwritten details once dry.
How to Display or Gift It
Tie a set with ribbon for party favors. Store cards flat for mailing.
- Drip-Pour Mini Canvases
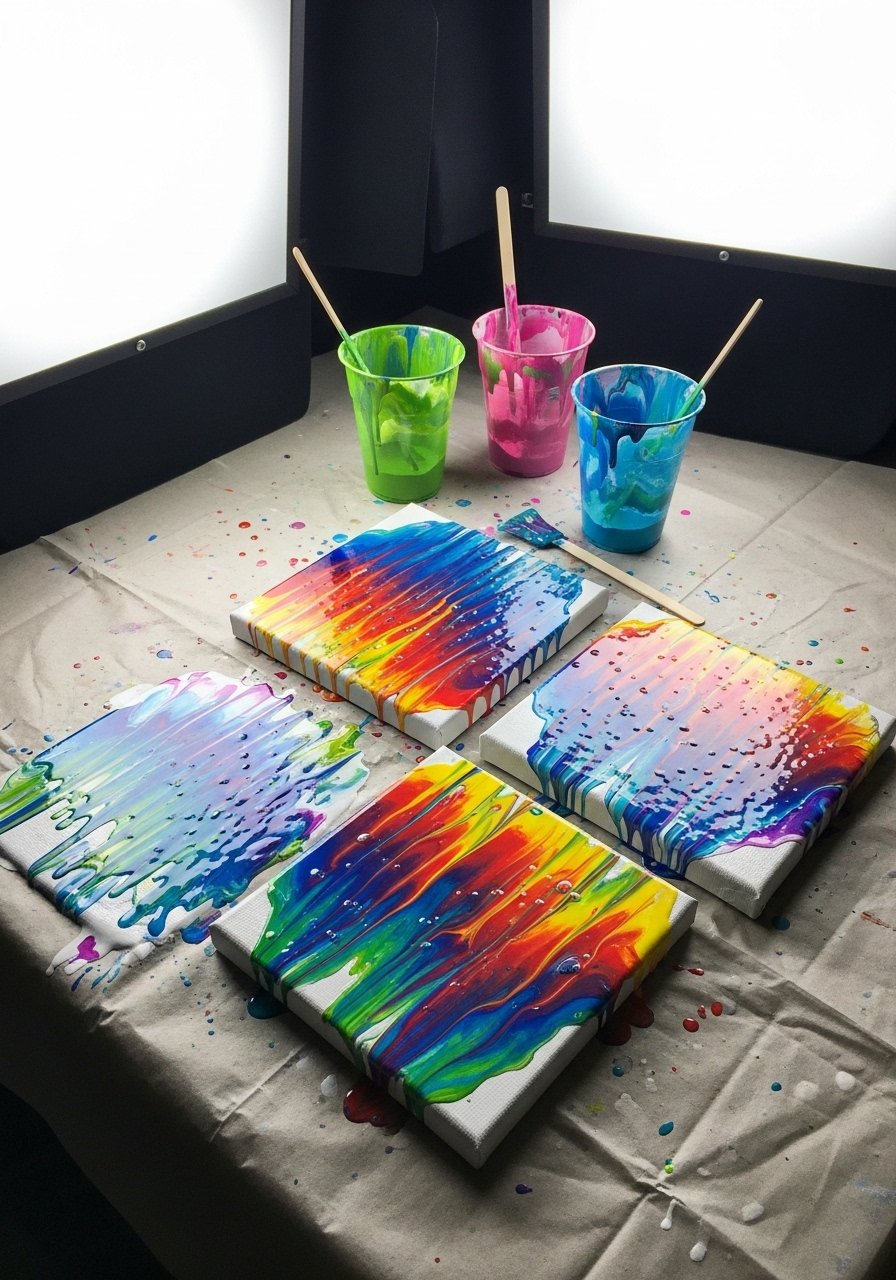
Controlled pours and drips teach physics of paint flow. Kids learn layering and color blocking.
Materials
- Mini stretched canvases, 4 x 4, 3
- Pouring medium mixed with acrylic paint, 2 oz per color
- Disposable plastic cups, 3
- Stir sticks and gloves
- Drop cloth
Instructions
- Mix paint with pouring medium in cups (follow medium instructions for ratios).
- Pour colors layer by layer into a cup, then flip onto canvas.
- Lift canvas to let paint drip and spread.
- Tilt gently to direct drips; wipe excess off edges.
- Let sit undisturbed 24 hours for full curing.
- Seal after 48 hours with clear sealer.
How to Display or Gift It
Cluster mini canvases on a shelf. Wrap individually and nest in tissue for gifting.
- Puffy Puffy Puffy Marshmallow Dab Painting
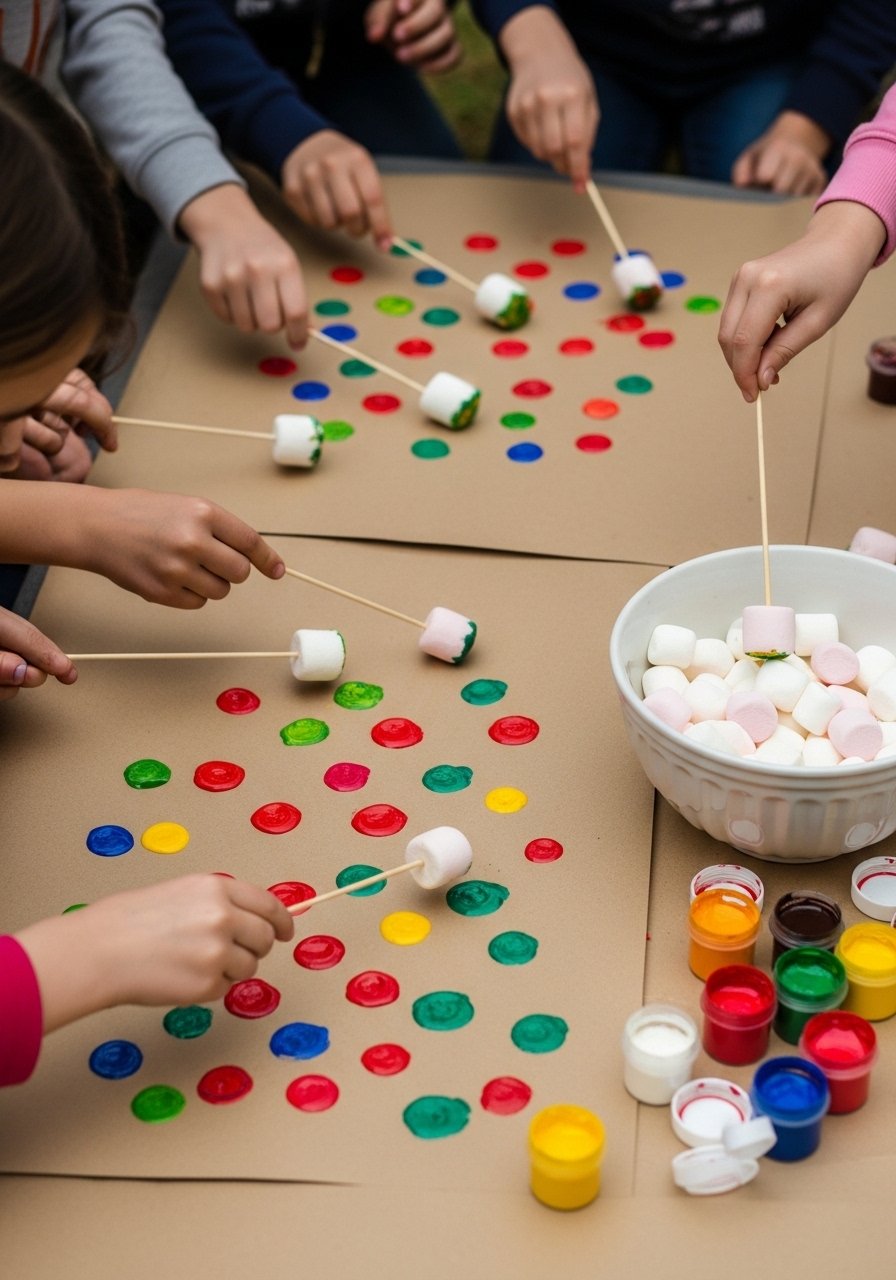
Using marshmallows on sticks is a fun one-off tool that makes soft-round dots and is biodegradable for quick cleanup.
Materials
- Mini marshmallows, 20 (food-safe)
- Wooden skewers, 20
- Acrylic craft paint, 3 colors
- Kraft paper rolls or butcher paper
- Small bowls for paint
Instructions
- Skewer marshmallows onto sticks.
- Dip marshmallow in paint and stamp onto paper.
- Create patterns or pictures; replace marshmallow when too saturated.
- Let artwork dry 20–30 minutes.
- Dispose of used marshmallows or compost if possible.
How to Display or Gift It
Use large sheets as party table decor. Roll and tie with twine for a giggly gift.
- Tie-Dye T-Shirt Painting with Brushes
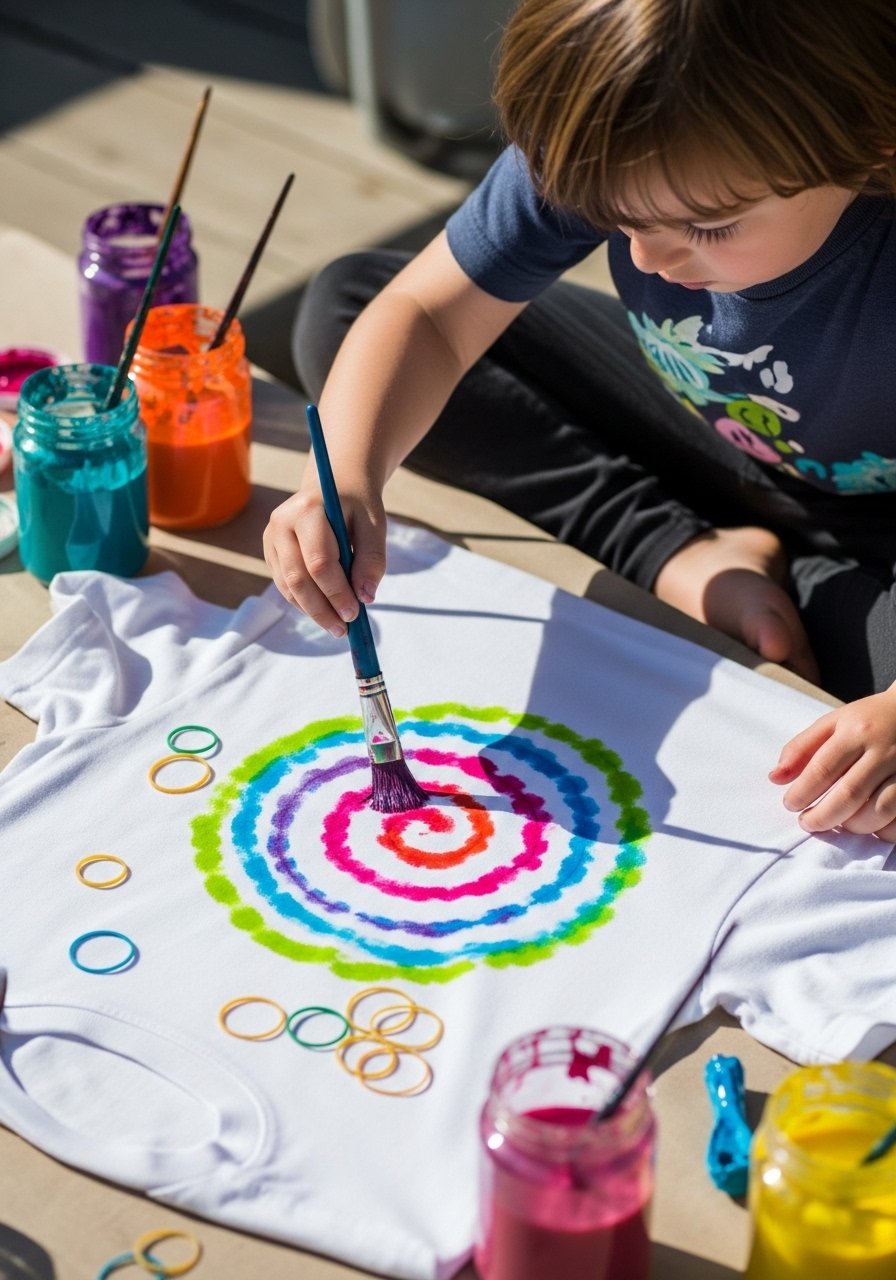
Brush-based tie-dye lets kids paint patterns without the twist-and-soak mess. Fabric paints set with heat for washable shirts.
Materials
- Plain white cotton T-shirt, child-size
- Fabric paints (opaque), 3 colors, 1 oz each
- Foam brushes and small detail brushes
- Rubber bands (for optional texture)
- Iron for heat-setting (adult use)
Instructions
- Place cardboard inside the shirt to prevent bleed-through.
- Twist or pleat and secure with rubber bands for resist patterns.
- Paint sections with fabric paints; avoid over-saturating.
- Let dry 1–2 hours until no tackiness.
- Heat-set per paint instructions (usually ironing on cotton setting for 3–5 minutes with a press cloth).
- Wash inside out after 24 hours as directed.
How to Display or Gift It
Fold and present in a clear cell bag with a ribbon. Store painted shirts flat until heat-set.
- Chalkboard Painted Treasure Map
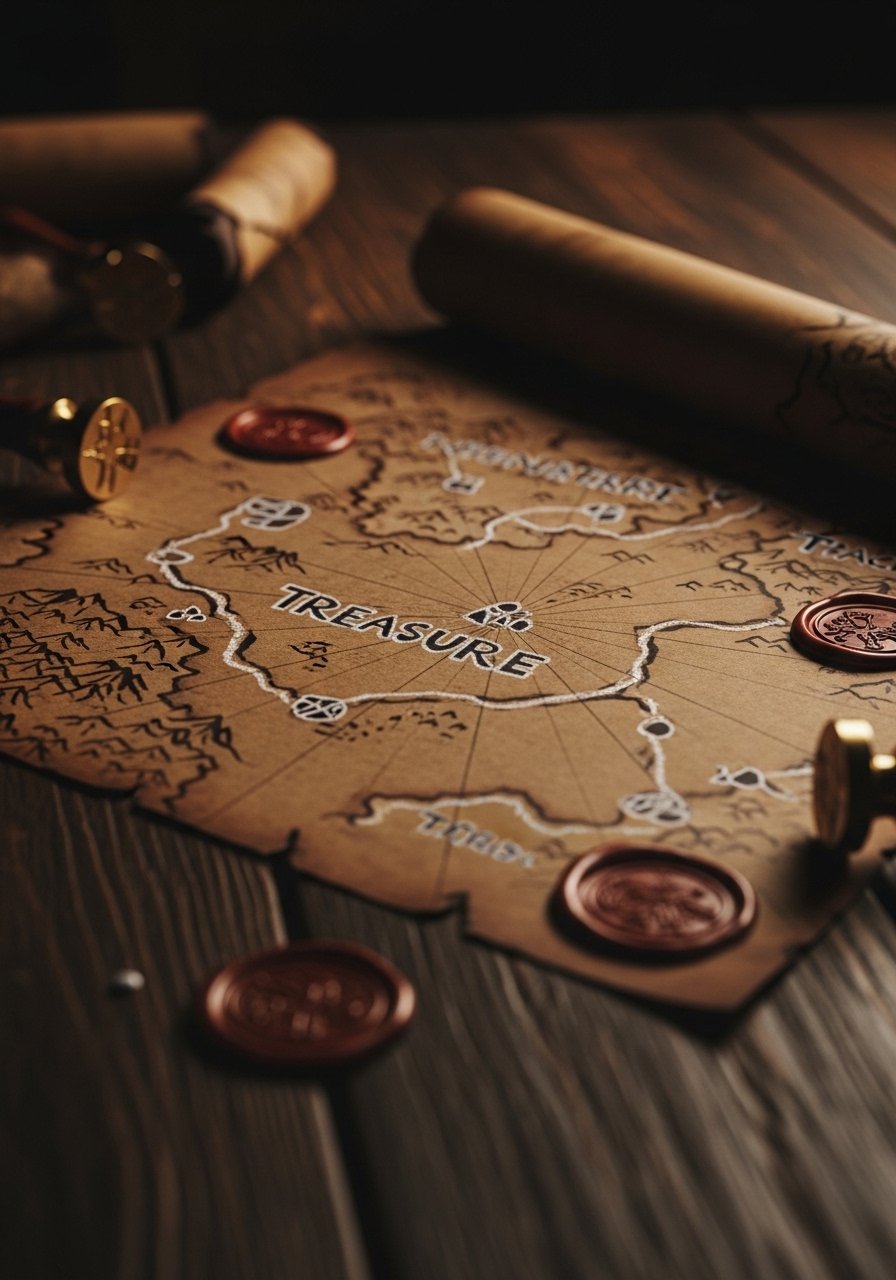
Turn painting into pretend play by making a reusable chalkboard map. Chalk paint lets kids repaint routes again and again.
Materials
- Heavy brown kraft paper, 18 x 12
- Chalkboard paint, 4 oz
- Foam roller
- Chalk sticks, 1 set
- Brush for detail
- Wax crayon for initial map lines
Instructions
- Roll chalkboard paint over kraft paper in thin, even coats; 2 coats, drying 30 minutes between.
- Once dry, draw map outlines with wax crayon so chalk won’t adhere there.
- Let kids color routes with chalk and erase as needed.
- Store rolled loosely to avoid cracks.
How to Display or Gift It
Roll with a soft ribbon and include a small chalk set as a party favor. Keep flat for long-term storage.
- Bubble-Wrapped Cityscape Prints

Bubble wrap gives interesting repeat textures—build skyscrapers and rooftops with simple stamped rectangles.
Materials
- Bubble wrap sheet, large
- Acrylic paint (black, metallic gold), 1 oz each
- Brayer roller
- Mixed-media paper, 9 x 12
- Craft knife for trimming (adult use)
Instructions
- Cut bubble wrap into rectangle stamp shapes.
- Roll a thin layer of paint onto bubble side with a brayer.
- Press onto paper to leave bubble impressions in a block pattern.
- Layer black for silhouette and gold for window highlights.
- Dry 20–30 minutes.
- Trim and mount on colored cardstock.
How to Display or Gift It
Frame as a modern print and hang in a playroom. Store extra bubble wrap flat.
- Glow-in-the-Dark Night Sky Jars
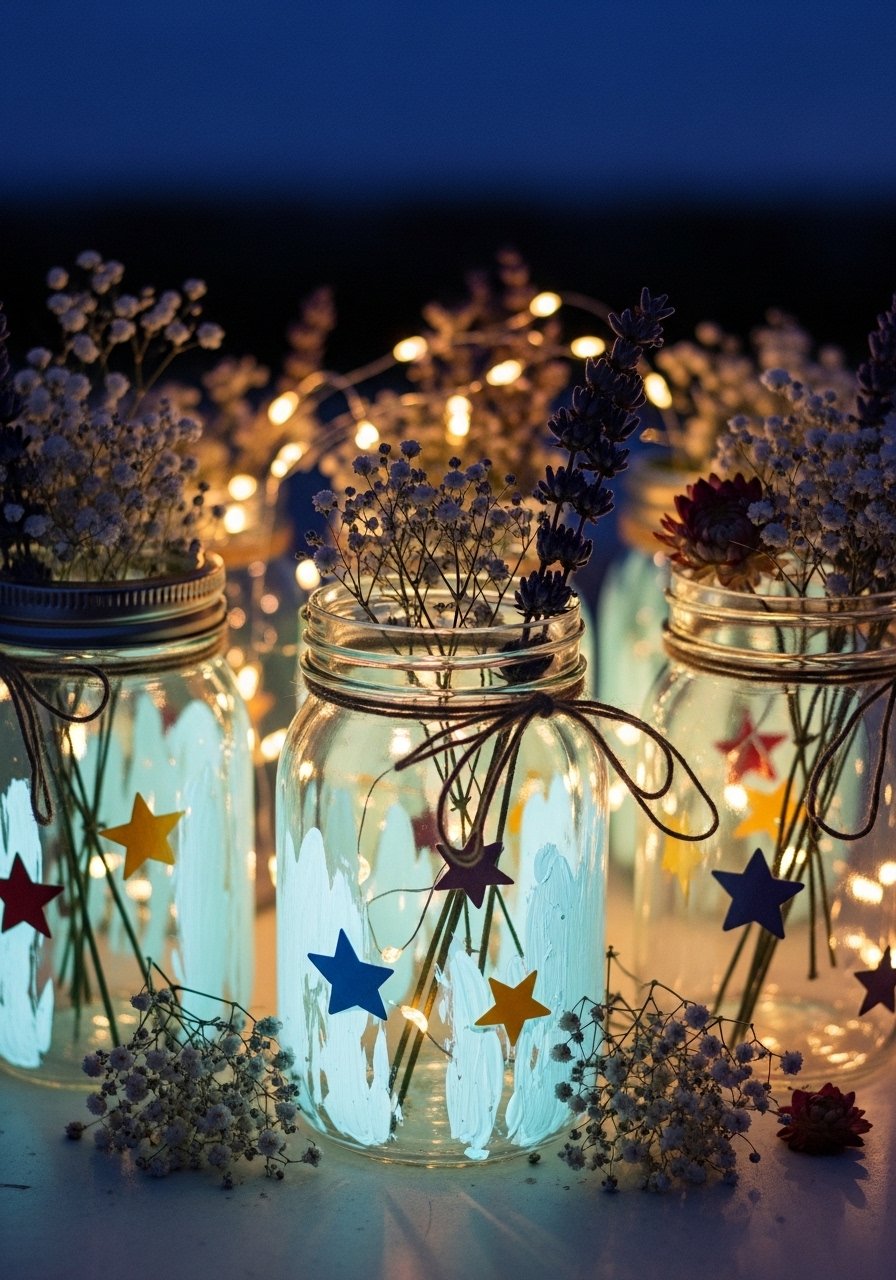
Make jar lanterns with glow paint—magical bedside companions for bedtime stories.
Materials
- Mason jars, pint size, 2
- Glow-in-the-dark paint, 2 oz
- Small foam brush
- Star stickers or metallic paint pen
- Battery tealight (optional)
Instructions
- Paint the inside bottom and sides of jars with glow paint; 2 coats, allow 15 minutes between coats.
- Add star stickers or draw constellations on outside.
- Charge under a lamp or sunlight for 10–20 minutes.
- Turn off lights to enjoy glow; glow may last several hours depending on paint.
- Keep jars sealed when not in use to prevent dust.
- Use battery tealight for added ambiance.
How to Display or Gift It
Place on a bedside shelf or gift with a bedtime storybook. Store jars upright in a box.
You made it to the end—what a gallery-worthy run of colorful, messy, and satisfyingly tactile projects. From finger-paint rainbows to glow-in-the-dark jars, these painting craft ideas for kids cover sensory play, fine-motor practice, and keepsake-making. Pin this list to your rainy-day board and pick one that fits the time and supplies you have. Which project are you trying first—spin art, balloon stamps, or that salt-watercolor galaxy? Share your pictures with friends or gift the finished pieces; handmade crafts always carry extra warmth.
One last tip: a reliable set of washable acrylics will serve across nearly every project here—it cuts cleanup time and keeps colors bright. I use a multipack of student-grade acrylics for most kid projects and reserve specialty inks for older kids. Happy painting—and don’t forget the wet wipes.
Foam brush set | Cricut Joy cutting machine | Mod Podge gloss sealer | Painter's tape 1-inch | Acrylic craft paint set | Hot glue gun low temp | Salad spinner
Note: Replace any product choices with ones you prefer, but these styles will help you get consistent results across these kid-friendly painting crafts.


