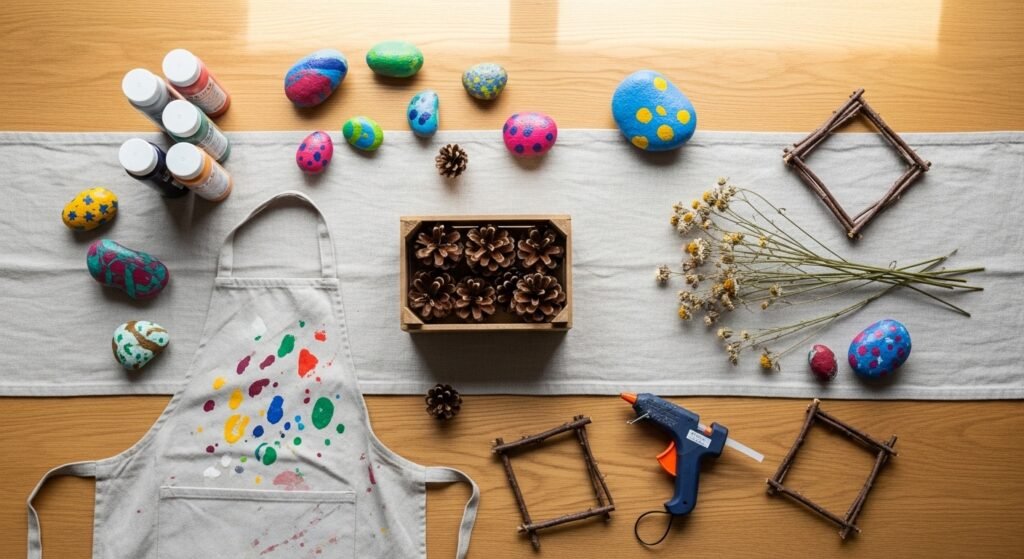
Summer afternoons sticky with lemonade and a yard full of treasures—sound familiar? If you want hands-on fun that gets kids outside, messy, and happily absorbed, these 20 outdoor craft ideas for kids are made for you. You’ll find nature-first projects that celebrate mud, leaves, sticks, and bright paint. Each idea includes a clear materials list with exact quantities, step-by-step instructions (with drying times), and display or gifting tips so creations live beyond the day they were made.
I start many projects with a basic hot glue gun for quick assembly, but a glue stick works well for paper crafts. Try my go-to all-purpose acrylic set for bold kid-friendly color: student acrylic paint set. Keep things tidy with a pack of disposable foam brushes—cheap, effective, and easy to toss when paint hardens.
Ready to get messy? These outdoor craft ideas for kids lean cottagecore and boho, use easily found materials, and include tips to avoid the most common kid-craft disasters like flaking paint, soggy paper, or brittle glue joins. Let’s make some garden memories.
- Leaf Print Suncatchers — outdoor craft ideas for kids

This simple paint-and-press project turns collected leaves into glowing window art. The texture of veins comes through beautifully, and kids love watching color shift when suncatchers catch the light. Beginners and preschoolers will enjoy the tactile mixing and pressing. For crisp paint application, a pack of disposable foam brushes helps keep fingers clean.
Materials
- 6 sheets of clear shrink-plastic (approx 6 x 6 in each)
- 6–12 medium leaves (fresh, not brittle)
- Acrylic paint (assorted colors, 20 ml tubes)
- Disposable foam brushes, pack of 12
- Permanent marker (fine-tip)
- Hole punch (single hole)
- Linen ribbon, 1/4 in x 2 yds
- Baking tray and parchment paper
Instructions
- Preheat oven to 325°F (163°C). Line a baking tray with parchment.
- Place a leaf face-down on a shrink-plastic sheet. Trace its outline lightly with a permanent marker.
- Paint the back of the shrink-plastic where the leaf sits using foam brushes. Use thin coats so paint doesn’t pool—one or two coats should do.
- Press another clean scrap of plastic or a sheet of wax paper over the painted area with your palm to imprint texture. Peel gently after a minute.
- Punch a hole near the edge for hanging.
- Bake according to shrink-plastic instructions—usually 2–4 minutes. Watch through the oven window; pieces will curl then flatten. When flat and firm, remove and cool 5 minutes.
- Thread linen ribbon through the hole and knot.
How to Display or Gift It
- Hang several on a small tension rod for a garden window display.
- Tie a few together with twine to make a sun mobile.
- Store flat between sheets of cardstock until ready to hang. A small wooden easel shows one off well indoors: mini wooden easel set.
- Make a set for teachers as seasonal window décor.
- Painted Rock Garden Markers
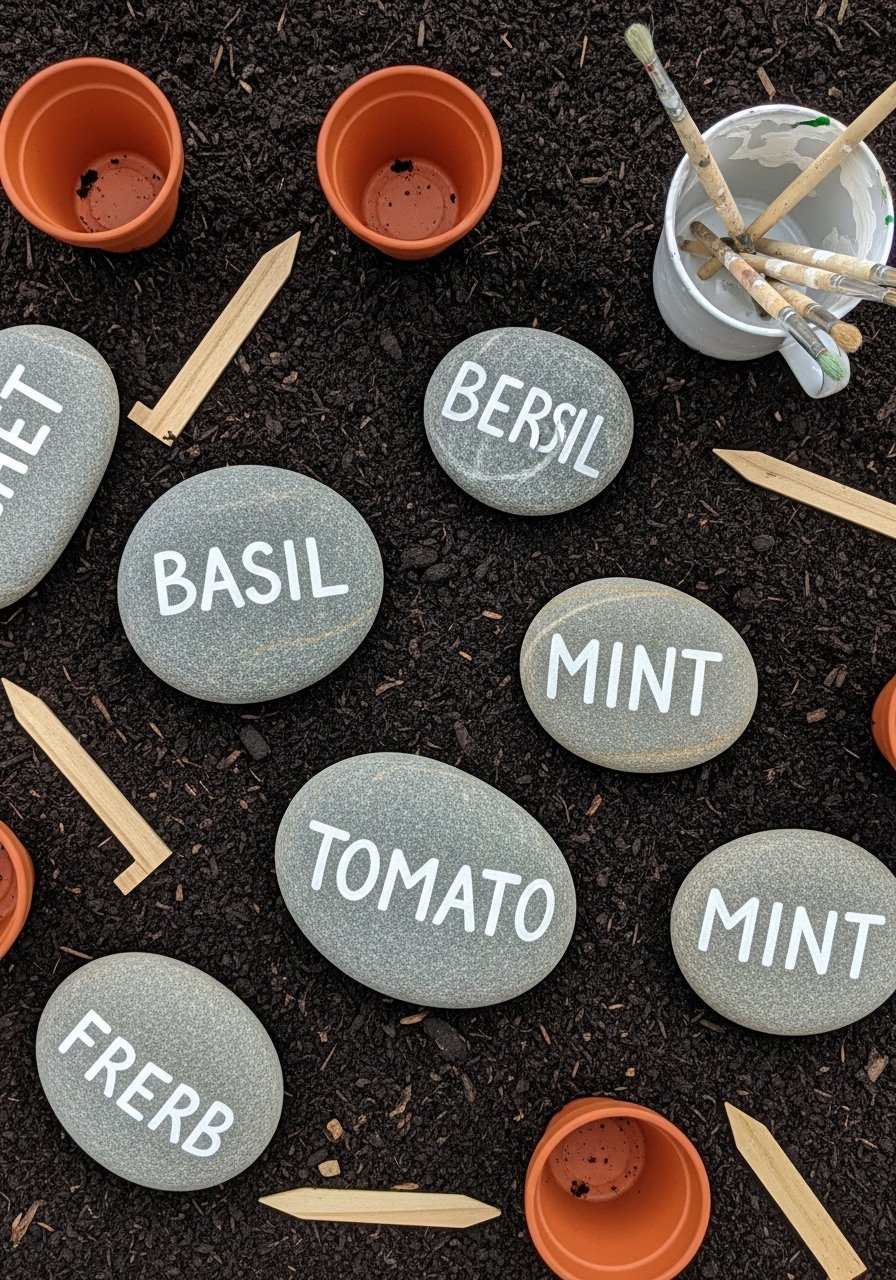
Smooth rocks become mini signposts for your garden. This project is tactile, low-mess once rocks are pre-washed, and kids can practice lettering. Use an acrylic paint pen for fine labels that last outdoors.
Materials
- 12 smooth river rocks (~2–3 in each), washed and dried
- Acrylic craft paint set (12 colors)
- 1 white paint pen (fine tip)
- Foam brushes (6) and a detail round brush (size 0)
- Clear outdoor sealer spray (matte, 2-coat finish)
- Painter’s tape, thin strips
- Plastic tray for painting
Instructions
- Wash and dry rocks thoroughly; remove dust.
- Tape off any sections for two-tone designs. Apply base coats with foam brush; 1–2 thin coats, drying 20 minutes between coats.
- After base is dry to the touch (30 minutes), use the detail brush or paint pen to write names like “Basil” or draw simple icons.
- Let paint cure 24 hours for best adhesion.
- Spray two light coats of outdoor sealer, 5–10 minutes between coats. Let cure 24 hours before placing in soil.
How to Display or Gift It
- Push rock markers into herb pots for instant charm.
- Group them in a small wooden crate as a garden starter gift; wrap with kraft paper and twine.
- Store extras in a craft organizer bin between painting sessions: plastic craft organizer tray.
- Nature Collage Boards — outdoor craft ideas for kids
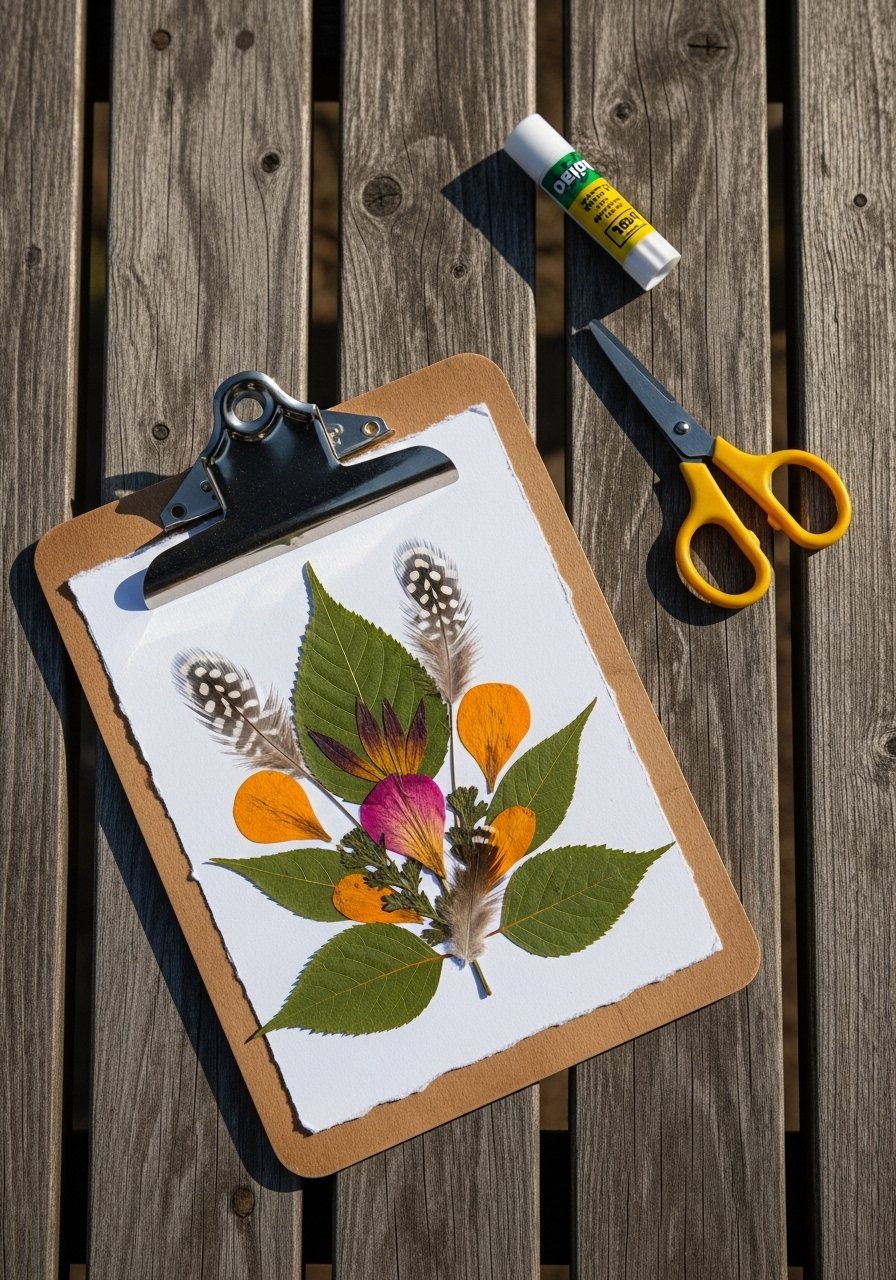
Collect twigs, petals, and seed pods to arrange into textured collages on stiff boards. This project encourages observation and fine-motor play. Use a glue stick for lightweight pieces and a low-temp hot glue gun for heavier items—kids should be supervised with the hot glue.
Materials
- 4 hardboard panels (6 x 6 in) or recycled cardboard
- Glue stick (1 per child) and low-temp hot glue gun with glue sticks (10 sticks)
- Assortment of collected nature finds (twigs, petals, seeds)
- Watercolor paper scrap for background (6 x 6 in)
- Scissors (child-safe)
- Pencil for layout
- Clear Mod Podge (matte, 2 oz) and foam brush
Instructions
- Trim watercolor paper to board size and glue lightly with a glue stick.
- Lay out larger elements first—twigs, larger leaves—until composition pleases you.
- Secure lightweight bits with the glue stick. Have an adult tack heavier items with the hot glue gun.
- When everything is attached, seal the surface with one thin coat of Mod Podge using a foam brush. Let dry 30 minutes and apply a second thin coat.
- Dry fully 2–4 hours before handling.
How to Display or Gift It
- Clip to a mini easel or hang with baker’s twine for a shelf vignette.
- Make a set of four in different color backgrounds as a birthday present.
- Keep collages flat in a stackable craft drawer until sealed: stackable craft drawers.
- Pinecone Bird Feeders
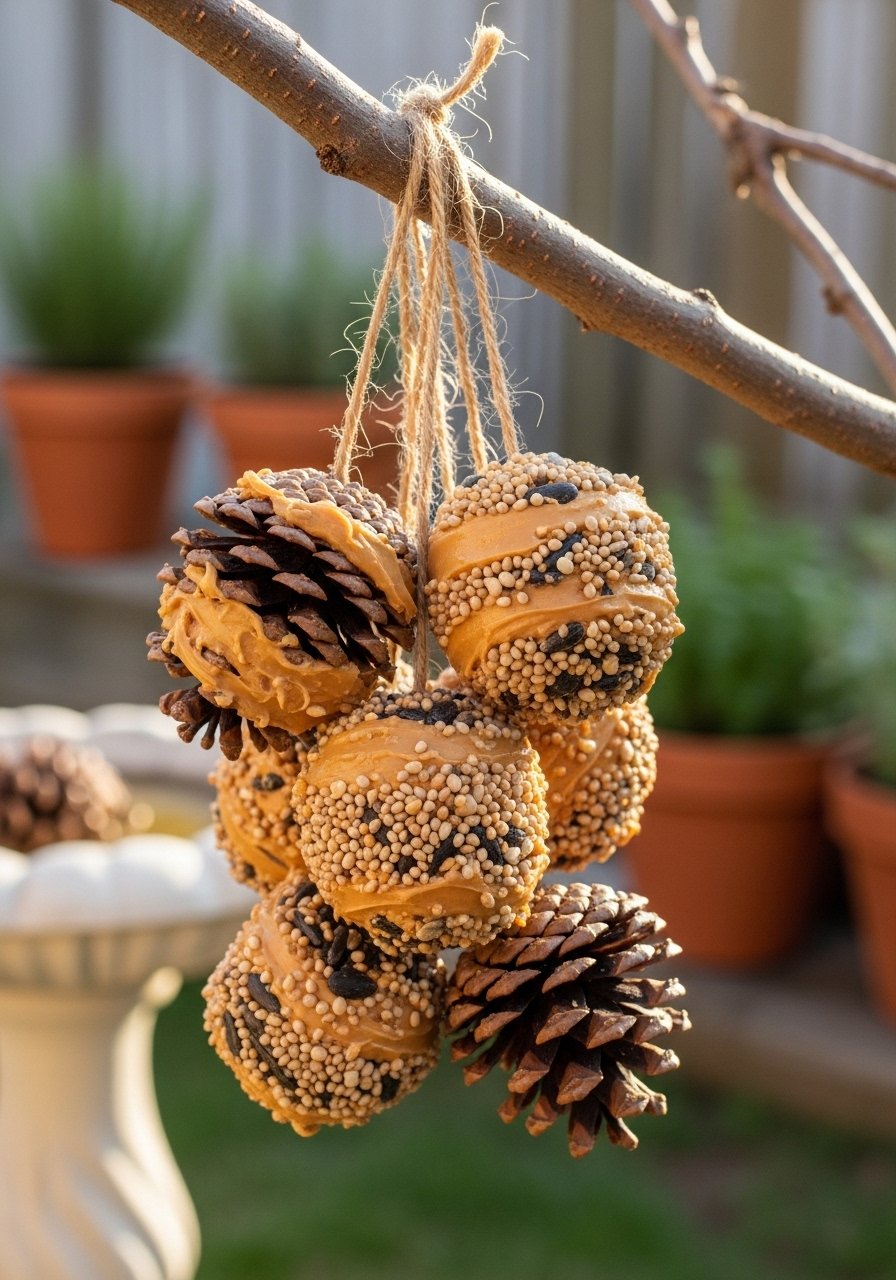
Kids can feed feathered friends with this classic messy favorite. It’s tactile, slightly sticky, and super satisfying to watch birds visit later. Use natural twine for hanging and keep peanut butter allergy awareness in mind.
Materials
- 6 medium pinecones, cleaned and dry
- 1 cup peanut butter (or sunbutter for allergies)
- 2 cups birdseed mix
- Natural twine (10 ft), cut into 6 x 18 in lengths
- Butter knife or small spatula for spreading
- Disposable plate or tray
Instructions
- Tie a length of twine securely near the top of each pinecone to create a hanging loop.
- Spread peanut butter into open scales using the knife. Work into crevices.
- Roll the coated pinecone in birdseed on the tray until well-covered. Press seeds into peanut butter.
- Let sit 15–30 minutes to set.
- Hang them in sheltered spots in the yard, away from predators.
How to Display or Gift It
- Group feeders at varying heights for different bird species.
- Package in a small mesh gift bag with a note on peanut butter alternatives.
- Store unused pinecones dry in a mesh bin: mesh storage bags.
- Mud Pie Terracotta Stepping Stones

Make garden stepping stones using quick-set concrete in terracotta molds. Kids press found items into the surface for impressions. This is hands-on, a little messy, and kids love the weight and texture. Use gloves for sensitive skin.
Materials
- Quick-set cement mix (3 lb bag)
- Terracotta saucers or shallow molds (8–10 in diameter)
- 1 cup sand per mold (if recommended by cement instructions)
- Disposable mixing bucket and wooden stir stick
- Rubber gloves and small trowel
- Leaves, shells, small toys for impressions
- Non-stick spray or petroleum jelly to grease molds
Instructions
- Grease the terracotta saucer lightly with non-stick spray or petroleum jelly.
- Mix cement per package directions—usually mix 2 cups cement with ~1 cup water until pourable. Work quickly; quick-set cures in 10–20 minutes.
- Pour into saucer to about 1 in thickness. Tap to remove air bubbles.
- Press found objects gently into the wet surface. Avoid removing too much material.
- Let set 20–30 minutes until firm to the touch. Remove from mold after 1 hour. Full cure 24–48 hours before placing on the ground.
How to Display or Gift It
- Arrange a few stones as a tiny garden path or use one as a plant coaster.
- Wrap with burlap and a twine bow for a housewarming gift.
- Keep unused cement in its original bag sealed and dry in a garage.
- Twig Frame Photo Craft
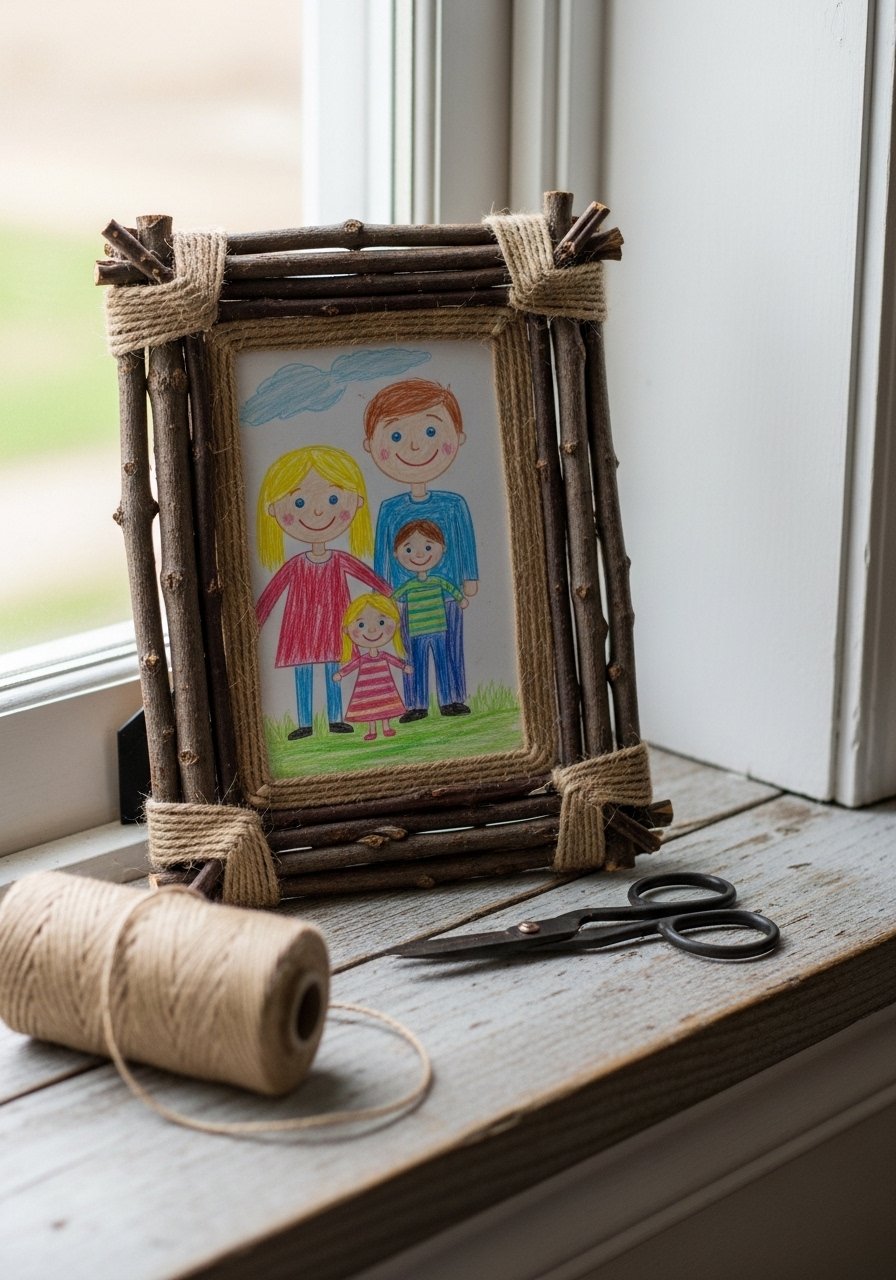
This frame uses gathered twigs and a hot glue gun to make a woodland picture holder. Kids love building the "log cabin" look. A small clamp or clothespins help while glue cools.
Materials
- 8–12 small straight twigs (~6–8 in long)
- Thin plywood backing (5 x 7 in) or thick cardboard
- Hot glue gun (low-temp) and 10 glue sticks
- Jute twine (3 mm, 5 yds)
- Craft knife or pruning shears (adult use)
- Mini clothespins for photo display
Instructions
- Trim twigs to similar lengths with pruning shears. Smooth any rough ends.
- Lay out twigs in two overlapping rows to frame the plywood.
- Glue ends to plywood with hot glue; hold in place with clothespins until set (1–2 minutes).
- Wrap junctions with jute twine for a rustic look and extra hold. Knot securely.
- Attach a small clothespin to the top center to hold a photo.
How to Display or Gift It
- Prop on a small wooden easel for a tabletop display.
- Make several sizes for a gallery shelf.
- Package in a kraft box for gifting with twine: kraft gift boxes.
- Seed Bombs for Pollinator Patches

Mix clay, compost, and native seeds into little balls kids can toss into bare spots. It’s delightfully messy and helps pollinators later. Store dry seed bombs until planting season.
Materials
- 2 cups powdered clay (or red clay soil)
- 2 cups potting compost or screened compost
- 1 cup native wildflower seed mix (small seeds)
- 3/4 cup water (approx; adjust)
- Baking tray for drying
- Small scoop or spoon
Instructions
- Combine clay and compost in a bowl. Stir in seeds.
- Add water slowly until mixture holds together when pinched (texture like playdough).
- Roll mixture into 1–1.5 in balls. Place on a tray.
- Let dry 24–48 hours in a warm spot. Flip once to ensure even drying.
- Store in a paper bag until ready to toss into dirt in spring.
How to Display or Gift It
- Tie a few in a small muslin bag with planting instructions.
- Label the seed mix and suggested planting months.
- Keep extras in a cool, dry craft organizer: fabric muslin bags.
- Nature Crown Weaving
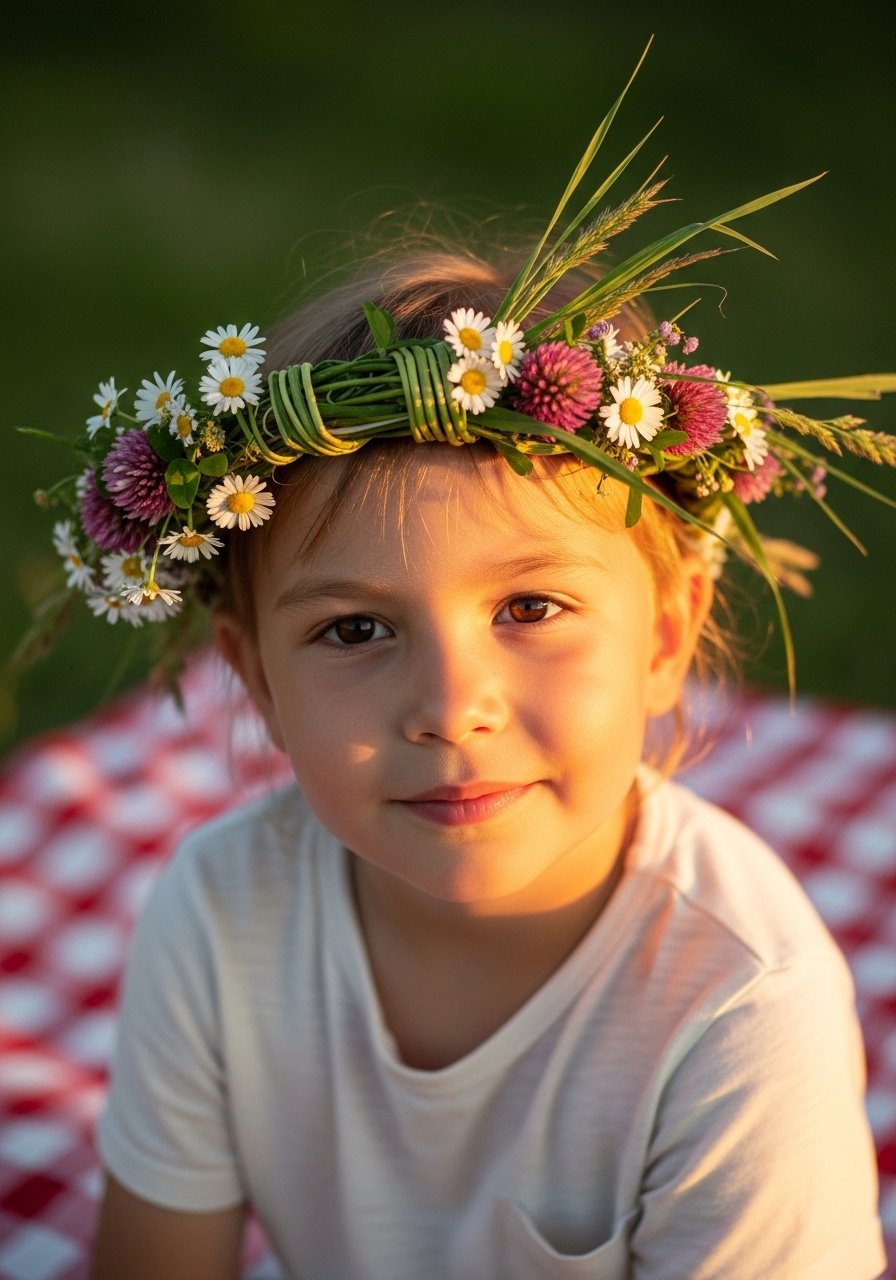
Weave grasses and flexible stems into a wearable crown. It’s immersive, portable, and perfect for pretend play. Use floral tape to secure joins if stems are brittle.
Materials
- Long grasses or flexible stems (6–10 pieces per crown, each 18–24 in)
- Small wildflowers or clover heads (12–20)
- Floral tape (green, 1 roll)
- Scissors or snips
- Optional: thin ribbon for ties
Instructions
- Measure a length of grass to fit the head with a small overlap; form a circle and secure with floral tape.
- Weave additional stems through the circle—over and under—to build thickness. Add new stems by tucking and taping.
- Tuck flowers into the weave and secure with tape as needed.
- Trim ends and wrap with ribbon for comfort.
How to Display or Gift It
- Wear immediately for outdoor play; these crowns are delicate and best used same-day.
- For a longer-lasting option, swap in dried flowers or paper blooms.
- Store flat in a shallow box lined with tissue to preserve shape.
- Chalk Mural Map for Backyard Adventures
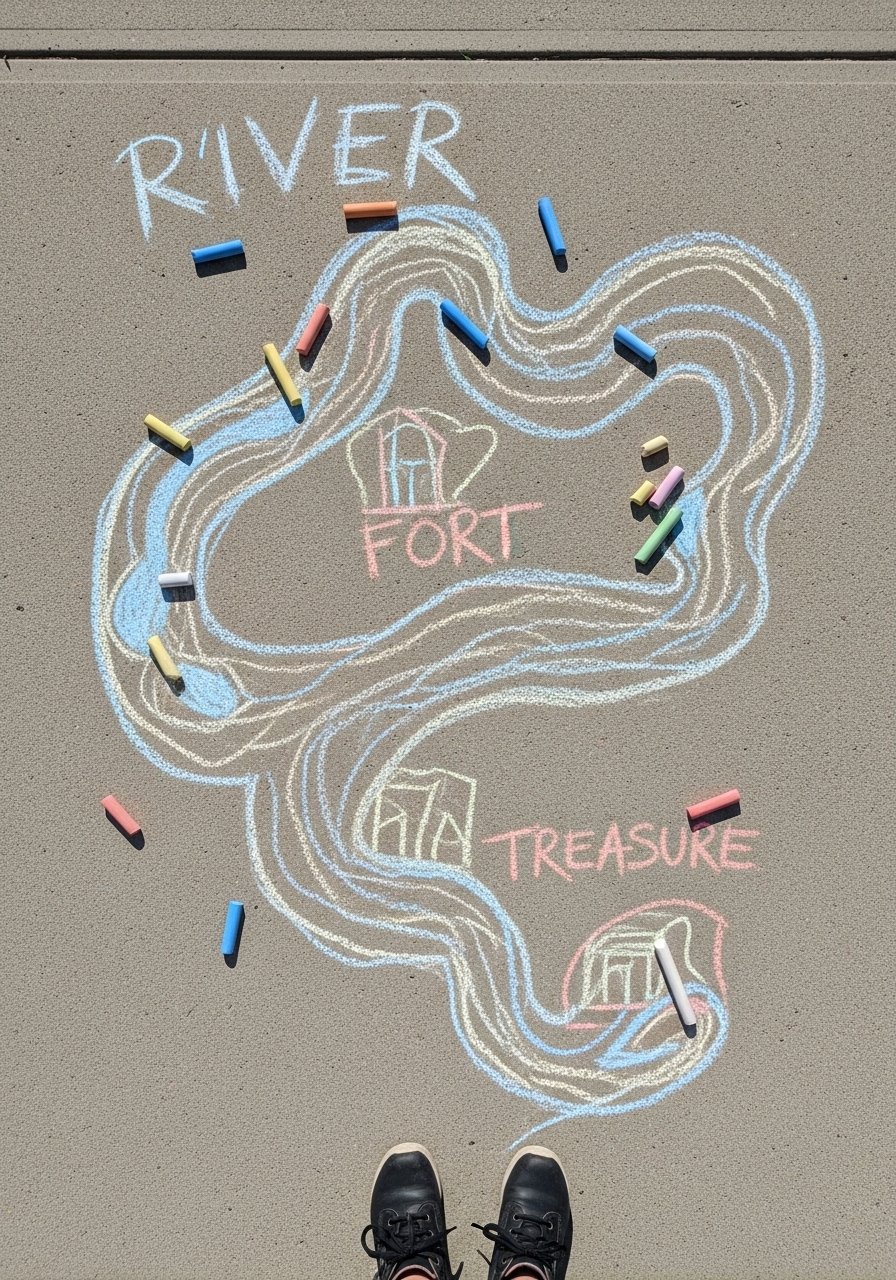
Draw a giant game map on the driveway with sidewalk chalk. Kids can create landmarks from the yard’s natural features and play treasure-hunt games. A chalk holder keeps little hands cleaner.
Materials
- Large sidewalk chalk set (24 sticks)
- Spray bottle with water for blending colors
- Chalk holder for toddlers (optional)
- Painter’s tape to mark gridlines (if desired)
- Small printed “map key” or stick signs
Instructions
- Plan the map roughly on paper—include river, forest patch, fort.
- Use chalk to outline major features with light strokes.
- Fill color with broad side of chalk; blend with a spritz of water for soft gradients.
- Add small details like footprints, stars, or X marks.
- Play the game and rinse off later if you want a clean slate.
How to Display or Gift It
- Photograph the finished mural for a mini portfolio in a photo album.
- Pack chalk in a mesh bag and keep with outdoor toys: outdoor chalk set with holder.
- Make a seasonal map for each playdate.
- Pressed Flower Bookmarks
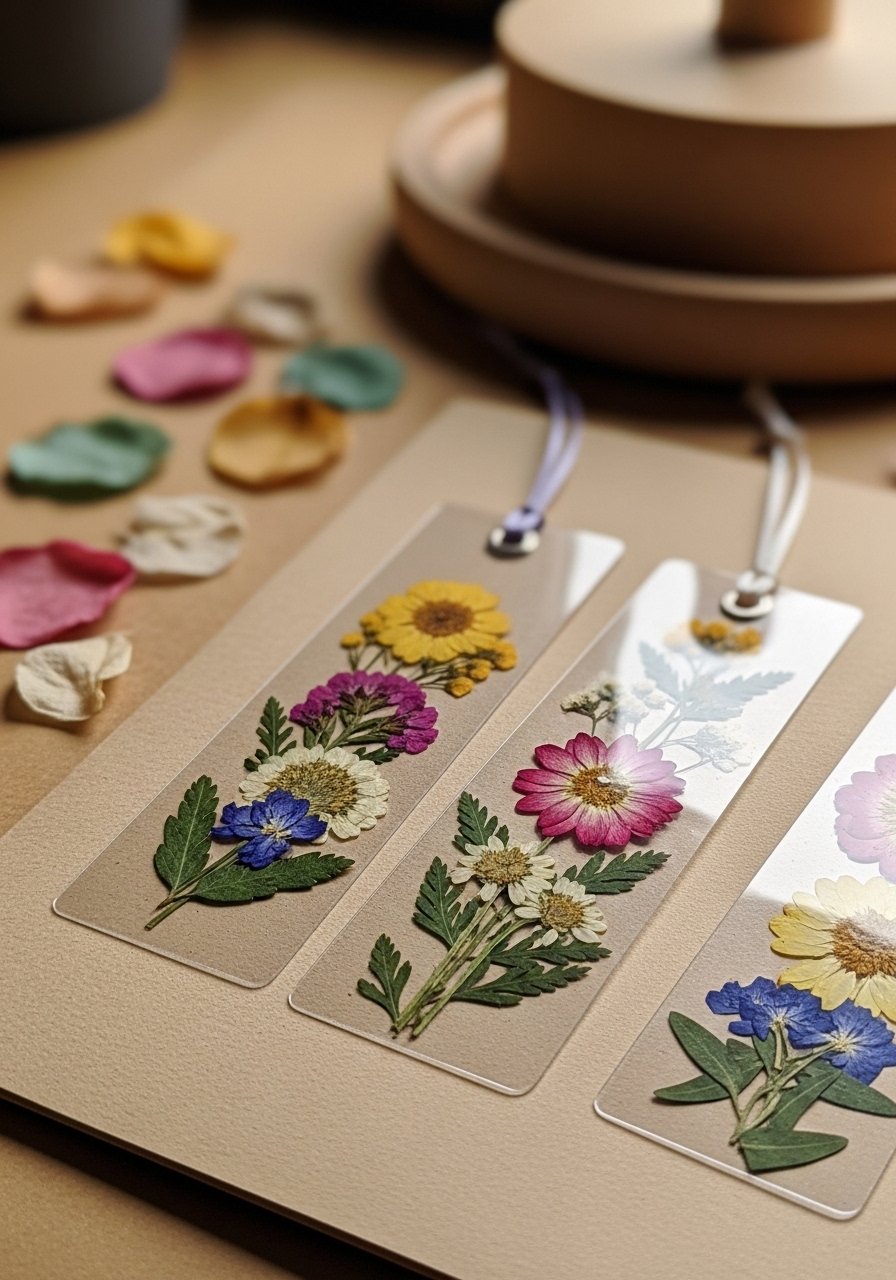
Press flowers and lam them into thin bookmarks. This quiet craft feels peaceful and produces a functional keepsake. A flower press helps, but you can use heavy books and blotting paper.
Materials
- Fresh flowers and small leaves (pressed and dried)
- Bookmarks cut from cardstock (2 x 6 in, 5 pieces)
- Self-adhesive laminating sheets (5) or clear Mod Podge (matte)
- Hole punch and ribbon (1/4 in, 3 colors)
- Blotting paper and heavy books (if not using a press)
Instructions
- Press flowers at least 7–10 days between blotting paper under heavy books or in a flower press.
- Arrange pressed elements on cardstock bookmarks until you like the layout.
- Cover with a laminating sheet and trim edges, or brush thin coats of Mod Podge—2 coats, 30 minutes drying between coats.
- Punch a hole and tie ribbon.
How to Display or Gift It
- Bundle three bookmarks with twine and kraft tags for a thoughtful gift.
- Store bookmarks flat in a small photo box to prevent bending: small photo storage box.
- Nature Stamping with Pine Cones and Fruit
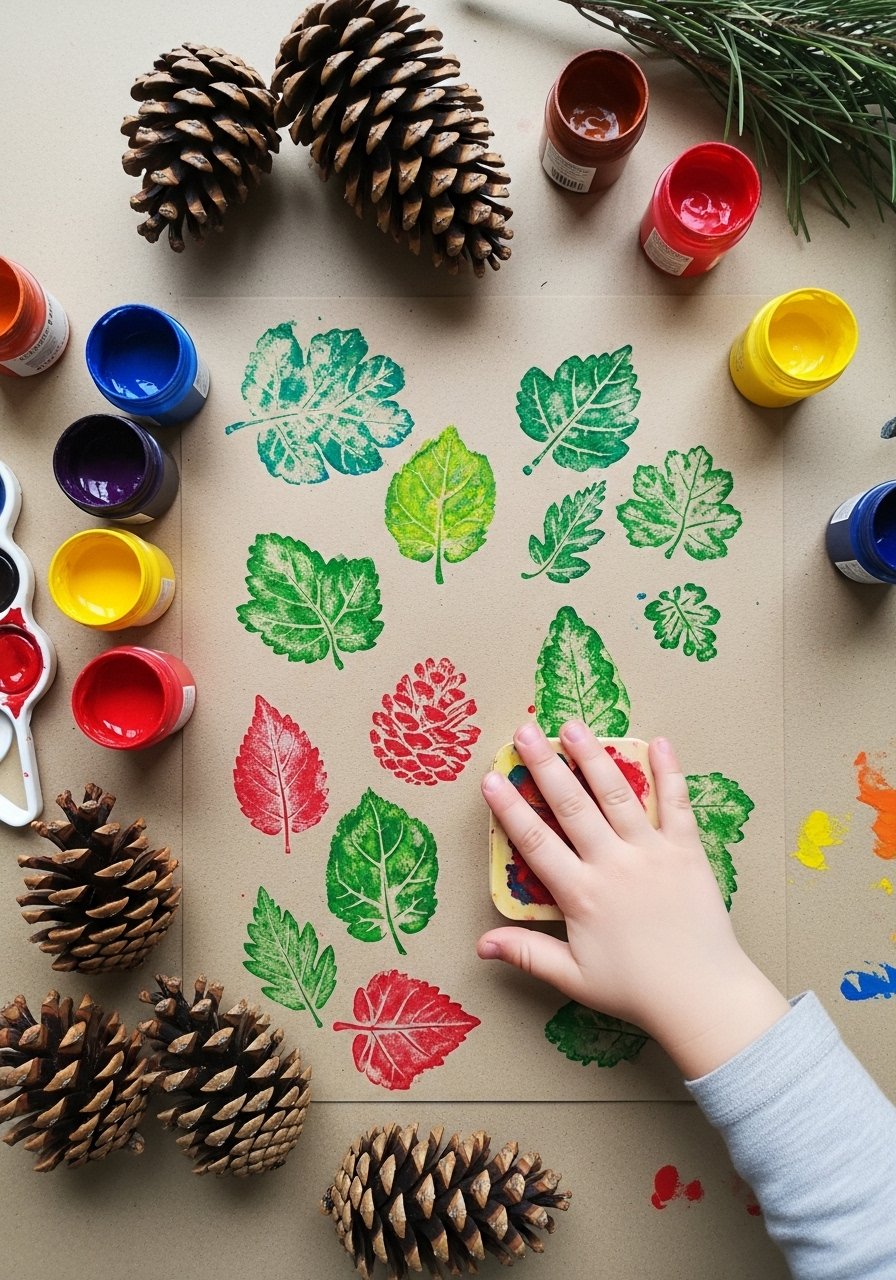
Use pine cones, apples, or halved potatoes as stamps to print on paper or fabric. This is wonderfully messy and teaches pattern play. Use washable paints for easy cleanup.
Materials
- Washable tempera or acrylic paint (6 colors, 20 ml each)
- Pine cones, halved apples, potatoes, carved shapes (assorted)
- Kraft paper rolls or plain fabric tote bags (1 per child)
- Foam brushes and a shallow paint tray
- Baby wipes and a large bin for washing
Instructions
- Set up a paint station with trays for each color.
- Press stamps lightly into paint with foam brushes then onto paper or fabric. Use even pressure.
- Let prints dry 30–60 minutes for paper, 24 hours for painted fabric before light use.
- For fabric prints, heat-set with an iron per paint instructions if needed.
How to Display or Gift It
- Use printed fabric to sew simple pillow covers or tote bags.
- Roll finished kraft sheets for gift wrap.
- Store stamps in a plastic bin between uses: plastic storage bin.
- Sun Printing with Cyanotype Paper
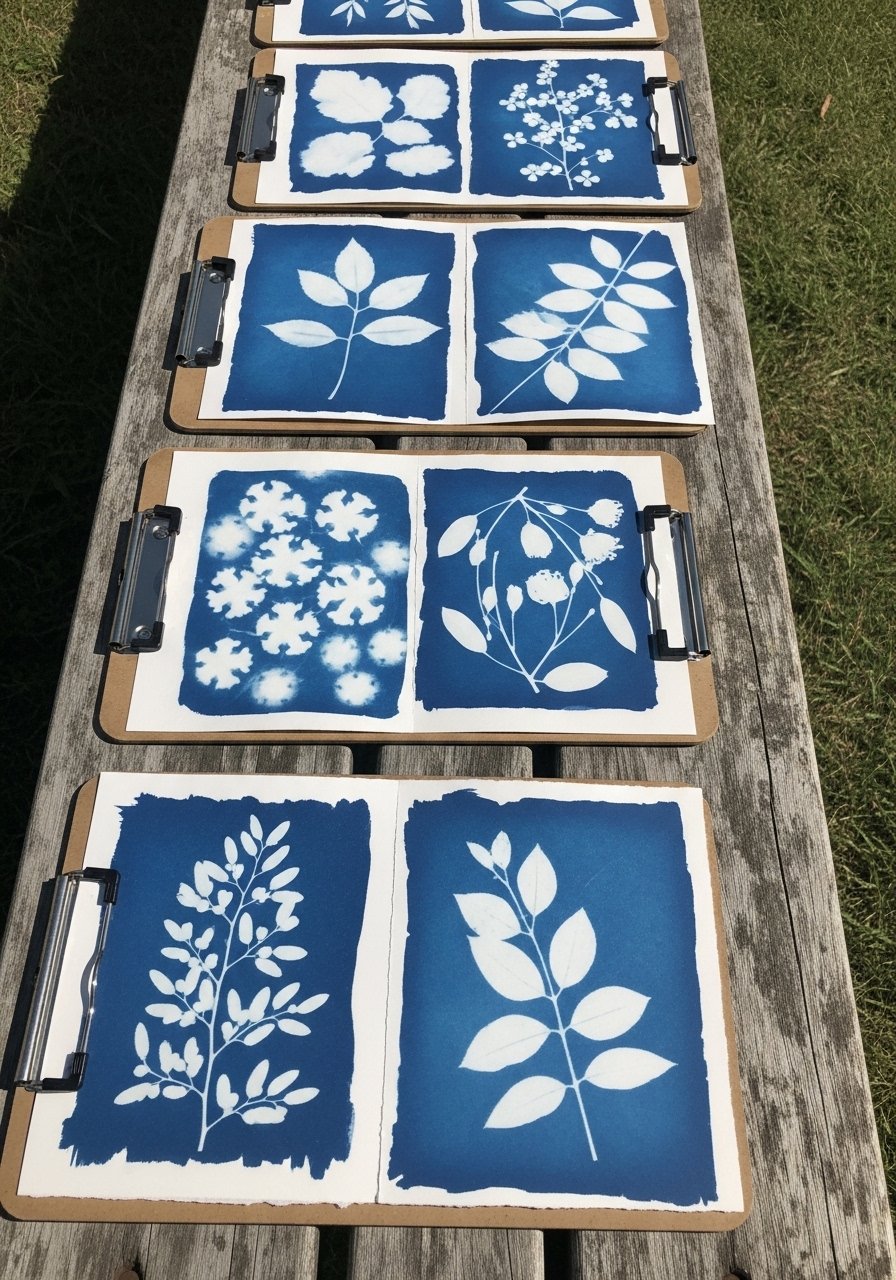
Sun prints (cyanotypes) create high-contrast nature silhouettes with just sunlight and special paper. This scientific-feeling craft thrills older kids. Follow package darkroom-safe instructions and rinse times closely.
Materials
- Cyanotype sun-print paper pack (8 sheets, 5 x 7 in)
- Glass or plexiglass sheets to hold objects flat
- Assorted leaves, flowers, small toys for silhouettes
- Shallow tray of water for rinsing
- Clipboards to press sheets flat
Instructions
- Work quickly—place cyanotype paper face up in sunlight. Arrange natural objects on top and cover with glass to keep flat.
- Expose 1–5 minutes in bright midday sun (test first; times vary by brand).
- Remove objects; immediately rinse in water 30–60 seconds until white areas stop washing out.
- Lay flat to dry 1–2 hours. Colors will deepen as they dry.
How to Display or Gift It
- Mat and frame in small wooden frames for a modern cottagecore look.
- Pack sets of prints tied with twine as a gift for grandparents.
- Keep unused paper in opaque packaging until use per product storage instructions.
- Bark Rubbings and Field Guide Pages
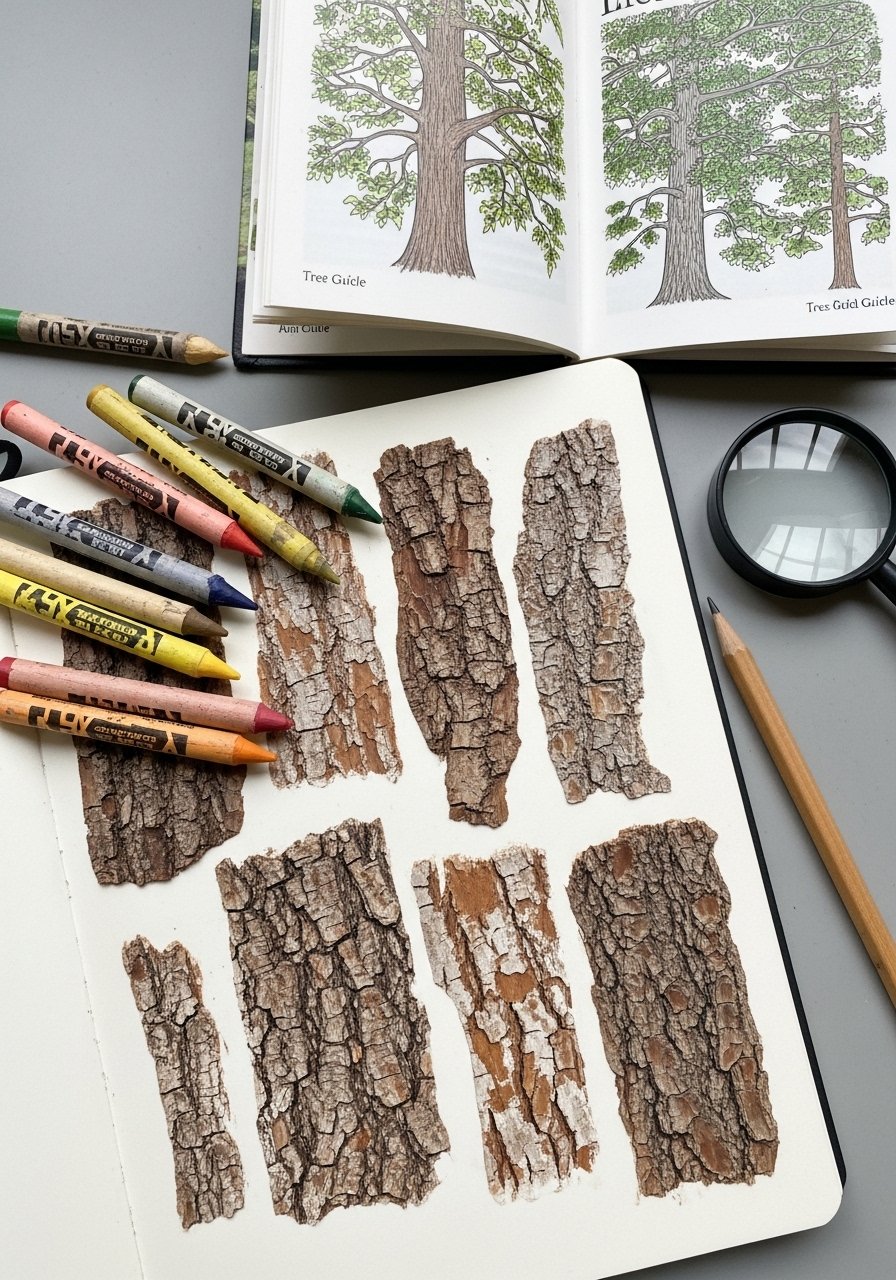
Take rubbings of bark, leaves, and textures to create a homemade field guide. This encourages observation and journaling. Crayons with paper sleeves make rubbings cleaner.
Materials
- Sketchbook or heavy paper (9 x 12 in, 1 per child)
- Crayons with sleeves or charcoal sticks (12)
- Tape to secure paper in place
- Field guide or printout for ID notes
- Small clip or elastic to keep book closed
Instructions
- Tape a sheet of paper over the bark or textured surface to keep it from slipping.
- Hold paper taut and rub the side of a crayon firmly across the surface to reveal texture.
- Label each rubbing with date, location, and notes in pencil.
- Add watercolors or colored pencil accents after rubbing if desired.
How to Display or Gift It
- Bind several pages into a backyard nature guide.
- Slip pages into plastic sleeves for long-term storage in a binder: 3-ring binder with sleeves.
- Pair completed pages with a small magnifying glass for gift sets.
- Wind Chimes from Found Objects

Assemble wind chimes using driftwood, shells, beads, and twine. It’s noisy, tactile, and charming. Pre-drilling holes in harder materials makes assembly smoother.
Materials
- Driftwood piece or small branch (10–12 in)
- Shells, wooden beads, small metal washers (12–20)
- Nylon string or fishing line (10 ft)
- Small hand drill or awl for holes (adult use)
- Scissors and tape to hold strands while knotting
Instructions
- Drill small holes in shells or beads as needed.
- Cut strings to varying lengths (6–10 in). Tie beads and shells on each strand and knot at the bottom to secure.
- Tie strands evenly along driftwood and knot securely. Add a central clapper if desired.
- Test balance and adjust strand lengths until it hangs level.
How to Display or Gift It
- Hang in a sheltered porch spot to prevent breakage in storms.
- Wrap with tissue and place in a shallow craft box for gifting.
- Store small metal washers and spare beads in a divided organizer: craft bead organizer.
- Painted Garden Flags
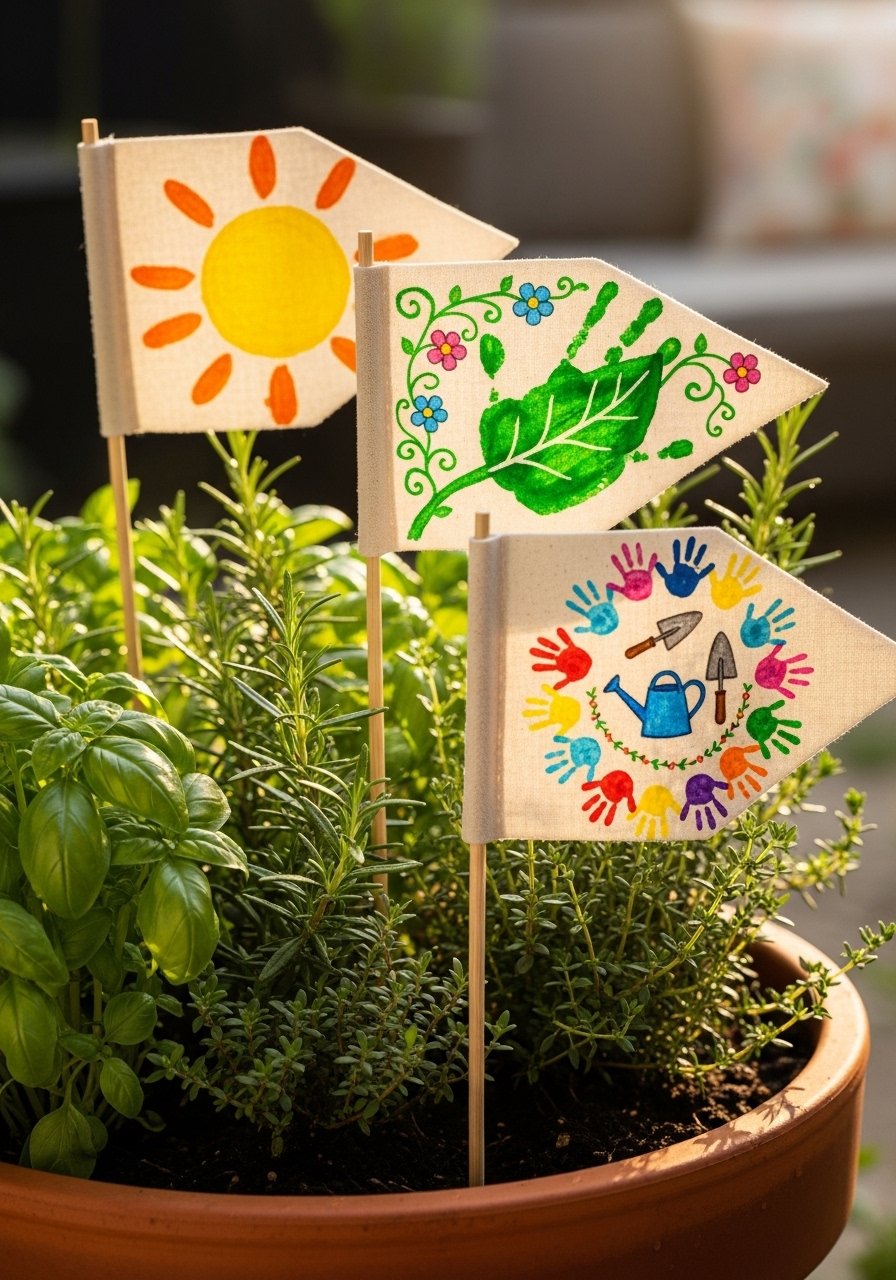
Use fabric paint on small canvas flags to add cheer to planters. This is fast, involves hands or stamps, and flags hold up with outdoor fabric paint.
Materials
- Canvas pennant flags (5 x 7 in, 4 flags)
- Outdoor fabric paint set (6 colors)
- Foam brushes and small sponge stamps
- Wooden dowels (4, 12 in) and jute twine
- Painter’s tape to mask designs
Instructions
- Tape or secure flag to a flat surface.
- Apply paint with foam brushes or stamps; use thin layers. Dry 15–30 minutes between layers.
- Heat-set per paint instructions (iron on low or as manufacturer directs).
- Attach flag to dowel with tape and twine.
How to Display or Gift It
- Swap flags seasonally on porch or in pots.
- Bundle a set for a hostess gift with a terra cotta pot.
- Store extra flags flat in a craft envelope to avoid creases.
- Mud Painting on Recycled Cardboard
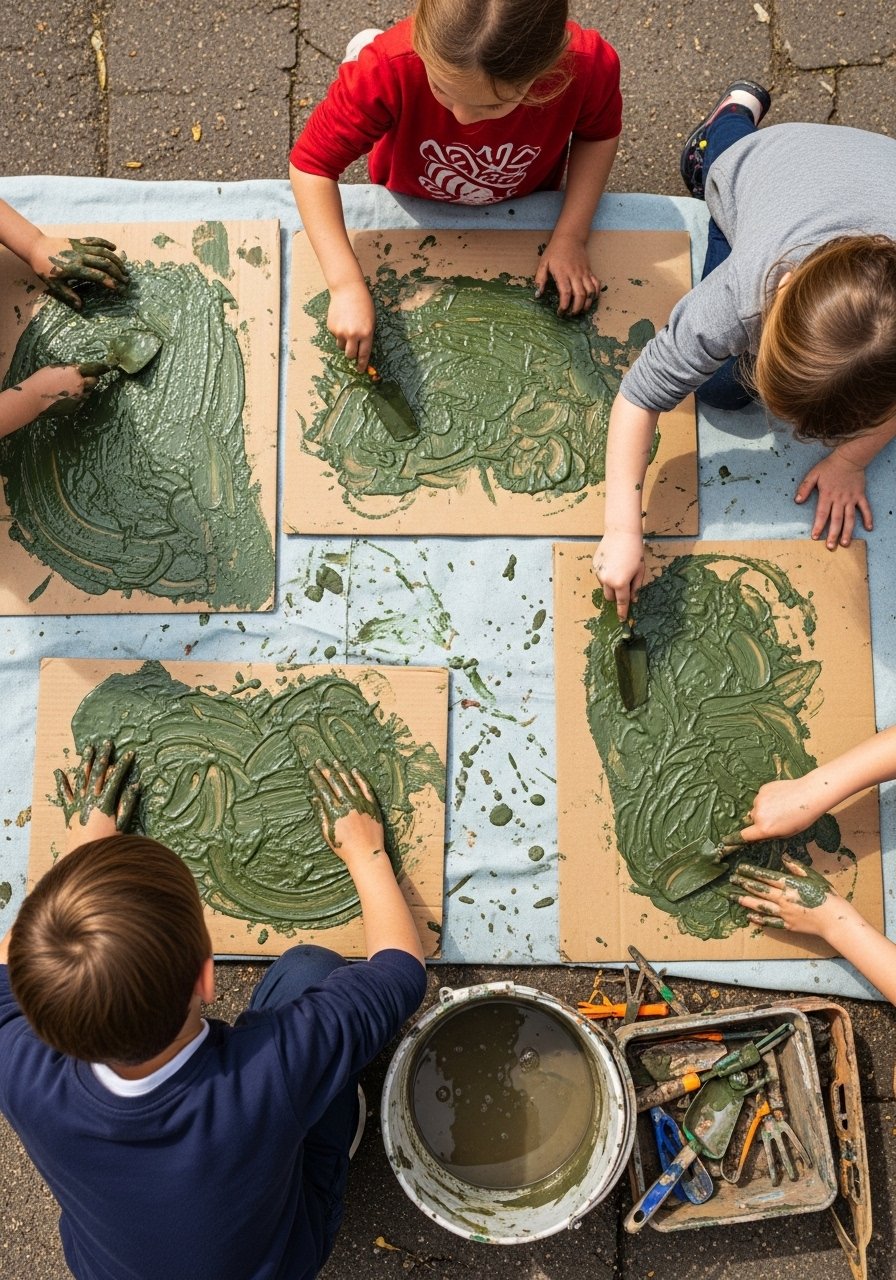
Mud painting is the epitome of messy fun and sensory play. It’s low-cost, earth-friendly, and great for younger kids exploring texture. Use thick cardboard as a canvas.
Materials
- Large recycled cardboard panel (24 x 18 in)
- Bucket for mixing mud and water
- Small paintbrushes and spatulas
- Optional: natural pigments (turmeric, cocoa) for color
- Spray bottle of water for blending
Instructions
- Mix soil and water to a paint-like consistency. Stir well.
- Use brushes or hands to paint on cardboard. Layer mud for texture.
- Add natural pigments sparingly for warm hues.
- Let dry fully 24–48 hours—thicker areas may take longer.
- If mold concerns appear, discard and create new work the next time.
How to Display or Gift It
- Photograph finished pieces for a keepsake portfolio.
- Use laminated photos to make a storybook of play days.
- Store cardboard flat and dry before painting to avoid sagging.
- Twig and Yarn Weaving Looms
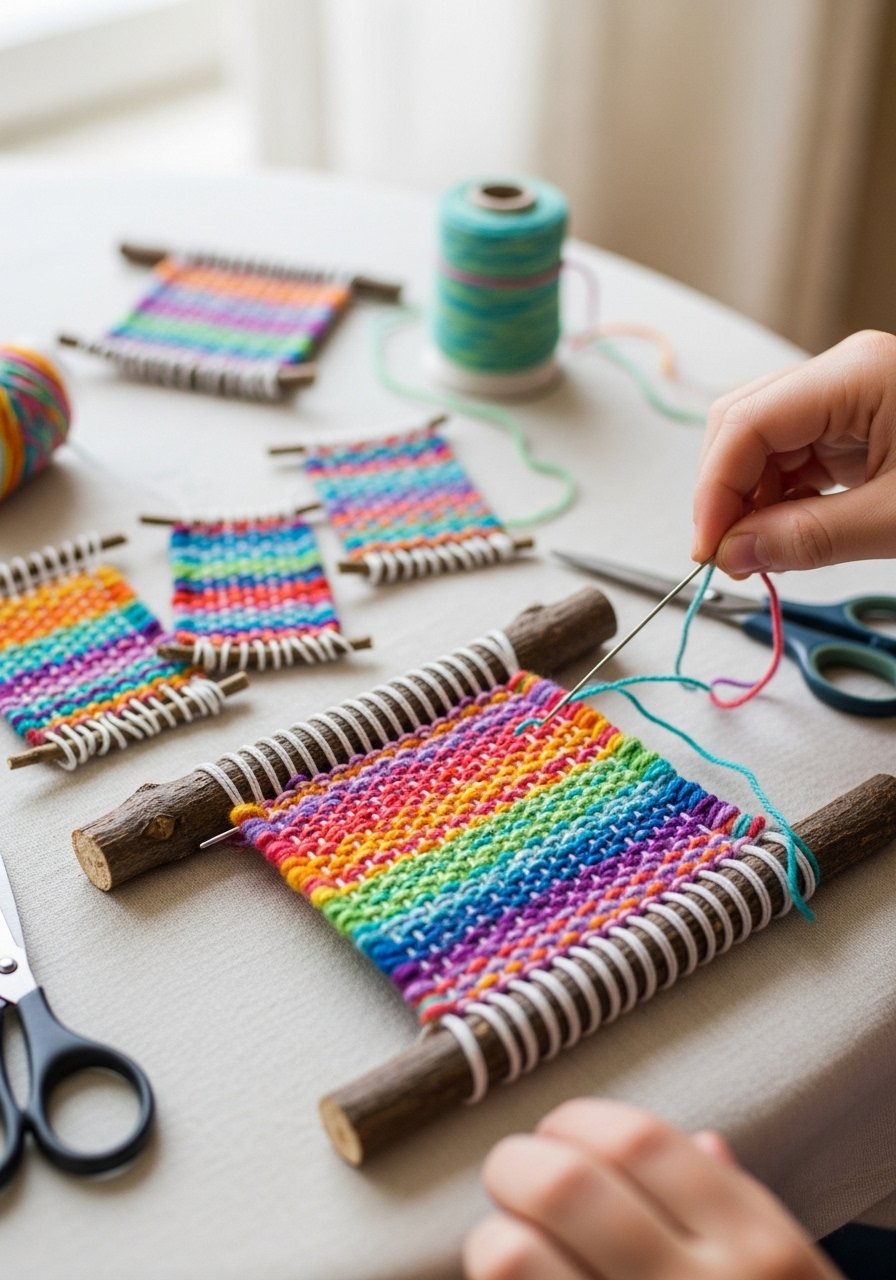
Create tiny looms with twigs and weave scraps of yarn for textured art. This craft builds pattern skills and uses up yarn scraps. A blunt tapestry needle speeds weaving.
Materials
- 4 sturdy twigs per loom (each 8–10 in)
- Strong yarn (assorted, 50 g each small ball)
- Blunt tapestry needle (1)
- Scissors and hot glue (optional)
- Small wooden bead for finishing knot (optional)
Instructions
- Form a square or rectangle with twigs and tie corners with twine or secure with hot glue.
- Warp the loom by wrapping yarn around opposite sides to create vertical strings.
- Use the tapestry needle to weave horizontal yarn through the warp. Alternate over/under for texture.
- Finish by tying off ends and adding a bead if desired.
How to Display or Gift It
- Hang mini weavings on a simple dowel or stick for a boho wall cluster.
- Make multiples as a set for a friend; place them in a gift tray.
- Store leftover yarn in a clear craft bin: yarn storage box.
- Painted Shell Wind Spinner
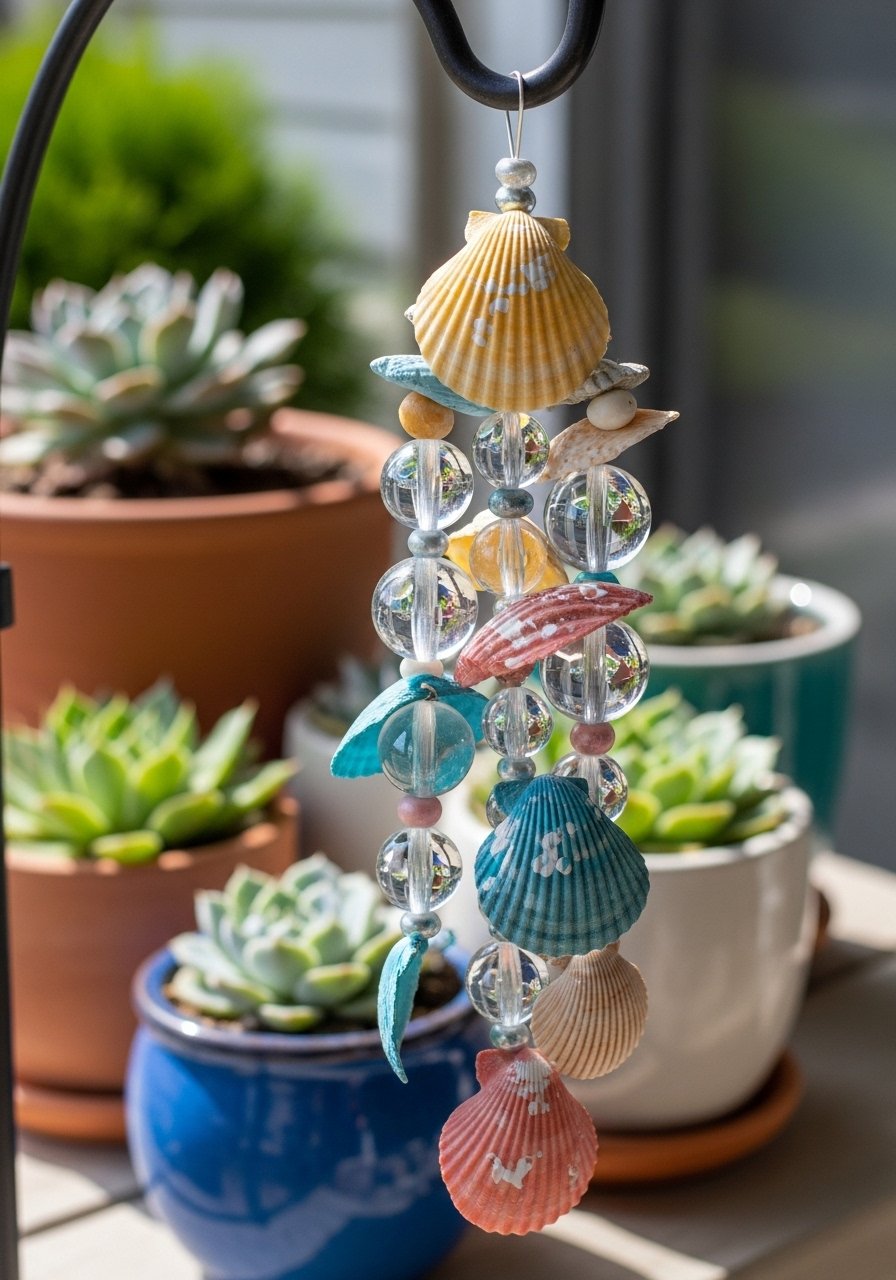
Use shells strung with beads and small driftwood to create a seaside spinner. This is calming, slightly fiddly, and a nice way to use found beach items. Waterproof paint and sealant make it outdoor-safe.
Materials
- Assorted shells (12–20)
- Clear nylon line or fishing line (10 ft)
- Glass or wooden beads (20)
- Acrylic enamel spray sealer (1 can)
- Small driftwood piece for top anchor
- Drill with tiny bit for shell holes (adult use)
Instructions
- Pre-drill tiny holes in shells carefully.
- Cut lengths of fishing line and thread shells and beads in desired patterns. Knot below and above each shell to space them.
- Tie strands to the driftwood anchor.
- Spray light coats of enamel sealer 2 coats, 10 minutes apart. Let cure 24 hours before hanging.
How to Display or Gift It
- Hang near a sheltered porch to avoid storms.
- Pack wrapped in tissue with a note about gentle hanging care.
- Store spare beads and line in a small hardware box.
- Nature-Inspired Stained Glass with Tissue Paper
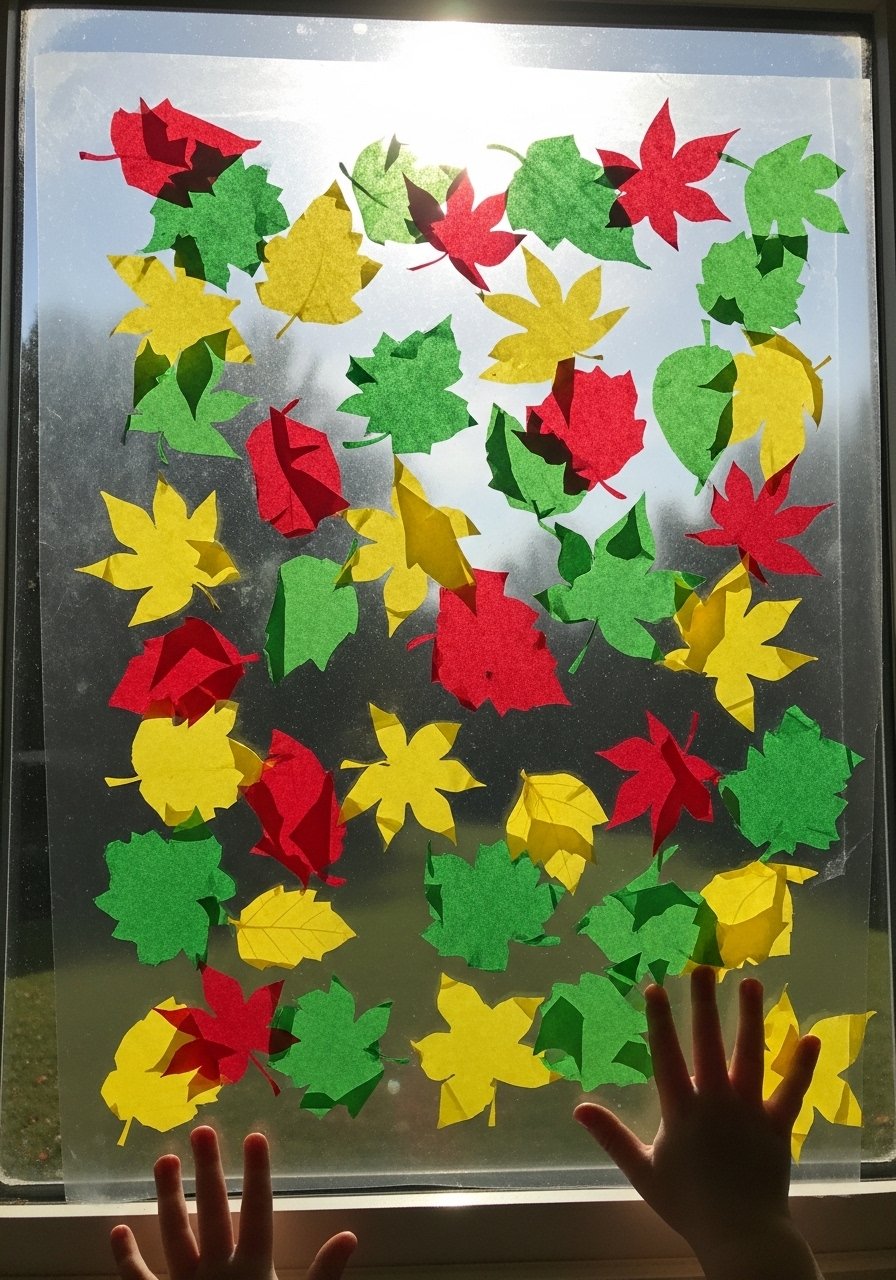
This mess-friendly "stained glass" uses tissue paper between contact sheets. It’s colorful, forgiving, and sticks to any window. Use contact paper outdoors only in sheltered spots.
Materials
- Self-adhesive clear contact paper (12 x 12 in sheets, 4)
- Tissue paper sheets in assorted colors (8 sheets)
- Scissors and craft punches (optional)
- Thin black cardstock for faux leading (optional)
- Ruler and pencil for measuring
Instructions
- Cut contact paper to a manageable square and peel backing.
- Arrange tissue paper shapes on the sticky side. Overlap colors for blending.
- Cover with second contact sheet and smooth with a brayer or your palm.
- Trim edges and attach to a clean window. Replacement will peel off cleanly.
How to Display or Gift It
- Make a set of seasonal panels for a sliding glass door.
- Store tissue scraps in a zipper bag for future mosaics.
- Package completed panels flat between cardstock.
- Tiny Fairy Gardens in Teacups

Build micro-landscapes in old teacups using moss, pebbles, and small figurines. It’s a gentle, creative project that blends gardening and craft. Supervise soil use around young children.
Materials
- Vintage-style teacup or small planter (per garden)
- Small potting mix (1–2 cups)
- Sheet moss (3 x 3 in pieces)
- Tiny pebbles and plant cuttings (assorted)
- Miniature figures or recycled craft bits
- Small spoon and spray bottle for watering
Instructions
- Fill the teacup 3/4 with potting mix and tamp lightly.
- Arrange moss and small plants or succulents; press gently to anchor.
- Create paths with pebbles and add miniature figures.
- Mist lightly with a spray bottle after planting and place in indirect light. Water sparingly; succulents need every 2–3 weeks, moss prefers light misting weekly.
How to Display or Gift It
- Place on a sunny windowsill or a shaded shelf on a porch.
- Wrap with cellophane and a ribbon for gifting.
- Keep spare pebbles and moss in a small craft bin.
Thank you for spending time with these outdoor craft ideas for kids—there’s a little muddy play, plenty of paint, and lots of ways to showcase what kids make. I hope you try a few projects this weekend and snap a photo to save to your craft board. Which one will you start with—the messy mud painting or the delicate pressed bookmarks?
If you want one tool recommendation that makes many of these projects faster and cleaner, a temperature-controlled hot glue gun really helps with quick joins and neat finishes: temperature control hot glue gun. Share these ideas with a friend, pin this list for later, and tell me which project your kids loved most.


