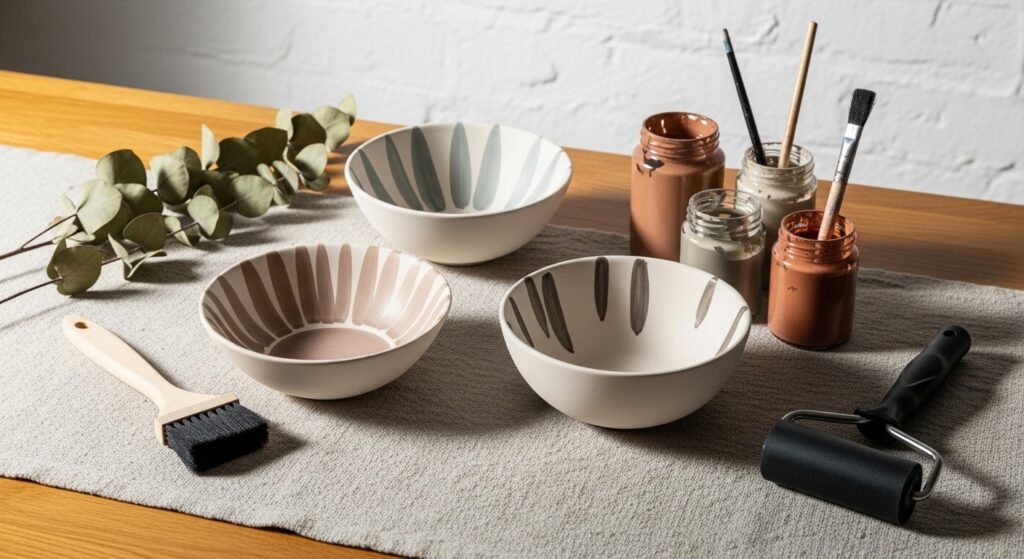
Bring the outside in with simple bowls that feel like a walk through the garden. These 21 nature inspired ceramic bowl painting ideas give you a range of looks — from delicate botanical linework to rustic stone glazes. You’ll find projects for quick weekend makes, handfuls that are great for gift-giving, and a few that use epoxy for a glossy, water-like finish.
I start many of these projects with a flat foam brush and small detail brush set because they make both washy leaves and crisp lines easy. Try my favorite small flat brush set for precise edges and smooth strokes. For stencils or crisp edges, painter’s tape is a reliable friend; press it down firmly for clean lines.
Each project below includes a full materials list, step-by-step instructions with realistic drying and curing times, and display or gifting ideas. Whether you’re a beginner or you’ve painted bowls before, you’ll find nature inspired ceramic bowl painting ideas that fit your time, style, and skill level.
- Meadow Sprig Watercolor Bowl
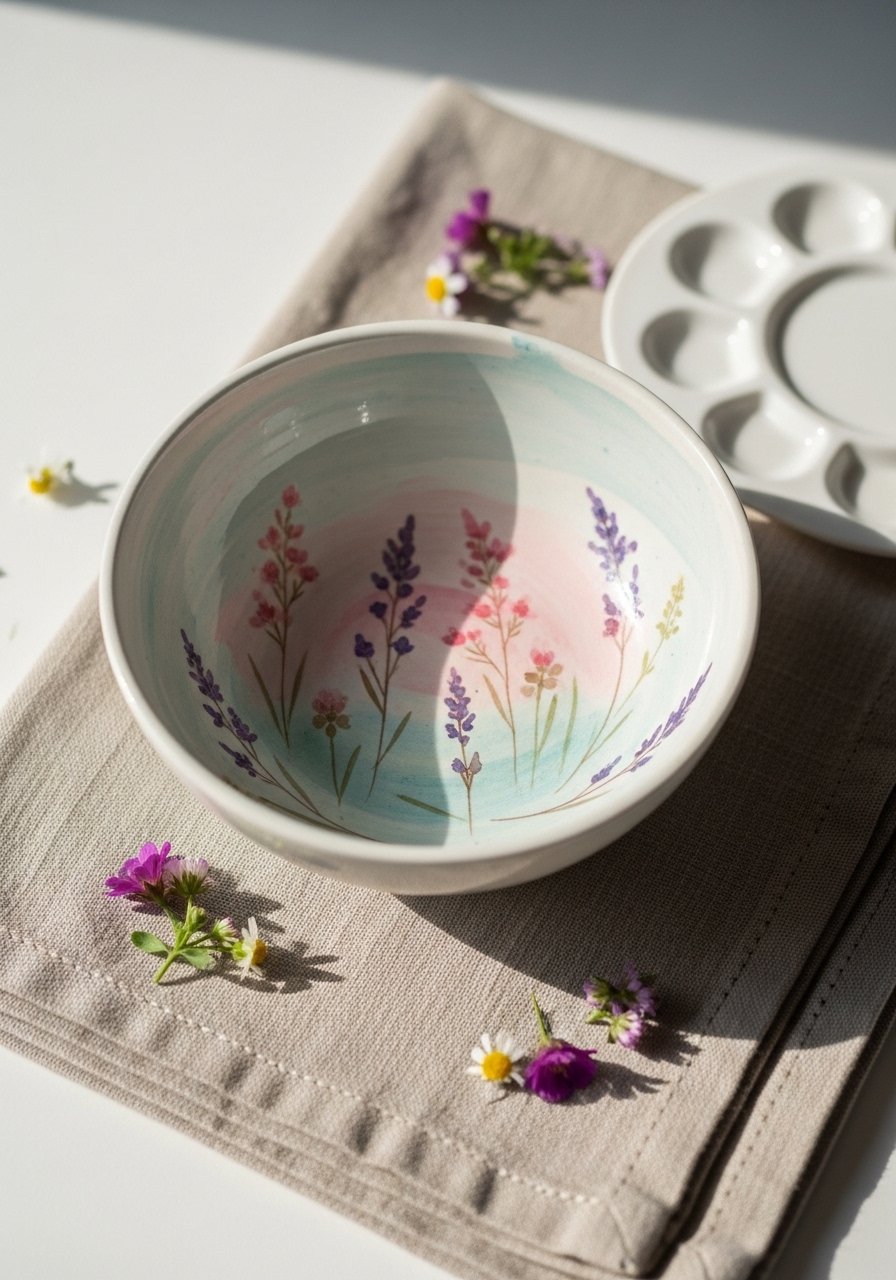
This bowl mimics watercolor on porcelain for a soft meadow look. The paint pools slightly in low areas for a translucent, layered feel. It’s great if you like a gentle, cottagecore vibe and want something tactile and light. Beginners will love this forgiving wash technique.
Materials
- 1 bisque-fired ceramic bowl, 6–7" diameter
- Acrylic ceramic paints in sage, soft yellow, and blush (2 oz each)
- Ceramic medium or flow extender, 1 oz
- Small round detail brush (#1), small flat brush (6 mm)
- Palette or mixing tray
- Rubbing alcohol wipe, one
- Clear ceramic sealer, satin, 2 coats (spray)
Instructions
- Wipe the bowl with a rubbing alcohol wipe and let it fully dry (5 minutes).
- Thin the acrylic paint with 1:4 ceramic medium to paint ratio for a watercolor wash.
- Load your small flat brush with thinned sage and sweep loose strokes along the bowl inside. Let the first wash dry to the touch (10–15 minutes).
- Add soft yellow and blush washes in separate places to suggest wildflowers; blend edges while wet.
- Use the round detail brush with undiluted sage to paint tiny sprig details over the washes.
- Let cure 24 hours. Apply two thin coats of clear spray sealer, 10 minutes between coats. Full cure 48 hours.
How to Display or Gift It
- Nest this bowl with linen napkins for a cottagecore shelf vignette.
- Tie with twine and tuck dried lavender for gifting.
- Store stacked with soft tissue between pieces in a craft organizer tray to avoid scuffs. Consider a small wooden easel for photographing the piece before gifting.
- Pebble-Stipple Stoneware Bowl
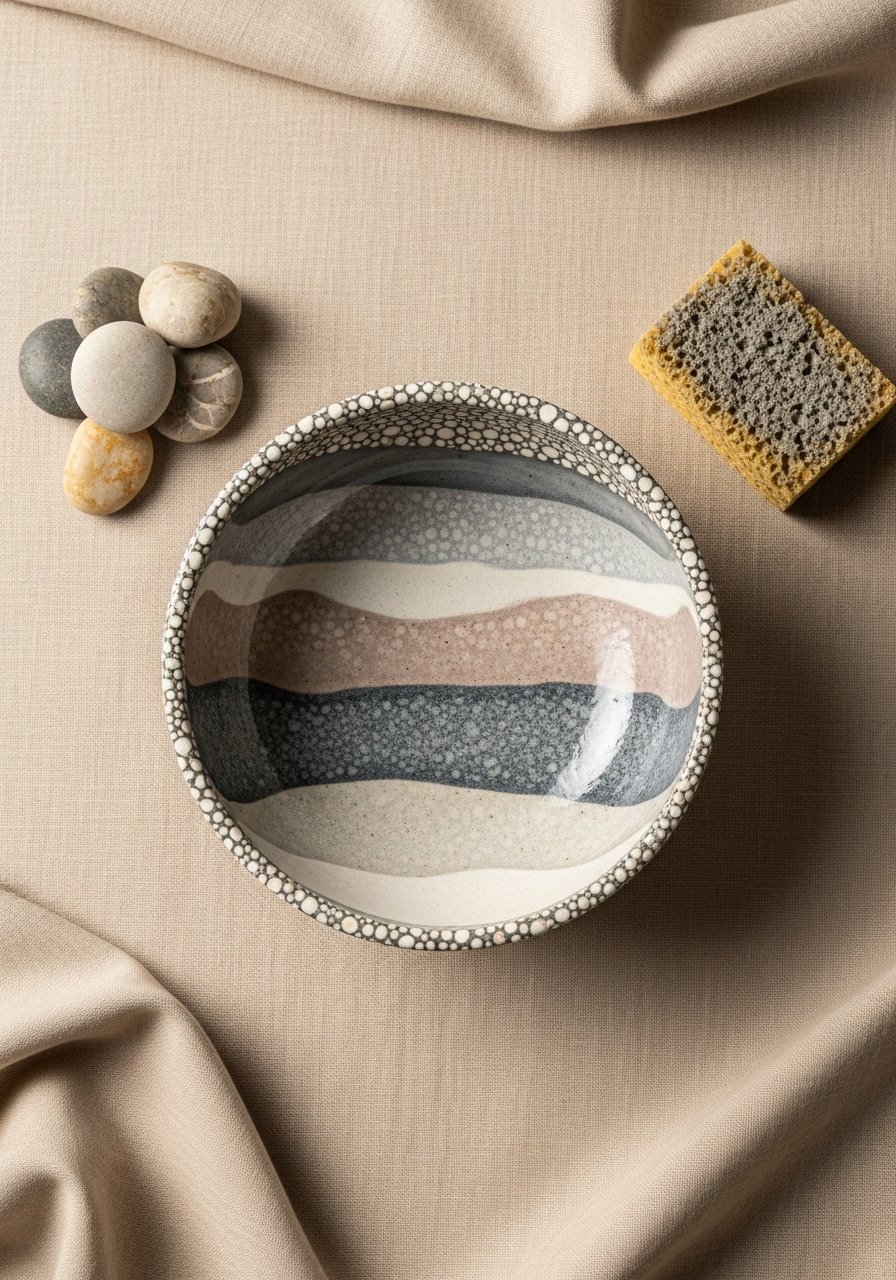
This project uses stippling to mimic river pebbles and weathered stone. The texture comes from layering tiny dots with a stiff brush or sponge. It pairs perfectly with japandi and minimalist decor styles. Intermediate crafters will enjoy the meditative dotting.
Materials
- 1 raw stoneware bowl, 7–8" diameter
- Matte acrylic paints: warm grey, cool grey, taupe (2 oz each)
- Stiff stipple brush or makeup sponge
- Fine grit sandpaper (220)
- Foam brush (1")
- Matte ceramic sealer, 2 coats
- Rubbing alcohol wipes, one
Instructions
- Sand any glossy spots on the bisque bowl lightly; wipe with alcohol.
- Base coat the bowl inside with warm grey, one thin coat; dry 20 minutes.
- Dip stipple brush into cool grey and tap to create pebble dots. Work in small sections and vary dot size.
- Add taupe dots and tiny highlights with almost-dry stipple brush.
- Once paint is fully dry (1 hour), gently sand edges of pebbles for a worn look.
- Seal with two coats of matte sealer. Full cure 24–48 hours.
How to Display or Gift It
- Use as a catchall on a reclaimed wood console table.
- Pair with potted succulents for a natural centerpiece.
- Wrap in kraft tissue and bundle in a small gift box for a housewarming present.
- Fern Frond Monochrome Rim Bowl
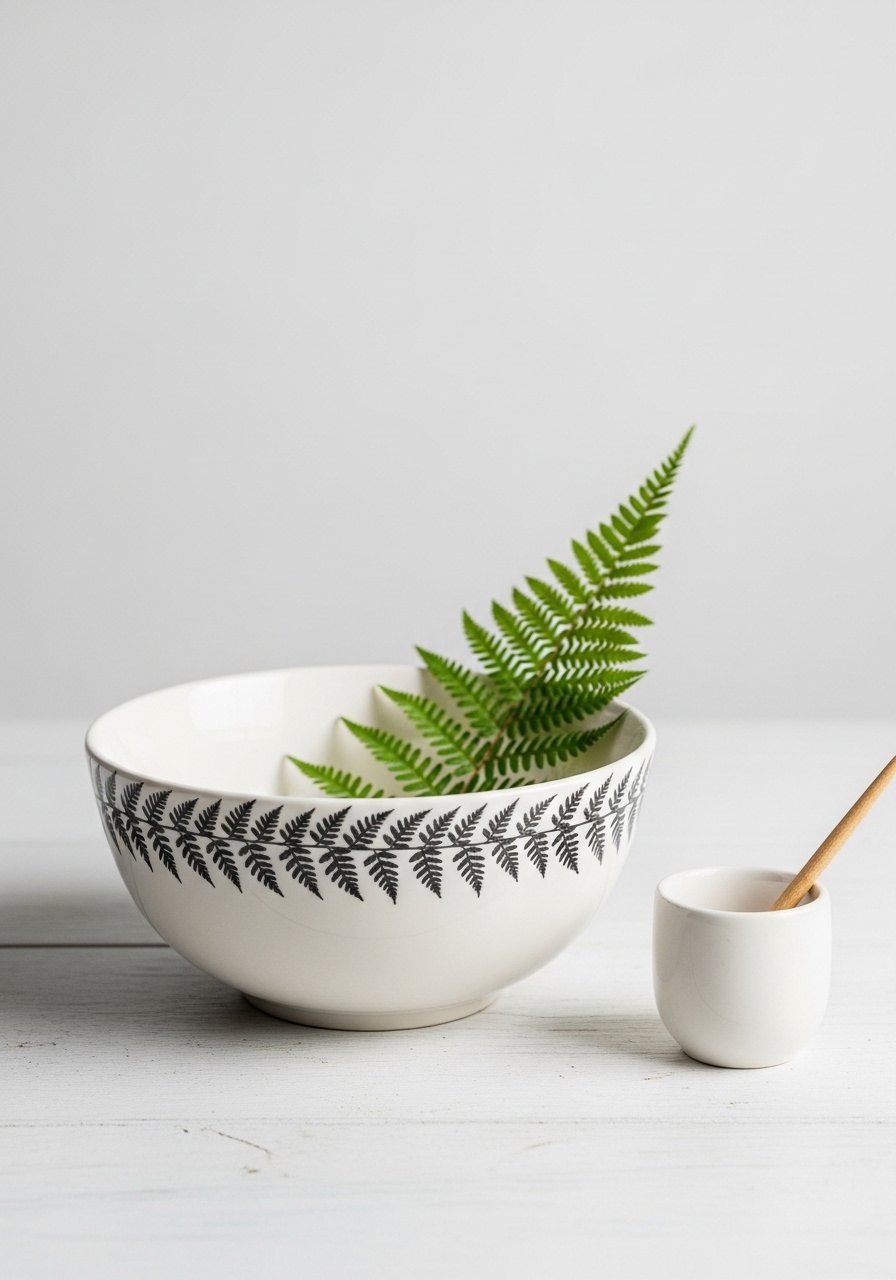
A rim-focused design keeps the center usable while adding botanical charm. This uses a simple repeat stencil or hand-painted fronds in a single color, lending a modern farmhouse feel. It’s quick and ideal for beginners or decorating multiple bowls.
Materials
- 1 white glazed ceramic bowl, 6" diameter
- Acrylic paint pen, forest green (0.7 mm tip)
- Small liner brush (#0)
- Repositionable fern stencil or thin washi tape to mask guide
- Painter’s tape
- Matte sealer spray, 1–2 coats
Instructions
- Clean bowl surface with alcohol wipe.
- Place stencil around rim and secure with painter’s tape.
- Use paint pen to trace frond shapes; go back with liner brush for slight variations.
- Remove stencil after paint is tack-free (5–8 minutes).
- Touch up with detail brush if needed. Let dry 1 hour.
- Seal with one light coat of matte sealer; cure 24 hours.
How to Display or Gift It
- Stack with matching plates and tie with raffia.
- Display on open shelving with a woven placemat underneath.
- Slip the bowl into a small kraft box with shredded paper for gifting.
- Mossy Ombre Earth Bowl
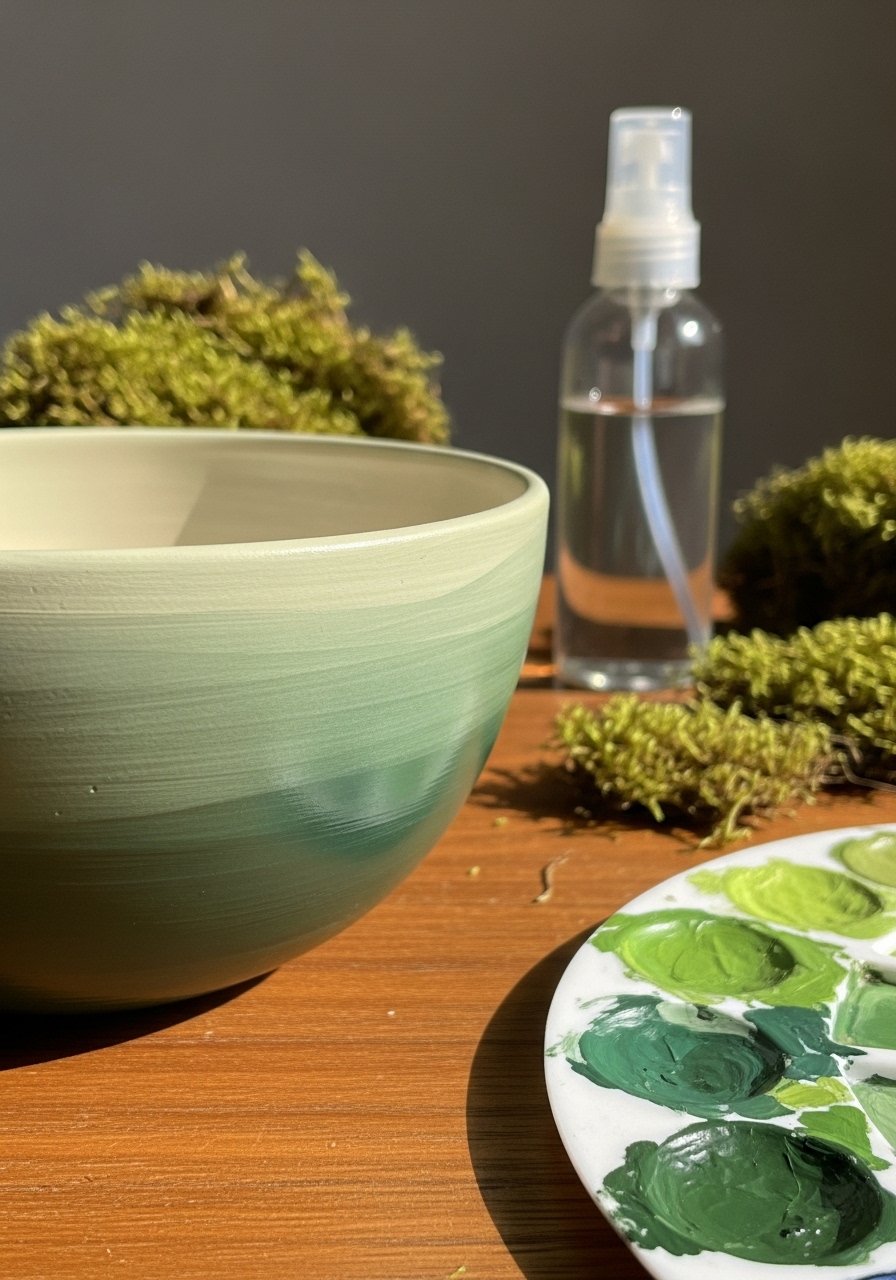
Ombre techniques create a soft gradient reminiscent of moss-covered stones. This project uses a sponge and a brayer roller to blend. It’s tactile and works well with boho or cottagecore aesthetics.
Materials
- 1 ceramic bowl, 7" diameter
- Acrylic paints: deep forest green, moss green, sage (2 oz each)
- Small handheld brayer roller
- Natural sea sponge
- Palette and water jar
- Satin ceramic sealer, 2 coats
Instructions
- Clean bowl and let dry.
- Apply base coat of deep forest green at the bowl’s bottom with foam brush; dry 20 minutes.
- Use the brayer roller to blend moss green over the middle, rolling gently upward to soften.
- Dab sage with sponge around the rim to feather the edge.
- Add one more blended layer if needed. Dry fully 1–2 hours.
- Seal with two light coats of satin sealer; cure 48 hours.
How to Display or Gift It
- Nest with peat pots and a small seed packet for plant-lover gifts.
- Display near a window with natural light to emphasize gradient.
- Wrap in a craft organizer tray for safe storage during transport.
- Botanical Linework Bowl — nature inspired ceramic bowl painting ideas
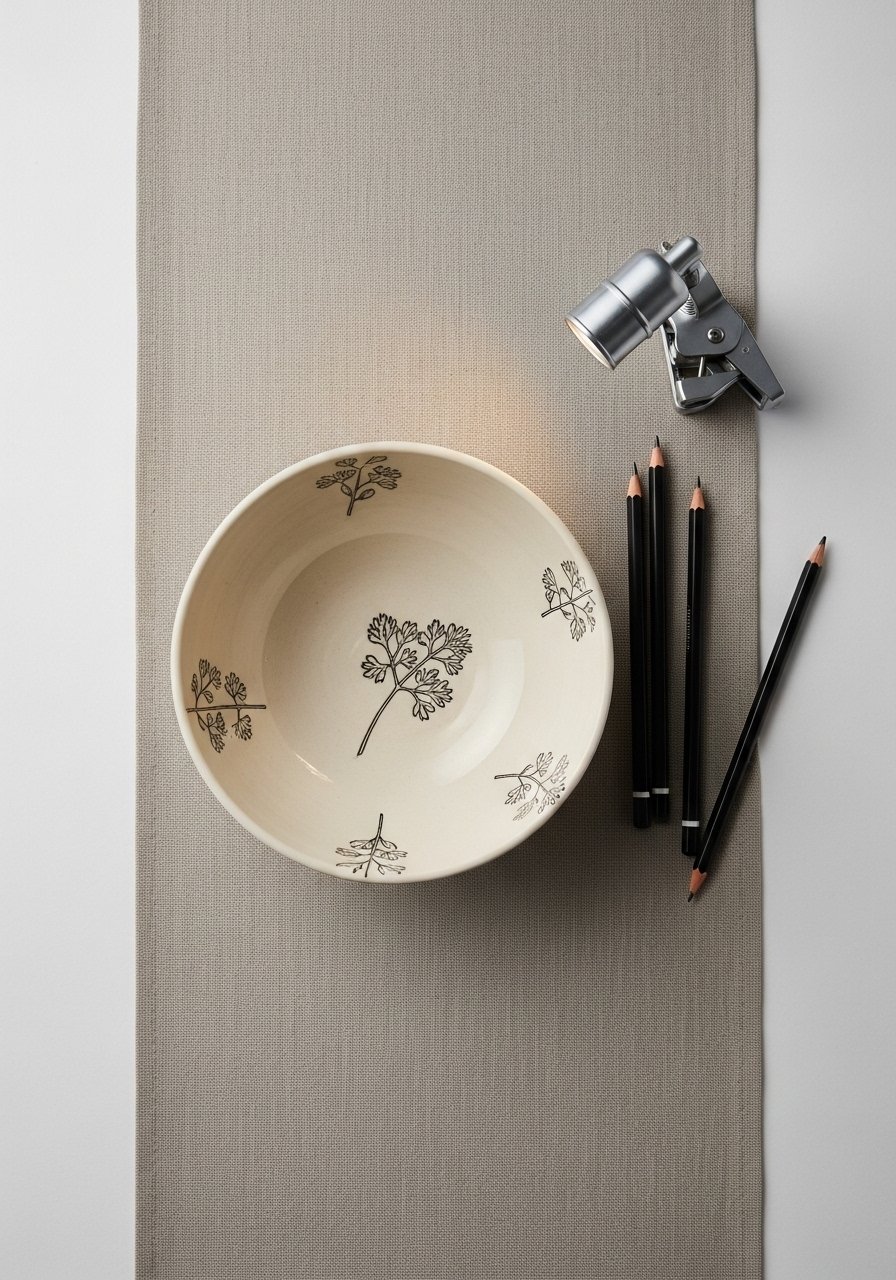
Fine-line botanical sketches give a very modern, Scandinavian look. They’re perfect if you love clean lines and a subtle, natural motif. Use a ceramic paint pen or a small liner brush for crisp strokes.
Materials
- 1 matte ceramic bowl, 6–8" diameter
- Black ceramic paint pen (0.5 mm)
- Small liner brush (#00) and black acrylic paint (1 oz)
- Pencil for light layout
- Rubbing alcohol wipes
- Gloss sealer for protection, 1–2 coats
Instructions
- Sketch frond placements faintly with pencil.
- Trace sketches with a ceramic paint pen or fine liner brush in smooth strokes.
- Allow pen paint to dry 15–20 minutes; refine lines with a tiny brush if needed.
- Let fully cure 24 hours.
- Spray one thin coat of gloss sealer; let dry 30 minutes and add a second coat. Cure 48 hours.
How to Display or Gift It
- Display on a small wooden easel for a gallery-like shelf.
- Pair with neutral pottery and woven baskets for a Japandi look.
- Slip into a shallow kraft gift box with tissue and a handwritten note.
- Bluebird Sky Glaze Bowl

This design layers blues for a sky effect, finished with tiny bird silhouettes. It works well for coastal or cottagecore styles. Use thin glazing techniques and soft blending.
Materials
- 1 bisque bowl, 7" diameter
- Acrylic glaze medium and sky blue, cerulean blue, white (2 oz each)
- Soft blending brush, small round brush (#2)
- Toothpick for tiny bird silhouettes
- Satin sealer, 2 coats
Instructions
- Mix acrylic glaze medium with blues at a 1:1 ratio for translucency.
- Apply the lightest blue towards the rim and blend darker blues toward the base with soft brush strokes.
- Dry 20–30 minutes between layers; add one more translucent layer if needed.
- Use a toothpick dipped in black paint to dot tiny bird silhouettes near the rim.
- Cure 24 hours; seal with satin sealer in two thin coats. Full cure 48 hours.
How to Display or Gift It
- Pair with coastal linens and natural rope coasters.
- Gift with a packet of birdseed and a note about local birds.
- Keep wrapped flat in stackable craft containers for safe transport.
- Copper Leaf Metallic Accent Bowl

Adding metallic leaf to painted leaves gives a slightly rustic glam look. You’ll use adhesive sizing and a burnisher to set leaf. This suits an elegant boho shelf or centerpiece.
Materials
- 1 glazed ceramic bowl, 6–8" diameter
- Metallic copper leaf sheets (pack of 10)
- Adhesive sizing (leafing adhesive), one 2 oz bottle
- Small synthetic paintbrush for adhesive and a burnishing cloth
- Acrylic paint base (deep green) 1 oz
- Matte or gloss sealer, 2 coats
Instructions
- Paint leaf shapes on the bowl with deep green as a base; dry 30 minutes.
- Apply sizing over painted leaf areas and wait until tacky (5–10 minutes).
- Carefully press copper leaf onto tacky area and use a soft cloth to burnish.
- Brush away excess leaf with a dry, soft brush.
- Allow adhesive to set 24 hours; seal with two thin coats of gloss sealer. Cure 48 hours.
How to Display or Gift It
- Place on a velvet-lined tray for a luxe gift.
- Use a small paper label noting “hand-leafed” for gifting.
- Store in a shallow gift box with tissue to protect metallic finish.
- Wildflower Dot Mandala Bowl
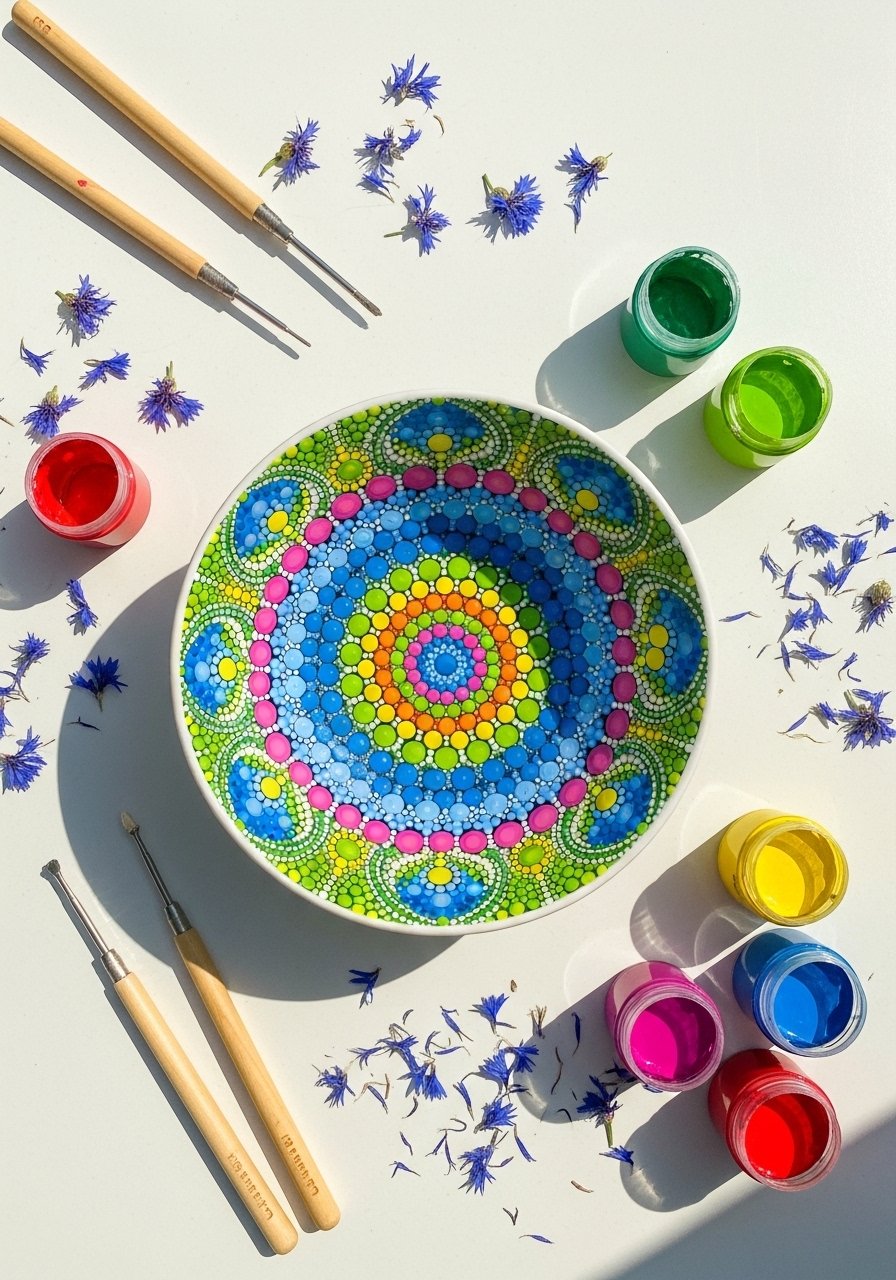
Dot mandalas feel cheerful and meditative. You’ll use dotting tools to create consistent dots that build into floral motifs. This project is forgiving and satisfying.
Materials
- 1 ceramic bowl, 6–7" diameter
- Acrylic paint set with bright colors (6 colors, 2 oz each)
- Dotting tool set (various sizes)
- Compass or round sticker to find center
- Gloss sealer, 2 coats
Instructions
- Mark center point with a faint pencil dot or sticker.
- Start with a single central dot and build outward using progressively larger dot sizes.
- Alternate colors for petal rings. Allow sections to dry 10–15 minutes if colors might mix.
- Once full design is dry (1 hour), touch up any uneven dots.
- Apply two coats of gloss sealer, waiting 15 minutes between coats. Full cure 48 hours.
How to Display or Gift It
- Fill with wrapped candies or potpourri for gifting.
- Display as part of a colorful kitchen vignette.
- Store in a craft organizer with compartments to prevent rubbing.
- Leaf Imprint Clay & Paint Bowl — nature inspired ceramic bowl painting ideas
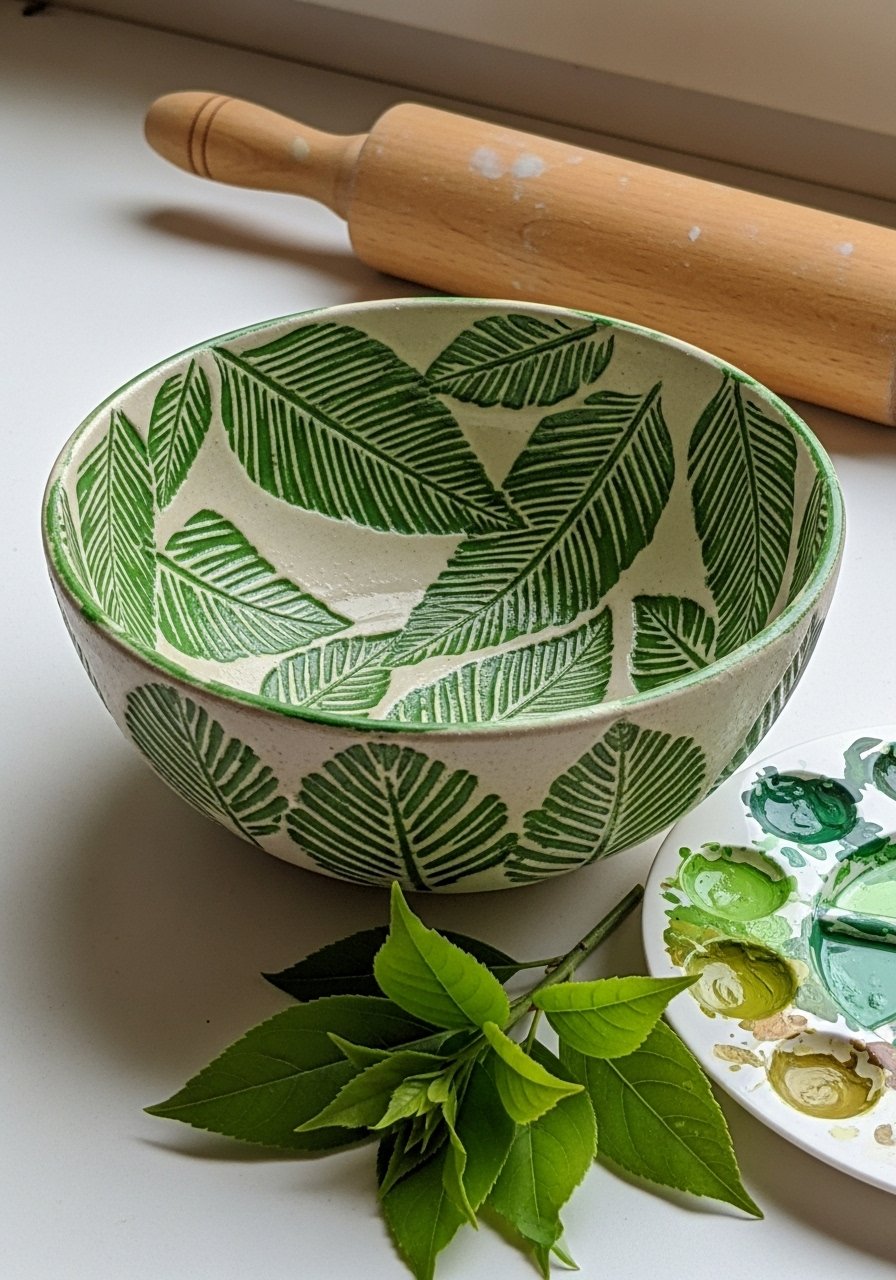
Using leaf imprints gives natural texture and organic lines. This works best on bisque or raw clay bowls where you can press leaves into the soft surface. It’s tactile and perfect for rustic or farmhouse interiors.
Materials
- 1 bisque or raw clay bowl (pressable), 7" diameter
- Fresh leaves with prominent veins (3–5)
- Soft bristle brush and acrylic paints: olive, fern, white (2 oz each)
- Soft rolling pin for imprinting
- Water spray bottle
- Satin sealer, 2 coats
Instructions
- If using raw clay, press leaves gently into damp clay and remove to leave impression. If using bisque, you can glue a thin stencil and paint within grooves.
- Let clay dry per manufacturer (24–48 hours) then bisque-fire if needed. For bisque pieces, proceed to painting.
- Dry brush olive and fern into grooves to accent leaves; wipe excess with a damp cloth.
- Add white highlights sparingly for contrast.
- Cure paint 24 hours; seal with satin sealer in two coats. Full cure 48 hours.
How to Display or Gift It
- Pair with a small jute placemat and a dried leaf sprig.
- Gift with a note describing the leaves used and local foraging info.
- Keep wrapped flat in a sturdy box with shredded paper.
- Marbled River Bowl with Resin Finish
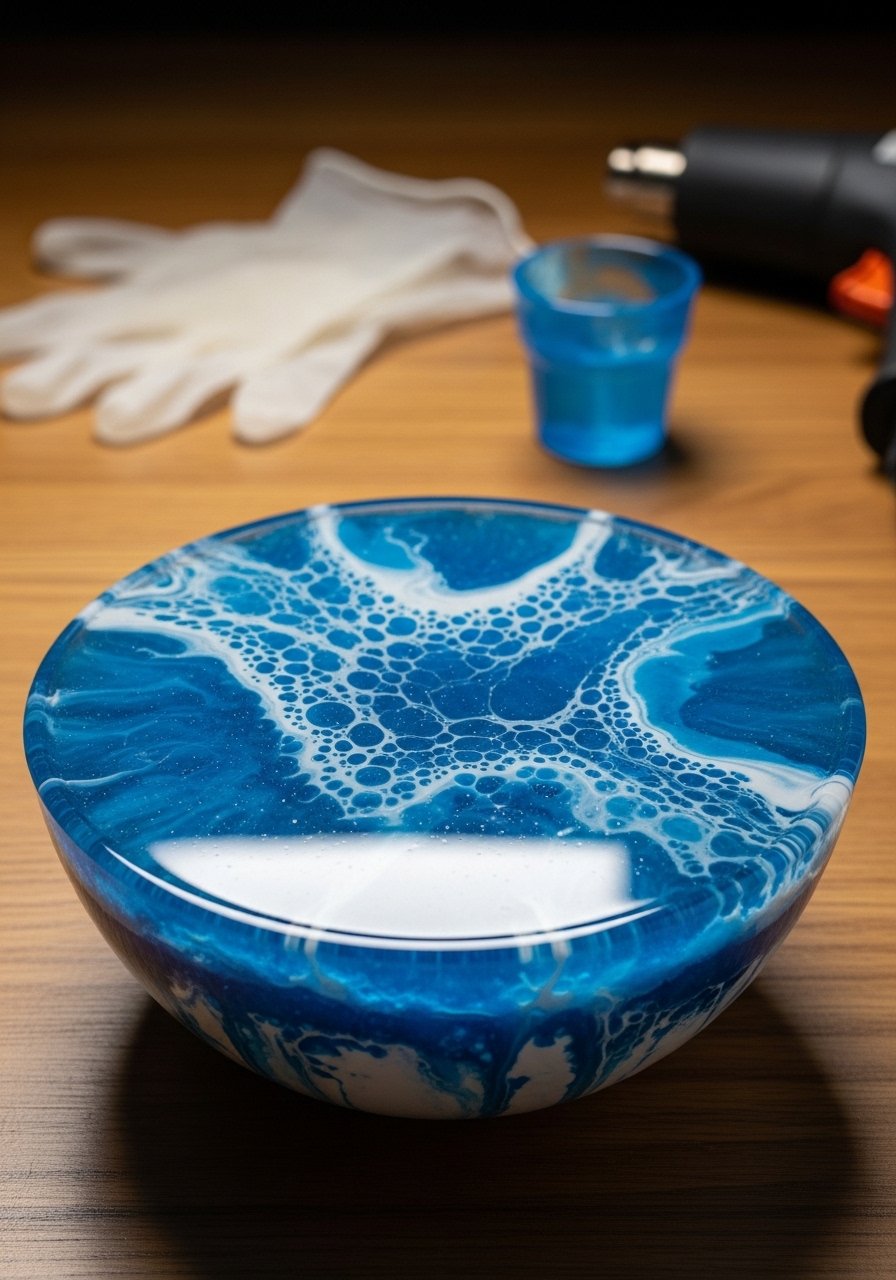
This glossy marbled bowl uses poured paint and a thin epoxy topcoat to create a water-like finish. It’s dramatic and beautiful but requires careful resin handling and ventilation.
Materials
- 1 bisque-fired ceramic bowl, 7–8" diameter
- Acrylic pouring paints: ultramarine, white, teal (2 oz each)
- Pouring medium, 4 oz
- Epoxy resin kit (clear, UV resistant) — follow kit mixing ratios
- Heat gun for bubble removal
- Nitrile gloves and mixing cups
Instructions
- Mix acrylic paints with pouring medium per product instructions.
- Create a marbled pour in a cup and pour into bowl, tilting to cover interior.
- Let paint settle and dry 1–2 hours.
- Mix epoxy resin per kit directions in a well-ventilated area.
- Pour a thin, even resin layer over the bowl interior. Use a heat gun briefly to pop bubbles.
- Cure per resin kit—usually 24–72 hours until hard.
How to Display or Gift It
- Display as a statement piece on a coffee table.
- Gift to someone who collects glossy ceramics; include care instructions.
- Store flat during curing and transport in a foam-lined box.
- Tiny Moss Garden Textured Bowl
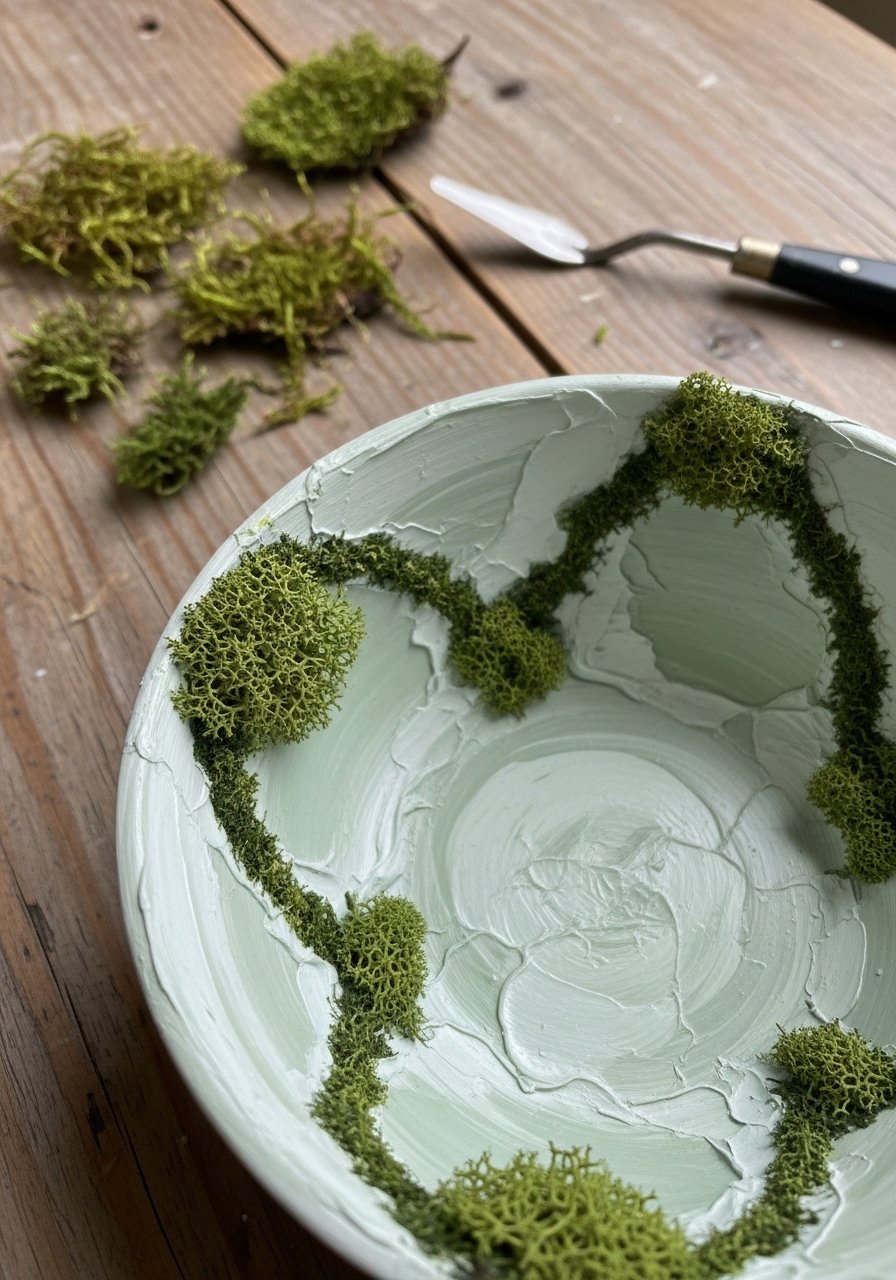
Add texture with modeling paste to build a faux moss garden. Paint over with layered greens and add tiny faux moss clumps for realism. This one is great as a sculptural piece.
Materials
- 1 raw or bisque ceramic bowl, 6–7" diameter
- Lightweight modeling paste, 4 oz
- Palette knife
- Acrylic paints: multiple green shades (2 oz each)
- Small faux moss clumps (bag)
- Matte sealer, 2 coats
Instructions
- Apply modeling paste in small patches with palette knife to create “mounds.” Let dry 24 hours.
- Paint the textured areas with deep green base, then layer lighter greens dry-brushed to highlight texture.
- Glue tiny faux moss clumps into recesses with craft glue; let dry 2 hours.
- Seal textured areas with matte sealer lightly. Full cure 48 hours.
How to Display or Gift It
- Use as a succulent display (with a plastic liner for moisture).
- Gift as a desktop zen piece with a mini care card.
- Store in a shallow craft box with tissue around raised textures.
- Birch Bark Stripe Bowl
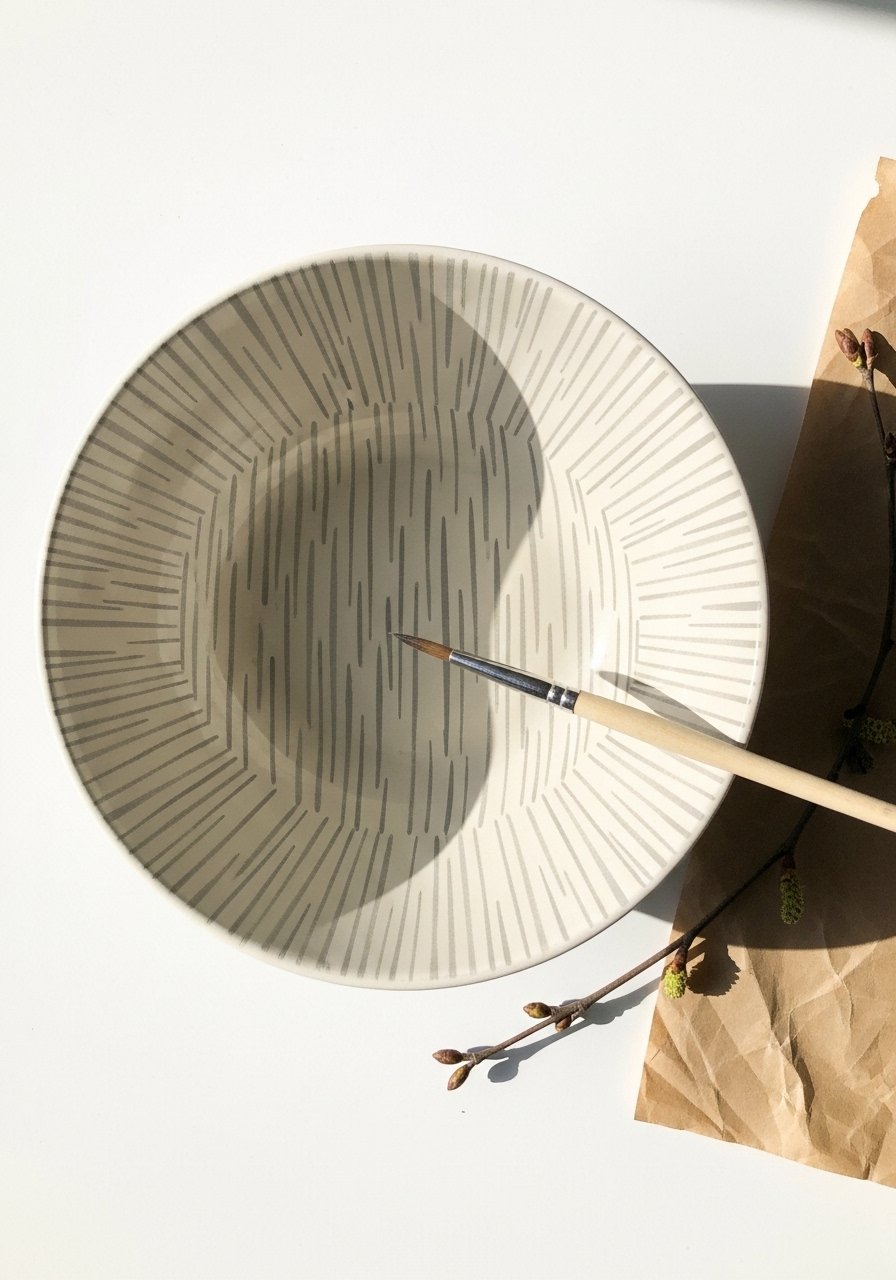
Thin vertical stripes mimic birch tree patterns and create a woodland-modern statement. This uses painter’s tape for consistent spacing or freehand with a steady liner brush.
Materials
- 1 ceramic bowl, 6–8" diameter
- Acrylic paints: cream, warm grey, charcoal (2 oz each)
- Thin liner brush (#00)
- Painter’s tape
- Sanding sponge (fine)
- Satin sealer, 2 coats
Instructions
- Clean bowl and mark stripe layout with faint pencil.
- Use painter’s tape to mask alternating stripes or steady hand a brush for freehand bark lines.
- Paint stripes in cream and overlay charcoal veins with thin liner strokes.
- Once dry (30–60 minutes), sand lightly for a slightly weathered look.
- Seal with two coats of satin sealer; cure 48 hours.
How to Display or Gift It
- Group with wood accents and neutral textiles for a woodland table.
- Gift paired with a small birch-scented candle.
- Store stacked with paper separators.
- Seaweed Brushstroke Bowl
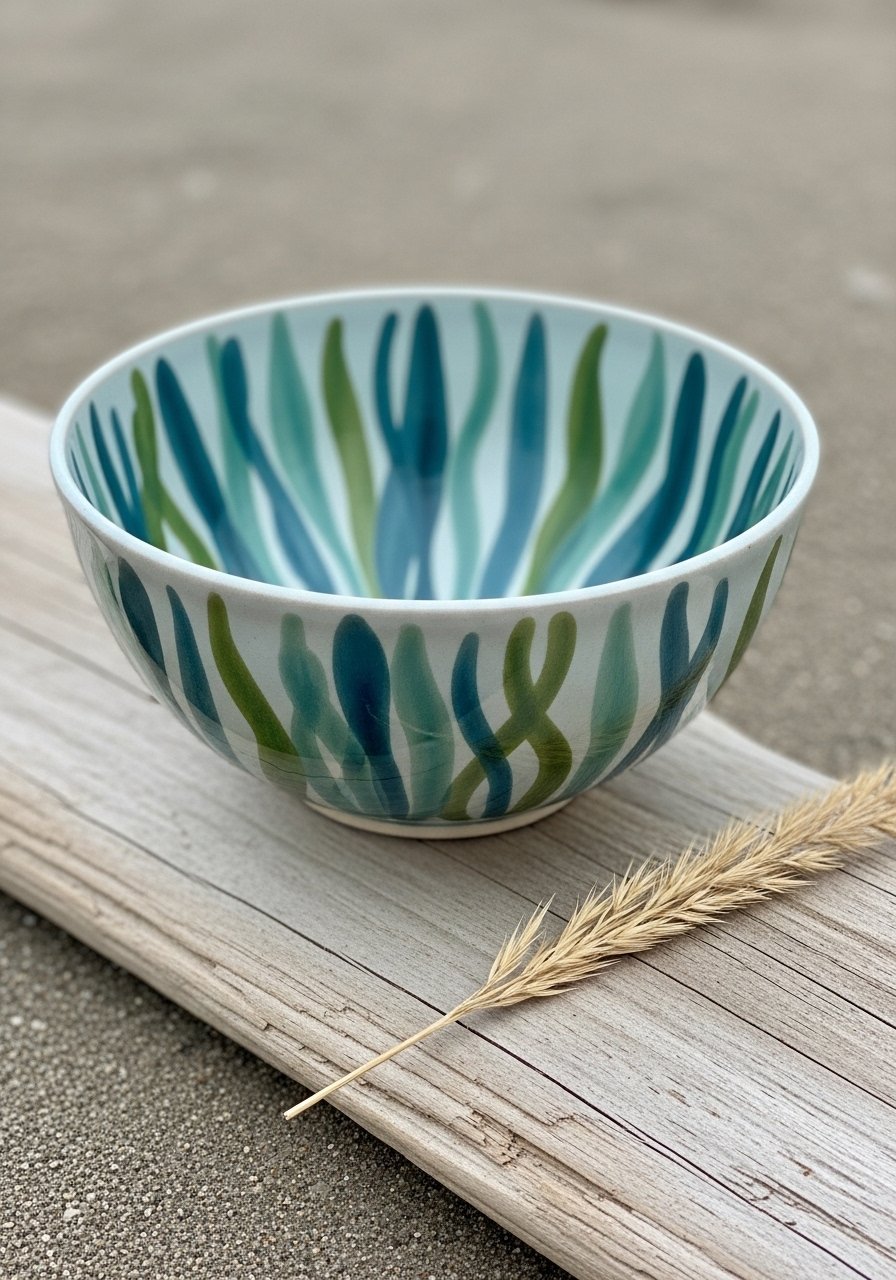
Long, flowing brushstrokes emulate underwater plants. Use a soft filbert or large round brush to get sweeping marks. The result is breezy and coastal.
Materials
- 1 glazed ceramic bowl, 7" diameter
- Acrylic paints: seafoam, teal, deep ocean blue (2 oz each)
- Filbert brush (size 8)
- Water jar and cloth
- Satin sealer, 2 coats
Instructions
- Wipe bowl and plan stroke direction.
- Load filbert brush with paint and create sweeping strokes from rim toward center.
- Layer colors while strokes are wet to blend softly; let dry 20–30 minutes between layers.
- Add thin dark lines for depth with a #2 round brush.
- Seal with two coats of satin sealer; cure 48 hours.
How to Display or Gift It
- Use with coastal napkins and coral decor.
- Wrap with a thin raffia ribbon and a shell for gifting.
- Store with soft padding in a craft tote.
- Impressionist Petal Bowl
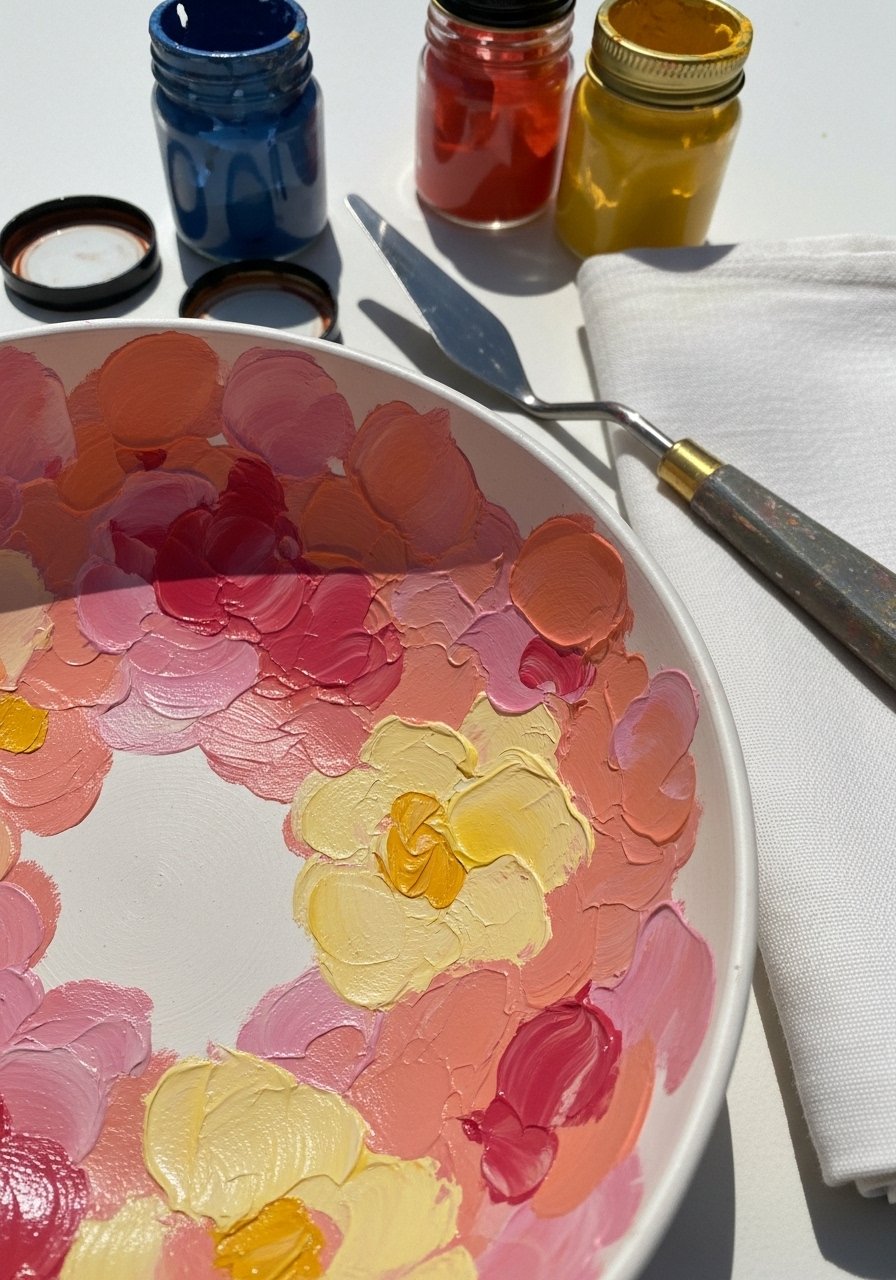
Dabbed petals and loose strokes create an impressionist floral feeling. A palette knife or chisel brush creates texture and paint movement.
Materials
- 1 ceramic bowl, 6–7" diameter
- Acrylic paints in pinks, corals, yellow, and green (2 oz each)
- Palette knife and chisel brush
- Palette paper
- Gloss sealer, 2 coats
Instructions
- Apply a pale base color and let dry 30 minutes.
- Use a palette knife to dab thick petals; vary pressure and paint load.
- Add leaf accents with a quick chisel brush stroke.
- Let paint dry 1–2 hours to avoid smudging.
- Seal with two thin coats of gloss sealer; cure 48–72 hours.
How to Display or Gift It
- Stack with floral napkins or place on a saucer with a dried flower bundle.
- Gift with a small vase or sachet of dried petals.
- Keep in a well-padded craft drawer to protect texture.
- Golden Sunset Gradient Bowl
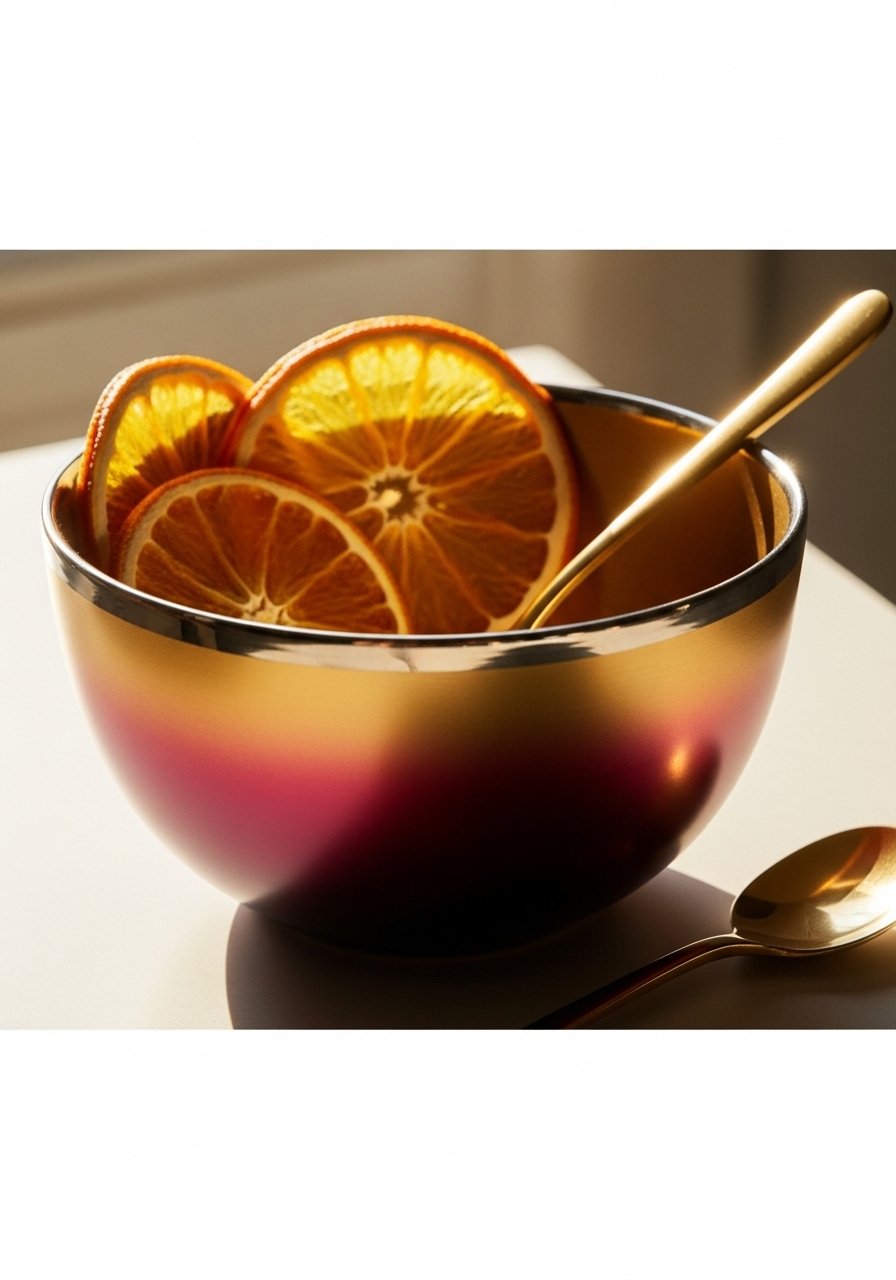
Warm gradients mimic sunset palettes. Add a delicate metallic rim for warmth. Use a sponge or soft brush to blend colors smoothly.
Materials
- 1 ceramic bowl, 7" diameter
- Acrylic paints: crimson, coral, amber, gold metallic (2 oz each)
- Soft blending sponge
- Small angled brush for metallic rim
- Satin sealer, 2 coats
Instructions
- Paint deepest color at the base and blend upward using a damp sponge.
- Work quickly while paint is wet to create smooth transitions.
- Once dry to the touch (30–45 minutes), apply metallic gold to the rim with an angled brush.
- Dry 1 hour; seal with two coats of satin sealer. Cure 48 hours.
How to Display or Gift It
- Pair with warm wood accents and brass cutlery.
- Gift with seasonal teas or spices in small jars.
- Store in a padded box with cloth to protect metallic rim.
- Woodland Critter Silhouette Bowl
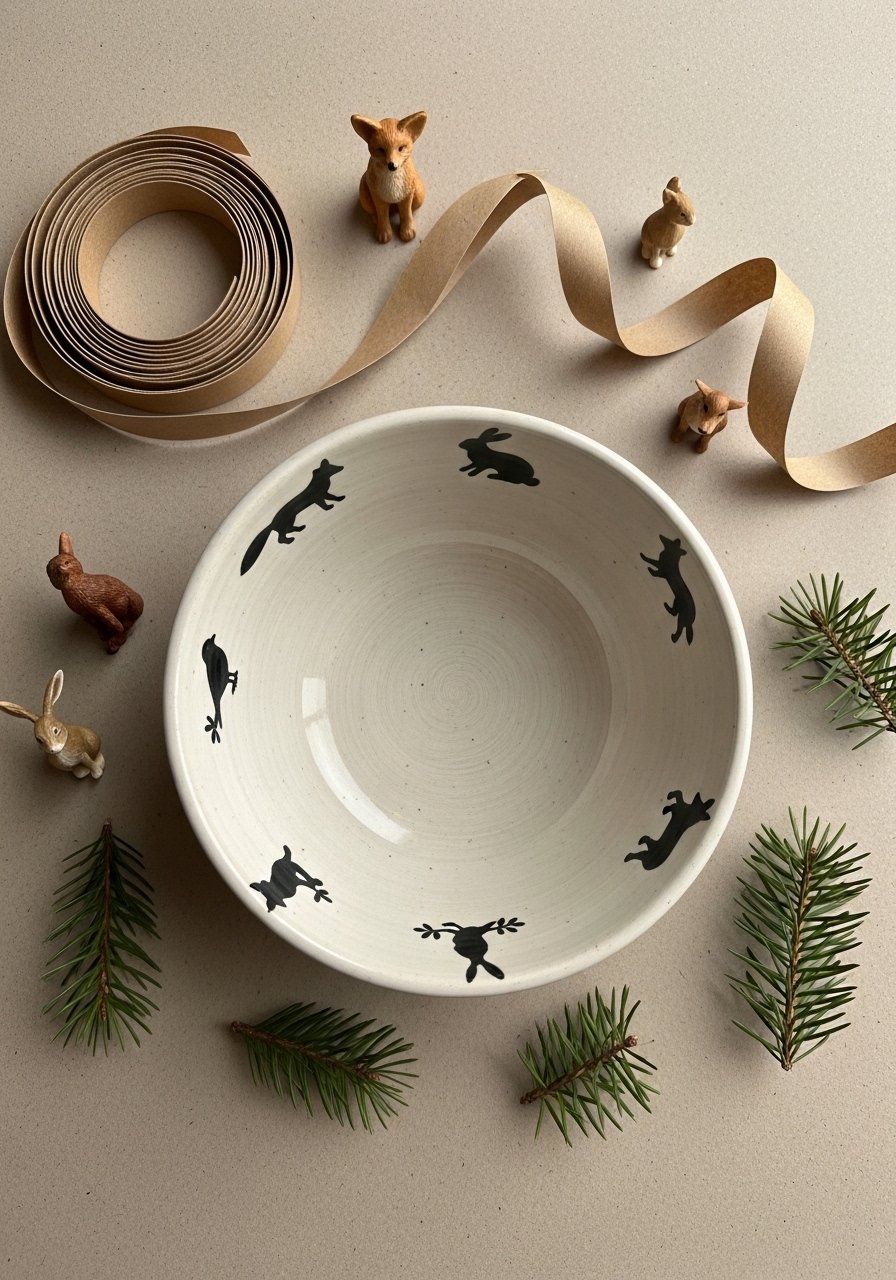
Silhouettes add whimsical charm. Paint tiny animals in dark tones around the rim for a playful, storybook feel. Great for gifting to nature lovers.
Materials
- 1 ceramic bowl, 6–8" diameter
- Black acrylic paint (1 oz)
- Small round brush (#1)
- Pencil, eraser for layout
- Matte sealer, 2 coats
Instructions
- Sketch small silhouettes lightly around the rim.
- Fill silhouettes with black paint using a small round brush; keep strokes smooth.
- Touch up edges with a damp fine brush if needed.
- Let cure 24 hours; seal with two coats of matte sealer. Full cure 48 hours.
How to Display or Gift It
- Present with a small story card naming each animal.
- Use as a catchall in a child’s room or entryway.
- Store flat in a craft drawer with separators.
- Succulent Geode Rim Bowl
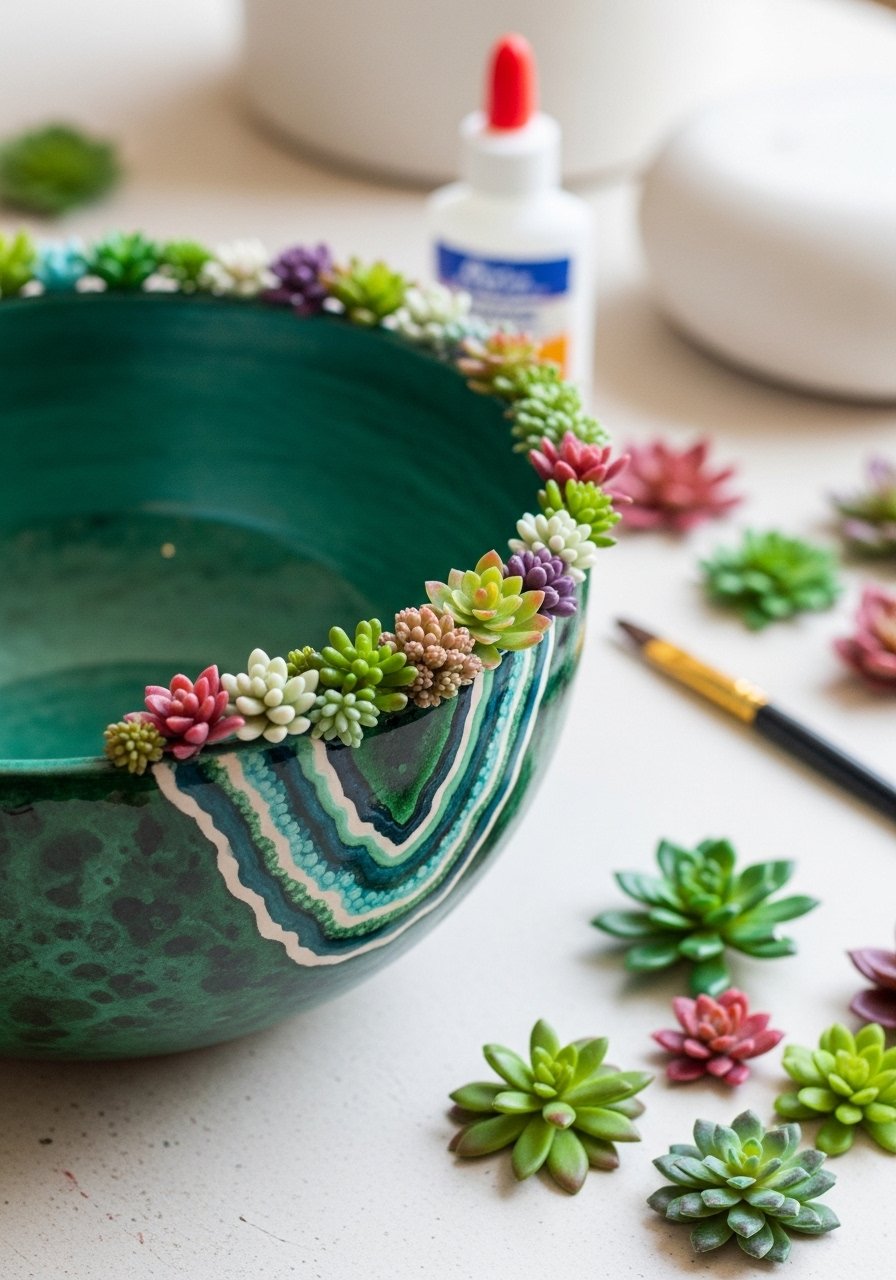
Combine painted geode rings with tiny faux succulents for a mixed-media look. The faux plants add a 3D element, great for tabletops and shelf styling.
Materials
- 1 ceramic bowl, 7" diameter
- Acrylic paints: teal, emerald, dark green (2 oz each)
- Fine glitter or mica powder (small jar)
- Small faux succulents (10–12)
- E6000 or craft glue, 1 tube
- Gloss sealer, 2 coats
Instructions
- Paint concentric geode rings with layered greens, adding mica powder between rings for shimmer.
- Let paint dry 1 hour.
- Attach faux succulents with E6000 in small clusters at the rim; let set 24 hours.
- Seal painted areas with gloss sealer, avoiding glued succulents. Cure 48–72 hours.
How to Display or Gift It
- Place on a dessert stand for visual interest.
- Gift with care instructions noting succulents are faux and avoid water.
- Store with bubble wrap around added succulents during transport.
- Autumn Leaf Resist Bowl

Resist painting leaves leaves crisp negative-space silhouettes. Use removable leaf templates or real leaves with temporary glue. The result feels seasonal and layered.
Materials
- 1 ceramic bowl, 6–7" diameter
- Repositionable leaf stickers or craft glue to hold leaves
- Acrylic paints: burnt orange, ochre, brown (2 oz each)
- Small flat brush and sponge
- Matte sealer, 2 coats
Instructions
- Place leaf stickers or lightly tack real leaves to bowl.
- Sponge warm washes around leaves to create a soft gradient.
- Allow paint to dry 20–30 minutes, then remove leaves carefully.
- Touch up edges for crispness and let fully dry 24 hours.
- Seal with matte sealer; cure 48 hours.
How to Display or Gift It
- Use as a fall centerpiece with mini pumpkins.
- Gift with hot cider mix in a small jar.
- Store flat with tissue between stacked pieces.
- Lichen Speckle Reactive Finish
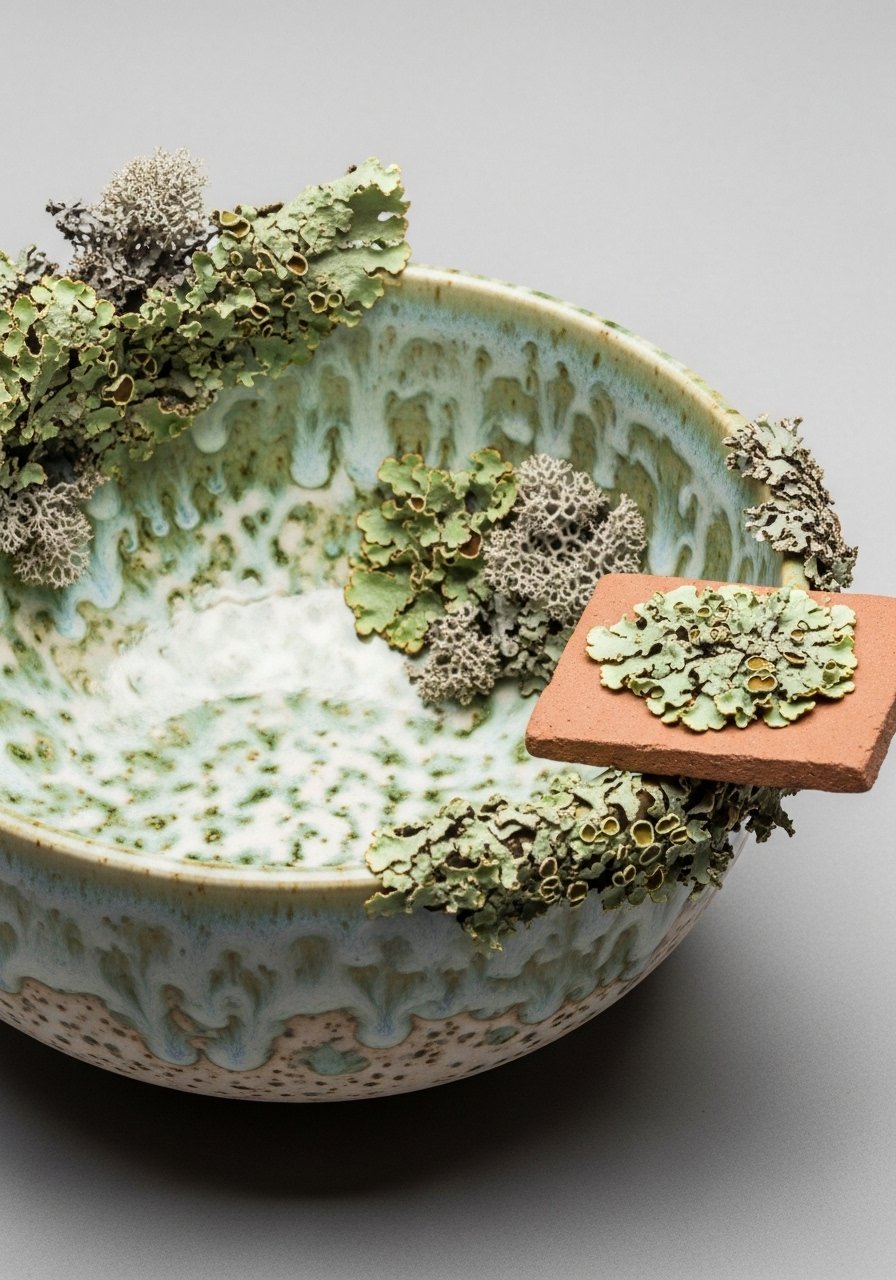
This speckled look mimics lichen using layered speckles and reactive paint techniques. It’s a tiny bit experimental but yields lovely organic textures.
Materials
- 1 bisque-fired bowl, 6–8" diameter
- Acrylic paints: pale green, cream, moss (2 oz each)
- Toothbrush or stiff nylon brush for splattering
- Salt or fine sand (optional, 1 tsp)
- Matte sealer, 2 coats
Instructions
- Base coat bowl with pale green; dry 30 minutes.
- Dip toothbrush in cream paint and flick to create fine speckles.
- Add heavier moss speckles with a stiffer brush for depth.
- Allow paint to dry 1–2 hours.
- Seal with matte sealer; cure 48 hours.
How to Display or Gift It
- Pair with raw wood trays and small ceramic pots.
- Gift with a tiny plant for a nature-lover combo.
- Store in a padded craft box to protect speckled surface.
- Night Sky Constellation Bowl

Create a cosmic nature twist with tiny constellation dots and connecting lines for a starry-night bowl. This works well with dark, moody decor.
Materials
- 1 deep navy glazed bowl, 6–7" diameter
- Gold paint pen (0.5 mm)
- White paint pen for small star dots
- Small round brush (#0) for connecting lines
- Gloss sealer, 2 coats
Instructions
- If bowl isn’t navy, paint base coat and dry thoroughly.
- Use white paint pen to add tiny star dots in clusters.
- Connect stars lightly with a thin line using a small round brush and gold paint pen accents.
- Let dry 24 hours; seal with two coats of gloss sealer. Cure 48–72 hours.
How to Display or Gift It
- Place under soft lamp light to let stars glimmer.
- Gift with a miniature constellation guide or poem.
- Store flat and covered to avoid dust settling into paint.
- Forest Floor Collage Bowl

Decoupage pressed botanicals onto a bowl and seal for a layered forest-floor effect. This mixed-media piece feels intimate and handcrafted.
Materials
- 1 bisque or pre-glazed bowl (matte surface preferred), 7" diameter
- Pressed flowers and leaves (assorted)
- Mod Podge matte, 4 oz
- Foam brush for application
- Small scissors and tweezers
- Gloss or matte sealer, 2 coats depending on desired finish
Instructions
- Arrange botanical pieces on bowl and trim as needed.
- Apply a thin coat of Mod Podge where each piece will sit.
- Place botanicals gently and smooth with a fingertip or tweezers.
- Brush a thin coat of Mod Podge over the top to seal; let dry 15–20 minutes.
- Add a second coat over entire design; cure 24 hours.
- Finish with a protective sealer. Full cure 48 hours.
How to Display or Gift It
- Frame with a small note explaining the plant names.
- Gift in a box with silica gel packet to keep dryness.
- Store flat and avoid moisture to preserve botanicals.
Give one of these ideas a try and see how quickly a simple painted bowl brings a room together. Which of these 21 nature inspired ceramic bowl painting ideas will you try first? Save or pin this post so you can come back to your favorite projects later, and share a photo when you make one — I love seeing how you interpret natural motifs.
Trust me, picking up a quality hot glue gun with temperature control changed how every single one of these projects turned out — no more stringy mess, no more burns. Consider a reliable glue gun to make mixed-media steps much smoother: High-Temp Hot Glue Gun
Happy painting and pin away — these bowls make lovely gifts and home accents that feel like the outdoors, right at your table.





