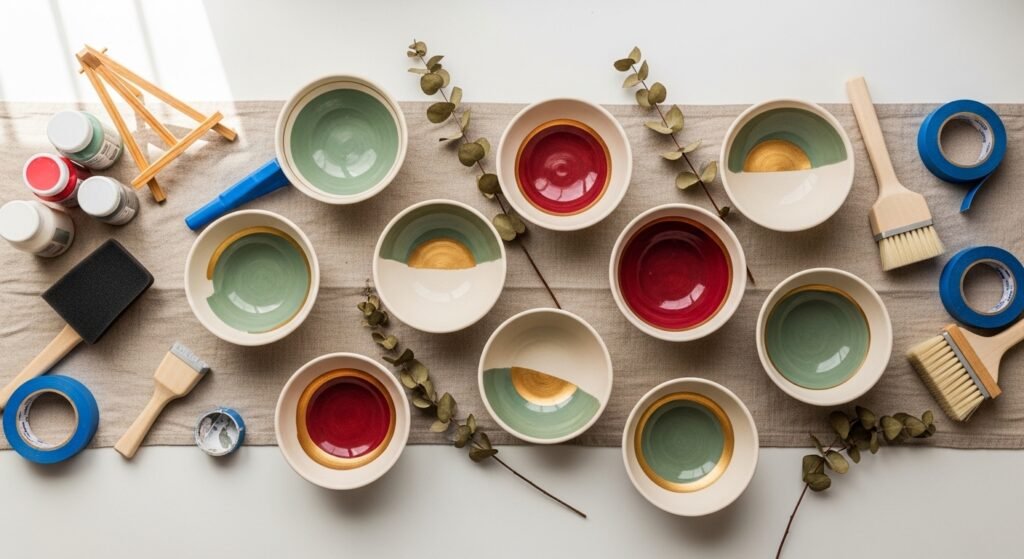
Whipping up handmade holiday bowls is one of the simplest ways to give something memorable and personal. Whether you want a small thoughtful hostess gift, a festive candy dish, or a seasonal centerpiece, these 28 holiday ceramic bowl painting ideas are designed to fit cottagecore, farmhouse, japandi, and boho tastes — and they're approachable if you're new to painting ceramics.
You’ll find everything from quick stamped motifs to layered metallic rims and full-of-detail scene bowls. Each project below includes exact materials, step‑by‑step instructions with drying and curing notes, display and gifting tips, and troubleshooting for common problems like paint bleed, bubbles in resin, or crazing in glazes. I often reach for a trusted brand like Pebeo Porcelaine 150 paint set when I want oven-bake durability, and a pack of soft foam brushes makes thin, even coats easy. Pin your favorites and keep the supply list handy — let’s get painting.
- Nordic Snowflake Stamped Bowl
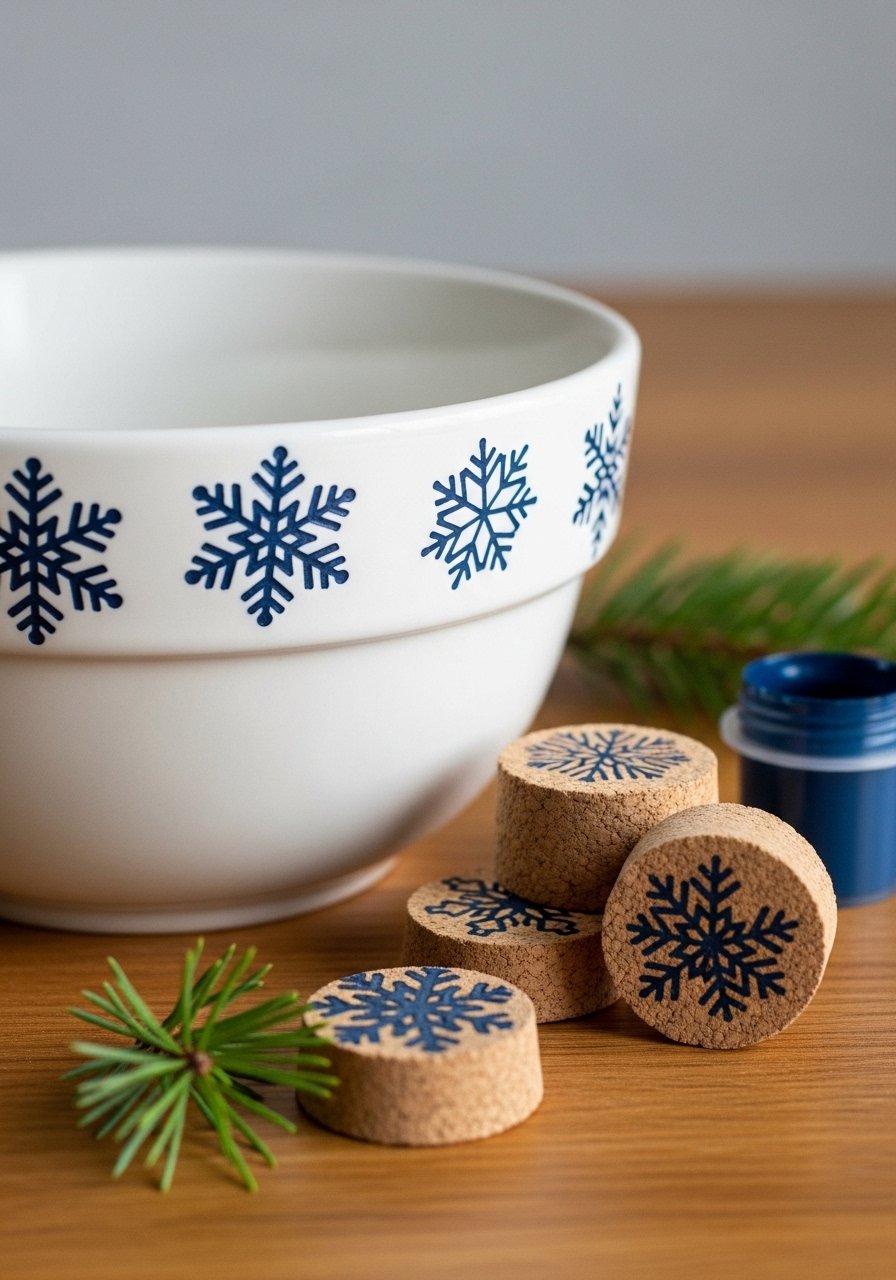
This classic Nordic look uses simple stamps for a polished, repeatable pattern. It’s quick, graphic, and perfect for gift sets. The finished bowl feels clean and slightly rustic — great for fans of farmhouse and nordic holiday decor. Beginners and batch-makers will love how fast stamps make consistent motifs. I use a small ink roller when pressing stamps to avoid heavy paint build-up.
Materials
- 1 plain white ceramic bowl, 6–7" diameter
- Pebeo Porcelaine 150 navy paint – 15 ml tube
- Small rubber snowflake stamp or craft stamp (1"–1.5")
- foam brush (1" flat)
- Painter’s tape (1/2" width)
- Isopropyl alcohol and lint-free cloth
- Small ink brayer or paint pad
- Oven for baking
Instructions
- Wash bowl with dish soap, rinse, and wipe with isopropyl alcohol. Let dry 10 minutes.
- Use painter’s tape to mark a clean rim edge if you want a white border; press firmly.
- Squeeze a small amount of navy paint onto a palette. Load the stamp lightly via brayer.
- Test-stamp on scrap paper until the coverage is even.
- Stamp evenly around the rim, spacing stamps about 1–1.25" apart.
- Let air-dry 30 minutes, then touch up any thin spots with a small brush.
- Bake per paint instructions: place in cool oven, heat to 300°F (150°C), bake 35 minutes, then cool in oven to avoid thermal shock.
- After cooling, check for full adhesion — paint should be firm and scratch-resistant.
How to Display or Gift It
- Stack two or three bowls with tissue and tuck in a small wooden spoon for a charming hostess gift.
- Display on a small wooden easel or shelf with coordinating navy linens.
- Wrap in kraft paper and secure with twine and a sprig of pine.
- Store wrapped in a stackable craft organizer until you’re ready to gift.
- Gilded Rim Cottagecore Bowl
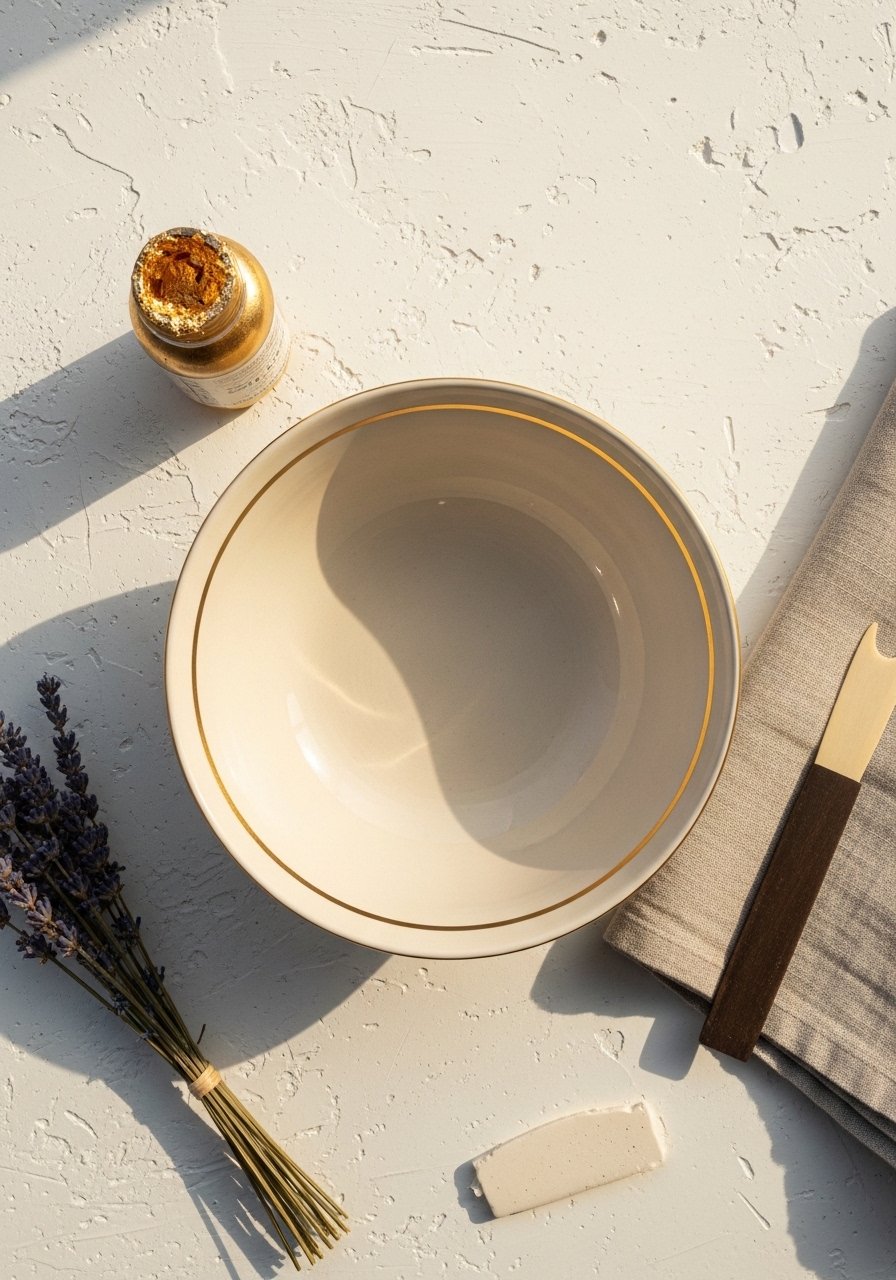
A delicate gold rim gives a cottagecore bowl a vintage, handcrafted vibe. The finish reads luxe but is simple to paint. Use a steady hand or a thin painter’s tape line for razor-clean edges. This one is ideal for gift-givers who want an elegant but understated present. A quick tip: a gold paint pen helps for control on curved rims.
Materials
- 1 cream ceramic bowl, 5–7" diameter
- Gold metallic paint pen (0.7–1 mm tip)
- Fine artist round brush (size 0 or 1)
- Painter’s tape (1/8" if available)
- Mild dish soap and cloth
- Clear food-safe oven-bake glaze option (Pebeo Porcelaine 150 gilding varnish if using same brand)
- Oven for curing
Instructions
- Clean bowl thoroughly and dry.
- If you want a perfectly even line, wrap painter’s tape around rim as guide; leave 1–2 mm exposed.
- Draw the gold line with the paint pen, moving smoothly around the rim.
- If using brush and paint, apply two thin coats, letting each dry 15–20 minutes.
- Remove tape slowly once paint is tack-free.
- Bake following the product’s instructions (often 30–35 minutes at 300°F / 150°C). Allow to cool in oven.
- Apply a clear bake-on glaze if the paint calls for it; follow glaze cure times.
How to Display or Gift It
- Nest bowls with linen napkins and a sprig of dried lavender.
- Attach a handwritten gift tag with craft twine.
- Display on an open shelf grouped with wooden beads and pottery for a cottagecore vignette.
- Wrap in a small kraft box with tissue filler.
- Festive Confetti Speckle Bowl (keyword: holiday ceramic bowl painting ideas)
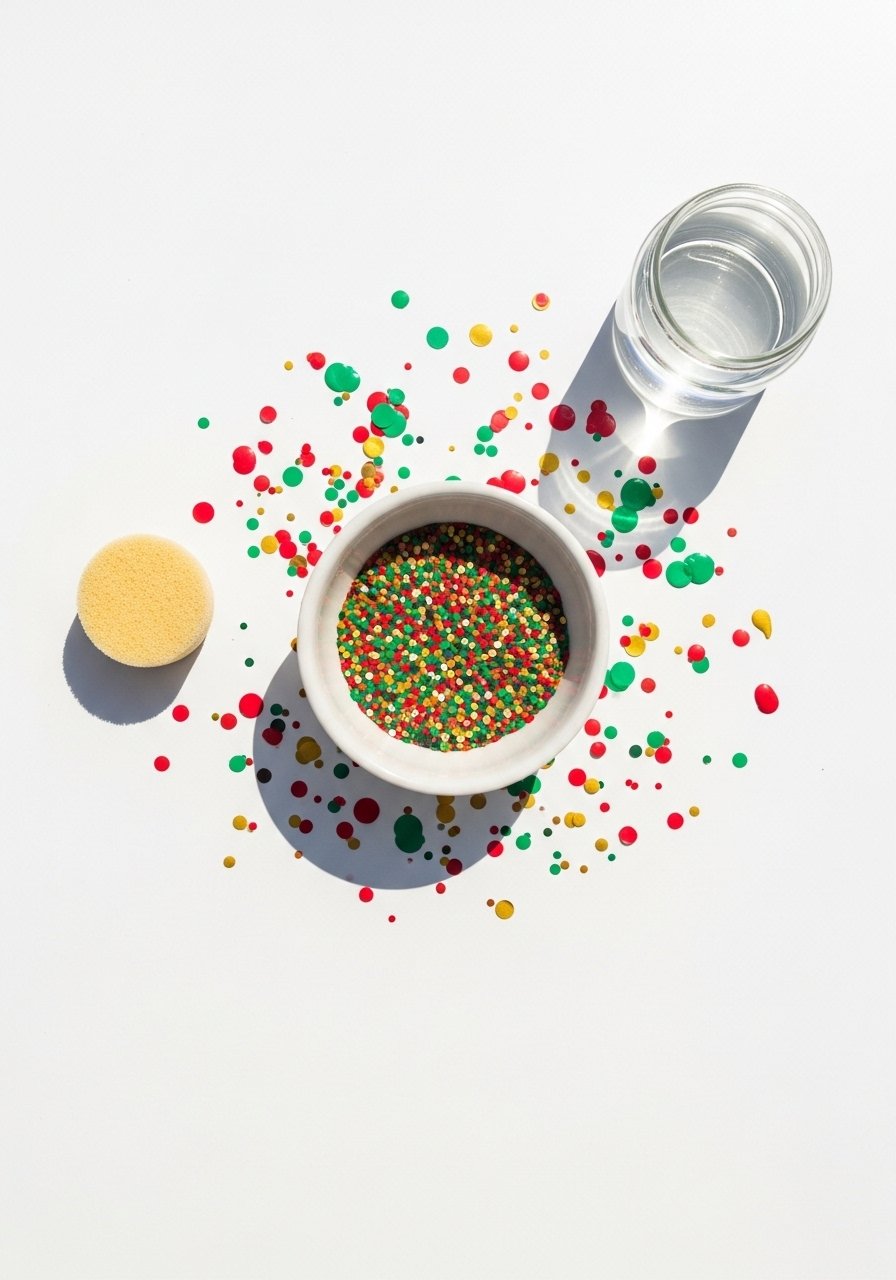
Confetti speckle is joyful and forgiving — perfect when you want a handmade look that’s lively but low-pressure. The textured speckles feel cheerful and fit casual holiday tables. Kids can help with this one (use non-toxic, oven-bake paints). A toothbrush or sponge gives that classic speckle effect.
Materials
- 1 white ceramic bowl, 5–6"
- Acrylic ceramic paints or oven-bake porcelain paints: red, green, metallic gold
- Small round sponge brush and toothbrush
- Disposable palette or paper plate
- Painter’s tape (optional)
- Gloves and drop cloth
- Oven (if using bake-on paints)
Instructions
- Clean and dry the bowl; tape the rim if you want a border.
- Thin small amounts of paint with a drop of water (acrylic) or use undiluted porcelain paint per instructions.
- Dip toothbrush or sponge lightly in paint; hold over bowl and flick or dab gently to create speckles.
- Rotate bowl to get an even spread. Less is more — build in layers.
- Let layers dry 10–15 minutes between colors.
- For acrylic, apply two thin clear coats of gloss varnish following manufacturer dry times.
- For oven-bake paints, cure per instructions (typically 300°F for 35 minutes).
How to Display or Gift It
- Fill the bowl with wrapped candies or handmade ornaments for gifting.
- Group several speckled bowls in different colors for a cheerful centerpiece.
- For storage, nest bowls with tissue paper in small gift boxes.
- Minimal Japandi Brushstroke Bowl

A single brushstroke creates an elegant japandi look — restrained and modern. This project is all about confident strokes and negative space. The feel is earthy and serene, ideal for lovers of minimalist holiday decor. Use a flat synthetic brush for crisp edges and smooth flow.
Materials
- 1 off-white ceramic bowl, 6–8"
- Matte black or charcoal ceramic paint (15 ml)
- Flat synthetic brush (6–12 mm)
- Palette or plate
- Painter’s tape (optional)
- Rubbing alcohol and cloth
- Oven or air-dry varnish depending on paint
Instructions
- Clean the bowl and prep work area.
- Load brush with a moderate amount of paint, removing excess on palette.
- Practice the stroke on paper; steady your wrist.
- One confident sweep across the interior gives the best look. Don’t overwork.
- Let dry 30 minutes; apply a second pass if needed for opacity.
- Cure according to paint (oven-bake or air-dry sealant).
- Check for smooth, matte finish — paint should be non-tacky when cured.
How to Display or Gift It
- Pair with a simple linen napkin and a wooden spoon for a gift set.
- Display on open shelving or use as a decorative catchall for keys and jewelry.
- Store in a flat craft organizer between uses.
- Handwritten Holiday Script Bowl
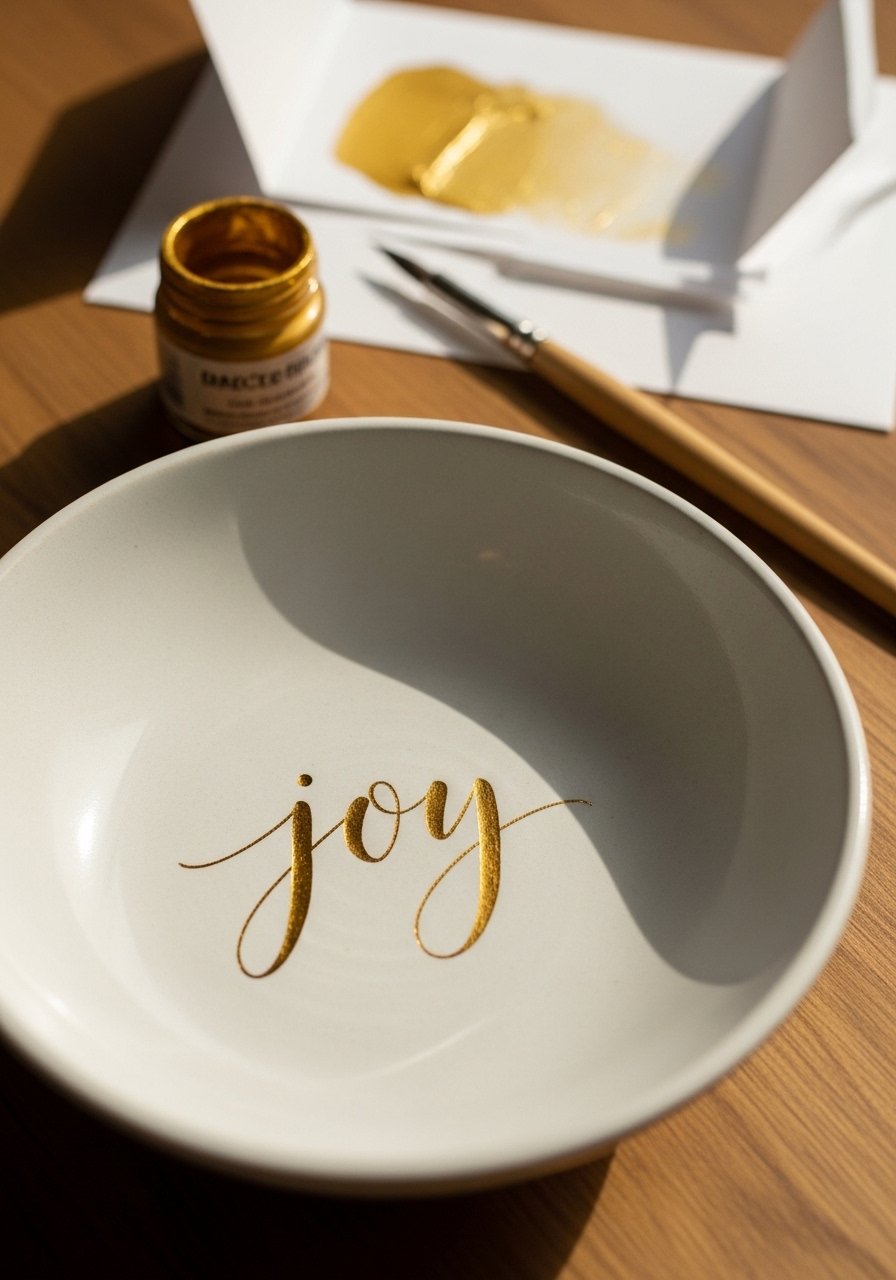
Hand-lettered bowls feel personal and boutique — great for gifting with a matching card. The smooth center gives a focal point for script. If your handwriting needs a little help, use a printed stencil or transfer method. A metallic gold paint pen gives control for lettering.
Materials
- 1 white ceramic bowl, 6" diameter
- Metallic gold paint pen (0.7–1 mm)
- Transfer paper or printed stencil (optional)
- Pencil for faint guideline marks
- Clear bake-on glaze or sealant
- Rubbing alcohol wipe
Instructions
- Clean bowl and dry.
- Lightly draw guidelines with pencil (a faint circle helps center your word).
- Transfer word with transfer paper if using a printed design.
- Trace over pencil with gold paint pen, making smooth strokes.
- Let dry 20–30 minutes; apply a second thin pass if needed.
- Bake or seal per product instructions.
- Erase any faint pencil marks gently if visible.
How to Display or Gift It
- Pair with a hand-written note and a sachet of potpourri.
- Place on a small easel or in a shallow bowl stand for display.
- Wrap in tissue and place in a kraft box for mailing.
- Boho Dotted Mandala Bowl
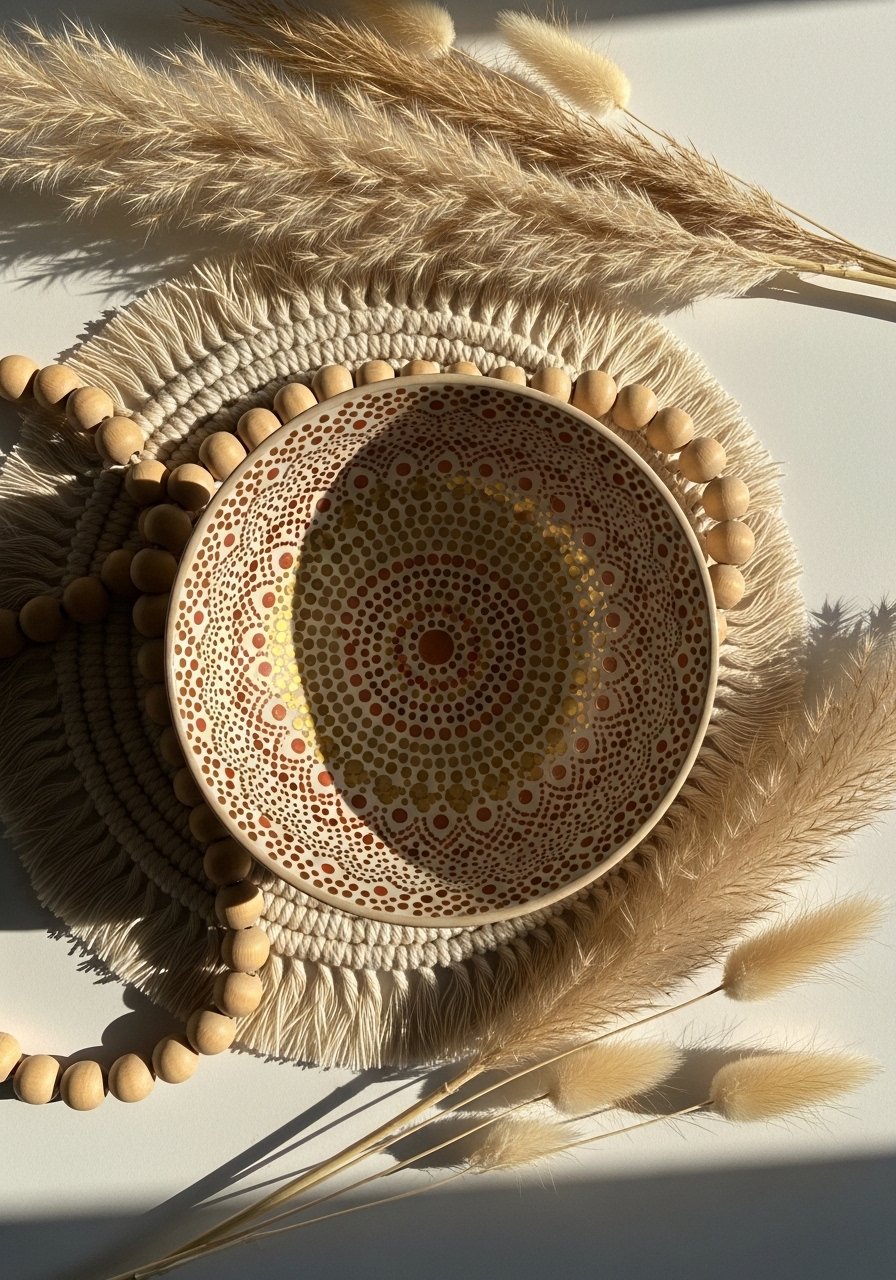
Dotted mandalas read boho and handcrafted. The pattern is meditative to paint and forgiving of tiny imperfections. Dotting tools or the ends of paintbrushes create uniform dots. This is a relaxing project for makers who love repetitive, tactile work.
Materials
- 1 neutral ceramic bowl, 6–8"
- Acrylic or porcelain paints: terracotta, mustard, metallic gold
- Dotting tools (set) or wooden dowel ends
- Small palette or ceramic dish
- Ruler for marking concentric circles
- Sealant (gloss) or oven-bake glaze
Instructions
- Clean bowl and mark concentric circles faintly with pencil.
- Pour small dots of each color onto palette.
- Dip dotting tool into paint and press gently along circles.
- Work from center out for symmetry.
- Allow 15 minutes between color layers so they don’t run.
- Apply two thin coats if necessary for opacity.
- Seal with gloss varnish or bake if using porcelain paints.
How to Display or Gift It
- Tuck a small bundle of cinnamon sticks inside and wrap with jute.
- Display on a low wooden riser with woven placemats for boho tables.
- Store nested with tissue between bowls to protect dots.
- Evergreen Line Art Bowl (keyword: holiday ceramic bowl painting ideas)
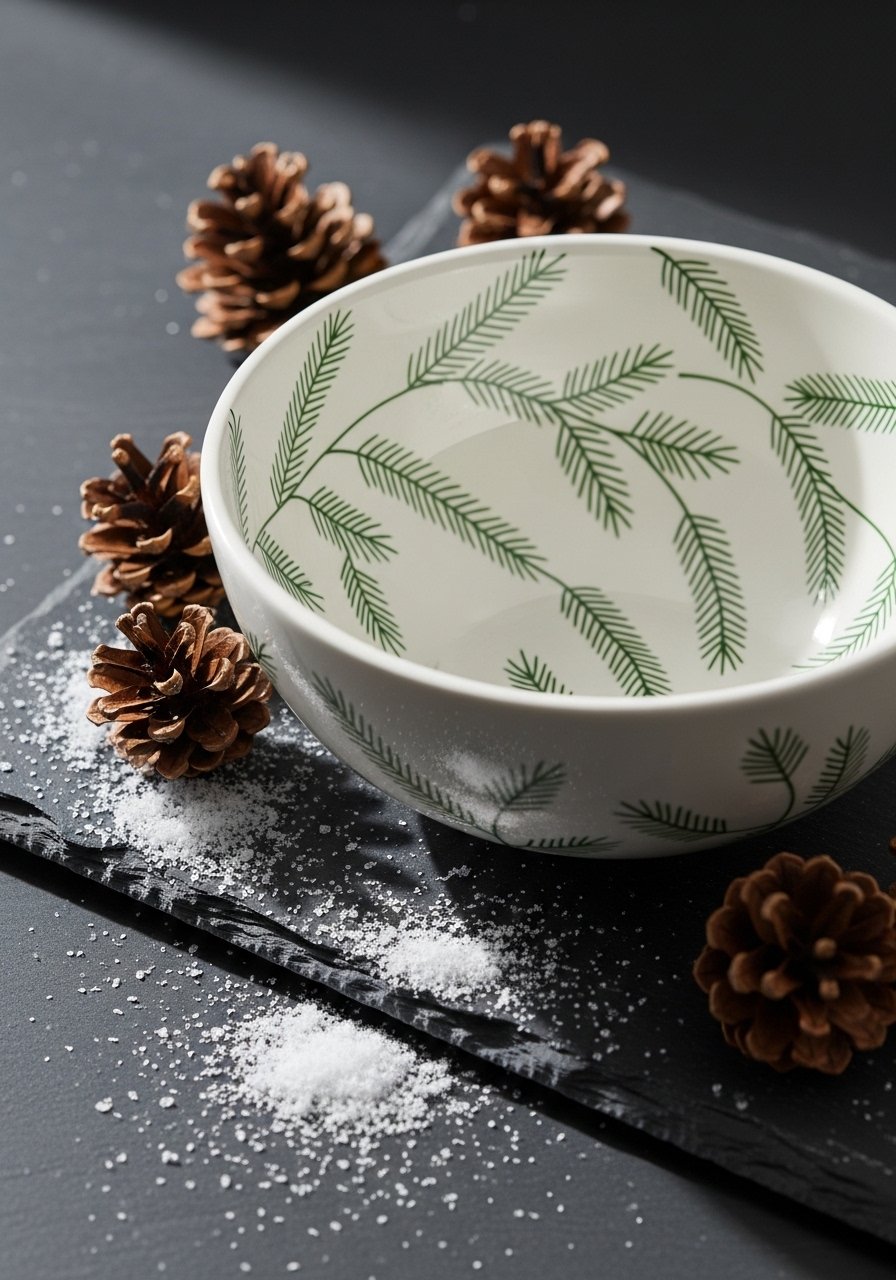
Delicate line art of evergreen sprigs feels fresh and modern. The minimal design is perfect for japandi-lovers who want holiday hints without full-on kitsch. A fine-tipped paint pen or detail brush gives the control you need. This is great for advanced beginners who like precision.
Materials
- 1 white ceramic bowl, 6–7"
- Fine-tipped paint pen (green) or size 0 detail brush
- Green porcelain or acrylic paint
- Pencil and eraser for faint sketching
- Lightbox or printed reference (optional)
- Clear glaze for sealing
Instructions
- Clean and dry the bowl.
- Lightly sketch sprig placement with pencil.
- Trace over sketch with fine paint pen. Keep steady, use wrist support.
- Let lines dry 20 minutes; correct small mistakes by touching up with white paint once cured.
- Add a few tiny berries or gold dots for holiday pop.
- Bake or varnish per paint directions.
- Ensure lines are non-tacky and resilient before use.
How to Display or Gift It
- Pair with homemade spiced tea sachets as a seasonal gift.
- Display on a mantel or coffee table with pinecones and fairy lights.
- Wrap with kraft paper and string for a modern rustic feel.
- Festive Plaid Decal Bowl

Plaid makes any bowl instantly seasonal. Using painter’s tape to mask straight lines prevents bleed and gives crisp edges. This is a great batch project — mask, paint, repeat. Use a small foam roller for even coverage.
Materials
- 1 ceramic bowl, 6–8"
- Painter’s tape (1/8"–1/4")
- Acrylic or porcelain paints: red, green, cream
- Small foam roller or flat foam brush
- Craft knife and ruler
- Clear varnish or bake-on glaze
Instructions
- Clean bowl.
- Plan plaid layout and mark lines with a pencil.
- Apply painter’s tape strips where you want the white base to remain.
- Roll paint over exposed sections with foam roller in thin coats.
- Let dry 20 minutes before removing tape.
- Re-tape for perpendicular lines and repeat painting.
- Seal per product instructions once fully dry.
How to Display or Gift It
- Fill with homemade cookies and tie with gingham ribbon.
- Stack with coordinating plaid napkins for a themed gift box.
- Store in a shallow cardboard box with tissue to prevent scuffing.
- Snowy Texture Paste Bowl
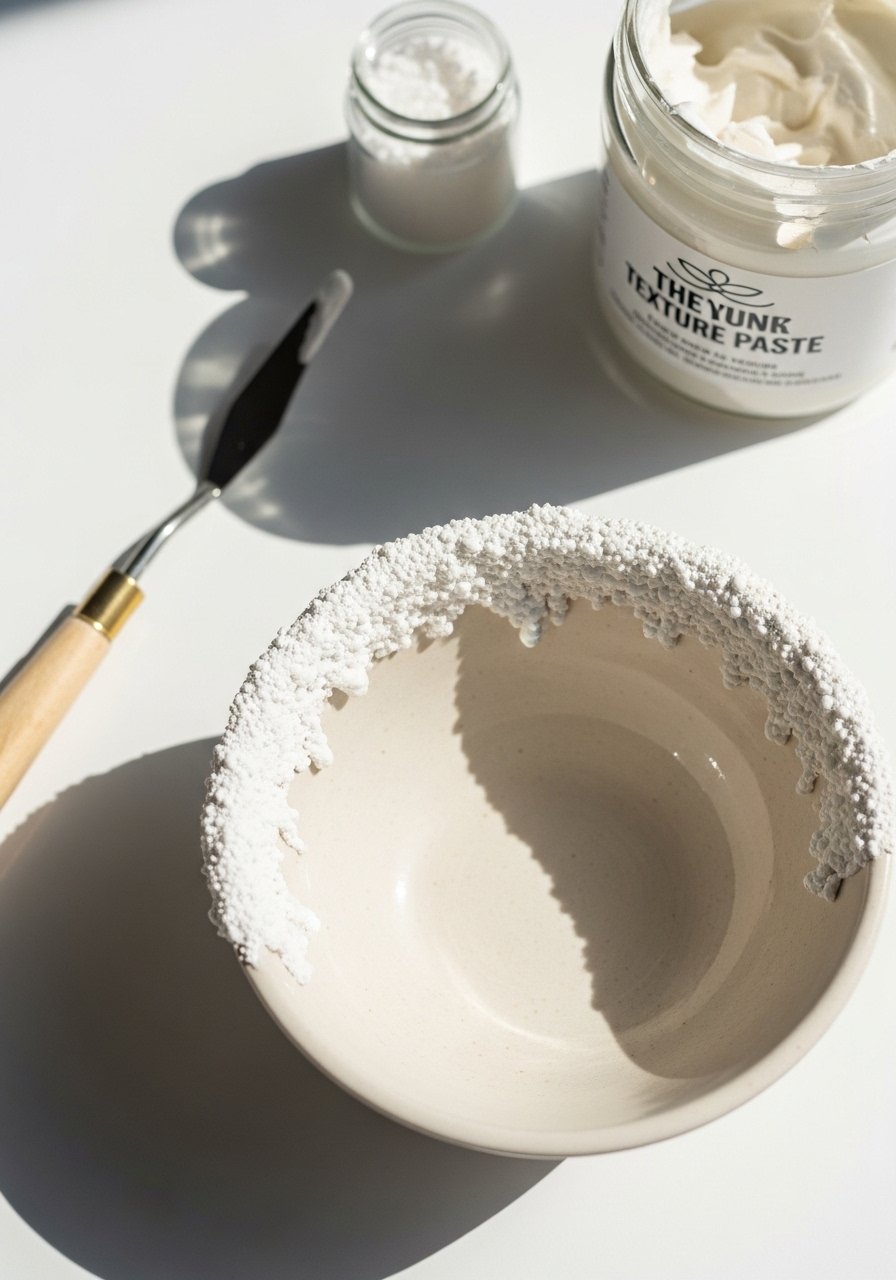
Adding texture paste gives a three-dimensional snowy rim, perfect for a tactile holiday accent. This one truly feels handmade and cozy. Texture paste is easy to sculpt and dries firm; finish with pearlescent paint for shimmer.
Materials
- 1 ceramic bowl, 5–7"
- Acrylic texture paste (modeling paste) — 2 oz
- Palette knife or small spatula
- Pearlescent white and silver acrylic paints
- Small fan brush for dry-brushing
- Sealant (matte or satin)
Instructions
- Clean and dry the bowl.
- Apply texture paste to rim with palette knife, creating organic peaks.
- Let paste dry 1–2 hours (thin layers may dry faster); thicker areas may take up to 6 hours.
- Once dry, paint with pearlescent white, dry-brush silver highlight.
- Seal with two thin coats of varnish, letting each dry 20 minutes.
- Curing is complete when texture is firm and non-tacky.
How to Display or Gift It
- Fill with faux snow and LED tealight for a centerpiece (battery tealight recommended).
- Wrap with clear box and ribbon to show texture.
- For storage, nest with bubble wrap to protect raised areas.
- Peppermint Swirl Bowl

The peppermint swirl is fun, festive, and cheerful. It’s a great project for a holiday snack bowl or candy dish. A round sponge or small stencil makes even swirls easy. Keep lines slightly imperfect for a charming handmade look.
Materials
- 1 white ceramic bowl, 5–7"
- Red and white porcelain or acrylic paint
- Small round sponge or spiral stencil
- Fine liner brush for clean edges
- Clear glaze or varnish
- Warm water and cloth for cleanup
Instructions
- Clean the bowl and plan the central swirl.
- Use pencil to draw the spiral lightly if needed.
- Paint alternating red and white spirals with sponge or stencil.
- Touch up with a fine liner brush for crisp lines.
- Let dry 20–30 minutes between coats.
- Apply sealant or bake per paint manufacturer.
- Ensure center is fully opaque and smooth before gifting.
How to Display or Gift It
- Fill with peppermint candies or hot cocoa stirrers.
- Tie a paper straw and a small spoon to the outside with ribbon.
- Store in a gift box with shredded paper.
- Woodland Animal Silhouette Bowl

Silhouettes of deer, foxes, or owls evoke a cozy woodland holiday. Using a stencil ensures crisp shapes while keeping the process beginner-friendly. This bowl reads storybook and pairs well with rustic decor.
Materials
- 1 cream ceramic bowl, 6–8"
- Stencil of woodland animal
- Burnt umber or deep brown porcelain paint
- Small sponge dauber or stipple brush
- Painter’s tape
- Bake-on glaze or varnish
Instructions
- Clean bowl, position stencil inside or outside, and tape in place.
- Dab paint using sponge dauber; avoid brushing to prevent bleed.
- Build color in thin layers until opaque.
- Remove stencil carefully after paint is tack-free.
- Touch up edges with a fine brush if needed.
- Bake or seal per paint instructions.
How to Display or Gift It
- Pair with a wooden spoon and bag of homemade granola.
- Wrap in burlap with a pine sprig for rustic presentation.
- Keep in a divider box when sending multiple items.
- Metallic Marbled Bowl

Marbling with metallics yields an elegant holiday look that feels upscale. This technique uses thin paints and swirling motions to mimic stone. Work in a ventilated area and protect surfaces — metallic paints can be messy.
Materials
- 1 dark glazed ceramic bowl, 6–8"
- Metallic acrylic paints: gold, pewter
- Pour medium or extender (1–2 tbsp)
- Small disposable cups and stirring sticks
- Toothpick for veining
- Clear varnish (gloss)
Instructions
- Clean bowl and protect work surface.
- Thin metallic paints with small amounts of pour medium in cups.
- Pour small amounts into bowl and tilt gently to spread.
- Use toothpick to create veins and marbled effects.
- Let rest until fully set (1–2 hours); dry time varies with thickness.
- Seal with two thin coats of gloss varnish after 24 hours.
- Avoid food contact unless using food-safe materials.
How to Display or Gift It
- Use as a jewelry catchall or decorative piece.
- Pair with a velvet pouch and small trinket for a luxe gift.
- Wrap in tissue and place in a rigid box to protect finish.
- Candy Cane Stripe Bowl (keyword: holiday ceramic bowl painting ideas)
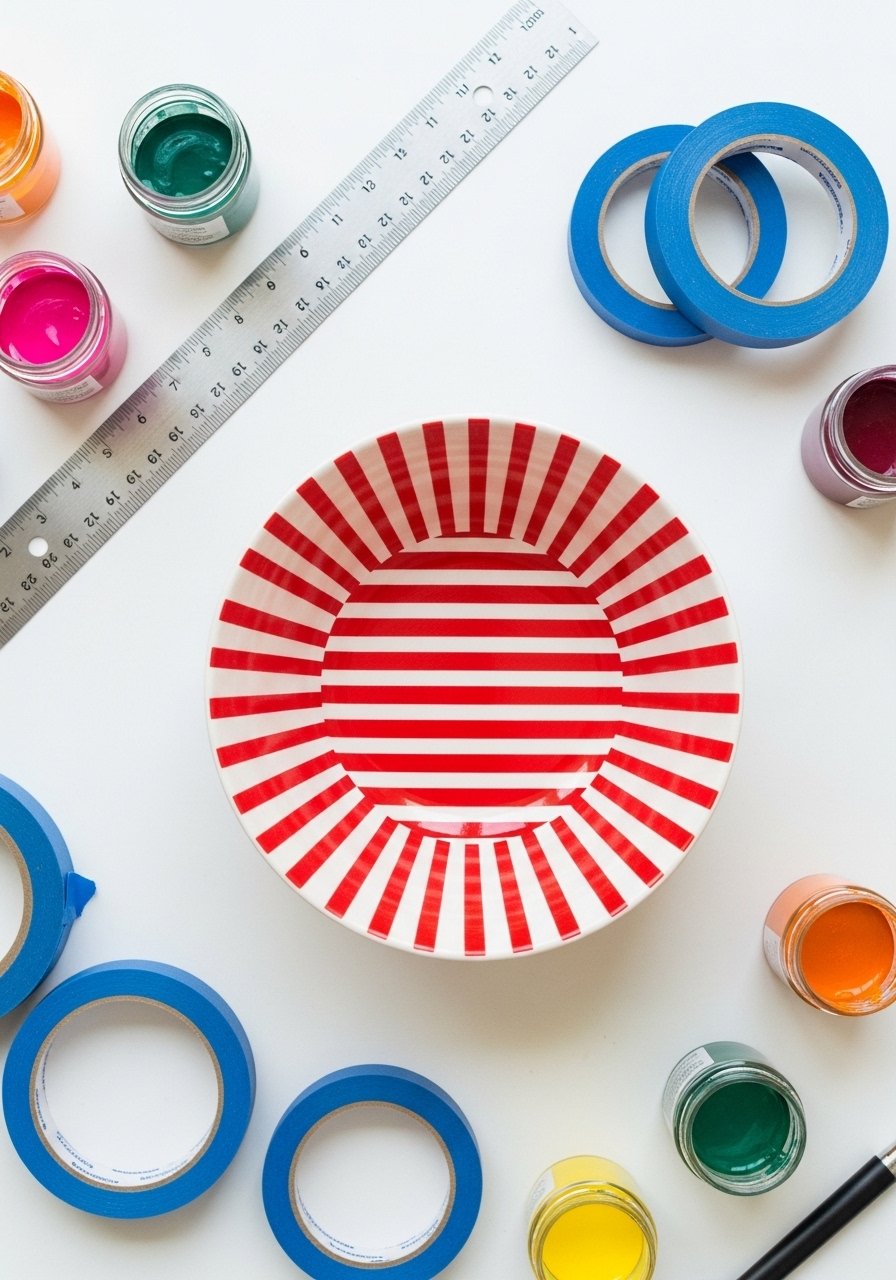
Candy-cane stripes are graphic and festive, perfect for holiday servingware. Masking with thin painter’s tape produces straight, even stripes. This is a good assembly-line project for making sets.
Materials
- 1 white ceramic bowl, 6–8"
- Red porcelain paint or acrylic paint suitable for ceramics
- Thin painter’s tape (1/8" and 1/4")
- Small foam brush or roller
- Clear sealant or bake-on glaze
Instructions
- Clean bowl and plan stripe spacing.
- Apply painter’s tape vertically leaving gaps for stripes.
- Paint exposed areas red with foam roller in thin coats.
- Allow 20 minutes drying between coats.
- Remove tape slowly when paint is tack-free.
- Touch up edges with fine brush if needed.
- Bake or seal according to paint directions.
How to Display or Gift It
- Fill with candy canes or peppermint bark.
- Bundle with a holiday mug and hot cocoa mix for gifting.
- Store flat and separated by paper to avoid rubbing.
- Scandinavian Tree Cluster Bowl

A small cluster of stylized trees makes for a playful seasonal pattern. The matte, simple shapes are very Scandinavian in feel. This pattern repeats easily, so it’s ideal for sets of bowls or a coordinated table.
Materials
- 1 white or cream bowl, 6–8"
- Green and gray porcelain paints
- Small flat brush or triangular sponge stamp
- Pencil for layout
- Clear glaze or varnish
Instructions
- Clean and pencil-mark layout lines.
- Paint small tree shapes with flat brush, keeping strokes short.
- Work in rows for consistent spacing.
- Let dry 15–30 minutes; add second coat as needed.
- Seal with glaze and cure per product instructions.
How to Display or Gift It
- Put in a gift basket with artisanal hot chocolate and wooden spoons.
- Display with miniature wooden trees on a mantel.
- Stack carefully with divider tissue for storage.
- Frosted Glass Look Bowl (using etching paint)
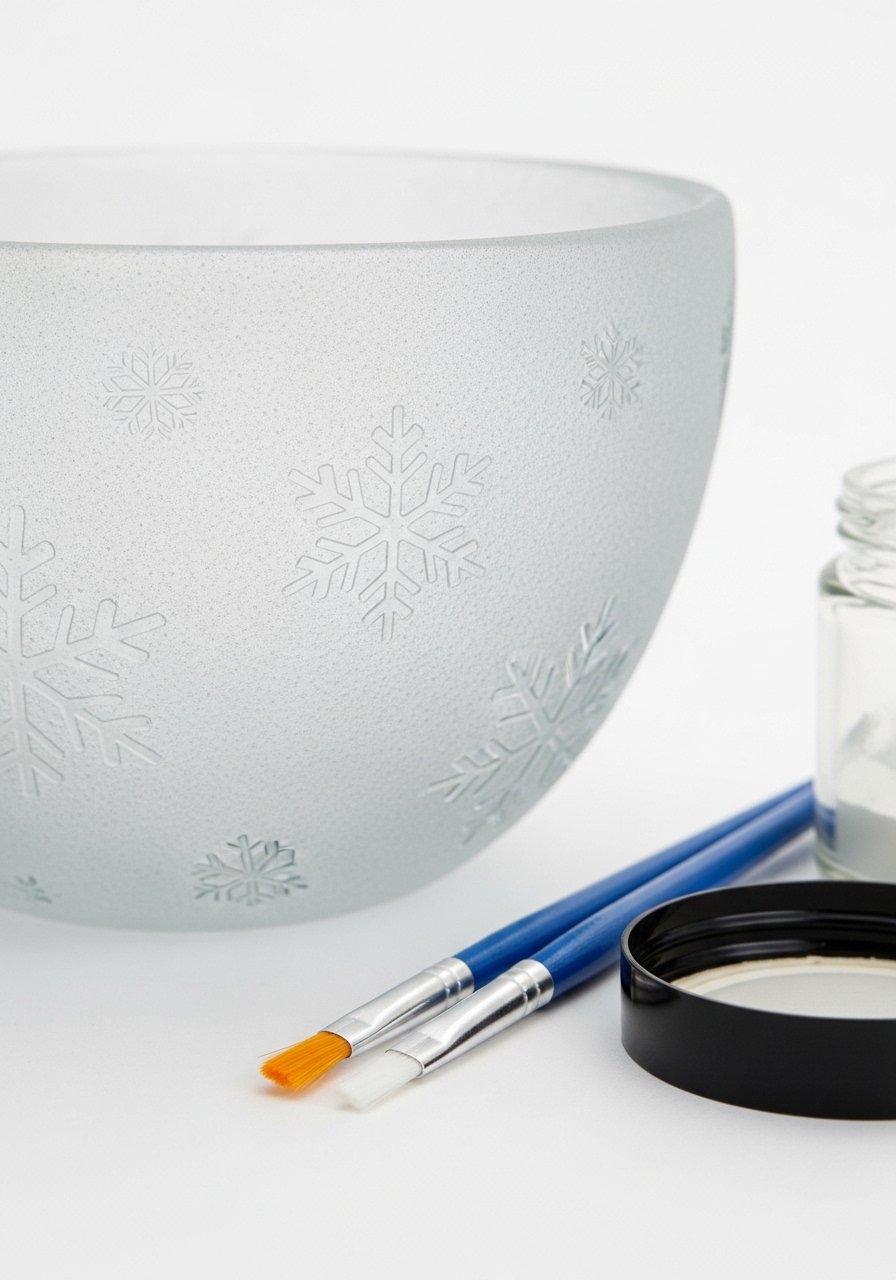
Etching cream creates a frosted glass appearance on glossy ceramic, giving a sleek modern look. This works beautifully for neutral, minimalist holiday styling. Note: follow etching product safety instructions and use disposable applicators.
Materials
- 1 glazed white ceramic bowl, 6–8"
- Glass etching cream (small jar)
- Snowflake stencil
- Disposable foam brush and gloves
- Rinse station and water
- Sealant if needed
Instructions
- Thoroughly clean bowl; dry.
- Position stencil and secure with tape.
- Apply etching cream per product instructions with disposable brush. Wear gloves.
- Wait recommended time (usually 1–5 minutes).
- Rinse cream thoroughly and remove stencil.
- Dry and inspect frosted finish. No oven required.
- If needed, seal edges with clear varnish for longevity.
How to Display or Gift It
- Fill with battery tea lights for a frosted glow.
- Wrap in a translucent box to showcase finish.
- Store with padding to avoid scuffs.
- Hand-Stamped Holiday Words Bowl

Alphabet stamps let you personalize bowls with short holiday words. It’s great for gifting named items or short messages. Use a light touch so letters stay crisp.
Materials
- 1 ceramic bowl, 5–7"
- Alphabet stamp set (craft stamps)
- Pigment or porcelain ink pads (black or gold)
- Small foam pad to press stamp evenly
- Clear bake-on glaze or varnish
Instructions
- Clean bowl.
- Decide word arrangement and test on paper.
- Ink letter stamps lightly; press firmly into bowl interior.
- Work slowly and evenly to avoid smudging.
- Let dry according to ink instructions; bake if required.
- Seal per product directions.
How to Display or Gift It
- Personalize with recipient names for hosting gifts.
- Nest in a box with a handwritten recipe card.
- Label with a calligraphy tag tied with ribbon.
- Rustic Speckle & Rim Bowl

Rustic speckle plus a brushed rim gives a handmade studio-pottery feel. It suits farmhouse and cottagecore aesthetics. A sponge or speckle medium helps you control dot density.
Materials
- 1 natural stoneware bowl, 6–8"
- Speckle medium or diluted acrylic brown/black paint
- Soft brush or toothbrush for speckling
- Flat brush for rim brushing
- Matte sealer or bake-on glaze
Instructions
- Clean bowl.
- Brush rim with diluted brown paint; wipe excess to create antique look.
- Thin speckle color and flick with toothbrush or soft brush over bowl surface.
- Build layers gradually, less is more.
- Let dry 20–30 minutes between passes.
- Seal once fully dry per sealer instructions.
How to Display or Gift It
- Pair with artisanal bread or preserves for hostess gifts.
- Display on a shelf with ceramic vases and dried flowers.
- Wrap in kraft paper and tie with twine.
- Snow Globe Scene Bowl

A tiny painted scene looks like a snow globe inside a bowl — whimsical and detailed. Small brushes and steady hands are helpful, but you can simplify shapes for a charming naive look. Great for gifting to lovers of illustrative detail.
Materials
- 1 white ceramic bowl, 6–7"
- Small liner brushes (sizes 00–1)
- Porcelain paints: white, sky blue, green, burnt umber
- Palette and water jar
- Clear glaze for sealing (bake-on if using porcelain paints)
Instructions
- Clean bowl and sketch a simple scene.
- Paint background sky with diluted blue; let dry 10 minutes.
- Add trees and buildings with small brushes.
- Use white dots for falling snow with the tip of a brush.
- Layer details once base is dry.
- Bake or seal per paint instructions.
- Check for fully opaque coverage and firm finish.
How to Display or Gift It
- Fill with a few faux snowballs and tuck a tiny note inside.
- Wrap in clear cellophane so the scene remains visible.
- Store flat with cushioning to avoid scratching the interior.
- Chevron Holiday Bowl
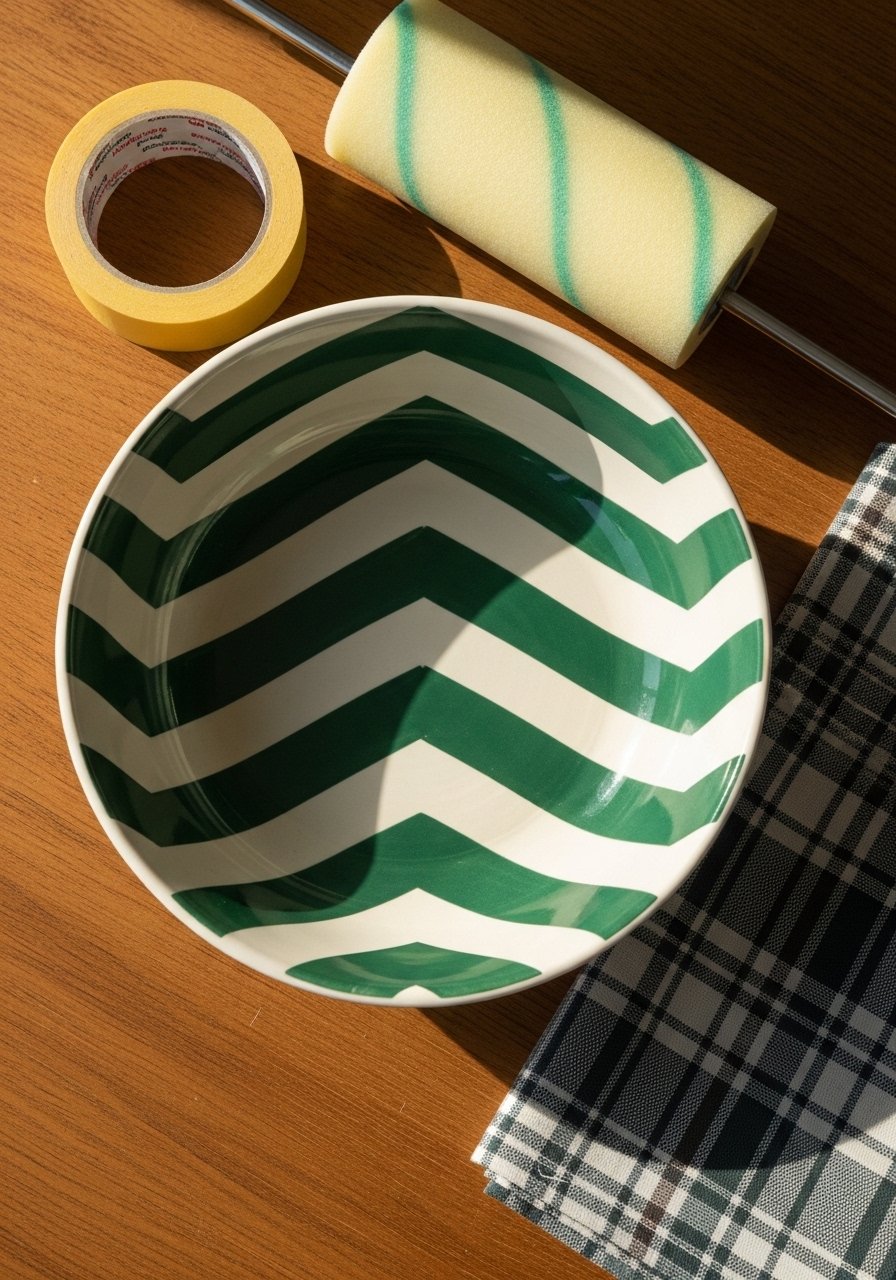
Chevron stripes give a bold, modern holiday punch. This is a quick pattern that reads festive and graphic. Tape carefully for crisp chevrons and use a small foam roller to avoid streaks.
Materials
- 1 ceramic bowl, 6–8"
- Painter’s tape (for chevron angles)
- Green and cream porcelain paints
- Mini foam roller or flat foam brush
- Straightedge or protractor for angles
- Sealant or glaze
Instructions
- Clean bowl and mark chevron angle layout.
- Apply painter’s tape in V shapes for chevrons.
- Roll paint over exposed areas in thin layers.
- Remove tape when paint is tacky, not fully wet.
- Repeat for alternating colors.
- Seal once dry per product instructions.
How to Display or Gift It
- Pair with a bold striped napkin for a coordinated table setting.
- Fill with crunchy holiday nuts for gifting.
- Stack with tissue for shipping.
- Miniature Wreath Center Bowl
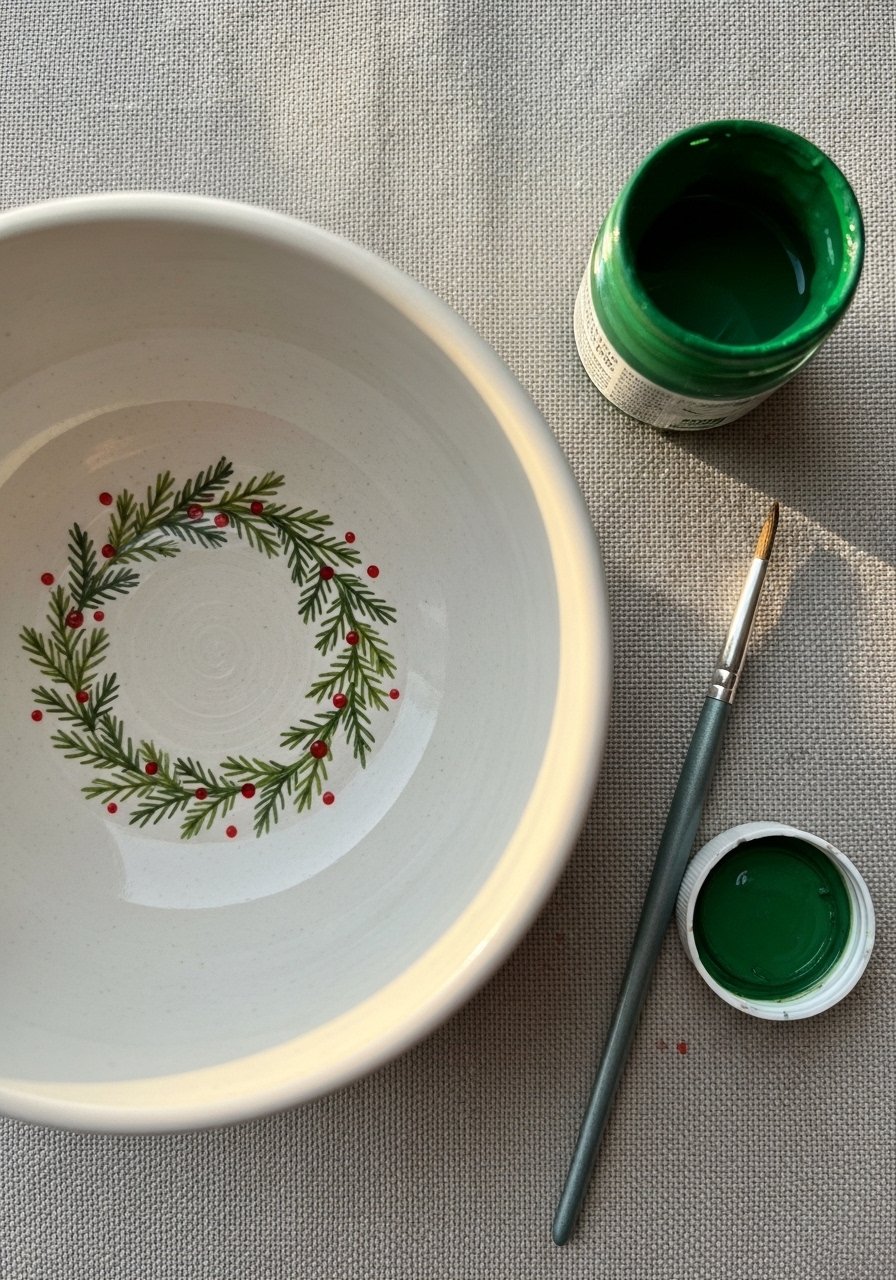
A tiny wreath around the bowl center is subtle and charming. This works well for intimate gifts and seasonal décor. Use a fine brush to paint small leaves and red berry dots for contrast.
Materials
- 1 cream or white bowl, 5–6"
- Fine round brush (size 0)
- Green and red porcelain paints
- Palette and water jar
- Clear glaze or varnish
Instructions
- Clean bowl and sketch a faint circle as guide.
- Paint leaf clusters around the circle with short strokes.
- Dot tiny red berries intermittently.
- Let dry 15–20 minutes and add a second layer if needed.
- Seal per product instructions.
How to Display or Gift It
- Nest with small holiday sprigs and a tiny candle (battery operated).
- Wrap in tissue and place inside a snug kraft box.
- Label with a sticker and short message.
- Patchwork Plaque Bowl

Patchwork squares create a cozy, handmade vibe reminiscent of quilt motifs. This fits cottagecore and boho shoppers who like soft palettes. Use a ruler to mark squares and paint carefully for crisp lines.
Materials
- 1 ceramic bowl, 6–8"
- Acrylic or porcelain paints in 4–6 muted tones
- Small flat brush and detail brush
- Ruler and pencil for grid
- Sealant or bake-on glaze
Instructions
- Clean bowl and draw a faint grid inside or outside.
- Paint each square a different color using thin coats.
- Let dry 15 minutes between colors.
- Outline certain squares with a thin dark line for definition if desired.
- Seal once fully dry.
How to Display or Gift It
- Pair with a small patchwork napkin or coaster.
- Stack with other handmade items in a gift basket.
- Store wrapped in tissue to prevent scratches.
- Retro Ornament Motif Bowl
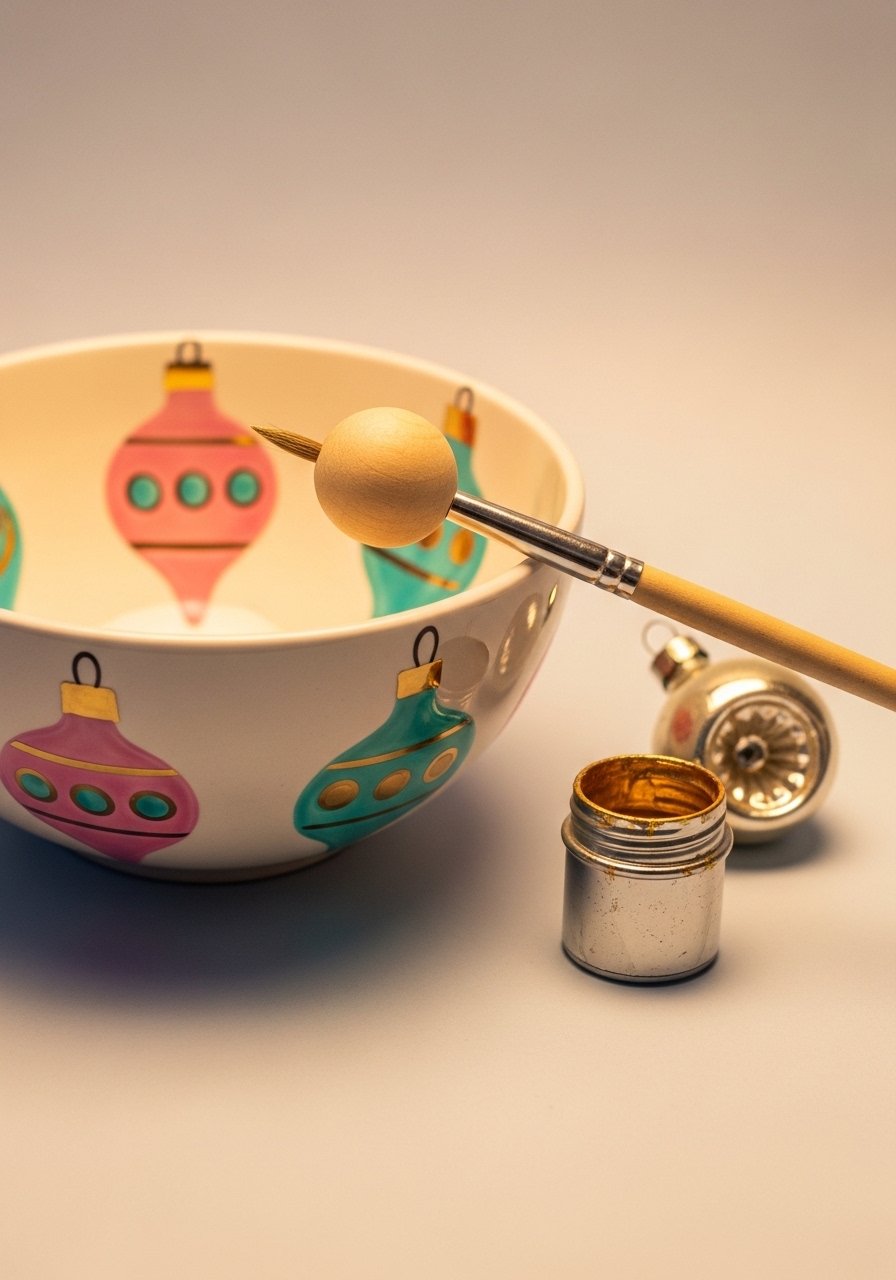
Retro ornament motifs bring mid-century holiday nostalgia to a bowl. Use rounded shapes and metallic highlights for a vintage look. This is playful and great for colorful holiday schemes.
Materials
- 1 white ceramic bowl, 6–7"
- Paints: pink, teal, metallic gold
- Small round brush for shapes
- Toothpick for highlights
- Clear glaze or varnish
Instructions
- Clean bowl and lightly sketch ornament placements.
- Paint rounded ornament shapes and add small hanger loops at top.
- Add metallic highlights and dots for sparkle.
- Let dry 20–30 minutes between layers.
- Seal per product instructions.
How to Display or Gift It
- Bundle with a set of handmade ornaments for a themed gift.
- Display on a shelf with vintage holiday decor.
- Wrap in tissue and place in a snug gift box.
- Candy Sprinkles Rim Bowl
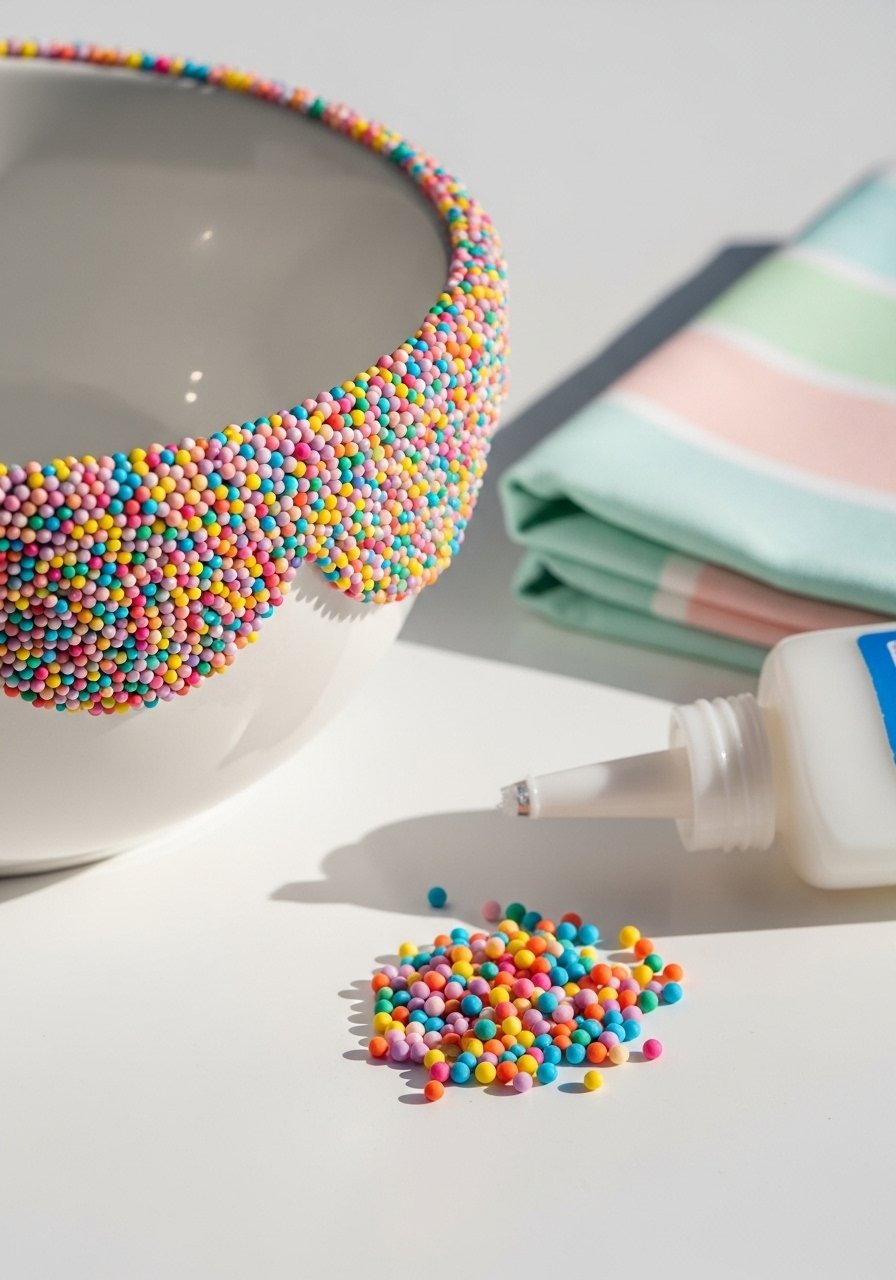
Using tiny polymer clay dots or raised paint dots on the rim creates playful candy-sprinkle texture. This works well for gift bowls aimed at kids or anyone who loves playful detail. Bake clay per package and attach with clear craft glue.
Materials
- 1 ceramic bowl, 5–7"
- Polymer clay in assorted colors (tiny amounts)
- Craft glue (E6000 or clear-drying)
- Sealant for clay edges
- Small tool to shape dots
Instructions
- Condition polymer clay and roll tiny pea-sized balls.
- Bake clay dots per manufacturer instructions.
- Clean bowl rim and arrange dots evenly.
- Adhere with small dots of craft glue; let set 24 hours.
- Seal edges with clear sealer if needed.
- Check adhesion before gifting.
How to Display or Gift It
- Fill with mini candies or trinkets.
- Wrap in clear cellophane to show the rim detail.
- Include a care note that pieces are decorative and avoid dishwasher.
- Starburst Metallic Bowl
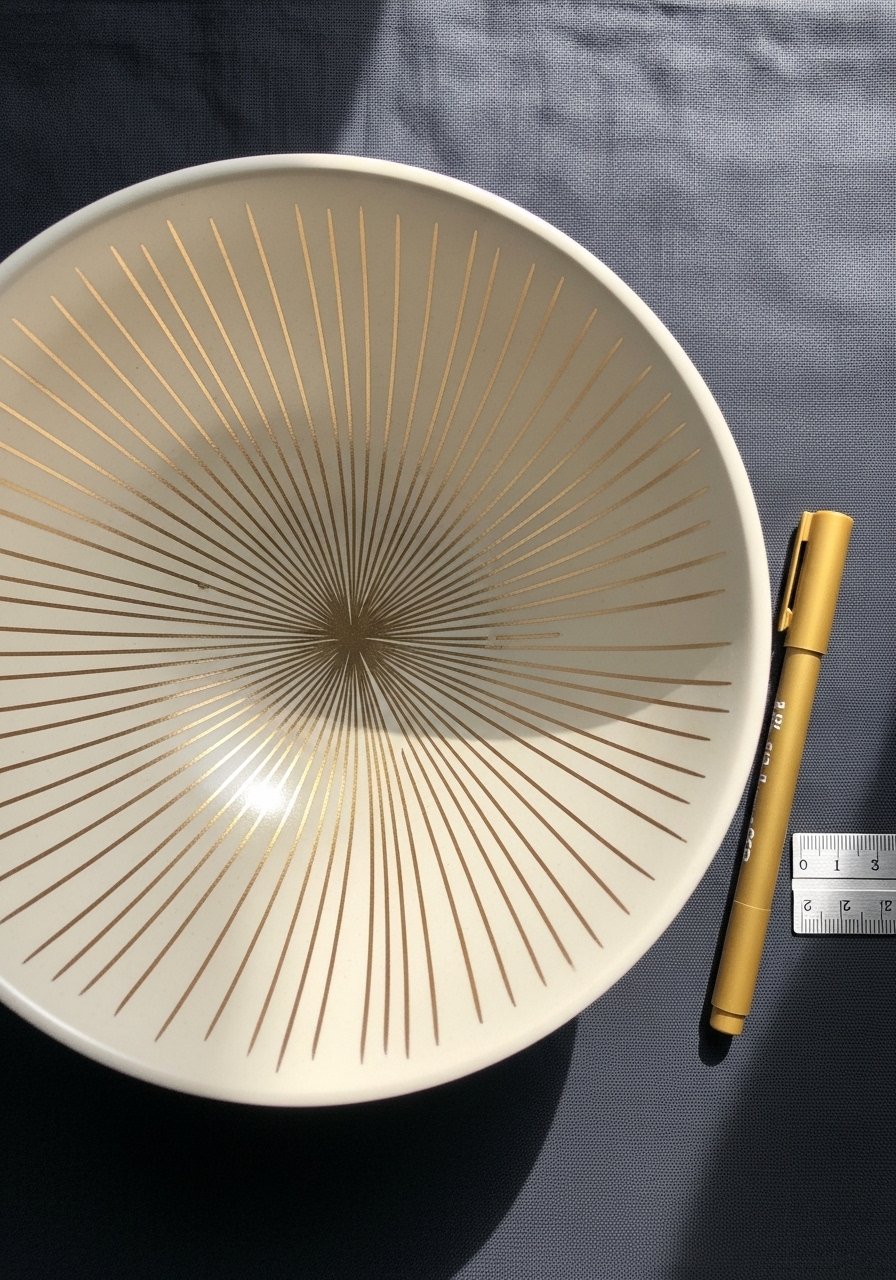
A metallic starburst reads elegant and festive without heavy patterning. Fine lines radiating from center add movement. A steady hand and a metallic paint pen make this surprisingly accessible.
Materials
- 1 dark or black glazed bowl, 6–8"
- Metallic gold paint pen (fine tip)
- Pencil for faint center mark
- Ruler or circle template (optional)
- Clear varnish
Instructions
- Clean bowl and mark center lightly with a pencil.
- Draw radiating thin lines with the paint pen.
- Keep lines steady; use wrist support.
- Add multiple thin layers for even metallic coverage.
- Seal with gloss varnish after full dry.
How to Display or Gift It
- Pair with a candle for a holiday centerpiece.
- Wrap in tissue and box to preserve metallic finish.
- Store upright to avoid rubbing metallic lines.
- Woodland Bark Texture Bowl
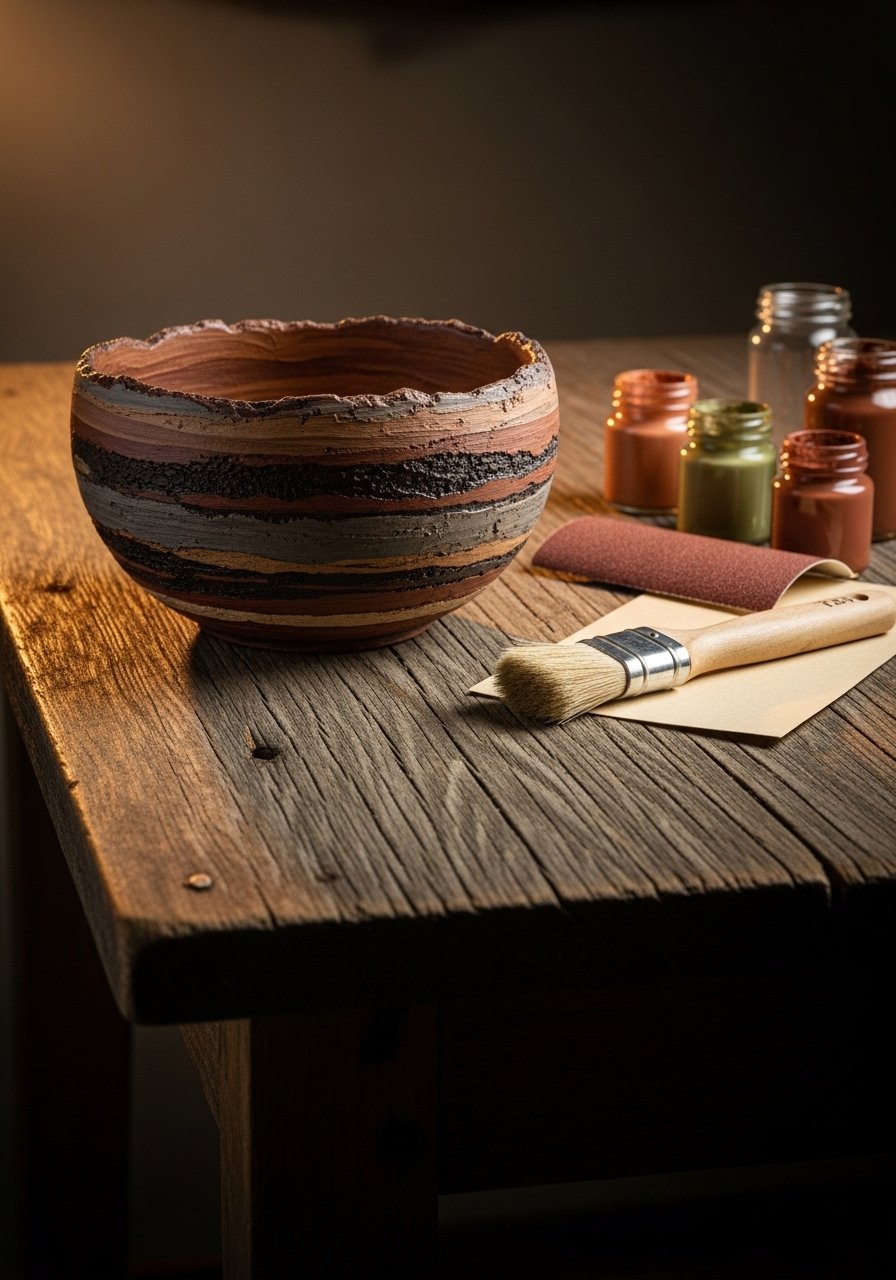
Mimicking bark texture gives a natural, woodland feel. Layered dry-brushing and stippling create depth and organic texture. This bowl suits rustic holiday tables and pairs well with wooden serving pieces.
Materials
- 1 stoneware bowl, 6–8"
- Acrylic paints: burnt umber, taupe, gray
- Stipple brush and dry-brush
- Fine sandpaper (220 grit) for subtle distressing
- Sealant (matte or satin)
Instructions
- Clean bowl and apply a base coat of taupe.
- Dry-brush darker browns and gray in short, vertical strokes.
- Stipple small knots and texture with stipple brush.
- Lightly sand some areas for a lived-in feel.
- Seal with matte varnish once fully dry.
How to Display or Gift It
- Nest with wooden utensils and a linen napkin.
- Wrap in kraft paper and tie with jute for rustic presentation.
- Keep stored in a compartmentalized craft drawer.
- Minimal Gold Dot Rim Bowl
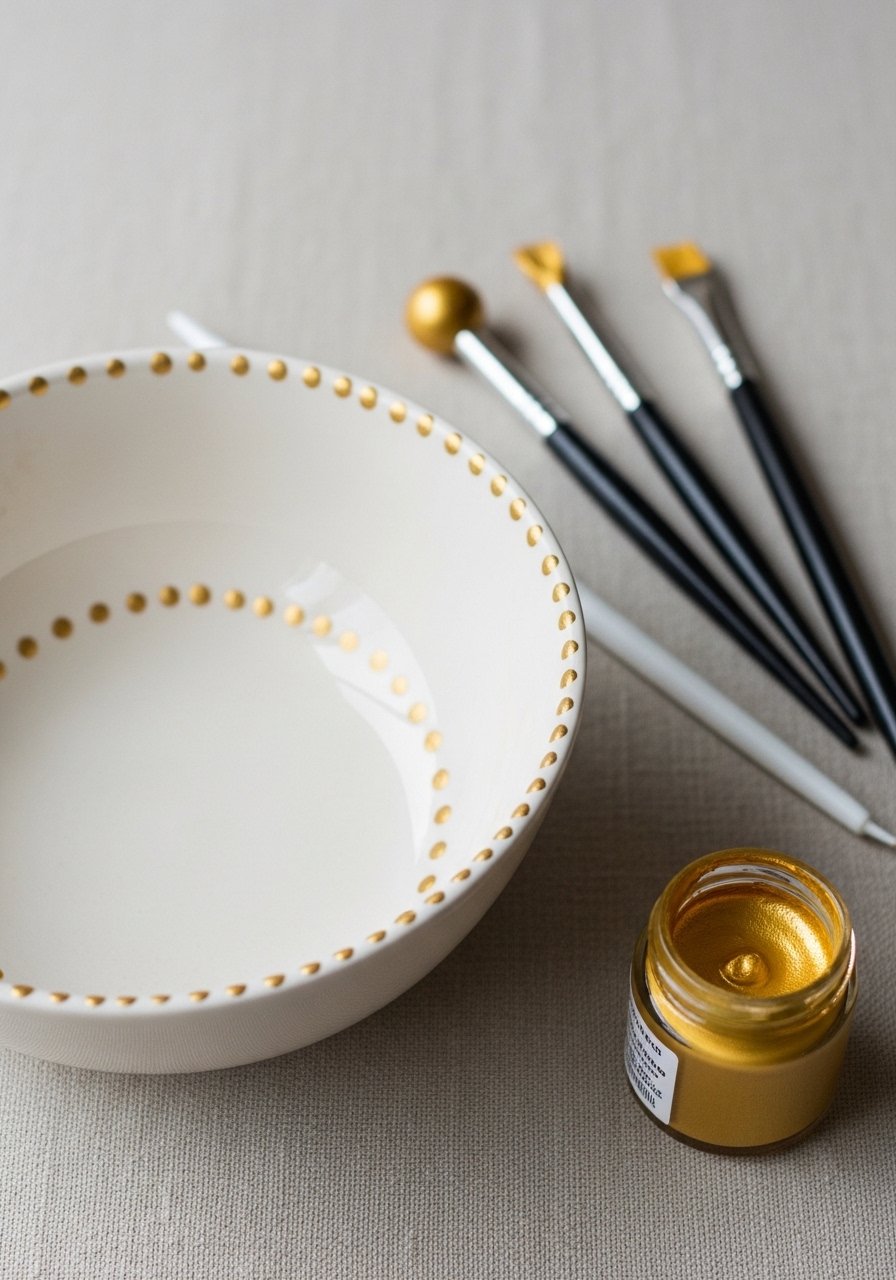
A row of tiny gold dots is understated yet festive. This small detail elevates a plain bowl while remaining neutral and versatile. Dotting tools or paint pen tips make uniform dots effortless.
Materials
- 1 white or cream bowl, 6–7"
- Gold metallic paint pen or small dotting tool with gold paint
- Ruler or tape to mark spacing
- Clear glaze or varnish
Instructions
- Clean bowl and lightly mark dot spacing with pencil.
- Use dotting tool or pen to place dots around rim.
- Let dry 15–20 minutes and add second coat if needed.
- Seal and cure per product instructions.
How to Display or Gift It
- Pair with gold-accented napkins and a small matching tray.
- Wrap in tissue and place in a slim box with a gold ribbon.
- Store nested with paper separators.
- Holiday Word Mosaic Bowl

Mosaic squares spelling holiday words feel folk-art inspired and graphic. This project is patient but rewarding, and it scales up well for sets. Use a small square brush for clean edges and a grid layout guide.
Materials
- 1 ceramic bowl, 6–8"
- Acrylic paints in 4–6 colors
- Small square brush or sharpened sponge tip
- Pencil grid guide
- Clear varnish or bake-on glaze
Instructions
- Clean and draw a faint grid.
- Paint individual squares, alternating colors.
- Plan letter placement so words are centered.
- Let dry between passes and touch up edges.
- Seal per varnish instructions.
How to Display or Gift It
- Combine with a matching coaster for a two-piece gift.
- Place in a decorative box with a printed label.
- Store in a flat organizer between gifting.
- Pocket-Sized Hot Cocoa Bowl (mini bowls set)

Mini bowls are perfect for gifting as a set — think hot cocoa accompaniments or single-serve treats. Small canvases make them quick to paint, and sets feel extra giftable. Use consistent color palettes for a cohesive look.
Materials
- Set of three mini ceramic bowls (3–4" each)
- Porcelain paint set (3 coordinating colors)
- Small brushes (00–1) and dotting tools
- Small gift box and tissue
- Clear glaze or varnish
Instructions
- Clean all mini bowls and lay out your palette.
- Decide on coordinating motifs (tree, star, stripe).
- Paint each bowl using small brushes, allowing 10–15 minutes drying between details.
- Add metallic accents if desired.
- Bake or seal per paint instructions.
- Package together in a small box with tissue and a ribbon.
How to Display or Gift It
- Fill each bowl with mini marshmallows, chocolate chips, and a cocoa packet.
- Tie together with twine and a small wooden spoon.
- Store in a compartmentalized box for safe transport.
I hope this round-up of holiday ceramic bowl painting ideas left you inspired and ready to create. From quick stamped patterns to tiny illustrated scenes and textured rims, there’s something here for every skill level and holiday aesthetic. Save this post for your next craft day or pin a few favorites to curate a gift set — making a few bowls ahead of time is great for holiday markets or last-minute hostess gifts.
One tool that keeps showing up in these projects is a good set of small liner brushes and a few dotting tools — they make detail work faster and more precise. I’ve found my projects go smoother with a reliable set of foam brushes and a quality metallic paint pen when I want crisp metallic accents. Which bowl will you try first? Share a photo with someone you’ll gift to — handmade pieces always feel more personal.
(Note: If you plan to use bowls for food, follow paint and glaze manufacturer instructions for food safety. When in doubt, keep painted bowls decorative or for dry items only.)





