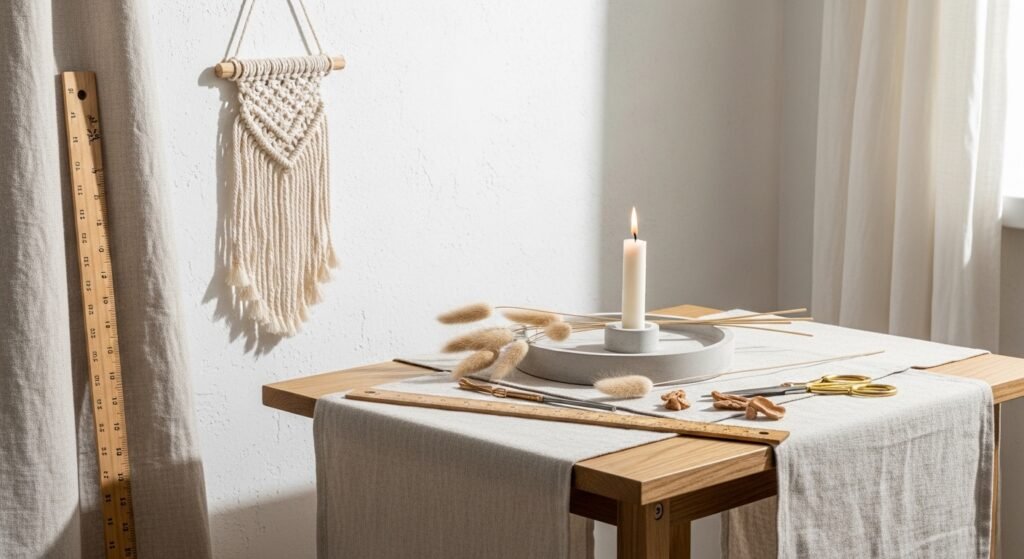
You want a room that feels calm, clean, and quietly elegant. These 20 simple minimalist aesthetic room decor DIY ideas are perfect when you want chic results with little fuss. Each project is made for real homes, real makers, and real schedules—most finish in an hour or two, while a few that use paint or resin need a little patience.
I built these projects around neutral tones, tactile textures, and slow-craft techniques that suit styles from Japandi to soft boho. You'll see macramé, linen, concrete, restrained paint palettes, and subtle brass or wood accents. I often start with my Cricut Joy cutting machine for small vinyl labels, but a sharp craft knife works fine. Grab a temperature-control hot glue gun for clean assembly and less mess.
Read on for full materials lists, step-by-step instructions, drying times, styling tips, and small product recommendations to make each project as stress-free as possible. Pin a few you love and try one this weekend.
- Minimalist Aesthetic Room Decor DIY: Neutral Macramé Plant Hanger
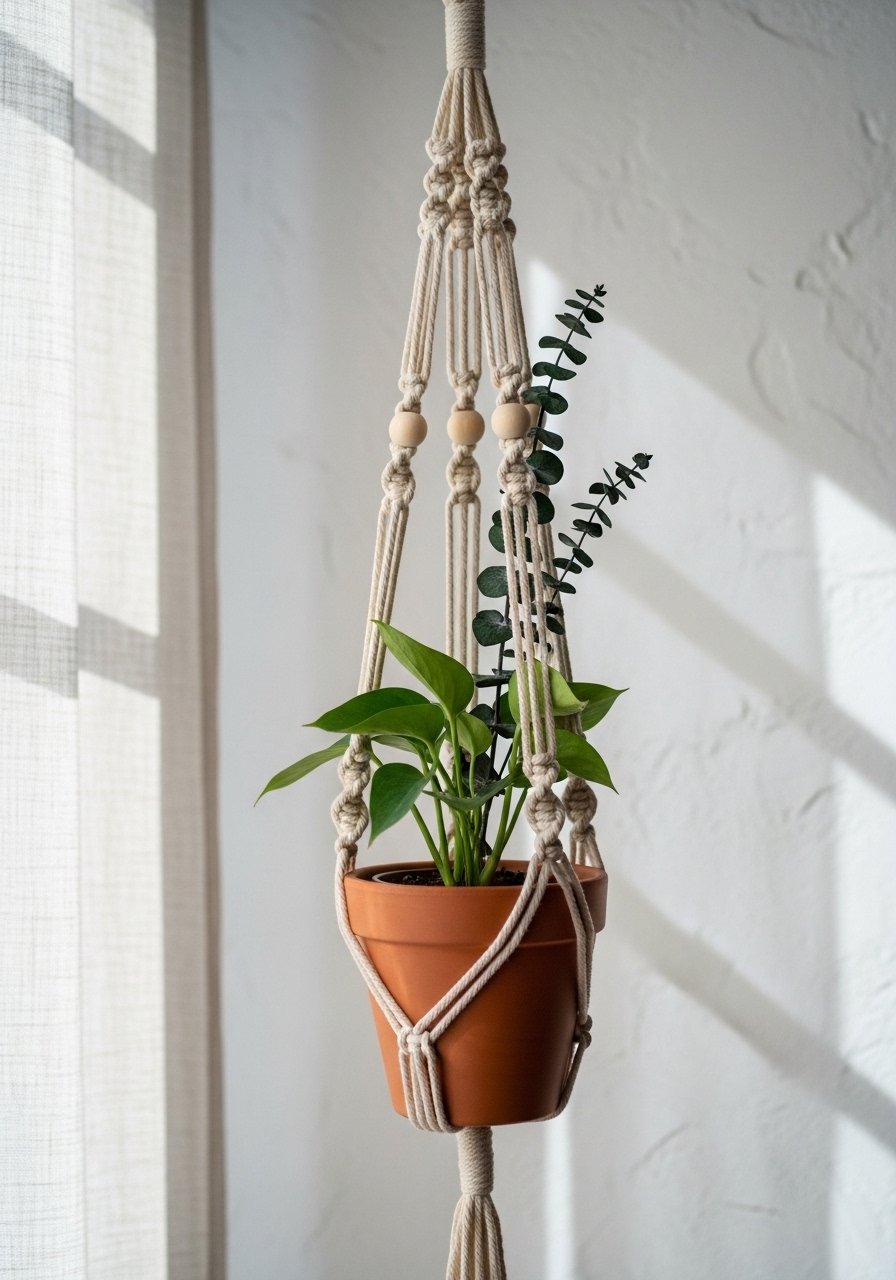
Macramé in a minimal palette feels organic and modern. This hanger uses thin cord and small wooden beads for a lightweight, airy look that won't overwhelm a corner. It's perfect for small hanging planters and works well near a window where light filters through leaves. Beginners will love the repetitive square knots and quick payoff.
Materials
- 3mm single-strand cotton macramé cord, 10 yards
- Wooden beads, 10mm, 6 pieces
- 6" metal O-ring (brushed brass finish)
- Small terracotta pot, 3.5–4" diameter
- Scissors
- Measuring tape
- Comb or brush for fringe
- Optional: macramé board or clipboard to hold work
Instructions
- Cut four lengths of cord, each 2.5 yards. Fold in half and loop through the O-ring to create eight working strands.
- Measure 12" down from the ring and tie a gathering knot to secure all cords. Leave a 1" tail.
- Divide cords into four groups of four. Make 6 square knots in each group, keeping knots tight and even.
- Add a wooden bead to the two central cords of each group at knot 4. Push beads up snug against the knots.
- After the square knots, tie two half hitch knots around each group to create a small cradle.
- Measure so the cradle's height fits your pot—aim for 3–4" cradle height for a 3.5" pot. Adjust and test with the pot.
- Trim the fringe to an even 2.5" length and comb out fibers for a soft finish.
- Hang, load the pot, and tweak knots if the hanger sits unevenly.
How to Display or Gift It
- Hang near a sunny window with a trailing pothos or small fern.
- Add a dried eucalyptus sprig tucked into the pot for texture.
- Pack multiple hangers in kraft gift boxes tied with jute twine for a thoughtful housewarming set.
- Store unfinished hangers flat in a stackable craft organizer if you make in batches.
- Minimal Concrete Catchall Tray
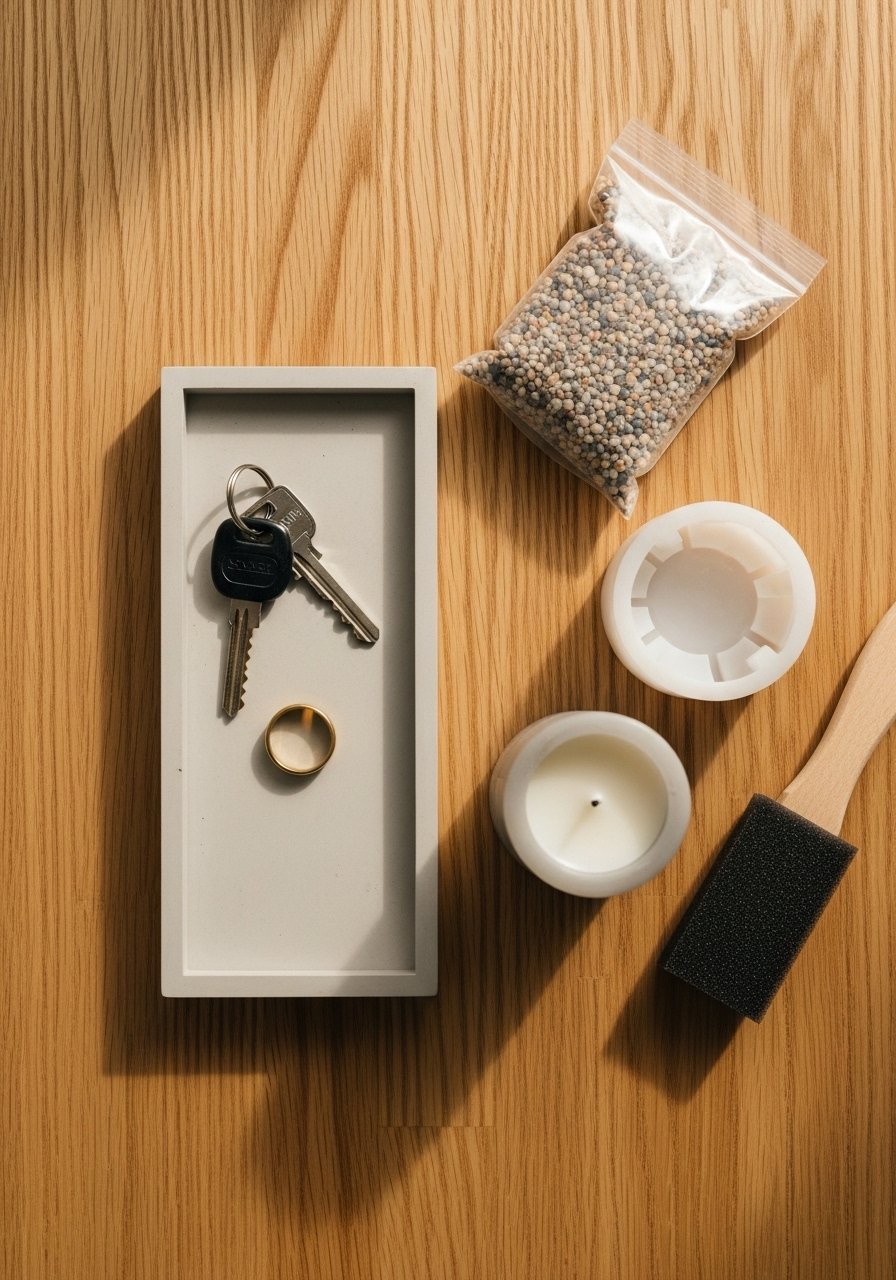
Concrete brings a cool, sculptural edge to minimalist decor. This shallow catchall tray is ideal for keys, jewelry, or bathroom accessories. Use a silicone mold for a smooth finish and fine sand for a soft matte surface. Beginners should follow safety tips for mixing and curing.
Materials
- Fast-setting concrete mix, 1 lb (small batch)
- Silicone rectangle mold, 6 x 4 x 0.5"
- Mixing cup and stir stick
- Fine sand for top finish, 1/4 cup
- Disposable gloves
- Mask for dust
- Foam brush
- Popsicle stick or trowel
- Optional: concrete sealer (matte)
Instructions
- Prepare mold by wiping a light film of cooking oil or mold release.
- Mix 1 lb concrete with ~6 oz water (follow your mix directions) in a cup. Stir until lump-free.
- Pour half the mix into the silicone mold. Tap the mold on the table to release air bubbles.
- Sprinkle a thin layer of fine sand and then pour remaining concrete. Smooth top with a trowel.
- Let set undisturbed for 24–36 hours. For fast mixes, check manufacturer time; many cure to touch in 4–6 hours.
- Demold after 24–36 hours and let cure 72 hours before heavy use for full hardness.
- If desired, sand edges lightly with fine sandpaper and apply 1 thin coat of matte concrete sealer. Let cure 24 hours.
How to Display or Gift It
- Style a tray on a dresser with a matte ceramic candle and dried grass.
- Group two sizes on a console for keys and sunglasses.
- Wrap in tissue and a kraft box for gifting.
- Store extra cured trays flat in a craft storage bin.
- Minimalist Aesthetic Room Decor DIY: Linen Pillow Cover with Subtle Geometric Stripe

A tailored linen pillow gives any sofa or bed a soft, tactile focal point. The painted stripe is intentionally imperfect. This project is fast and adds warmth without pattern overload. You'll use a fabric paint pen for a crisp line.
Materials
- Natural linen fabric, 18 x 18" pre-cut pillow cover or fabric to sew a cover
- Fabric paint pen, black or charcoal, 1mm tip
- Foam brush, small
- Painter's tape, 1/2" wide
- Pillow insert, 18 x 18", 95% down or down alternative
- Sewing machine or fabric glue (if making cover)
- Ruler and chalk for marking
Instructions
- If making a cover: cut linen to 19 x 19" squares for seam allowance. Sew three sides, insert pillow, then stitch closed with invisible seam.
- Mark center line lightly with chalk. Use painter's tape to mask a straight line, leaving a 1/4" gap for the stripe.
- Shake the fabric paint pen. Draw the stripe lightly, building up to desired opacity.
- Let dry 90 minutes to touch. For colorfastness, iron on back for 3 minutes once fully dry.
- Remove tape and check edges for bleed. Touch up with a small foam brush if needed.
- Insert pillow and fluff.
How to Display or Gift It
- Layer with a small knit throw for cozy contrast.
- Pair two identical covers on a bench for symmetry.
- Include a care card and wrap in tissue for gifting.
- Store spare covers in a breathable fabric storage bag.
- Minimal Wood and Brass Candle Holder Set

Wood and brass feel understated but luxe. These turned holders are small and easy to make with pre-turned wooden blanks. Finish with natural oil for warmth. They're perfect for dinner tables or bedside styling.
Materials
- Pre-turned wooden candle holder blanks, set of 3 (varied heights)
- Brass tea light inserts, 3
- Sanding block, 220 grit
- Tung oil or beeswax finish, 1 oz
- Lint-free cloth
- Drill with 7/8" spade bit (if not pre-bored)
- Masking tape
Instructions
- Sand blanks with 220 grit until smooth. Wipe dust away.
- If needed, bore a shallow hole with the 7/8" spade bit to fit tea light inserts. Depth: 1/2".
- Apply 1–2 thin coats of tung oil with a lint-free cloth. Let each coat dry 6–8 hours. Full cure 24–48 hours.
- Insert brass tea light cups snugly.
- For a warmer patina, buff with beeswax after final cure.
How to Display or Gift It
- Cluster three on a marble tray for a bedside vignette.
- Pair with a small linen runner.
- Wrap in kraft tissue with a tiny candle for a thoughtful gift.
- Keep extras in a small wooden crate for seasonal rotations.
- Minimalist Aesthetic Room Decor DIY: Slim Floating Wall Shelf
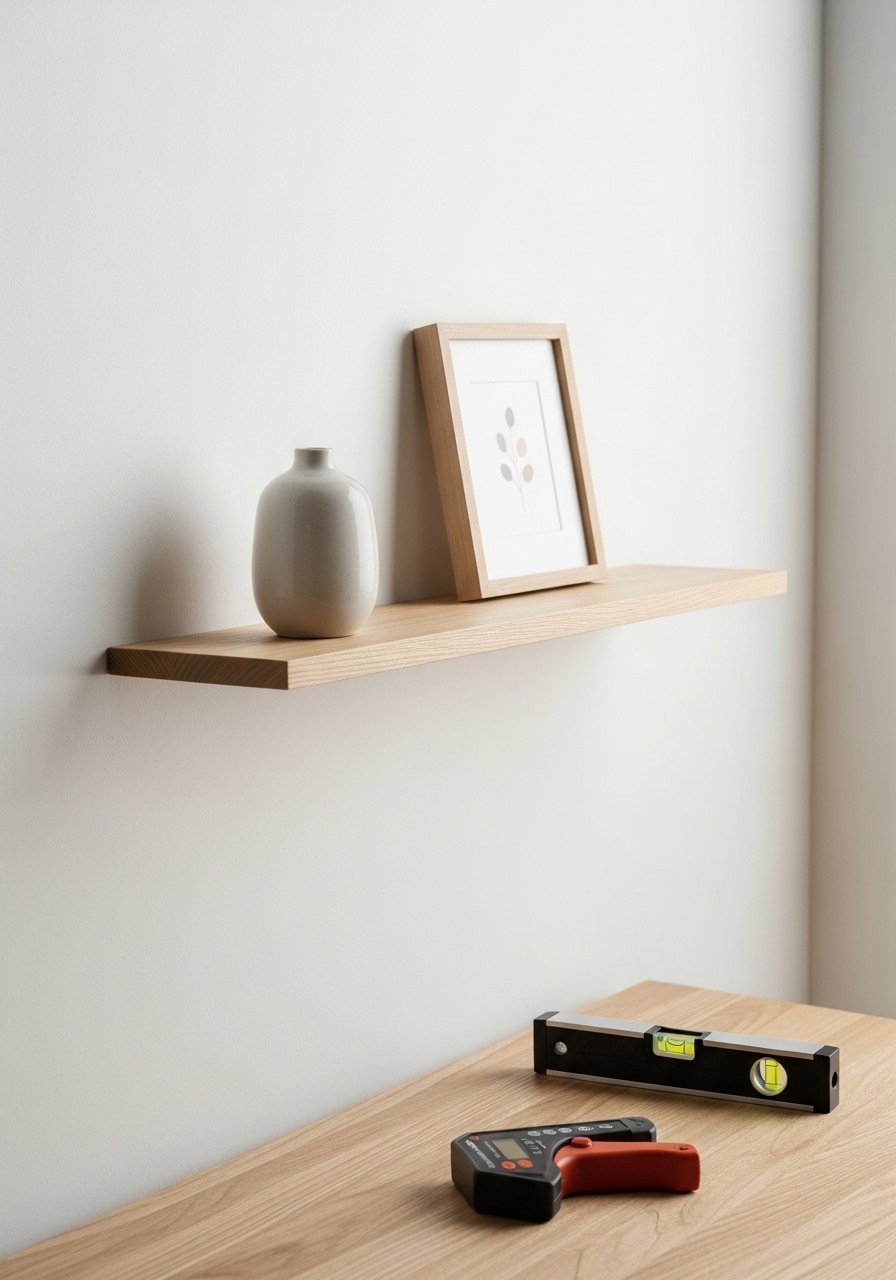
A slim floating shelf adds function and clean lines. This version uses a single board with hidden bracket hardware for a floating look. It's great for small collections and fits Japandi or modern farmhouse styles.
Materials
- Oak or birch board, 24 x 4 x 1"
- Hidden floating shelf bracket (holds up to 20 lbs)
- Stud finder
- Level
- Screws and anchors
- Sandpaper, 180 grit
- Clear matte polyurethane, 1 small can
- Drill and bit set
Instructions
- Sand board smooth with 180 grit and wipe dust.
- Apply 2 thin coats of matte polyurethane with a foam brush. Let dry 2 hours between coats.
- Locate studs with stud finder and mark bracket position. If no stud, use anchors rated for weight.
- Install bracket per instructions, ensuring level.
- Slide board onto bracket until snug. Check for wobble.
- Style with a single object or a small stack of books.
How to Display or Gift It
- Use as a mini display ledge for small frames or ceramics.
- Mount in odd-numbered groups for gallery style.
- Gift as a DIY kit with pre-sanded boards and hardware in a kraft box set.
- Minimal Painted Geometric Wall Art (Acrylic on Wood)
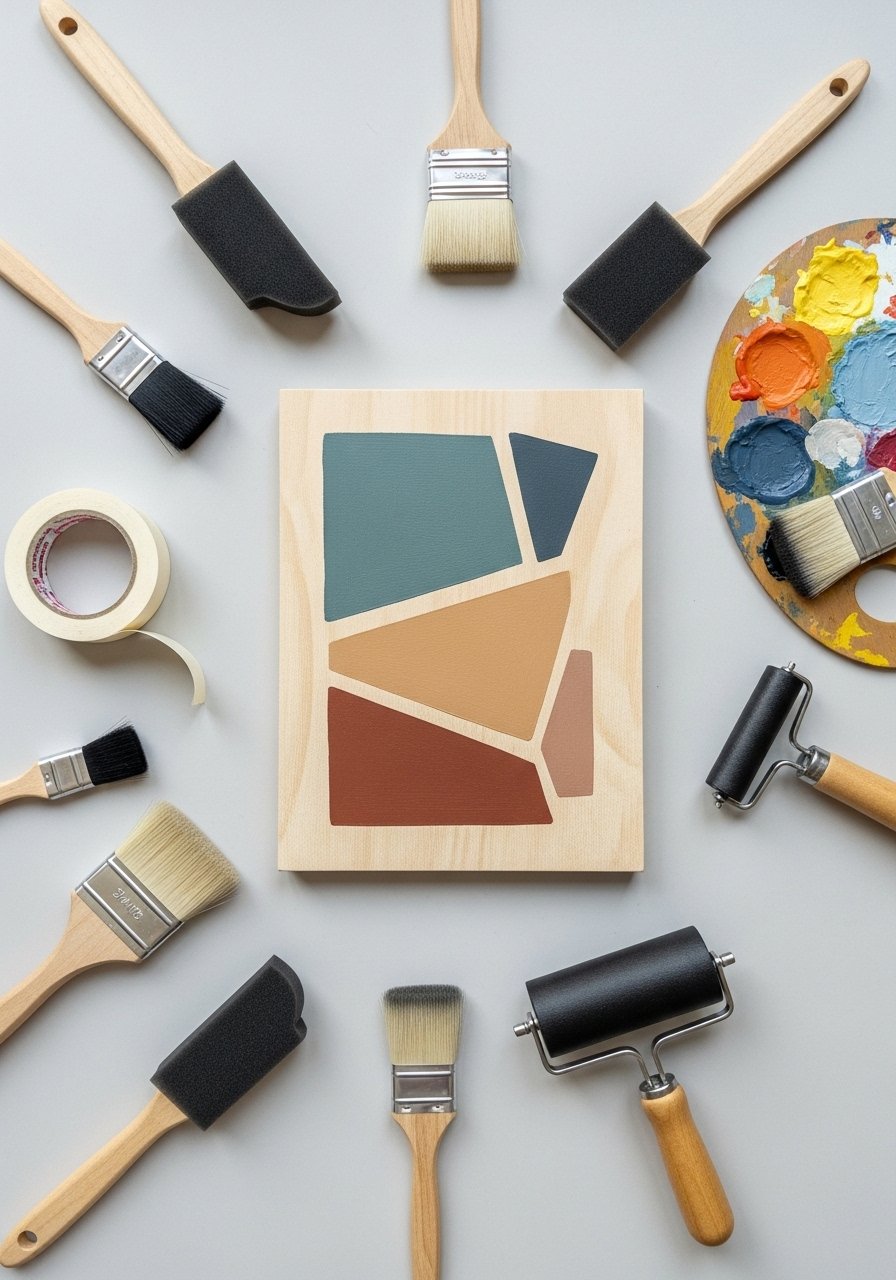
Geometric art feels modern but calm when colors are muted. Painting on a small wood panel gives texture and a minimalist finish. Painter's tape and a brayer help you get crisp edges.
Materials
- 8 x 10" birch wood panel
- Acrylic craft paint set in muted tones (sage, clay, charcoal)
- Painter's tape, 1/4" and 1/2"
- Foam brush, medium
- Flat brayer roller
- Sandpaper, 220 grit
- Primer or gesso, 1 small jar
- Pencil and ruler
Instructions
- Lightly sand panel and apply 1 coat of gesso. Let dry 1 hour.
- Sketch simple geometric shapes with a pencil. Mask shapes with painter's tape.
- Roll paint with a brayer for a smooth finish. Apply 2 thin coats for even coverage. Let dry 30–45 minutes between coats.
- Remove tape when paint is dry to touch for crisp edges.
- Seal with 1 thin coat matte Mod Podge if desired. Dry 1–2 hours.
How to Display or Gift It
- Lean on a slim shelf or prop on a small wooden easel for an easy vignette.
- Pair with a linen pillow of a coordinating tone.
- Wrap in kraft paper for gifting and tuck in a dried sprig.
- Store flat between sheets of acid-free tissue in a stackable art storage box.
- Minimal Ceramic Air-Dry Clay Bud Vases
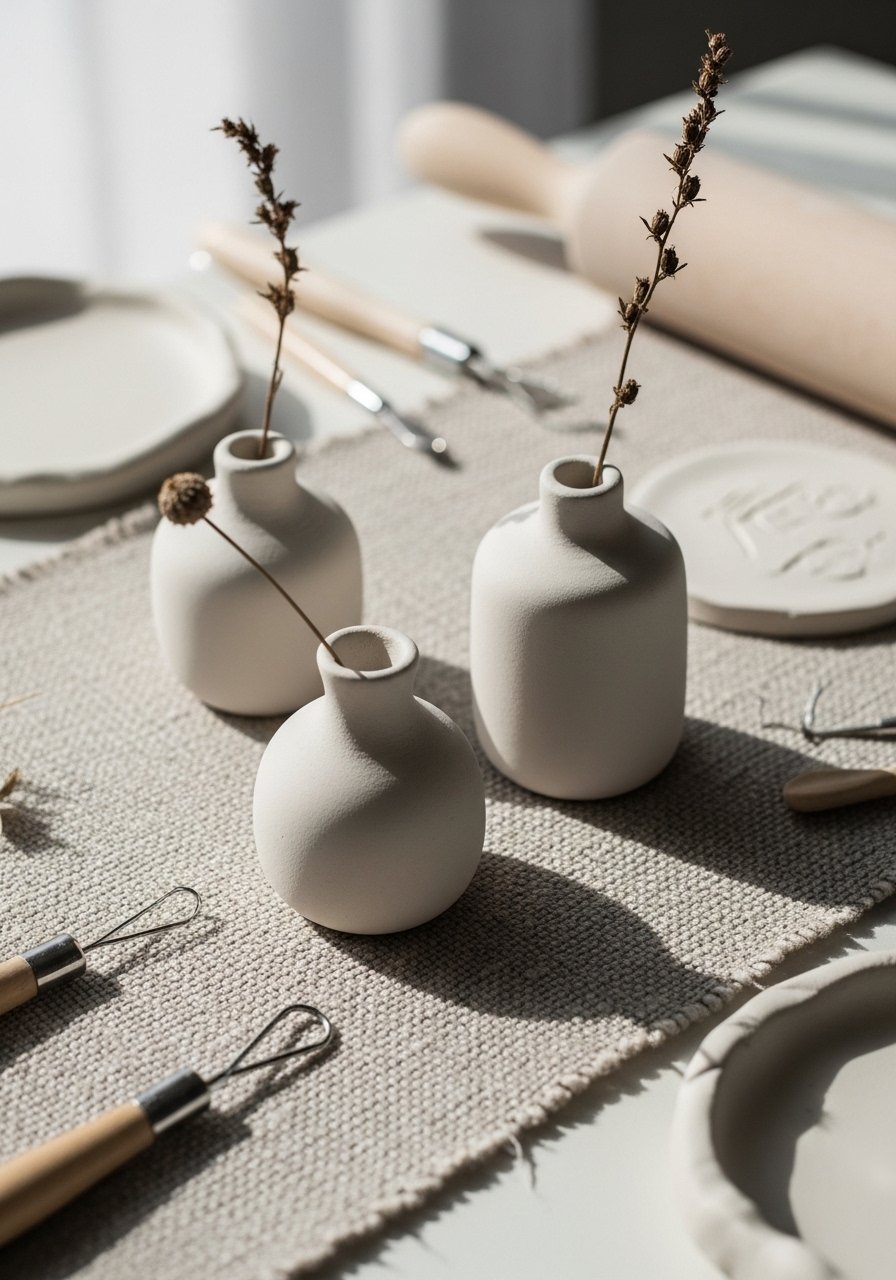
Tiny clay vases bring organic shapes and a handcrafted feel. Using air-dry clay avoids kiln firing. Make a trio in varying heights for a calm, collected cluster.
Materials
- Air-dry clay, 1 lb
- Rolling pin
- Clay modeling tools
- Sandpaper, 320 grit
- Acrylic matte paint, white (optional)
- Clear matte sealer, 1 small spray
- Small water brush
Instructions
- Condition ~1/3 lb clay per vase by kneading until smooth.
- Roll into a log and form into a cylinder. Pinch the base to flatten for stability.
- Use a hollowing tool to create the vase interior. Wall thickness: 3–5mm.
- Smooth seams with a damp finger. Let dry 24–48 hours, depending on thickness.
- Sand lightly with 320 grit for a matte finish. Paint with acrylic if desired.
- Seal with a light spray of matte sealer. Cure 24 hours before adding water. Use bud vases for single stems or dried flowers to avoid water on unsealed clay.
How to Display or Gift It
- Cluster three on a windowsill with single stems.
- Place them on a concrete tray for contrast.
- Wrap individually in kraft tissue and place in a small gift box set.
- Minimalist Tassel Wall Garland
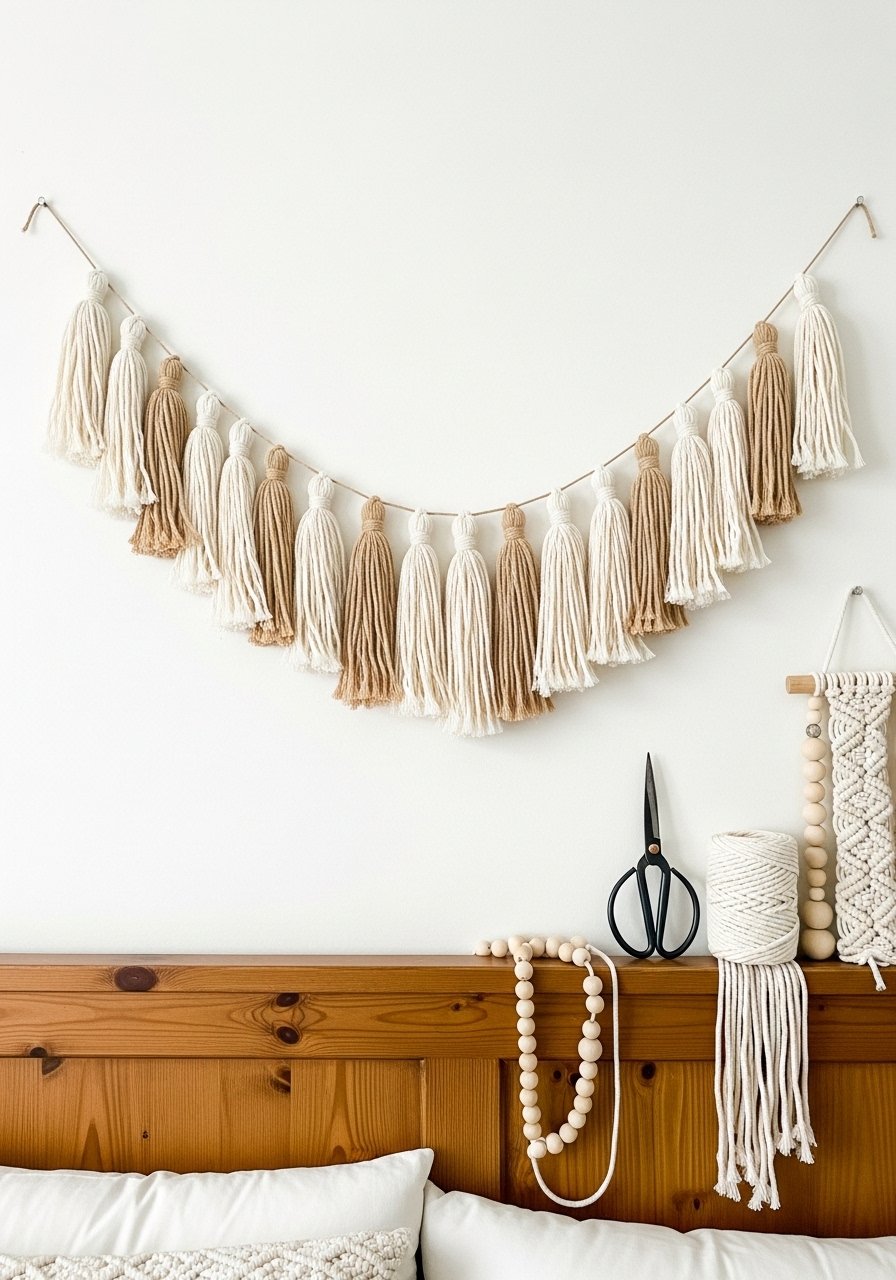
A tassel garland is flexible and light. Neutral yarn in cream and sand shades keeps the look minimal. It’s a quick weekend project and easy to personalize.
Materials
- Natural cotton yarn, 3 colors, 50 yards total
- Jute cord, 3 yards for hanging
- Wooden beads, large, 8mm, 6
- Scissors
- Comb for fringe
- Measuring tape
Instructions
- Wrap yarn around a 4" wide cardboard piece 20 times for each tassel.
- Tie top with a 6" length of yarn. Cut looped edge to form fringe.
- Wrap a 6" length tightly around tassel neck and secure with a knot.
- Comb out fringe and trim to 3.5" length for uniformity.
- Space tassels 6–8" apart on the jute cord, knotting each in place.
- Thread wooden beads between tassels for rhythm.
How to Display or Gift It
- Hang across a headboard or above a mirror.
- Remove beads now and then to wash yarn if needed.
- Bundle multiple garlands in a craft storage tube for gifting or storing.
- Minimal Stone and Driftwood Shelf Mobile
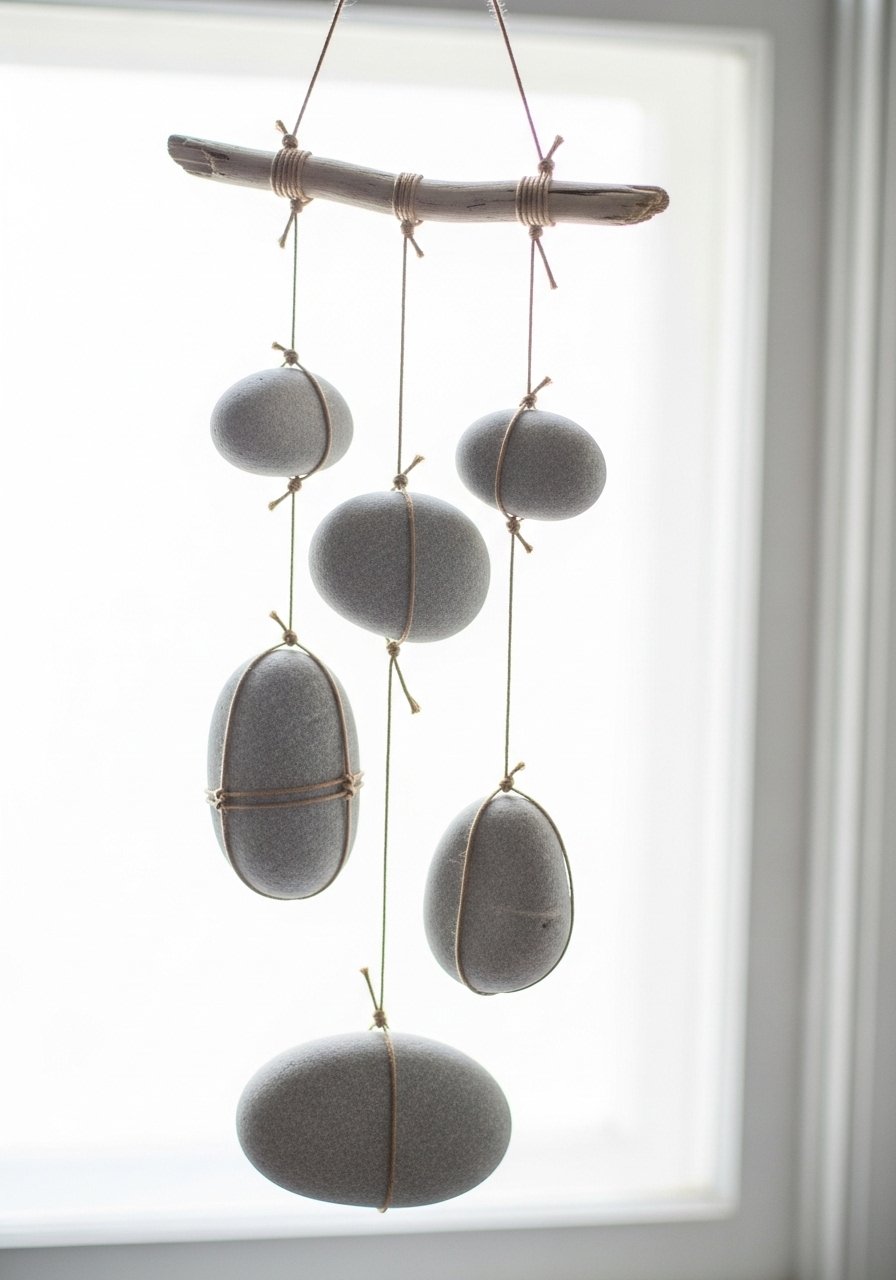
This mobile uses natural materials for a quiet, sculptural accent. It’s weighted but light enough to sway. Keep stone sizes small for balance.
Materials
- Small river stones, 6 (similar weight)
- Driftwood stick, 10–12"
- Jute twine, 10–12 feet
- Drill with small masonry bit (or use pre-drilled stones)
- Hot glue for anchor
- Scissors
Instructions
- If stones aren’t pre-drilled, carefully drill a small hole through each stone with a masonry bit. Wear eye protection.
- Cut twine lengths ranging 8–18" for varied drop heights.
- Thread twine through stone holes and knot securely. Add a dab of hot glue to knot for extra hold.
- Tie stones to the driftwood at measured intervals for balance.
- Tie a three-strand hanger on each end of driftwood and join at the top.
- Hang from a hook and tweak spacing for visual balance.
How to Display or Gift It
- Hang in a bathroom or near a window where it gently moves.
- Gift wrapped with twine in a shallow box.
- Store flat in a shallow craft box to protect stones.
- Minimalist Aesthetic Room Decor DIY: Neutral Framed Pressed Flower Art
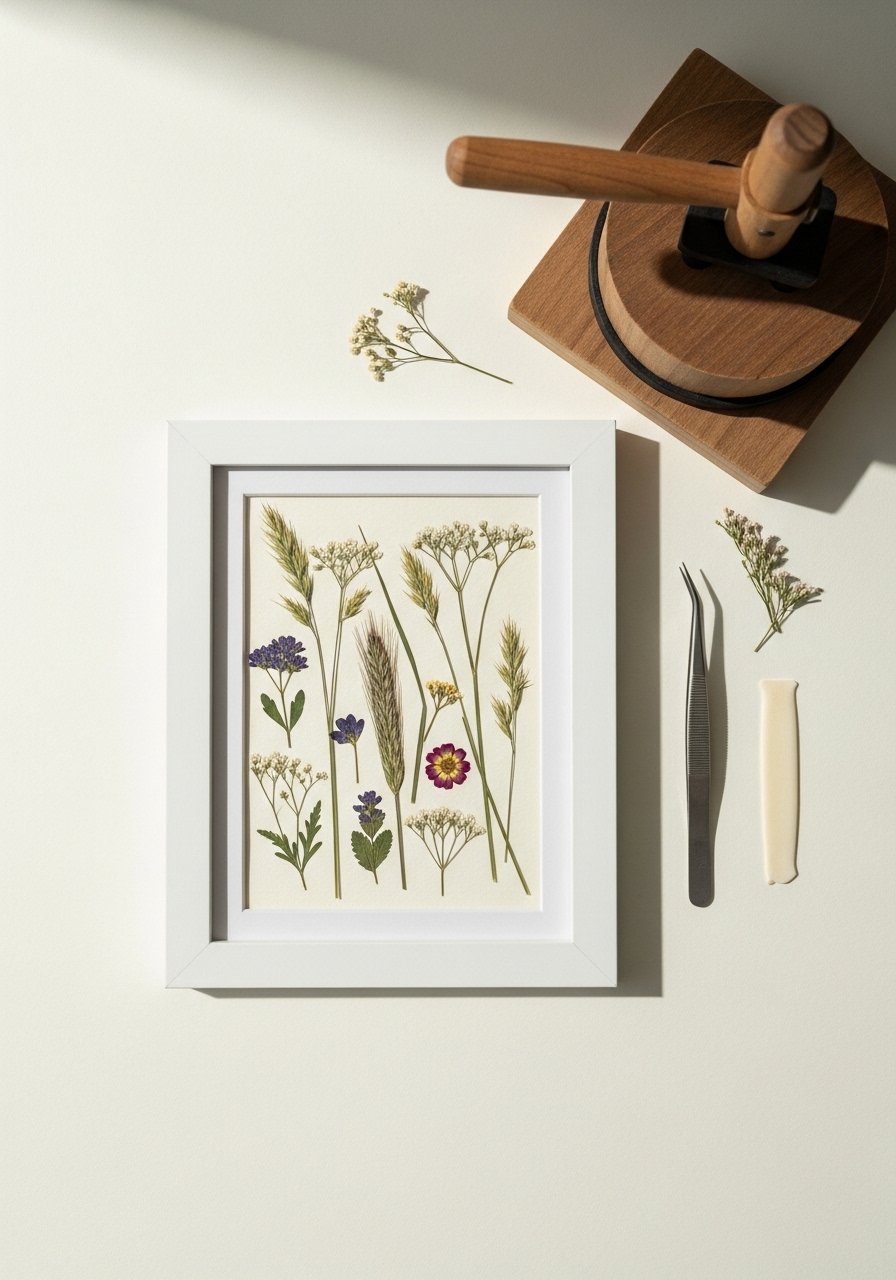
Pressed flowers feel calm and personal. A neutral mat and thin white frame keep it modern. Use pressed blooms from your garden or dried bouquets.
Materials
- Pressed flowers and grasses, assorted (well-pressed)
- 8 x 10" frame, white with mat
- Acid-free mounting paper, cream
- Tweezers
- PVA glue stick or archival glue
- Bone folder or flat tool
Instructions
- Press flowers for 2–4 weeks between absorbent paper and heavy books, changing paper if damp.
- Arrange pressed pieces on mounting paper. Use tweezers for delicate placement.
- Apply small dots of archival glue with a toothpick to back of stems and press down with a bone folder.
- Let glue dry 30–60 minutes.
- Place into frame and close. Keep out of direct sunlight to avoid fading.
How to Display or Gift It
- Create a mini-gallery with three small frames.
- Add a small label with plant names using a Cricut-made vinyl label or handwritten tag.
- Slip into a flat mailer with cardboard for safe gifting.
- Minimal Painted Wooden Block Set (Playful Shelf Decor)
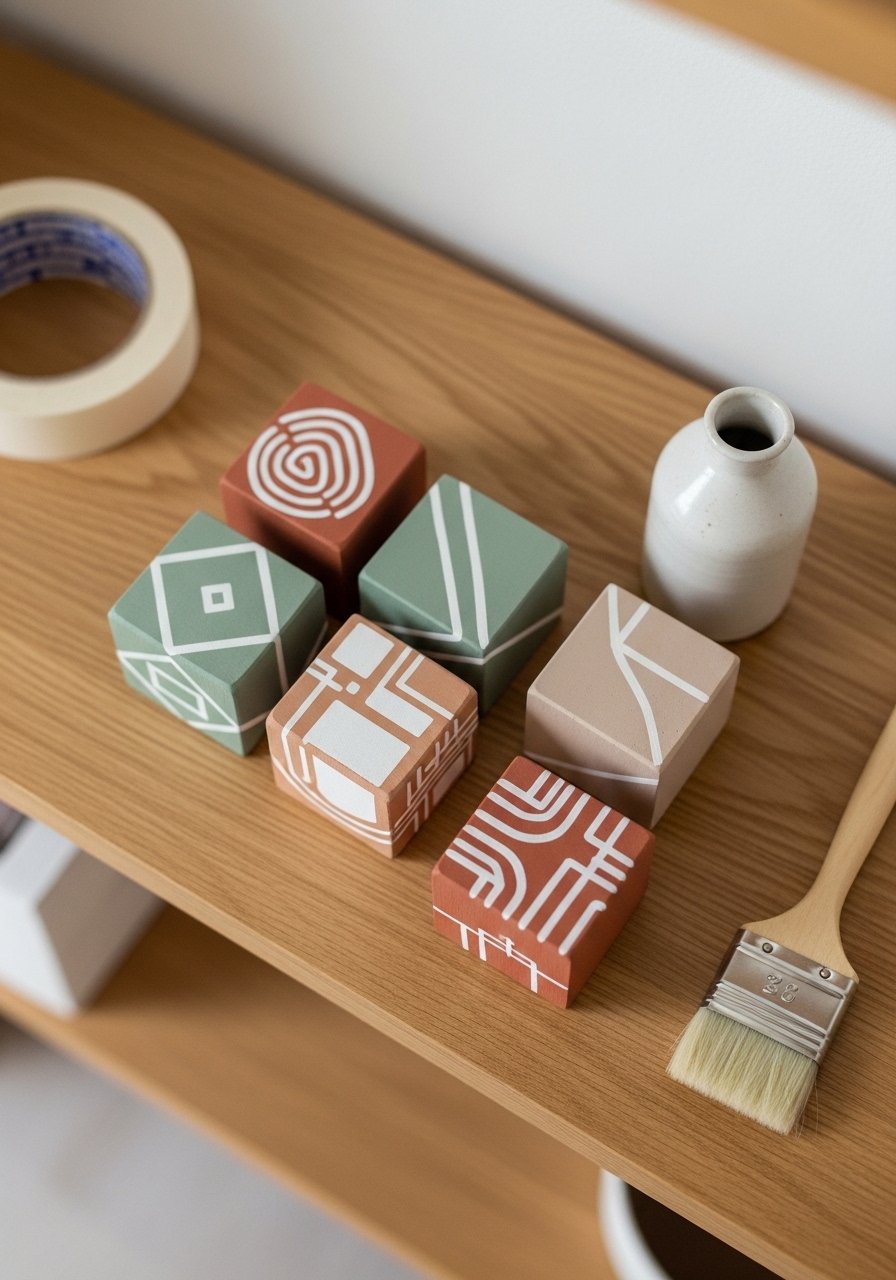
Painted wooden blocks are sculptural and simple. Use muted tones and negative space for a restrained look. They work as shelf art or as gentle toys in a nursery.
Materials
- Solid wood blocks, set of 5, 2 x 2 x 2"
- Acrylic craft paint, 3 muted tones + white
- Painter’s tape, 1/8" or washi tape
- Small flat brush
- Matte sealer, 1 small bottle
- Sandpaper, 220 grit
Instructions
- Sand blocks and wipe clean.
- Paint base colors with 1–2 coats, letting dry 30 minutes between coats.
- Use painter’s tape to mask off shapes and paint accent areas. Remove tape while paint is dry to the touch for clean lines.
- Apply 1 thin coat of matte sealer. Dry 1–2 hours.
- Arrange in groups of odd numbers for best balance.
How to Display or Gift It
- Place on a shelf with books and pottery.
- Add to a nursery shelf for tactile decor.
- Pack in a small box with tissue for gifting.
- Store extras in a small craft bin.
- Minimal Rope-Wrapped Vase
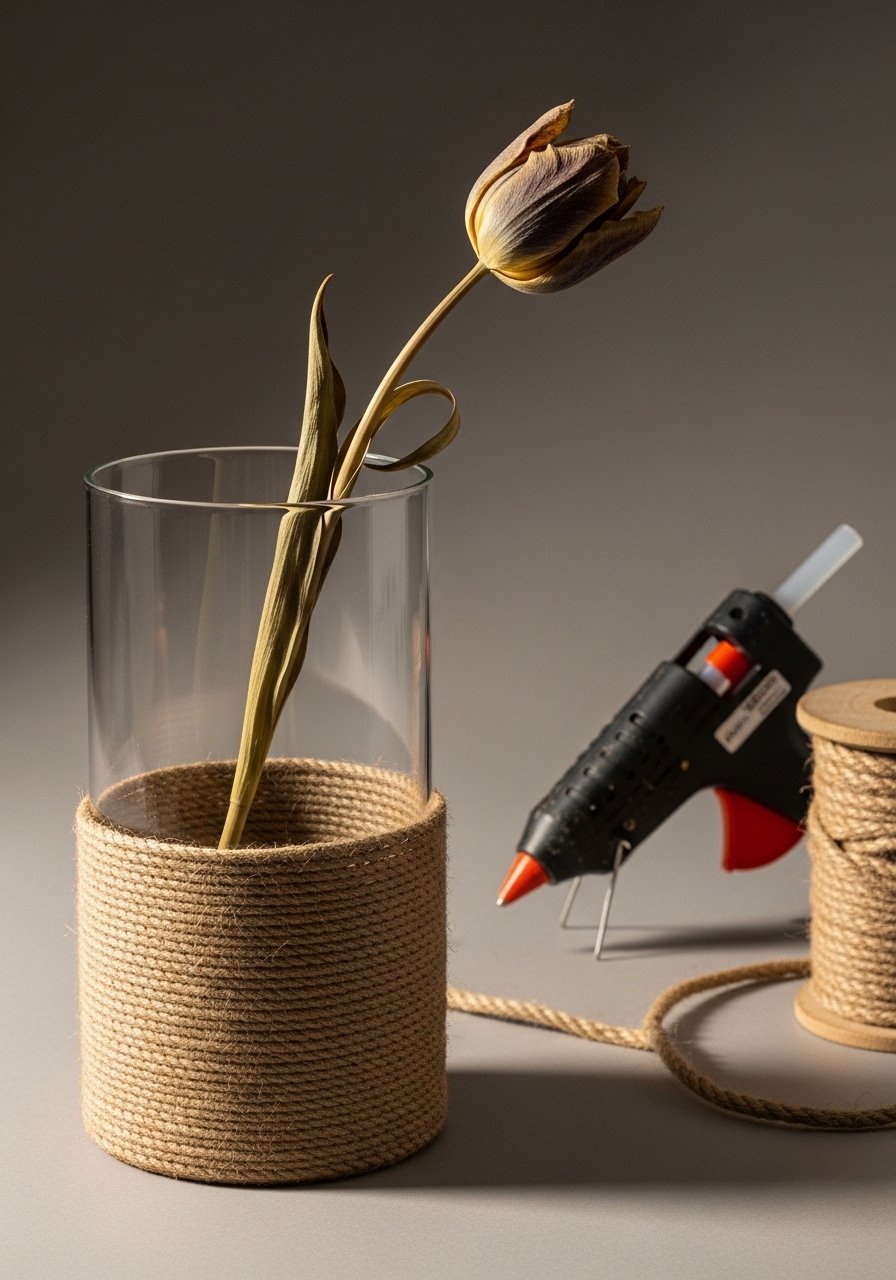
A rope-wrapped vase gives texture without adding color. Use clear glass vases and wrap the bottom third for a balanced look. Hot glue helps the rope stay put.
Materials
- Clear glass vase, 6–8" tall
- Natural jute rope, 10–12 feet
- Temperature-control hot glue gun and glue sticks
- Scissors
- Clothespin to hold starting loop (optional)
Instructions
- Place a dab of hot glue near the base and press rope into it, leaving a 1/2" tail.
- Wrap rope tightly around the vase, applying small dabs of hot glue every 2–3 inches.
- Keep wraps even and parallel. Use a clothespin to hold the starting tail inside while glue sets.
- Finish by tucking and gluing the rope end on the inside rim.
- Let cool fully 10–15 minutes before adding stems.
How to Display or Gift It
- Pair with a single dried stem for minimalist styling.
- Use as a bathroom toothbrush holder or pen jar.
- Gift as a set with a small bouquet, packed in a kraft gift box.
- Minimal Linen-Covered Memo Board
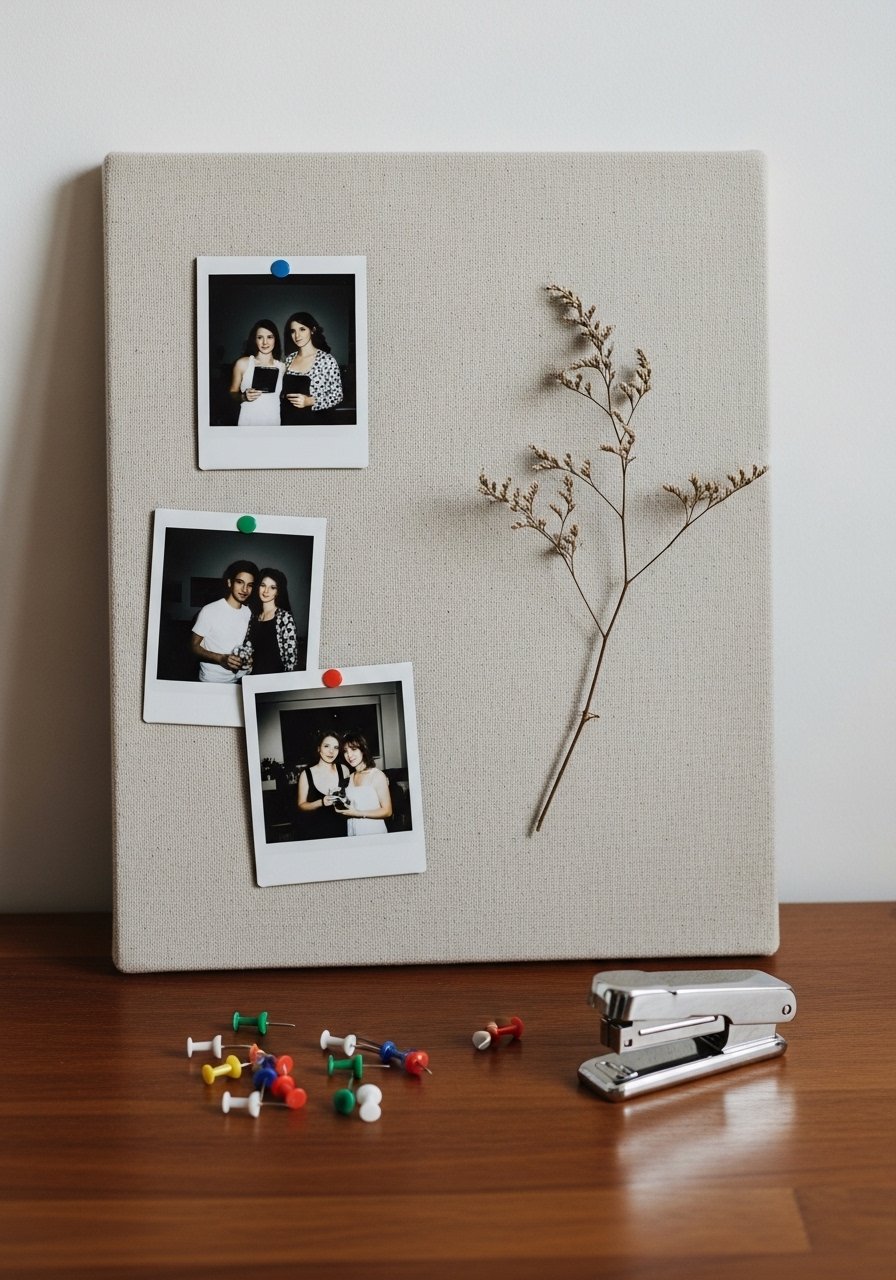
A simple memo board keeps notes tidy and looks soft on a wall. Linen cover keeps it neutral and tactile. Use thin cork so it hangs flush.
Materials
- Cork sheet, 11 x 14"
- Linen fabric, 14 x 17" (to wrap)
- Staple gun
- Push pins, brass finish, 12
- Scissors
- Craft glue (optional for edge neatening)
Instructions
- Center cork on linen. Fold and staple fabric to the back of cork, keeping surface taut.
- Trim excess fabric. For neat corners, fold like wrapping a gift and staple.
- Add a simple hanging wire or adhesive strip to the back.
- Pin photos, notes, and cards with brass push pins.
How to Display or Gift It
- Pair with a small set of brass push pins in a jar for gifting.
- Hang above a desk or entry console for quick notes.
- Pack in a protective sleeve in a craft portfolio when making multiples.
- Minimal Stenciled Terracotta Planters
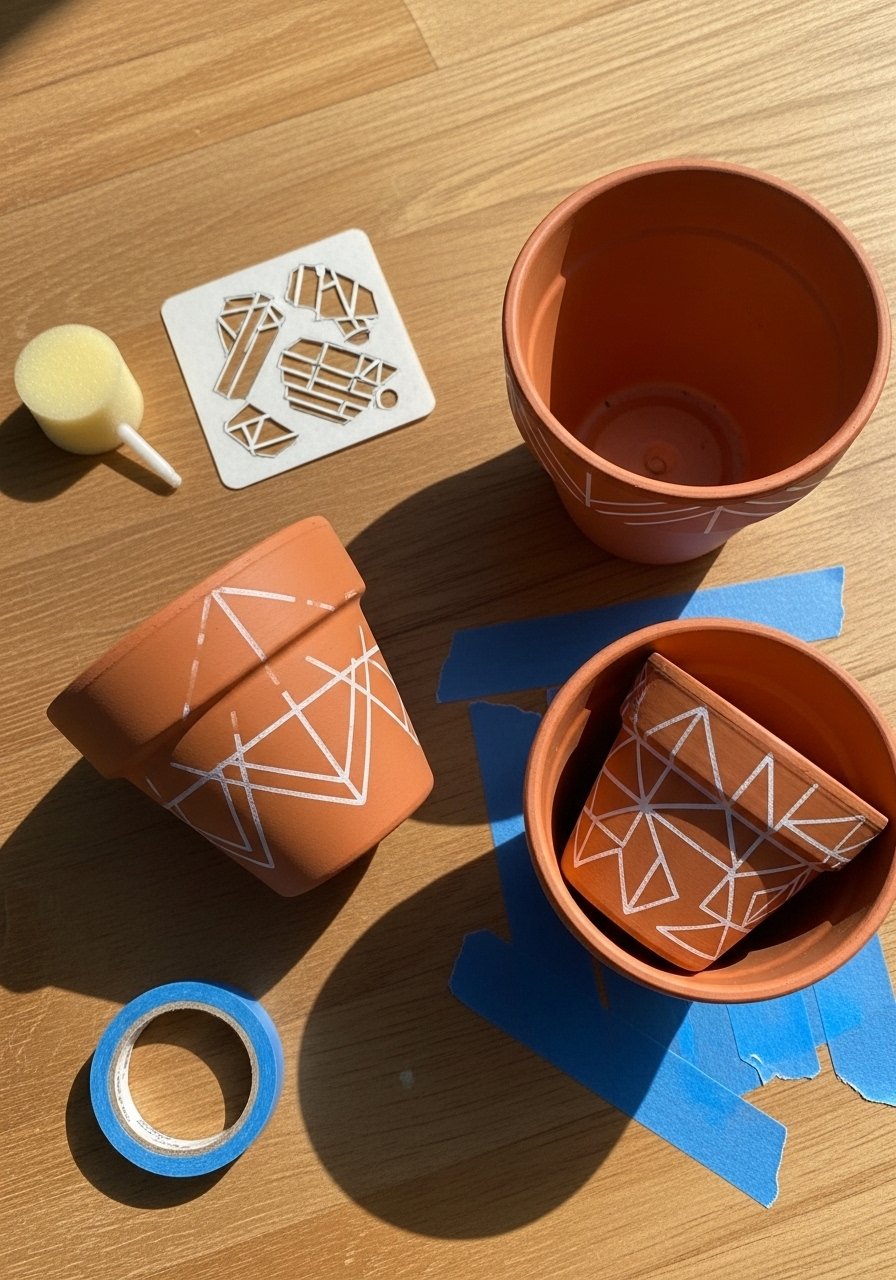
Stenciling terracotta keeps planters modern and light. Thin white lines on raw clay feel crisp and clean. Use acrylic suitable for terracotta.
Materials
- Small terracotta planters, 3 x 3"
- Acrylic paint (matte white)
- Adhesive stencil sheets or painter’s tape
- Small foam dabber
- Clear matte sealer (for outdoor use)
- Ruler and pencil
Instructions
- Clean pots and let them dry fully.
- Position stencil and secure with small pieces of painter’s tape.
- Dab paint lightly with foam dabber. Avoid overloading to prevent bleeding.
- Remove stencil once paint is dry to the touch 15–20 minutes.
- For outdoor use, seal with a clear matte sealer and let cure 24 hours.
How to Display or Gift It
- Group three on a windowsill with small succulents.
- Gift with a packet of seeds and a kraft tag.
- Store extra pots in a stackable plastic bin.
- Minimal Woven Yarn Wall Hanging (Small)
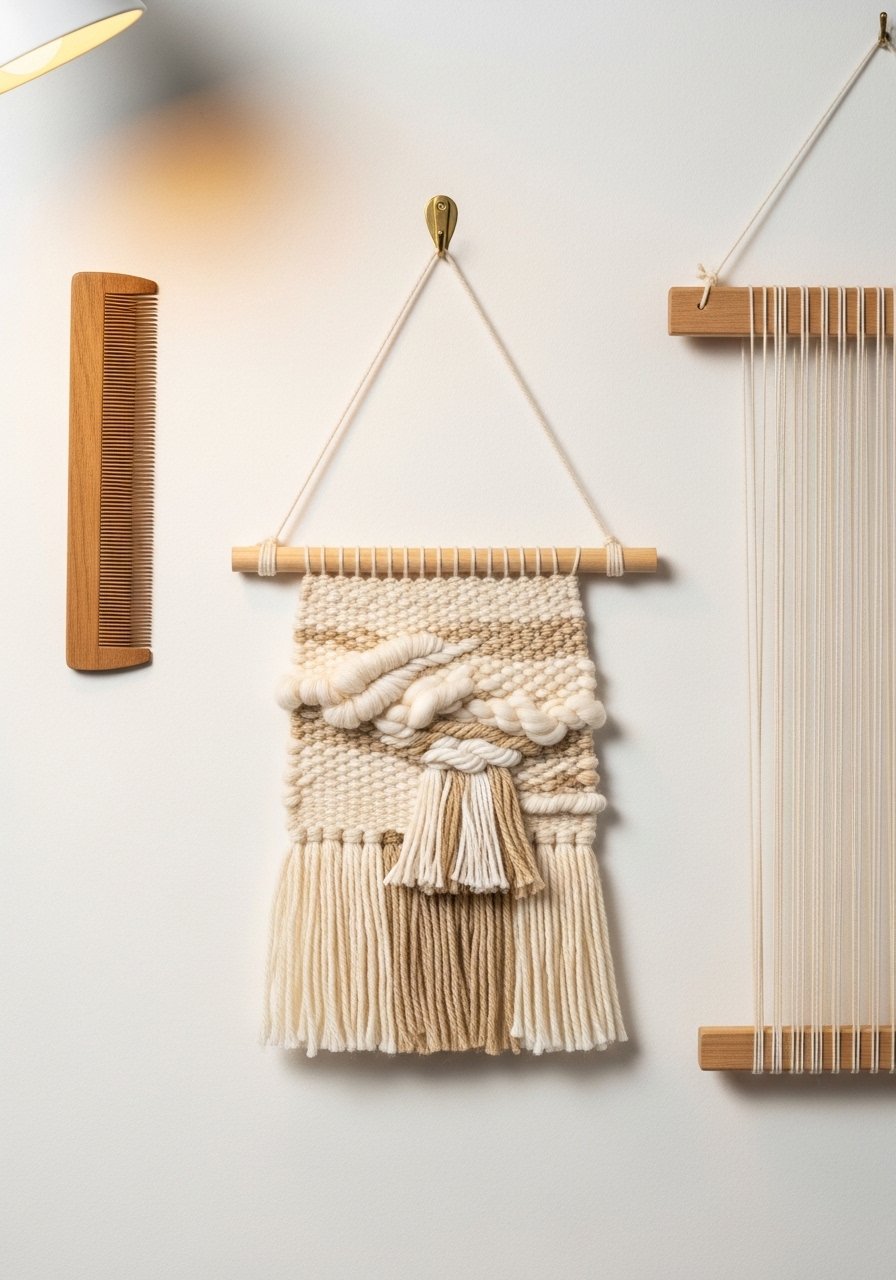
A small woven piece adds soft texture without heavy color. Use neutral yarn weights for a modern look. Looming is relaxing and portable.
Materials
- Small lap loom or cardboard loom
- Wool and cotton yarn, assorted neutral weights, ~50–60 yards
- Wooden dowel, 12"
- Tapestry needle
- Weaving comb or fork
- Scissors
Instructions
- Warp your loom with strong cotton yarn. Keep tension even.
- Weave a few rows of plain weave as the base.
- Alternate textures—thick wool, thin cotton, and rya knots for fringe.
- Beat with a comb to compact weave. Finish with hemstitch knots to secure.
- Remove from loom and tie to a wooden dowel. Trim fringe evenly.
How to Display or Gift It
- Hang above a bedside table for tactile interest.
- Make in pairs for symmetry.
- Pack and gift in a kraft tube for protection.
- Minimal Painted Door Knob Hook Rack
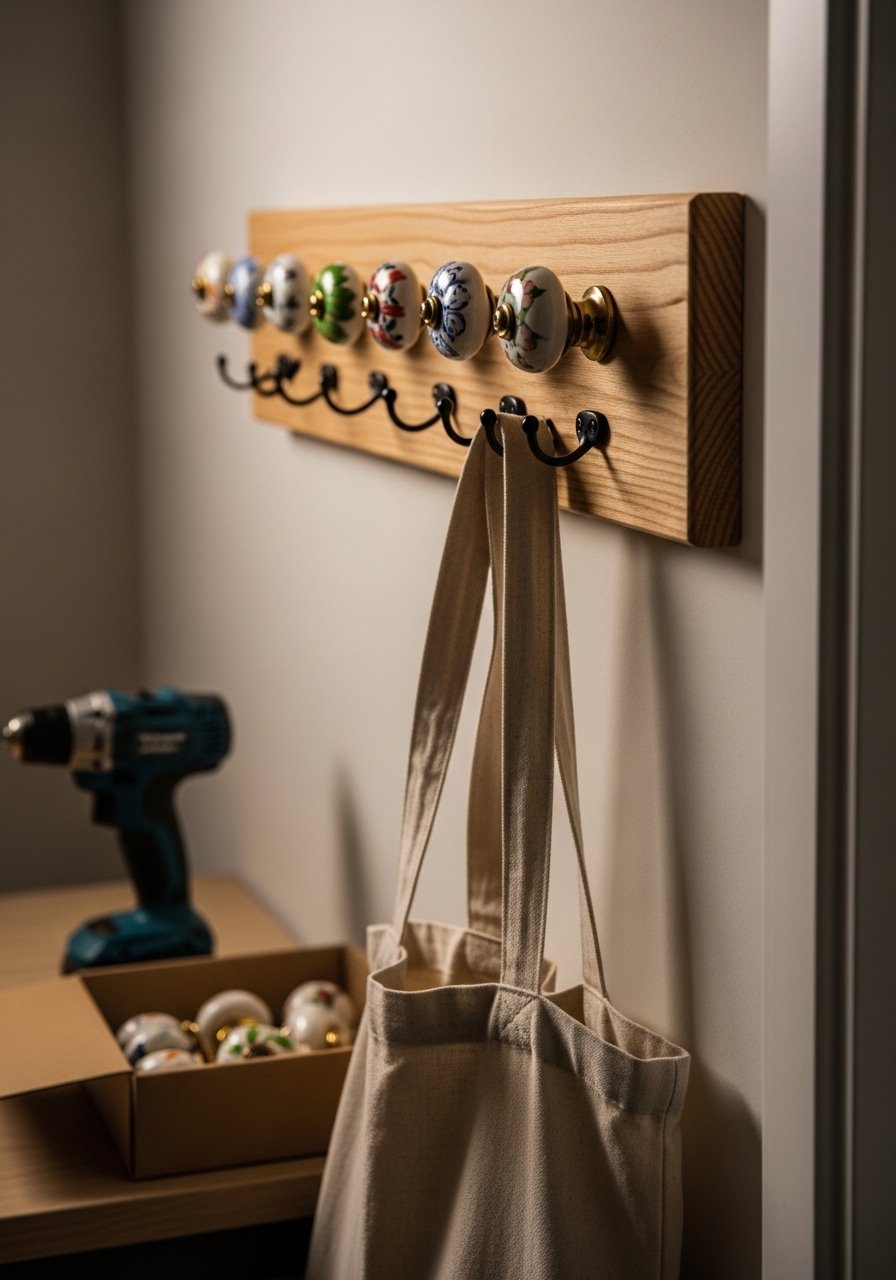
Repurpose ceramic knobs into hooks on a narrow board for understated storage. It's great for hats, light bags, or scarves.
Materials
- Wooden board, 24 x 3 x 0.75"
- Ceramic knobs, 4
- Drill and bit set
- Screws to mount knobs
- Matte paint for board, 1 small pot
- Clear sealer
- Wall anchors
Instructions
- Paint board with 2 thin coats of matte paint. Dry 30–45 minutes between coats.
- Mark knob spacing and drill pilot holes to match knob screws.
- Attach knobs with screws and secure with washers if needed.
- Mount to wall using anchors, ensuring screws align with studs if heavy items will hang.
How to Display or Gift It
- Mount near the door for lightweight everyday use.
- Gift with a matching set of ceramic knobs in a small box.
- Store spare knobs in a small hardware organizer.
- Minimal Resin River Desk Tray (Small)
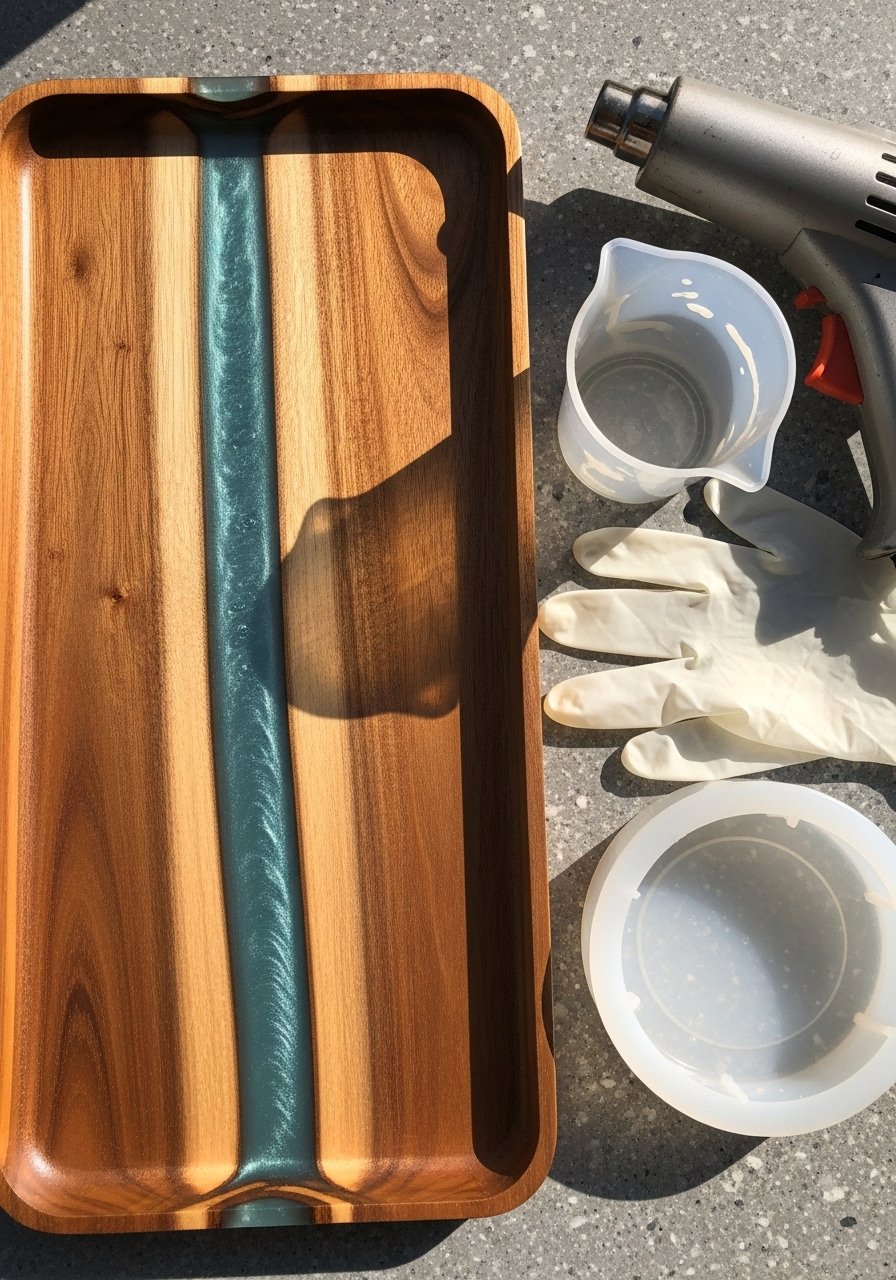
A narrow resin river adds color without loud pattern. Use a shallow poured resin accent on a thin wood tray for desktop organization. Follow resin safety and cure times.
Materials
- Thin wooden tray blank, 8 x 4 x 0.75"
- Epoxy resin kit, small (1 part A + 1 part B)
- Pearlescent or translucent resin pigment, teal
- Mixing cups and stir sticks
- Gloves and mask
- Heat gun to remove bubbles
- Painter’s tape for edge protection
Instructions
- Seal wooden tray with 1 thin coat of resin or primer. Let cure 12 hours.
- Mask edges where you want the river line.
- Mix resin per kit instructions. Add 2–4 drops pigment and stir slowly to avoid bubbles.
- Pour a thin line in the carved channel. Use a heat gun briefly to pop bubbles.
- Let cure 24–48 hours to demold. Full cure 72 hours for heavy use.
- Lightly sand any drips and buff edges.
How to Display or Gift It
- Use for daily desk items, jewelry, or a phone resting spot.
- Pair with a small concrete candle for texture contrast.
- Pack in a protective box lined with bubble wrap and tissue.
- Minimal Paper Leaf Wall Art (Origami)
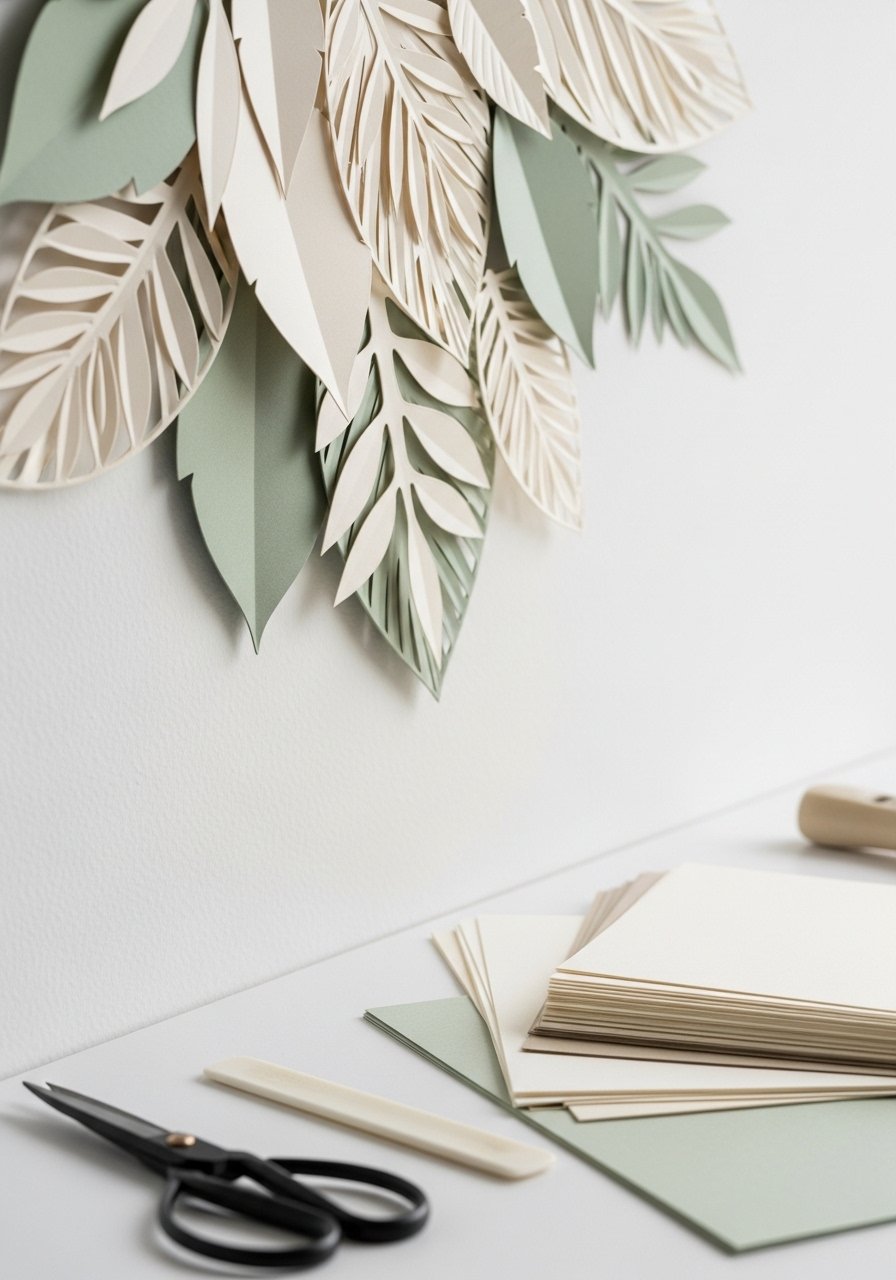
Paper leaf art is inexpensive and highly customizable. Use thick cardstock for subtle relief and arrange in a small cluster for a focal point.
Materials
- Heavyweight cardstock, 100 lb, 3 sheets in neutral tones
- Bone folder
- Precision craft knife
- Adhesive dots for mounting
- Ruler and pencil
- Lightweight frame or canvas, optional
Instructions
- Draw a simple leaf template and trace onto cardstock. Cut 8–12 leaves.
- Use a bone folder to crease veins gently.
- Layer and arrange on the wall, adhering with adhesive dots for a slight shadow.
- For permanence, mount onto a small canvas and frame.
How to Display or Gift It
- Make a small grouping above a nightstand.
- Package flat in a shallow frame for gifting.
- Store extra cut leaves in a flat archival sleeve.
- Minimal Embroidery Hoop Wall Accent
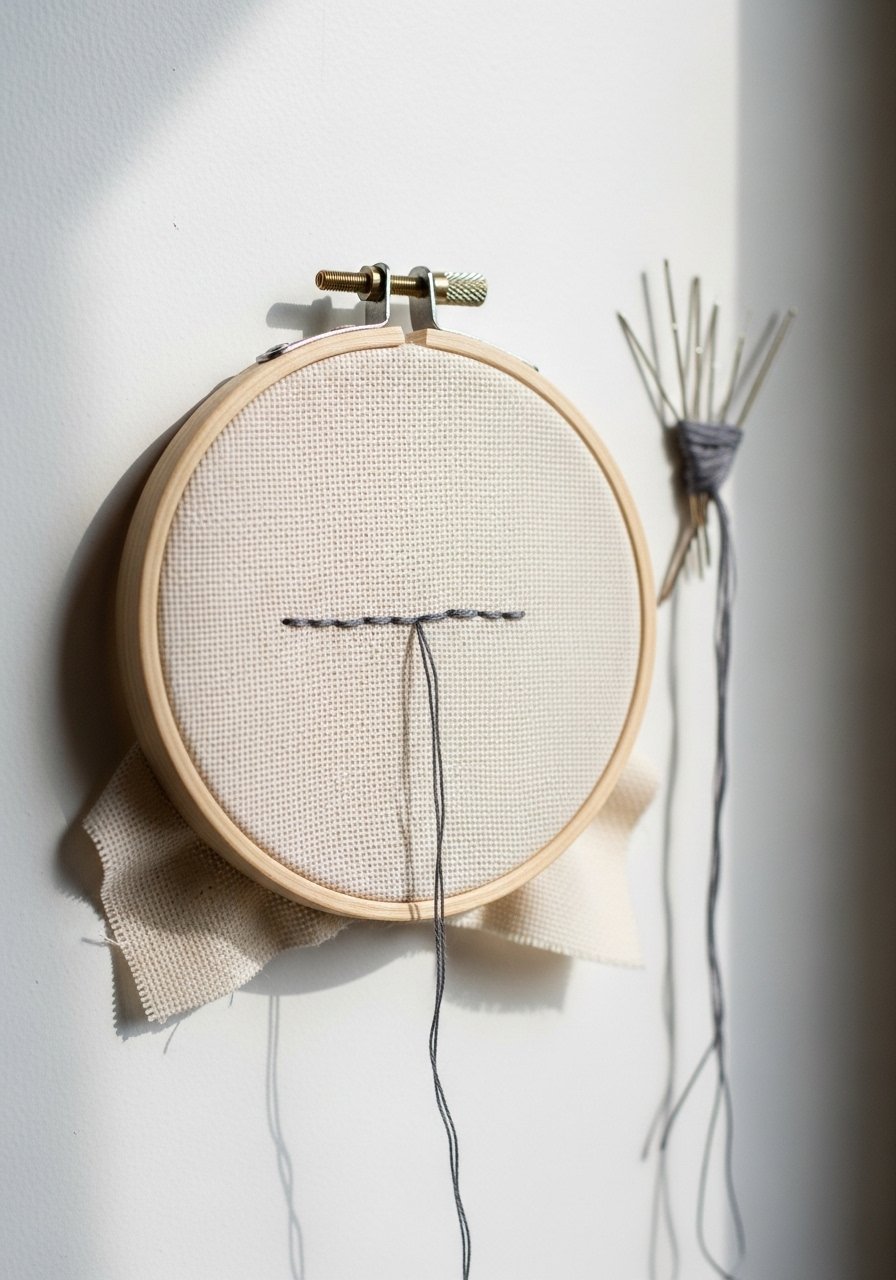
A single-line embroidery in a hoop is meditative and subtle. Use linen tones and dark charcoal thread for restrained contrast.
Materials
- Embroidery hoop, 6"
- Natural muslin or linen, enough to stretch
- Embroidery floss, charcoal, 1 skein
- Embroidery needle
- Scissors
- Light pencil for marking design
Instructions
- Stretch fabric in hoop, tightening until taut.
- Lightly sketch a single-line design or word.
- Stitch with a simple backstitch. Keep stitches small (3–4mm).
- Trim excess fabric and glue to the inside of the hoop for a neat finish.
- Hang with a small nail.
How to Display or Gift It
- Cluster several hoops for a textured gallery.
- Frame in a shadow box for protection during shipping.
- Store hoops flat in a craft hoop storage bag.
- Minimal Neutral Wreath with Dried Botanicals
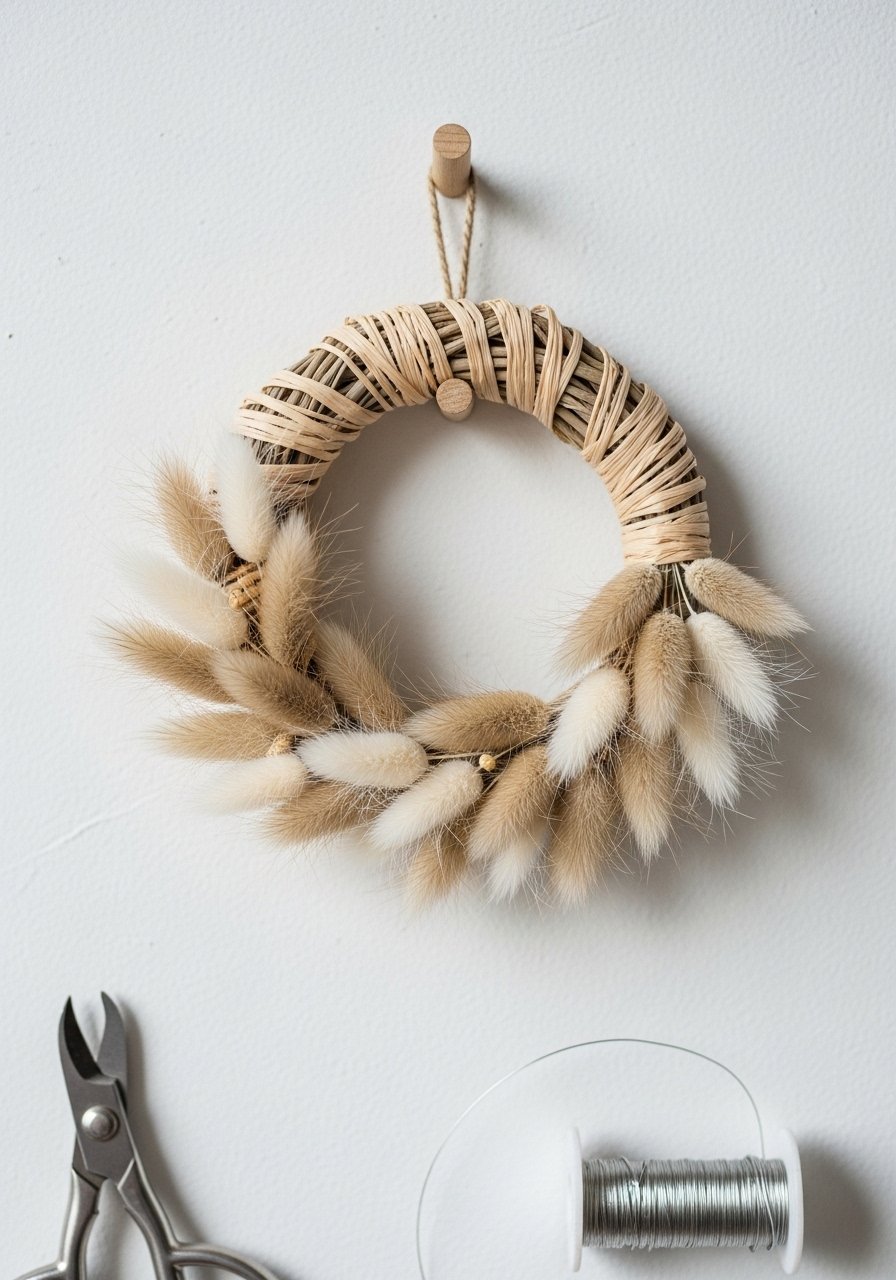
A small dried wreath is calming and long-lasting. Use a simple raffia wrap and a few dried stems for subtle texture. It's light and easy to hang.
Materials
- Foam wreath form, 6"
- Natural raffia, 20 feet
- Dried bunny tails or wheat stems, 8–10 stems
- Floral wire
- Wire cutters
- Hot glue (optional)
Instructions
- Wrap the foam form tightly with raffia, securing ends with a dab of glue or wire.
- Trim stems to 3–4" lengths and bunch into small bundles.
- Attach bundles around the wreath with floral wire, spacing evenly.
- Tuck in a small sprig of contrasting color for interest.
- Hang on a small peg using raffia loop.
How to Display or Gift It
- Hang on an interior door or above a small mirror.
- Tie a tiny kraft gift tag for gifting.
- Store flat in a shallow wreath box to keep shape.
Thanks for exploring these 20 minimalist aesthetic room decor DIY projects. Between linen, wood, concrete, and gentle fiber pieces, you have options that are simple to make and quietly stylish. Try one that speaks to you this weekend and pin the post so you can return when you're ready for the next. Which project will you try first? Share with a friend, or make a pair—some of these (like the macramé hanger and woven wall piece) make lovely, handcrafted gifts.
Trust me, picking up a quality temperature-control hot glue gun made so many of these projects faster and cleaner — less stringy mess and clearer joins.


