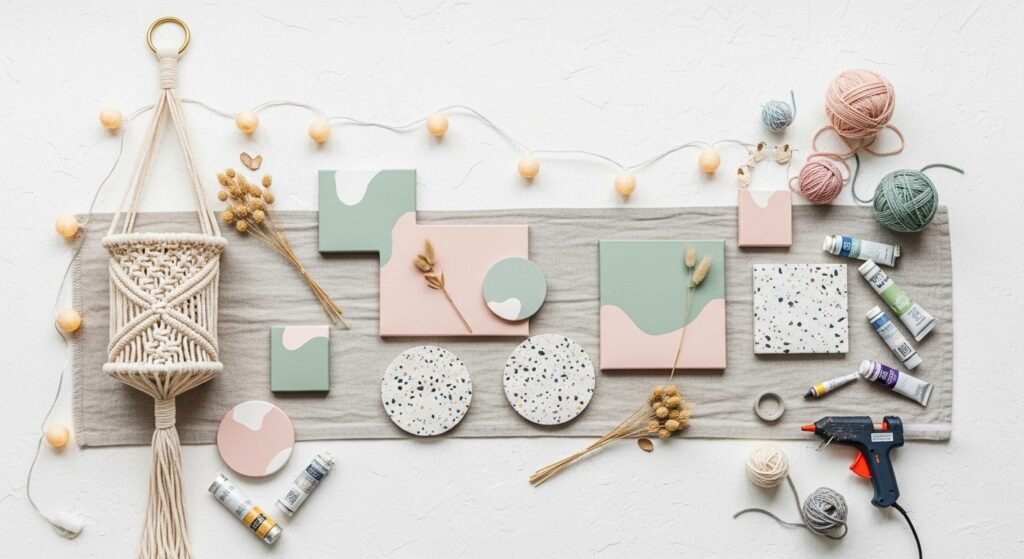
You know that feeling when your room finally matches how you want to feel? These 24 aesthetic room decor DIY ideas for teens are all about making that cozy, trendy vibe happen without breaking the bank or needing pro skills. You’ll find projects inspired by cottagecore, boho, Japandi, and soft minimalism — each one designed to look Pinterest-ready and actually hold up in a teen’s life.
I promise these projects stay simple: most are under an hour, use affordable materials, and rely on basic tools like a hot glue gun or a cutting mat. I usually cut vinyl with my Cricut Joy cutting machine for photo flags, but a craft knife works just as well. Grab a temperature-control hot glue gun to avoid messy strings — it changes how neat everything feels. Read on for full materials lists, step-by-step instructions, troubleshooting tips, and styling ideas you can pin for later.
- Polaroid String Photo Display with LED Clips
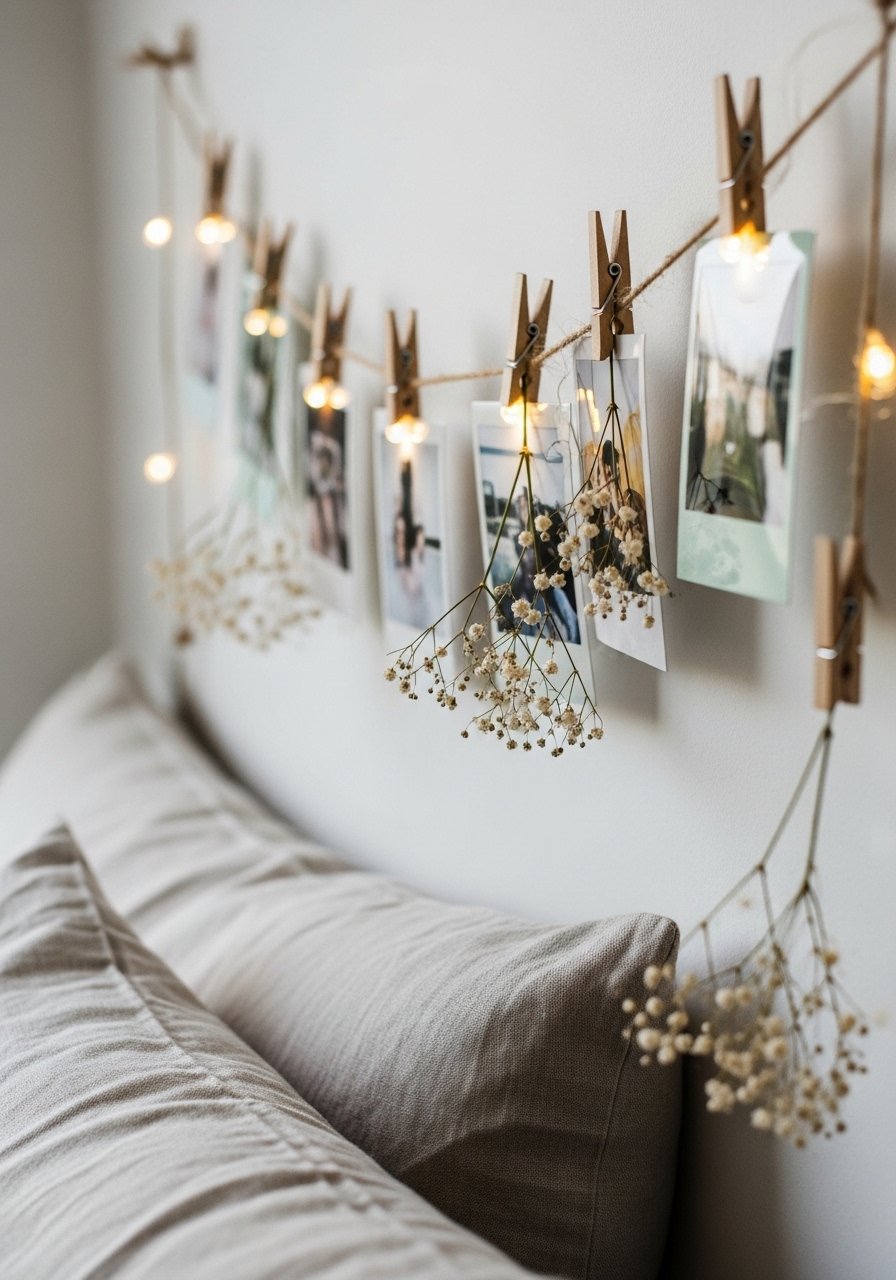
This Polaroid string photo display mixes soft lighting and personal photos for an instant mood boost. It’s budget-friendly, easy to update, and perfect for renters since it hangs with removable hooks. Teens love the tactile look of printed photos and the soft glow at night. Use a battery-powered LED clip string for tidy wiring and long battery life.
Materials
- 10 ft natural jute twine or baker’s twine
- 1 10-20 LED battery-operated photo clip string (approx 6 ft)
- 20 mini wooden clothespins
- 20 printed 2×3" Polaroid-style photos or Instax prints
- 2–4 removable Command picture hanging strips (small)
- Optional: dried baby’s breath sprigs
Instructions
- Decide placement above bed or desk and measure a length of jute twine for a gentle curve (allow extra for tying).
- Cut twine to length and tie a small loop at each end for hanging.
- Attach Command strips to wall per package directions (clean surface with rubbing alcohol first).
- Hang twine loops on the mounted strips so the twine droops slightly.
- Clip photos to twine with mini clothespins, spacing evenly.
- Weave the LED clip string along the same twine and clip or tie LED clips beside photos.
- Test LEDs and replace batteries if flicker happens; swap photo order for fresh looks.
How to Display or Gift It
- Layer two rows for a denser gallery look.
- Add removable washi tape flags behind photos for color pops.
- This makes a great dorm-room welcome gift — pack flat with extra clothespins in a kraft box.
- Store spare clips and batteries in a small craft organizer tray.
- Easy Cottagecore Pressed Flower Frame
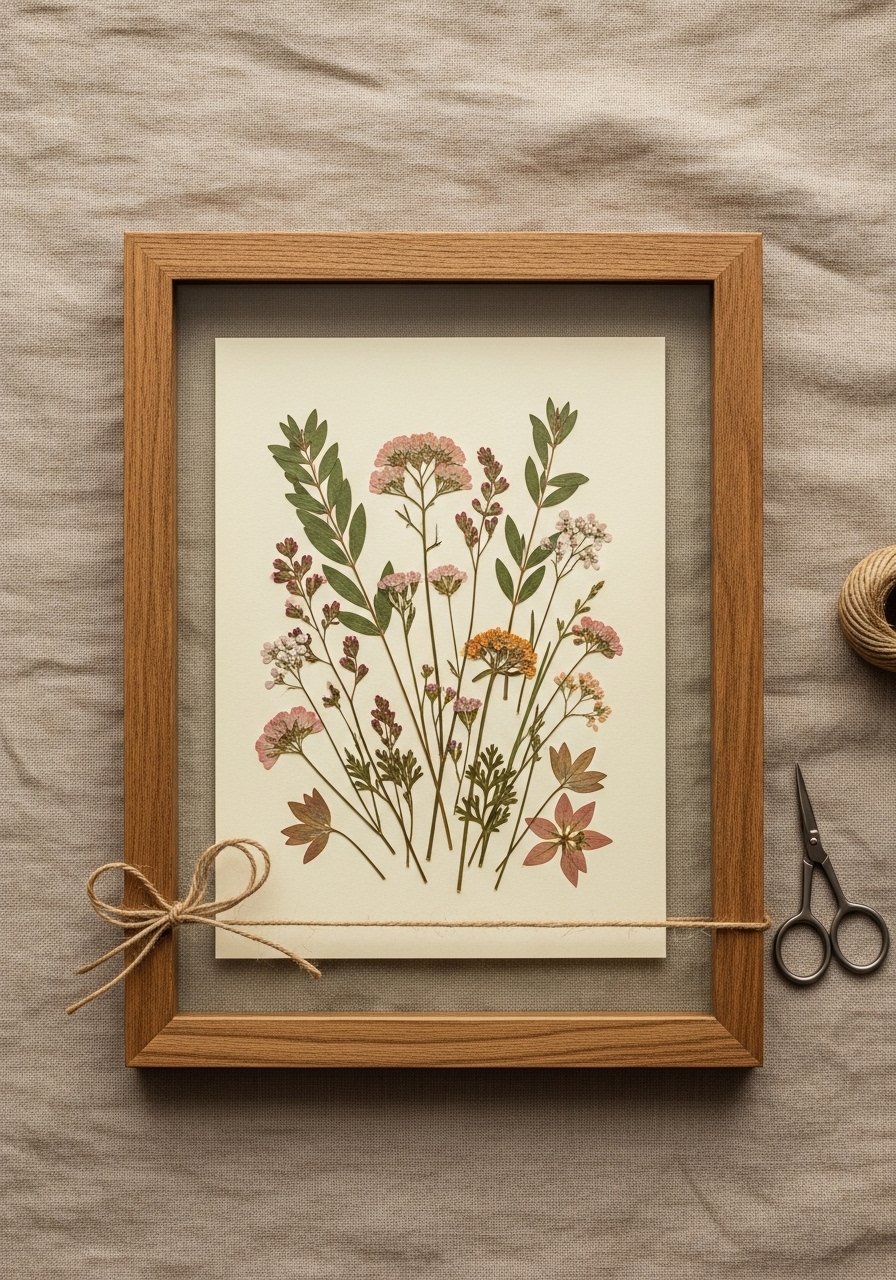
Pressed flowers bring gentle cottagecore charm to a room and feel surprisingly elegant. This project uses a simple frame with glass so the flowers float and the whole composition looks airy. Good for beginners and great as a heartfelt gift. Use a flat 8×10" wood frame with glass for best effect.
Materials
- 1 8×10" wood frame with glass
- Assorted pressed flowers (approx 10-20 small blooms; press 2–3 weeks ahead)
- 1 sheet cream or pastel cardstock cut to 8×10"
- Removable adhesive dots (34–50 dots) or acid-free glue
- Tweezers for delicate handling
- Optional: craft paper mat for extra border
Instructions
- Press flowers at least 10–14 days in a heavy book with parchment between petals.
- Cut cardstock to fit frame and center it on a clean surface.
- Use tweezers to place tiny adhesive dots on stems and press flowers onto the cardstock.
- Arrange starting with larger blooms then fill gaps with smaller petals.
- Put the glass back on carefully to avoid smudges; close frame.
- Wipe glass clean and hang with picture-hanging hardware.
Display/Gift Tips
- Hang near a window for soft backlight. Avoid direct sun to prevent fading.
- Add a kraft tag with the date and flower names for a keepsake feel.
- Store extras flat in a shallow craft storage box.
- aesthetic room decor DIY ideas for teens: Simple Macramé Plant Hanger
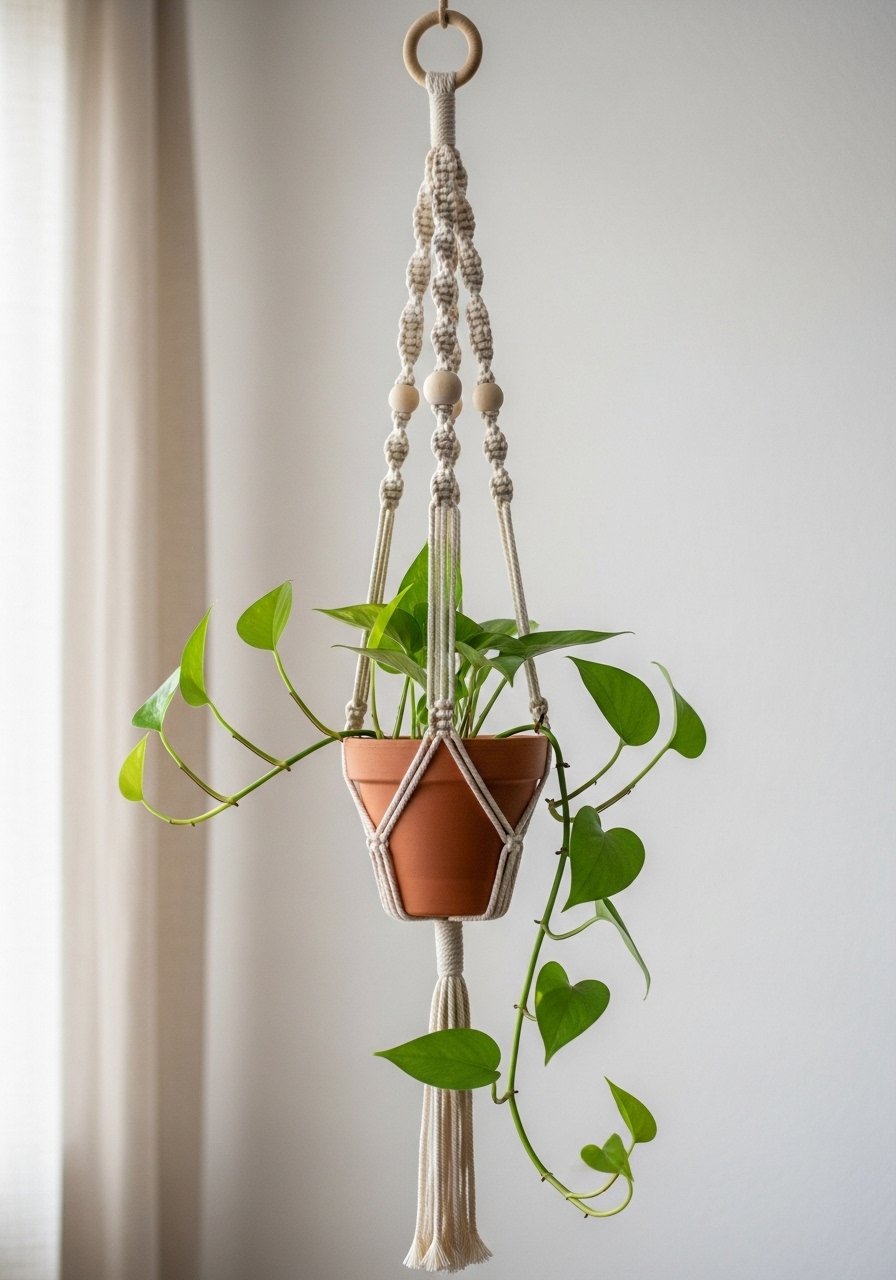
Macramé brings tactile boho energy and is forgiving for beginners. This basic plant hanger uses a few square knots and looks more complex than it is. If you're learning knots, a 3mm cotton macramé cord set helps you keep even tension. Perfect for plant lovers and those who like cozy texture.
Materials
- 30 ft total 3mm single-strand cotton macramé cord (cut into four 7.5 ft cords)
- 1 wooden or metal ring (1.5" diameter)
- 1 terracotta pot (4"–5" diameter)
- 2 wooden beads (12mm)
- Scissors
- Measuring tape
Instructions
- Fold the four cords in half and loop through the ring using a lark's head knot.
- Group cords into four pairs and tie four sets of 6–8 square knots about 4" below the ring.
- Slide a wooden bead onto two center cords and continue two more square knots beneath.
- Gather all cords and tie a tight overhand knot 6" below the last row to form the basket.
- Trim ends into a tassel or leave long for a layered look.
- Place pot in hanger; tug cords to ensure even support.
Display/Gift Tips
- Hang near a sunny window but away from drafts.
- Spray a light protectant if hanging in humid spaces.
- Package as a gift in a kraft gift box with a care note.
- Painted Moon Shelf (DIY Shelf Accent)
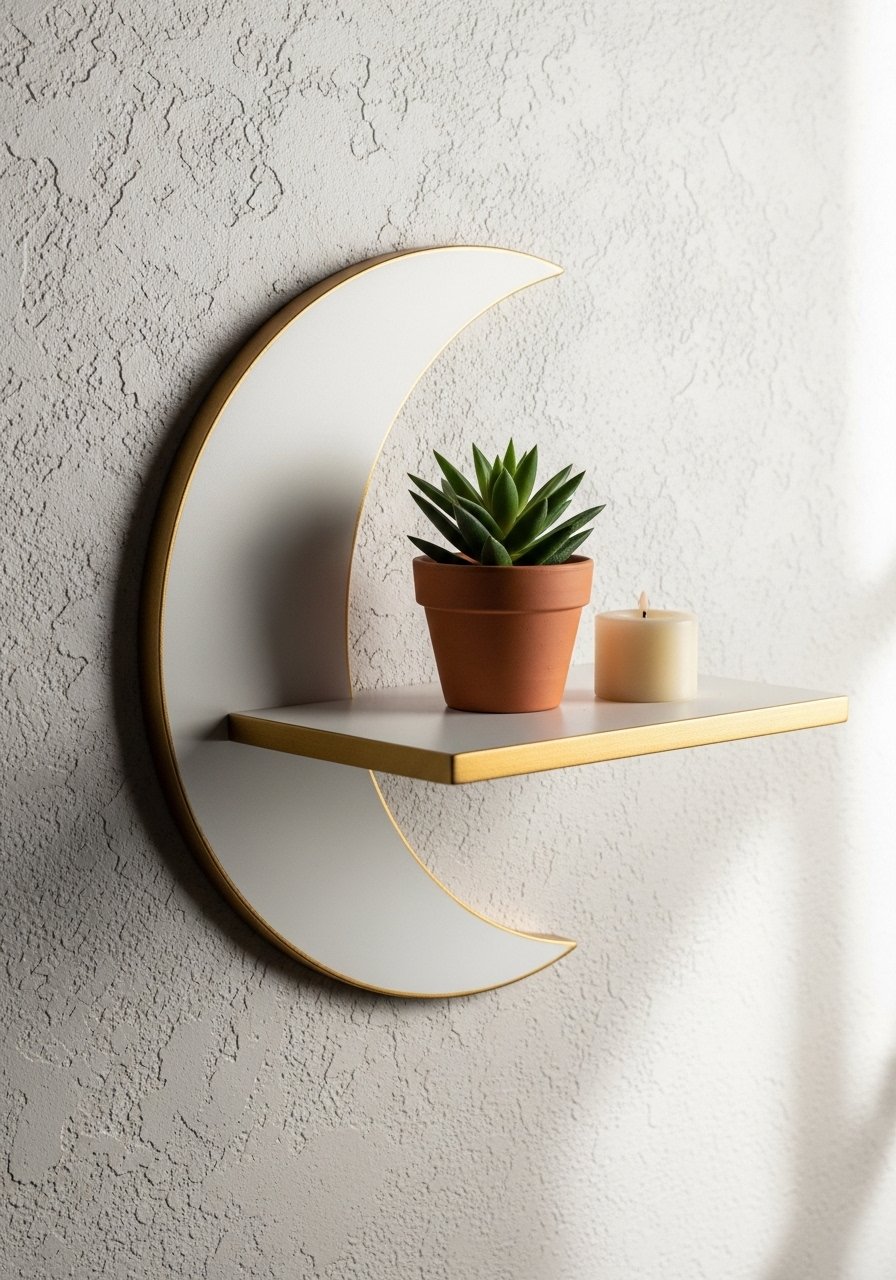
This crescent shelf adds a sculptural, dreamy mood and makes use of a pre-cut wood shelf blank you can paint in any palette. Finishes like chalk paint give a velvety look. Teens who like celestial decor will love the statement without fuss.
Materials
- 1 pre-cut wooden moon shelf (12" wide)
- 1 8 oz can chalk paint (matte white or desired color)
- 1 small can gold leaf paint (edge highlight)
- Sandpaper (220 grit)
- 1 foam brush and 1 small angled brush
- 2 wall anchors and screws
Instructions
- Sand shelf lightly and wipe off dust.
- Apply one coat of chalk paint with foam brush; let dry 30 minutes.
- Apply a second thin coat; dry 30 minutes until firm to touch.
- Use angled brush to add a gold leaf edge; cure 24 hours for full adhesion.
- Mount shelf using wall anchors and screws per weight rating.
- Place light items like a tiny succulent and a tealight (battery tealight recommended).
Display/Gift Tips
- Paint inside of crescent a contrasting color for depth.
- Use a small suction cup level or bubble level for perfect mounting.
- Wrap shelf in tissue and twine for gifting.
- DIY Washi Tape Accent Wall Stripes
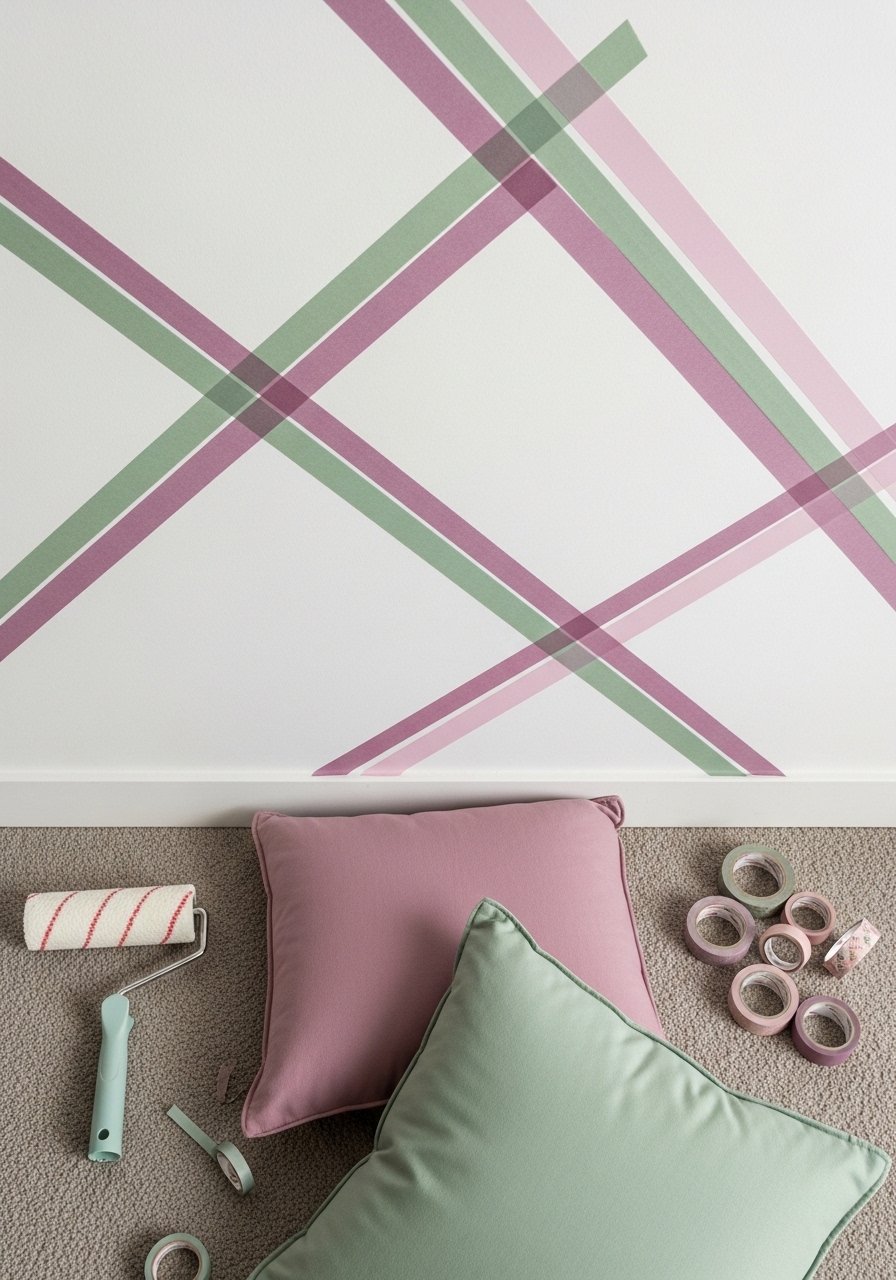
Washi tape stripes are renter-friendly, removable, and perfect for trying color combinations. This geometric method gives a modern vibe that suits Japandi or soft minimal rooms. Painter's tape can be swapped if you want sharper paint edges.
Materials
- 3–5 rolls of washi tape (15mm–30mm widths, color-coordinated)
- 1 measuring tape and pencil for marking
- 1 small level
- 1 step stool
- Optional: vinyl wallpaper smoother or a clean credit card to press edges
Instructions
- Clean the wall surface with a damp cloth and let dry.
- Measure and mark the spacing lines lightly with pencil (e.g., 6" apart).
- Use a level to draw faint guide lines.
- Apply washi tape along marked lines, pressing with a smoother to avoid air pockets.
- Trim tape ends with a precision craft knife for crisp edges.
- Peel and reposition any tape that bubbles; washi is forgiving.
Display/Gift Tips
- Create an accent corner behind a desk or headboard rather than the whole room.
- Store leftover washi in a clear craft organizer for future projects.
- For a more durable look, seal top edge with a thin coat of matte Mod Podge.
- Mini Canvas Quote Trio
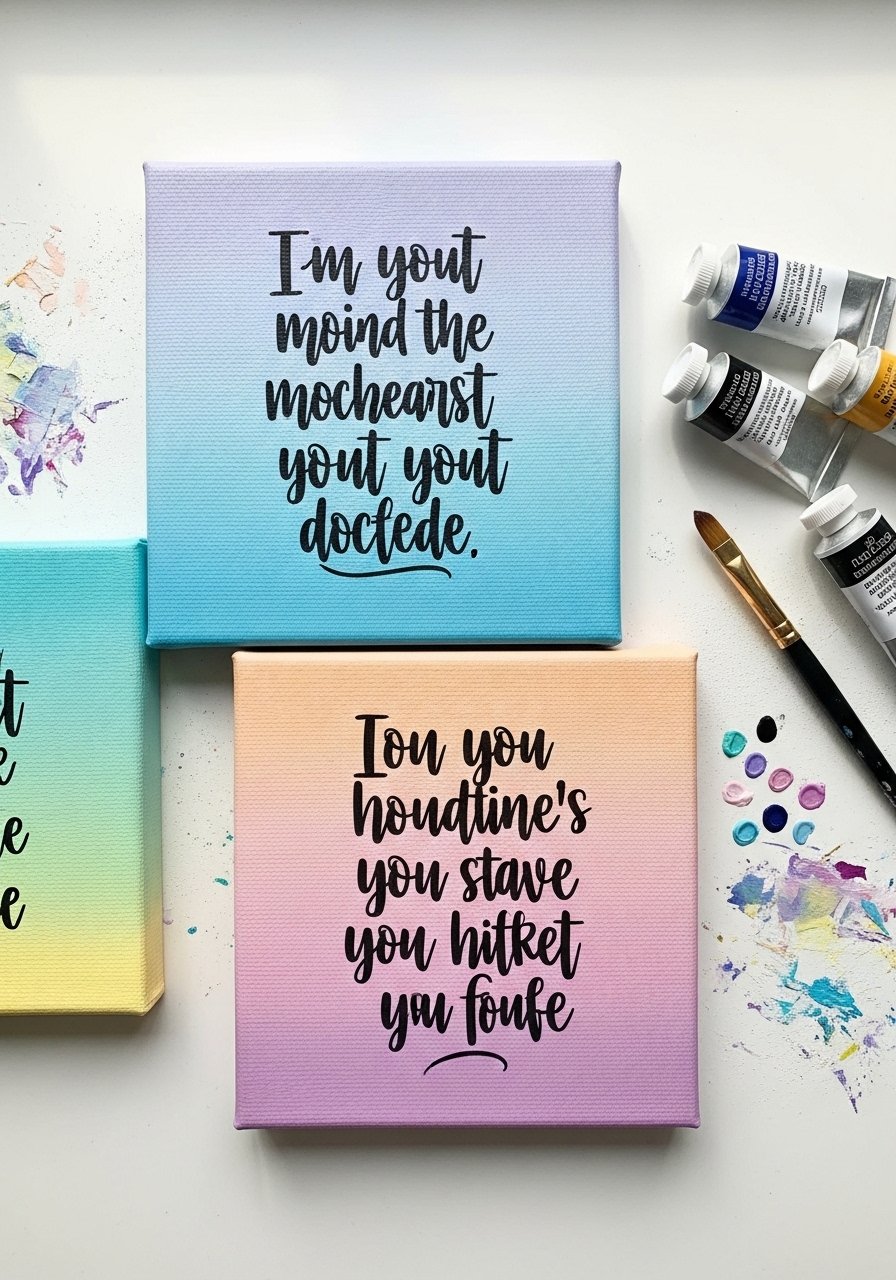
Mini canvases let you play with color and typography without a big commitment. Create a matching trio of motivational quotes or aesthetic words like "soft," "calm," "breathe." Using a fine-tip paint pen keeps lettering tidy.
Materials
- 3 6×6" stretched canvases
- 1 acrylic craft paint set (pastel palette)
- 1 black paint pen (size 0.7mm)
- 1 flat foam brush and a detail round brush
- Painter’s tape (for geometric lines)
- Palette or paper plate
Instructions
- Apply a base coat on each canvas with foam brush; let dry 20–30 minutes.
- Add gradients or color blocks; allow 30 minutes between coats for opacity.
- Sketch text lightly with pencil once paint is dry.
- Trace letters with a black paint pen in even strokes; let dry 15 minutes.
- Optionally seal with one thin coat of matte Mod Podge; dry 1 hour.
- Hang as a trio with small picture hooks or prop on a shelf.
Display/Gift Tips
- Create a gallery shelf using small wooden easels to swap pieces seasonally.
- Wrap in tissue and add a ribbon for gifting.
- Store extras flat in a canvas storage crate.
- DIY Terrazzo Coasters

Terrazzo coasters mimic an on-trend stone look using polymer clay chips and resin or an easy air-dry approach. They feel luxe but are lightweight. Clear epoxy gives a glossy finish—work in a ventilated area.
Materials
- 4 3.5" round silicone coaster molds
- Acrylic polymer clay in 3–4 pastel shades (peppercorn chips)
- 1 4 oz epoxy resin kit (mixed per instructions)
- Sandpaper (400 grit)
- Alcohol wipes for surface prep
- Disposable mixing cups and stir sticks
Instructions
- Condition and slice polymer clay into tiny chips; press them lightly into the molds to create a terrazzo pattern.
- Mix resin per kit instructions; pour slowly to avoid bubbles.
- Fill molds to about 1/4"–3/8" thickness; pop any bubbles with a heat gun for 3–5 seconds.
- Cure for 24–48 hours or per resin instructions until fully hard and non-tacky.
- Demold, sand edges gently and buff if necessary.
- Wipe surface with alcohol and let rest 24 hours before first use.
Display/Gift Tips
- Stack coasters and tie with twine; include care instructions.
- Use a small wooden coaster stand for countertop display.
- Keep spares in a small drawer organizer.
- Painted Terracotta Moon Phase Planters
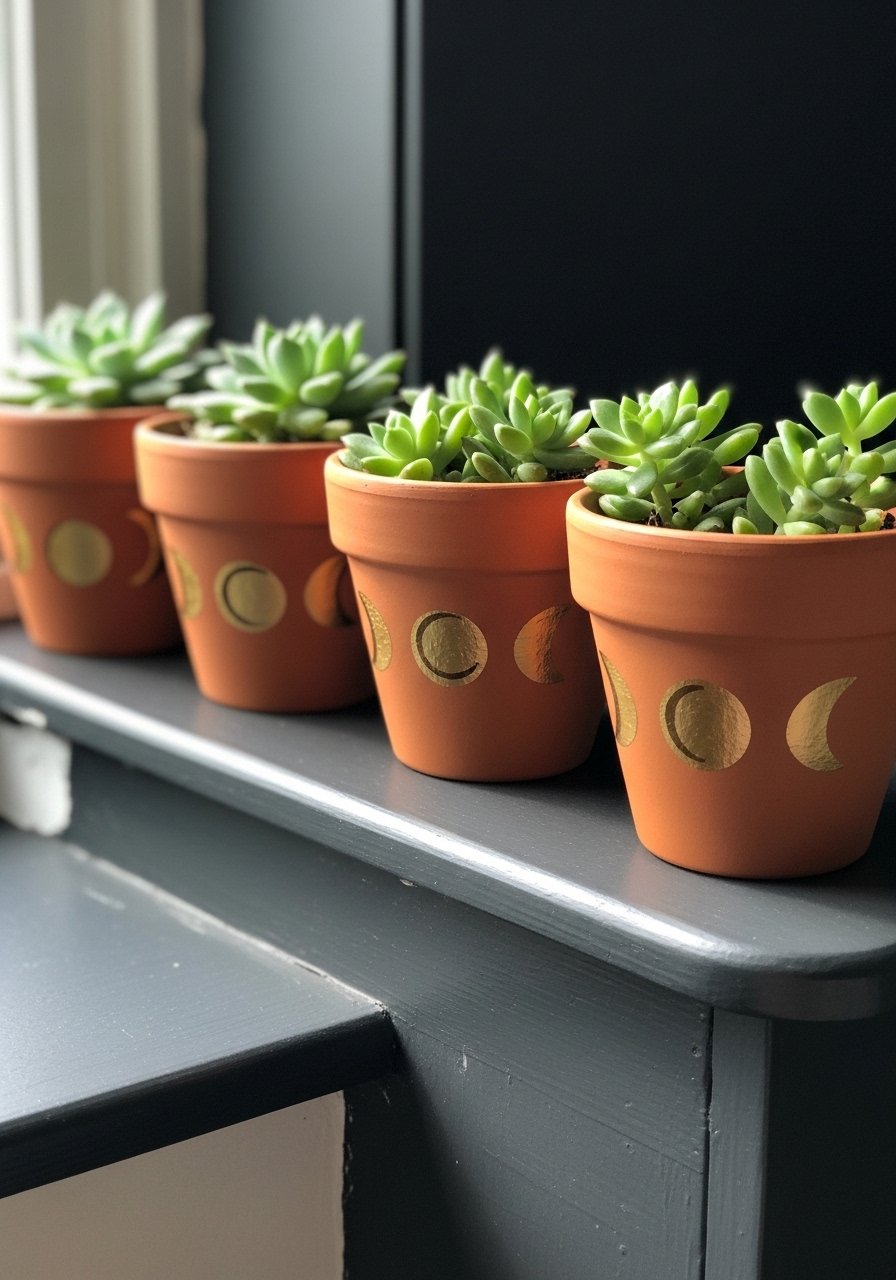
Moon phase planter sets add subtle celestial style in a set and are great for propagation stations. Chalk paint and paint pens make crisp symbols and last well with a matte sealer.
Materials
- 5 2.5" terracotta pots
- 1 2 oz jar chalk paint (black or navy)
- Gold paint pen (0.5mm)
- Foam brush
- Clear matte sealer spray (optional)
- Cactus soil and small succulents
Instructions
- Paint each pot with one thin coat of chalk paint; dry 20–30 minutes.
- Apply a second coat; dry 30 minutes until firm to the touch.
- Draw moon shapes lightly with pencil; trace with gold paint pen.
- Let paint cure 24 hours before planting.
- Add soil and succulents, water sparingly.
Display/Gift Tips
- Arrange in a line on a sill or stack on a small tray.
- Use a mini plant stand for tiered display.
- Wrap as a set with kraft paper for gifting.
- Boho Feather & Bead Wall Hanging
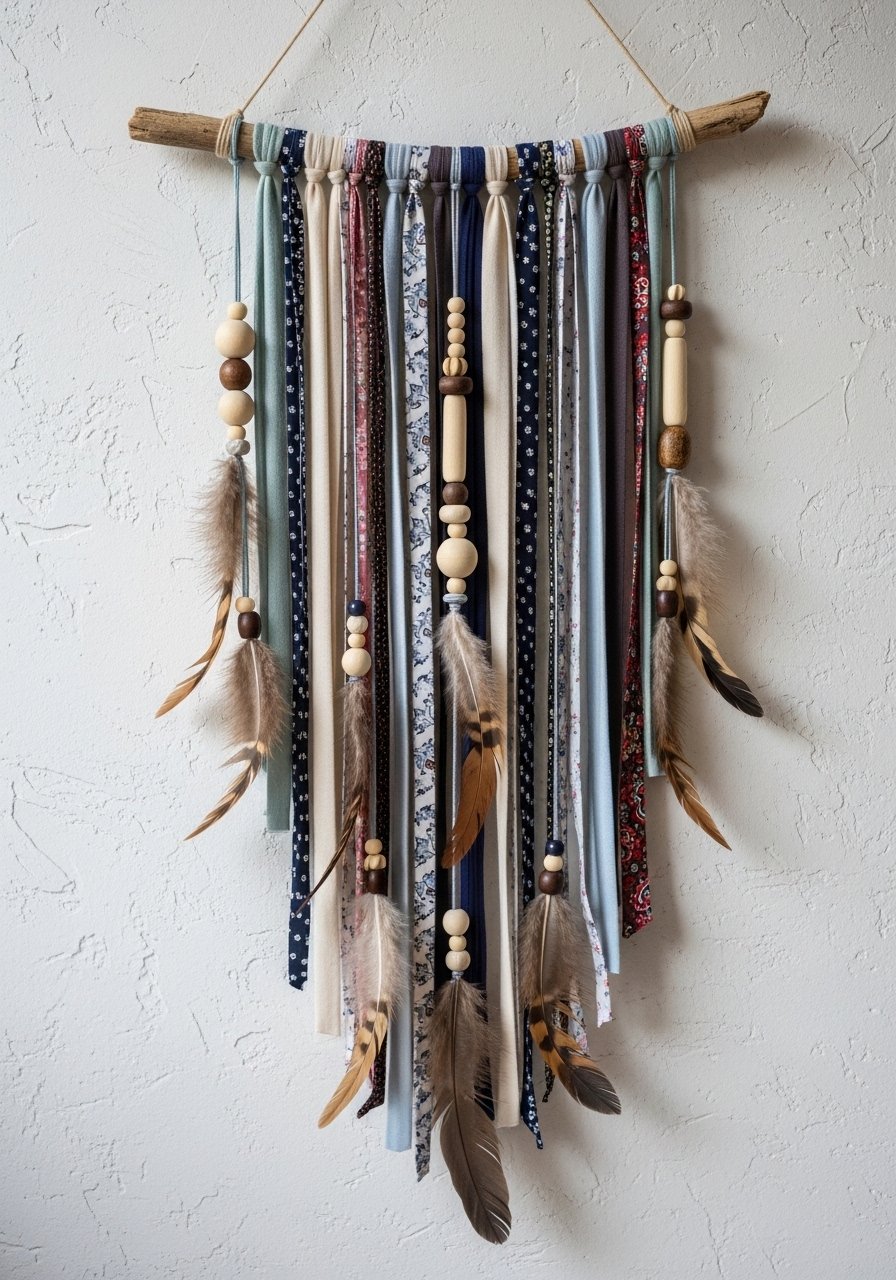
Feather hangings feel tactile and add motion. Using fabric scraps keeps it budget-friendly. Dye natural feathers with food coloring or fabric dye for customized colors.
Materials
- 1 driftwood stick (12"–18")
- 1 pack assorted feathers (12–20)
- Assorted fabric strips (cotton, linen; total 3–4 yd cut into 1–2" strips)
- Wooden beads (10–15)
- Hot glue gun
- Jute cord for hanger
Instructions
- Cut fabric strips to 10–14" lengths.
- Tie fabric strips along the driftwood using lark’s head knots, spacing evenly.
- Thread feathers and beads onto short lengths of twine and tie them between fabric strips.
- Secure feathers with a dab of hot glue if loose.
- Add a jute hanger and trim fabric ends evenly for a neat edge.
Display/Gift Tips
- Hang above a bed or reading nook.
- Pack flat with tissue and a small care card.
- Store in a long garment tube to avoid crushing feathers.
- aesthetic room decor DIY ideas for teens: Washable Tie-Dye Pillowcase
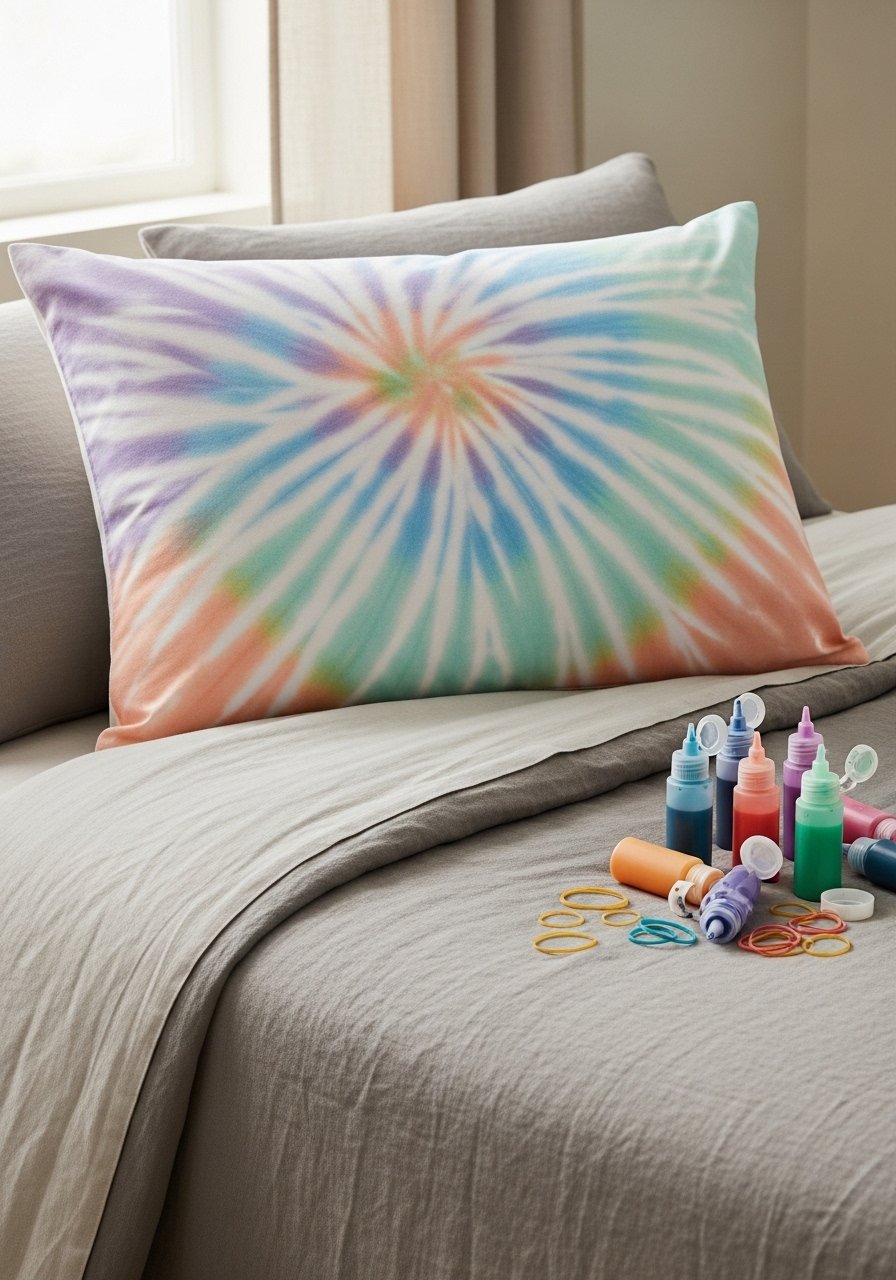
Tie-dye pillowcases give a playful, handmade color touch to bedding and are washable when set properly. This soft pastel technique fits cottagecore and boho aesthetics—use fiber-reactive or textile dyes for long-lasting color.
Materials
- 1 20×26" cotton pillowcase (100% cotton)
- 3 small bottles fiber-reactive dye (pastel shades)
- Rubber bands (6–8)
- 1 plastic squeeze bottle per dye color
- Plastic gloves, protective tarp
- Soda ash fixative (per dye instructions)
Instructions
- Soak pillowcase in soda ash solution as instructed; wring and form a spiral with rubber bands.
- Apply dye in small amounts to sections; less is more for pastel shades.
- Wrap in plastic and let set 6–8 hours (overnight for deeper color).
- Rinse under cold water until water runs clear, then wash separately in cold cycle.
- Air dry or tumble dry on low.
Display/Gift Tips
- Pair with a matching eyelet pillow or neutral linen.
- Wrap as a dorm welcome gift with a matching sleep mask.
- Store in a breathable fabric storage bag.
- Mini Shelf with Painted Edge Accent
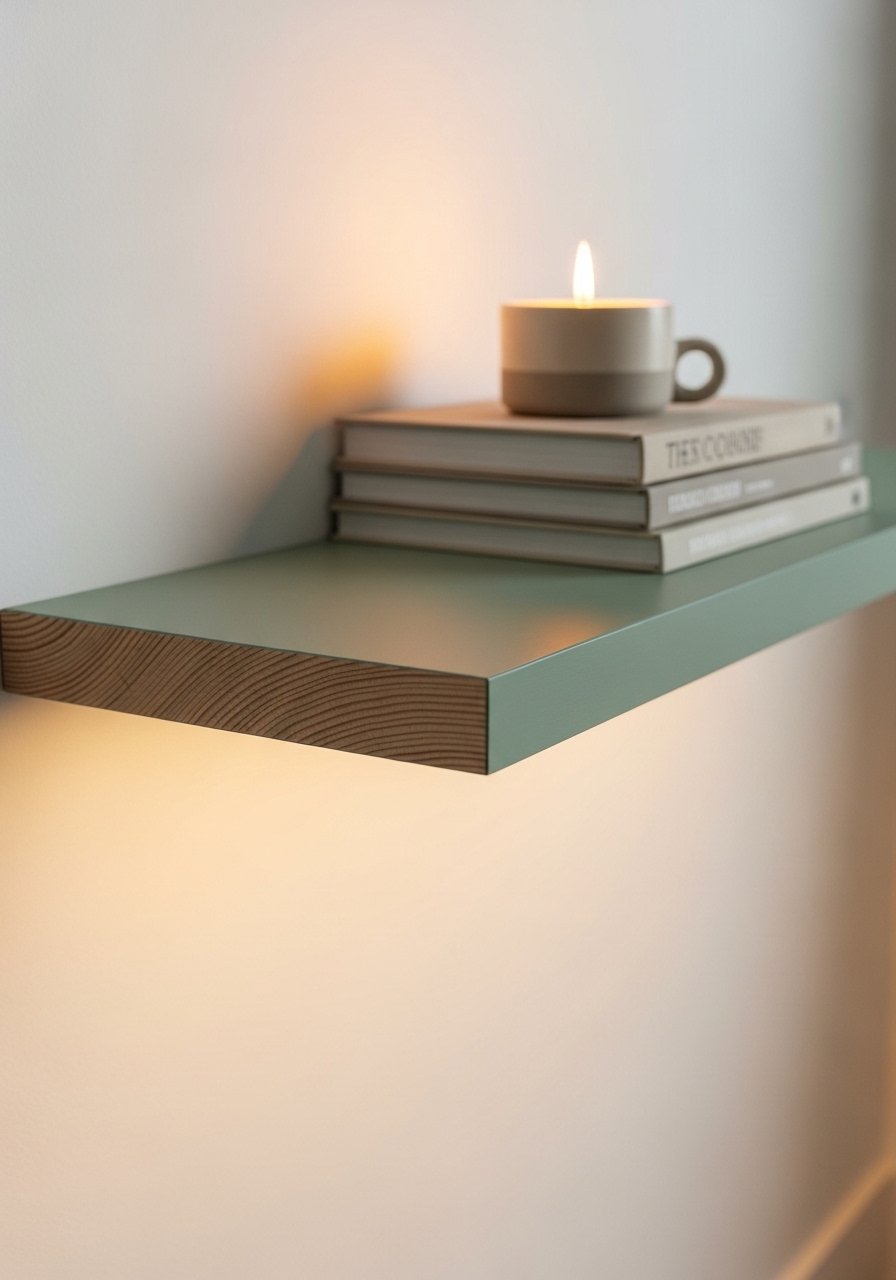
A painted-edge shelf adds color without a big commitment. Use a pre-cut floating shelf blank and paint the underside or edge for a peek of color that looks modern and neat.
Materials
- 1 8×24" floating shelf blank
- 1 8 oz chalk paint in accent color
- Painter’s tape
- 1 foam brush
- Mounting hardware (included with shelf)
Instructions
- Tape edges you want to keep raw.
- Paint selected edge with a thin layer; dry 30 minutes.
- Add second coat if needed; dry 30 minutes.
- Remove tape while paint is tacky for a cleaner line.
- Mount shelf per hardware instructions and style.
Display/Gift Tips
- Use a small wooden easel to show mini prints on the shelf.
- Keep extra hooks and anchors in a small hardware organizer.
- Resin Photo Tray
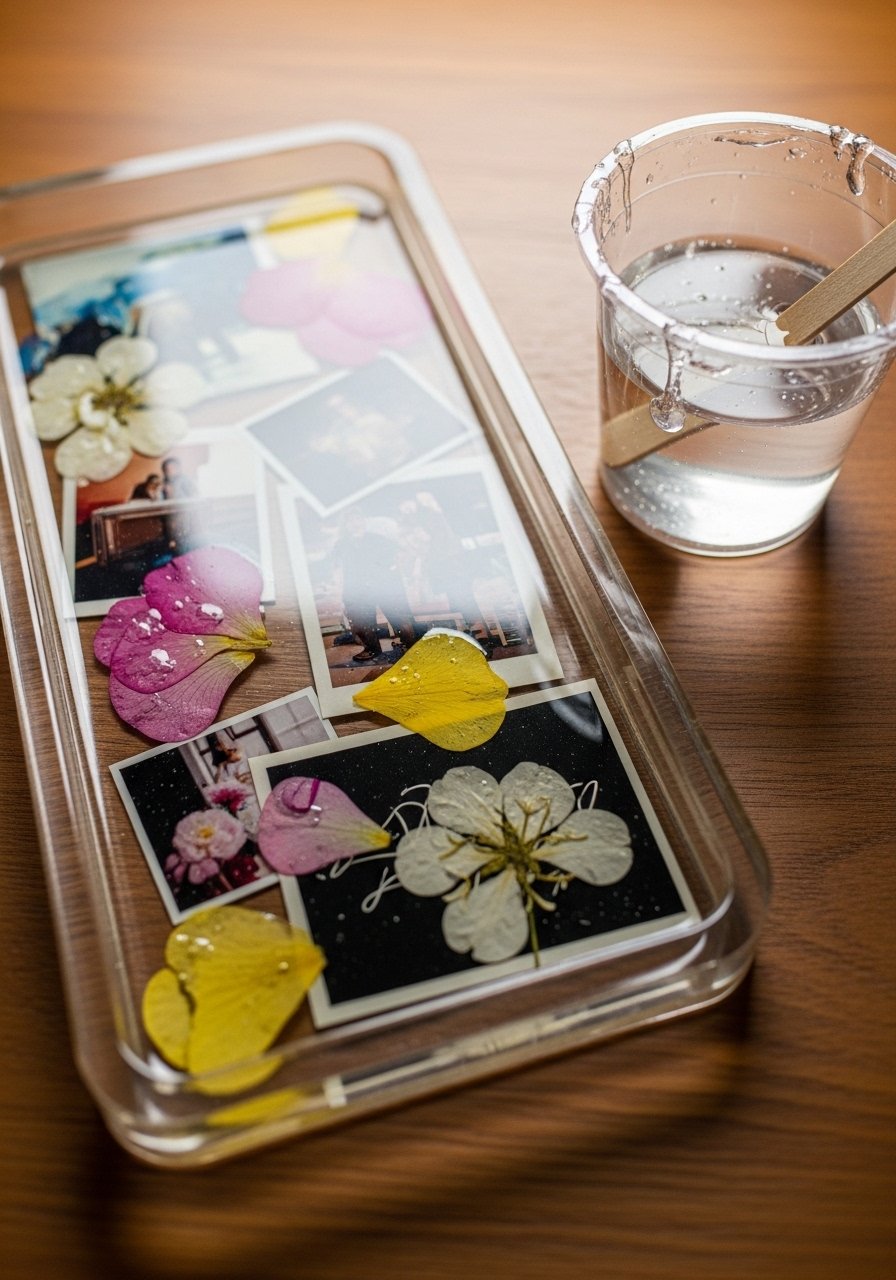
A resin photo tray preserves memories and looks glossy and high-end. Work carefully with resin, mix per directions, and use a heat gun briefly to pop bubbles.
Materials
- 1 rectangular silicone tray mold (8×5")
- Printed photos trimmed to fit
- Epoxy resin kit (enough for tray; usually 4–8 oz)
- Disposable mixing cups and stir sticks
- Heat gun or small torch
- Gloves and respirator mask
Instructions
- Place photos flat in mold, face-up.
- Mix resin per kit instructions and pour a thin layer to seal photos.
- Let set 2–4 hours, then pour a top layer to desired thickness.
- Run a heat gun for 3–5 seconds to release bubbles.
- Cure 24–48 hours or per resin instructions until hard.
- Demold carefully and sand any rough edges.
Display/Gift Tips
- Use as a catchall on a dresser.
- Wrap in tissue and put in a kraft box for gifting.
- Felt Letter Garland
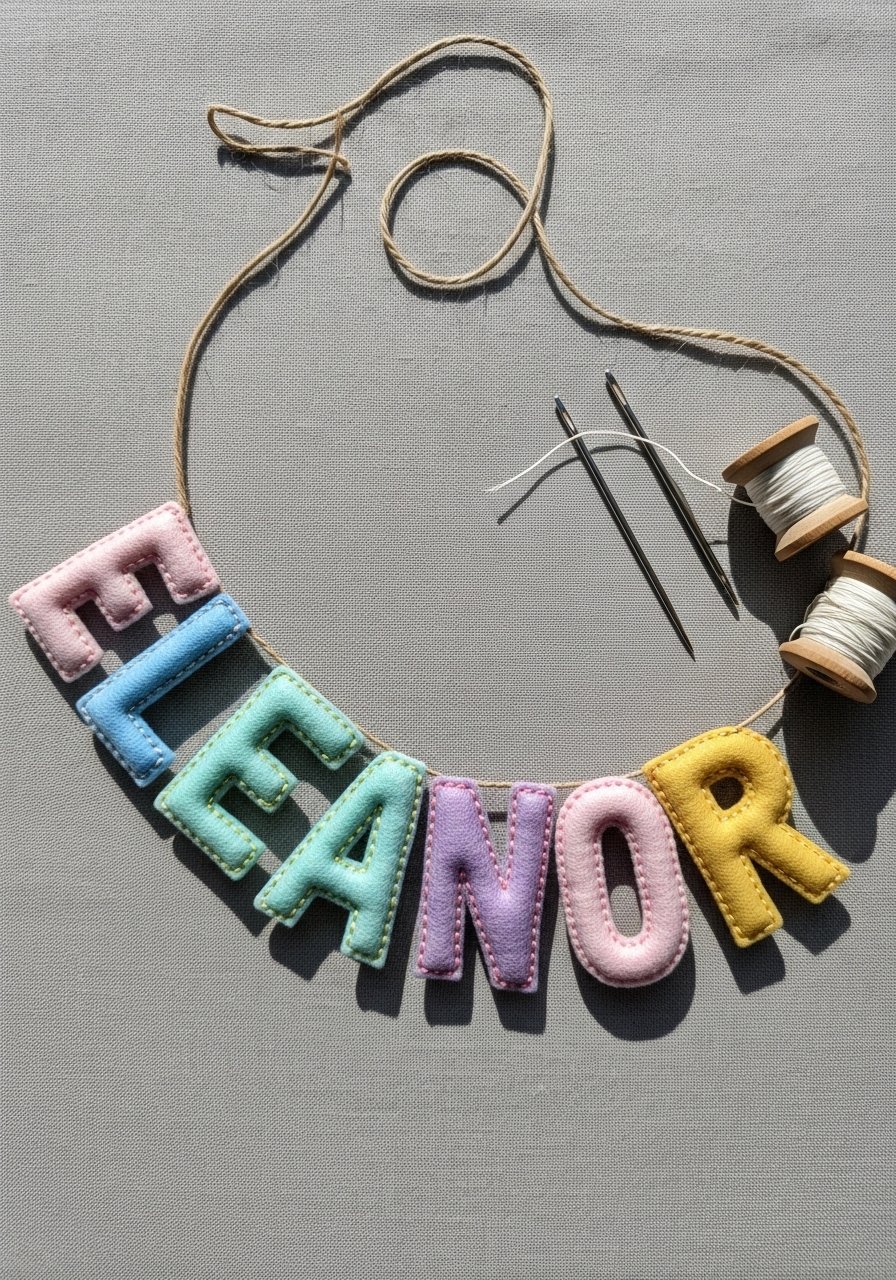
Personalized felt letter garlands are light, washable, and ideal above beds or dressers. They’re kid-friendly and perfect for beginner sewing practice.
Materials
- Felt sheets in multiple colors (9×12", 5–6 sheets)
- Embroidery floss (contrasting colors)
- Embroidery needle
- Paper letters template
- Twine (4–6 ft)
- Scissors and fabric glue
Instructions
- Trace letters onto felt and cut two of each letter for front/back.
- Sew edges with running stitch, leaving top open for stuffing if desired or flat for a clean look.
- Attach letters to twine with small stitches or glue, spacing evenly.
- Add small felt hearts between letters for decoration.
- Hang with removable hooks.
Display/Gift Tips
- Fold flat and place in a reusable gift bag for shipping.
- Make mini versions for desk-stake decor.
- Clay Ring Dish with Gold Rim
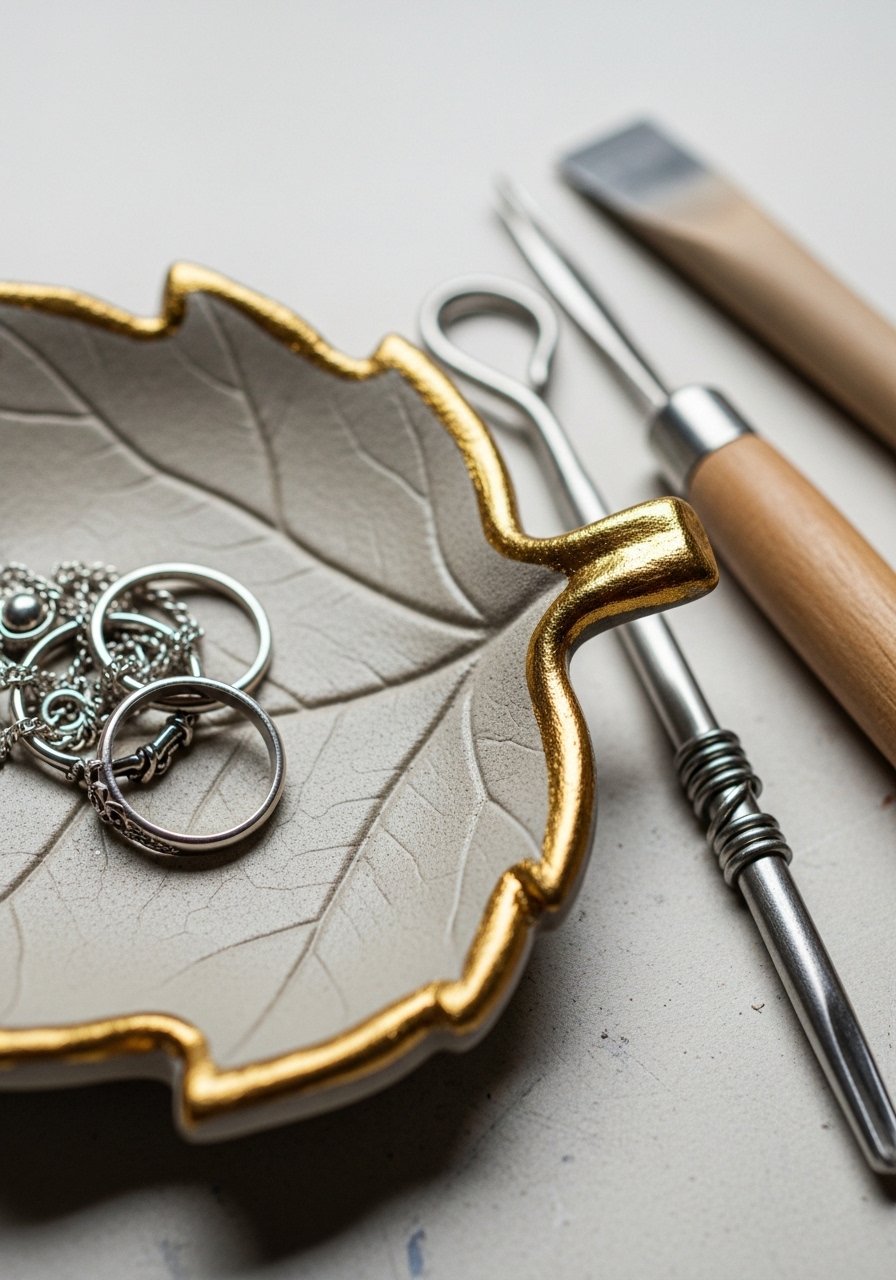
A small ring dish makes daily rituals feel special and is perfect for bedside styling. Air-dry clay is forgiving and quick-drying for home crafters.
Materials
- 4 oz air-dry clay
- 1 small rolling pin
- Leaf template or small dish mold
- Gold leaf paint pen
- Sandpaper (220 grit)
- Clear matte sealer (optional)
Instructions
- Roll clay to 1/4" thickness and shape with template or mold.
- Smooth edges with water and let air dry 24–48 hours until fully hard.
- Lightly sand any rough spots.
- Paint rim with gold leaf paint pen; let dry 30 minutes.
- Seal with matte sealer if needed; cure 24 hours.
Display/Gift Tips
- Tuck a small note or pair of earrings inside for gifting.
- Store multiple dishes stacked in a small drawer organizer.
- DIY Corkboard Mood Board
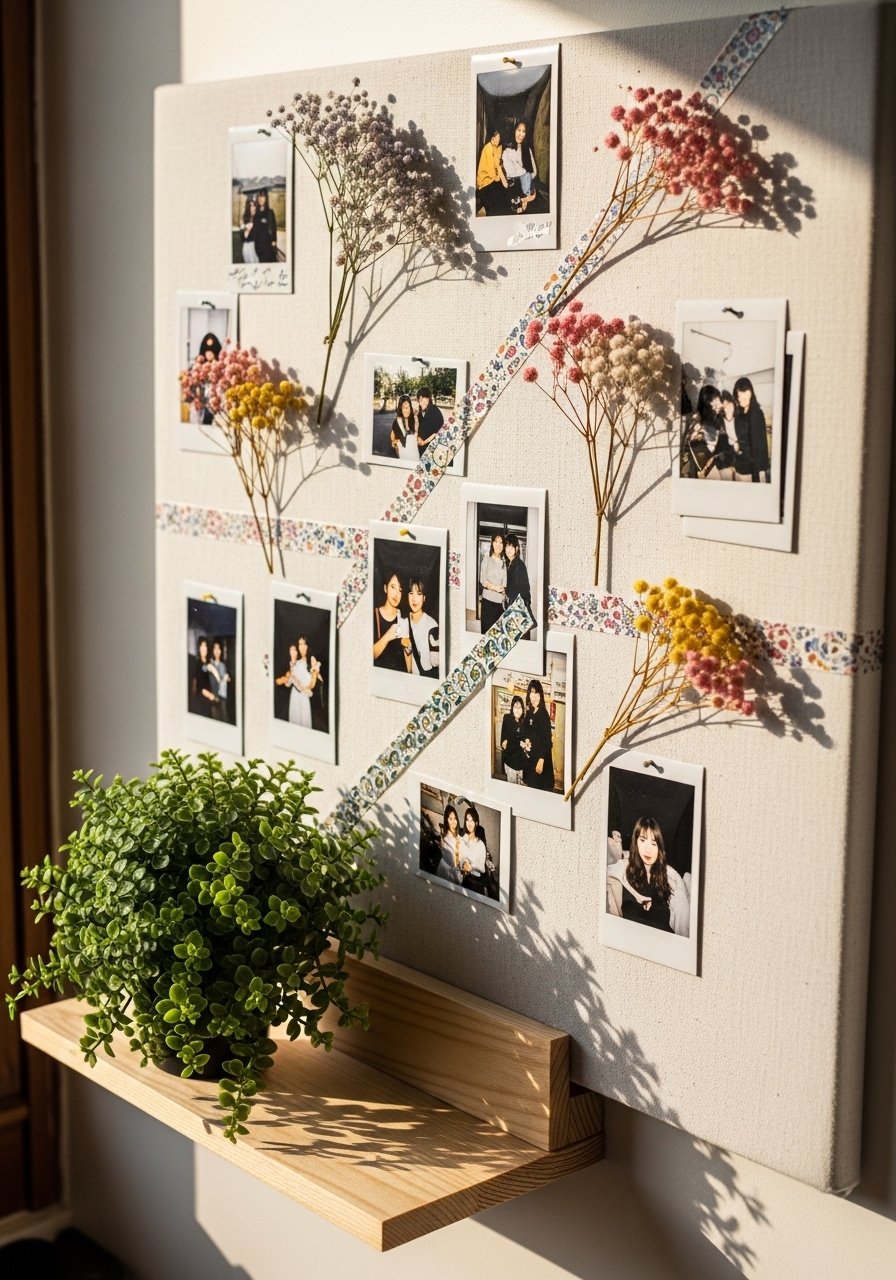
A fabric-covered corkboard feels polished and lets you pin changing inspiration. Use thin foam board under fabric for a soft look and push pins for easy swaps.
Materials
- 1 16×20" corkboard
- 1 1/2 yd upholstery fabric
- Staple gun and staples
- Push pins
- Scissors
- Optional: thin foam backing for extra cushion
Instructions
- Lay fabric face-down, center corkboard and wrap edges under, stapling on the back.
- Trim excess fabric and fold corners neatly.
- Mount to wall and arrange pins in clusters.
- Swap photos and mementos seasonally for an updated mood board.
Display/Gift Tips
- Use a small shelf beneath to hold scissors and pens.
- Keep pins organized in a magnetic pin holder.
- Tiny Canvas String Light Garland
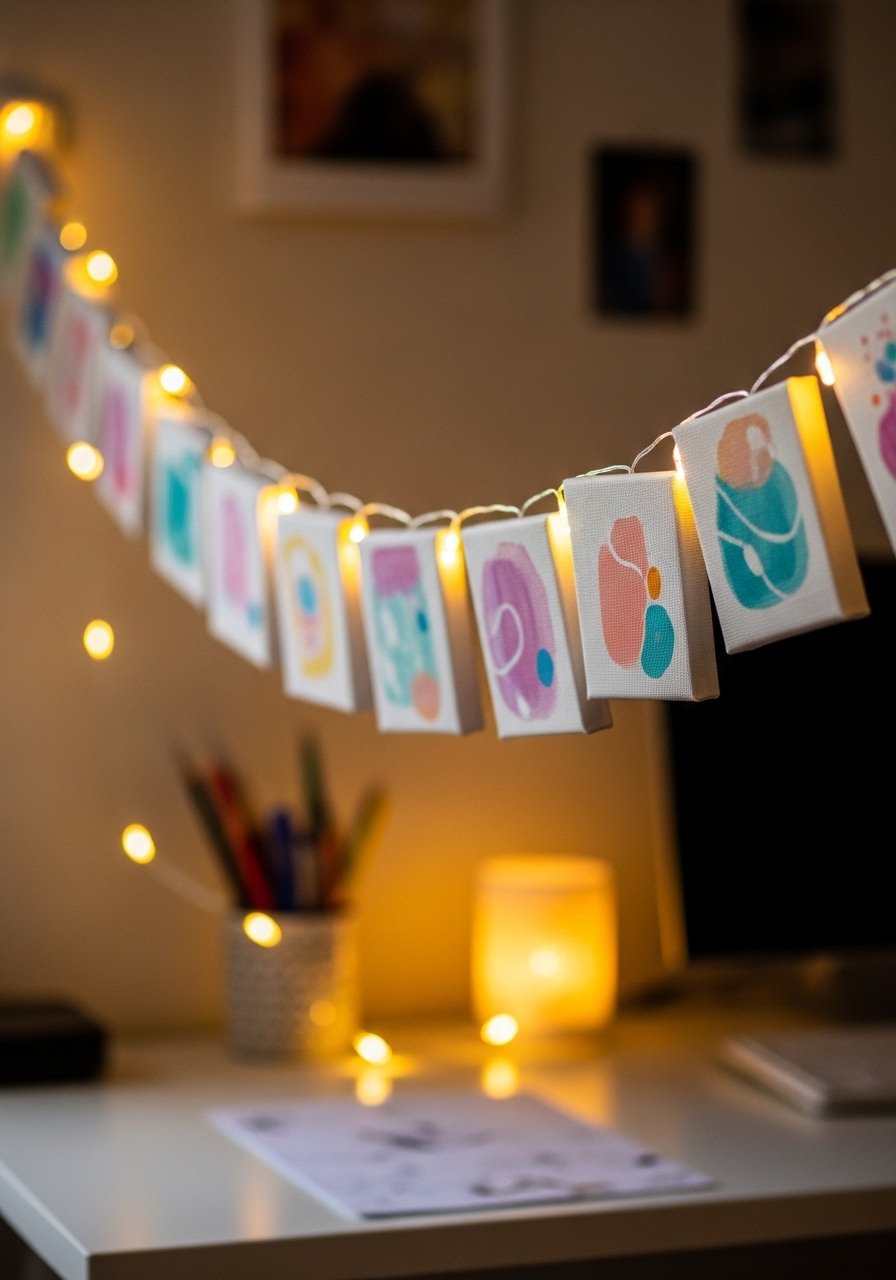
Tiny canvas garlands add color and soft light. Paint quick abstracts or small faces for a whimsical look. Stringing canvases onto fairy lights creates cozy ambiance.
Materials
- 10 mini 2×3" stretched canvases
- 1 set battery fairy lights (20–30 LEDs)
- Acrylic paint set
- Small detail brush
- Hot glue gun (low-temp)
Instructions
- Paint each mini canvas with abstract shapes; dry 20–30 minutes.
- Once dry, arrange the fairy light strand and hot-glue the battery-side LED to one canvas edge.
- Hot-glue each LED to the back center of a canvas, spacing evenly.
- Let glue set 10 minutes, test lights, and hang on wall.
Display/Gift Tips
- Use removable adhesive strips to hang the strand.
- Include spare batteries in a mini battery organizer.
- DIY Floating Frame Photo Ledge
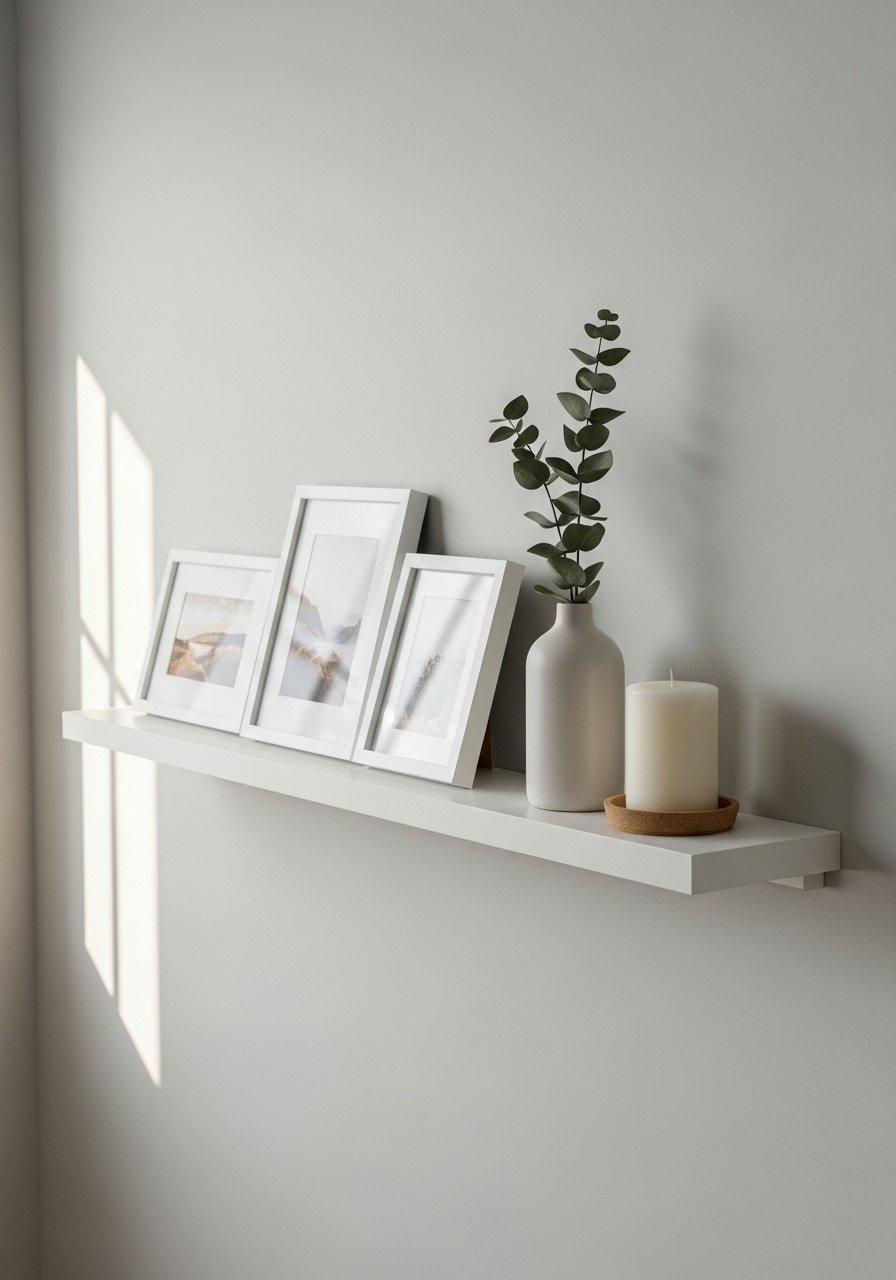
A floating ledge is great for rotating art and makes styling effortless. Use lightweight frames and vary heights for interest. Good for teens who like to change decor often.
Materials
- 1 36×4" floating ledge shelf
- Assorted lightweight frames (mixed sizes)
- Small decorative objects
- Wall anchors and screws
- Tiny rubber pads to prevent slipping
Instructions
- Install shelf level and secure to wall with anchors rated for weight.
- Arrange frames and objects on shelf in layers.
- Use rubber pads under frames to keep them from sliding.
- Refresh display monthly for a new look.
Display/Gift Tips
- Rotate themed weeks: pastel art, band posters, study inspo.
- Store small decor pieces in a stackable organizer.
- aesthetic room decor DIY ideas for teens: Painted Wooden Letter Lights
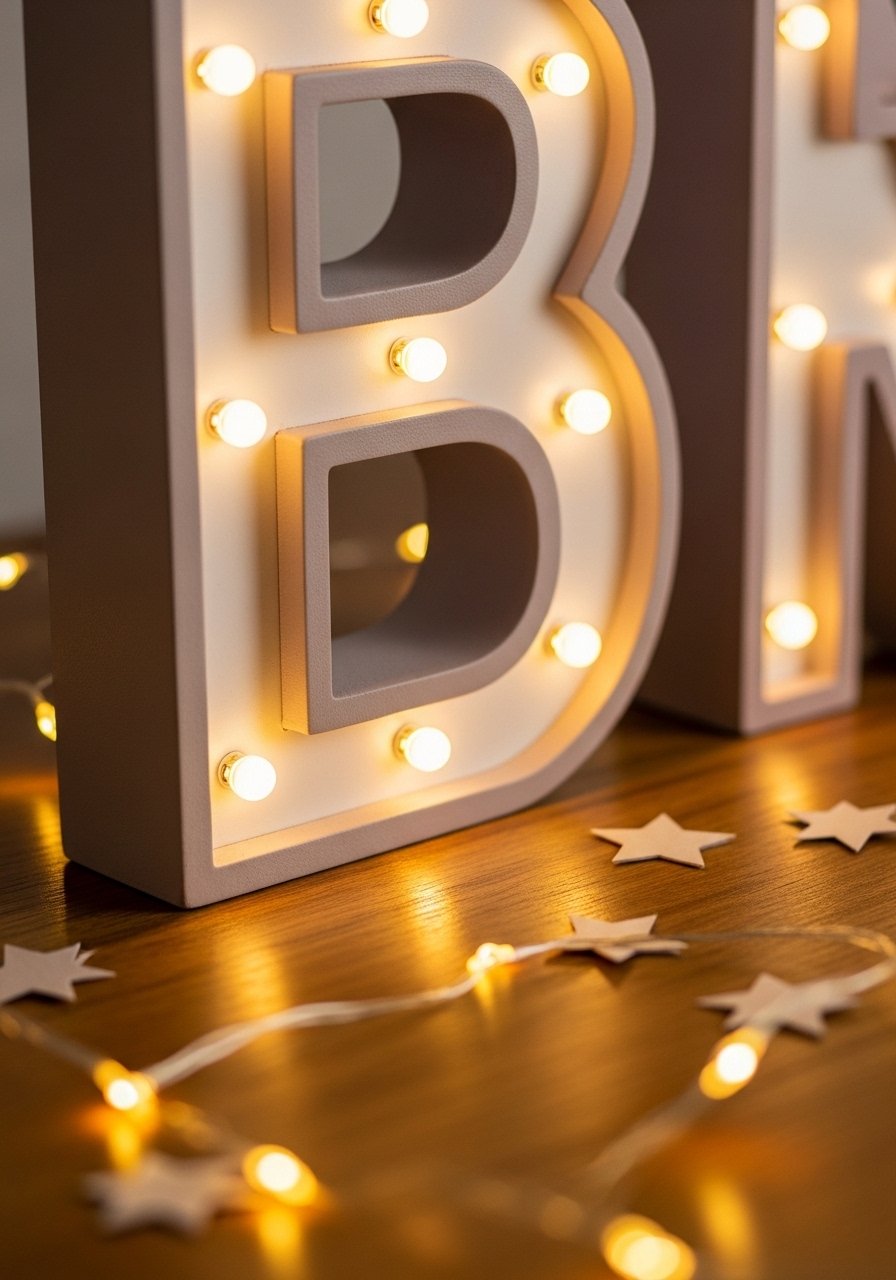
Letter lights make a room personal and bright. Using battery-operated LED dots keeps wiring invisible. Paint letters to match room palette for an on-trend statement.
Materials
- 1 wooden marquee letter (12" tall)
- 1 pack battery-operated LED puck lights (20 small LEDs)
- Acrylic craft paint (matte)
- Foam brush and detail brush
- Batteries (as required)
- Drill (if letters need holes)
Instructions
- Sketch dot placements, drill small pilot holes if needed for LEDs.
- Paint letter with two thin coats; dry 30 minutes between coats.
- Insert LED lights and secure battery pack behind the letter with mounting tape.
- Test lighting and hang or stand letter on desk.
Display/Gift Tips
- Spell a short name or word across a shelf.
- Wrap individually and tuck battery packs in a small gift pouch.
- Paper Star Lanterns
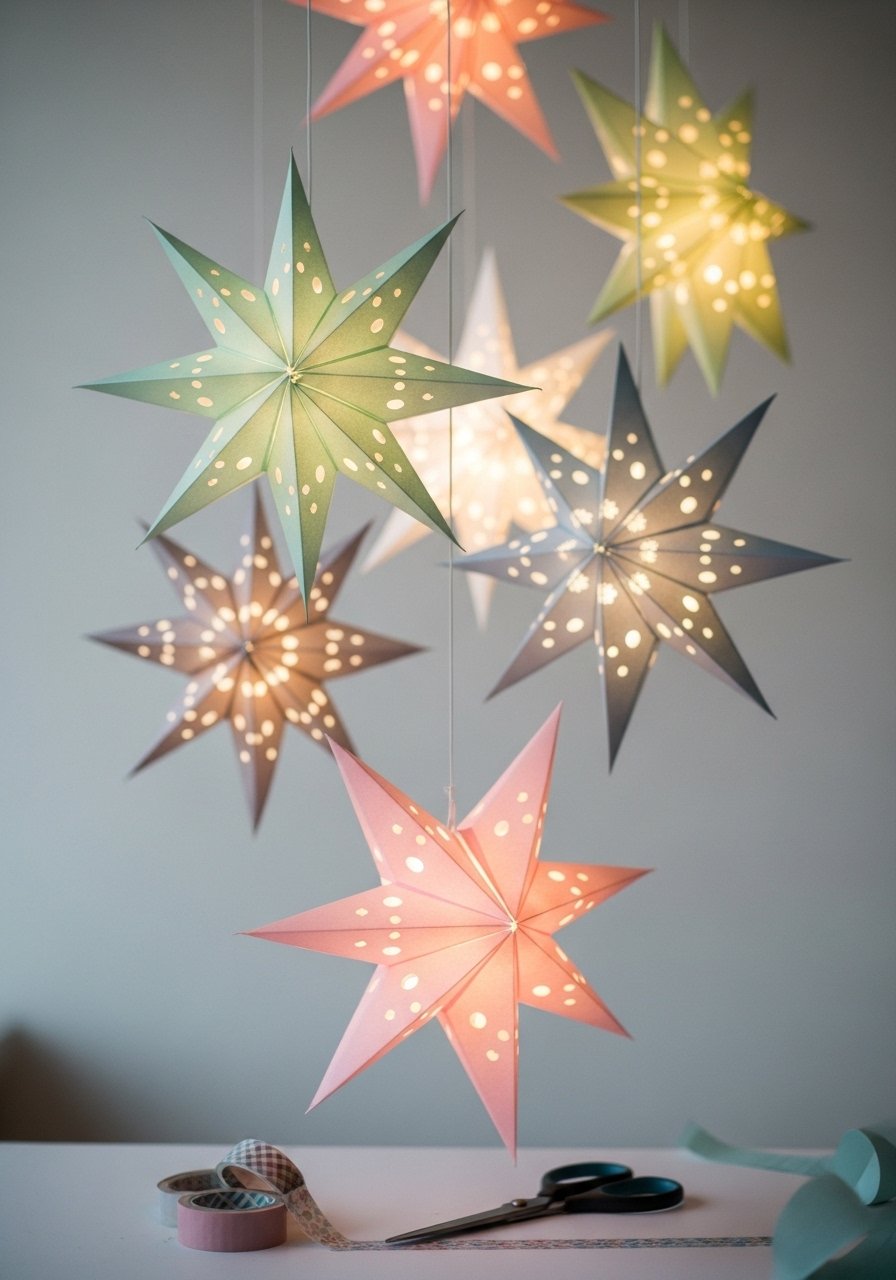
Paper star lanterns create magical overhead texture and are surprisingly sturdy when made from quality paper. LED tealights keep them safe and cozy.
Materials
- 10–12 sheets heavy craft paper (8.5×11")
- Scoring tool and ruler
- Glue stick
- Battery LED tealights
- Sewing thread for hanging
Instructions
- Score and fold paper into star prisms following a 5-point star template.
- Glue edges firmly and allow glue to set 10–15 minutes.
- Insert a battery LED tealight or secure externally under the star for glow.
- Hang multiple at various heights with thread.
Display/Gift Tips
- Cluster above a reading nook or bed.
- Pack flat star templates in a flat document folder for gifting.
- Felt Succulent Wall Pocket

Felt wall pockets bring greenery without the watering commitment. Use faux succulents for maintenance-free style.
Materials
- 9×12" felt sheet
- Hot glue gun
- Faux succulents (3 small)
- Twine for hanger
- Scissors and ruler
Instructions
- Fold felt into a pocket shape and glue side seams.
- Glue twine hanger to top and reinforce with more glue.
- Arrange faux succulents and glue into the pocket.
- Hang on wall with a small hook.
Display/Gift Tips
- Use faux succulents so pockets remain low-maintenance.
- Keep spare pockets in a fabric storage bin.
- DIY Painted Desk Organizer
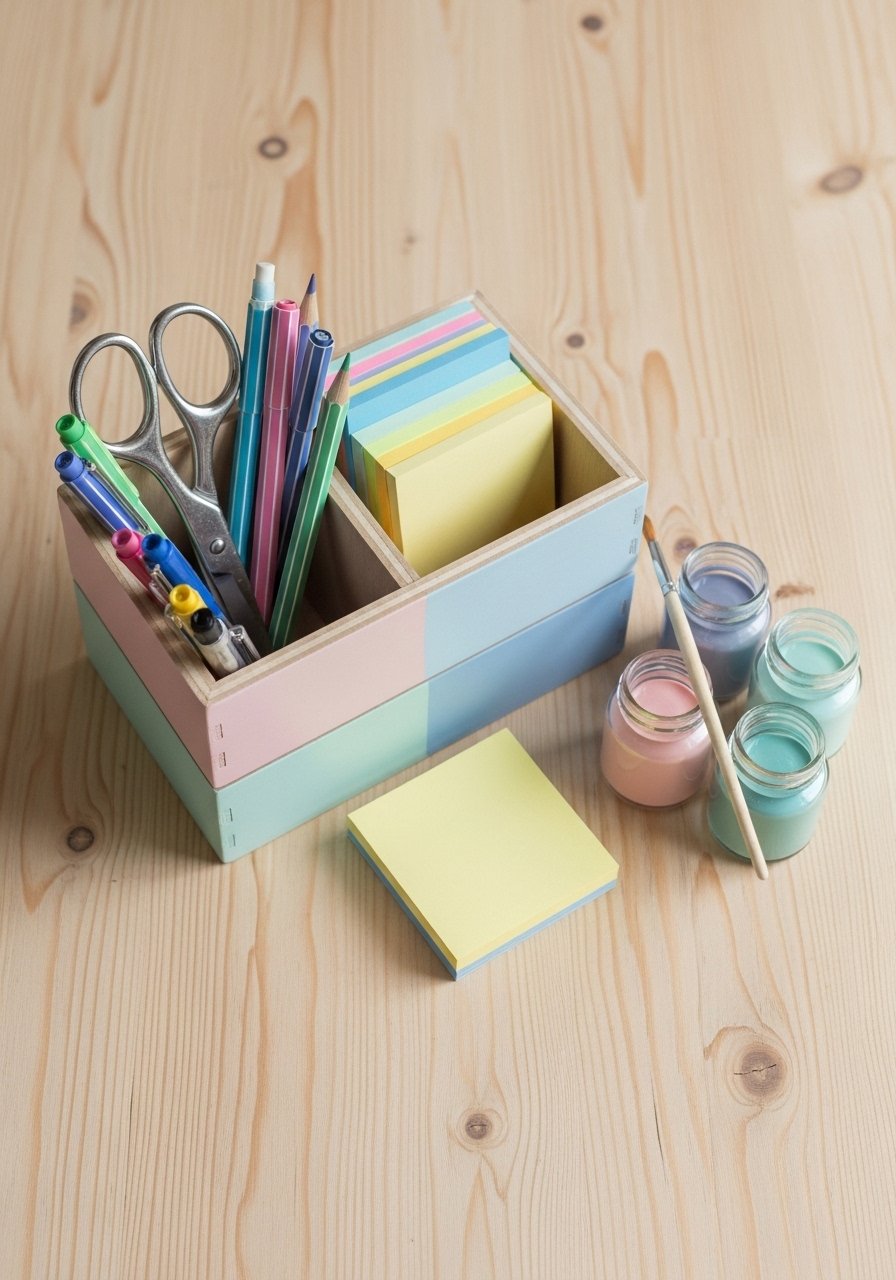
A customized desk organizer keeps school supplies tidy and looks cohesive with room colors. Use a sanding block to smooth factory edges before painting.
Materials
- 1 wooden desk organizer blank (multi-compartment)
- Acrylic craft paint (3 colors)
- Painter’s tape
- Flat foam brush
- Sandpaper (220 grit)
Instructions
- Sand organizer lightly and clean dust.
- Tape off sections for color blocking.
- Paint thin coats; dry 20–30 minutes between coats.
- Remove tape while paint is tacky for crisp lines.
- Let cure 24 hours for handling.
Display/Gift Tips
- Pair with a matching painted frame on the wall.
- Store spare supplies in a desk drawer organizer.
- Clipboard Art Rotator
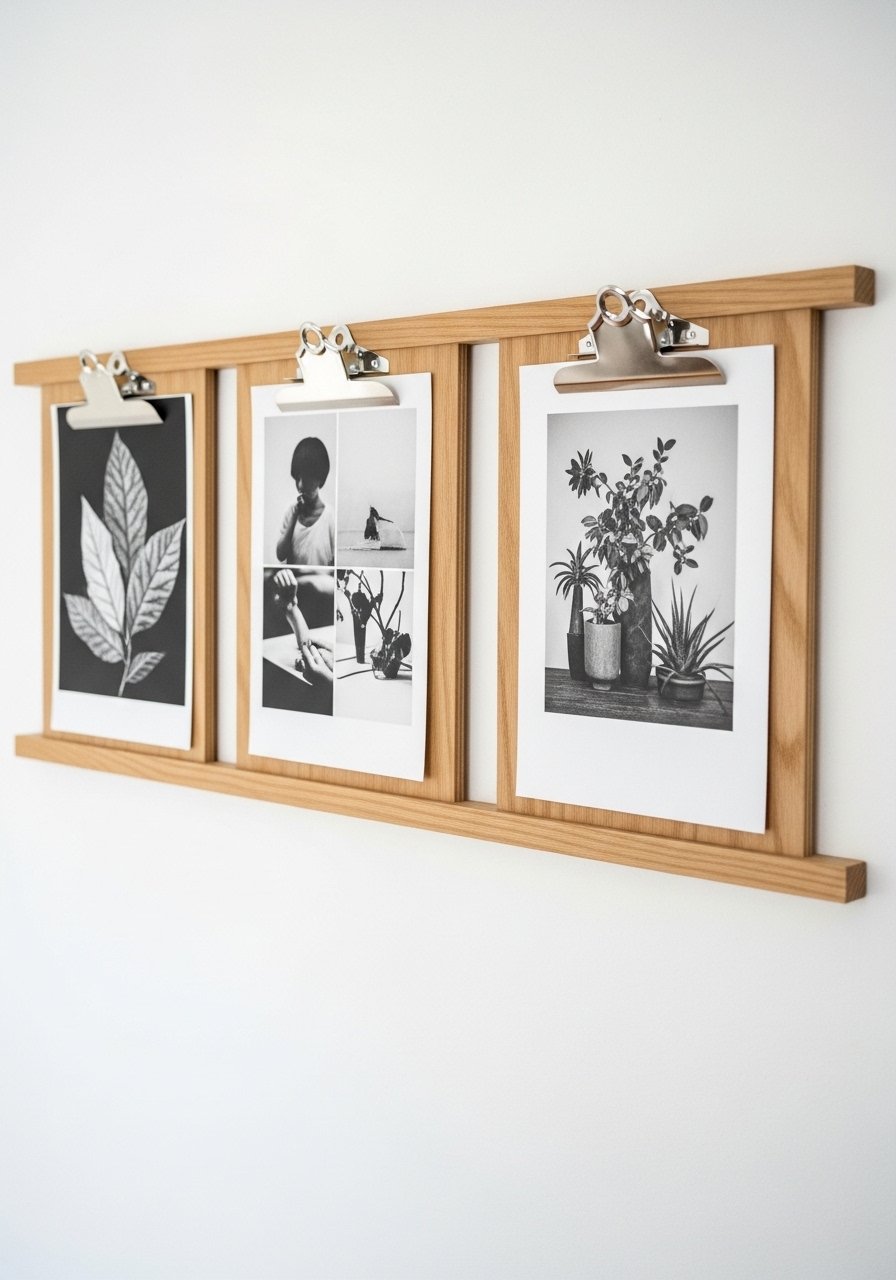
Clipboards make switching art effortless and create a gallery effect. Use uniform clipboards for a clean grid.
Materials
- 3 9×12" wooden clipboards
- Mounting hardware
- Printed art or mini canvases
- Pencil for leveling
- Small level
Instructions
- Mount clipboards in a straight row using picture hangers.
- Clip artwork and rotate pieces weekly.
- Use clipboards with a slight gap for dimension.
Display/Gift Tips
- Keep extra prints in a flat storage portfolio.
- Gift a set of curated prints with a clipboard.
- Beaded Curtain for Doorway
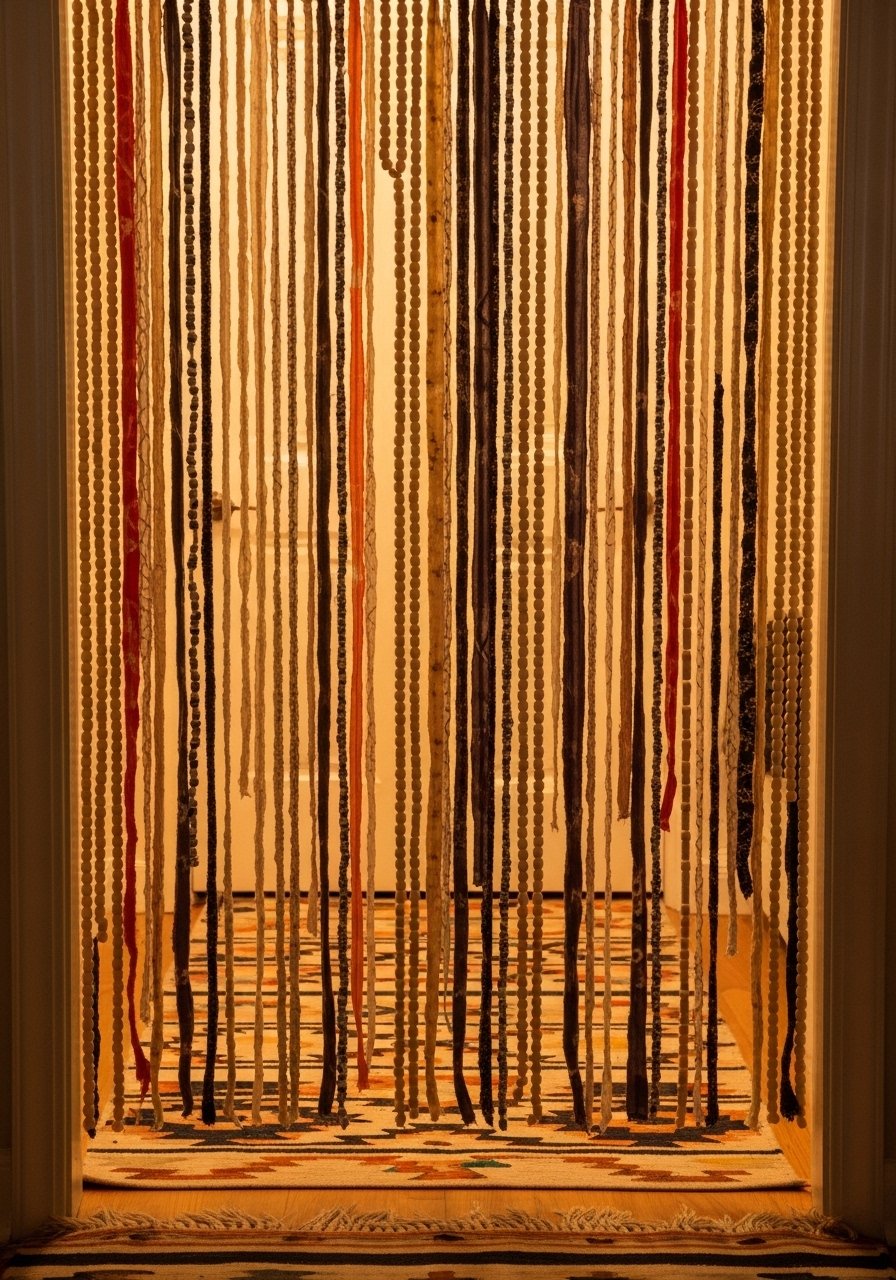
A beaded curtain adds motion and pattern to a room entrance. Use large wooden beads and thicker string for durability.
Materials
- 1 tension rod (width of doorway)
- 100 wooden beads (12mm–20mm)
- 10 lengths of twine (each 7 ft)
- Fabric strips tied intermittently
- Scissors
Instructions
- Cut twine into even lengths and knot at top around tension rod.
- String beads and tie fabric strips between bead clusters.
- Mount the rod in doorway and trim ends.
- Shake curtain gently to settle beads.
Display/Gift Tips
- Use a heavy-duty tension rod rated for beads.
- Store extra beads in a small zip bag.
- Upcycled Denim Wall Pocket Organizer
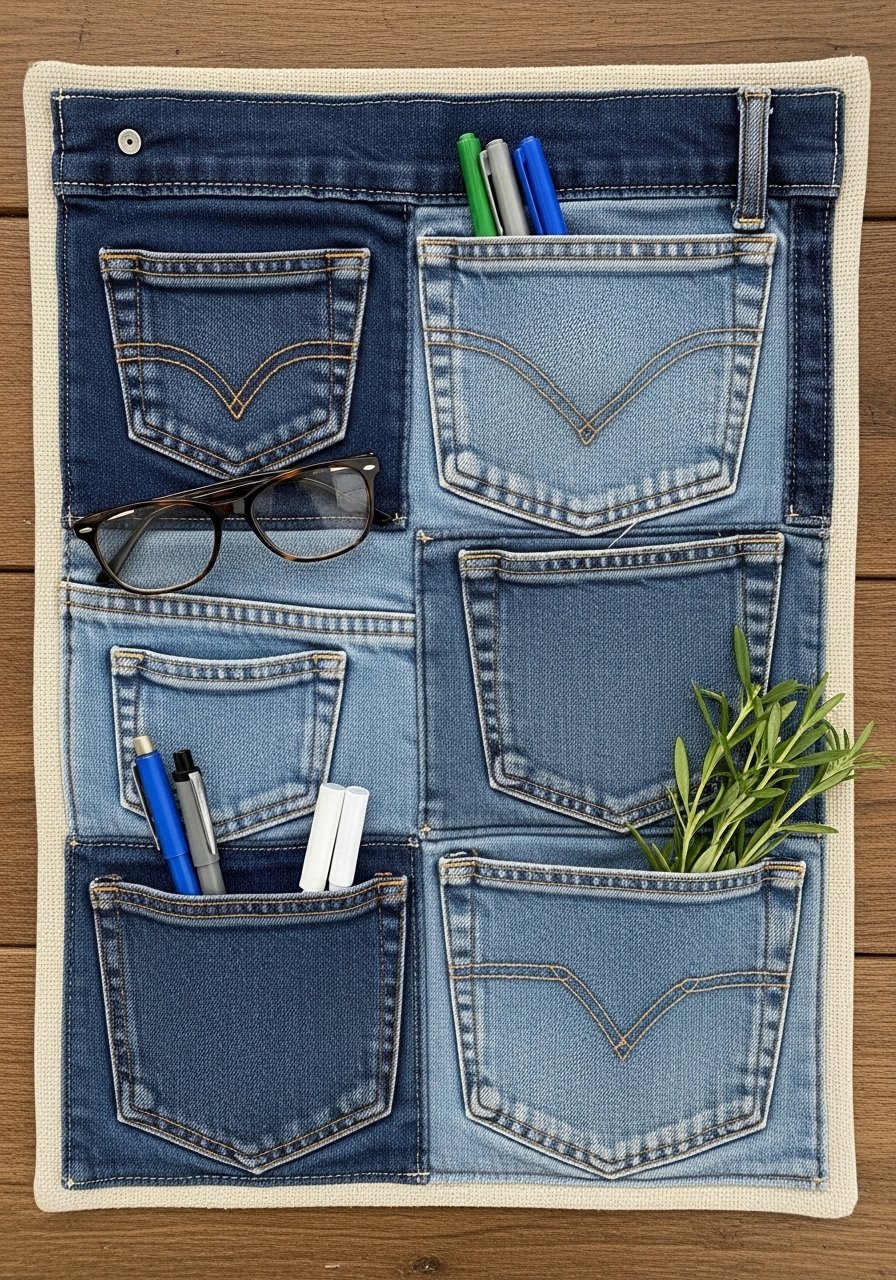
Repurpose jeans into handy wall pockets for school supplies and small plants. Denim is durable and gives a casual, lived-in vibe.
Materials
- Old jeans pockets (4–6 pockets)
- 1 canvas backing or heavy fabric (12×24")
- Sewing machine or needle and thread
- Fabric glue (optional)
- Grommets and rope for hanging
Instructions
- Arrange pockets on canvas and pin.
- Sew pockets in place with a straight stitch; double-stitch stress points.
- Add grommets to top corners and thread rope for hanging.
- Hang and fill pockets with supplies or faux plants.
Display/Gift Tips
- Label pockets with small cloth tags for organization.
- Fold and wrap in a reusable tote bag for gifting.
Thanks for sticking with the list — that was a lot of good stuff to try. These 24 projects cover playful, cozy, and minimal styles so you can pick pieces that fit your room and mood. Try a few quick ones (photo string, mini canvases, or the clay dish) to build confidence, then tackle the more involved projects when you have an afternoon. Save or pin this post for later and share it with a friend who’s redoing their space — which project are you starting with? I’d reach for a reliable temperature-control hot glue gun if I were packing a portable craft kit — it keeps finishes clean across so many of these ideas.
Keywords used: This article included "aesthetic room decor DIY ideas for teens" throughout to help you find exactly the projects that match your vibe. Happy crafting!


