Do you love the look of boutique room styling but not the price tag? These 24 budget aesthetic room decor DIY ideas prove you can get that high-end feel with thrifted finds, basic supplies, and a little creativity. Each project focuses on cheap or repurposed materials and simple techniques so you’ll get that curated vibe without breaking the bank.
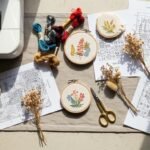
Throughout this list you'll see projects labeled for cottagecore, boho, Japandi, and minimalist tastes so you can pick what fits your space. I often start with a clean cutting mat and a precision craft knife for small trims, but a pair of sharp scissors works just as well for most projects. For stickers and clean paint lines, press painter’s tape down firmly before painting.
These budget aesthetic room decor DIY ideas include clear materials lists, step-by-step instructions with drying times, and styling tips so you can make multiples for quick seasonal refreshes or gifts. Grab a hot glue gun and let’s make something pretty.
1. Faux Marble Tray from a Thrifted Frame

This faux marble tray looks luxe but costs almost nothing if you start with a thrift-store frame. The painted veining and matte sealer give a stone-like finish that feels weighty and refined. Beginners will love how forgiving acrylic paint is for marble swirls.
Materials
- 1 thrifted wooden picture frame (inner size about 8 x 12 in)
- 1 sheet of lightweight MDF or cardboard cut to frame inner size
- 2–3 acrylic craft paints: white, light grey, charcoal
- 1 bottle matte Mod Podge, 8 oz
- 1 foam brush (1 inch)
- 1 small round detail brush (size 0–2)
- Painter's tape, 1/2 in
- Sandpaper, 120 grit
- Hot glue gun + glue sticks
- Optional: clear matte spray sealer, 5–7 days curing
Instructions
- Remove glass and backing from the frame. If the frame has fasteners, bend them out carefully.
- Cut MDF/cardboard to fit snugly inside the frame. Sand rough edges with 120-grit sandpaper.
- Paint the MDF base two coats of white acrylic, letting each coat dry 20–30 minutes until fully opaque.
- Dilute light grey with a drop of water for a translucent wash. Use a foam brush to pull faint veins across the white base. Let dry 15 minutes.
- Mix charcoal with a tiny bit of water to make a very thin ink-like wash. Using the small round detail brush, drag thin, broken lines to mimic marble veins. Vary pressure for organic lines. Work quickly; wipe off mistakes with a damp cloth.
- Once satisfied, seal the painted surface with one coat of matte Mod Podge using a foam brush. Let dry 30 minutes and apply a second thin coat. Cures to touch in 1–2 hours, fully cures in 24 hours.
- Place the painted panel into the frame and secure with hot glue along the inner lip. Clean edges with a craft knife if glue squeezes out.
How to Display or Gift It
Display on a dresser as a catchall for jewelry or a bedside tray for a candle and book. Pair with a small wooden easel for photos. Wrap it flat in kraft tissue and a twine bow for gifting. Store extra finished trays flat in a stackable craft organizer if making multiples for markets. For a glossy stone look, swap matte Mod Podge for a thin coat of clear epoxy resin and cure per kit instructions. I like using a hot glue gun for quick assembly.
2. Minimalist Washi Tape Accent Wall Stripes

Vertical washi tape stripes create an architectural, high-end feel with almost zero cost. It's temporary, renter-friendly, and lets you experiment with pattern scale. This is perfect if you want a subtle Japandi or Scandinavian look that reads crisp and modern.
Materials
- 1–3 rolls of washi tape (10mm–30mm widths) in neutral tones
- Measuring tape (or yardstick)
- Pencil
- Level
- Masking/painter’s tape (optional)
- Scissors
- Faux plant or shelf for styling
- Drop cloth or towels
Instructions
- Choose your stripe spacing (common: 6–8 in apart for narrow stripes, 12–18 in for bold stripes). Mark small pencil dots at top and bottom.
- Use a level to draw faint vertical guide lines between marks.
- Tear a length of washi tape and apply from ceiling to baseboard along guide lines. Press firmly with your palm to remove bubbles.
- For perfect ends, wrap tape around baseboard edge and crease, then trim excess with a precision craft knife on a cutting mat.
- If overlapping colors, start with the lightest first and layer darker tones on top for crisp edges.
- Step back and adjust spacing or add an extra stripe if needed; washi is removable for repositioning.
How to Display or Gift It
Pair the striping with simple wooden frames and a woven wall basket. For seasonal swaps, remove and replace with new tape in ten minutes. Store leftover rolls in a small craft drawer. A self-healing cutting mat helps when trimming tape edges.
3. Upcycled Glass Bottle Vase Wrapped in Jute

This jute-wrapped bottle vase is rustic-boho with a refined silhouette. It’s one of those projects where texture sells the aesthetic: the tactile roughness of jute against glass feels handcrafted and cozy.
Materials
- 1 recycled glass bottle (wine or olive oil bottle), cleaned
- 10–15 yards 1–2 mm jute twine
- Hot glue gun + glue sticks
- Scissors
- Ruler
- Optional: small wooden beads (6–10)
- Dried stems or faux grasses for styling
Instructions
- Clean and dry the bottle. Remove labels by soaking in warm water for 15–30 minutes.
- Apply a small dot of hot glue near the base and adhere the jute’s starting end.
- Wrap jute tightly around the bottle, pressing each new row against the previous. Add a tiny dab of hot glue every 6–8 inches to hold tension.
- When you reach the desired height, cut twine and secure with a final glue dot. Tuck loose ends under the last wrapped row.
- For a decorative collar, thread wooden beads onto jute and knot; glue this band near the bottle neck.
How to Display or Gift It
Group several wrapped bottles in varying heights on a windowsill or shelf. Fill with dried eucalyptus for a cottagecore feel. Wrap finished vases in tissue and place in a kraft box for gifting. Store extra twine in a craft organizer tray to keep it tidy.
4. DIY Linen-Wrapped Bulletin Board

A linen-wrapped bulletin board gives a soft, tailored backdrop for photos, notes, or botanicals. It reads like a boutique store piece but is inexpensive to make from a foam core and fabric remnant.
Materials
- 1 foam core board, 12 x 18 in
- 1/2 yard unbleached linen fabric
- 1 staple gun + staples
- Scissors
- Ruler
- Hot glue gun (for ribbon loop)
- 2 yards narrow cotton ribbon (for grid lines, optional)
- Push pins, brass finish
Instructions
- Cut linen so it wraps around foam core with 2 in overlap on all sides.
- Center fabric on foam core. Fold and staple one long side to the board’s back, pull taut, then staple the opposite side.
- Fold corners neatly (like wrapping a present) and staple.
- If adding a ribbon grid, lay horizontal and vertical strips across the front and glue or stitch intersections. Secure ends on the back.
- Attach a ribbon loop to the back top with hot glue for hanging if not framing.
How to Display or Gift It
Lean on a small wooden easel or hang above a desk. Use brass push pins for a cohesive look. Wrap in kraft paper and tie with ribbon for gifting. For storing multiple boards, stack flat in a closet or in a large craft binder. A staple gun makes assembly fast.
5. Painted Boho Terra-Cotta Pots with Chalk Finish

A chalk-like paint finish on thrifted terra-cotta pots instantly modernizes them. The tactile matte finish feels expensive and pairs perfectly with small succulents for a Japandi or boho shelf.
Materials
- 3 small terra-cotta pots (2–4 in diameter)
- 3 chalk-style acrylic paints (matte white, muted sage, terracotta)
- 1 foam brush
- Fine sandpaper, 220 grit
- Painter’s tape
- Clear matte sealer spray
- Potting soil and small succulents
- Drop cloth
Instructions
- Clean pots and let dry. Lightly sand to help paint adhere.
- Tape a simple geometric pattern if desired.
- Apply one thin coat of chalk paint with a foam brush. Let dry 30 minutes then apply a second coat for full coverage.
- Remove tape while paint is still slightly tacky for crisp edges.
- Once dry, sand edges lightly for a worn, soft look.
- Spray one light coat of matte sealer, dry 15–20 minutes. Let cure 24 hours before planting.
- Add soil and succulents; water sparingly.
How to Display or Gift It
Cluster pots on a windowsill or tray. Tie a simple twine bow around a pot for gifting. Keep extra painted pots stacked in a craft storage bin until ready to plant.
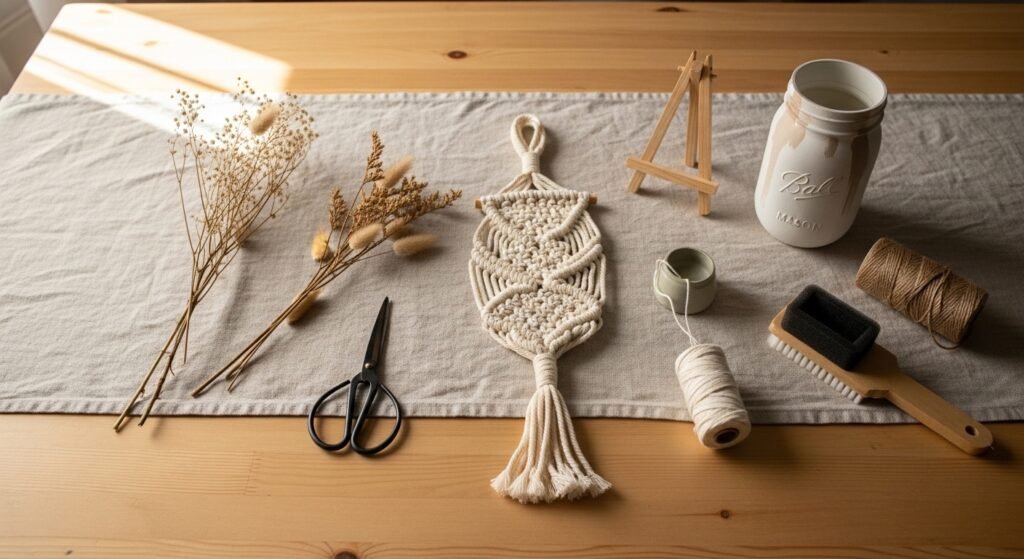
6. Simple Macramé Key Tassel (Beginner)

Tiny macramé tassels add artisanal texture to drawer pulls, keys, or as curtain tiebacks. This quick project uses 3mm cord and basic knots, so it's ideal for beginners learning square and lark’s head knots.
Materials
- 3mm single-strand cotton macramé cord, 10 yards
- 1 wooden bead, 12 mm
- Scissors
- Ruler
- Comb (for fringing)
- Key ring or lobster clasp
- Optional: clear fabric glue
Instructions
- Cut four lengths of cord at 18 in each.
- Fold cords in half and attach to key ring with lark’s head knots.
- Thread a wooden bead onto the central cords and slide up to secure.
- Work a square knot pattern for 1.5 in below the bead.
- Tie a tight overhand knot at the base. Trim ends to desired tassel length and comb out fibers.
- If fraying is too loose, add a dab of clear fabric glue inside the knot and let dry 10 minutes.
How to Display or Gift It
Attach to a drawer pull, zipper, or packaging ribbon. Make a set of three in different neutral shades and put in a kraft box for gifting. Store extra cord in a craft organizer.
7. DIY Faux Marble Coasters with Polymer Clay
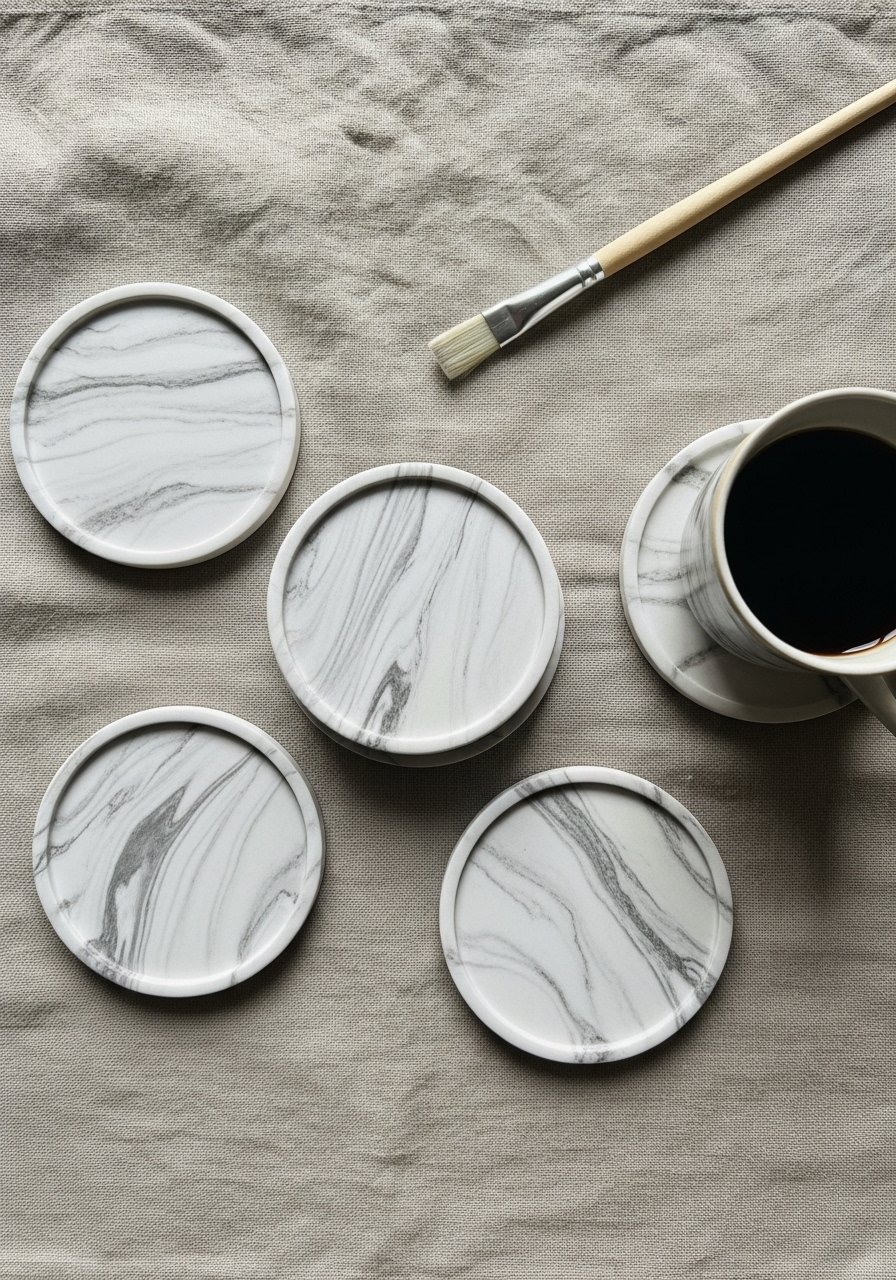
Polymer clay coasters can mimic marble veins and are heat-resistant. They feel luxe and are small, making them perfect to batch-make as room decor gifts. This project uses a rolling pin and simple marbling technique.
Materials
- Polymer clay in white, light grey, charcoal (total ~90 g)
- 3 in round cutter (cookie cutter)
- Rolling pin or acrylic roller
- Baking sheet + parchment paper
- Sandpaper, 400 grit
- Clear matte sealer (spray or brush-on)
- Toothpick or needle tool
Instructions
- Condition clay until soft. Slice thin strips of grey and charcoal and press into white base.
- Fold and twist to create veins. Roll flat to about 1/8 in thickness.
- Cut rounds with the cutter and slightly sand edges after baking.
- Bake per package instructions (typically 265°F/130°C for 15–20 minutes per 1/4 in thickness). Cool completely.
- Lightly sand any rough spots, then seal with a thin layer of matte sealer. Let dry 1 hour.
How to Display or Gift It
Stack with ribbon for a sleek gift. Pair with a small wooden easel for in-situ display. Store finished coasters flat in a shallow craft box. A detail brush set helps apply sealer evenly.
8. Minimal Driftwood Shelf (Small)

A tiny driftwood shelf adds organic texture and a coastal minimal vibe. Use a reclaimed plank and simple brackets for a shelf that looks like a curated boutique find.
Materials
- 1 small driftwood plank (approx 12 x 4 x 1 in)
- 2 mini brass L-brackets
- 4 screws (1 in)
- Drill with small bit
- Sandpaper, 120 grit
- Clear matte wood oil (or tung oil)
- Tape measure
Instructions
- Clean and sand driftwood lightly. Remove loose splinters.
- Drill pilot holes for bracket screws on the plank and wall.
- Apply one thin coat of wood oil with a lint-free cloth; wipe dry. Let cure 12 hours.
- Attach brackets to plank, level on wall, mark holes, then fix to studs or use wall anchors.
- Place a small plant or candle on the shelf.
How to Display or Gift It
Use as a tiny display shelf for a shell, candle, or a small photo. For gifting, pack with a small dried sprig and kraft tag. Store additional brackets in a hardware organizer. I like using a drill bit set for clean pilot holes.
9. Pressed Flower Glass Frame Mobile
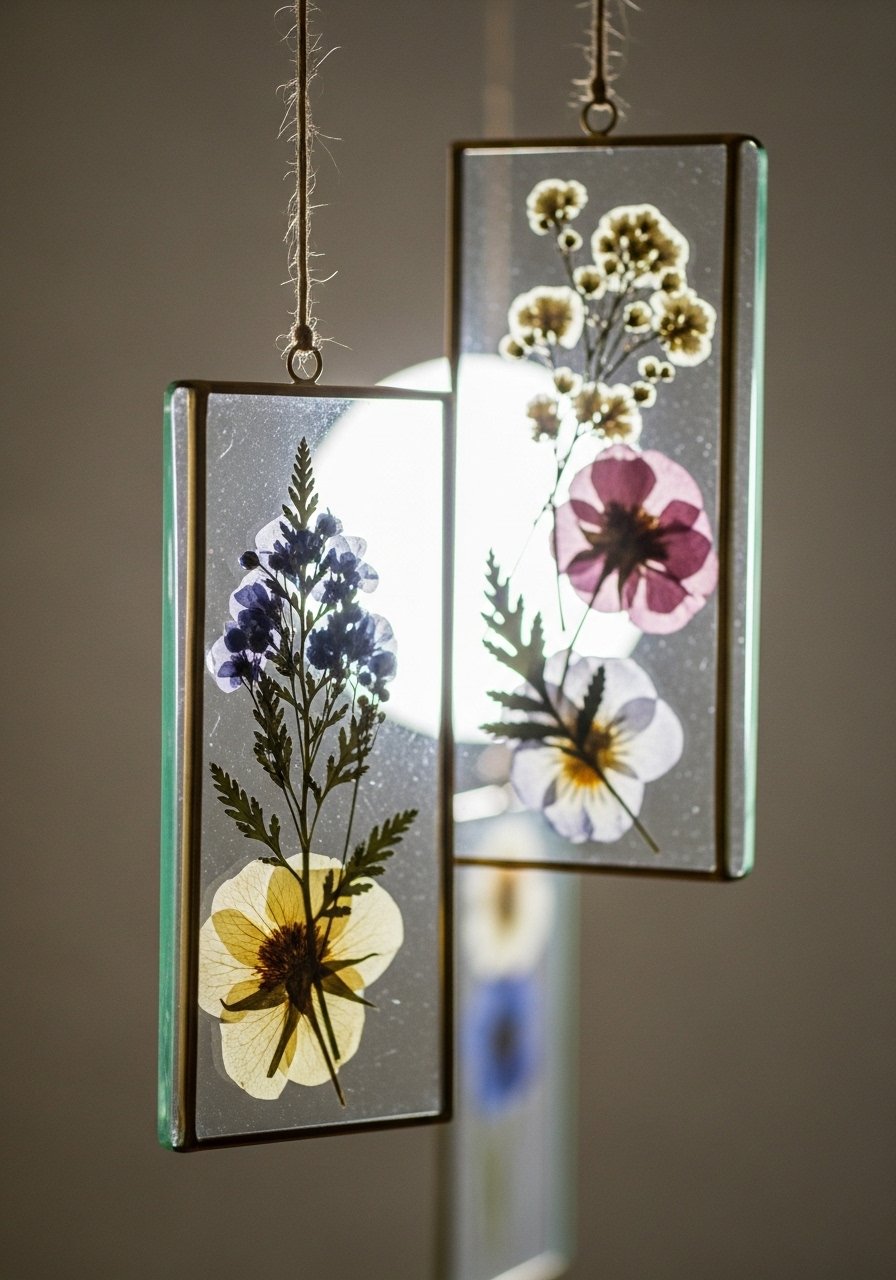
Pressed flowers in glass frames make ethereal, cottagecore window hangings. This project is romantic and light-catching, and it uses inexpensive floating frames.
Materials
- 2–3 small floating glass frames (2.5 x 3.5 in)
- Assorted pressed flowers (or press your own)
- 1 spool thin jute or twine
- Small brass jump rings or wire
- Scissors
- Tweezers
- Optional: glue dots
Instructions
- Arrange pressed flowers on glass using tweezers. Avoid overlapping the edges.
- Close frames carefully and latch securely.
- Attach twine loops using jump rings or wrap twine around the frame metal loops.
- Suspend frames from a single twine hanger at varying lengths for a mobile.
- Trim excess twine and knot securely.
How to Display or Gift It
Hang in a south-facing window for glowing silhouettes. Gift as a pair with a small card explaining the meaning of the flowers. Keep spare frames in a stackable craft organizer.
10. Scandinavian Inspired Painted Wood Beads Garland
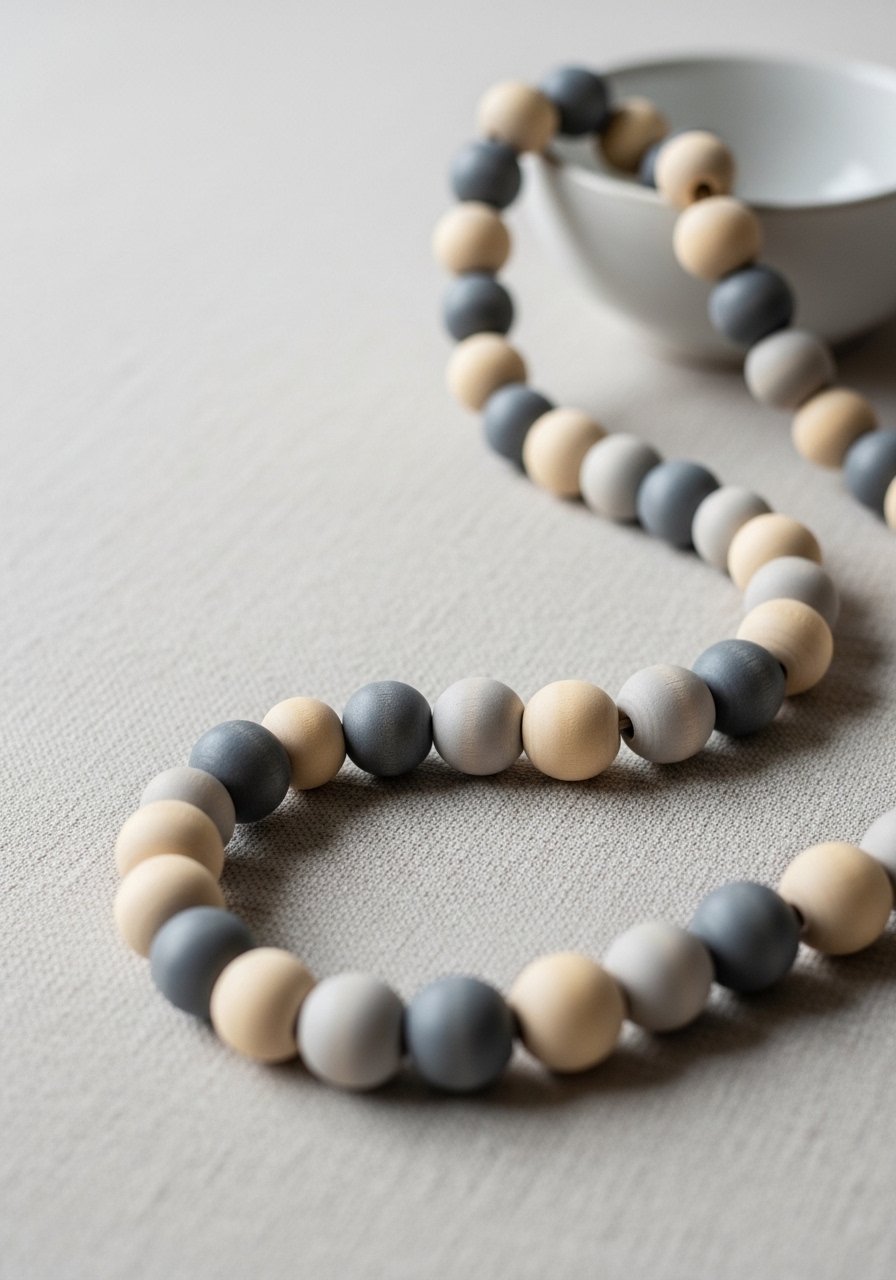
Wood bead garlands add sculptural minimalism. Paint half the beads in soft neutrals and knot them on cotton cord for a cozy, tactile shelf accent.
Materials
- 40–50 wooden beads, 12–20 mm
- 3 ft cotton cord, 3 mm
- Acrylic craft paints in soft neutrals
- Foam brush
- Ruler
- Scissors
- Clear matte sealer spray
Instructions
- Paint beads individually using a foam brush. Let dry 20–30 minutes and apply a second coat if needed. Cure 24 hours.
- Thread beads onto cord in desired sequence, space them with simple overhand knots.
- Tie secure knots at ends and trim cord.
- Add a dab of clear sealer to painted areas if beads will be handled often.
How to Display or Gift It
Drape over a stack of books, a vase, or a shelf edge. Coil and place in a small ceramic bowl for a styled vignette. Store extra beads and cord in a small parts organizer.
11. Vintage Photo Locket Display on Ribbon

Tiny locket displays on ribbon turn small photos into heirloom-like decor. They look especially chic grouped on a pegboard or in a shallow frame.
Materials
- 2–4 miniature photo lockets (1 in)
- 2–3 yards narrow linen ribbon
- Printed miniature photos (1 in diameter)
- Scissors
- Tweezers
- Clear glue or glue dots
Instructions
- Resize and print photos to fit lockets. Trim carefully.
- Open lockets and secure photos with glue dots or a dab of clear glue.
- Thread ribbon through locket loops and tie neat bows.
- Hang on a small pegboard or frame in a grid.
How to Display or Gift It
Cluster in a shallow shadow box or hang vertically as a sentimental necklace display. Wrap each locket in tissue and tuck into kraft gift bags.
12. Painted Cork Pinboard Tiles

Cork tiles are inexpensive and customizable. Paint tiles in a muted palette for a cohesive, modern memo wall that looks curated.
Materials
- 4 cork tiles, 12 x 12 in each
- Chalk-style craft paints (2-3 colors)
- Foam roller or 3 in foam brush
- Painter’s tape
- Sandpaper, 220 grit
- Command strips or small nails
- Ruler
Instructions
- Lay tiles on drop cloth. Tape off geometric patterns if desired.
- Roll paint in thin coats. Let each coat dry 30 minutes. Apply second coat for opacity.
- Remove tape while paint is slightly tacky for crisp edges.
- Allow tiles to cure 24 hours, then mount on wall using Command strips or small nails.
How to Display or Gift It
Arrange in a grid above a desk and use brass pushpins for a cohesive look. For gifting, stack painted tiles with a ribbon. Keep extra tiles flat in a closet to avoid warping.
13. Minimalist Framed Pressed Leaf Trio
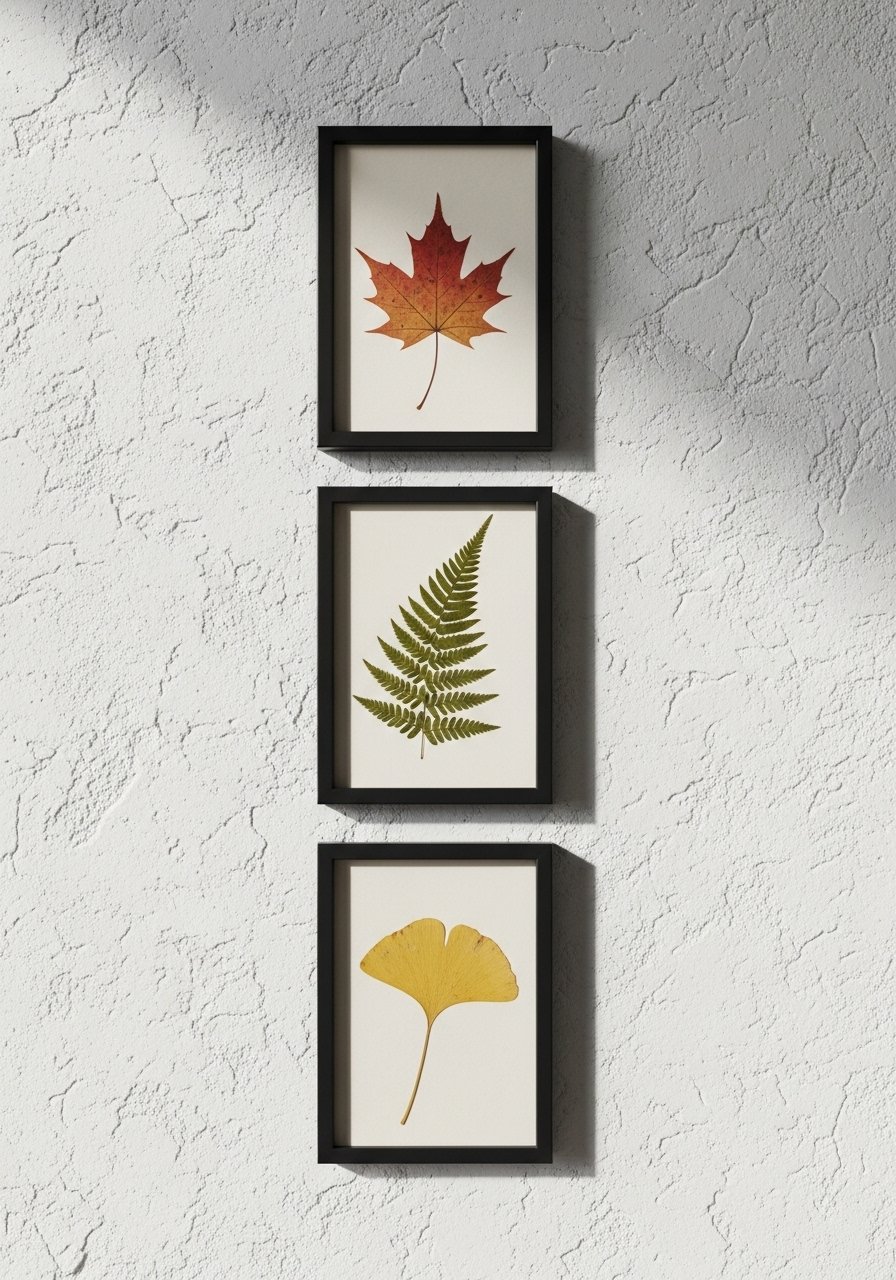
Three framed pressed leaves look polished and serene. Using the same leaf shape and simple frames creates a gallery-worthy set that feels intentional.
Materials
- 3 slim frames, 5 x 7 in
- 3 pressed leaves (same shape)
- Cream cardstock (cut to frame size)
- Tweezers
- Double-sided tape or glue dots
- Ruler
- Pencil
Instructions
- Center each leaf on cream cardstock and secure with a tiny piece of tape or glue dot on the stem.
- Insert into slim frames and close.
- Hang vertically with equal spacing (about 3 in between frames).
How to Display or Gift It
Group above a console table or nightstand for a calming focal point. Wrap in kraft paper with a twine bow for gifting. Store extra frames flat with cardboard separators.
14. DIY Marbleized Planter with Nail Polish (Small)

Marbling with nail polish on water gives a delicate stone pattern on ceramics. This small planter feels artisanal and costs pennies if you already have discarded nail polish.
Materials
- 1 small ceramic planter (glazed)
- Shallow bowl or disposable pan with water
- 2–3 nail polish colors (white, grey, black)
- Toothpick
- Rubber gloves
- Paper towels
- Clear matte sealer spray
Instructions
- Fill bowl with room-temperature water about 2 in deep.
- Working quickly, drip nail polish onto the water surface. Swirl gently with a toothpick.
- Dip planter rim slowly into the marbling. Lift straight out and let excess water drip off.
- Wipe interior or undesired spots with a cotton swab.
- Let dry 1–2 hours. Spray a light coat of matte sealer and cure 24 hours.
How to Display or Gift It
Pair with a tiny succulent and a handwritten care tag. Wrap in tissue paper for gifting. For storage, keep planters upright in a box with bubble wrap.
15. Wash-Painted Ombre Canvas Art
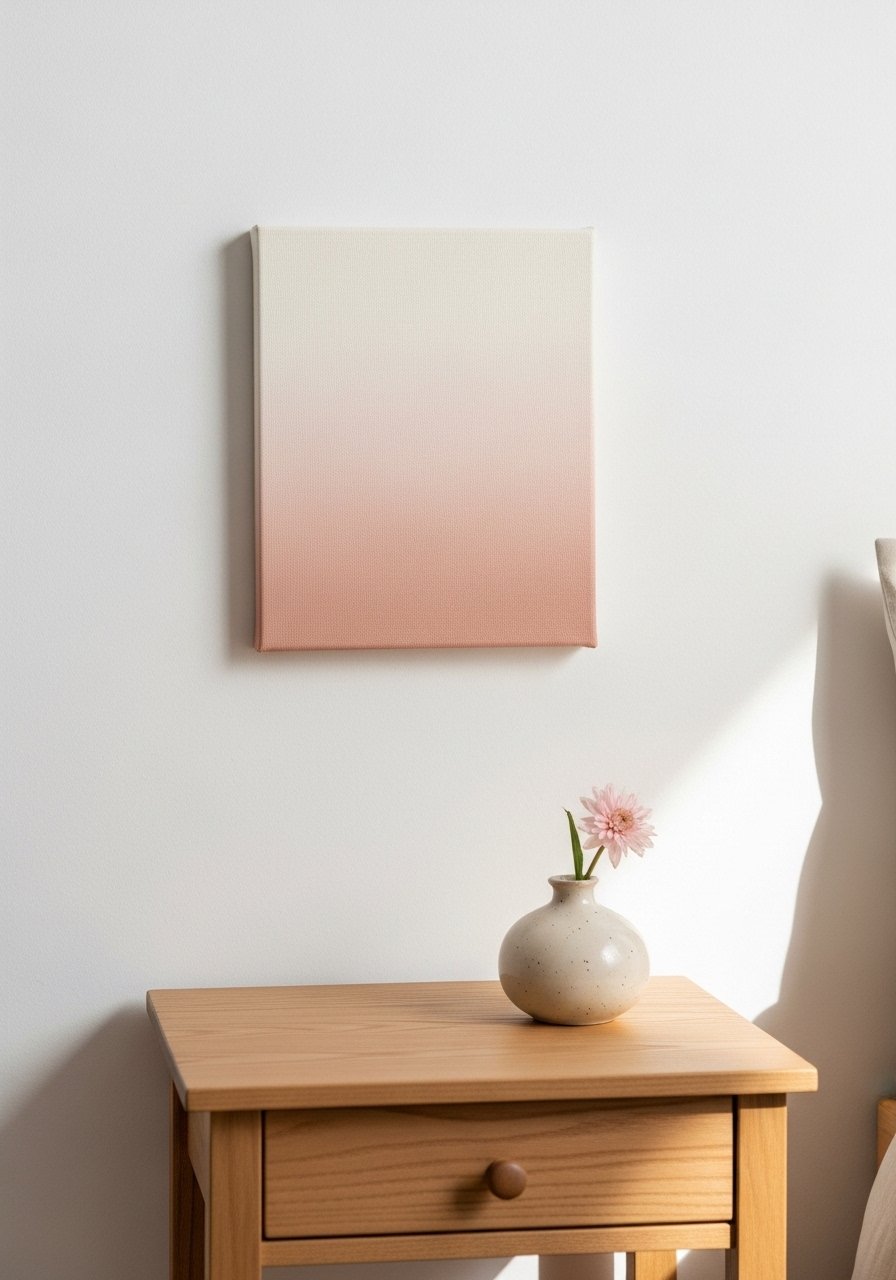
Ombre wash on a canvas is an instant minimalist statement piece. Use watered-down acrylics for a soft watercolor-like effect that reads gallery-made.
Materials
- 1 stretched canvas, 8 x 10 in
- Acrylic craft paints (white + one muted color)
- Large flat foam brush
- Water jar
- Paper towels
- Palette
Instructions
- Mix your color with water to a translucent wash. Test on scrap paper.
- Apply the lightest wash at the top, then add slightly more pigment as you work down.
- Blend where colors meet with a clean damp brush. Work quickly while paint is wet.
- Let dry 30–60 minutes. Add a second glazed layer if you want deeper color; dry 30 minutes more.
- Seal with one thin coat of matte Mod Podge if desired.
How to Display or Gift It
Lean on a shelf with a small vase of dried flowers. Wrap in tissue for gifting and include hanging hardware. Store canvases upright in a closet with cardboard separators.
16. Rustic Rope Mirror Frame (Small Round)
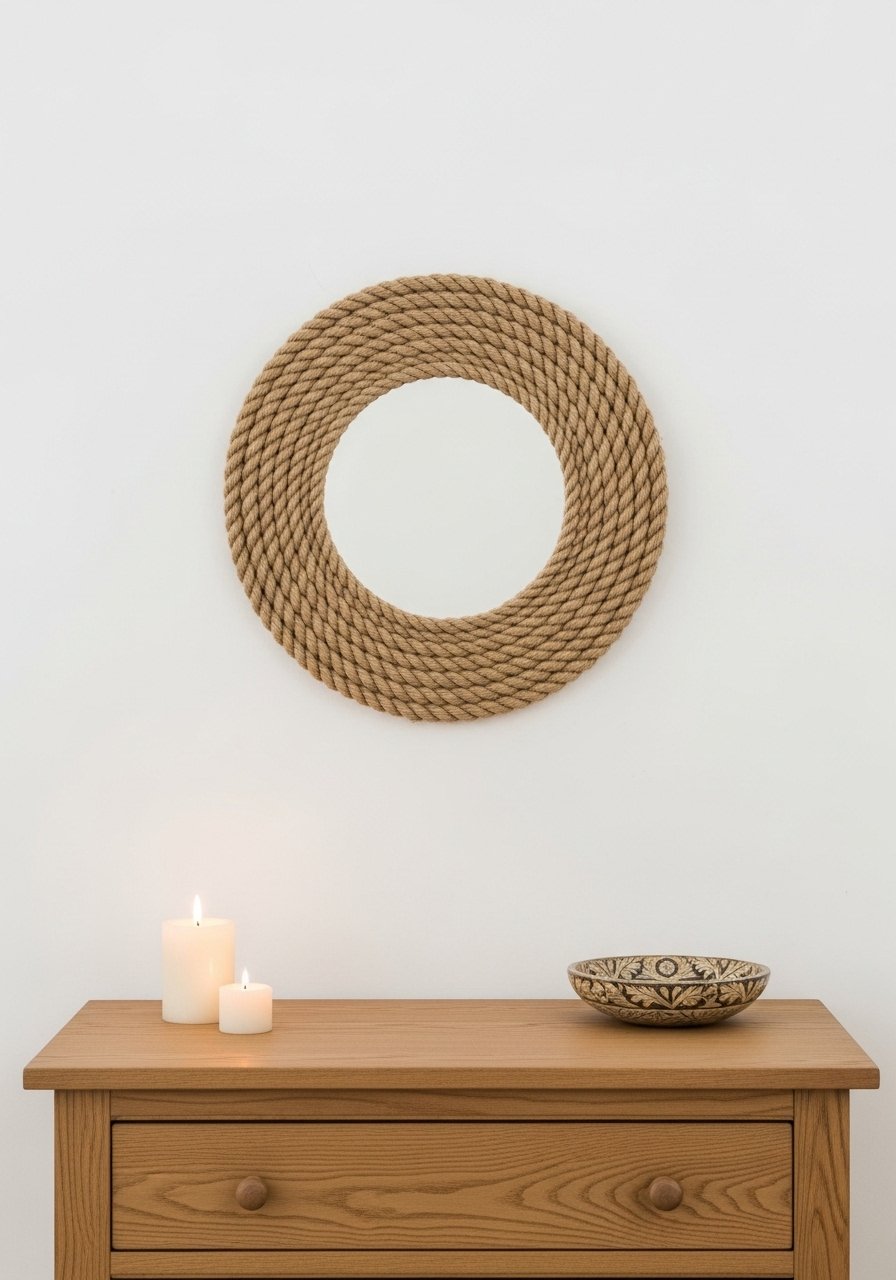
Wrapping a round mirror in rope creates a coastal-rustic look that still reads polished. It’s a great way to upgrade a basic mirror for under $10.
Materials
- 1 small round mirror, 8–10 in
- 3–4 yards natural rope (1/2 in)
- Hot glue gun + glue sticks
- Scissors
- Small wooden button (for center back support)
- Hanging hardware
Instructions
- Clean mirror edges. Glue one end of rope to the mirror backing.
- Wrap rope snugly around mirror edge, adding glue every 3–4 inches.
- When complete, tuck end under previous coil and secure with glue.
- Attach a small wooden button glued to the back as an anchor for hanging hardware.
How to Display or Gift It
Hang above a small console or in a bathroom for a relaxed spa vibe. Wrap in kraft paper and tie with twine for gifting. Store extra rope in a craft storage bin.
17. Geometric Painted Wooden Wall Tile Set

Geometric wooden tiles look modern and gallery-ready but cost very little. Cut from thin balsa or MDF and painted in muted palettes, they create instant pattern and rhythm on a wall.
Materials
- 3 wood tiles (balsa or MDF) 6 x 6 in
- Acrylic paints in 3 coordinating colors
- Painter’s tape
- Foam brush
- Sandpaper, 220 grit
- Command strips for mounting
Instructions
- Sand tile faces smooth. Wipe dust away.
- Tape off geometric shapes with painter’s tape.
- Paint shapes in thin coats, letting each coat dry 20–30 minutes.
- Remove tape while paint is tacky for clean lines.
- Attach Command strips to back and mount in a row.
How to Display or Gift It
Arrange above a study nook or as a small gallery. Stack extras in a shallow box for gifting. A foam brush pack speeds painting.
18. Painted Trim Floating Shelf (Thin)
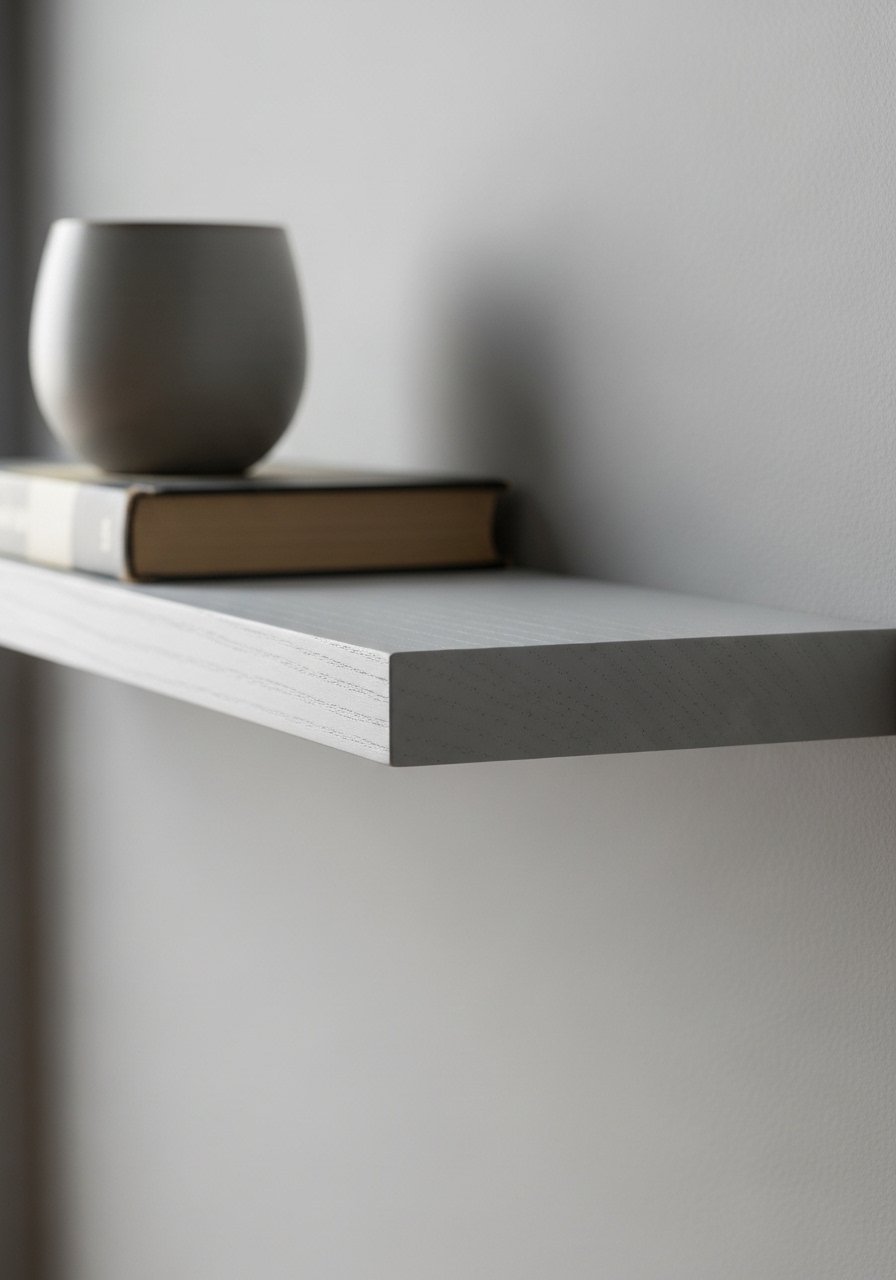
This slim floating shelf is painted to match your decor and appears custom-made. It’s great for displaying small items without bulky shelving.
Materials
- 1 piece of trim/moulding, 24 in x 3 in
- 1 shelf bracket kit for floating shelves
- Sandpaper, 120 and 220 grit
- Chalk paint (1/2 cup)
- Foam roller
- Screws and anchors
- Drill
Instructions
- Sand trim smooth and prime if necessary.
- Paint with chalk paint using a foam roller for smooth coverage. Let dry 30 minutes, apply second coat.
- Mount bracket to wall per kit instructions and slide shelf into place.
- Let paint cure 24 hours before placing items.
How to Display or Gift It
Use to showcase a small plant or ceramic cup. For gifting, include mounting hardware and instructions. Keep extra screws and anchors in a small hardware box.
19. Minimal Brass Photo Clips on a Wooden Dowel

This simple hanger displays photos or cards with a clean, gallery feel. The combination of wood and brass reads boutique and works in almost any aesthetic.
Materials
- 1 wooden dowel, 18 in x 3/4 in
- 3–5 brass binder clips or brass photo clips
- Twine or thin leather cord, 3 ft
- Two small brass cup hooks
- Drill (small bit) or awl
Instructions
- Drill two small holes near dowel ends and thread cord through, knotting inside.
- Attach cup hooks to wall at desired spacing.
- Hang dowel by cord and clip photos with brass clips.
How to Display or Gift It
Use in a hallway or above a desk. For gifts, include a set of printed photos wrapped with twine. Store extra clips in a small parts organizer.
20. DIY Mini Pegboard for Jewelry

A mini pegboard keeps jewelry organized and looks intentionally styled. Paint the board in a neutral tone and add matching pegs for a sleek, boutique-ready organizer.
Materials
- 1 small plywood board, 12 x 8 in
- 10–12 wooden pegs (1/2 in diameter)
- Drill with 1/2 in bit
- Chalk paint
- Sandpaper, 120 grit
- Hanging hardware
- Ruler and pencil
Instructions
- Sand board smooth, mark peg layout with pencil.
- Drill holes at marks for pegs; sand any rough edges.
- Paint board and pegs in a soft neutral. Let dry 30 minutes, apply second coat if needed.
- Insert pegs and mount on the wall.
How to Display or Gift It
Place on a vanity or hang near a closet. For gifting, include a small pouch with a few handmade tags. Store spare pegs in a small container.
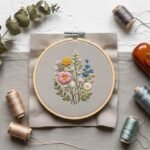
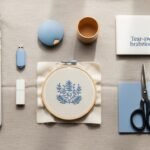
21. Embroidery Hoop Wall Art (Abstract)

Simple abstract stitching in an embroidery hoop is calming and refined. Use neutral threads for a subtle texture that reads designer-made.
Materials
- 1 embroidery hoop, 8 in
- Cream linen scrap, 12 x 12 in
- Embroidery floss in 2–3 neutral shades
- Embroidery needle
- Scissors
- Pencil for sketching guide
Instructions
- Stretch linen in hoop and tighten.
- Lightly sketch abstract lines with a pencil.
- Stitch using running stitch, backstitch, or simple chain stitch. Keep stitches slightly irregular for charm.
- Trim excess fabric at back and secure with glue if desired.
How to Display or Gift It
Cluster in groups of three above a bed or shelf. Gift with a small care card. Store extra hoops and linen in a fabric bin.
22. DIY Scented Sachets with Linen and Lavender
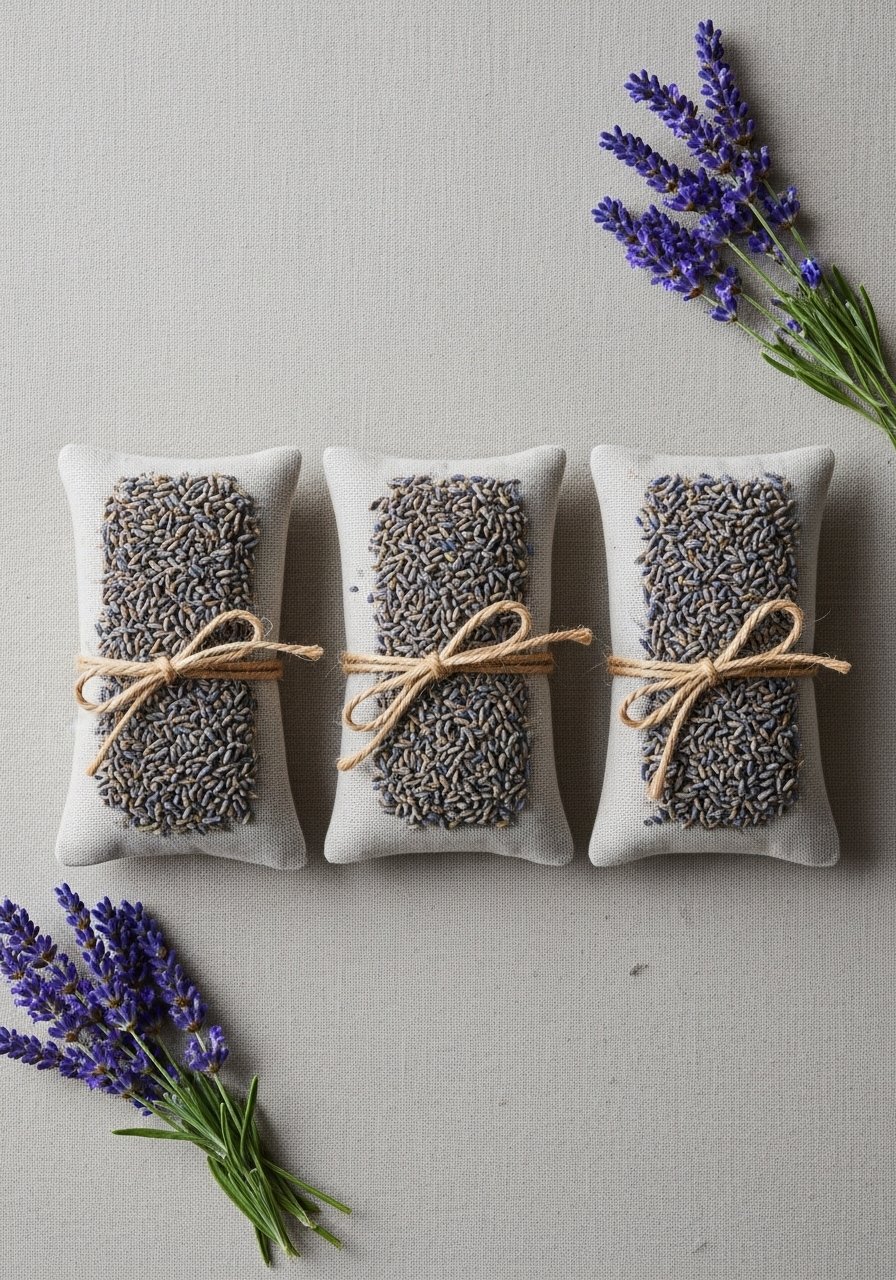
Scented linen sachets are fast, cheap, and give a boutique scent to drawers and closets. Use dried lavender for a timeless cottagecore scent.
Materials
- Linen scraps, 6 x 6 in each (3 pcs)
- Dried lavender, 1/2 cup total
- Sewing needle and thread or fabric glue
- Scissors
- Twine or ribbon
- Funnel or paper cone for filling
Instructions
- Fold linen squares in half and stitch two sides, leaving one side open. Or use fabric glue and let cure 24 hours.
- Fill with about 1–2 tbsp dried lavender per sachet.
- Stitch or glue closed and tie with twine.
How to Display or Gift It
Place in drawers, tuck into luggage, or include in a linen closet. Bundle three in a small kraft box for gifting. Store extra dried lavender in a sealed jar.
23. Painted Wooden Bead Curtain Tiebacks

Bead tiebacks are a tiny detail that instantly refines curtains. Painted beads tied on cord look designer-made but cost a fraction of store-bought hardware.
Materials
- 12–15 wooden beads, 20–25 mm
- 2 ft cotton cord
- Acrylic paint in two colors
- Foam brush
- Scissors
- Clear sealer
Instructions
- Paint beads in stripes or blocked colors. Dry 30 minutes and seal if desired.
- Thread onto cord and knot ends, leaving loops for hooking around curtain.
- Trim and tuck knots neatly.
How to Display or Gift It
Use with linen curtains for a soft, tactile finish. Make two pairs and gift in a small fabric pouch. Keep extra beads and cord in a craft storage tray.
24. Tiny Resin “Geode” Accent Dish (Using Leftover Resin)
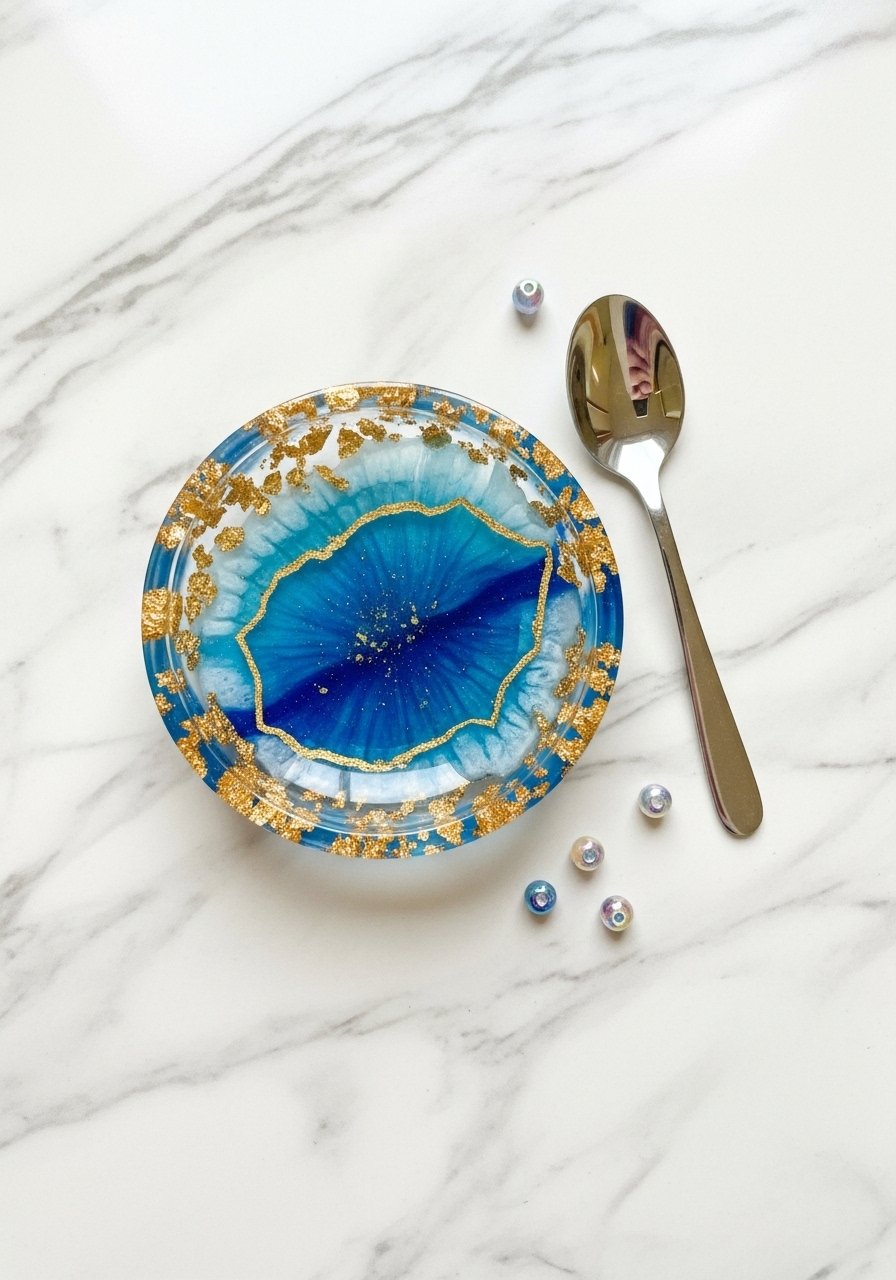
A small resin accent dish uses leftover resin and mica powders to create a luxe mini geode for rings or keys. Keep the pour small to save money and use up resin partials.
Materials
- Small silicone dish mold, 3 in
- Epoxy resin kit (use leftover mixed resin, follow kit ratios)
- Mica powder or alcohol inks
- Gold leaf flakes (tiny pinch)
- Disposable mixing cups and stir sticks
- Gloves and heat gun
- Sandpaper, 400–600 grit
Instructions
- Mix resin per kit instructions precisely (usually 1:1 or 2:1) and stir slowly for 3 minutes.
- Divide into small cups and tint with mica powders.
- Pour colors into silicone mold in layers. Add gold leaf while resin is wet.
- Use a heat gun briefly to remove bubbles. Let cure 24 hours for tack-free, 72 hours for full strength (follow your resin kit).
- Demold and sand rough edges gently.
How to Display or Gift It
Use as a ring dish on a bedside table. Wrap in tissue with a small label. Store cured pieces flat in a stackable organizer. A heat gun helps remove bubbles quickly.
You made it through 24 low-cost, high-impact projects that prove budget aesthetic room decor DIY can look curated and expensive. From faux marble trays to tiny resin dishes, there are projects for cottagecore, boho, Japandi, and minimalist spaces—many of which you can make in under an hour and repeat for gifts or seasonal swaps. Pin this list for later and pick one project to try this weekend — which style are you most excited to make? Share your photos with friends or recreate several pieces to build a cohesive look.
If you plan to try a few different projects, a temperature-controlled hot glue gun and a good self-healing cutting mat will speed things up and reduce frustration across most of these DIYs. Happy crafting — pin it, try it, and pass it on.