You know that feeling when a corner of your room finally feels like you? These 25 aesthetic room decor DIY ideas are designed to help you create that vibe without breaking the bank. Each project mixes current trends—cottagecore, boho, Japandi, and modern minimal—so you can pick what fits your space.
This list is packed with realistic materials, step-by-step instructions, and honest tips for avoiding common craft problems like bubbling resin or unraveling macramé. I often start small with a Cricut Joy cutting machine for precise paper cuts or use a heat gun to speed up drying on paint. You’ll find projects perfect for beginners, quick weekend builds, and thoughtful gifts.
Grab your hot glue gun and a few jars of acrylic paint. Let’s make a room that feels like you—one easy DIY at a time.
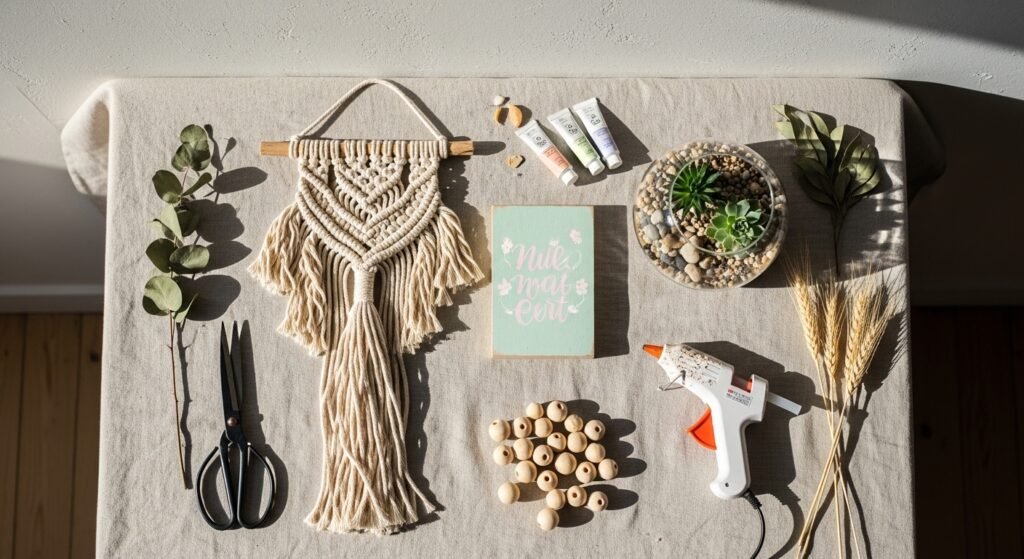
- Mini Macramé Crescent Wall Hanging

This petite macramé brings soft texture and a hand-made look to any nook. It’s slightly more forgiving than full-size macramé. The crescent shape adds a whimsical boho accent. Beginners will love the simple square knots and the tactile fringe. It feels cozy in your hands and soft against a linen backdrop. I use a small roll of 3mm single-strand macramé cord for neat knots and even edges.
Materials
- 3mm macramé cord, 30 yards total (cut into lengths)
- 6-inch wooden dowel (1)
- Scissors (sharp fabric scissors)
- Measuring tape
- Pencil for marking
- Wooden beads, 8mm (6)
- Optional: small comb for fringe
Instructions
- Cut six lengths of cord at 60 inches each. Fold in half to make 12 working strands.
- Tie a lark’s head knot across the dowel with each folded cord.
- Make a row of square knots across, using sets of four strands.
- Create the crescent curve by trimming outer cords shorter. Measure outermost cords to 20 inches, center cords to 30 inches.
- Slide wooden beads onto selected strands, knot below each bead to secure.
- Trim and comb the fringe to shape the crescent. Lightly mist with water and let dry flat for 30 minutes to settle the fibers.
How to Display or Gift It
Hang it above a bedside shelf or inside a gallery cluster for instant texture. Add a dried sprig tucked into the knots for cottagecore style. Wrap in tissue and tuck into a kraft box for a handmade gift. Store extra cord in a stackable craft organizer until ready.
- Painted Wood Dowel Hanging Shelf
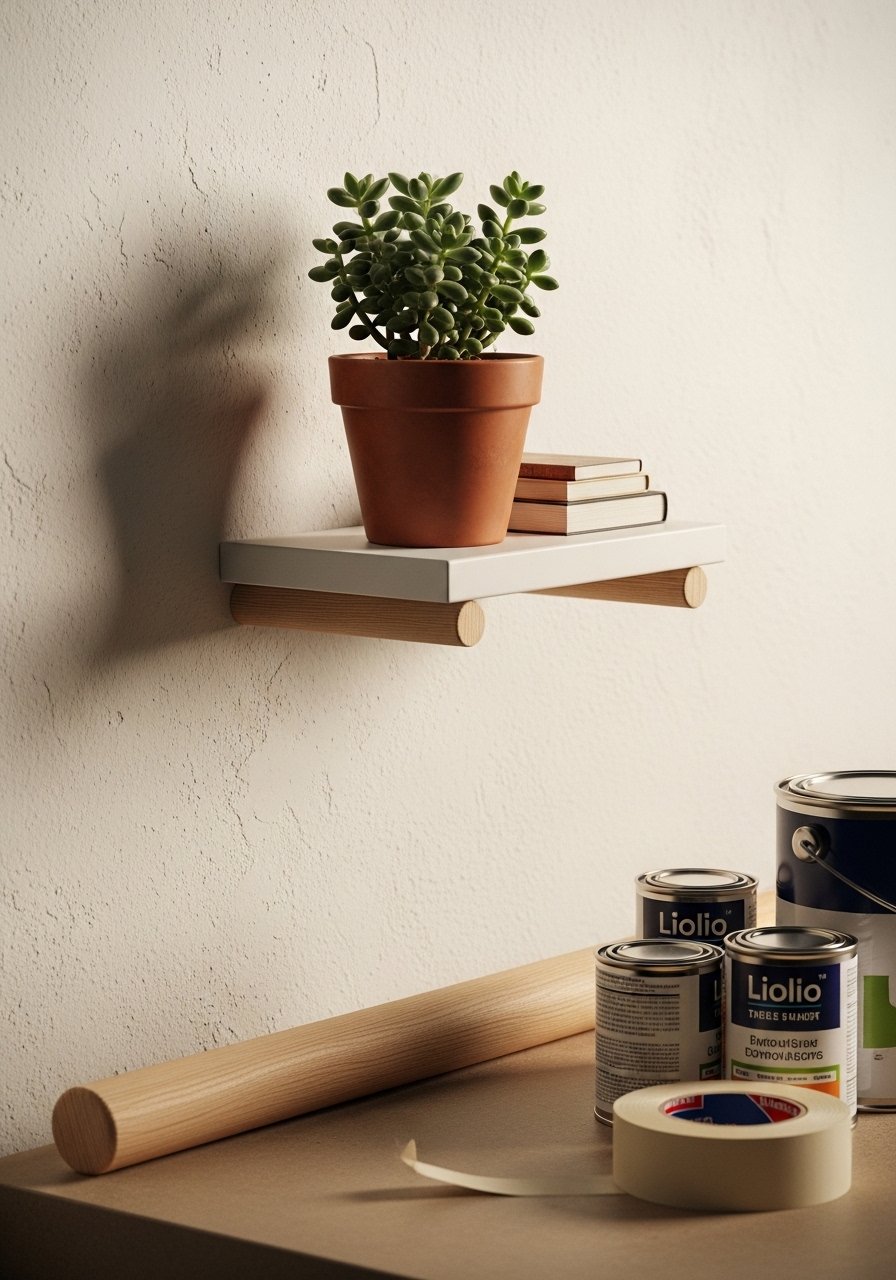
This slim hanging shelf is great for plants, candles, or a rotating vignette. It’s a Japandi-friendly piece with clean lines and warm wood. The pocket-shelf design keeps small items secure. I sand the dowel before painting for a smooth finish. Use a foam brush to apply paint without brush strokes.
Materials
- 1-inch wooden dowel, 24 inches long (1)
- 1/4-inch plywood board, 6 x 24 inches (1)
- Sandpaper, 120 and 220 grit
- Acrylic chalk paint (matte), 4 oz
- Painter’s tape
- Wood glue (rapid setting)
- Two ceiling hooks and cord (3mm jute), 6 feet
- Small screws and screwdriver
Instructions
- Sand plywood edges smooth with 120 then 220 grit. Wipe dust.
- Paint the plywood with two thin coats. Dry each coat for 45 minutes.
- Glue the dowel to the front edge of the plywood. Clamp for 1 hour.
- Drill two holes at shelf ends for jute. Thread and secure with knots underneath.
- Attach ceiling hooks spaced 18 inches apart. Hang and adjust level.
- Let everything cure 24 hours before loading with decor.
How to Display or Gift It
Style with a trailing plant in a small pot and a candle. Mount above a desk for extra storage. Wrap in kraft paper and tie with twine for gifting. Store in a flat shelf until you’re ready to hang.
- Aesthetic Room Decor DIY: Layered Paper Collage Prints
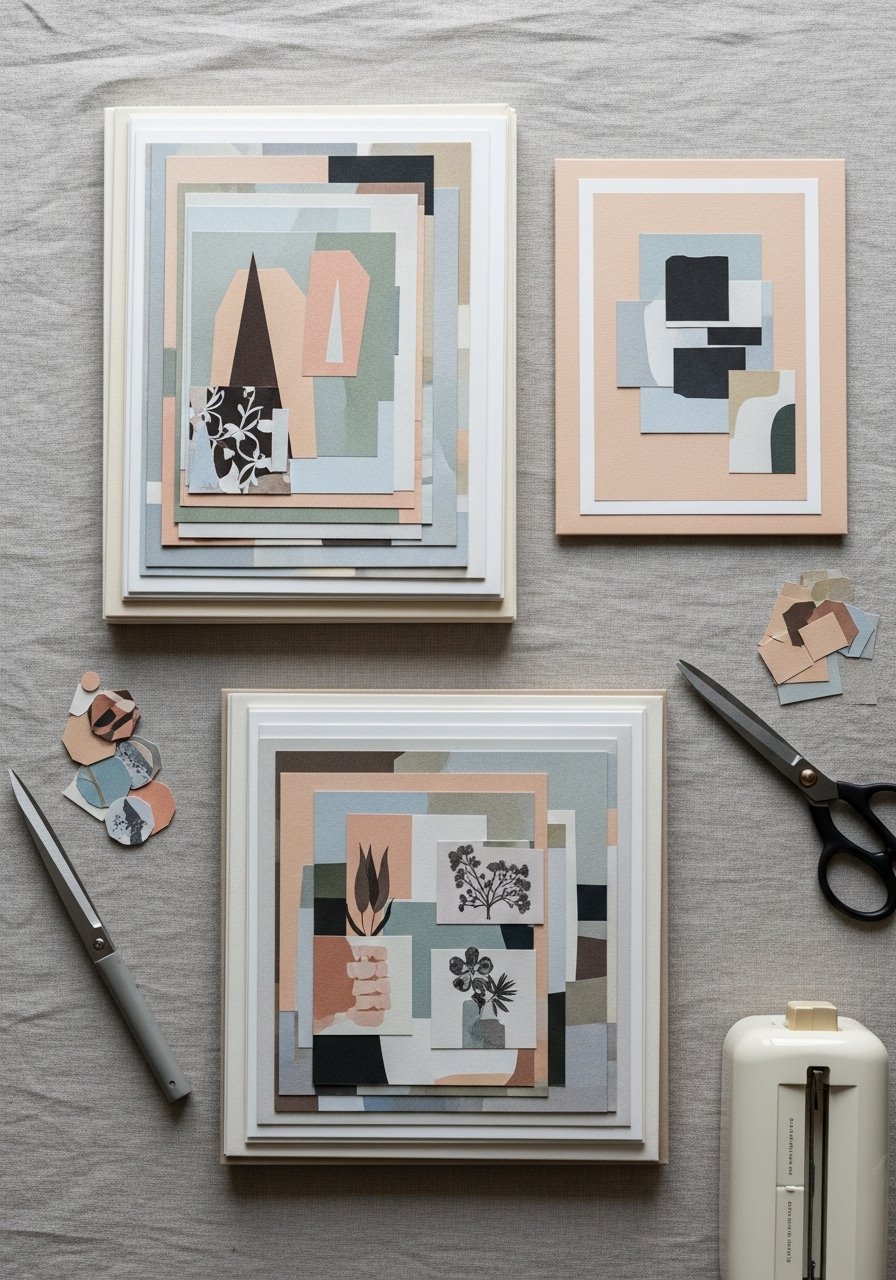
This layered paper collage creates a gallery-worthy print without framing expensive art. It plays well with minimal and boho palettes. Use patterned cardstock and hand-cut shapes, or speed things up with a cutting machine. I run printables through my Cricut Explore cutting machine when I want crisp edges.
Materials
- Assorted textured cardstock (8.5 x 11), 6 sheets
- Watercolor paper, 9 x 12 inches (1)
- Adhesive foam dots, small
- Precision craft knife
- Self-healing cutting mat, 12 x 18 inches
- Ruler and pencil
- Frame, 8 x 10 inches
Instructions
- Sketch shapes (arches, leaves, moons) on cardstock.
- Cut shapes using a craft knife on the self-healing mat.
- Arrange shapes on the watercolor paper until composition pleasing.
- Adhere some elements flat and some with foam dots for dimension.
- Trim edges flush if needed. Let adhesive set 10 minutes.
- Frame with the mat removed or new mat for a modern look.
How to Display or Gift It
Create a small gallery wall by repeating the composition in varying colors. Gift as a framed set for a housewarming. Keep extra cut shapes in a flat organizer for quick future mixes.
- Boho Clay Sun Catcher Mobile
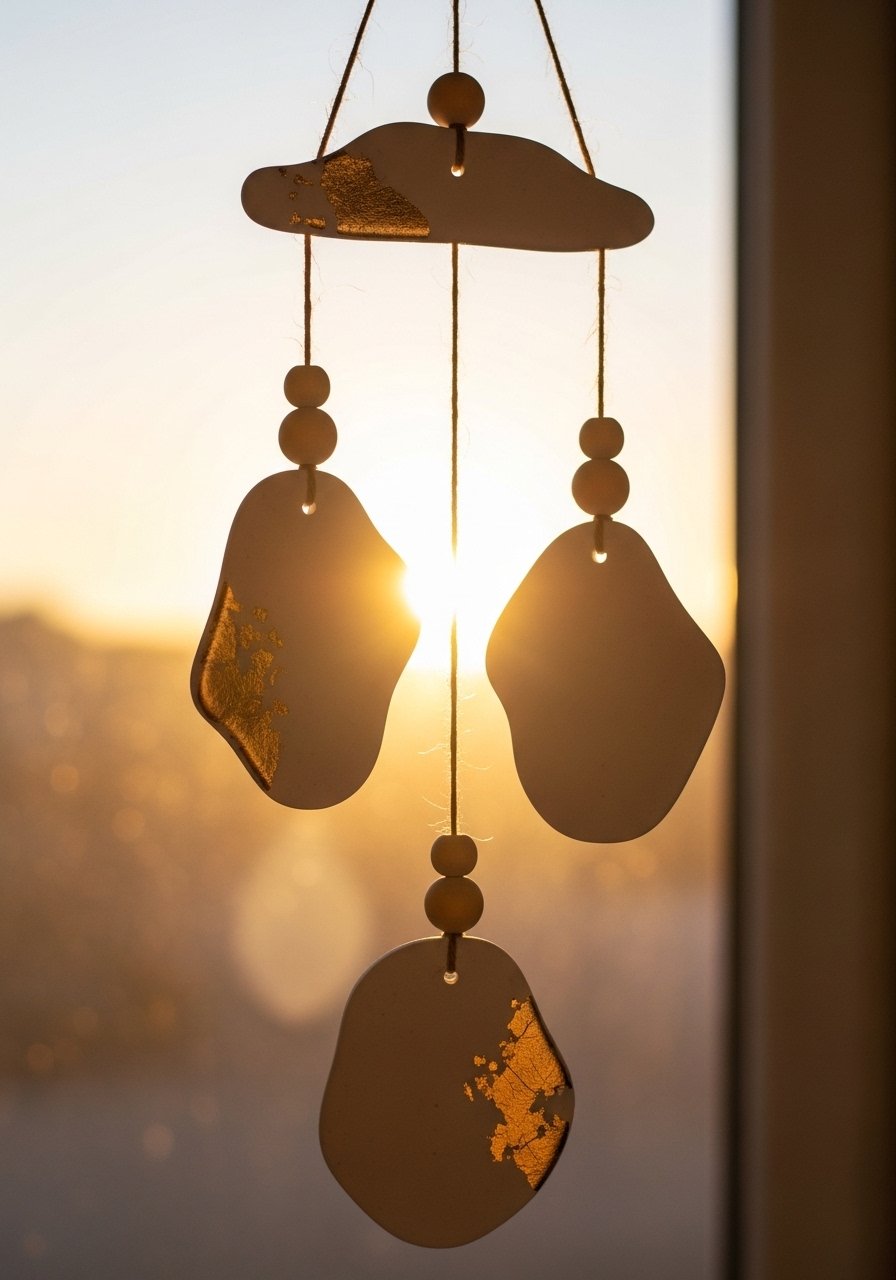
This sun catcher blends handmade charm with shimmer. Baked air-dry clay gives a soft matte finish that reflects light differently than glazed ceramics. It’s tactile and looks delightful swinging by a window. Use a silicone rolling mat for easy cleanup.
Materials
- Air-dry clay, 250g block
- Gold leaf flakes (small jar)
- Twine, 3mm (5 feet)
- Wooden beads, 10mm (8)
- Small metal jump rings, 8
- Acrylic paint, metallic accent
- Rolling pin and silicone mat
Instructions
- Condition clay and roll to 1/8 inch thickness.
- Cut shapes with cookie cutters or knife.
- Use a skewer to make hanging holes. Let dry 24 hours completely.
- Paint accents and add gold leaf with glue. Dry 1 hour.
- Thread beads and shapes with twine. Secure with tight knots.
- Trim ends and hang with a small loop.
How to Display or Gift It
Hang in a sunny window for shimmering accents. Pair with potted greenery on the sill. Wrap in tissue and tuck instructions for care (avoid moisture). Store flat in a shallow box to prevent breakage.
- Painted Terra Cotta Moon Planters
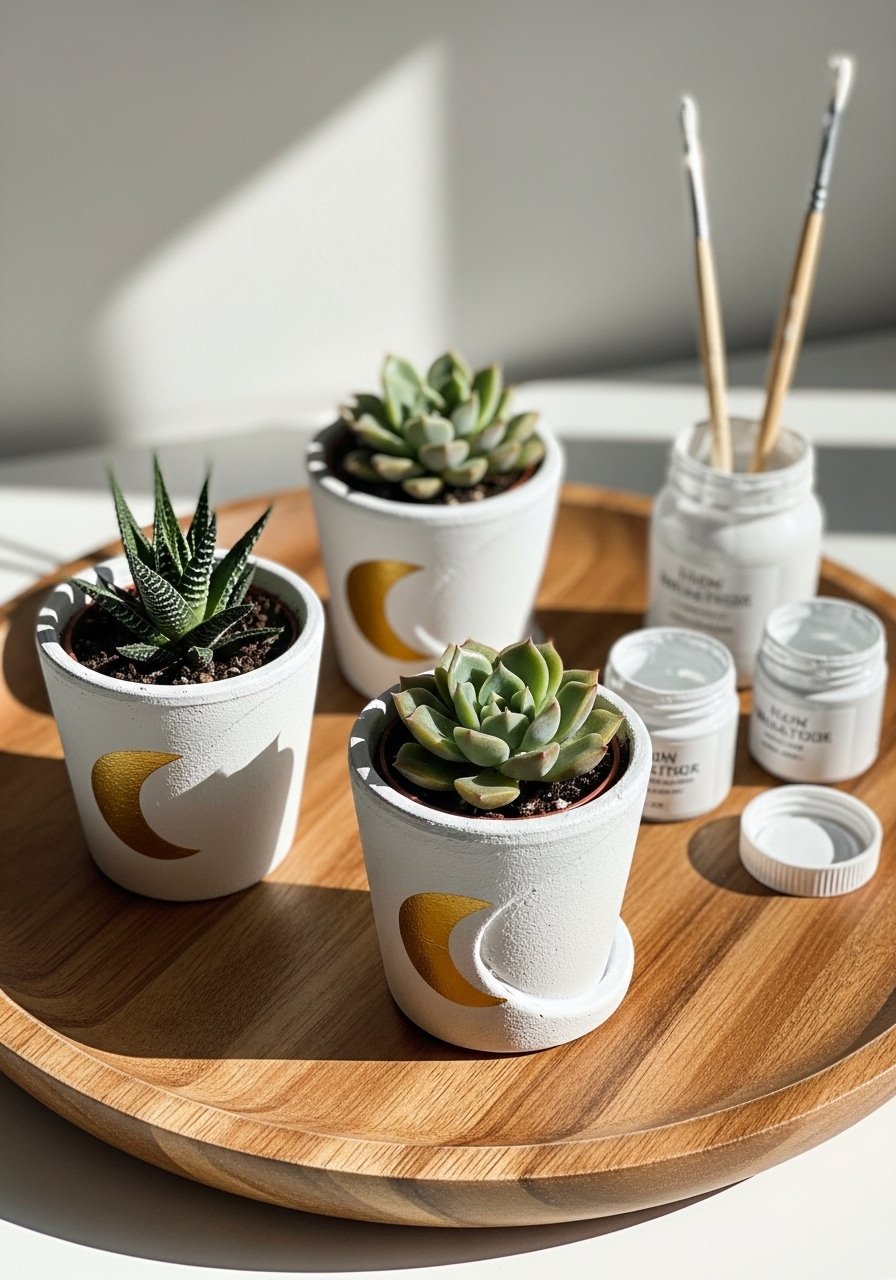
These mini planters add subtle lunar shapes to a windowsill. The chalky paint gives a muted, Japandi-friendly look. Seal painted surfaces to prevent flaking when watering. I use a flat foam brush for even coats.
Materials
- Terra cotta pots, 3-inch diameter (3)
- Chalk-style acrylic paint, 2 colors
- Small foam brush
- Fine paintbrush for details
- Clear matte sealer, spray or brush-on
- Painter’s tape
- Small succulents and soil
Instructions
- Clean pots and lightly sand rim. Wipe dust.
- Tape off moon shapes or freehand with a pencil.
- Apply first coat of chalk paint. Dry 30 minutes.
- Add a second coat. Dry 45 minutes.
- Remove tape carefully. Touch up details with a fine brush.
- Seal with two thin layers of matte sealer. Cure 24 hours before planting.
How to Display or Gift It
Cluster on a wooden tray or tiered shelf. Add a small care note when gifting. Store empty pots inverted to avoid dust. Use a small kraft box and shredded paper for mailing.
- DIY Poured Resin Trinket Dish (Marble Effect)
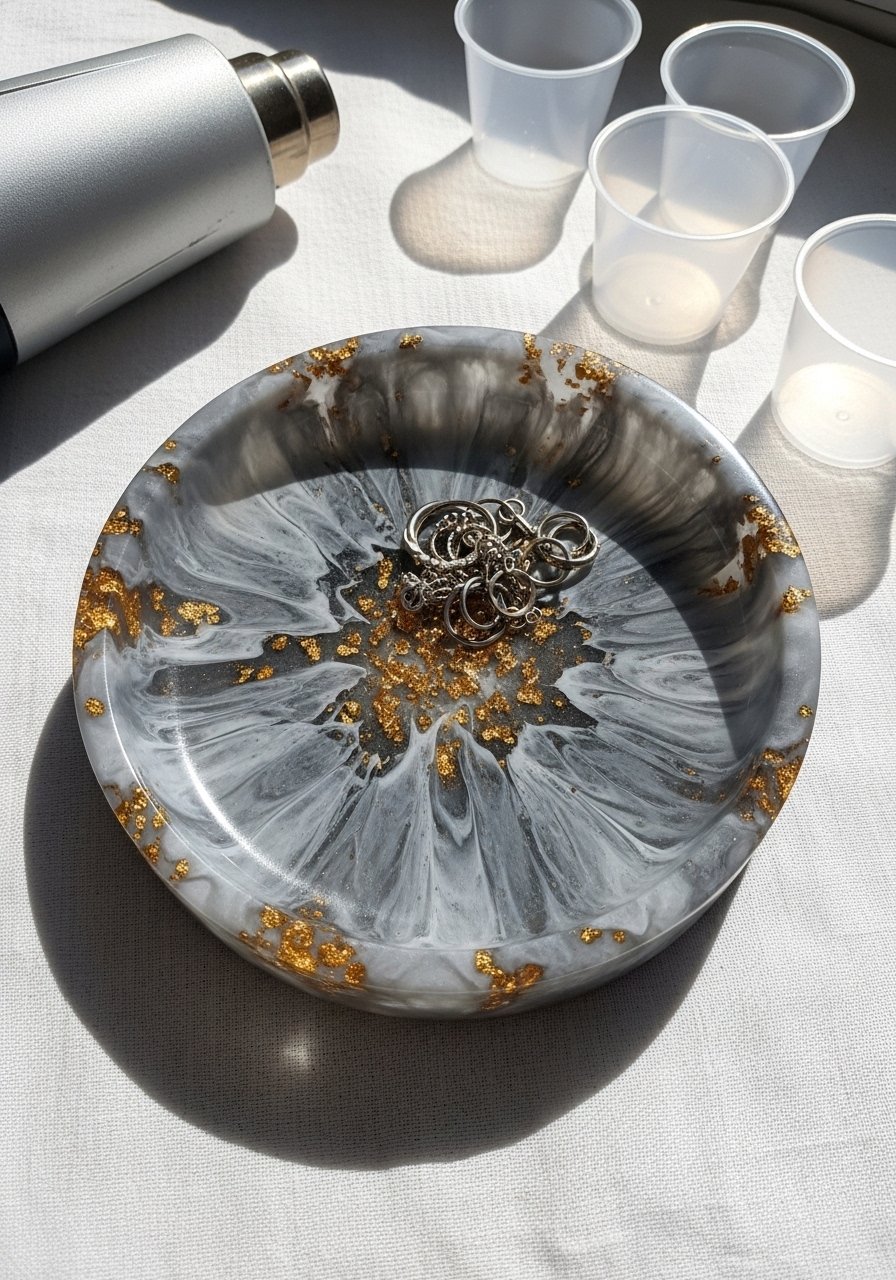
A glossy resin dish looks high-end and is surprisingly beginner-friendly. Marble swirls are forgiving; accidental streaks can look intentional. Work in a ventilated area and follow epoxy curing times. A heat gun removes bubbles quickly.
Materials
- Epoxy resin kit (clear), 8 oz total
- Resin pigment powders (black, white)
- Small gold leaf flakes
- Silicone round dish mold, 4-inch
- Disposable mixing cups and stir sticks
- Nitrile gloves and mask
- Heat gun or small torch
Instructions
- Measure resin and hardener per kit directions. Mix slowly for 3 minutes.
- Divide resin into two cups. Tint one with white, one with black pigment.
- Pour base clear into mold. Add small pours of tinted resin.
- Use a stir stick to create swirls — don’t over-mix.
- Add gold leaf flakes on top. Pop bubbles with a heat gun for 5–10 seconds.
- Cover and cure 24–48 hours until firm and no tackiness.
How to Display or Gift It
Place by the bedside for jewelry or keys. Display on a small wooden easel on a shelf. Wrap in tissue and tuck into a small gift box for a polished present. Store cured dishes in a foam-lined container.
- DIY Fabric-Covered Bulletin Board (Cottagecore)
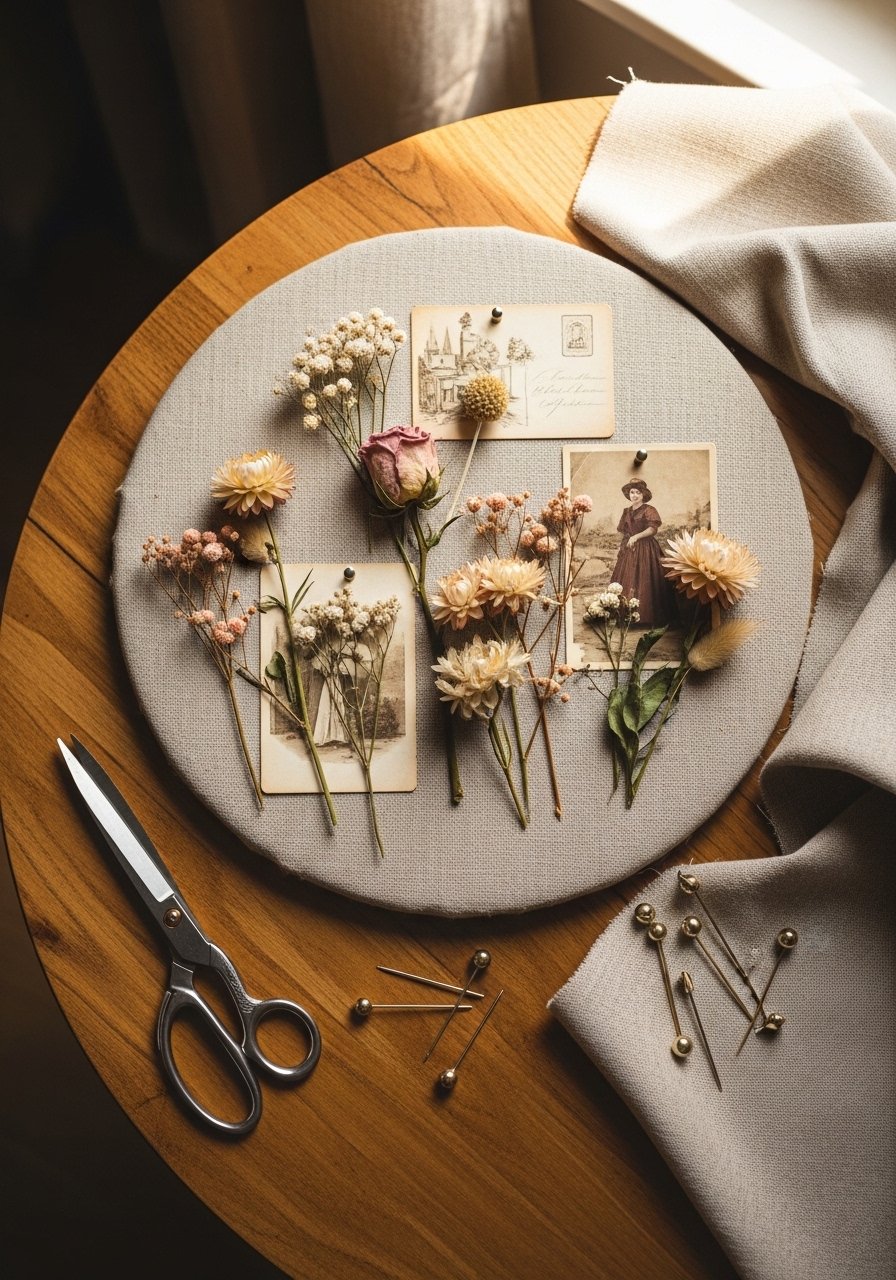
This fabric bulletin board softens a workspace with cottagecore charm. Linen or floral fabric adds pattern without overwhelming. Use upholstery pins for secure hold and a smooth edge. A staple gun speeds assembly.
Materials
- Cork sheet, 12 x 12 inches
- Linen fabric, 14 x 14 inches
- Spray adhesive, low-tack
- Upholstery pins or tacks
- Jute twine for hanging, 24 inches
- Staple gun (or hot glue)
Instructions
- Cut cork to size and spray adhesive lightly on the back of fabric.
- Center cork on fabric and press flat. Let set 10 minutes.
- Fold fabric over edges and secure with staples or hot glue every 1 inch.
- Add upholstery pins for decoration and to anchor notes.
- Hot-glue a loop of jute on the back for hanging. Let glue cure 30 minutes.
- Hang and pin lightweight items only.
How to Display or Gift It
Lean above a desk or group with framed prints. Add mini clothespins and string for photos. Wrap in tissue and place in a shallow gift box. Store flat to avoid warping.
- Easy Neon Accent Yarn Wall Art (Boho Pop)
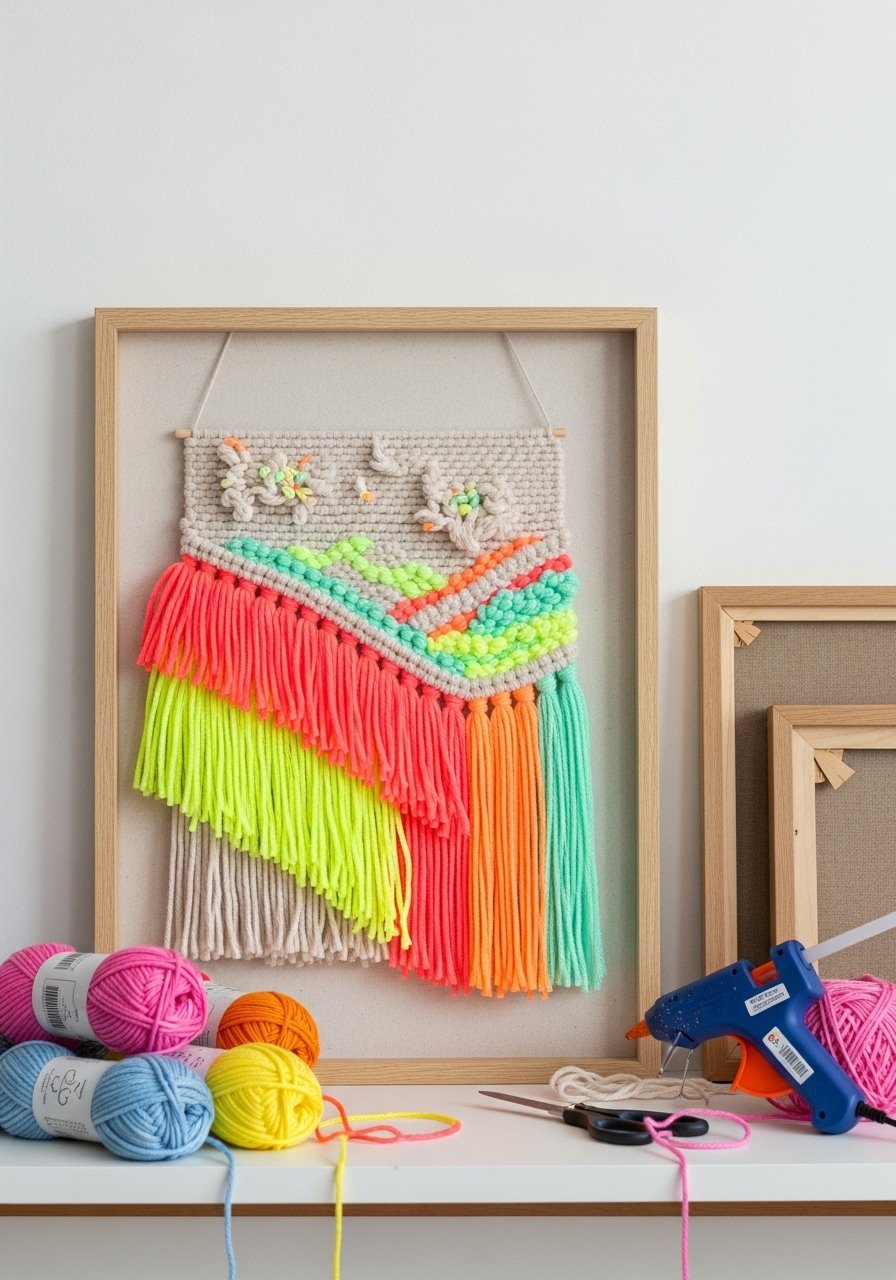
This neon yarn piece adds a playful pop without overwhelming a room. The contrast between neon fringe and a neutral base is very Pinterest-friendly. Use a craft glue gun to secure yarn quickly.
Materials
- Wooden frame, 8 x 10 inches (no glass)
- Neutral canvas or heavy card stock
- Assorted yarn skeins, neon (3 colors)
- Hot glue gun and glue sticks
- Scissors and ruler
- Craft knife for trimming
Instructions
- Remove glass and backing from the frame. Attach canvas to inner frame.
- Measure fringe length — 8 inches — and cut yarn in doubled pieces.
- Glue yarn bundles across the top in rows. Overlap colors slightly.
- Trim the fringe to create a wave or straight edge.
- Secure loose ends on the back with glue. Let set 15 minutes.
- Reattach frame backing and hang.
How to Display or Gift It
Pair with a small plant on a shelf for contrast. Add a small easel for tabletop display. For gifting, wrap in protective paper and store flat. Use a craft organizer drawer for leftover yarn.
- Upcycled Glass Bottle Lamp with Twine Wrap
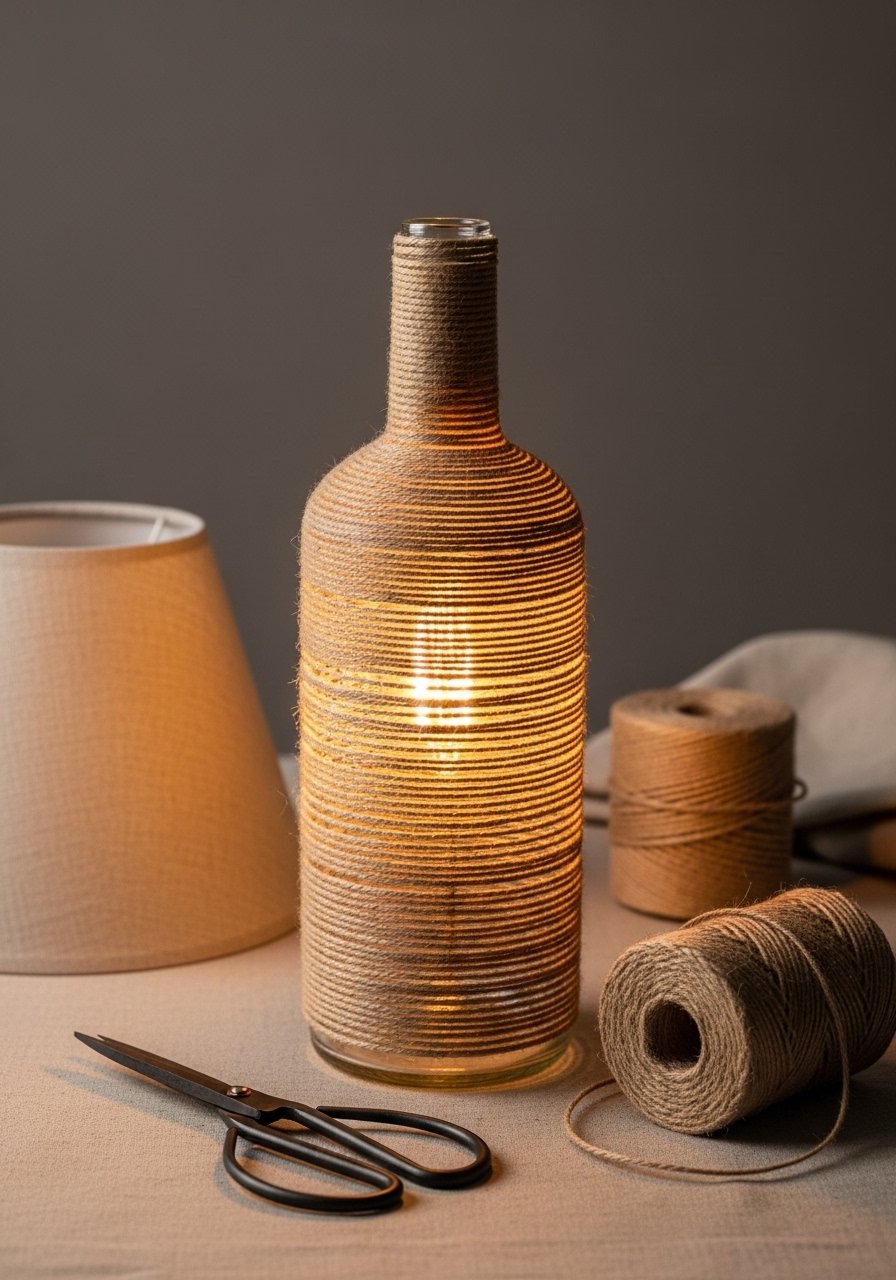
This lamp blends rustic texture with warm light. The twine wrap hides imperfections and adds grip for hands. Use an indoor-rated lamp kit and test wiring safely. A simple twist of twine gives a coastal-meets-farmhouse feel.
Materials
- Empty glass bottle (recycled), cleaned
- Lamp kit with socket and cord (indoor use)
- Jute twine, 100 feet
- Hot glue gun and glue sticks
- Small drill for bottle hole (if needed)
- Linen lampshade, 6-inch top
Instructions
- Clean the bottle and dry thoroughly.
- If needed, drill a small hole to feed the cord. Smooth edges.
- Attach lamp kit to bottle neck per instructions.
- Apply small dots of hot glue and wrap twine tightly from base to neck.
- Attach shade and install LED bulb no higher than 6W for safety.
- Test the lamp and ensure the cord is secure.
How to Display or Gift It
Place on a bedside table for cozy task light. Pair with a stack of books and a ceramic coaster. Wrap in kraft paper for safe transport. Store untwined cord neatly with a cable tie.
- Aesthetic Room Decor DIY: Minimalist Washed Paint Headboard
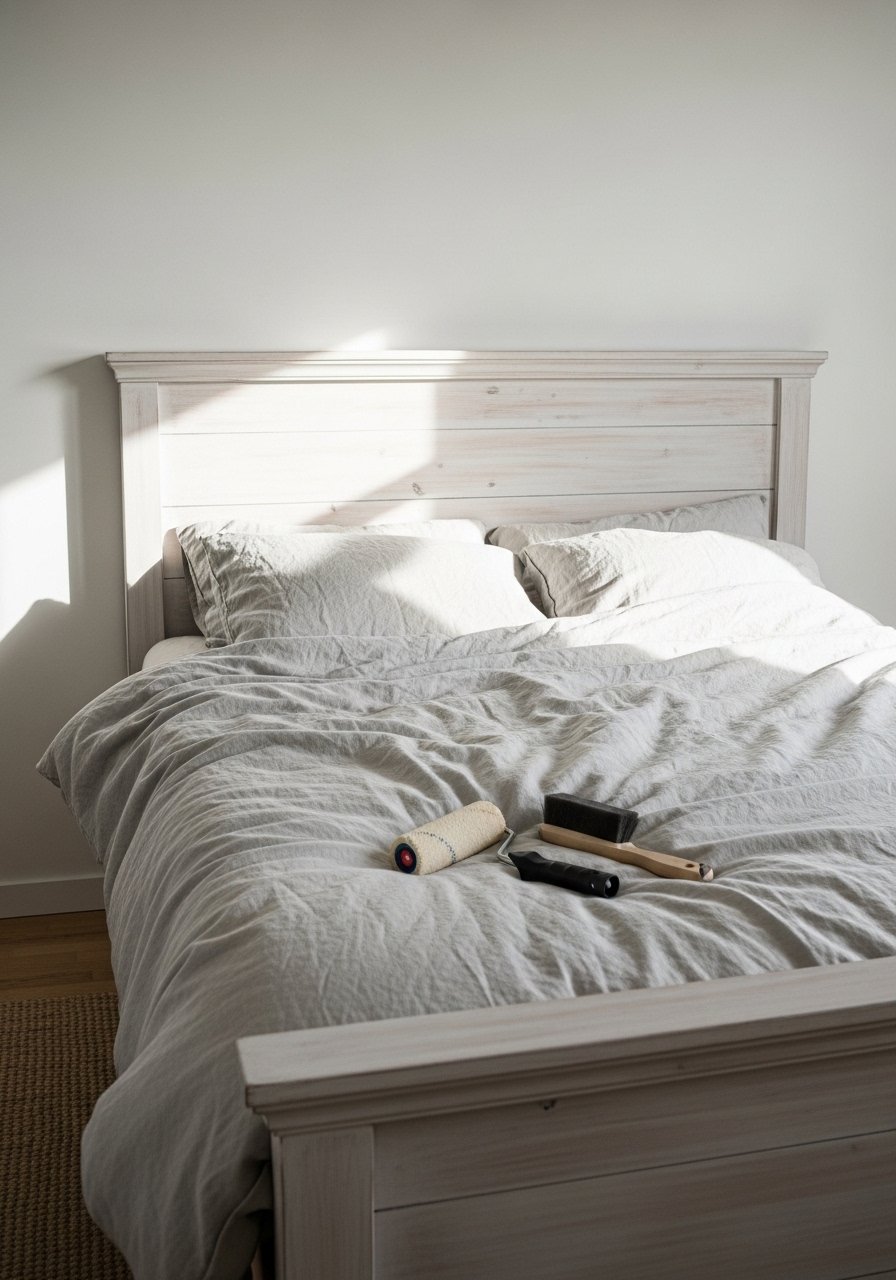
A soft-washed painted headboard brings subtle color and texture without major renovation. Chalk paint thins for an elegant wash look. Use painter’s tape to protect walls. This project fits Japandi and minimalist aesthetics.
Materials
- Plywood headboard panel, 48 x 24 inches
- Chalk-style acrylic paint, 8 oz
- Water for thinning (ratio 2:1 paint to water)
- Foam roller and small foam brush
- Sanding block, 220 grit
- Painter’s tape
Instructions
- Sand the panel lightly and wipe dust.
- Mix paint with water at 2:1 ratio for a wash.
- Apply thin coat with roller, working in sections.
- Lightly sand between coats for a smooth finish. Wipe.
- Apply a second pale wash as needed. Dry 1 hour between coats.
- Mount to bed frame or wall with heavy-duty picture hangers. Let cure 24 hours before use.
How to Display or Gift It
Pair with linen bedding in warm neutrals. Accent with a textured throw pillow to complement the wash. Store unused paint in an airtight jar. For gifting, consider a custom-sized headboard commission.
- Vintage Lace and Bead Dreamcatcher

This dreamcatcher blends heirloom lace with glass beads for an ethereal vibe. It’s gentle, boho, and looks great over a bedside lamp. Use a wooden embroidery hoop as the base. The finished piece feels airy and soft to the touch.
Materials
- 8-inch embroidery hoop
- Vintage lace doilies or lace trim, 1 yard total
- Glass beads, assorted small sizes
- Suede cord or ribbon, 2 yards
- Feathers (optional), 6
- Hot glue gun
Instructions
- Stretch lace into the embroidery hoop and secure the hoop tightly.
- Knot suede cord to the hoop rim and add bead accents as you go.
- Attach feathers to the ends of hanging cords with beads to secure.
- Trim excess lace and tuck into the hoop for a neat edge.
- Add a top loop for hanging. Test balance and adjust.
- Let glue fully set 30 minutes before hanging.
How to Display or Gift It
Hang above a crib or next to a reading nook. Tuck a dried lavender sprig into the lace for a calming scent. Wrap in tissue and a small box for gifting.
- Textured Rope Mirror Frame
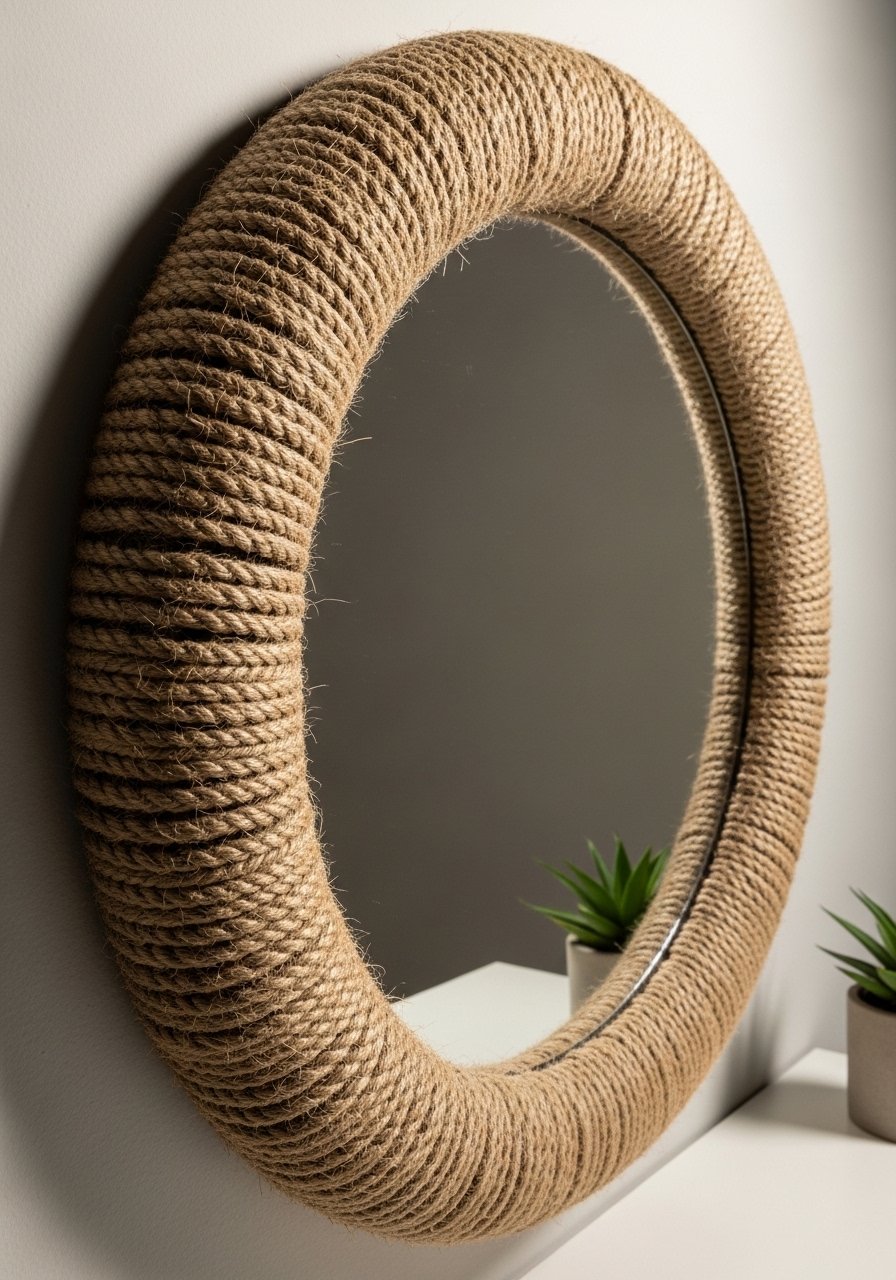
Wrapping a mirror frame in natural rope instantly warms any wall. The texture reads coastal yet neutral. Use a hot glue gun for quick adhesion. A round mirror paired with jute feels tactile and modern.
Materials
- Round mirror, 12-inch diameter
- Natural rope, 1/2 inch, 8 feet
- Hot glue gun and glue sticks
- Scissors and ruler
- Craft backing board to hide seams (optional)
Instructions
- Start at the mirrored edge and glue rope in place.
- Coil rope tightly around the frame, gluing every 2 inches.
- Finish by tucking the rope end under a wrapped coil and securing with glue.
- Add a backing board to hide raw edges if desired.
- Let glue cool and set 30 minutes.
- Hang using mirror hardware rated for mirror weight.
How to Display or Gift It
Hang above a console table or in an entryway. Add a small cluster of hooks beneath for keys. For gifting, nest mirror in bubble wrap and a sturdy box.
- DIY Botanical Candle Votives
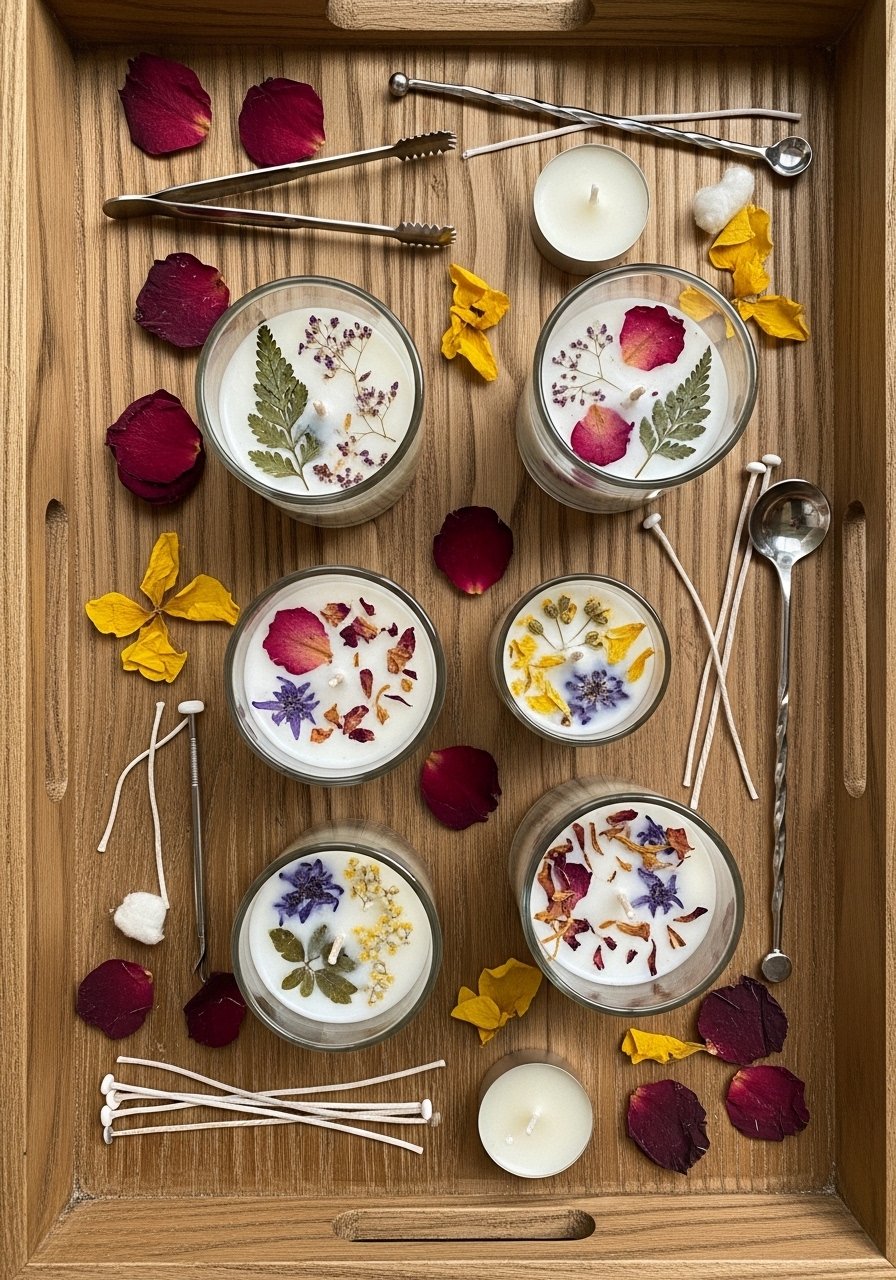
Pressed botanicals in clear votives give a romantic, cottagecore glow. Use soy wax for a cleaner burn and slow scent throw. Pressed flowers may darken slightly when embedded. I like scenting with essential oils for subtle fragrance.
Materials
- Clear glass votives, 2-inch x 2-inch (4)
- Soy wax flakes, 1 lb
- Cotton wicks with tabs (4)
- Pressed flowers and leaves, assorted
- Double boiler or wax melting pot
- Essential oils for scent
Instructions
- Attach wick tabs to votive bottoms with a dab of molten wax; center with a pencil.
- Melt soy wax in a double boiler to 160°F.
- Remove from heat, add essential oils (10–15 drops per votive).
- Pour layers, placing pressed botanicals against glass as you pour for adhesion.
- Let cool 4–6 hours until firm. Top off if a sinkhole forms.
- Trim wicks to 1/4 inch before lighting.
How to Display or Gift It
Group on a wooden tray for a table centerpiece. Pack each votive in a small Kraft box with a safety note. Store unused wax in a sealed jar.
- Ombre Bead Curtain Tiebacks
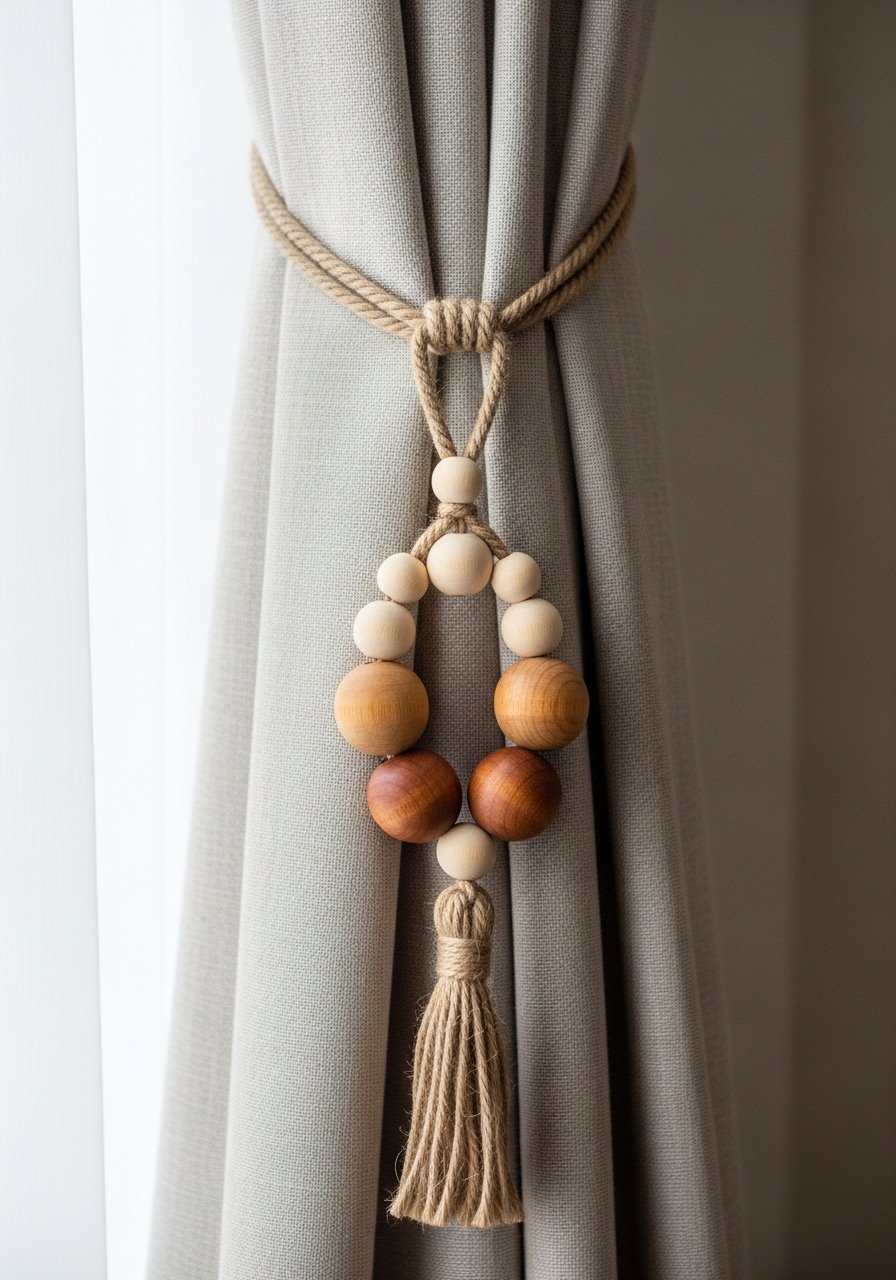
Bead tiebacks add a playful tactile element to your curtains. Ombre staining looks modern and pairs well with neutral linens. Use a coat of matte sealer for durability. A simple loop design keeps installation easy.
Materials
- Wooden beads, assorted sizes (20)
- Jute cord, 3mm, 60 inches
- Wood stain in three tones
- Small tassel (optional)
- Matte sealer spray
- Scissors and lighter to melt cord ends
Instructions
- Stain beads in gradient tones. Dry 1 hour between coats.
- Seal beads with matte spray and let cure 2 hours.
- Thread beads onto jute cord in ombre order. Knot ends securely.
- Add a tassel and finish with a loop knot for hanging.
- Trim excess cord and melt ends lightly to prevent fraying.
- Test on curtain thickness and adjust bead count if needed.
How to Display or Gift It
Loop around drapery for a soft boho look. Pair with neutral linen curtains. Store beads and cord in a small organizer box until assembly.
- DIY Terracotta Wall Pockets
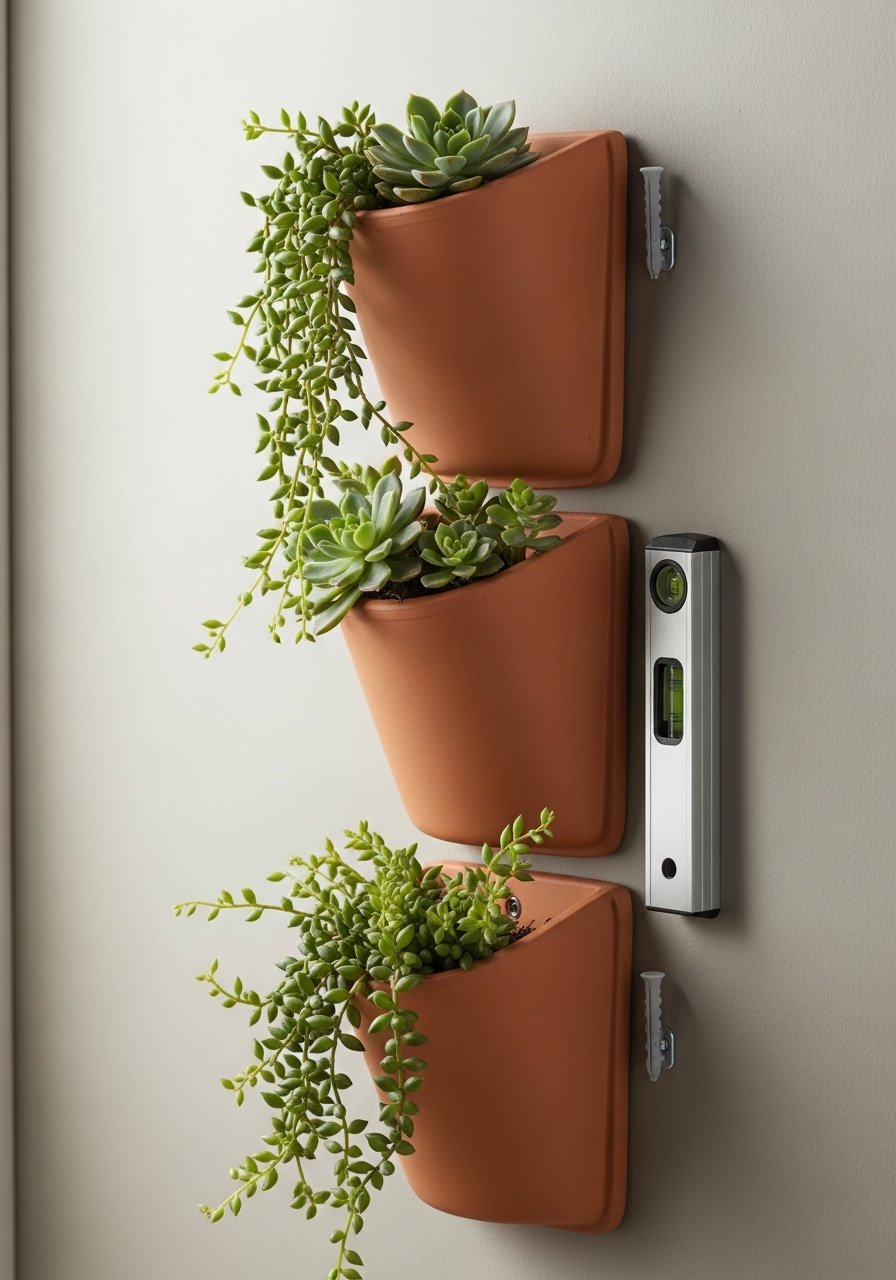
Wall pockets bring living plants onto vertical surfaces. Terracotta breathes for succulents and herbs. Make sure to allow for drainage and use soil suited to succulents. These add a farmhouse or rustic touch.
Materials
- Terracotta half-pot wall planters, 5-inch (3)
- Small wall anchors and screws (3 sets)
- Quick-dry exterior paint (optional)
- Potting mix for succulents
- Small succulents, 2-inch pots each
- Small level and drill
Instructions
- Paint pots if desired. Dry 1 hour between coats.
- Mark wall spacing and install anchors.
- Screw pots into anchors; ensure level.
- Fill with succulent soil and plant succulents.
- Water sparingly — succulent soil should be mostly dry between waterings.
- Let plants acclimate 2 weeks before pruning.
How to Display or Gift It
Mount in a stairwell or bathroom for moisture-loving plants. Wrap in craft paper and include care instructions if gifting. Store unused planters stacked in a protective box.
- DIY Block-Printed Throw Pillow Covers
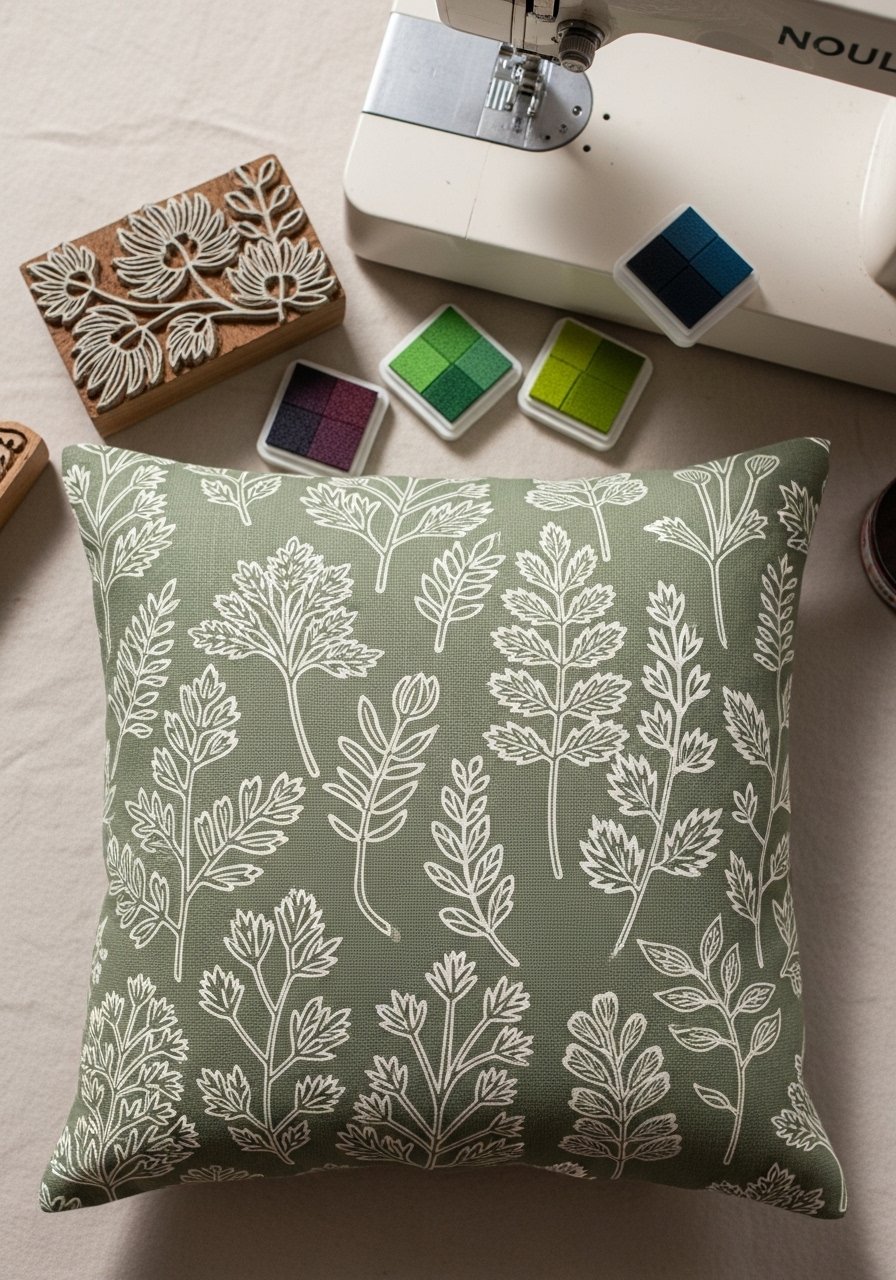
Block printing gives pillows a handmade artisan look. Use fabric ink that won’t wash out. The slightly imperfect repeat adds charm. You can buy wooden blocks or carve your own from rubber blocks for a personalized motif.
Materials
- Linen pillow cover, 18 x 18 inches
- Fabric ink pads or textile paint, 2 colors
- Wooden printing block or carved rubber block
- Scrap cardboard to protect work surface
- Small roller for even ink
- Sewing machine or ready-made cover
Instructions
- Place cardboard inside the pillow cover to prevent bleed-through.
- Ink the block evenly with textile paint.
- Press block onto fabric, applying firm even pressure.
- Repeat across the cover with consistent spacing.
- Heat-set per ink instructions — often 3 minutes with an iron on low.
- Wash gently before first use if recommended by ink manufacturer.
How to Display or Gift It
Pair with a woven throw on a sofa or bench. Stack pillow covers flat in a fabric organizer for storage. Gift with a care card for washing instructions.
- DIY Minimal Floating Frame Shelf

A floating frame shelf provides a minimal display for small art and objects. It’s great for small books or ceramics. Use a stud finder for secure mounting. The finished piece feels sleek and intentional.
Materials
- Pine shelf board, 24 x 4 inches
- Wood stain or paint, 4 oz
- French cleat mounting hardware
- Sandpaper, 120 then 220 grit
- Measuring tape and level
- Small felt pads to protect wall
Instructions
- Sand the board smooth and apply stain or paint. Dry 1 hour between coats.
- Attach the cleat to the shelf and to the wall stud level.
- Hang shelf and test bearing with a small weight.
- Add felt pads to the underside to protect surface.
- Let adhesive for cleat cure 24 hours before heavy objects.
- Arrange framed art and small objects.
How to Display or Gift It
Use to stagger artwork or place under a mirror. Store mounting hardware in a labeled bag. Present as a ready-to-hang shelf for gifting.
- Aesthetic Room Decor DIY: Stenciled Accent Rug Mat

A stenciled rug mat can personalize an entryway or bedside. Outdoor acrylic paint on a woven rug ensures durability. Use a brayer roller for even paint and to prevent bleed. The result is a subtle patterned anchor underfoot.
Materials
- Small woven rug mat, 24 x 36 inches
- Outdoor acrylic paint, 4 oz per color
- Stencil of choice (vinyl or plastic)
- Brayer roller
- Painter’s tape
- Foam brush for edges
Instructions
- Lay stencil flat on rug and tape securely.
- Load paint onto brayer and roll off excess.
- Roll over stencil evenly. Do not overload with paint.
- Carefully lift stencil and repeat pattern as needed.
- Allow paint to dry 24 hours and cure 48 hours before heavy use.
- Vacuum gently after curing to remove any loose fibers.
How to Display or Gift It
Place at an entry or beside the bed. Roll and store flat between uses. For gifting, include care instructions and a small rug pad.
- DIY Mini Woven Wall Tapestry (Loom-Friendly)
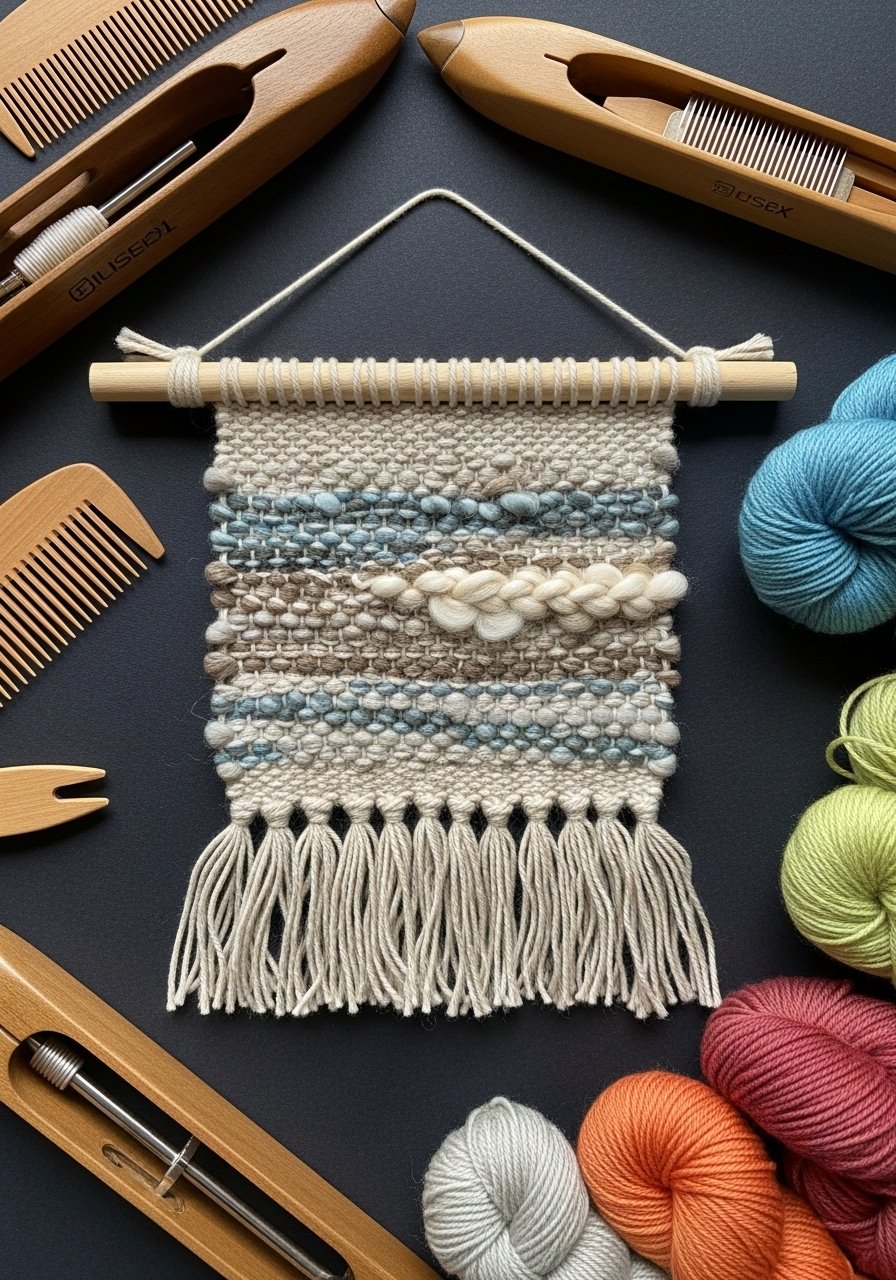
This small woven tapestry is an instant texture-maker. You can weave on a simple lap loom or cardboard loom. Mixing yarn weights creates depth. The tactile surface feels soft and inviting.
Materials
- Portable weaving loom or DIY cardboard loom, 6 x 8 inches
- Warp thread (cotton), 1 skein
- Assorted yarns and roving, 4–6 colors
- Wooden dowel, 8 inches
- Tapestry needle and scissors
- Comb or fork for packing rows
Instructions
- Warp your loom using cotton thread spaced evenly.
- Start with a base weft of sturdy yarn for stability.
- Change yarn textures and color every few rows.
- Use a comb to pack weft tightly for a neat finish.
- Finish by securing ends and tying to the dowel.
- Trim fringe and hang.
How to Display or Gift It
Group with framed art or hang solo above a desk. Put an extra loom and yarn in a craft organizer for gifting. Store finished tapestries flat or rolled.
- DIY Marbled Clay Coasters
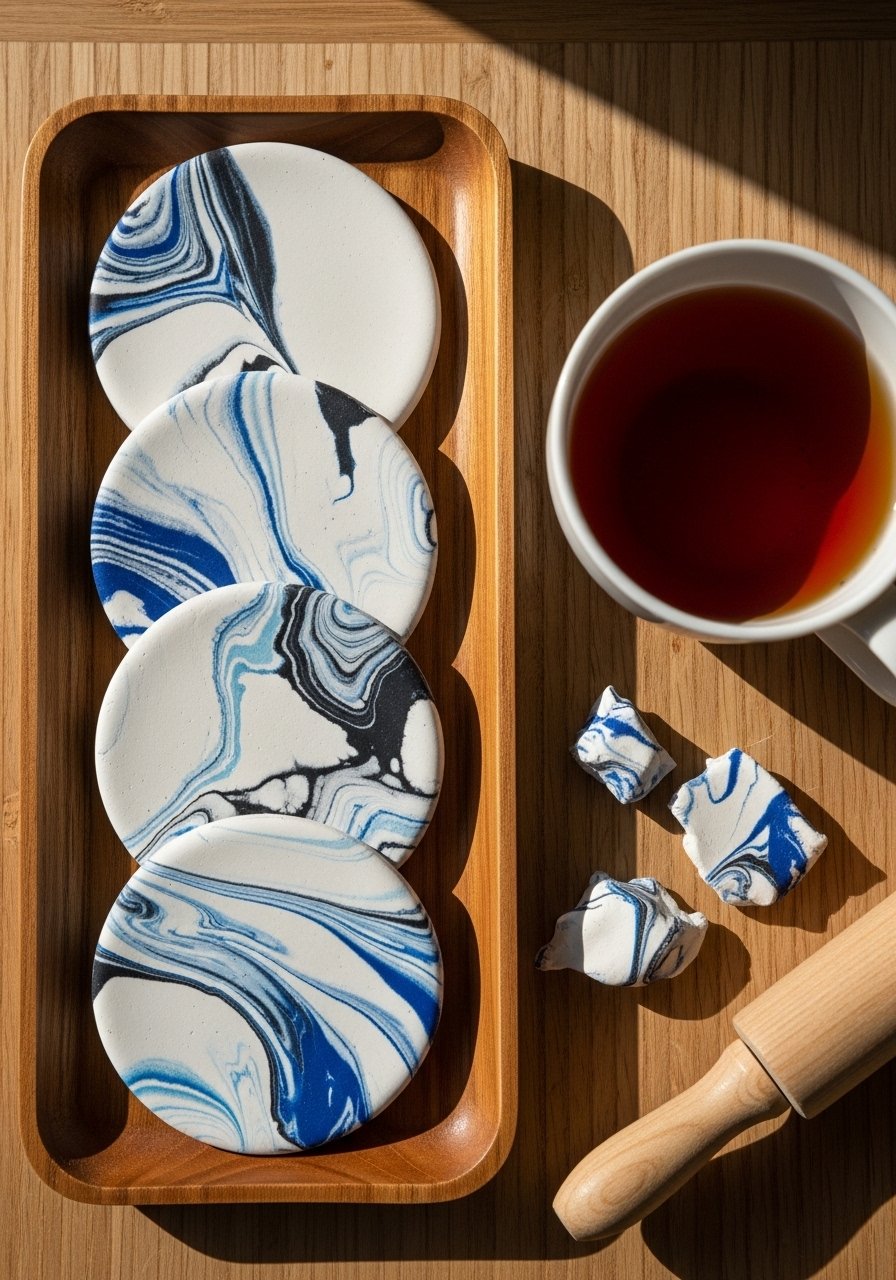
Marbled clay coasters feel luxe but are super approachable. Air-dry clay allows easy shaping. Seal with a waterproof sealer for longevity. The cool, smooth feel makes them a great tactile piece for coffee tables.
Materials
- Air-dry clay, 400g
- Acrylic paint in two colors (small amounts)
- Rolling pin and silicone mat
- Round cutter, 3.5-inch diameter
- Clear water-resistant sealer
- Fine sandpaper
Instructions
- Condition clay and mix in small paint amounts to create marbling.
- Roll to 1/4 inch thickness and cut rounds.
- Smooth edges with your thumb and a damp brush.
- Dry 24–48 hours until firm to the touch.
- Lightly sand and spray two thin coats of sealer. Cure 24 hours.
- Use felt pads underneath to protect surfaces.
How to Display or Gift It
Stack on a wooden tray as a gift set and tie with twine. Store flat between uses to avoid warping. For gifting, include a care note about hot liquids.
- DIY Photo Clip Grid — Trendy and Simple
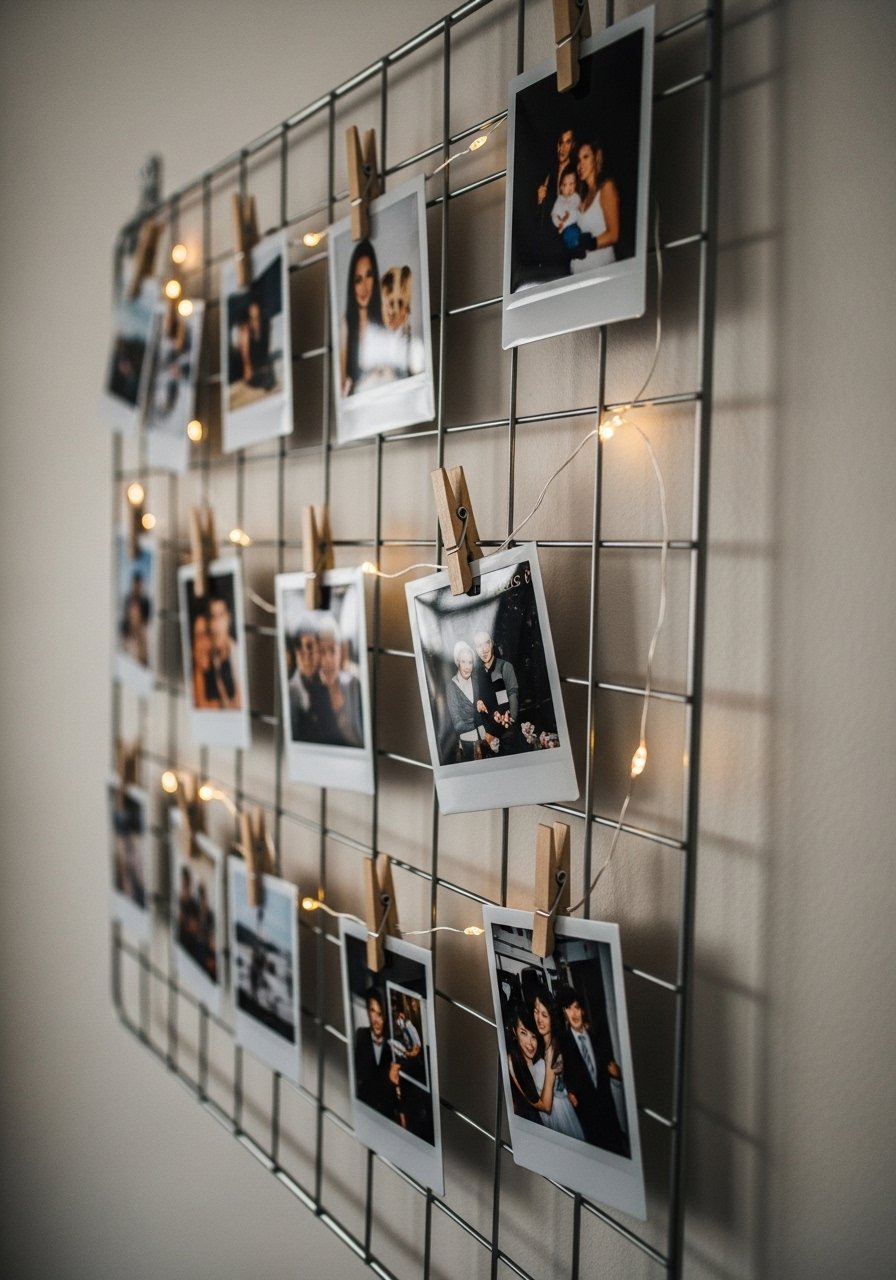
A photo clip grid turns favorite snapshots into wall art. String lights woven through the grid add a cozy glow. Use mini clothespins for easy rearranging. The grid feels youthful and customizable.
Materials
- Wire photo grid, 15 x 20 inches
- Mini clothespins, pack of 12
- String lights, battery-operated
- Command hooks for hanging (if no drill)
- Photos (wallet size) or polaroids
- Small decorative clips
Instructions
- Hang the grid using hooks or Command strips.
- Arrange photos and secure with mini clothespins.
- Weave string lights behind or around the grid.
- Add small notes or pressed flowers for variety.
- Replace photos seasonally to refresh the display.
- Check battery pack periodically and replace as needed.
How to Display or Gift It
Place above a desk or bed for a personal gallery. Roll up lights and extras in a small gift box for gifting. Store clips and photos in a photo organizer.
- DIY Concrete Shelf Ledge
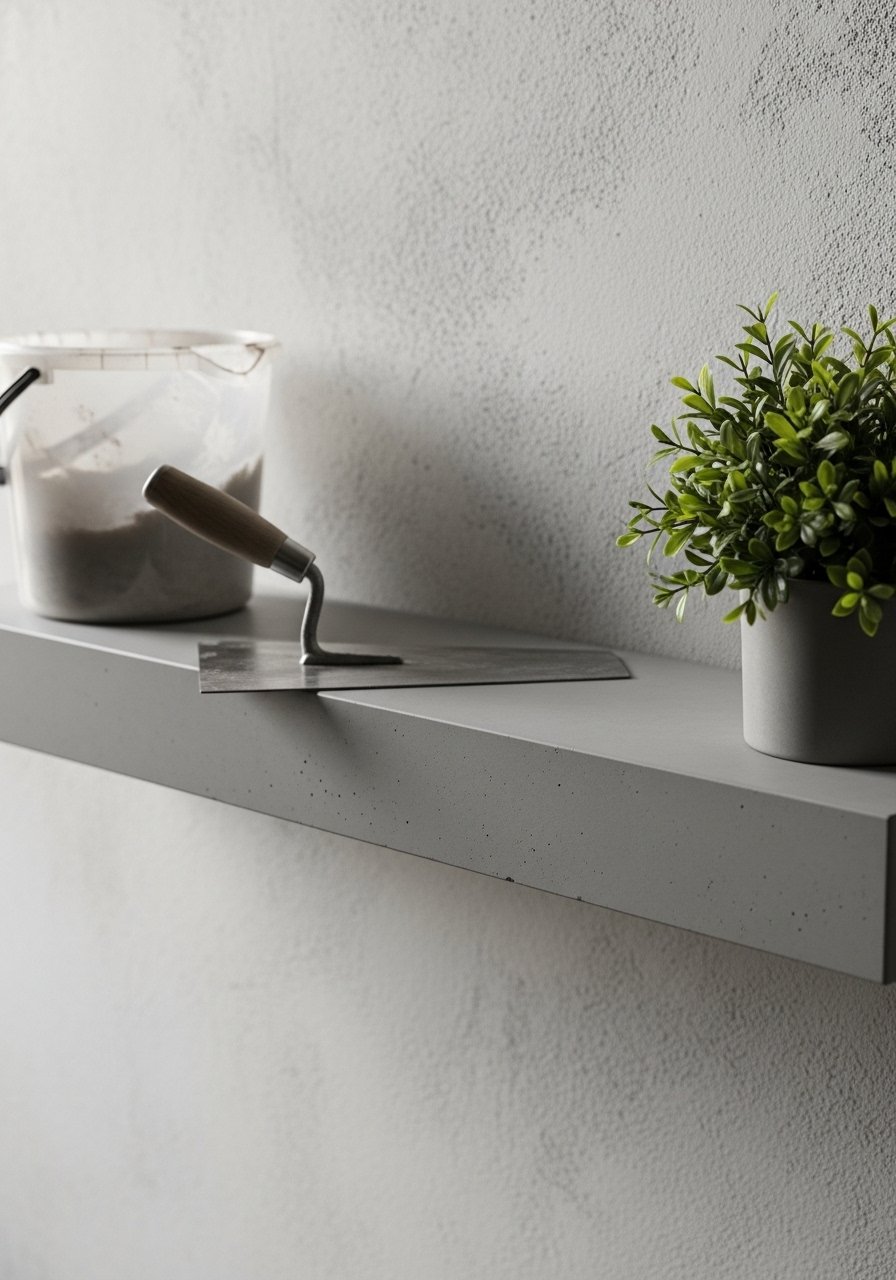
A concrete ledge offers an industrial chic accent. Lightweight concrete mixes are easy for small shelves. Mold in a silicone tray for smooth edges. Seal to prevent staining. The cool hardness contrasts nicely with soft textiles.
Materials
- Lightweight concrete mix, 2 lb
- Silicone mold or wooden form, 24 x 4 inches
- Trowel and mixing bucket
- Release agent (mold release spray)
- Concrete sealer, matte
- Sandpaper (120 grit)
Instructions
- Spray mold with release and prepare mix per package.
- Pour into mold and tap to release air bubbles.
- Smooth surface with a trowel and cover.
- Let cure 24–48 hours. Demold carefully.
- Sand edges lightly and apply two coats of sealer, drying 1 hour between.
- Install using wall anchors rated for weight.
How to Display or Gift It
Use for smaller plants or ceramics. Mount in a kitchen for small spice jars. Wrap in protective padding if gifting.
- DIY Beaded Curtain for a Closet Door
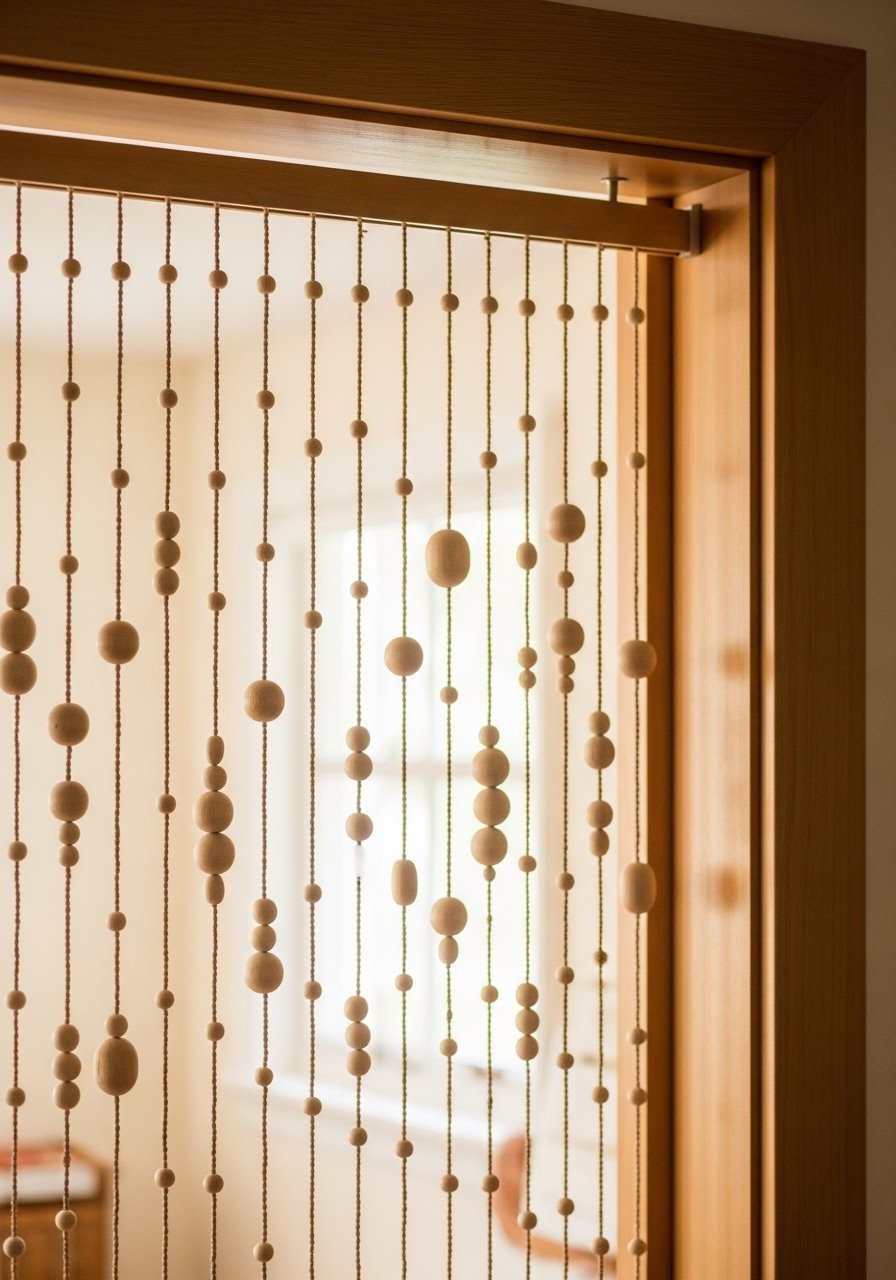
A beaded curtain softens a doorway and adds a tactile, vintage vibe. Use wooden beads in graduated sizes for visual movement. Secure the rod well. The gentle clacking sound adds atmosphere.
Materials
- Wooden beads, assorted sizes (approx 200)
- Curtain rod, 36 inches
- Nylon fishing line or cord, 20 yards
- Small spacer dowels
- Scissors and lighter
Instructions
- Cut cords to desired length (allow extra for knots).
- Thread beads in patterns, add spacers for movement.
- Knot ends and secure to the rod at even intervals.
- Attach rod per instructions and test opening/closing.
- Trim and melt cord ends to prevent fraying.
- Adjust bead density to avoid catching on clothes.
How to Display or Gift It
Use in a closet or between rooms for privacy. Roll the completed curtain and place in a sturdy tube for shipping.
- DIY Linen-Covered Storage Boxes
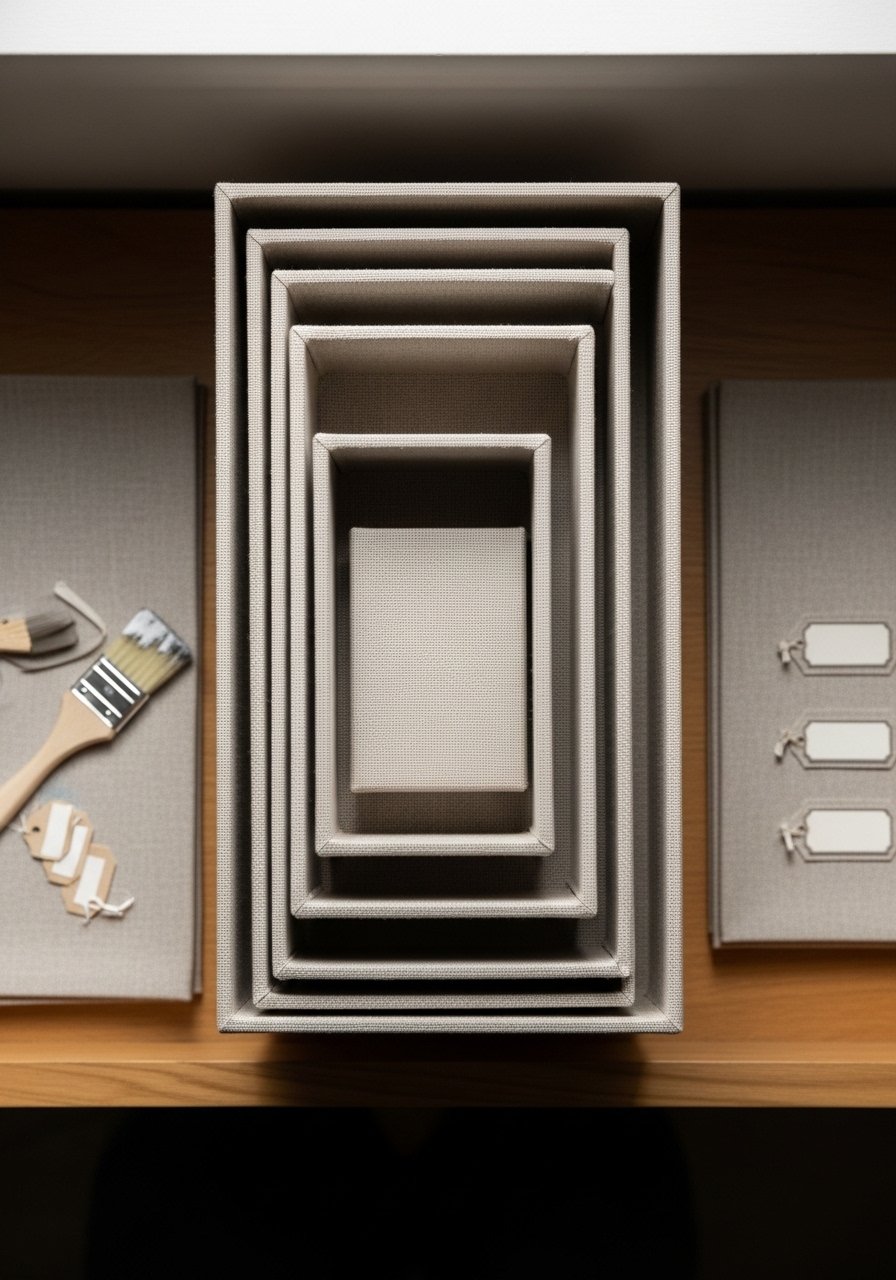
Linen-covered boxes keep clutter hidden and look curated on open shelving. Using Mod Podge gives a smooth, lasting finish. Label with kraft tags for a personalized touch. The textured linen feels warm and crafted.
Materials
- Cardboard storage boxes, 12 x 9 x 6 inches
- Linen fabric, enough to wrap each box
- Mod Podge Matte, 8 oz
- Flat foam brush
- Scissors and ruler
- Kraft tags and twine
Instructions
- Cut linen to cover each box with 2 inches overlap.
- Brush Mod Podge evenly on box and smooth fabric from one side.
- Fold edges neatly and glue down inside for a finished look.
- Apply a thin coat of Mod Podge over the fabric for durability. Dry 1 hour.
- Add tags with twine and fill with linens or craft supplies.
- Stack or label as needed for organization.
How to Display or Gift It
Stack on a closet shelf or use as hidden toy storage. Store empty boxes nested to save space. Wrap a filled box in kraft paper for gifting.
- DIY Hanging Book Planter (Book Nook)
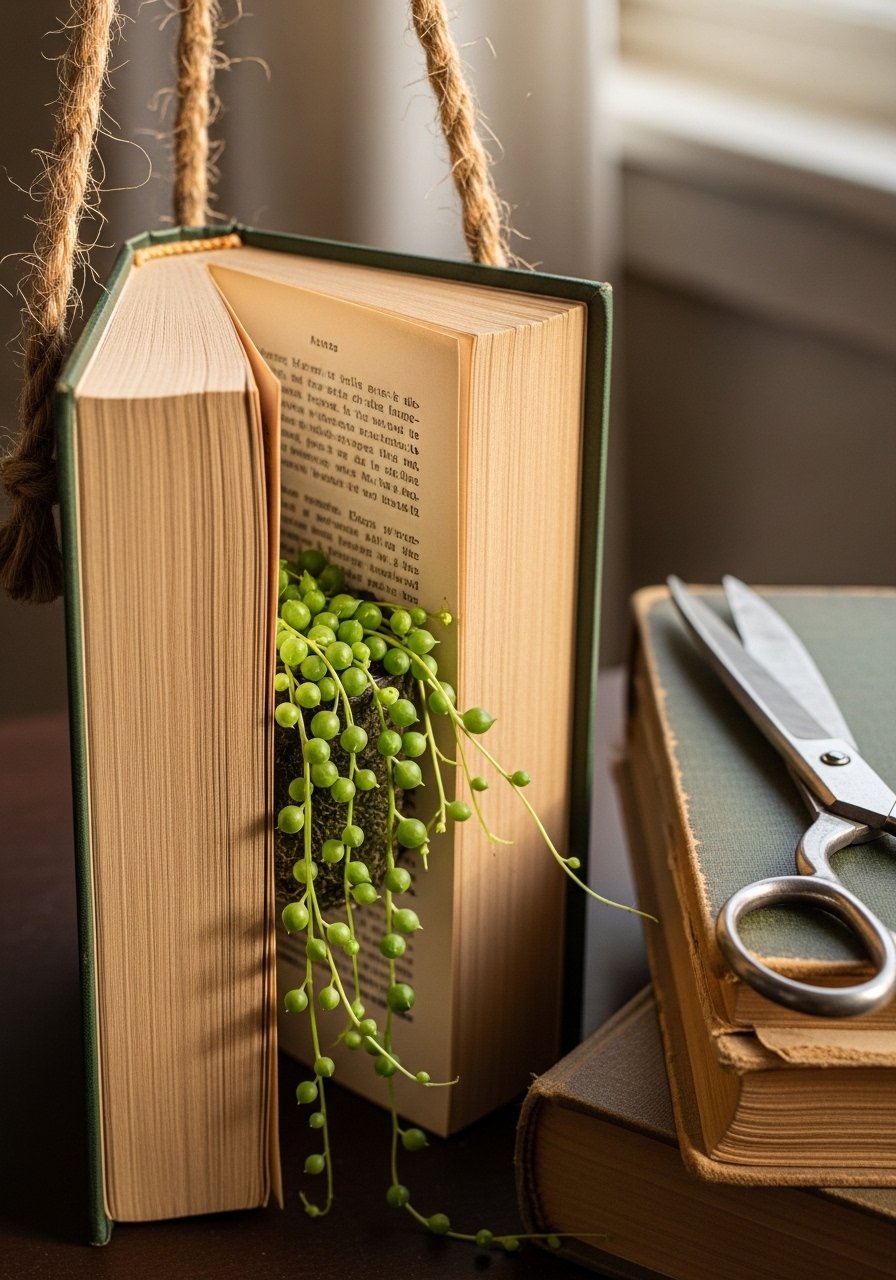
A hollowed book planter makes a literary vignette come alive. Use a waterproof liner inside to protect the book. Hanging from a cord turns it into a floating bookshelf planter. It’s whimsical and excellent for book lovers.
Materials
- Vintage hardcover book, at least 1.5 inches thick
- Small plastic liner or recycled jar
- Craft knife and metal ruler
- Waterproof glue or silicone
- Jute cord, 3mm, 36 inches
- Small trailing plant and potting soil
Instructions
- Use a metal ruler to guide cuts and hollow the book center, leaving 1/2-inch border.
- Insert a small plastic liner or jar to hold soil.
- Secure the liner with waterproof glue and let cure 24 hours.
- Drill small holes in the cover for the jute cord and thread through, knotting inside.
- Plant a small trailing plant and add soil, being careful not to over-water.
- Hang and water lightly; reseal if liner shows wear.
How to Display or Gift It
Hang near a reading chair or window. Wrap in tissue and a protective box for gifting. Store unused liners and tools in a shallow craft drawer.
You’ve now got 25 approachable aesthetic room decor DIY projects to choose from, whether you’re after boho warmth, Japandi calm, or cottagecore charm. Try one tonight, or pin a few to build a mood board for your space. Which project will you tackle first? Share this list with a friend who loves making, and keep a temperature-controlled hot glue gun handy—it changes how smoothly these small finishing touches go on.
Trust the process: craft slowly, enjoy the texture, and pin your favorites for later.


