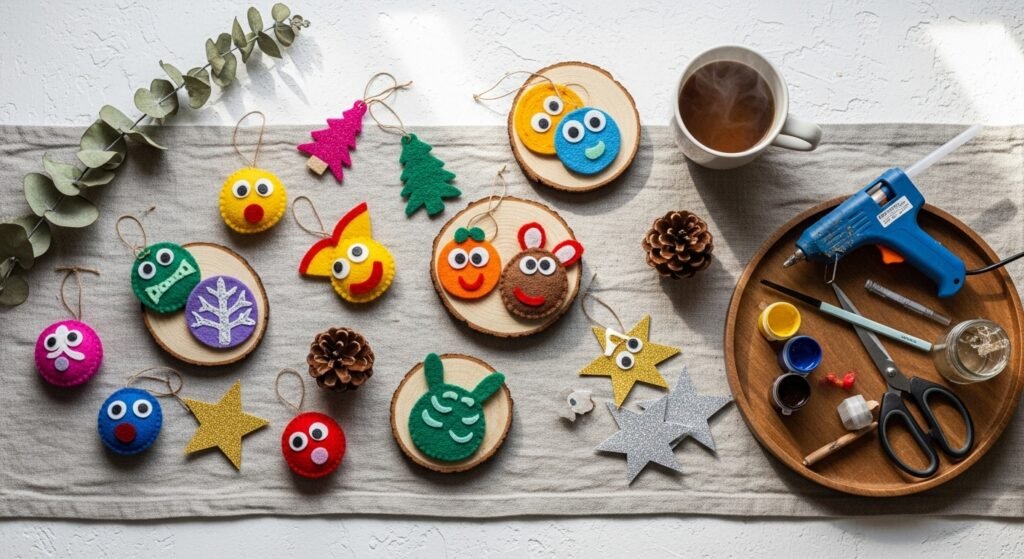
You know that buzz when the calendar flips and tiny hands start asking to make something sparkly? These seasonal holiday craft ideas for kids are designed for just that—simple enough for little crafters, but pretty enough you’ll want to display every piece. You’ll find projects that work for snow-dusted winter holidays, cozy autumn celebrations, and bright midwinter festivals. Each one includes exact materials, step-by-step instructions, and realistic drying times so your family can make without the guesswork.
I often reach for a hot glue gun with temperature control for glued details and my Cricut Joy cutting machine when we want perfectly matched shapes for a bunch of kids. Keep a roll of painter’s tape nearby for crisp paint edges. Ready to try 30 festive projects—many snug enough for a family craft night and some great for gifting? Let’s go.
1. Cinnamon Stick Reindeer Ornaments

These cinnamon stick reindeer smell like the season and look charming on a tree. They’re tactile and kid-friendly—glue, decorate, and hang. The texture of the cinnamon pairs well with felt and wooden beads for antlers. Younger kids love adding the googly eyes and noses; older kids can thread beads with a craft needle.
Materials
- 3 cinnamon sticks per ornament (approx. 4.5" long)
- 6–8 small wooden beads (6mm) for antlers
- Felt scraps (red and brown), 2" x 2" each
- Googly eyes, 8mm
- Jute twine, 12" for hanging
- Mini bell, 1 per ornament
- Hot glue sticks, 10 count
- Optional: acrylic craft paint (brown), foam brush, fine-tip permanent marker
Instructions
- Lay two cinnamon sticks parallel and glue a third across them near the top to form a T for stability. Let glue set 2–3 minutes until firm.
- Thread two wooden beads each onto a short piece of jute and knot; glue these as antlers at the top ends. Hot glue gun works best for speed.
- Cut a small red felt circle (¾" dia.) for the nose and glue below where the sticks cross.
- Glue googly eyes above the nose. Press firmly until set, about 30 seconds.
- Attach a 12" loop of jute at the top with a generous glue dab; add a mini bell to the loop.
- If desired, brush edges with brown acrylic paint for shading; allow paint to dry 20–30 minutes.
How to Display or Gift It
Tie several on a branch for a minimalist nature-inspired tree. For gifting, nest a few in a small kraft box with crinkle paper and a sprig of rosemary. Store extras flat in a craft organizer drawer to prevent accidental breakage. A small packet of kraft gift tags works great to label each child’s creation: kraft gift tags.
2. Salt Dough Handprint Ornaments
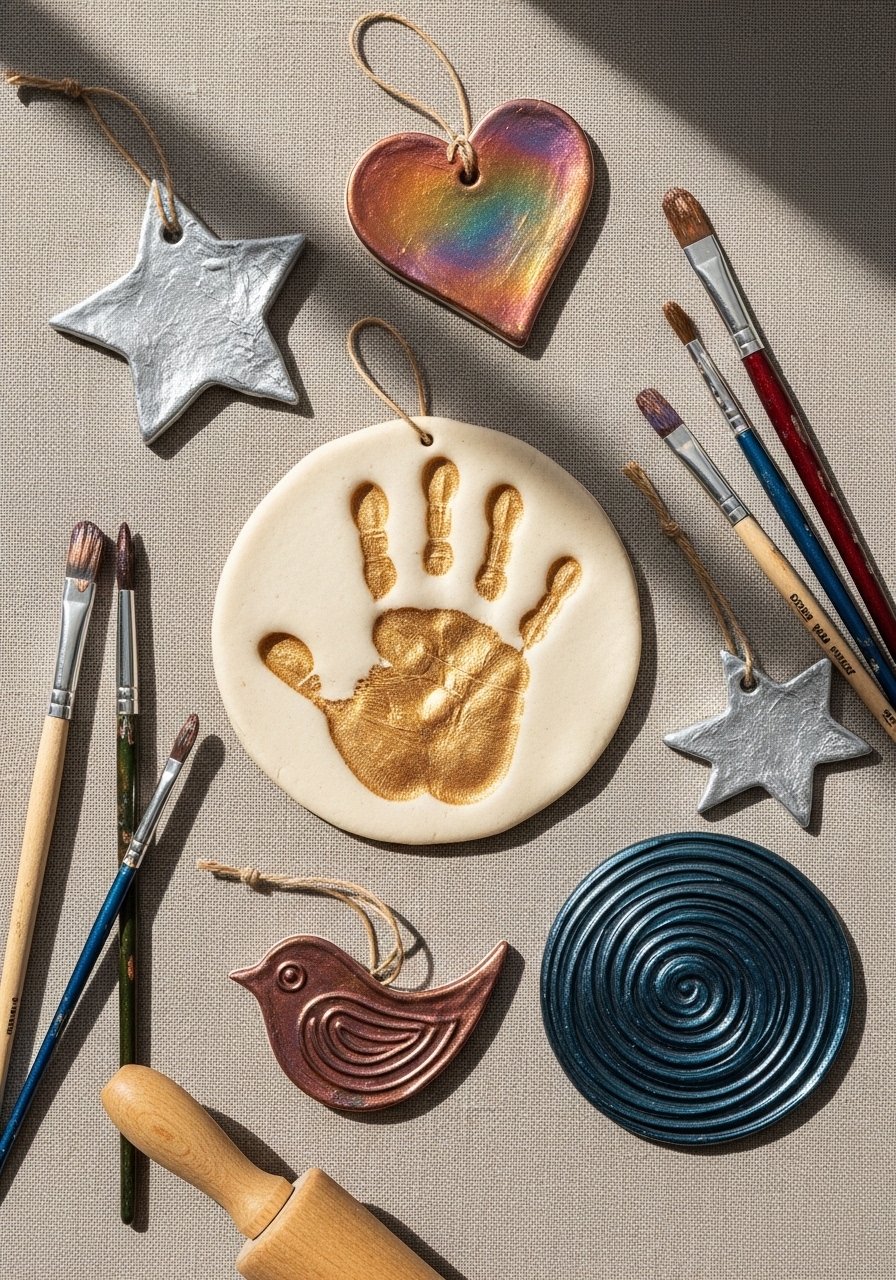
Handprint ornaments freeze a season in time. Kids press their palm into soft salt dough to make a keepsake. The texture is matte and rustic after baking, which looks lovely with chalky paint or a wash of metallic. This is a perfect toddler-friendly project if you’re ready to supervise the oven step.
Materials
- 2 cups all-purpose flour
- 1 cup fine salt
- 1 cup warm water
- Rolling pin, small
- Cookie cutters (holiday shapes), 2–4" wide
- Acrylic paint set, small pots
- Paintbrushes (flat & detail)
- Baking sheet and parchment
- Ribbon or twine, 12" per ornament
- Clear sealer spray (matte) optional, 1 spray can
Instructions
- Mix flour and salt in a bowl. Add warm water gradually and knead for 3–4 minutes until a smooth dough forms.
- Preheat oven to 250°F (120°C). Roll dough to ¼" thickness on parchment.
- Cut shapes with cookie cutters. Use a straw to make hanging hole near top.
- Press child's hand gently into each shape. Bake on a parchment-lined sheet for 2–3 hours until fully dry and firm (time varies with thickness).
- Cool completely. Paint with acrylics; allow 30 minutes dry between coats.
- Seal with a light spray coat if desired and thread ribbon when seal is dry (at least 1 hour).
How to Display or Gift It
Add a label with the date on the back using a fine-tip marker. Tie to a holiday package as a personalized gift tag. Store flat in an airtight container between layers of tissue paper to avoid scuffing.
3. Felt Tree Ornaments — seasonal holiday craft ideas for kids
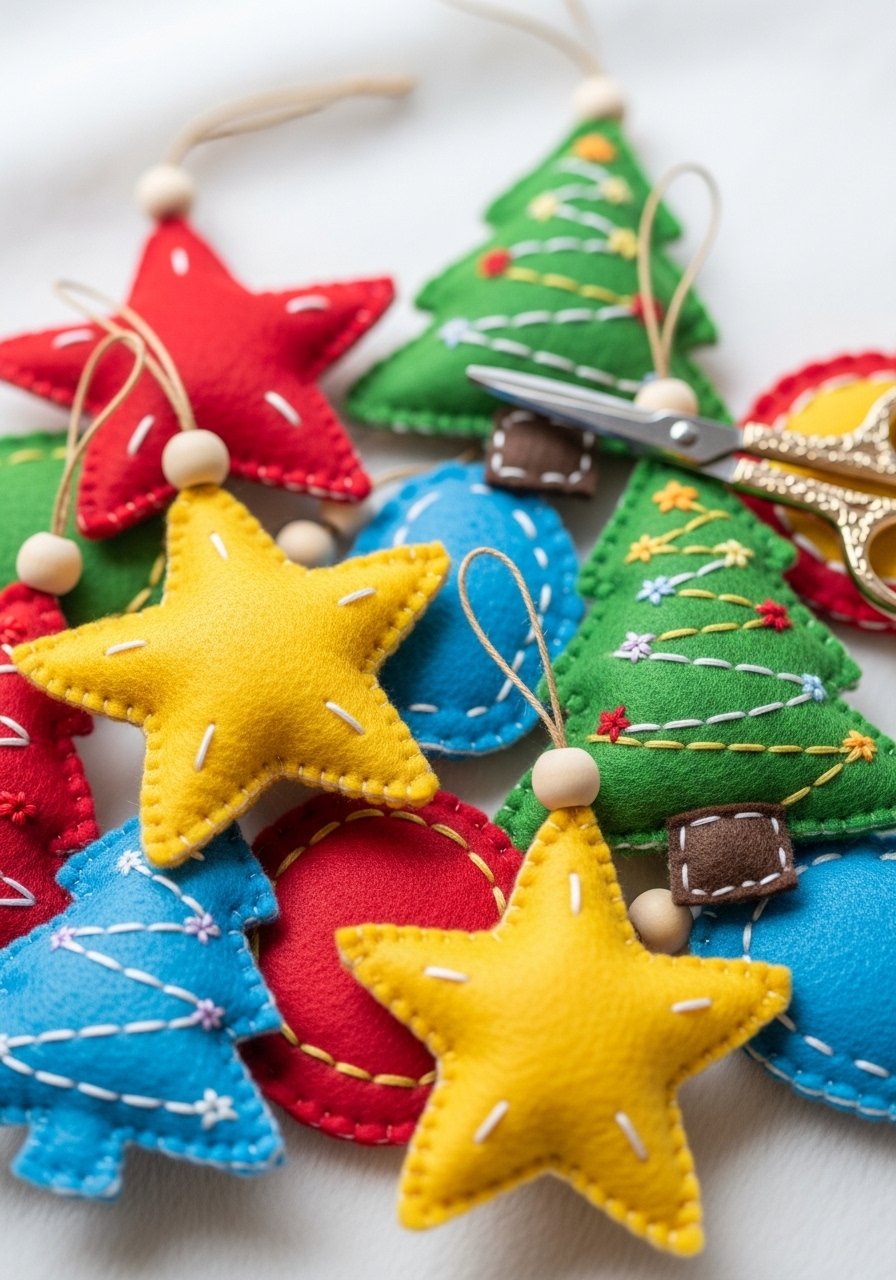
Felt ornaments are soft, forgiving, and great for threading practice. They have a cozy handmade look that complements cottagecore and farmhouse holiday styles. Kids can learn basic running stitch or use fabric glue for no-sew options. The felt feels warm and plush in your hands.
Materials
- Assorted felt sheets, 9" x 12", 2–3 colors
- Embroidery floss, 6-strand, assorted colors (8 yards)
- Embroidery needles, blunt tip for kids
- Toy stuffing, small amount (polyfill), 1 oz per ornament
- Wooden beads, 8mm (for hanger)
- Fabric glue (optional, 1 oz) or a low-temp hot glue gun
- Scissors (detail), 1 pair
Instructions
- Trace shapes onto felt using a washable fabric pen. Cut two identical shapes per ornament.
- Thread a wooden bead onto a 12" piece of floss and knot to form a hanger loop; position between two felt pieces at the top.
- Use a running stitch to sew sides together, stuffing lightly with polyfill halfway through.
- Finish stitching and knot securely. Trim thread tails.
- Add embroidered details like snowflakes or stripes using backstitch.
- If you prefer no-sew, sandwich hanger between felt and glue edges with fabric glue; press firmly and let set 15–20 minutes.
How to Display or Gift It
String a set on jute to make a felt garland. Package several in a small muslin bag with a sprig of dried lavender for a scented gift. Keep extras in a breathable fabric storage box to avoid felt compression: fabric storage bins.
4. Pinecone Turkeys (or Winter Pinecone Critters)
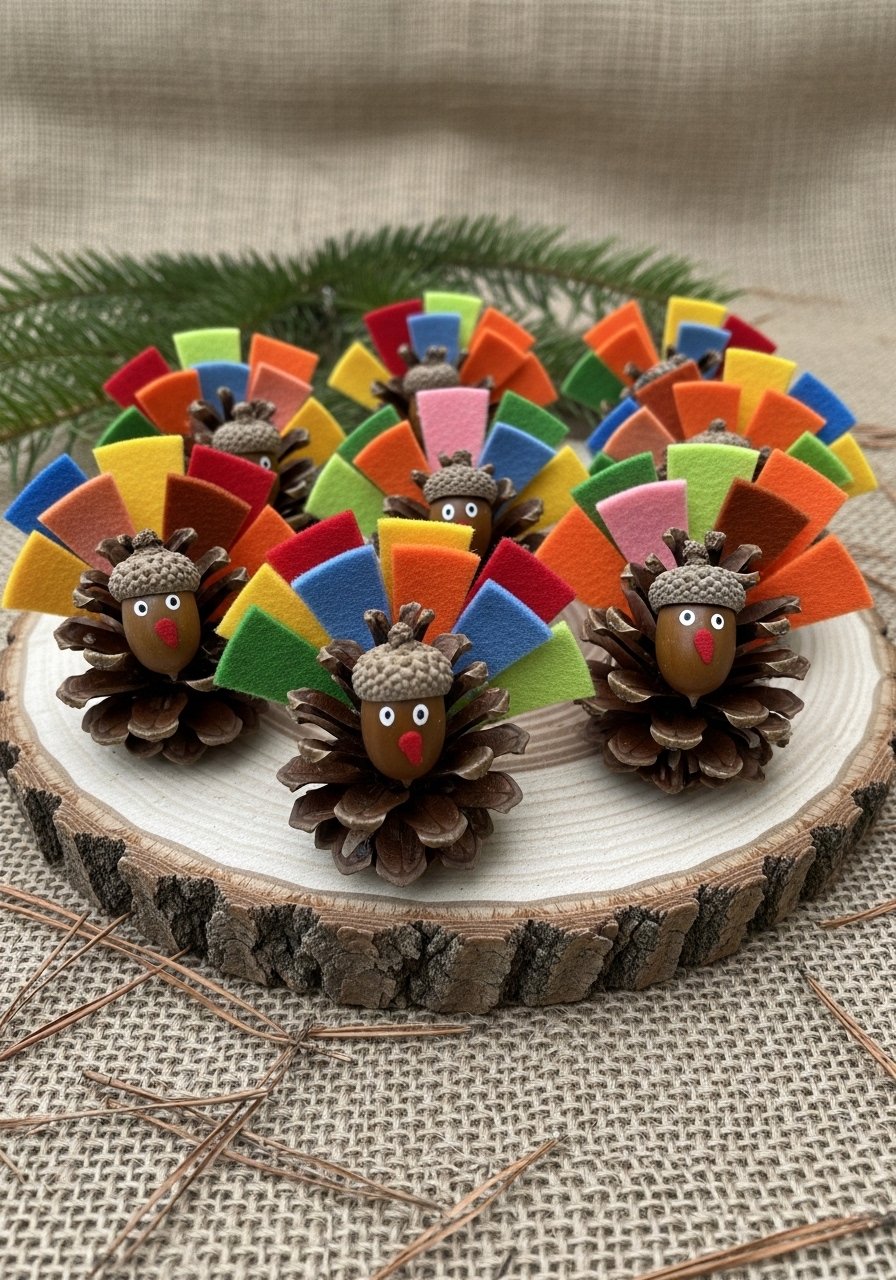
Pinecone critters make great family projects that use foraged materials. They’re tactile and a little messy—perfect for outdoor crafting. Paints add color, while felt or foam beaks and eyes give character. The scale feels handmade and rustic.
Materials
- Large pinecones, 1 per critter (3–4" tall)
- Acrylic craft paints, small set (6 colors)
- Foam sheets or felt, assorted colors
- Googly eyes, 8–12mm
- Hot glue gun and sticks (standard)
- Small acorn caps or wooden bead for head
- Fine paintbrush, size 0–2
- Protective sealer (optional), matte finish
Instructions
- Clean pinecones of debris. Place on cardboard and paint base colors; dry 20–30 minutes.
- Cut small beak and wattle shapes from foam or felt.
- Glue acorn cap or wooden bead as head to the top of the pinecone.
- Attach googly eyes and beak with hot glue. Press until set.
- If adding tail feathers, arrange felt pieces behind and glue into place. Allow glue to cure 10 minutes.
- For durability, spray a light coat of matte sealer and let dry 1 hour.
How to Display or Gift It
Use as a table centerpiece with a few candles (battery-operated for safety). Package multiple in a small crate with tissue for a fall or winter gift. Store in a ventilated tray to prevent mildew.
5. Popsicle Stick Nativity Scene
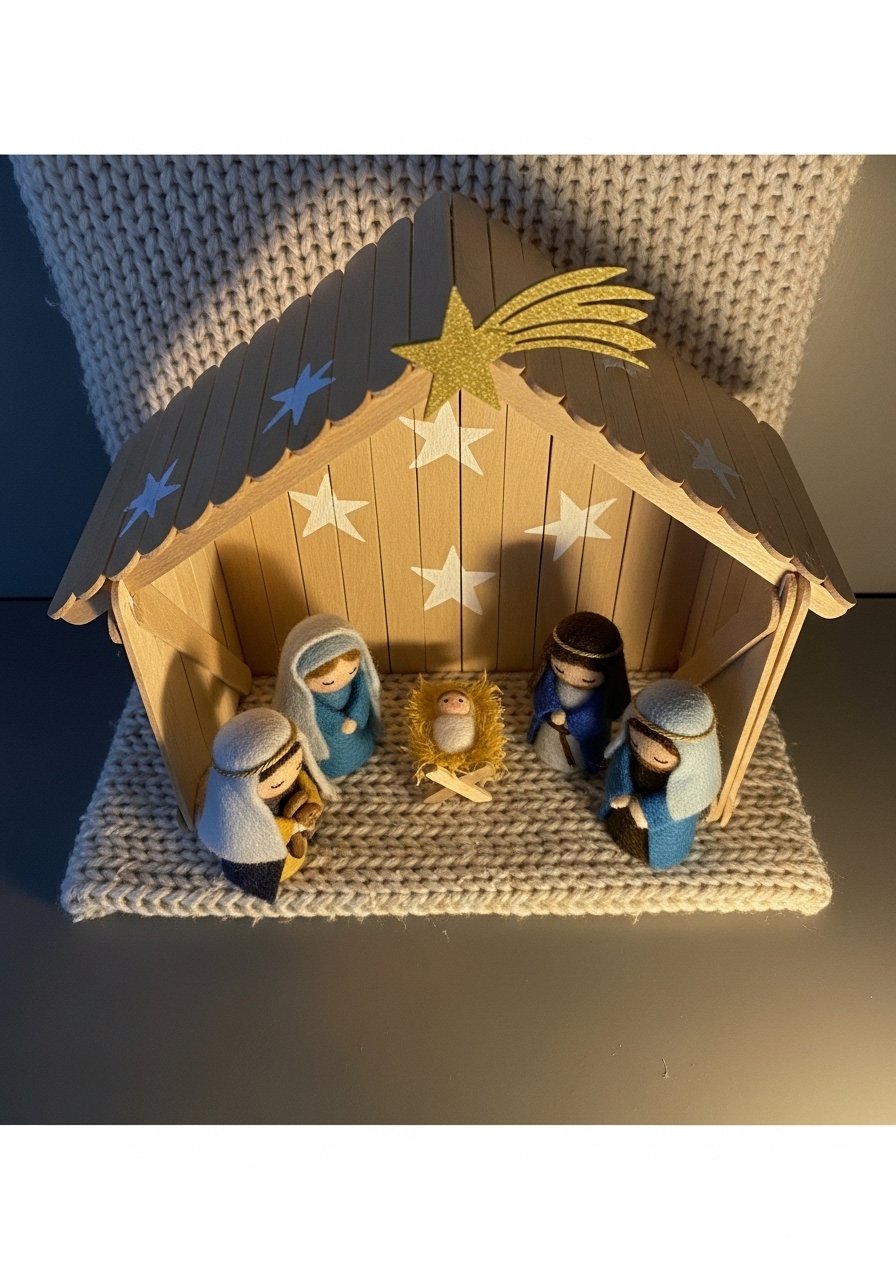
This simple nativity stable is great for storytelling crafts. Popsicle sticks are economical and easy for kids to arrange. Younger kids enjoy painting, while older kids can do gluing and figure construction. The finished look is rustic and can be adapted to many styles.
Materials
- Popsicle sticks, 20 per stable
- Acrylic paint (brown, gold, white)
- Foam or felt for tiny figures
- Hot glue gun and sticks
- Gold metallic pen for star details
- Mini LED tealight (battery-operated), 1
- Optional: small wooden star charm
Instructions
- Paint popsicle sticks and allow to dry 20 minutes.
- Build stable base by gluing 4 sticks for the back wall in a square, then add angled roof sticks.
- Create small figure shapes from felt; glue them into simple standing forms.
- Glue figures into the stable and add a gold star on top.
- Place a battery tealight behind for a gentle glow.
- Allow full glue cure 30 minutes before handling.
How to Display or Gift It
Place on a mantel or a child's bookshelf. For gifting, tuck into a shallow kraft box with tissue and a small card explaining the scene. Store flat in a shallow box.
6. Paper Star Window Suncatchers
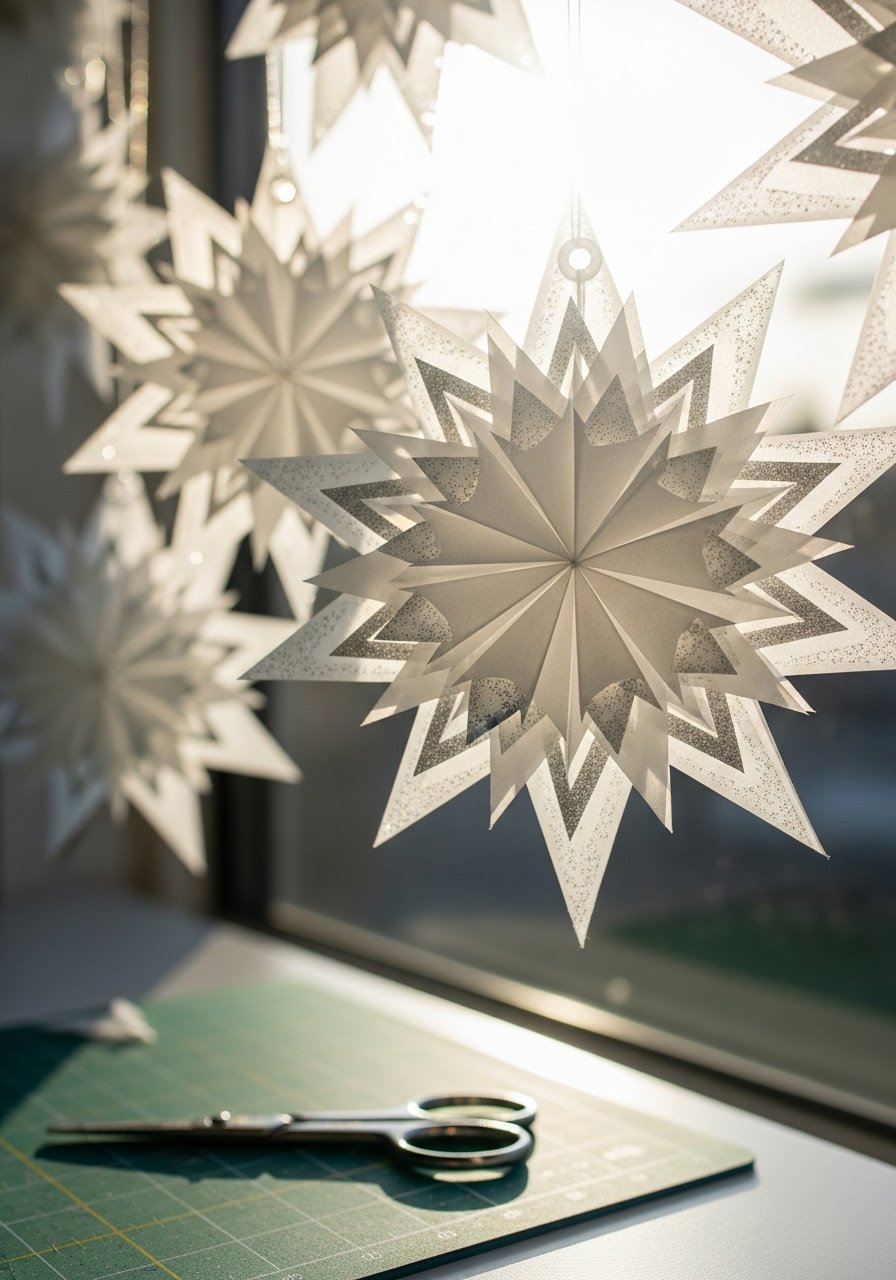
These stars are sparkly and lightweight—perfect for window displays. Kids fold, cut, and glue translucent vellum for a stained-glass effect. The finished stars are colorful and catch winter light beautifully.
Materials
- Translucent vellum sheets, 8.5" x 11" (assorted colors), 4 sheets per star
- Cardstock (contrasting color), 1 sheet
- Glue stick, 1
- Glitter glue pen for edge accents
- Scissors or a kid-safe craft knife and a self-healing cutting mat
- Hole punch, 1
- String or clear fishing line for hanging, 18"
Instructions
- Fold vellum sheet into quarters and cut a simple star shape from cardstock for a template.
- Trace template onto vellum and cut 4 layers; glue them together offset slightly for depth.
- Use glitter glue to outline each star; let set 15–20 minutes.
- Punch a hole near the top and thread fishing line.
- Hang in a sunny window; rotate for color mixing.
How to Display or Gift It
Cluster several at varying lengths in a window for a gallery effect. Wrap a set in tissue and place in a clear cellophane sleeve for gifting. Store flat between sheets of cardstock to prevent creasing.
7. Tiny Button Wreaths on Mini Hoops
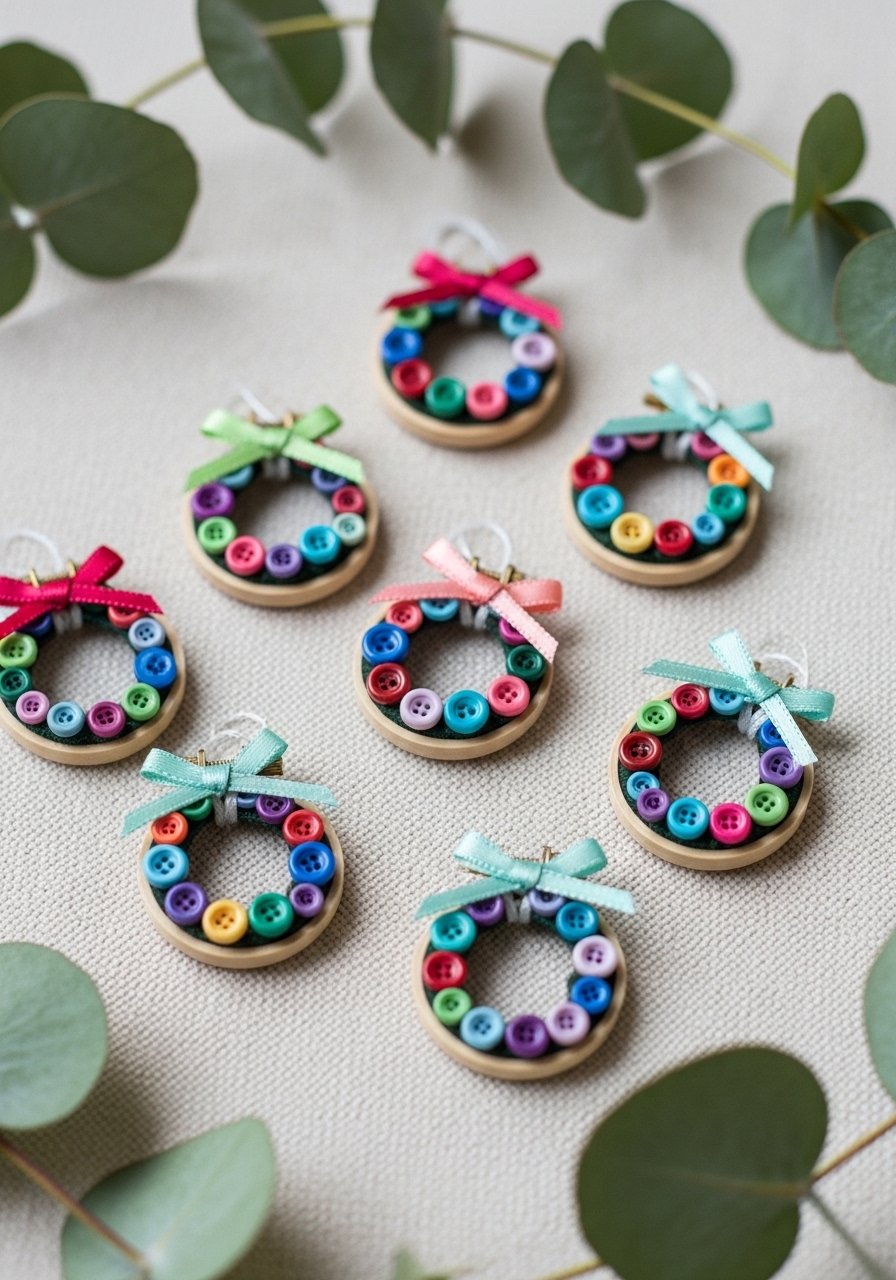
Button wreaths are a great way to use small scraps and teach composition. Kids love sorting buttons by color and threading them into dense, sparkly circles. The finished look pairs well with Japandi or boho holiday aesthetics when you pick muted palettes.
Materials
- Mini wooden embroidery hoops, 2" diameter, 1 per wreath
- Assorted buttons, 40–60 small buttons (6–12mm)
- Floral wire, 18 gauge, 12" per wreath
- Ribbon (satin or grosgrain), 6" for bow
- Needle-nose pliers (for cutting wire)
- Hot glue gun (optional for extra hold)
Instructions
- Thread floral wire through buttons, stringing them close together.
- Wrap the buttoned wire around the hoop, tucking ends and twisting to secure.
- Make a small bow from ribbon and glue or tie to the top.
- Tuck any wire ends under buttons or add a dab of hot glue to secure.
- Trim excess wire; smooth any rough edges with pliers.
- Hang using ribbon loop.
How to Display or Gift It
Cluster several in a window or on a pegboard for a decorative display. Tuck a small gift card behind the hoop when gifting. Store in a shallow ornament box to keep buttons from snagging.
8. Painted Wooden Rounds Snow Family
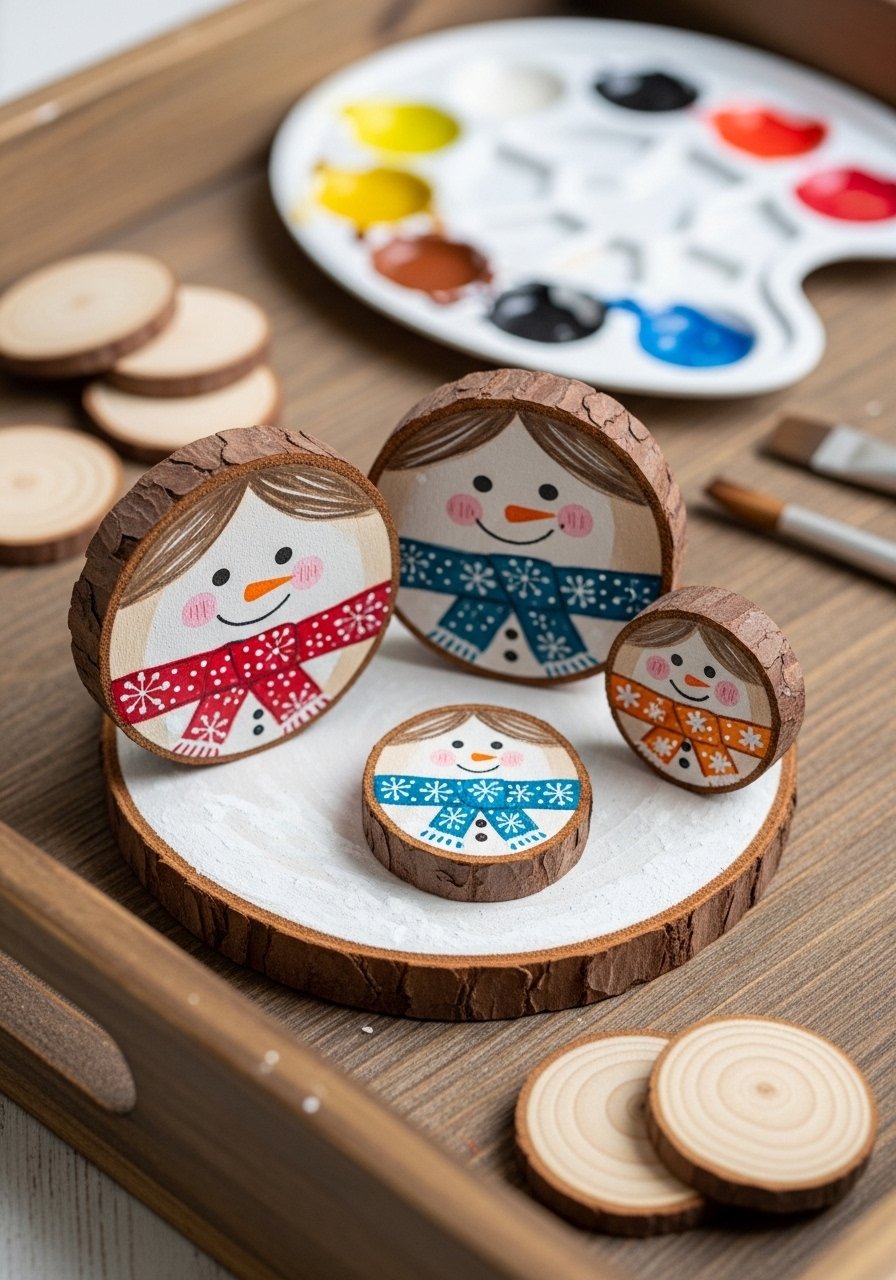
Wood rounds are sturdy and give a natural look. Painting little snow people encourages fine motor skills and creative faces. Use matte acrylics for a cozy cottagecore finish. Kids can add scarves with ribbon or paint.
Materials
- Wooden rounds, 2–3" diameter, 1–3 per family
- Acrylic paint set, white and accent colors
- Fine detail brushes, size 00–1
- Mod Podge Matte for sealing, 1 small jar
- Ribbon scraps for scarves
- Pencil for sketching faces
- Foam brush to apply Mod Podge
Instructions
- Sand a light coat on wood rounds if rough. Wipe clean.
- Paint a white circle for snow bodies and let dry 15–20 minutes.
- Sketch faces lightly and fill with paint details.
- Add ribbon scarves with a dab of Mod Podge or glue. Let dry 10 minutes.
- Seal with one coat of Mod Podge; allow 1 hour to cure.
- Optional: glue a small magnet on the back for fridge display; cure 24 hours for full hold.
How to Display or Gift It
Arrange as a tabletop vignette on a small wooden tray with faux snow. Magnetic versions make sweet teacher gifts. Store wrapped in tissue in a craft organizer drawer.
9. Puffy Paint Snowflake Cards
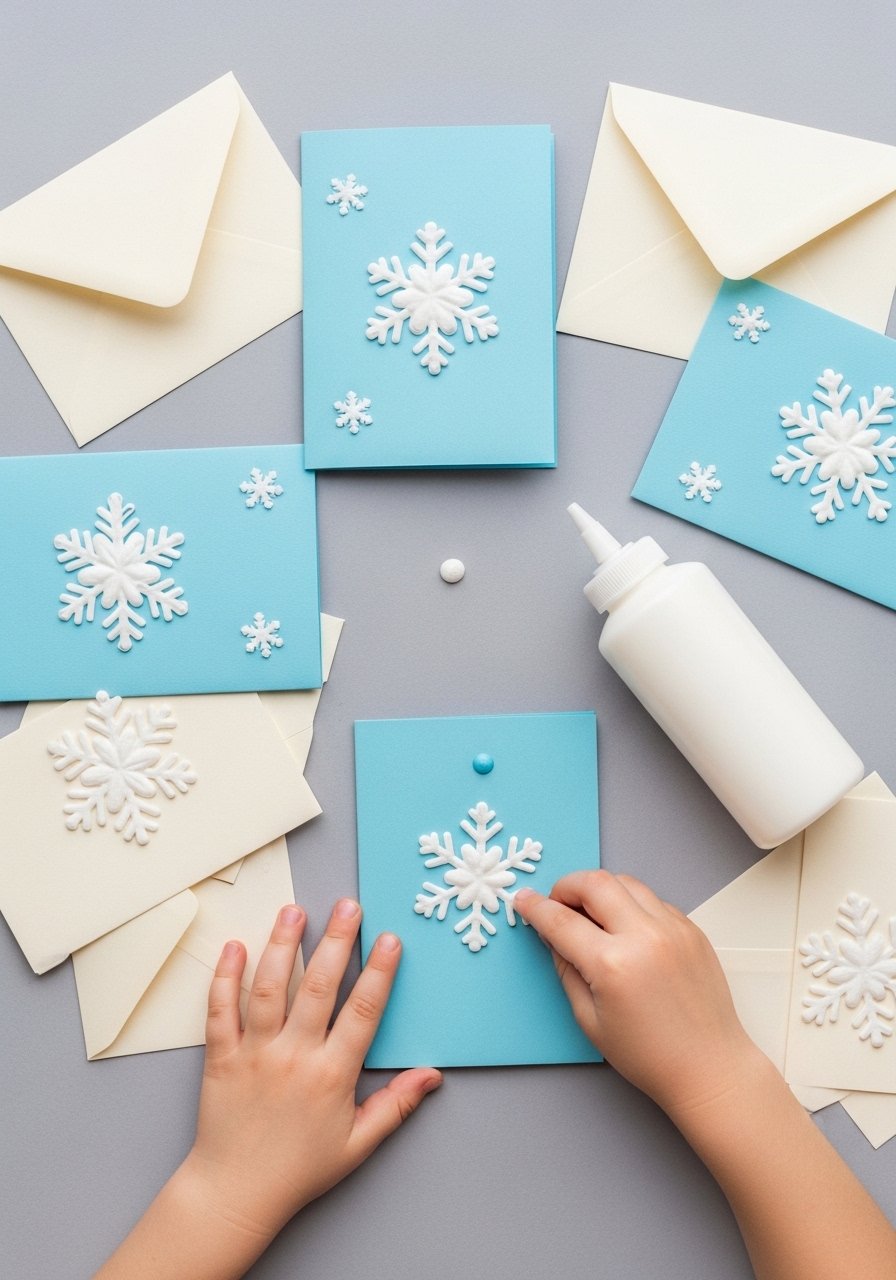
Puffy paint gives a raised, tactile finish that kids adore. These snowflake cards are sensory and bold. The paint dries into soft peaks, perfect for holiday mail or classroom exchanges.
Materials
- Heavyweight card stock, 8.5" x 11", folded to cards, 6 cards
- Puffy paint bottles, white and metallic silver
- Ruler and pencil for guidelines
- Washi tape to mask edges (optional)
- Envelopes, A2 size, 6
- Foam stickers or sequins, optional for added shine
Instructions
- Fold cardstock into cards and lightly mark center.
- Use puff paint to draw symmetrical snowflake arms from center outward.
- Add dot accents at tips. Let dry upright 4–6 hours for full puffiness.
- If desired, add sequins with a glue dot once paint is tacky.
- Keep cards flat during initial 15–20 minutes to prevent paint sliding.
- Allow full cure 24 hours before stacking or mailing.
How to Display or Gift It
Include in a bundled set and tie with baker’s twine. Store flat in a sealed plastic sleeve to protect raised details. Use a small craft organizer sheet to keep them separate.
10. Paper Chain Countdown Calendar — seasonal holiday craft ideas for kids
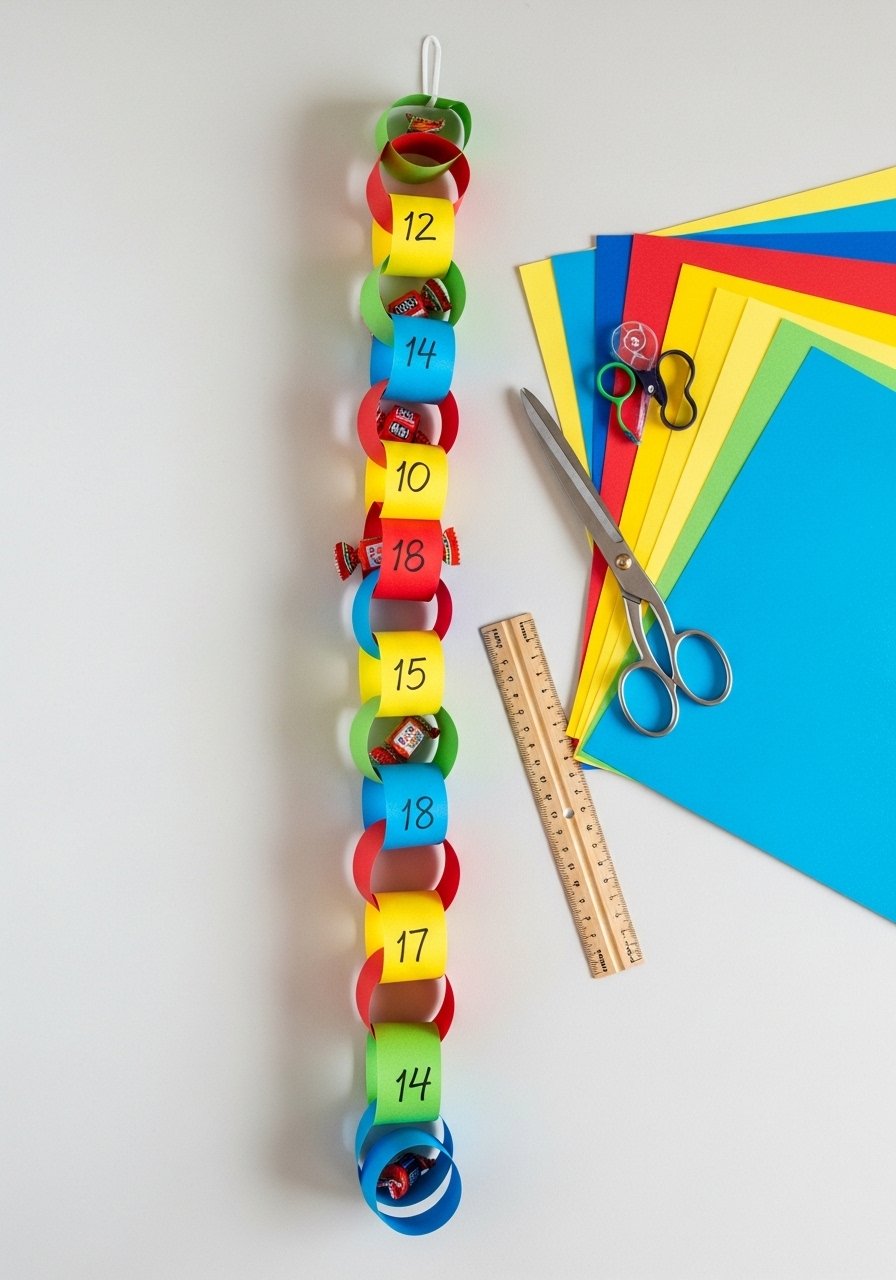
A paper chain calendar builds anticipation and is a classic classroom craft. Customize with notes, jokes, or small treats tucked into selected loops. This project is repetitive in a good way—great for younger children practicing cutting and gluing.
Materials
- Colored paper pads, 12 sheets assorted
- Glue stick, 1
- Hole punch (optional for tabs)
- Fine-tip marker, black for numbering
- Ruler, clear 12"
- Scissors (kids’ safe), 1 pair
- Clip hooks or removable adhesive for display
Instructions
- Cut paper into 1" x 6" strips for each chain link (24–30 strips).
- Loop first strip into a ring and glue ends. Thread the next strip through and glue; repeat.
- Number each link before connecting or after assembling.
- For notes, write on small slips and slip into chosen loops before sealing.
- Hang from a low hook or mantel and remove one link each day.
- Keep spares in a labeled envelope for replacements.
How to Display or Gift It
Drape along a mantel or staircase. Pack made-ahead chains flat in a kraft envelope for gifting. Small adhesive hooks help you hang without nails: removable wall hooks.
11. Scented Spice Sachets
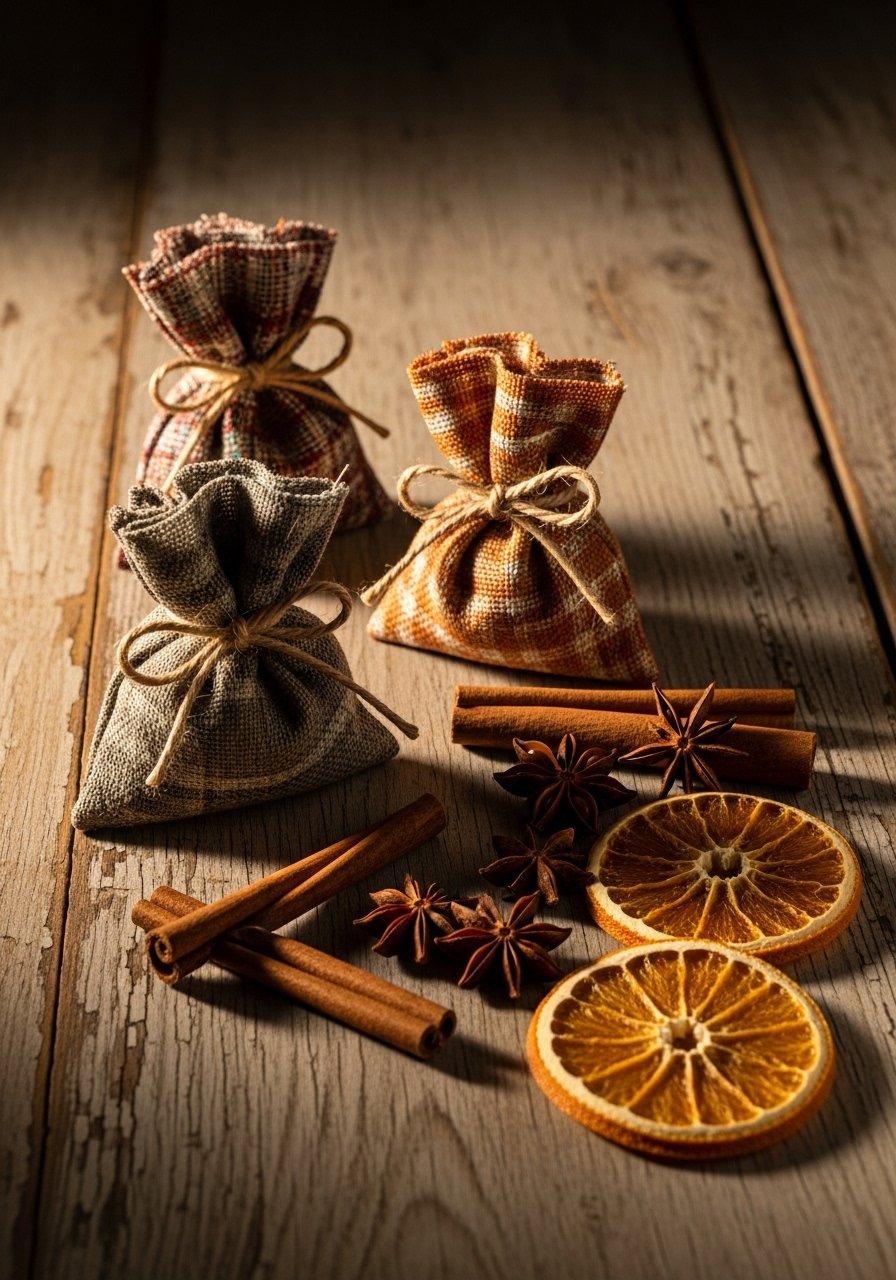
Scented sachets bring holiday fragrance to drawers and backpacks. Kids can help fill and tie simple sewn or no-sew fabric pouches. The texture of the dried botanicals and warmth of spices is sensory-rich.
Materials
- Muslin fabric squares, 5" x 5", 6 pieces
- Dried lavender, 1/4 cup
- Ground cinnamon, 2 tbsp
- Whole cloves or star anise, 1 tbsp
- Satin ribbon or twine, 12" total per sachet
- Needle and thread or fabric glue
- Funnel or small spoon
Instructions
- Mix lavender, cinnamon, and cloves in a bowl.
- Fold muslin into a pouch, spoon in 1–2 tbsp of mix.
- Secure top with ribbon and tie tightly. If sewing, stitch across top and knot.
- Shake gently to distribute scent.
- Let sachets sit 24 hours to meld scents before gifting or use.
- Refresh scent with a few drops of essential oil if needed.
How to Display or Gift It
Tuck into dresser drawers, coat pockets, or put in a small kraft bag as a stocking stuffer. Store extra sachets in an airtight jar to preserve scent: mason jars.
12. No-Sew Fleece Stockings

No-sew fleece stockings are quick, soft, and forgiving. Kids can cut fringe and tie edges. The plush texture feels cozy and fits farmhouse or boho palettes depending on fabric.
Materials
- Fleece fabric, 1/2 yard per two stockings
- Scissors or rotary cutter and cutting mat
- Template (paper stocking outline)
- Ribbon for hanging, 6" per stocking
- Fabric marker or chalk
- Optional: pom-poms or fringe
Instructions
- Fold fleece and trace stocking template twice; cut out two identical pieces.
- Cut 1" fringe along curved edges for 1–2 inches.
- Tie matching fringes in pairs around the curve to join pieces.
- Trim excess and add ribbon loop inside top for hanging with a dab of fabric glue.
- Add pom-pom or felt initials glued to front.
- Test holds by inserting a small gift; reinforce fringe ties if needed.
How to Display or Gift It
Hang on a mantle or pegboard for a casual look. Store flat in a drawer to avoid deformation. A stackable fabric bin keeps seasonal textiles neat.
13. Kid-Friendly Resin Star Ornaments
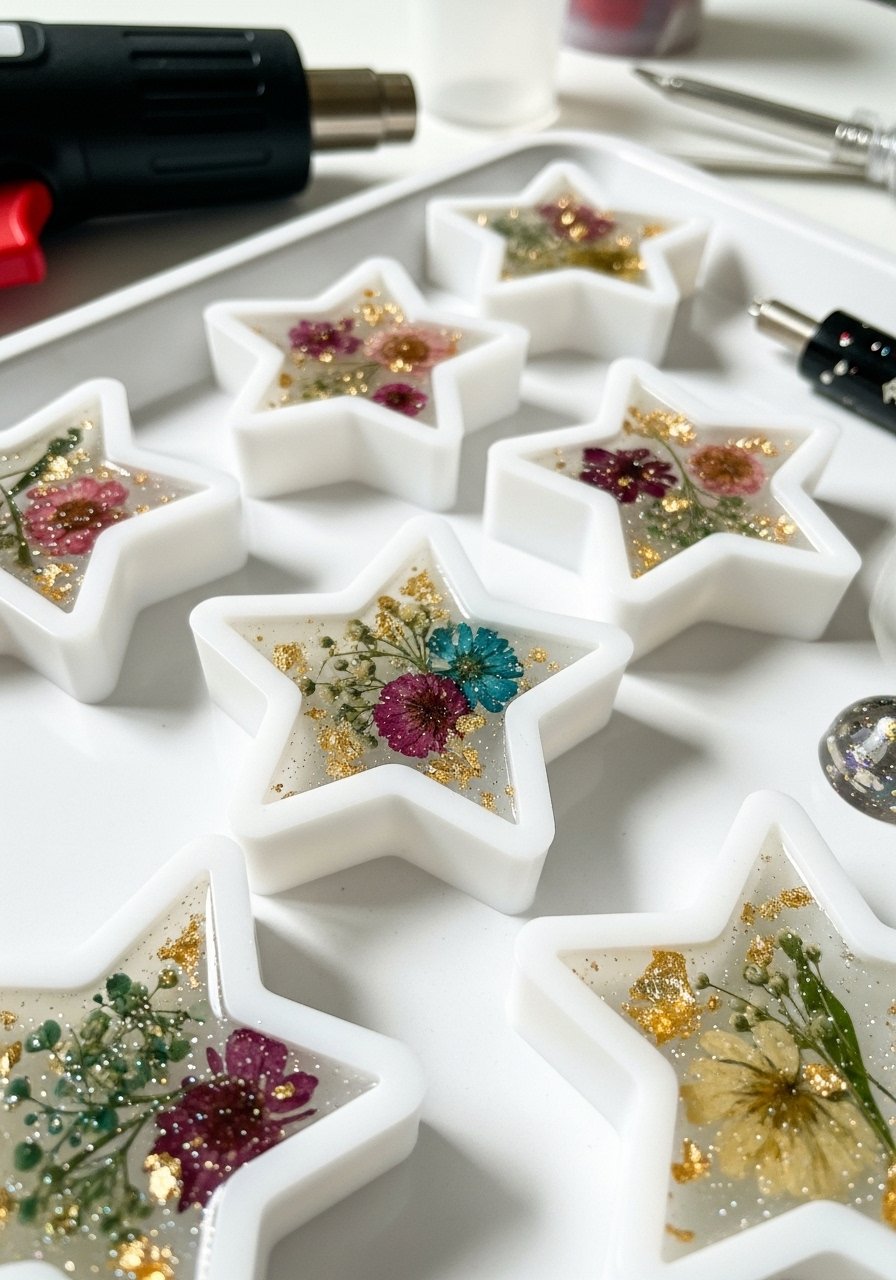
Resin gives a glossy, jewel-like finish that kids love watching set (grown-up supervision required). Using silicone molds keeps shapes consistent. Embed dried botanicals, glitter, or tiny confetti for a custom look.
Materials
- Epoxy resin kit, small (2-part)
- Silicone star molds, 2" and 3"
- Disposable mixing cups and stir sticks
- Glitter, dried flowers, tiny charms
- Disposable gloves and small pipettes
- Heat gun (briefly to remove bubbles) or toothpick
- Jump rings and ribbon for hanging
Instructions
- Work in a well-ventilated area and wear gloves. Measure resin and hardener per kit instructions (usually 1:1 or 2:1).
- Mix slowly for 2–3 minutes to minimize bubbles.
- Pour a thin base layer into mold, add embellishments, then fill to top.
- Remove surface bubbles with a quick pass of heat gun for 1–2 seconds or a toothpick.
- Cure per resin kit, usually 24–48 hours for full hardness.
- Demold, sand edges if needed, and add jump ring for hanging.
How to Display or Gift It
Place on a velvet card for gifting or string into a suncatcher cluster. Store in a foam craft box to prevent scratches. A kid-safe resin kit reduces fumes and simplifies measuring: epoxy resin kit.
14. Mitten Garland with Washi Accents
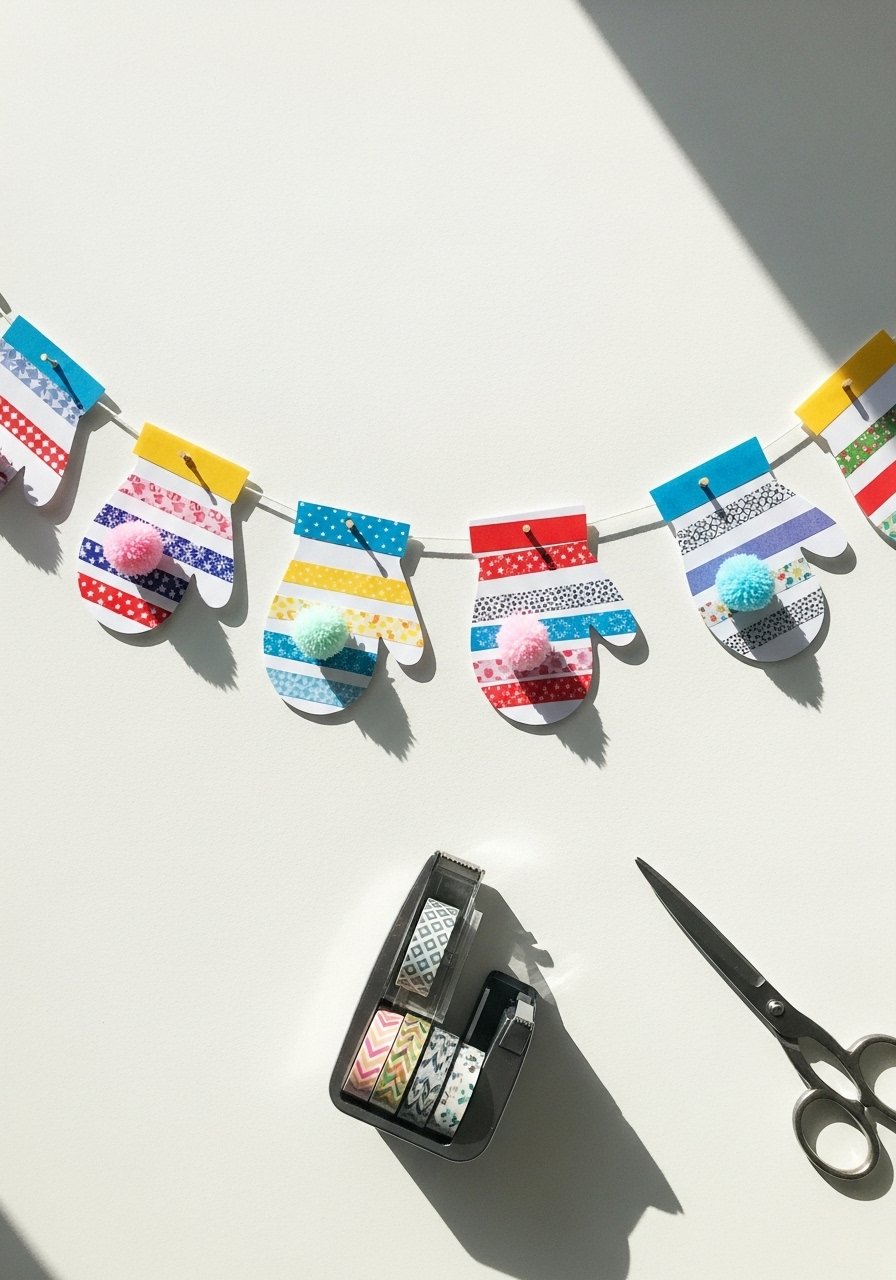
This mitten garland is colorful and adaptable. Use patterned washi tape to create stripes and textures without a lot of cutting. Kids can personalize each mitten, making this great for group crafting.
Materials
- Colored cardstock, assorted, 6 sheets
- Washi tape rolls, assorted patterns
- Scissors
- Hole punch
- Baker’s twine, 6–8 feet
- Mini pom-poms, 12
- Glue dots for quick sticking
Instructions
- Cut mitten templates (about 3" wide) and trace onto cardstock; cut out.
- Apply washi tape in stripes or patterns across each mitten.
- Punch a hole at the top and thread twine to connect mittens at spacing of 3–4".
- Add pom-poms to cuffs with glue dots.
- Hang along a mantel or window and adjust spacing.
- Store flat in a scrapbook box to preserve shapes.
How to Display or Gift It
Drape along a bookshelf or across a doorframe. For gifting, roll gently and tie with twine. Keep a washi tape set handy for quick repairs or refreshes: washi tape set.
15. Twig Star Ornaments with Metallic Accents
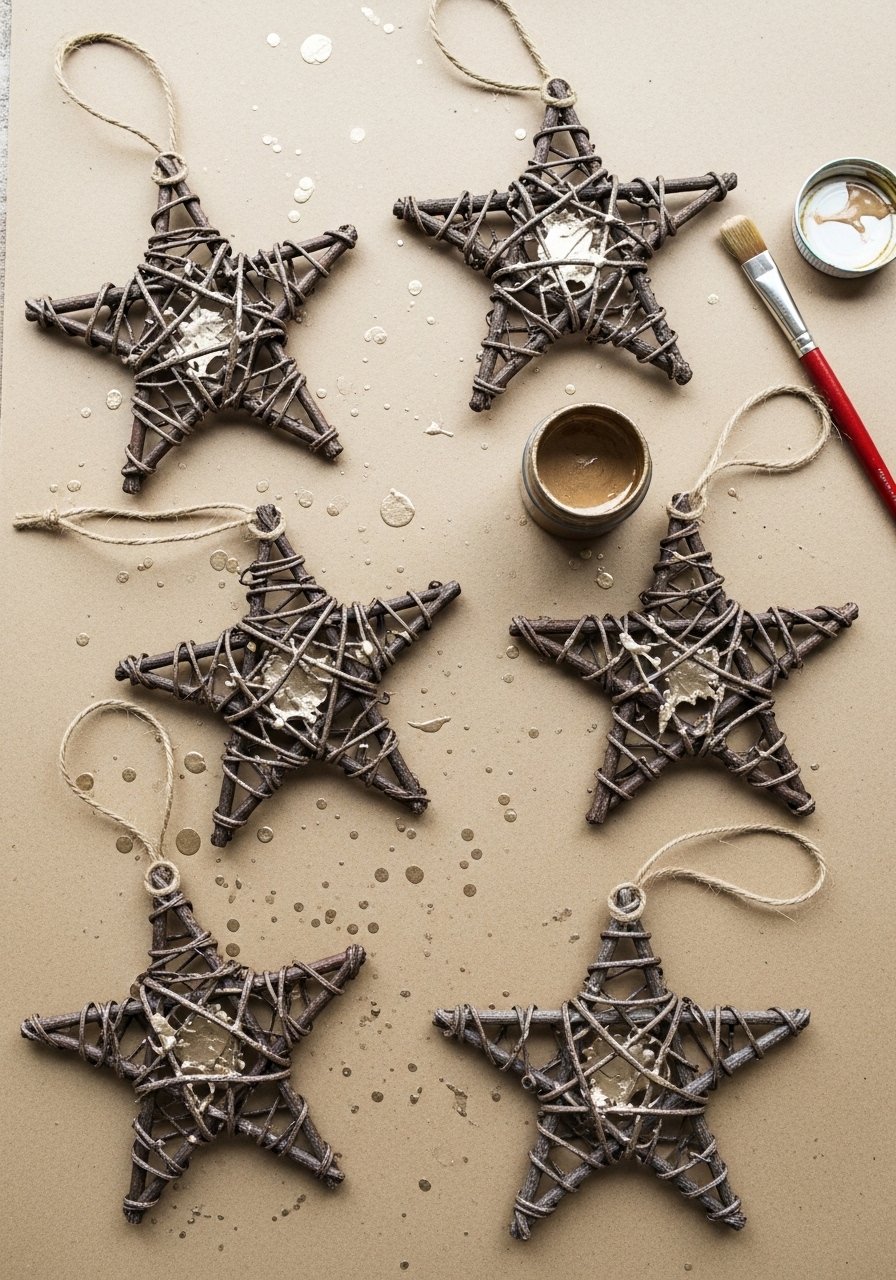
Twig stars bring the outdoors in and look charming in farmhouse or rustic holiday decor. Kids can paint, tie, and add metallic splatter for sparkle. The texture is natural and slightly rough, giving a handcrafted charm.
Materials
- Small twigs, about 6–8 per star, each ~3–4" long
- Twine, 12" per star
- Metallic acrylic paint, gold or silver
- Hot glue gun
- Paintbrush, small
- Optional: wood beads for center
Instructions
- Gather and dry twigs. Trim to similar lengths.
- Form a five-point star by crossing twigs and glue intersections; hold until set 30–60 seconds.
- Wrap twine around one point to form a hanger loop and tie.
- Flick metallic paint with a loaded brush for splatter accents; dry 20–30 minutes.
- Glue a wooden bead at the center for stability if desired.
- Let fully cure 1 hour before hanging.
How to Display or Gift It
Cluster three stars of different sizes on a wall, or hang from a curtain rod. Pack in recycled tissue and a kraft box for gifting. Store in a shallow box to avoid bending.
16. Holiday Placemats from Laminated Kid Art
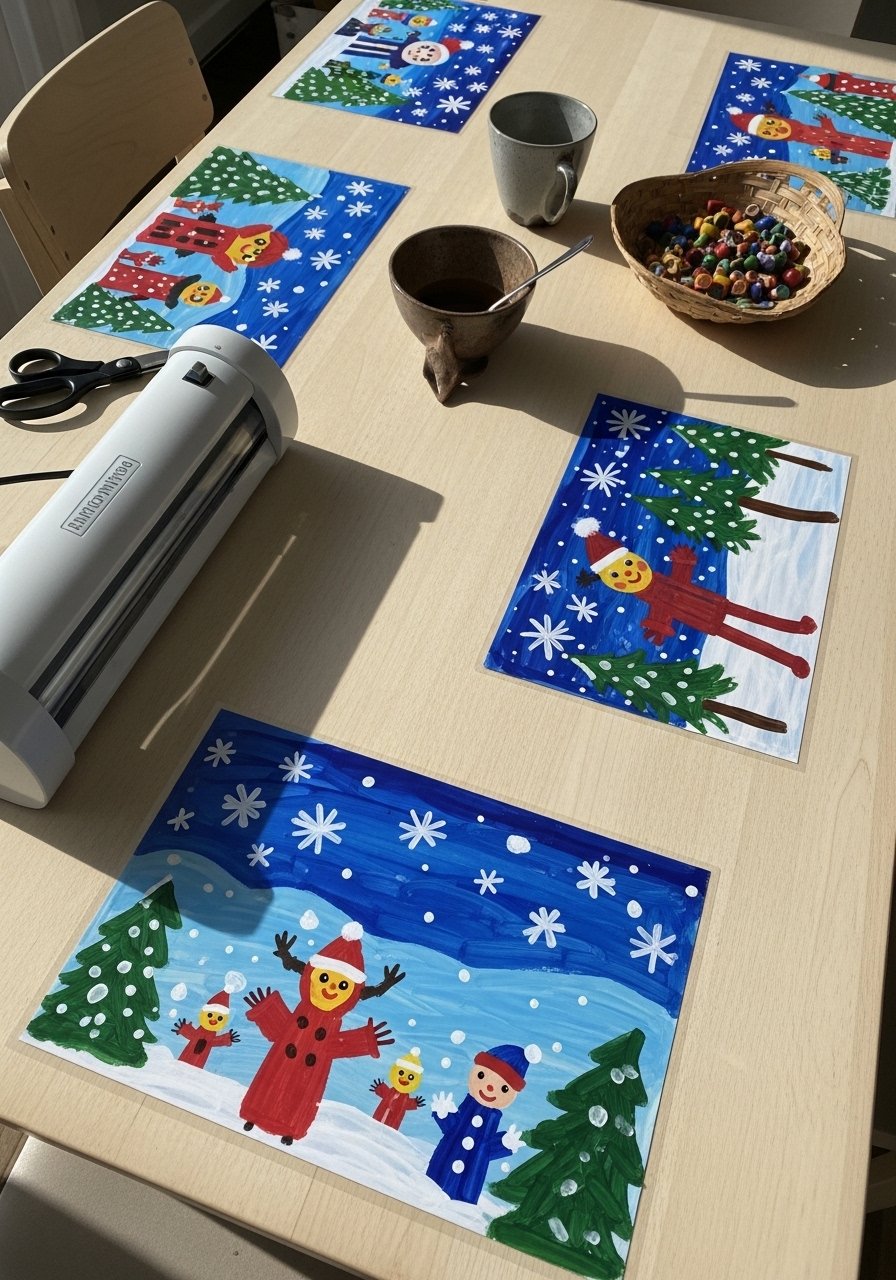
Turn kids’ drawings into durable placemats with a laminator. They’re wipe-clean and make meals feel extra special. Laminating seals in paint and gives a glossy finish. This also teaches kids pride in seeing their art put to use.
Materials
- Children’s artwork on 8.5" x 11" paper
- Home laminator with pouches (A4 or letter size)
- Scissors or rounded-corner cutter
- Ruler, optional
- Washable markers or tempera paint for creating art
Instructions
- Have kids create artwork on standard paper. Let paint or marker dry 30–60 minutes.
- Slide artwork into a laminator pouch and run through laminator per manufacturer's instructions.
- Trim edges and round corners to prevent peeling.
- Wipe clean with a damp cloth. Avoid high-heat pot holders directly on surface.
- For a heavier placemat, back with thin cork board using spray adhesive and seal edges.
- Store stacked flat in a drawer.
How to Display or Gift It
Use as a kid-friendly table set during holiday meals. Pack a set of laminated placemats in a gift bag with a small marker set for gifting. A budget home laminator is handy for many projects: home laminator.
17. Yarn Pom-Pom Wreath
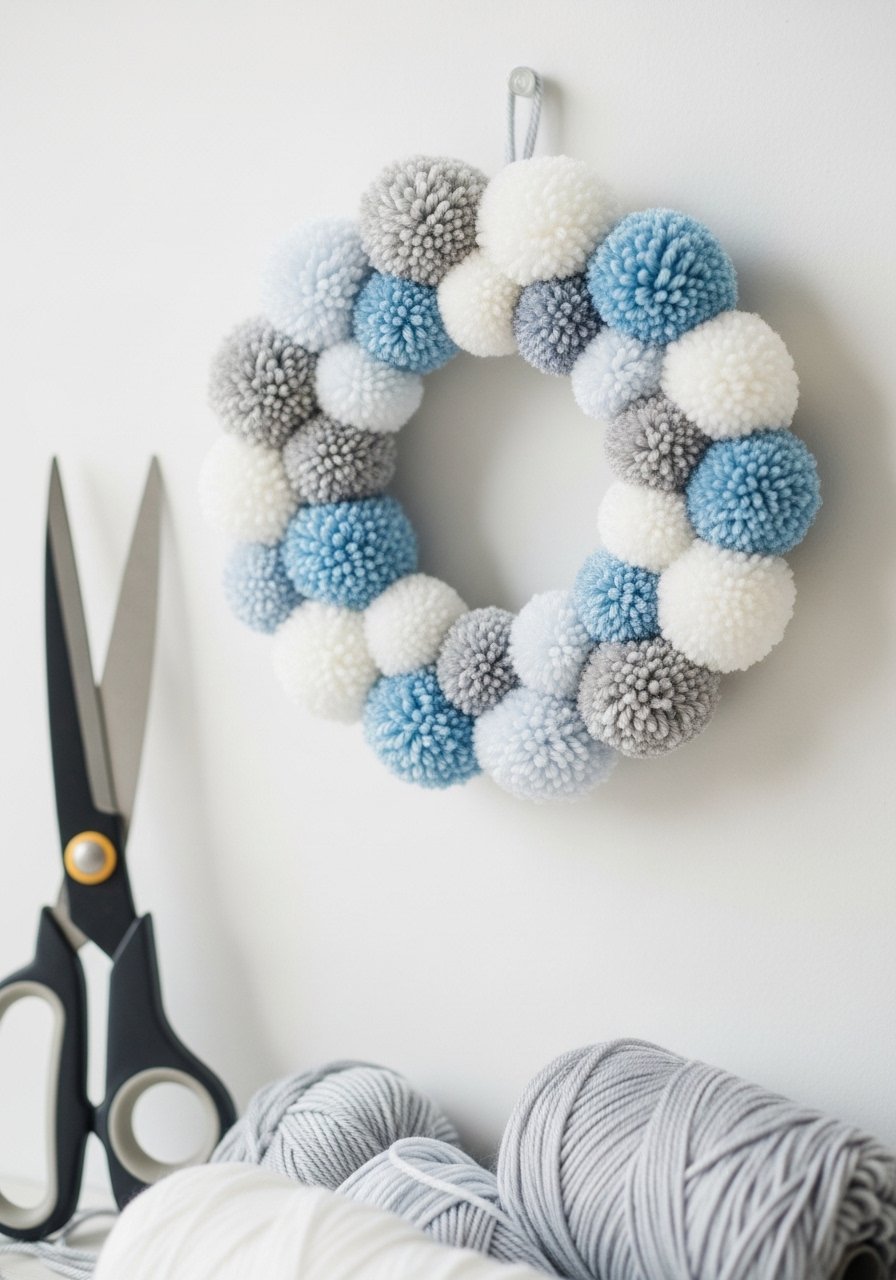
A pom-pom wreath is tactile and forgiving. Kids can make pom-poms from yarn then glue them to a circular base—great for color sorting and fine motor practice. The result is fluffy and festive.
Materials
- Yarn skeins, worsted weight, 2–3 colors (50g each)
- Cardboard ring (6" diameter) or foam wreath base
- Pom-pom maker (optional) or cardboard template
- Hot glue gun
- Scissors, blunt for kids
- Ribbon for hanging
Instructions
- Wrap yarn around pom-pom maker or cardboard until dense.
- Tie center tightly and cut loops to form pom-pom. Trim to even shape.
- Repeat until you have enough pom-poms to cover the ring (approx. 12–16).
- Hot glue pom-poms around the wreath base, pushing them close together.
- Add a ribbon bow and hang with a loop.
- For freshness, tuck a dried orange slice or cinnamon stick into wreath for scent.
How to Display or Gift It
Hang on a child’s bedroom door for a festive touch. Store in a breathable fabric bag to prevent dusting. A pom-pom maker speeds up production: pom-pom maker.
18. Cardboard Nativity Shadow Boxes
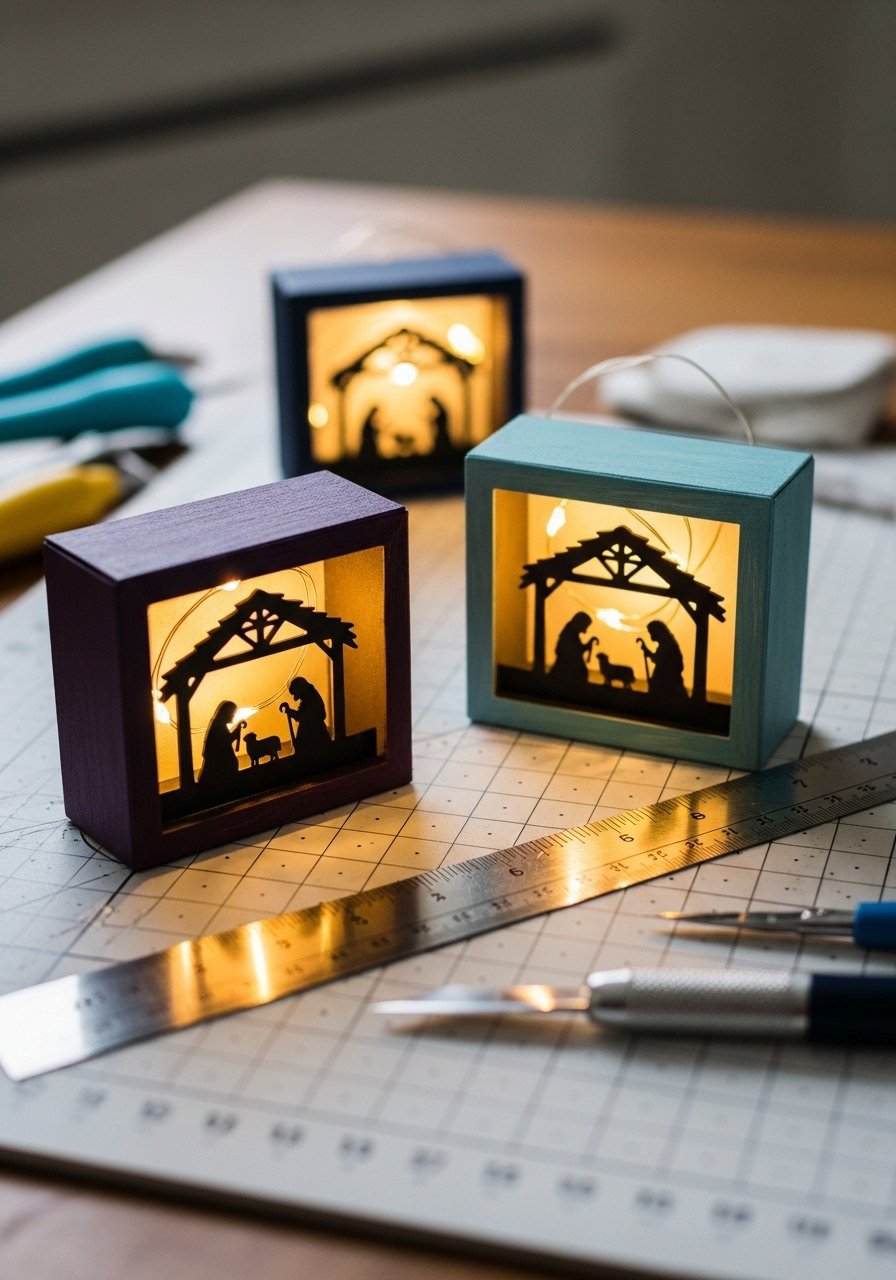
Shadow boxes are dramatic and quiet—perfect for reflective holiday moments. Kids can cut silhouettes and back them with metallic or painted paper. Small LED lights add a warm glow.
Materials
- Sturdy cardboard or pre-made shadow box frames (3" x 3")
- Black cardstock for silhouettes
- Acrylic paint for box interiors
- Battery LED string lights, tiny
- *Glue stick or tacky glue
- Craft knife (adult use) and cutting mat
Instructions
- Paint the inside of the box in a night-sky color; let dry 30 minutes.
- Draw or trace nativity silhouettes on black cardstock and cut out.
- Glue silhouette into box, leaving a small gap from the back for lights.
- Tuck LED string lights behind silhouette, placing battery pack outside box.
- Close and secure the back. Test lights.
- Allow glue to fully set 1 hour before display.
How to Display or Gift It
Line a mantel with several boxes for a quiet vignette. Battery LED strings make them safe for small hands. Store in a padded box with tissue.
19. Foil Relief Holiday Cards
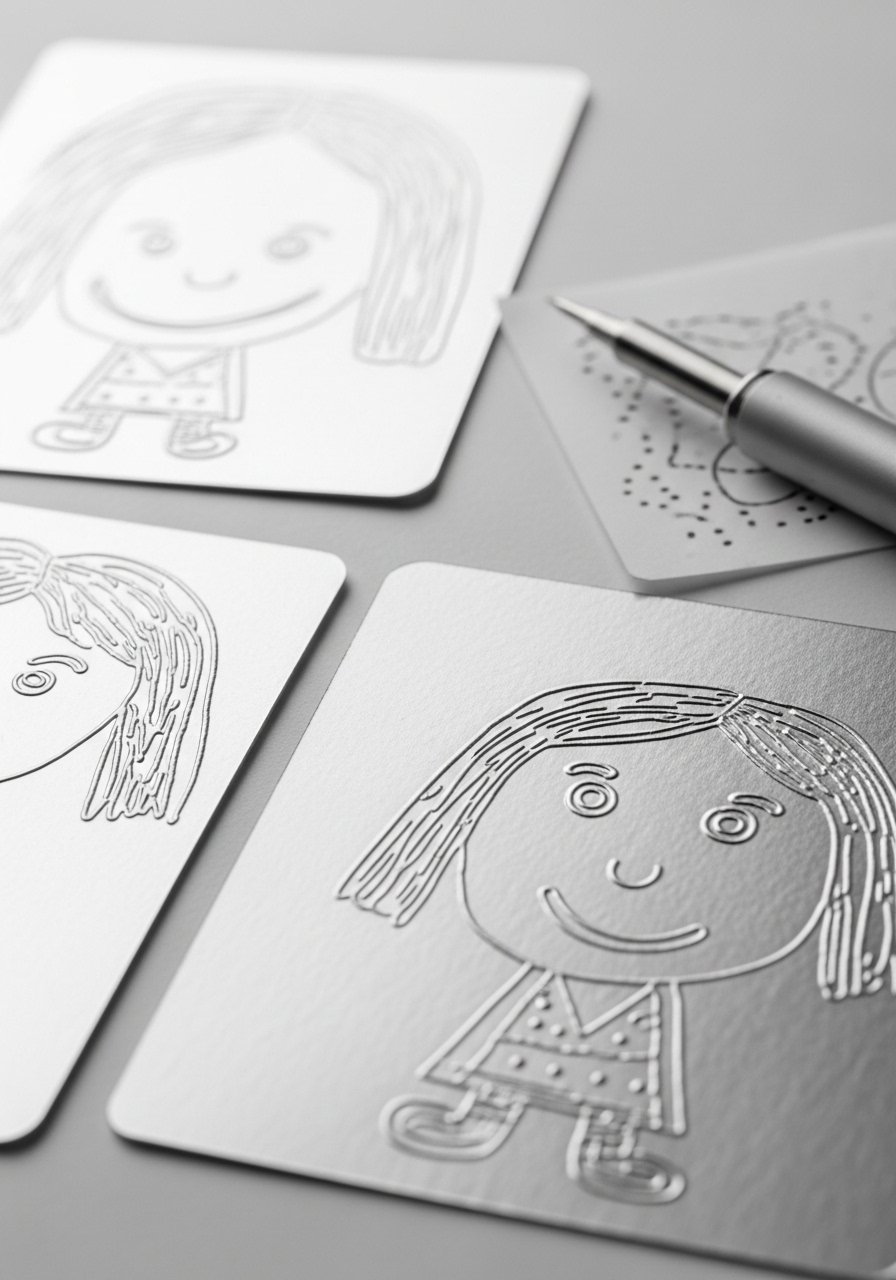
Foil relief cards let kids create raised, shiny designs with simple tools. The technique is satisfying: draw, transfer, then rub foil over the raised lines for a metallic finish.
Materials
- Heavyweight cardstock, 8.5" x 11"
- Tracing paper, 1 sheet
- Ballpoint stylus or blunt pencil
- Aluminum foil, craft sheets
- Glue stick
- Fine-tip marker for accents
Instructions
- Draw simple line art on tracing paper and lay it over cardstock.
- Trace firmly with stylus to press lines into the card.
- Apply a thin coat of glue over the lines and lay foil sheet shiny-side up.
- Rub gently with a cotton ball or finger to transfer foil to raised lines.
- Peel foil to reveal metallic relief.
- Allow glue to dry 15–20 minutes before stacking.
How to Display or Gift It
Pair with a coordinating envelope and wax seal for a special touch. Keep flat in a card storage box to avoid crushing the relief. A set of styluses makes tracing easier: ballpoint stylus set.
20. Gingerbread Playdough and Cookie Cutter Play Set — seasonal holiday craft ideas for kids
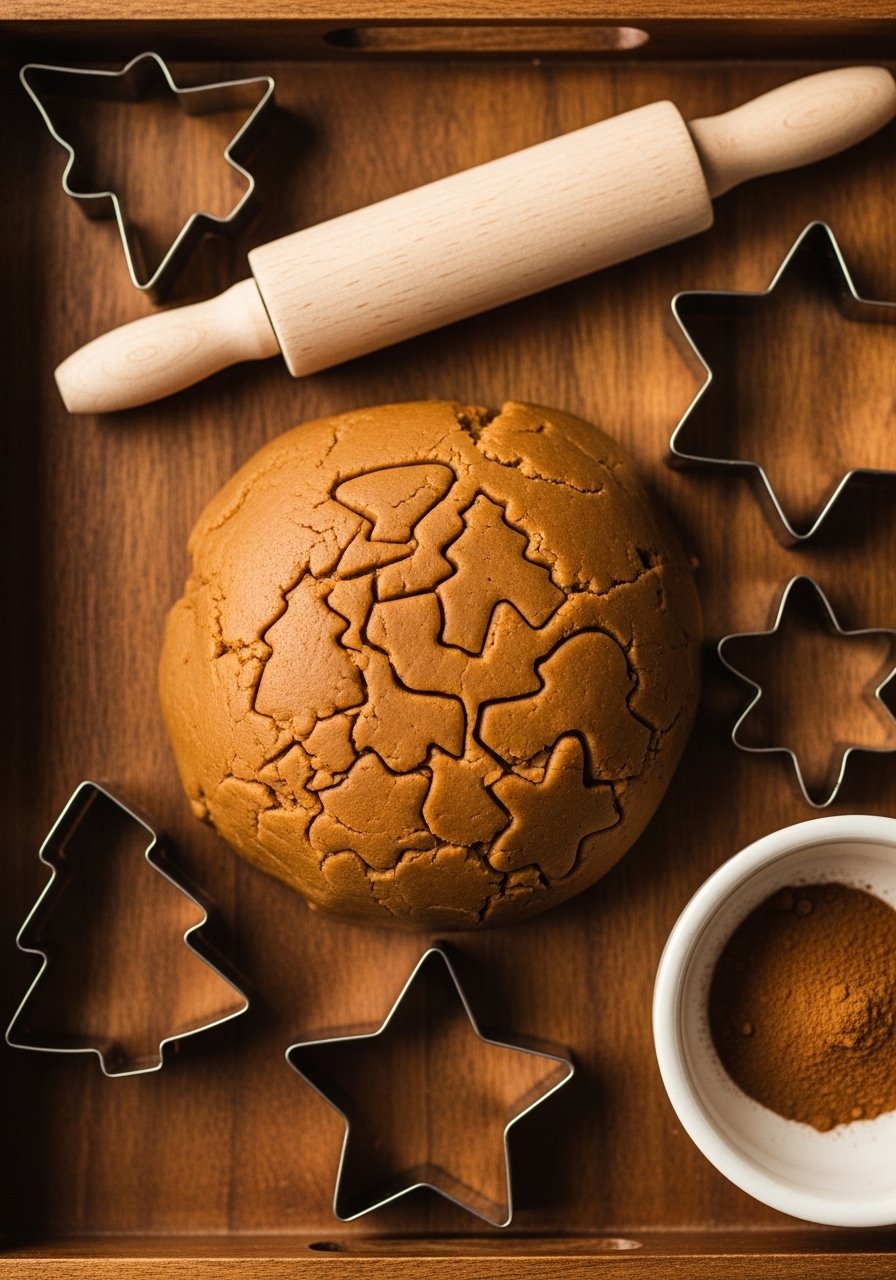
Scented playdough is safe, sensory, and endlessly reusable. Make a gingerbread-scented batch for holiday-themed play. Include cookie cutters and small wooden rolling pins for a bakery role-play session.
Materials
- Salt-free playdough recipe or store-bought (approx. 1 cup per child)
- Ground cinnamon and ginger for scent, 1 tsp total per batch
- Cookie cutters, small holiday shapes
- Mini rolling pins, 1 per child
- Airtight containers for storage
- Optional: child-safe glitter for sparkle
Instructions
- Make or soften playdough. Knead in cinnamon and ginger (start with ½ tsp and add more if desired).
- Divide into portions and give each child a rolling pin and cutters.
- Encourage making cookies and stamping textures.
- Store unused dough in airtight containers; it lasts 2–4 weeks refrigerated.
- If dough dries, soften with a few drops of water and knead.
- Supervise for accidental ingestion and keep small decorative beads away.
How to Display or Gift It
Pack small containers of themed playdough with a mini cutter set for gifting. Label with scent and date. A set of mini rolling pins and cutters helps organize: mini rolling pin set.
21. Rustic Chalkboard Gift Tags

Chalkboard tags add a handmade touch to presents and let kids write names and messages. The matte texture contrasts nicely with shiny wrapping. Kids enjoy erasing and rewriting.
Materials
- Mini chalkboard tags, 12 pack
- Chalk markers, white and metallic
- Twine, natural, 12' total
- Small sprigs of evergreen for decoration
- Scissors
- Optional: small hole reinforcements
Instructions
- Write names or messages with chalk marker; allow ink to dry 5 minutes.
- Thread twine and tie to a package.
- Tuck an evergreen sprig under the twine for decoration.
- If children want to redo names, wipe gently with a damp cloth and re-write after 30 seconds.
- Store unused tags in a small box to avoid scratches.
How to Display or Gift It
Attach to presents for an instant rustic look. Keep extra tags in a craft organizer drawer. Chalk markers make writing bold on dark surfaces: chalk markers.
22. Beaded Pipe Cleaner Candy Canes
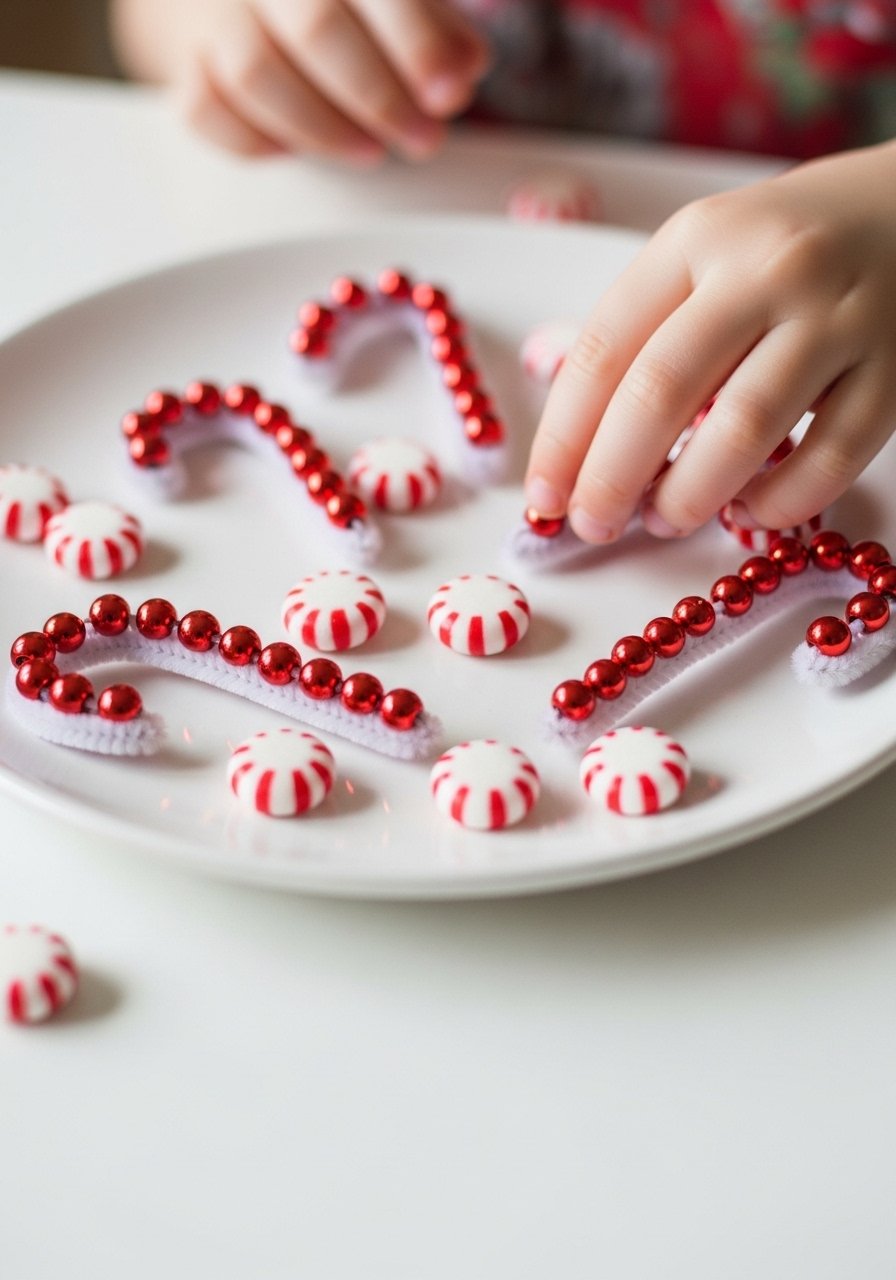
Beading pipe cleaners is a classic fine-motor activity. These candy canes are bright, bendable, and forgiving. They can be hung on a tree or used in place settings.
Materials
- White pipe cleaners, 1 per candy cane
- Red pony beads, 30–40 per candy cane (6mm)
- Needle-nose pliers (adult use optional)
- Scissors
- Ribbon for hanger, 6" each
Instructions
- Thread red beads onto white pipe cleaner until it’s mostly filled.
- Bend the top into a candy cane curve and twist the end to secure beads.
- Add a ribbon loop and tie.
- Trim any rough ends with scissors.
- Make a set in varied bead patterns (stripes, polka dots).
- Store in a small craft tray to keep beads together.
How to Display or Gift It
Use as tree ornaments or napkin ring decorations. Pack in a small clear box for teachers or friends. Pony beads are inexpensive and come in large packs: pony beads pack.
23. Hand-Painted Rock Snowmen

Painting rocks is a grounding, calming craft. Snowmen made from smooth stones are durable and have a sweet shelf presence. The smooth texture takes paint well and kids will enjoy layering dots and details.
Materials
- Smooth river rocks, 2–3" diameter each
- Acrylic paint set
- Fine detail paintbrush, size 0–1
- Sealer spray, matte
- Tiny fabric scraps for scarves
- Glue for attaching fabric
Instructions
- Wash rocks and let dry completely 30 minutes.
- Paint a base white coat; dry 20–30 minutes.
- Add faces, buttons, and scarf details with fine brushes.
- Glue fabric scarf and let set 15 minutes.
- Seal with matte spray; cure 1 hour before handling.
- Use as paperweights or decorations.
How to Display or Gift It
Arrange on a wooden tray for a seasonal centerpiece. Gift in a small box lined with tissue. A set of fine brushes speeds detailed work: fine detail paintbrush set.
24. Simple Papier-Mâché Tree Cones
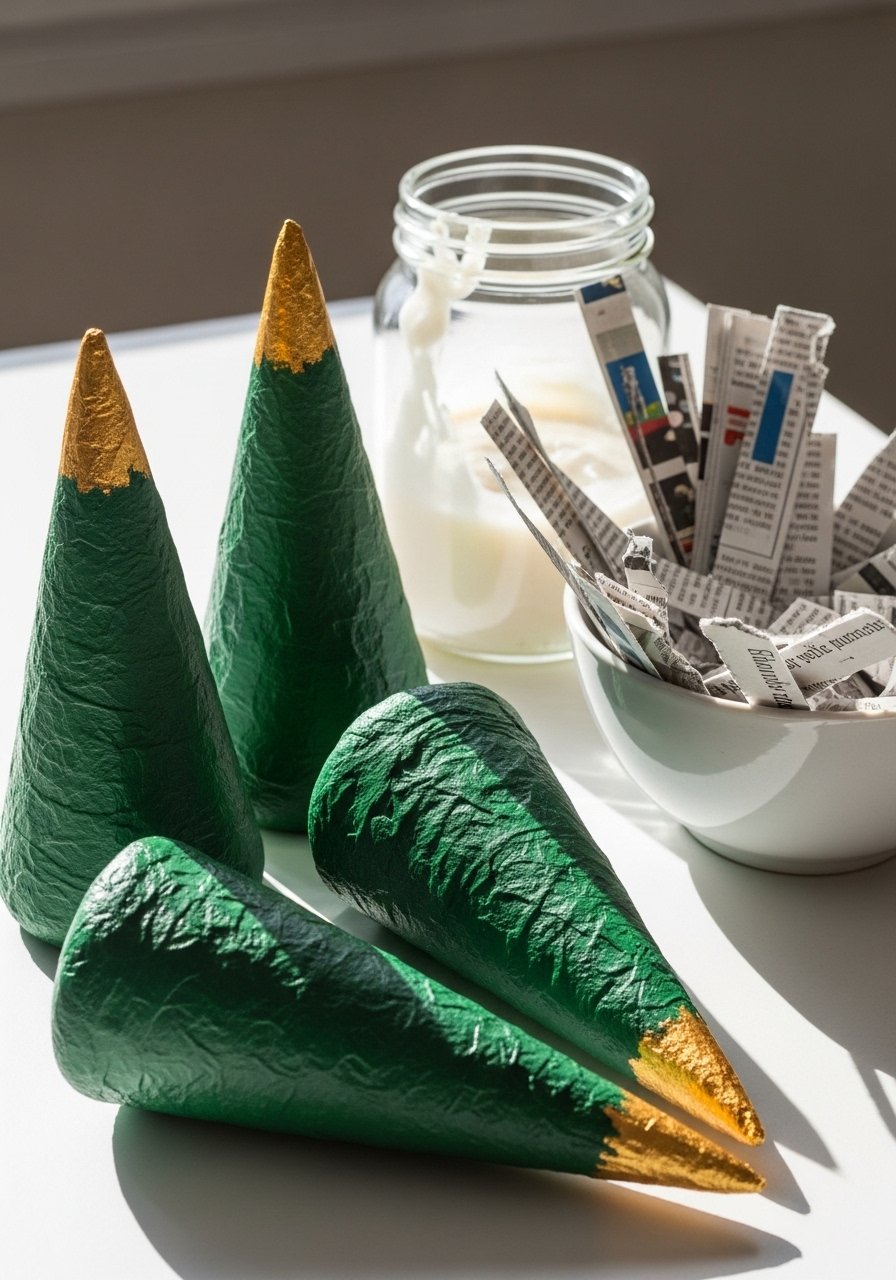
Papier-mâché cones are lightweight and a great way to teach layering. Kids can paint and embellish them with sequins or glitter. The tactile paste and strips are satisfying to shape.
Materials
- Heavy cardstock cones or cone cardboard forms (6")
- Newspaper strips, 2–3 sheets
- Flour and water paste or craft adhesive (1 cup paste)
- Acrylic paint, green shades
- Sequin accents and glue
- Paintbrush and bowl for paste
Instructions
- Make paste by mixing 1 cup flour and 1 cup water, whisk to smooth.
- Dip newspaper strips, remove excess paste, and smooth over cone form in overlapping layers.
- Allow to dry 12–24 hours fully.
- Paint base colors and add gold tips or glitter once dry.
- Glue sequins for snowy sparkle; let glue cure 30 minutes.
- Store upright to avoid flattening.
How to Display or Gift It
Cluster cones of varying heights on a mantel. Package in a tall kraft box to protect shape. A pack of cardboard cones saves time: cardboard cone forms.
25. Sock Snowmen with Rice Weighted Base
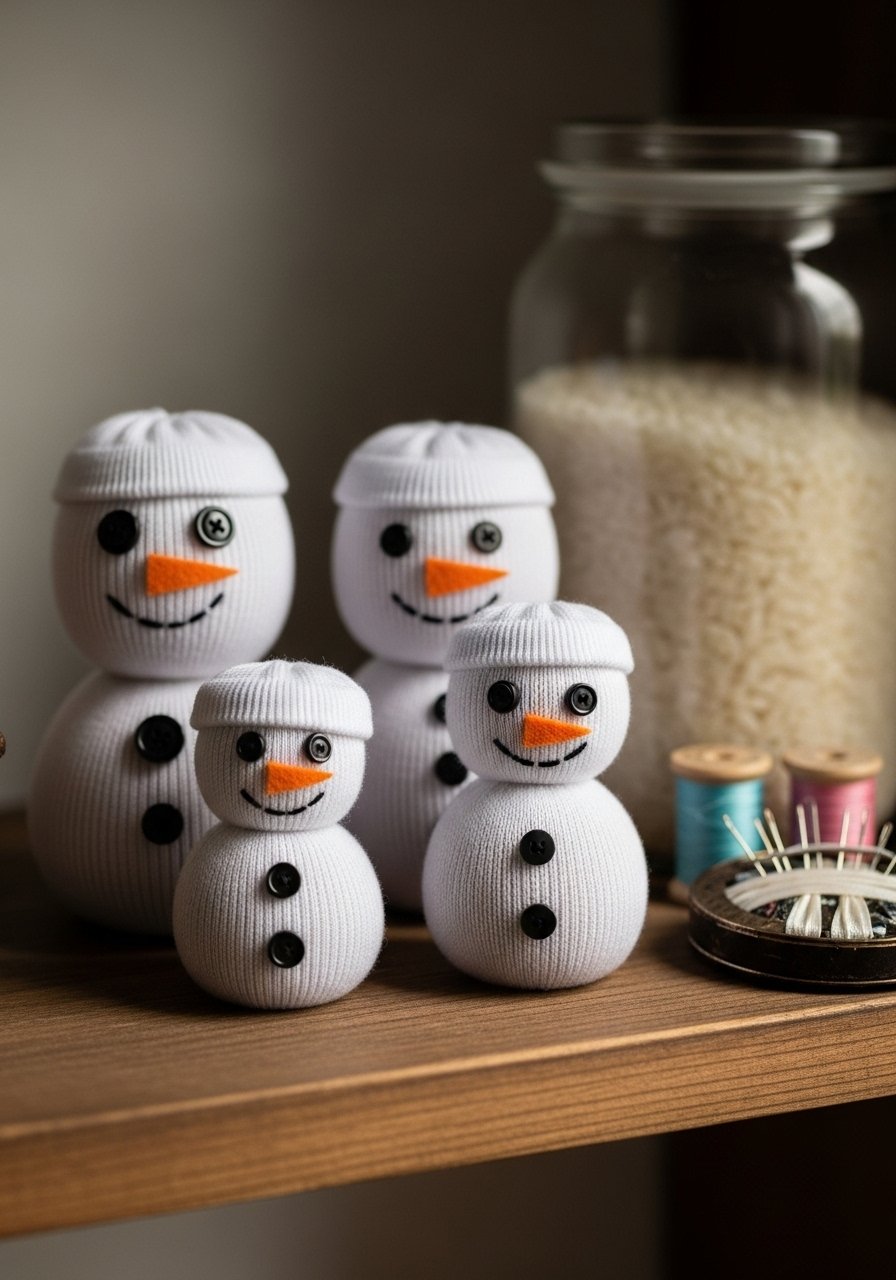
Sock snowmen are cozy and sew-light. Filling the base with rice gives weight so they stand. They’re a great project for kids practicing threading and tying.
Materials
- White socks, adult size, 1 per snowman
- Rice, 1 cup per base
- Fiberfill stuffing, 1/2 cup
- Buttons, small for eyes and body
- Felt scraps for nose and scarf
- Needle and thread or hot glue
- Rubber bands to section body
Instructions
- Fill foot of sock with 1 cup rice, tie off with a knot or rubber band for base.
- Add fiberfill for head and tie off to create a two-section snowman.
- Glue or sew buttons and felt nose and scarf.
- Add ribbon or hat from felt; secure with glue.
- Trim excess sock fabric and tuck neatly.
- Allow any glue to set 30 minutes before play.
How to Display or Gift It
Line a shelf with varying sizes for a cheerful vignette. These make sweet hand-made gifts when boxed in kraft tuck boxes. A small sewing kit is handy for repairs: beginner sewing kit.
26. Simple Embroidery Hoop Snowflakes

Embroidery hoop snowflakes teach basic stitches and create elegant wall art. Use white or metallic thread on cool blues for a hygge winter look. This is a great quiet craft for older kids.
Materials
- Mini embroidery hoops, 3–4" diameter
- Cotton fabric squares, 6" x 6"
- Embroidery floss, white or metallic
- Embroidery needle
- Printed simple snowflake template
- Scissors
Instructions
- Stretch fabric in hoop and tighten screw.
- Trace snowflake template lightly with a pencil on fabric.
- Use backstitch and French knots to stitch the snowflake; keep tension even.
- Knot floss on the back and trim excess.
- Optionally, paint a subtle wash behind the snowflake before stitching; dry 30 minutes.
- Hang or group multiple hoops for a gallery wall.
How to Display or Gift It
Display as a cluster above a mantle. For gifting, wrap hoop in tissue and tuck a small skein of floss inside. An embroidery starter kit helps beginners: embroidery starter kit.
27. Tiny Jar Luminaries with Battery Tealights
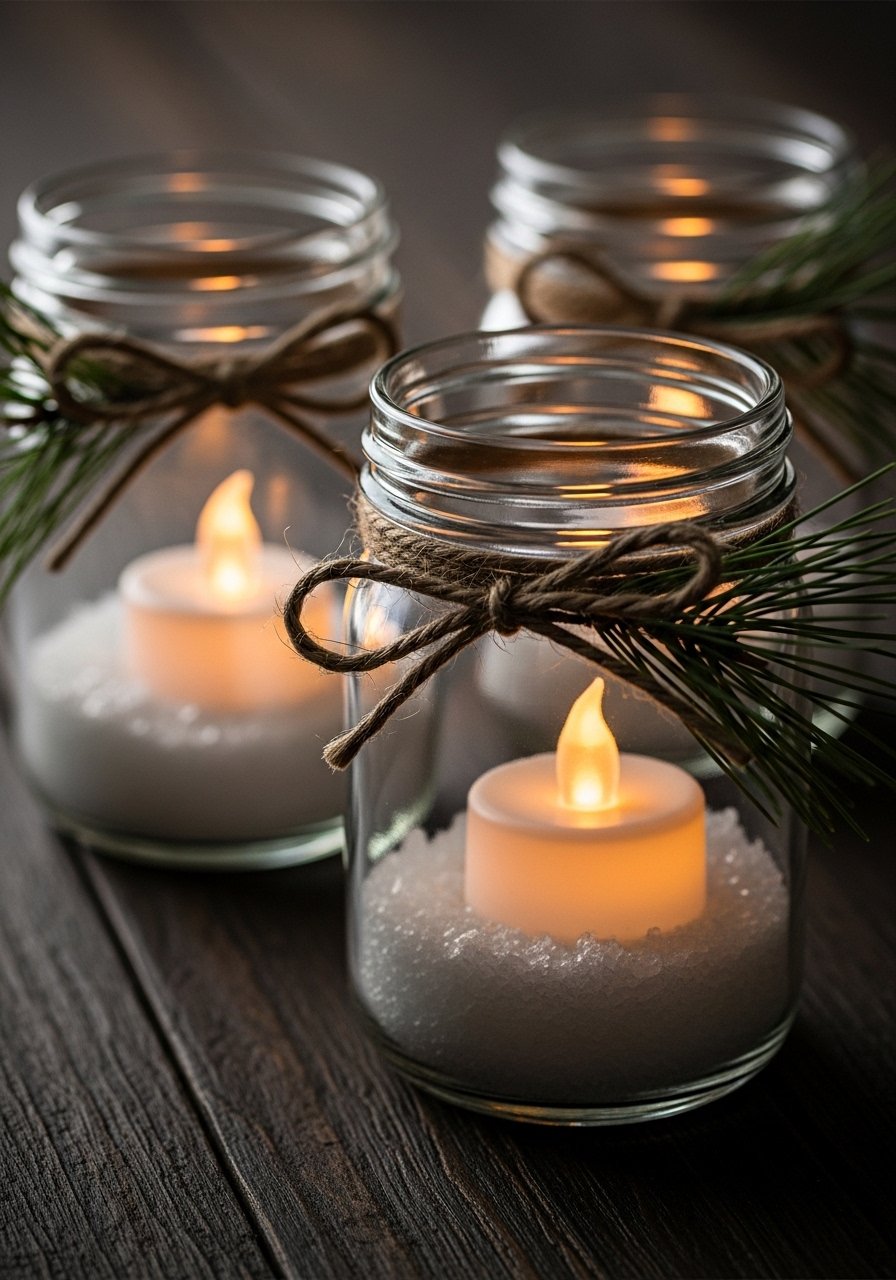
Luminaries give cozy light without open flame. Kids can decorate jars with faux snow, stickers, or paint, then add battery tealights for safe glow. The texture of layered faux snow is tactile and festive.
Materials
- Small mason jars, 4 oz, 4–6 jars
- Battery tealights, 4–6
- Epsom salt or faux snow, 1 cup total
- Miniature pine sprigs or glitter
- Twine for tying
- Glue (hot glue for sprigs)
Instructions
- Fill jars with a thin layer of faux snow or Epsom salt.
- Place battery tealight on top (do not bury).
- Decorate jar rim with twine and glue a pine sprig.
- Close lid loosely and test light.
- Use as table accents; battery life varies—replace batteries as needed.
- Store jars without batteries to prevent leakage.
How to Display or Gift It
Cluster on a tray for a warm centerpiece. Pack a set in a small box with tissue. Battery tealights are safer for kids: battery tealights.
28. Handprint Reindeer Cards
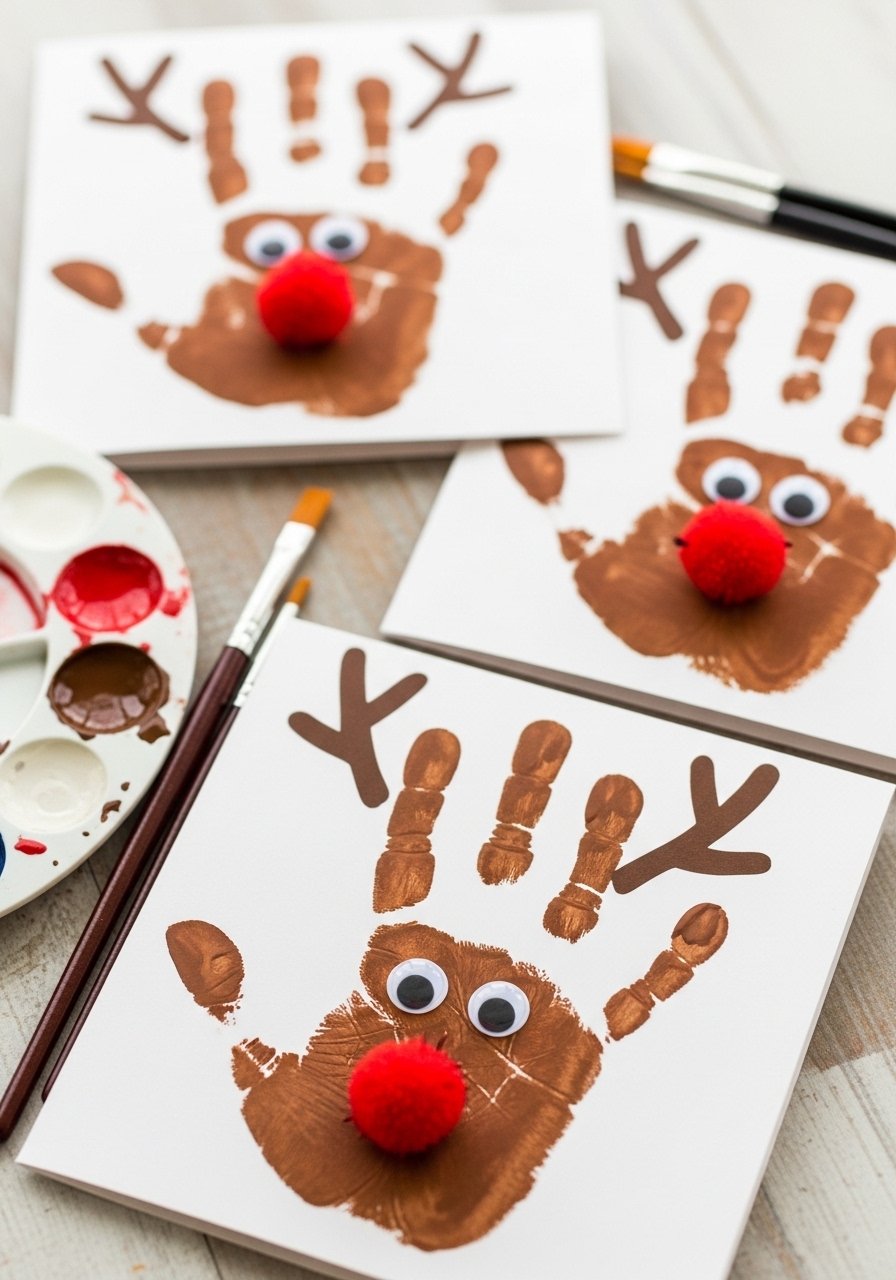
Handprint reindeer cards mix keepsake and card-making. Kids press a painted hand onto paper, then you add a nose and eyes. The result is personal and charming.
Materials
- Cardstock, folded cards, 6
- Brown washable paint, 2 oz
- Googly eyes, 12
- Red pom-poms, 6
- Glue (white glue)
- Fine-tip marker for message
Instructions
- Paint child’s palm with a thin coat of brown paint.
- Press hand firmly onto folded card and lift straight up; let dry 15–20 minutes.
- Glue on googly eyes and a red pom-pom nose.
- Write a message inside with a marker.
- Allow glue to set 15 minutes before stacking.
- Store flat in a card box.
How to Display or Gift It
Mail to family members or use as place cards at a holiday table. Keep extra paint in a sealed container for touch-ups.
29. DIY Kinara Craft for Kwanzaa
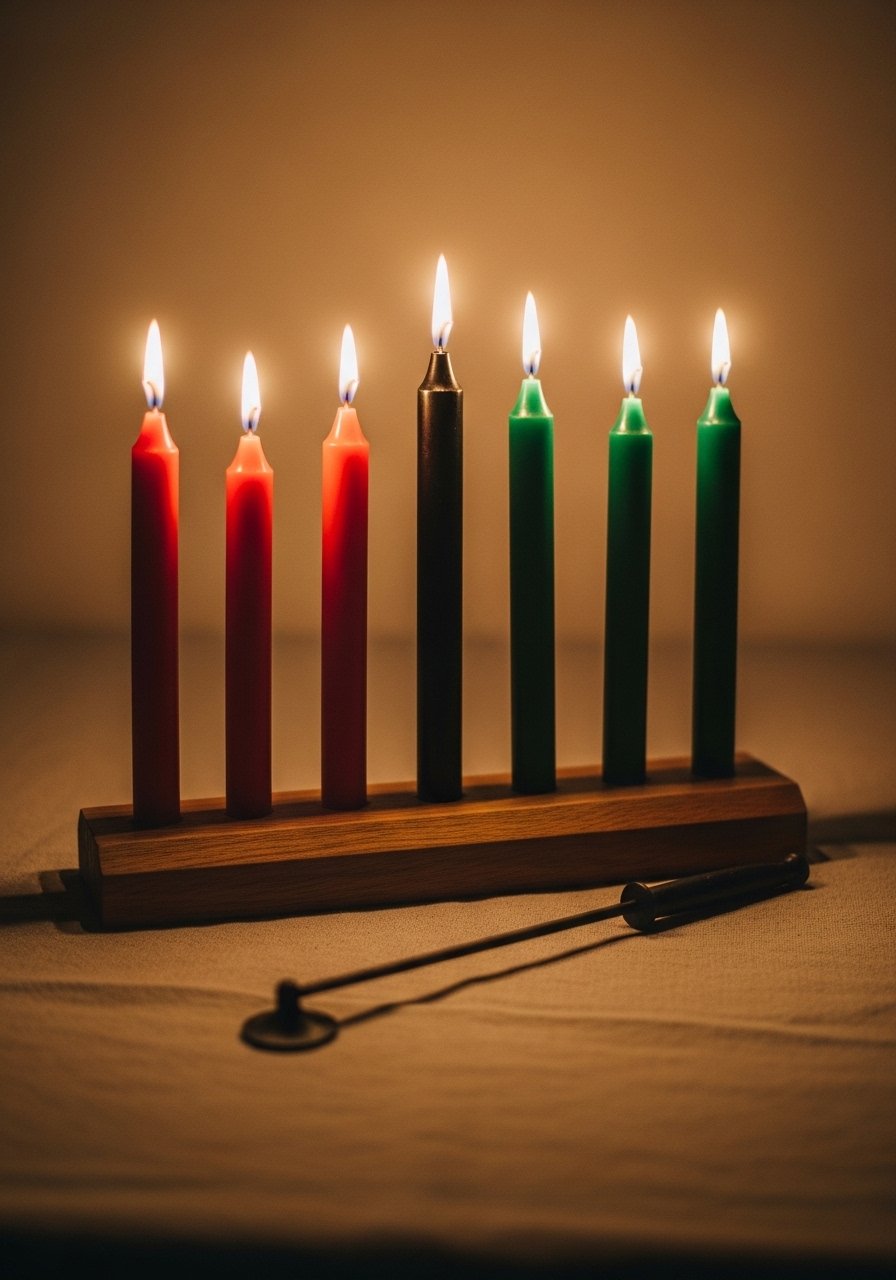
This simplified kinara is child-friendly and respectful. Use wooden dowels and a sturdy base so kids can paint and arrange candles safely. It’s a thoughtful way to include Kwanzaa crafts in holiday celebrations.
Materials
- Wooden dowels, five, 6" long each
- Small wooden block base, 1
- Acrylic paints (red, black, green, brown)
- Drill with small bit (adult use) or pre-drilled base
- Paintbrush and sandpaper
- Small candle holders or beeswax votives, 5
Instructions
- Sand dowels and paint them to match or leave natural; let dry 30 minutes.
- Drill evenly spaced holes into the wooden base (adult step).
- Insert dowels into base; secure with a dab of wood glue and let set 1 hour.
- Place candle holders on each dowel or set small votives between dowels.
- Discuss the meaning of the symbols while crafting.
- Store in a padded box between uses.
How to Display or Gift It
Center on a table for Kwanzaa celebrations. For gifting, present with a small booklet about Kwanzaa traditions. A set of small beeswax votives pairs well: beeswax votives.
30. Polymer Clay Holiday Charms
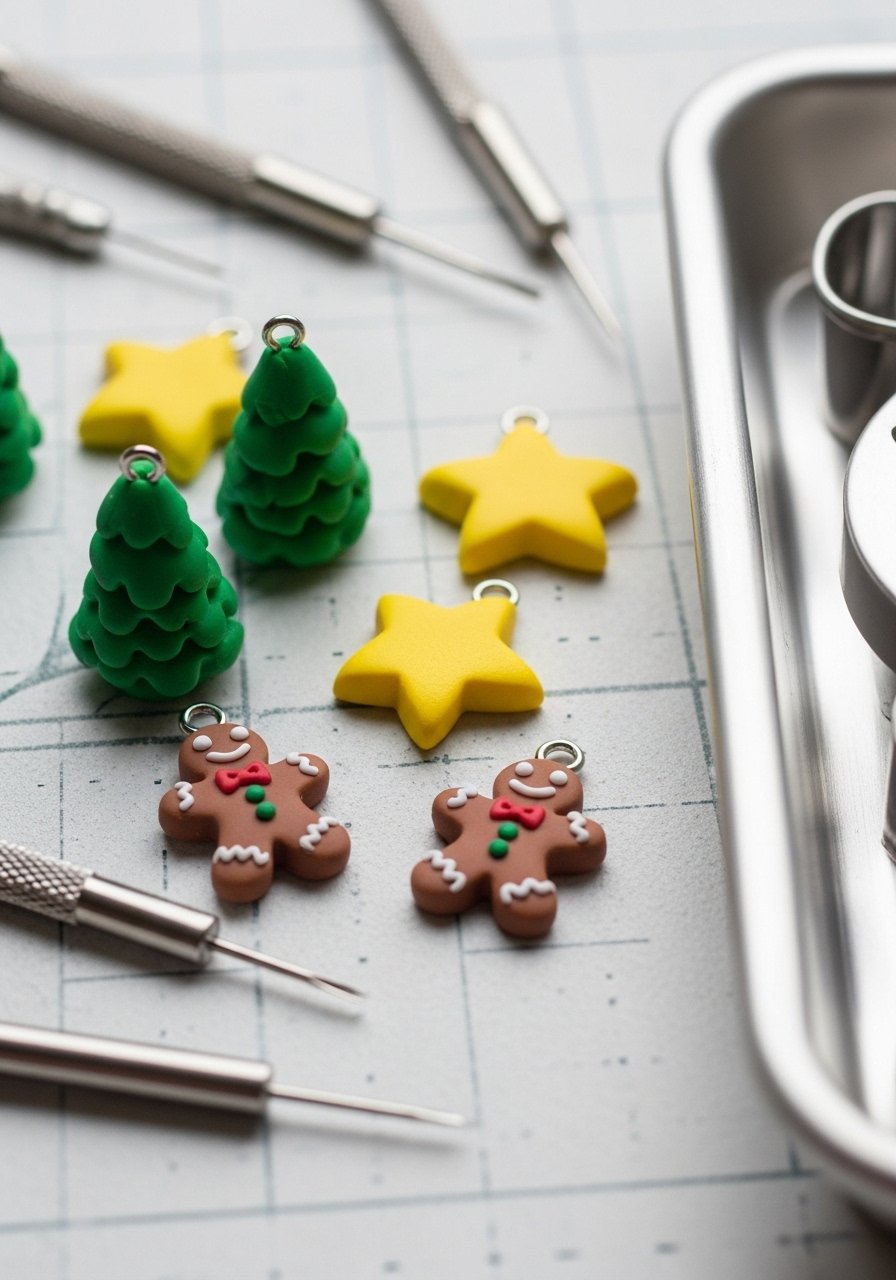
Polymer clay charms are tiny, detailed, and make excellent gift toppers or jewelry. Kids can press patterns and bake charms in a home oven (with adult supervision). The finish is smooth and slightly satiny.
Materials
- Polymer clay, assorted colors (24 blocks, 2 oz each)
- Small clay tools or toothpicks for detail
- Silicone baking mat and tray
- Jump rings and small pliers
- Gloss varnish, small bottle (optional)
- Oven thermometer (to verify temperature)
Instructions
- Condition clay by kneading until soft.
- Shape into small charms (about 1" each), use tools to add texture.
- Place on silicone mat and bake at 275°F (135°C) per brand instructions, typically 15–30 minutes depending on thickness.
- Cool completely before adding jump rings with pliers.
- Optionally, brush with a gloss varnish and let dry 1 hour.
- Store in a small divided craft box to keep charms organized.
How to Display or Gift It
Attach to gift ribbons, use as zipper pulls, or string into a charm bracelet. Keep charms in a divided organizer for small parts: small parts organizer.
You made it—30 family-friendly projects that cover every cozy corner of the season. From sensory play to keepsake ornaments, these seasonal holiday craft ideas for kids offer a mix of quick activities and weekend workshops, so you can pick what fits your time and energy. Pin the post to save your favorites, try a few with your kids this weekend, and share which project became the family classic.
If you're stocking a craft closet, a good-quality hot glue gun with temperature control changed how smoothly these projects came together for me—less stringing, cleaner joins, and fewer reheats. Which project do you want to try first? Share a photo or tag a friend who crafts with kids.


