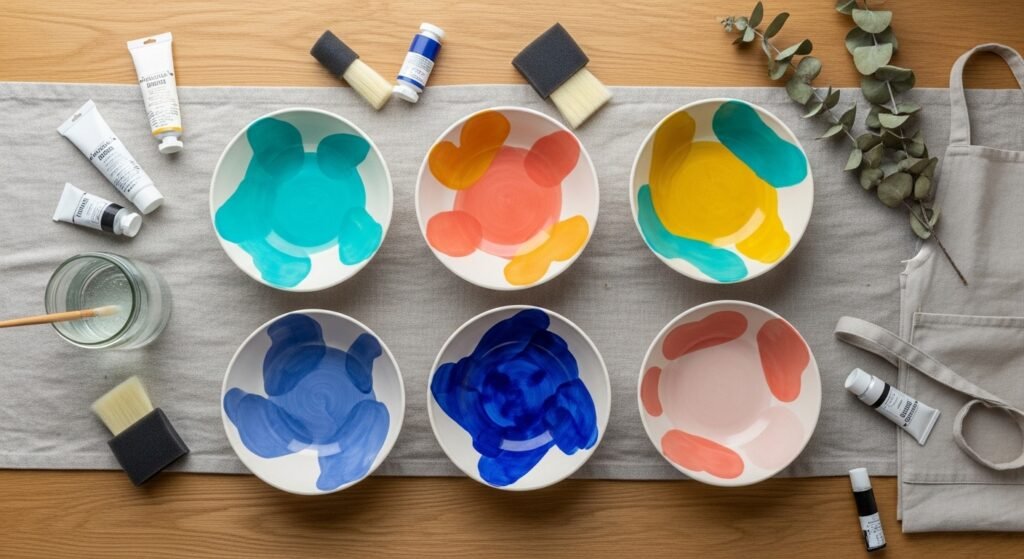
Bright, bold, and totally one of a kind—these abstract ceramic bowl painting ideas are for when you want color that feels personal and a little wild. Whether you’re updating thrifted ceramic, decorating unfinished bisque bowls, or making keepsake gifts, this list has techniques that span playful splatters to refined brushstroke geometry.
You’ll find 20 distinct projects with exact materials, measured quantities, step-by-step instructions, and real drying/curing times. I mention the right tools when they actually help—like using painter’s tape for razor-sharp edges or a heat gun to pop bubbles in epoxy—and I link to helpful products so you can shop fast. I usually prep my pieces with isopropyl alcohol and use a fine round brush for details. Grab a roll of painter's tape and a reliable cutting tool like the Cricut Joy cutting machine if you plan to mask shapes quickly—both save time and headaches.
Ready to paint bowls that read like mini abstract artworks? Let’s get into 20 abstract ceramic bowl painting ideas that will brighten your shelves and make perfect handmade gifts.
- Color-Blocked Crescent Bowls
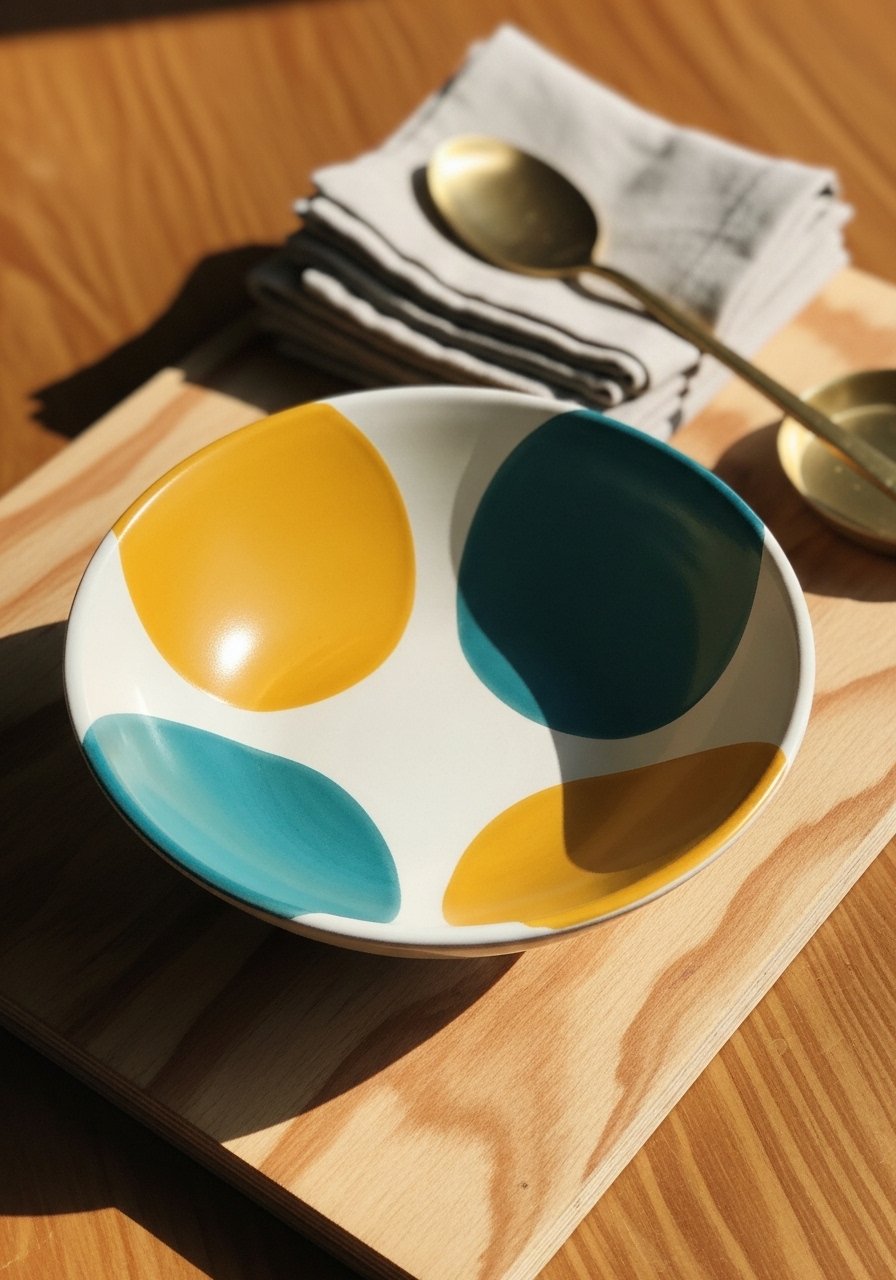
Why this works: Clean shapes feel modern and bold. The crescent motif plays with the bowl’s curve for movement. Great for beginners who want crisp edges using tape.
Materials
- 1 ceramic or bisque bowl (6–8" diameter)
- Isopropyl alcohol, 70%, 2–3 cotton pads
- Painter’s tape, 1/2 inch roll
- Acrylic enamel paint, FolkArt or Liquitex—2 colors, 30 ml each
- Flat foam brush, 1/2 inch
- Fine round detail brush, size 0
- Clear water-based sealer spray, 1 can
- Sanding block, 220 grit
- Paper towels, disposable gloves
Instructions
- Wash the bowl with dish soap, rinse, dry. Wipe surface with isopropyl alcohol and let air dry 10 minutes.
- Lightly sand the paint area with the 220-grit block and wipe clean.
- Mark crescent placement with a pencil. Apply painter’s tape in curved strips, pressing edges down firmly.
- Paint the exposed area with a thin coat of enamel acrylic using the foam brush. Let touch-dry 20–30 minutes.
- Apply a second thin coat for full opacity. Let dry 1 hour between coats.
- Remove tape slowly while paint is still slightly tacky to avoid peeling.
- Touch up edges with the fine round brush if needed. Let dry 24 hours.
- Spray 2 light coats of sealer, 10 minutes between coats. Let cure 24 hours before use.
How to display or gift it
- Pair with a matching linen napkin and tuck into a kraft gift box.
- Display on a small wooden easel for a shelf vignette. I store extras in stackable craft boxes to prevent chips; a set of craft organizer trays works well.
- Painterly Brushstroke Bowl

Why this works: Expressive strokes feel like miniature abstract paintings. Texture shows brush movement—perfect for makers who love visible handwork.
Materials
- 1 ceramic bowl, 7" diameter
- Acrylic paint set, 12-color (includes coral, navy)
- Flat brush, 1/2 inch
- Filbert brush, size 6
- Gold acrylic paint or leaf pen, 10 ml
- Palette or disposable plate
- Water jar and paper towels
- Clear matte Mod Podge, 4 oz
Instructions
- Clean bowl with isopropyl alcohol and dry 10 minutes.
- Load the flat brush with a thin wash of color and apply confident strokes across the bowl interior.
- Alternate colors, rinsing the brush slightly to blend where desired. Keep strokes loose—overworking will muddy colors.
- Let paint dry 30–45 minutes between overlapping strokes.
- Add gold accents with a fine brush or leaf pen. Let dry 1 hour.
- Apply one thin coat of matte Mod Podge with a foam brush. Let dry 30 minutes; apply a second coat. Allow 24 hours cure.
How to display or gift it
- Layer on an open shelf with a small succulent tucked inside (plastic pot). For gifting, wrap in tissue and include care instructions: not food-safe unless sealed with food-safe product. Store in a shallow craft storage bin.
- Tape-Resist Geometric Trio

Why this works: Geometric tape resist gives a modern, graphic look. The technique yields repeatable patterns, perfect for sets and gift sets.
Materials
- 3 small ceramic bowls, 5–6"
- Painter’s tape, 1/4 inch & 1/2 inch
- Acrylic craft paint (matte black, blush), 20 ml each
- Self-healing cutting mat, 12×12"
- Precision craft knife (e.g., precision craft knife)
- Flat foam brush, 3/4 inch
- Clear gloss sealer spray, 1 can
Instructions
- Clean bowls with isopropyl alcohol. Dry 10 minutes.
- Use painter’s tape to map triangles and shapes. Trim tape edges with the craft knife on the mat for sharp points.
- Paint exposed areas using thin coats. Let touch-dry 20 minutes between coats. Two coats usually cover.
- Peel tape slowly before final coat fully dries to avoid pulling edges.
- Repair tiny flaws with a fine brush. Let dry 24 hours.
- Spray one even coat of clear gloss sealer outdoors or in a ventilated area. Let cure 24 hours.
How to display or gift it
- Stack nested bowls and tie with twine. Display as a trio on a breakfast bar or bedside table. Store in stackable foam-lined trays to protect the paint.
- Bold Splatter Statement Bowl

Why this works: Splatter adds joyful chaos and instant personality. Great weekend project for a group or for gifting to someone who loves drama.
Materials
- 1 white ceramic bowl, 8"
- Acrylic fluid paints, 3 colors, 30 ml each
- Old toothbrush and stiff-bristle paint brush
- Disposable gloves, latex-free
- Drop cloth or newspaper
- Small cup of water and stirring stick
- Clear acrylic sealer, 1 can
Instructions
- Protect your workspace with a drop cloth. Clean bowl; dry 10 minutes.
- Thin paint with 10–20% water so it flicks easily. Test splatter on scrap paper.
- Hold the toothbrush against your thumb and flick paint toward the bowl from 6–12" away.
- Layer colors, starting light to dark. Allow 15–20 minutes dry between layers.
- If large drips form, tilt bowl to encourage even spread.
- Let bowl dry 24 hours, then spray two light coats of sealer with 10 minutes between sprays.
How to display or gift it
- Pair with a rustic wooden spoon and wrap in tissue inside a kraft box. To store multiples, separate with craft tissue paper in organizer bins.
- Metallic Leaf Accent Bowl

Why this works: Metallic leaf lifts simple painted surfaces into luxe territory. It’s dramatic but surprisingly easy when you use adhesive sizing.
Materials
- 1 bisque or painted bowl, 7"
- Acrylic paint for base color, 30 ml
- Gold leaf sheets or flakes, 1 pack
- Adhesive sizing (for leaf), 15 ml
- Soft brush for burnishing
- Clear non-yellowing varnish, 4 oz
- Cotton gloves
Instructions
- Paint the bowl base color and allow 24 hours to fully cure.
- Apply adhesive sizing where you want leaf accents. Let sit until tacky (per product—usually 10–15 minutes).
- Press gold leaf onto tacky areas with cotton gloves. Gently brush away excess with a soft brush.
- Seal with one thin coat of non-yellowing varnish. Let dry 2 hours; apply second coat. Cure 24 hours.
How to display or gift it
- Place on a mirrored tray to reflect the metallic. For gifting, wrap in black tissue with a tiny care card explaining leaf is delicate—store away from moisture.
- Soft Ombre Interior Bowl

Why this works: A subtle ombre uses gradient color to accent the bowl’s depth. It reads refined and calm—ideal for bedroom or bathroom trinket bowls.
Materials
- 1 ceramic bowl, 6"
- Two coordinating acrylic paints, 30 ml each
- Cosmetic sponge or makeup wedge
- Palette knife for mixing
- Water spray bottle (fine mist)
- Clear matte sealer, 1 can
Instructions
- Clean bowl and dry 10 minutes.
- Mix intermediate gradient colors on palette with palette knife.
- Dab sponge into paint and apply starting at the rim, working inward, blending as you go with light overlapping dabs.
- Mist lightly with water between blends if drying too fast.
- Let dry 30–45 minutes and repeat a second pass for smoothness.
- Seal with one light coat of matte sealer; let cure 24 hours.
How to display or gift it
- Nest within a shallow bowl of dried lavender for gifting. Store stacked with soft cloth between bowls.
- Terrazzo Speckle Bowl

Why this works: Terrazzo is trendy across home decor right now. Tiny speckles create texture without busy patterns.
Materials
- 1 white bowl, 6–8"
- Acrylic paints in 4 colors, 10–15 ml each
- Small round brush, size 2
- Toothpick or dotting tool
- Matte varnish, 4 oz
Instructions
- Prep bowl. Thin paints slightly with water for dotting.
- Dip toothpick in paint and dot small, irregular shapes across outer surface.
- Space colors so composition reads balanced. Let dry 30 minutes between colors to avoid bleeding.
- After completing, apply two thin coats of matte varnish with 15 minutes between coats. Cure 24 hours.
How to display or gift it
- Pair with terrazzo coasters or a small ceramic tray. Wrap in tissue and tuck in a kraft box.
- Ink-Wash Bleed Bowl (Alcohol Ink Look)

Why this works: Alcohol-ink style washes create delicate, fluid abstracts on glazed ceramics. Best for decorative bowls, not for food use.
Materials
- 1 glazed ceramic bowl, 7"
- Alcohol inks, 3 colors
- Isopropyl alcohol (91%), small bottle
- Fine mist spray bottle
- Small pipette or dropper
- Gloves and ventilated area
Instructions
- Work in a ventilated space. Clean bowl with alcohol and let 10 minutes.
- Drop a few drops of alcohol ink and spritz with isopropyl alcohol to encourage spread.
- Tilt the bowl gently to move color and create soft creeps.
- Layer additional drops for depth, letting each layer dry 10–15 minutes.
- Seal with a glossy spray sealer rated for inks; cure 24 hours.
How to display or gift it
- Use as a decorative catch-all. For gifting, include care notes about alcohol inks not being food-safe unless a food-safe glaze and firing are used.
- Sgraffito Scratch-Back Bowl

Why this works: Sgraffito (scratching back layers) gives graphic etched lines and tactile texture. Results feel artisan and boho.
Materials
- 1 bisque bowl, 7"
- Undercoat acrylic paint, white, 30 ml
- Topcoat acrylic paint, matte black, 30 ml
- Scratch tools: wooden stylus, needle tool
- Fine sandpaper, 320 grit
- Clear matte sealer, 4 oz
Instructions
- Apply two coats of white undercoat; let dry 1 hour.
- Paint two thin coats of matte black; let dry 1 hour.
- Using the stylus, scratch lines to reveal the undercoat. Work steadily so lines are clean.
- Wipe away dust with a soft cloth.
- Seal with matte varnish; let cure 24 hours.
How to display or gift it
- Pair with rustic textiles like linen. It makes a handmade jewelry catch-all—wrap with kraft paper and twine.
- Drip-Glaze Resin Bowl (Glossy Finish)

Why this works: Epoxy resin gives a glassy, dimensional drip that reads like professional glazing. Great for statement pieces.
Materials
- 1 ceramic bowl, 6–8"
- Two-part epoxy resin kit, 8 oz (e.g., epoxy resin kit)
- Resin tint pigments or mica powders, 3 small jars
- Silicone mixing cups and stir sticks, 10 each
- Disposable nitrile gloves, box of 50
- Small butane torch or heat gun (for bubbles)
- Respirator rated for organic vapors
Instructions
- Clean bowl and tape interior if you want resin only on rim.
- Mix epoxy per manufacturer ratios—usually 1:1—stir for 3–5 minutes.
- Divide resin into cups and add pigments. Pour carefully to create drips down the rim.
- Use torch or heat gun briefly to remove bubbles. Let cure 24–48 hours fully.
- Sand any sharp drips lightly and apply a thin clear resin topcoat if needed. Full cure can be 72 hours depending on kit.
How to display or gift it
- Keep resin pieces away from direct sunlight to avoid yellowing. For gifting, include care info: hand-clean only, not microwave-safe.
- Minimal Negative Space Rings

Why this works: Negative space lets the bowl breathe while color accents the shape. It feels modern and calm.
Materials
- 1 bowl, 6"
- Paint pens (acrylic), fine tip, 2 colors
- Pencil for light guidelines
- Ruler or circular guide
- Clear matte sealer, 1 can
Instructions
- Lightly pencil concentric rings using a circular guide.
- Fill rings with paint pen in thin, even strokes. Allow 15 minutes between colors.
- Correct mistakes quickly with a damp cotton swab.
- Let dry 2 hours, then seal with matte spray. Cure 24 hours.
How to display or gift it
- Display on floating shelf with a neutral vase. For storage, flat stack in drawer organizers.
- Stippled Color-Field Bowl
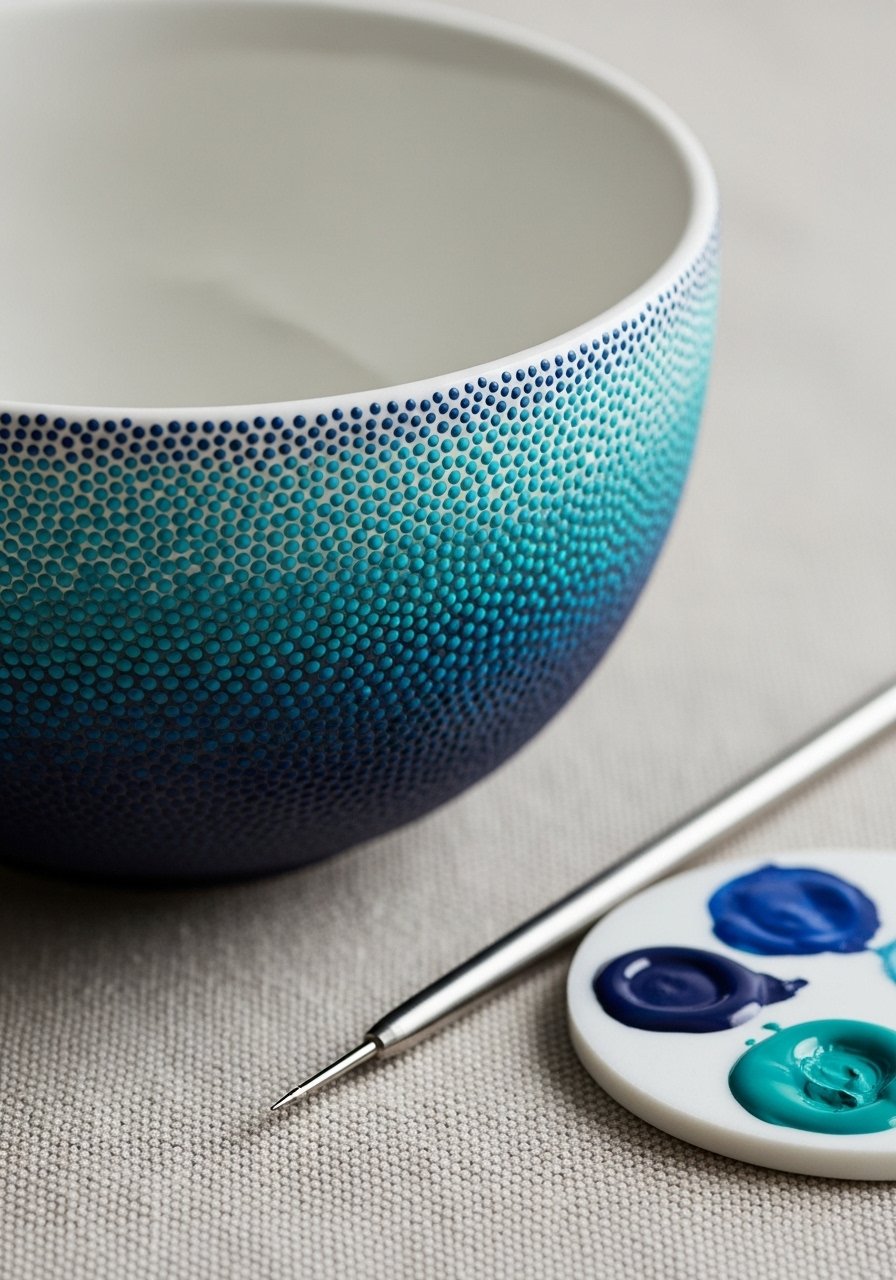
Why this works: Stippling builds rich texture without brushstrokes. The result looks handcrafted and tactile.
Materials
- 1 ceramic bowl, 7"
- Acrylic paints, 2–3 colors
- Dotting tools (set), or toothpicks
- Palette
- Paint-thinner rag
- Clear satin sealer, 1 can
Instructions
- Plan gradient and place dots starting from one end.
- Use a dotting tool for uniform dots; vary pressure for size contrast.
- Work in small sections and let dry 15 minutes per section to avoid smudging.
- After completion, seal with two light coats of satin sealer. Cure 24 hours.
How to display or gift it
- Pair with matching coasters for a cohesive gift. Store in padded organizer trays.
- Abstract Line Art with Paint Pens

Why this works: Continuous linework reads gallery-ready and is fun for steady-handed beginners. Quick to execute with paint pens.
Materials
- 1 glazed bowl, 6"
- Acrylic paint pen set, fine nib
- Pencil and eraser
- Clear gloss sealer, 1 can
Instructions
- Lightly sketch a continuous abstract motif in pencil.
- Trace with a black paint pen; allow 10–15 minutes to dry.
- Add small colored accents with additional pens.
- Seal with clear gloss spray; cure 24 hours.
How to display or gift it
- Reads great in a modern kitchen stacked on floating shelves. Wrap in tissue and tuck a mini care card.
- Marbled Polymer Clay Inlay Bowl

Why this works: Polymer clay inlays allow complex marbling without advanced tools. Pieces feel dimensional and tactile.
Materials
- 1 ceramic bowl, 7"
- Polymer clay in assorted colors, total 30 g
- Pasta machine or roller
- Small circle cutter, 0.5–1"
- Strong craft glue (e.g., E6000)
- Oven (for curing clay per package), parchment paper
Instructions
- Condition clay, create marbled sheet with roller. Cut small discs.
- Bake clay discs per package instructions (usually 275°F / 130°C for 15–30 minutes, check brand).
- Clean bowl and glue discs inside; press gently and wipe excess glue.
- Let glue dry 24 hours. Seal edges with matte varnish if desired.
How to display or gift it
- Great as jewelry dish. Present in kraft box with a ribbon and small card about not using for food.
- Monoprint Transfer Bowl

Why this works: Gel printing transfers make one-of-a-kind layered patterns that feel painterly and abstract.
Materials
- 1 bisque bowl, 7"
- Gel plate, 6×8"
- Brayer roller, soft rubber
- Acrylic inks or paint thinned for printing
- Palette knife and paper scraps
- Clear spray sealer, 1 can
Instructions
- Prepare gel plate with thin paint layers and create textures.
- Press paper onto plate to lift a print. While paint is still tacky, press sheet into the bowl surface and rub gently to transfer.
- Repeat for layered depth; allow 20 minutes drying between layers.
- Seal with two light coats of spray sealer. Cure 24 hours.
How to display or gift it
- Frame one bowl on a small easel as wall art for a shelf. Wrap with tissue inside a shallow gift box.
- Chalky Matte Japandi Bowl

Why this works: The japandi aesthetic favors muted palettes and organic shapes. Chalk or chalk-style paints give velvety matte finishes.
Materials
- 1 ceramic bowl, 6"
- Chalk-style acrylic paint, 30 ml
- Soft foam brush
- Light sanding sponge
- Clear matte wax (for sealing chalk paint)
- Small wax brush
Instructions
- Sand bowl lightly and wipe clean.
- Apply two thin coats chalk paint with foam brush, 30 minutes between coats.
- Paint an arc or accent with a contrasting chalk color.
- Once dry 24 hours, buff with wax using a small wax brush for durability. Cure 24 hours.
How to display or gift it
- Pair with minimal textiles like linen napkins. Store in a cool, dry drawer.
- Negative-Mask Leaf Motif (Cottagecore)

Why this works: Cottagecore textures and leaf motifs are trending. Masking creates crisp organic shapes that feel handmade and cozy.
Materials
- 1 bowl, 7"
- Stencil vinyl or precut leaf stencils (use Cricut for custom shapes)
- Chalk or acrylic paint, 30 ml
- Small foam roller
- Transfer tape if using vinyl
Instructions
- Apply stencil to clean bowl surface, smoothing edges.
- Use foam roller to apply thin paint in one pass to avoid bleeding.
- Remove stencil while paint is slightly tacky. Let dry 1 hour.
- Seal with matte varnish; cure 24 hours.
How to display or gift it
- Tuck into a basket with a hand-written herb bundle for a cottagecore gift set.
- Layered Wash & Wax Resist (Batik Effect)

Why this works: Wax resist creates delicate white veins and layered color effects reminiscent of batik. The texture is soft and painterly.
Materials
- 1 ceramic bowl, 7"
- Beeswax block or wax resist pen
- Acrylic washes (thinned paint)
- Small heat gun (for smoothing wax)
- Fine brush for washes
- Matte varnish
Instructions
- Apply wax lines with stylus where you want resist. Heat gently to set.
- Brush thinned washes over waxed areas. Allow 15–20 minutes between layers.
- Gently remove wax by warming and wiping with a soft cloth.
- Seal with matte varnish; cure 24 hours.
How to display or gift it
- Adds a handcrafted look for seasonal gifts. Pack in a shallow box with kraft tissue.
- Bold Contrast Rim (Farmhouse Pop)

Why this works: A painted rim is minimal but offers strong visual punctuation. Looks great in farmhouse or modern rustic spaces.
Materials
- 1 bowl, 8"
- Painter’s tape, 1/2 inch
- Chalk or enamel paint for rim, 20 ml
- Angled sash brush, size 1/2 inch
- Clear wax or enamel sealer
Instructions
- Tape off the rim evenly and press down edges.
- Paint rim with two thin coats, allowing 30 minutes between coats.
- Remove tape while paint is still slightly tacky.
- Apply wax or sealer; cure 24 hours.
How to display or gift it
- Pair with wooden spoons and place on the counter. Store in craft trays when not using.
- Abstract Collage with Decoupage

Why this works: Decoupage lets you add patterns, text, or vintage snippets for unique collage bowls. Great way to upcycle scrap paper.
Materials
- 1 ceramic bowl, 6–8"
- Patterned paper scraps or napkins, assorted
- Matte Mod Podge, 4 oz
- Soft foam brush
- Small scissors
- Sanding sponge, fine
Instructions
- Cut paper into small irregular shapes.
- Clean bowl and brush a thin layer of Mod Podge where pieces will sit.
- Smooth paper pieces, then brush a thin coat of Mod Podge over the top.
- Let dry 20–30 minutes, then apply a second top coat. Cure 24 hours.
- Lightly sand any rough edges and apply a final thin protective coat. Cure 24 hours.
How to display or gift it
- Makes a sweet memory bowl—add ticket stubs or photos before sealing. Pack carefully in kraft boxes.
You now have 20 distinct abstract ceramic bowl painting ideas to try—each with measured materials and realistic drying times so you can plan a crafty afternoon or an assembly-line gift session. Try mixing techniques: a marbled polymer clay inlay inside a painted ombre bowl makes a striking combo. Save or pin this guide so you can come back when you’re ready to make a set for yourself or friends.
Which project are you most excited to try first? Share a photo with a friend or pin this page—these bowls make lovely handmade gifts, and a reliable temperature-controlled hot glue gun will speed up assembly when you’re preparing several at once.





