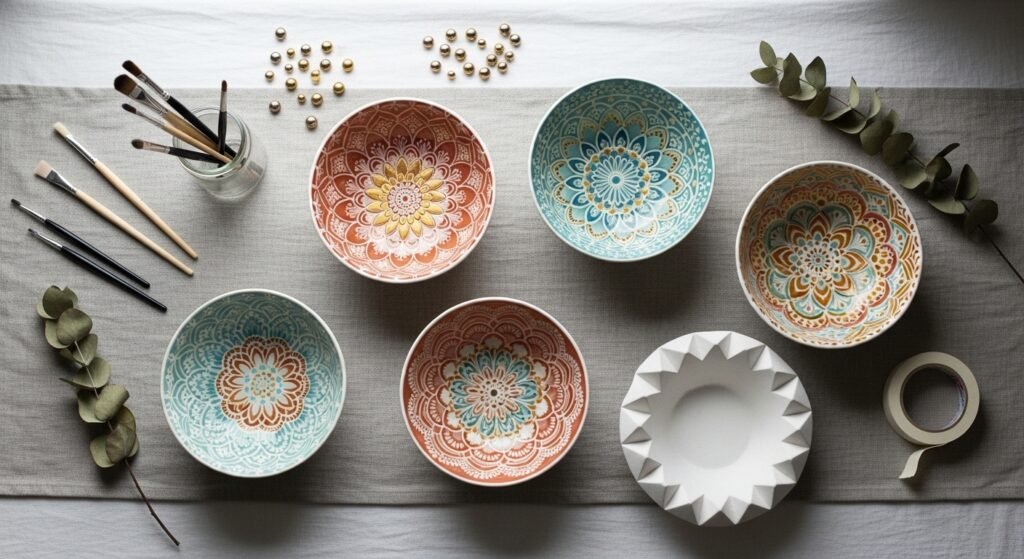
You know that calm, focused buzz you get when your hands steady and a tiny paint dot becomes a perfect ring? That’s the magic of mandala ceramic bowl painting ideas—simple tools, meditative rhythm, and bowls that look gallery-ready. Whether you’re painting to relax, make gifts, or stock a craft fair table, these 26 projects cover styles from boho and cottagecore to japandi minimalism.
I’ll walk you through dot mandalas, metallic highlights, resin-sealed keepsakes, and kid-friendly bowls—each with exact materials, realistic drying times, and troubleshooting tips. I often reach for a reliable acrylic craft paint set and a fine-detail brush set; the color payoff and control matter when you’re working small. Try my go-to acrylic craft paint set or a smooth Posca-style paint pen pack for crisp lines.
This article is packed with step-by-step projects you can start right away. Pin the whole list for later and pick one project that matches your vibe—you’ll be surprised how meditative painting these bowls can be.
- Classic Dot Mandala Ceramic Bowl Painting Ideas

This project is the gateway to mandala bowl painting ideas: approachable, repetitive, and incredibly calming. The finished bowl has a tactile look from layered dots and a smooth, glossy finish if sealed. Great for beginners, mindful makers, or someone trying hand-eye coordination practice. You’ll feel the rhythm as you dot—small, steady motions that build into pattern.
Materials
- 1 pre-fired glazed ceramic bowl, 6–8" diameter
- Acrylic craft paints, 2 oz tubes (white, teal, coral, metallic gold)
- Posca-style paint pens, fine tip (0.7–1.0 mm)
- Dotting tool set, 6 pieces (1mm–6mm)
- Small foam brush, 1/2" flat
- Painter’s tape, 0.7" roll
- Paper towels and palette plate
- Clear spray sealer, satin, 11 oz
Instructions
- Clean bowl with isopropyl alcohol and let dry fully (5–10 minutes).
- Center the bowl under a steady light. Mark the exact center with a faint pencil dot.
- Use the smallest dotting tool dipped in white acrylic to make the center dot. Let dry 5–10 minutes until tack-free.
- Work outward in rings. Alternate dot sizes for contrast. Allow each color ring to dry 10–15 minutes before the next color to avoid smudging.
- Add fine details and outlines with a fine-tip paint pen for crisp lines, waiting 5–10 minutes between pen strokes.
- When fully dry (about 1 hour), apply 2 thin coats of clear spray sealer, 15 minutes between coats. Let cure 24 hours before use.
How to Display or Gift It
Display it on a small wooden easel for a shelf vignette or nest it in a linen-lined gift box. Tie a dried lavender sprig to the box with jute twine for a cottagecore touch. Store extra pieces in a stackable craft organizer until sealant cures fully. If gifting, mention hand-wash only and avoid microwaving painted surfaces.
- Metallic Halo Gold-Leaf Accented Mandala Bowl

Gold leaf makes a mandala sing without complex painting. This design combines painted rings with delicate gold-leaf accents for a luxe look. It’s slightly advanced because of gilding, but the end result reads boutique. Ideal for gift-givers and seasonal décor fans.
Materials
- 1 pre-fired ceramic bowl, 7" diameter
- Acrylic paint, matte white (2 oz) and warm taupe (2 oz)
- Gold leaf sheets, 25-sheet pack
- Gold leaf adhesive (size), 30 ml
- Fine-tip round brush, #00 and #2
- Soft gilder’s brush for burnishing
- Masking fluid or low-tack painter’s tape
- Clear gloss sealer, brush-on, 2 oz
Instructions
- Clean the bowl and tape off a central guide ring with painter’s tape.
- Paint base rings in white and taupe. Allow 20–30 minutes between coats; apply 2 coats if needed. Cure 1 hour.
- Apply thin lines of gold-size where you want metallic fill. Wait until tacky per manufacturer (usually 5–15 minutes).
- Gently lay a gold leaf sheet over the tacky areas. Use a soft brush to press and lift excess.
- Brush away loose flakes and burnish lightly. Let dry 1 hour.
- Seal with 1–2 coats of clear gloss sealer, 30 minutes apart. Cure 24 hours.
How to Display or Gift It
Set it on a ceramic display stand or inside a craft gift box with tissue paper. Add a small care card: “Hand wash only; avoid abrasive scrubbing.” For storage, use felt-lined stackable trays so gold leaf doesn’t rub.
- Raised Texture Puffy Paint Mandala Bowl
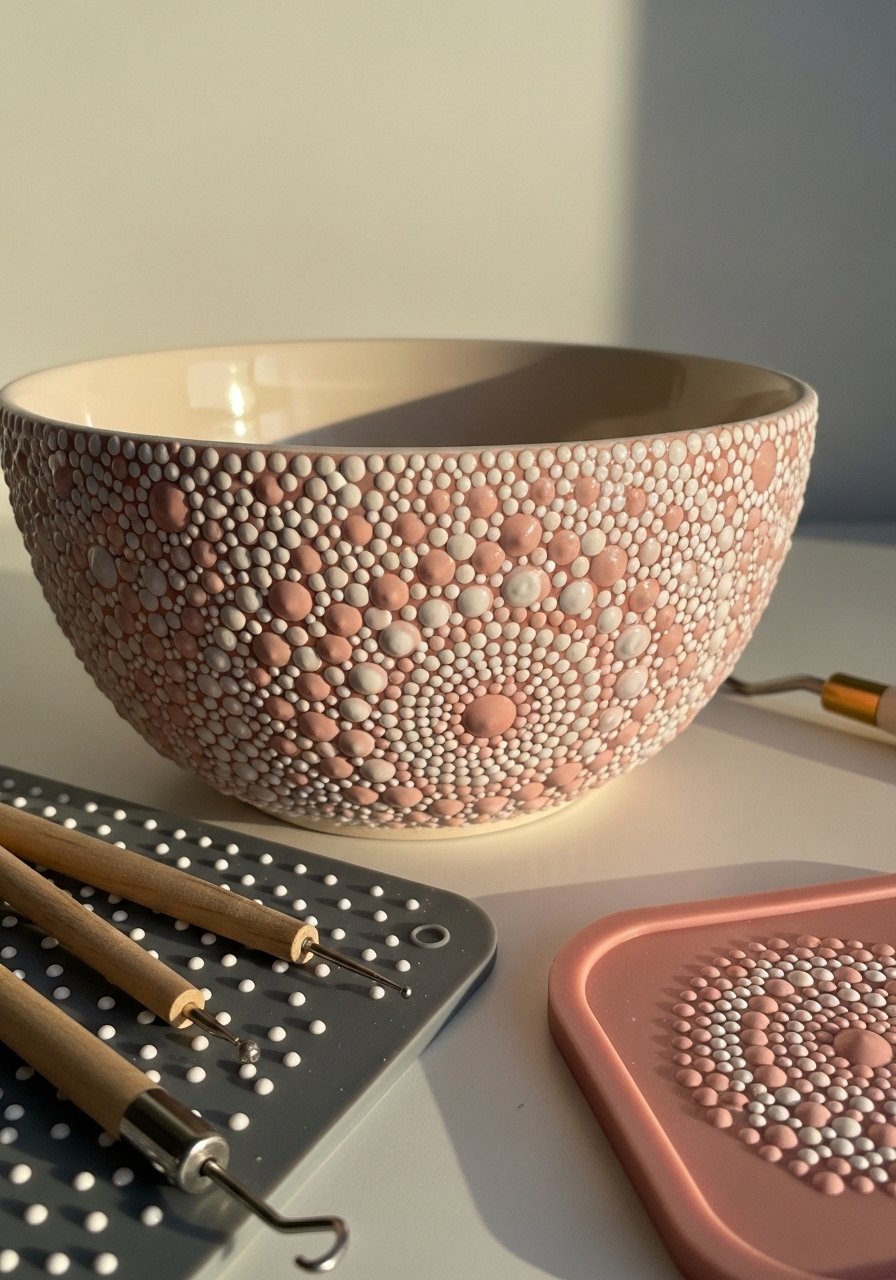
This project uses dimensional fabric puff paint to create a raised mandala that you can feel. It’s tactile and great for people who enjoy texture. The look is almost textile-like and pairs well with boho and farmhouse interiors.
Materials
- 1 ceramic bowl (6–9")
- Puffy fabric paint, 3 oz bottles (blush, white)
- Fine-tip applicator nozzle (comes with paint)
- Dotting tool set, medium sizes
- Disposable gloves and silicone mat
- Clear acrylic sealer, matte
Instructions
- Clean bowl and make a light pencil center mark.
- Apply puffy paint directly from the nozzle for the center dot. Keep steady pressure.
- Use dotting tools to press and shape larger dots while they’re wet for smooth domes.
- Work in rings; wait 15–20 minutes between layers so dots maintain shape. Full set time per bottle is usually 1–2 hours, but check packaging.
- Once completely dry and firm (usually 24 hours), seal with 1 coat of clear acrylic sealer to protect raised texture.
- Test curvature by lightly pressing a small area—fully cured puffy paint should be springy but firm.
How to Display or Gift It
Raised bowls are excellent as jewelry catchalls or plant pot saucers. Pair with a small linen pouch for gifting. Store flat in a small craft box to prevent crushing. Recommend a clear acrylic organizer for multiple finished pieces.
- Cottagecore Floral Mandala with Fine Liner Detail
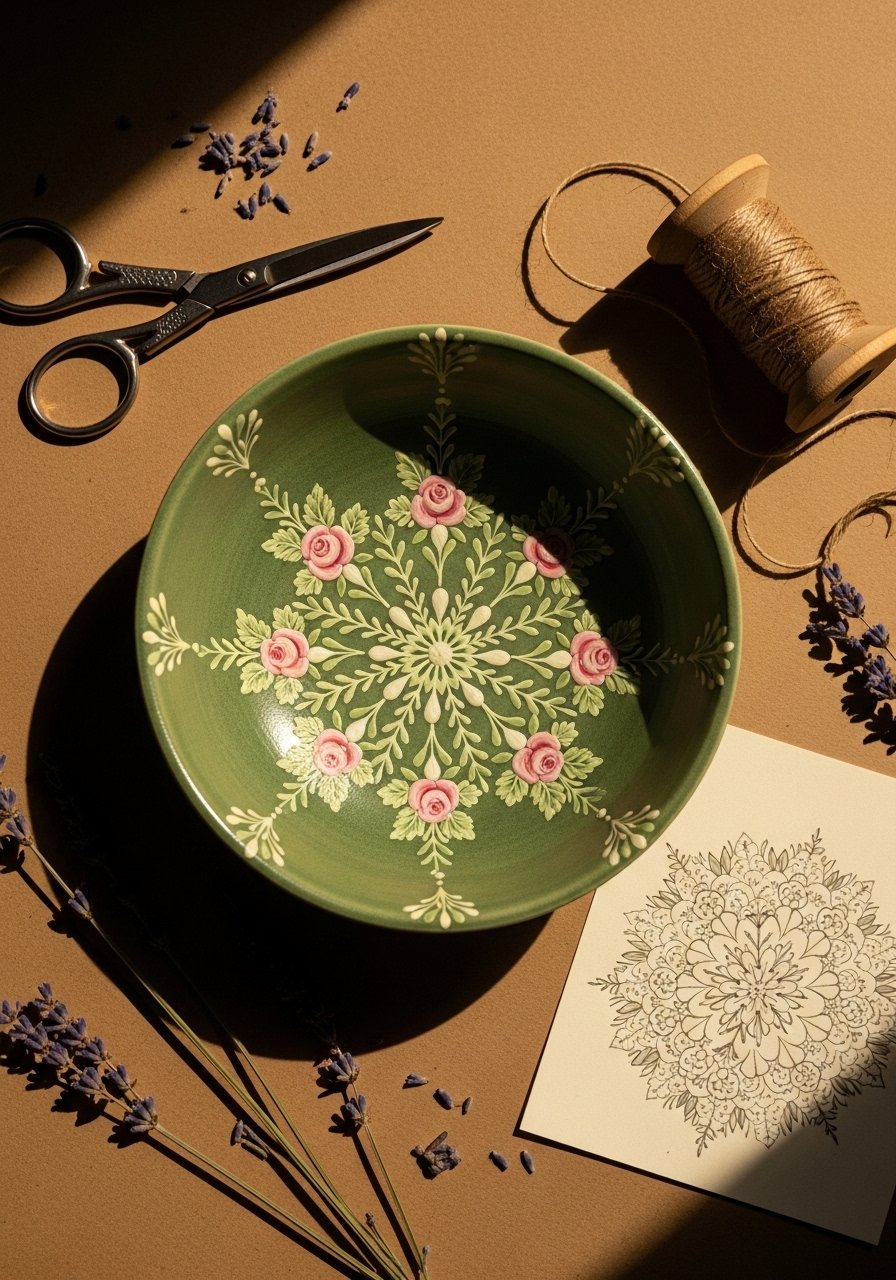
This floral mandala leans cottagecore—soft colors and tiny botanicals arranged in concentric rings. The finished bowl has delicate linework that reads handmade and romantic. Great for garden-lovers and bridal-shower gifts.
Materials
- 1 ceramic bowl, 7" diameter
- Acrylic craft paints, pastel palette (5 colors, 2 oz each)
- Fine liner paint pen, 0.3 mm
- Round brushes, #0 and #2
- Pencil and eraser, kneaded
- Clear matte Mod Podge, 8 oz
- Small palette or mixing tray
Instructions
- Lightly sketch floral mandala with pencil. Keep shapes simple—tiny petals, dots, and leaves.
- Block in base colors with thin layers; let 10–15 minutes dry between strokes.
- Once colors are dry (30–45 minutes), go over details with a fine liner pen for crisp outlines. Wait 10 minutes for pen ink to set.
- If paint layers feel uneven, gently sand glossy spots with fine sandpaper, wipe clean.
- Apply 2 thin coats of matte Mod Podge with a foam brush, 20 minutes between coats; cure 24 hours.
- After full cure, hand-wash gently.
How to Display or Gift It
Nest the bowl in a kraft gift box with tissue and a sprig of dried lavender. For shelf styling, place on a small wooden riser next to vintage books and a linen napkin. Use stackable craft organizers for safe storage.
- Japandi Minimalist Negative Space Mandala
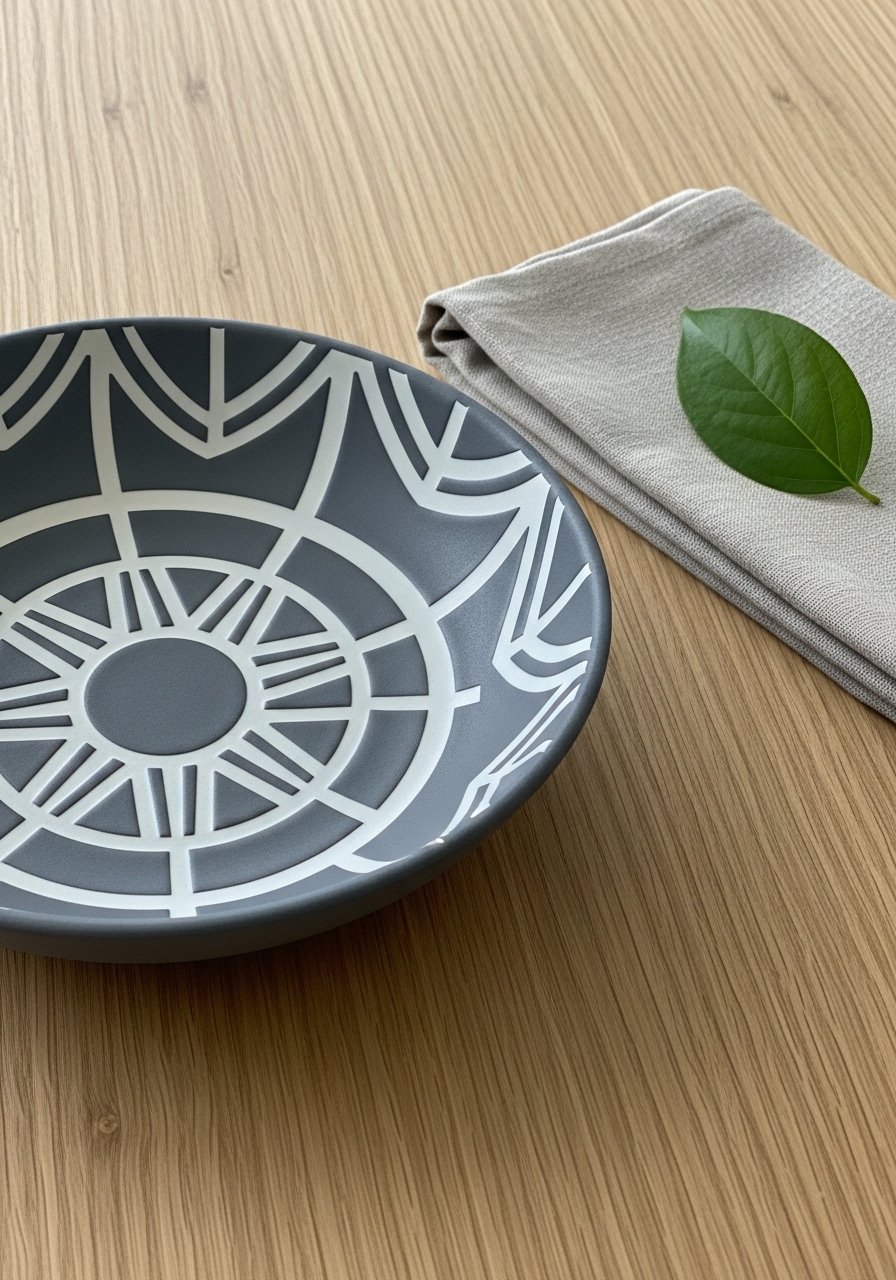
Japandi favors calm simplicity—this negative-space mandala uses a neutral palette and larger geometric shapes for a serene look. It’s ideal for minimalist homes and people who prefer subtle patterns.
Materials
- 1 matte ceramic bowl, 6–8"
- Chalk-style acrylic paint, 2 oz (soft white)
- Low-tack painter’s tape, 1" roll
- Round brush, #4
- Small ruler and compass for accurate spacing
- Clear matte sealer, 8 oz
Instructions
- Measure and mark concentric guide lines with a compass and pencil.
- Apply painter’s tape to reserve negative spaces where the base will show.
- Paint the exposed rings with thin, even coats. Allow 15–20 minutes between coats.
- Carefully remove tape while paint is still slightly tacky for clean edges.
- Touch up tiny imperfections with a fine brush. Let cure 1–2 hours.
- Seal with 1 coat matte sealer; cure 24 hours.
How to Display or Gift It
Place in a neutral vignette with linen and wood pieces. For gifting, slip into a kraft box with shredded paper filler. Store painted pieces flat to avoid edge chipping.
- Boho Earth-Tone Terracotta Mandala Bowl

Use earthy pigments for a boho look that feels grounded and handmade. The warm palette pairs well with rattan and jute textures. This project works with both gloss and matte finishes depending on your home’s style.
Materials
- 1 unglazed terracotta bowl, 7–8"
- Acrylic paints, earth-tone set (5 colors)
- Fine round brushes, #0, #2
- Dotting tools, medium sizes
- Spray sealer, satin
- Small sponge for subtle blending
Instructions
- For unglazed terracotta, wipe and prime with a thin coat of gesso; dry 30 minutes.
- Sketch simple ring guides and block in color bands. Let 15 minutes between layers.
- Use dotting tools to add contrast dots. Build layers, waiting 10 minutes between rings to prevent bleeding.
- If edges look harsh, soften by dabbing with a damp sponge.
- Once fully dry (about 1 hour), apply 2 light spray sealer coats, 10–15 minutes apart. Cure 24 hours.
- Avoid microwave and dishwasher use.
How to Display or Gift It
Pair with a woven bread basket or serve wrapped eucalyptus for a brunch display. For gifting, tuck in kraft tissue and secure with natural jute. Store in labeled stackable drawers until ready to present.
- Stenciled Mandala Ceramic Bowl Painting Ideas (Precision Stencil Method)
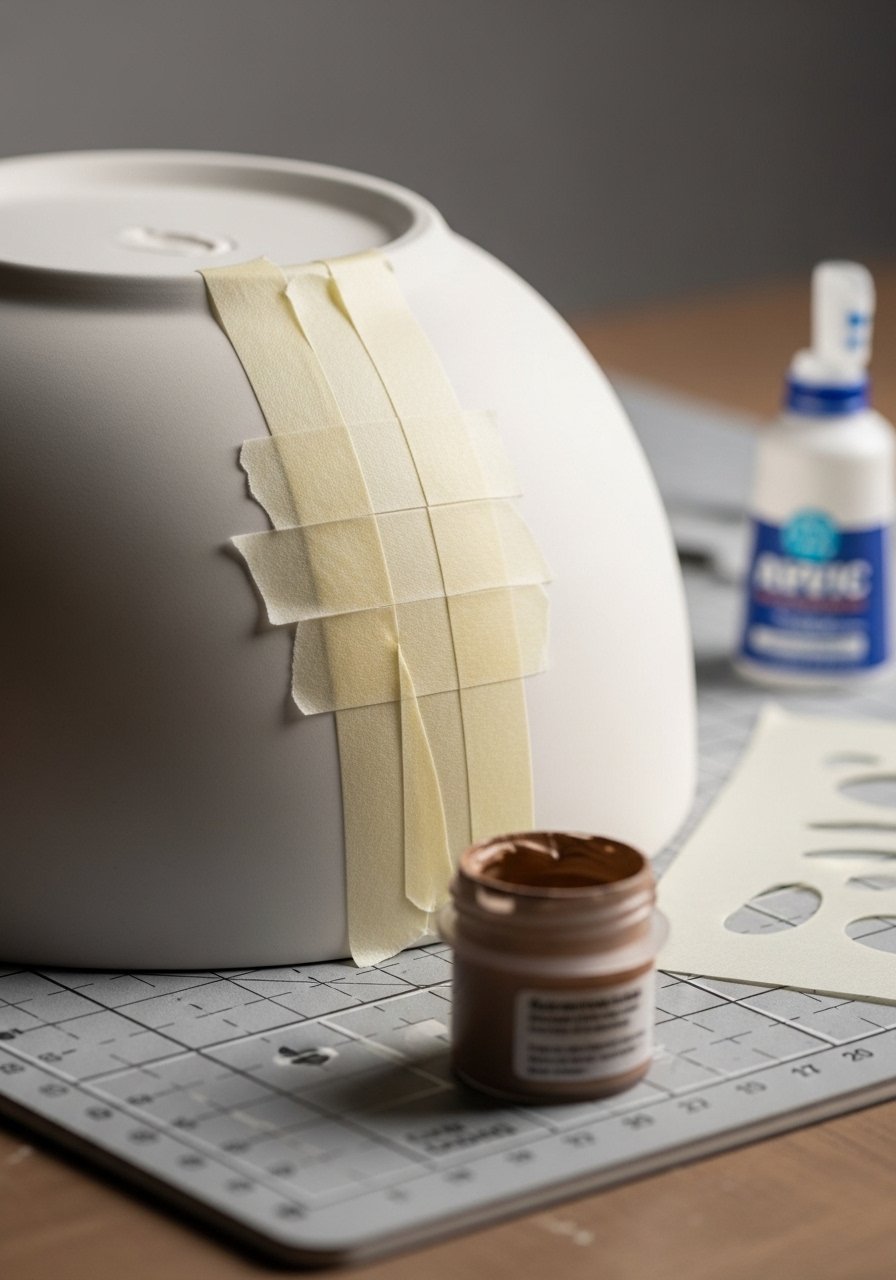
Stencils give you perfect symmetry and repeatability—ideal if you plan to make sets. This is one of the mandala ceramic bowl painting ideas that’s great for makers who like crisp edges and short paint time.
Materials
- 1 ceramic bowl, 6–9"
- Mandala stencil, 6–8" diameter
- Acrylic craft paints, 2–3 colors
- Stencil brush or small foam pouncer
- Low-tack painter’s tape
- Cutting machine (optional) like a Cricut for custom stencils
- Clear spray sealer, gloss
Instructions
- Secure stencil in center with painter’s tape. Tape prevents bleed.
- Use a foam pouncer with minimal paint. Dab off excess on paper towel.
- Apply paint in light layers. Build opacity with 2–3 passes, letting each pass dry 5–10 minutes.
- Carefully remove stencil while paint is tacky to avoid peeling.
- Touch up with a fine brush if needed. Allow 30–60 minutes to dry fully.
- Spray 2 thin coats of gloss sealer; cure 24 hours.
How to Display or Gift It
Show stenciled bowls as matching sets on open shelving or gift them in a crush-proof box with bubble wrap. For storage, keep stencils flat in a labeled craft folder. Consider using a small display easel for countertop styling.
- Jewel-Toned Ombre Mandala Bowl
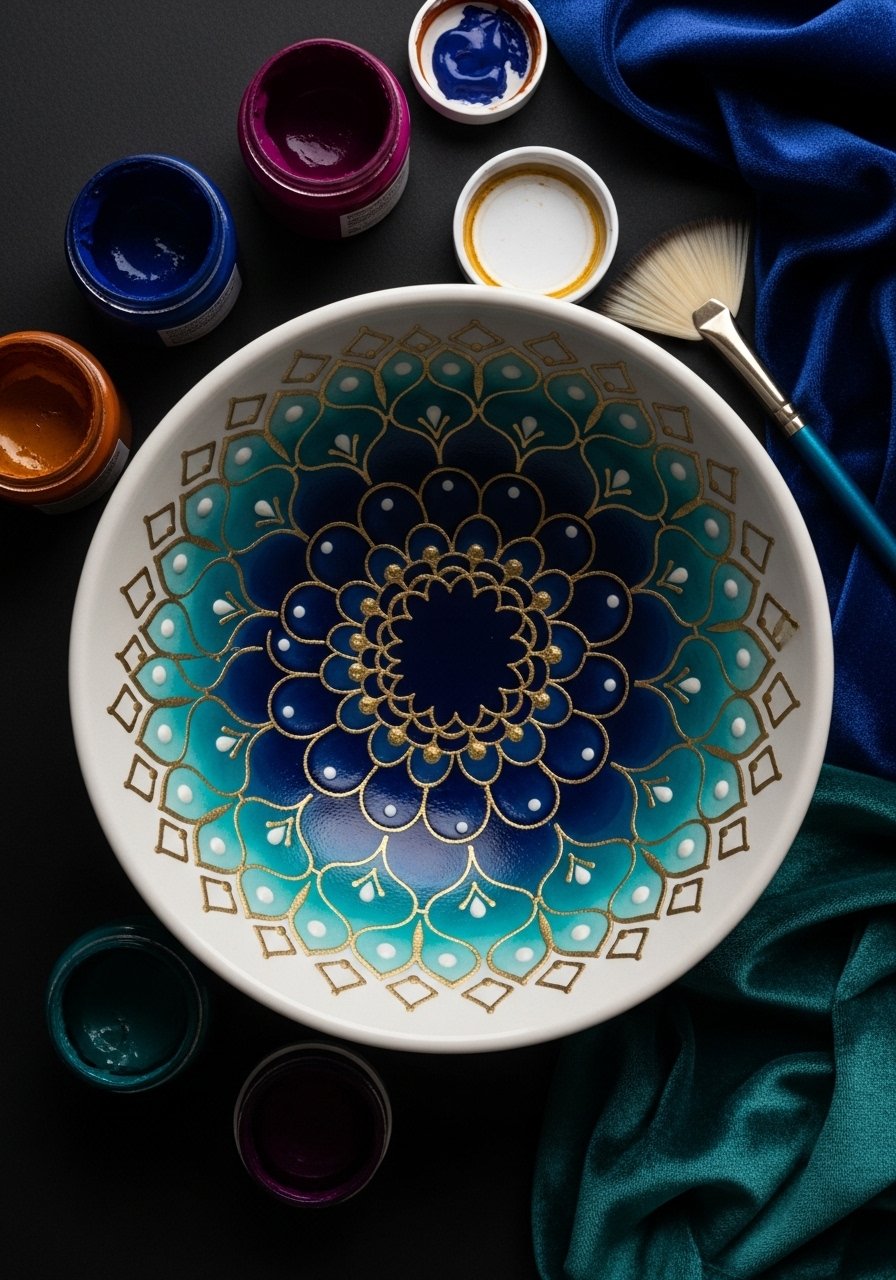
Ombre mandalas combine gradient color transitions with radial patterns for depth and movement. The jewel tones read luxe and work well with metallic highlights. This is a slightly advanced technique because of blending.
Materials
- 1 ceramic bowl, 7"
- Acrylic paints, deep navy, teal, emerald (2 oz each)
- Small blending brush or soft fan brush
- Round brushes, #0–#2
- Fine metallic paint pen (gold)
- Gloss sealer, brush-on or spray
Instructions
- Pre-wet the brush lightly and blend the darkest color at the center, moving outward to lighter tones.
- Work quickly in thin layers to create smooth transitions. Let each blended pass dry 15–20 minutes.
- Once gradient is satisfactory, add dot or petal mandala elements in contrasting colors.
- Use a metallic paint pen for small accents. Let ink set 10 minutes.
- Seal with 2 coats of gloss sealer, 20 minutes apart; cure 24–48 hours.
- For consistent blends, practice on paper or spare ceramic before committing to the bowl.
How to Display or Gift It
Ombre bowls make dramatic centerpiece clusters. Wrap in black tissue and a gold twine bow for gifting. Store in padded craft boxes with divider inserts for protection.
- Geode-Inspired Mandala Bowl with Resin Accent
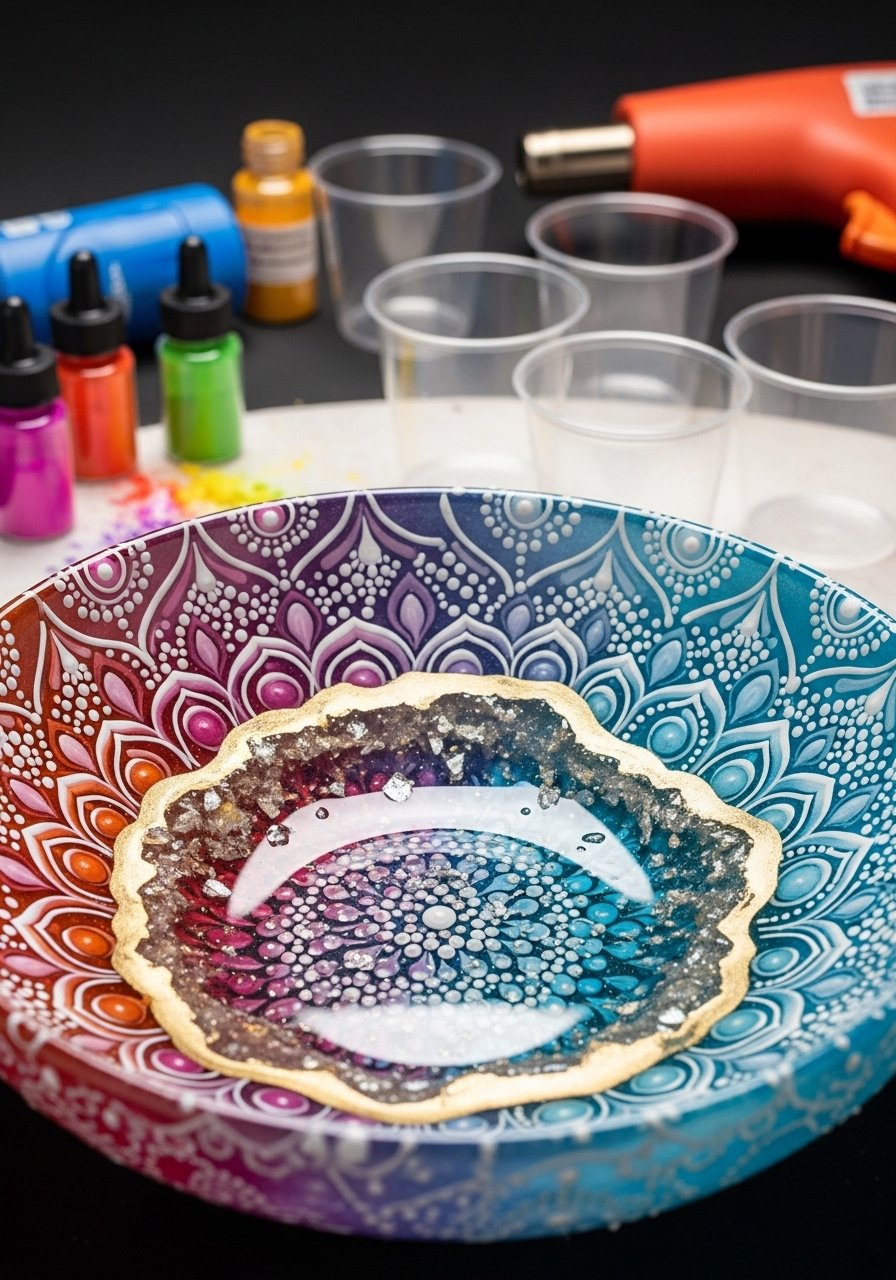
Add a resin center to mimic a geode’s glossy depth. Combine painting with a small epoxy pour for a jewelry-like finish. This project requires careful resin mixing and safety precautions.
Materials
- 1 ceramic bowl, 6–8" (deep center)
- Acrylic paints, 3 colors for mandala
- Epoxy resin kit, 8 oz (clear)
- Mica powders or cosmetic-grade glitter (small amount)
- Mixing cups and stir sticks
- Disposable gloves, respirator recommended, and heat gun
- Painter’s tape and silicone mat
Instructions
- Paint mandala rings leaving the center area blank for resin. Cure paint 24 hours.
- Mask bowl interior edges to create a small, flat well for resin (about 1/4" depth).
- Mix epoxy resin per kit instructions—typically 2:1 ratio—and stir gently for 3 minutes. Let sit 2 minutes to reduce bubbles.
- Add mica powder to resin and pour into the prepared center. Use a heat gun at low bursts to pop bubbles.
- Let resin cure in a dust-free area for 24–48 hours (full hardness may take up to 72 hours).
- Remove tape and lightly sand any sharp edges; polish with a microfiber cloth.
How to Display or Gift It
Geode bowls are showstoppers on coffee tables. Box with foam padding when gifting. Store fully cured resin pieces in a cool, dry place to prevent yellowing.
- Chalkboard Paint Mandala for Changeable Designs

Using chalkboard paint lets you redraw mandalas whenever mood strikes. It’s perfect for seasonal patterns or teaching kids pattern repetition.
Materials
- 1 ceramic bowl, 6–8"
- Chalkboard paint, 2 oz
- Chalk markers (white and colored)
- Fine brush for touch-ups
- Painter’s tape
- Clear chalk sealer (optional)
Instructions
- Prime the bowl with a thin coat of chalkboard paint; dry 30 minutes, apply a second coat if needed. Cure 24 hours.
- Condition the surface by rubbing chalk over and wiping off.
- Draw mandala with chalk markers. If using regular chalk, keep lines thin so they erase cleanly.
- To make marks semi-permanent, use a light spray of clear chalk sealer—test first.
- Erase and redraw as desired.
How to Display or Gift It
Gift with a tiny chalk set tucked inside and instructions for care. For storage, wrap in bubble wrap and keep flat to avoid smudging.
- Galaxy Mandala with Starburst Dots

This piece combines cosmic ombre with radiating star dots for a celestial vibe. It’s playful and makes a striking decorative bowl for nightside decor.
Materials
- 1 ceramic bowl, 7"
- Acrylic paints, black, navy, purple, magenta
- White acrylic for star dots
- Small round brushes and dotting tools
- Sponge for soft blending
- Gloss sealer
Instructions
- Paint a black base and blend galaxy colors toward the center using a sponge.
- Add mandala rings with contrasted colors to mimic nebula bands; dry 15 minutes between layers.
- Use a toothpick or smallest dotting tool to create tiny star dots in white.
- Allow paint to dry fully 1–2 hours before sealing.
- Apply 2 coats of gloss sealer; cure 24 hours.
How to Display or Gift It
Set on a dark velvet cloth and use as a celestial catchall. For gifting, include a small note about avoiding direct sunlight to preserve colors.
- Sgraffito Mandala (Scratch Through Layered Slip)

Sgraffito involves scratching a design through a top layer to reveal a contrasting color beneath. This project is great for ceramicists who like a tactile carved look.
Materials
- 1 leather-hard ceramic bowl (unglazed)
- Colored slip or underglaze, 50 ml
- White slip or underglaze, 50 ml
- Sgraffito tools or needle tool
- Soft sponge and small brush
- Clear glaze for final coat (if firing)
Instructions
- Apply a base coat of colored slip and let dry to touch (30–60 minutes).
- Cover with white slip evenly; let set until firm but not bone-dry (20–40 minutes).
- Scratch mandala design with sgraffito tools, revealing the underlayer.
- Clean lines with a soft brush to remove dust.
- If you can fire the piece, apply clear glaze and bisque/firing as directed. For painted unglazed bowls, skip firing and seal with food-safe clear glaze if available.
- Let final glaze cure per kiln schedule or drying per product instructions.
How to Display or Gift It
Sgraffito pieces are lovely as art bowls. If glazed and fired, they can be used functionally; otherwise, present as decorative. Store in a glazed-safe organizer.
- Mosaic Tile Mandala Inlay

Tiny tiles create a mosaic mandala that gleams with texture. This is hands-on and slightly time-consuming, but the visual payoff is high.
Materials
- 1 ceramic bowl (sturdy), 7–9"
- Glass mosaic tile set, 100–200 small tesserae
- Tile adhesive (waterproof)
- Grout, small packet (color of choice)
- Mini tile nippers, safety glasses
- Sponge and rubber grout float
Instructions
- Plan your mandala pattern on paper and transfer a light guide to the bowl.
- Break tiles as needed with nippers. Apply a small dab of adhesive and press tiles into place, working outward.
- Allow adhesive to set 12–24 hours depending on product.
- Grout the tiles, pressing into gaps and wiping excess with a damp sponge. Let grout dry 24 hours.
- Seal grout if recommended. Allow full cure 72 hours before use.
How to Display or Gift It
Mosaic bowls are decorative; avoid holding liquids unless sealed and waterproof. Gift in a snug box with foam padding. Display on a low plate stand.
- Negative Space Lace Stencil Mandala
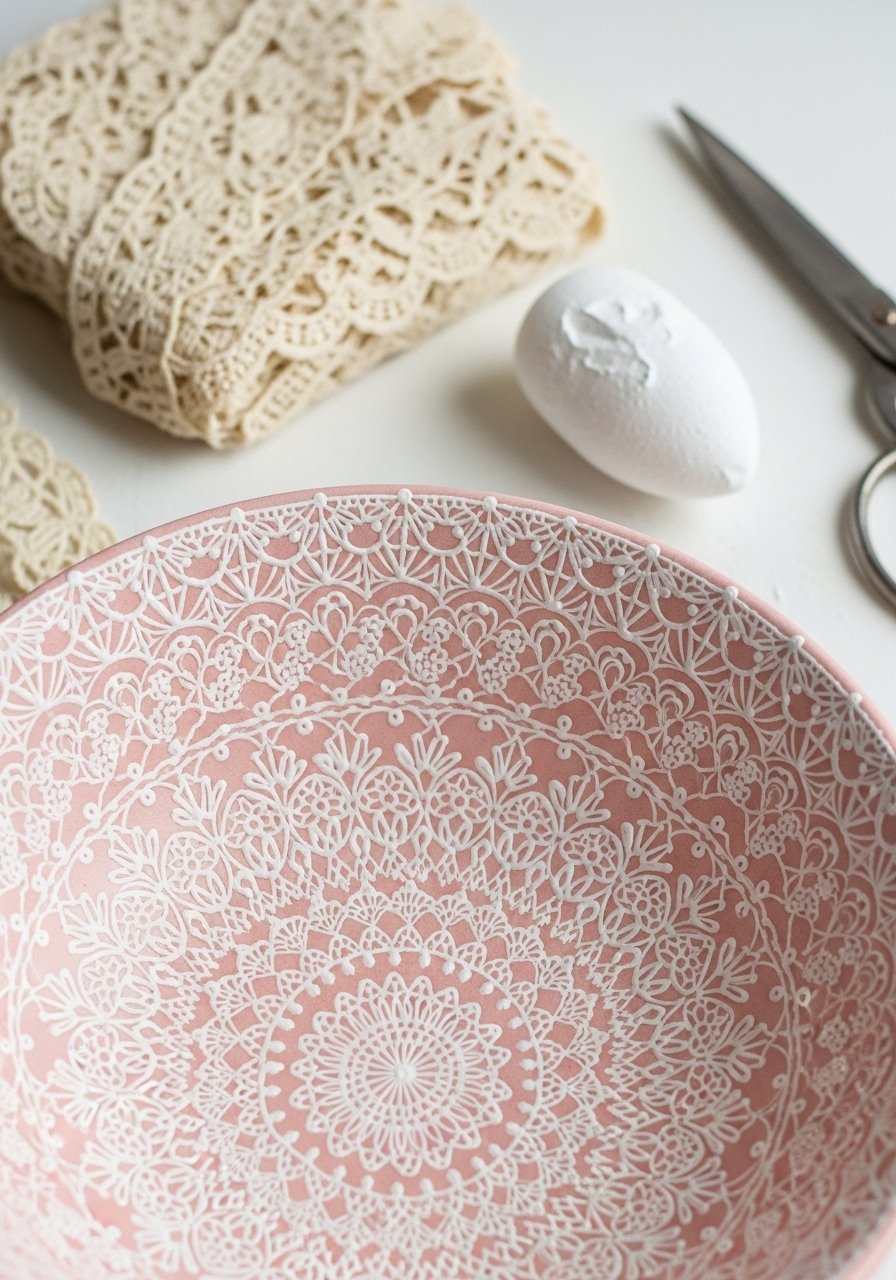
Use lace or doily stencils to paint intricate-looking mandalas without hand drawing every petal. This works well for shabby chic or farmhouse aesthetics.
Materials
- 1 ceramic bowl, 6–8"
- Lace stencil or paper doily
- Chalky acrylic paint, blush or pastel
- Foam pouncer
- Low-tack spray adhesive (optional, for stencil hold)
- Clear matte sealer
Instructions
- Center lace stencil and secure with low-tack adhesive or tape.
- Use a foam pouncer with minimal paint and tap lightly. Build coverage in light layers to avoid bleed.
- Remove stencil carefully. Touch up edges with a fine brush.
- Let dry 30–60 minutes, then seal with matte sealer. Cure 24 hours.
- If using multiple colors, wait 15–20 minutes between color passes.
How to Display or Gift It
Pair with linen napkins and a small jar of potpourri for a thoughtful gift. Store stencils flat to reuse.
- Mandala Ceramic Bowl Painting Ideas: Painted-Inlay with Colored Clay Slip

This is a hybrid between painting and pottery carving—incise lines into a prepared surface, then fill with colored slip for crisp inlay. The result is a refined, artisan look.
Materials
- 1 leather-hard ceramic bowl (unglazed)
- Colored underglazes/slips, 30–50 ml each
- Loop tools and fine carving needle
- Soft sponge and small brushes
- Clear glaze for firing or clear sealant for non-fired pieces
Instructions
- Apply a base slip color and let tone set to leather-hard.
- Incise mandala guidelines lightly with a needle tool.
- Carve shallow grooves for inlay with a fine loop tool.
- Fill grooves with colored slips using a small brush; smooth with a damp sponge.
- If firing is possible, bisque and glaze per kiln instructions. Otherwise, allow slips to dry and seal with clear glaze or clear sealer.
- Let final coat cure per product—sealers often require 24–48 hours.
How to Display or Gift It
Inlaid bowls read like artisan ceramics. Give with care instructions and a gentle cleaning cloth. For storage, wrap in acid-free tissue.
- Zentangle-Inspired Pen Mandala Bowl

Zentangle is meditative and graphic. Use fine paint pens for black-on-white contrast that looks intricate without complex color mixing. Perfect for pattern lovers.
Materials
- 1 glossy white ceramic bowl, 7"
- Waterproof fine-tip paint pens, black 0.1–0.5 mm
- Pencil and eraser
- Ruler or compass
- Clear satin sealer
Instructions
- Lightly draw concentric guides with pencil.
- Fill each ring with repeating Zentangle motifs using waterproof paint pens.
- Let ink set 10–15 minutes before applying sealer.
- Apply 1–2 thin coats of clear sealer, waiting 15 minutes between. Cure 24 hours.
- Avoid scrubbing the inked areas.
How to Display or Gift It
These bowls are perfect as desktop pen holders or jewelry dishes. Gift with a small sketchbook and fine-liner pen. Store in labeled craft drawers.
- String-Guided Radial Mandala (Precision with Compass and Thread)
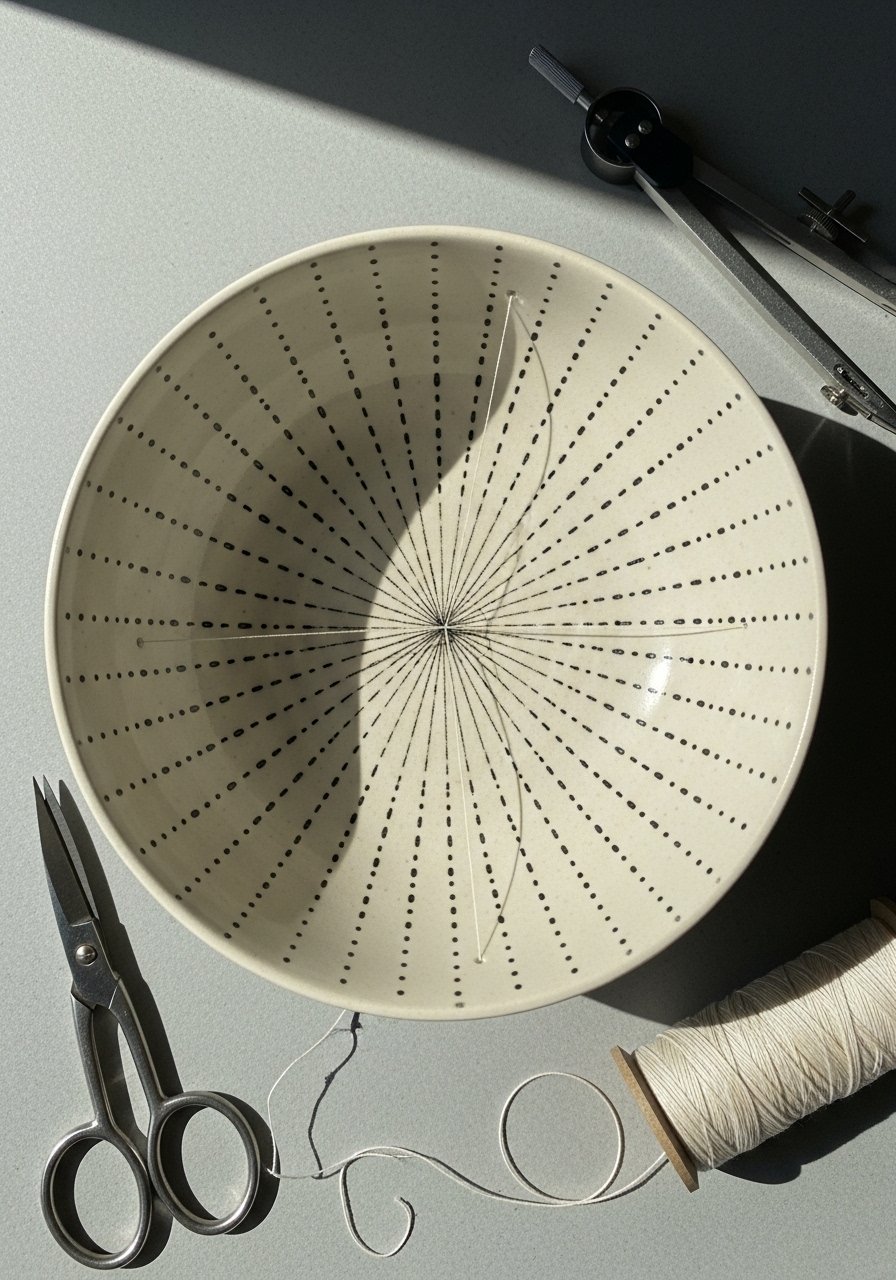
Using a string and compass helps you achieve perfectly spaced elements without a machine. It’s satisfying and reliable—great for makers who want precision.
Materials
- 1 ceramic bowl, 6–8"
- Strong cotton thread or non-stretch fishing line
- Small round brushes and dotting tools
- Acrylic paints, small tubes
- Fine-tip metallic pen for accents
- Clear gloss sealer
Instructions
- Tie thread to a center point (use a removable tack) and mark rings by rotating the thread while holding tension.
- Use thread marks as placement guides for dots and petals.
- Paint dots using dotting tools and a steady hand. Allow 10–15 minutes between rings.
- Add metallic accents with a fine pen, let ink set 10 minutes.
- Seal with gloss sealer; cure 24 hours.
How to Display or Gift It
These perfectly radial bowls look great in modern or mid-century settings. For gifting, include a small card about the method. Store in flat stacks separated by tissue.
- Child-Friendly Washable Mandala Bowls
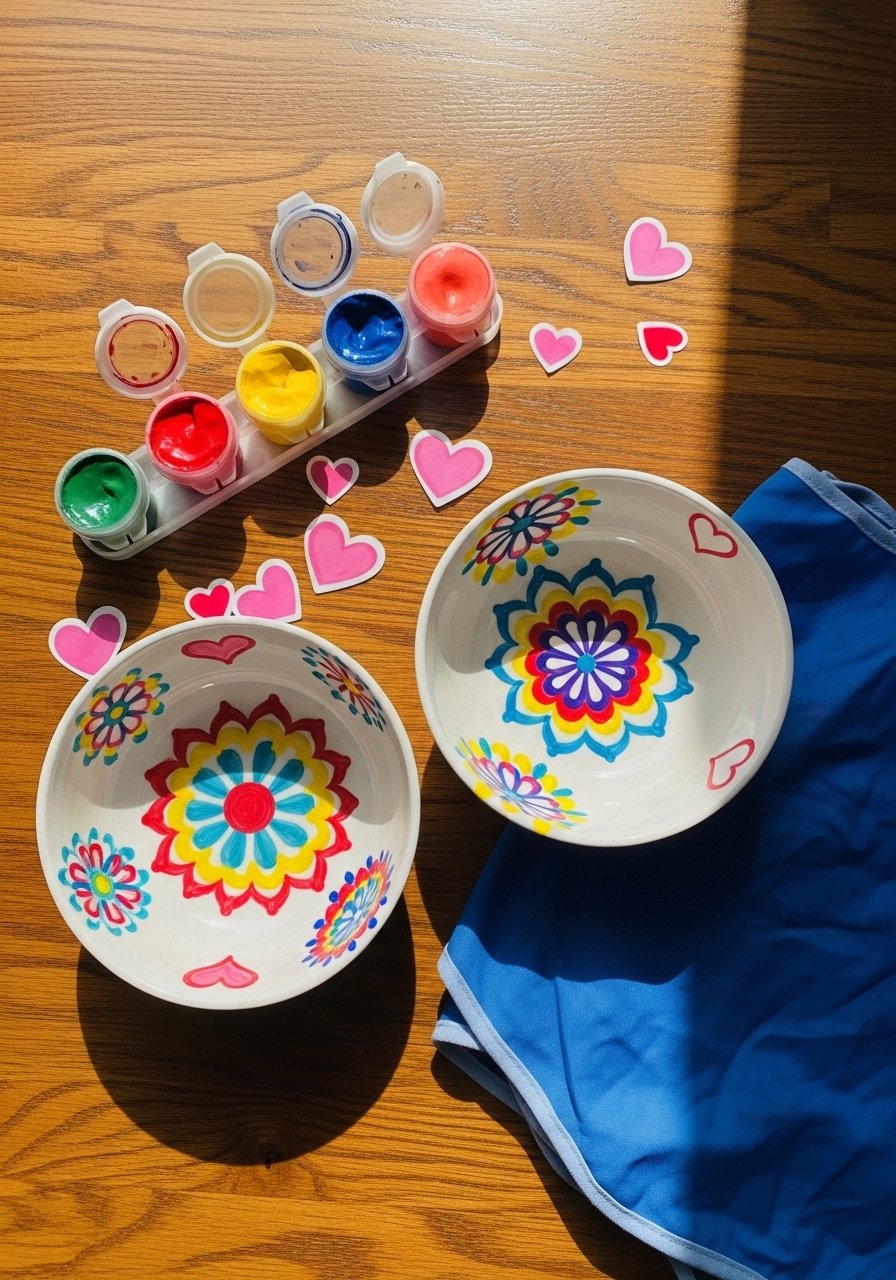
This simplified mandala uses washable paints and bold shapes so kids can join the fun. The finish is washable but not dishwasher-safe—perfect for weekend crafting.
Materials
- 2 small ceramic bowls, 4–5"
- Washable tempera paints, 6-color set
- Round foam brushes
- Large dotting tools (or blunt cotton swabs)
- Acrylic sealer (optional for longevity)
Instructions
- Let kids paint simple concentric rings or handprints. Use foam brushes for large areas.
- Allow 20–30 minutes drying time between thicker layers.
- For longer life, apply 1 coat of clear acrylic sealer when adult-supervised; cure 24 hours.
- Hand-wash gently only after sealer cure.
How to Display or Gift It
These bowls make cute kid-made gifts for grandparents. Wrap in tissue and add a handwritten note. Store in a low shelf for easy access.
- Petal-Brushstroke Mandala Bowl
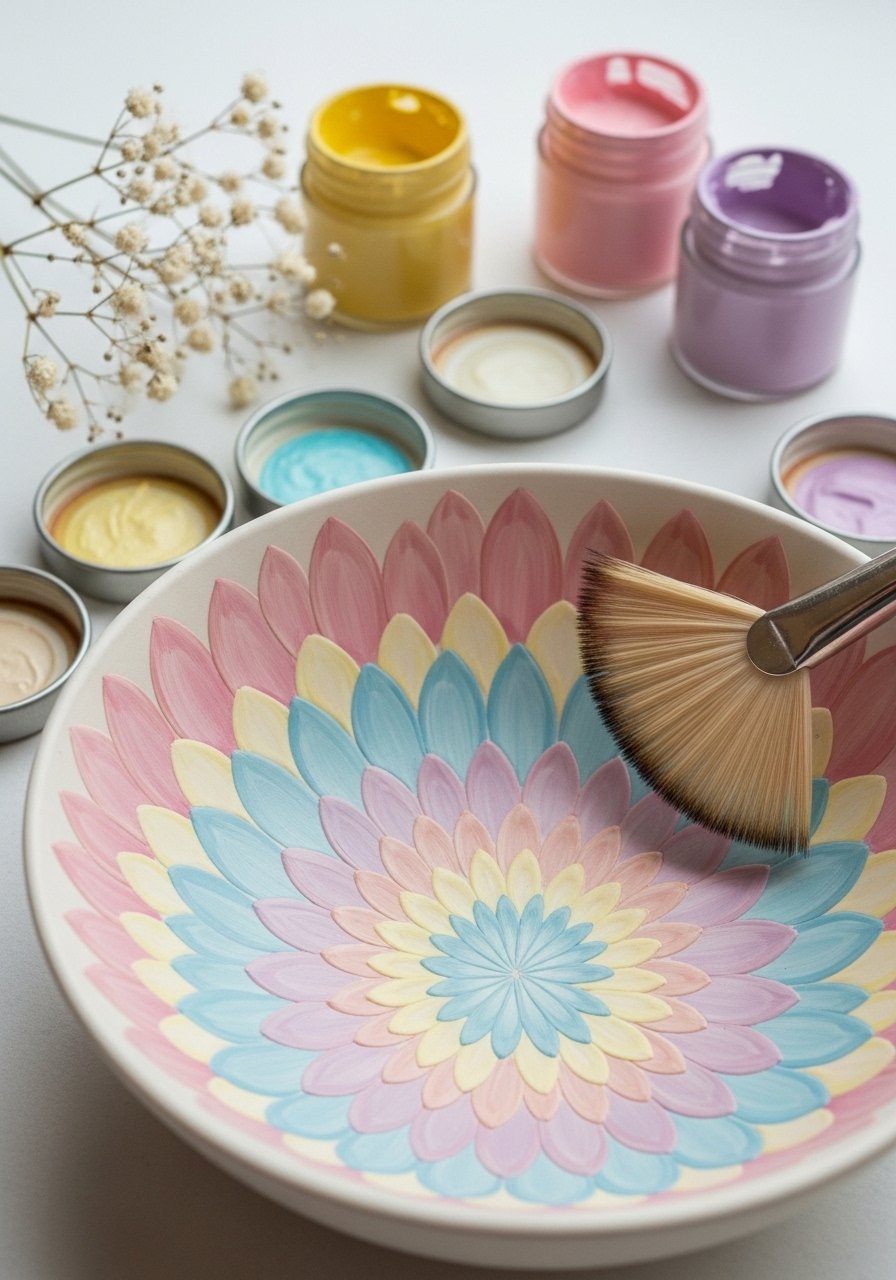
Create mandala petals through rhythmic brushstrokes rather than dots. The result is painterly and organic—great for an artsy, bohemian look.
Materials
- 1 ceramic bowl, 7"
- Acrylic paints, pastel set
- Fan brush and round brush #2
- Palette and water jar
- Clear satin sealer
Instructions
- Load the fan brush lightly and pull petal shapes radially from center.
- Layer colors for depth, waiting 10–15 minutes between layers.
- Add small dot accents with a round brush.
- Once dry 1 hour, seal with satin sealer. Cure 24 hours.
- If strokes look uneven, thin paint slightly and re-layer.
How to Display or Gift It
Nest with linen napkins and a small dried flower bundle. Store in protective dividers in a craft drawer.
- Botanical Leaf-Imprint Mandala
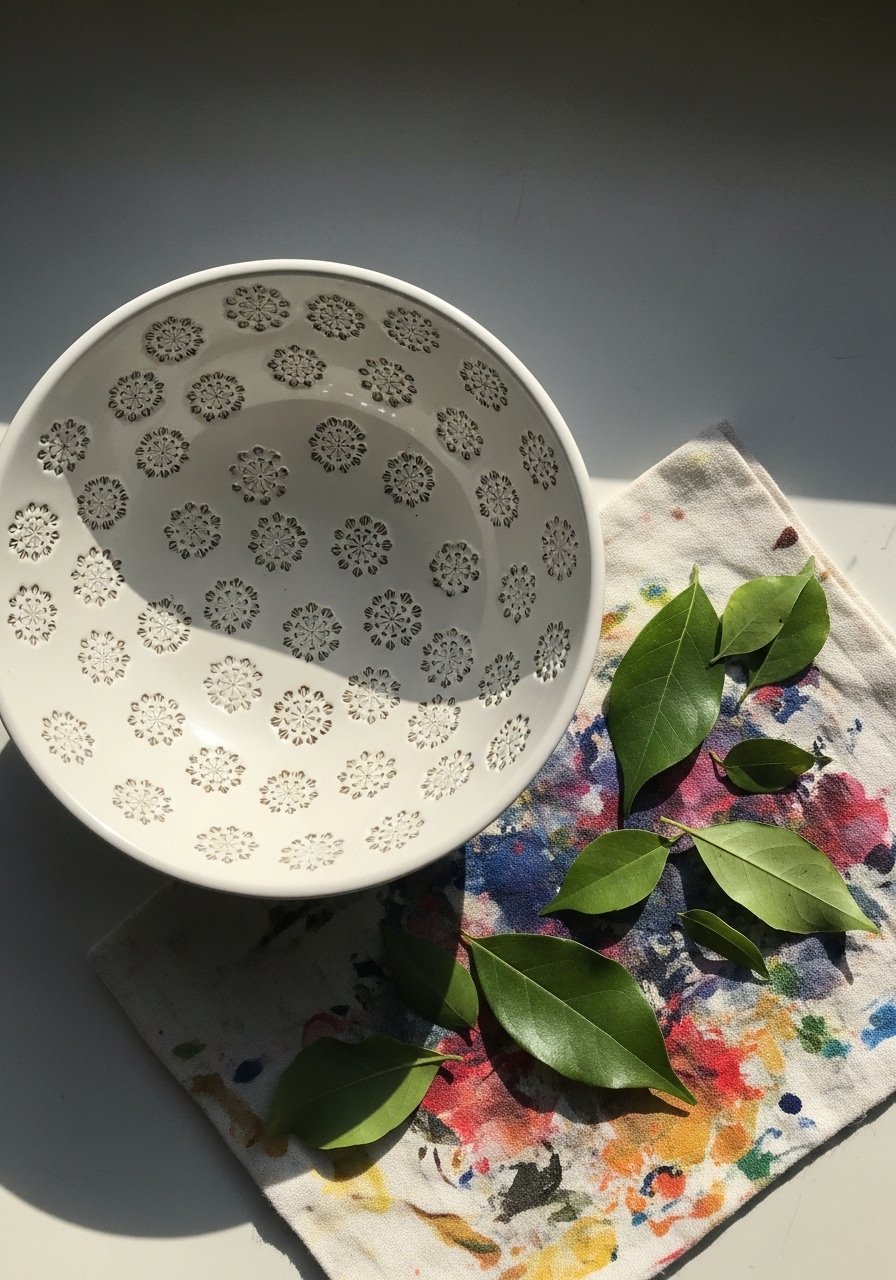
Press small leaves into paint to create organic mandala rings. This technique yields an earthy, botanical look perfect for garden lovers and cottagecore decor.
Materials
- 1 ceramic bowl, 6–8"
- Acrylic paints, leaf-green and brown
- Fresh small leaves (e.g., baby rosemary or thyme)
- Soft sponge and small brush
- Clear matte sealer
Instructions
- Paint a thin ring of paint, press leaf gently, lift straight up.
- Repeat in concentric rings, switching leaves for variety.
- Fill small gaps with dots or tiny painted veins.
- Let dry 30–60 minutes, then seal with matte sealer. Cure 24 hours.
- Test a spare leaf first to see imprint clarity.
How to Display or Gift It
Pair with a small potted herb for a garden-themed gift. Store in a cool, dry place to prevent adhesive or paint tack.
- Glazed Underpainting Mandala (Layered Transparent Washes)
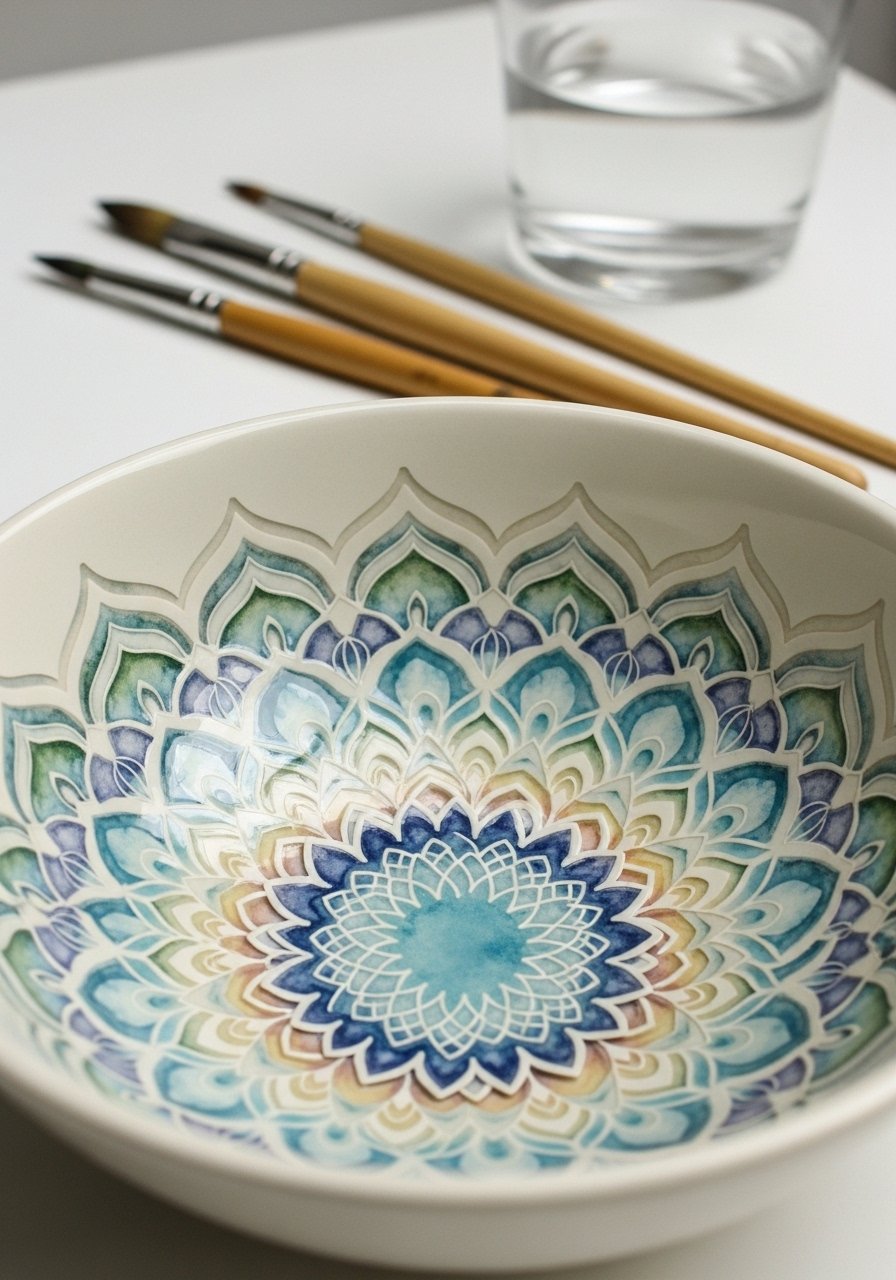
Layering translucent washes builds subtle color depth, similar to watercolor. Finish with gloss for a luminous result.
Materials
- 1 glossy ceramic bowl, 7"
- Acrylic glazing medium and transparent paint colors
- Soft round brushes, #2 and #4
- Palette
- Gloss varnish
Instructions
- Mix paint with glazing medium (1:1) for transparent layers.
- Apply thin concentric washes, allowing 10–15 minutes drying between layers.
- Build depth slowly until desired intensity is reached.
- Seal with gloss varnish once fully dry (1–2 hours).
- For even gloss, apply two thin coats.
How to Display or Gift It
These bowls suit modern interiors. Gift in a glossy box and avoid abrasive scrubbers.
- Glitter-Accent Resin Mandala Bowl

Tiny resin glitter dots make mandalas sparkle. Use small epoxy dollops to encase glitter, creating jewel-like points.
Materials
- 1 ceramic bowl, 6–8"
- Epoxy resin, small kit (2 oz)
- Fine cosmetic glitter (gold or iridescent)
- Mini pipettes and mixing sticks
- Disposable gloves and heat gun
- Painter’s tape
Instructions
- Paint mandala base and let cure 24 hours.
- Mix small resin batch per instructions. Add glitter.
- Using a pipette, place tiny resin dots along mandala rings.
- Remove bubbles with gentle heat gun bursts. Cure 24–48 hours fully.
- Seal surrounding areas if needed.
How to Display or Gift It
Glitter bowls are festive table accents. Wrap in protective padding for gifting. Keep out of direct sun to maintain sparkle.
- Gold-Flecked Speckle Mandala (Terrazzo Style)

Terrazzo speckles add contemporary texture. Combine speckling with mandala rings for a modern take.
Materials
- 1 ceramic bowl, 6–8"
- Acrylic paint, cream base
- Gold and colored metallic flakes or mica chips
- Clear epoxy or gloss sealer
- Small silicone brush or flicking brush
Instructions
- Paint base cream and let dry 30–60 minutes.
- Mix small amount of flakes into thin glue or epoxy and flick onto rings, or press flakes individually for controlled placement.
- Seal with gloss to encapsulate flakes. Cure 24–72 hours depending on sealant.
- Clean edges with a soft brush after curing.
How to Display or Gift It
Pair with marble coasters or brass accents. Store in lined drawers for protection.
- Glow-in-the-Dark Mandala Bowl
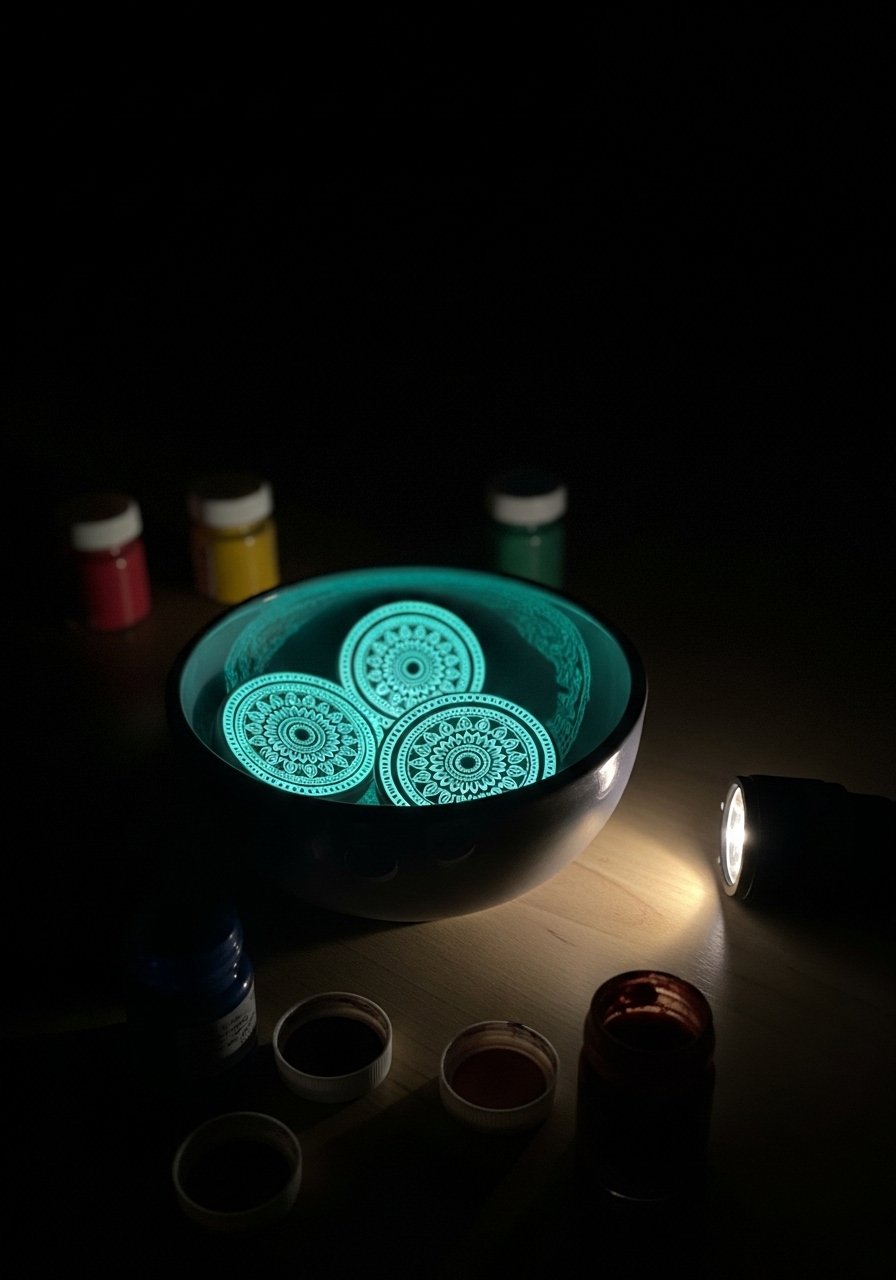
Use glow-in-the-dark paint for a playful bowl that glows after lights out—a fun decorative piece for bedrooms or evening patios.
Materials
- 1 ceramic bowl, 6–8"
- Glow-in-the-dark acrylic paint, 30 ml
- White base paint for charge layer
- Fine brushes
- Clear gloss sealer
Instructions
- Paint a white base to maximize glow; cure 1 hour.
- Apply glow paint in mandala rings; allow 15 minutes between layers.
- Charge under bright light for 10–20 minutes to test glow.
- Seal with gloss sealer; cure 24 hours.
- For best glow, avoid sealing with thick opaque varnish.
How to Display or Gift It
Great as nightstand decor. Gift with a small LED keychain to “charge” the glow. Store away from sunlight to preserve pigments.
- Lace-Imprinted Decoupage Mandala Bowl
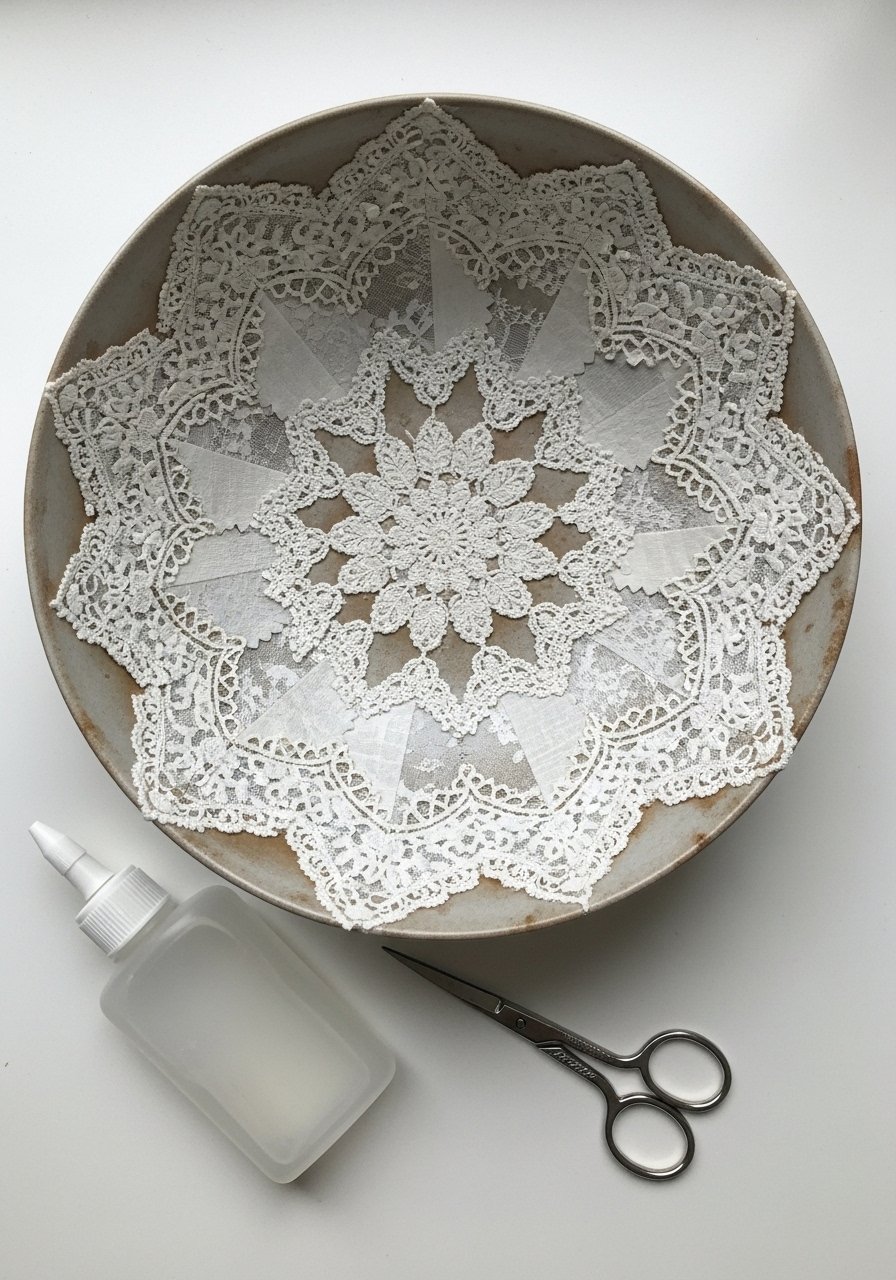
Decoupage lace into rings to create a textured mandala that reads vintage and tactile. Sealing is essential for longevity.
Materials
- 1 ceramic bowl, 6–8"
- Paper lace doilies or fabric lace cutouts
- Mod Podge (matte or gloss), 8 oz
- Small scissors
- Soft brush for smoothing
- Clear sealer (optional extra)
Instructions
- Cut lace into strips or shapes that fit concentric rings.
- Brush a layer of Mod Podge, place lace, smooth gently, and top with thin Mod Podge layer.
- Work ring by ring, letting each dry 20–30 minutes before moving outward.
- Apply 2–3 thin final coats; allow full cure 24–48 hours.
- For washable durability, use an outdoor Mod Podge and let cure 72 hours.
How to Display or Gift It
Tuck in a sachet of dried lavender and wrap in tissue for gifting. Store flat to avoid peeling.
- Minimalist Japandi Brushstroke Mandala Bowl (Two-Color)

A second Japandi-inspired finish—this time pared-back brushstrokes in two colors for quiet elegance. Simple, fast, and very modern.
Materials
- 1 matte ceramic bowl, 7"
- Acrylic paints, charcoal and cream
- Flat sable brush, #6
- Palette
- Matte sealer
Instructions
- Load brush with paint and pull gentle strokes from center outward to form petals.
- Alternate charcoal and cream strokes for contrast.
- Keep composition sparse—less is more here.
- Let dry 30–60 minutes, then seal with one thin coat of matte sealer. Cure 24 hours.
- If edges feather, thin paint slightly and reapply.
How to Display or Gift It
Place on a minimal wooden stand or in a monochrome vignette. For gifting, use a simple kraft box with ribbon.
You made it through 26 different mandala ceramic bowl painting ideas—each aimed at a different style, skill level, and occasion. From quick dot mandalas to resin geode centers and gilded highlights, there’s a technique here for meditative crafting, thoughtful gifting, or starting a small shop line. Pin this guide so you can come back when inspiration hits, and pick one project to try this weekend.
Which style are you most likely to try first—the tactile puffy paint, the refined gold-leaf, or the resin-geode? Share your favorites with friends or gift a finished bowl to someone who’d love a handmade touch. And if you’re building a small toolkit for these projects, a temperature-controlled hot glue gun and a versatile fine-detail brush set will make many of these techniques easier and more precise. Happy painting!





