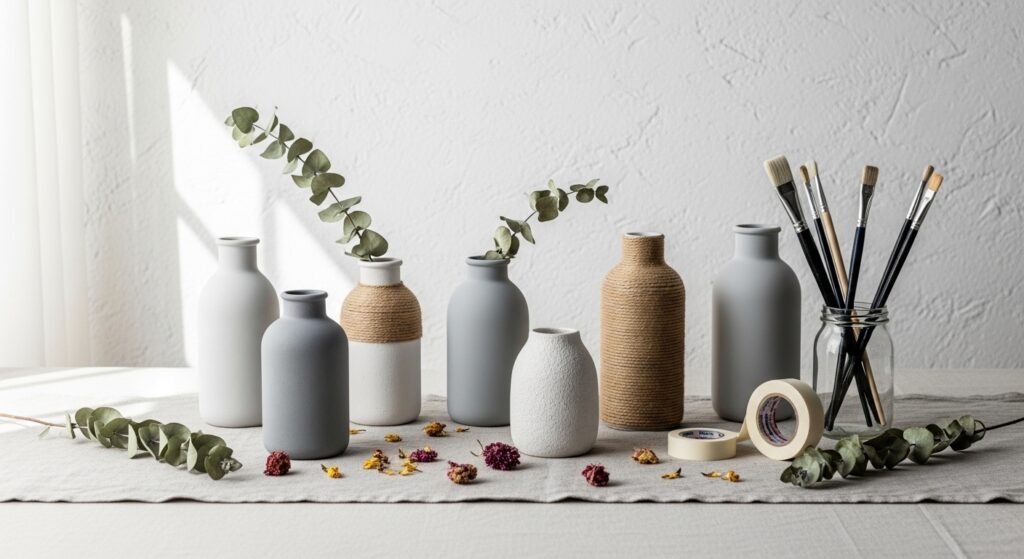
Welcome — if you’ve ever stared at a plain glass vase and wondered how to make it sing, you’re in the right place. These 22 DIY vase decorating ideas cover everything from quick weekend refreshes to craft-night projects that give your shelves a one-of-a-kind look. You’ll find projects for boho, cottagecore, farmhouse, japandi, and modern minimalist tastes, and most are beginner-friendly.
I reach for a basic foam brush or a small set of acrylic paints for nearly every paint-based idea — my go-to is a set of affordable acrylic craft paints that dries quickly and layers well. If you plan to seal or decoupage, a bottle of Mod Podge gloss solves a lot of finishing headaches.
Below are 22 complete projects. Each one includes a photo prompt, materials with exact quantities, clear step-by-step instructions with drying times and troubleshooting tips, and display or gifting ideas. Grab your hot glue gun, pick a style, and let’s make those plain vases into real decor pieces.
- Rustic Twine-Wrapped Vase — DIY vase decorating ideas for farmhouse style
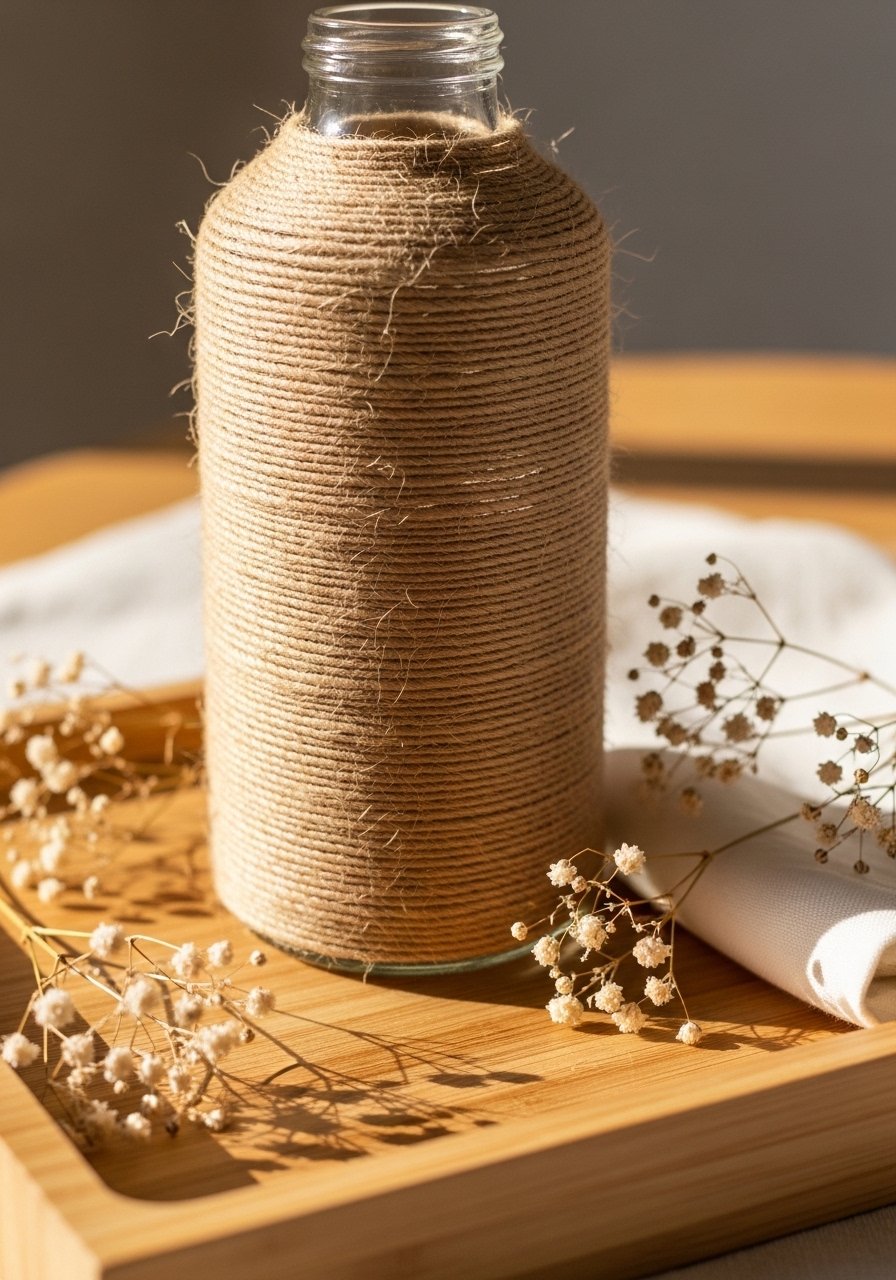
This classic farmhouse-style wrap uses jute twine for texture and a handcrafted, tactile finish. It’s budget-friendly, forgiving, and great for beginners or kids. The finished piece is warm to the touch and adds a cozy, tactile accent to a mantel or entry table. I use a low-temp hot glue gun for neat, immediate adhesion.
Materials
- One 16 oz clear glass bottle or vase
- 50 ft natural jute twine (3 mm)
- Hot glue sticks, 10-pack
- Low-temp hot glue gun
- Scissors
- Ruler or tape measure
- Small adhesive felt pads (optional)
Instructions
- Clean vase well; remove labels and degrease with rubbing alcohol. Let dry fully.
- Measure and cut an initial 6-inch tail of twine. Apply a small dot of hot glue at the base and press twine for 10 seconds.
- Wrap tightly around the vase, keeping rows snug. Add a dot of glue every 1–2 inches to secure.
- For a clean top edge, cut twine and tuck the end beneath a wrapped row; secure with a tiny dot of glue.
- If desired, stop halfway for a two-tone effect (see Project 3). Total wrap time: 20–30 minutes.
- Let glue cool and set for 10 minutes until firm to the touch.
Troubleshooting: Use low-temp glue to avoid glass fogging. If glue strings appear, run the nozzle along a scrap wood once warmed to reduce stringing.
How to Display or Gift It
- Display on a wooden tray with eucalyptus sprigs or cotton stems for a cottagecore corner.
- Add adhesive felt pads on the base to protect surfaces.
- Gift in a kraft box with shredded paper and a twine bow. For storing extras, use a stackable craft organizer to keep twine tidy.
- Dip-Painted Color-Block Vase (Matte Finish)
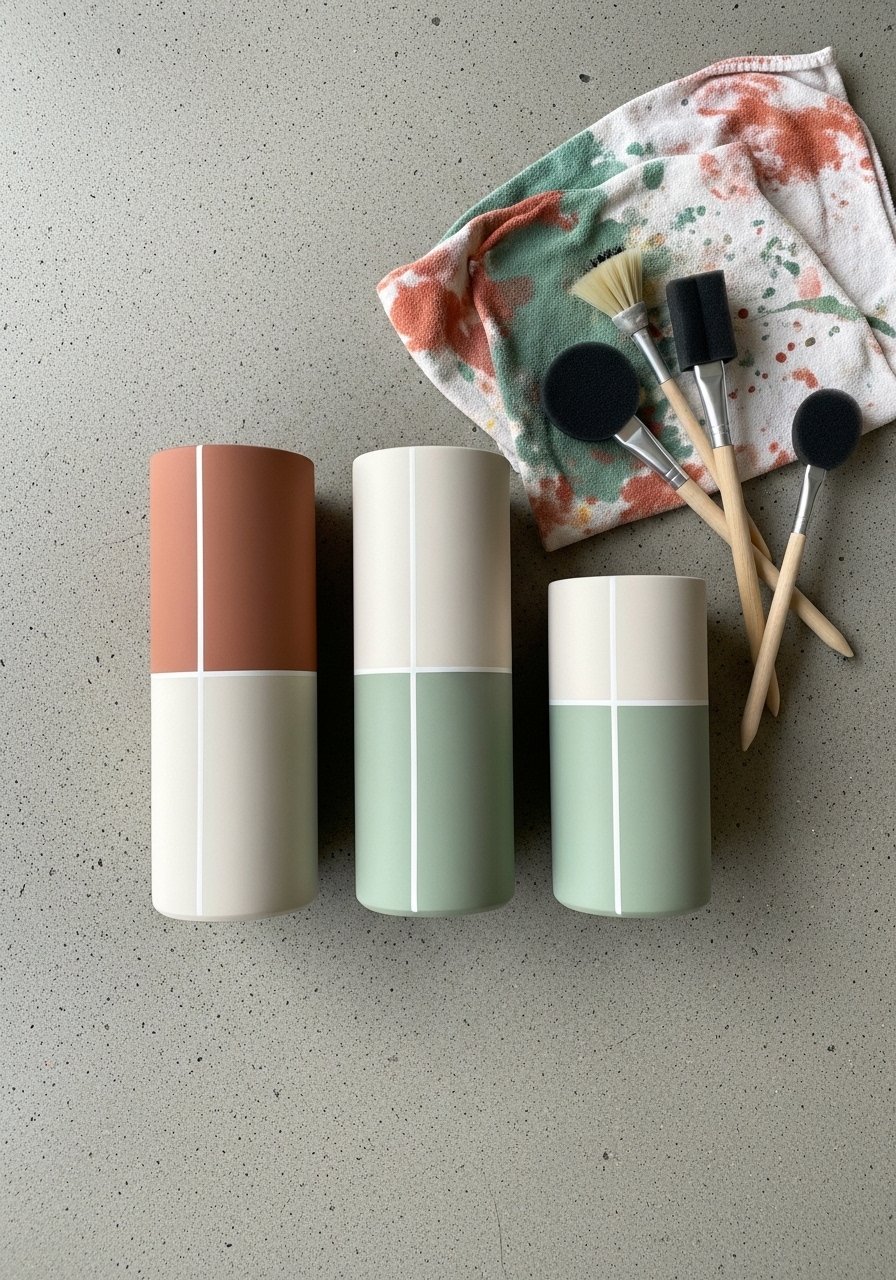
Color-block dipping gives you crisp, modern lines without complex stencils. It’s quick, looks designer-made, and works on glass or ceramic. Use chalk paint for a velvety matte finish that sands slightly for a vintage feel.
Materials
- One 16–20 oz glass or ceramic vase
- Chalk paint, 2–3 colors (2 oz each)
- Painter’s tape (1⁄2 inch)
- Flat foam brush (1-inch)
- Disposable cup for paint (4 oz)
- Sanding sponge, fine grit (220)
- Drop cloth or craft paper
Instructions
- Clean vase; remove grease. Tape off a straight line where you want the color block.
- Pour chalk paint into a cup and brush a thin first coat below the tape line. Let dry 20–30 minutes.
- Apply a second coat for full opacity. Dry time: 30 minutes between coats.
- Once fully dry (2 hours), carefully remove tape. Lightly sand the edge for a soft, worn look.
- If using glass, seal with two thin coats of Mod Podge gloss or a spray sealer, following manufacturer cure times.
- Allow final cure 24 hours before adding water/flowers.
Troubleshooting: If paint drips, sand and recoat after full cure. Use a brayer roller to smooth paint for even coverage.
How to Display or Gift It
- Group three different heights on a shelf for a coordinated vignette.
- Wrap with kraft paper for gifting and include a pack of dried stems.
- Store unfinished painted vases upright in a craft bin to avoid knocks.
- Two-Tone Dyed Rope Vase (Boho)
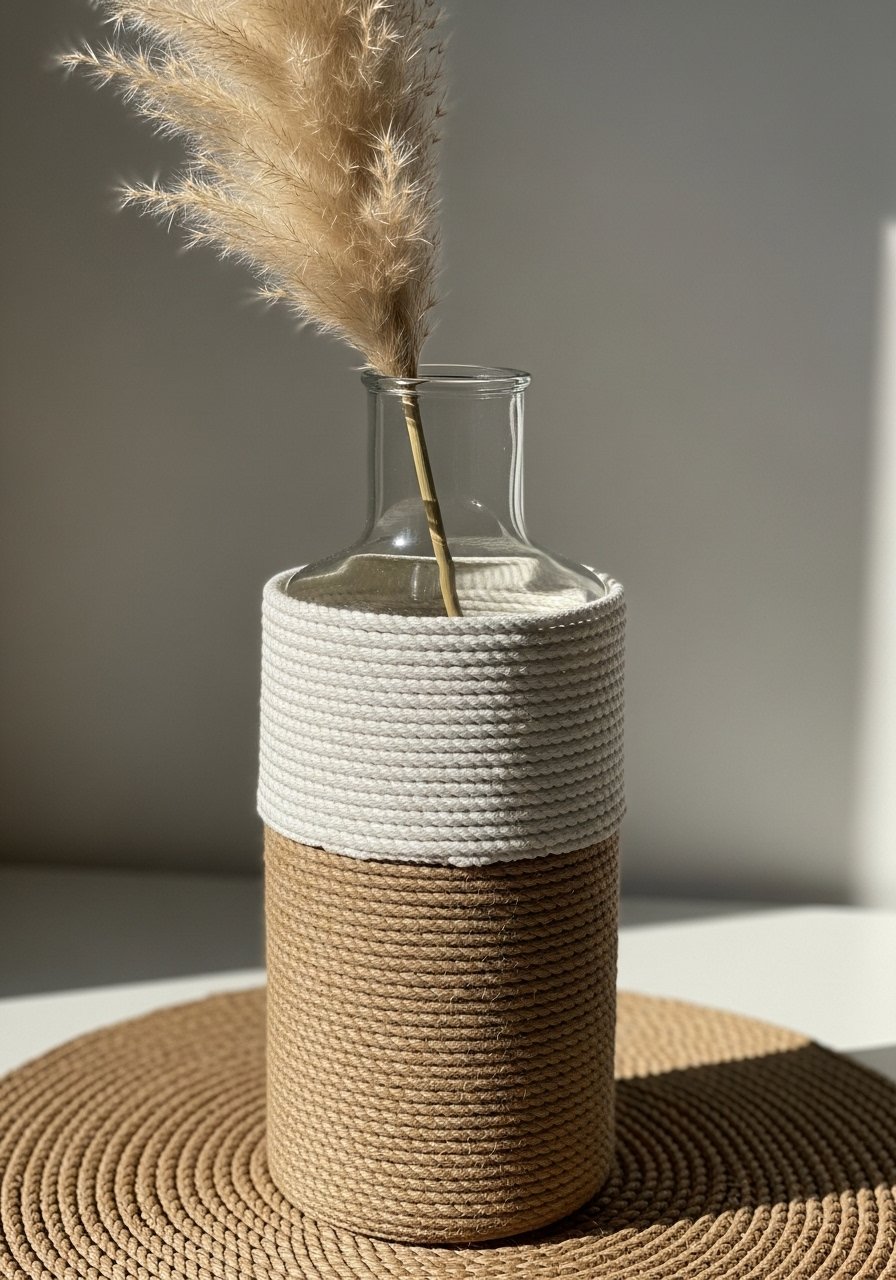
This boho-friendly rope wrap mixes dyed and natural fibers for a cozy, textural piece. You’ll dye a small length of cotton rope for contrast. Use a heat-resistant dye kit and wear gloves.
Materials
- One 12–16 oz clear glass vase
- 10 ft cotton rope (5 mm)
- 8 ft bleached cotton rope (5 mm) — or dye 8 ft to desired shade
- Fabric dye sachet (if dyeing)
- Hot glue gun and glue sticks
- Scissors
- Plastic bin for dyeing (if used)
- Rubber gloves
Instructions
- If dyeing, follow dye kit directions: dissolve dye in hot water, submerge rope for 5–10 minutes for medium shade, rinse until water runs clear, air dry 24 hours.
- Clean vase. Start from the base with a short tail glued in place.
- Wrap colored rope for the top half; glue every 1–2 inches. Switch to natural rope at midpoint and continue wrapping.
- Keep tension even to avoid gaps. Trim and glue ends under a wrap.
- Let glue set 10 minutes before handling. Total project time: ~45–60 minutes.
Troubleshooting: If dye bleeds onto vase, let rope dry fully and rinse before wrapping.
How to Display or Gift It
- Pair with dried pampas or seedheads for neutral boho decor.
- Gift wrapped in a mesh bag with a note on dye color care.
- Store extra rope in a labeled craft organizer.
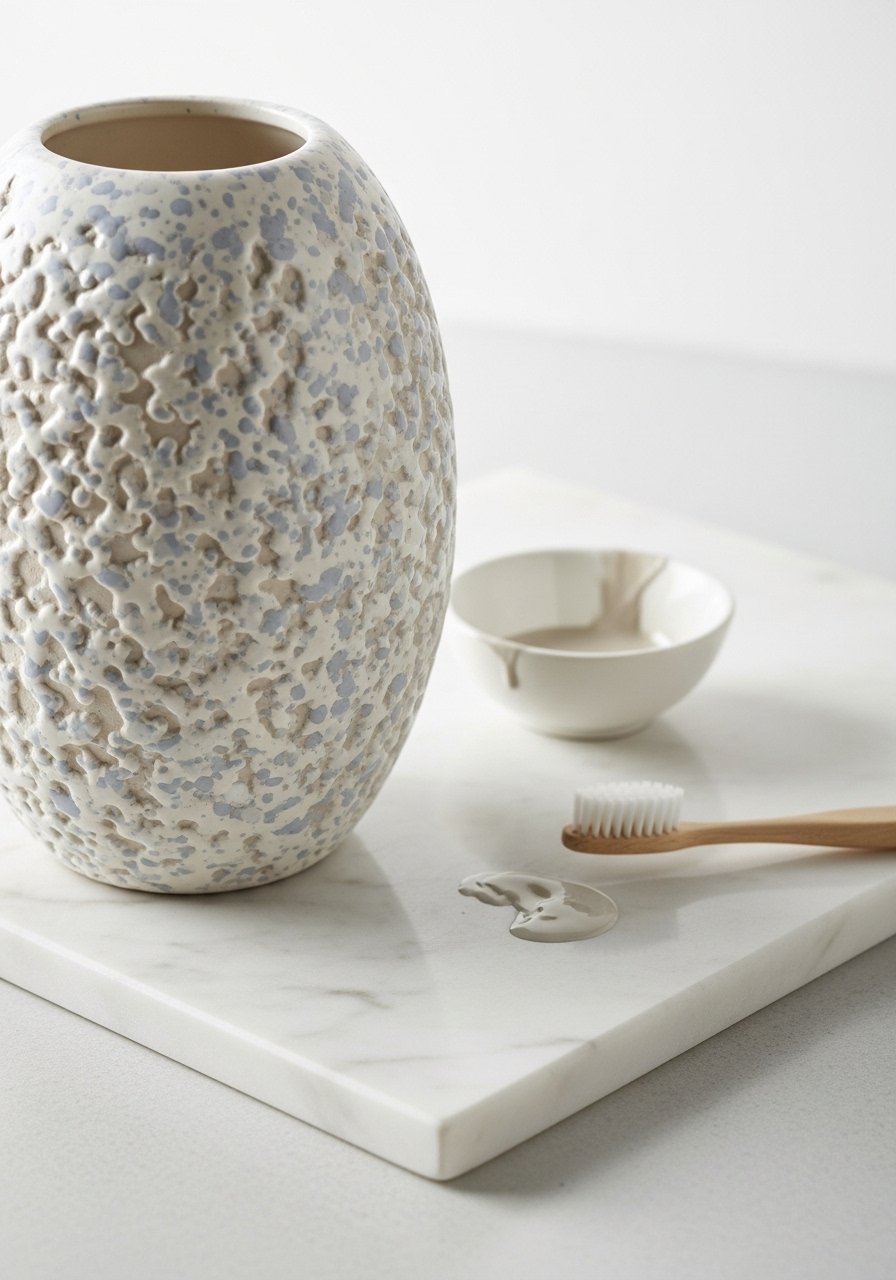
- Painted Terracotta Look on Glass
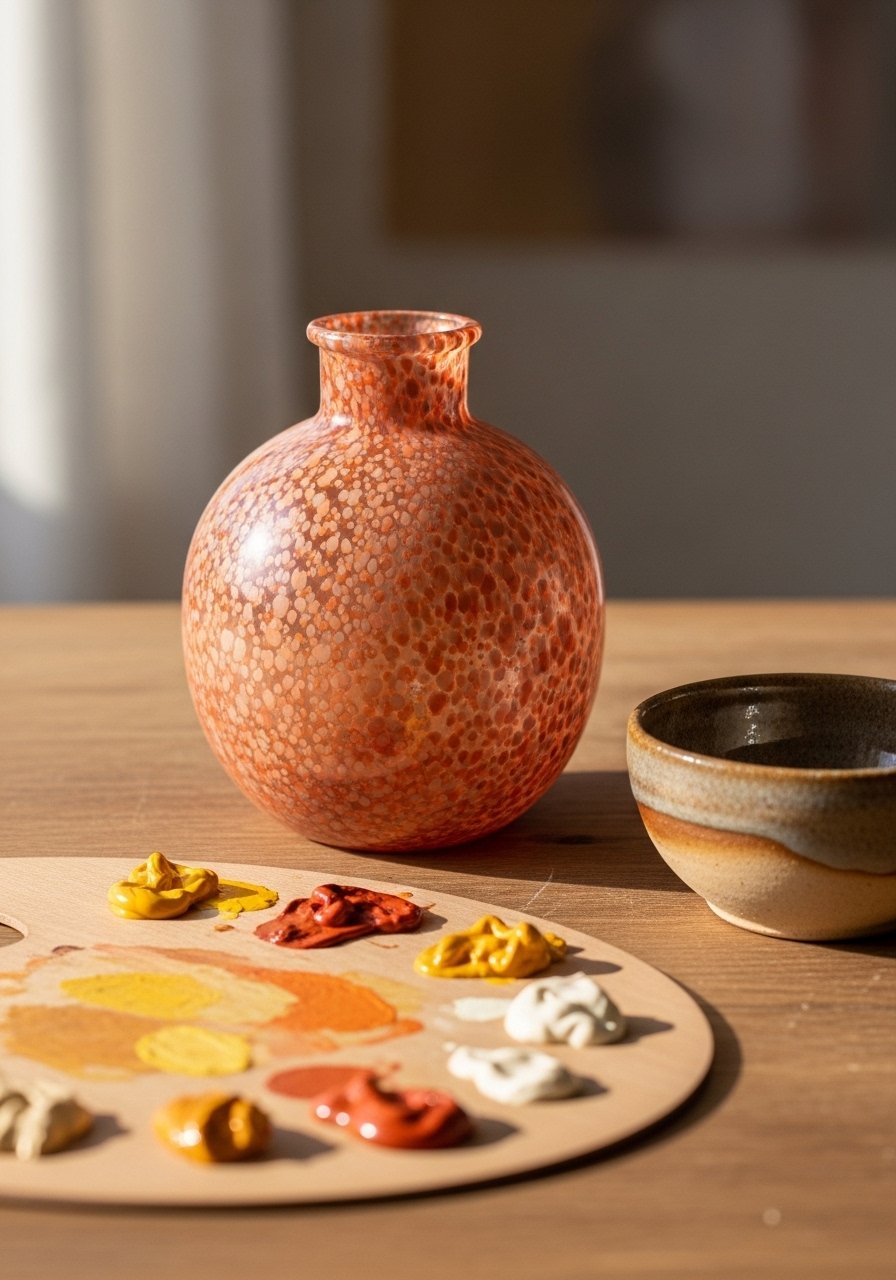
You can make a glass vase look like fired clay using layered paints and a speckle technique. This project creates a tactile, earthy finish that fits cottagecore and farmhouse aesthetics.
Materials
- One 12 oz clear glass vase
- Chalk paint (terracotta shade, 2 oz)
- Burnt sienna acrylic (1 oz) for speckle
- Flat foam brush (1–2 inch)
- Old toothbrush for speckling
- Sanding sponge (220)
- Matte acrylic spray sealer
Instructions
- Clean and degrease vase. Apply one thin coat of chalk paint; dry 20–30 minutes.
- Apply second coat and texture while still tacky by stippling with a crumpled paper towel for clay effect.
- Mix a tiny amount of burnt sienna with water. Dip toothbrush and flick speckles gently over the vase. Practice on scrap.
- Let dry 1 hour. Lightly sand spots to soften texture.
- Seal with two light coats of matte spray, 15 minutes between coats. Full cure 24 hours.
Troubleshooting: If paint chips after washing, add one thin layer of Mod Podge gloss under the sealer.
How to Display or Gift It
- Place alongside real terracotta pots for layered texture.
- Add a kraft gift tag and recycled tissue for gifting.
- Store painted pieces in a padded box until fully cured.
- Minimalist Block-Stripe Vase — DIY vase decorating ideas for japandi
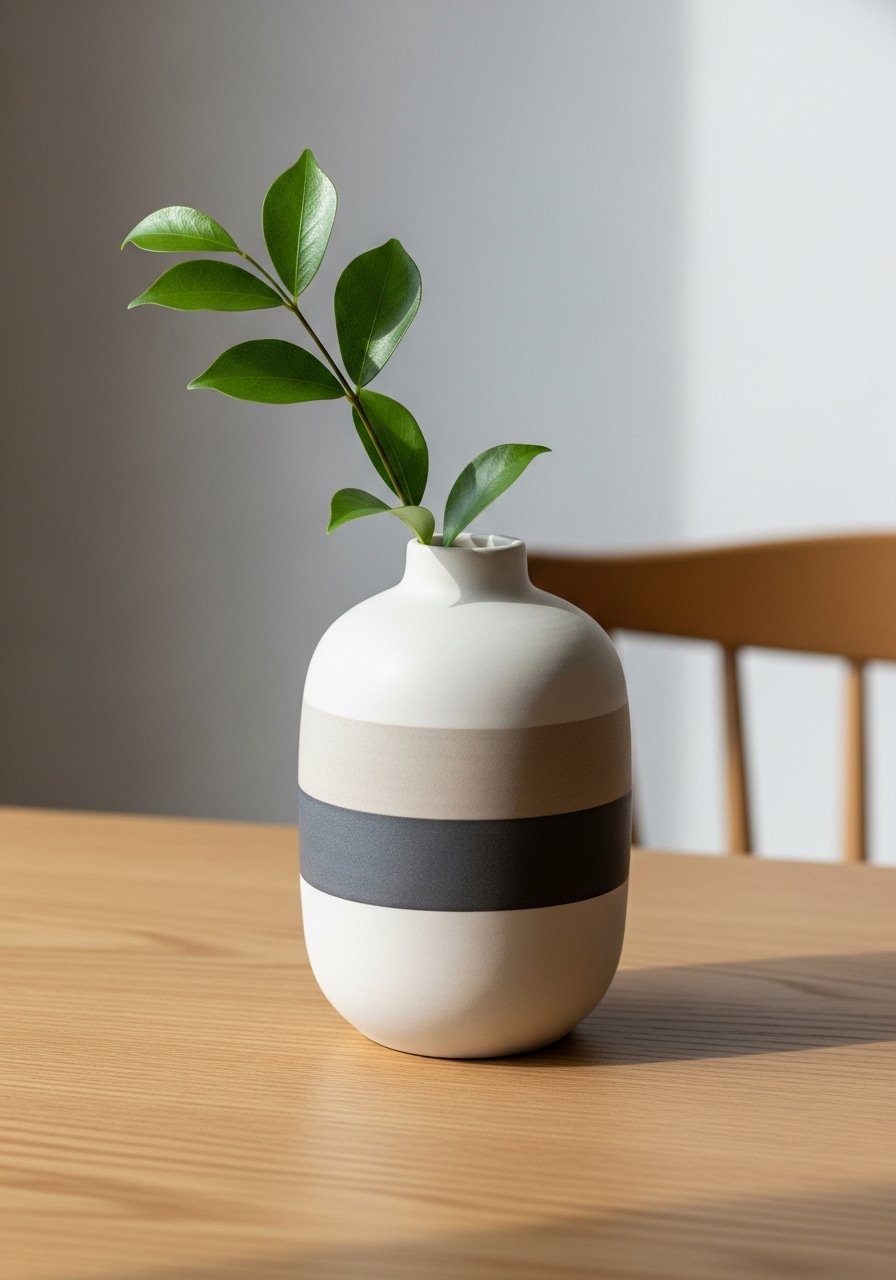
Japandi favors simplicity and calm lines. This block-stripe vase is all about restraint — two neutral hues on a ceramic or glass vase create a serene, modern look. Painter’s tape makes lines crisp; I recommend using a high-quality painter’s tape for clean edges.
Materials
- One 10–14 oz ceramic or glass vase
- Chalk paint in two neutral tones (1–2 oz each)
- 1⁄4-inch and 1⁄2-inch painter’s tape
- Small angled paintbrush
- Foam brush
- Sanding sponge (320)
- Clear matte sealer spray
Instructions
- Clean vase. Decide stripe placement and mark lightly with pencil.
- Apply painter’s tape along pencil lines. Press down firmly.
- Paint the exposed area with thin coats. Two coats, 20–30 minutes between coats.
- Remove tape after final coat is tacky (not fully dry) to prevent peeling.
- Sand tiny drips and finish with matte sealer. Cure 24 hours before use.
Troubleshooting: Remove tape slowly at a 45-degree angle for clean lines.
How to Display or Gift It
- Add a single branch or ikebana-inspired stem.
- Wrap in tissue paper and tie with a thin ribbon for gift-giving.
- Store multiple finished vases upright in a craft shelf to avoid scuffs.
- Decoupage Floral Collage (Vintage Look)
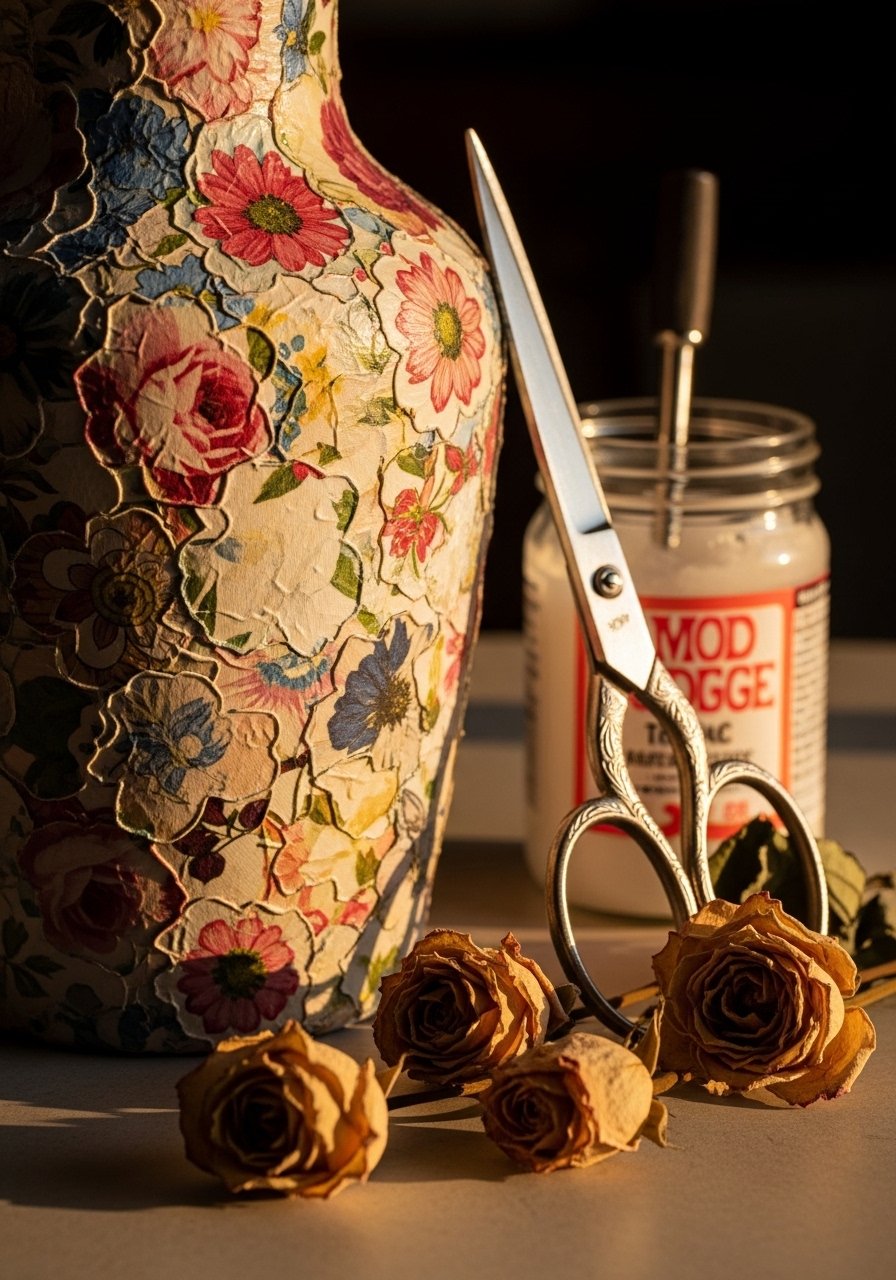
Decoupage lets you apply pattern and vintage charm to plain vases using paper napkins or scrapbooking paper. The finish is glossy and durable when sealed properly.
Materials
- One 16 oz glass vase
- Paper napkins or floral scrapbook paper (3–6 sheets)
- Mod Podge gloss, 8 oz
- Foam brush
- Scissors and tweezers
- Sandpaper fine (220)
- Soft lint-free cloth
Instructions
- Separate napkin layers; use only the printed top layer. Cut shapes roughly.
- Apply a thin coat of Mod Podge to vase where you’ll place paper.
- Lay paper gently and smooth with a foam brush working outward to remove bubbles.
- Seal with two more thin coats of Mod Podge, drying 20–30 minutes between coats.
- Let cure 24–48 hours before adding water. If edges lift, sand lightly and add a spot coat.
Troubleshooting: Thin coats prevent wrinkling. If paper tears, overlap with another piece for a collage look.
How to Display or Gift It
- Fill with faux flowers for a long-lasting gift.
- Pair with a set of matching decoupaged jar votives for a gift bundle.
- Store unused napkins flat in an archival paper folder.
- Geometric Washi Tape Mosaic
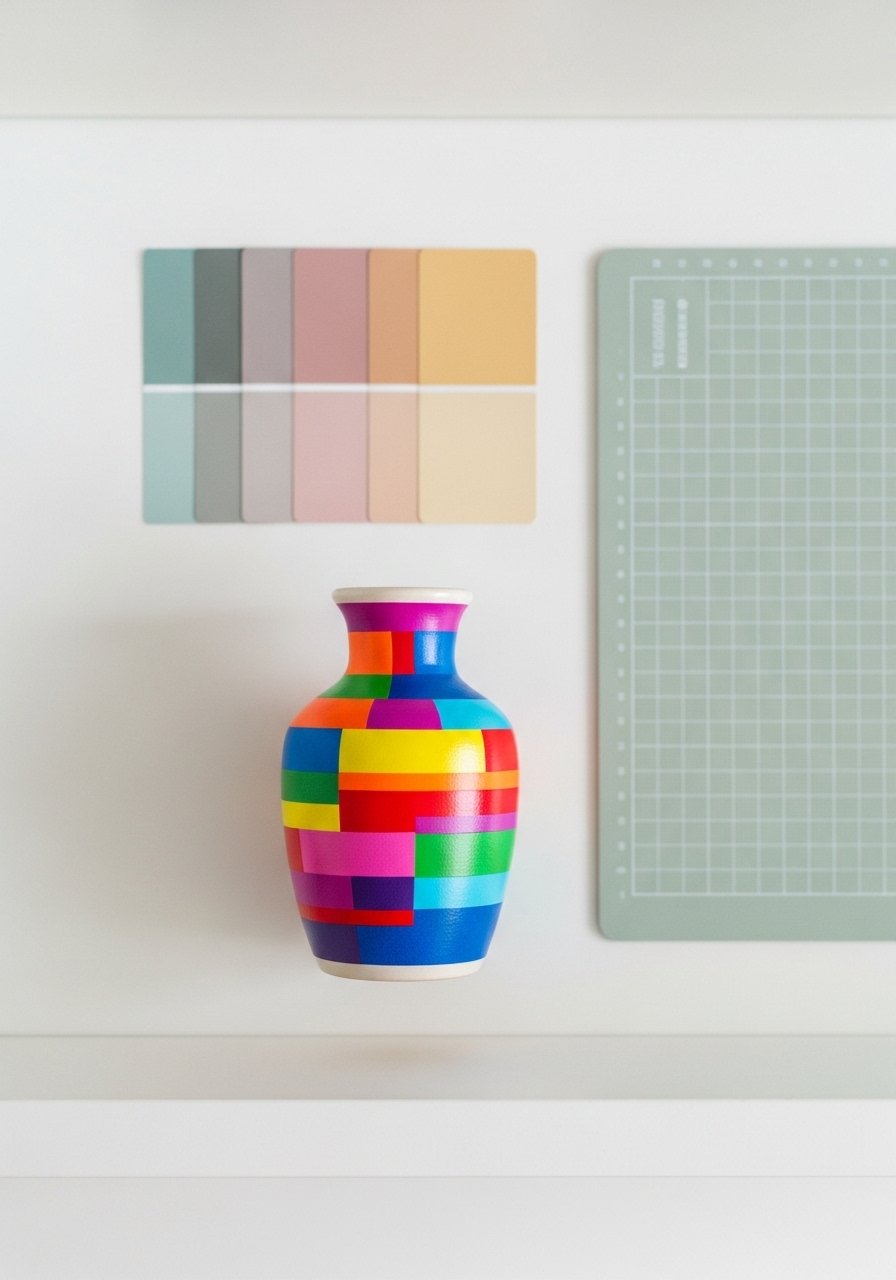
Washi tape gives instant pattern without paint. It’s perfect for renters or temporary decor and removes cleanly. Use a self-healing mat and a precision craft knife for crisp edges.
Materials
- One 12 oz glass or ceramic vase
- Washi tape rolls (3–6 patterns)
- Self-healing cutting mat
- Precision craft knife
- Ruler
- Scissors
- Clean cloth
Instructions
- Clean vase. Plan layout by layering tape on scrap first.
- Apply long strips across vase, smoothing as you go.
- Use ruler and craft knife on cutting mat to trim ends flush for tight seams.
- Overlap edges slightly for durability.
- For a lasting finish, add one light coat of acrylic sealer spray. Cure 24 hours.
Troubleshooting: If bubbles appear, lift tape and reapply. Replace the tape if adhesive loses tack.
How to Display or Gift It
- Use for seasonal color swaps — replace tape as trends change.
- Gift with a set of washi tape rolls in a small craft box.
- Store spare rolls in a small clear organizer.
- Speckled Eggshell Finish for Subtle Texture
Subtle speckling adds interest without loud color. This finish is delicate and pairs well with neutral interiors.
Materials
- One 10–14 oz vase
- Acrylic craft paint (base color, 2 oz)
- Dark acrylic for speckle (1 oz)
- Old toothbrush
- Small jar with water
- Paper towel
- Fine sanding sponge
Instructions
- Paint base coat thinly; let dry 30 minutes. Apply a second coat if needed.
- Dilute dark paint with a teaspoon of water for speckling.
- Dip toothbrush, hold bristles near vase, and flick with thumb to create droplets. Practice first.
- Let dry 1 hour; sand tiny raised spots if needed.
- Seal with matte sealer and let cure 24 hours.
Troubleshooting: Too watery paint will produce runs. Reduce water until droplets hold shape.
How to Display or Gift It
- Pair with neutral textiles and linen napkins.
- Include a small instruction note if gifting (speckle technique summary).
- Store sealed vases on a high shelf protected by a soft cloth.
- Mosaic Tile Accent Vase — DIY vase decorating ideas with small tiles
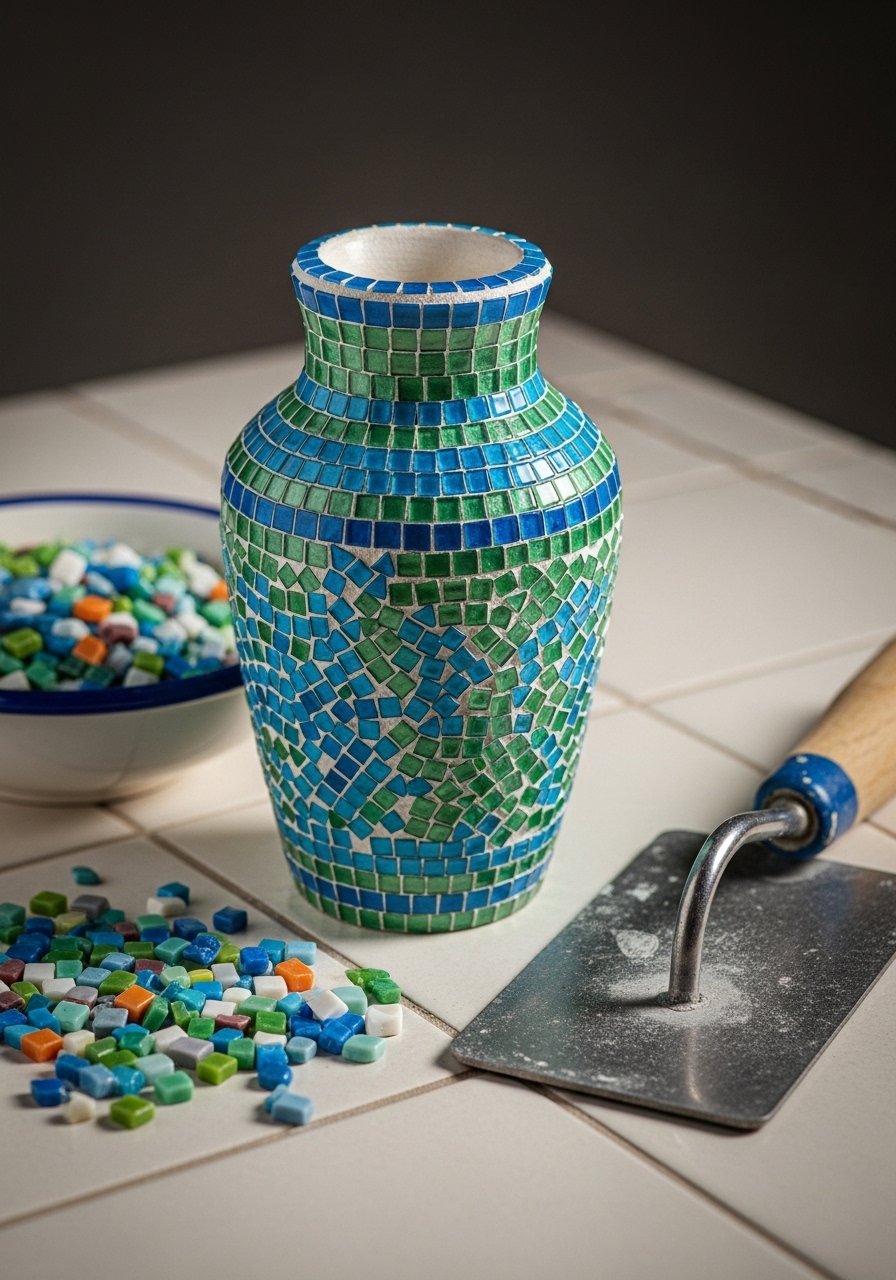
Mosaic adds artisanal depth and color. Small glass tiles or broken vintage china both work. Use tile adhesive and unsanded grout for a smooth finish.
Materials
- One 8–12 oz glass vase
- Mosaic tiles or glass tile pieces (approx. 1 cup)
- Tile adhesive (small tub, 8 oz)
- Unsanded grout (4 oz)
- Grout float or silicone spatula
- Sponge and bowl of water
- Safety glasses and gloves
Instructions
- Clean vase. Plan tile placement and size; dry-fit pieces.
- Apply tile adhesive small sections at a time and press tiles into place.
- Let adhesive cure 24 hours.
- Mix grout to toothpaste consistency and press into gaps with a float.
- Wipe excess grout with a damp sponge. Let grout set 20–30 minutes, then clean haze with soft cloth.
- Cure grout 72 hours before use.
Troubleshooting: Don’t over-grout — remove excess quickly. For glass vase curves, use smaller tiles for better fit.
How to Display or Gift It
- Display as a statement piece near coastal or cottage decor.
- Wrap in bubble wrap and kraft paper for safe gifting.
- Store leftover tiles in a divided organizer for future repairs.
- Metallic Rub-On Accents (Modern Glam)

If you want small metallic gleams without full gilding, rub-on foil sheets or metallic leaf transfers add luxe accents easily.
Materials
- One 12 oz glass or ceramic vase
- Metallic rub-on leaf sheets (gold or copper, 1 pack)
- Transfer tool or burnishing stick
- Soft brush
- Ruler and pencil
- Clear gloss sealer (optional)
Instructions
- Clean and degrease vase. Plan shapes with pencil.
- Cut foil transfers to size. Position and press with transfer tool.
- Gently peel backing; rub until foil adheres.
- Smooth edges with soft brush and seal with one light coat of gloss sealer. Cure 24 hours.
Troubleshooting: If foil lifts, reapply and press harder. Work in small sections for control.
How to Display or Gift It
- Pair with monochrome blooms to highlight metallics.
- Gift in a small box with a note about handling metallic foil.
- Store extra foil sheets flat in a craft folder.
- Rope Macramé Sleeve (3mm Cord)
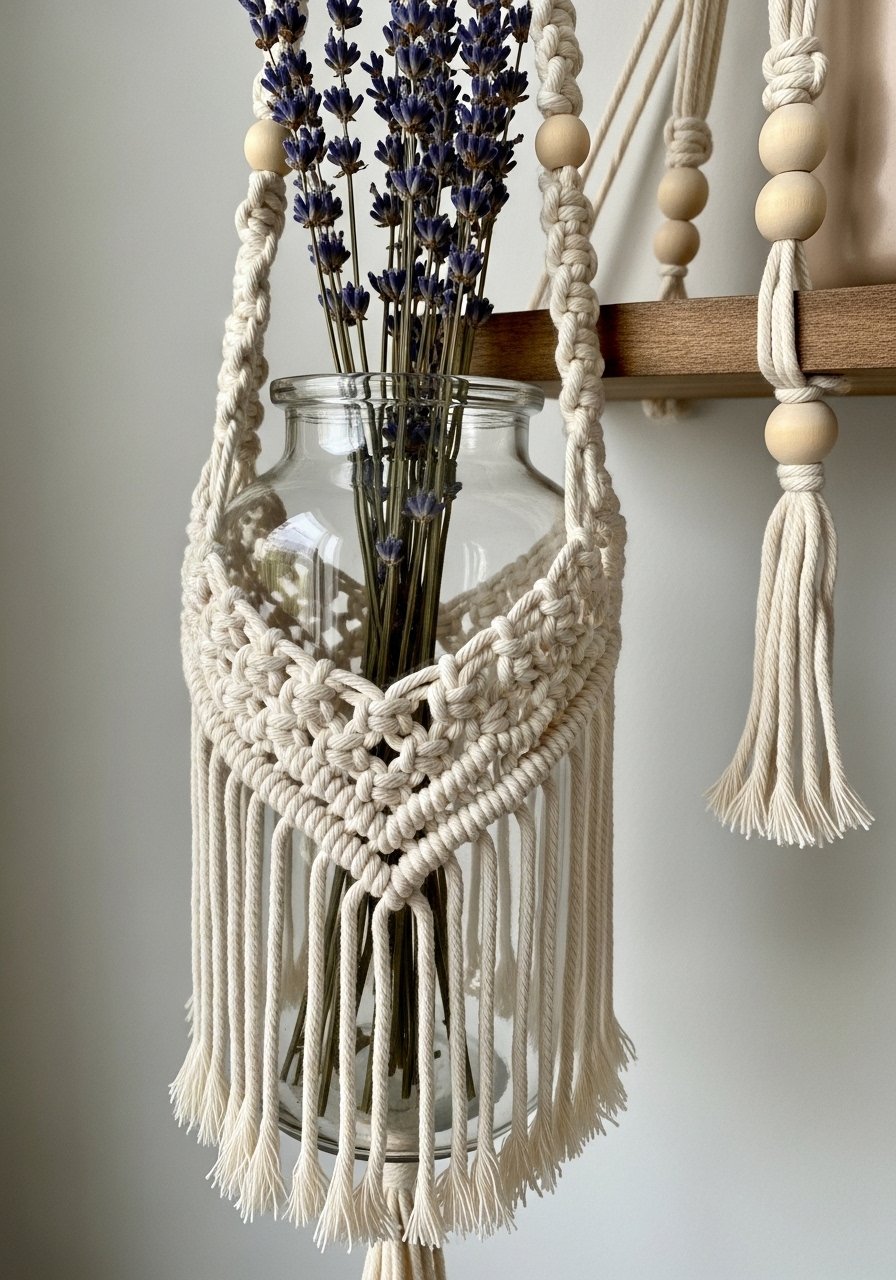
A macramé sleeve adds boho texture and is removable for easy cleaning. Use 3mm macramé cord and basic knots like square knots.
Materials
- One 12–16 oz vase
- 3 mm single-strand macramé cord, 20 yards
- Wooden beads (20 mm, 4 pcs)
- Scissors
- Measuring tape
- Small safety pin to hold cords
- Optional small wooden dowel for top loop
Instructions
- Cut 8 cords at 60 inches each. Fold in half and attach to a loop or dowel with lark’s head knots.
- Create a band of square knots for 4 inches, then add beads and continue knotting to cover vase height.
- Fit sleeve onto vase and adjust cords. Trim and melt ends if using synthetic cord (not needed for cotton).
- Total time: 1.5–2 hours.
Troubleshooting: Measure vase width and height before cutting cords to ensure fit.
How to Display or Gift It
- Use with fresh or dried stems. Sleeve is washable by hand.
- Gift with a mini macramé knotting guide.
- Store unused cord on a spool holder.
- Marbleized Pour-Paint Vase (Acrylic Pour)
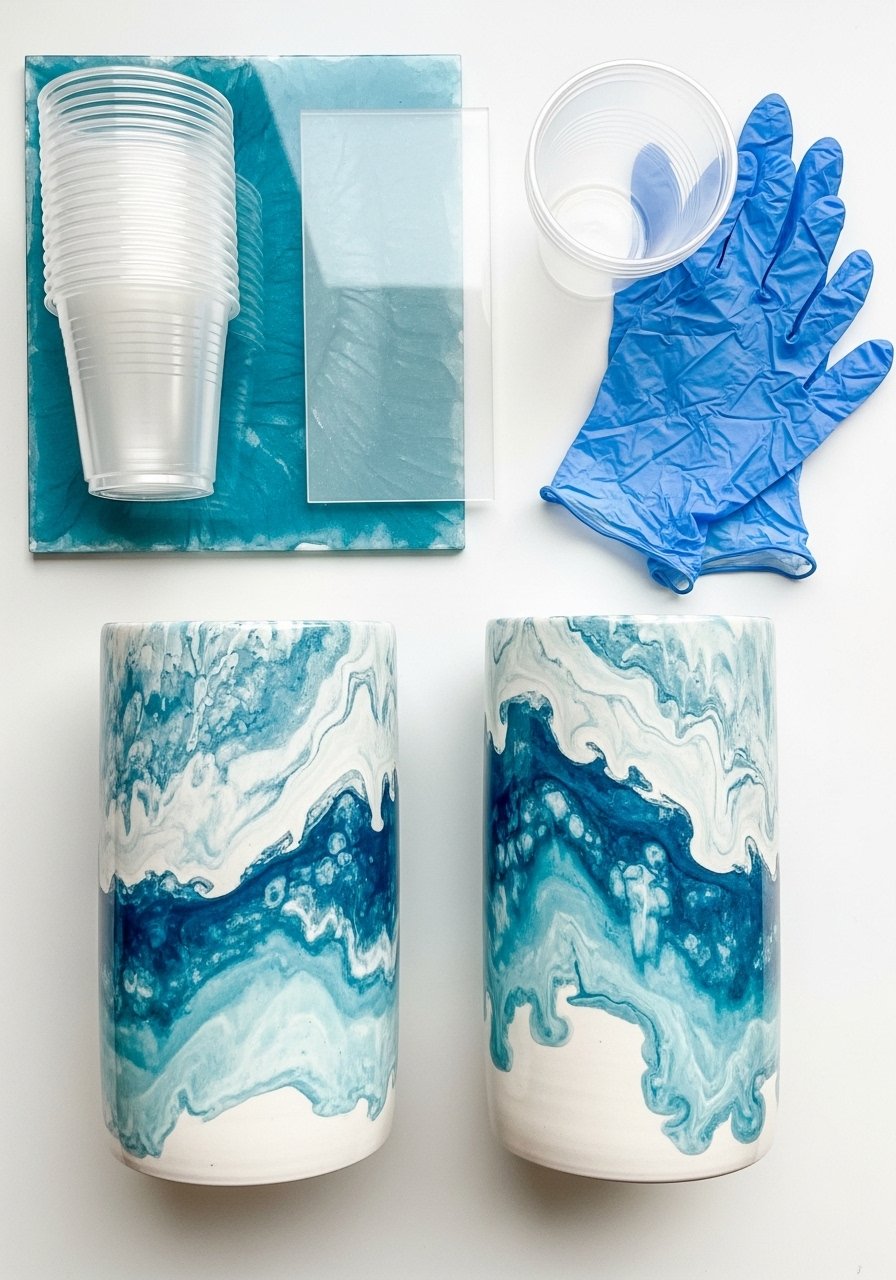
Acrylic pour creates uniquely marbled patterns. Work on a protected surface and use a silicone oil for cells if desired.
Materials
- One 10–16 oz vase
- Acrylic pouring paints (3–4 colors, 2 oz each)
- Pouring medium (4 oz)
- Disposable cups and stir sticks
- Silicone oil (optional)
- Gloves and protective mat
- Small torch or heat gun (optional)
Instructions
- Mix paint with pouring medium to a honey consistency (about 1:1 paint to medium).
- Layer paints in a cup and pour over the vase while rotating to create swirls.
- Use silicone oil to encourage cells, then pop bubbles with torch briefly.
- Let drip-dry on a protected rack 24–48 hours.
- Seal with glossy resin or varnish for a high-shine finish; if using resin, follow kit mixing and cure times (usually 24–72 hours).
Troubleshooting: Too-thick paint won’t flow; thin gradually. If bubbles persist, a quick pass with a heat gun helps.
How to Display or Gift It
- Use as a centerpiece; group similar patterns for cohesion.
- For gifting, include a care note explaining that resin-finished vases are not dishwasher-safe.
- Store completed pieces upright in a dust-free box until fully cured.
- Textile-Wrapped Linen Band (Soft Modern)
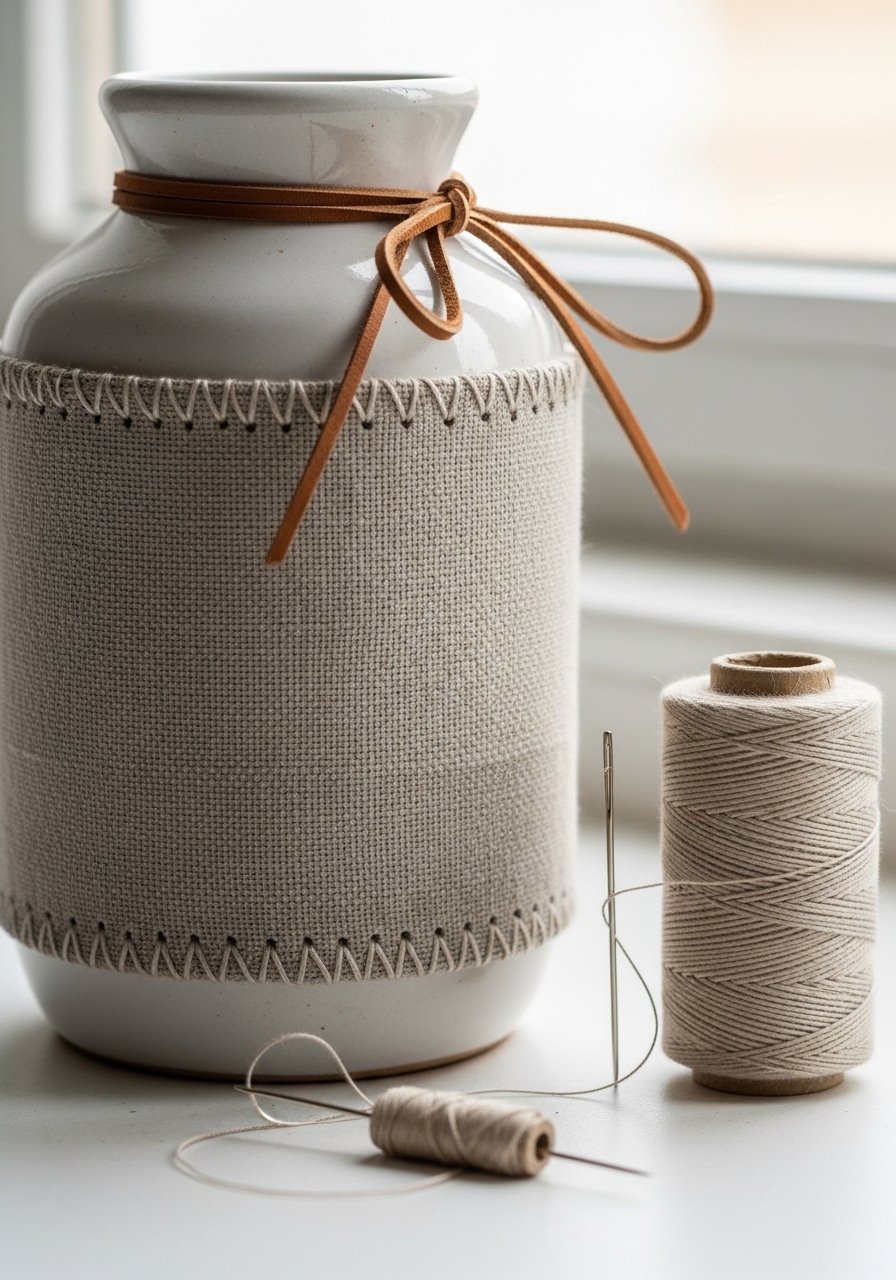
Wrapping a band of fabric gives soft texture and a premium feel. This works well for ceramic vases and is removable for washing.
Materials
- One 10–14 oz vase
- Linen fabric strip (3 in x circumference + 1 inch)
- Sewing needle and thread (or fabric glue)
- Thin leather cord (30 inches)
- Scissors and ruler
- Fabric stiffener (optional)
Instructions
- Cut linen strip to fit vase circumference plus 1 inch for overlap and 3 inches tall.
- Hem raw edges or use fabric glue for a clean finish.
- Wrap band snugly and overlap; tack with a few stitches or a short line of fabric glue.
- Tie leather cord around the center and add a knot or bow.
- Let glue cure 24 hours if used.
Troubleshooting: If fabric slips, add a strip of double-sided tape under the band.
How to Display or Gift It
- Swap bands seasonally for many looks from one vase.
- Package with a spare linen band for a gift set.
- Store bands flat in an accordion fabric organizer.
- Painted Terracotta Rim (Subtle Accent)
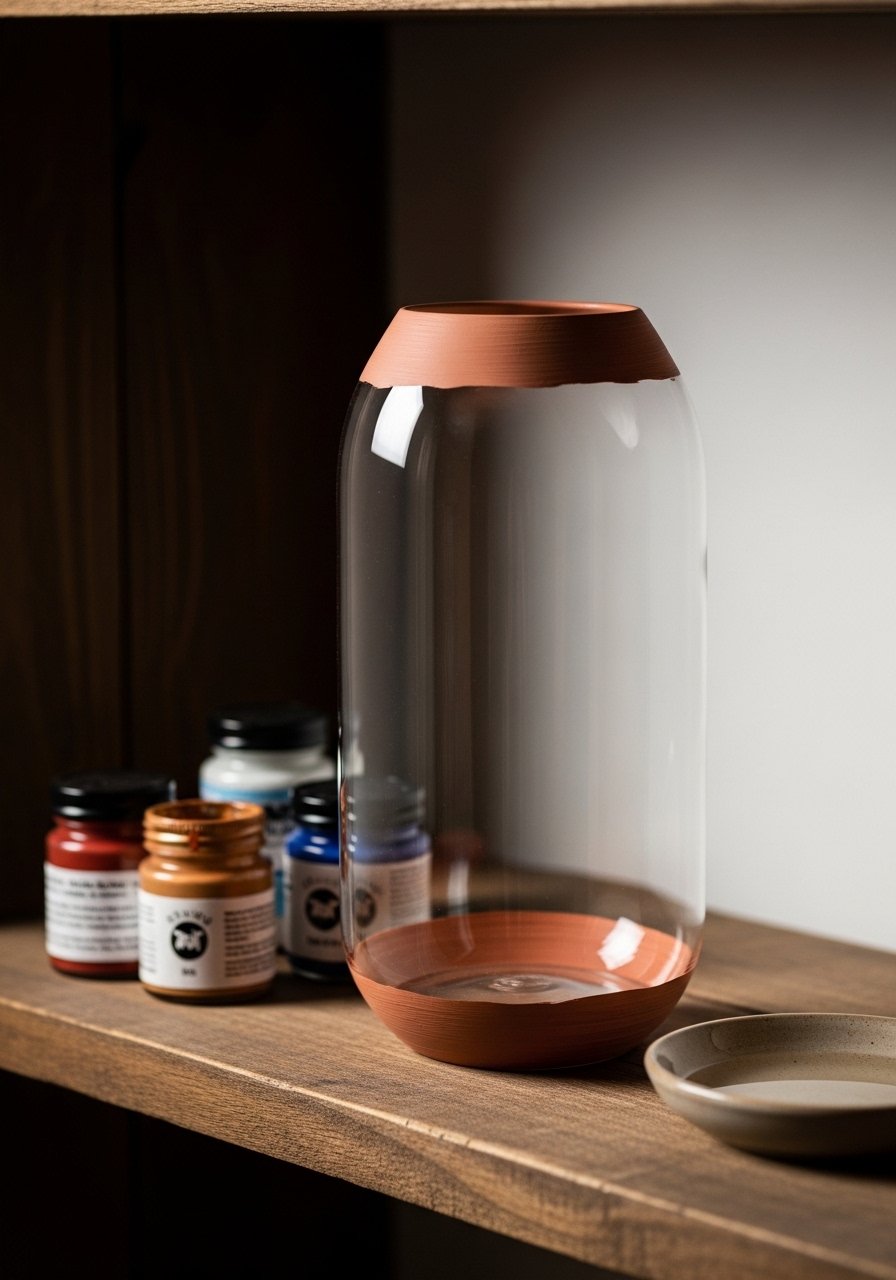
This minimal rim accent is quick and highly effective. It’s ideal if you want a hint of color without committing to a full paint job.
Materials
- One 12–20 oz glass vase
- Acrylic paint (terracotta, 1 oz)
- Small round detail brush (size 2)
- Painter’s tape (optional)
- Clear acrylic sealer spray
Instructions
- Clean rim and tape off interior if painting only exterior rim.
- Apply two thin coats, 10–15 minutes drying between coats.
- Remove tape while paint is tacky to avoid peeling.
- Seal with one light spray coat. Cure 24 hours.
Troubleshooting: Use a steady hand or tape for perfect edges.
How to Display or Gift It
- Use with crisp white flowers for contrast.
- Pair with a small matching tray and wrap in tissue for gifting.
- Store brushes flat to keep bristles in shape.
- Chalkboard Label Vase (Functional & Rustic)
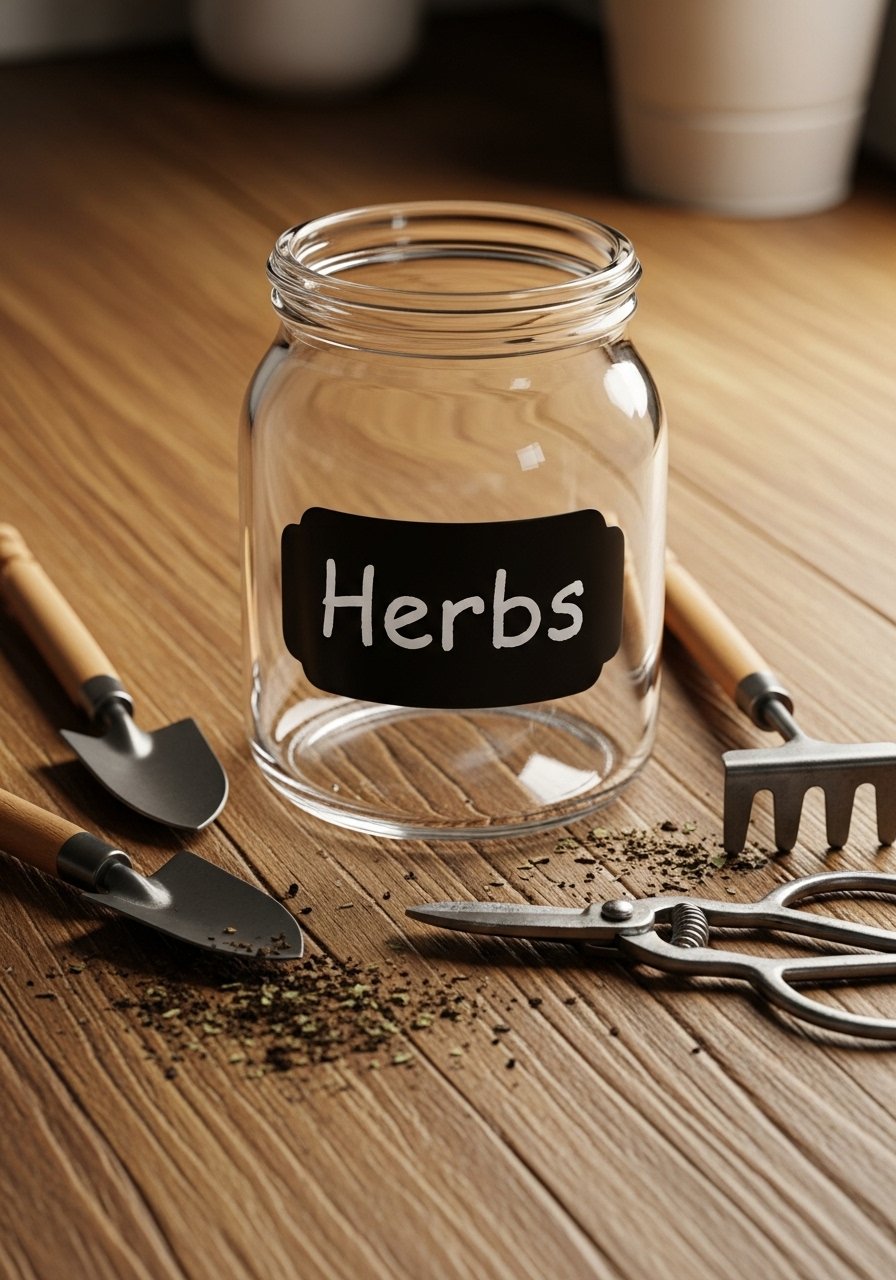
A chalkboard label turns your vase into a functional herb planter or rotating message piece. Use chalkboard paint and a fine brush for lettering.
Materials
- One 16 oz mason jar or vase
- Chalkboard paint (2 oz)
- Fine detail paintbrush
- Chalk or chalk marker
- Sanding sponge (320)
- Masking tape
Instructions
- Tape the area to paint the label. Apply two thin coats of chalkboard paint, 15–20 minutes between coats.
- After 24 hours cure, sand edges lightly if needed.
- Season the chalkboard by rubbing the side of a piece of chalk and wiping off.
- Write your label with chalk marker. Reapply chalk paint every year with wear.
Troubleshooting: If chalkboard surface is too glossy, sand lightly and wait 24 hours.
How to Display or Gift It
- Use for kitchen herb stations; fill with soil and herbs.
- Gift with a chalk marker and seed packets in a kraft bag.
- Store jars upside down in a box between uses.
- Etched Glass Look with Frosted Spray
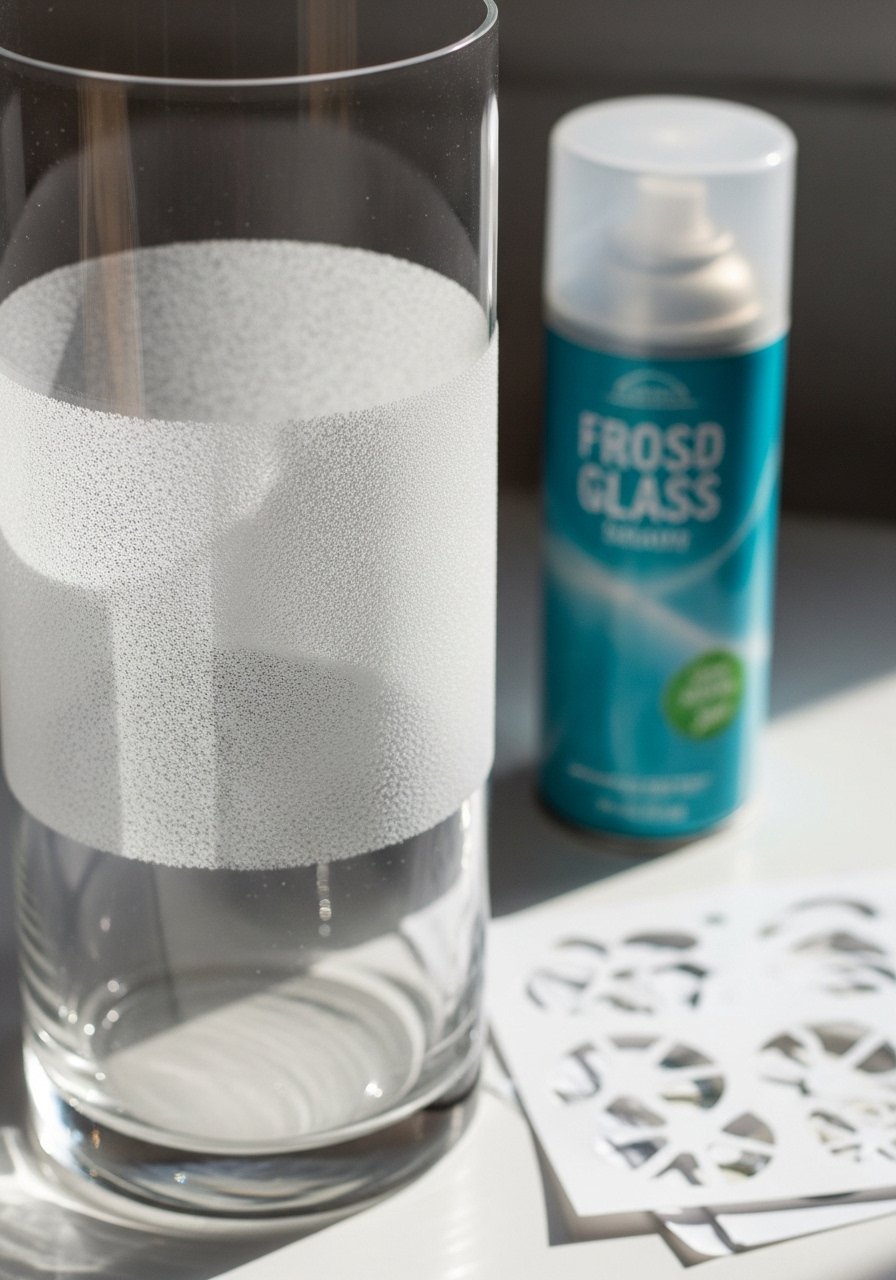
Frosted spray gives the look of etching without the tools. Use stencils for patterns or tape for bands.
Materials
- One 12–18 oz glass vase
- Frosted glass spray (1 can)
- Painter’s tape or stencil
- Gloves and protective mask
- Drop cloth
- Sandpaper (320) for corrections
Instructions
- Clean and tape off areas you want clear. Work outdoors or in ventilated area.
- Apply two light coats of frosted spray, 5–10 minutes between coats.
- Remove tape after 10 minutes of drying for crisp lines.
- Cure 24 hours before washing.
Troubleshooting: Avoid over-spraying; thin coats build even frost.
How to Display or Gift It
- Works great with tea lights or frosted vases for soft light diffusion.
- Gift with a small candle or LED string lights.
- Store spray cans upright in a cool closet.
- Natural Leaf Printing (Eco-Print)
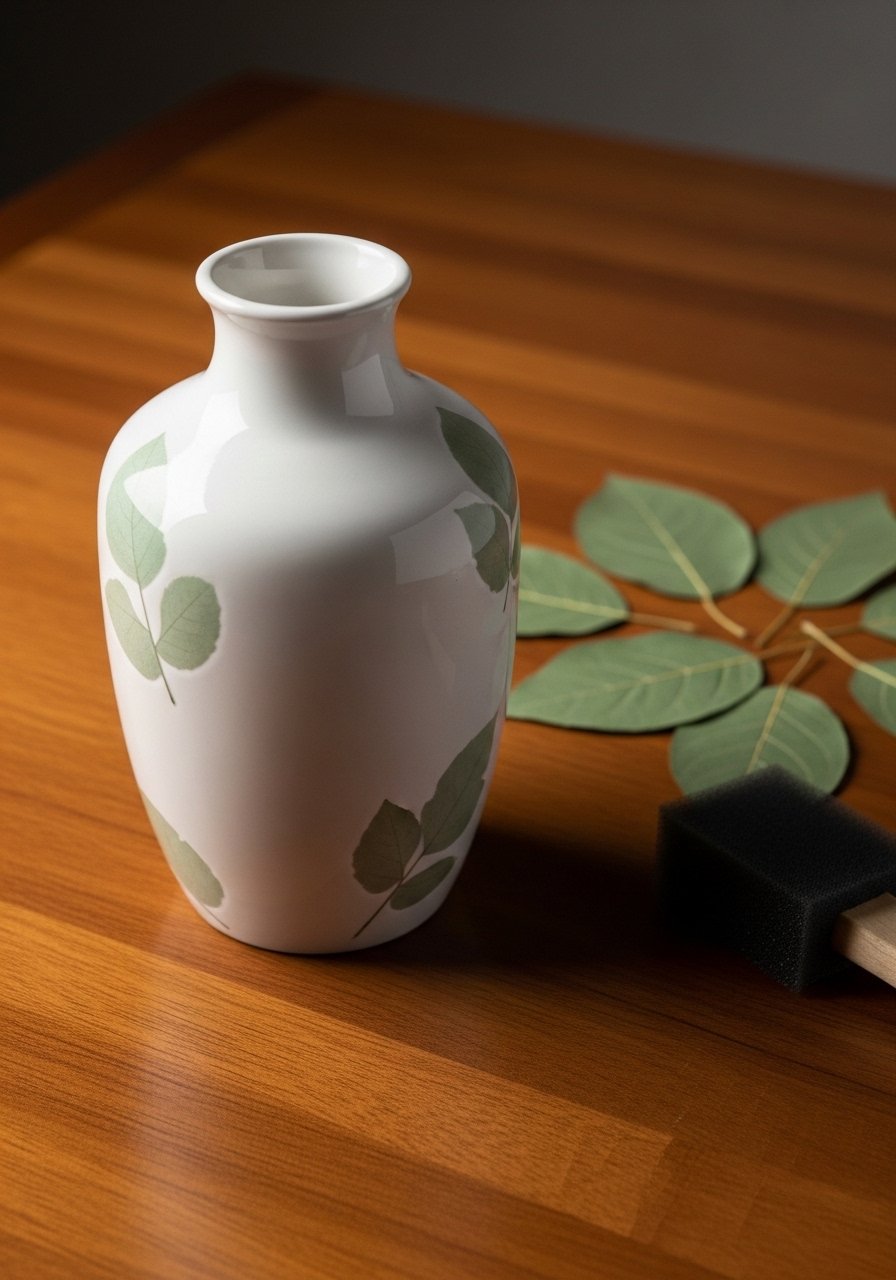
Printing with real leaves imparts an organic, botanical look. Use a thin coat of paint and press leaves against the vase.
Materials
- One 10–14 oz vase
- Fresh or pressed leaves (6–10)
- Acrylic paint (sage, 1 oz)
- Flat foam brush
- Gloves
- Tweezers
Instructions
- Paint a thin wash on a leaf and press it against the vase, paint side down.
- Hold for 10–15 seconds, then lift carefully to reveal the print.
- Repeat around vase; allow paint to dry 30 minutes between rounds.
- Seal with matte spray after 24 hours.
Troubleshooting: Use flat leaves for better prints; test on paper first.
How to Display or Gift It
- Pair with dried wildflowers.
- Gift with a packet of local pressed leaves and a note.
- Store leaves flat in archival envelopes for future printing.
- Glitter Ombre Vase (Party-Ready)

Glitter ombre adds sparkle for holidays or celebrations. Use fine craft glitter and an adhesive like Mod Podge.
Materials
- One 8–12 oz glass vase
- Fine craft glitter (gold, 2 oz)
- Mod Podge gloss (4 oz)
- Foam brush
- Disposable tray or paper
- Clear acrylic sealer
Instructions
- Brush Mod Podge on bottom third of vase and sprinkle glitter heavily.
- For ombre, apply Mod Podge slightly higher and dust with less glitter.
- Let dry 30–60 minutes. Tap off excess glitter and seal with two light coats of clear acrylic spray.
- Cure 24 hours before use.
Troubleshooting: Apply sealer in light layers to avoid dulling glitter.
How to Display or Gift It
- Use as a festive centerpiece or candle holder (use battery candles for safety).
- Wrap in cellophane and tie with ribbon for gifting.
- Store glitter in a lidded craft jar.
- Yarn-Wrapped Stripes (Colorful Textures)
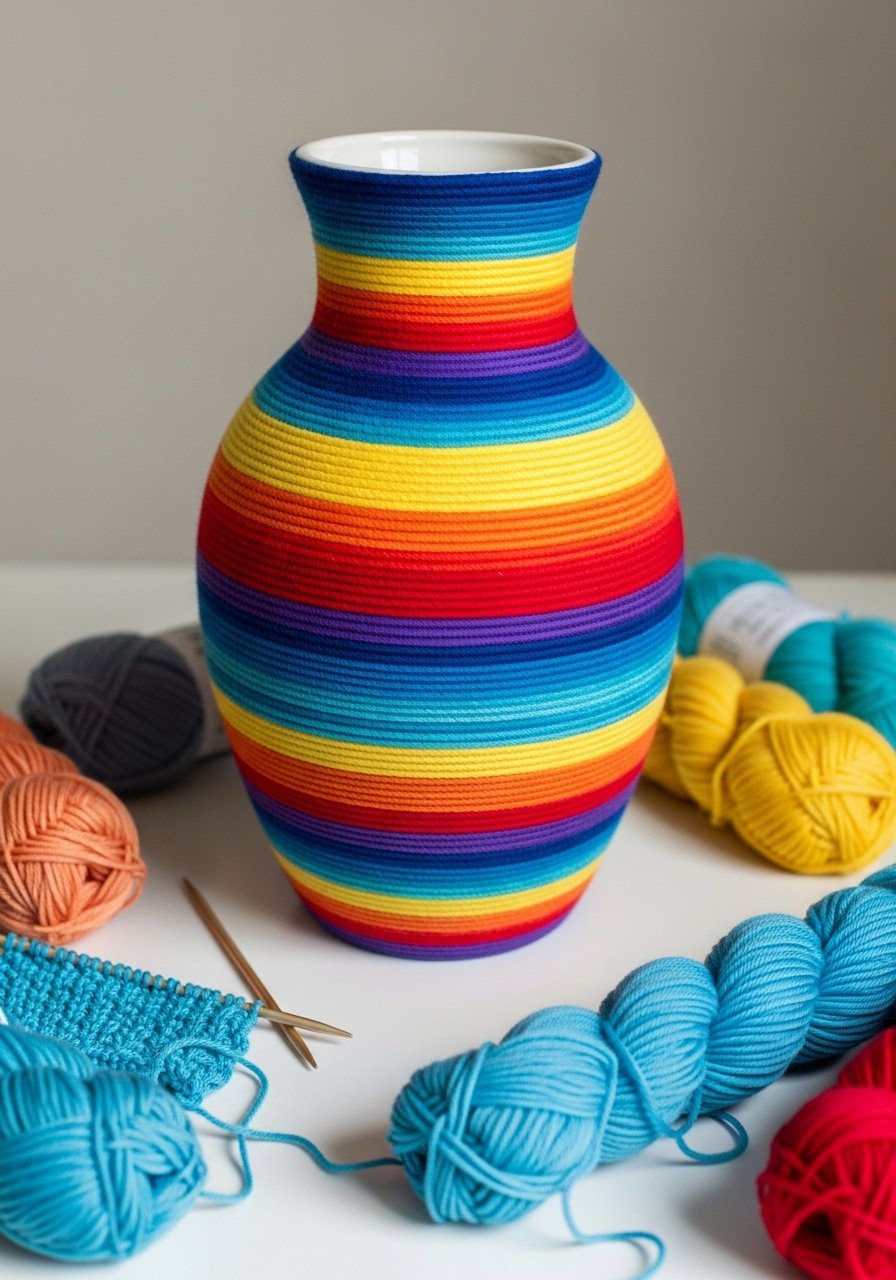
Yarn wrapping is playful and quick. Use bulky yarn for bold stripes or thin yarn for delicate bands.
Materials
- One 10–16 oz vase
- Yarn (worsted weight), 3 colors, 10–15 yards each
- Hot glue gun and sticks
- Scissors
- Ruler
Instructions
- Glue start of yarn near base. Wrap yarn snugly in chosen stripe width.
- Secure each color end with a small dot of glue and continue wrapping.
- Trim and tuck final ends under a wrapped row; glue if needed.
- Let glue set 10 minutes.
Troubleshooting: If yarn shifts, add more glue dots every 2 inches.
How to Display or Gift It
- Great for kids’ craft nights; package with a skein for gifting.
- Store extra yarn in a divided organizer box.
- Resin-Encased Botanicals (High-End Finish)
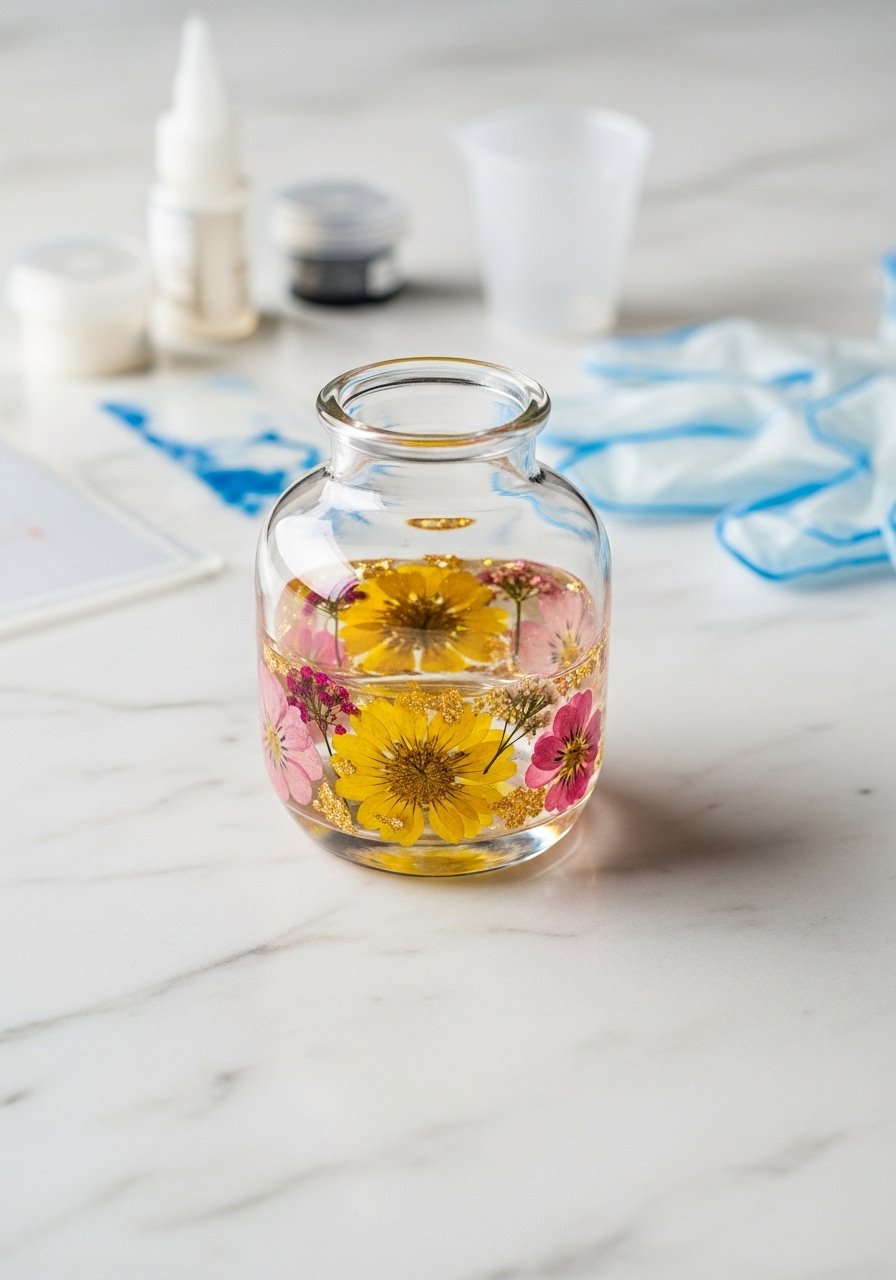
Resin provides a glassy, protective window for delicate flowers. This produces a high-end look but requires careful mixing and curing.
Materials
- One glass vase
- Epoxy resin kit (2-part, 8 oz)
- Pressed flowers (10–20)
- Small disposable mixing cups and stir sticks
- Painter’s tape
- Nitrile gloves and mask
Instructions
- Mask the band area on the vase where resin will sit.
- Mix resin per kit instructions (typically 1:1 by volume). Stir slowly to avoid bubbles.
- Pour a thin base layer, place pressed flowers, then pour a second leveling layer.
- Use a heat gun briefly to remove bubbles. Cure 24–72 hours per kit instructions.
- Remove tape and sand any rough edges gently.
Troubleshooting: Measure resin precisely; uneven mixing causes tacky spots.
How to Display or Gift It
- Use as a showpiece with single stem florals.
- Wrap carefully in bubble wrap for gifting.
- Store resin leftovers tightly sealed and upright.
- Painted Chalky Words (Personalized Message Vase)
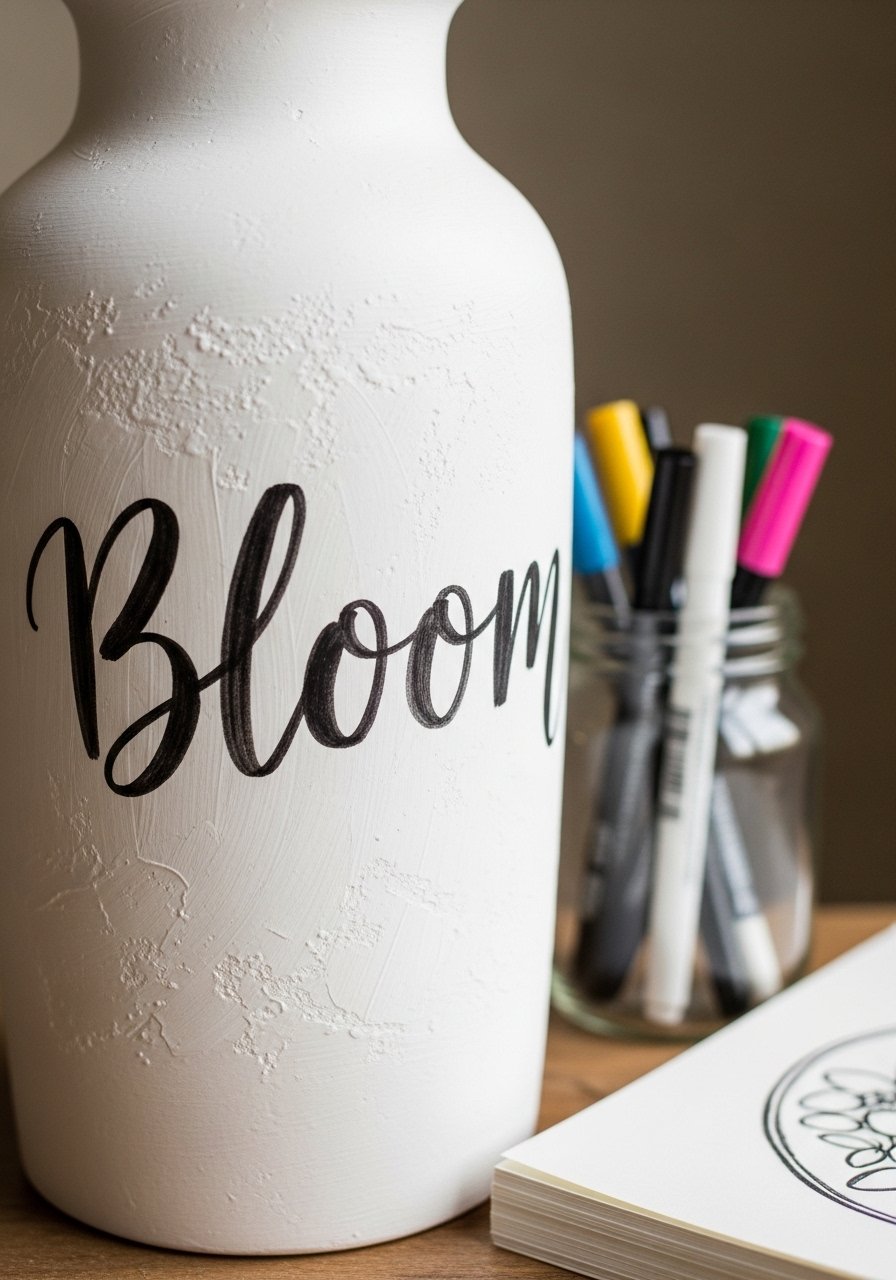
Hand-lettered words personalize vases for gifts, weddings, or home mottos. Use paint pens for control or a fine brush for calligraphy.
Materials
- One 12–16 oz ceramic vase
- Chalkboard paint pen or acrylic paint pen (black)
- Pencil and eraser
- Fine round brush (size 0–2) if using paint
- Ruler
Instructions
- Lightly sketch word in pencil. Practice lettering on paper.
- Trace with paint pen or brush. Allow 30–60 minutes to dry.
- Add a second coat if needed. Seal with matte spray after 24 hours.
Troubleshooting: If letters smudge, let dry longer and recoat thinly.
How to Display or Gift It
- Great for custom wedding favors or birthday gifts.
- Pair with a matching mug or tray.
- Store extra pens in a pen organizer.
- Wrapped Leather Accent (Industrial Chic)
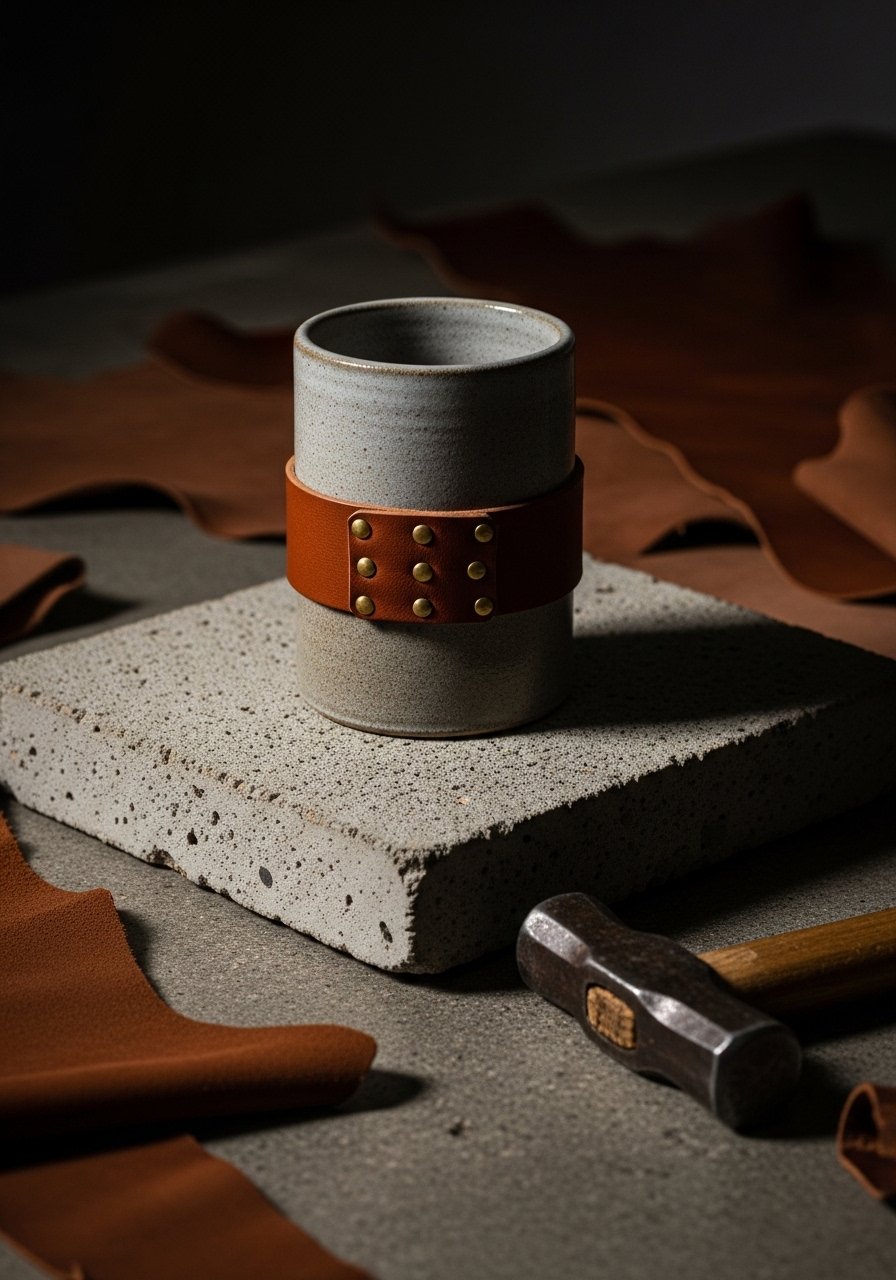
Leather gives a luxe, industrial touch that contrasts nicely with ceramics or glass. Use rivets or small nails for a permanent finish.
Materials
- One 10–14 oz vase
- Leather strip (1/4 in x circumference + 1 in)
- Small brass rivets or upholstery tacks (6 pcs)
- Leather punch or awl
- Hammer and cutting mat
- Ruler and scissors
Instructions
- Measure and cut leather strip to fit snugly around vase.
- Mark rivet placement evenly and punch holes.
- Wrap around vase and secure rivets or tacks. Trim ends flush.
- Optionally treat leather with a clear leather balm and let dry 24 hours.
Troubleshooting: If leather stretches, add an interior silicone line to keep tight.
How to Display or Gift It
- Pair with succulents for masculine or modern farmhouse styling.
- Gift with a small leather care kit.
- Store extra leather flat in a cool dry place.
Thanks for sticking with me through 22 ways to make ordinary vases sing. Between twine, paint, textiles, resin, and a little glue, you’ve seen ideas for every skill level and style. Pin this list for later and try one or two projects this weekend — they’re quick to start and satisfying to finish.
Which style will you try first — the boho macramé sleeve, a marble pour, or a twine-wrapped favorite? Share your photos or tag a friend who’d love to craft a set with you. Trust me, picking up a quality hot glue gun with temperature control changed how every single one of these projects turned out — less stringing, nicer adhesion, and far fewer burned fingers.
Happy crafting!


