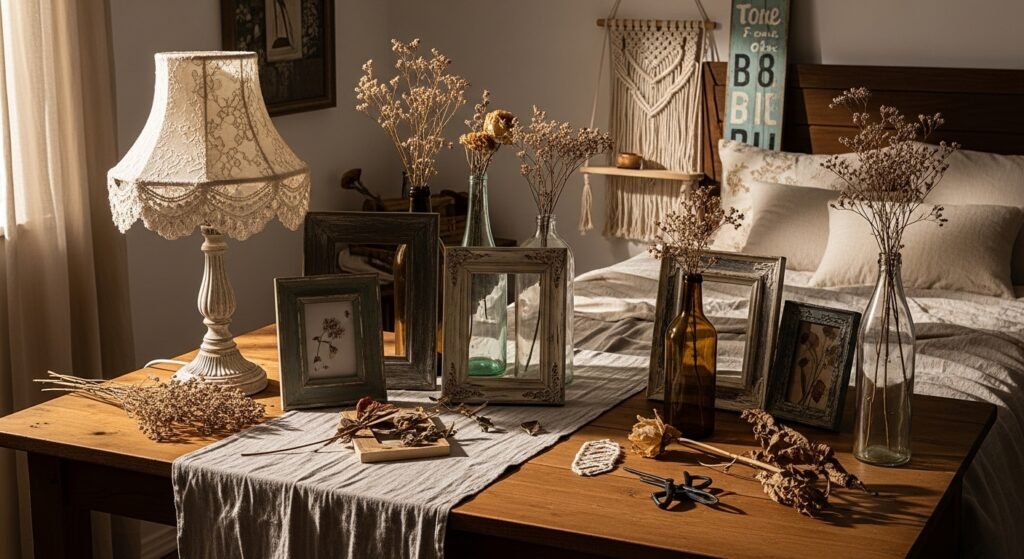
You know that satisfying thrill of spotting a thrifted find and picturing it in your room? These 30 projects are all about that feeling—simple ways to turn secondhand treasures into aesthetic room decor DIY with thrifted items that feel sustainable, stylish, and one of a kind. You’ll find projects that lean cottagecore, boho, japandi, and modern farmhouse—small upgrades that make a big visual impact.
I start many small cutting tasks on my Cricut Explore cutting machine but a sharp precision craft knife works for detailed trims. Grab a temperature-controlled hot glue gun for quick assembly and fewer strings. Each project below lists exact materials, sizes, and realistic drying times so you can craft with confidence. Pin your wishlist, grab a thrift haul, and let’s make your room unmistakably you with aesthetic room decor DIY with thrifted items.
1. Vintage Lace Lampshade Revamp
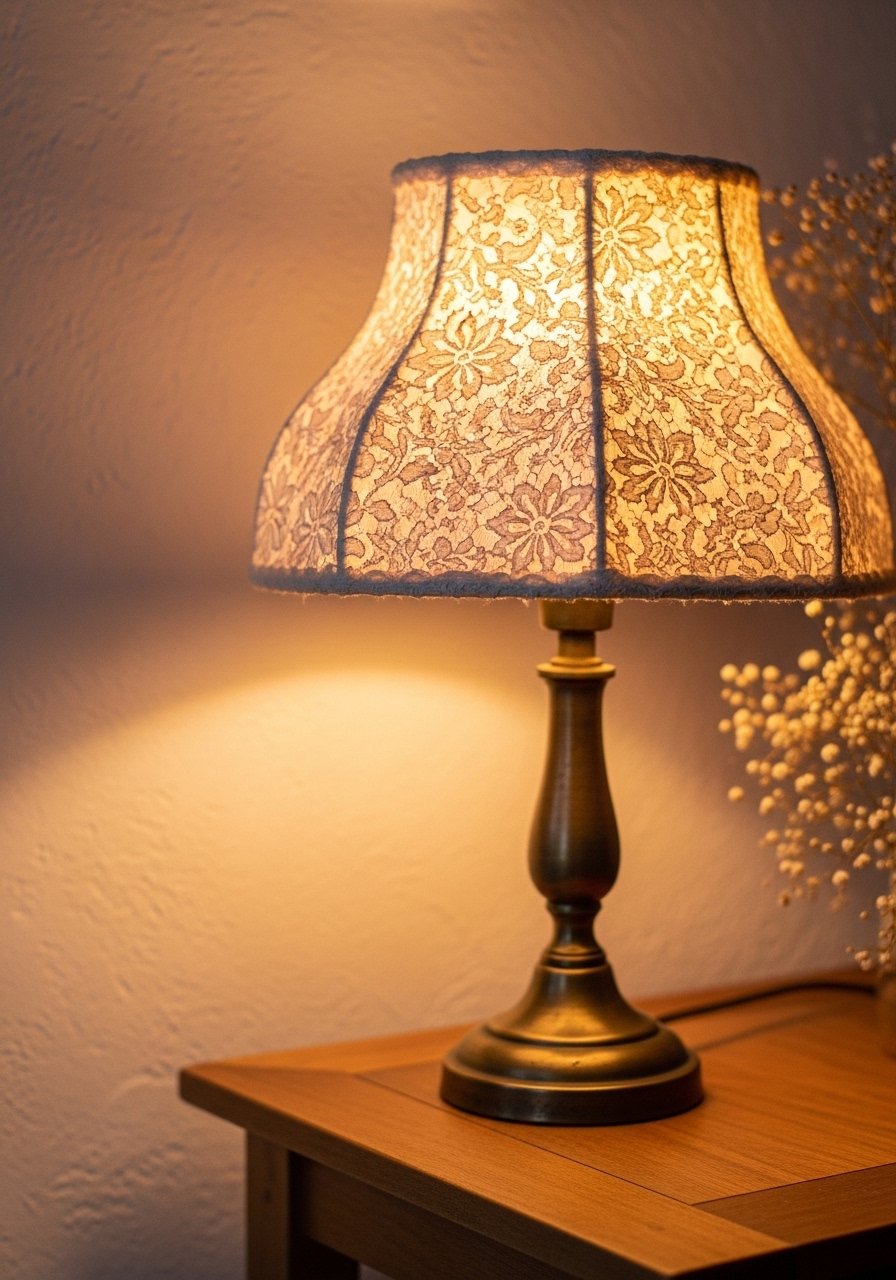
This project turns a dingy old fabric shade into a delicate, cottagecore focal piece. Lace adds texture and filters light beautifully for a warm glow. Beginners will love how forgiving stitching and glue are here.
Materials
- Thrifted fabric lampshade (standard 10" top diameter, 12" bottom diameter)
- 0.5 yard vintage lace trim (2"–4" width)
- Fabric glue or quick-dry craft glue, 2 oz
- Thin cotton twine, 3 yards
- Scissors
- Small hand-sewing needle and thread (optional)
- Painter’s tape (small strips)
Instructions
- Remove the shade fabric if possible, or clean the existing shade with a damp cloth and let dry 30 minutes.
- Measure circumference and cut lace with 1" overlap. Use a precision craft knife for neat ends.
- Apply a thin bead of fabric glue along the top edge. Press lace in place, smoothing with fingers to remove bubbles.
- Work in 6–8" sections, overlapping seams slightly and trimming excess.
- If seams aren’t secure, stitch with running stitches every 1" for durability.
- Add a twine bow at the base for a hand-finished look. Allow glue to cure 24 hours until not tacky.
How to Display or Gift It
- Place on a vintage brass or painted thrifted lamp base for an instant cozy corner.
- Add a LED filament bulb for warm light and energy savings.
- Wrap gently in kraft tissue and tuck in a gift box. Store spare lace and thread in a clear craft organizer for future repairs.
2. Painted Frame Gallery from Secondhand Frames
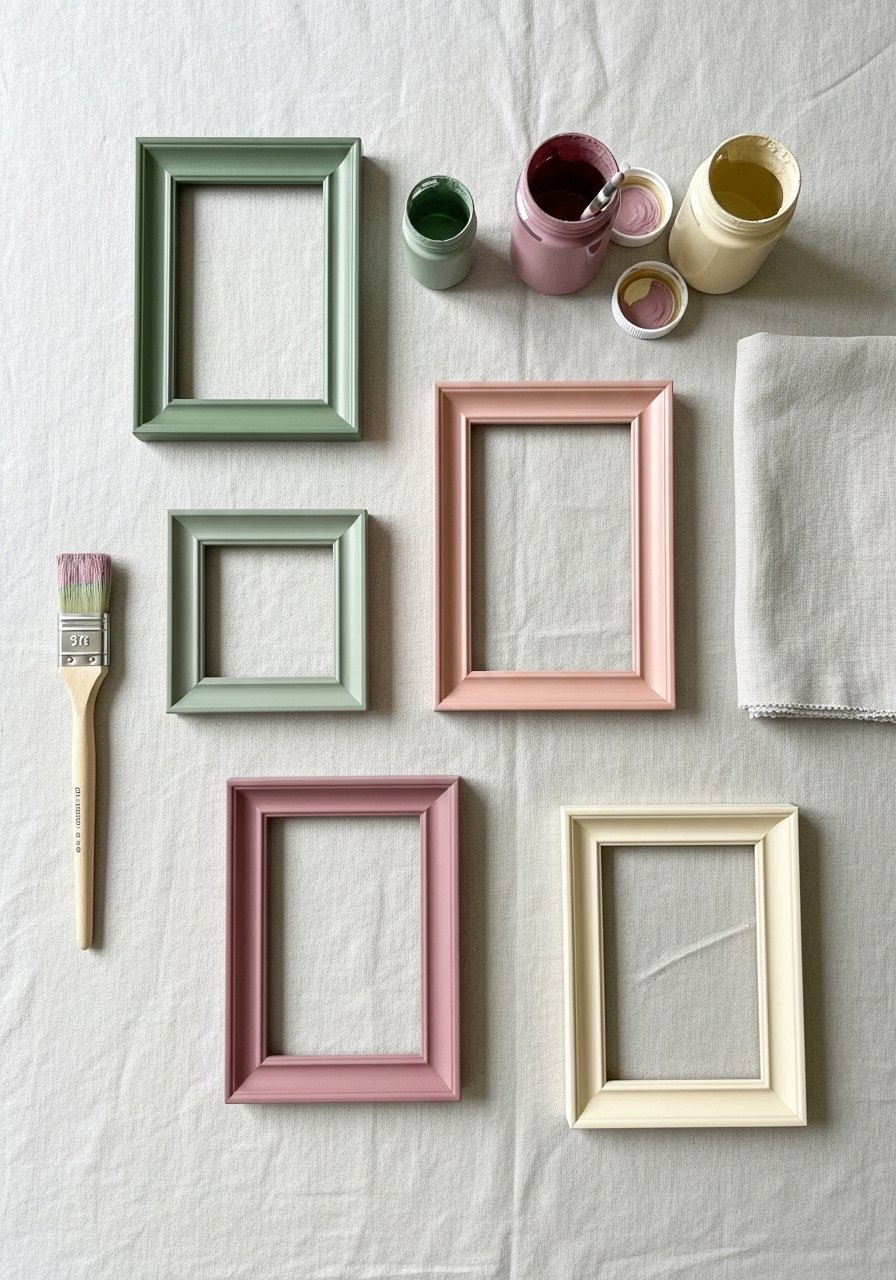
Thrifted frames are perfect for creating a cohesive gallery. A few coats of chalk paint unify mismatched finishes and give a soft matte look that fits cottagecore, boho, or farmhouse spaces.
Materials
- 4–8 thrifted picture frames (various sizes)
- Chalk paint (sample pots) 2–3 oz each
- Foam brush (1" and 2")
- Sandpaper 120–220 grit
- Painter’s tape
- Drop cloth or newspaper
- Polycrylic matte sealer, 6 oz
Instructions
- Clean frames of dust and loose paint; let dry 15 minutes.
- Sand glossy sections lightly with 120 grit until toothy.
- Tape glass or backings to protect them.
- Apply first thin coat of chalk paint with foam brush; dry 30–45 minutes.
- Apply second coat for full coverage. Sand edges lightly for a distressed look.
- Seal with two thin coats of polycrylic, 30 minutes between coats. Cure 24 hours.
How to Display or Gift It
- Create a gallery wall around a bed or desk using a level and picture-hanging kit.
- Insert thrifted botanical prints, pressed flowers, or family photos.
- Gift grouped frames wrapped in twine with a set of mini printables. Store extra paint in a labeled jar for touch-ups.
3. Thrifted Tray Makeover — Keyword in Title
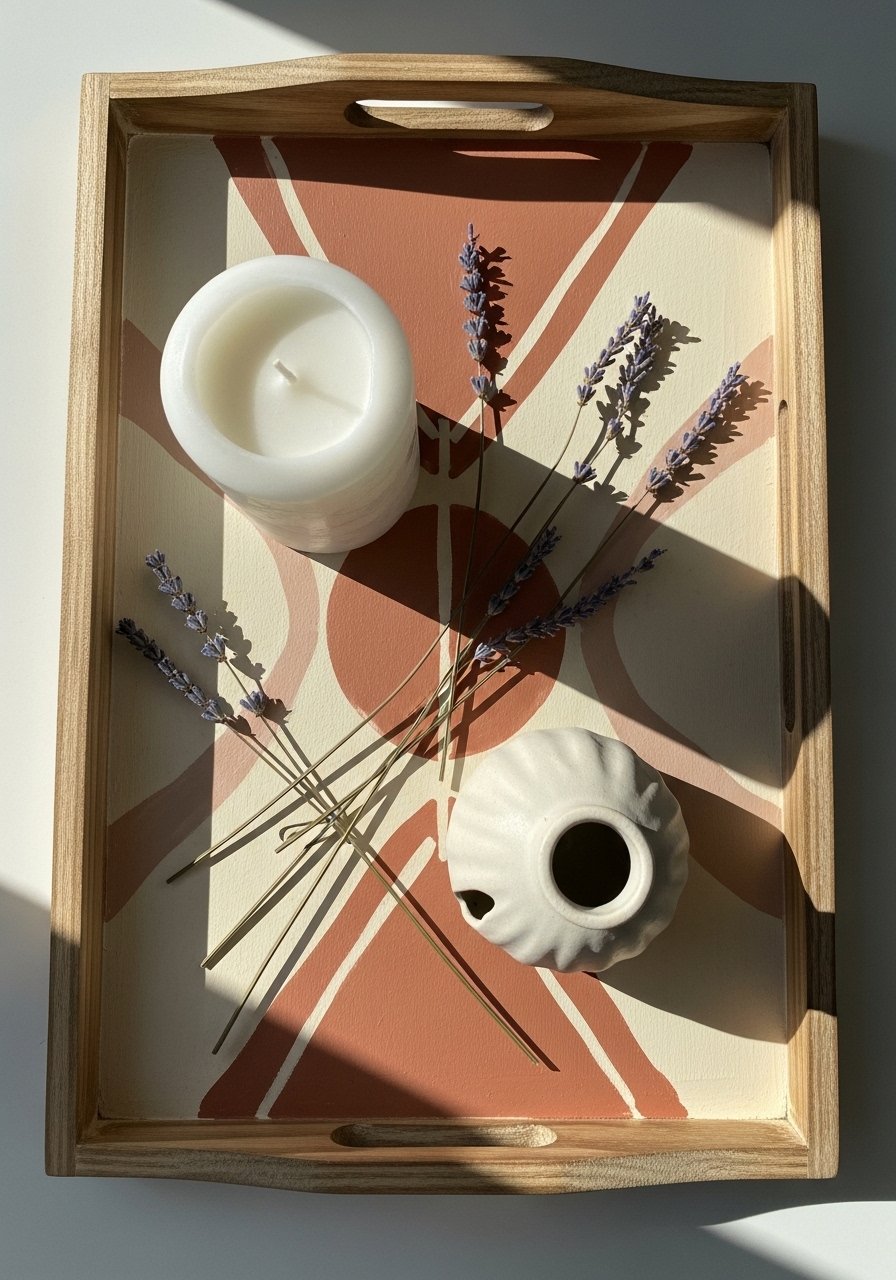
A scratched wood tray becomes a slow-living focal for a nightstand or coffee table. Use stencils for clean shapes and wear-resistant sealer for durability—perfect for anyone who loves Japandi or modern farmhouse vibes.
Materials
- Thrifted wooden tray (approx 16" x 12")
- Acrylic craft paint, 2 sample sizes
- Stencil (geometric or floral)
- Stencil brush or foam roller
- Painter’s tape
- Fine sandpaper 220 grit
- Water-based polyurethane, 6 oz
Instructions
- Wipe tray clean and sand to remove varnish sheen; wipe dust away.
- Tape stencil in place and anchor with low-tack painter’s tape.
- Use a foam roller with minimal paint to avoid bleed; dab off excess.
- Apply two thin coats, 20 minutes apart, then remove stencil while paint is tacky.
- After 1 hour, sand very lightly for a soft finish. Apply polyurethane; allow to cure 24 hours.
How to Display or Gift It
- Use as a bedside tray for a candle and book. Pair with a small wooden easel for display.
- Wrap in kraft paper and tuck in a dried lavender sprig for gifting.
4. Bottle Vase with Metallic Dip Dye
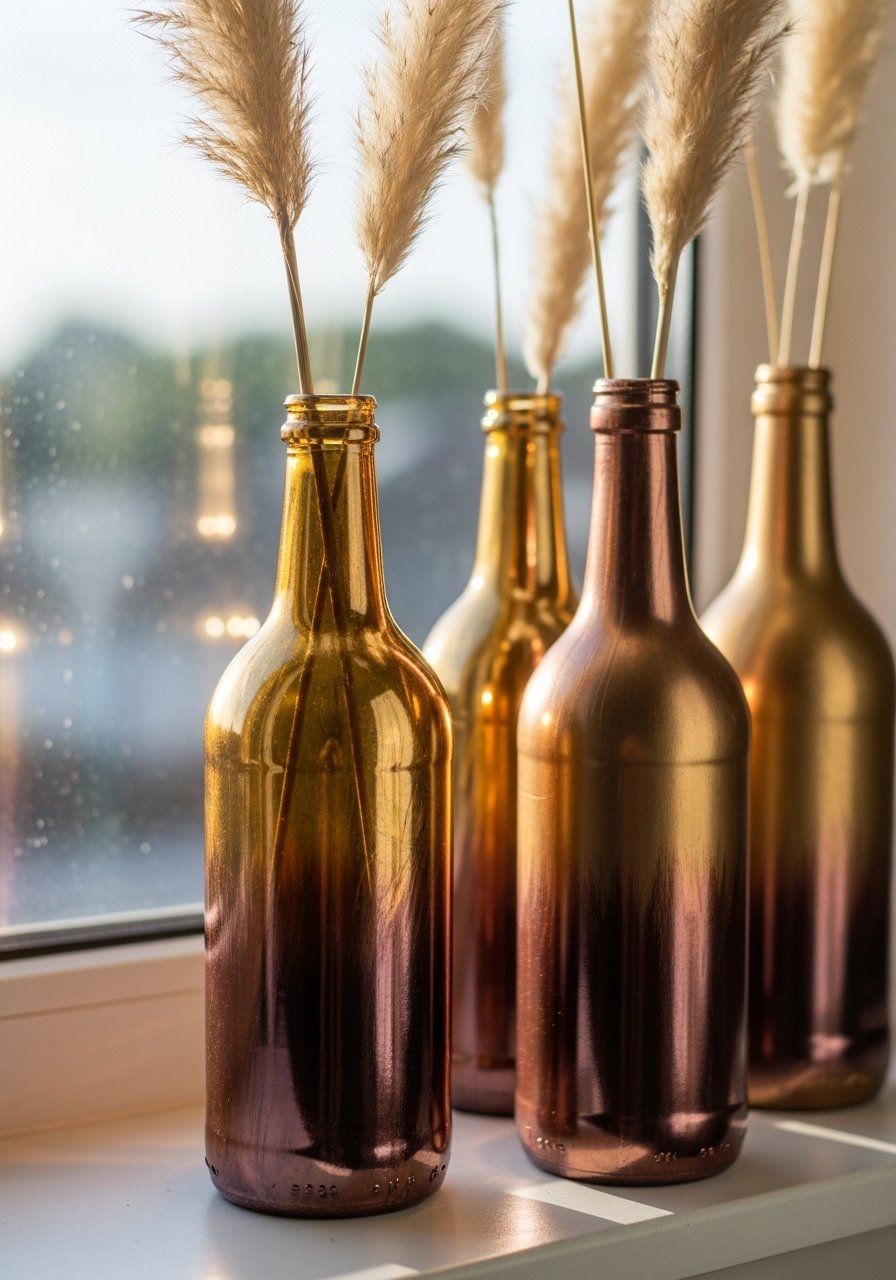
Clear glass bottles from the thrift store become chic vases when treated with interior spray paint or exterior metal leaf. The metallic dip technique adds a luxe touch while keeping sustainability front and center.
Materials
- 2–3 thrifted glass bottles (varying heights)
- Metallic spray paint in copper or gold
- Painter’s tape
- Nitrile gloves
- Drop cloth
- Dried stems (pampas or wheat), 3 stems per bottle
Instructions
- Clean bottles inside and out; soak labels in warm soapy water 20 minutes.
- Tape off necks if you want clear tops. Work outdoors or in ventilated area.
- Spray from 12" away in even passes. Let first coat dry 20 minutes.
- Apply second light coat for opacity. Cure 24 hours before handling.
- Add dried stems. For interior paint look, pour paint inside and roll to coat, then pour excess out.
How to Display or Gift It
- Group bottles on a thrifted tray for a boho centerpiece.
- Wrap in tissue and place in a gift bag with a card.
5. Macramé Plant Hanger from Old Curtain Rope
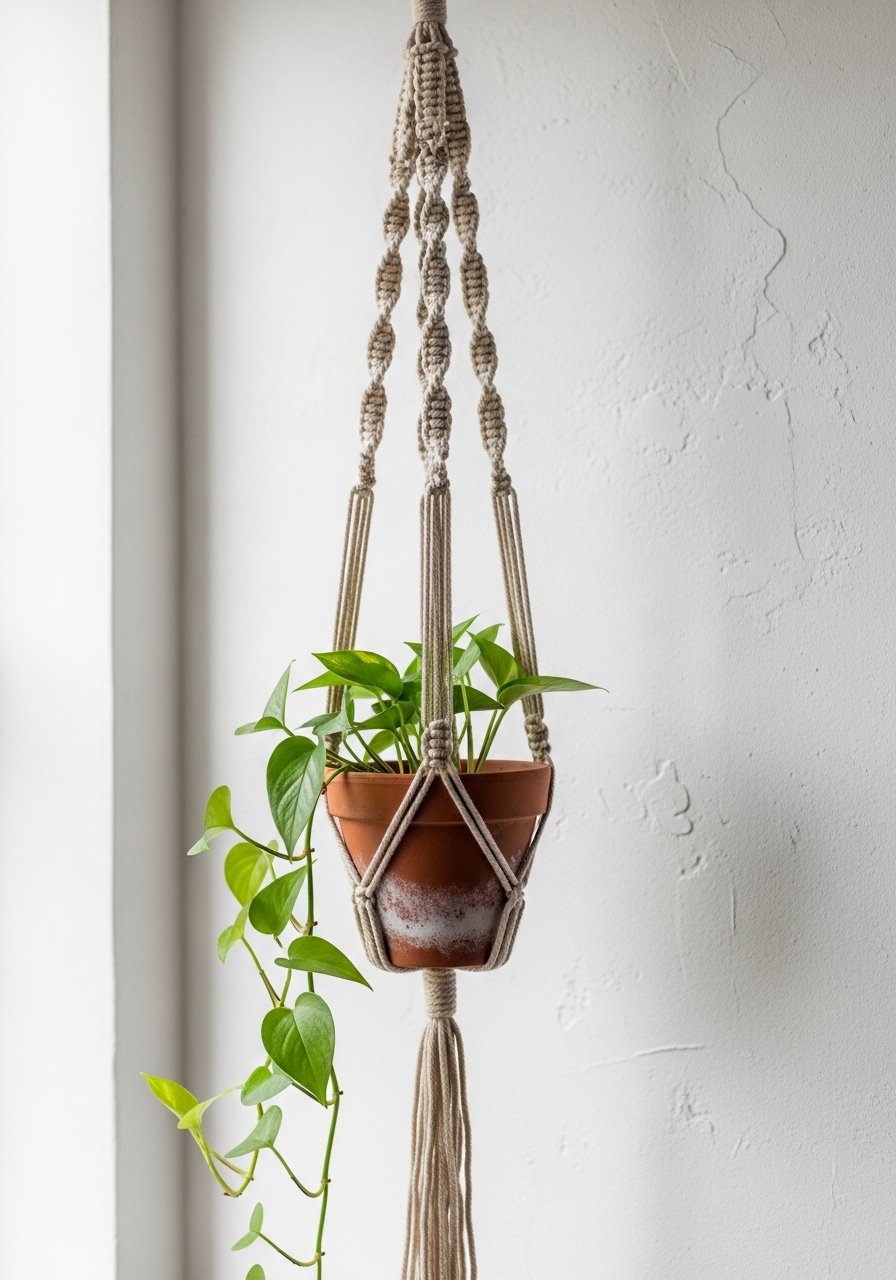
Turn old curtain cords into airy macramé hangers using simple square knots. This piece adds vertical texture and brings plants into tight spaces.
Materials
- Curtain rope or 3mm macramé cord 5 strands x 3.5 yards
- Wooden ring 2"
- Small terracotta pot 3–4" diameter
- Scissors
- Tape measure
Instructions
- Cut five cords at 3.5 yards each. Fold in half and loop through wooden ring.
- Create alternating square knots 6–8" down. Leave 4–5" fringe at bottom.
- Create a cradle of knots to hold the pot snugly.
- Trim fringe to desired length and comb with a small wire brush for fullness.
How to Display or Gift It
- Hang near a sunny window with a small trailing plant.
- Gift with a thrifted ceramic pot wrapped in kraft paper and twine.
6. Sweater Yarn Pom-Pom Wall Garland
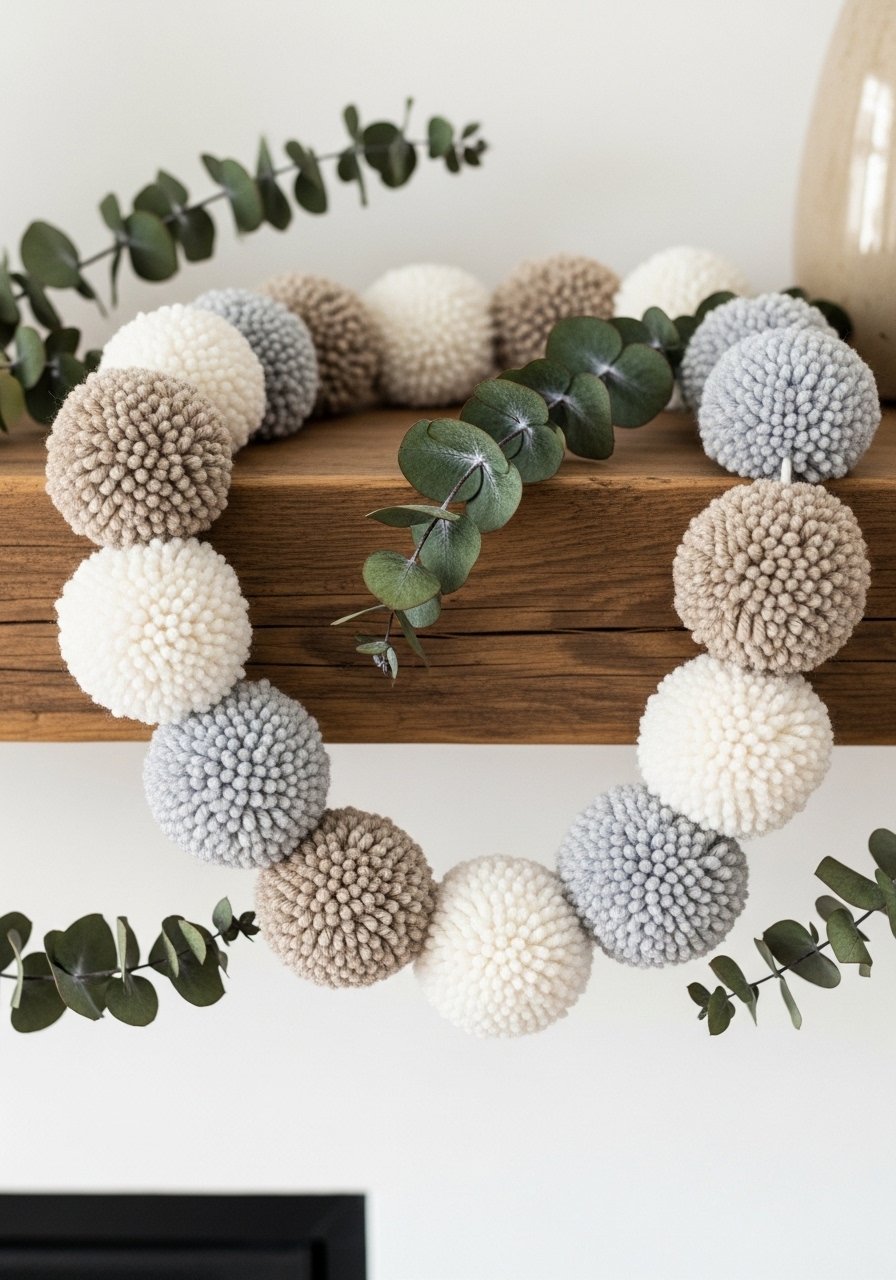
Repurpose thrifted wool sweaters into yarn for soft pom-poms that become a textural wall garland fitting cottagecore and hygge aesthetics.
Materials
- 1 thrifted wool sweater (medium weight)
- Pom-pom maker 4"
- Sharp scissors
- Yarn needle
- Thin twine 3 yards
Instructions
- Cut sweater into strips and unravel to create yarn; roll into balls.
- Use a 4" pom-pom maker to create pom-poms. Trim for uniform shape.
- Thread pom-poms onto twine using yarn needle, spacing 4–6" apart.
- Tie looped ends for hanging.
How to Display or Gift It
- Drape across a headboard or over a shelf.
- Package in a clear cellophane tube with a note about reclaimed wool.
7. Record Bowl Planter
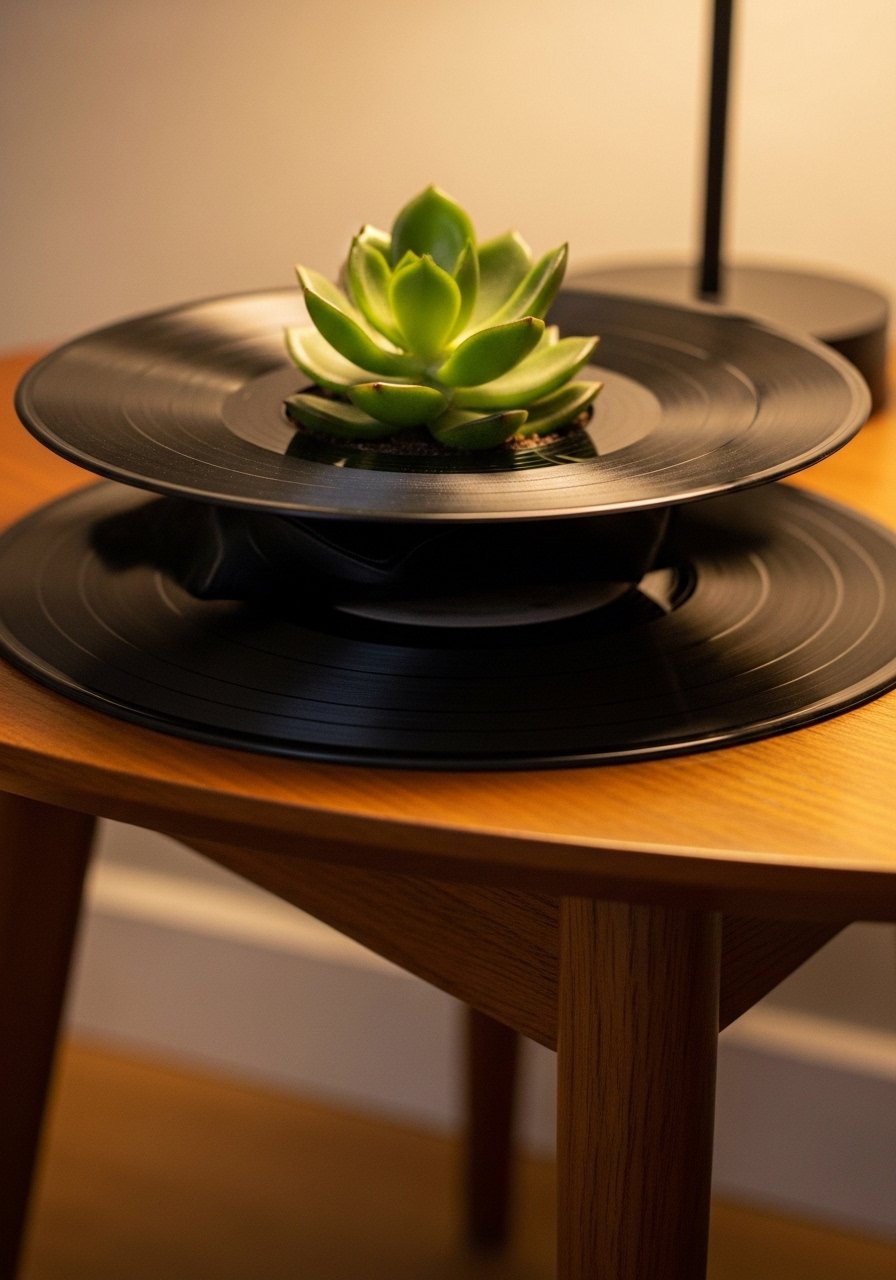
Old vinyl records can be softened and reshaped into modern planters. The matte black adds contrast to green plants and works well with mid-century or modern decor.
Materials
- Thrifted vinyl record (clean)
- Heat-resistant oven tray
- Oven or heat gun
- Small terracotta pot as mold 3"
- Oven mitts
Instructions
- Preheat oven to 200°F (93°C).
- On an oven-safe tray, place record over a small inverted terracotta pot.
- Heat in oven for 2–3 minutes while watching closely.
- When softened, press gently with oven mitts into desired bowl shape; cool 15 minutes.
- Add a plastic liner or use a small potted plant to avoid water contact.
How to Display or Gift It
- Use as a planter or catchall on an entry table.
- Gift with a tiny potted succulent in a kraft box.
8. DIY Mosaic Frame Using Thrifted China
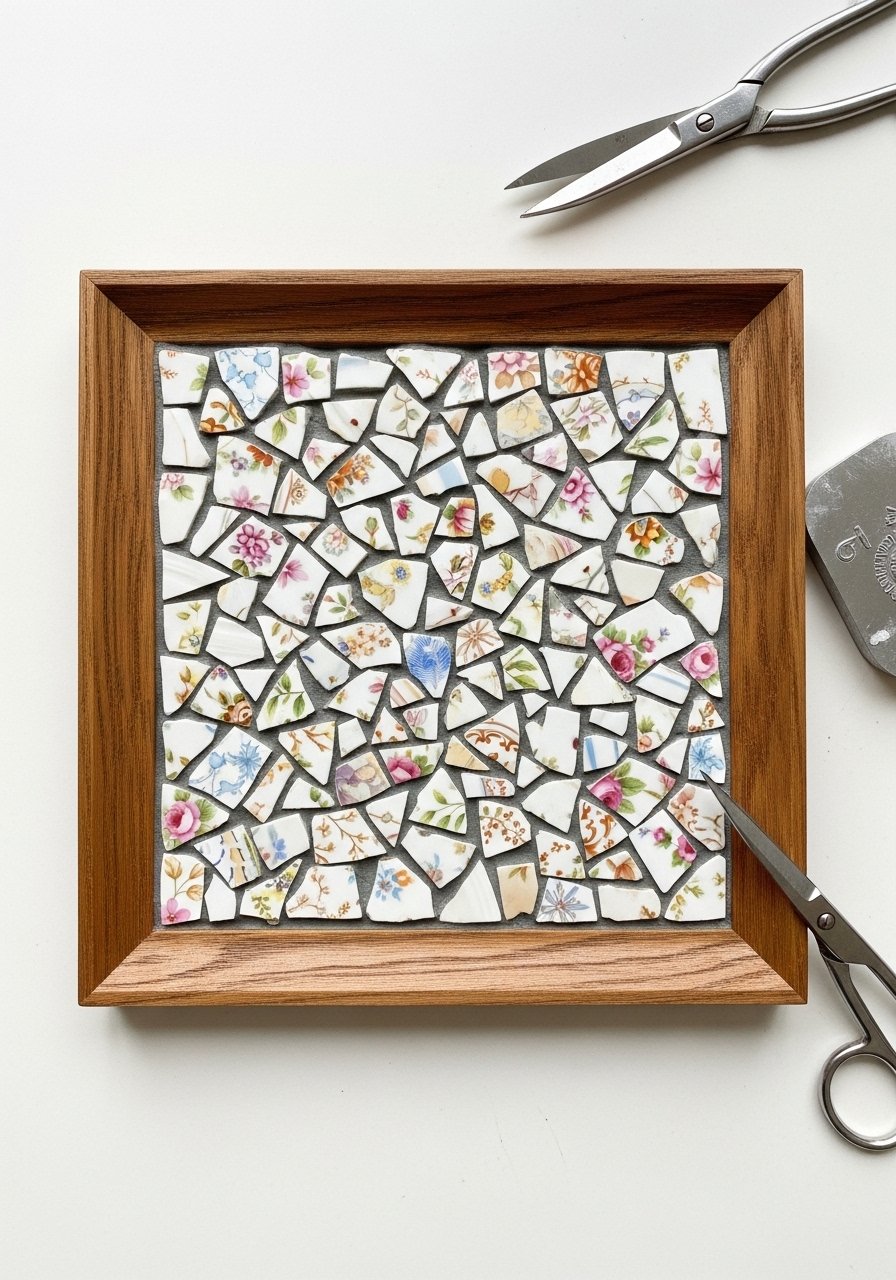
Turn broken thrifted china into a colorful mosaic frame. The tactile surface reads handmade and pairs beautifully with coastal, cottage, or eclectic rooms.
Materials
- Thrifted wooden frame
- Broken thrifted china pieces (small shards)
- Tile adhesive 4 oz
- Grout, sanded, 8 oz
- Sponge and bucket
- Safety goggles and gloves
- Tile nippers (optional)
Instructions
- Clean frame and plan layout of shards without adhesive.
- Apply thin tile adhesive, press pieces in place, leave 1/8" gaps.
- Let adhesive set 24 hours.
- Mix grout and apply into gaps with a rubber float. Wipe excess with sponge.
- After 30 minutes, clean haze with damp cloth. Fully cure 72 hours.
How to Display or Gift It
- Insert a vintage botanical print for a coastal display.
- Wrap in tissue and bubble wrap; ship in a sturdy box if gifting.
9. Boho Fringe Mirror from Thrifted Mirror
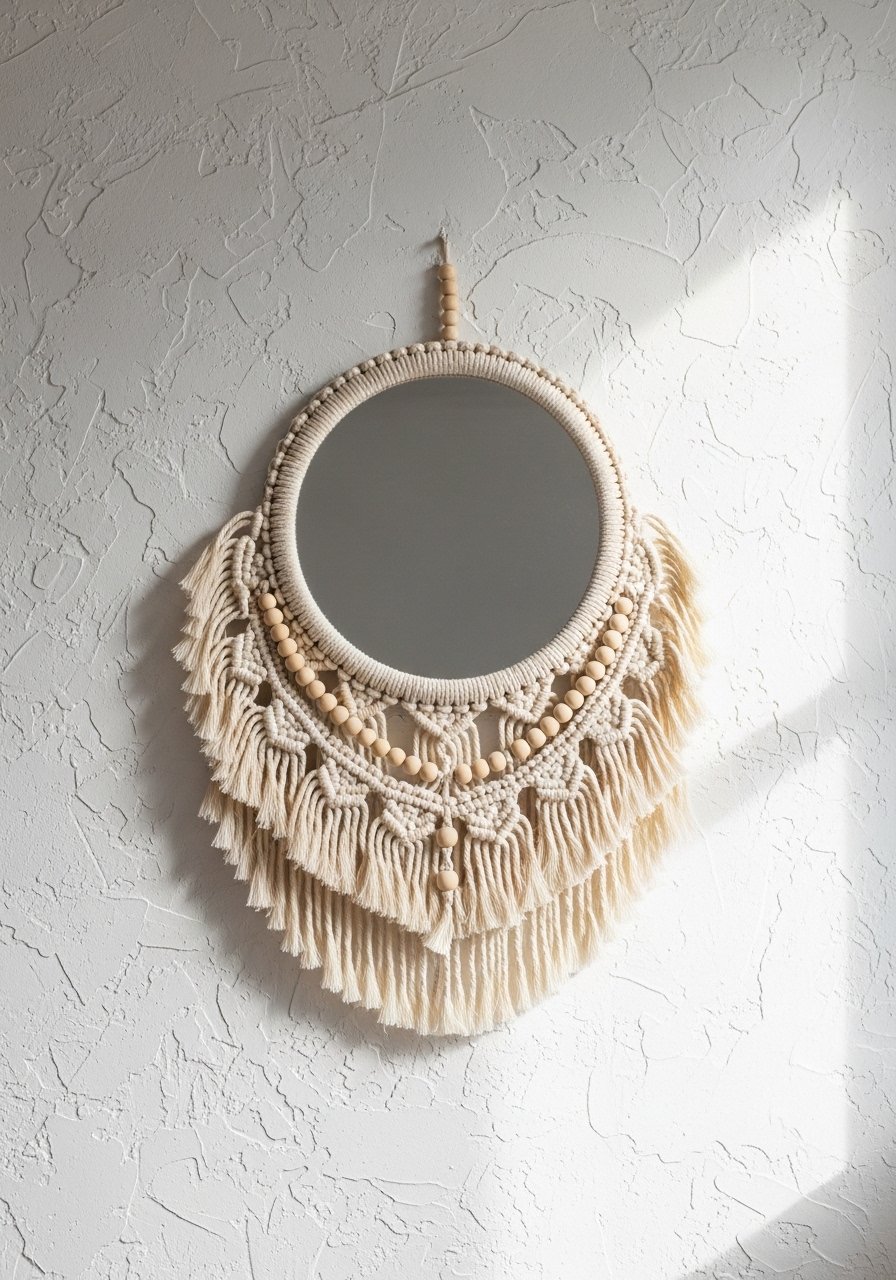
Add homemade fringe for a boho feel. Layered textures and beads make the mirror feel curated and handcrafted.
Materials
- Thrifted round mirror 12"–16" diameter
- 3mm macramé cord 60 yards
- Wooden beads 20 pcs
- Hot glue sticks, 10
- Small jump rings (for hanging)
Instructions
- Clean mirror and remove existing backing if needed.
- Attach a fabric strip around rim with hot glue to anchor cords.
- Cut cords in desired fringe lengths; knot into place.
- Add wooden beads to select cords and secure with tight knots.
- Trim fringe evenly and brush out for fullness.
How to Display or Gift It
- Hang over a dresser or entryway. Add a small shelf below with thrifted trinkets.
- Gift with a small care card about dusting fringe with a lint roller.
10. Upcycled Teacup Candle
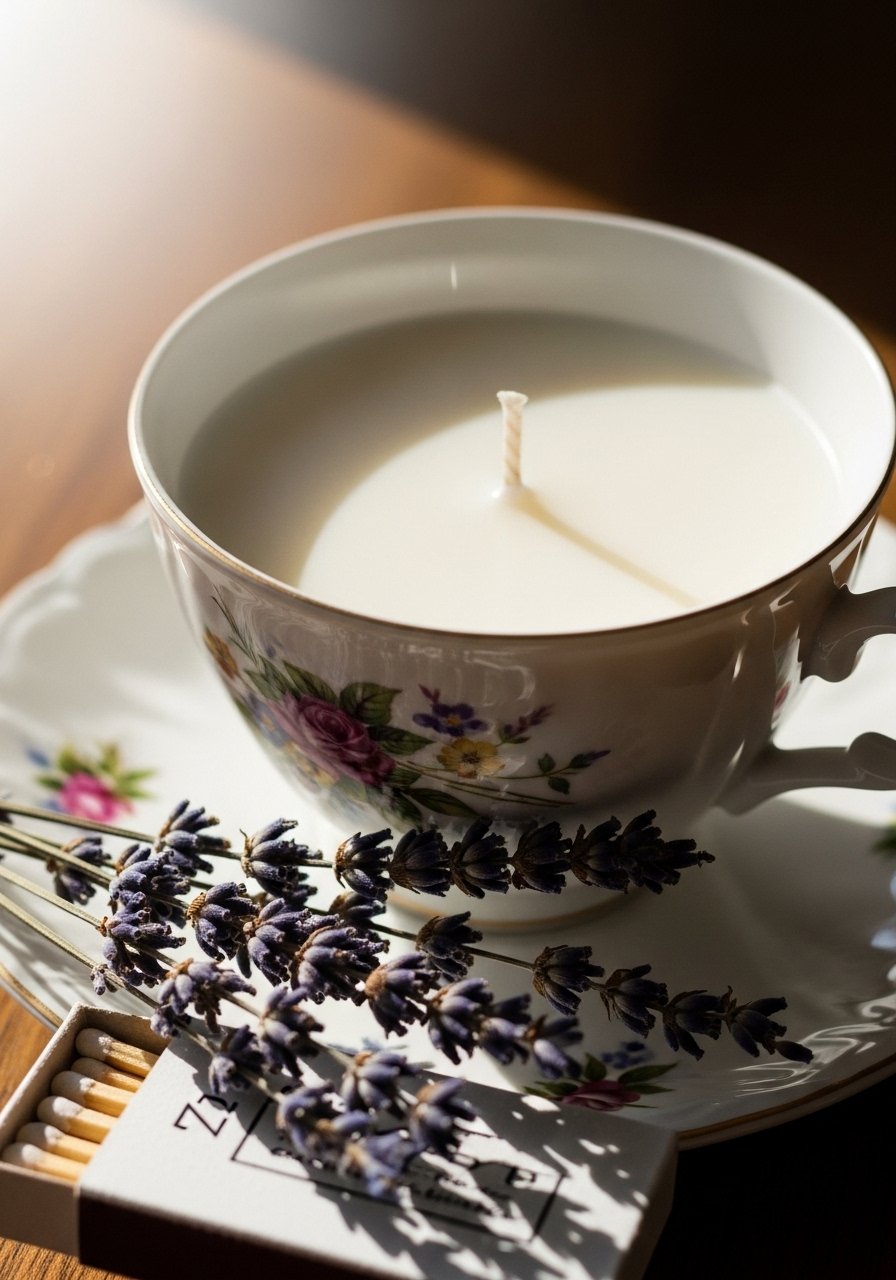
Thrifted tea sets become charming candles—perfect for gifting or adding a delicate scent to a bedside table.
Materials
- Thrifted porcelain teacup or small bowl
- Soy wax flakes 8 oz (yields 2–3 small candles)
- Cotton wicks 2
- Double boiler (or heat-safe glass measuring cup)
- Fragrance oil 10 ml
- Thermometer
Instructions
- Clean cup; pre-wick by anchoring wick with a dot of hot glue.
- Melt wax in double boiler to 185°F (85°C).
- Add fragrance oil; stir 30 seconds. Let cool to 135°F (57°C).
- Pour into cup and center wick. Allow to set 8–12 hours.
- Trim wick to 1/4" before burning.
How to Display or Gift It
- Place on a small thrifted saucer and wrap in tissue for gifting.
- Store spare cups and wicks in a craft storage organizer.
11. Rustic Crate Nightstand (from a Fruit Crate)
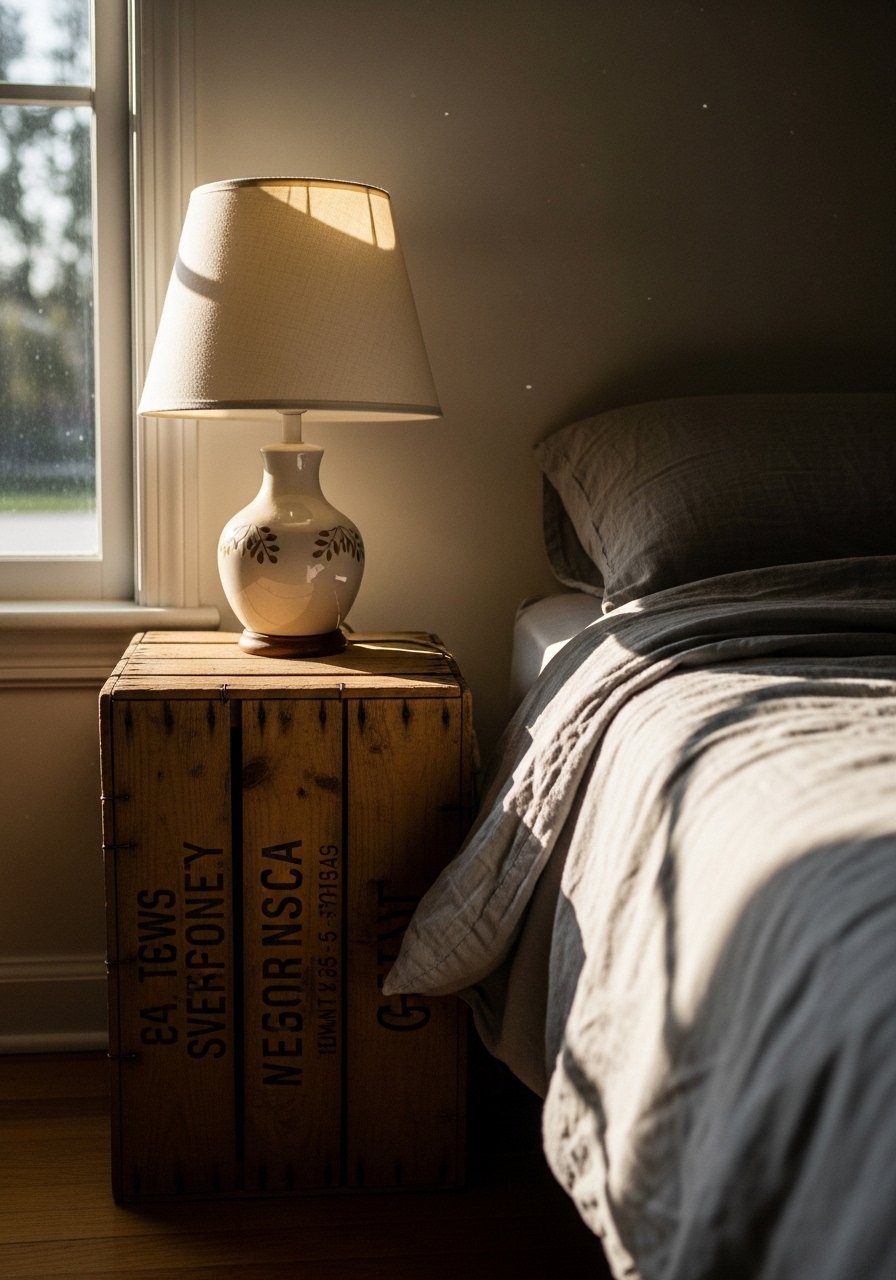
A wooden fruit crate becomes a compact nightstand with minimal tools. It’s roomy enough for books and a lamp, great for farmhouse or rustic bedrooms.
Materials
- Thrifted wooden crate 16" x 12" x 10"
- Sandpaper 120 and 220 grit
- Furniture casters 4
- Wood stain (optional) 4 oz
- Drill and screwdriver
- Wood screws 8
Instructions
- Sand crate inside and out starting with 120 grit, finishing with 220 grit.
- Optional: Apply one thin coat of wood stain; let dry 2 hours.
- Attach casters to the bottom with screws; pre-drill pilot holes.
- Flip and tighten screws. Check stability; add corner braces if needed.
How to Display or Gift It
- Pair with a thrifted lamp and small potted plant.
- Stack multiple crates for a bedside library. Use a set of caster wheels for mobility.
12. Keyword: Collage Wall with Thrifted Books and Prints
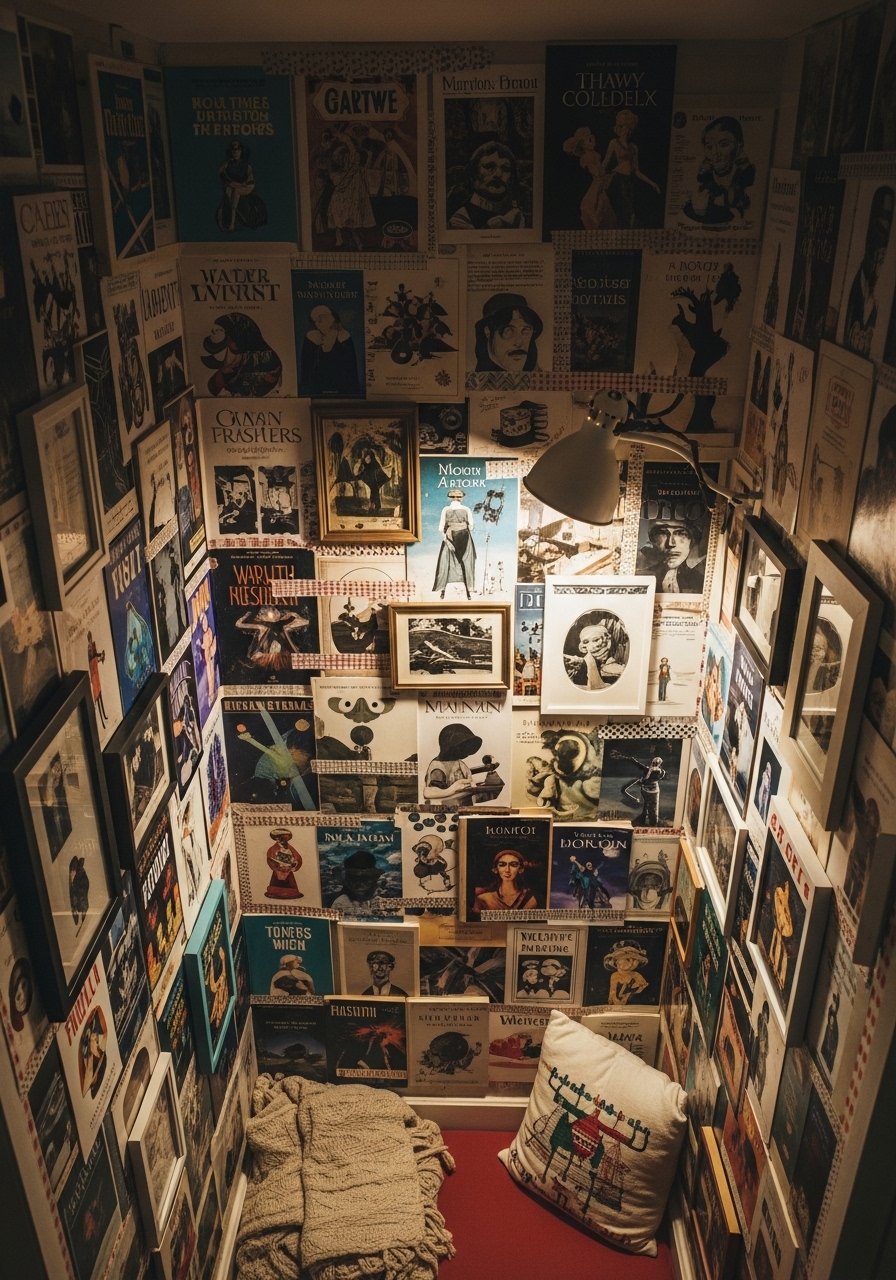
Use thrifted book covers, postcards, and prints to create an artful collage. It’s a low-cost, personal statement that fits boho, eclectic, or cozy reading corners.
Materials
- Thrifted books and postcards
- Small thrifted frames
- Acid-free double-sided tape 1 roll
- Washi tape 3 rolls
- Small nails and picture hanging hooks
Instructions
- Remove dust jackets and plan layout on the floor.
- Use double-sided tape to mount lightweight covers to backing boards in frames.
- Hang central piece first, then arrange surrounding elements.
- Add washi tape accents and small 3D items like pressed flowers.
How to Display or Gift It
- Position above a thrifted reading chair. Swap pieces seasonally.
- Gift as a curated mini-gallery in a protective mailing tube.
13. Embroidery Hoop Wall Art from Vintage Tablecloth

Vintage textiles make beautiful hoop art. This project showcases needlework or printed fabrics for small, tactile focal points.
Materials
- Vintage tablecloth scrap 10" square
- Wooden embroidery hoop 8"
- Sharp scissors
- Spray adhesive (optional)
- Acrylic paint for hoop (optional)
Instructions
- Trim fabric to 2–3" beyond hoop diameter.
- Place fabric in hoop and tighten. Smooth wrinkles.
- Optional: Paint hoop before attaching fabric; dry 30 minutes.
- Trim excess fabric on back and secure with a dab of spray adhesive.
How to Display or Gift It
- Cluster several hoops at varying sizes for a gallery.
- Gift paired hoops in a kraft box with care instructions.
14. Stenciled Pillow Cover from Thrifted Shirt
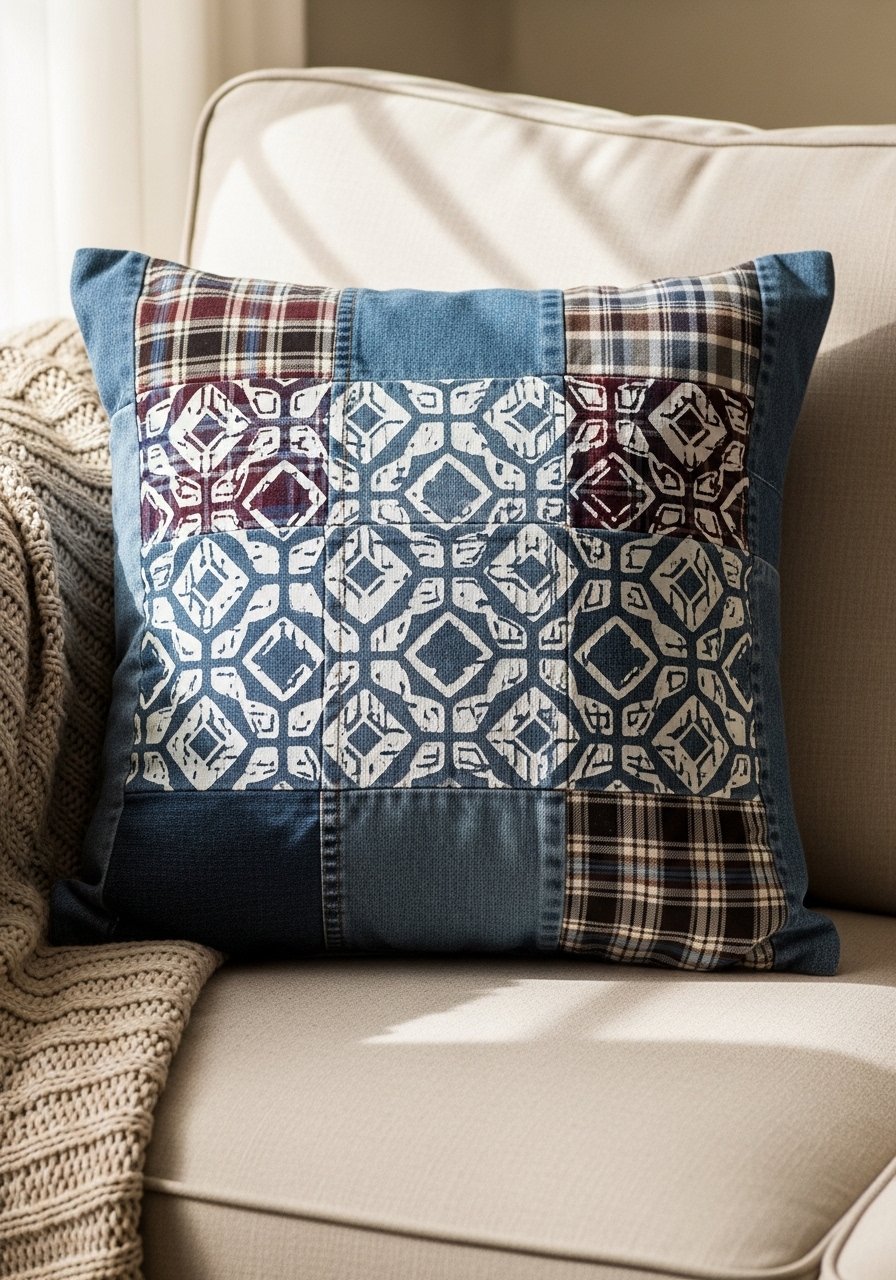
Make pillow covers from thrifted shirts or curtains. Stencils let you customize patterns and coordinate palettes without sewing.
Materials
- Thrifted shirt or fabric enough for 18" x 18" cover
- Stencil (repeat pattern)
- Fabric paint 2 oz
- Foam brush
- Invisible zipper or envelope back
- Sewing needle and thread or sewing machine
Instructions
- Cut fabric to 19" x 19" to allow seam allowance.
- Secure stencil and dab fabric paint with foam brush. Let dry 1 hour.
- Sew seams with 1/2" allowance and insert zipper or create envelope back.
- Insert thrifted pillow form and fluff.
How to Display or Gift It
- Mix with neutral cushions for texture contrast.
- Gift as a set with a matching pillow insert.
15. Ceramic Tile Coasters from Broken Tiles
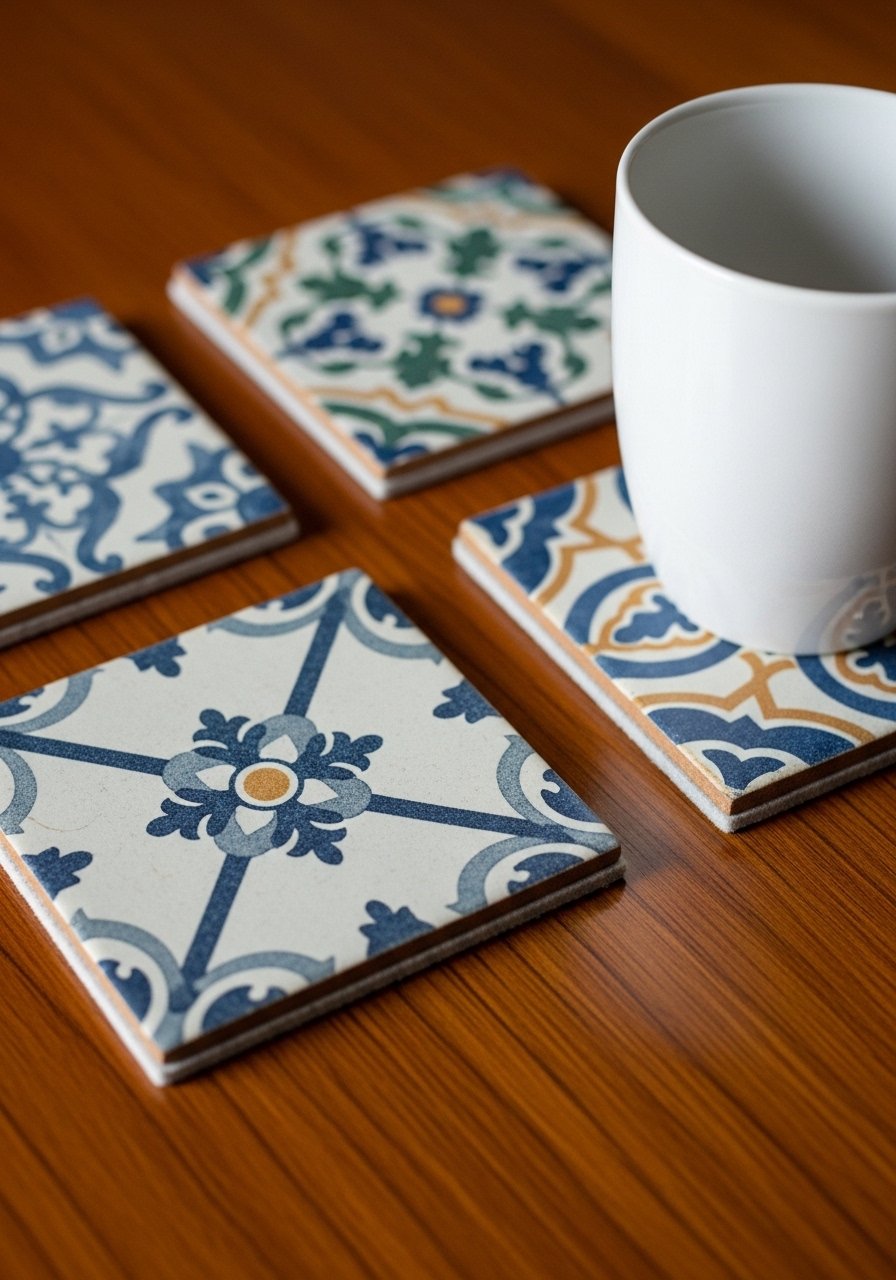
Throw together tile shards from thrift stores or hardware remnant bins to create durable, decorative coasters.
Materials
- Thrifted ceramic tiles 4 pcs, 4" square
- Cork backing sheets 4" squares
- Strong craft glue (E6000 recommended) 1 oz
- Felt or cork pads
- Sandpaper 220 grit
Instructions
- Clean tiles and sand rough edges lightly.
- Cut cork sheet to match tile size and glue to bottom; press firmly.
- Let adhesive cure 24 hours.
- Add felt pads to corners to protect surfaces.
How to Display or Gift It
- Bundle four with twine and kraft paper for gifting.
- Store extras flat in a craft organizer.
16. Painted Drawer Shelf from Thrifted Nightstand Drawer
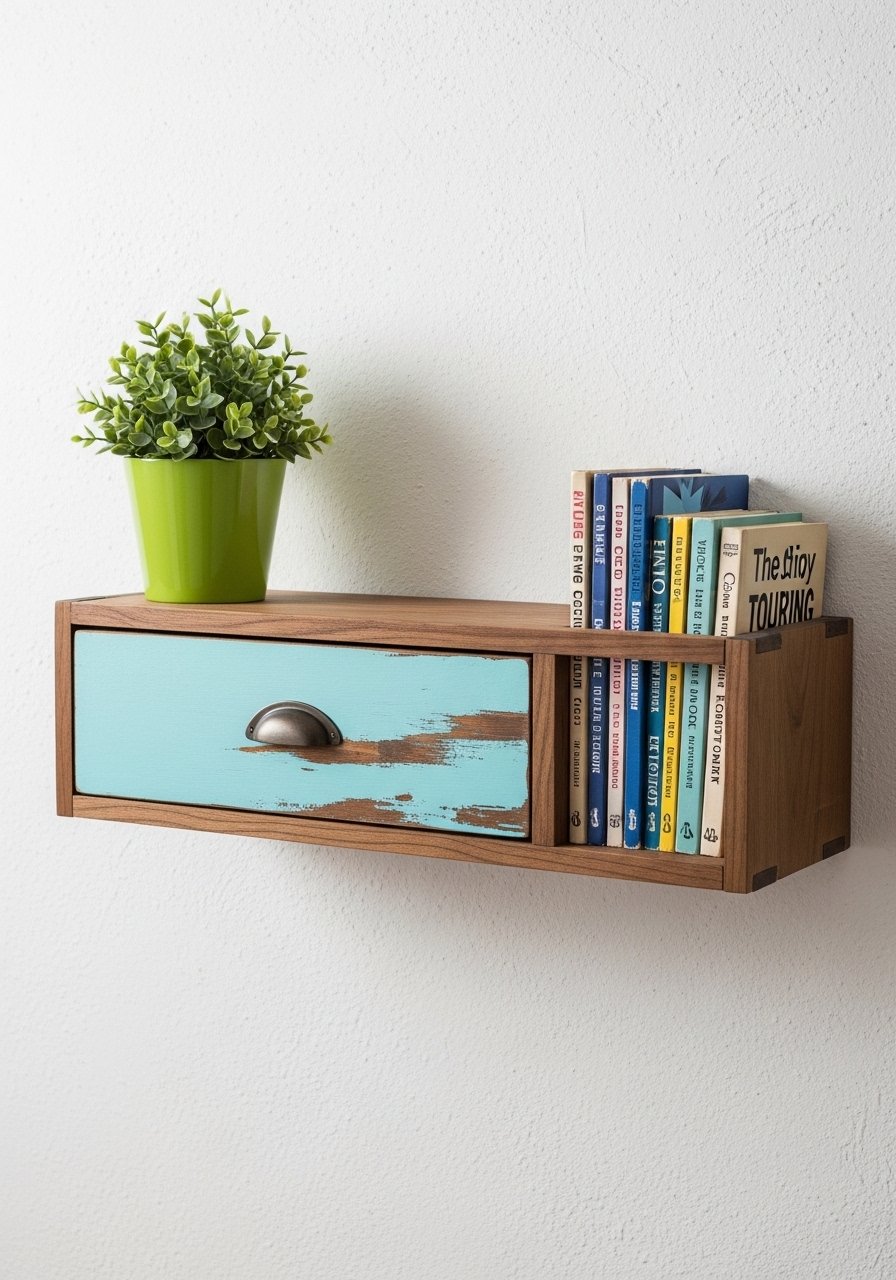
Old drawers make shallow shelves with built-in character. Paint the interior a contrasting color for a pop.
Materials
- Thrifted drawer (no runners needed) approx 18" x 10"
- Chalk paint 4 oz
- Brackets or keyhole hangers (2)
- Sandpaper 120–220 grit
- Drill and screws
Instructions
- Clean and sand drawer; paint inside and out with two coats, drying 30–45 minutes between coats.
- Attach brackets or keyhole hangers to back centered on the width.
- Mount on wall into studs or with anchors. Style with small plants and photos.
How to Display or Gift It
- Use as a bedside shelf or entry catchall.
- Gift as a ready-to-hang organizer with accessories.
17. Fabric-Covered Bulletin Board from Thrifted Tart Pan
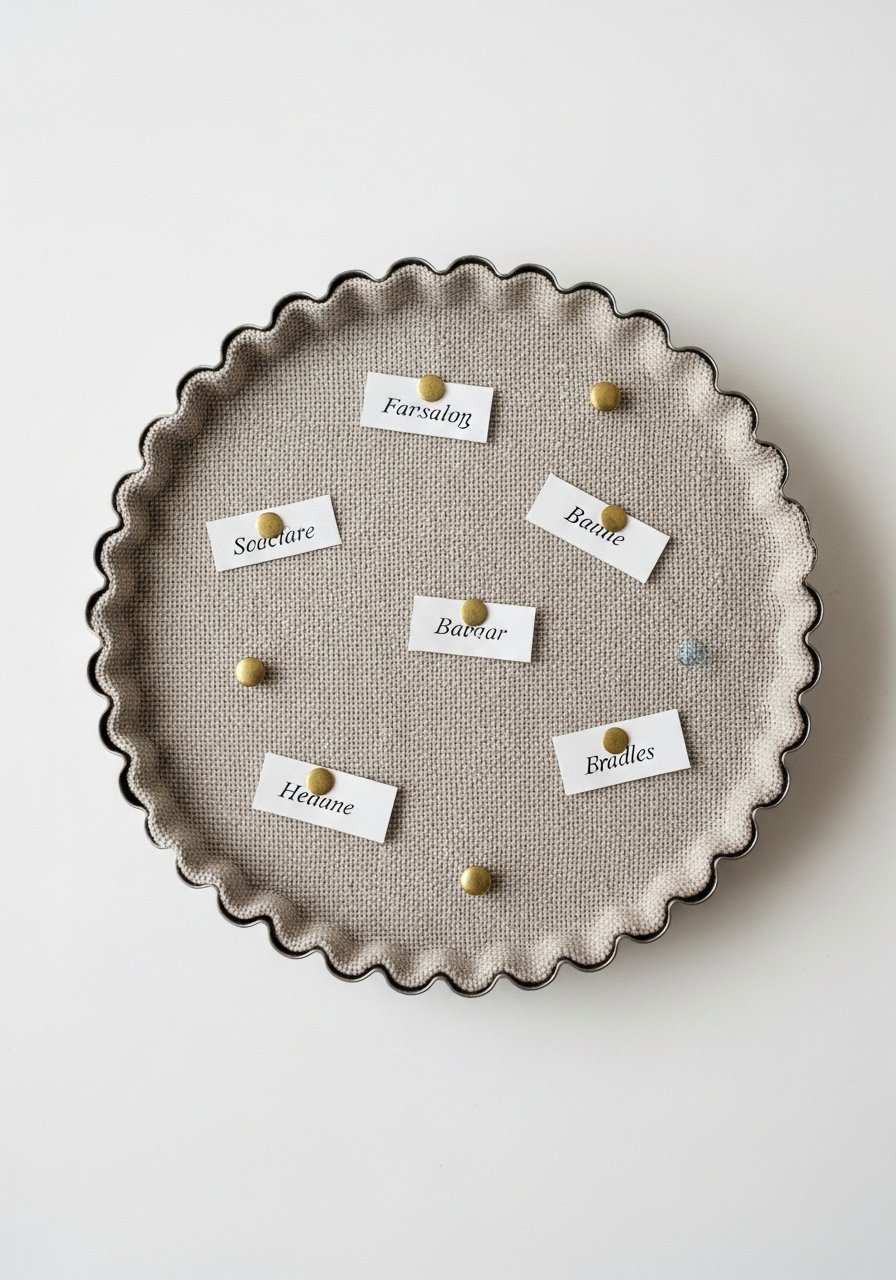
A metal tart pan refashioned into a memo board is quirky and useful. Cover with fabric and add tacks for functional art.
Materials
- Thrifted metal tart pan 9"
- Linen fabric scrap 12" square
- Foam backing 1/4" thick, 9" circle
- Upholstery tacks 10
- Hot glue gun
Instructions
- Cut foam to fit inside pan. Stretch linen fabric over foam and secure with hot glue.
- Place into pan and hammer upholstery tacks evenly around rim.
- Use push pins to attach notes; hang with a small picture hook.
How to Display or Gift It
- Cluster several sizes in a kitchen command center.
- Gift with a set of colorful push pins.
18. Hand-Painted Nightlight from Ceramic Figurine
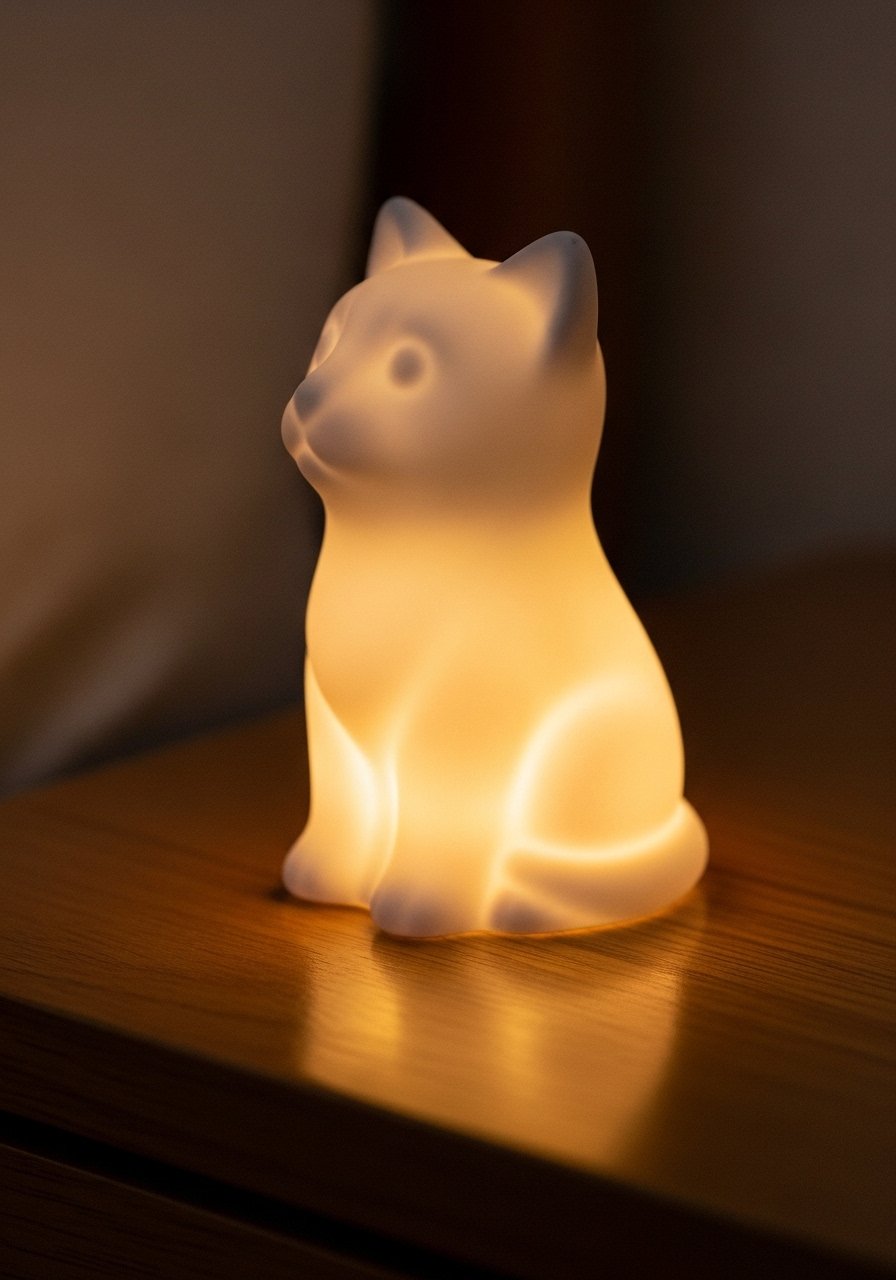
Small ceramic figurines make whimsical nightlights. Drill a tiny hole for a battery tea light or insert an LED puck for safety.
Materials
- Thrifted ceramic figurine
- Acrylic paint (matte white) 2 oz
- Small battery-operated LED puck light
- Dremel tool with small bit (optional)
- Sandpaper 220 grit
Instructions
- If necessary, create a small access hole at base using a Dremel; wear eye protection.
- Paint exterior with two thin coats; dry 30 minutes between layers.
- Insert LED puck and check glow. Secure with a dab of removable adhesive if needed.
How to Display or Gift It
- Place on a nightstand or bookshelf for subtle ambiance.
- Gift with a set of batteries and a note.
19. Distressed Wood Sign from Thrifted Cutting Board
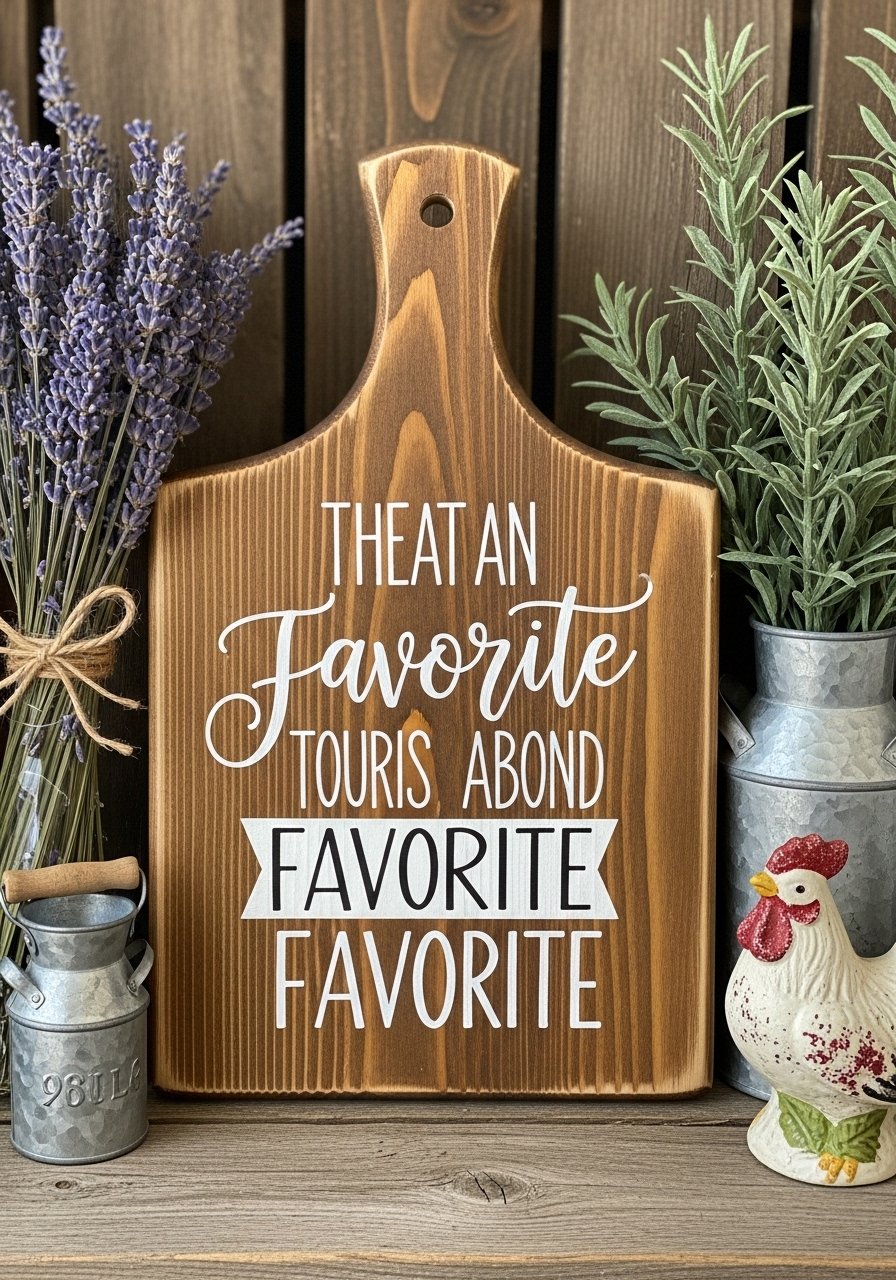
A thrifted cutting board becomes a rustic sign with hand-lettering. Use stencils or freehand for a custom message.
Materials
- Thrifted wooden cutting board
- Chalk paint (background) 2 oz
- Paint pens for lettering (fine tip)
- Sandpaper 220 grit
- Hanging hardware (sawtooth hanger)
Instructions
- Sand clean and apply a base coat. Dry 30–45 minutes.
- Lightly sand edges for a distressed look.
- Sketch lettering in pencil; trace with paint pen.
- Seal with matte polycrylic and attach hanger; cure 24 hours.
How to Display or Gift It
- Hang in kitchen or entryway. Gift with a matching tea towel.
20. Repurposed Sweater Pouf Seat
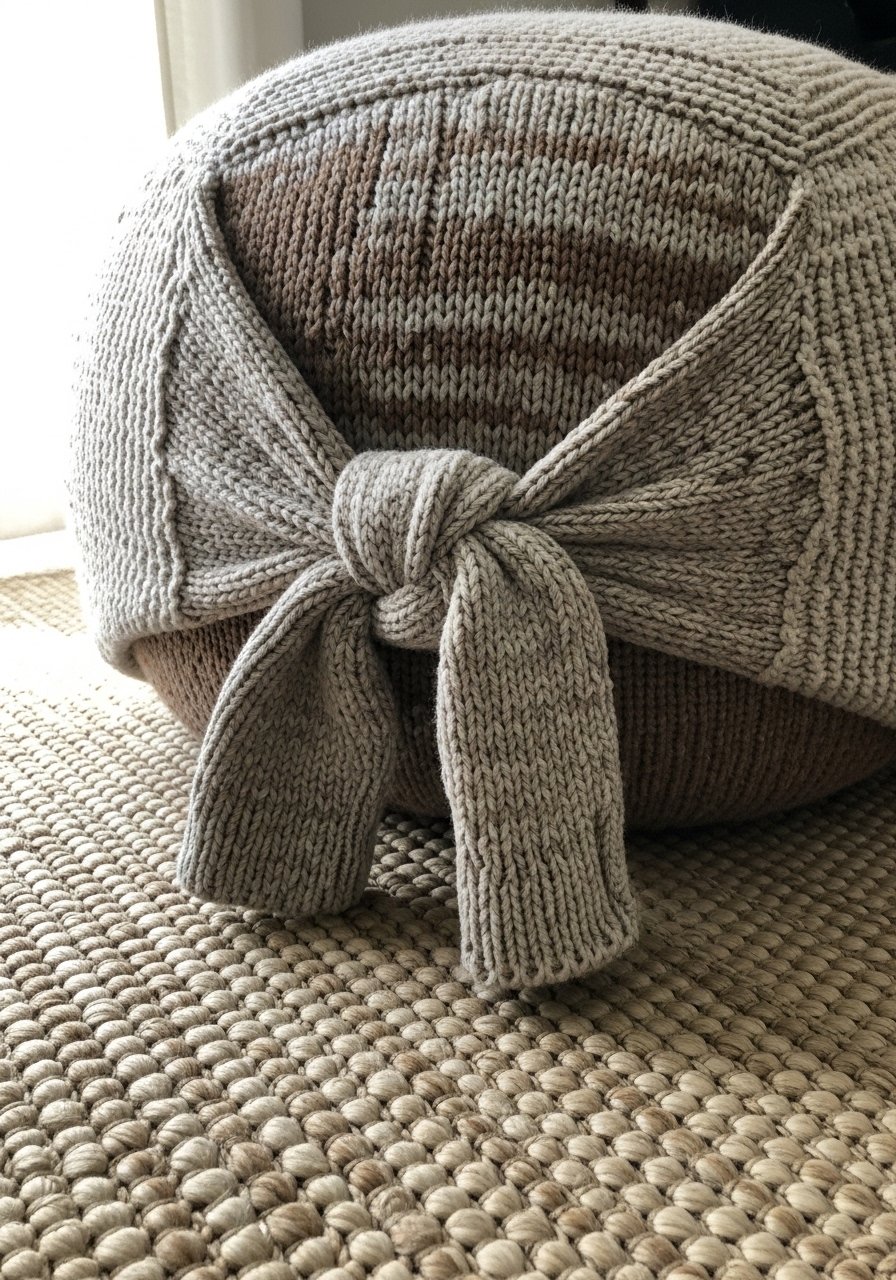
Thick thrifted sweaters make soft poufs—great for extra seating or footrests. Simple sewing and stuffing turn fabric into functional decor.
Materials
- Thick thrifted sweater (adult size)
- Polyfill stuffing 4–6 lbs
- Heavy-duty needle and upholstery thread
- Sewing machine (optional)
- Zip-top inner cushion cover (18" round) or hand-sew base
Instructions
- Cut and sew sweater into a round cover, leaving an opening for stuffing.
- Fill an inner cushion or fill directly with polyfill until firm.
- Close opening with blind stitch or zipper. Fluff and adjust.
How to Display or Gift It
- Use near a reading nook. Store extra stuffing in zip-top bags for future repairs.
- Gift as a comfy floor cushion.
21. Glass Pendant Light from Thrifted Shade
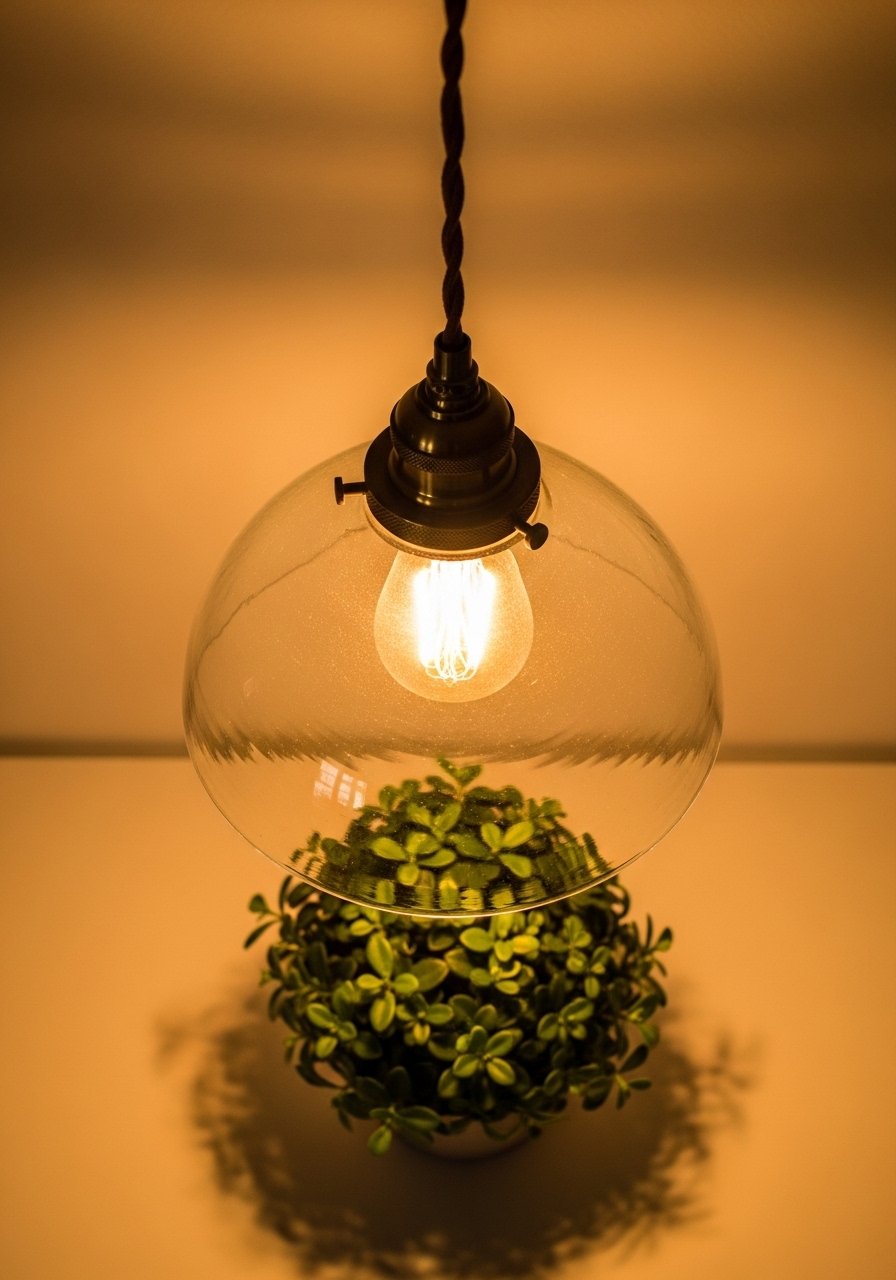
Convert a thrifted glass shade or bowl into an overhead pendant with a simple socket kit. Adds a tailored mid-century or industrial accent.
Materials
- Thrifted glass shade or large bowl
- Pendant cord kit with brass socket
- Rubber grommet (if needed)
- LED bulb (low heat)
- Screwdriver
Instructions
- Fit pendant kit through shade opening; use grommet for stability.
- Secure socket and test wiring according to kit instructions (follow safety guidelines).
- Install LED bulb and hang kit to a secure ceiling hook.
How to Display or Gift It
- Use over a nightstand or reading nook. Pair with a warm LED bulb.
- Gift with installation instructions and parts labeled.
22. Decorative Ladder Shelf from Thrifted Rungs
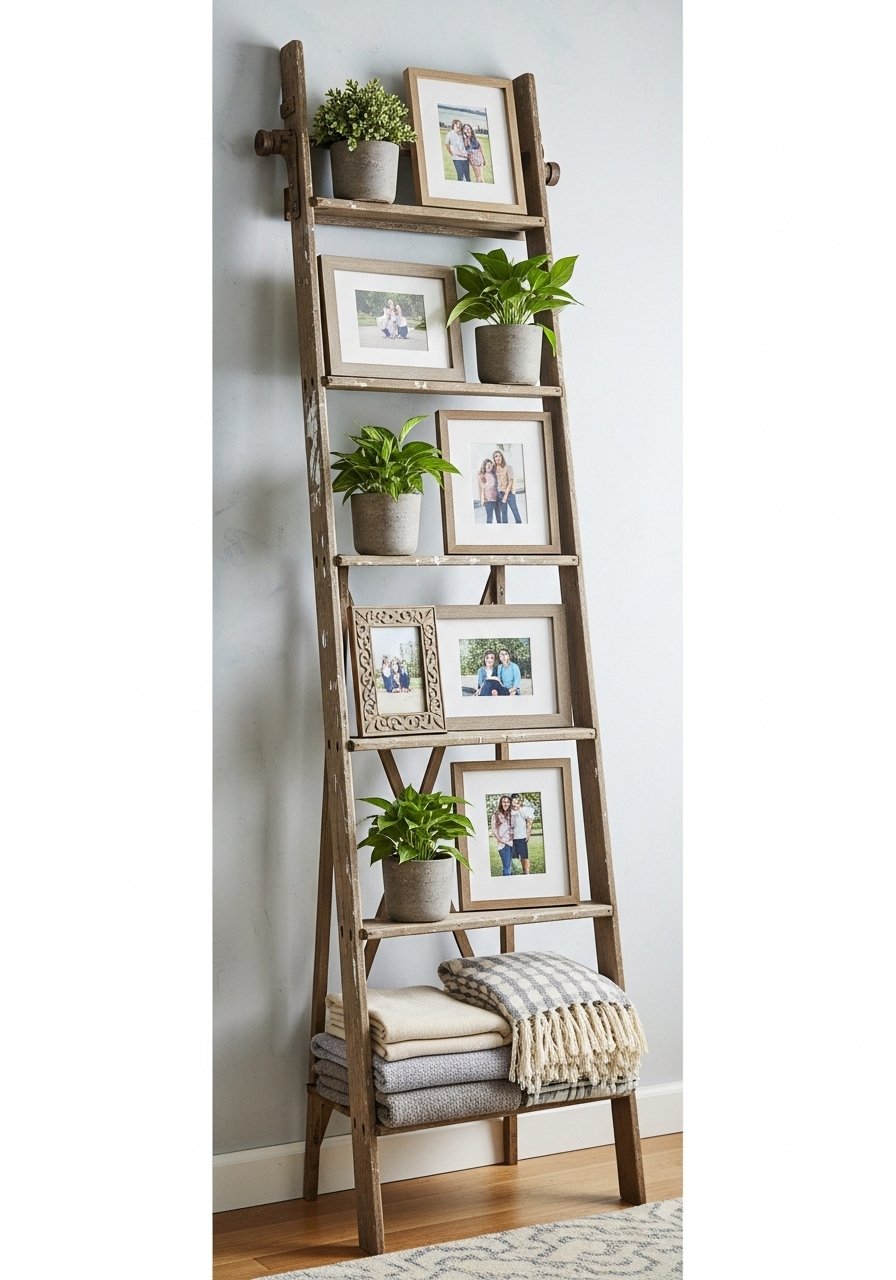
Old ladders become display units for throws, plants, and framed finds. Sand and finish for a clean look.
Materials
- Thrifted wooden ladder (short or long)
- Sandpaper 120–220 grit
- Wood wax or oil 4 oz
- Small rubber feet (optional)
Instructions
- Clean ladder and sand rough spots.
- Apply wax or oil following the grain; buff after 10 minutes.
- Add rubber feet for floor protection. Lean securely against wall.
How to Display or Gift It
- Drape throws or hang framed prints from rungs.
- Gift with a bottle of wood oil and a care cloth.
23. Chalkboard Top from Secondhand Tray
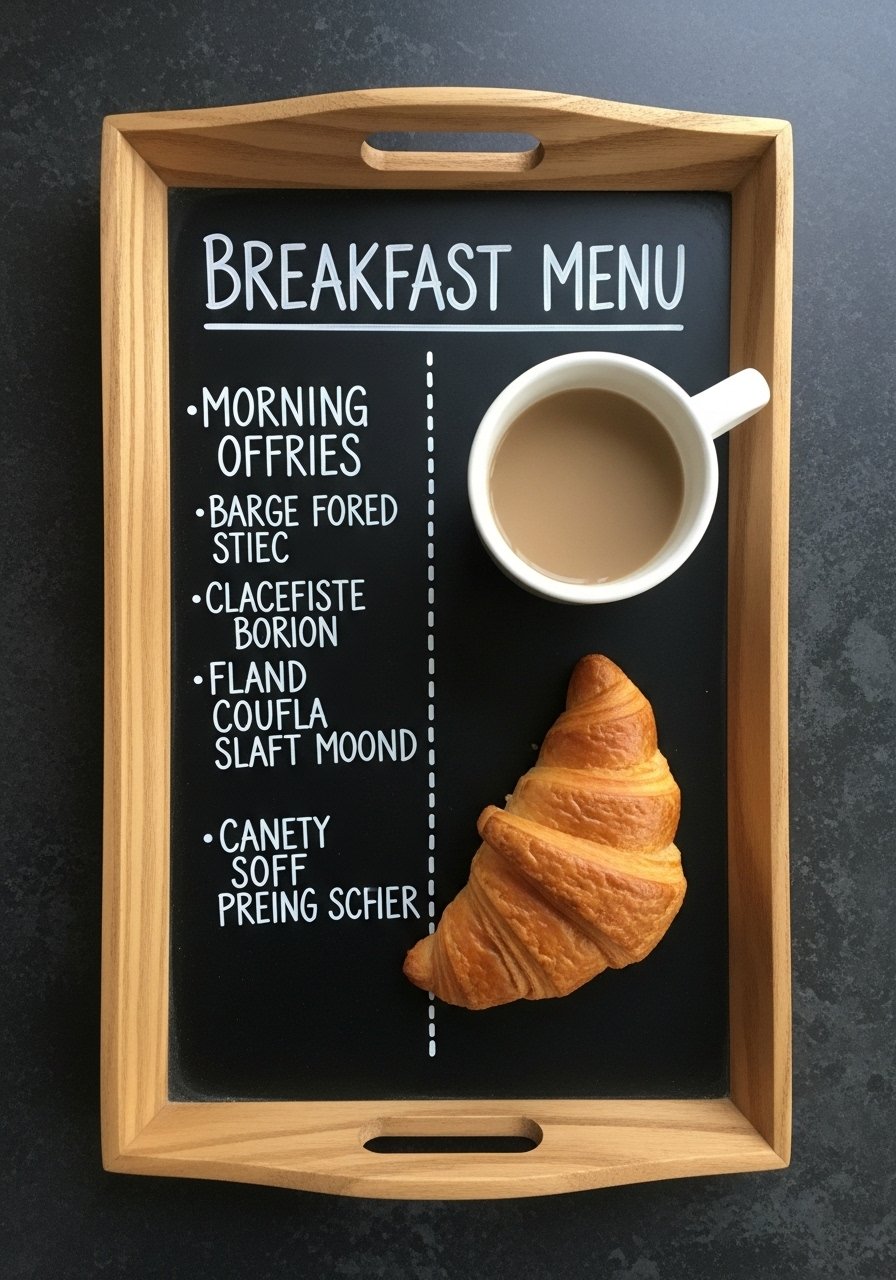
Make a memo or menu board by painting the interior of a tray with chalkboard paint—handy for kitchens or small apartments.
Materials
- Thrifted wooden tray
- Chalkboard paint 2 oz
- Foam brush
- Chalk or chalk markers
- Painter’s tape
Instructions
- Clean tray surface and sand lightly.
- Tape edges and apply two coats of chalkboard paint, 30 minutes between coats.
- Cure 24 hours, then season with full chalk rub before writing.
How to Display or Gift It
- Use propped on a stand for menus or quotes. Gift with a set of chalk markers.
24. Driftwood Mobile from Thrifted Pieces
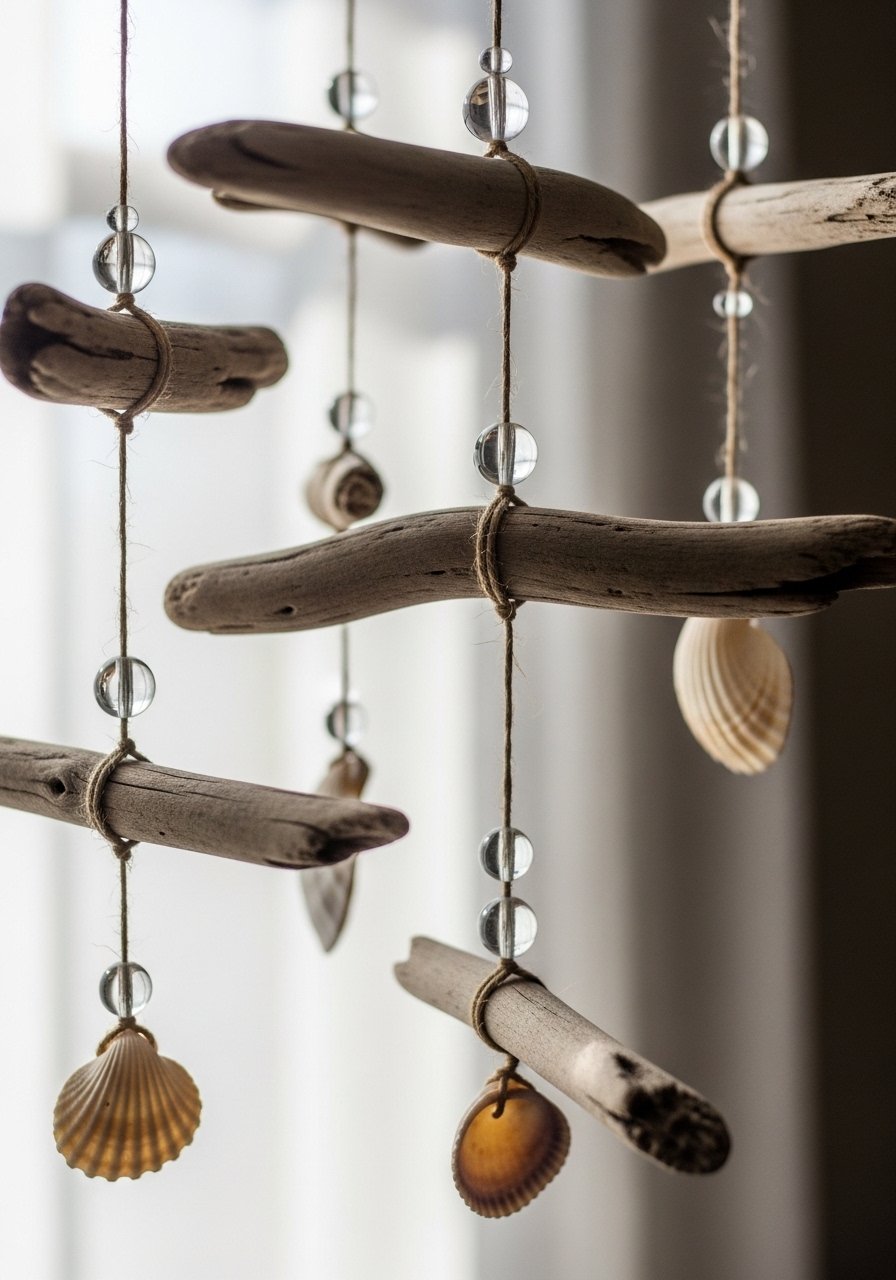
Gather thrifted driftwood or small branches and string beads and shells for an airy window mobile.
Materials
- Assorted driftwood pieces or thrifted branches 3–5
- Twine 10 yards
- Wooden beads 20
- Small shells or charms
- Hot glue gun
Instructions
- Clean and sand driftwood if needed.
- Cut twine lengths and tie beads and shells at varying intervals.
- Secure twine to driftwood and balance pieces to hang evenly.
- Add a loop at top for hanging.
How to Display or Gift It
- Hang in a sunlit window; pairs well with coastal decor.
- Package in a long tube for gifting.
25. Keyword: Miniature Thrifted Book Nook
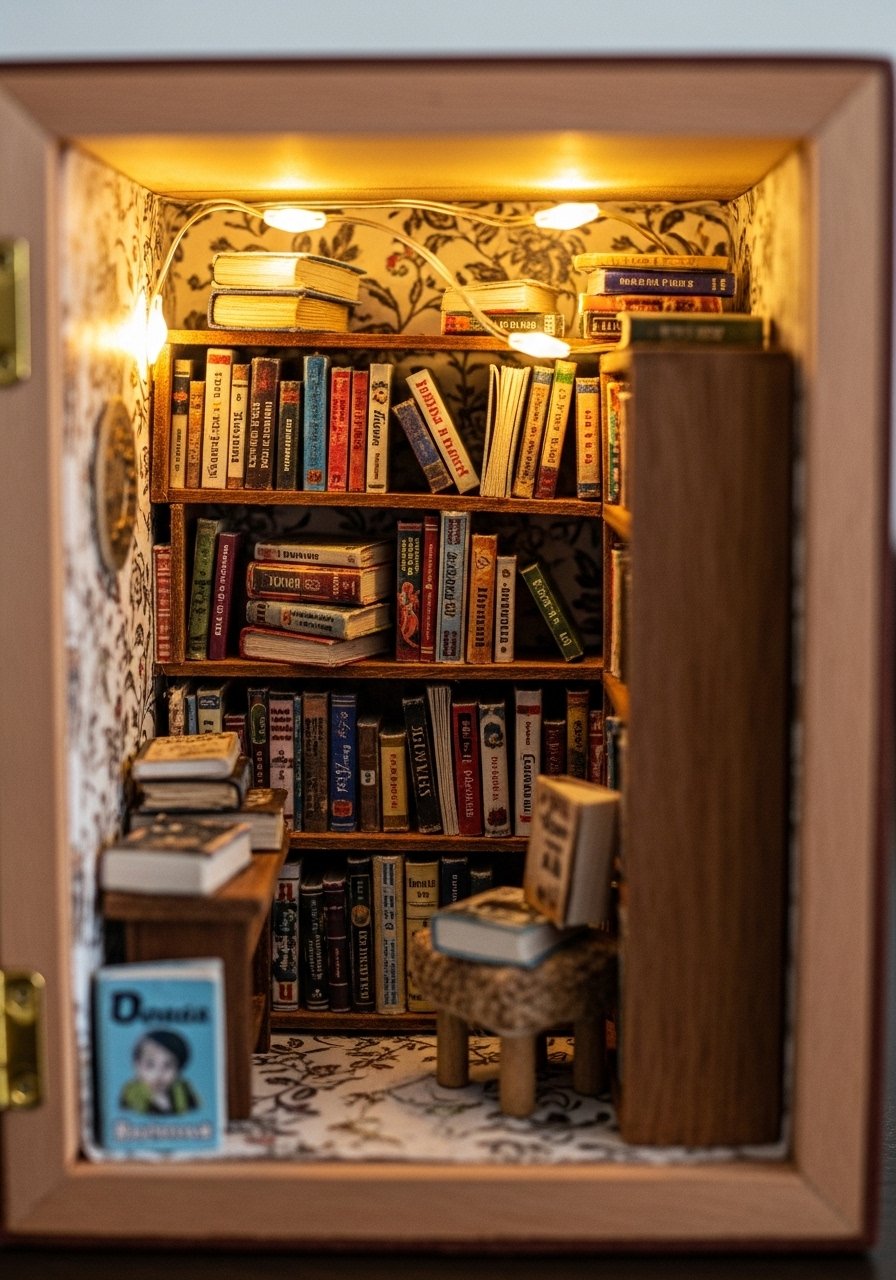
Use a small thrifted box to build a miniature scene—whimsical, low-cost, and perfect for shelves. Works for niche aesthetic room decor DIY with thrifted items fans.
Materials
- Thrifted small wooden box or cigar box approx 8" x 4"
- Wallpaper or scrapbook paper for lining 8" x 6"
- Mini LED fairy lights (battery) 1 string
- Glue stick and craft glue
- Tiny book prints or cutouts
Instructions
- Measure and cut paper to line box interior; glue in place.
- Arrange miniature props and secure with small dabs of glue.
- Install tiny battery fairy lights at the top and tuck battery into rear pocket.
- Close and display with the lid slightly ajar for a peek.
How to Display or Gift It
- Place on a bookshelf as a hidden delight.
- Gift with a printed story card describing the scene.
26. Thrifted Towel Rug with Oversized Crochet
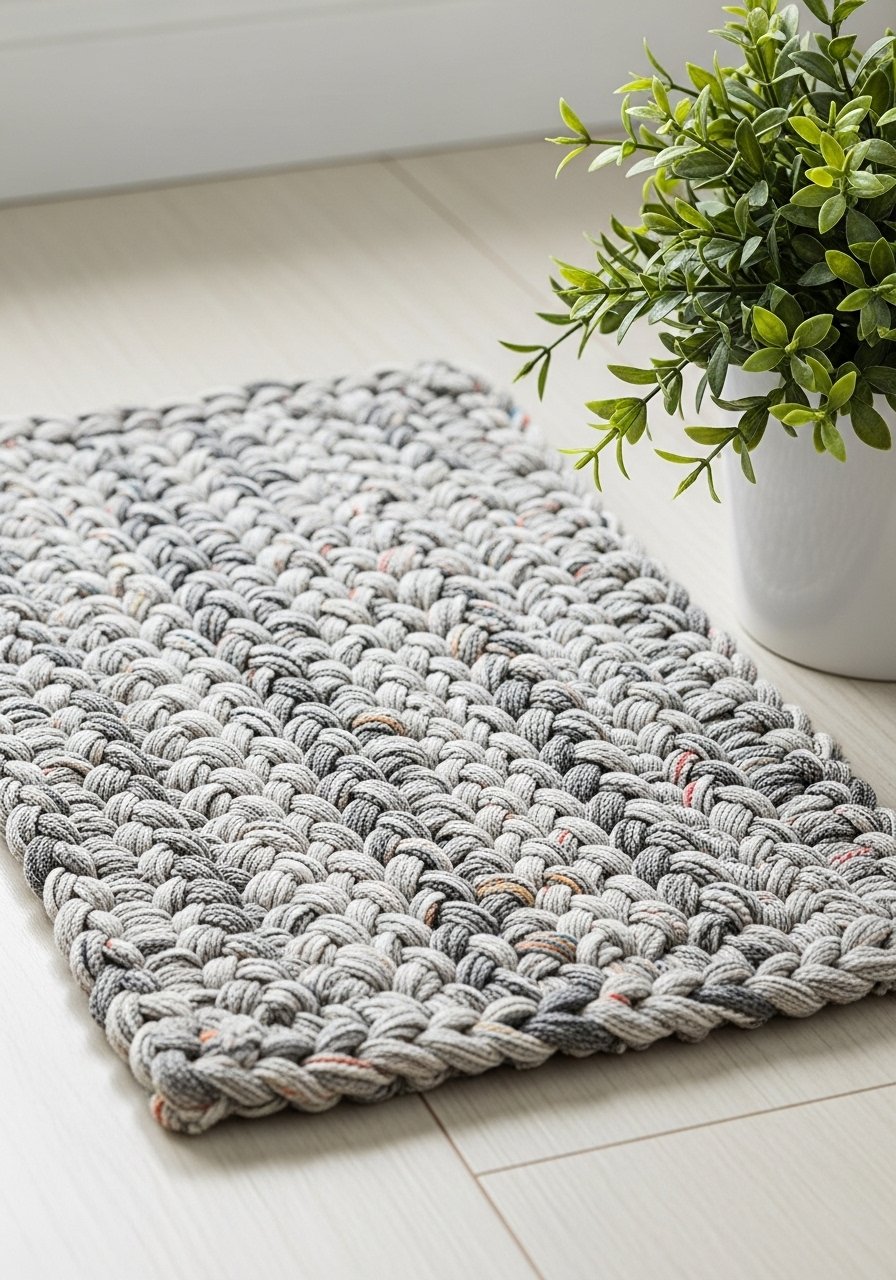
Use sturdy thrifty towels braided or crochet for a plush bath mat. The heavy cotton stands up well to washing.
Materials
- 2–3 thrifted cotton towels
- Yarn needle
- Non-slip rug pad 18" x 24"
- Fabric scissors
Instructions
- Cut towels into 2" strips and braid together or crochet with largest hook you have.
- Form into a round or rectangle and stitch edges with yarn needle.
- Attach to non-slip rug pad with glue or whipstitch.
- Wash on gentle cycle; air dry to maintain shape.
How to Display or Gift It
- Use in bathroom or entry. Store extra towels in a breathable bin.
- Gift as a housewarming present with care instructions.
27. Hand-Stenciled Ceramic Plate from Thrifted Dish
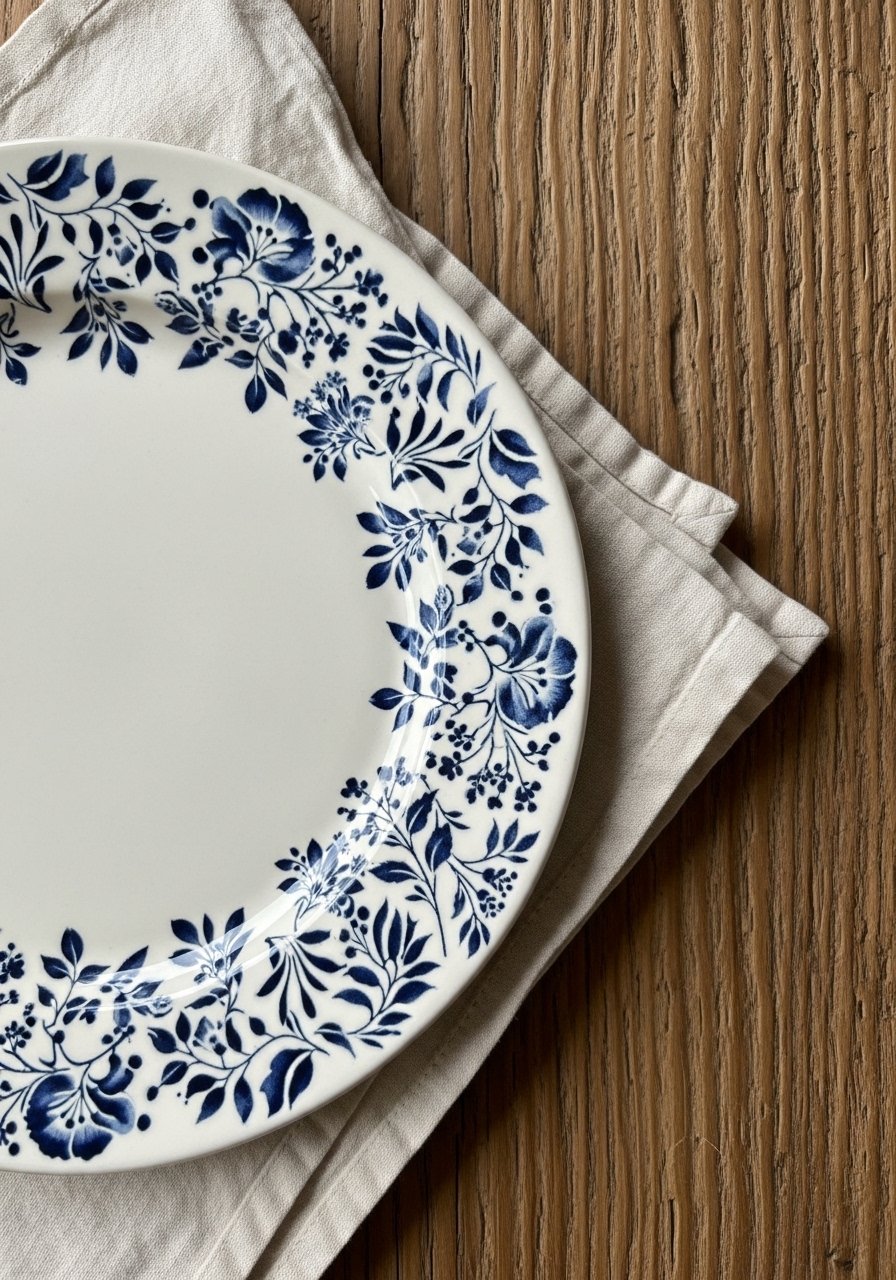
Turn a plain thrifted plate into statement wall art with ceramic paint and stencils. Seal for longevity.
Materials
- Thrifted ceramic plate
- Ceramic paint pens or porcelain paint 2
- Stencil
- Painter’s tape
- Oven for curing
Instructions
- Clean plate with alcohol. Tape stencil in place.
- Apply porcelain paint by pen or brush; let dry 1 hour.
- Cure in oven per paint instructions (usually 350°F for 30 minutes).
- Cool in oven to prevent cracks.
How to Display or Gift It
- Use a plate hanger for wall display or stand on an easel.
- Gift as a decorative piece with matching smaller plates.
28. Upcycled Piano Key Wall Hook
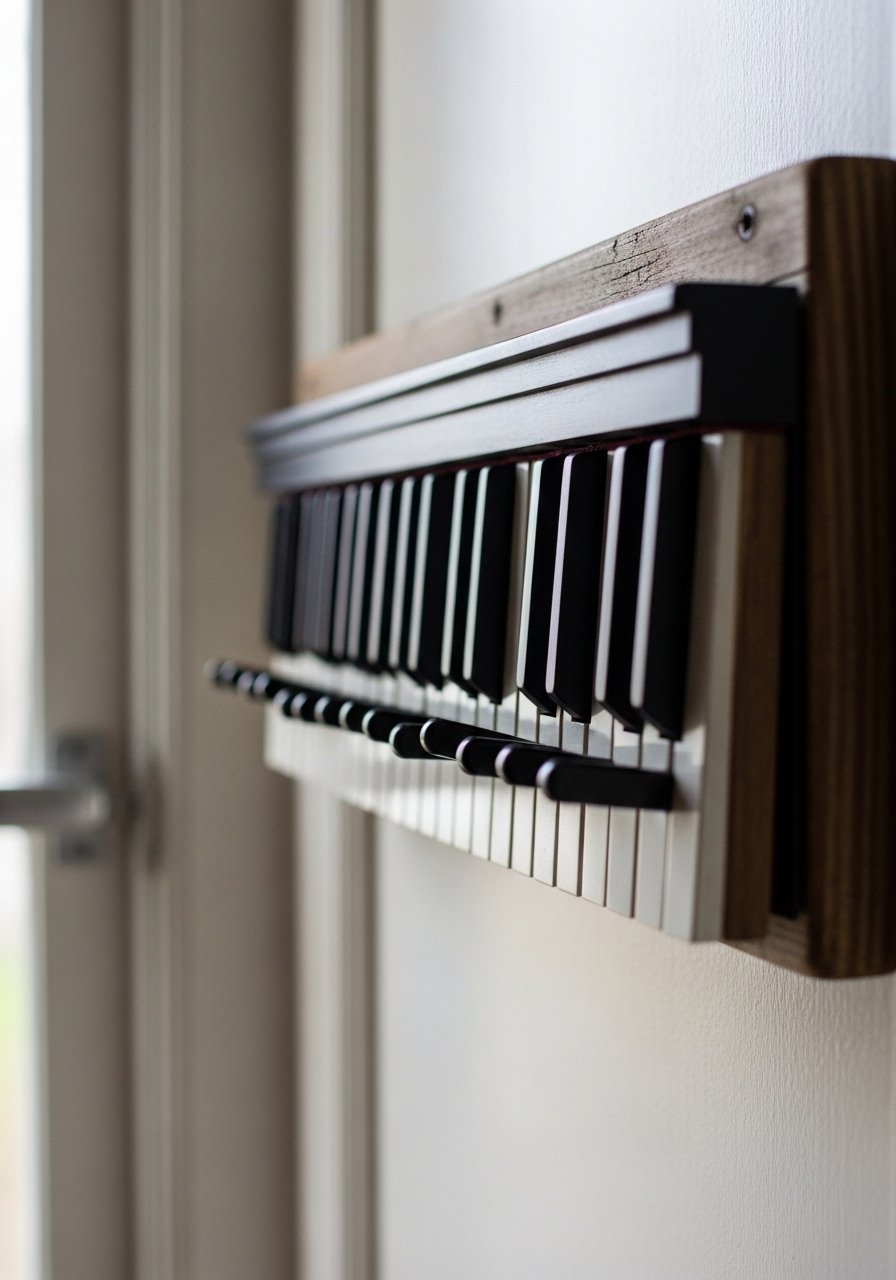
Repurpose broken keyboard keys or piano keys into quirky hooks for keys and jewelry. It’s playful and vintage-friendly.
Materials
- Broken keyboard keys or spare piano keys 6–8
- Small wooden board 12" x 4"
- Small brass hooks 6
- Drill and screws
- Strong craft glue
Instructions
- Arrange keys on board and glue in place. Reinforce with small screws if needed.
- Attach brass hooks below keys for hanging.
- Mount board near entry or vanity.
How to Display or Gift It
- Use for keys, scarves, or necklaces.
- Gift wrapped with a set of vintage-style key tags.
29. Resin-Poured Jewelry Dish from Thrifted Saucer
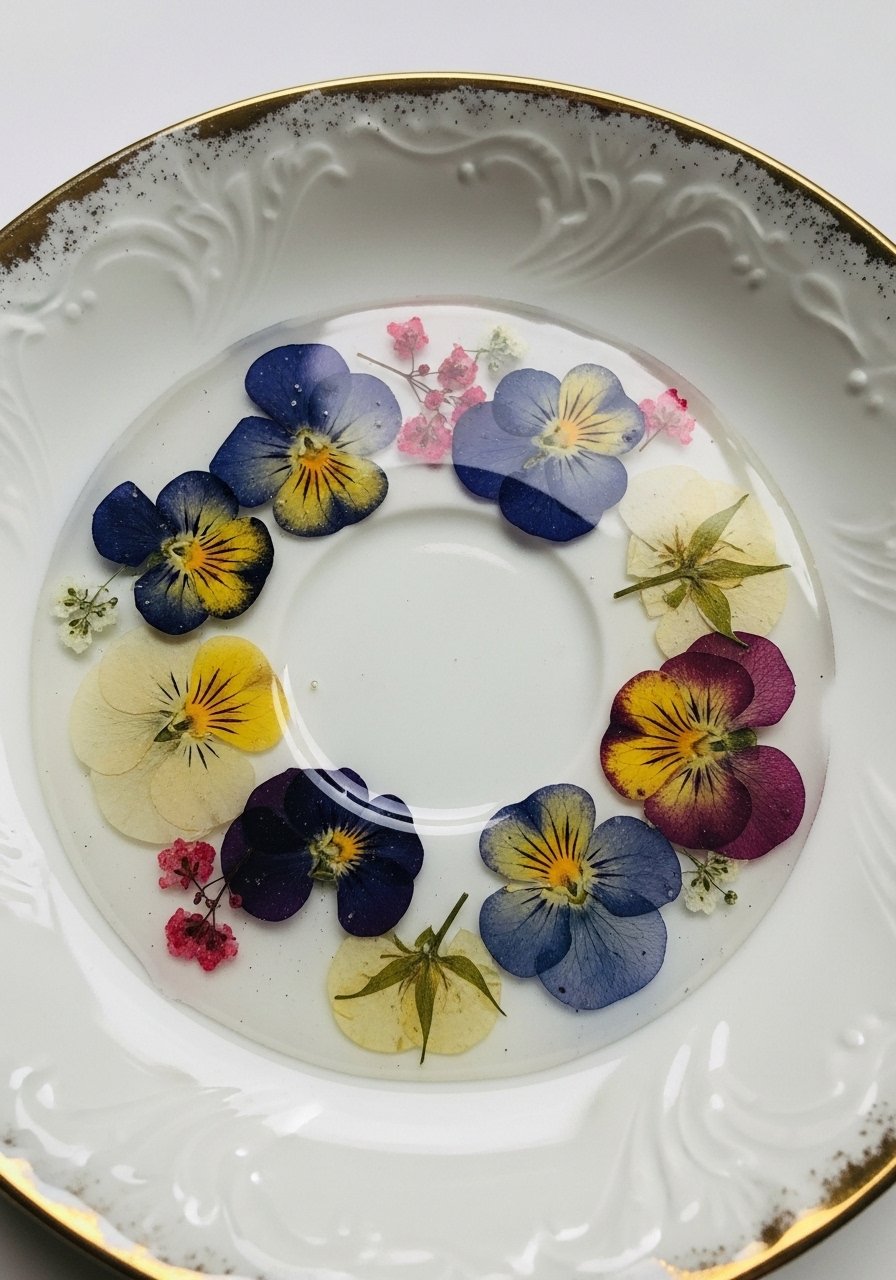
Fill a saucer with a thin pour of clear resin and embed pressed botanicals for a glossy jewelry dish. Resin gives a durable, glass-like finish.
Materials
- Thrifted porcelain saucer
- Two-part epoxy resin kit 8 oz
- Silicone mixing cups and stir sticks
- Nitrile gloves
- Pressed flowers, small trinkets
Instructions
- Clean saucer and position items where you like.
- Mix resin per kit instructions (usually 1:1) and pour thinly to cover items.
- Gently pop bubbles with a heat gun for 2–3 seconds.
- Let cure 24–48 hours until fully hard and warm to the touch.
How to Display or Gift It
- Use on a dresser or bathroom counter for rings.
- Gift in a small box with cushioning.
30. Button-Covered Lamp Base
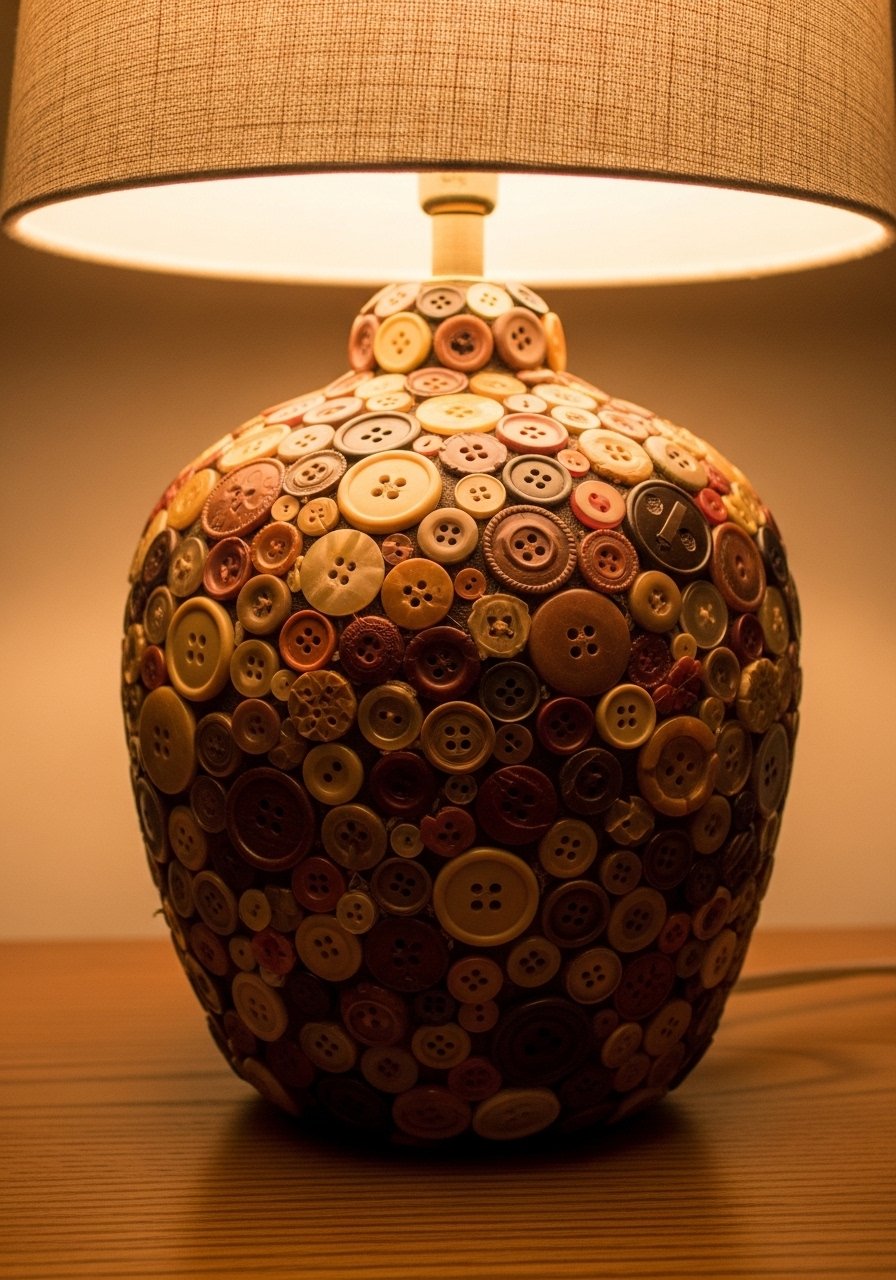
Sew a mosaic of buttons onto an old lamp base for color and texture. Buttons from thrifted garments make each piece unique.
Materials
- Thrifted lamp base (non-electric or used with bulb)
- Assorted vintage buttons 100–200
- Strong fabric glue and needle/thread
- Drop cloth
Instructions
- Plan button placement and glue or sew buttons starting at the base.
- Overlap edges to avoid visible base.
- Let glue cure 24 hours. If sewing, knot threads tightly and tuck ends.
- Reassemble lamp and test.
How to Display or Gift It
- Pair with a simple shade to let buttons shine.
- Gift with a note about the button origins if known.
Trust your thrift instincts—the texture, color, and small imperfections are what make these projects feel lived-in and personal. Try a quick project first, like the painted frames or teacup candle, to build confidence. Save this list to your favorite board and pin projects you want to try later.
One small tool that makes many of these projects easier is a temperature-controlled hot glue gun. It gives better control for delicate trims and speeds up assembly without the mess. Which thrifted item are you excited to rescue first? Share a photo or tag a friend who’d love these sustainable, stylish ideas.


