
You want rooms that feel lived-in and cozy without buying pricey décor. This aesthetic candle decor DIY shows you three easy, beginner-friendly projects that add warmth, soft light, and textured style in an afternoon. You’ll make frosted votives, a wooden candle tray, and wax-drip taper accents—simple updates that change how a room feels.
A few small supplies make the difference: using Matte Mod Podge for frost effects and a pack of foam brushes keeps finishes smooth and streak-free. Expect each mini-project to take 30–90 minutes, plus drying time.
Read on for step-by-step instructions, realistic drying times, and neat shortcuts so your aesthetic candle decor DIY looks pin-worthy fast.
Gather and Prep Materials (beginner-friendly, one-afternoon)
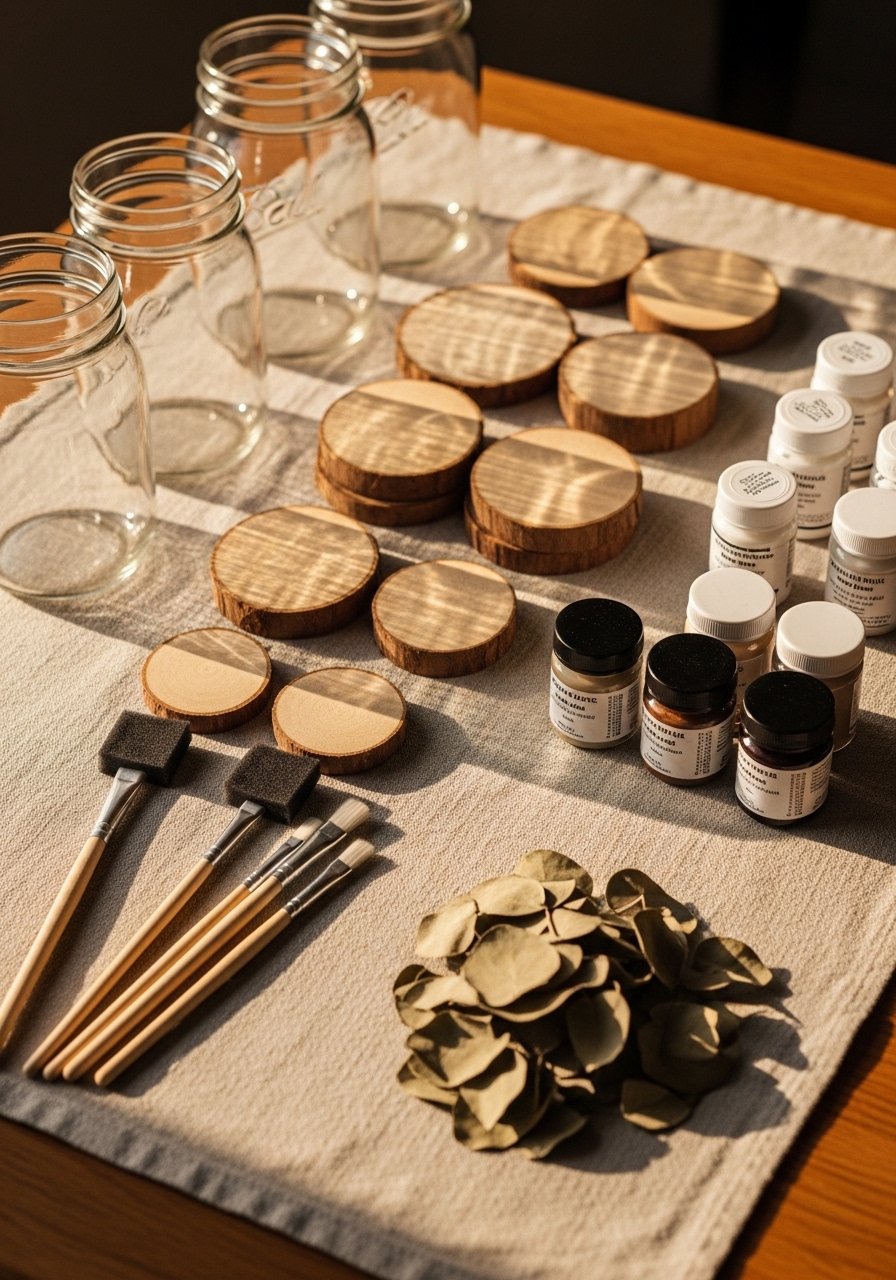
Start by clearing a 2×3-foot area and lining it with newspaper or a silicone mat. Group the mason jars and wooden rounds by size so you can work assembly-line style. For clean edges and fast work:
- Use painter’s tape to mask sections for crisp bands.
- Pre-sand wooden rounds with a sandpaper set for paint adhesion—120–220 grit is perfect.
- Have a hot glue gun handy for quick assembly; it sets in seconds and holds beads and accents firmly.
Plan about 15–20 minutes of prep time; it speeds up every step after.
Frosted Votives — Easy, budget-friendly glass update

Turn plain mason jars into soft, frosted votives that diffuse candlelight beautifully.
- Wipe jars clean and remove labels.
- Apply a thin coat of Matte Mod Podge with a foam brush.
- While tacky, dip or dust coarse sea salt for texture, or sand slightly after drying for a subtle haze.
- Let dry 30–60 minutes, then seal with another Mod Podge coat. Full cure 24 hours.
Tips:
- For layered color, paint the inside with a sheer wash of acrylic craft paint and let dry 30–45 minutes between coats.
- Use battery LED tealights in delicate jars for safe, long-lasting glow.
Wooden Candle Tray with Beads — Upcycled, rustic centerpiece
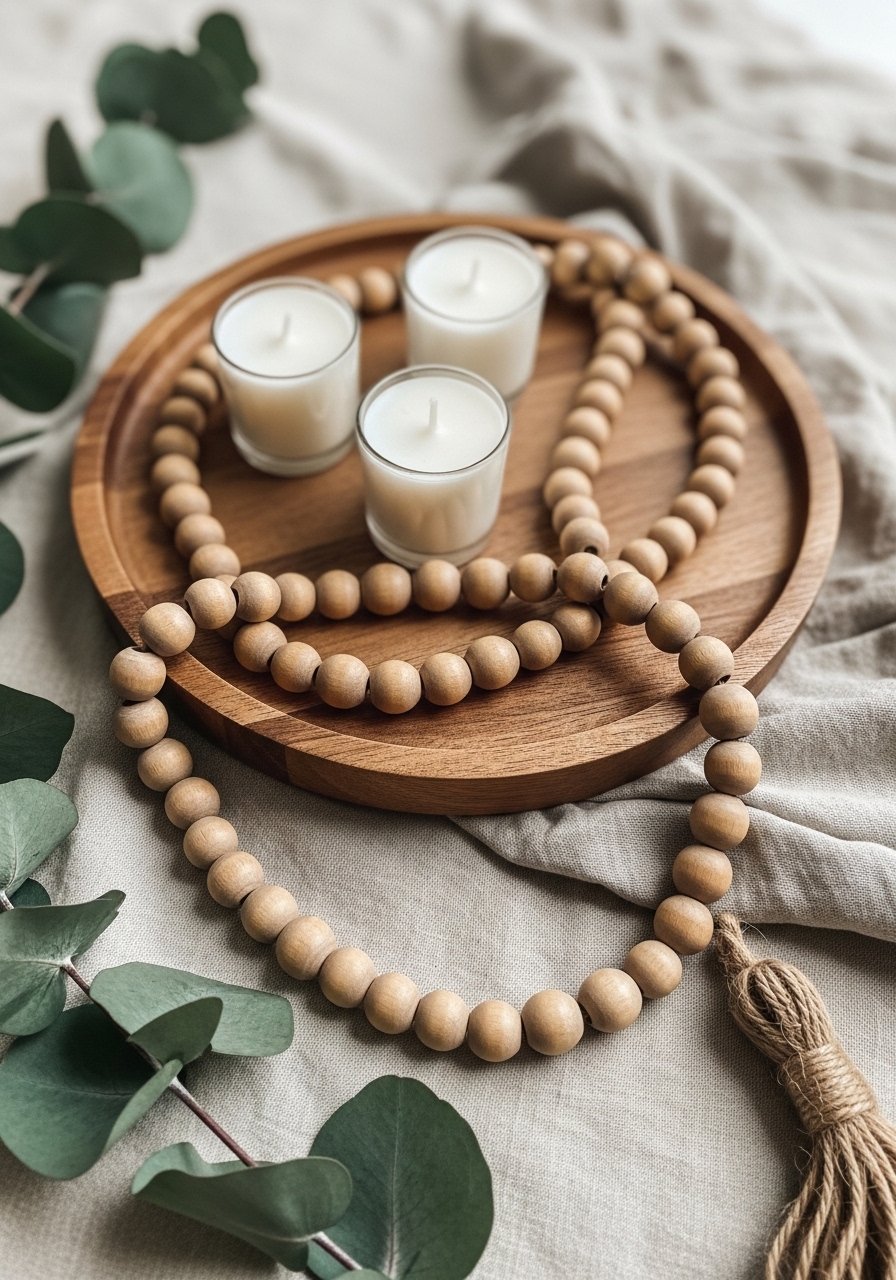
A wooden tray grounds multiple candles and adds texture to a tabletop.
- Sand a 10–12 inch wooden round until smooth.
- Paint the rim or center with acrylic craft paint; dry 30–60 minutes.
- Glue a strand of wooden beads around the base with a hot glue gun or tie with twine.
- Seal with a matte coat of Matte Mod Podge for protection; cure 24 hours.
Pro tips:
- For a tapered look, stack a small wooden round under a larger one for height.
- If you want a sturdier finish, use a craft heat gun carefully to remove air bubbles from wet sealers.
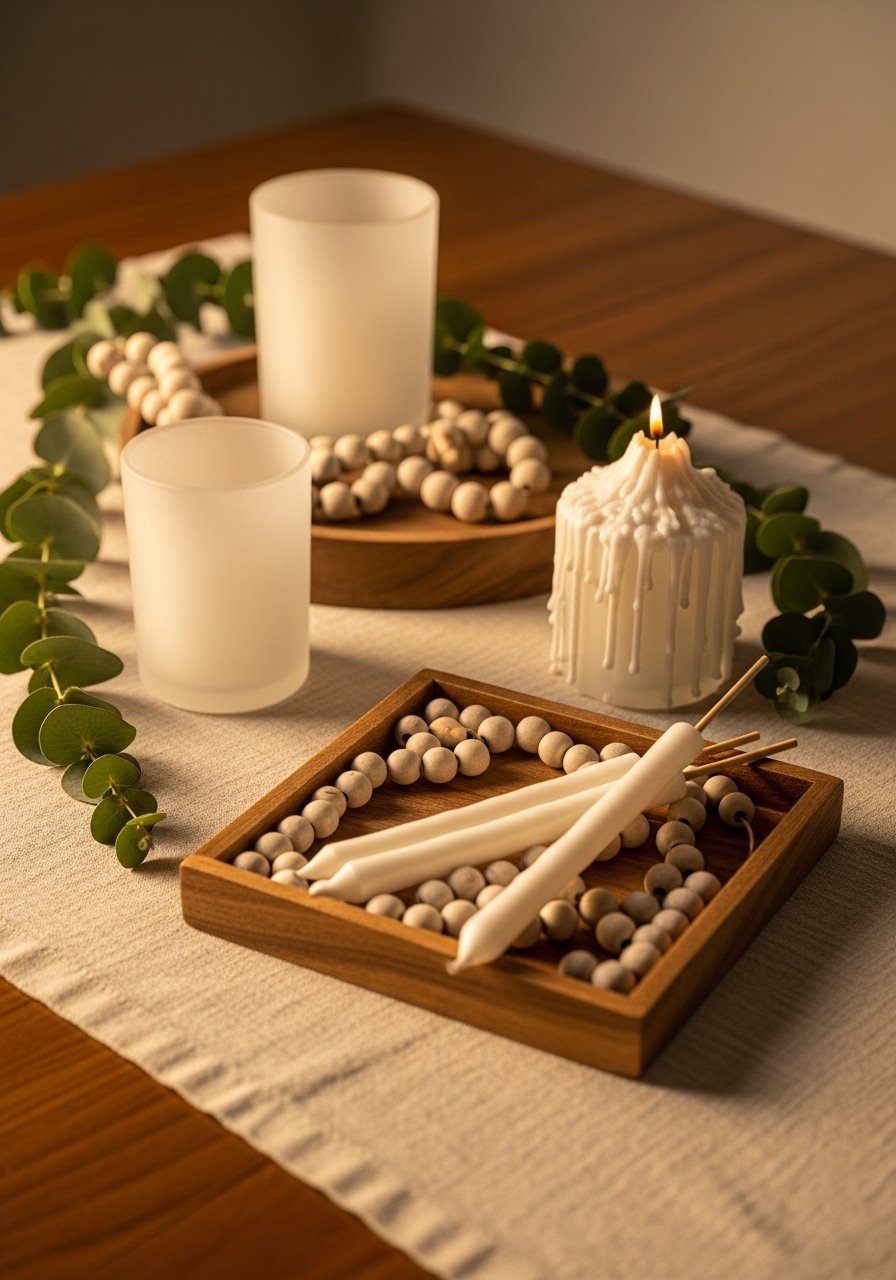
Wax-Drip Taper Accents and Display Tips (pin-worthy finishing)

Add simple wax-drip tapers to create cozy, lived-in charm.
- Drip beeswax or paraffin intentionally by lighting a taper above a small bowl and letting drops fall onto a holder. Protect surfaces with a silicone mat.
- For easy cleanup, use a small wooden easel to display decorative votives as a styled photo prop or gift stand.
- Store extras in a cool box or stacked in mason jars when not in use.
Display ideas:
- Cluster three sizes on a tray with greenery for a cozy mantel vignette.
- Alternate warm candles with LED options for nights you want ambiance without the flame.
Warm cautions:
- Never leave real flames unattended and keep candles away from flammable decor like dried botanicals.
- Test adhesives and finishes on scraps before final application.
You've just made accessible, aesthetic candle decor DIY that adds instant warmth and style to any room. These projects are forgiving, quick, and easy to customize with color and texture. Pin this guide for a cozy craft afternoon, save it for later, and share with a friend who loves handmade home touches. Which of these will you try first—frosted votives, the wooden tray, or wax-drip tapers?


