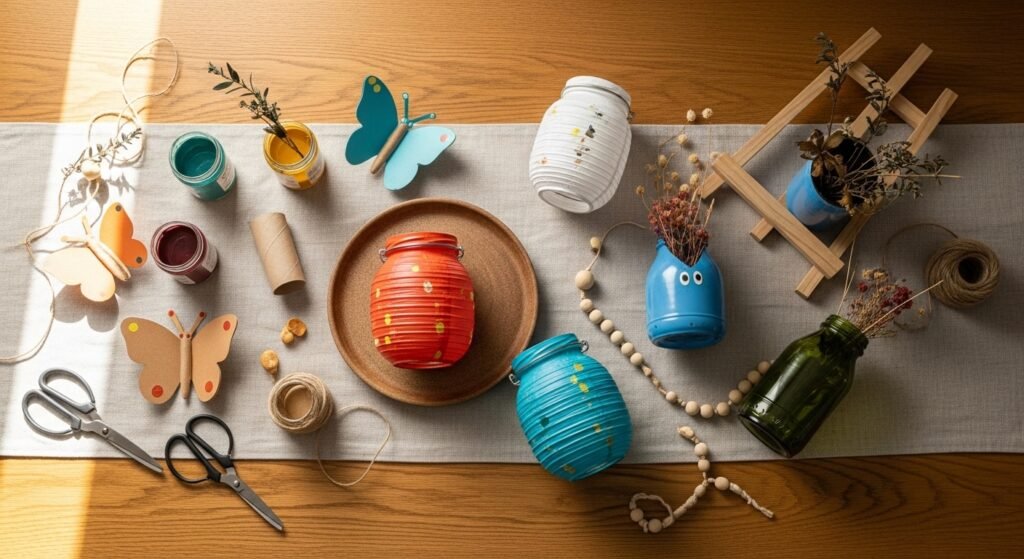
You know that pile of “trash” that somehow becomes a craft supply stash? Perfect—that’s what these projects are for. This collection of 26 bold recycled craft ideas for kids turns cardboard, jars, plastic bottles, and other everyday cast-offs into charming, hands-on treasures. Whether you’re crafting for rainy-day entertainment, a classroom project, or quick homemade gifts, you’ll find approachable projects that look great on a shelf or hang from a playroom wall.
I usually start simple: a sharp pair of kid-safe scissors and my hot glue gun with temperature control for firm holds that don’t string. For cutting vinyl or more precise shapes, the Cricut Joy cutting machine speeds things up. These recycled craft ideas for kids use common supplies, offer clear drying times, and include helpful tips so projects don’t fail halfway through.
Ready to make trash feel like treasure? Grab a foam brush and your imagination, and let’s create.
- Toilet Paper Roll Butterfly Garland

This easy garland uses empty toilet paper rolls to make bright, chunky butterflies kids love. The shapes are tactile and satisfying to paint, and the finished garland adds a playful touch to a bedroom or party. Great for beginners and preschoolers—cutting is simple and painting is forgiving.
Materials
- 6 toilet paper rolls, cut in half for 12 butterfly bodies
- Acrylic craft paint set, assorted colors (8 oz total tubes)
- 1 roll thin jute twine, 10 yards
- 20 wooden beads, 10–12 mm
- Hot glue sticks, standard size (for glue gun)
- Fine-tip permanent marker, black
- Scissors (kid-safe)
- Foam brush, 1" (for base coats)
- Clear matte Mod Podge, 2 oz for sealing
Instructions
- Flatten each half roll slightly and pinch one side to create the butterfly “body” shape. Trim edges with scissors for neat wings.
- Paint both sides of each shape with a base color using a foam brush; allow 20–30 minutes to dry to the touch.
- Add patterns (dots, stripes) with a small round brush or paint pens; let paint dry 30 minutes.
- Seal both sides with a thin coat of Mod Podge; dry 15–20 minutes between coats. Two coats recommended; cure 24 hours for full durability.
- Thread jute twine through the wooden beads and glue a butterfly on either side of each bead using your hot glue gun with temperature control. Work quickly—glue skins over in 15–30 seconds.
- Tie loops at ends for hanging. Trim any excess glue strings with scissors.
How to Display or Gift It
Hang the garland above a bed, across a bookshelf, or as party decor. Add sprigs of dried baby’s breath between butterflies for a cottagecore vibe. For gifting, coil gently and tuck into a kraft box with tissue paper. Store flat in a craft organizer tray to avoid crushed wings—craft organizer drawers work well.
- Egg Carton Flower Stamps
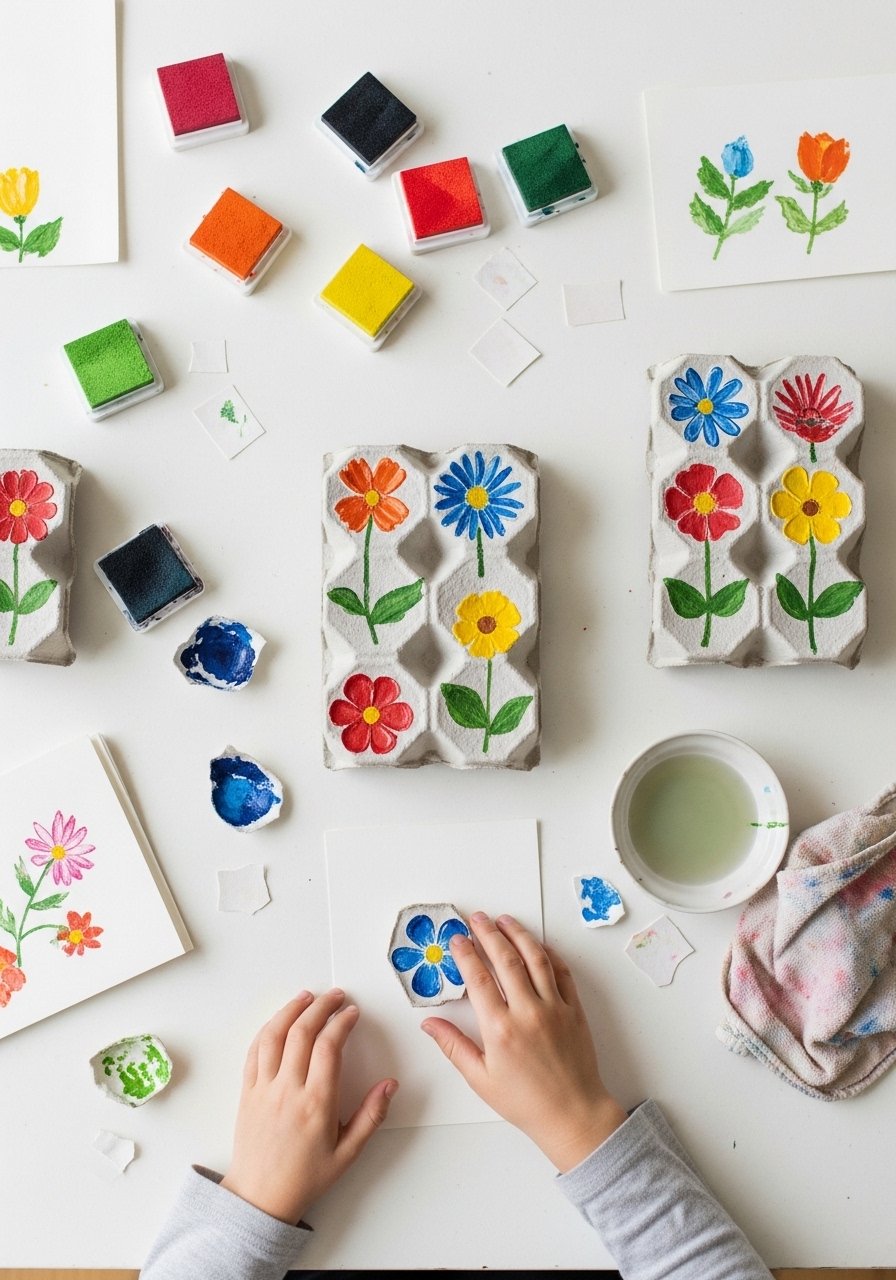
Turn egg cartons into reusable stamps that print lovely flower patterns on cards and wrapping paper. These stamps are durable, easy to paint, and double as a sensory craft when kids press and peel the cartons.
Materials
- 1 cardboard egg carton, cut into cup sections (6–12 stamps)
- Acrylic paint set, small tubes or craft pots
- Foam roller/brayer, 2" (for even ink)
- Glue gun or strong craft glue
- Popsicle sticks, 6 (as handles)
- Cardstock, 10 sheets (5×7") for cards
- Palette or paper plate for paint
- Paper towels
Instructions
- Cut the egg carton into individual cups; trim any excess to create neat petal shapes.
- Paint the top of each cup with a base color; let dry 20–30 minutes.
- Glue a popsicle stick to the underside as a handle; let glue set 10 minutes.
- Load paint onto a small palette and press the cup lightly into paint using a brayer for a thin, even coat.
- Press stamp onto cardstock with gentle, even pressure; lift straight up.
- Rinse stamps and reapply paint as needed. Allow printed pieces to dry 30–60 minutes.
How to Display or Gift It
Use stamped cards as gift tags or make a framed set for a playroom wall. Store stamps flat between sheets of wax paper in a shallow box. Pair with a set of colored envelopes and a ribbon for gifting.
- Cardboard Box Dollhouse (Mini)
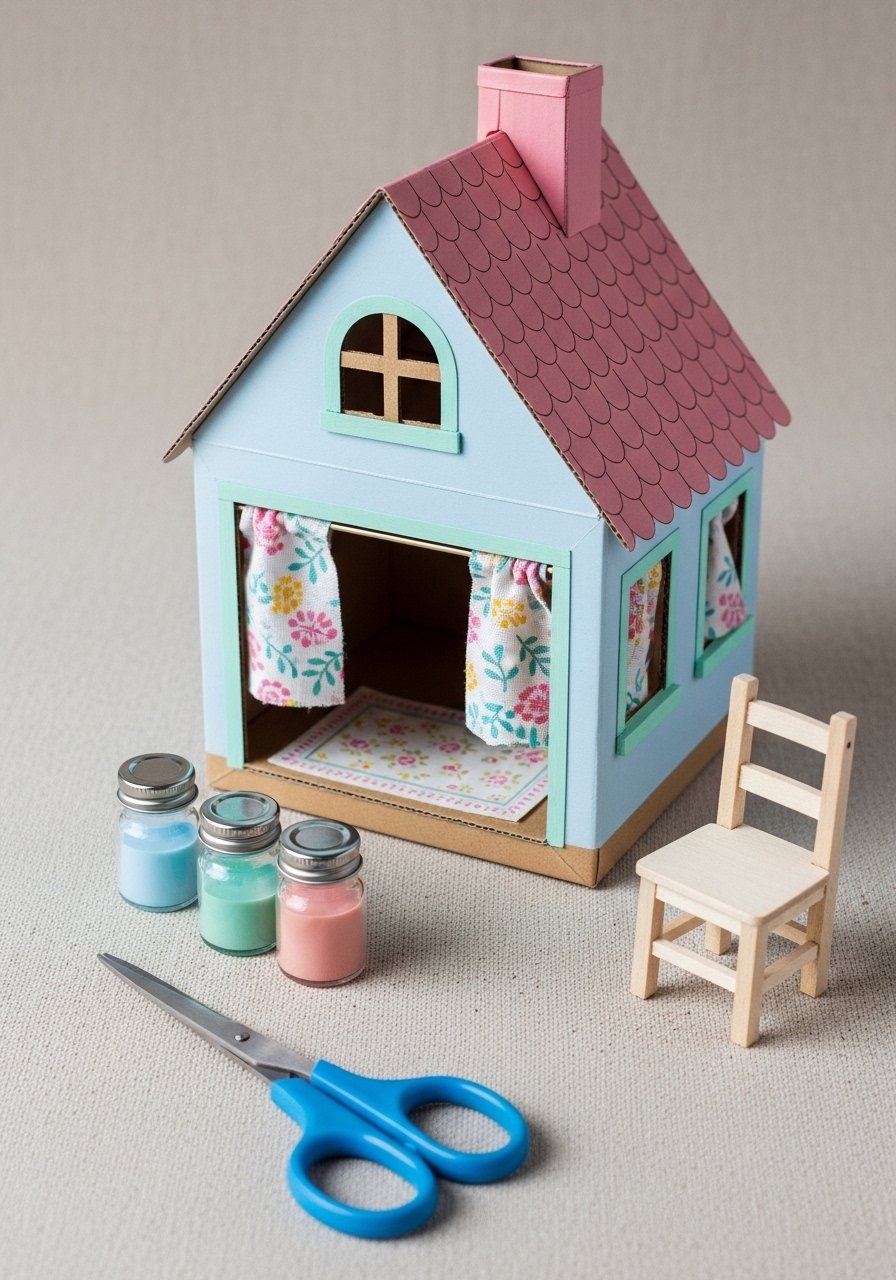
A simple dollhouse from cereal boxes encourages imaginative play and is a great group project. You’ll be surprised how sturdy decorated cardboard can look when layered and sealed.
Materials
- 2 large cereal boxes or shipping boxes (12×8×4" each)
- Acrylic craft paint, latex-safe for cardboard, 4 colors
- Craft knife and self-healing cutting mat
- Hot glue gun + sticks
- Scrap fabric, small pieces for curtains and rugs
- Ruler and pencil
- Mod Podge gloss, 4 oz (for wallpaper/sealing)
- Small wooden furniture or craft dowels for simple chairs
Instructions
- Plan the layout—cut front panels for rooms and windows using a craft knife on a self-healing mat.
- Assemble boxes side by side with hot glue to form multi-room structure; allow glue to cool 5–10 minutes.
- Paint walls and floors; allow 30–45 minutes drying time between coats.
- Use Mod Podge to adhere fabric scraps as curtains and rugs; smooth with a brayer roller to avoid bubbles. Dry 15–20 minutes.
- Add simple furniture or make chairs from cut dowels and glue; let pieces set 20 minutes.
- Seal interior with one thin coat of Mod Podge for durability; cure 24 hours.
How to Display or Gift It
Display on a low shelf or tabletop. Add small labels for room names for educational play. For gifting, fill rooms with a tiny fabric starter set and wrap in kraft paper.
- Bottle Cap Magnets
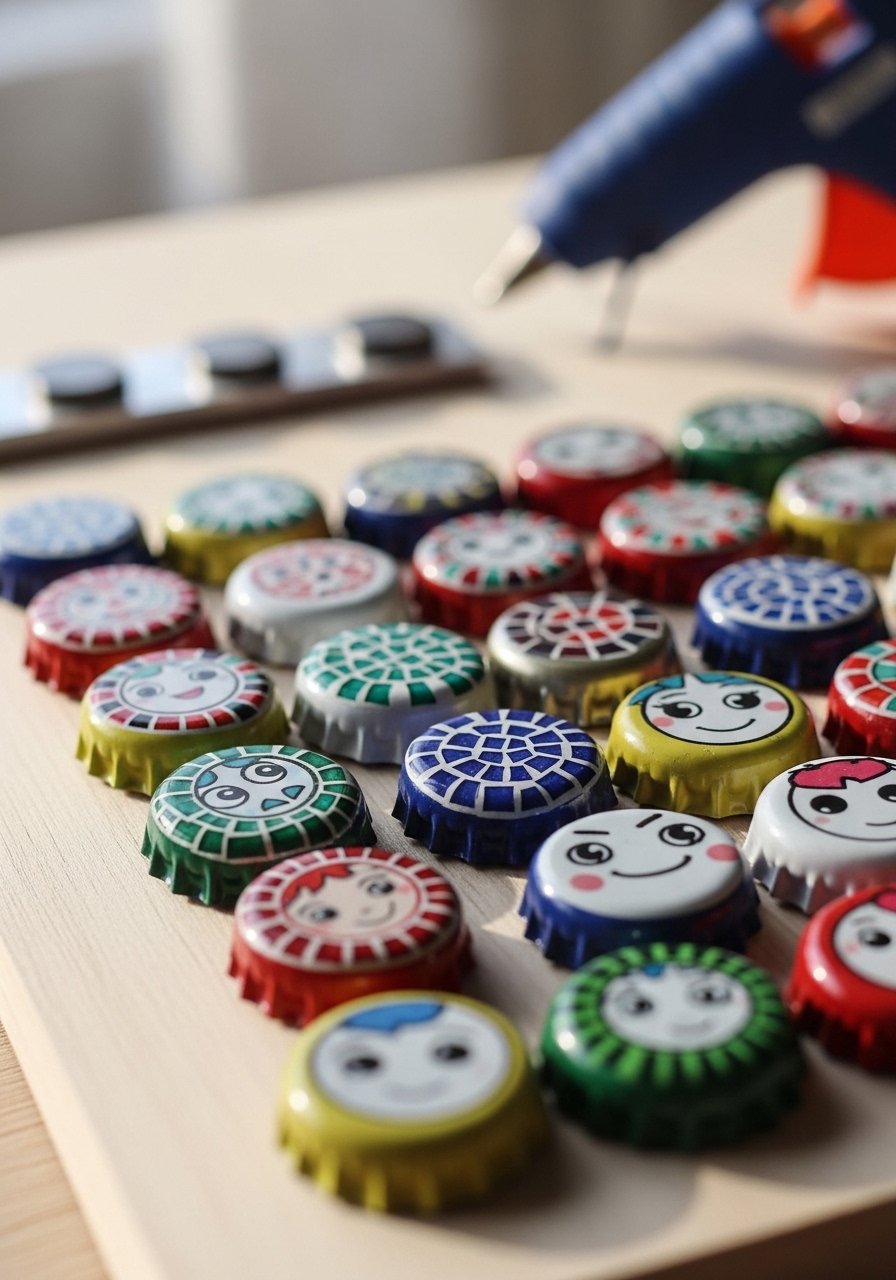
Bottle caps become fun magnets for the fridge—perfect for crafting with older kids who can add tiny collage pieces under resin or Mod Podge. This project is great for mixing patterned papers and small found objects.
Materials
- 30 metal or plastic bottle caps (cleaned)
- Flat neodymium magnets, 30 (8–12 mm)
- Mod Podge gloss, 2 oz
- Small craft glue, E6000 or strong adhesive, 1 oz
- Scrapbook paper or magazine images
- Foam brushes, small for glue
- Clear acrylic spray sealer, 1 can (optional)
- Scissors and hole punch (tiny)
Instructions
- Clean bottle caps and dry thoroughly.
- Cut images from scrapbook paper to fit inside cap; test fit.
- Apply thin layer of Mod Podge inside cap, press image, smooth with foam brush.
- Seal with another thin Mod Podge coat; dry 20–30 minutes. Two coats recommended.
- Glue a magnet to the back of each cap with E6000; set weight down and allow 24 hours to cure fully.
- Optional: spray tops lightly with clear acrylic for extra durability; dry 1 hour.
How to Display or Gift It
Stick on the fridge for a colorful display. Bundle 6–8 as a fridge magnet set in a kraft box with tissue. Store extras in a small jar labeled by color—mason jars are perfect.
- Plastic Bottle Planters — recycled craft ideas for kids
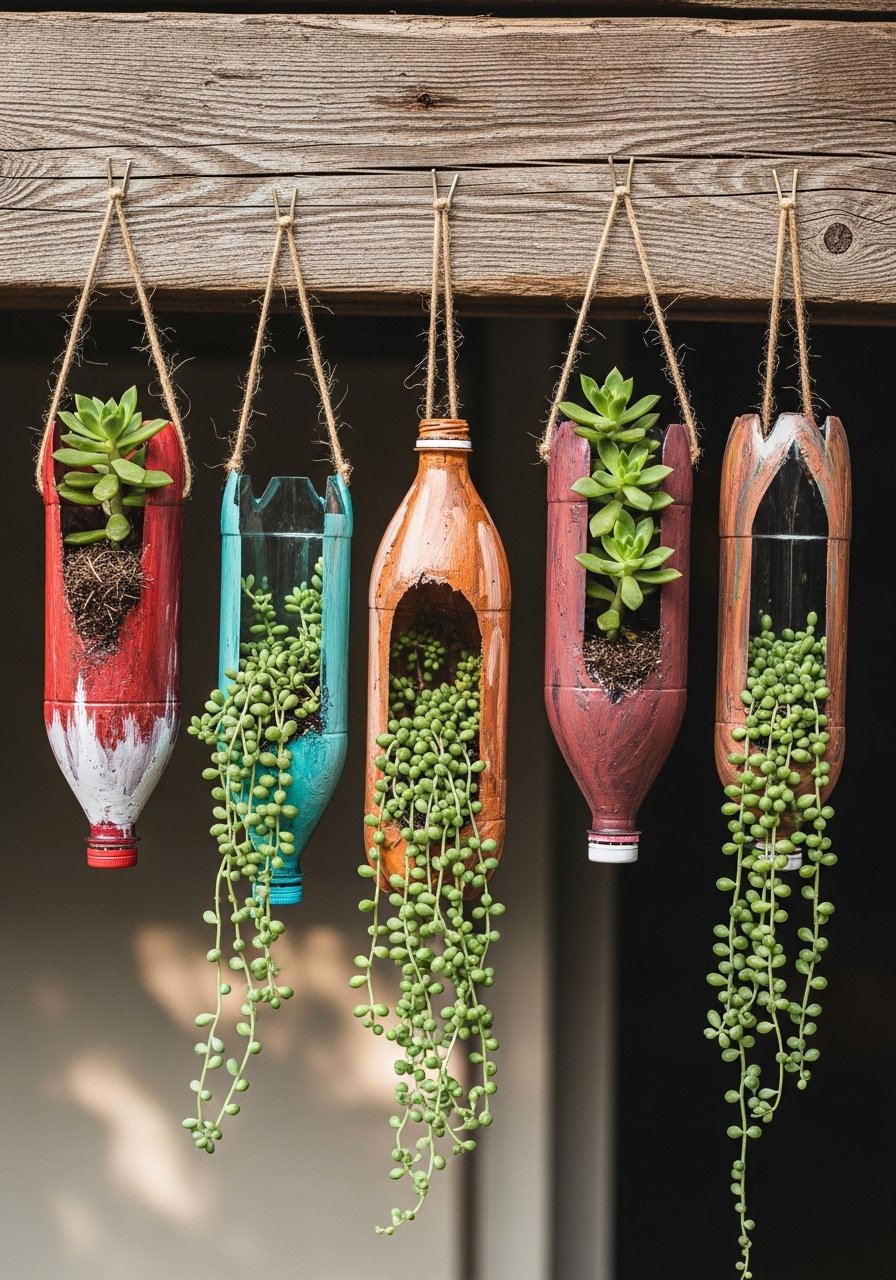
These hanging planters upcycle plastic bottles into little pots for succulents or herbs. They’re lightweight, kid-safe, and can be decorated in farmhouse, boho, or japandi palettes. Kids learn about drainage and plant care, too.
Materials
- 3 large plastic bottles (1–2 L), clean and cut in half
- Acrylic chalk paint, 3 colors (matte finish)
- Jute twine, 15 feet
- Drill or nail for drainage holes
- Potting soil, small bag (1 quart)
- Small succulents or cuttings, 3
- Hot glue gun + sticks
- Paint brush, 1" flat
Instructions
- Cut bottles in half horizontally; sand rim lightly for smooth edge.
- Drill 1–2 drainage holes in base; wipe clean.
- Paint exterior with chalk paint; allow 30–40 minutes between coats. Two coats give solid coverage.
- Wrap twine around the bottle neck and knot to create a hanging cradle; secure with hot glue.
- Fill with a thin layer of pebbles for drainage, then potting soil; place succulents gently.
- Water sparingly—succulents need about 1 tablespoon every 10–14 days. Hang in bright, indirect light.
How to Display or Gift It
Hang three on a porch rail or along a window for a mini garden. They make fresh teacher gifts—packaged in a small kraft box with care instructions. For storage, nest empty bottles in a large bin until ready to craft.
- Glass Jar Fairy Lanterns
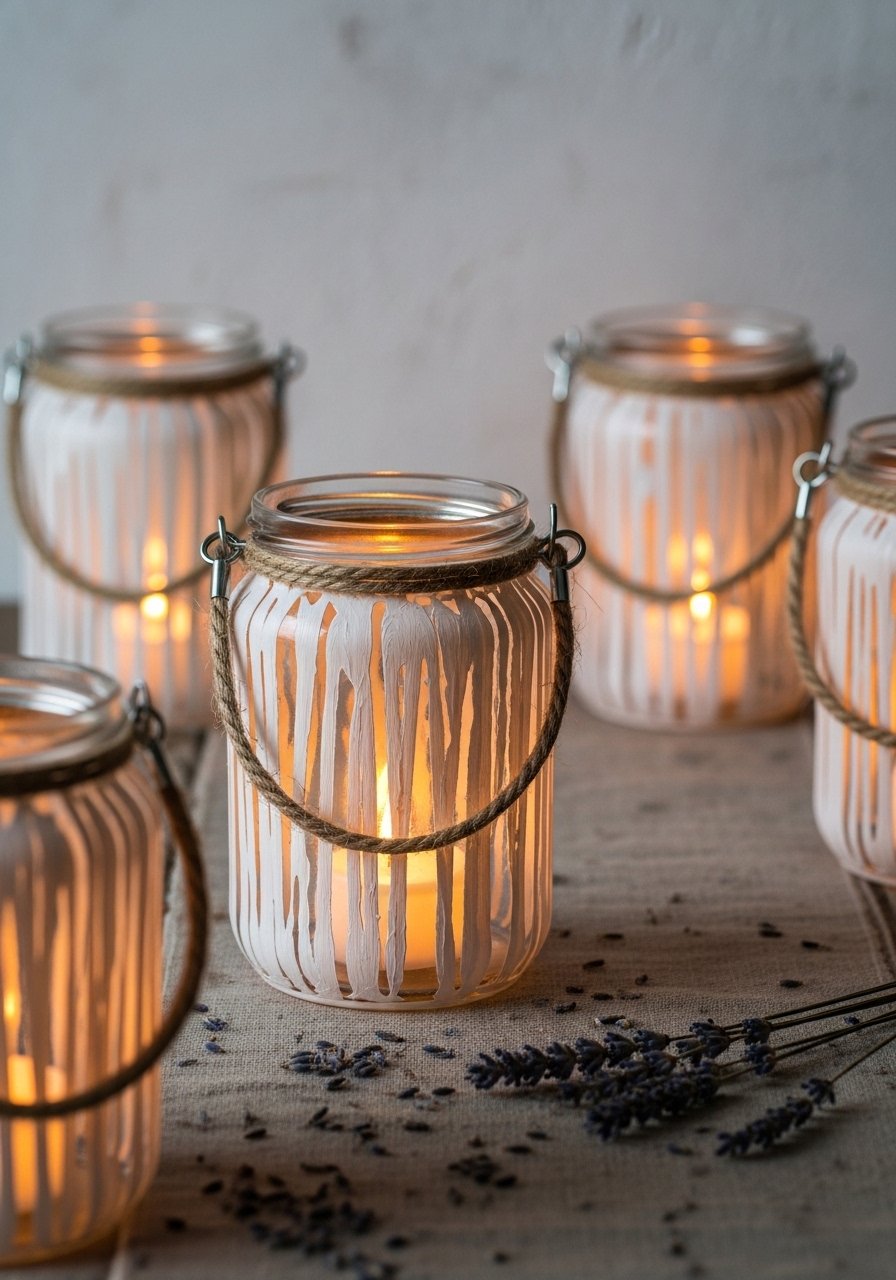
Turn glass jars into soft-glow lanterns using tissue paper, paint, and battery tealights. The finished look is magical and fits cottagecore or boho bedrooms.
Materials
- 4 cleaned glass jars (mason or jam jars)
- Tissue paper, assorted colors
- Mod Podge matte, 4 oz
- Foam brushes, 1"
- Twine, 6–8 feet for handles
- Battery tealights, 4
- Scissors and ruler
Instructions
- Tear tissue paper into small pieces. Apply a thin coat of Mod Podge to jar with a foam brush.
- Press tissue pieces onto jar, smoothing with brush; overlap edges for color variation.
- Seal with another thin coat of Mod Podge; dry 20–30 minutes. Two coats recommended.
- Tie twine around the jar neck, knotting to form a handle; reinforce with a dab of hot glue.
- Place battery tealight inside and test glow; battery life varies but plan for 100+ hours.
How to Display or Gift It
Group several lanterns on a bedside table or porch. Add a dried lavender sprig under twine for fragrance. For gifting, wrap extra tealights in tissue and tuck into a small kraft gift box.
- Wine Cork Stamps
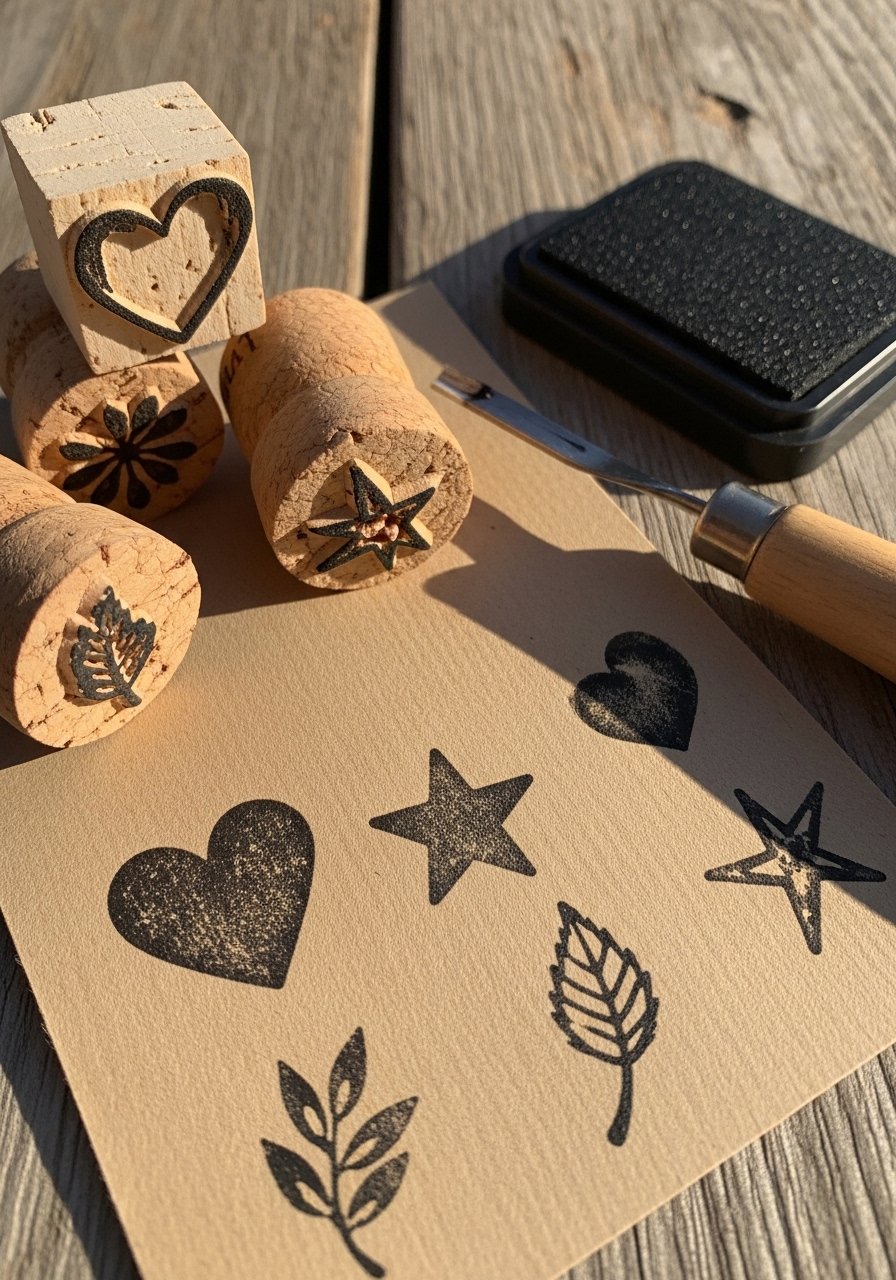
Wine corks make durable little stamps when carved into shapes. Kids can stamp wrapping paper, cards, and more. This project suits older kids for safe carving with supervision.
Materials
- 10 wine corks, cleaned
- Carving tool or craft knife (adult use)
- Ink pads or acrylic paint + foam brush
- Cardstock, 12 sheets (5×7")
- Pencil and sharpie for outlines
- Small sanding block, 120-grit
Instructions
- Sketch simple shapes on the cork ends using a pencil.
- Carefully carve away negative space with a craft knife (adult does carving). Sand edges smooth.
- Dab stamp into ink pad or paint with foam brush and press onto cardstock with firm pressure.
- Repeat, re-inking as needed. Allow prints to dry 20–30 minutes.
- Clean corks with a damp cloth between different ink colors.
How to Display or Gift It
Make custom gift wrap or a set of cards. Store stamps in a small compartmentalized tin. Include a label showing the carved shape for quick reuse.
- CD Suncatchers

Old CDs catch light beautifully. Layer tissue paper mosaics and add ribbon hangers for easy, sparkly suncatchers perfect for sunny windows.
Materials
- 6 old CDs
- Tissue paper, colorful, torn into pieces
- Mod Podge gloss, 2 oz
- Ribbon, 6 pieces (12" each)
- Hole punch for ribbon hole (or drill small hole)
- Foam brush, small
Instructions
- Apply Mod Podge to CD surface and press tissue pieces in a mosaic pattern.
- Seal with another Mod Podge layer; dry 15–20 minutes between coats. Two coats recommended.
- Punch a small hole near the edge and tie ribbon for hanging.
- Hang in a sunny window; expect gloss to cure 24 hours for best durability.
How to Display or Gift It
Hang single or clustered suncatchers in a sun-facing window. Wrap one in tissue and tuck into a small box for a handmade gift. Store flat to avoid bending.
- Milk Jug Scoops
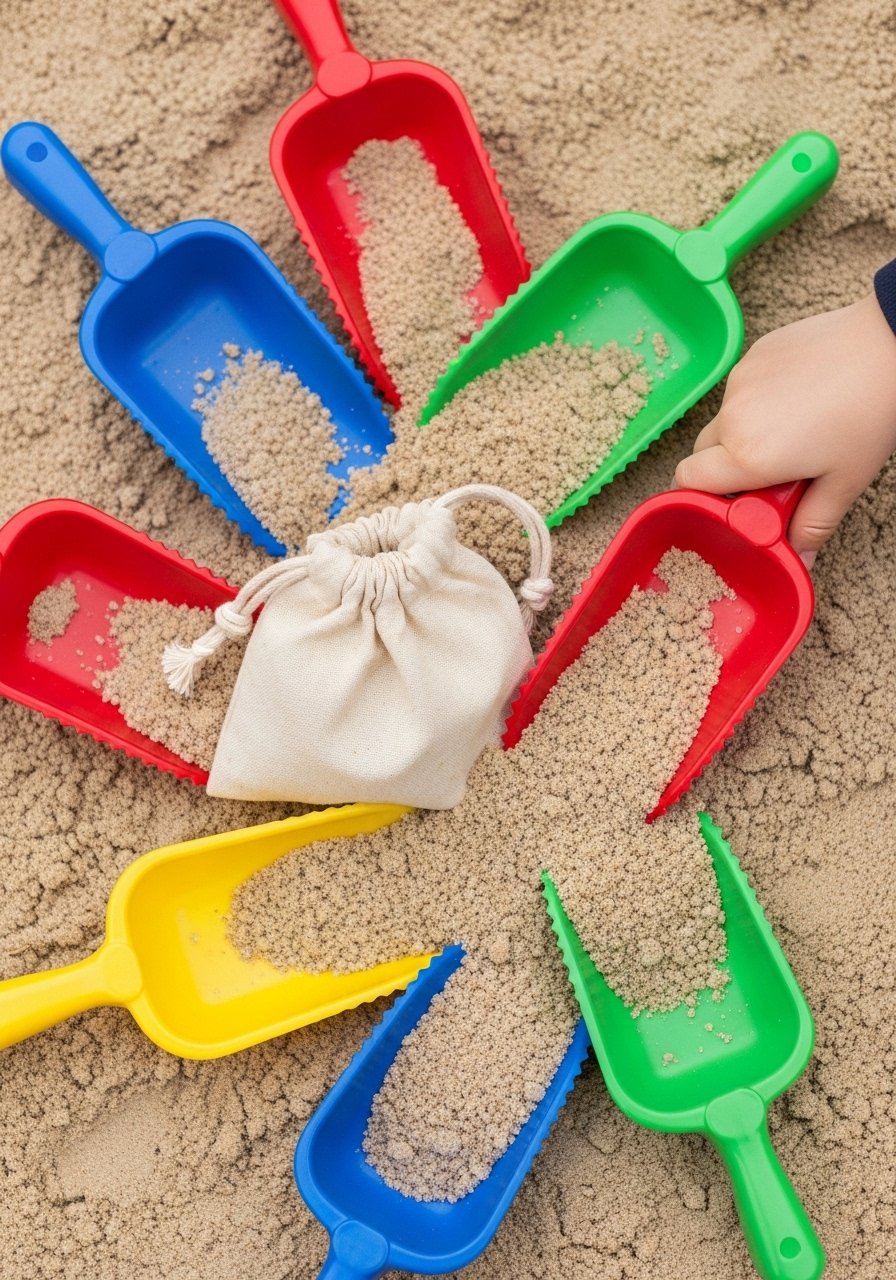
Cut milk jugs into scoops for sand, pet food, or garden use. They’re sturdy, washable, and simple to personalize with paint.
Materials
- 2 empty milk jugs, cleaned and dried
- Sharp scissors or utility knife (adult assist)
- Acrylic paint pens for decorating
- Sandpaper, medium grit for smoothing edges
- Painter’s tape, 1" for clean lines
- Permanent marker for tracing
Instructions
- Draw a scoop shape on the side of the milk jug. Cut along lines with scissors or a utility knife (adult handles final cuts).
- Sand cut edges smooth. Mask off areas with painter’s tape for design.
- Decorate with paint pens; allow 20–30 minutes to dry.
- Rinse after heavy use. Scoops are dishwasher safe on top rack for most jugs—test one before regular use.
How to Display or Gift It
Keep scoops in a canvas caddy near the sandbox or gardening shelf. Bundle a set with a small sand toy in a mesh bag for a beach-ready gift.
- Magazine Paper Beads Necklace
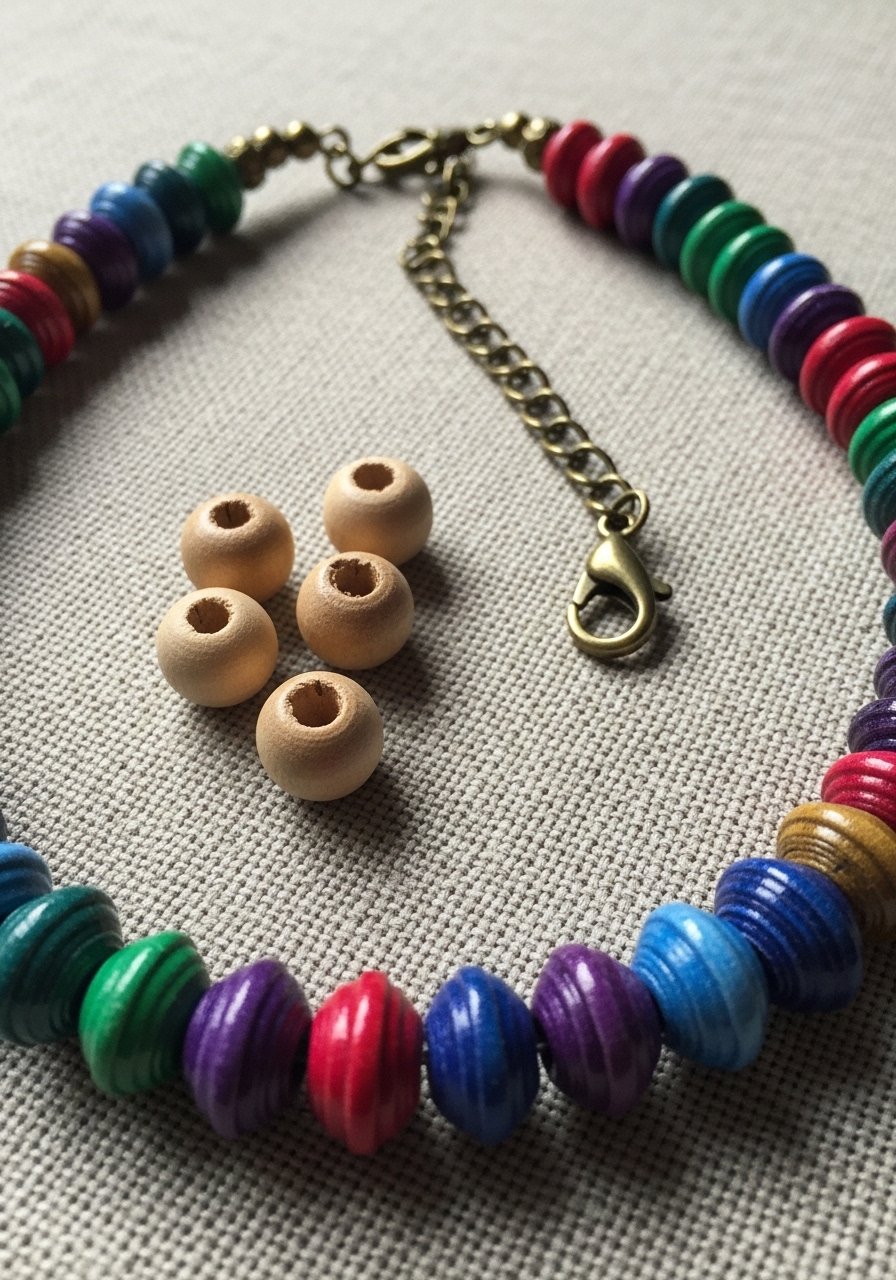
Magazine pages make glossy, colorful beads when rolled tightly and sealed. This project teaches fine motor skills and results in wearable art.
Materials
- 10 glossy magazine pages, cut into strips (1" × 8")
- Wooden beads, 10 (optional separators)
- PVA glue or Mod Podge, 2 oz
- Toothpicks or bead roller tool
- Clear varnish spray, 1 can
- Jewelry cord or elastic, 24"
- Scissors
Instructions
- Cut magazine pages into triangular strips (1" wide base × 8").
- Roll each strip tight around a toothpick, sealing the end with glue. Let beads dry 15–30 minutes.
- Apply a coat of Mod Podge to each bead; dry 20 minutes. Repeat 2 coats.
- Spray with clear varnish outdoors for shine and durability; dry 1 hour.
- String beads with wooden separators on jewelry cord and knot securely.
How to Display or Gift It
Place in a small jewelry box or display on a wooden card. Make matching bracelets for a set and store in a jewelry organizer drawer.
- Tin Can Wind Chimes
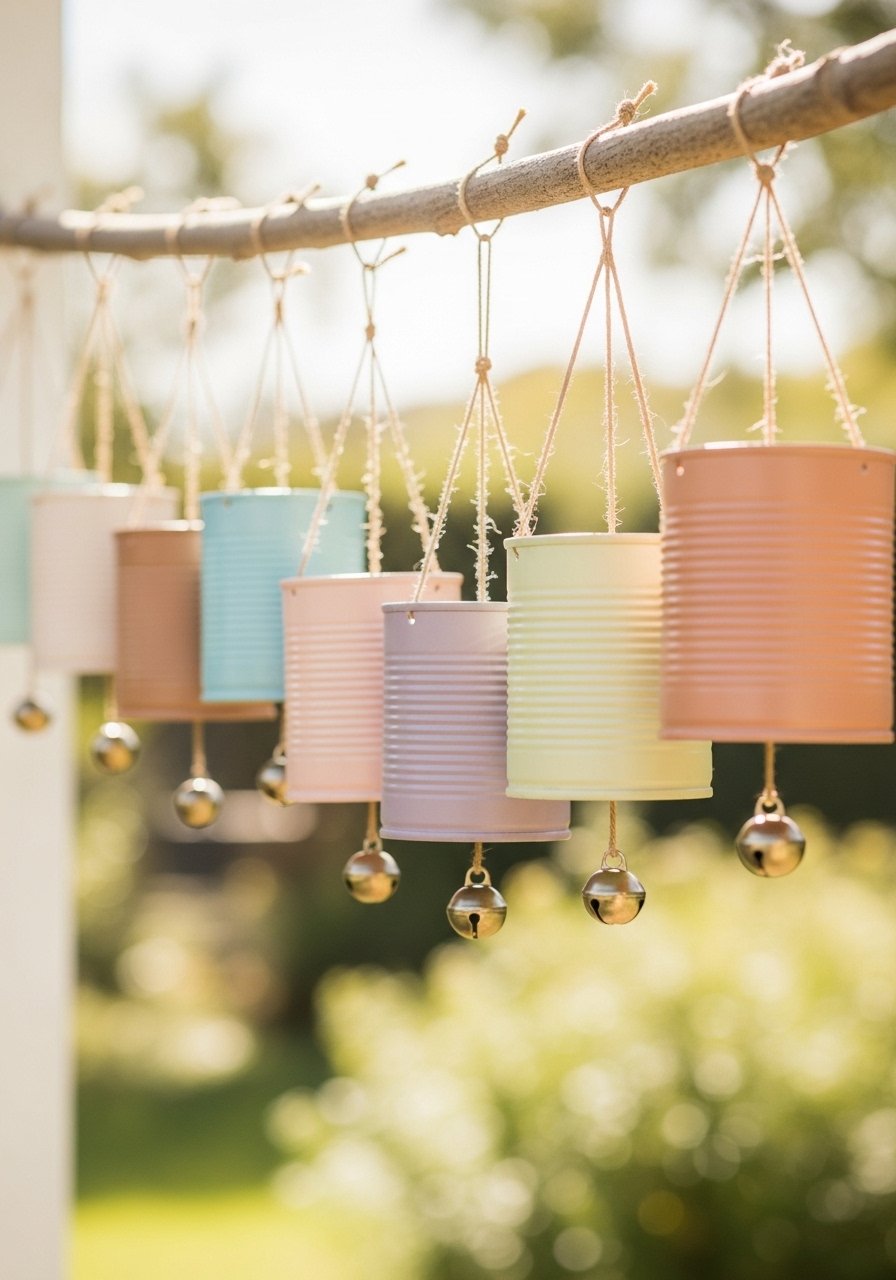
Painted tin cans create joyful wind chimes with great sound and personality. Kids can hammer holes and paint patterns for an outdoor accent.
Materials
- 4 empty tin cans, cleaned and labels removed
- Acrylic outdoor paint, 3 colors
- Drill or nail for holes
- Twine, 10–15 feet
- Small metal washers or bells, 8
- Small wooden branch or metal hoop for hanging
- Sandpaper, medium grit
Instructions
- Sand can edges and paint exteriors; allow 30–45 minutes to dry. Two coats recommended.
- Drill two small holes in the base of each can for hanging chimes and one in the top for hanger.
- Thread twine through holes, knotting below can; tie bells or washers to bottoms for sound.
- Attach cans to the branch or hoop at varied lengths. Secure with tight knots and hot glue if needed.
- Hang outdoors in a sheltered spot. Expect paint cure 24 hours before exposure to moisture.
How to Display or Gift It
Hang on a porch or garden hook. For gifting, pack in a recycled box with instructions for hanging. Store extra bells and twine in a craft organizer when not in use.
- Cereal Box Puzzle — recycled craft ideas for kids
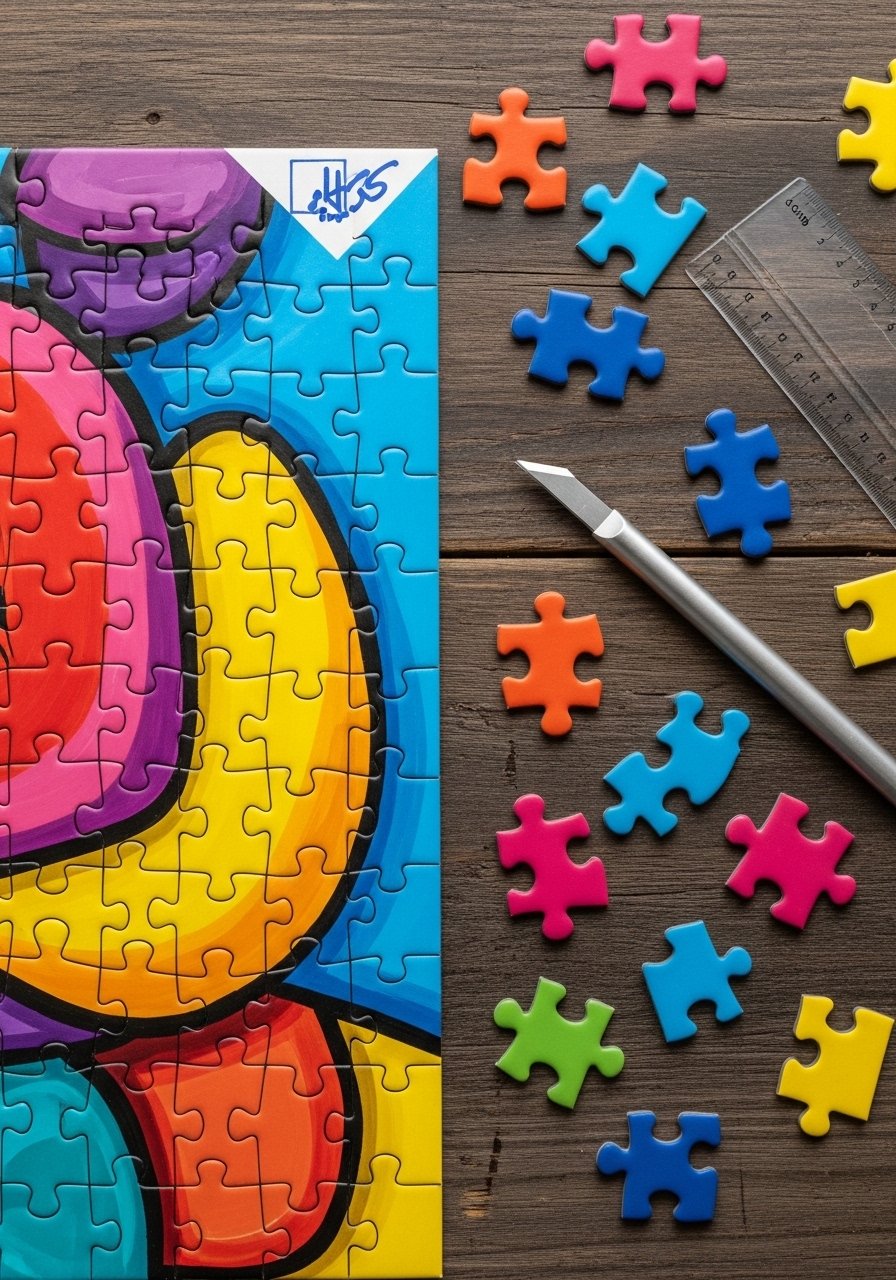
Turn cereal boxes into custom puzzles by painting scenes and cutting pieces. This is a quiet activity that doubles as a personalized gift or classroom center.
Materials
- 1 empty cereal box, flattened
- Acrylic paint set, small tubes
- Craft knife and self-healing cutting mat
- Ruler and pencil for puzzle grid
- Glue stick or tape (to back paper)
- Clear Mod Podge, 2 oz for sealing
Instructions
- Flatten cereal box and cut one large panel as puzzle base. Paint a scene or glue a printed picture on.
- Seal with a thin coat of Mod Podge; allow 20–30 minutes to dry.
- Draw a simple puzzle grid—6–12 pieces depending on age. Use a craft knife to cut shapes on a self-healing mat. Adults handle cutting steps.
- Test-fit pieces, re-trim edges if needed. Seal edges with another Mod Podge coat to prevent peeling. Dry 24 hours for full cure.
How to Display or Gift It
Place pieces in a small drawstring bag and tuck into a kraft box. Label with child’s name or age. Keep puzzles flat in a drawer or craft bin to avoid bending.
- Yarn-Wrapped Cardboard Animals
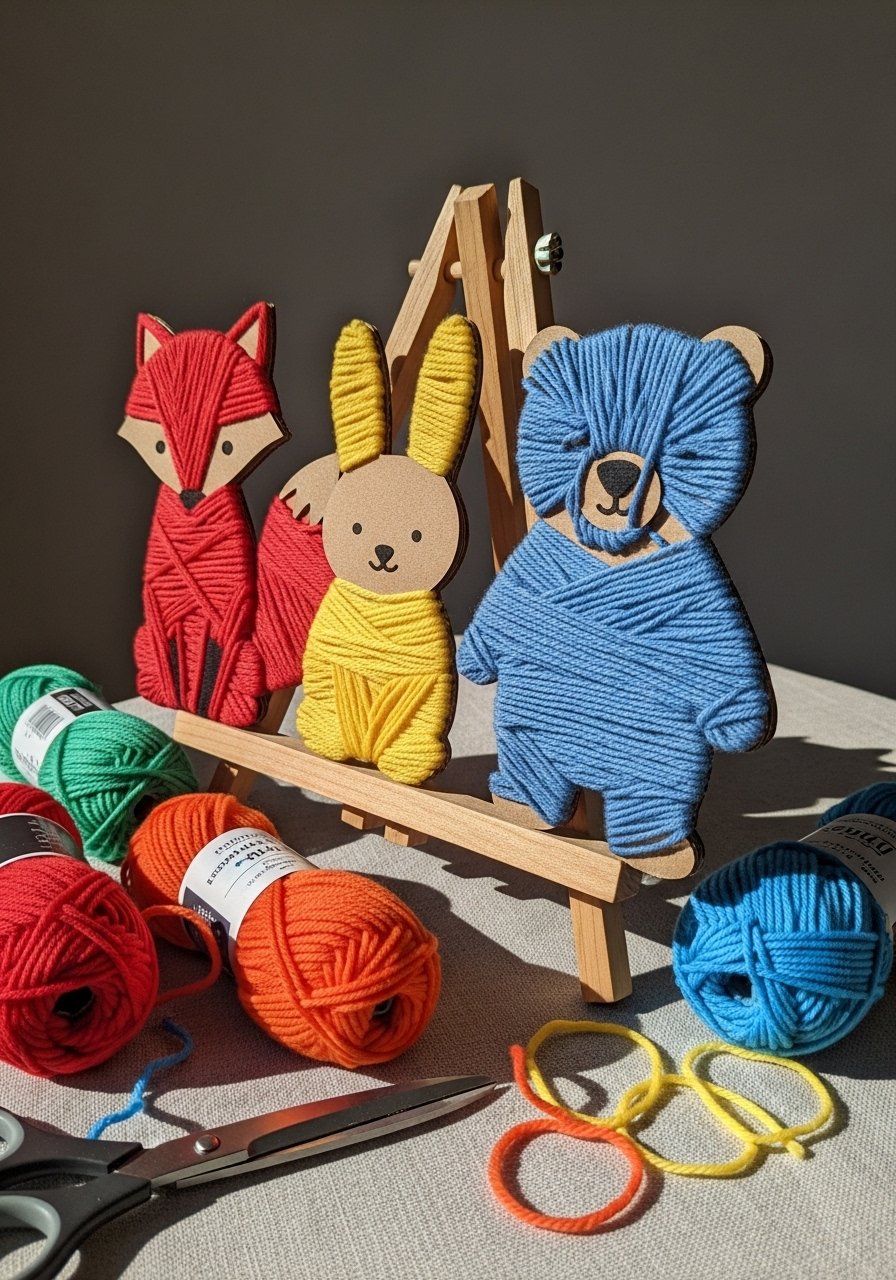
Cut animal silhouettes from cereal boxes and wrap yarn to add texture and color—an ideal project for tactile learning and fine-motor practice.
Materials
- Cereal box cardboard, 1 panel
- Yarn, assorted colors, 20–40 yards total
- Scissors and pencil
- Hot glue gun for securing ends
- Small wooden easel for display
- Printable animal templates (optional)
Instructions
- Trace animal silhouettes onto cardboard and cut out.
- Secure yarn end with a dab of hot glue and wrap tightly around the shape, changing colors as desired.
- Glue ends on the back and tuck neat edges under wrapped yarn.
- Trim any stray fibers, and mount on a small easel.
How to Display or Gift It
Display on shelves or in a nursery gallery wall. These make quick party favors—wrap in clear cello with a twine bow. Store unused yarn in a divided yarn organizer.
- Sock Puppets from Old Socks

Turn single, mismatched socks into expressive puppets for storytelling and imaginative play. This sewing-lite project is a hit at parties.
Materials
- Old socks, 4 pairs (mismatched ok)
- Felt sheets, assorted colors (6×9")
- Glue gun or fabric glue
- Buttons or googly eyes, 8 pieces
- Embroidery floss and needle (optional)
- Scissors
Instructions
- Add felt mouth pieces inside the sock where the palm sits. Glue or stitch in place.
- Attach buttons or googly eyes to the top fold for character faces.
- Use small felt scraps to make ears, tongues, or hair and glue securely.
- Let glue set 10–15 minutes before play.
How to Display or Gift It
Keep puppets in a small toy chest or hang on a pegboard using tiny clothespins. For gifts, add a short storybook and a small puppet theater cardboard box.
- Bottle Lid Mosaic Art
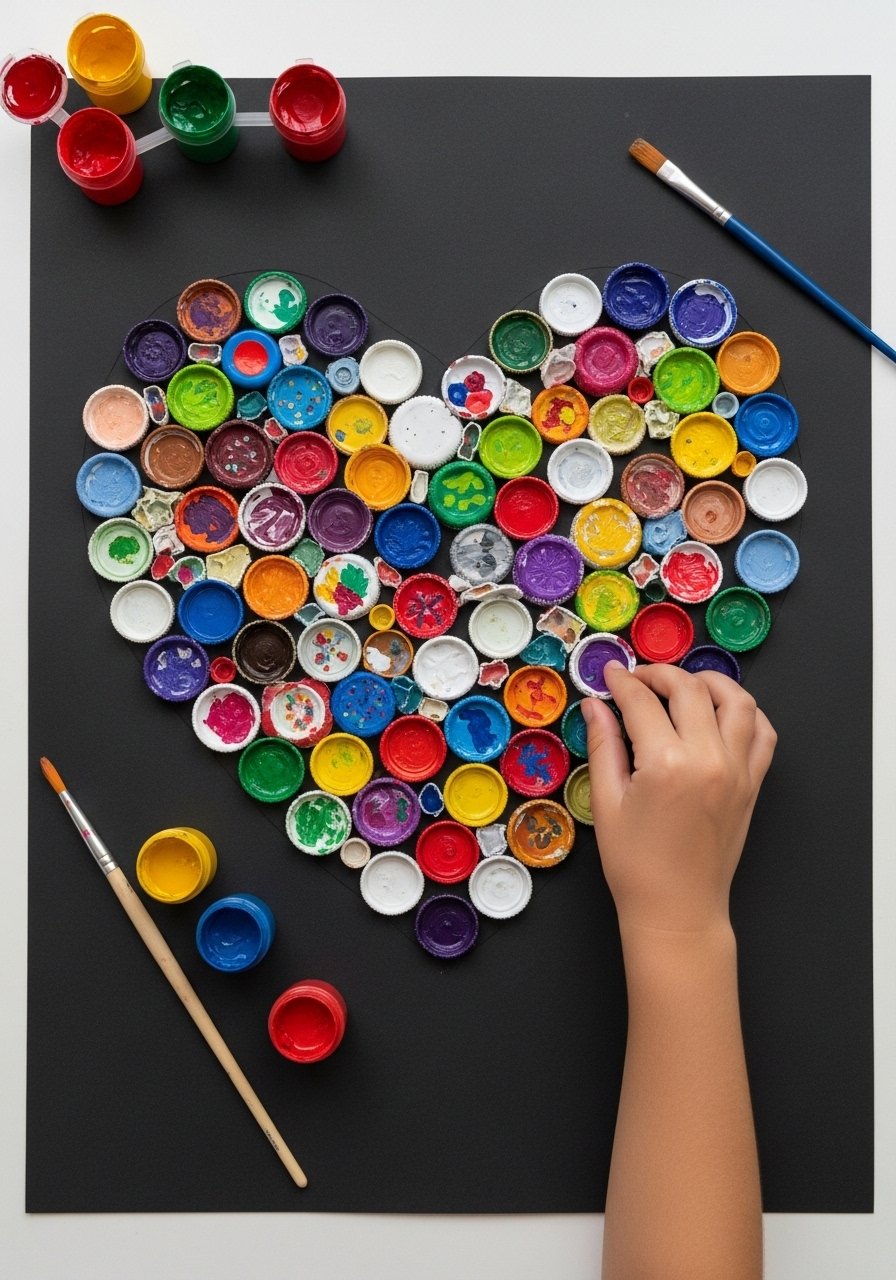
Collect bottle lids and paint them to form bright mosaics. This large-scale piece is tactile and bold—a great collaborative project for classrooms.
Materials
- 50+ bottle lids (assorted sizes)
- Spray primer for plastic/metal (optional)
- Acrylic paint, assorted colors
- Poster board or wooden board, 12×18"
- E6000 adhesive, 1 oz for strong hold
- Painter’s tape for layout guides
Instructions
- Prime metal lids lightly if needed. Paint lids on the outside and allow 30–45 minutes to dry. Two coats may be needed.
- Lay out a design on the board before gluing. Use painter’s tape to mark borders.
- Glue lids in place with E6000; set heavy books on top and allow 24 hours to cure.
- Once cured, hang or display on an easel.
How to Display or Gift It
Frame the board or mount on a small wooden easel. For gifting, pair with a note explaining the recycling story. Store extra lids and paints for follow-up projects.
- Paper Towel Roll Marble Run
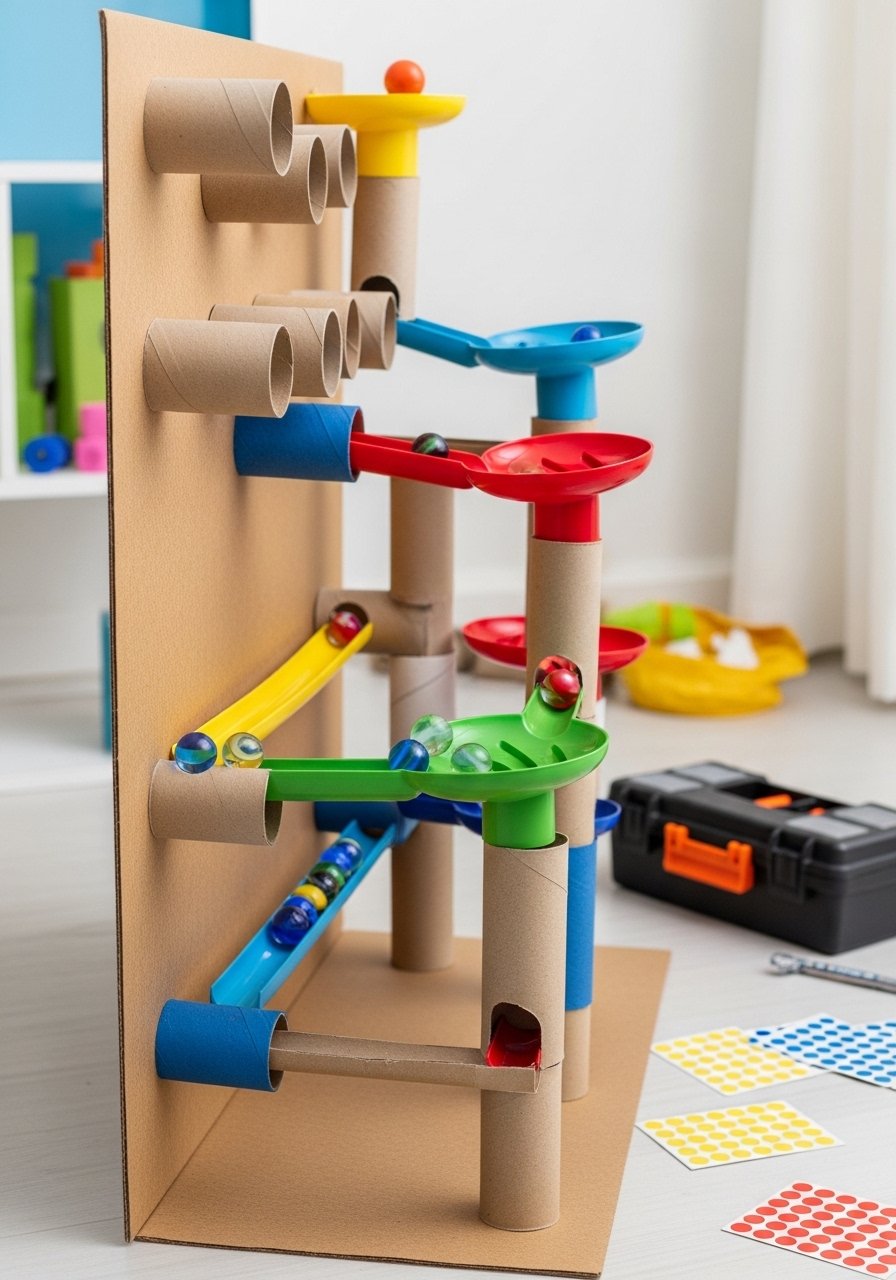
Construct a vertical marble run from paper towel rolls and cardboard—great for physics play and problem-solving.
Materials
- 3 paper towel rolls and 6 toilet paper rolls
- Large cardboard sheet, 18×24" as backing
- Hot glue gun + sticks
- Scissors and masking tape
- Marbles, 6
- Small clamps or binder clips for temporary hold
Instructions
- Cut rolls into angled chutes and test-fit on cardboard backing with masking tape.
- When layout is set, glue each chute with hot glue and hold with clips for 2–5 minutes.
- Allow entire structure to set 15–20 minutes before testing with marbles.
- Adjust angles for speed control—steeper for faster runs, shallower for slow.
How to Display or Gift It
Mount on a playroom wall or let kids bring it down for table play. For gifting, include extra marbles in a small tin.
- Crayon Drip Heart Art
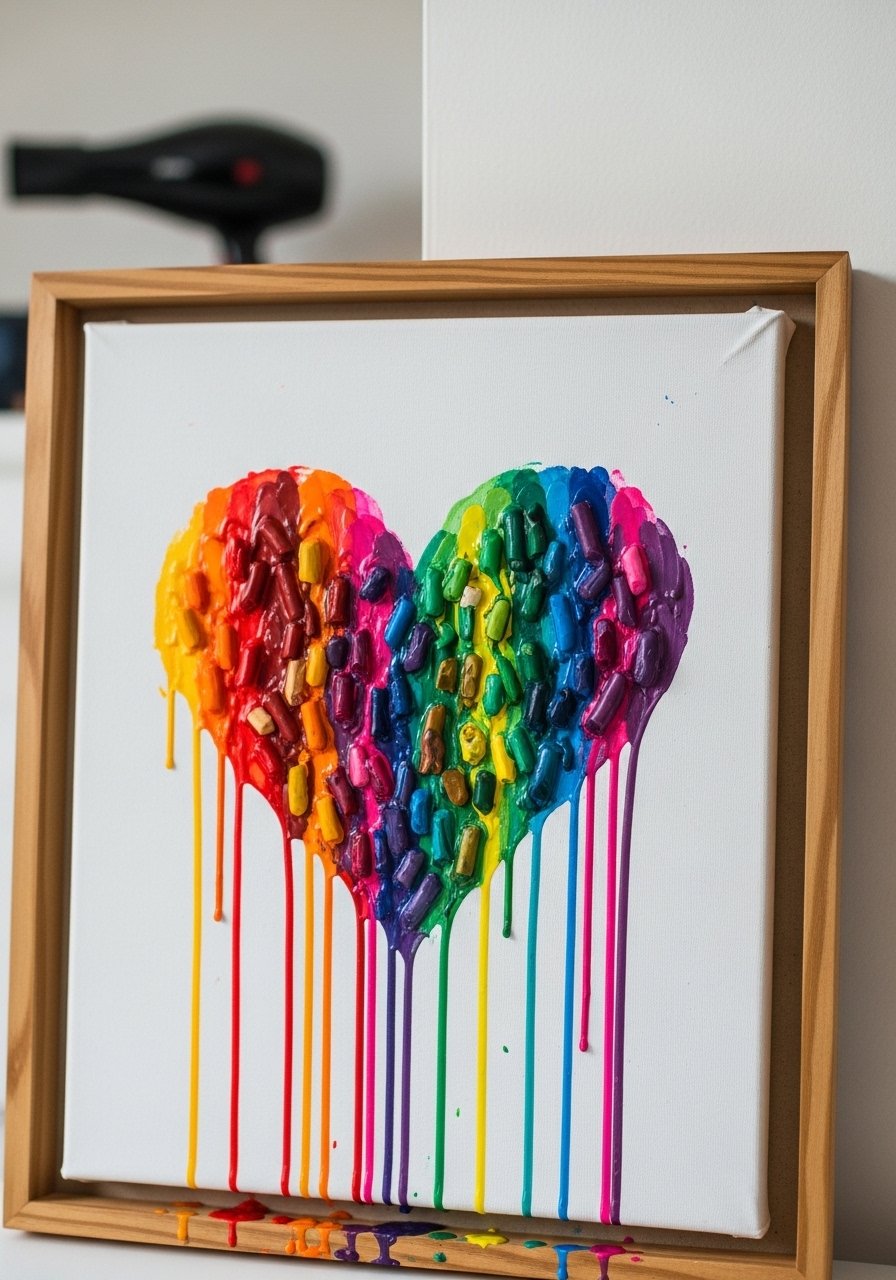
Old broken crayons get a second life in drip art—vibrant, slightly messy, and always satisfying.
Materials
- Old crayons, 30–50 peeled and sorted by color
- Small canvas panel, 8×10"
- Hot glue gun to affix crayons before melting
- Hairdryer or heat gun (adult supervision)
- Protective paper for workspace
Instructions
- Arrange crayons across canvas top and hot glue at the back.
- Use a hairdryer on high heat to melt crayons slowly, allowing drips to run down. Work in short bursts and tilt canvas if needed.
- Let melted wax cool and harden—about 10–15 minutes.
- Add a painted heart shape beneath the drips if desired and touch up edges.
How to Display or Gift It
Lean on a shelf or hang with command strips. For gifts, mount in a simple wooden frame. Store leftover crayons in a small divided tin.
- Cardboard City Playset
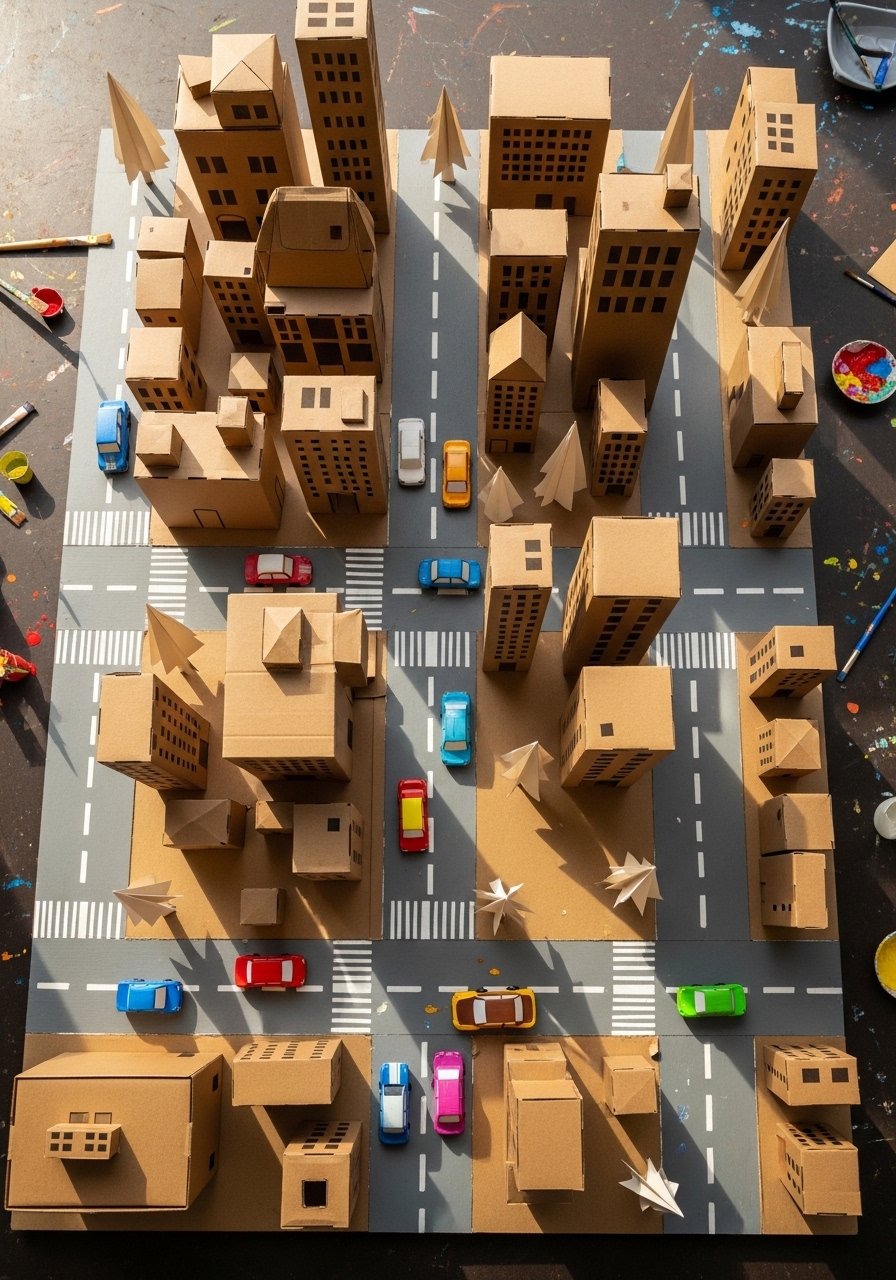
Use multiple boxes to create a street-filled cardboard city—perfect for open-ended play and group crafting sessions.
Materials
- Several small shipping boxes, assorted sizes
- Acrylic paint, gray, white, green, black for roads and buildings
- Masking tape and pencil for road lines
- Hot glue gun for assembly
- Paper straws or dowels for streetlights
- Small toy cars and figurines
Instructions
- Cut boxes into building shapes and glue together to form a layout.
- Paint roads on a large base board and add building facades. Allow 30–45 minutes drying.
- Add details like windows with paint pens or glued paper.
- Create trees from paper straws and tissue paper foliage and glue into place.
How to Display or Gift It
Leave on a low table for play. Store buildings flat in a large shallow box. For gifting, include a small bag of toy cars.
- Denim Pocket Organizer
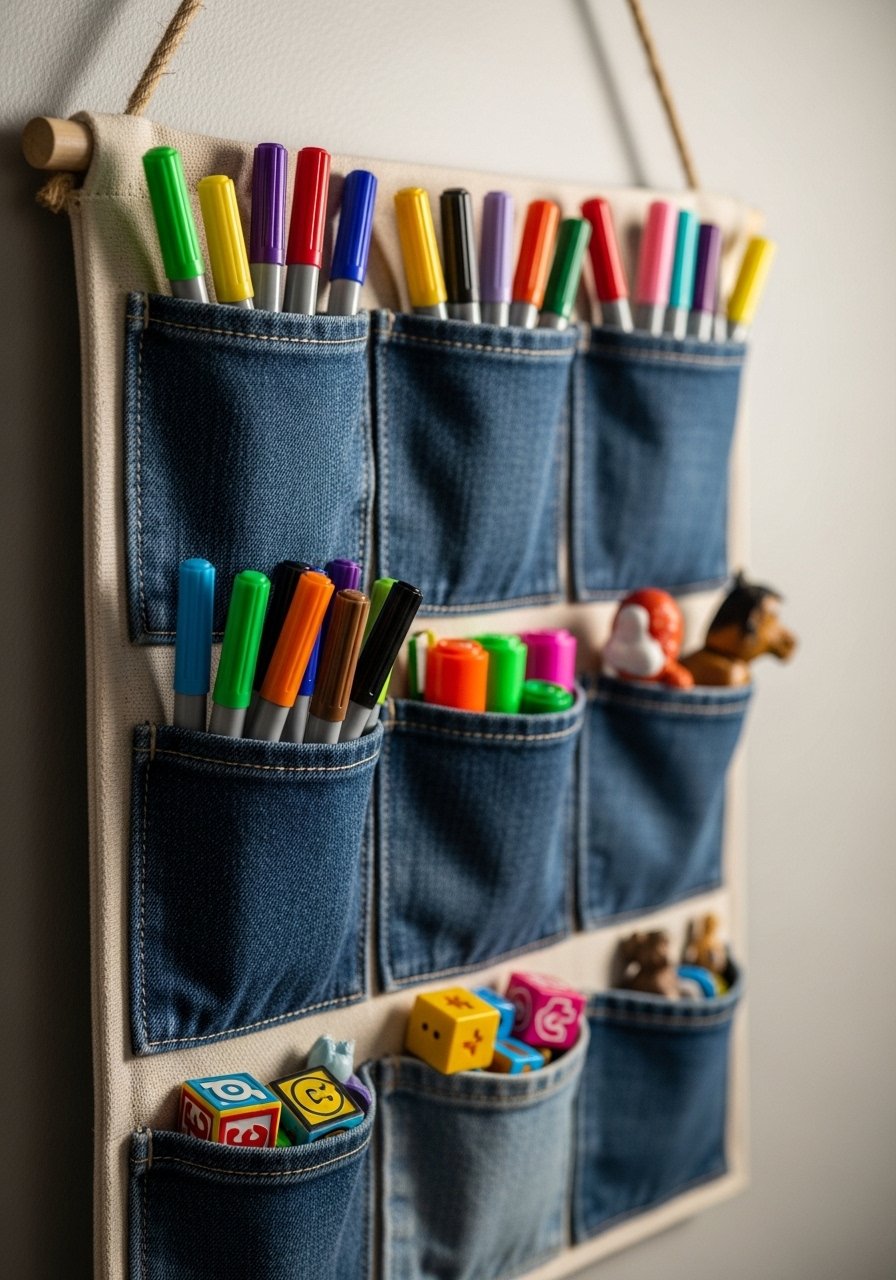
Recycle jean pockets into a hanging organizer for art supplies or small toys—a practical, rustic piece with farmhouse charm.
Materials
- 5 denim jeans pockets, cut with 1" seam allowance
- Canvas fabric backing, 12×18"
- Sewing machine or needle and strong thread
- Wooden dowel, 12" for hanging
- Twine for hanger
- Scissors and pins
Instructions
- Arrange pockets on canvas and pin in place.
- Sew around pocket edges with a sewing machine or by hand using strong thread. Backstitch at stress points.
- Insert wooden dowel at top and tie twine for hanging.
- Hang and test weight with tools or markers.
How to Display or Gift It
Hang in a craft corner or entryway for small items. For gifting, fill pockets with colored pencils and a sketchbook.
- Egg Carton Caterpillars — recycled craft ideas for kids
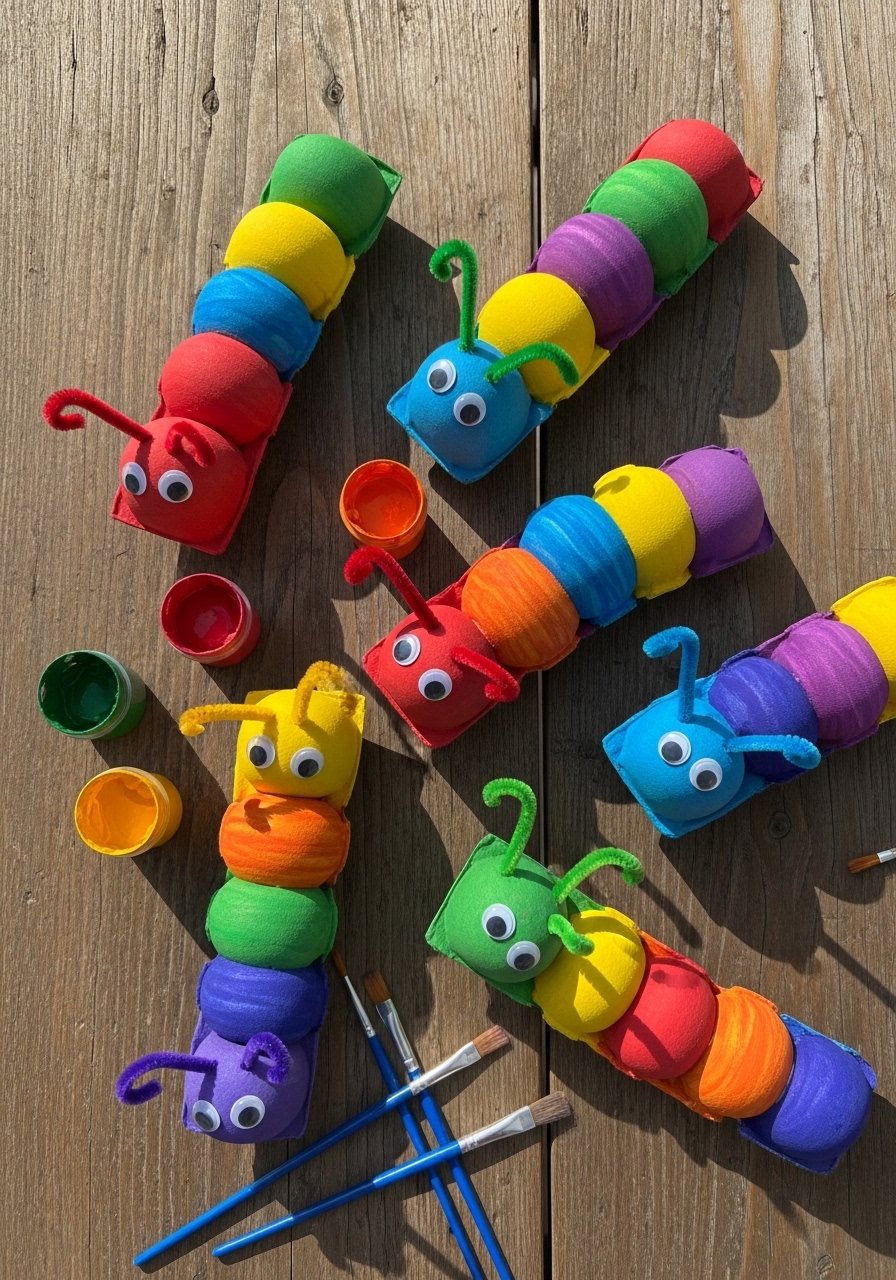
These tactile caterpillars use egg carton cups and pipe cleaners. Kids can paint, glue, and assemble for a cute classroom or party craft.
Materials
- 1 egg carton, cut into a strip of 6 cups
- Acrylic paint, assorted colors
- Pipe cleaners, 6 (for legs/antennae)
- Googly eyes, 12 (2 per caterpillar)
- Hot glue or craft glue
- Foam brush and small paintbrush
Instructions
- Cut a strip of 6 egg cups and paint full strip; dry 20–30 minutes.
- Poke small holes for pipe cleaner legs and antennae.
- Insert and twist pipe cleaners; glue googly eyes to front cup.
- Add patterns with paint pens and allow 15–20 minutes to dry.
How to Display or Gift It
Place on a windowsill or tie a label “Made by [child’s name]” for gifting to grandparents. Store extras in a shallow tray.
- Plastic Straw Weaving Coasters
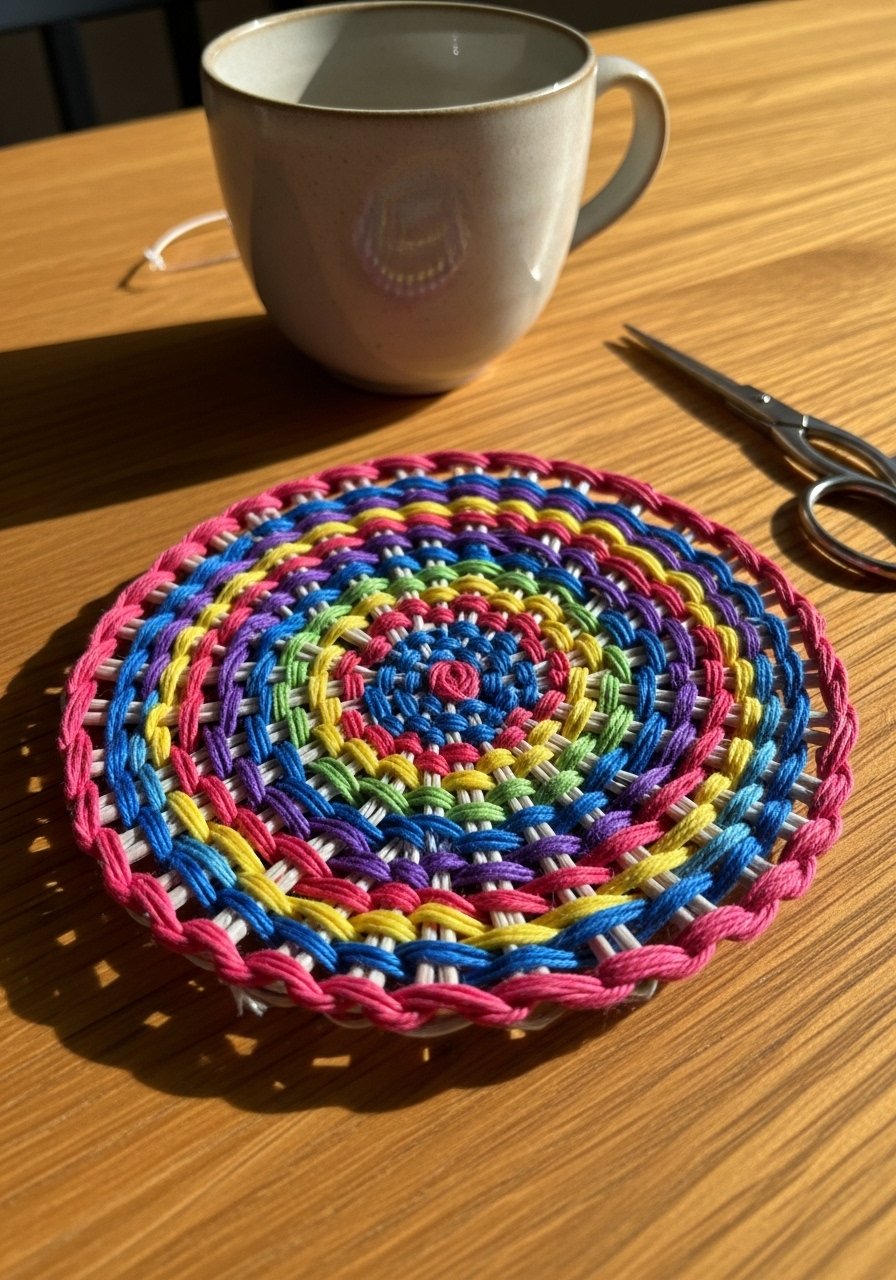
Plastic straws become surprisingly sturdy coasters when woven on a simple cardboard loom. This project practices patterning and hand skills.
Materials
- 30 plastic straws, cut into 1.5" pieces
- Cardboard for a small loom (4×4")
- Embroidery floss, assorted colors
- Needle with large eye
- Scissors
Instructions
- Cut straws into uniform lengths and thread onto embroidery floss to create warp.
- Weave additional floss through straws with a needle to form a tight fabric.
- Tie off ends and trim to shape. Allow any glue securing ends to set 10 minutes.
How to Display or Gift It
Stack and tie with ribbon for a kitchen set. Keep spare straws in a small jar for replacements.
- Cupcake Liner Flower Bouquet
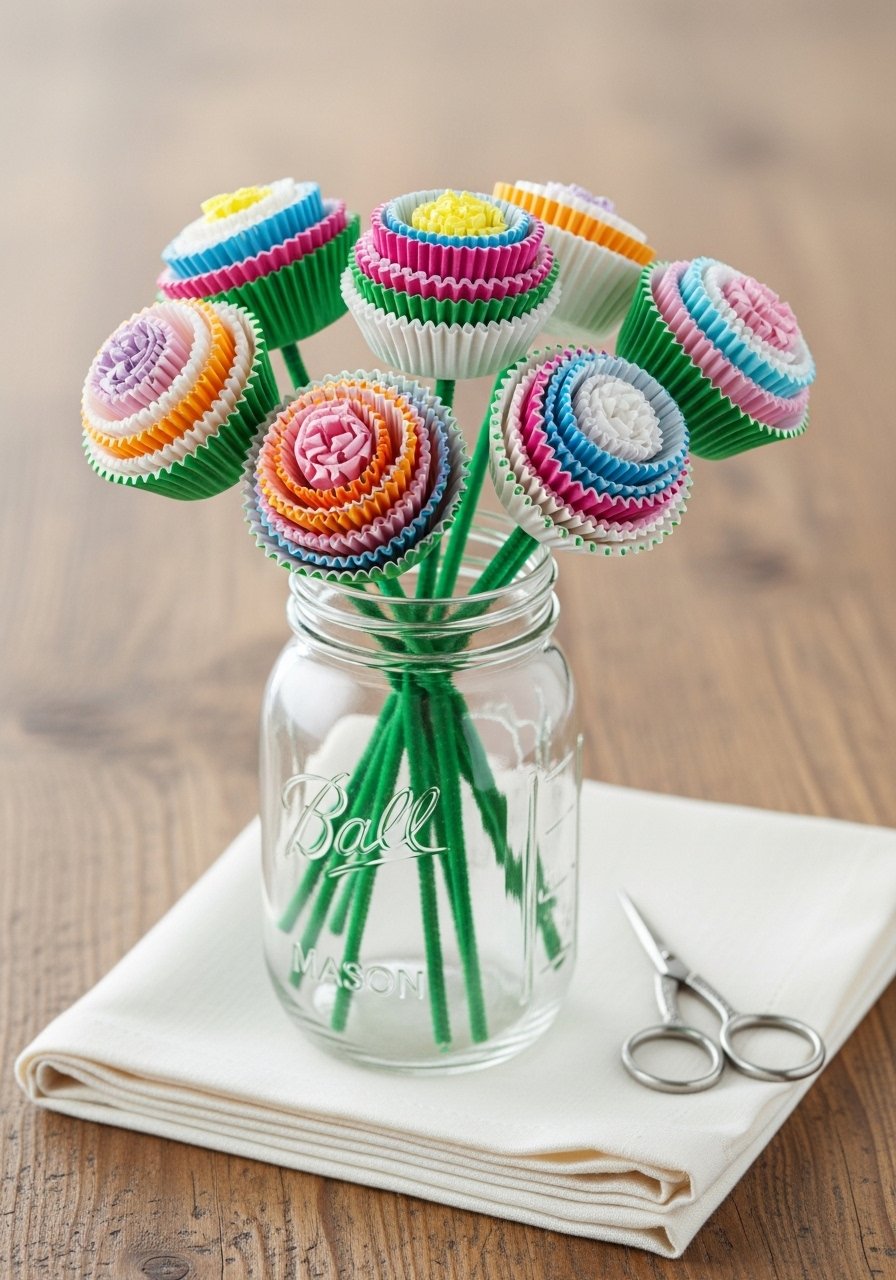
Cupcake liners create layered, ruffly flowers kids can assemble quickly. Combine with pipe cleaners and a jar for an instant cheerful bouquet.
Materials
- 50 cupcake liners, assorted sizes and patterns
- Pipe cleaners, 12 (green) for stems
- Hot glue gun for center stabilization
- Mason jar for vase
- Scissors and small beads for centers
Instructions
- Layer 4–6 liners and secure center with a bead threaded onto a pipe cleaner and hot-glued.
- Twist pipe cleaner to form stem and add leaves by folding and twisting.
- Arrange in a jar. No drying time required.
How to Display or Gift It
Place on a kitchen table or give as a teacher gift. Wrap stems with kraft paper and twine for gifting.
- Bread Tag Bracelet
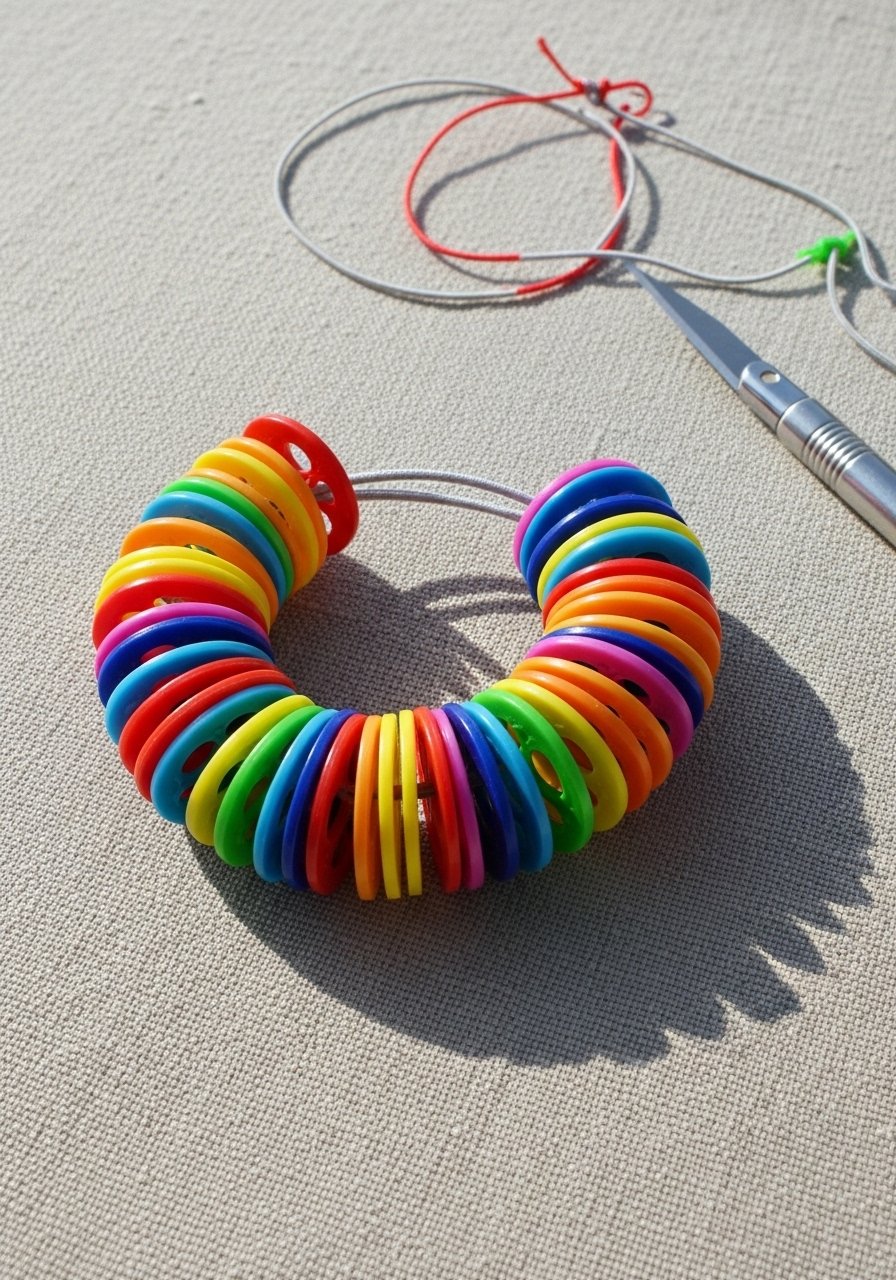
Bread tags are surprisingly colorful and stackable into a funky bracelet for kids. This recycling craft is quick and portable.
Materials
- 30 bread tags, assorted colors
- Elastic cord, 12"
- Scissors
Instructions
- Thread bread tags onto elastic and knot securely.
- Trim excess cord and hide knot inside a tag if possible.
How to Display or Gift It
Place in a small jewelry pouch as a friendship bracelet kit. Store extra tags in a small box.
- Takeout Box Lanterns
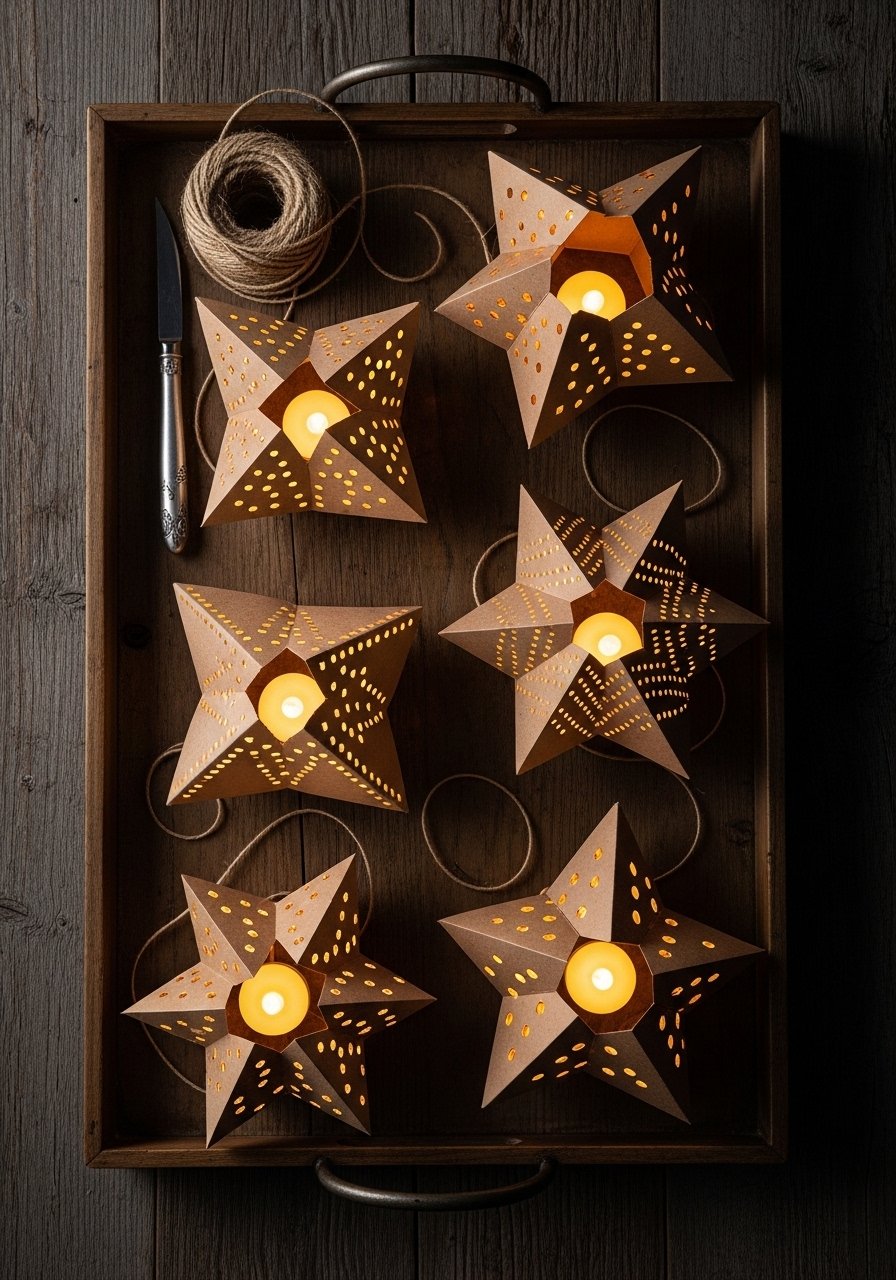
Paper takeout boxes can be folded and punched into lanterns that glow warmly with battery lights—great for party décor.
Materials
- 4 paper takeout boxes, cleaned and flattened
- Battery tealights, 4
- Hole punch or craft knife for patterns
- Twine for handles
- Ruler and pencil
Instructions
- Fold boxes into lantern shapes and punch patterns with a hole punch or craft knife (adult does cutting).
- Place a battery tealight inside and test glow. No drying time.
How to Display or Gift It
String lanterns for a backyard party. For travel-friendly gifts, include extra tealights in a small box.
- Tin Foil Sculptures
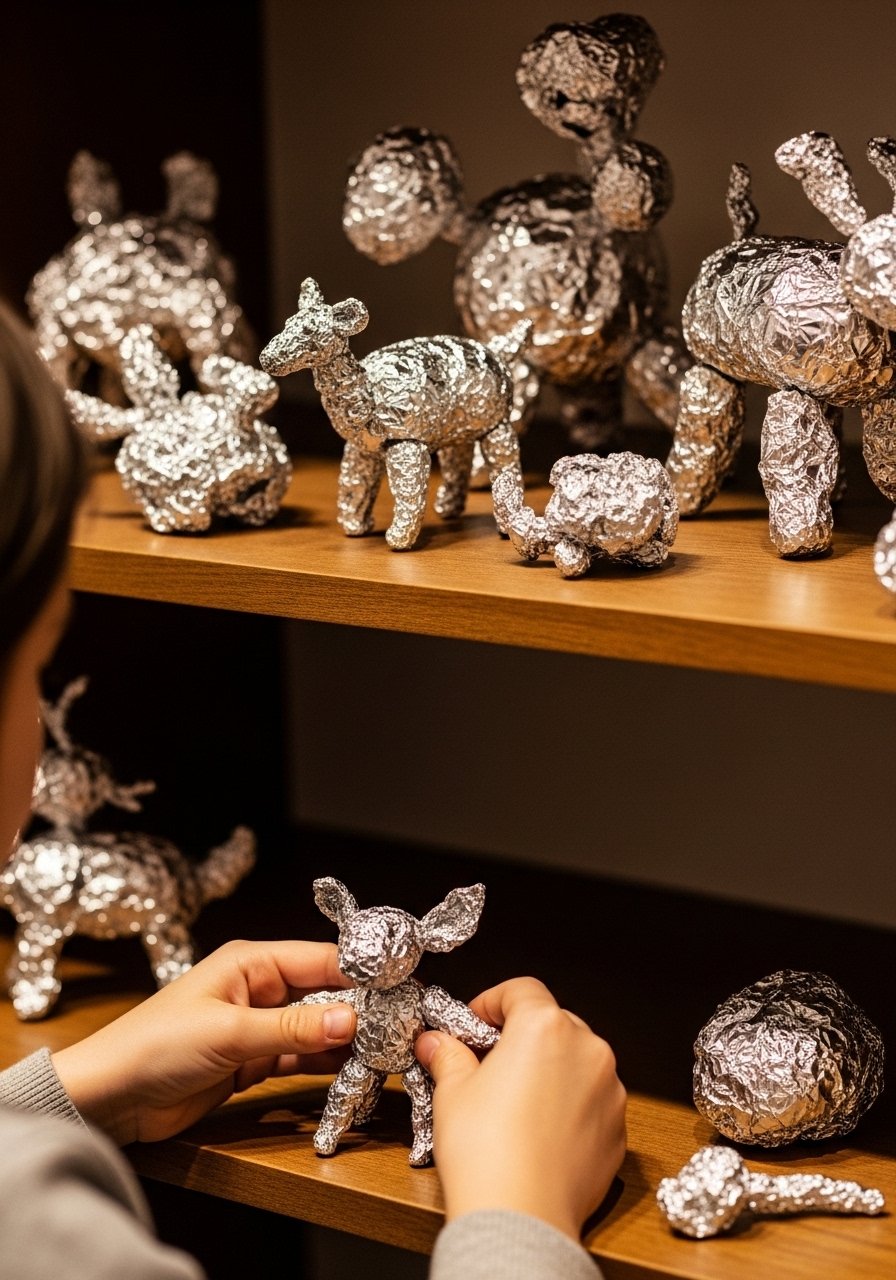
Tin foil is great for quick sculptures. Kids can build armatures for papier-mâché or make small shiny figures as-is.
Materials
- Several sheets of tin foil, large
- Optional: masking tape for reinforcement
- Small beads for eyes or details
- Spray paint (optional) for finish
Instructions
- Crumple and shape foil into figures, using tape to reinforce joints.
- Add beads or small details with glue. Use spray paint for a more unified look—adult use only.
- Let paint cure 24 hours before handling heavily.
How to Display or Gift It
Set on a shelf or inside a small shadow box. To gift, mount on cardboard with a ribbon.
- Scrap Fabric Patchwork Pillow
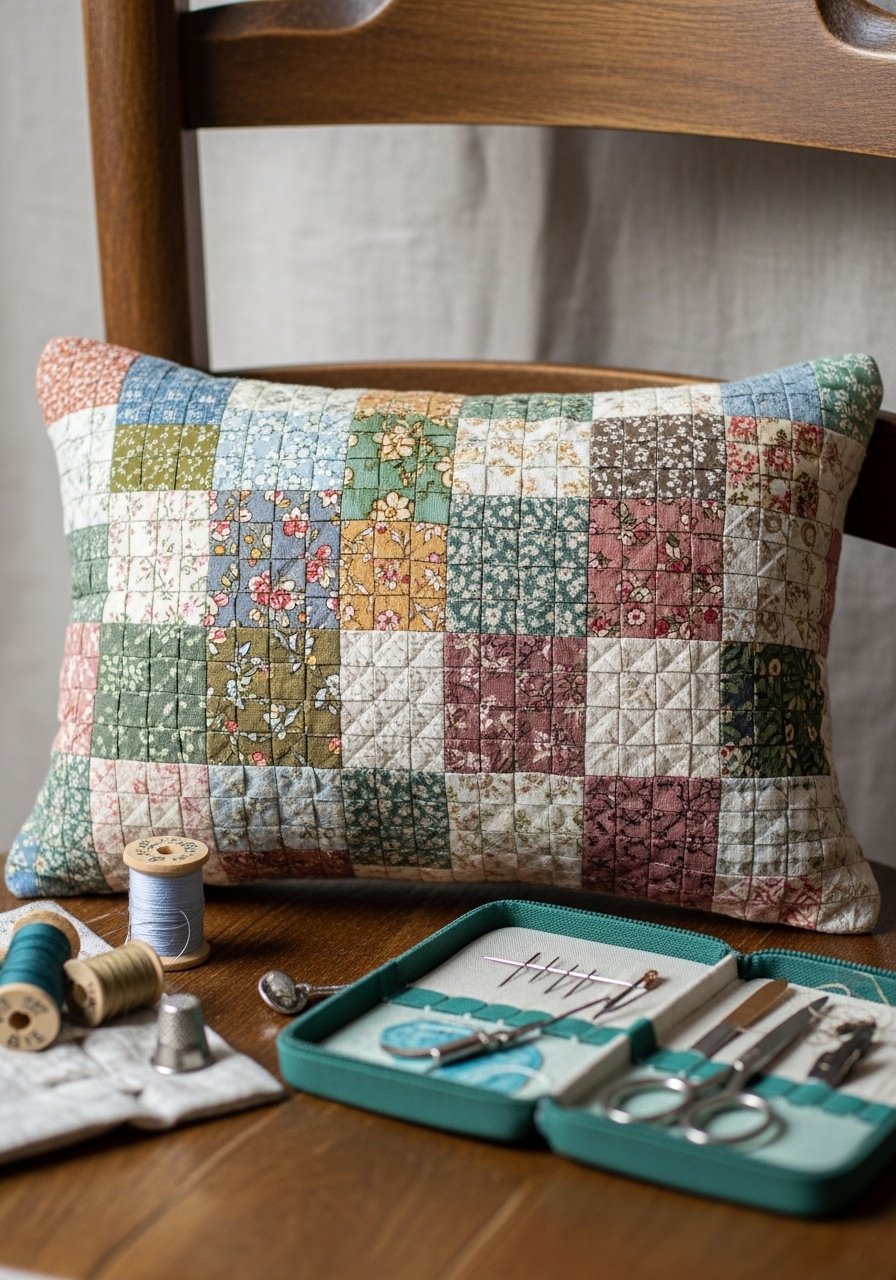
Use old clothing and fabric scraps to sew a cozy patchwork pillow—an upcycle that teaches basic sewing and design.
Materials
- Assorted fabric scraps, 1 yard total pieced
- Pillow form, 12×12" or stuffing (polyfill), 1 bag
- Sewing machine or needle and thread
- Scissors and pins
- Zipper or envelope closure fabric strip
Instructions
- Cut scraps into equal squares (3×3") and lay out a pattern.
- Sew squares into rows, press seams, then sew rows together.
- Attach backing with a zipper or make an envelope closure.
- Insert pillow form or stuff with polyfill. Machine-sewn seams should be double-stitched for durability.
How to Display or Gift It
Use on a child’s bed or as a reading nook pillow. For gifting, pair with a small plush toy and wrap in tissue.
Thanks for crafting through this long list—26 ways to turn everyday trash into delight. You’ve got projects that suit rainy afternoons, classroom centers, gift-giving, and seasonal decor, using supplies you probably already have on hand. Save or pin this page so you can come back when your next stack of recyclables starts to look like potential. Which project will you try first?
Trust me, picking up a quality hot glue gun with temperature control changed how every single one of these projects turned out — no more stringy mess, no more burns. Share a photo when you make something—I’d love to see which trash-to-treasure idea becomes your kiddo’s favorite.


