
If you love cozy corners, soft neutrals, and homes that feel lived-in and loved, these farmhouse vase decorating ideas are for you. Whether you have a plain glass jar from the recycling bin or a thrift-store ceramic find, you’ll leave each project feeling like you brought a little country charm into your space. These ideas range from quick wraps to more involved painted finishes, so there’s something for a lazy afternoon and for a weekend-long craft session.
You’ll see projects using twine, chalk paint, epoxy resin accents, macramé, and simple vinyl decals — techniques that keep that warm farmhouse look without a lot of fuss. I often start with my Cricut Explore cutting machine for precise vinyl labels, and a temperature-controlled hot glue gun saves a ton of frustration when attaching trims. Read on for 25 step-by-step projects with materials, exact measurements, drying times, and styling tips so you can create vases that look like they belong in a country cottage magazine.
- Rustic Twine-Wrapped Mason Jar Vase
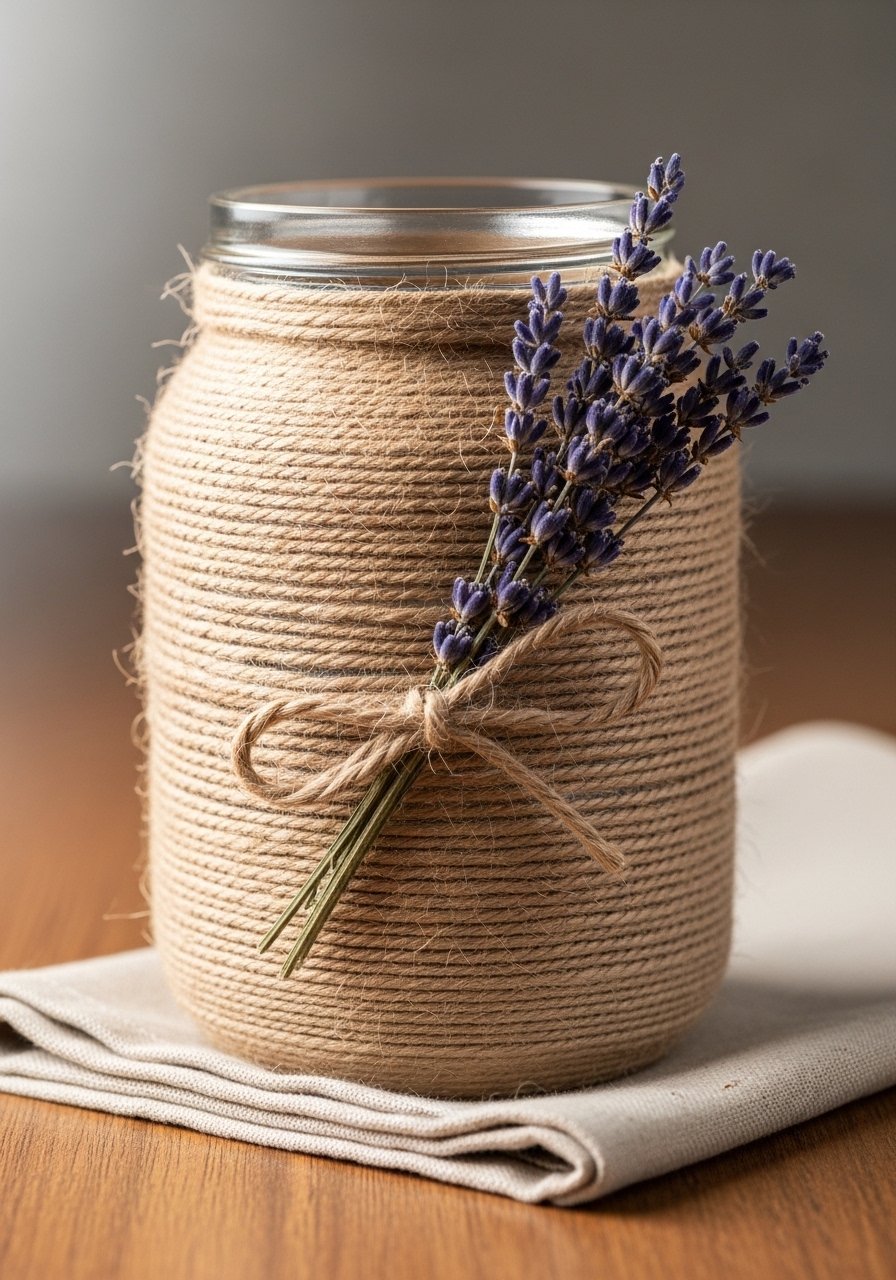
This classic farmhouse vase decorating idea turns a plain mason jar into a tactile, rustic showpiece. The twine gives a warm, touchable texture and hides seams on imperfect jars. Beginners will love how quick it is; patience helps when wrapping tightly. I grab a spool of jute twine and my low-temp hot glue gun for neat, secure wraps.
Materials
- 1 standard 16 oz mason jar (clean, label removed)
- 50 ft natural jute twine (2–3 mm)
- 10 low-temp hot glue sticks
- Scissors
- Ruler
- Optional: small wooden beads (10–20) for accent
Instructions
- Remove labels and adhesive with warm soapy water; dry fully.
- Mark a starting line 1/2" from jar rim with a pencil.
- Apply a small bead of hot glue at the starting mark and press the end of twine down for 10 seconds.
- Wrap twine snugly around the jar, adding a small dab of glue every 3–4 inches to hold tension.
- Continue until you reach the bottom; trim twine and glue down end securely.
- Add wooden bead garland or a tied twine bow around the neck if desired.
- Let cool for 10 minutes; test that twine is firm to the touch.
How to Display or Gift It
- Tuck dried lavender or wheat stems in the jar for a country kitchen vignette.
- Tie kraft paper tag with a small wooden bead and gift as a hostess present.
- Store extra wrapped jars in a crate; they stack flat and keep dust off.
- Use a small craft organizer tray to store twine and glue when not in use.
- Chalk-Painted Milk Bottle Vase (Farmhouse Vase Decorating Ideas)
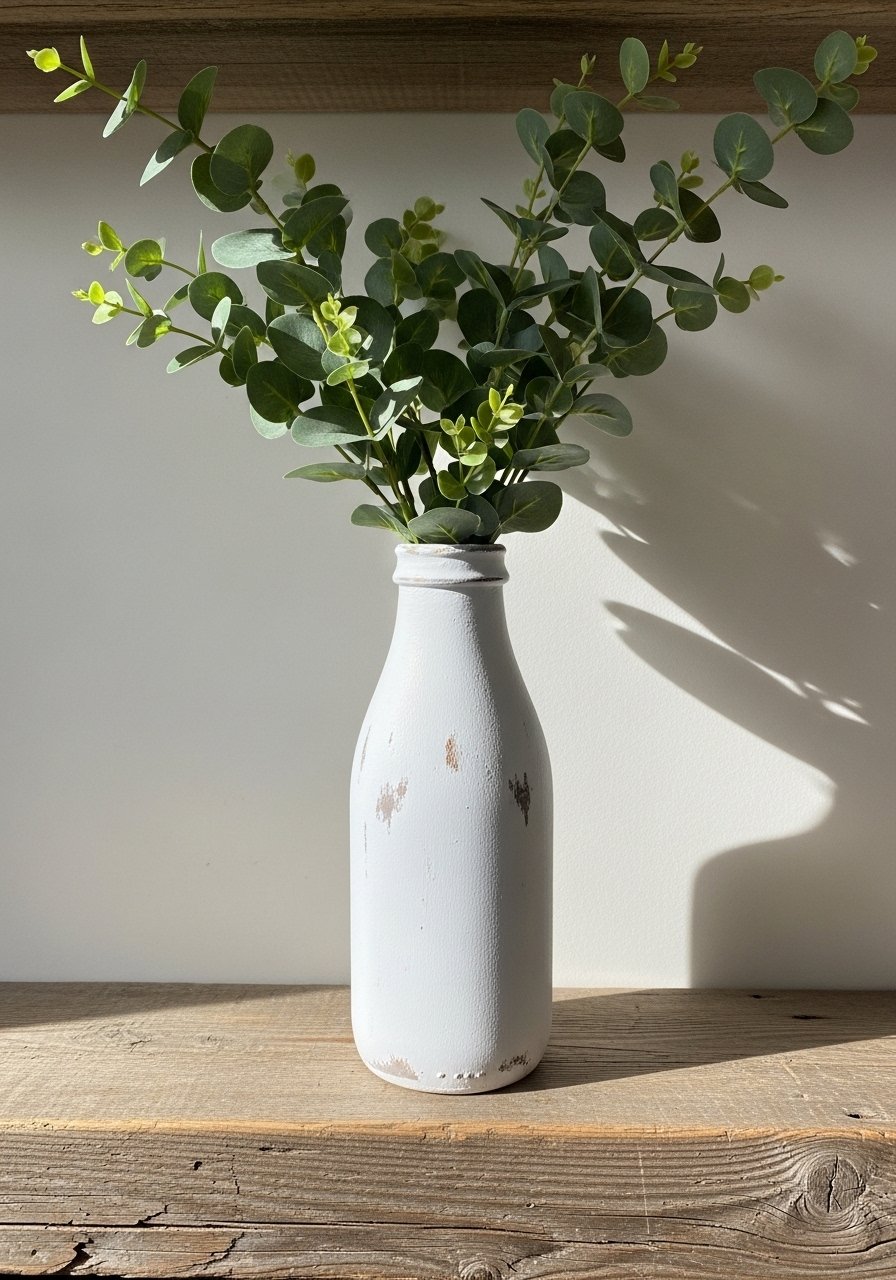
A milky chalk-paint finish reads instantly farmhouse. This project gives a matte, velvety look and lets you distress edges for that worn-in vibe. Use thin coats and a fine sanding sponge for that smooth, slightly lived-in texture. I usually use an affordable small can of chalk paint and a flat foam brush for crisp application.
Materials
- 1 glass milk bottle or tall vase (24 oz)
- 3 oz chalk paint (antique white)
- 1 flat foam brush (1")
- 1 sanding sponge (fine grit)
- Painter’s tape
- Drop cloth
- 2 coats of clear matte wax or sealer (optional)
Instructions
- Clean the bottle with rubbing alcohol; let dry.
- Tape off any areas you want to keep glass-clear (e.g., the rim).
- Apply first thin coat of chalk paint with the foam brush; wait 30 minutes to dry.
- Apply a second thin coat for full coverage; wait 30–60 minutes.
- Lightly sand raised areas and edges with the sanding sponge for a distressed look.
- Wipe away dust and apply a thin coat of matte wax or sealer; cure 24 hours before handling heavily.
How to Display or Gift It
- Group multiple painted bottles of varying heights on a farmhouse tray.
- Fill with foraged branches or seasonal blooms.
- Wrap in kraft paper and tie with twine for gifting.
- Store extra painted bottles upright in a tall cardboard box to avoid dings.
- Burlap & Lace Wrapped Vase
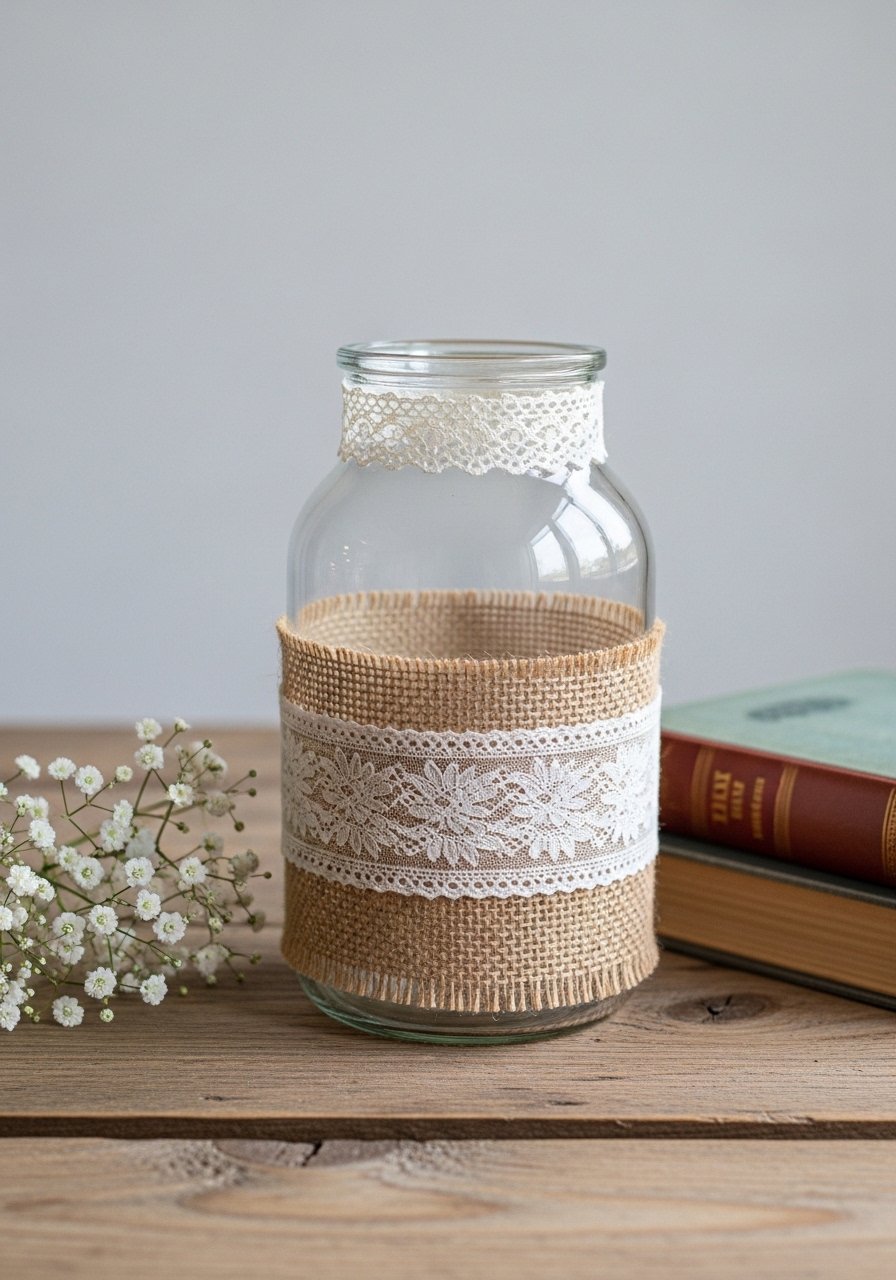
Burlap and lace balance rugged and delicate — a signature farmhouse contrast. This project uses fabric glue and gives texture without heavy tools. A pair of sharp fabric scissors and a bottle of craft glue make the process effortless.
Materials
- 1 medium glass vase (18 oz)
- 12 in burlap strip (6–8" wide)
- 14 in white lace trim
- Fabric glue (1 oz)
- Straight pins
- Fabric scissors
- Ruler
Instructions
- Measure the vase height and cut a burlap strip to wrap with 1/2" overlap.
- Run a thin bead of fabric glue along one cut edge and secure the seam.
- Position burlap around the vase and tack with straight pins while glue sets (~10 minutes).
- Glue lace trim over the seam where burlap meets the rim; press gently.
- Let glue cure 24 hours for full strength before adding water and flowers.
- Trim pins and any loose threads.
How to Display or Gift It
- Slip in a small glass insert to use fresh flowers.
- Pair with a kraft-wrapped candle and give as a set.
- Store spare burlap and lace neatly in a fabric storage bin.
- Painted Stripes on Recycled Glass Vase
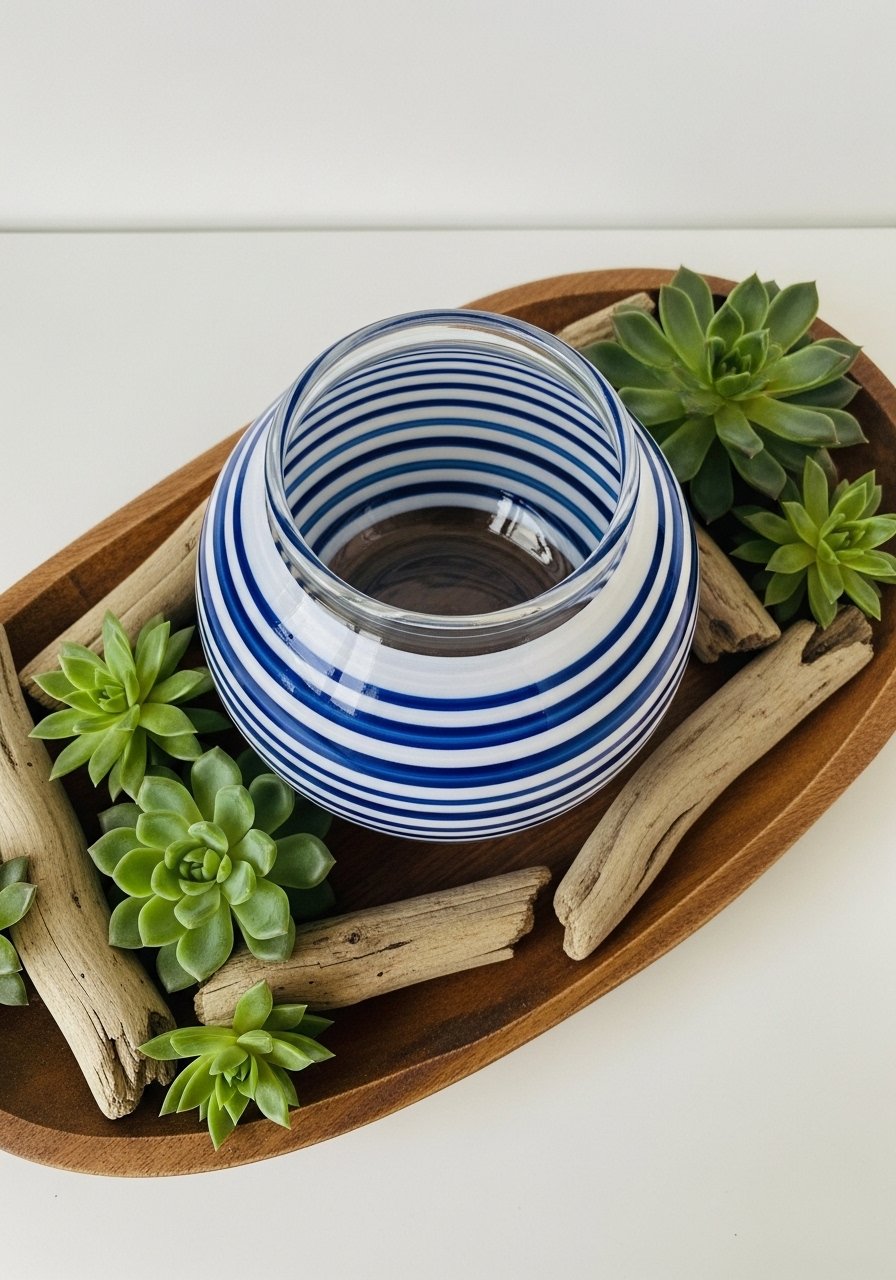
Stripes are an easy way to add color and pattern while keeping a farmhouse palette. Use painter’s tape for crisp lines and a brayer for bubble-free vinyl stencils. Acrylic craft paint dries quickly and handles well on glass when using an outdoor or multi-surface formula.
Materials
- 1 recycled glass vase (12 oz)
- 2 oz acrylic craft paint (navy)
- 2 oz acrylic primer or gesso for glass
- 1 foam roller (2")
- Painter’s tape
- Sandpaper (220 grit)
- Paper towels
Instructions
- Clean glass thoroughly and sand lightly to create tooth.
- Apply a thin coat of primer/gesso; let dry 30 minutes.
- Wrap painter’s tape horizontally to mark stripes (1" stripes suggested).
- Use foam roller to apply navy paint between taped sections; remove tape after 10–15 minutes while paint is tacky for sharper edges.
- Add a second thin coat if coverage isn’t opaque; dry 30 minutes between coats.
- Allow paint to cure 24–48 hours before gentle use.
How to Display or Gift It
- Fill with short-stemmed flowers or a cluster of votive candles.
- Place on a tray with driftwood for coastal-farmhouse styling.
- Wrap in tissue paper and tuck into a kraft gift box for giving.
- Twine & Bead Neck Farmhouse Vase

Adding a bead garland to the vase neck gives instant texture and charm. Use 5mm macramé cord and natural wooden beads for an authentic country look. A simple tapering knot keeps the garland replaceable for cleaning.
Materials
- 1 ceramic bud vase (6–8 oz)
- 3 yd 5mm macramé cord
- 12 wooden beads (12 mm)
- Scissors
- Measuring tape
- Needle (large eye) for threading (optional)
Instructions
- Cut 3 lengths of cord at 24 in each for a triple-strand garland.
- Thread beads evenly on each strand using a needle or by pushing beads.
- Tie a simple overhand knot at one end; slide beads into place so the knot sits at the back.
- Drape around vase neck and tie a decorative bow to secure.
- Trim ends at a diagonal for neatness.
- Remove garland before washing the vase.
How to Display or Gift It
- Change beads seasonally (white-painted beads for winter).
- Store extra garlands in a small craft organizer tray.
- Slip a kraft tag through the cord for gifting.
- Vintage Label & Decal Vase (Using Vinyl)
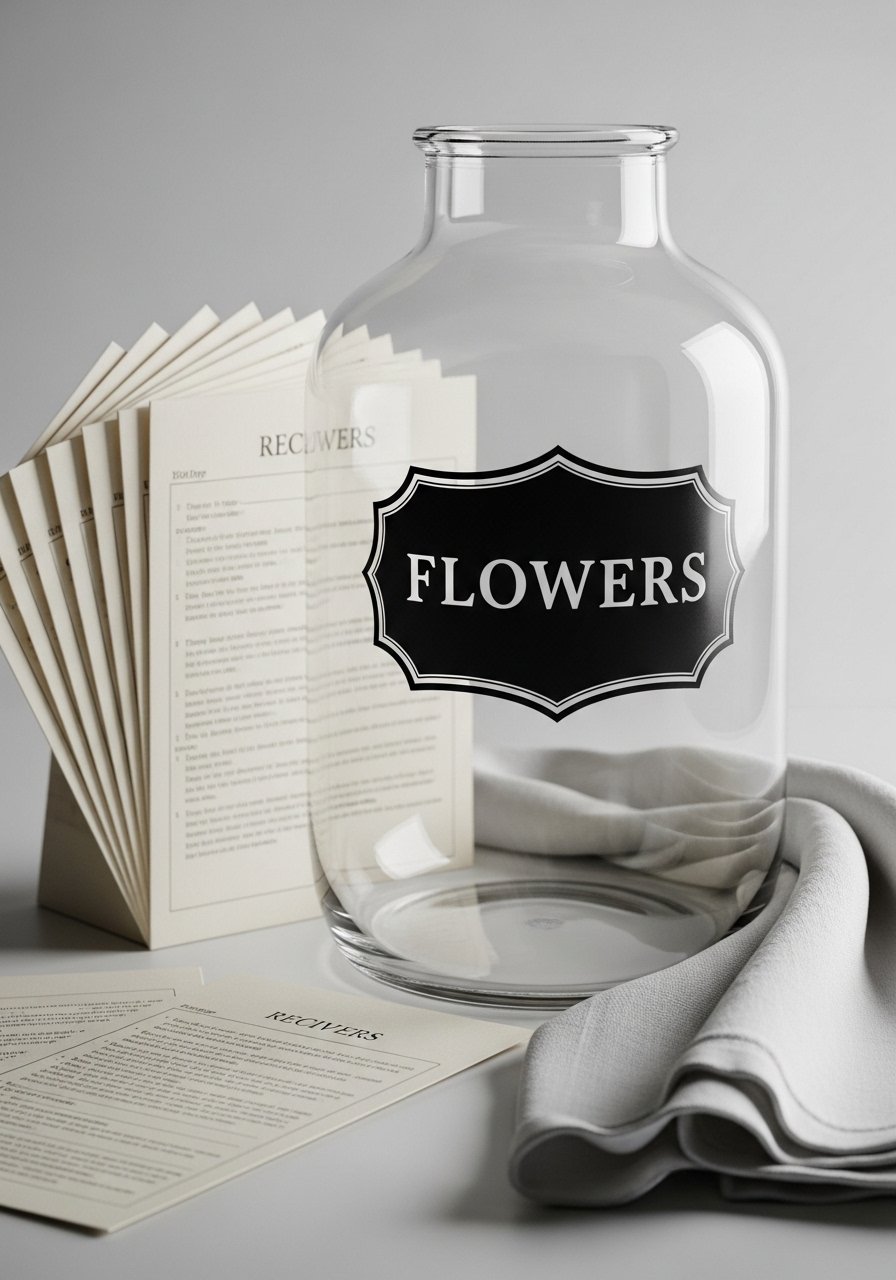
Vinyl decals give a clean graphic look that reads modern farmhouse. Cut labels with a Cricut and weed using fine tweezers. Permanent outdoor vinyl holds up to water and gives an authentic printed label feel.
Materials
- 1 glass vase (12–16 oz)
- Adhesive vinyl (permanent black) 4" x 12"
- Transfer tape
- Weeding tool
- Cricut Explore (or similar cutting machine)
- Rubbing alcohol
- Scissors
Instructions
- Clean vase with rubbing alcohol and let dry.
- Design or select a vintage label file and cut it on the Cricut.
- Weed excess vinyl and apply transfer tape.
- Position label on the vase, rub with a squeegee, and remove transfer tape slowly.
- Press edges with fingers to remove bubbles; wait 30 minutes before adding water.
- For extra protection, avoid scrubbing over the vinyl; hand wash gently.
How to Display or Gift It
- Pair with matching labeled jars or canisters for a pantry-style display.
- Gift with a packet of seeded paper tied to the neck.
- Store extra vinyl sheets and tools in a craft storage drawer.
- Farmhouse Vase with Faux Milk Paint Crackle
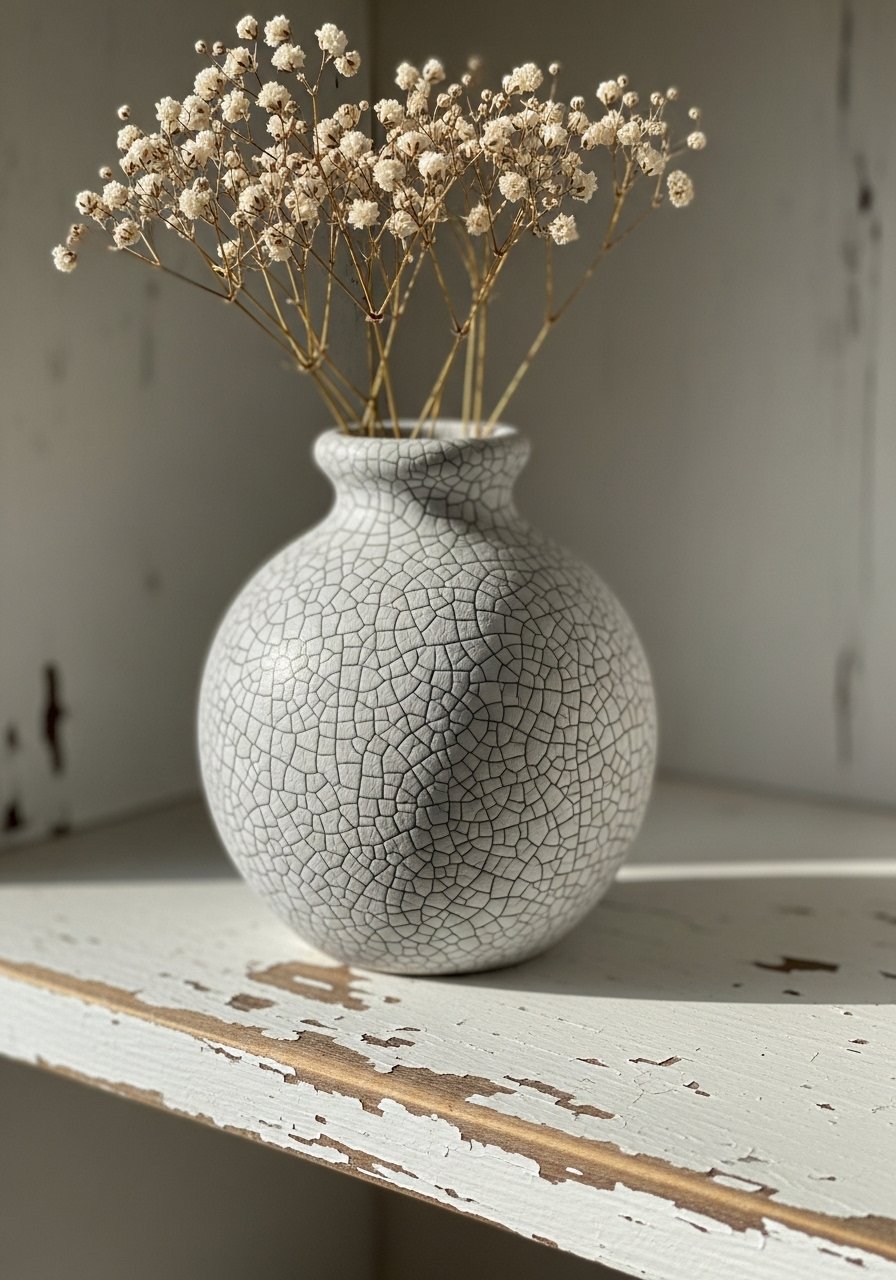
A faux milk-paint crackle gives vintage character without harsh chemicals. Use a milk-paint effect medium or a 2-step crackle glaze and a chalk paint top coat. This is one of my favorite farmhouse vase decorating ideas when I want age without real antique hunting.
Materials
- 1 small ceramic vase (10 oz)
- 2 oz crackle medium
- 2 oz chalk paint (pale gray)
- Flat brush (1/2")
- Sandpaper (fine)
- Lint-free cloth
Instructions
- Clean and dry the vase thoroughly.
- Brush one even coat of crackle medium; allow to dry until tacky (~15–20 minutes).
- Apply a thin coat of chalk paint over the medium; crackling will appear as paint dries (10–30 minutes).
- Let cure 24 hours then lightly sand raised edges for depth.
- Wipe with a lint-free cloth to remove dust.
How to Display or Gift It
- Place on a small wooden pedestal to highlight texture.
- Add a dried stem or anemone for a gift that feels handcrafted.
- Keep extra crackle medium and paints organized in a storage bin.
- Burlap & Painted Stencil Vase
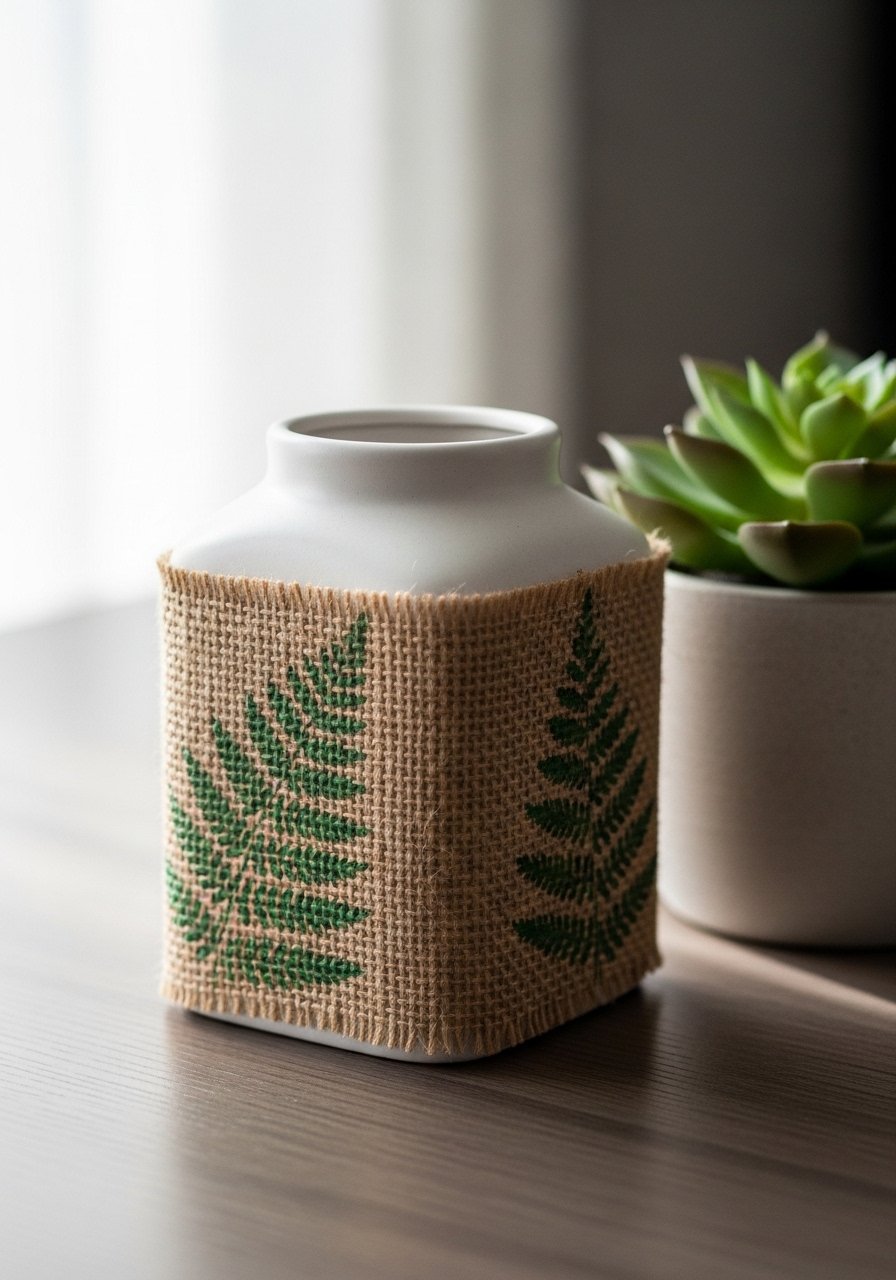
Stenciling on a burlap wrap gives pattern without painting directly on glass. Use a foam pouncer and a reusable stencil for crisp fern or floral motifs. The texture of burlap makes paint look weathered in the best way.
Materials
- 1 squat glass vase (14 oz)
- 12 in burlap strip (8" wide)
- Reusable stencil (4" x 4")
- 2 oz acrylic craft paint (sage green)
- Foam pouncer
- Fabric glue
- Scissors
Instructions
- Cut burlap to size and secure seam with fabric glue; let set 30 minutes.
- Position stencil and dab paint lightly with the foam pouncer; avoid overloading.
- Move stencil and repeat until burlap is decorated.
- Let paint dry 20–30 minutes; press burlap onto vase with fabric glue or tie with twine.
- Allow glue to cure 24 hours.
How to Display or Gift It
- Swap burlap wraps for seasonal patterns.
- Pack in kraft tissue and tie with twine as a hostess gift.
- Store stencils flat in a stencil folder.
- Rope-Coiled Ceramic Vase
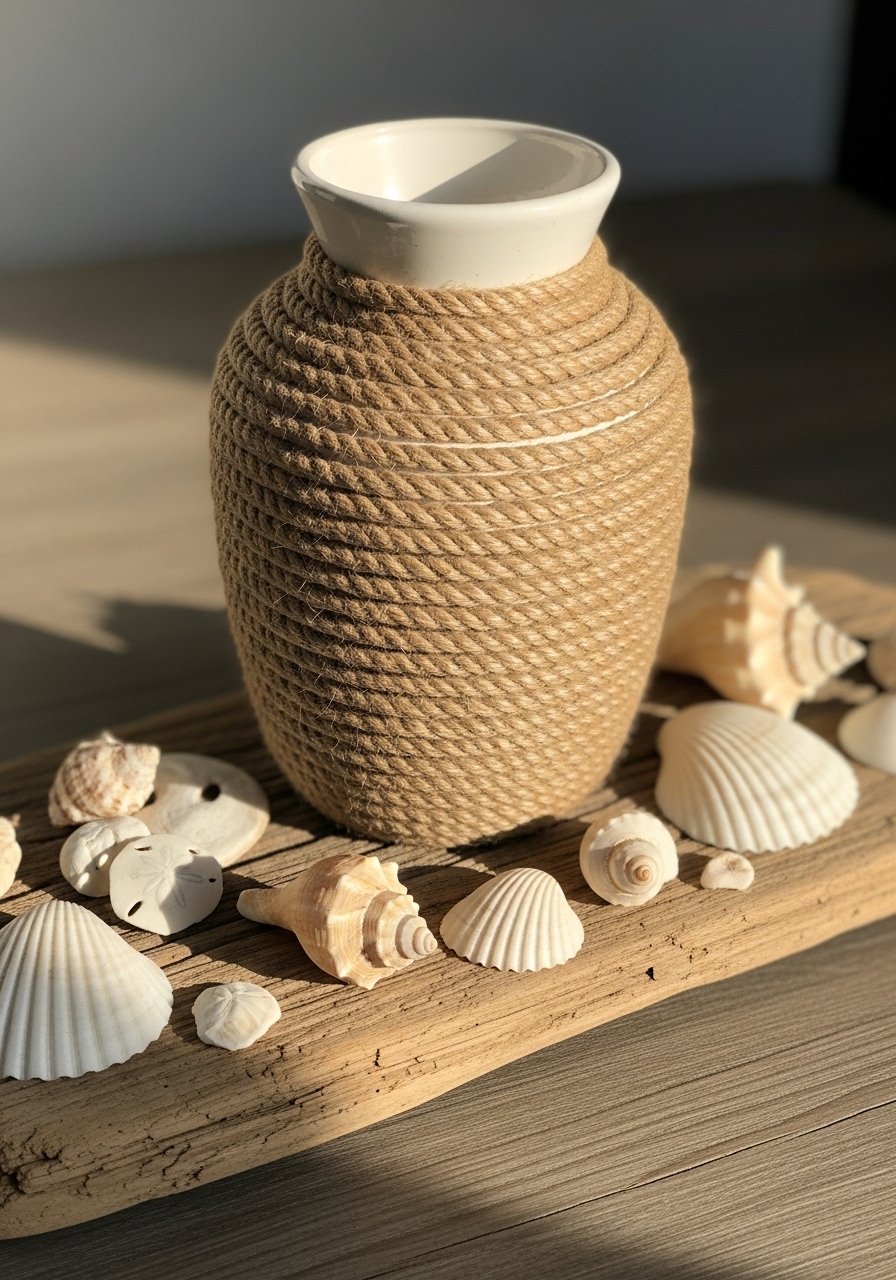
Coiled rope adds a nautical-farmhouse texture and hides imperfect surfaces. Use a strong adhesive like E6000 and a heat gun carefully to speed cure if needed (low setting). This project produces a sturdy, tactile vessel.
Materials
- 1 ceramic or terracotta vase (12–16 oz)
- 10 ft natural rope (1/4")
- E6000 adhesive (1 oz)
- Scissors
- Clamps or small clothespins (optional)
- Heat gun (low setting, optional)
Instructions
- Clean vase surface and plan coil placement.
- Apply a bead of E6000 to vase and press rope coil into place starting at base.
- Continue gluing and coiling, securing with clothespins until adhesive sets (~10–15 minutes per section).
- For faster set, briefly run a heat gun in low over the glue for 5–10 seconds (keep moving).
- Trim rope at the top and glue end down; let cure 24–48 hours for full bond.
- Test for firmness before adding water.
How to Display or Gift It
- Fill with long-stemmed branches or pampas grass.
- Wrap in kraft paper and include care instructions for the glued finish.
- Store extra rope and adhesive in a tool caddy.
- Dip-Dyed Ombre Vase

Dip-dyeing glass with diluted acrylic or alcohol ink creates a watercolor ombre that feels modern farmhouse. Work in stages and blot to blend. Alcohol inks dry fast, but acrylic layers may need longer curing.
Materials
- 1 tall glass vase (20 oz)
- 2 shades of acrylic paint or alcohol inks
- 2 cups warm water (for acrylic dilution)
- Disposable cup
- Gloves
- Paper towels
Instructions
- Clean glass thoroughly.
- Mix diluted acrylic: 1 part paint to 3 parts water for a translucent wash.
- Dip bottom third of vase into lighter color; hold for 10–15 seconds, lift and blot gently.
- Dip lower third into darker shade overlapping slightly; blend with paper towel while still wet.
- Let dry 30–60 minutes between dips for acrylic; alcohol ink may dry in 5–10 minutes.
- Apply a clear spray sealer if desired; cure 24 hours.
How to Display or Gift It
- Pair with coastal decor or neutral linens.
- Wrap in tissue and place in a snug kraft gift box.
- Make a set in graduated sizes for a striking centerpiece.
- Macramé Wrapped Bud Vase
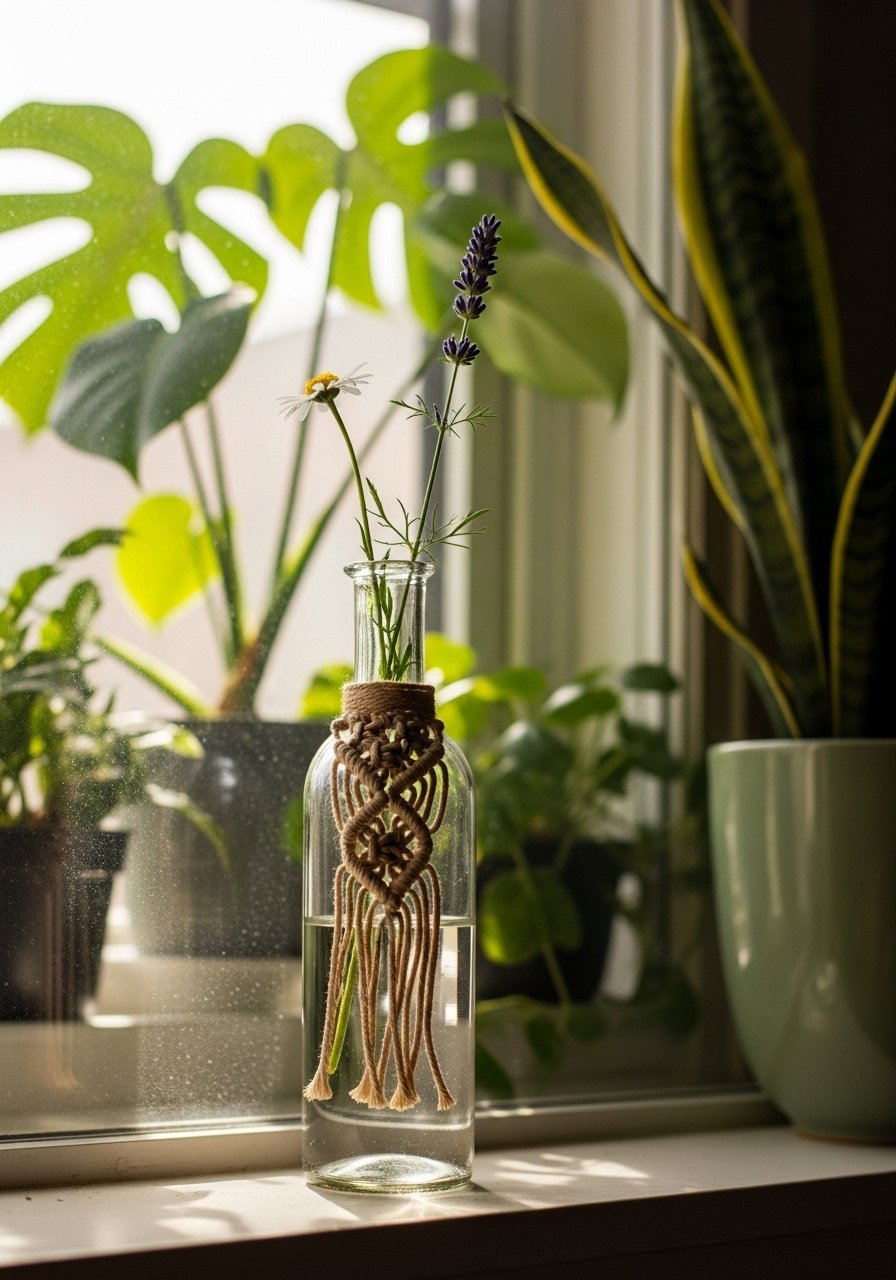
Macramé adds boho-farmhouse texture and feels delicate on small vases. Use 3mm cord and a few square knots for a quick wrap. Beginners will appreciate a short pattern that finishes in under an hour.
Materials
- 1 bud vase (6–8 oz)
- 3 mm macramé cord, 10 yd
- Measuring tape
- Scissors
- T-pins or small clips
- Optional: wooden bead (1)
Instructions
- Cut 4 cords at 60 in each; attach to a wrapped loop around the vase neck using lark’s head knots.
- Work a row of square knots for 3 inches.
- Add a wooden bead threaded onto center cords if desired.
- Finish with an overhand knot and trim ends at 1" for a neat fringe.
- Secure with a small dab of clear glue at the knot for longevity.
- Remove before washing or use only as a dry-stem vase.
How to Display or Gift It
- Group three different macramé-wrapped bud vases on a narrow shelf.
- Pack in a small gift bag with a sprig of dried flowers.
- Store spare cord and beads in a small organizer box.
- Burlap-Dipped Vase with Painted Rim
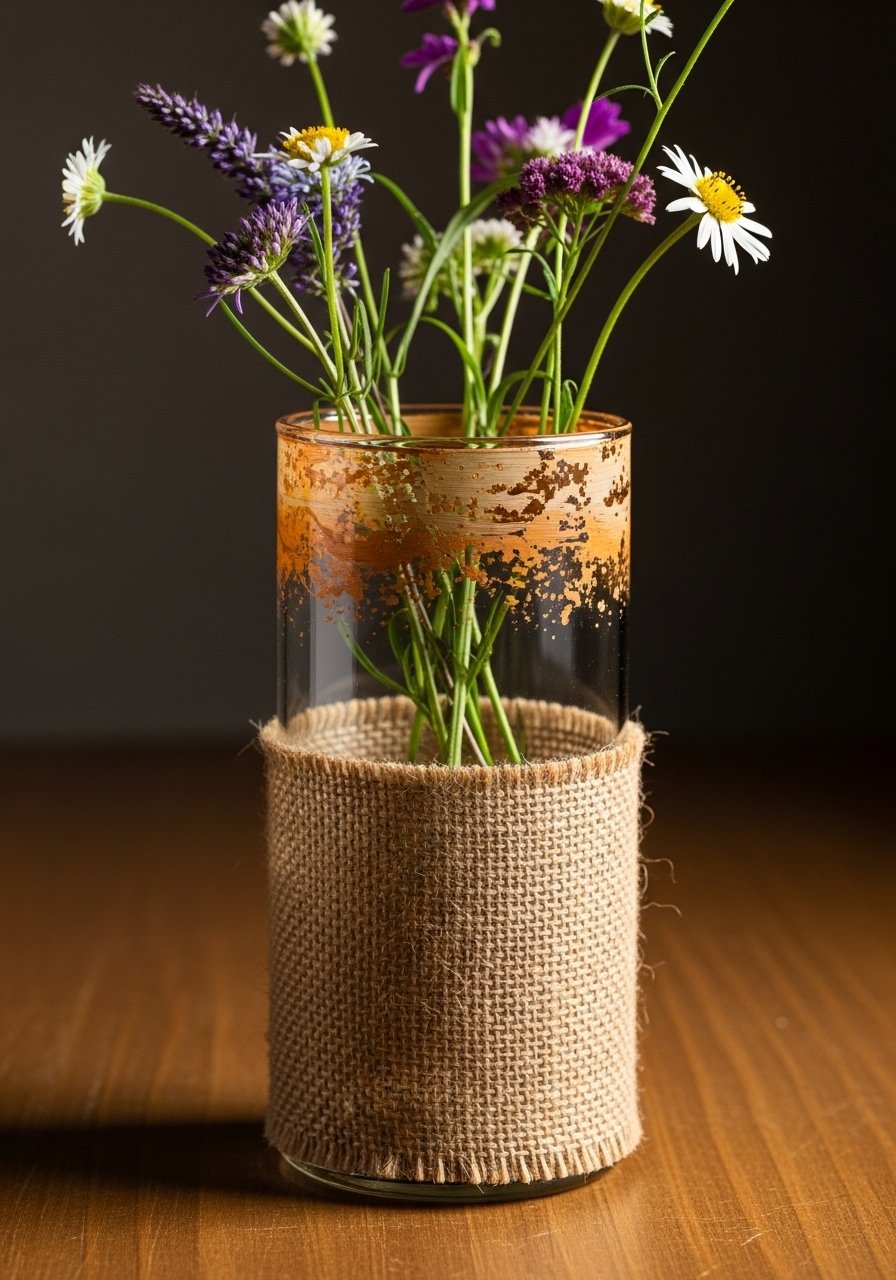
Dipping in a burlap sleeve creates a cozy wrapped look combined with a painted rim for a pop of color. The painted rim gives a farmhouse-meets-modern contrast. Use a foam brush for a smooth rim finish.
Materials
- 1 cylindrical glass vase (14 oz)
- Burlap sleeve (pre-sewn or cut to size)
- 1 oz acrylic paint (ochre)
- 1 foam brush (1/2")
- Fabric glue
- Clothespins
Instructions
- Slide burlap sleeve onto vase; secure seam with fabric glue and clothespins until set (~30 minutes).
- Paint rim with the foam brush; allow first coat to dry 20–30 minutes.
- Add a second thin coat for opacity; dry 30 minutes.
- Distress lightly with fine sandpaper if desired.
- Let glue and paint cure 24 hours before use.
How to Display or Gift It
- Pair with plates in similar rim color for tablescapes.
- Tie a tag around the burlap for a personalized gift.
- Store extra sleeves flat in a fabric storage bin.
- Rustic Chalkboard Label Vase (farmhouse vase decorating ideas)

A chalkboard label is both decorative and practical for labeling bouquets. Use chalkboard paint in a small rectangle and a paint pen for neat writing. Great for events or flower arranging practice.
Materials
- 1 glass jar (16 oz)
- 1 oz chalkboard paint
- 1 small flat brush
- Chalk marker
- Twine (2 yd)
- Rubbing alcohol
- Painter’s tape
Instructions
- Clean jar with rubbing alcohol and let dry.
- Tape a rectangle for your chalkboard area.
- Paint two thin coats of chalkboard paint; dry 30 minutes between coats.
- Remove tape carefully and season the chalkboard with the side of chalk, then wipe.
- Write your label with a chalk marker.
- Tie twine around the neck as a finishing touch.
How to Display or Gift It
- Use to label bouquets at a farmer’s market table.
- Wipe clean and reuse for different occasions.
- Pack with a small chalk marker as a ready-to-gift set.
- Linen-Wrapped Vintage Vase
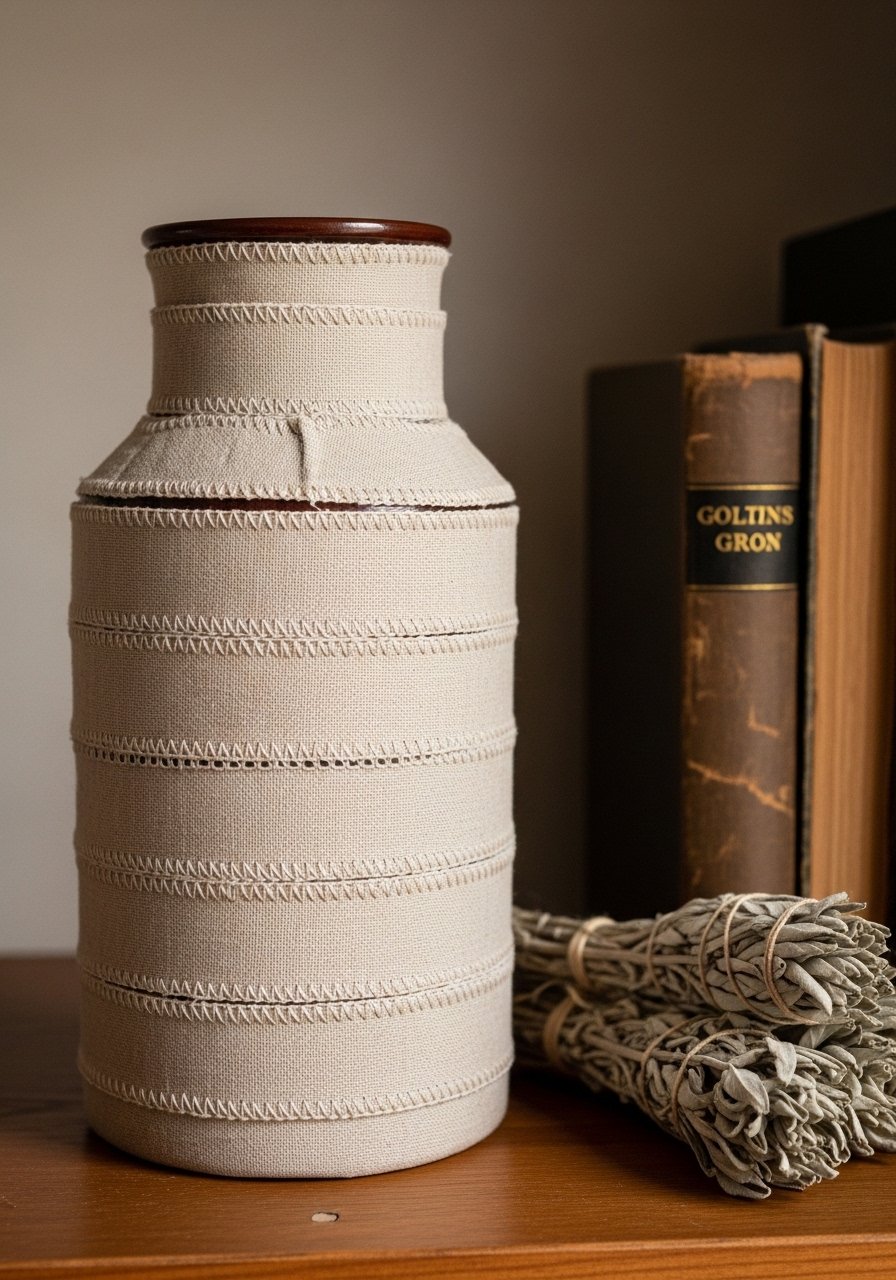
Linen gives an elegant farmhouse look and is softer than burlap. Stitch or glue seams for a tailored finish. The fabric also masks chips and scratches on thrifted pieces.
Materials
- 1 tall vase (20 oz)
- 1/2 yd natural linen fabric
- Fabric glue or needle and thread
- Scissors
- Measuring tape
- Tailor’s chalk
Instructions
- Measure vase height and cut linen with 1/2" seam allowance.
- Glue or stitch the seam and wrap fabric around vase, tucking at top and bottom.
- Secure with small stitches or fabric glue; press and dry 30 minutes.
- Add a stitched linen bow or vintage button accent.
- Allow any adhesive to cure 24 hours before heavy handling.
How to Display or Gift It
- Group with soft linens and muted palettes on an open shelf.
- Include a packet of dried lavender when gifting.
- Store leftover linen folded with tissue in a fabric organizer.
- Rustic Painted Wood Collar Vase
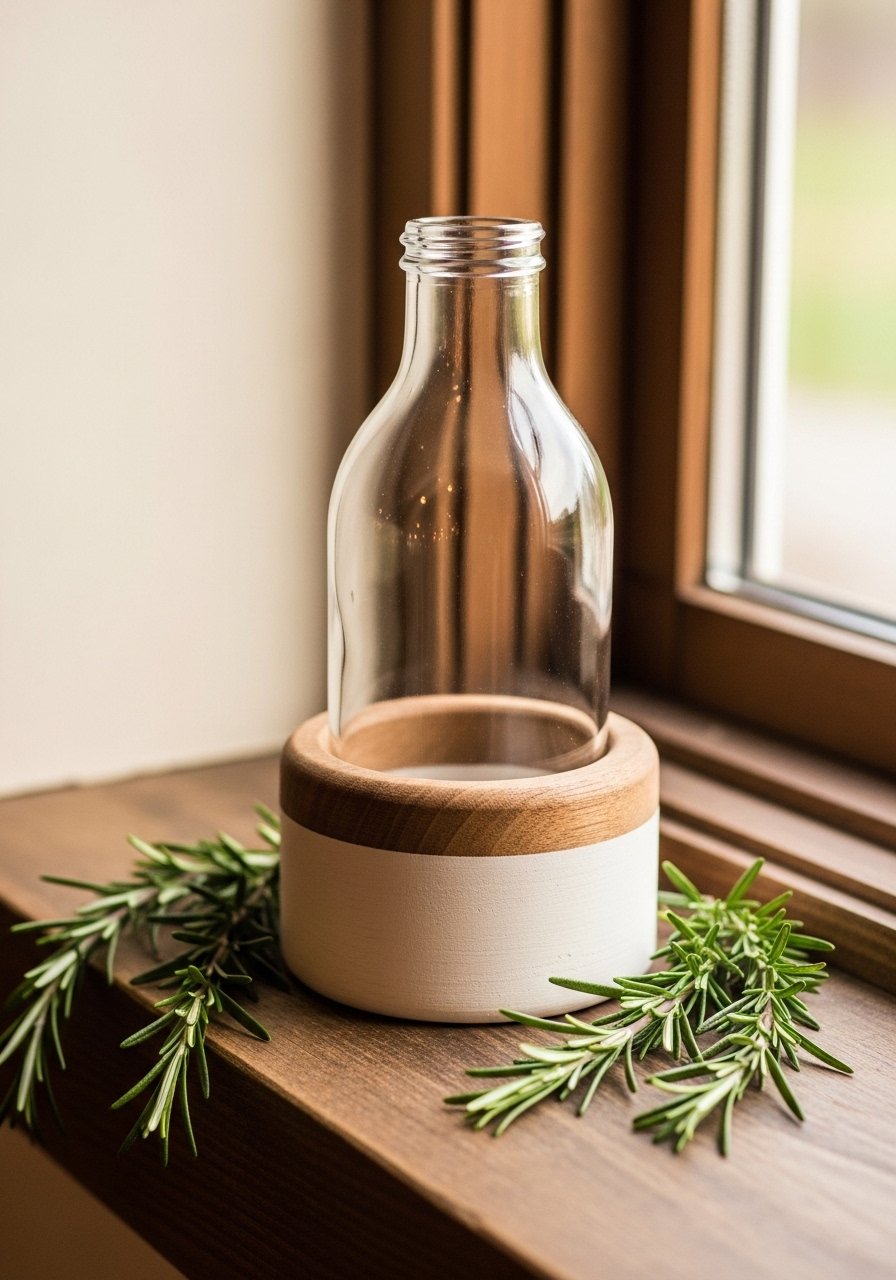
A wooden collar frames a simple bottle and adds weight and rustic charm. Paint the wood in a chalky color and dry-brush for a farmhouse finish. Use a drilled opening for the bottle to nest securely.
Materials
- 1 glass bottle (16 oz)
- Wood round with center hole (1/2" thick)
- 2 oz chalk paint (soft gray)
- Sandpaper
- Wood glue
- Clamps (optional)
Instructions
- Cut or buy a wood collar sized to the bottle neck.
- Paint the wood with chalk paint; let dry 30–60 minutes.
- Sand edges lightly for a distressed look.
- Place bottle into collar; add a dab of wood glue where wood meets bottle if desired.
- Clamp lightly until set (~30 minutes) and let cure 24 hours.
How to Display or Gift It
- Group several collared bottles in a row on a mantle.
- Nest in crinkle paper inside a kraft box for gifting.
- Keep spare collars stacked flat in a drawer.
- Distressed Paint & Wax Vase
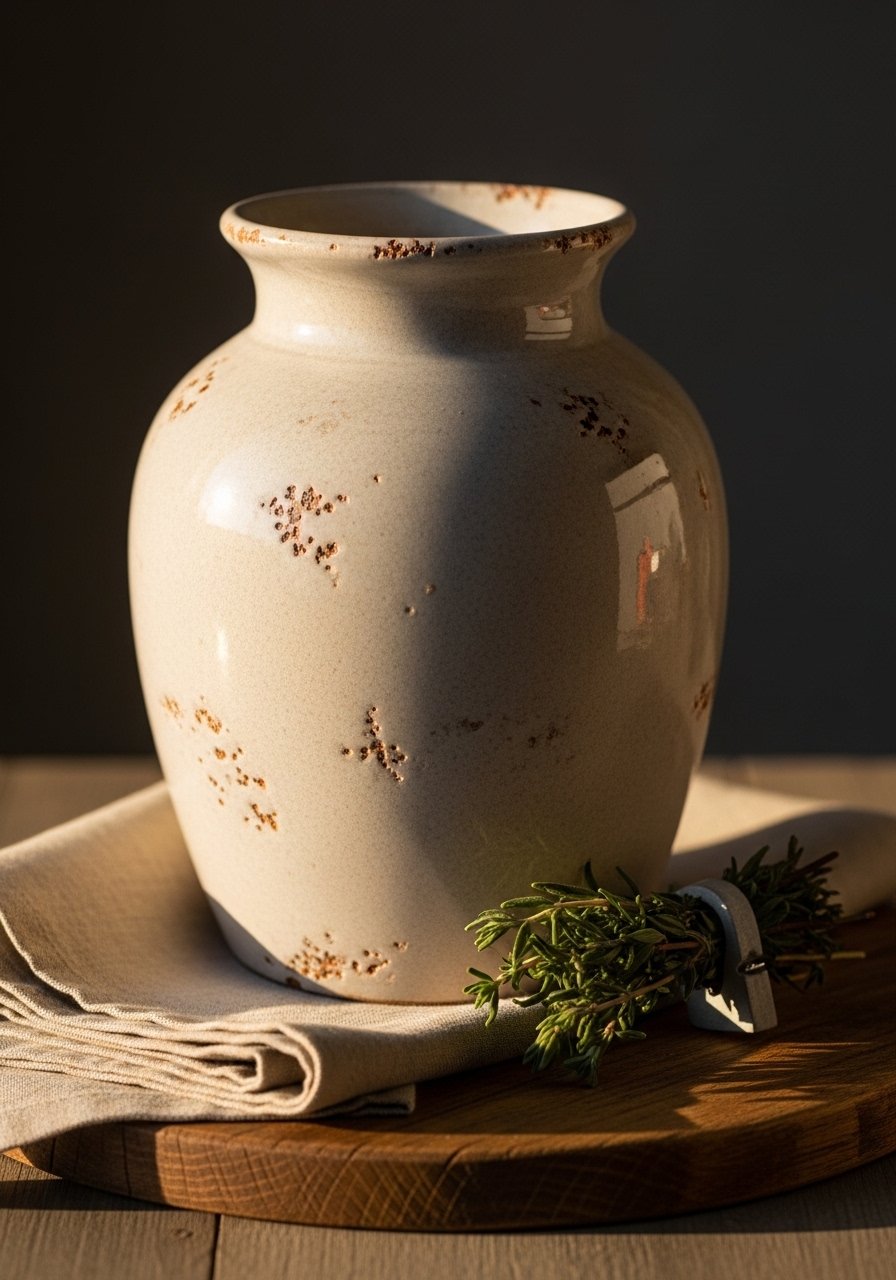
Waxing paint gives a soft sheen and depth to distressed finishes. Use matte chalk paint, distress with sandpaper, and finish with clear wax for protection. The process yields a tactile farmhouse surface.
Materials
- 1 ceramic vase (14 oz)
- 3 oz chalk paint (cream)
- Sandpaper (220 grit)
- Clear wax (2 oz)
- Lint-free cloth
- Flat brush
Instructions
- Clean vase and paint two thin coats of chalk paint; dry 30–60 minutes between coats.
- Sand edges lightly for distressing.
- Apply a thin coat of clear wax with lint-free cloth; buff after 10 minutes.
- Let wax cure 24 hours before handling.
How to Display or Gift It
- Place on a wooden tray with candles.
- Wrap in muslin and tie with baker’s twine for a gift.
- Keep wax and cloth in a craft organizer drawer.
- Mason Jar with Lace Decoupage
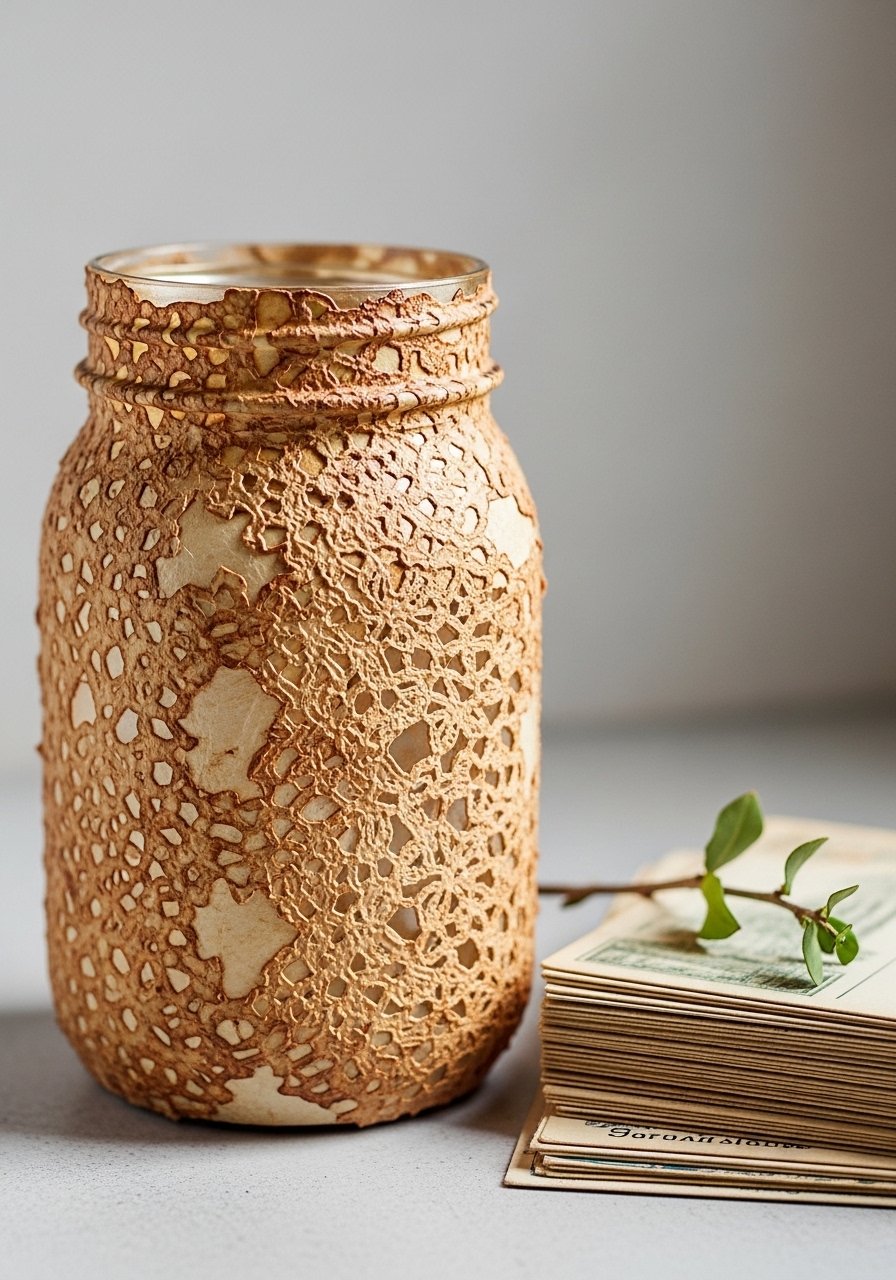
Paper lace decoupage gives a vintage, romantic farmhouse look. Use matte Mod Podge for a subtle finish that feels like old paper glued gently to glass. Work in small sections for clean results.
Materials
- 1 mason jar (16 oz)
- 4 oz Mod Podge (matte)
- Paper lace doily (1)
- Foam brush
- Scissors
- Sponge brush for smoothing
Instructions
- Trim doily to fit jar and plan placement.
- Brush a thin layer of Mod Podge on the jar and press doily into place.
- Smooth gently with a sponge brush to remove bubbles.
- Brush a thin coat of Mod Podge over the top; dry 15–20 minutes between coats.
- Apply 2 coats total; cure 24 hours for best durability.
How to Display or Gift It
- Fill with fairy lights for a cozy nightlight.
- Pack in a small kraft gift box with tissue for giving.
- Store unused Mod Podge and brushes upright in a craft organizer.
- Painted Dot Pattern Vase (Hand-Stamped)

Hand-stamping with a pencil eraser or foam dot maker gives a charming dotted pattern. It’s forgiving and adds a handmade look that’s perfect for country homes. Use paint pens or thinned acrylics for consistent dots.
Materials
- 1 small glazed vase (8–10 oz)
- 1 oz acrylic paint (charcoal)
- Pencil eraser or foam stamp (8 mm)
- Small palette
- Paper towel
- Ruler for spacing
Instructions
- Clean vase and plan dot placement with light pencil marks.
- Dip eraser or foam stamp lightly in paint; test on paper.
- Stamp dots evenly around vase, spacing 1/2–1" apart.
- Allow paint to dry 20–30 minutes, then add touch-ups.
- Seal with a clear matte spray if desired; cure 24 hours.
How to Display or Gift It
- Use a single bloom or a short cluster of stems.
- Wrap base with baker’s twine for gifting.
- Keep extra dot tools and paints in a small organizer box.
- Resin-Encased Sprig Vase Accent
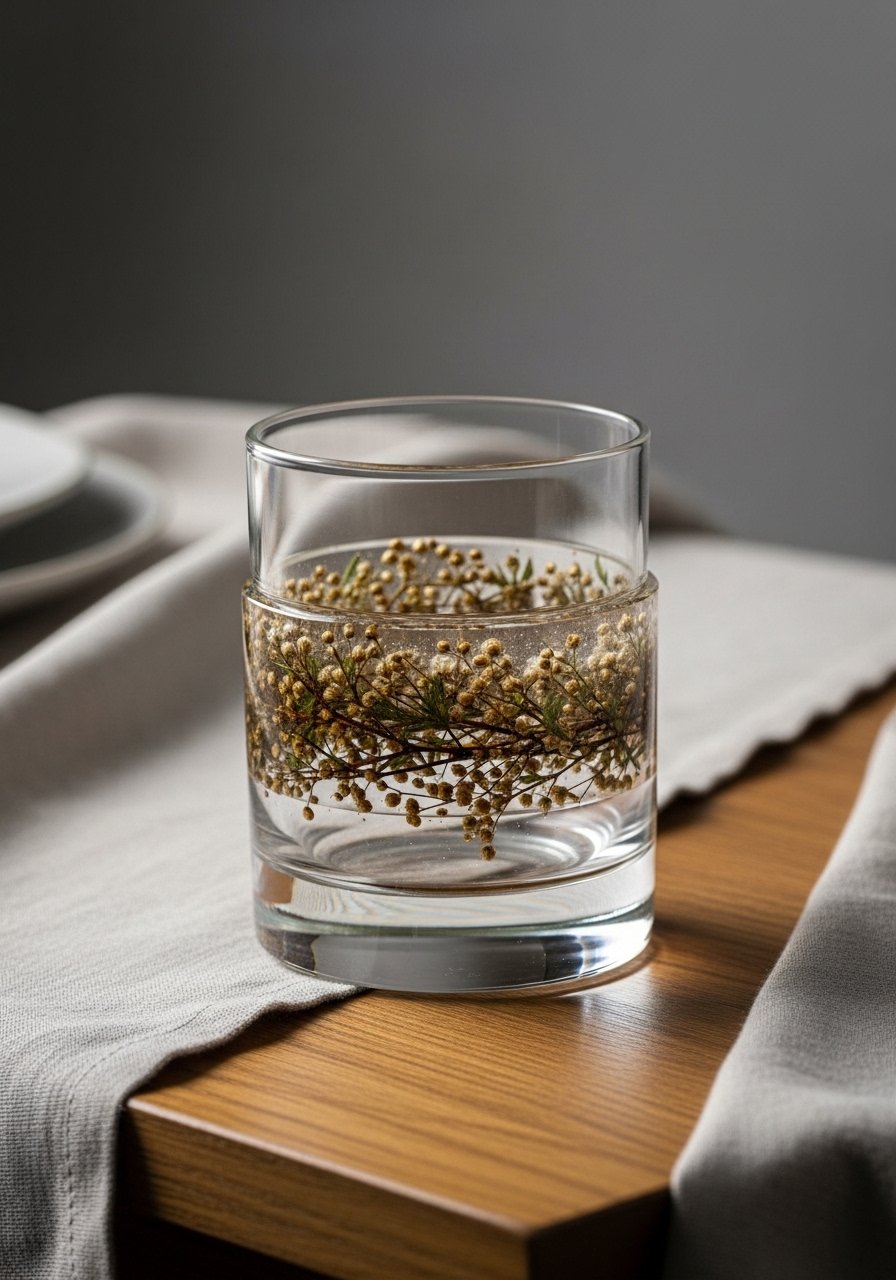
A resin band can freeze a tiny botanical scene on your vase. Epoxy resin needs careful measuring and ventilation, but the result is a glossy, modern farmhouse accent. Follow resin kit instructions and cure times precisely.
Materials
- 1 glass vase (12 oz)
- 1 kit epoxy resin (enough for small band, ~2 oz mixed)
- Dried sprigs/seeds
- Painter’s tape
- Mixing cups and sticks
- Nitrile gloves
Instructions
- Mask off a band area with painter’s tape.
- Arrange dried sprigs on the vase within the masked band.
- Mix epoxy resin per kit instructions (measure 1:1 or as directed).
- Pour a thin layer and use a toothpick to position botanicals.
- Allow to cure 24–72 hours depending on kit; eliminate bubbles with brief heat gun passes.
- Remove tape and lightly sand edges if needed.
How to Display or Gift It
- Keep resin vases away from direct sunlight to avoid yellowing.
- Gift with care note about hand-washing only.
- Store resin leftovers and mixing tools in a ventilated craft area.
- Twine Tassel Accent Vase
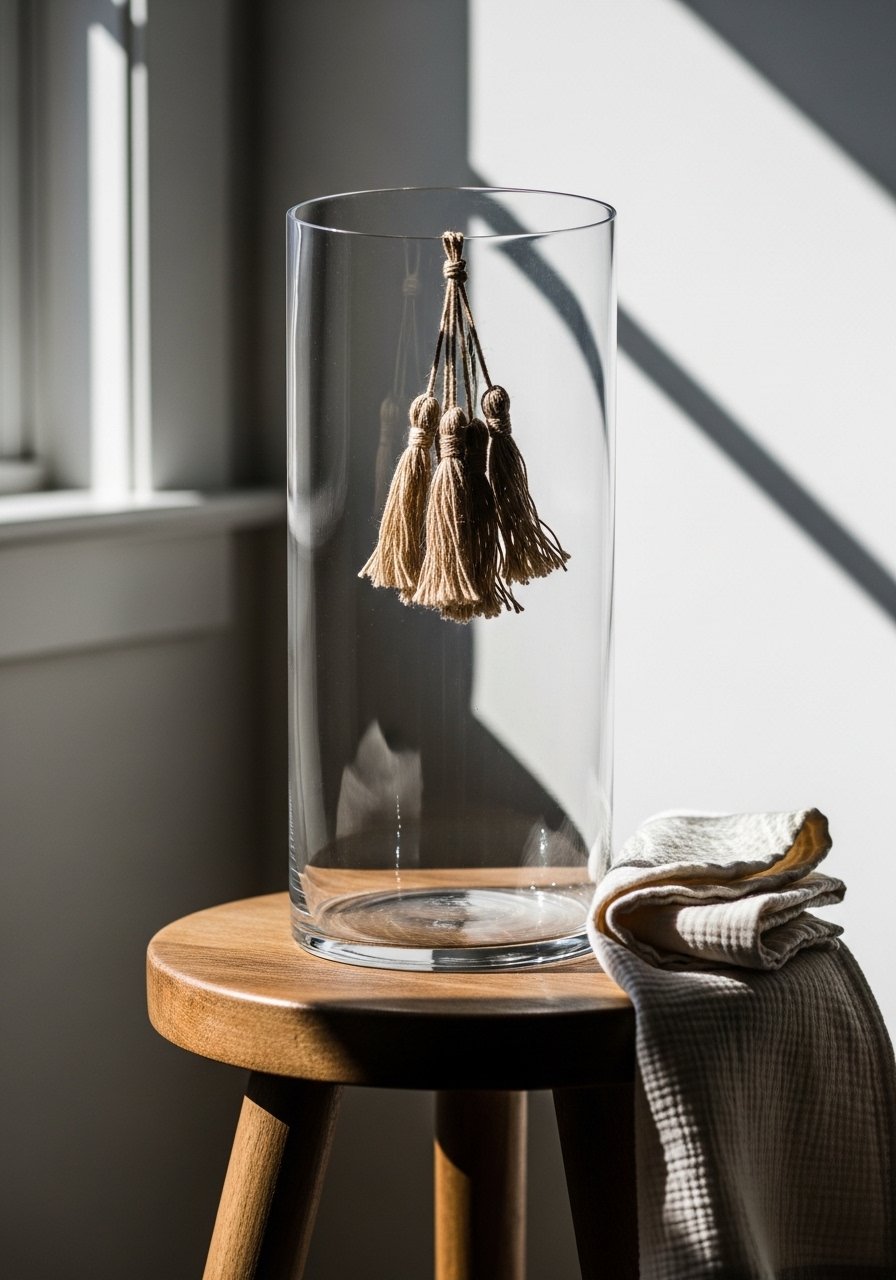
Tassels add movement and a cozy, handmade feel. Make several small tassels from twine and tie them together for a charming cluster. Tassels can be swapped seasonally for fresh looks.
Materials
- 1 cylinder glass vase (18–20 oz)
- 6 small twine tassels (each 3 in long)
- Jute twine (5 yd)
- Scissors
- Small piece of cardboard for wrapping tassels
- Needle and thread (optional)
Instructions
- Wrap twine around a 3" cardboard 15–20 times for each tassel.
- Slide looped twine off and tie a small 1" knot at top; cut bottom loops to form tassel.
- Trim ends evenly and repeat for 6 tassels.
- Tie tassels together with jute and knot around vase neck.
- Adjust spacing and trim any stray ends.
- Remove before washing vase interior.
How to Display or Gift It
- Pair with a small bunch of dried flowers for seasonal decor.
- Store tassels flat in a small storage tray.
- Copper Wire Wrapped Vase
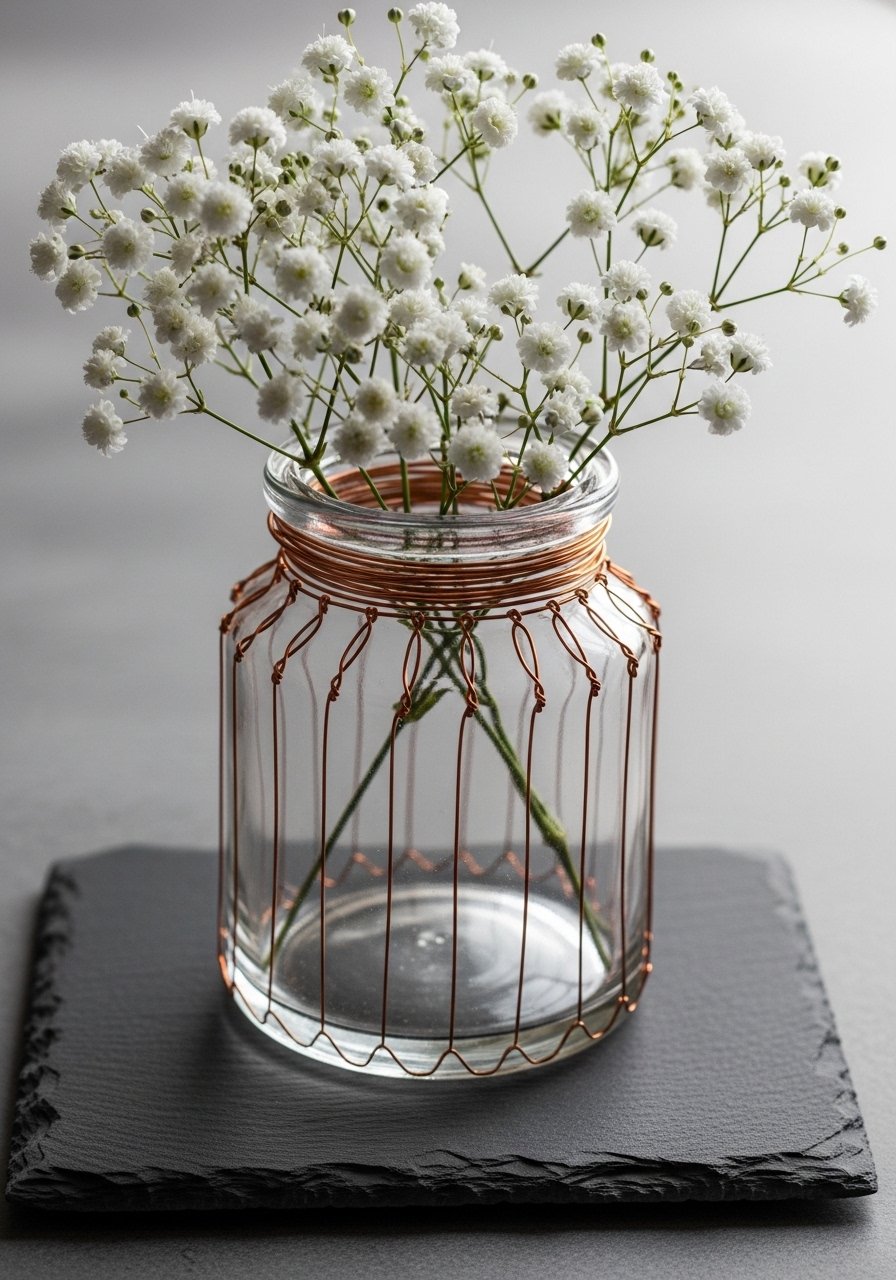
Thin copper wire brings a warm metallic contrast that's still understated. Use 20–24 gauge wire and pliers for neat wraps. It’s a subtle industrial touch that fits farmhouse spaces.
Materials
- 1 glass vase (10–12 oz)
- 20 ft copper wire (24 gauge)
- Wire cutters
- Round-nose pliers
- Ruler
- Optional: patina solution (for aged look)
Instructions
- Cut several lengths of wire to fit vase height plus 2".
- Anchor one end under a wrap and coil vertically, leaving small gaps (1/4–1/2").
- Twist ends neatly with pliers and tuck inward to avoid snags.
- Add more strands for a denser look, spacing evenly.
- Optionally age with patina per product instructions; let dry 24 hours.
How to Display or Gift It
- Combine with exposed-bulb candles for an industrial-farmhouse display.
- Wrap in tissue and include wire cutters when giving.
- Store extra wire in a wire spool organizer.
- Rope & Chalk Paint Two-Tone Vase
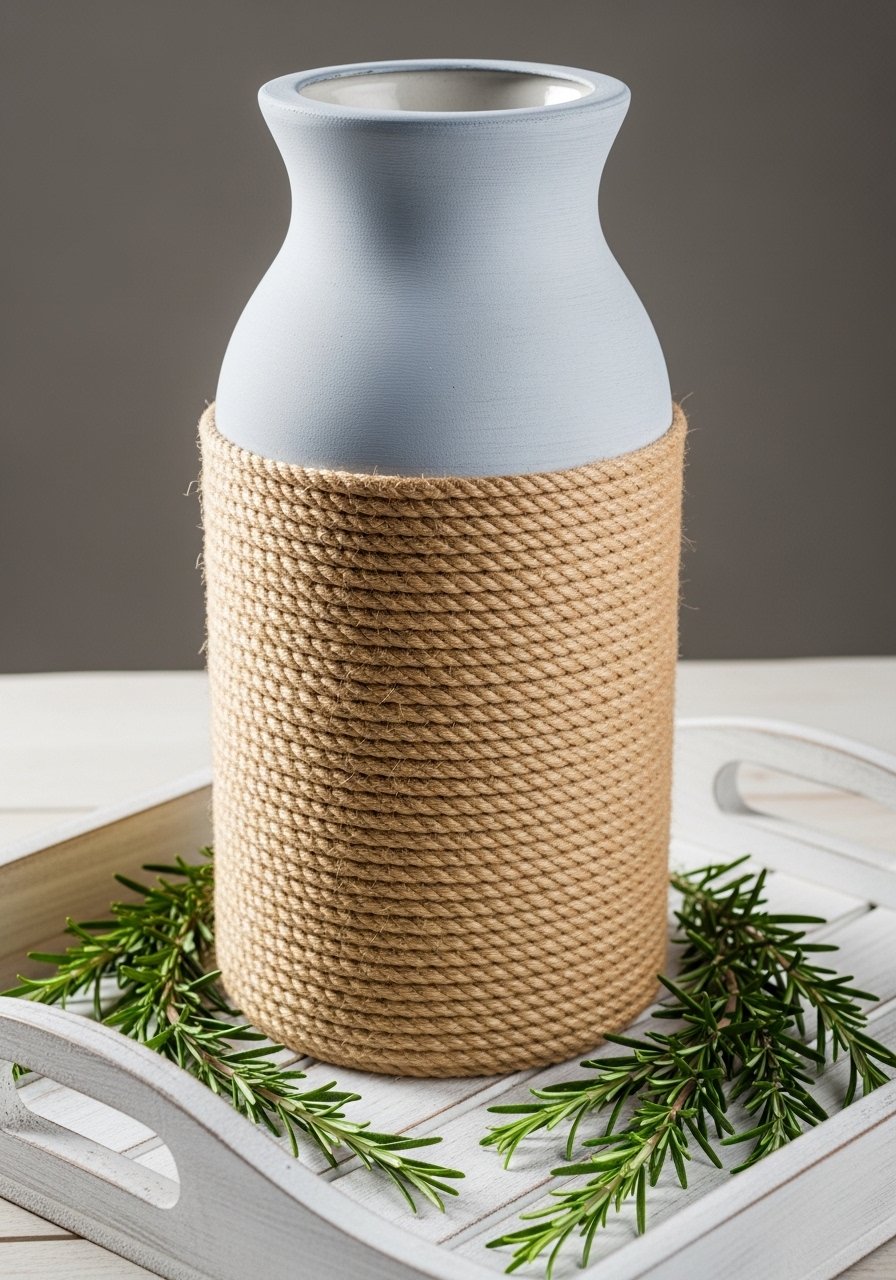
Two-tone finishes balance color and texture beautifully. Paint the top half and wrap the bottom in rope for a grounded look. Painter’s tape and clamps help keep lines clean.
Materials
- 1 tall vase (18–20 oz)
- 2 oz chalk paint (soft blue)
- 10 ft natural rope (1/4")
- Painter’s tape
- Hot glue gun
- Foam brush
Instructions
- Tape a clean line around the vase where paint will end.
- Paint top half with two thin coats; dry 30 minutes between coats.
- Remove tape and allow paint to cure 24 hours.
- Glue rope starting at the bottom and coil upward to meet paint line.
- Trim and secure rope end; test for firmness.
- Clean up excess glue strings with a heat gun briefly.
How to Display or Gift It
- Use as a floor vase for tall stems.
- Bundle smaller painted-and-roped vases together for a table centerpiece.
- Store spare rope and tape in a craft caddy.
- Painted Farmhouse Floral Motif Vase (farmhouse vase decorating ideas)
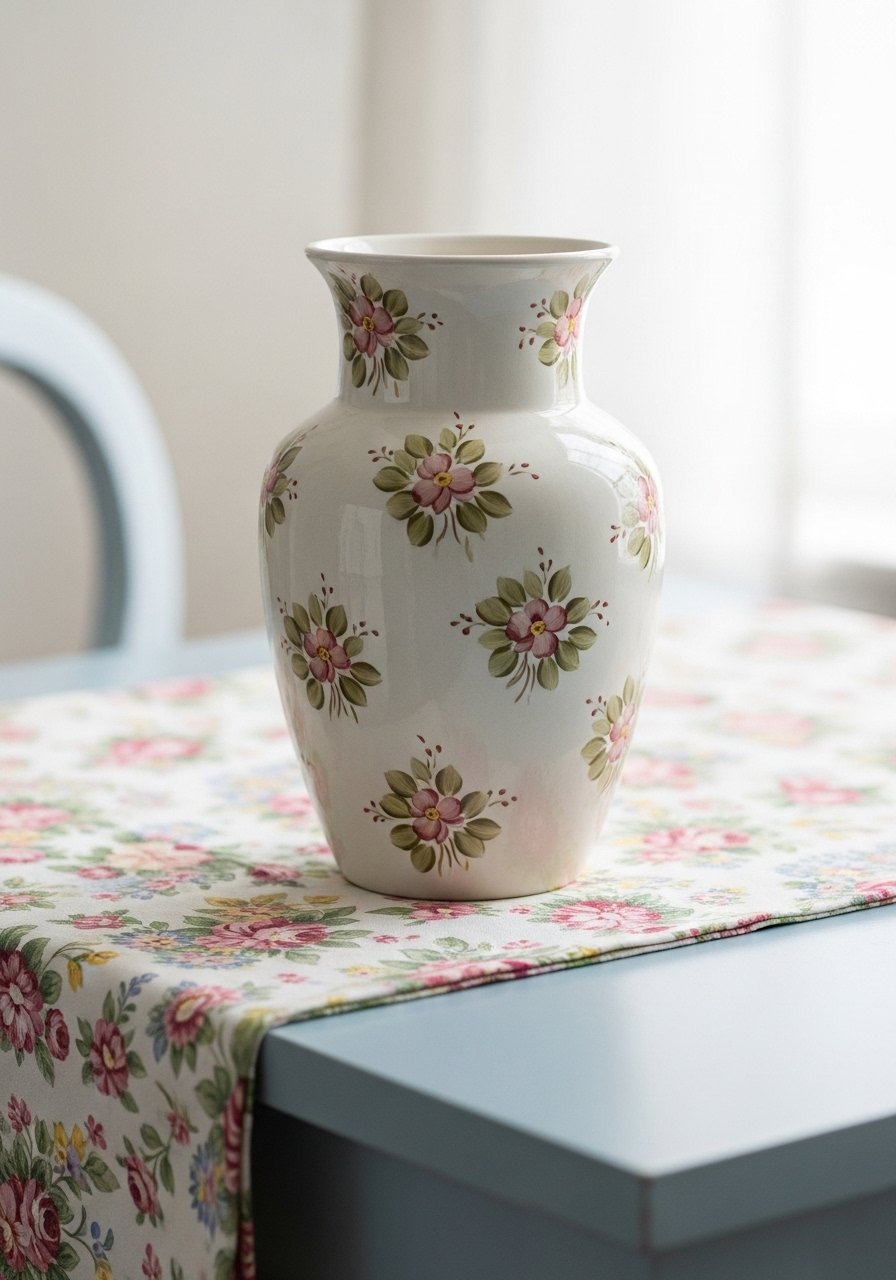
Hand-painted florals add a personal, vintage look. Use a fine-tipped detail brush and thinned acrylics for delicate petals. This project is perfect for those who enjoy painting small, tactile elements.
Materials
- 1 ceramic vase (12–14 oz)
- Acrylic paint set (small, muted palette)
- Fine detail brushes (sizes 0–2)
- Palette
- Water cup
- Clear matte sealer
Instructions
- Clean vase and sketch simple floral motifs lightly with pencil.
- Paint base leaves first, then petals with layered thin strokes.
- Allow 20–30 minutes drying between color layers.
- Add tiny highlights and dots for depth.
- Seal with a matte sealer; cure 24 hours before use.
- Avoid scrubbing painted areas when washing.
How to Display or Gift It
- Pair with a bouquet of coordinating fresh flowers.
- Include a small care card that it’s hand-painted and best hand-washed.
- Store extra brushes flat in a brush roll.
- Glazed Salt-Wash Effect Vase
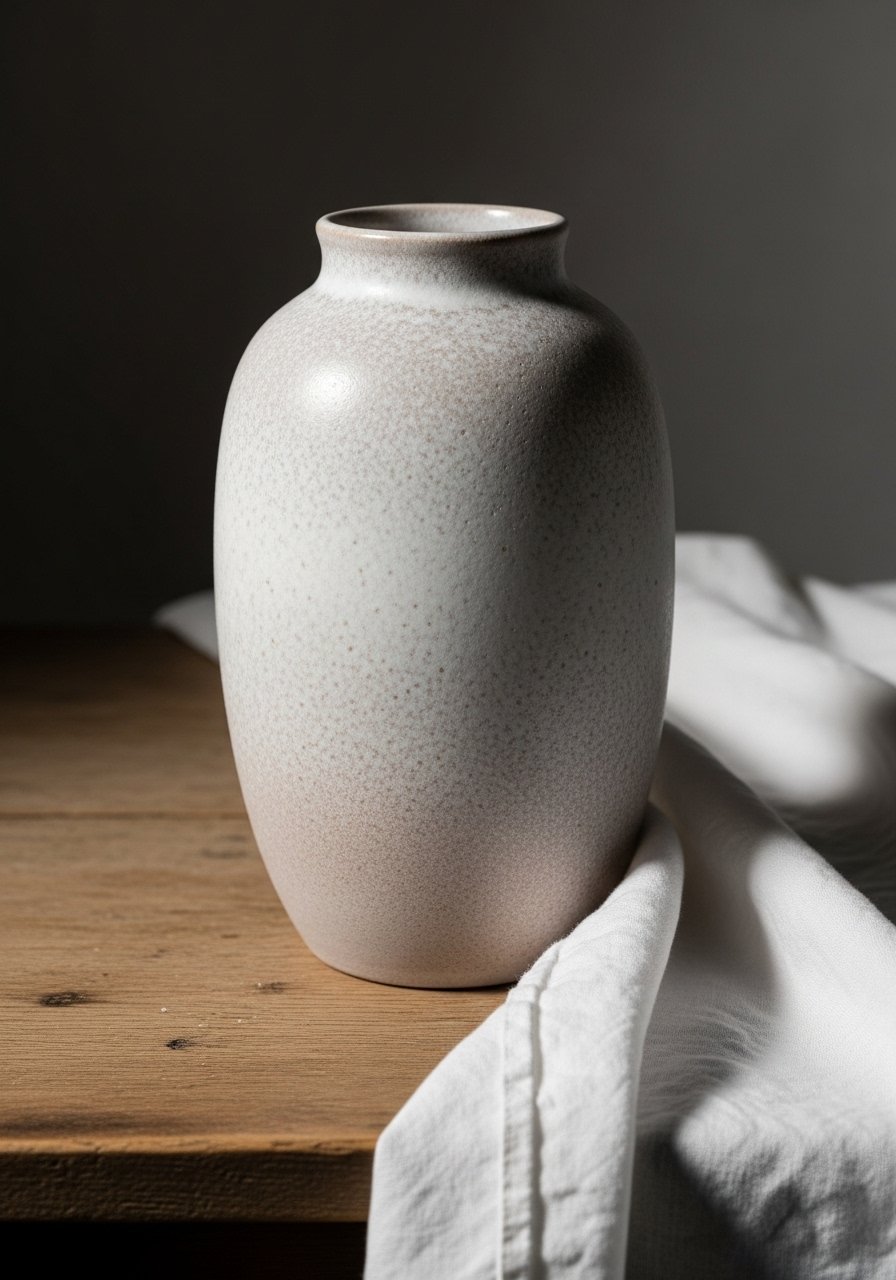
Salt-wash glaze gives a speckled vintage look that’s very farmhouse. Use salt granules sprinkled onto wet glaze or a diluted paint technique to get the speckle. The effect is subtle and natural-looking.
Materials
- 1 ceramic vase (12–16 oz)
- 2 oz ceramic glaze or thinned acrylic (neutral tone)
- Coarse salt (1 tsp)
- Small spoon
- Glaze brush
- Oven (if using oven-cure glaze per product instructions)
Instructions
- Clean vase and prepare glaze per product instructions.
- Brush a thin coat and sprinkle coarse salt while glaze is wet.
- Let set per glaze instructions (often air-dry or oven-cure).
- Once cured, brush off salt and apply a clear sealer if needed.
- Allow final cure 24–48 hours.
How to Display or Gift It
- Place with neutral linens and textured accents.
- Wrap in tissue and tuck a sachet of dried lavender for gifting.
- Store extra glaze and salts in labeled jars.
- Rustic Burlap & Button Wrap Vase

Buttons add whimsical, homespun charm and let you use found treasures on a burlap wrap. Hand-sew buttons or glue them for a quicker finish. The result is quaint and perfect for gifting.
Materials
- 1 tall narrow vase (18–20 oz)
- 12 in burlap strip (8" wide)
- 6–8 vintage buttons
- Needle and thread (or fabric glue)
- Scissors
- Ruler
Instructions
- Cut burlap to size and wrap with 1/2" overlap.
- Sew buttons in a vertical row to secure the seam, spacing 1" apart.
- Alternatively, glue buttons in place and allow glue to set 24 hours.
- Trim burlap edges neatly.
- Insert stems and enjoy.
How to Display or Gift It
- Fasten a small seed packet under a button as a surprise gift element.
- Store spare buttons and burlap in a sewing kit organizer.
I hope this long list of farmhouse vase decorating ideas gave you plenty of ways to cozy up your home and use simple supplies to make something beautiful. From quick twine wraps to paint, resin, and macramé, there’s a technique for every skill level and timeframe. Pin this for later so you can pick a project by season or mood — and tell me which one you’ll try first in the comments below. If you plan to craft a few at once, a quality temperature-controlled hot glue gun will save you time and frustration across many of these projects. Share these ideas with a friend who loves cozy, country-style homes and make a crafting day of it!


