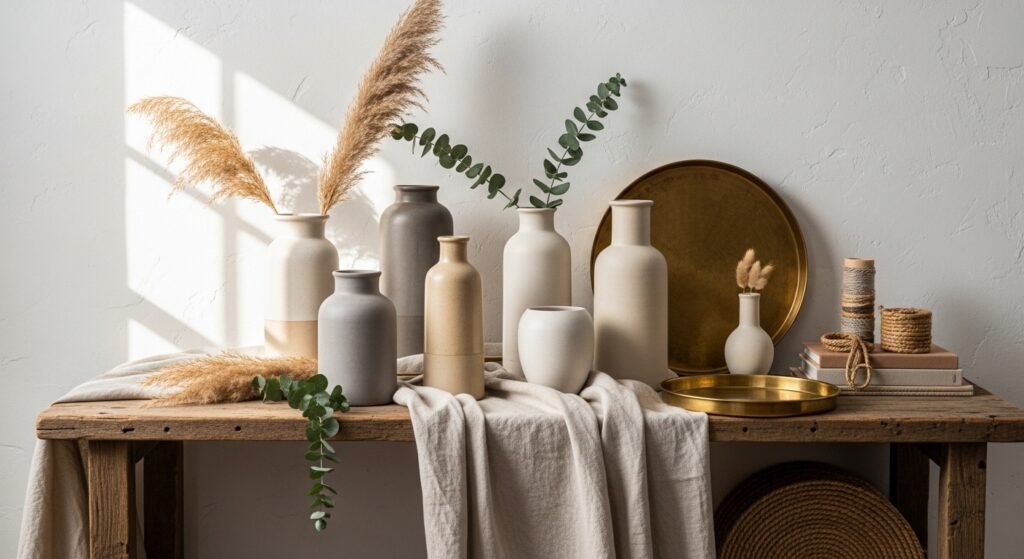
Welcome — if you've ever walked into a room and felt the entryway needed one bold piece, tall vases often do the job. These tall vase decorating ideas are exactly what you want when you need height, texture, or a focal point that feels intentional. You’ll find styles from boho macramé wraps to Japandi matte paint looks, cottagecore dried-floral fills, and modern resin inlays.
I’ve designed each project so you can finish a piece in an afternoon or spread a multi-step design across a weekend. You’ll read practical measurements, drying times, and troubleshooting tips so projects don’t stall mid-glue or mid-paint. I often start simple cuts with my Cricut Joy but a craft knife works fine for many designs. Also keep a hot glue gun nearby for quick assembly — it’s my go-to for things that need an instant hold.
Scroll through these 22 ideas and pick one that matches your room’s vibe. You’ll find beginner-friendly and slightly advanced techniques, clear materials with exact quantities, and display tips so your tall vase makes a bold statement right away.
- Boho Macramé Wrap Tall Vase

This boho macramé wrap adds soft texture and movement. The finished piece is tactile and cozy, perfect for a living room corner or entry bench. Beginners will like the simple square knot pattern, while makers who love fiber work will enjoy adding beads or tassels. The final feel is airy and natural — soft cord against smooth glass.
Materials
- 5mm natural cotton macramé cord, 20 yards (for one 14–16" tall vase)
- Wooden beads, 12mm, 8 pieces
- Scissors (sharp fabric/scissors)
- Measuring tape or ruler
- Masking tape, 1 in roll
- Optional: fabric stiffener, 2 oz (for stiffer fringe)
Instructions
- Clean and dry your vase. Measure the circumference; divide by 2.5 to get cord lengths. For a 30" circumference, cut 12 cords × 5 ft each.
- Tape a top anchor line across the vase lip using masking tape to hold cords while knotting.
- Fold each cord in half and attach with a lark’s head knot across the top anchor.
- Work three rows of square knots (about 1.5 in tall per row) to create a consistent pattern.
- Add wooden beads by threading cords before you tie a finishing knot; secure with a tight overhand knot.
- Trim fringe to desired length and comb out fibers. For crisper fringe, spray fabric stiffener, wait 30 minutes, then air-dry 2 hours.
How to Display or Gift It
- Place dried pampas or wheat for a true boho look.
- Tie a kraft tag with twine and tuck inside for gifting.
- Store leftover cord in a sealed craft organizer to keep it tangle-free.
- Display on a rattan tray or with a small woven basket beside it to complete the set.
- Chalk Paint Matte Japandi Vase
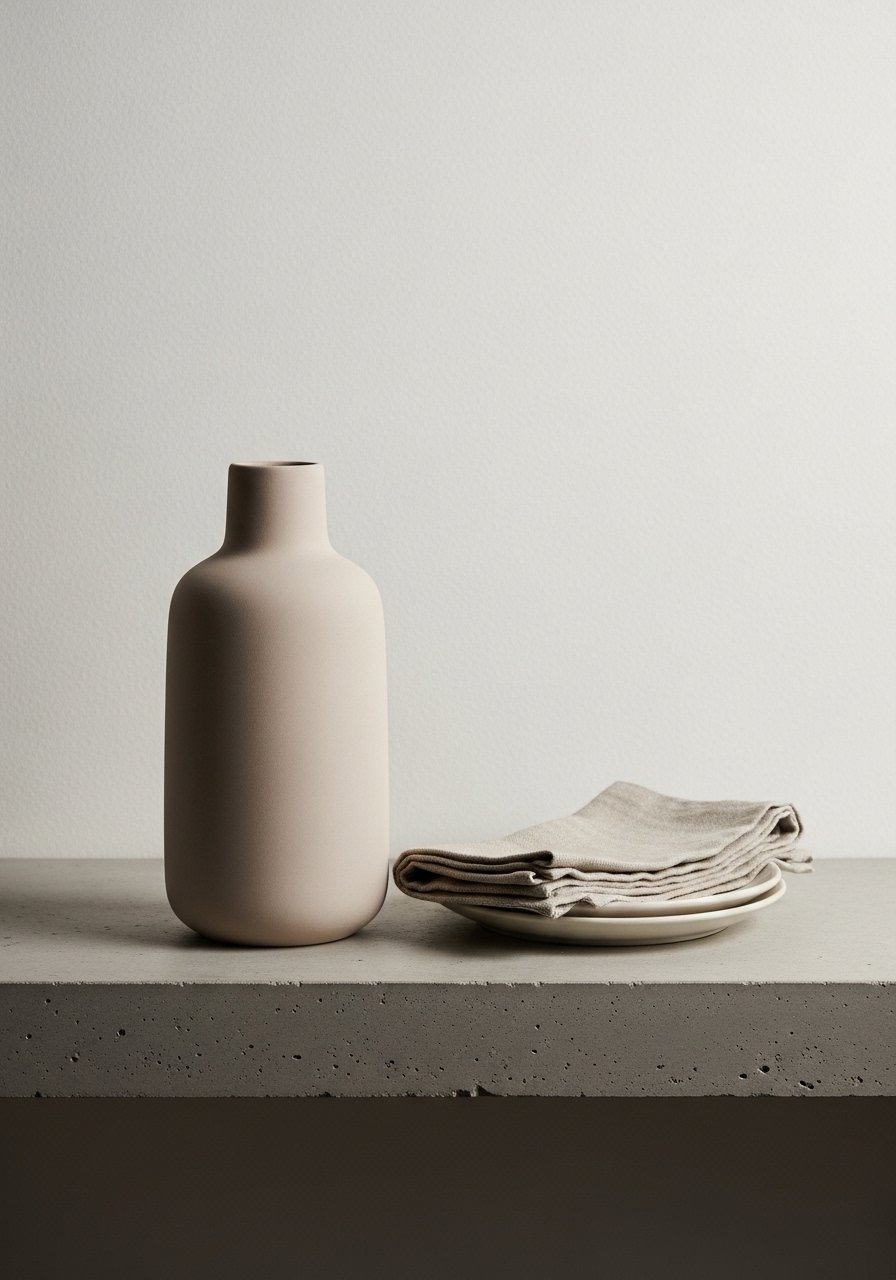
This Japandi-inspired matte finish is calm and sculptural. Chalk paint gives a textured, organics-first surface that pairs perfectly with minimalist decor. You’ll get a satiny matte finish that feels warm to the touch.
Materials
- Tall ceramic or glass vase (14–18" tall)
- Chalk paint (neutral tone), 8 oz
- Fine grit sandpaper (220)
- Flat foam brush, 1 in
- Painter’s tape, 1 in
- Soft lint-free cloth
Instructions
- Sand glossy surfaces lightly until dull. Wipe clean.
- Mask off any rim or area you want left raw with painter’s tape.
- Stir chalk paint gently and apply first thin coat with a foam brush. Let dry 30–45 minutes.
- Apply a second coat for full, even coverage. Aim for 2 coats total.
- Lightly buff with a lint-free cloth between coats for smoothness.
- After last coat, cure for 24 hours before handling heavily.
How to Display or Gift It
- Fill with single-stem branches for a minimal look.
- Wrap in kraft paper and tie with twine for gifting.
- Keep in a low-traffic area until fully cured to avoid scuffs.
- Use a small wooden easel to prop a coordinating label if giving as a housewarming gift — a simple display product like a small wooden easel works nicely.
- Coastal Rope-Wrapped Tall Vase

The rope-wrap brings a coastal, tactile look. Natural jute creates a warm finish that’s great for beachy or farmhouse spaces. This project is beginner-friendly and forgiving — uneven wraps hide in texture.
Materials
- Glass vase, 12–16" tall
- Natural jute rope, 5mm, 30 ft
- Hot glue sticks (clear), 30
- Hot glue gun
- Scissors
- Ruler
Instructions
- Dry-fit the rope beginning at the base to estimate length; mark every 10 in with a pencil.
- Heat glue gun. Apply a bead of hot glue at the base and press rope firmly.
- Continue wrapping upward, applying glue in 6–8 in sections to avoid burns and strings.
- When you reach the rim, tuck the end under the last wrap and secure with a dab of glue.
- Trim any stray fibers and press down for a seamless seam.
- Let cool 5 minutes before handling.
How to Display or Gift It
- Add dried lavender or bleached pampas for an airy coastal bouquet.
- Keep small craft storage boxes for leftover rope to reuse later.
- Gift paired with a sachet of dried lavender in a kraft box.
- Painted Geometric Tape-Resist Vase (modern)
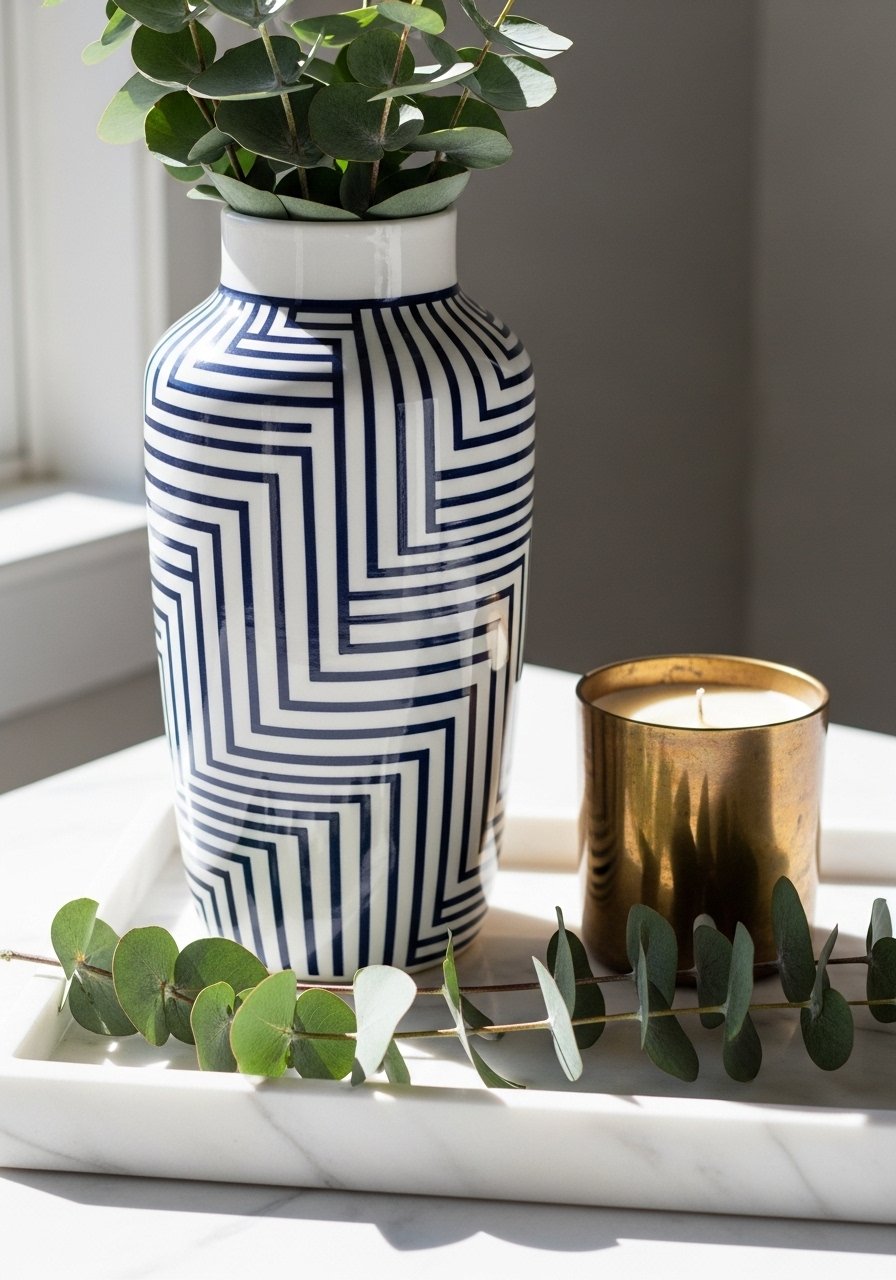
Crisp geometric stripes create a modern focal point. Painter’s tape ensures straight lines and clean edges — perfect for contemporary or mid-century rooms. The paint layers dry fast so you can finish in an afternoon.
Materials
- Tall ceramic vase, white, 14–16"
- Acrylic craft paint, navy and white, 2 oz each
- Painter’s tape, 0.5–1 in
- Flat foam brush, 1 in
- Sandpaper (220 grit)
- Damp cloth
Instructions
- Sand and wipe vase to remove dust.
- Plan your stripe layout with pencil marks. Apply painter’s tape carefully, pressing down edges.
- Apply one thin coat of acrylic paint with a foam brush. Dry 20–30 minutes.
- Apply a second coat if necessary for full opacity. Let dry 1 hour.
- Carefully remove tape at a 45-degree angle for crisp edges.
- Cure 24 hours before filling.
How to Display or Gift It
- Pair with brass accents or a geometric tray.
- For gifting, nest in kraft tissue inside a tube mailing box.
- Use washi tape to wrap a gift card to tuck into the vase neck.
- Ombre Dip-Dye Tall Glass Vase
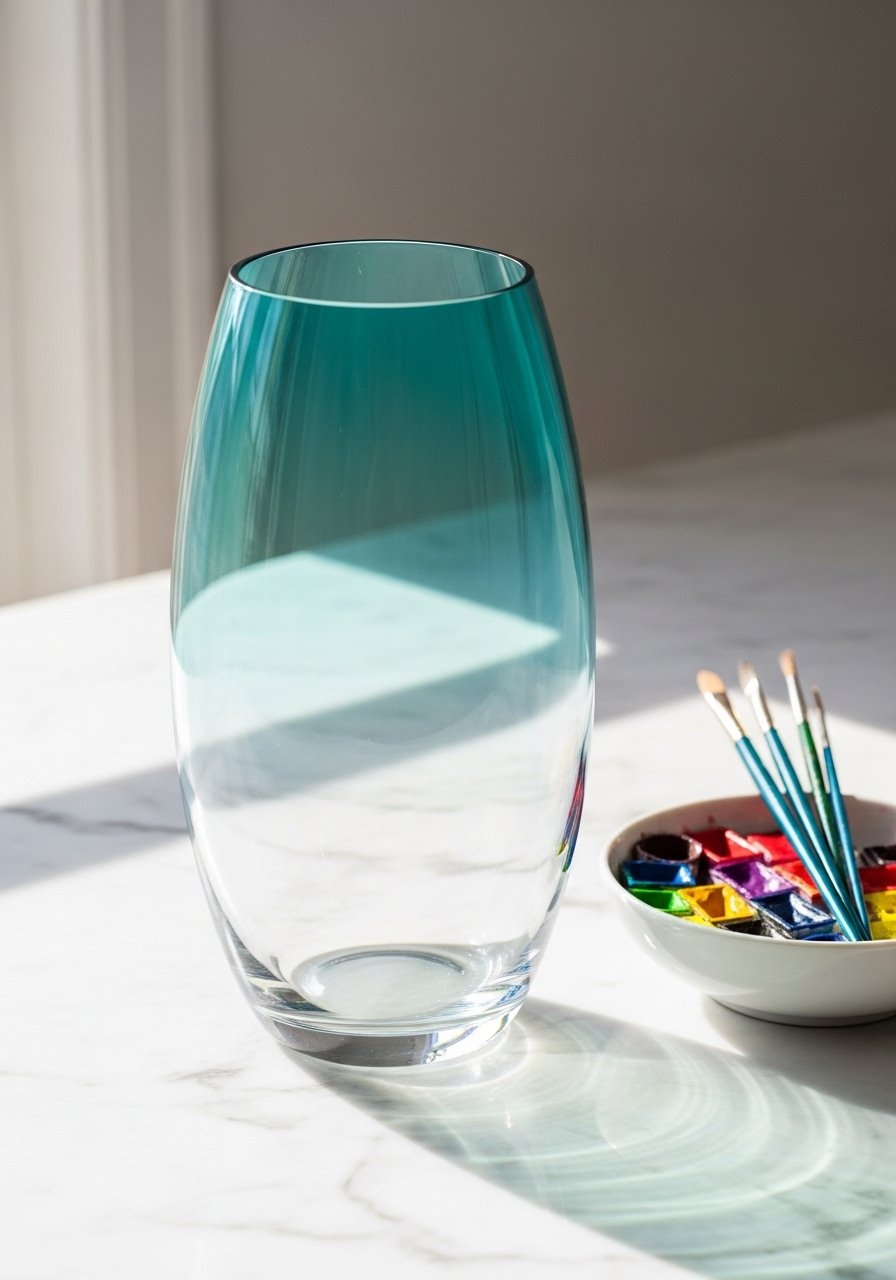
Dip-dye creates a watercolor ombré for coastal or modern spaces. Control dip time to vary saturation. This method works on glass and glazed ceramics and gives a handcrafted look even beginners can get right.
Materials
- Clear glass vase, 12–16"
- Alcohol ink set (teal/blue shades)
- Isopropyl alcohol, 50 ml
- Nitrile gloves
- Small syringe or dropper
- Paper towels
Instructions
- Clean vase with alcohol to remove oils.
- Dilute alcohol ink on a disposable palette. Test saturation on scrap glass.
- Using a dropper, apply ink near the bottom and let soak upward a little at a time.
- Rotate vase slowly to encourage even flow. For deeper color, repeat drops every 3–5 minutes.
- Let dry 2–3 hours; final cure 24 hours.
- Seal with a clear acrylic sealer for indoor use, following product cure times.
How to Display or Gift It
- Fill with fresh or faux stems that pick up color tones.
- Wrap the base in tissue and place in a tube for safe gifting.
- Store inks in a small craft organizer drawer to avoid spills.
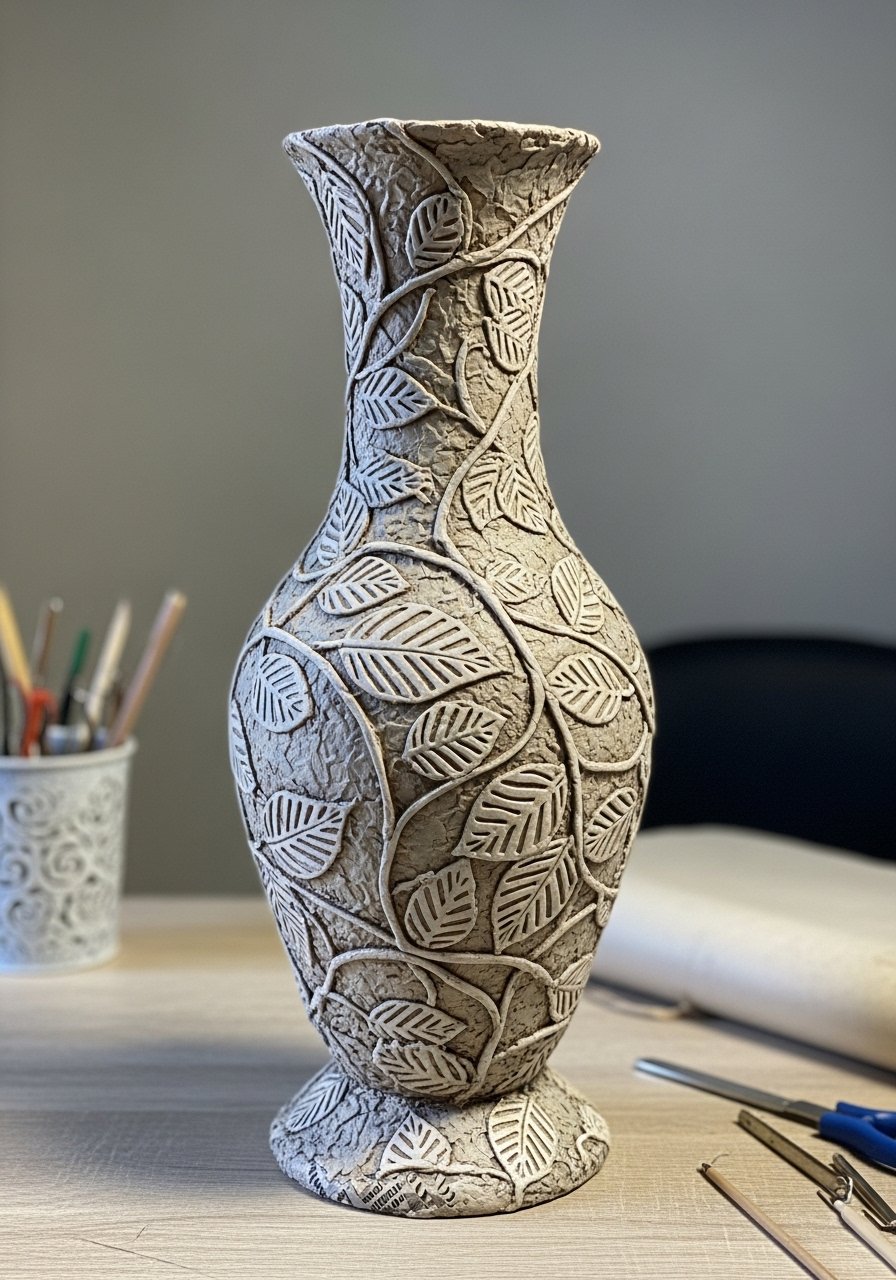
- Clay Coil Textured Tall Vase (air-dry)
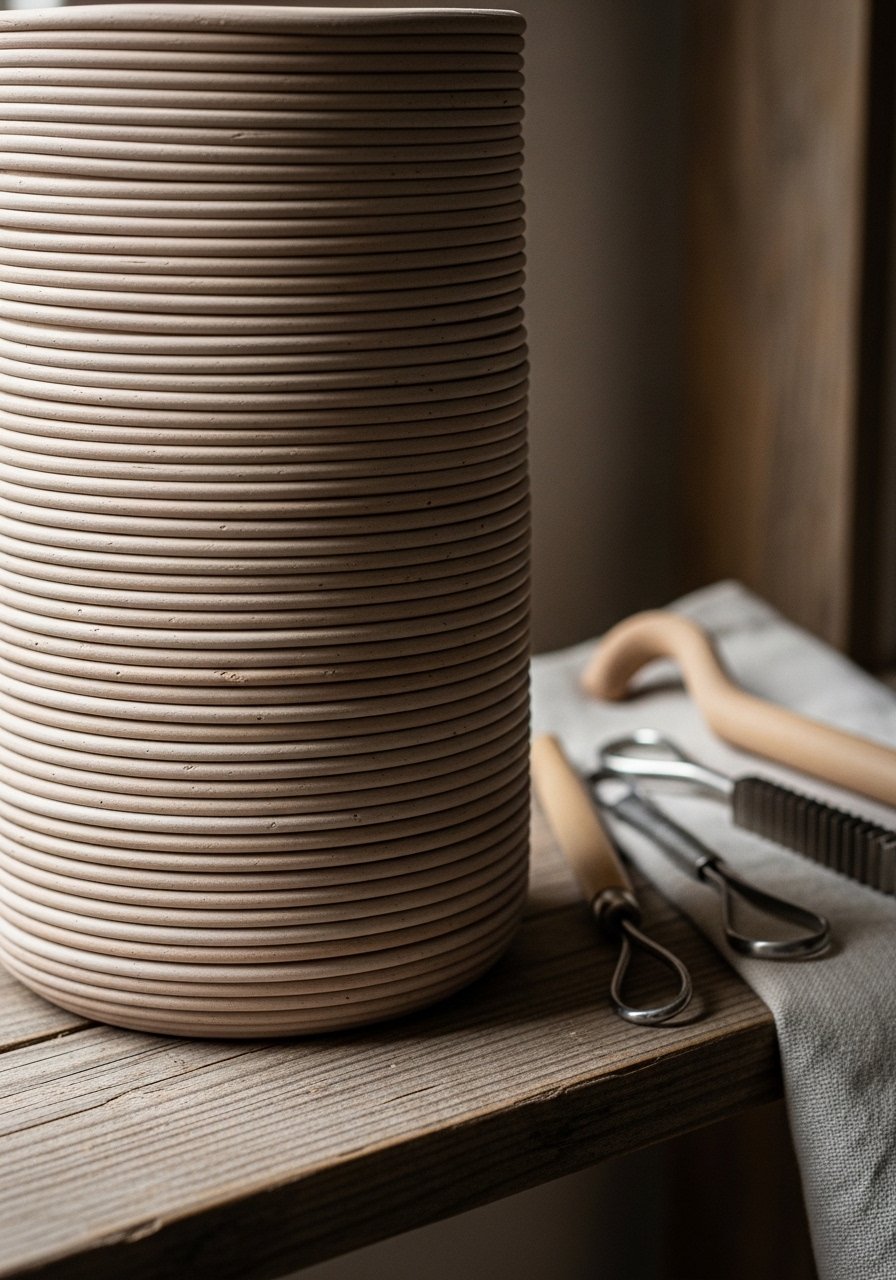
Add sculptural texture with air-dry clay coils. The tactile ribbing feels handcrafted and suits cottagecore or eclectic spaces. This is a hands-on project that works well for makers who like clay but don’t have a kiln.
Materials
- Tall glass vase, 12–16"
- Air-dry modeling clay, 16 oz
- Water spray bottle
- Clay sculpting tool set
- Sandpaper (320 grit)
- Acrylic matte sealer, 4 oz
Instructions
- Wipe vase clean and plan coil spacing.
- Roll 8–10 coils, each ⅜ in diameter and long enough to wrap the vase vertically.
- Score vase surface lightly and dampen with water spray.
- Press coils onto vase, blending seams with sculpting tool and adding texture.
- Let air-dry 24–48 hours, depending on thickness.
- Sand lightly to smooth rough spots and seal with 2 thin coats of matte sealer; dry 1 hour between coats.
How to Display or Gift It
- Add a single blooming branch to highlight the texture.
- Wrap in tissue and label with clay curing notes if gifting.
- Store small clay scraps in a sealable container for repairs.
- Metallic Leaf Accent Tall Vase
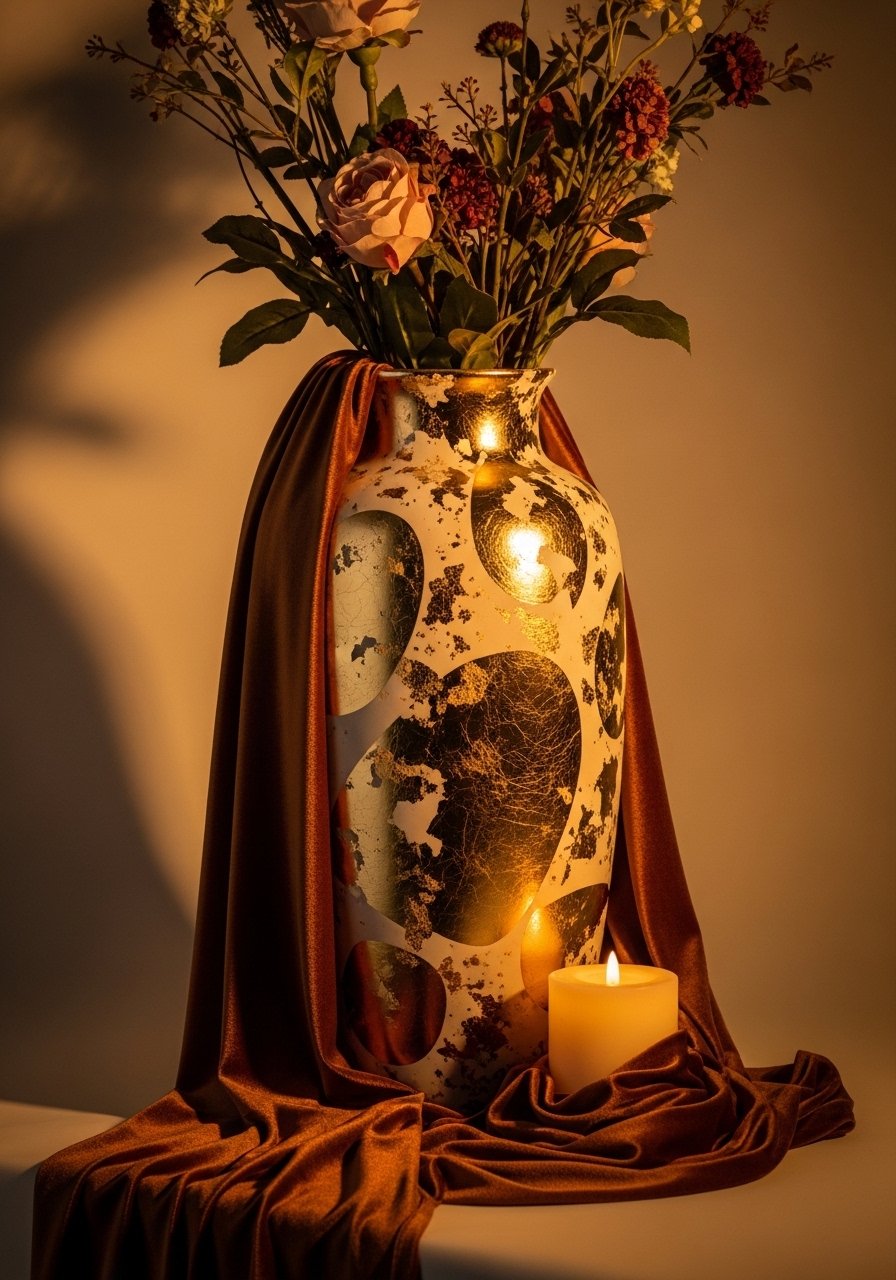
Gold leaf adds subtle glamour. Use an adhesive size and apply delicate sheets for a refined finish. This suits glam, modern farmhouse, or layered decor palettes.
Materials
- Ceramic vase, matte finish, 14–16"
- Gold leaf sheets (imitation), 10 sheets
- Adhesive size, 2 oz
- Soft fan brush
- Cotton gloves
Instructions
- Wipe vase clean. Apply adhesive size in your chosen pattern and let reach tacky (15–20 minutes).
- Gently lay gold leaf sheets over tacky adhesive using a soft fan brush.
- Press and burnish lightly; remove excess with brush.
- After 30 minutes, apply a clear sealer to protect leaf; dry 2 hours.
- If leaf flakes, touch up with small areas of discarded sheets and re-seal.
- Cure fully 24 hours before heavy handling.
How to Display or Gift It
- Pair with jewel-toned blooms for contrast.
- Place on a velvet runner for a luxe entryway vignette.
- Package in a rigid box with tissue for gifting.
- Graphic Tape Resist — tall vase decorating ideas for bold rooms
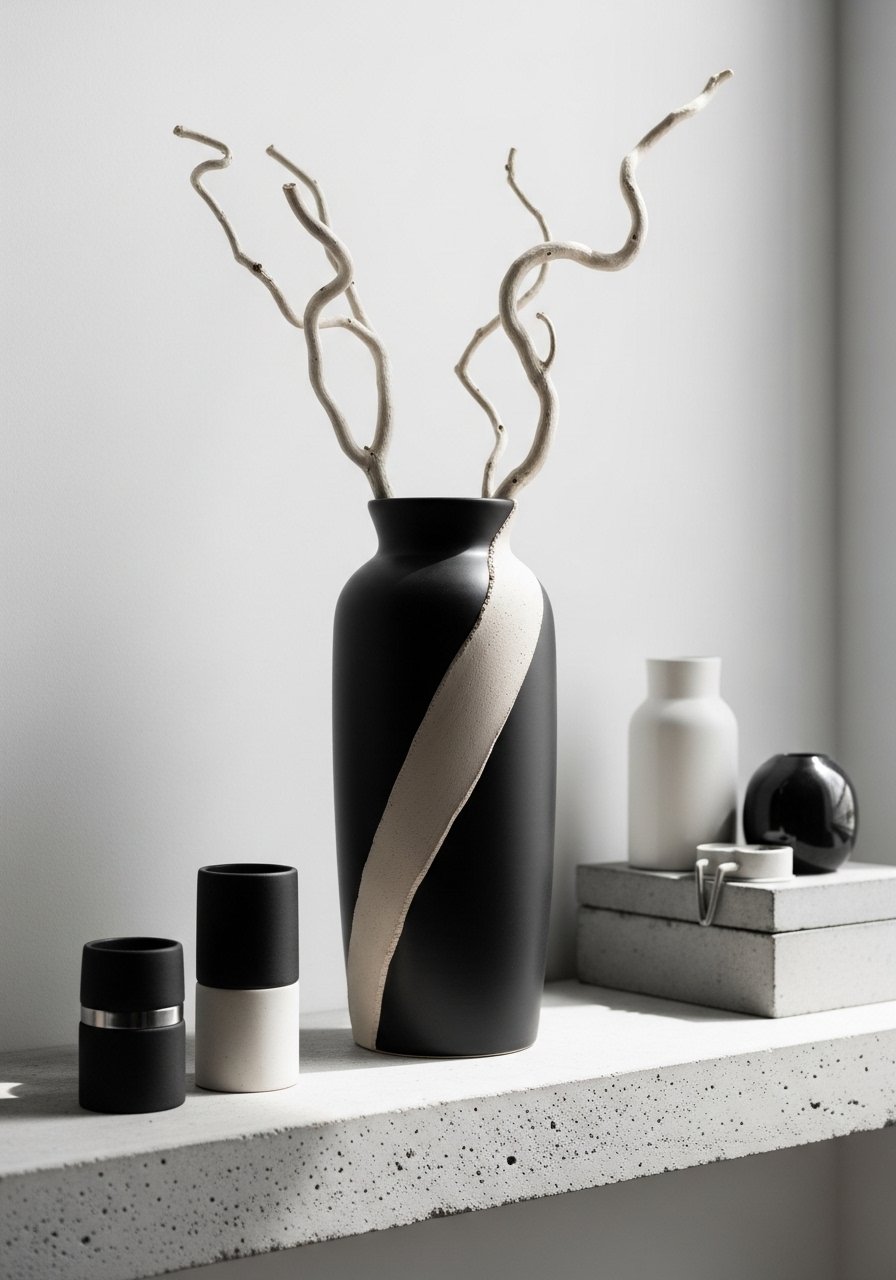
This bold tape-resist technique makes a clean, graphic statement. It’s perfect if you want a sculptural, modern accent. Painter’s tape creates hard edges; acrylics fill negative spaces for a sculptural feel.
Materials
- Tall ceramic vase, neutral, 14–18"
- Painter’s tape, 0.5–1 in
- Chalk pencil for layout
- Acrylic paint (matte black), 2 oz
- Foam roller, 2 in
- Clear matte varnish, 4 oz
Instructions
- Sketch diagonal layout with chalk pencil.
- Apply painter’s tape along lines, pressing edges firm.
- Roll thin coats of acrylic; wait 20–30 minutes between coats.
- Apply a second coat for even coverage.
- Remove tape at a 45-degree angle after final coat is tacky but not wet.
- Seal with matte varnish; cure 24 hours.
How to Display or Gift It
- Pair with sculptural branches in contrasting colors.
- Display on a concrete or black iron tray for drama.
- Gift with a note about colorfast care and placing on a cloth coaster.
- Driftwood Collage Tall Vase
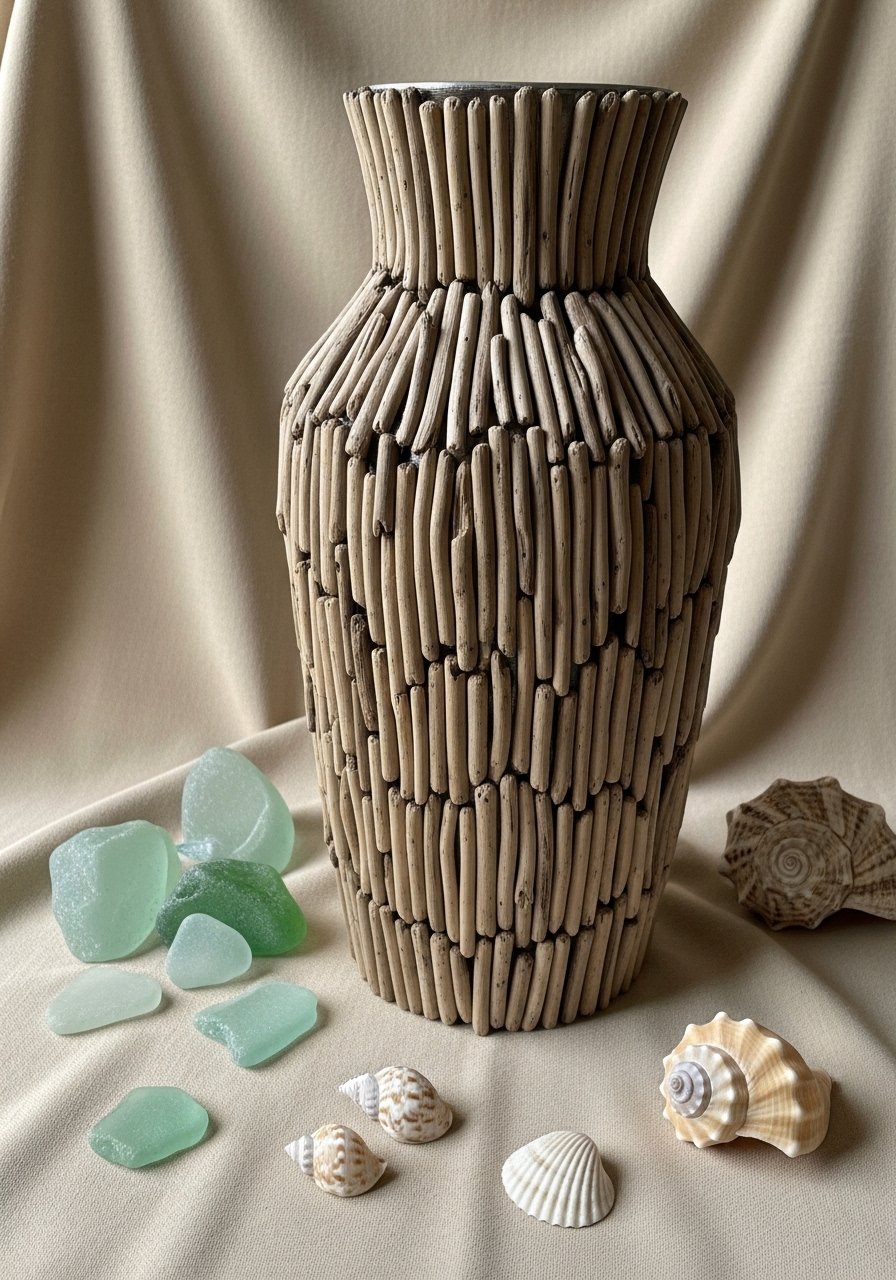
A driftwood collage brings a coastal, textural emphasis. The vagaries of natural wood give each piece unique character. This is great for making a statement with reclaimed materials.
Materials
- Glass vase, 12–16"
- Small driftwood pieces, assorted, 20–30 pieces
- E6000 adhesive
- Sandpaper
- Hot glue gun (optional) for quick tack
- Clear outdoor-grade sealer, 4 oz
Instructions
- Clean vase and sand any glossy areas for better adhesion.
- Lay out driftwood pieces around the vase before gluing for composition.
- Adhere pieces with E6000, holding each 10–15 seconds until tacky.
- For extra bonding while E6000 cures, spot glue with hot glue.
- Let cure 24–48 hours (E6000 full cure 72 hours).
- Seal with outdoor-grade sealer if vase may encounter humidity.
How to Display or Gift It
- Fill with faux blooms for a coastal arrangement that won’t rot.
- Wrap in kraft and nest in shredded paper for gifting.
- Use a sturdy shipping tube if mailing to protect the wood pieces.
- Washi Tape Patterned Tall Vase (kid-friendly)
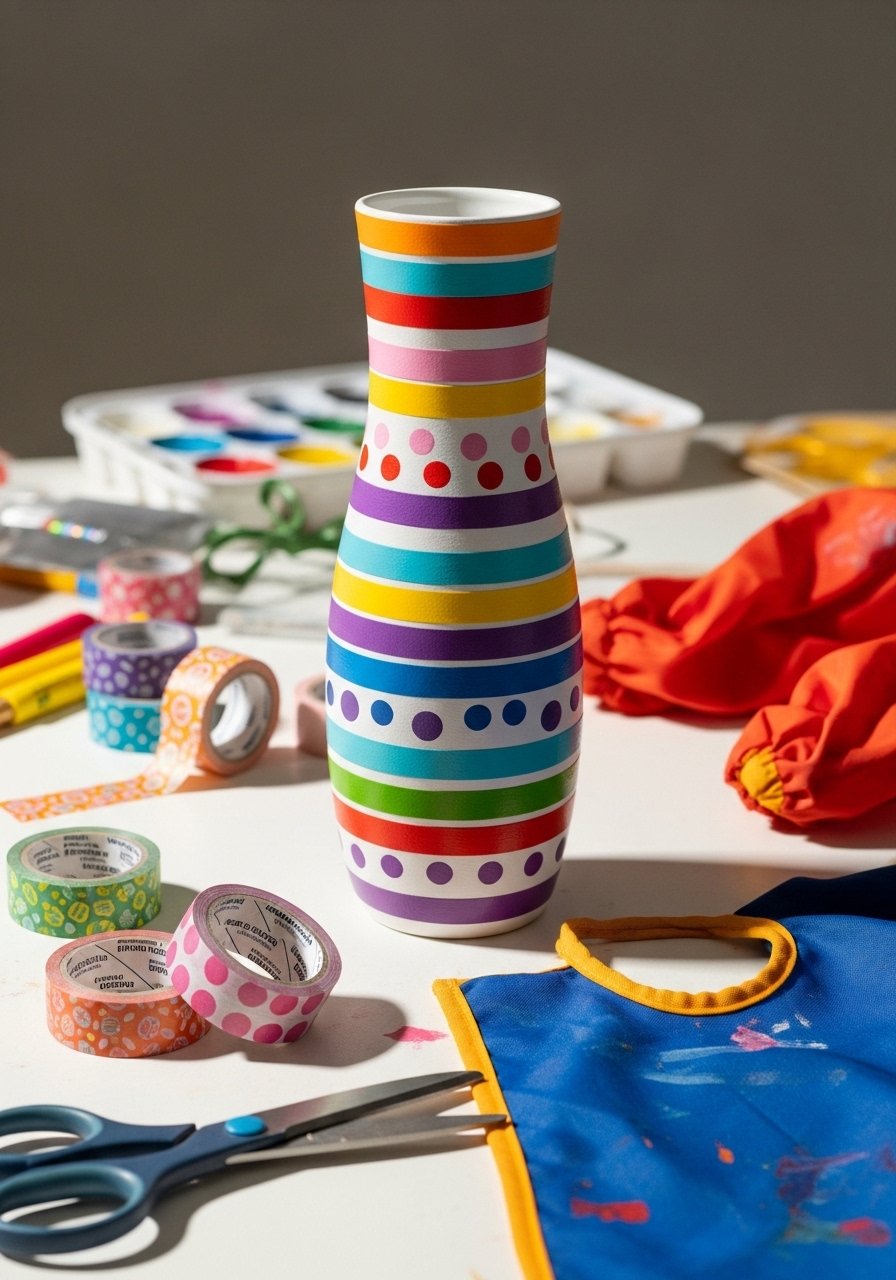
Quick, removable, and kid-friendly — washi tape creates colorful patterns with no mess. Perfect for seasonal decor and party vases.
Materials
- Glass or ceramic vase, 12–16"
- Assorted washi tape rolls, 5–8 rolls
- Scissors
- Ruler
- Clear craft sealer (optional), 4 oz
Instructions
- Plan pattern with pencil marks for spacing.
- Apply washi tape strips smoothly, trimming ends with scissors.
- Mix patterns or create diagonal, vertical, or chevron designs.
- For durability, seal with a spray or brush-on clear craft sealer and dry 1 hour.
- Avoid hot water when cleaning; wipe with damp cloth.
How to Display or Gift It
- Use seasonal washi for holiday vases.
- Gift with a mini set of matching washi rolls inside.
- Store leftover rolls in a small craft organizer drawer.
- Resin-Filled Floral Inlay Tall Vase (advanced)
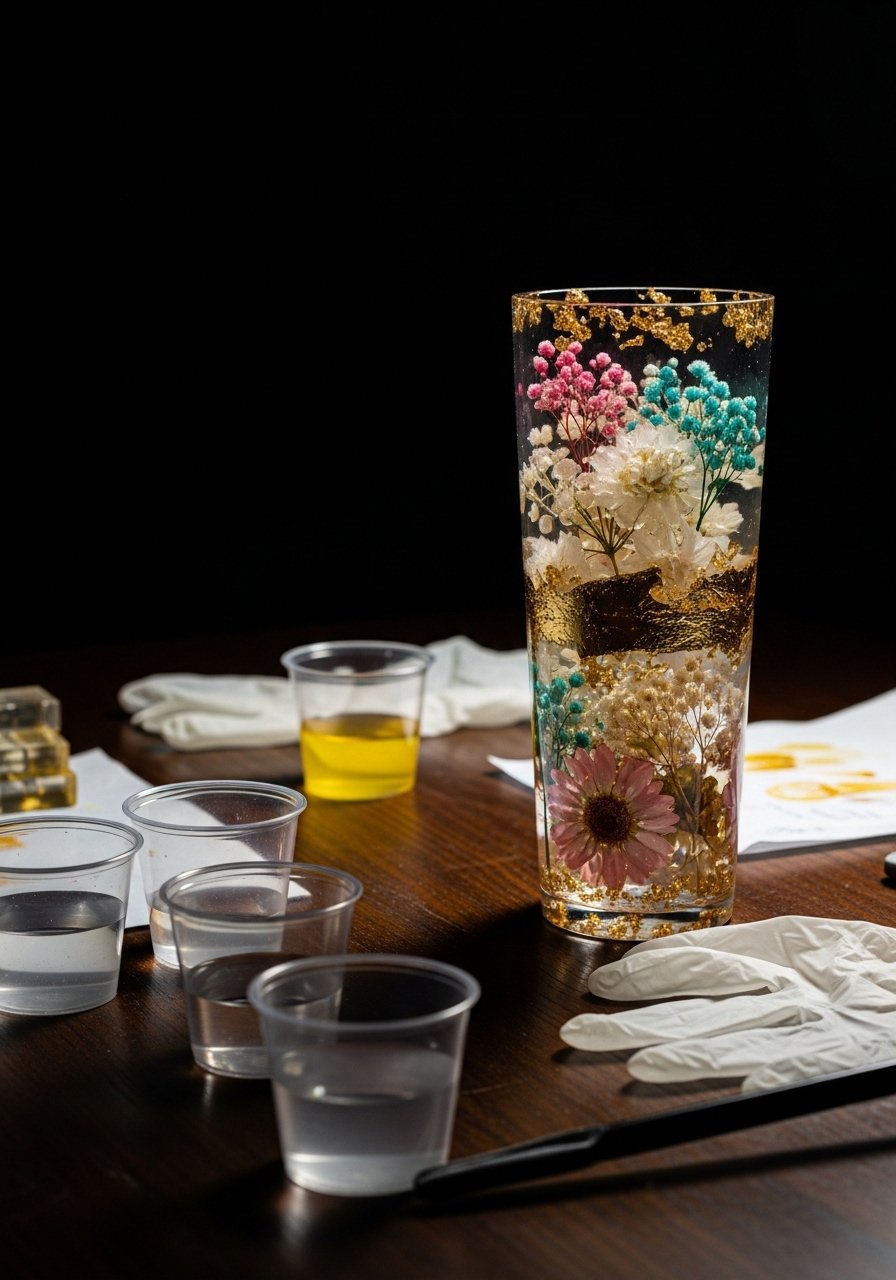
A resin inlay preserves blooms in glossy layers for a high-end look. This requires careful measuring and curing but produces museum-like results.
Materials
- Ceramic vase, 14–18"
- Two-part epoxy resin kit (clear), 16 oz
- Preserved or pressed flowers
- Mixing cups and stir sticks
- Nitrile gloves
- Heat gun (for bubble removal)
Instructions
- Clean vase and plan inlay area with pencil.
- Mix resin per manufacturer instructions; typical ratio 1:1. Stir slowly for 3 minutes to minimize bubbles.
- Pour a thin base layer and place flowers carefully. Let set 12 hours.
- Add second layer to fully encapsulate blooms. Pop bubbles with a 5-second pass of a heat gun.
- Let cure 24–48 hours, full hardness 72 hours.
- Sand edges lightly if needed and buff for a glossy finish.
How to Display or Gift It
- Display alone as a sculptural piece or with single stems.
- Pack carefully in a rigid box for shipping.
- Store leftover resin in sealed containers per manufacturer instructions.
- Jute Netting Vase Cover (coastal boho)
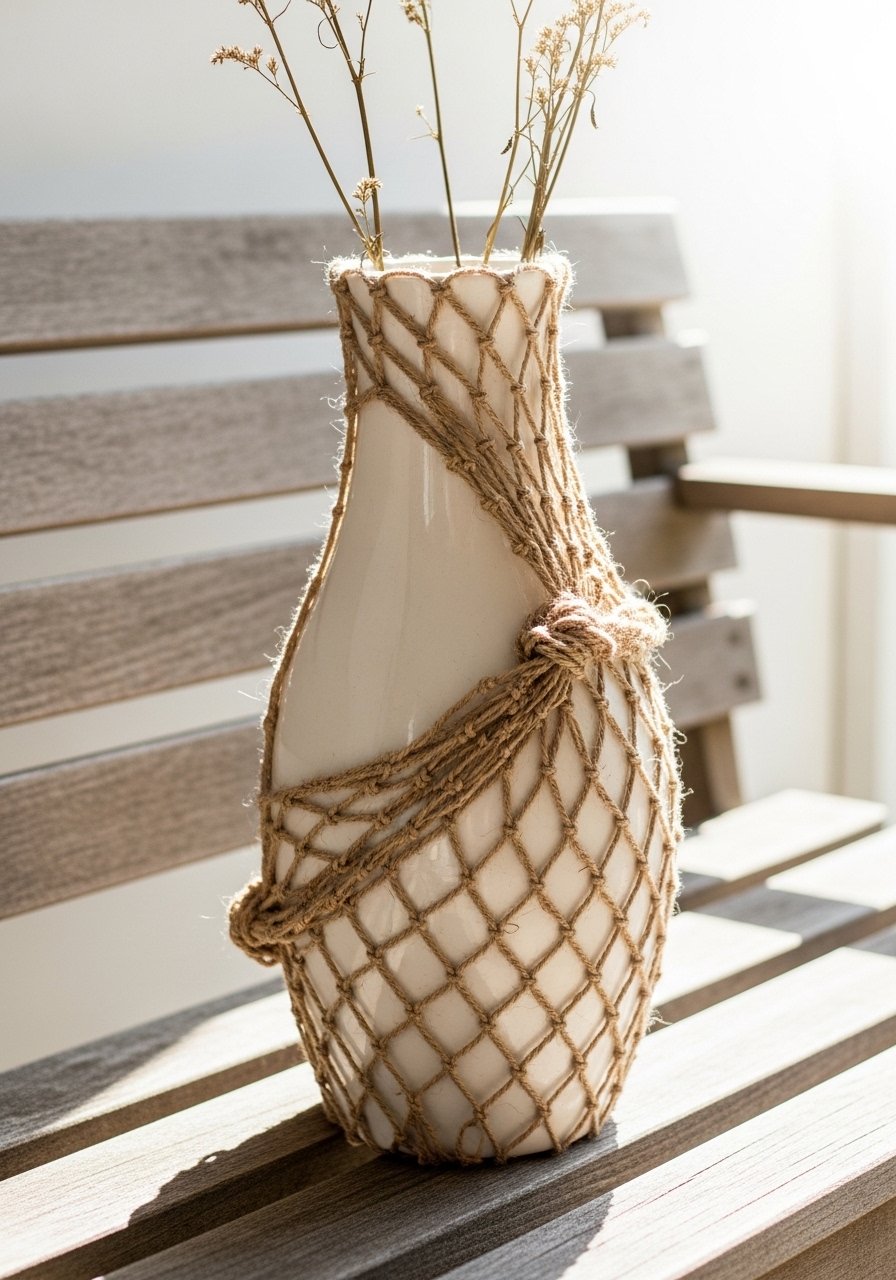
Netting is airy and nautical — the cover slips on and can be removed. It’s great for renters or seasonal decor.
Materials
- Tall vase, 12–16"
- Jute twine, 1 mm, 50 ft
- Wooden beads (optional), 10
- Measuring tape
- Scissors
Instructions
- Measure vase height and circumference. Cut 12 cords at 2× the height.
- Knot a base loop and attach cords evenly.
- Tie square knots in rows every 1–1.5 in to create open netting.
- Add beads for weight and detail near the bottom.
- Slip the netting over the vase and adjust for even drape.
- Trim ends and lightly singe tips with a lighter for a rustic finish (optional, do safely).
How to Display or Gift It
- Use with florals or shell-filled bases.
- Store flat folded in a fabric pouch.
- Pair with a small gift tag and place in a mesh-lined gift box.
- Minimalist Matte Spray-Painted Vase
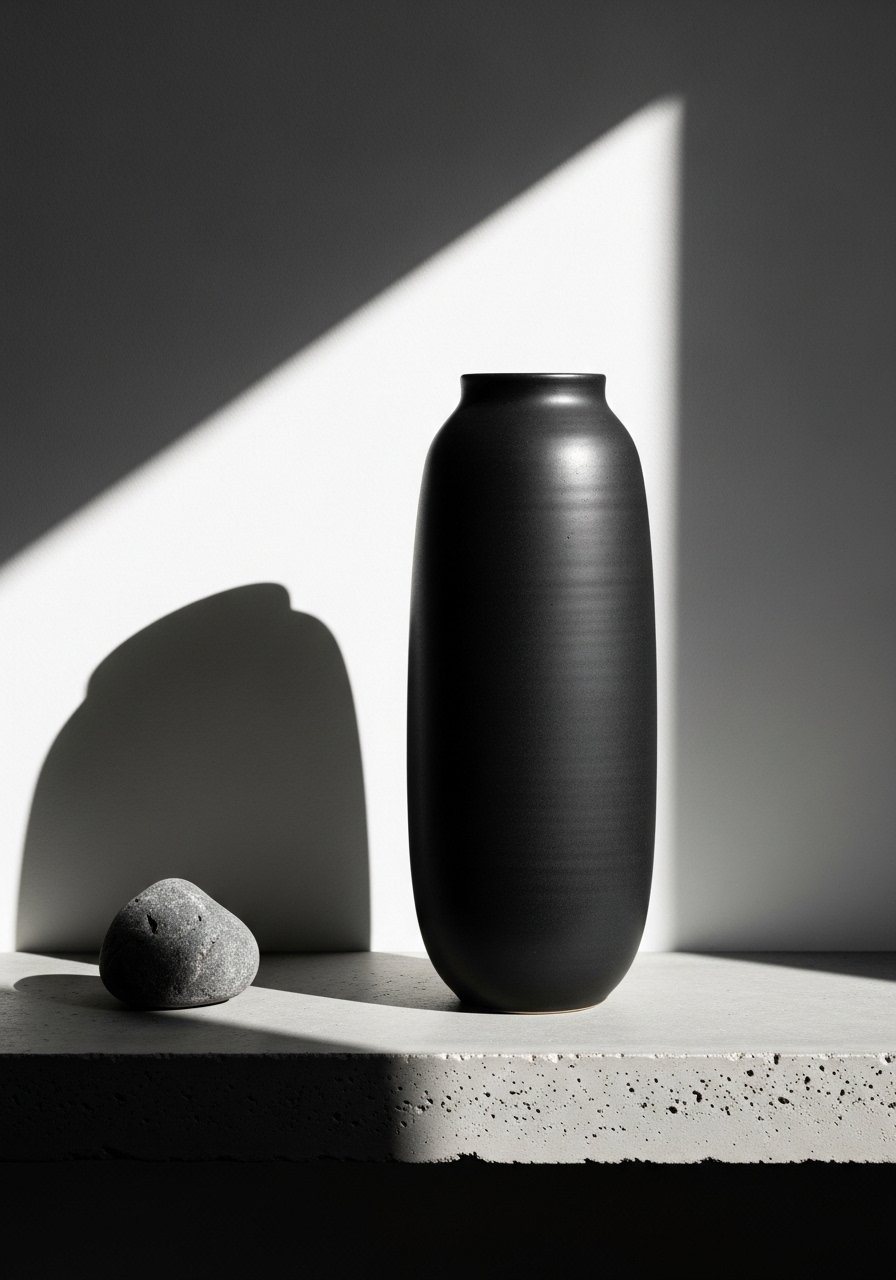
Spray paint gives rapid, even coverage and a velvety matte finish. Great for modern or monochrome interiors.
Materials
- Tall vase (ceramic or glass), 14–18"
- Matte spray paint (color of choice), 1 can
- Drop cloth
- Painter’s tape
- Rubber gloves
Instructions
- Work in a ventilated area and lay down a drop cloth.
- Mask any areas you don’t want painted.
- Shake spray can 1–2 minutes. Apply light coats from 10–12 in away.
- Wait 10 minutes between coats. Aim for 2–3 thin coats.
- Cure 24 hours before handling.
- If uneven, sand lightly with 320 grit and recoat.
How to Display or Gift It
- Pair with monochrome stems or sculptural dried branches.
- Wrap base with kraft and twine for gifting.
- Keep spare spray cans in a ventilated storage cabinet.
- Embroidered Fabric Sleeve Tall Vase
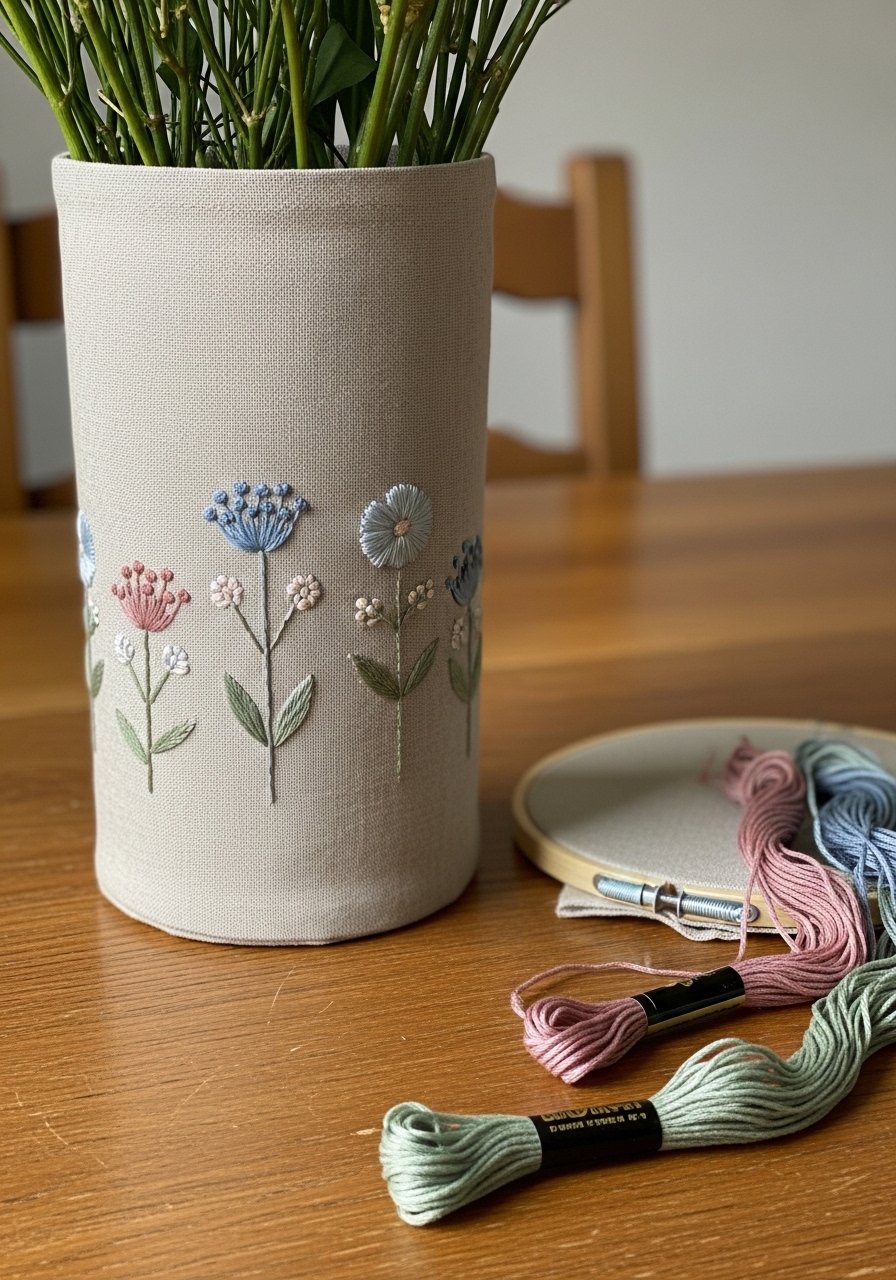
A removable embroidered sleeve adds a textile look without permanent alteration. It’s cozy and perfect for cottagecore or vintage decor.
Materials
- Tall vase, 12–16"
- Linen fabric, 0.5 yd
- Embroidery floss, assorted colors
- Embroidery hoop, 6–8 in
- Needle, scissors
- Velcro strip, 1 in × 3 in
Instructions
- Measure vase circumference and height. Cut fabric +1 in seam allowance.
- Hem top and bottom edges with a small fold.
- Stretch in hoop and embroider motifs using backstitch or satin stitch.
- Sew side seam and attach Velcro to close as a sleeve.
- Slip onto vase and adjust embroidery placement.
- For washing, remove sleeve and hand wash cold; air dry.
How to Display or Gift It
- Swap sleeves seasonally for different looks.
- Gift with a hoop and thread for a crafty friend.
- Store extra sleeves flat in a fabric organizer.
- Rustic Painted Stencil — tall vase decorating ideas for farmhouse charm
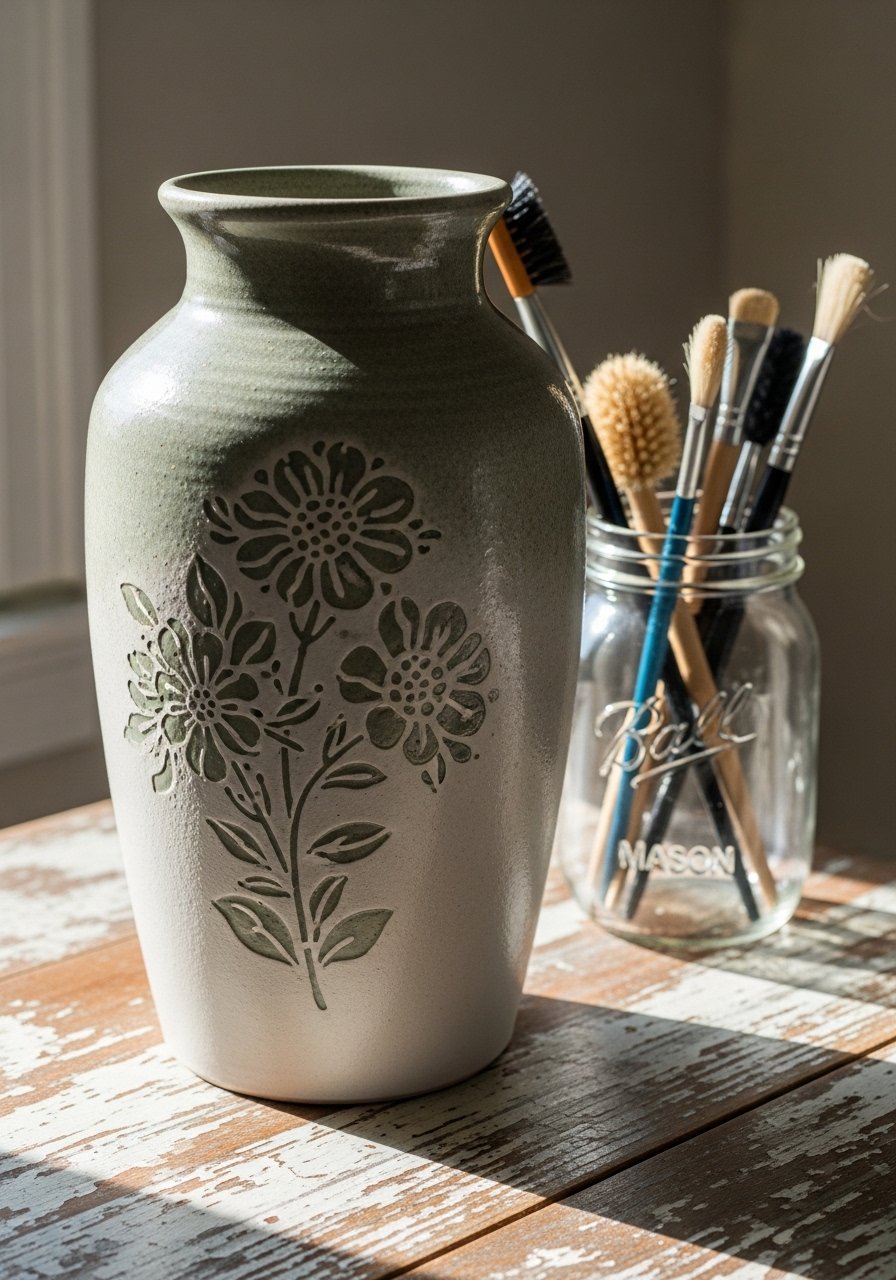
Stenciling gives farmhouse or cottage charm. Use a stencil brush or sponge for crisp edges. This is great for coordinated sets or seasonal themes.
Materials
- Stoneware vase, 14–16"
- Premade stencil (floral or geometric)
- Chalk paint or acrylic (sage), 2 oz
- Stencil brush or small foam pouncers
- Painter’s tape
- Soft cloth
Instructions
- Secure stencil with painter’s tape and dab paint with stencil brush using light pressure.
- Build color with 2–3 light layers, drying 15–20 minutes between layers.
- Remove stencil carefully when paint is tacky.
- Touch up imperfections with a small detail brush.
- Seal with matte varnish; dry 1 hour.
- Cure 24 hours before display.
How to Display or Gift It
- Pair with a mason jar of matching painted votives.
- Wrap in kraft and tie with twine for gifting.
- Store stencils flat in a stencil folder for reuse.
- Beaded Macramé Collar Tall Vase

This collar slips over the neck for a decorative, romantic look. The beads add weight and detail, giving boho elegance.
Materials
- Glass vase, 12–16"
- Macramé cord 3mm, 15 yards
- Wooden beads, assorted sizes (8–12)
- Scissors
- Measuring tape
Instructions
- Measure the neck circumference; cut 12 cords double height plus 6 in.
- Create lark’s head knots and three rows of square knots.
- Thread beads into cords where desired.
- Finish with tassels and trim evenly.
- Slip over vase and adjust bead placement.
- For storage, hang the collar to avoid tangles.
How to Display or Gift It
- Fill with fresh lilies or eucalyptus for an elegant display.
- Gift in a narrow box lined with tissue paper.
- Store in a hanging organizer to preserve shape.
- Cork Mosaic Tall Vase
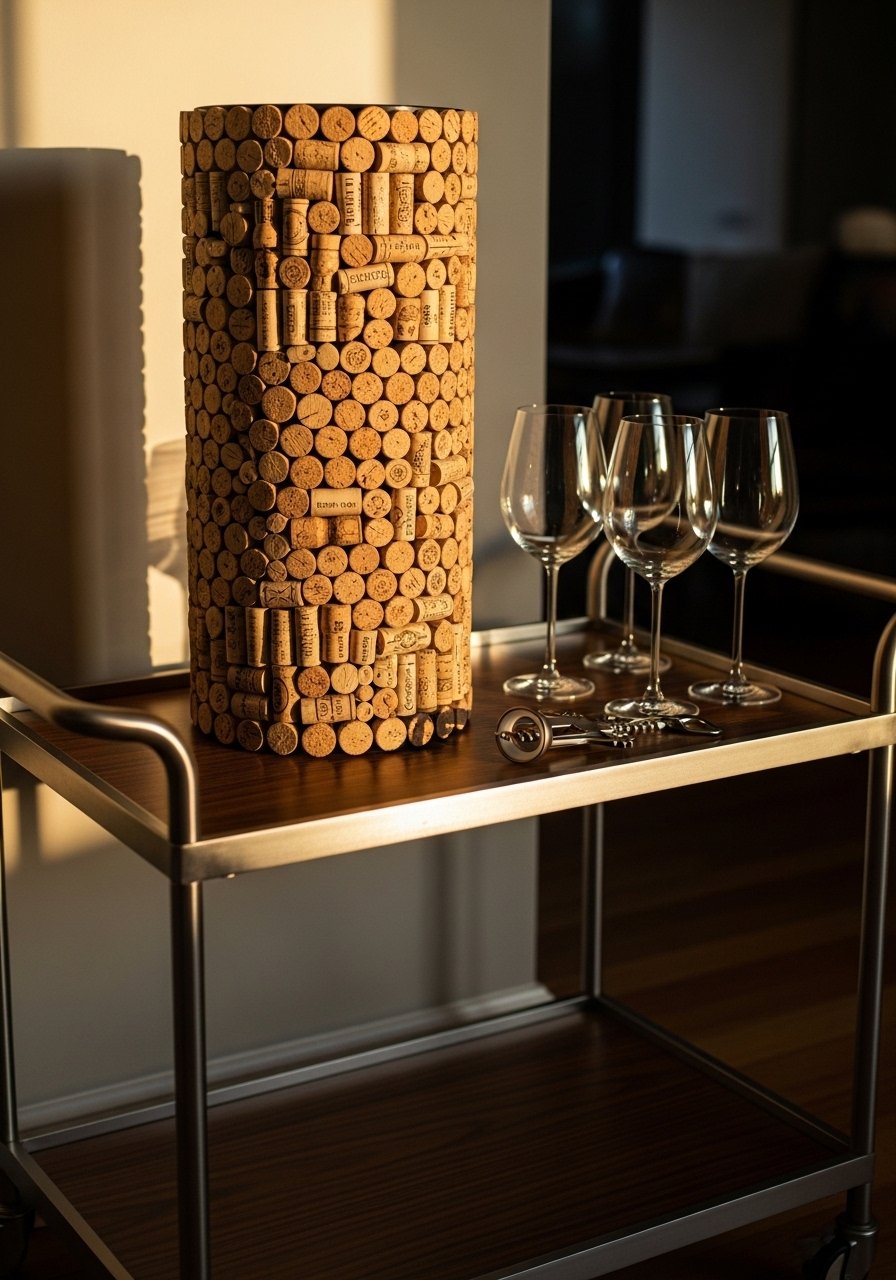
Cork adds warmth and is perfect for an eclectic bar area. Slicing corks gives a tile-like mosaic.
Materials
- Tall vase, 12–16"
- Wine corks, 30–40 (or pre-sliced cork tiles)
- Sharp craft knife
- Self-healing cutting mat
- E6000 adhesive or strong craft glue
- Clear sealer, 4 oz
Instructions
- Slice corks into ¼ in rounds using a craft knife on a self-healing mat.
- Arrange pattern on vase dry to plan placement.
- Adhere cork slices with E6000; press each for 10 seconds.
- Let cure 24–48 hours.
- Seal with clear sealer; dry 2 hours between coats.
- Trim any overhangs for flush edges.
How to Display or Gift It
- Use as a wine-themed hostess gift with a small corkscrew tucked inside.
- Pair with a cheese board on a serving cart.
- Store extra cork rounds in a small craft jar for future repairs.
- Felt Flower Appliqué Tall Vase
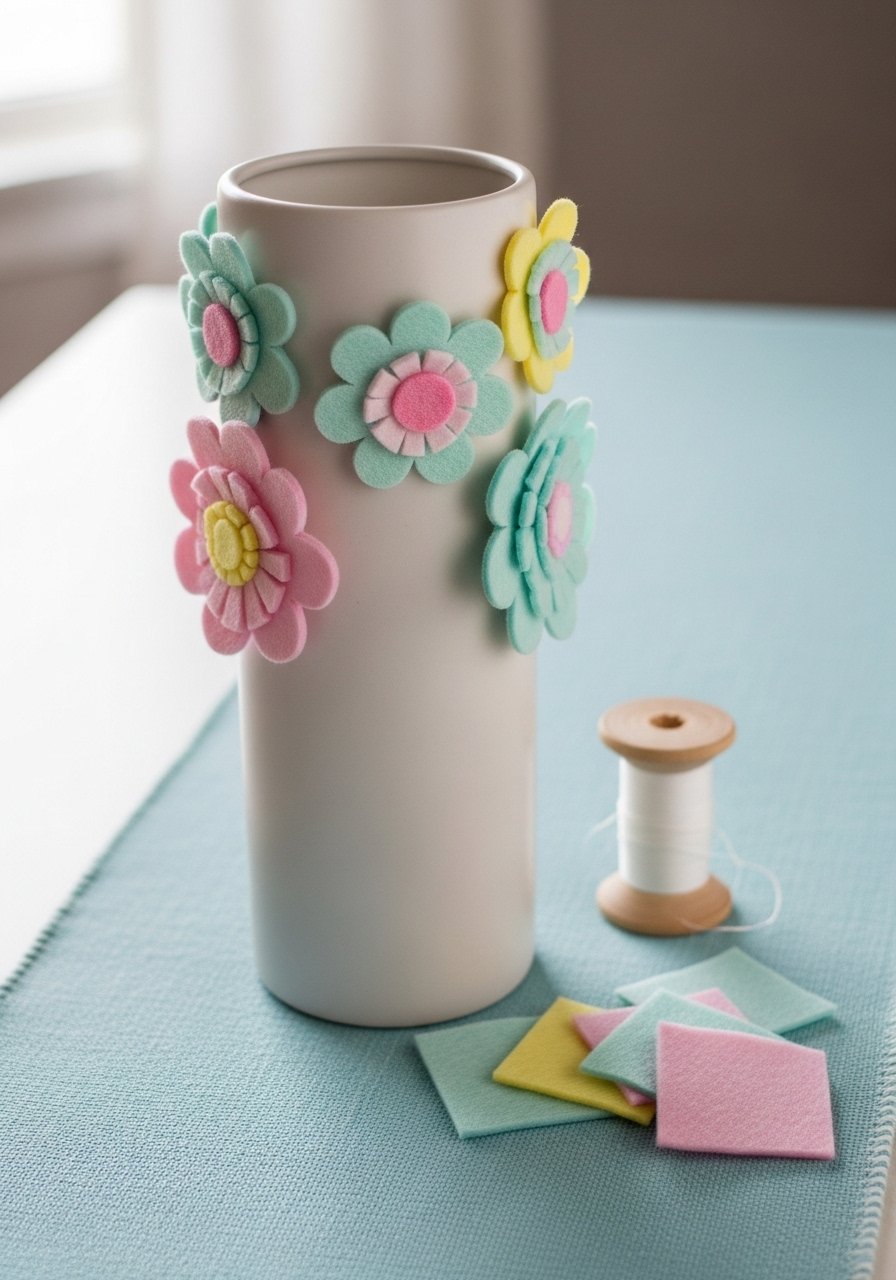
Felt flowers add color and a soft, playful look — great for nurseries or spring decor.
Materials
- Tall vase, 12–16"
- Felt sheets (assorted colors), 5–6 sheets
- Fabric glue or hot glue sticks
- Scissors (detail)
- Small round dowel (for curling petals)
Instructions
- Cut flower shapes from felt (3–5 petal layers per flower).
- Curl petals over dowel for dimension.
- Stack layers and glue centers; add a small felt circle to back for stability.
- Attach flowers to vase in a clustered band with fabric glue.
- Let set 1–2 hours. Hot glue sets within minutes.
- For longevity, place vase where it won’t get wet.
How to Display or Gift It
- Tuck a handwritten note beneath flowers for gifting.
- Store extra flowers flat in a shallow craft box.
- Pair with coordinating felt coasters as a gift set.
- Patterned Decoupage Tall Vase (vintage paper)
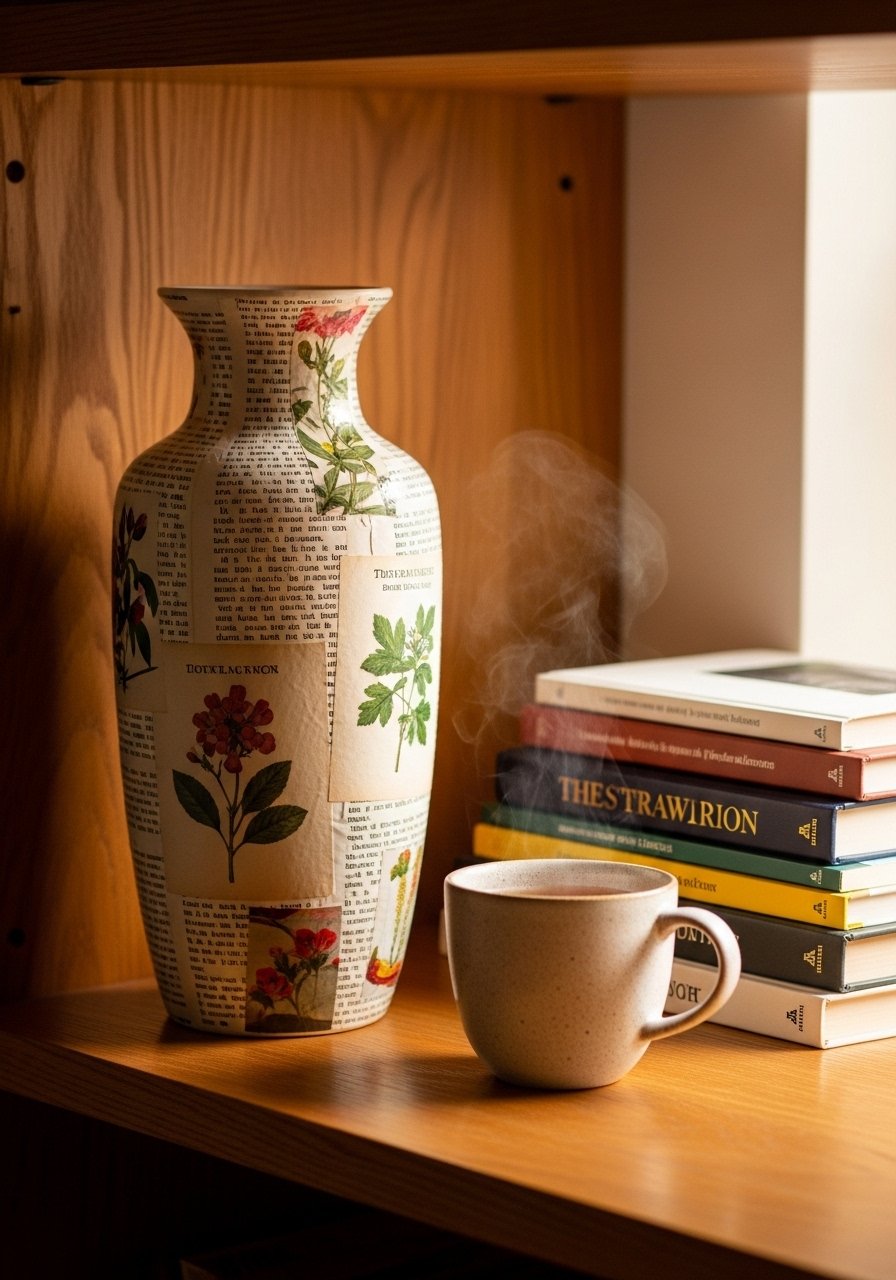
Decoupage lets you apply paper patterns for a vintage or cottagecore feel. Use thin tissue or book pages for smooth application.
Materials
- Tall vase, 12–16"
- Decoupage medium (Mod Podge matte), 8 oz
- Thin decorative paper or book pages
- Foam brush
- Sanding sponge
Instructions
- Cut paper pieces to size and plan layout.
- Brush a thin layer of decoupage medium on vase before applying paper.
- Smooth paper with foam brush, working from center outward to remove bubbles.
- Seal with 2–3 thin coats, letting dry 20–30 minutes between coats.
- Sand lightly after final coat for a soft finish.
- Cure 24 hours before filling.
How to Display or Gift It
- Add a silk ribbon and tuck in a dried sprig for gifting.
- Package in a shallow box with tissue and a care card.
- Store extra paper in a document organizer.
- Embossed Paper Mache Tall Vase
Paper mache can create embossed textures and lightweight sculptural pieces. It’s budget-friendly and customizable.
Materials
- Tall recycled base (plastic bottle inside), 12–16"
- Paper mache pulp or strips, 1 lb
- Stencil for embossing
- Small trowel or spatula
- Acrylic paint for finish, 2 oz
Instructions
- Create a stable base with a bottle and tape.
- Apply paper mache pulp in layers until ¼ in thick.
- Press stencil into slightly damp surface to emboss patterns.
- Let dry 24–48 hours depending on thickness.
- Sand lightly and paint with acrylics; dry 1 hour between coats.
- Seal with a water-resistant varnish before adding fresh water or stems.
How to Display or Gift It
- Display in a craft room as a bold sculptural piece.
- Gift wrapped with a tag explaining it’s lightweight for easy shipping.
- Store in a dry box to avoid moisture.
- Minimal Cork Base with Tall Stem (modern)
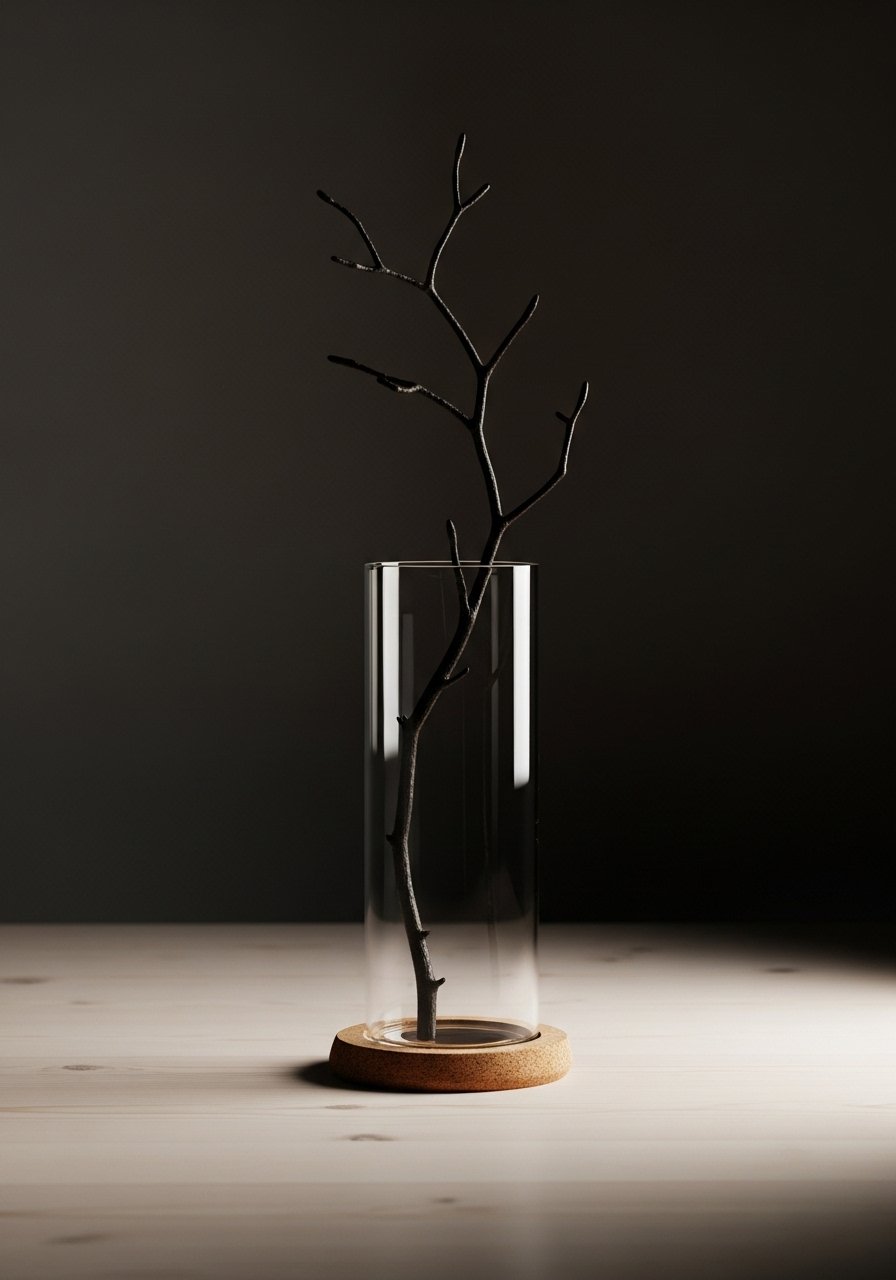
A cork base adds warmth and protects surfaces while keeping the vase minimal and modern. This is a quick DIY with big visual impact.
Materials
- Tall glass cylinder insert, 10–12"
- Cork sheet, 1/4 in, 6 in square
- Craft knife
- Contact adhesive or strong craft glue
- Sanding block
Instructions
- Cut cork into a ring to fit base circumference.
- Glue cork ring to vase base with contact adhesive; press for 30 seconds.
- Trim edges and sand smooth.
- Let adhesive cure 24 hours.
- Optionally stain cork lightly with tea for an aged look.
- Clean edges and buff with soft cloth.
How to Display or Gift It
- Pair with sculptural branches or a single dramatic bloom.
- Package in a slender box with bubble wrap for gifting.
- Store cork scraps for future coasters.
- Pressed Fern Shadowbox Tall Vase (glass collage)
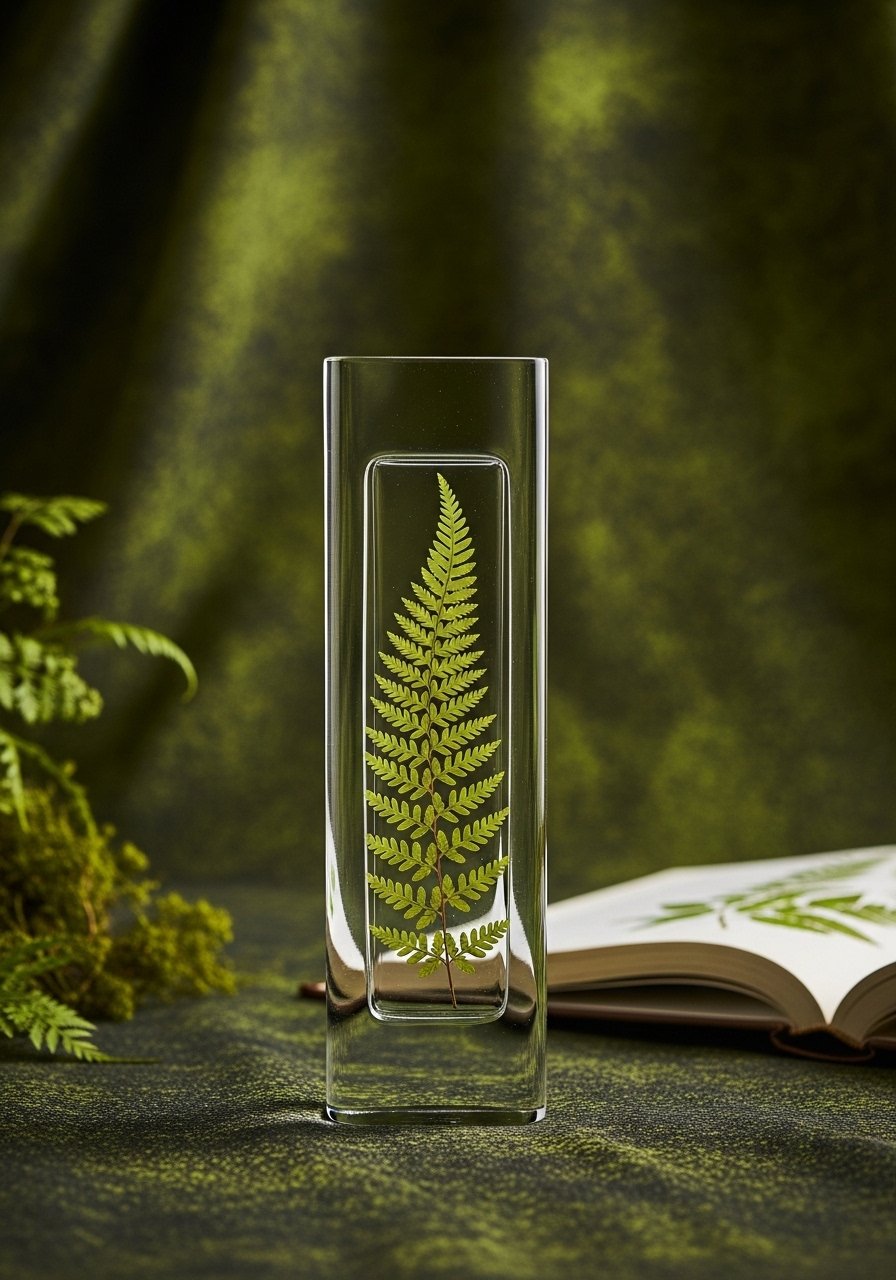
This pressed-fern inlay gives botanical, cottagecore charm like a living illustration. Encapsulating under glass keeps ferns crisp for years.
Materials
- Tall vase with flat panel or a tall rectangular glass vase, 12–16"
- Freshly pressed ferns (dried 7–10 days)
- Clear craft adhesive or thin epoxy, 4 oz
- Small tweezers
- Soft brush
Instructions
- Press ferns under heavy book for 7–10 days until fully dried.
- Clean inset panel area and apply a thin adhesive layer.
- Place ferns carefully with tweezers; press lightly with a soft brush.
- Apply a thin epoxy or craft sealer layer to encapsulate; cure per instructions (24–48 hours).
- Buff with cloth once cured.
- Avoid direct sunlight to reduce fading.
How to Display or Gift It
- Pair with a botanical print as a framed gift set.
- Store extra pressed ferns flat in an archival envelope.
- Use a small wooden easel to display the piece on a shelf.
Thanks for browsing these tall vase decorating ideas — I hope you found one (or five) that fits your style. From quick tape-resist patterns to hands-on macramé and resin inlays, there’s a project here for every skill level and aesthetic. Try pinning a few favorites to save the ones you want to revisit, and pass this list on to a crafty friend who likes giving handmade home gifts.
If you’ll be trying several of these, a quality hot glue gun with temperature control really speeds assembly and reduces stringing across projects. Which look are you trying first — boho fibers, painted minimalism, or something glossy with resin? Share your pick and tag a friend who’d love making it with you.


