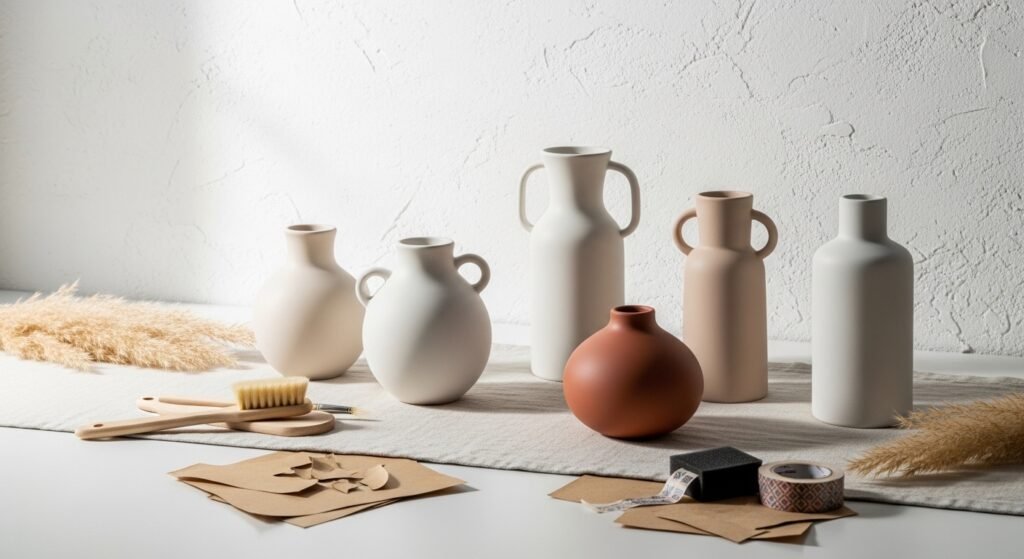
You know that moment when a plain vase sits on a shelf and the whole shelf suddenly feels unfinished? These simple, minimalist vase decorating ideas will help you refresh glass, ceramic, or thrifted finds in under an hour each. You’ll find projects that keep lines clean, palettes calm, and finishes refined—perfect for a Japandi shelf, cottagecore corner, or modern boho vignette.
This list includes painting, wrapping, stamping, and quick resin accents—so you can pick projects for five minutes or a full afternoon. I often start small shapes with my Cricut Joy cutting machine for crisp labels, and a low-temp hot glue gun keeps fabric wraps neat without drips. Each idea below has exact materials, realistic drying times, and display tips so you’ll avoid common mishaps like bubbling paint or loose seaming.
Grab a comfy seat, a cup of tea, and let’s make those vases feel intentional and calm with projects that are clean, elegant, and effortlessly chic.
- Matte Monochrome Dip-Painted Vase (minimalist vase decorating ideas)
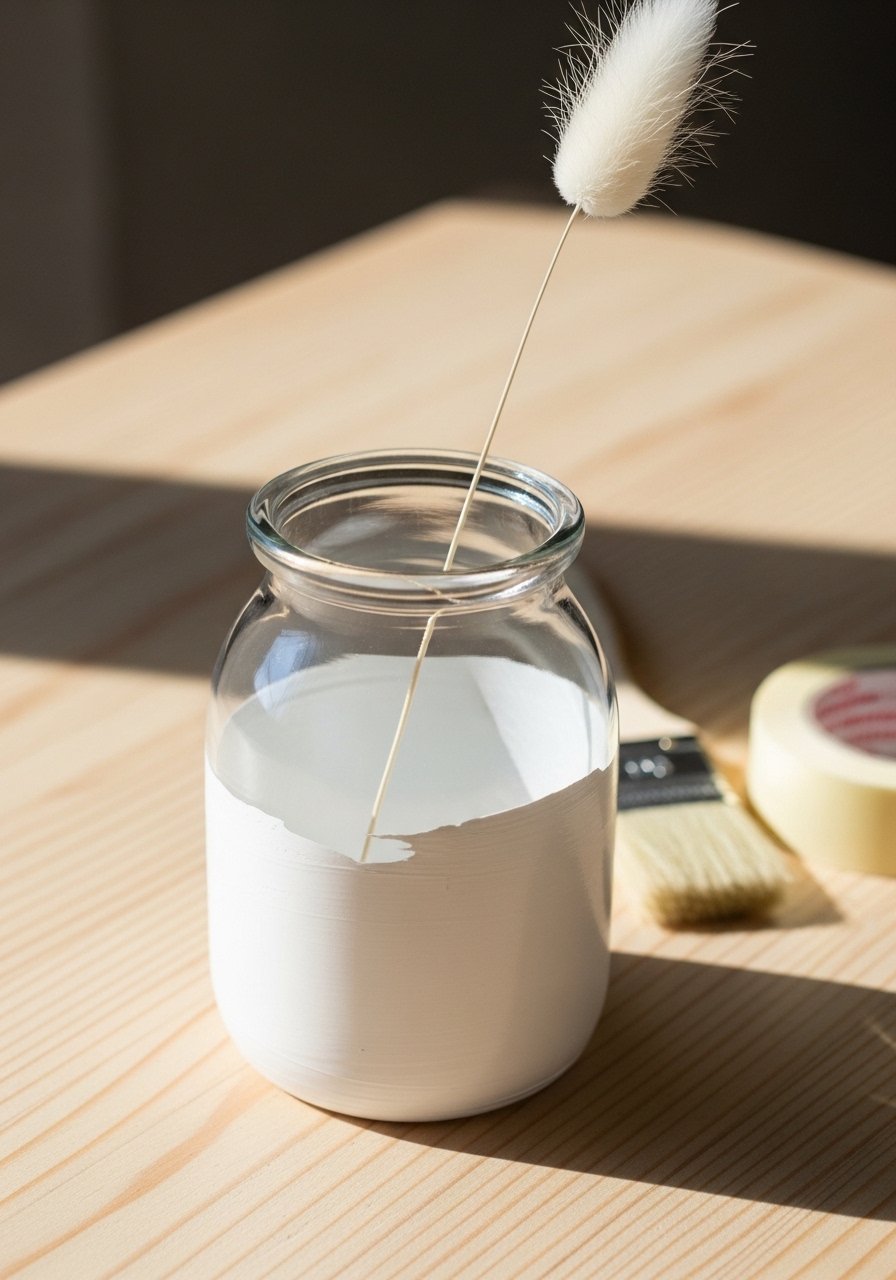
Why it works: The monochrome dip keeps things simple and sculptural. The matte finish is quiet and tactile, which suits bedrooms or coffee tables. Beginners love this for how forgiving the clean line is when you use painter’s tape. The painted band feels soft to the touch and adds subtle contrast.
Materials
- Plain glass or ceramic vase, 8–10 oz capacity
- Acrylic craft paint, matte white, 2 fl oz
- Painter’s tape, 1/2 in width
- Flat foam brush, 1 in
- Sandpaper, 220 grit
- Rubbing alcohol and lint-free cloth
Instructions
- Clean the vase with rubbing alcohol; let dry 10 minutes.
- Lightly sand glossy ceramic or glass with 220 grit until surface is slightly rough; wipe clean.
- Measure and mark the dip line with a pencil; wrap painter’s tape around the vase for a crisp edge.
- Stir paint, then apply first thin coat with a 1 in flat foam brush; wait 20–30 minutes.
- Apply a second thin coat for full opaque coverage; wait 30 minutes to touch dry.
- Remove tape slowly at a 45-degree angle once paint is dry to the touch for a clean reveal.
- Let fully cure 24 hours before filling with water or stems.
How to Display or Gift It
- Pair with a single stem of dried lagurus for a serene bedside accent.
- Tie a tiny loop of twine near the neck for a rustic touch.
- Gift by nesting in kraft tissue inside a small kraft box.
- Store extra painted vases upright in a craft organizer drawer while curing; a craft organizer tray keeps them safe.
- Subtle Washi Stripe Vase
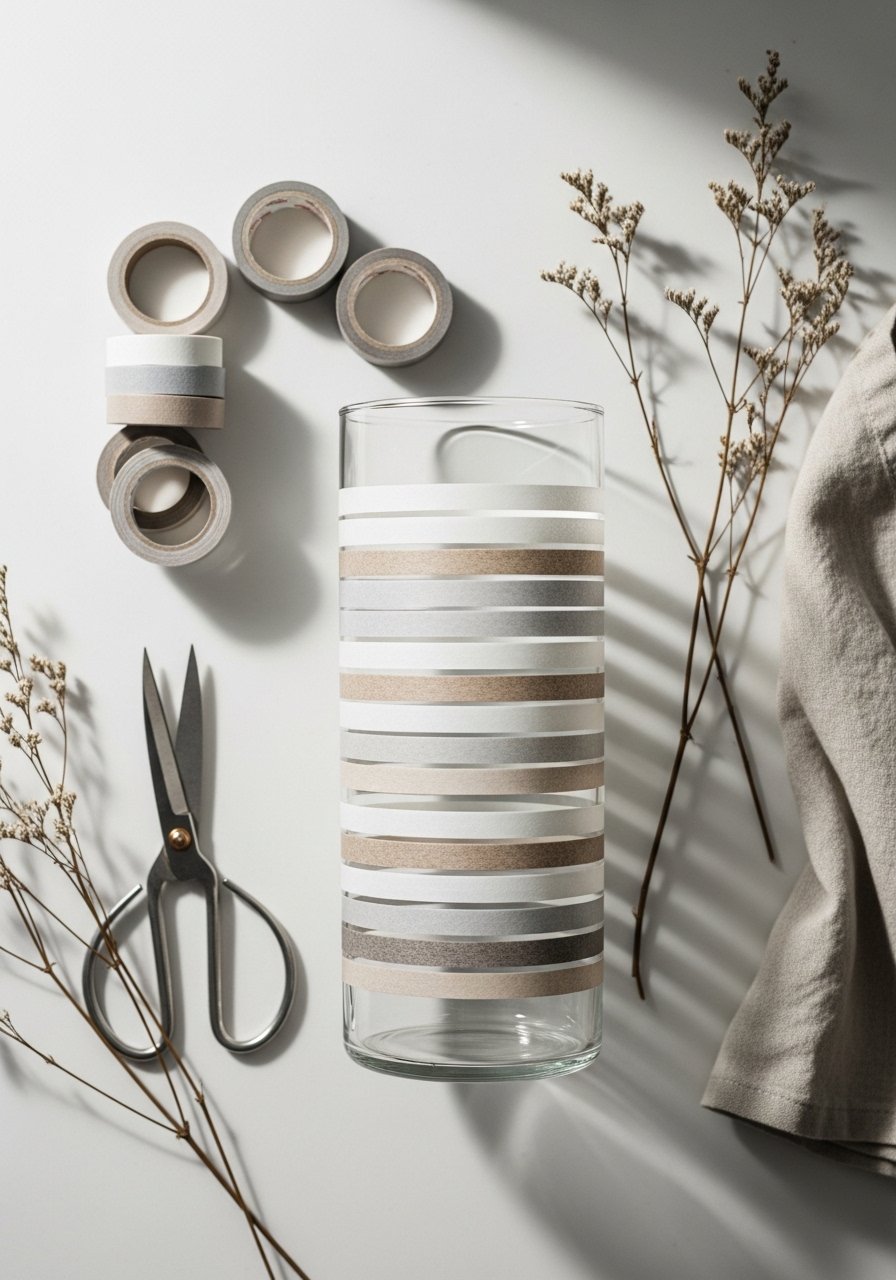
Why it works: Washi tape gives crisp, removable stripes—perfect for renters or seasonal tweaks. The paper finish adds soft matte texture and is easy to swap out.
Materials
- Tall glass cylinder vase, 10–12 in tall
- Assorted washi tape rolls (neutrals), each 10 mm–15 mm wide
- Scissors or detail craft knife
- Ruler and pencil
- Clear matte sealer spray (optional)
Instructions
- Wipe vase clean and plan stripe spacing with pencil marks every 1–2 in.
- Apply washi strips smooth and taut, trimming ends with scissors.
- For wrap-around seams, slightly overlap tape edges for no gaps.
- Optionally seal with 1 light coat of clear matte spray at 8–10 in distance; dry 15–20 minutes.
- Wait 1 hour before adding flowers to avoid shifting tape.
How to Display or Gift It
- Group two sizes of striped vases for a layered mantel look.
- Swap patterns seasonally—pine sprigs for winter, dried wheat for fall.
- Pack for gifting in a padded box with a ribbon.
- Store unused washi in a small roll organizer to prevent kinking.
- Twine-Wrapped Minimal Vessel
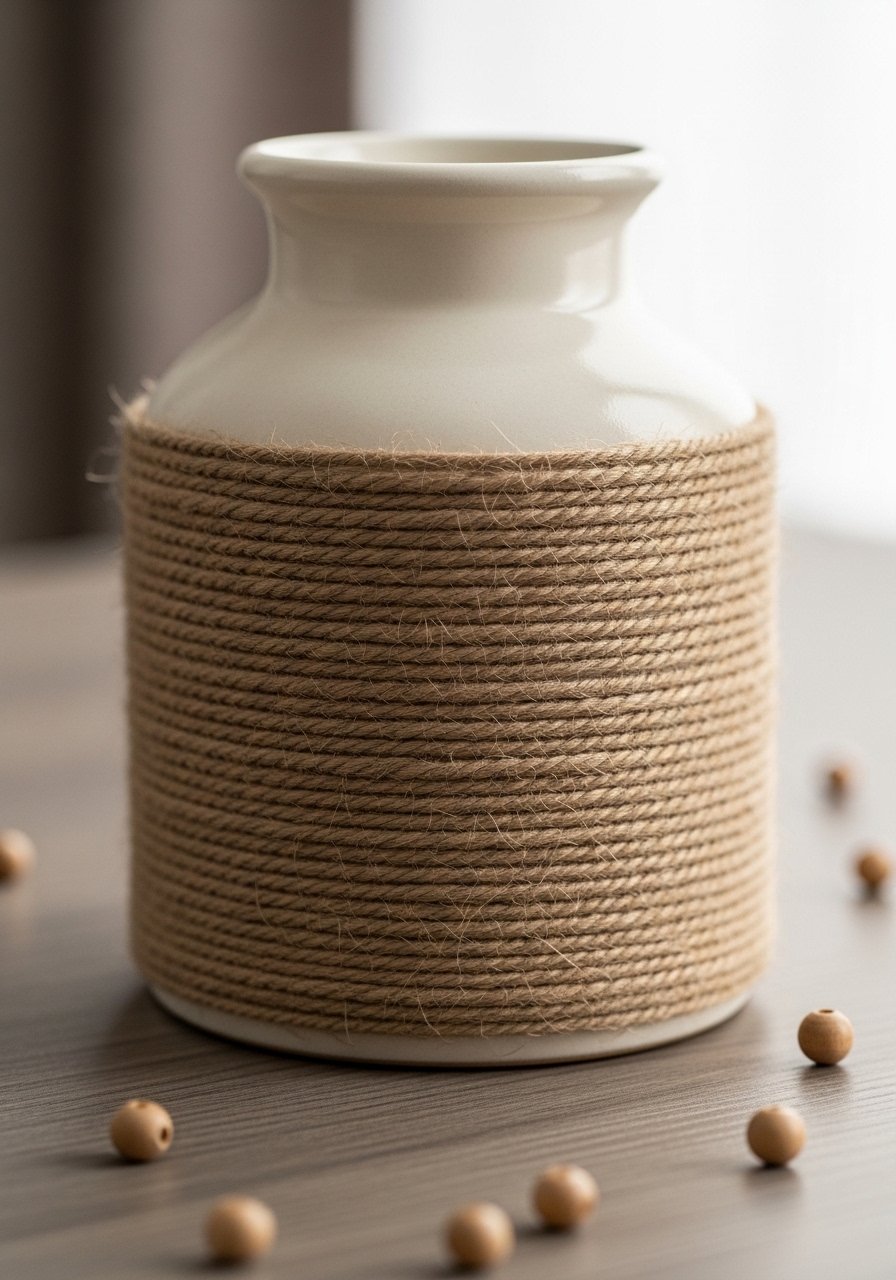
Why it works: Textured twine brings a warm, handmade feel while keeping the palette neutral. It’s durable, forgiving, and kid-friendly for simple wraps.
Materials
- Small ceramic vase, 5–7 in tall
- Natural jute twine, 1 mm, 20–30 ft
- Low-temp hot glue gun and glue sticks
- Scissors
- Clear matte Mod Podge (optional)
Instructions
- Plug in a low-temp hot glue gun to warm.
- Start at the base; secure the twine end with a dot of glue.
- Wrap twine tightly in rows, adding a dot of glue every 1–2 in to keep tension.
- When you reach the top band or desired height, cut and glue the end flush.
- Optionally seal with 1 light coat of Mod Podge; dry 15–20 minutes.
How to Display or Gift It
- Tuck a few dried stems into the top for a coastal shelf.
- Add small wooden beads threaded along the twine near the neck for detail.
- Wrap in kraft paper for gifting; include care note: keep dry.
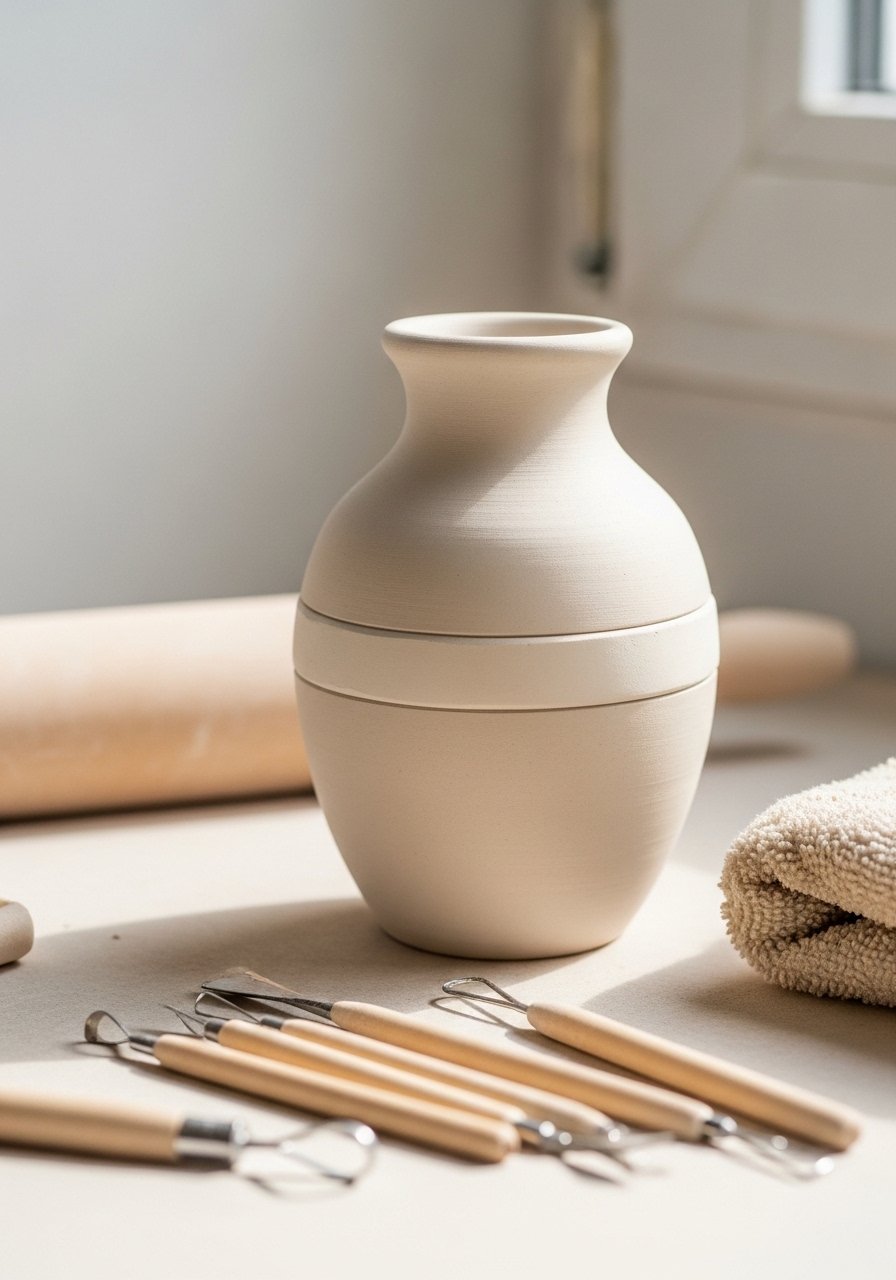
- Chalk-Painted Ceramic with Sanded Edge

Why it works: Chalk paint gives velvety, muted color that reads minimalist. Sanding the rim adds subtle character without clutter.
Materials
- Ceramic bud vase, 4–6 oz
- Chalk paint, sample pot (2 oz) in muted color
- Sanding sponge, fine grit
- Flat paintbrush, 1/2 in
- Clear wax or matte sealer
Instructions
- Clean vase; apply first thin chalk paint coat with a 1/2 in flat brush. Dry 20–30 minutes.
- Apply second coat for even coverage; dry 30 minutes.
- Lightly sand rim and random spots until subtle ceramic shows.
- Remove dust, then apply clear wax with a lint-free cloth; cure 24 hours.
- Buff wax to a soft sheen if desired.
How to Display or Gift It
- Show on a shelf with linen-wrapped books.
- Use as single-stem bud vase on a bedside table.
- Store extra painted pieces flat in a lined box while wax cures.
- Minimalist Masking-Tape Mono-Block
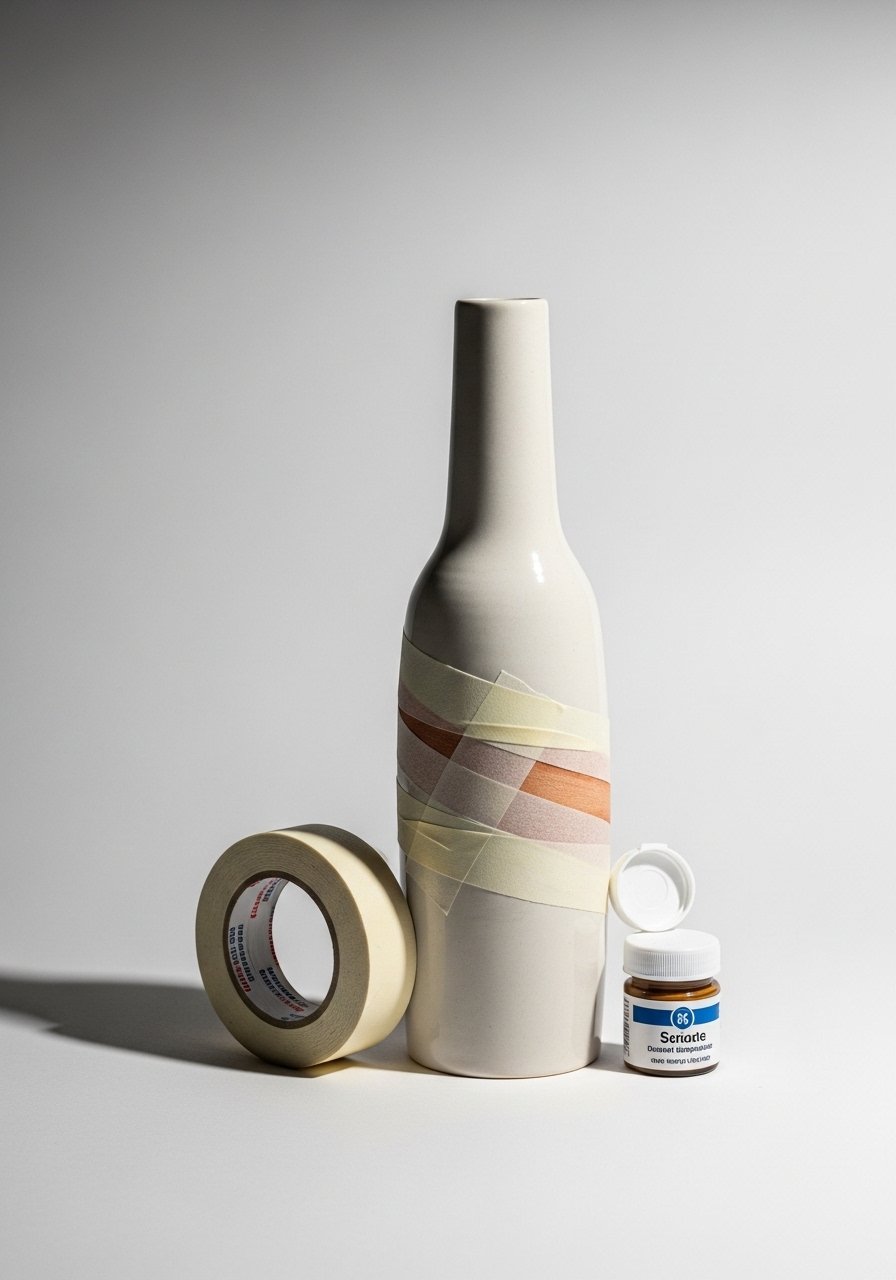
Why it works: A single negative-space band is bold yet restrained. Painter’s tape makes the line surgical—great for modern living rooms.
Materials
- Tall narrow vase, 9–11 in
- Acrylic paint, matte black, 2 fl oz
- Painter’s tape, 3/4 in
- Foam roller (brayer) or flat foam brush
- Rubbing alcohol and cloth
Instructions
- Clean and sand lightly; wipe with alcohol.
- Apply painter’s tape for the negative band at a diagonal. Press edges firmly with a brayer.
- Roll a thin coat of paint with a foam roller; let dry 20–30 minutes.
- Add second coat if needed; wait 30 minutes.
- Peel tape slowly; allow 24 hours cure before use.
How to Display or Gift It
- Pair two vases with diagonal bands in opposite directions for symmetry.
- Nest in a shallow tray with a textured linen runner.
- For shipping, pad inside a small kraft box with tissue.
- Clay Pinch-Strip Accent (Air-Dry Clay)
Why it works: Air-dry clay adds a sculptural, tactile strip that feels put-together without fuss. It’s good for hands-on crafters who like shaping details.
Materials
- Glass or ceramic vase, any size
- Air-dry clay, 250 g
- Water and clay smoothing tool or damp sponge
- Rolling pin or acrylic roller
- Sandpaper 400 grit
- Clear matte sealer spray
Instructions
- Wipe vase clean. Roll a 1/4 in thick, 6–8 in long clay coil.
- Press coil around vase and smooth seam with damp fingertip.
- Shape a clean top and bottom edge with a damp sponge.
- Let clay dry attached for 24–48 hours (thin pieces may take 24 hours).
- Sand lightly to smooth edges once fully dry.
- Seal with clear matte spray; cure 1 hour.
How to Display or Gift It
- Leave clay raw for a Scandinavian feel or paint a thin stripe for color.
- Wrap base in tissue and slip into a kraft box for gifting.
- Keep extra air-dry clay in an airtight container for future repairs.
- Japandi Rope Band (minimalist vase decorating ideas)
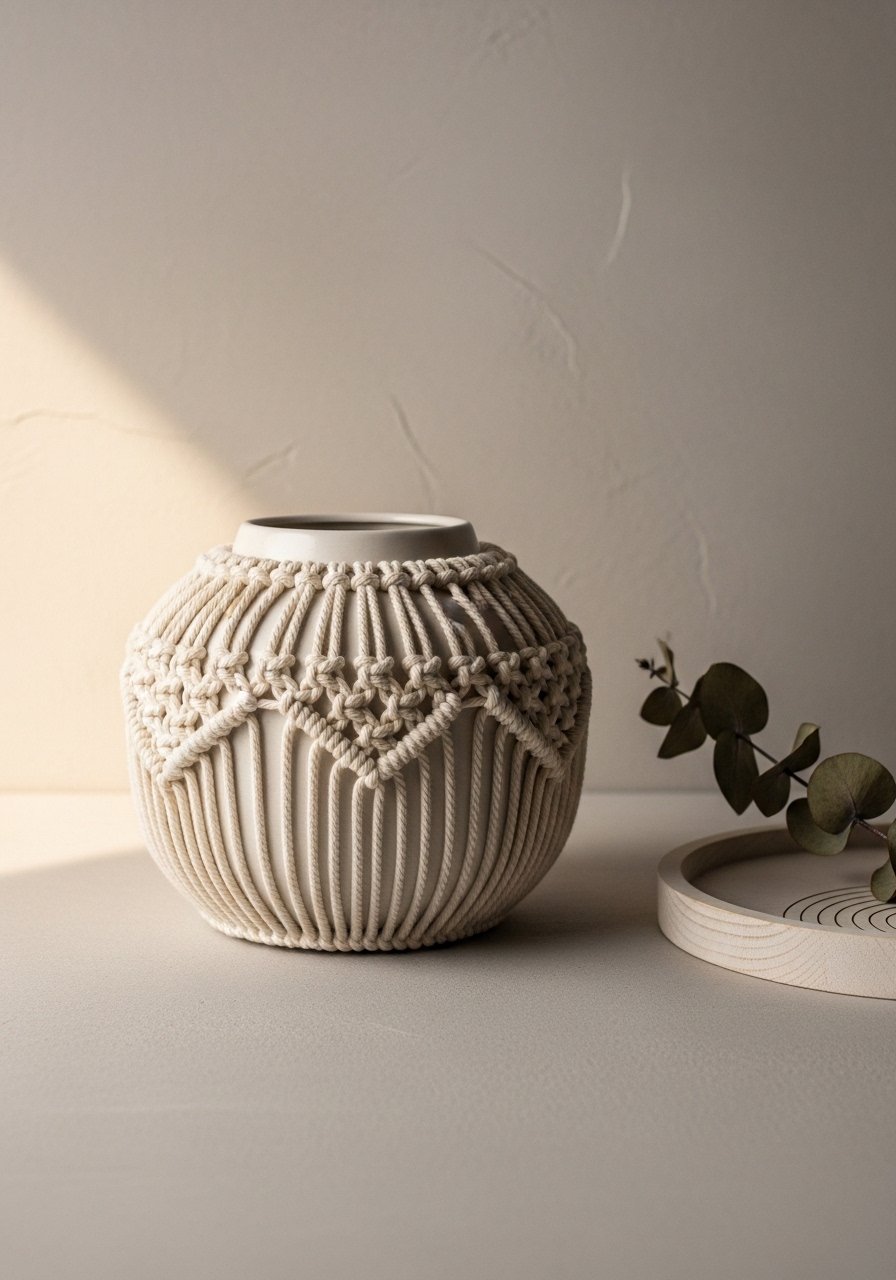
Why it works: The Japandi look blends Japanese minimalism and Scandinavian warmth; a simple rope band adds tactility without clutter. This suits neutral shelves and serene entry tables.
Materials
- Short squat vase, 6–8 in wide
- Cotton macramé cord, 3 mm, 10–15 ft
- Fabric glue or low-temp glue gun
- Scissors
- Small wooden beads (optional)
Instructions
- Measure cord to go around vase twice; cut 10–15 ft depending on vase girth.
- Apply a thin line of fabric glue where the band will sit.
- Wrap cord snugly, tucking and gluing every 1–2 in for a neat finish.
- Add wooden beads threaded on short cord lengths and glue them as accents.
- Let glue set 30 minutes; handle after 1 hour.
How to Display or Gift It
- Pair with matte ceramics and a small wooden tray for a calm vignette.
- Tie a tiny kraft tag for a friendly gift note.
- Store spare cord and beads in a small craft organizer drawer.
- Bleached Dried Stem Statement
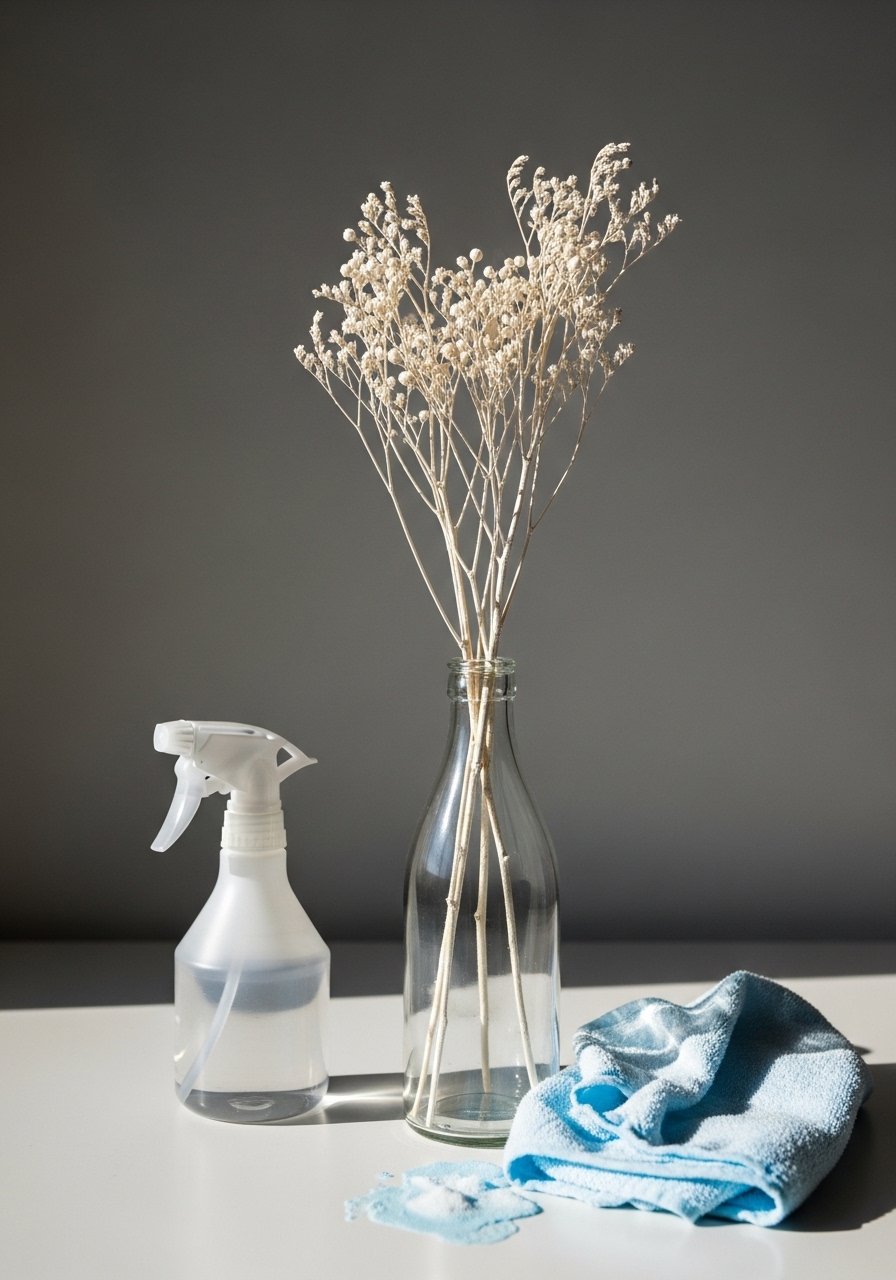
Why it works: Bleached stems read minimal and sculptural. The monochrome stems and simple vase make an elegant focal point for mantels.
Materials
- Clear glass bottle vase, 10–12 in tall
- Dried stems (wheat, pampas, bunny tail), 6–10 stems
- Household bleach and water solution (1:3)
- Rubber gloves and bucket
- White acrylic spray paint (optional)
Instructions
- Mix bleach solution in a well-ventilated area; wear gloves.
- Submerge stems briefly (2–5 minutes) until lighter; remove and rinse.
- Hang stems to dry fully 24–48 hours.
- Optionally mist with a thin coat of white acrylic spray; dry 30 minutes.
- Arrange in vase; rotate stems for balanced silhouette.
How to Display or Gift It
- Use a single variety of stem for a calm, sculptural look.
- Bundle and wrap stems with twine before gifting.
- Keep bleached stems in a dry box to preserve color.
- Minimal Marble with Alcohol Ink
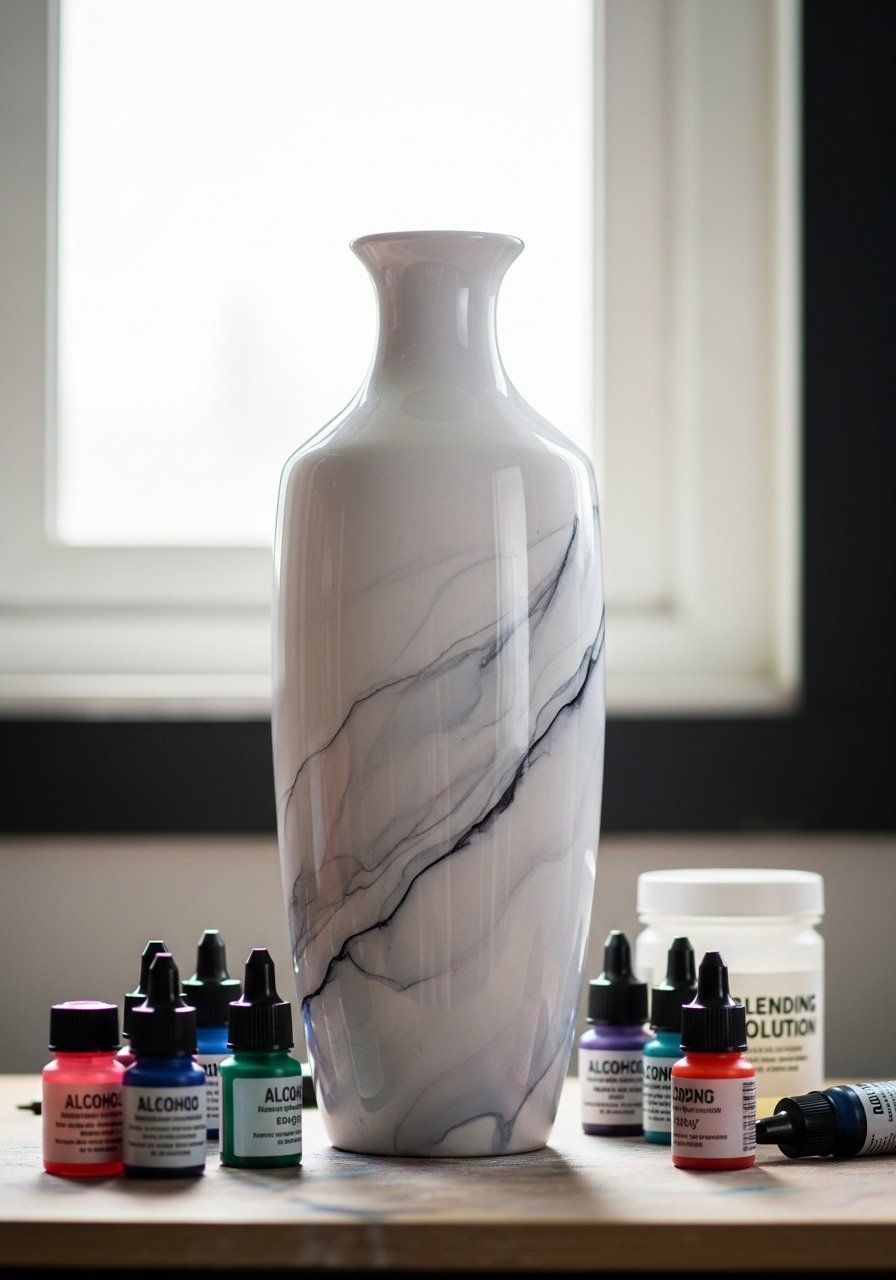
Why it works: Alcohol ink marble gives a fluid, natural stone look that’s quiet and modern. It’s fast and perfect for one-off pieces.
Materials
- White ceramic vase, 8–10 in tall
- Alcohol inks in gray and black, 5–10 mL each
- Blending solution or isopropyl alcohol, 10–20 mL
- Soft brush or felt pad
- Nitrile gloves and drop cloth
- Clear satin spray sealer
Instructions
- Work on a protected surface wearing gloves.
- Drop a few small dots of alcohol ink on the vase.
- Use blending solution and a soft brush to pull and soften veins.
- Rotate vase while working to control flow; stop when you like the pattern.
- Let dry 15–20 minutes, then apply one light coat of clear satin spray; cure 1 hour.
How to Display or Gift It
- Place on a low shelf with similar neutral accessories.
- Wrap in tissue and box for gifting; include care note to avoid scrubbing.
- Geometric Paper Tape Cutouts

Why it works: Paper cutouts keep decoration flat and minimal. This is a quick swap whenever you want a new layout.
Materials
- Ceramic or glass bud vase
- Kraft and cream cardstock, 6×6 in pieces
- Precision craft knife or Fiskars circle punch set
- Mod Podge (matte) and foam brush
- Ruler and pencil
Instructions
- Cut shapes from cardstock using a craft knife or Fiskars punch set.
- Apply thin Mod Podge coat on vase area; lay shapes and press smooth.
- Brush a thin topcoat of Mod Podge to seal; let 15–20 minutes between coats.
- Apply two topcoats total; dry 1 hour before use.
How to Display or Gift It
- Swap shapes seasonally for new moods.
- Pair with matching greeting card for gift sets.
- Store leftover cutouts flat in a document sleeve.
- Resin-Inlaid Minimal Accent
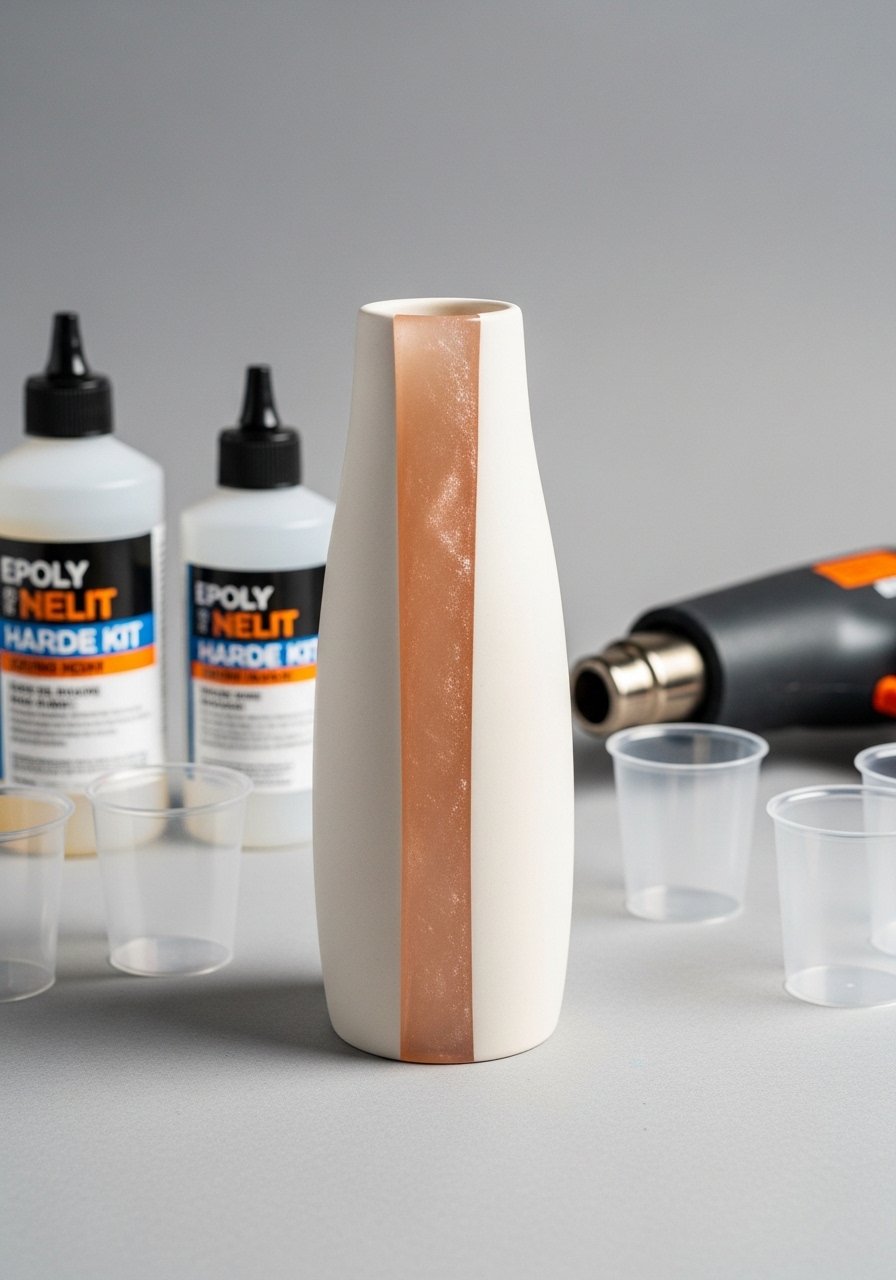
Why it works: A thin resin inlay adds calm depth and a hint of sheen while staying restrained. Use a small amount of resin to keep things light.
Materials
- Ceramic vase with recessed groove or taped band area
- Epoxy resin kit, clear, recommended 16 oz kit (makes multiple small projects)
- Mixing cups and wooden stir sticks
- Small silicone mixing cup for measuring 1:1 or 2:1 per kit instructions
- Mini torch or heat gun to pop bubbles
Instructions
- Prepare workspace and follow resin kit mixing ratio exactly. Mix slowly for 3–5 minutes.
- Pour a thin bead into the groove or taped band.
- Pass a mini torch or heat gun quickly over surface to remove bubbles; do not overheat.
- Let set 12–24 hours to reach handling strength; full cure 72 hours depending on kit.
- Sand any overflow gently once cured and polish with a soft cloth.
How to Display or Gift It
- Small resin accents pair beautifully with dried white flowers.
- Wrap in kraft tissue and a small kraft box for gifting.
- Keep extra resin in a cool, dry storage container sealed tightly.
- Negative Space Gold Leaf Edge
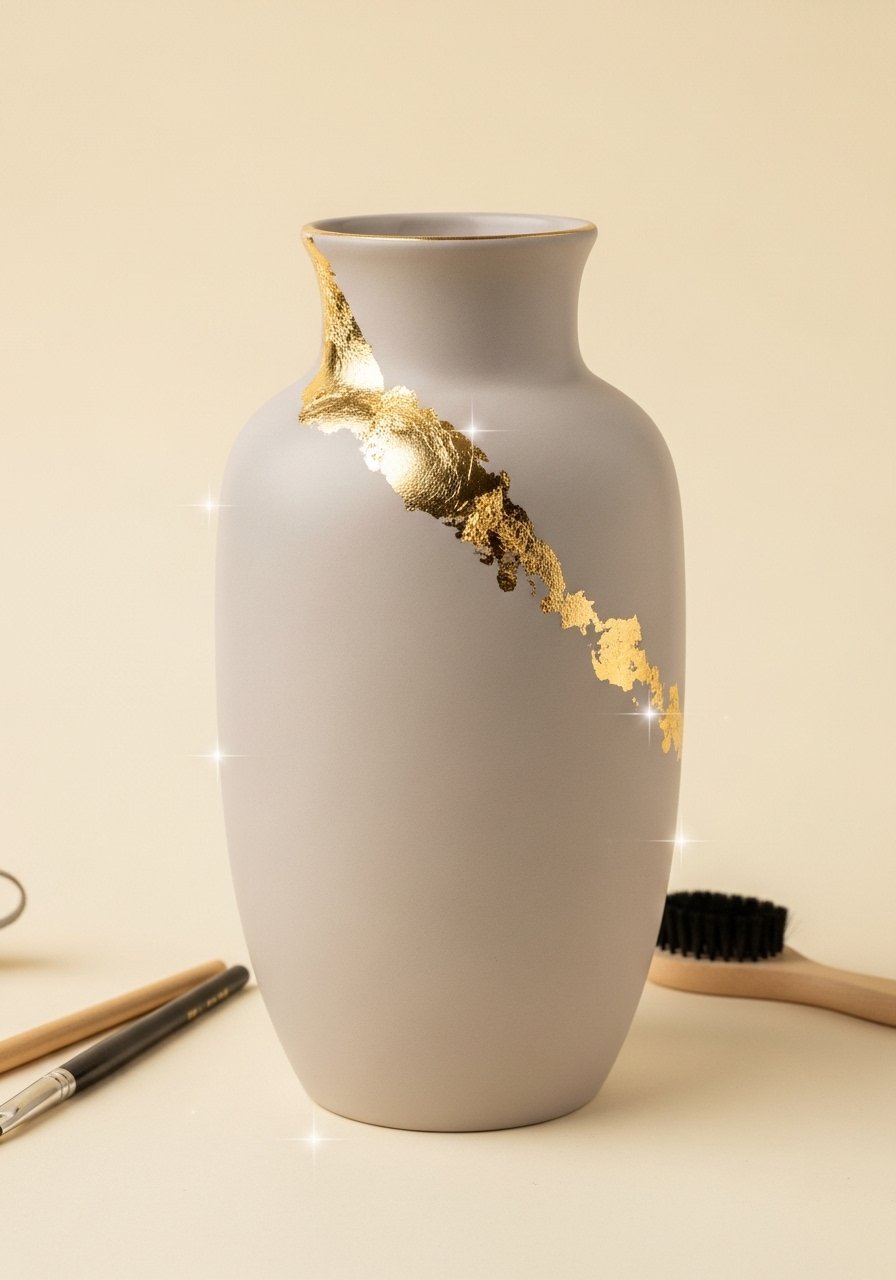
Why it works: A thin gold leaf edge reads minimal but luxurious. It’s an elegant way to add warmth without busy patterns.
Materials
- Matte ceramic vase
- Gold leaf sheets or transfer gold leaf, 24K look
- Gold leaf adhesive (size) and soft brush
- Small detail paintbrush and cotton gloves
- Clear satin sealer spray
Instructions
- Apply a thin coat of gold leaf adhesive to the rim; wait until tacky (per product, usually 10–15 minutes).
- Lay gold leaf onto the tacky adhesive with a soft brush; press gently.
- Remove excess leaf with a soft brush.
- Seal with clear satin spray; dry 30 minutes.
How to Display or Gift It
- Use as a small centerpiece for intimate dinners.
- Place on a mirrored tray with a soft linen napkin.
- Store in a padded box for safe transport when gifting.
- Linen Fabric Slip (minimalist vase decorating ideas)
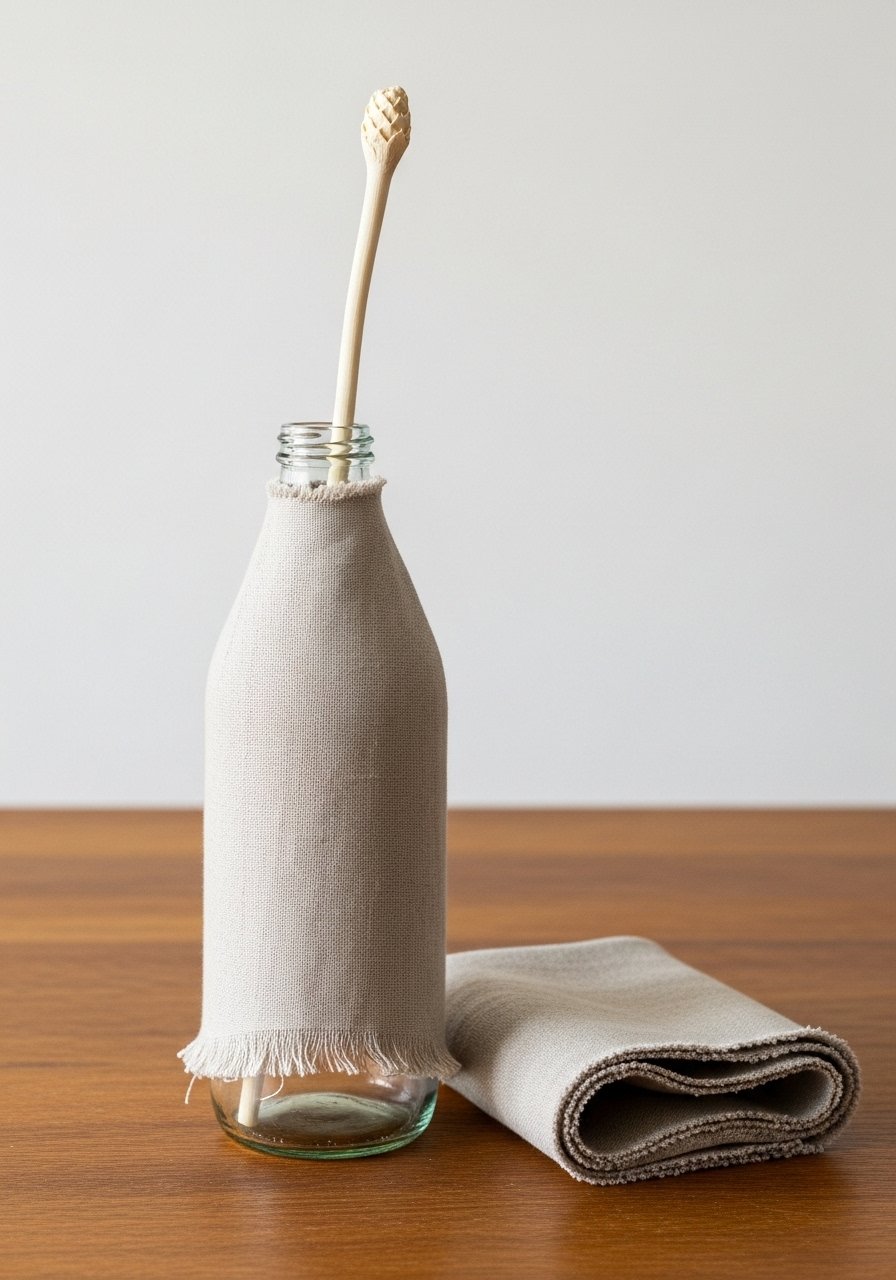
Why it works: A linen slip softens glass and adds textile warmth while keeping color neutral. It’s removable and washable—great for revolving seasonal decor.
Materials
- Glass bottle or vase, 8–10 in high
- Linen fabric scrap, 12 x 12 in (pre-washed)
- Sewing needle and thread or small sewing machine
- Fabric glue (optional)
- Scissors and measuring tape
Instructions
- Measure vase circumference and cut linen to height + 1 in for hem.
- Fold and hem top and bottom 1/4 in; stitch with small running stitches or machine.
- Slip linen over vase; secure hem at top with a small dot of fabric glue if needed.
- Remove for laundering as needed.
How to Display or Gift It
- Pair with a tied kraft tag and dried stem for a simple present.
- Make multiple slips to swap with seasons.
- Store extras folded in a fabric organizer box to keep them crisp.
- Cork Mosaic Base
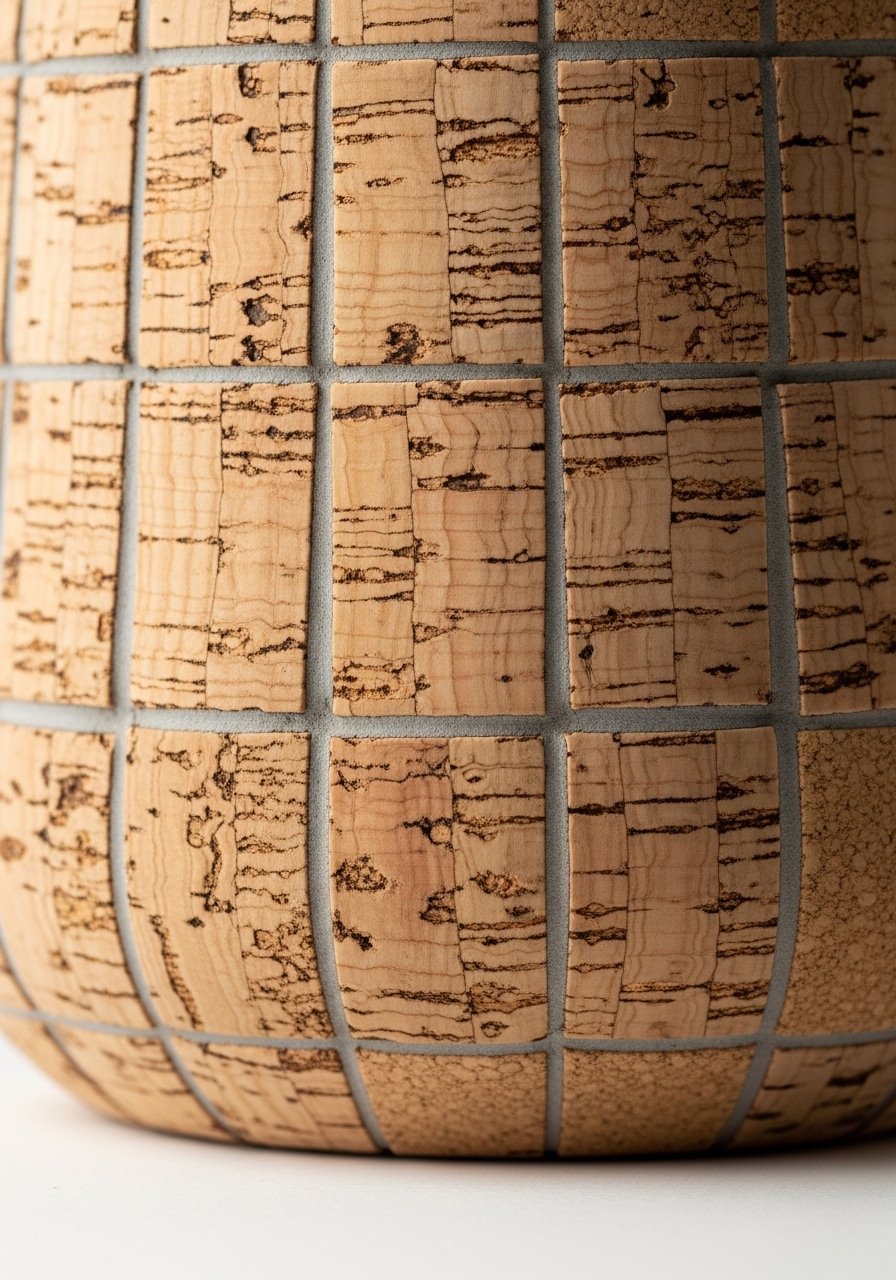
Why it works: Cork adds organic texture and softens harsh glass. Small cork tiles are lightweight and quiet to the touch.
Materials
- Short ceramic or glass vase
- Self-adhesive cork tiles, 1/4 in thick, cut to fit
- Precision craft knife and cutting mat
- Fine-grit sandpaper 220
- Clear matte sealer (optional)
Instructions
- Measure and cut cork tiles to fit sections around the base using a craft knife on a self-healing cutting mat.
- Press tiles onto vase, trimming as needed.
- Sand edges lightly for smooth joins.
- Seal with a light coat of matte sealer; dry 15–20 minutes.
How to Display or Gift It
- Place on a cork coaster to match and protect surfaces.
- Gift as a set with a small wooden spoon and dried herbs.
- Store extra cork tiles flat in a craft organizer.
- Minimal Speckle with Toothbrush Technique

Why it works: Speckle adds tactile interest without pattern overload. It’s fast and forgiving when you start light.
Materials
- White ceramic vase
- Acrylic paint, diluted slightly (1 tsp paint + 1 tsp water) for speckling
- Old toothbrush or stiff bristle brush
- Painter’s tape for masking (optional)
- Clear matte sealer spray
Instructions
- Mask areas you want to protect. Dip toothbrush in diluted paint.
- Hold brush close to vase and flick bristles with your thumb to create speckles. Start light.
- Let dry 15–20 minutes; add more speckle layers if needed.
- Seal with a light coat of matte sealer; cure 1 hour.
How to Display or Gift It
- Pair with a textured wooden tray for contrast.
- Wrap in tissue for gifting; include a note about the handmade speckle.
- Leather Strap Collar
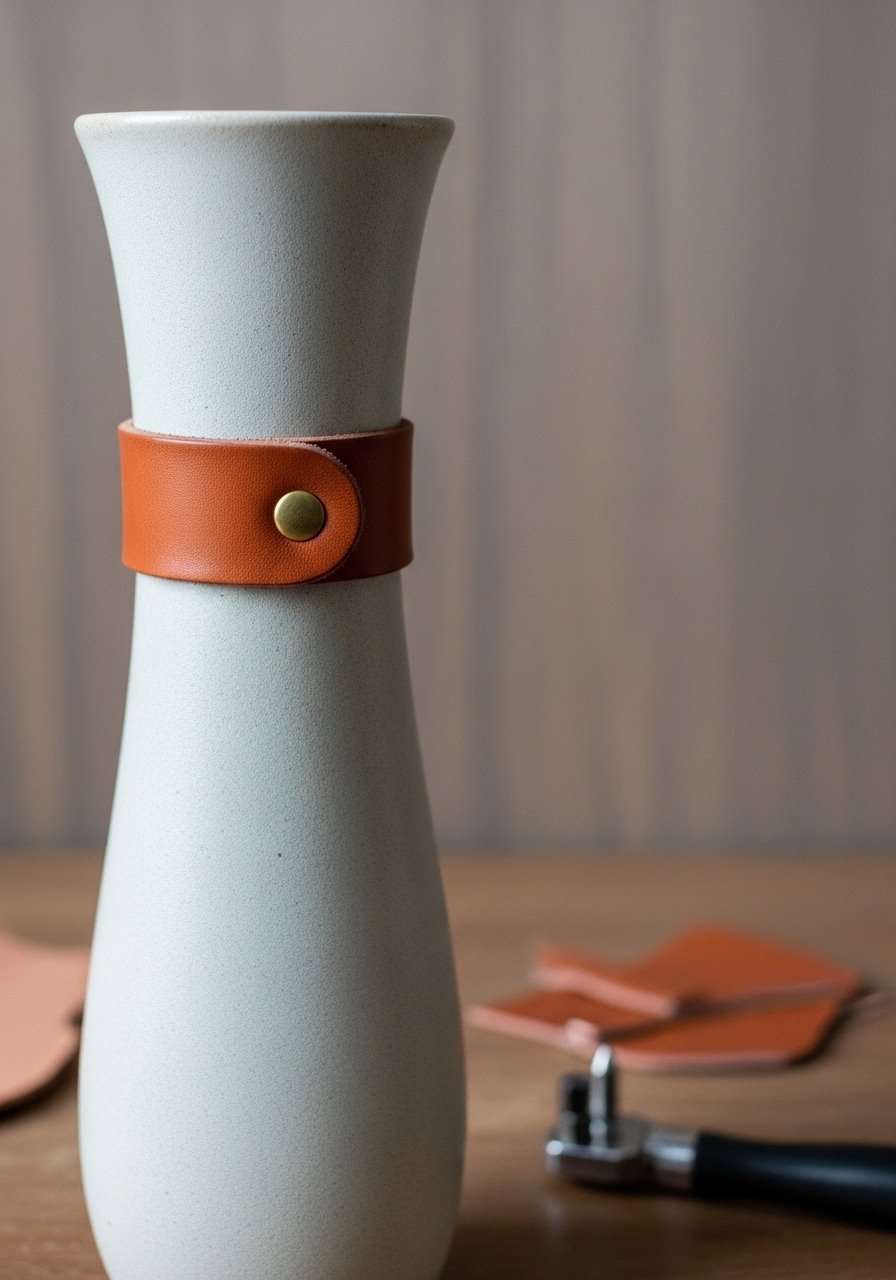
Why it works: Leather adds a quiet, grown-up texture. The collar can be removed or swapped, so the base remains pristine.
Materials
- Tall vase, slim-neck preferred
- Vegetable-tanned leather strip 1/2 in wide x circumference + 1 in
- Brass rivets and rivet setter
- Scissors and leather hole punch
- Leather conditioner
Instructions
- Measure around vase neck and cut leather with +1 in overlap. Punch rivet holes.
- Test fit, then set rivets with a rivet setter.
- Condition leather lightly and slide collar onto vase.
- Remove occasionally to prevent moisture build-up.
How to Display or Gift It
- Pair with a leather-wrapped notebook for a gift set.
- Store spare collars flat in a small drawer.
- Painted Negative Space Label
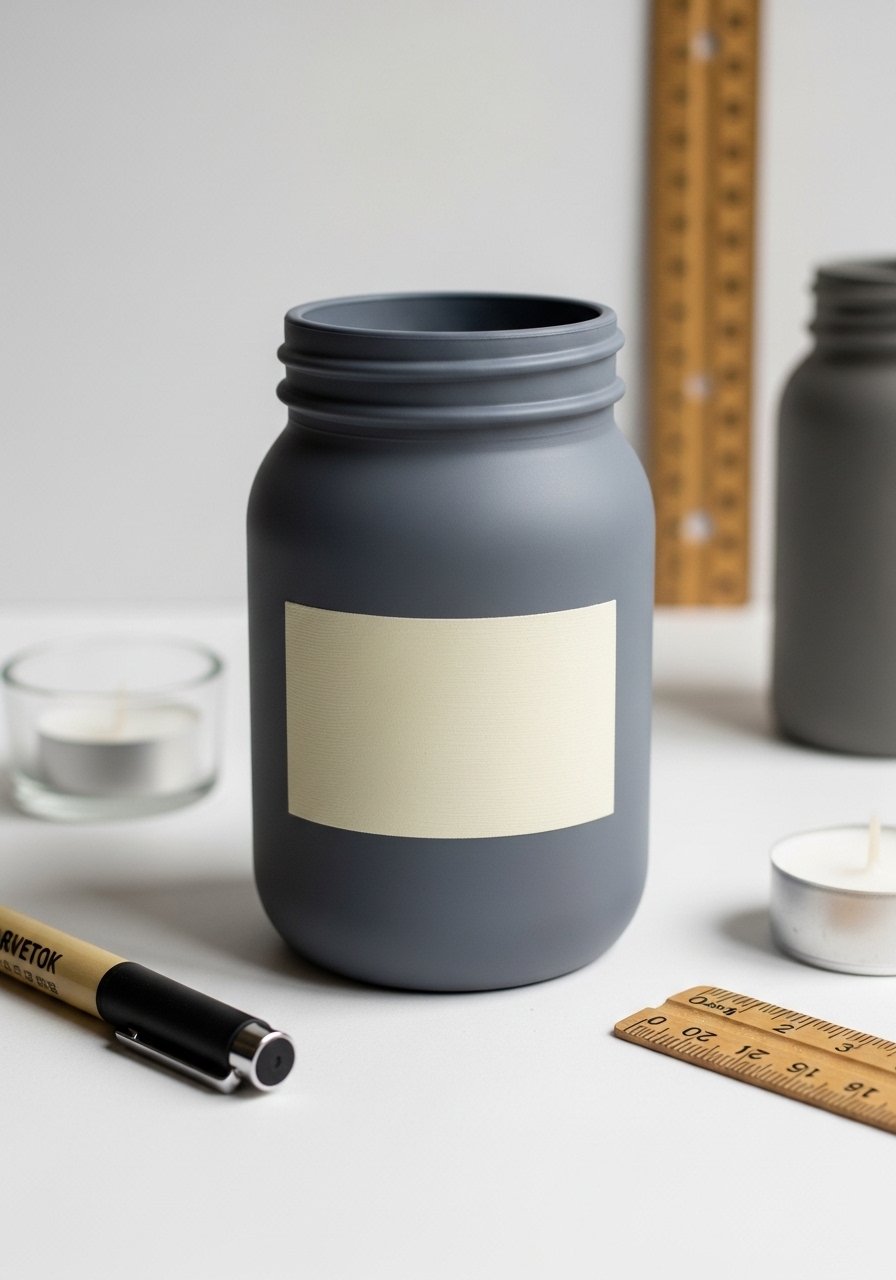
Why it works: A painted label offers a restrained focal point for short messages or initials. It’s very clean and personal.
Materials
- Small mason-style vase
- Chalkboard paint or matte acrylic in 2 colors
- Paint pens for lettering (white or black)
- Painter’s tape and ruler
- Clear matte sealer
Instructions
- Tape a neat rectangle on the vase using painter’s tape and ruler.
- Fill taped area with chalkboard or paint using a flat brush; dry 20–30 minutes.
- Add a second coat if needed; dry 30 minutes.
- Once cured 24 hours, write gently with a paint pen or chalk marker.
How to Display or Gift It
- Write recipient initials for a personalized gift.
- Use as a table marker for small gatherings.
- Store extra paint pens in a compact roll-up organizer.
- Minimal Cork-Fill Terrarium Accent
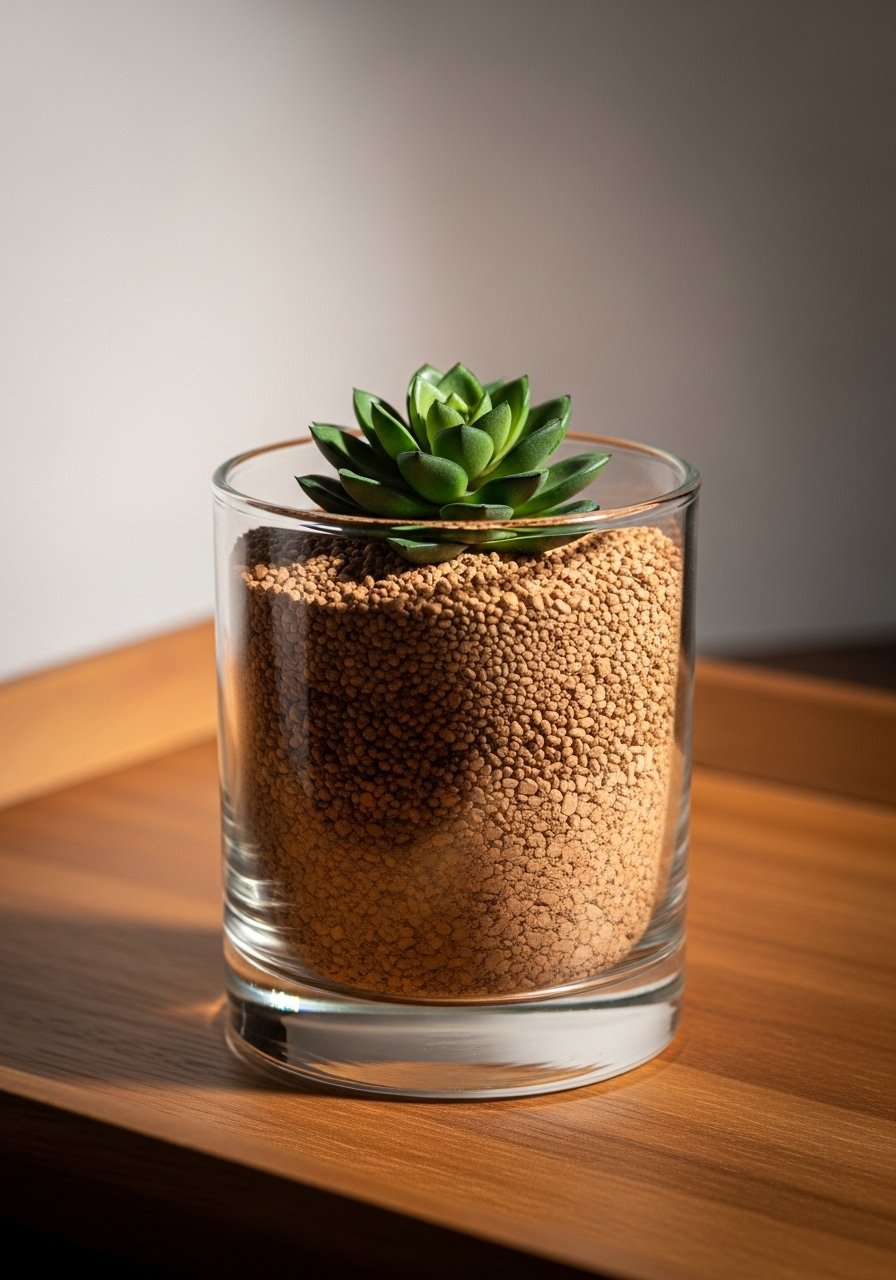
Why it works: Cork granules add color and texture while stabilizing a single preserved stem or faux succulent—no water required.
Materials
- Short clear glass vase
- Fine cork granules, 1–2 cups
- Preserved or faux succulent stem
- Small scoop or funnel
- Mini wooden spoon for arranging
Instructions
- Add 1–2 cups cork granules to the vase using a funnel.
- Press granules to level and create a small depression for the stem.
- Insert preserved succulent and adjust angle.
- Dust off edges and display—no curing needed.
How to Display or Gift It
- Group three different heights of cork-filled vases for a modern cluster.
- Gift with a small care card explaining preserved plant care.
- Store cork granules in a sealed container for reuse.
- Wooden Bead Wrap

Why it works: Beads add a subtle pattern and tactile warmth. Vertical bead strands keep the profile clean and sculptural.
Materials
- Medium ceramic vase
- Wooden beads, 8 mm and 12 mm, 50–100 beads total
- Cotton cord, 1 mm (length depends on number of strands)
- Scissors and lighter for sealing cord ends (if synthetic)
- Small stitch or glue for securing strands at neck
Instructions
- Cut cords to desired length with extra for knots.
- Thread beads in desired pattern on each cord.
- Knot cords and secure at vase neck with a dab of fabric glue or stitched wrap.
- Trim ends and tuck or secure neatly.
How to Display or Gift It
- Place on an entry console with a shallow tray.
- Gift with matching bead strand bracelet for a small set.
- Store extra beads in a divided organizer.
- Subdued Metallic Rub (Brushed Pewter)
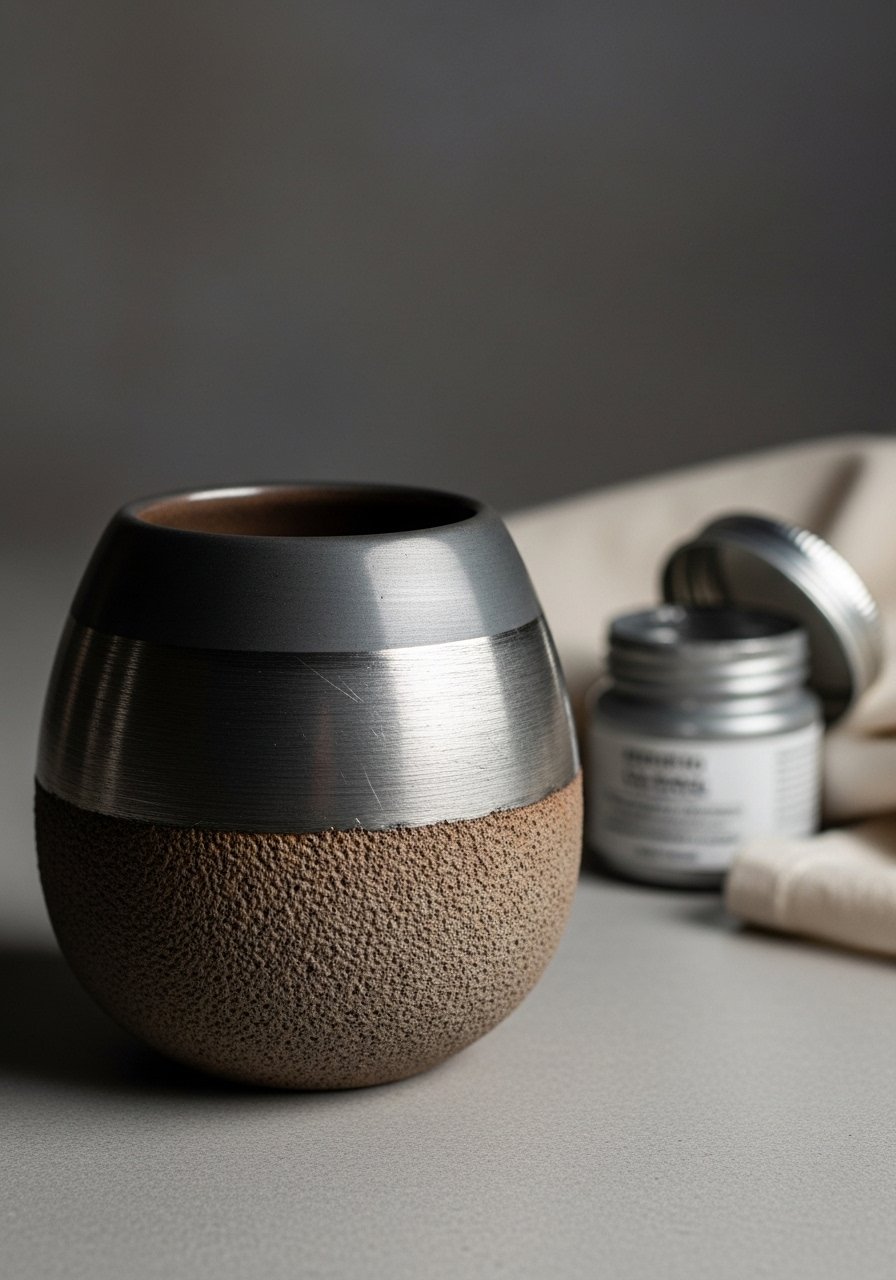
Why it works: Soft metallic rub gives shimmer without gloss. The brushed finish reads refined and modern while staying subtle.
Materials
- Round ceramic vase
- Metallic acrylic paint (pewter), 2 fl oz
- Small dry flat brush for rubbing technique
- Cotton cloth for soft buffing
- Clear matte varnish (optional)
Instructions
- Apply a thin dry brush stroke of metallic paint to desired area. Less is more.
- Buff softly with a cotton cloth to pull back shine and create a brushed look.
- Repeat until you get the desired soft shimmer.
- Optional clear matte varnish to protect; dry 30 minutes.
How to Display or Gift It
- Pair with a dark wood tray for contrast.
- Gift in a small box with a note about the brushed finish.
- Keep metallic paints stored upright in a small storage caddy.
Thanks for sticking with me through twenty calm, clean, and simple vase ideas. You’ve got painting, wrapping, tiny sculptural additions, and quick swaps that fit cottagecore, Japandi, farmhouse, or modern boho shelves. Try a few quick projects on thrift finds first—they’re budget-friendly practice pieces.
Save or pin this list for your next lazy Sunday craft session, and share a photo if you try one (I love seeing real-life tweaks). Which idea are you most likely to make: the linen slip, the resin inlay, or the twine wrap? Trust me, picking up a quality foam brush set and a self-healing cutting mat will make lots of these projects easier and neater—no drama, just calm crafting.


