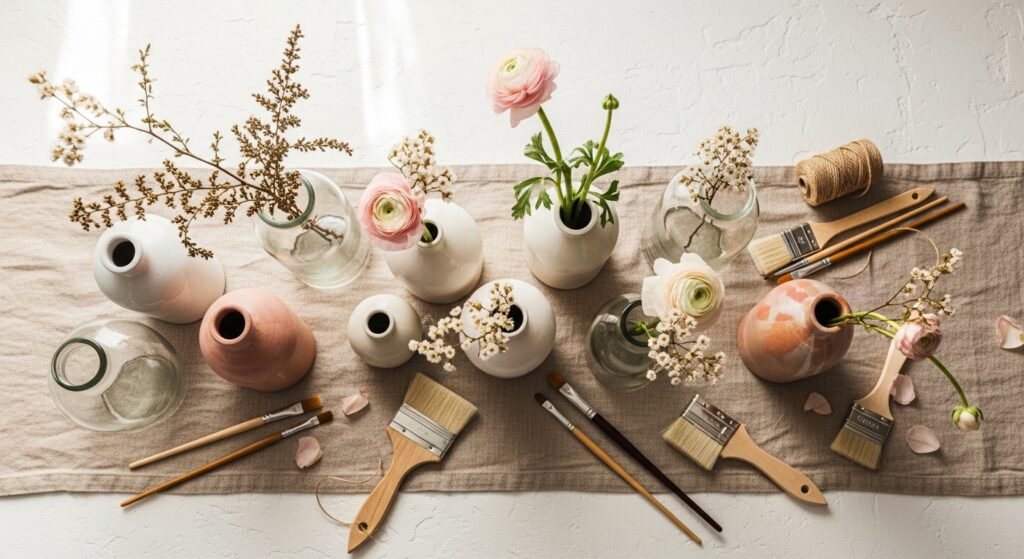
Brightening your table or entryway can be as simple as reimagining a jar, bottle, or old vase. These 24 floral vase decorating ideas are fresh, colorful, and easy to make for every season. Whether you like cottagecore dried bouquets, Japandi minimalism, or bold boho color, there's a project here that fits your style and time.
You’ll find step-by-step directions, exact materials and quantities, realistic drying times, and troubleshooting tips so projects actually work. I mention favorite tools as I go—like my go-to hot glue gun for quick attachments and a small Cricut Joy cutting machine for precision vinyl accents when I want crisp shapes. Pin the whole list and pick one project to try tonight—small supplies, big impact.
- Painted Ombre Terra Cotta Vase
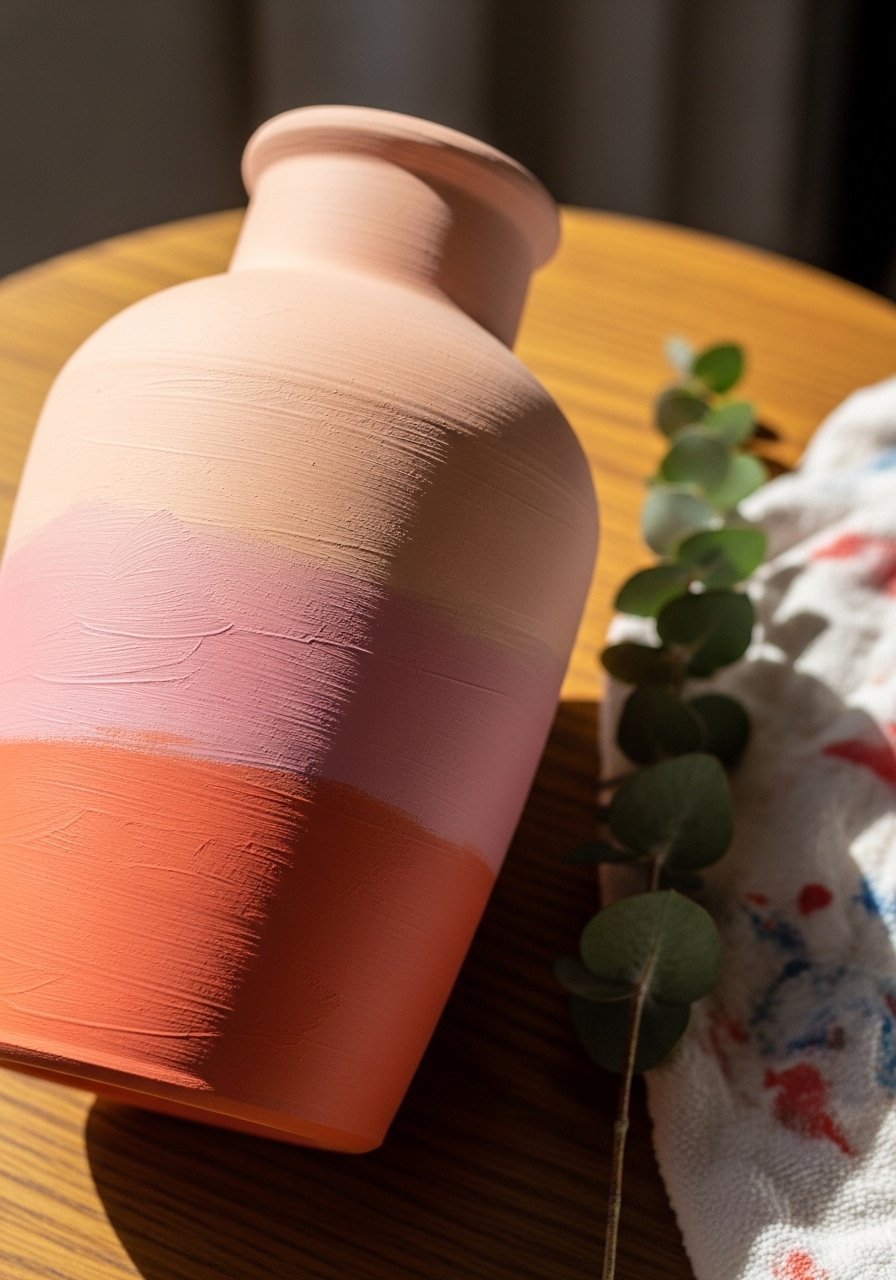
This ombre terra cotta vase is soft, modern, and perfect for seasonal bouquets. The matte chalk paint gives a velvety finish and the gradual color shift looks like a designer piece. Great for beginners who like a low-cost base and a high-impact finish. You’ll love the tactile, chalky feel after sealing.
Materials
- 1 unglazed terra cotta vase, 8" tall
- 2 bottles chalk paint (8 oz each): light peach and blush
- 1 jar white chalk paint (2 oz) for softening
- 1 flat foam brush, 2" wide
- 1 small blending sponge or brayer
- 1 painter’s tape, 3/4" wide
- 1 matte clear sealer spray, 10 oz
- Sandpaper, 120 grit (1 sheet)
Instructions
- Wipe the vase clean and sand the rim lightly with 120-grit to remove dust.
- Tape the bottom edge if you want a clean unpainted rim. Prime is optional; chalk paint adheres well to unglazed clay.
- Apply one thin coat of the lightest chalk paint with the foam brush. Let dry 30 minutes.
- Mix the mid-tone by blending the blush with a teaspoon of white on a palette.
- While the base coat is tacky, sponge the mid-tone along the middle third and use a clean sponge to feather the edge for a smooth blend.
- Add the darkest blush to the top third, blending downward with light dabbing pressure until the ombre looks seamless.
- Let dry 1 hour, then apply a second thin coat if coverage is uneven.
- Remove tape, let cure 24 hours, then spray 2 light coats of matte sealer, waiting 15 minutes between coats.
- Full cure before filling with water: 48 hours.
How to Display or Gift It
- Pair with soft dried bunny tails or ranunculus for a cottagecore look.
- Tie a small jute bow around the neck for gifting; store in a padded box if shipping.
- Display on a wooden tray or near linen curtains for a warm vignette.
- If gifting, include a tag with care instructions and a small packet of flower food. Consider a stackable craft organizer to keep extra paint and brushes handy: craft organizer drawers.
- Decoupage Floral Napkin Vase

Decoupage lets you turn a thrifted glass vase into a printed beauty using decorative napkins. The look is delicate and perfect for spring centerpieces. This project is forgiving—small tears or bubbles can be smoothed with a brush—so it's beginner friendly and satisfying for repurposing finds.
Materials
- 1 clear glass vase, 7–9" tall
- 4–6 printed paper napkins (single-ply designs)
- 1 8 oz bottle Mod Podge (matte)
- 1 foam brush, 1" for glue; 1 soft flat brush for smoothing
- 1 small scissors for trimming napkin
- 1 clear acrylic sealer spray
- Tweezers (optional)
Instructions
- Separate napkin layers, keeping the printed single ply only.
- Clean the vase with rubbing alcohol and let dry.
- Cut napkin pieces slightly larger than needed. Plan placement before gluing.
- Brush a thin coat of Mod Podge where the first piece will go.
- Lay the napkin gently and smooth from center outward with the soft flat brush to avoid tearing.
- Brush another thin coat on top to seal; it will look milky but dries clear.
- Repeat overlapping pieces until the vase is covered. Let dry 30 minutes between coats.
- Apply 2–3 topcoats of Mod Podge for durability, letting each dry 30 minutes.
- After 24 hours full dry, spray 1–2 light coats of acrylic sealer, 15 minutes apart.
How to Display or Gift It
- Add fresh peonies or a single large bloom for a coordinated look.
- Wrap in kraft paper and tie with ribbon for a boutique gift.
- Store in a padded box with tissue if transporting. Useful protective storage: gift boxes kraft.
- Macramé-Wrapped Boho Vase

Macramé wrapping gives glass vases instant boho texture. This version uses a simple knot repeat and wooden beads—great for beginners learning square knots. The finished piece feels handcrafted and cozy, perfect for dried stems or faux flowers.
Materials
- 1 10" tall recycled glass bottle
- 50 ft 3mm single-strand cotton macramé cord (natural)
- 10 wooden beads, 12mm hole
- 1 scissors
- 1 tape measure
- 1 hot glue gun for securing ends
- Lighter or fray seal (optional)
Instructions
- Cut 6 cords at 90 cm each. Attach them evenly around the bottle neck using a lark’s head knot.
- Measure down 6" and start a row of square knots (use 4 cords per knot set).
- After 6 rows, string a wooden bead onto the center cords and continue square knots below it.
- Repeat bead placement every 2" until you reach the base of the bottle.
- Finish with a gathering knot and trim excess, sealing ends with a lighter or a dab of glue.
- Tuck the final knots under previous rows for a clean finish.
- For heavier bouquets, add a small glue dot inside the base to secure the bottle and macramé wrap.
How to Display or Gift It
- Use dried grasses or faux stems for low-maintenance styling.
- Hang on a wall peg or place on a tray with other woven accents.
- Wrap in tissue and slide into a tall gift box. Keep spare cord in a craft box.
- Painted Geometric Glass Vase (Stencil)

This modern geometric vase uses vinyl or adhesive stencils for crisp lines. It's perfect for a Japandi or modern farmhouse palette. Using painter's tape and a small stencil brush helps avoid bleed-through.
Materials
- 1 clear glass cylinder vase, 8" tall
- 1 set adhesive stencils or pre-cut vinyl shapes
- 2 acrylic craft paints (matte navy and metallic gold), 2 oz each
- 2 round stencil brushes (10 mm and 5 mm)
- 1 roll painter’s tape, 1"
- 1 rubbing alcohol wipe
- Clear gloss spray sealer
Instructions
- Clean vase with rubbing alcohol and let dry.
- Apply stencils per design; press edges firmly to avoid paint bleed.
- Dab paint lightly using the larger stencil brush. Less is more to prevent bleeding.
- For metallic accents, use a separate clean brush and apply sparingly.
- Let paint dry 20–30 minutes, then remove stencils slowly.
- Touch up crisp edges with a detail brush if needed.
- Allow 24 hours to cure; spray 2 thin coats of gloss sealer, 15 minutes apart.
How to Display or Gift It
- Use single-color arrangements for a minimalist vibe.
- Group several sizes in a cluster on a console table.
- Keep sealed and wrap in cellophane for a chic gift. Consider a small mini easel to display a matching card.
- Mosaic Tile Wrapped Vase
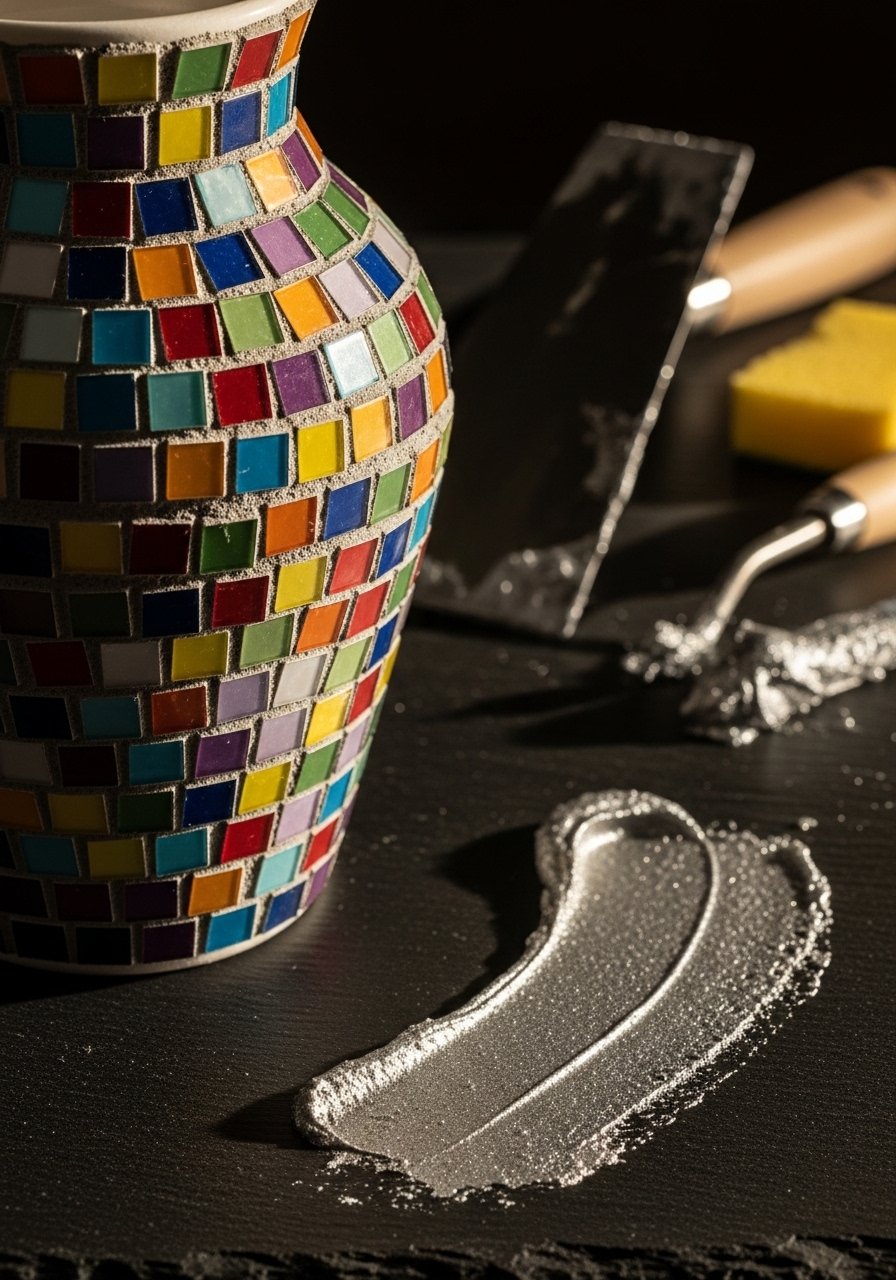
Tiny glass mosaic tiles add sparkle and tactile interest. This project creates a luxe effect on a small cylinder vase—ideal for candlelight centerpieces or posies. Mosaic work improves patience and fine-motor skills and results in a beautiful heirloom.
Materials
- 1 small glass vase, 6" tall
- 200 mosaic glass tiles (6 mm)
- 1 pack tile adhesive (small tube)
- 1 grout, white, 8 oz
- 1 grout float or silicone spreader
- 1 foam brush for adhesive
- 1 damp sponge and microfiber cloth for cleanup
- Safety gloves
Instructions
- Plan your pattern by laying tiles on the table first.
- Apply a thin line of tile adhesive to a 2" section of the vase.
- Press tiles into adhesive using tweezers for placement.
- Continue around the vase until covered. Let adhesive set 24 hours.
- Mix grout and spread over tiles with the grout float, pressing into gaps.
- Wipe excess grout with a damp sponge; buff with a microfiber cloth.
- Let grout cure 48 hours before rinsing and displaying.
How to Display or Gift It
- Add LED candles or small fresh stems for evening glow.
- Wrap in tissue in a sturdy box for shipping.
- Store unused tiles in a small storage organizer.
- Speckled Milk Glass Effect (Spray Paint)
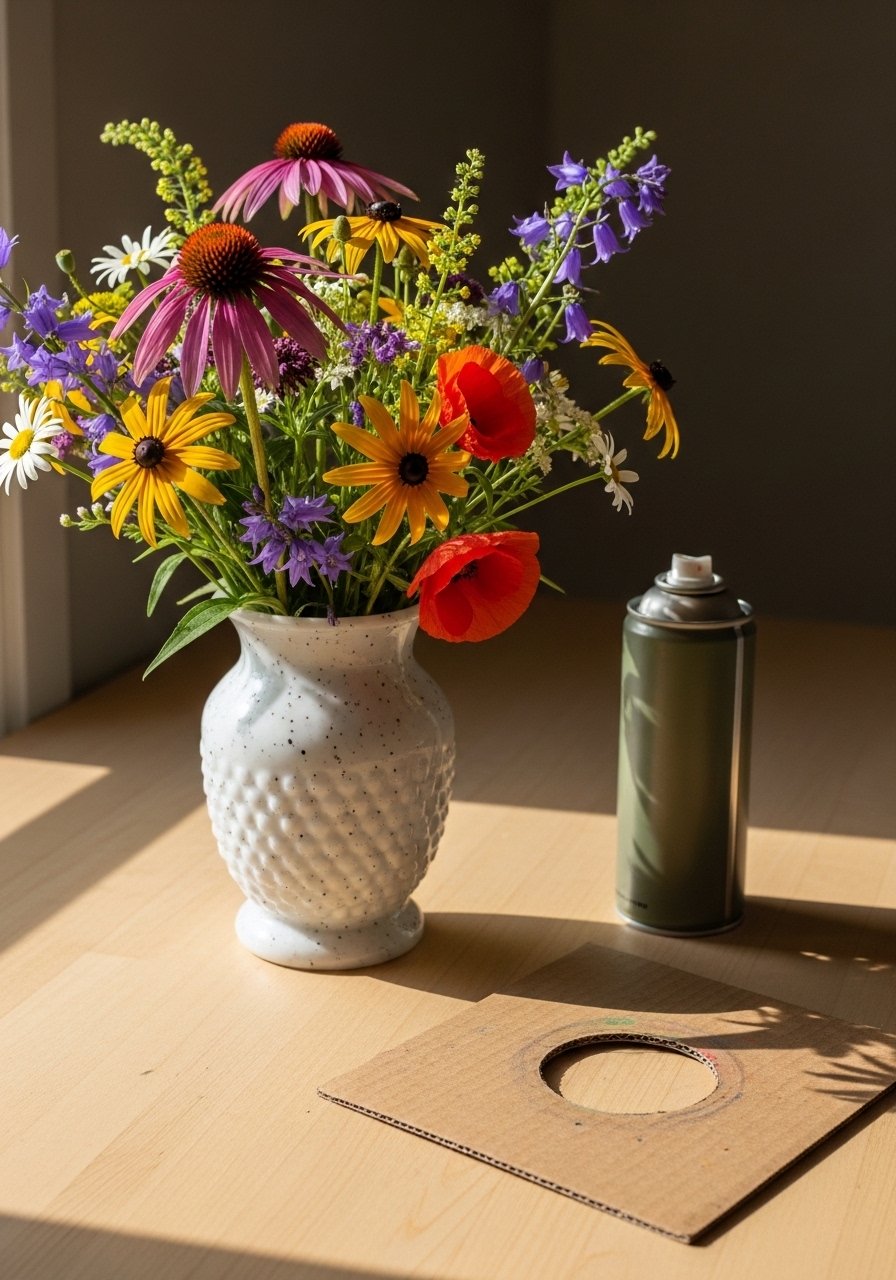
Spray paint can mimic milk glass with a speckled technique. This creates a farmhouse vibe without fragile vintage pieces. It's fast, ideal for weekend projects, and great for grouping different sizes for visual interest.
Materials
- 1 thrifted glass vase (any size)
- 1 can matte white spray paint, 12 oz
- 1 can clear matte sealer, 10 oz
- 1 toothbrush or spray shield (cardboard)
- Painter’s tape for protecting rims if desired
- Drop cloth or cardboard work surface
Instructions
- Clean and dry the vase thoroughly.
- In a well-ventilated area, apply 1 light base coat of white from 10–12" away. Let dry 15 minutes.
- For speckles, dip an old toothbrush into a small amount of paint and flick lightly over the vase while masked with a shield.
- Build layers until you like the speckle density, waiting 10 minutes between passes.
- Let dry 1 hour, then apply 2 thin coats of clear matte sealer for durability.
- Full cure 24 hours before adding water.
How to Display or Gift It
- Cluster with natural linen napkins and wooden trays for a farmhouse table.
- Fill with seasonal branches or tulips.
- Pack in a snug box with kraft paper; label fragile. For storage, use a bubble wrap roll.
- Embroidered Felt Sleeve Vase
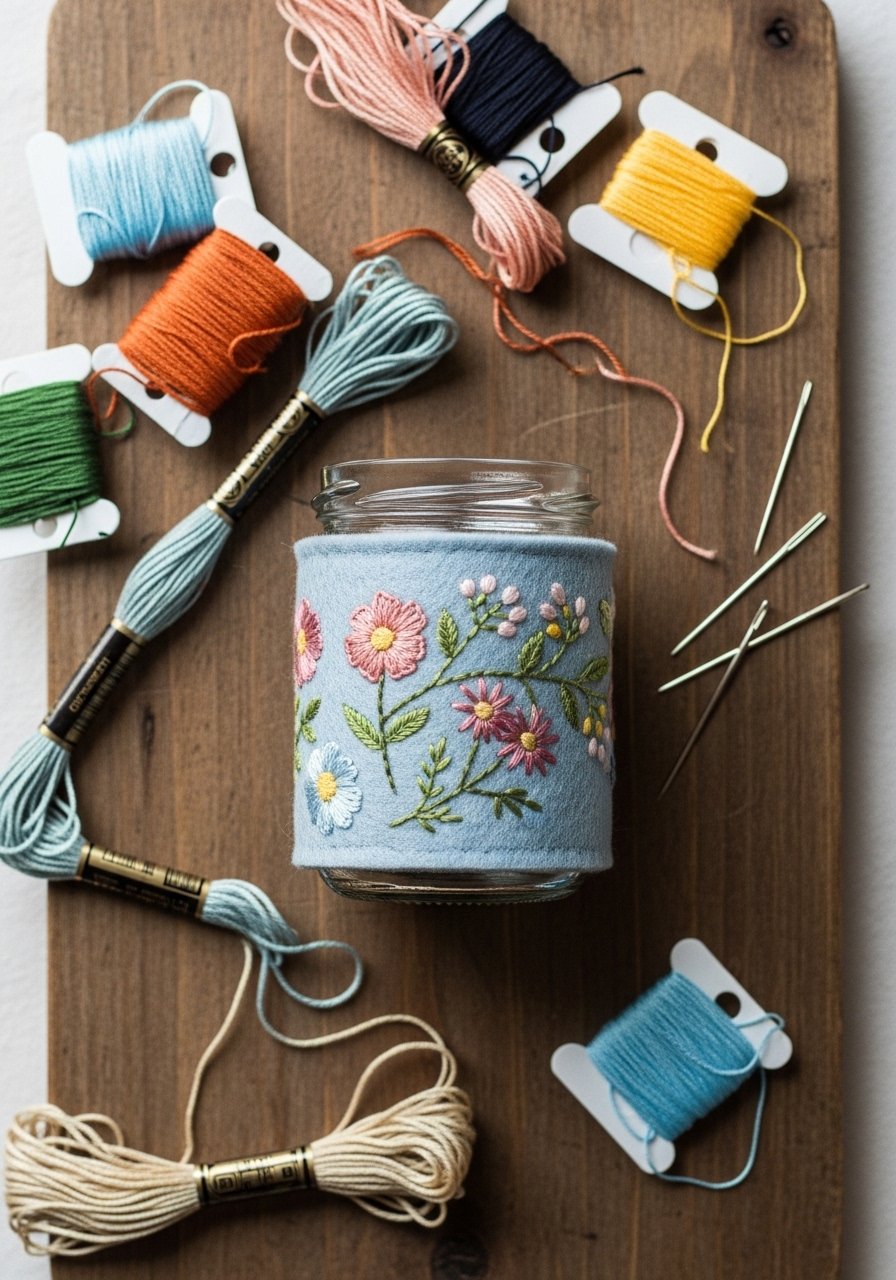
A felt sleeve adds textile warmth and makes the vase feel handmade. Embroidery stitches give a personal touch—perfect for Mother’s Day gifts. The sleeve is removable so the vase can be washed.
Materials
- 1 8 oz glass jar or small vase
- 1 sheet wool felt, 9×12", color of choice
- Embroidery floss (6-strand), 4 colors
- 1 embroidery needle and small scissors
- Fabric glue or a hot glue gun
- 1 ruler and chalk pencil for marking
Instructions
- Measure the jar circumference and height; add 1/2" seam allowance.
- Cut felt accordingly and mark floral design lightly with chalk.
- Use backstitch, French knots, and satin stitch to embroider motifs.
- Wrap sleeve around jar and secure the seam with a tiny dab of fabric glue or a discreet running stitch.
- Trim edges neatly. Let glue set 30 minutes.
- Slide sleeve off for washing vase; keep sleeve dry for longevity.
How to Display or Gift It
- Fill with short-stem posies or use as a pencil cup on a craft desk.
- Gift in a small muslin bag with extra embroidery floss.
- Store sleeves flat in a shallow fabric organizer tray.
- Resin-Encased Flower Vase (Topcoat Accent)
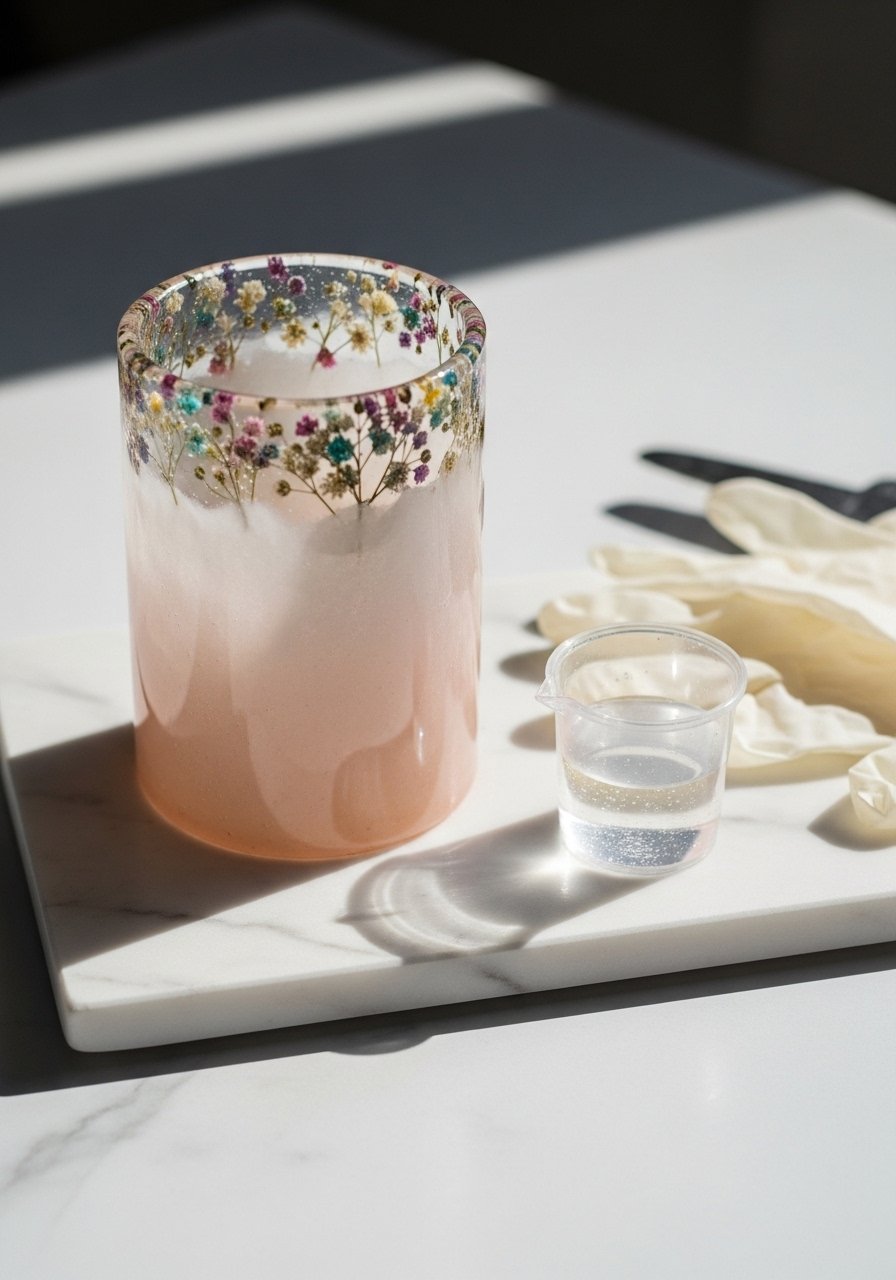
A thin resin rim with pressed flowers gives a luxe look. This project uses a small amount of epoxy over a clean glass edge—great for accenting a simple cylinder. Work in a dust-free area and follow resin safety.
Materials
- 1 glass vase, 6–8" tall
- 1 epoxy resin kit (clear, small 4 oz kit)
- Pressed tiny flowers (50 pieces)
- Mixing cups and stir sticks
- Disposable gloves and mask
- Fine-grit sandpaper (400)
- Small heat gun or torch to remove bubbles
Instructions
- Clean vase thoroughly and wipe with alcohol.
- Mix resin per kit directions (usually 1:1) and stir for 3 minutes.
- Pour a thin bead around the rim, place pressed flowers into the resin with tweezers.
- Gently pass a heat gun for 3–5 seconds to remove bubbles.
- Let cure 24–48 hours depending on resin instructions.
- Lightly sand any uneven edges with 400-grit for a smooth finish and buff clean.
- Full cure 72 hours before adding water.
How to Display or Gift It
- Use as a single-stem bud vase to show the resin rim.
- Wrap in a cushioned box for shipping; include cure time on a care tag.
- For safe storage of leftover resin supplies, a small storage case helps.
- Burlap-Wrapped Rustic Vase
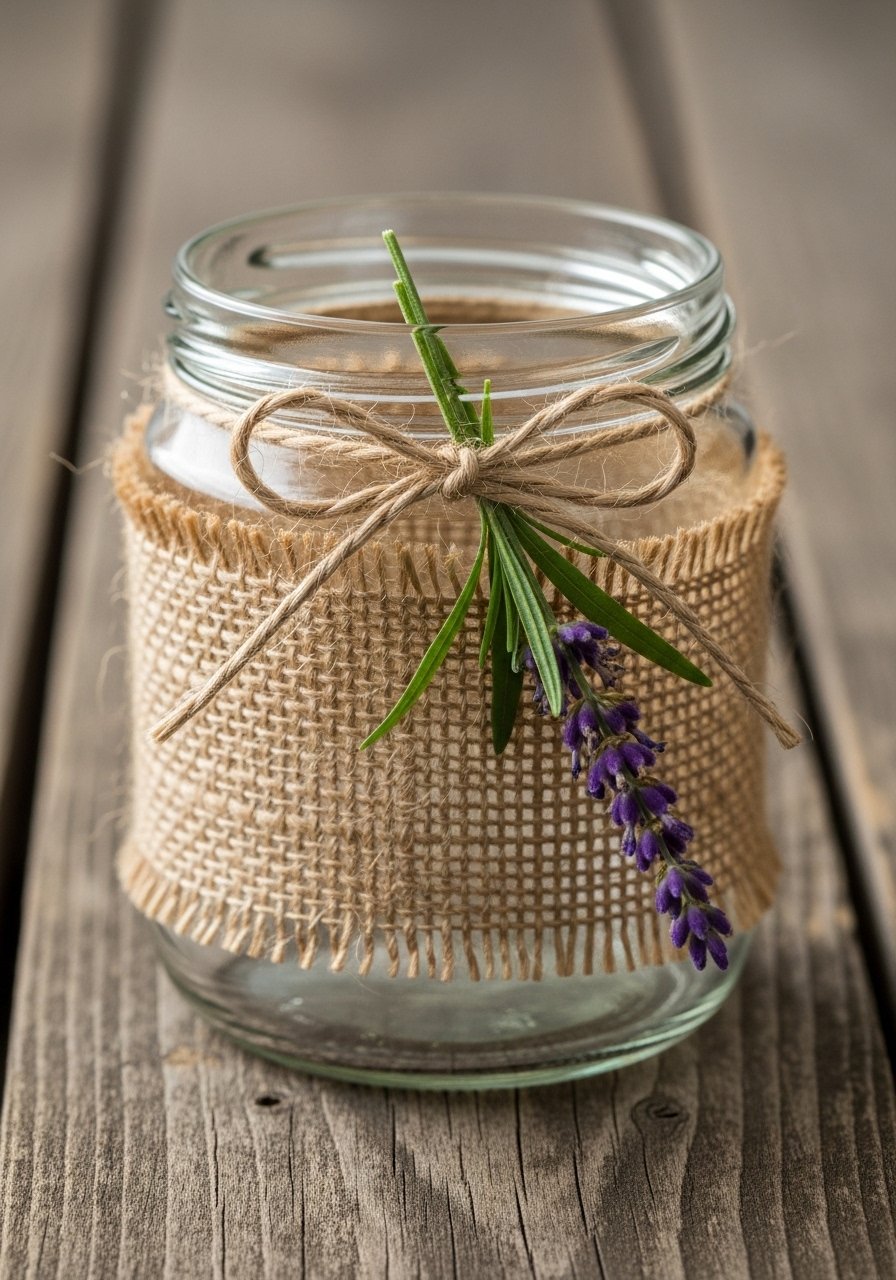
Burlap offers a simple rustic finish that pairs well with sunflowers or lavender. This quick wrap is forgiving and a lovely way to upcycle mason jars. The tactile roughness contrasts beautifully with fresh blooms.
Materials
- 1 mason jar or recycled jar, 16 oz
- Burlap ribbon, 6 ft long
- Jute twine, 10 ft
- Hot glue sticks and hot glue gun
- Scissors
- Dried lavender sprig for accent
Instructions
- Measure burlap to wrap around the jar with slight overlap.
- Secure the starting edge with a small dab of hot glue.
- Wrap tightly and glue the end.
- Tie a twine bow around the neck, tucking a lavender sprig under the knot.
- Add small glue dots to secure the sprig if needed.
- Let glue cool 5 minutes before handling.
How to Display or Gift It
- Fill with sunflowers or mixed wildflowers for a country table.
- Bundle several in a crate for market-style display.
- Wrap in cellophane and add a kraft tag. Store burlap and twine in a jute storage bag.
- Chalkboard Label Mason Vase
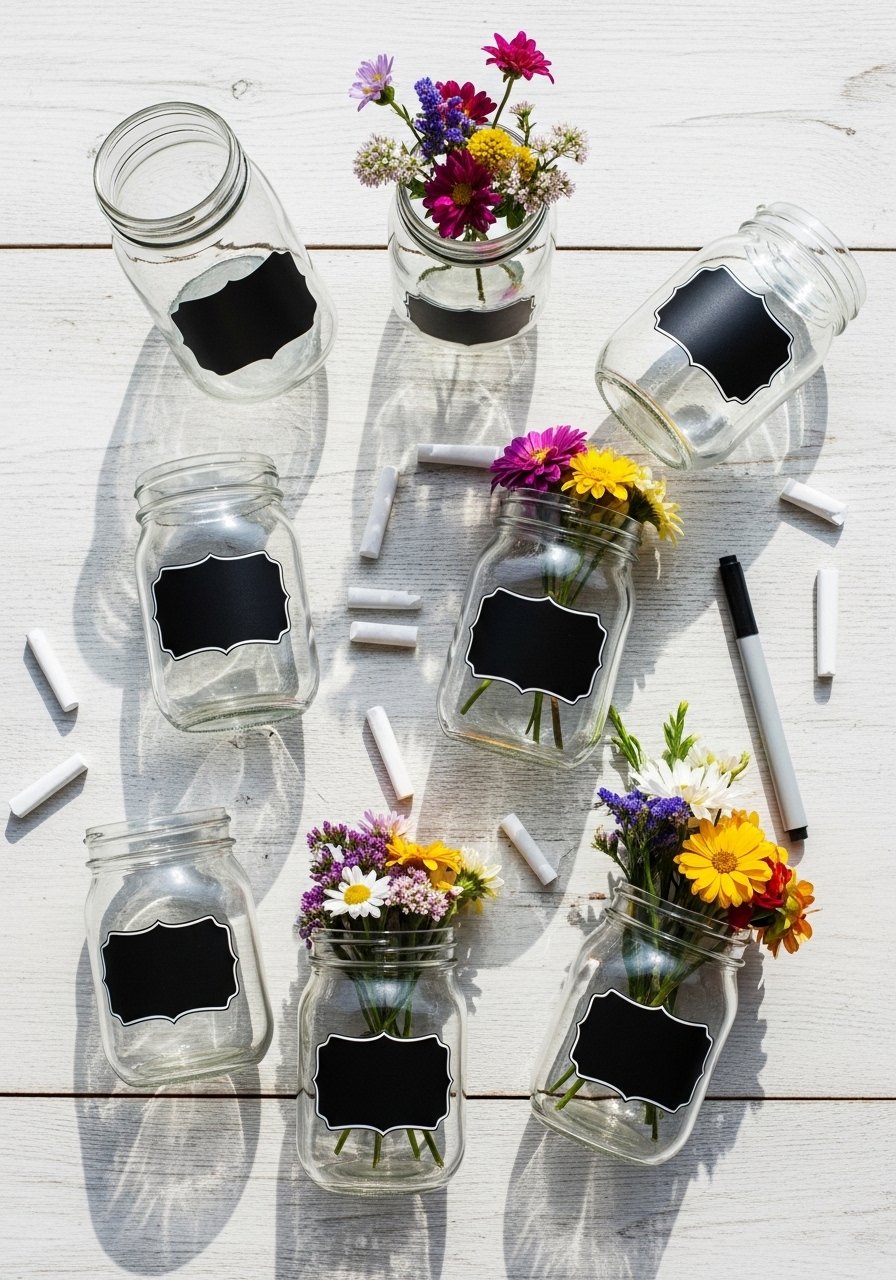
Add chalkboard labels to mason jars for customizable vases—perfect for events. You can write seasonal messages or flower names. Labels peel off cleanly, keeping the jar reusable.
Materials
- 1–6 mason jars, 16 oz each
- Chalkboard label stickers (6-pack)
- Chalk marker (white) or regular chalk
- Twine for neck bows, 5–10 ft
- Fresh seasonal flowers
- Small funnel (optional)
Instructions
- Clean the jar surface and apply chalkboard labels smoothly.
- Write messages with the chalk marker and let dry 2 minutes.
- Tie twine bows around the neck for a rustic accent.
- Fill jars with water and add flower food as needed.
- Change messages for events or seasons.
How to Display or Gift It
- Line several labeled jars down a table as a centerpiece.
- Use as place-card vases at a wedding by writing guest names.
- Store labels and markers in a craft label organizer.
- Wrapped Yarn Ombre Vase
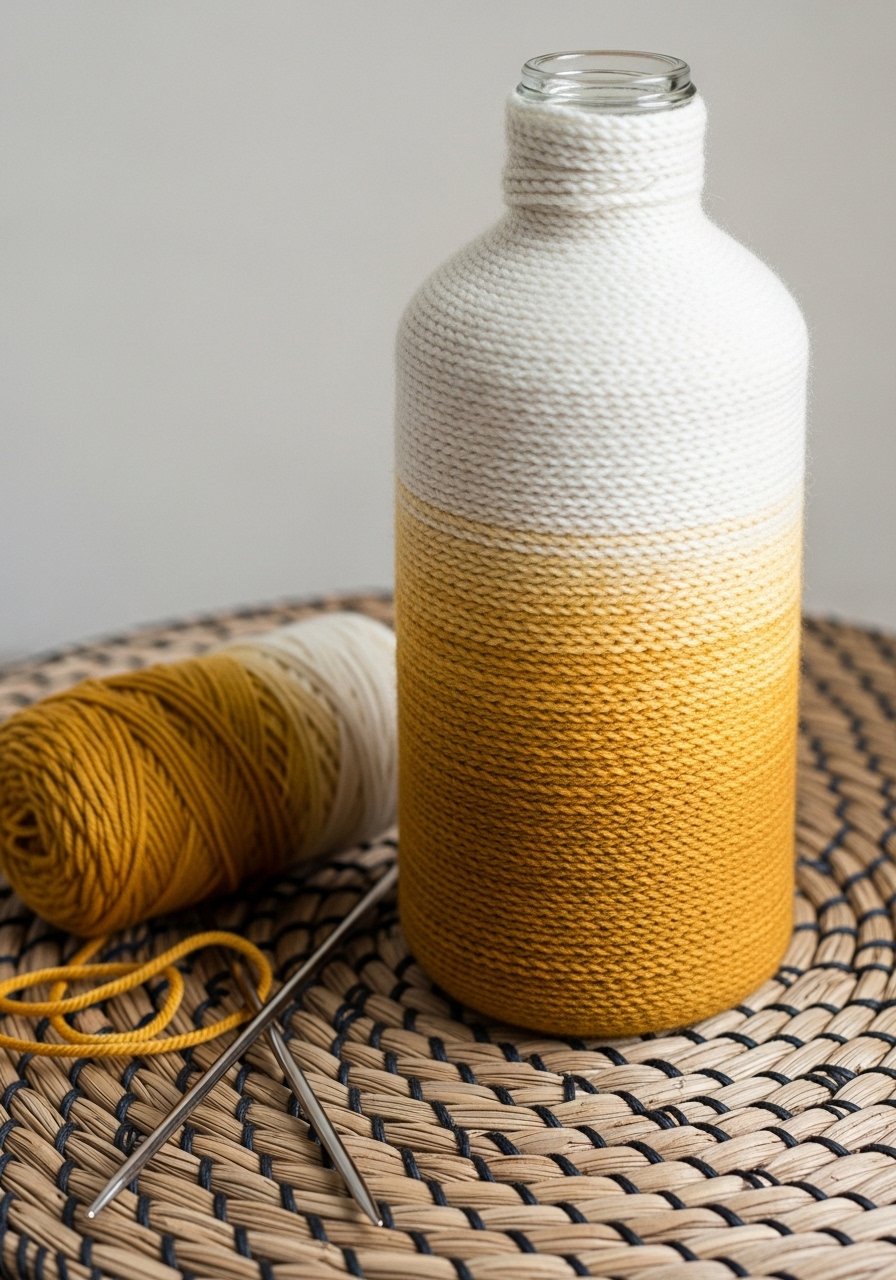
Yarn wrapping adds cozy texture and is a fast way to change the color story in a room. The ombre effect uses graduated yarn shades for a soft, knitted feel. This suits seasonal displays and living rooms with layered textiles.
Materials
- 1 recycled glass bottle, 9" tall
- Yarn in three shades (Bulky weight, 50 g each)
- Hot glue gun and glue sticks
- Scissors
- Measuring tape
Instructions
- Secure yarn end at the base with a dab of glue.
- Wrap tightly, adding glue every 4" to hold yarn.
- Transition to the next color by overlapping ends and gluing them flat.
- Keep tension even to avoid gaps or bulging.
- Finish at the neck with a knot hidden under a bow.
- Let glue set 10 minutes before filling with dried stems.
How to Display or Gift It
- Use with eucalyptus or cotton stems for a cozy vibe.
- Pair with a knitted throw and soft lighting.
- Pack with tissue in a long box. For extra yarn storage, try a yarn organizer bag.
- Metallic Leaf Gilded Vase
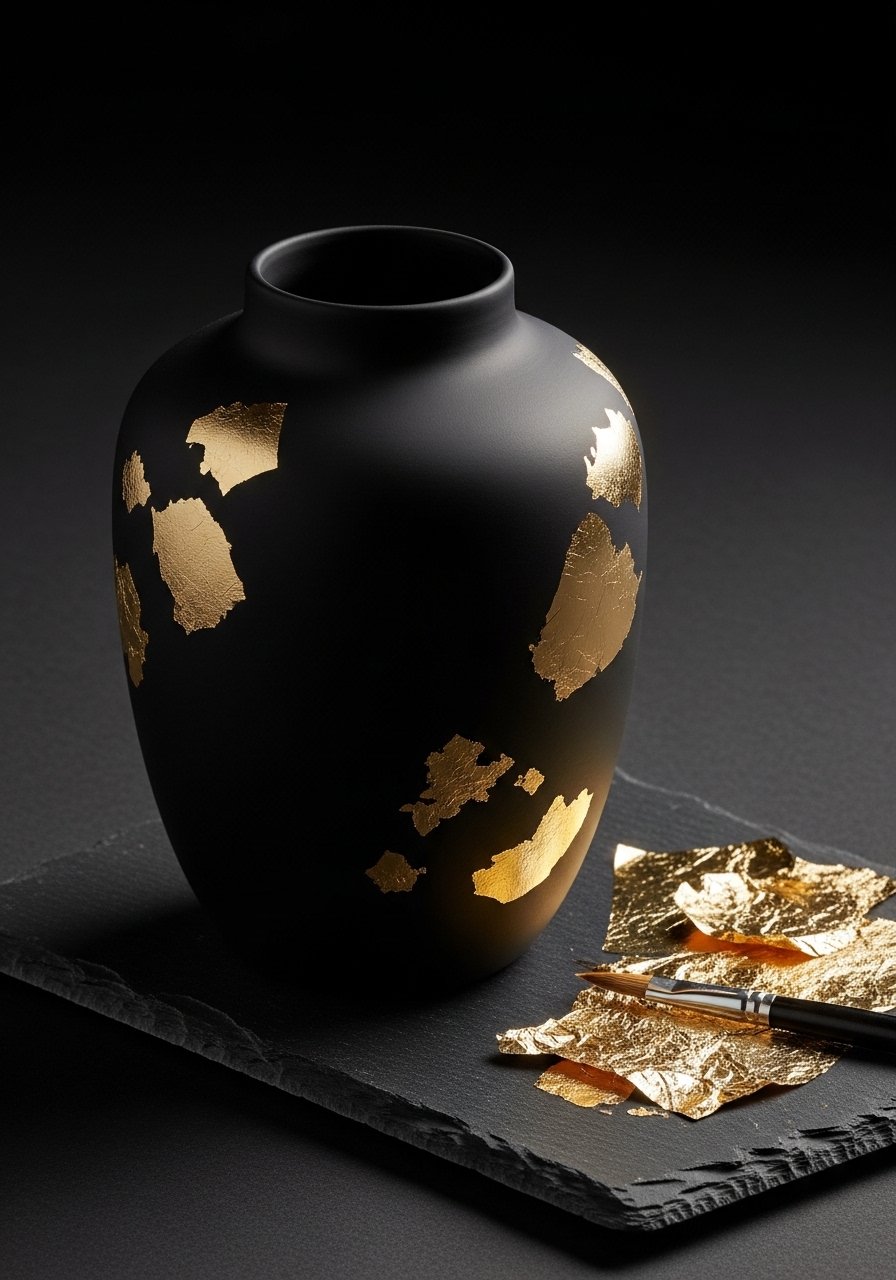
Gilding with metal leaf adds a touch of glamour. Sparse gold patches look modern and luxe on a matte base. It’s great for special-occasion vases or holiday displays.
Materials
- 1 ceramic vase, matte black finish
- Gold leaf sheets, 25 pages (genuine or imitation)
- Gilding adhesive (size), 2 oz
- Soft gilding brush
- Small sealer spray (varnish)
- Microfiber cloth
Instructions
- Clean vase and plan gold placement.
- Paint small areas with gilding adhesive and wait until tacky (per product, ~10–15 minutes).
- Lay gold leaf gently and press with the soft brush.
- Remove excess leaf with the brush; repeat until satisfied.
- Seal with a light spray varnish and let dry 1 hour.
- Cure 24 hours before use.
How to Display or Gift It
- Use a single stem of white lily for dramatic contrast.
- Wrap in velvet-lined box for gift giving.
- Store leftover gold leaf in a flat metal leaf storage folder.
- Washi Tape Striped Vase
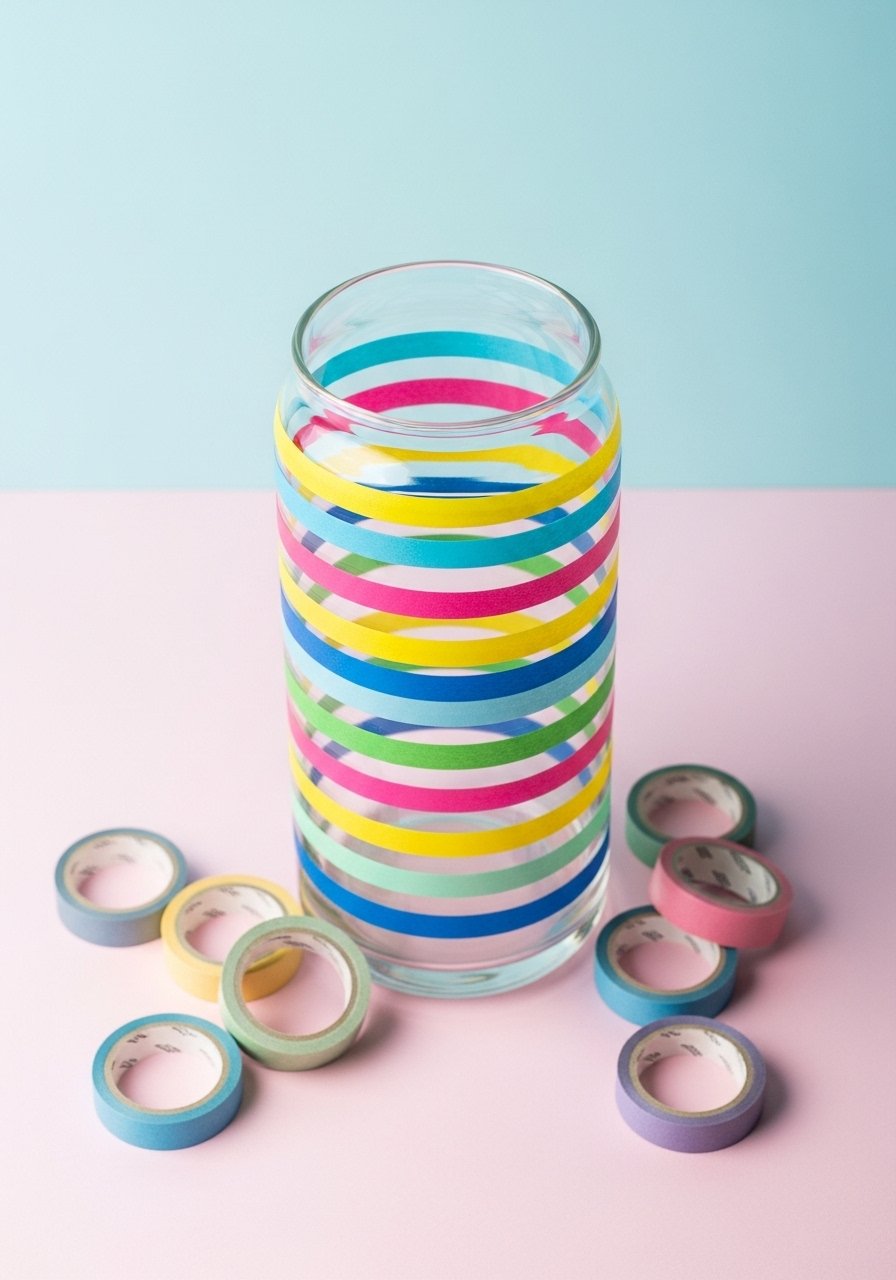
Washi tape stripes create playful, removable designs. It’s the fastest way to change your vase’s look by season or mood. No paint needed—easy for renters or quick party prep.
Materials
- 1 glass vase, any height
- Assorted washi tape rolls, 6–8 patterns
- Scissors or a craft knife
- Ruler
- Clear acrylic sealer (optional for durability)
Instructions
- Clean the vase and measure strip widths for even spacing.
- Apply tape strips slowly and press down to avoid bubbles.
- Trim ends with a craft knife for a clean edge.
- If you want permanence, lightly spray with acrylic sealer and let dry 30 minutes.
- Replace tape seasonally by peeling and reapplying new designs.
How to Display or Gift It
- Create a matching set for a cheerful table runner display.
- Pair with kraft-wrapped florals as a colorful gift.
- Keep rolls of washi in a washi tape dispenser.
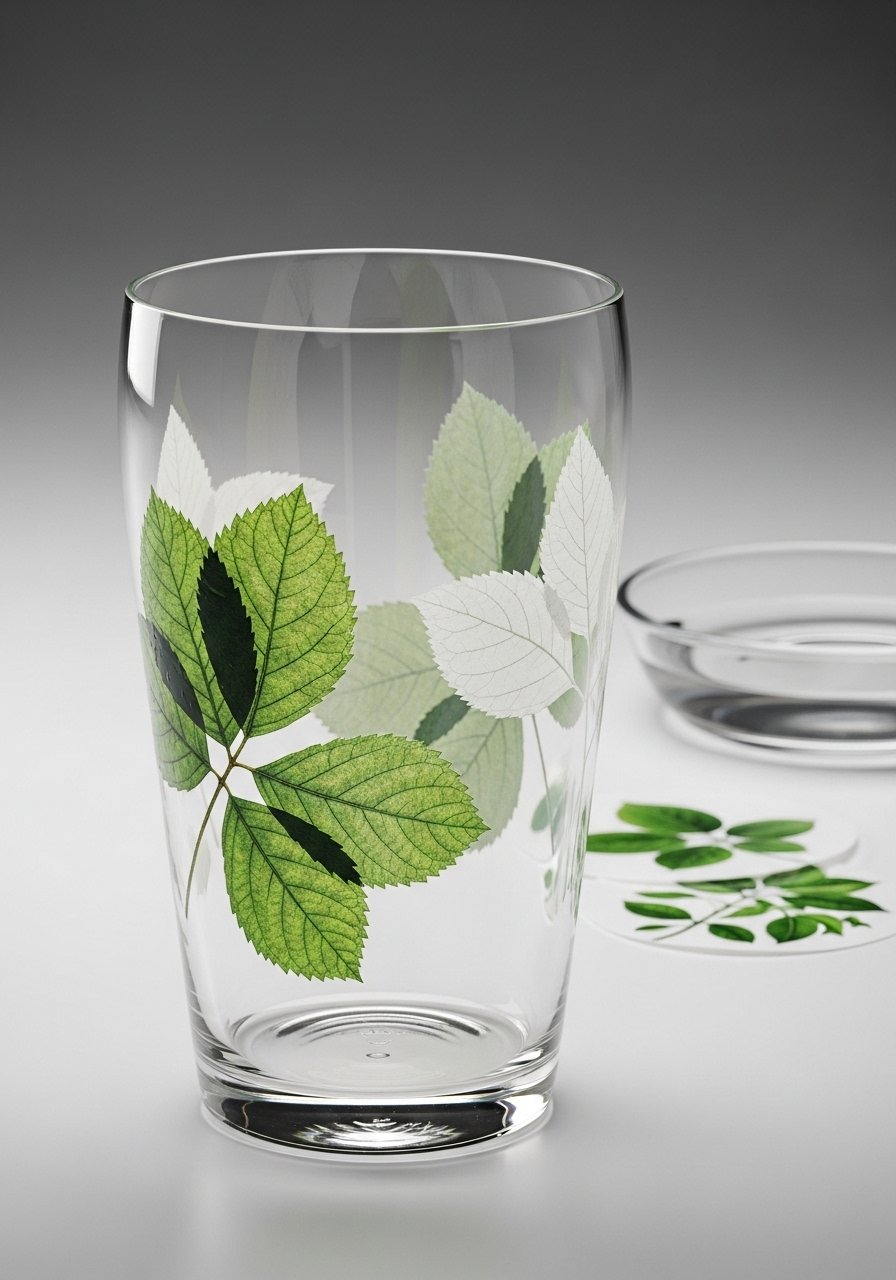
- Pressed Flower Glass Vase (Inside)
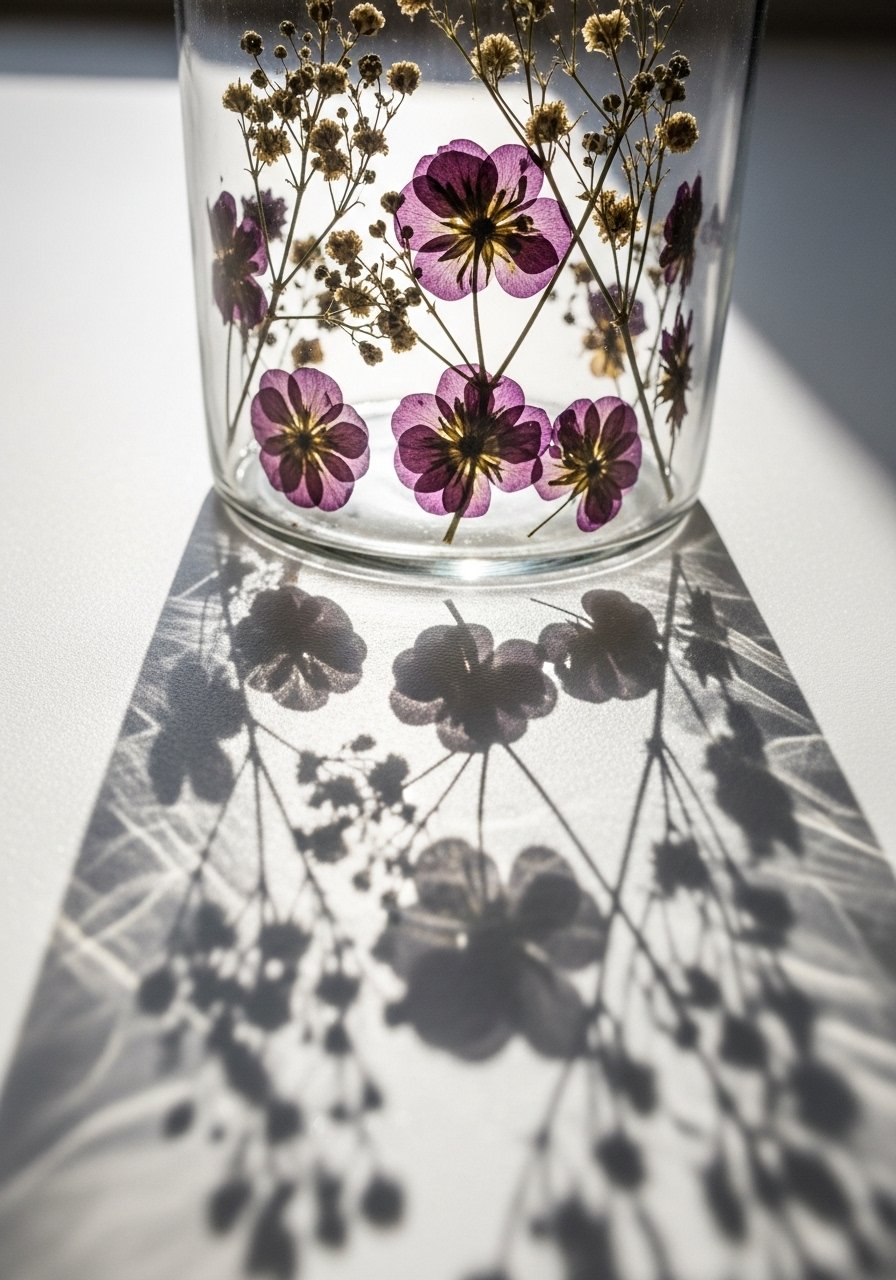
This delicate look affixes pressed petals inside the glass using a clear-drying adhesive. It requires patience but the result is jewel-like—perfect for small bud vases.
Materials
- 1 clear narrow-neck vase, 6–8" tall
- Pressed flowers and petals (assorted, flat)
- Clear-drying craft glue (thin applicator)
- Tweezers and a long, thin spatula tool
- Cotton swabs
- Microfiber cloth
Instructions
- Plan petal placement on a flat surface first.
- Use tweezers to place a petal against the inside glass and apply a tiny spot of glue with the applicator.
- Smooth with the spatula to remove air pockets.
- Continue until design is complete. Let dry 24 hours.
- Clean any glue residue with a damp cotton swab.
How to Display or Gift It
- Use with single-stem flowers to let the pressed petals shine.
- Include a note on how fragile the interior design is for gifting.
- Store extra pressed flowers in a flat pressed flower storage kit.
- Cork Mosaic Vase (Upcycled)

Cork mosaic is eco-friendly and textured. Using wine cork slices creates a warm, patterned surface. Great for kitchens or patios with a wine-country feel.
Materials
- 1 glass or ceramic vase, 6–8" tall
- 40–50 wine corks, sliced into 1/4" discs
- Strong craft adhesive (E6000 or similar), 2 oz
- Hot glue gun for temporary placement
- Sharp utility knife and cutting board
- Sandpaper for smoothing cork edges
Instructions
- Slice corks into discs evenly on a safe surface.
- Arrange discs before gluing to plan pattern.
- Use E6000 to adhere discs, pressing firmly for 10 seconds each.
- Fill gaps with smaller disc pieces.
- Let adhesive cure 24–48 hours before handling.
- Seal with a thin brush-on sealer if desired.
How to Display or Gift It
- Use with wildflower bunches for a picnic-ready vibe.
- Wrap in kraft paper and tie with twine for gifting.
- Store extra corks in a small craft bin.
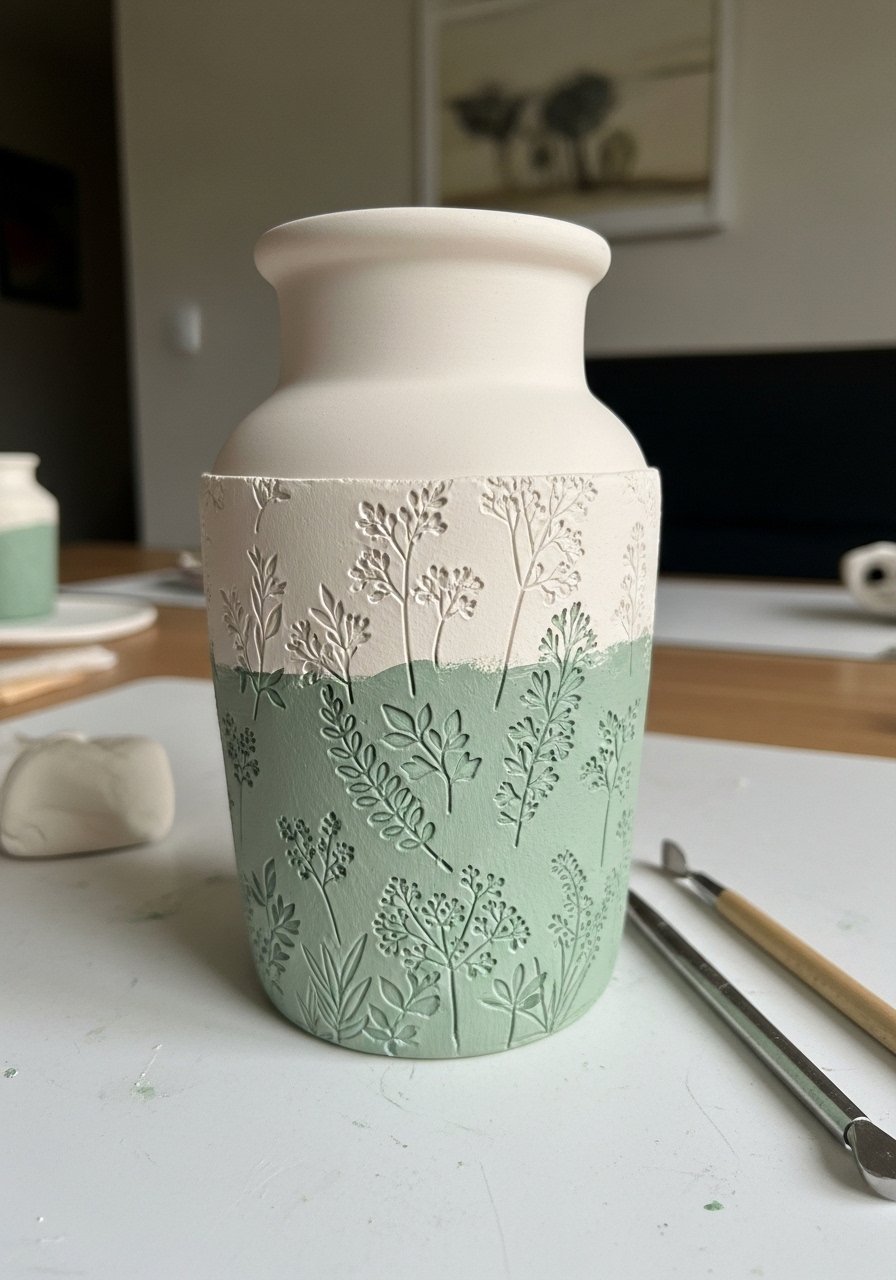
- Painted Botanical Stencil Vase

Stenciled botanicals mimic wallpaper patterns on vases. This technique fits cottagecore and botanical aesthetics. A detail brush helps add tiny veins for realism.
Materials
- 1 ceramic vase, unglazed or primed
- Botanical adhesive stencil sheets
- Acrylic craft paints (leaf green, olive, light green)
- Small stencil brush and detail brush
- Painter’s tape
- Matte varnish spray
Instructions
- Prime vase if needed and let dry 30 minutes.
- Apply stencil and tape edges down snugly.
- Use the stencil brush to apply paints in light, circular dabs.
- Remove stencil carefully and touch up veins with a detail brush.
- Let paint cure 24 hours, then spray with matte varnish.
- Wait 24–48 hours before water contact.
How to Display or Gift It
- Pair with potted herbs or seedlings for a kitchen gift.
- Display on a windowsill with morning light.
- Keep stencils in a labeled stencil storage folder.
- Dipped Metallic Rim Vase
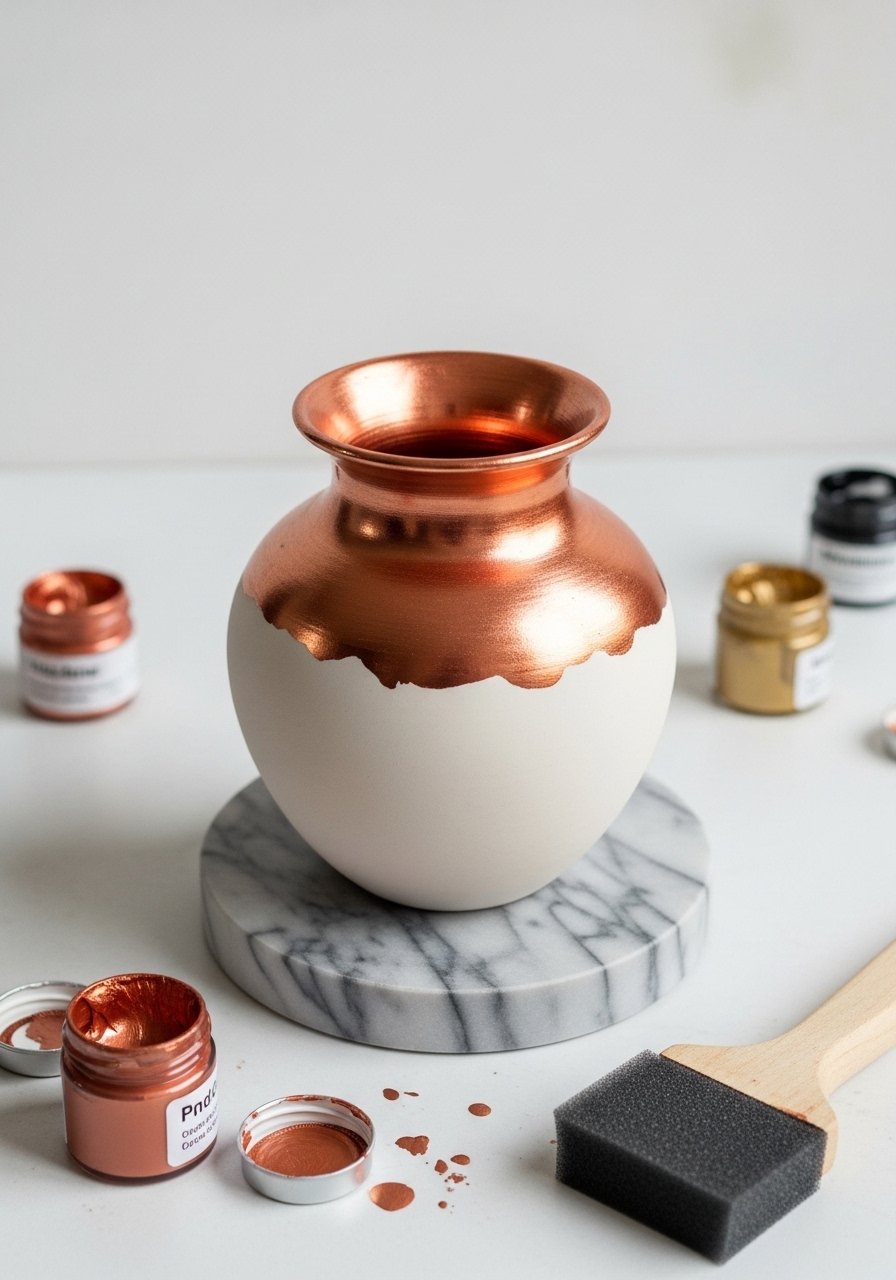
A dipped metallic rim is subtle but luxe. Quick to execute, this technique refreshes a plain vase and suits holiday or everyday use.
Materials
- 1 ceramic or glass vase, any size
- Metallic acrylic paint, copper or gold, 2 oz
- Foam brush
- Painter’s tape (optional for clean line)
- Clear gloss varnish
Instructions
- Tape off the line where you want the metallic dip.
- Apply metallic paint with a foam brush in thin coats.
- Let each coat dry 15–20 minutes; apply 2–3 coats for opacity.
- Remove tape carefully and touch up if needed.
- Seal with gloss varnish and let cure 24 hours before use.
How to Display or Gift It
- Pair with jewel-toned flowers for glam decor.
- Nest in a gift box with tissue. For extra protection, a small bubble mailer works well.
- Painted Chalkboard Stripe Vase (Keyword Use)
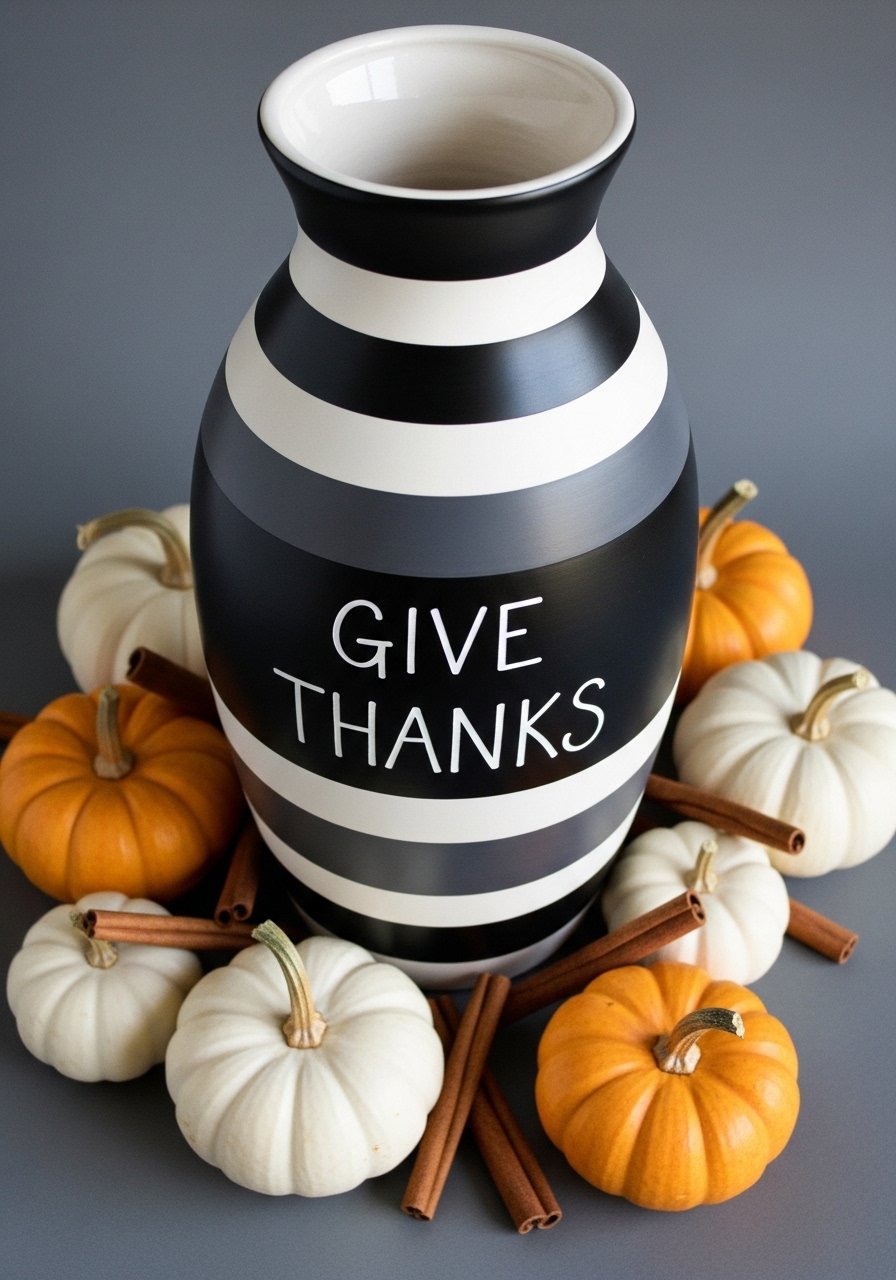
This floral vase decorating ideas pick mixes chalkboard paint and stripes for a seasonal label. Write holiday messages or floral names—changeable and charming for gatherings.
Materials
- 1 tall glass vase, 10" tall
- Chalkboard paint, 4 oz
- Painter’s tape, 1"
- Chalk or chalk marker
- Foam brush and small ruler
- Clear matte sealer (optional)
Instructions
- Mark stripes with a ruler and tape edges.
- Apply two thin coats of chalkboard paint, letting each dry 30 minutes.
- Remove tape and condition the surface by rubbing chalk across and wiping clean.
- Write your message with a chalk marker; let dry 2 minutes.
- Seal edges with matte sealer if desired; cure 24 hours before filling.
How to Display or Gift It
- Use for Thanksgiving centerpieces with handwritten menus.
- Store chalk and markers in a small pencil case alongside the vase for easy reuse.
- Fabric-Decoupage Linen Wrap Vase
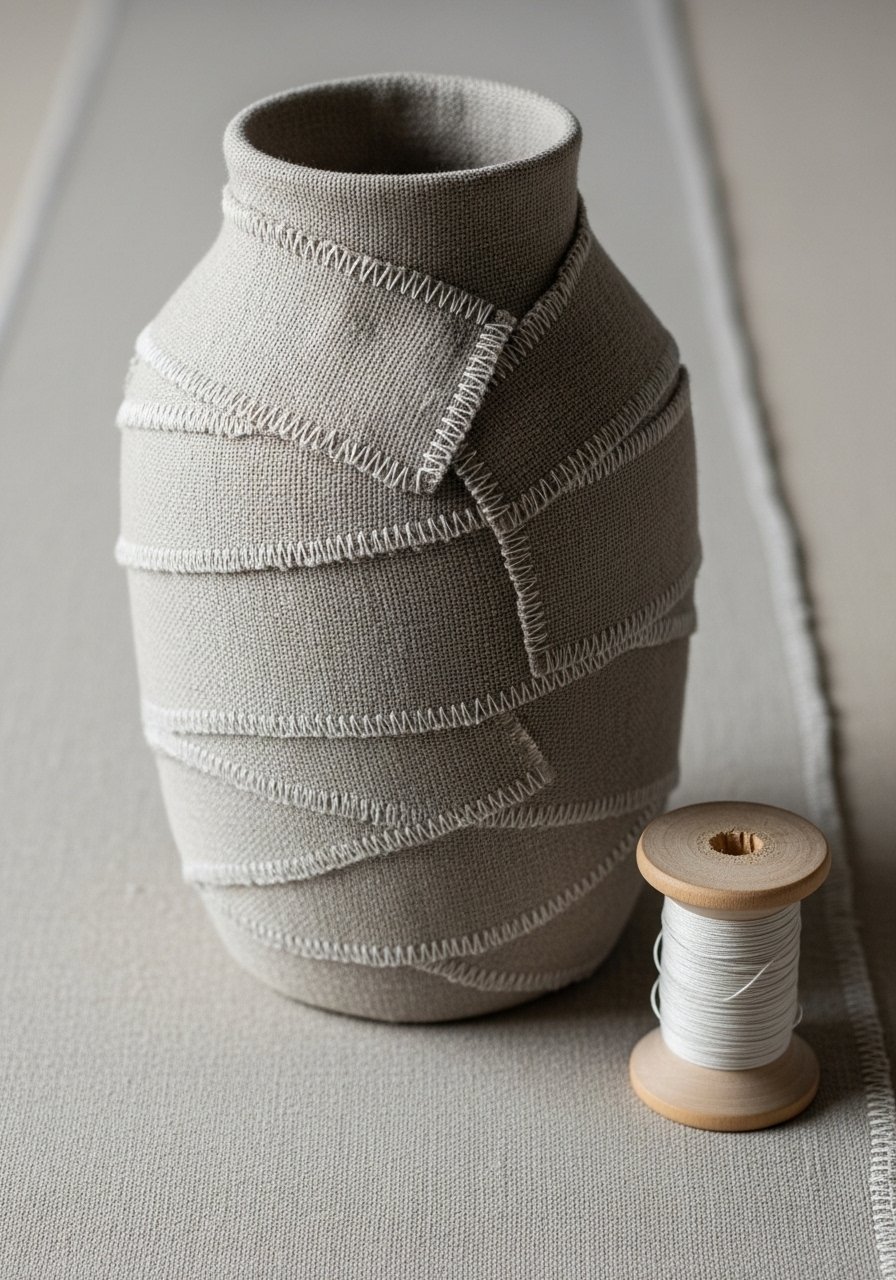
Linen decoupage wraps bring a soft, tactile finish. Use fabric scraps and Mod Podge for a tailored look that suits neutral, Japandi, or coastal interiors.
Materials
- 1 glass jar or vase, 8–10" tall
- Linen fabric scraps, total 1/2 yard
- Mod Podge (matte), 8 oz
- Foam brush and scissors
- Straight pins to hold during drying
- Clear matte spray sealer
Instructions
- Cut fabric strips long enough to wrap with slight overlap.
- Brush Mod Podge onto the vase and place fabric, smoothing wrinkles.
- Trim excess and finish seam with a thin glue line.
- Apply 2 topcoats of Mod Podge over fabric for durability.
- Let dry 1 hour between coats and cure 24 hours before use.
How to Display or Gift It
- Tuck a dried sprig behind a stitched seam for a finishing touch.
- Wrap in tissue and place in a tall gift box. Store leftover fabric in a fabric storage bin.
- Ribbon Tassel Vase
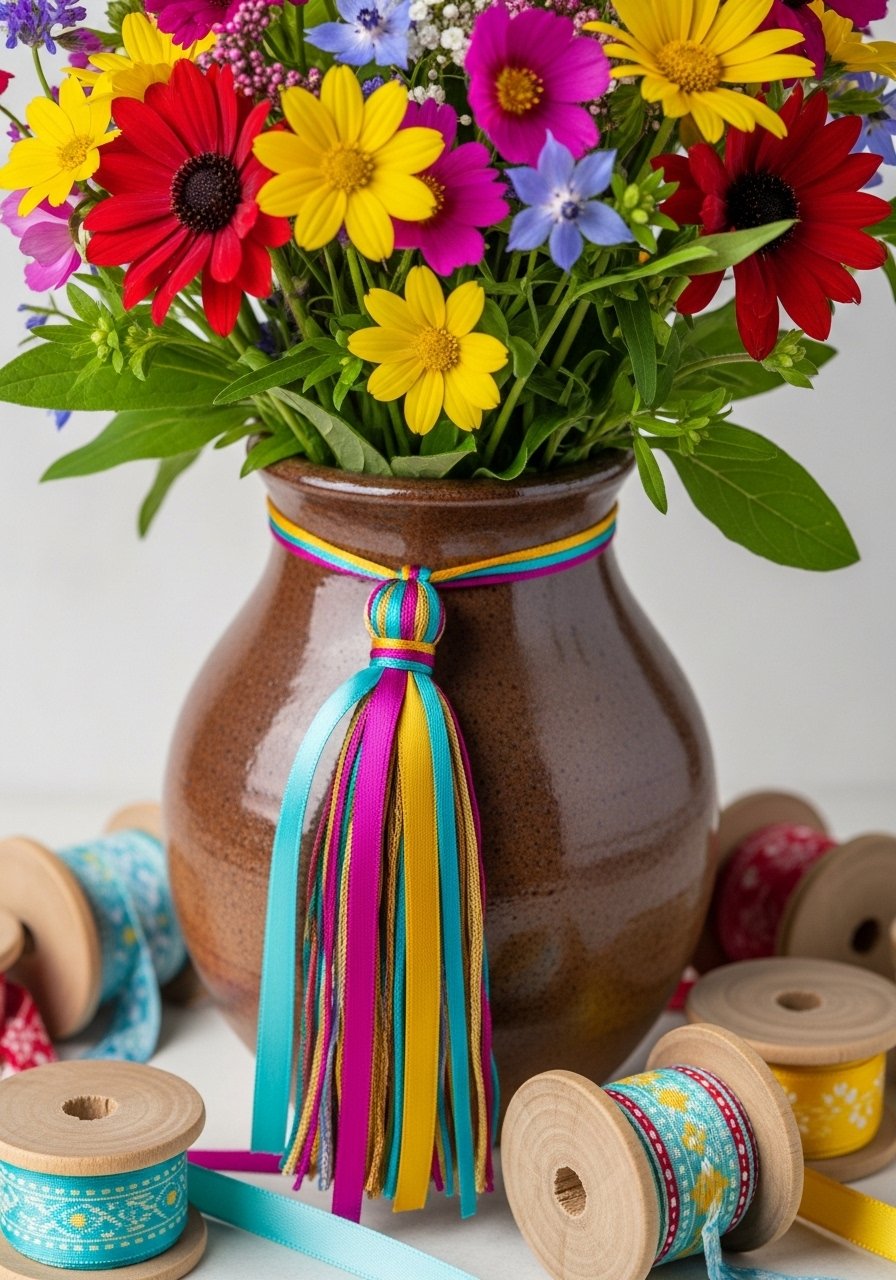
A ribbon tassel adds movement and color. Change tassel ribbon seasonally for a quick refresh—fun for parties and kid-made gifts.
Materials
- 1 small bottle or jar, 6–8" tall
- Assorted ribbons, total 6 ft
- Scissors
- Hot glue gun
- Small jump ring or ribbon ring (optional)
Instructions
- Cut ribbon lengths (6–8" each) and fold to form a tassel.
- Tie at the top with thin twine and attach the ring if using.
- Glue ring or knot to the neck of the vase.
- Trim ends evenly and fluff ribbons.
- Change ribbons for seasons or events.
How to Display or Gift It
- Use bright ribbons with sunflowers for summer picnics.
- Pack tassel separately in tissue for shipping.
- Keep extra ribbon organized in a ribbon storage box.
- Painted Botanical Transfer Vase (Decal)
Water-slide decals allow intricate botanical designs without hand painting. This technique yields sharp, printed detail and is great for matching sets.
Materials
- 1 glass or ceramic vase, 8–10" tall
- Water-slide decal sheets with botanical prints
- Scissors and small bowl of warm water
- Clear acrylic sealer spray
- Soft cloth for smoothing
Instructions
- Cut designs from decal sheet and soak in warm water until they slide off backing (usually 30–60 seconds).
- Slide decal onto the vase and smooth with fingers or a soft cloth.
- Let dry 1 hour, then seal with 2 light coats of acrylic sealer, 15 minutes apart.
- Cure 24 hours before adding water.
How to Display or Gift It
- Group matching decal vases in a centerpiece.
- Include decal sheets with instructions when gifting. Store extra decals flat in a document sleeve.
- Speckled Eggshell Vase (Eco Finish)
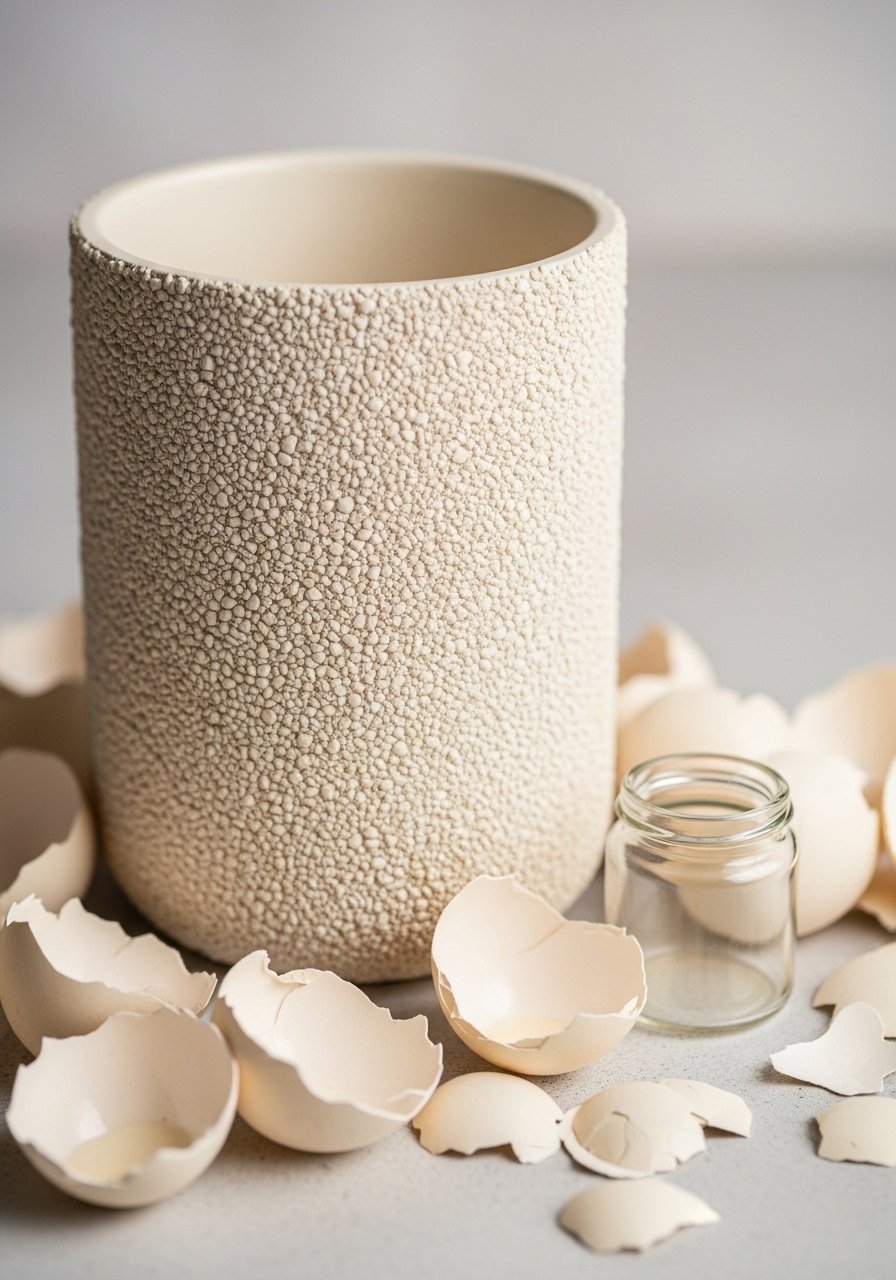
Eggshell speckle gives an organic, tactile surface using recycled shells. It’s eco-friendly and subtle—perfect for neutral, earth-toned decor.
Materials
- 1 clay or ceramic vase, primed
- Crushed eggshells, about 1/2 cup, ground to small pieces
- White craft glue, 4 oz
- Foam brush for glue application
- Clear matte sealer
Instructions
- Mix glue and a little water to thin slightly.
- Brush glue on vase sections and press crushed shells into the glue.
- Continue until covered; allow to dry 2–4 hours.
- Gently brush off loose shells and apply a thin sealer coat.
- Cure 24 hours before use.
How to Display or Gift It
- Complements dried grasses for neutral arrangements.
- Wrap securely for gifting and include a note about fragile texture.
- Keep extra shells in a labeled small jar.
- Marbled Alcohol Ink Vase
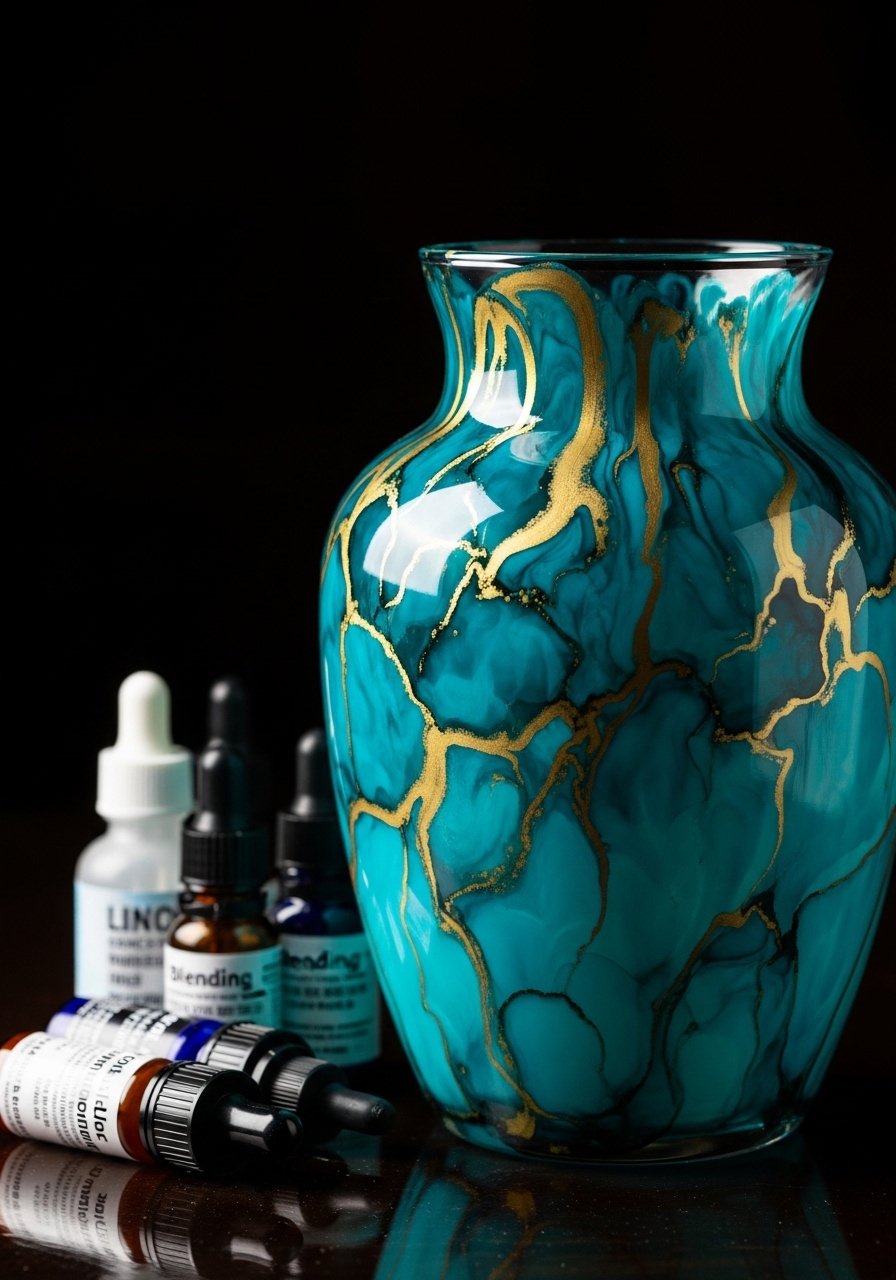
Alcohol inks create vibrant marbling on glass—bold and modern. The colors flow beautifully for statement pieces and look particularly striking with single-stem arrangements.
Materials
- 1 glass vase, 8–10" tall
- Alcohol inks (teal, navy, gold), 3 small bottles
- Blending solution, 1 oz
- Disposable gloves and paper towel
- Small straw or air blower for manipulating ink
- Isopropyl alcohol for cleanup
Instructions
- Clean the glass and work over protected surface.
- Apply drops of ink and a bit of blending solution.
- Use a straw or blower to push the ink into marbled patterns.
- Add gold sparingly for accent.
- Let dry 30–60 minutes; seal with clear gloss spray for durability.
- Wait 24 hours before adding water.
How to Display or Gift It
- Pair with tropical stems for bold table styling.
- Cushion in fabric-lined box for shipping. For ink storage, a small tackle box works well.
- Painted Patterned Clay Vase (Air-Dry Clay Sleeve)
Air-dry clay sleeves add sculptural depth. Stamp patterns into the clay before wrapping the vase for a tactile, handmade look. Ideal for gifting to craft-loving friends.
Materials
- 1 glass bottle or jar, 8–10" tall
- Air-dry clay, 250 g
- Rolling pin and texture stamps
- Clay sculpting tools and a small knife
- Acrylic paints (sage and cream)
- Clear matte varnish
Instructions
- Roll clay to 3–4 mm thickness and stamp patterns.
- Cut a sleeve the height of the vase, leaving 1/4" overlap.
- Moisten the vase slightly and wrap clay around, smoothing seam.
- Score and wet seam to bond; let air-dry 24–48 hours.
- Paint with acrylics and seal with matte varnish. Full cure 72 hours before use.
How to Display or Gift It
- Fill with faux stems to avoid clay getting wet.
- Package in a sturdy box with padding. Keep extra clay in an airtight clay storage container.
Thanks for scrolling—what a creative ride! From quick washi tape refreshes to textured clay sleeves and resin accents, these floral vase decorating ideas give you options for every skill level and season. Pin this for later and pick a project when a bouquet inspires you. Which style will you try first—boho macramé, painted ombre, or a gilded rim? Share a photo with a friend or make a few as thoughtful, handmade gifts.
Trust me, upgrading your glue game with a quality hot glue gun and keeping a small stash of foam brushes and Mod Podge on hand makes tackling multiple projects quicker and more fun. Happy crafting—and don’t forget to pin your favorites.


