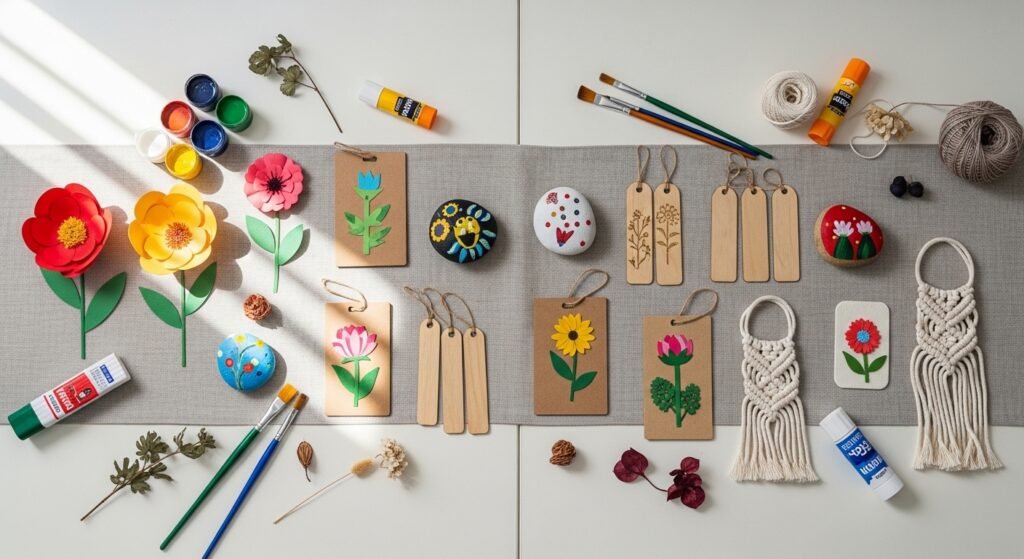
You’ve got a week of group activities to plan and only a small budget. These 24 classroom craft ideas for kids are built for busy teachers, parent volunteers, and craft club leaders who want projects that are cheap, fast to prep, and fun to make in groups. Each project lists exact materials, simple step-by-step directions, drying times, plus display and gifting tips you can use right away.
You’ll notice projects that suit lots of styles—cottagecore paper florals, boho yarn mobiles, farmhouse painted wood signs—so you can match themes for seasons or classroom corners. I often start cutting shapes with my Cricut Joy cutting machine to save prep time, but scissors work fine for younger groups. For gluing and quick fixes, I reach for a reliable hot glue gun with a low-temp setting—safer for little hands and speedier than craft glue.
These are meant to scale: choose one activity or run a craft-station rotation. Classroom craft ideas for kids don’t have to be fussy—just clear steps, measured supplies, and a few helpful tools. Let’s get crafting.
- Painted Story Stones
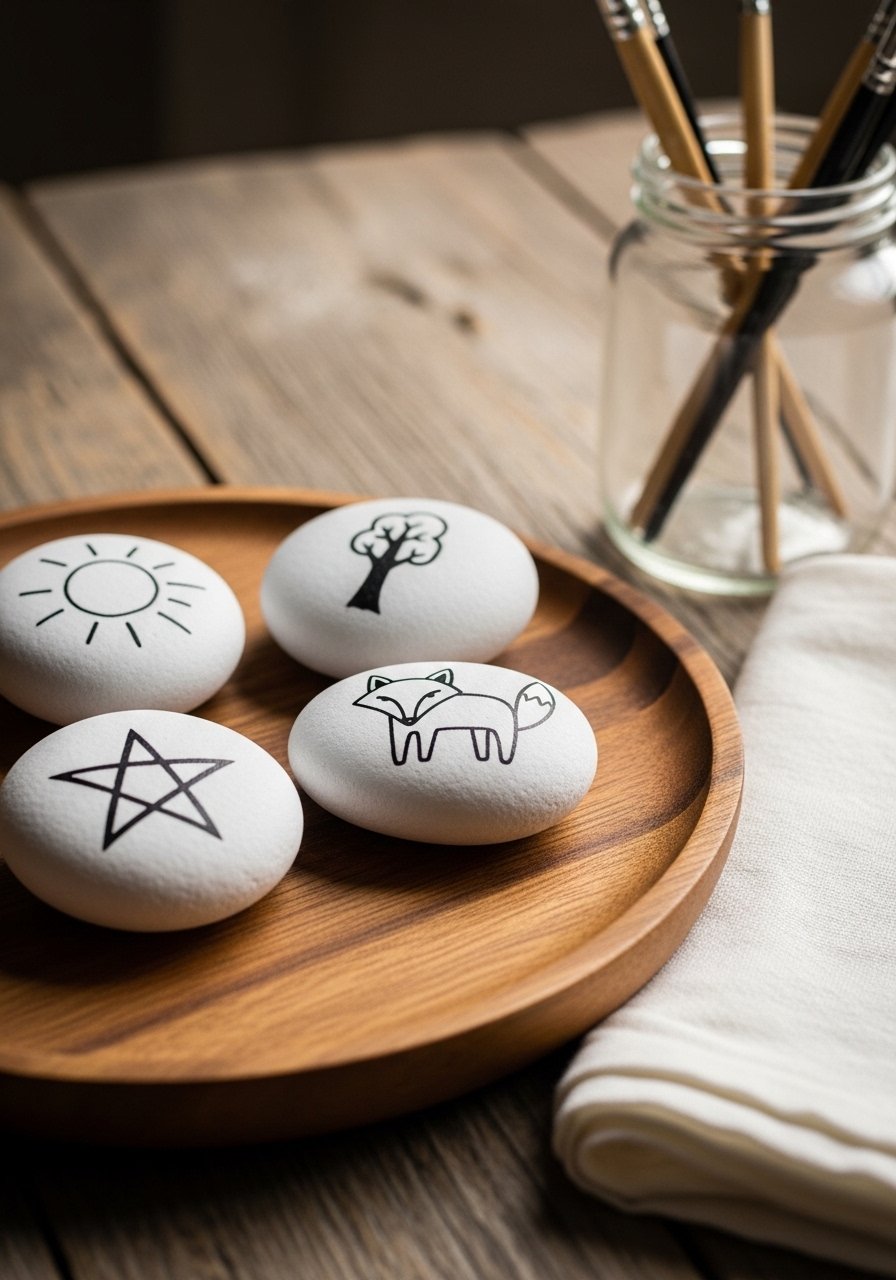
These tiny story stones turn circle time into spontaneous storytelling. The matte painted surface is tactile and perfect for little hands. Kids will love the bold shapes and you’ll like the minimal prep and durable outcome.
Materials
- 20 smooth river stones (about 1–2 inches each)
- Acrylic craft paint set (assorted colors, 12-pack)
- White paint pen, fine tip (for highlights)
- Clear matte sealer spray, 1 can (covers 40–60 stones)
- Flat foam brush, 1 (for base coats)
- Paper towels, small stack
- Cardboard tray to dry stones
Instructions
- Wash stones and dry fully; let air-dry 30 minutes.
- Apply one thin coat of base color with a flat foam brush; dry 15–20 minutes.
- Add details like eyes, leaves, or dots with acrylic and a small round brush; wait 10 minutes between colors.
- Use a white paint pen for crisp highlights and outlines.
- Let painted stones cure for 24 hours before sealing.
- Spray 2 light coats of clear matte sealer, 15 minutes between coats; handle after 1 hour.
How to Display or Gift It
Store stones in small drawstring bags and keep sets in a craft organizer tray for storytelling circle time. For gifting, tuck a set into a kraft box with a printed prompt card. Use a small wooden easel to show favorite stones during story hour.
- Washi Tape Bookmarks (Kid-Friendly)
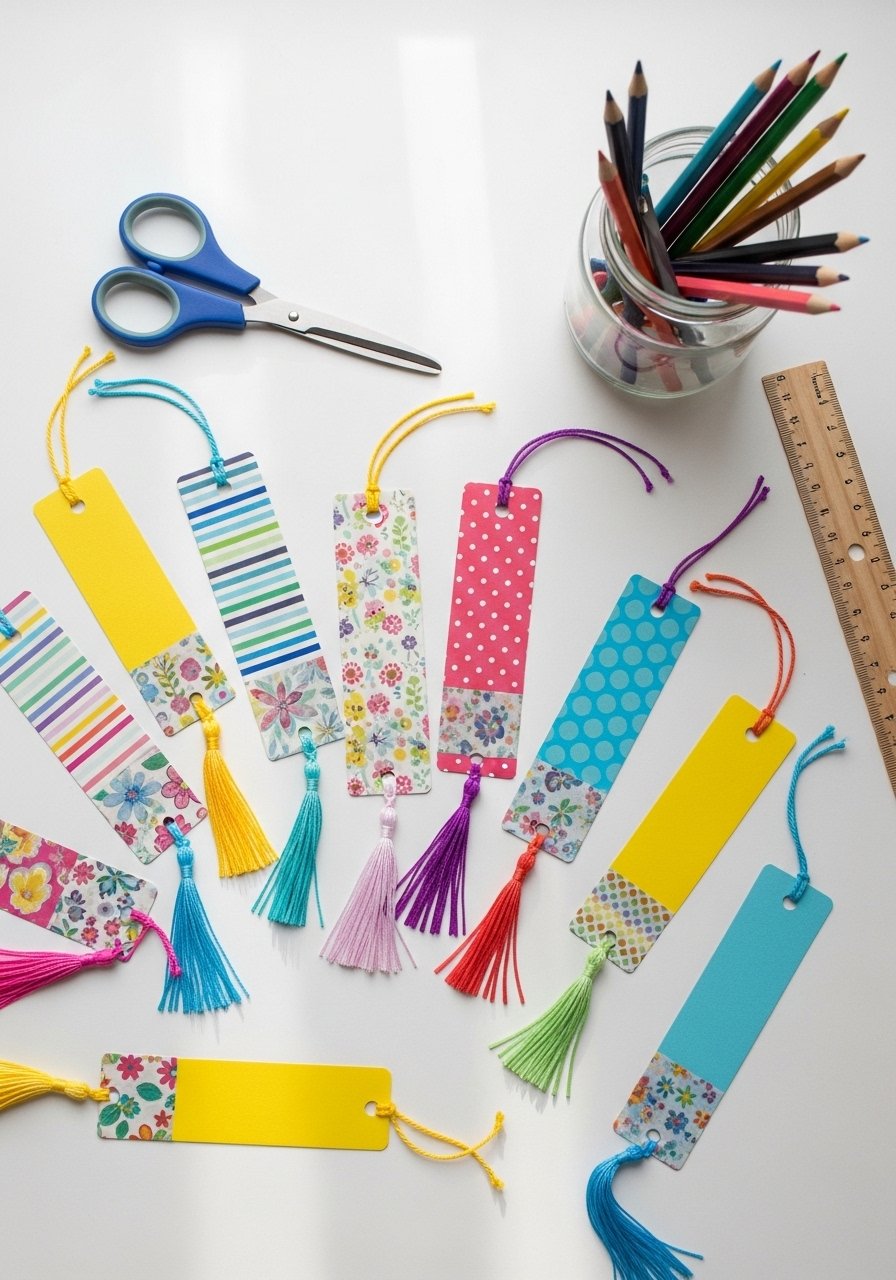
These bright bookmarks are easy to prep—cut cardstock, stick washi tape, and punch a hole for a yarn tassel. They’re great for independent reading rewards and fit cottagecore or classroom rainbow themes.
Materials
- 20 sheets heavy cardstock (5×8 inches)
- Washi tape rolls, assorted patterns (3 rolls)
- Hole punch, single
- Yarn, 3-yard skein (for tassels)
- Scissors, student-safe
- Ruler, 12-inch
Instructions
- Cut cardstock into 5×8-inch bookmark rectangles.
- Create patterns by layering washi tape across one side; trim edges with scissors.
- Punch a hole 1/2 inch from top center.
- Make tassels: fold 12 inches of yarn in half, loop through hole, knot.
- Smooth edges with a bone folder or by pressing down with a ruler.
- Stack finished bookmarks flat for 10 minutes to flatten tape.
How to Display or Gift It
Place bookmarks in a mason jar on the classroom reading shelf. Tie groups of five in kraft paper with twine and a handwritten note for parent volunteers. Keep extra washi tape rolls in a clear craft organizer box so kids can mix patterns during rotations.
- Paper Plate Sunflowers (Large Group)

This is a sensory, glue-and-layer activity with a bold visual result. The tissue-petals give a fluffy texture kids love. It’s budget-friendly and works for a whole table of kids at once.
Materials
- Large paper plates, 12 (one per child)
- Yellow tissue paper, 1 package (20 sheets)
- Brown cardstock circles, 12 (3-inch diameter)
- Green construction paper, 6 sheets (for leaves)
- Tacky glue, 8 oz bottle
- Scissors, 6 child-safe pairs
- Markers for stem details
Instructions
- Cut tissue paper into 2×2-inch squares (pre-cut for younger kids).
- Have kids crinkle or scrunch tissue into petal shapes.
- Apply a ring of tacky glue on plate edge and press tissue pieces in overlapping rows.
- Glue a 3-inch brown cardstock circle in the center.
- Cut green paper into leaf shapes and attach below the plate.
- Let dry on trays for 30–45 minutes before displaying.
How to Display or Gift It
Staple a drinking-straw stem to the back and stick into a classroom planter for a sunlit display. Bundle several as a cheerful hallway garland using twine and small clothespins. Store extras flat in a shallow craft organizer bin.
- Popsicle Stick Puppets
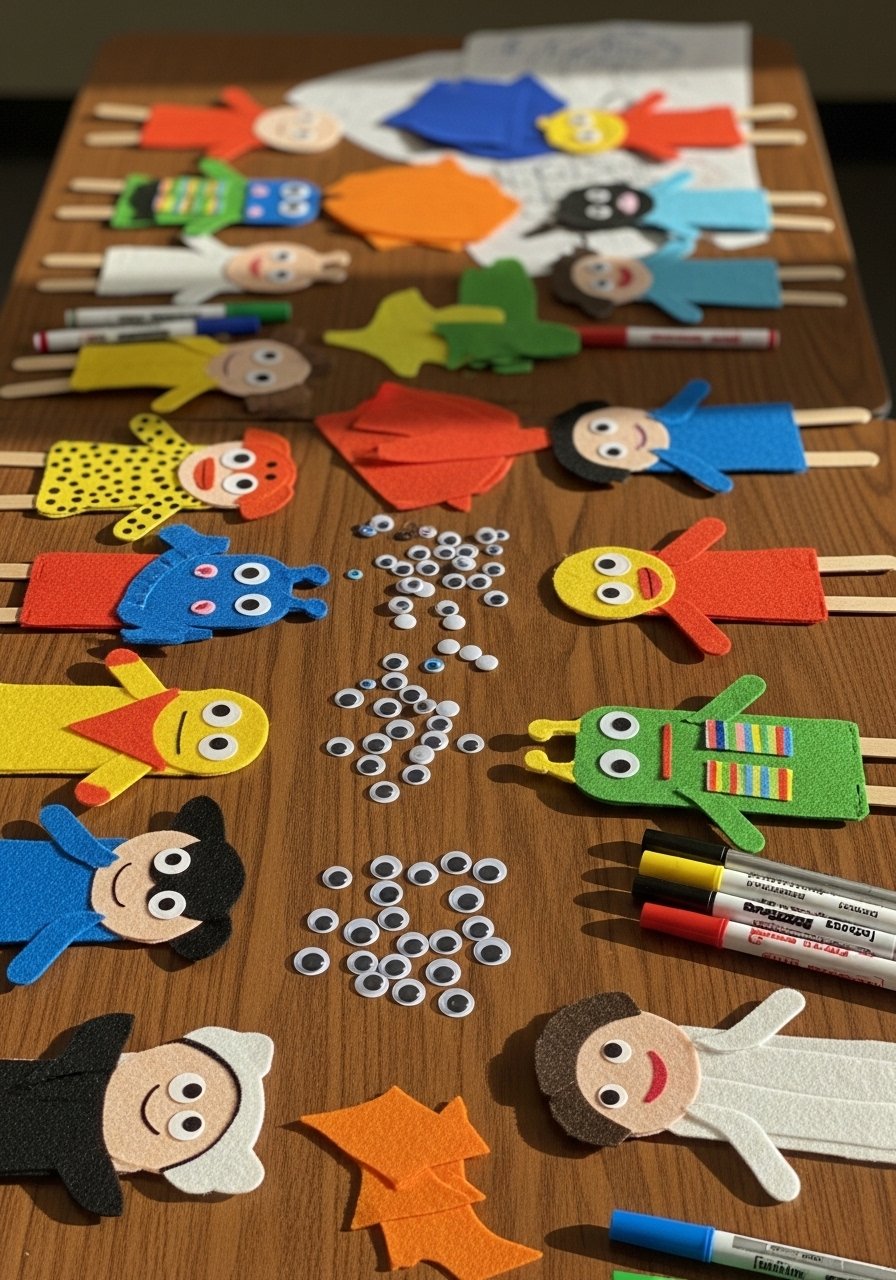
These puppets are a classic—simple gluing, instant imaginative play. Kids get to design characters, practice fine motor skills, and then use them for puppet shows.
Materials
- Popsicle sticks, 50-count
- Googly eyes, assorted sizes (100 pieces)
- Felt sheets, 6 colors (9×12 inches)
- Acrylic markers or permanent markers, 8-pack
- Hot glue gun (low-temp) and mini glue sticks
- Scissors, blunt-tip
- Small craft pom-poms, 1 bag
Instructions
- Sketch a simple character on felt for hair/clothing.
- Attach felt pieces to popsicle stick with small dots of hot glue; supervise kids when using hot glue.
- Add googly eyes and pom-pom noses using hot glue.
- Draw facial features and clothes with acrylic markers.
- Let glue set for 10–15 minutes until firm.
- Test puppet joints and trim any excess felt.
How to Display or Gift It
Store puppets upright in a tall mason jar for drama corner access. For gifts, wrap a set of 3 in tissue paper and include a mini stage made from a small cardboard box.
- Mini Macramé Keychains (Beginner)
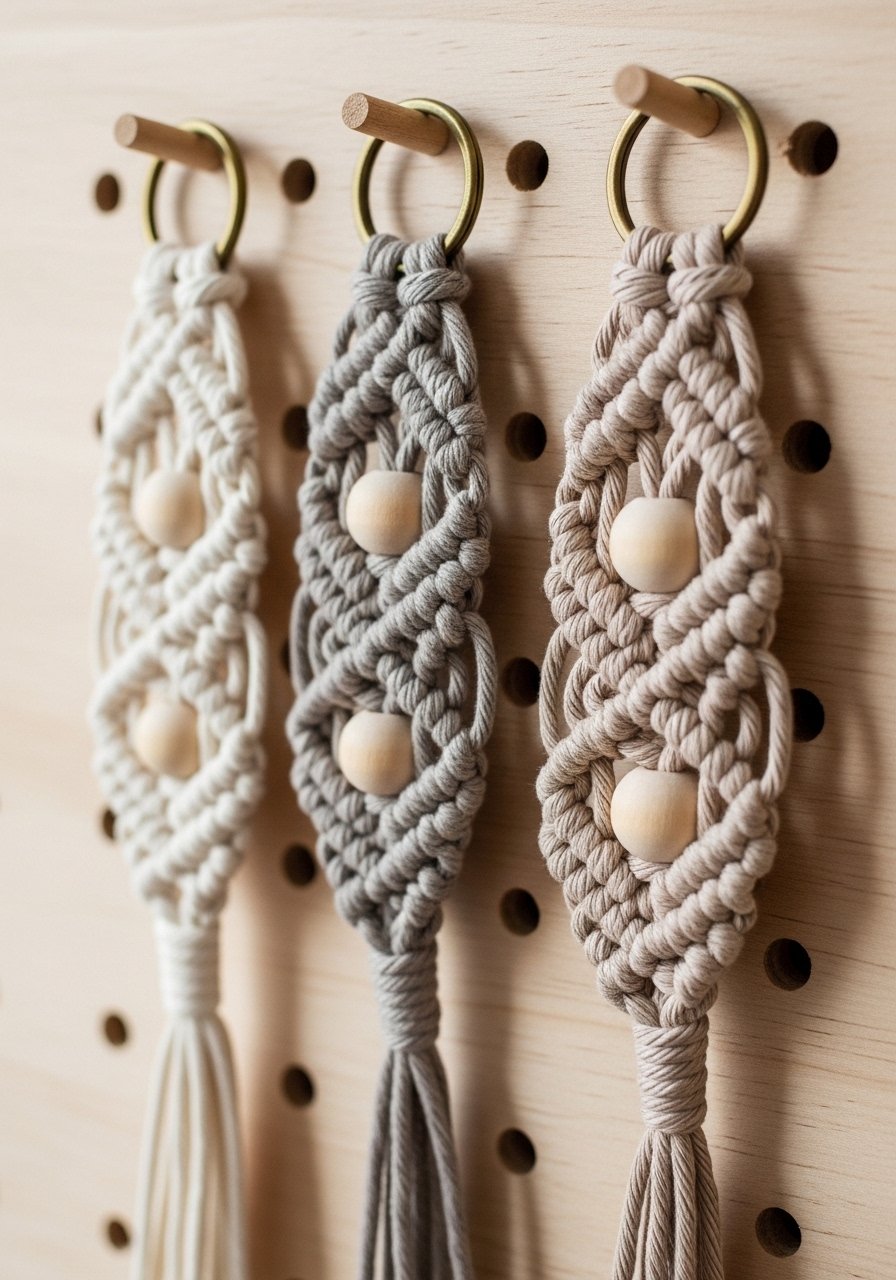
Macramé is trending and kids can handle simple knots with a little practice. These mini keychains use 3mm cord and wooden beads for a boho look that’s classroom-friendly.
Materials
- 3mm cotton macramé cord, 30 yards (approx. 10 keychains)
- Small brass key rings, 10
- Wooden beads, 50 (6mm)
- Scissors, sharp
- Measuring tape
- Clipboard or small masking tape (to hold cords while knotting)
Instructions
- Cut three cords at 24 inches each per keychain.
- Fold cords in half and loop through key ring to secure.
- Work a row of square knots for about 1.5 inches (teach knot pattern beforehand).
- Slide on a wooden bead and continue knotting for another 1 inch.
- Finish with an overhand knot and trim tails to 1 inch.
- Apply a tiny dot of fabric glue inside the knot for extra hold; allow 30 minutes drying.
How to Display or Gift It
Clip finished keychains to a pegboard or ring for a giveaway. They’re compact and great as party favors—tie 3 together with twine and tuck into kraft bags. Keep extra beads sorted in a small craft organizer drawer.
- Tissue Paper Stained-Glass Hearts
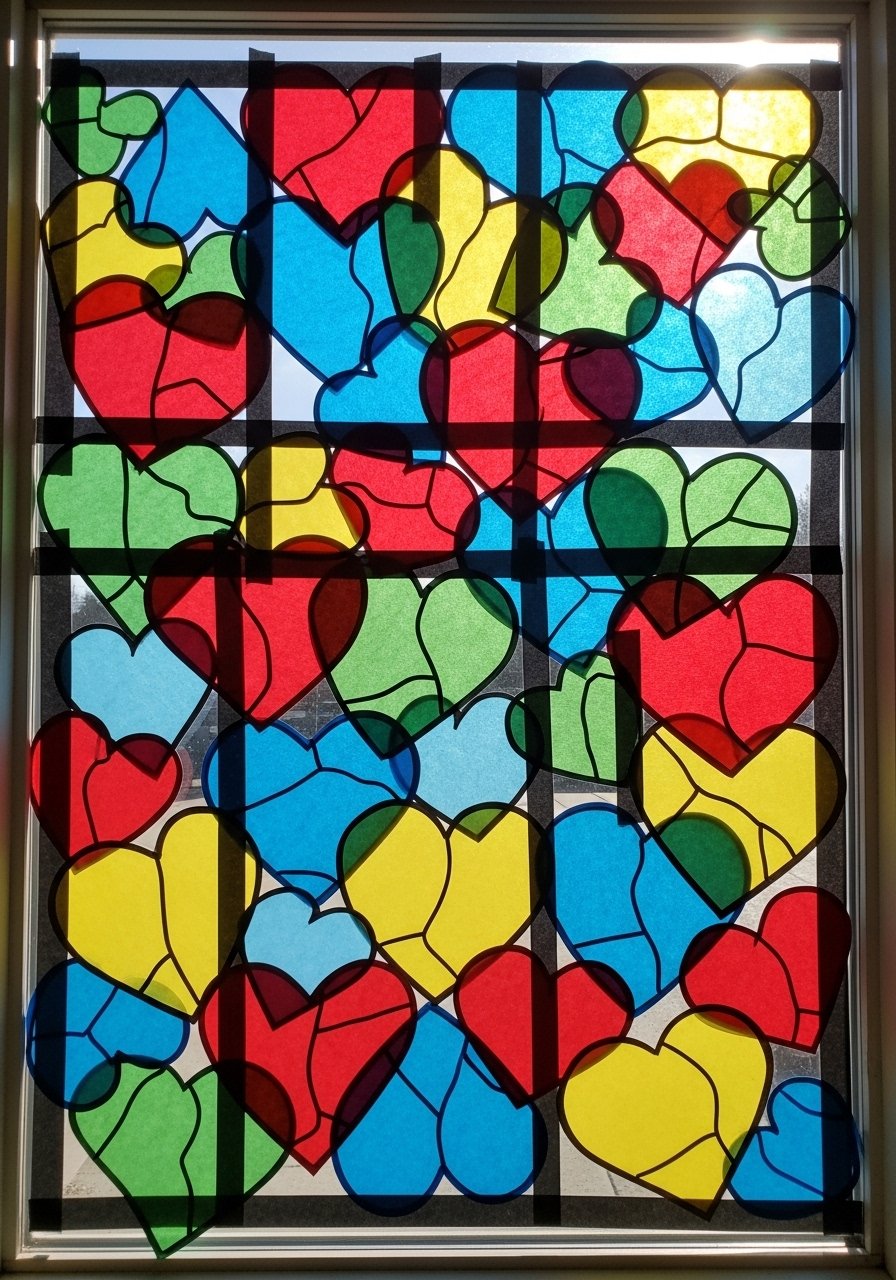
Kids love the glow of colored tissue against light. This project teaches cutting and layering while producing a cheerful window display.
Materials
- Black construction paper, 12 sheets (for frames)
- Colored tissue paper, assorted pack (50 sheets)
- Scissors, child-safe
- Clear contact paper, 2 rolls (12 inches wide)
- Pencil for tracing
- Ruler
Instructions
- Pre-cut heart frames from black construction paper (large enough to cover contact paper).
- Cut contact paper into 8×8-inch pieces; peel and place sticky side up.
- Let kids tear tissue into small pieces and stick onto contact paper within heart area.
- Place a second contact paper layer on top to seal; trim to frame.
- Glue or tape black frame around the sealed tissue.
- Hang on window; adhesive will last for months but replace after 6–8 weeks if needed.
How to Display or Gift It
Arrange hearts in a window row for seasonal displays. Wrap flat in tissue and place in a clear pocket for a sunny handmade card. Store unused contact paper in a craft roll holder.
- Clothespin Flower Garland (Easy Prep)
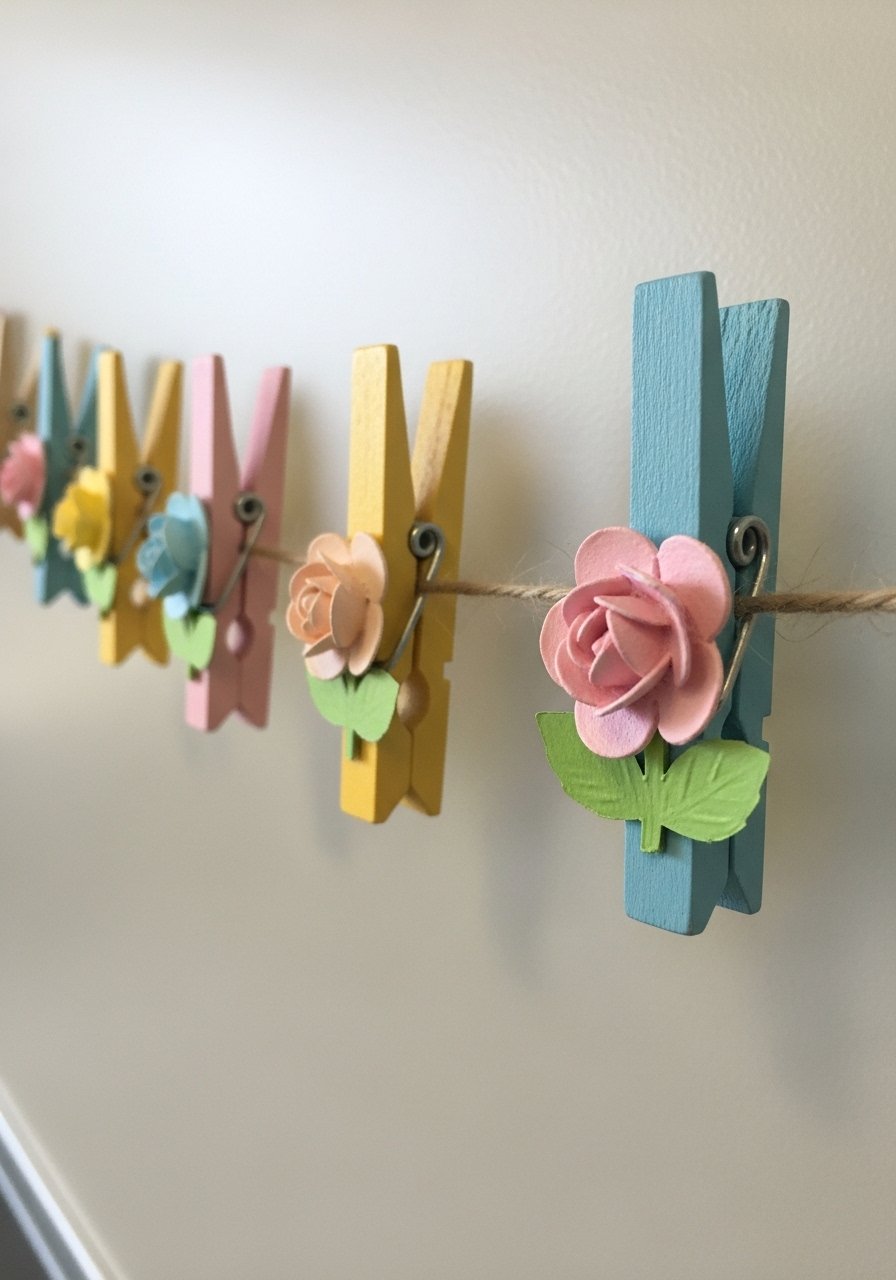
These sweet clothespin flowers look great in a classroom and are sturdy for repeated play. Painting clothespins gives a farmhouse or cottagecore look depending on color choices.
Materials
- Wooden clothespins, 24
- Acrylic craft paint, pastel set (8 colors)
- Small paint brushes, 3
- Green baker's twine, 10 feet
- Colored cardstock for leaves (6 sheets)
- Hot glue gun and glue sticks
Instructions
- Paint clothespin halves separate colors; let 20 minutes to dry.
- Cut small petal shapes from cardstock and glue to clothespin tops.
- Create leaves and attach to twine at intervals with glue.
- Clip clothespin flowers to twine every 4–6 inches.
- Let all glue set for 15 minutes before hanging.
- Trim excess twine and knot ends for a neat finish.
How to Display or Gift It
Drape across bulletin boards or above student cubbies. For gifting, clip three flowers to a kraft card and tuck into a small clear sleeve. Store remaining clothespins in a divided craft organizer.
- Recycled Crayon Shapes
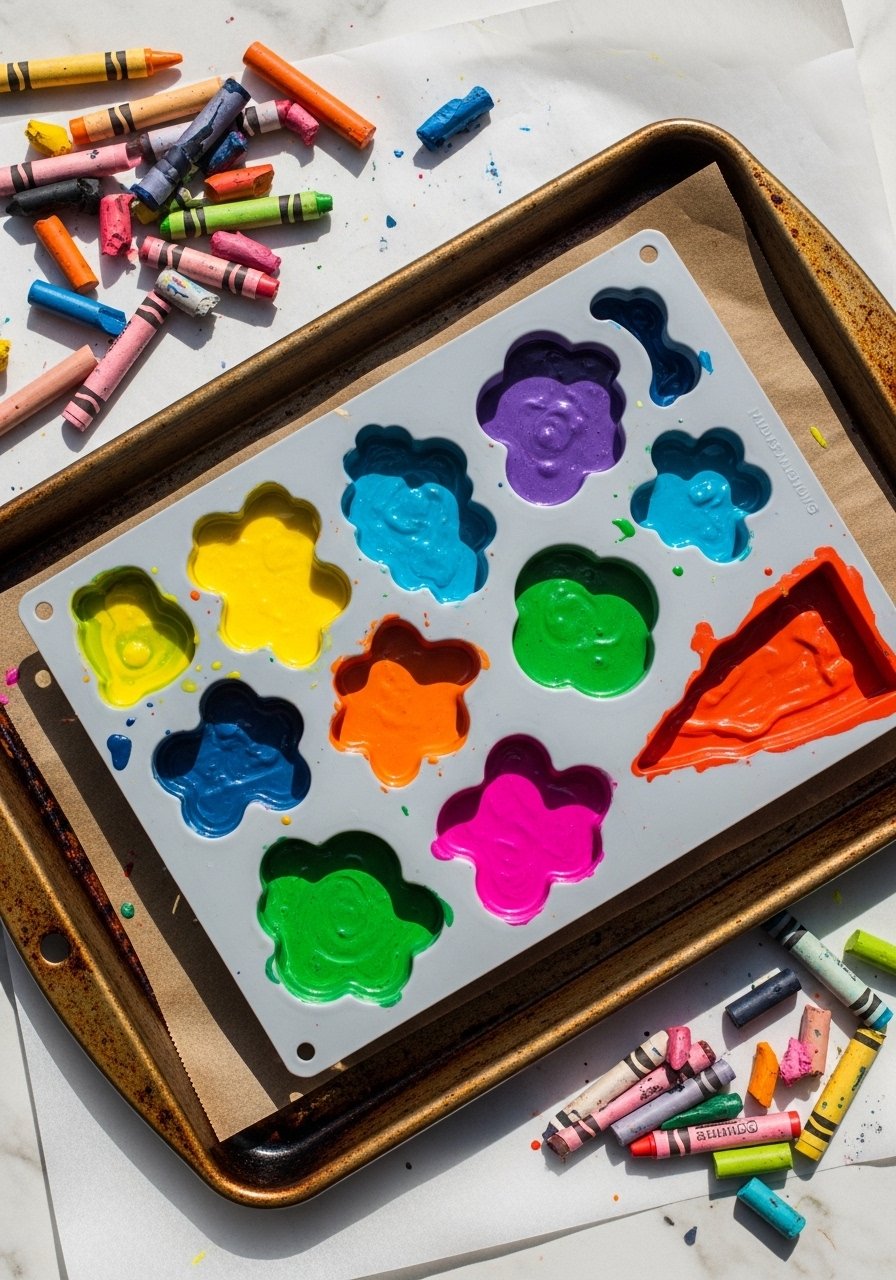
This is a great upcycling project for the classroom. Melt broken crayons into fun shapes using silicone molds. Kids get to sort colors and see a simple kitchen-safe melting demo.
Materials
- Broken crayon pieces, about 2 pounds
- Silicone baking molds, assorted shapes (24 cavities)
- Muffin tin (for solid base)
- Parchment paper
- Oven (adult-supervised)
- Kitchen tongs and oven mitts
Instructions
- Preheat oven to 250°F (120°C).
- Peel crayon wrappers and sort by color.
- Fill silicone molds with crayon pieces about 3/4 full.
- Place molds on a baking sheet and bake 8–10 minutes, watching closely.
- Remove and cool on a wire rack 20 minutes before unmolding.
- Let cool completely; store in small reusable bags.
How to Display or Gift It
Present sets in cellophane bags with a ribbon for take-home packs. Store extras in a mason jar or portion into a craft organizer drawer.
- Button Tree Collage (Sensory & Color Theory)
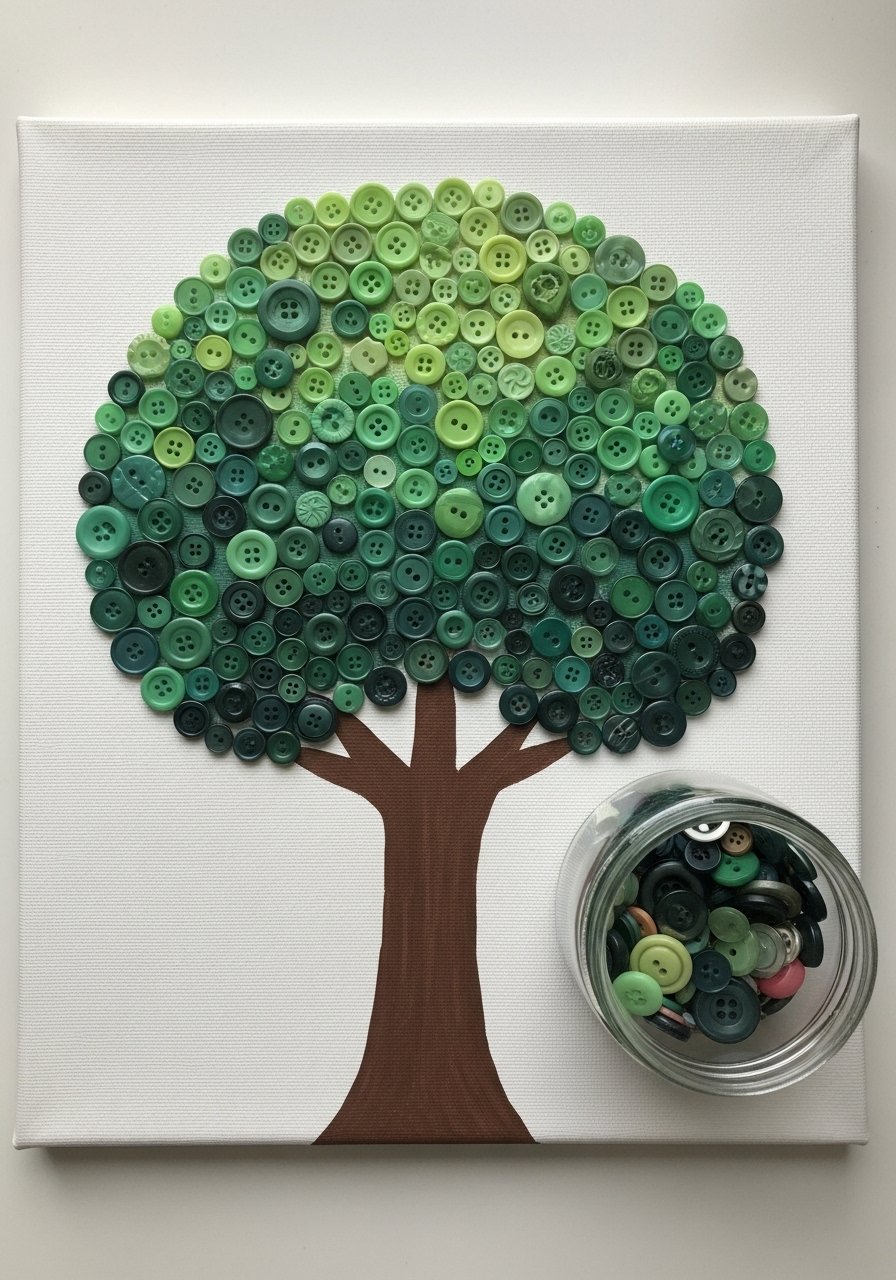
Button collages are tactile and teach color sorting. Kids glue buttons to a painted tree trunk—simple, forgiving, and visually striking.
Materials
- Small canvases, 8×10 inches, 12 count
- Assorted buttons, 1 lb mixed bag
- Acrylic paint, brown and green (2 oz each)
- Tacky glue, 8 oz
- Foam brushes, 6
- Tweezers, child-safe (for fine placement)
Instructions
- Paint a tree trunk on canvas with brown acrylic; let dry 30 minutes.
- Sort buttons into color groups by students.
- Apply small dots of tacky glue to canvas where leaves will go.
- Place buttons on glue using fingers or tweezers.
- Fill branches to desired density; press gently for 10 seconds.
- Allow glue to dry overnight (8 hours) before moving.
How to Display or Gift It
Create a classroom gallery wall with several canvases grouped together. For gifting, mount canvas in a simple frame and wrap in kraft tissue.
- Egg Carton Caterpillars
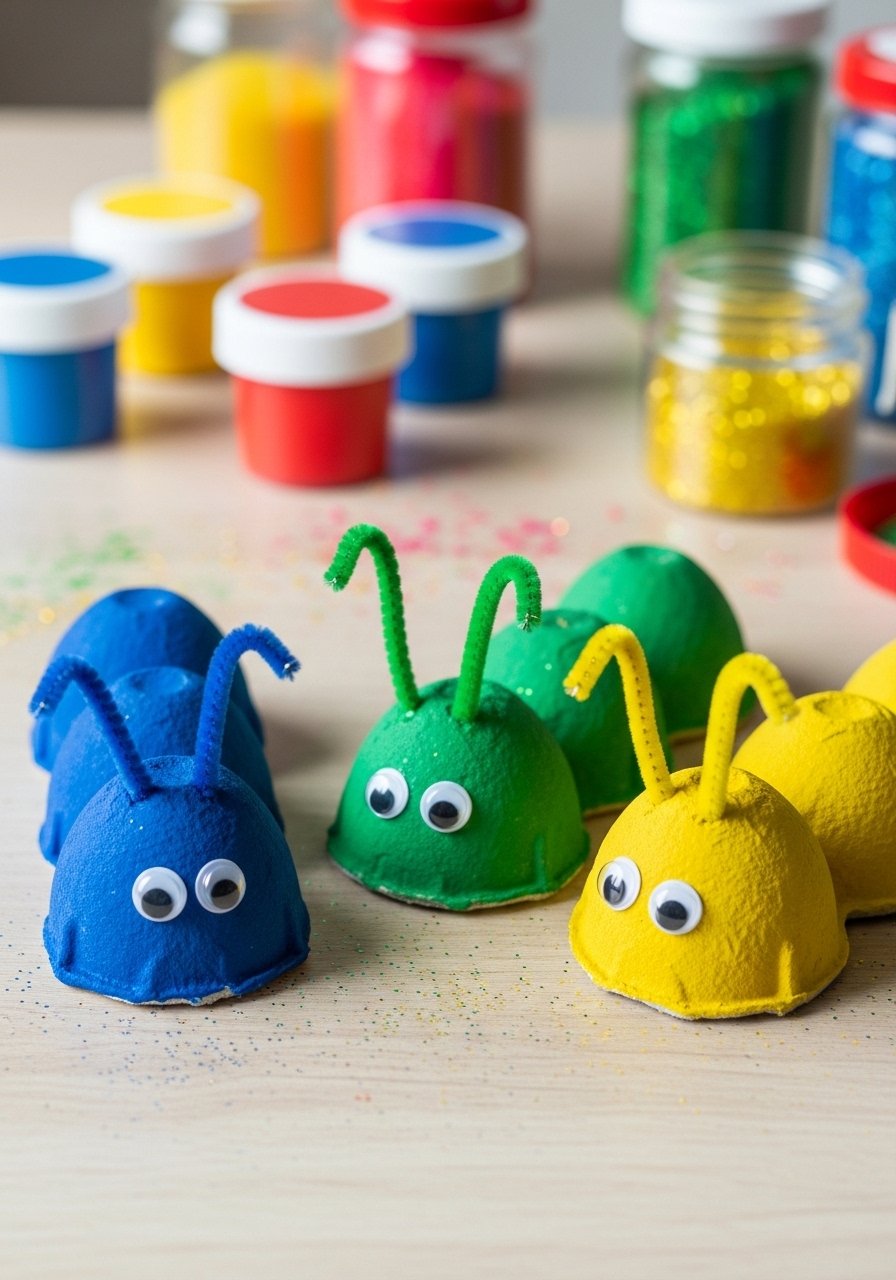
This low-cost craft uses egg cartons and pipe cleaners. It’s perfect for preschoolers and early elementary groups, with lots of room for personalization.
Materials
- Cardboard egg cartons, 6 (cut into strips)
- Tempera paint, assorted (6 colors)
- Pipe cleaners, 1 pack (100)
- Googly eyes, 100
- Glue, white school glue
- Scissors
Instructions
- Cut egg carton into strips of 4-6 cups each.
- Paint each strip using tempera; dry 15–20 minutes.
- Poke two small holes at one end for antennae.
- Thread pipe cleaners and twist inside carton to secure.
- Glue googly eyes and facial details; let glue dry 15 minutes.
- Bend pipe cleaner legs or glue on felt feet if desired.
How to Display or Gift It
Line them up along a windowsill or classroom bookshelf. Bundle a trio of caterpillars in cello bag with a handwritten note about metamorphosis.
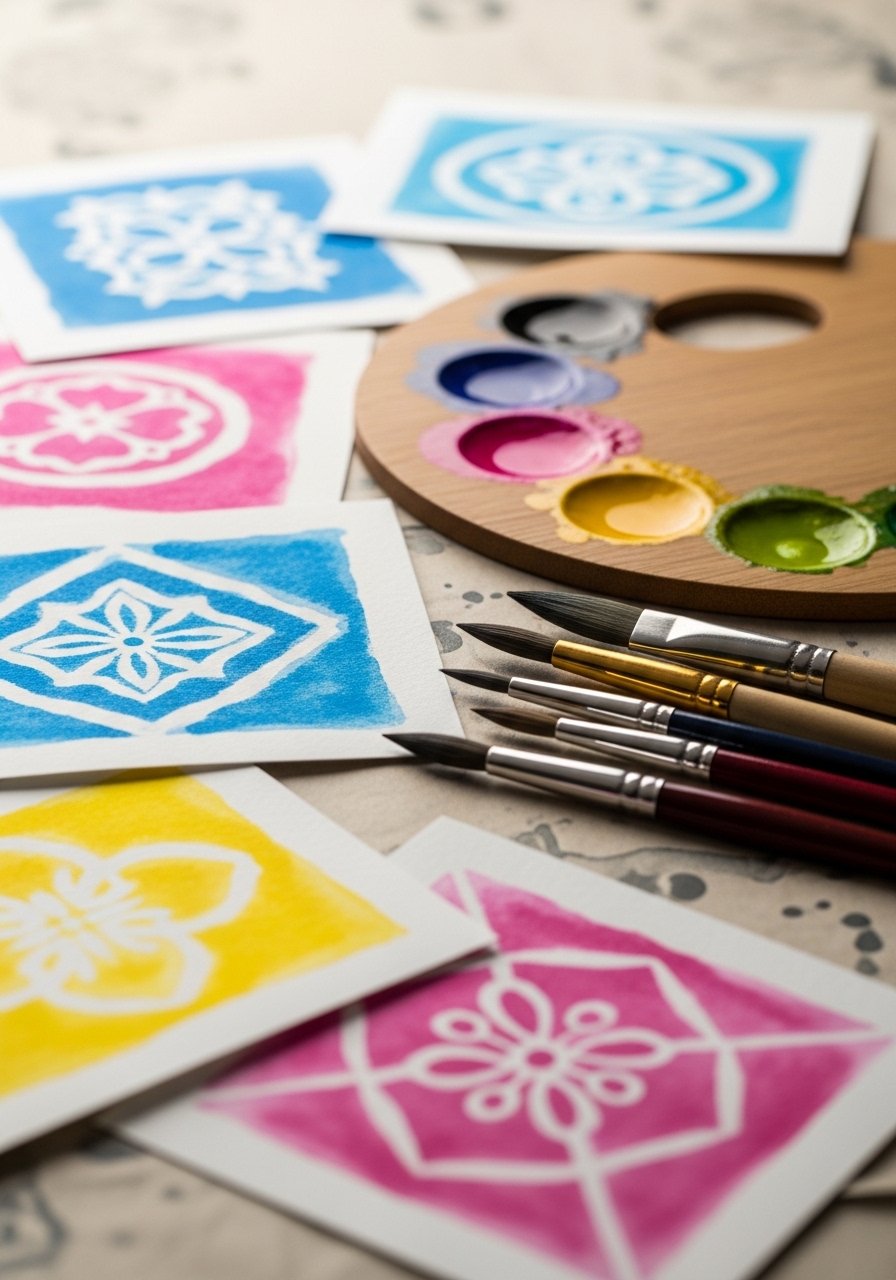
- Foam Stamp Printmaking

Foam stamps let kids create repeated patterns and gift-wrap designs. Precut foam shapes make prep fast and mess minimal.
Materials
- Craft foam sheets, 6 colors (9×12 inches)
- Wooden blocks, 12 small (2×2 inches)
- Washable ink pads, assorted colors (6)
- Liquid glue (for mounting foam)
- Scissors, craft knife (adult use)
- Kraft paper rolls (for printing)
Instructions
- Trace simple shapes onto foam and cut out (adults prep intricate shapes).
- Glue foam shapes onto wooden blocks; dry 30 minutes.
- Press stamp firmly into ink pad and stamp onto kraft paper.
- Encourage pattern play: alternating rows, concentric circles.
- Let ink dry 15–30 minutes depending on pad.
- Clean foam with damp cloth between colors.
How to Display or Gift It
Use printed kraft paper for handmade wrapping paper or classroom bulletin borders. Store mounted stamps in a shallow craft organizer.
- Paper Bag Puppets
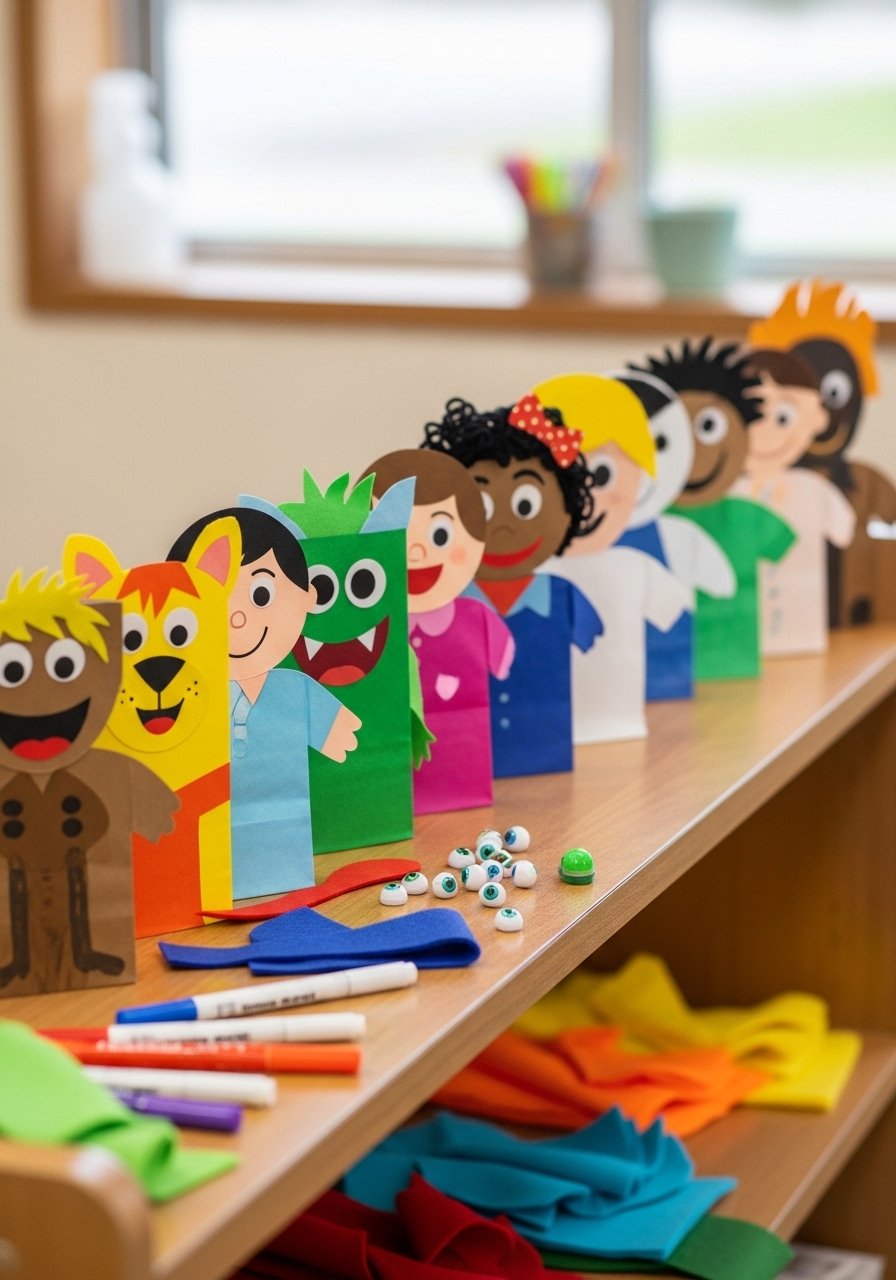
Paper bag puppets are cheap and scalable. Kids can create characters and then act out short scenes in groups.
Materials
- Brown paper lunch bags, 24
- Markers, washable (12-pack)
- Felt scraps, assorted
- Googly eyes, 60
- Glue sticks, pack of 6
- Stapler (for adding hats)
Instructions
- Give each child a bag and sketch a face outline.
- Attach felt pieces for ears or hair with glue stick.
- Add googly eyes and draw features with markers.
- Create accessories like hats from cardstock and staple on.
- Let glue set 10 minutes before play.
- Encourage children to write a short script to perform.
How to Display or Gift It
Keep puppets in a cardboard puppet theatre or crate. For take-home gifts, fold into small boxes and seal with washi tape.
- Pom-Pom Rainbows
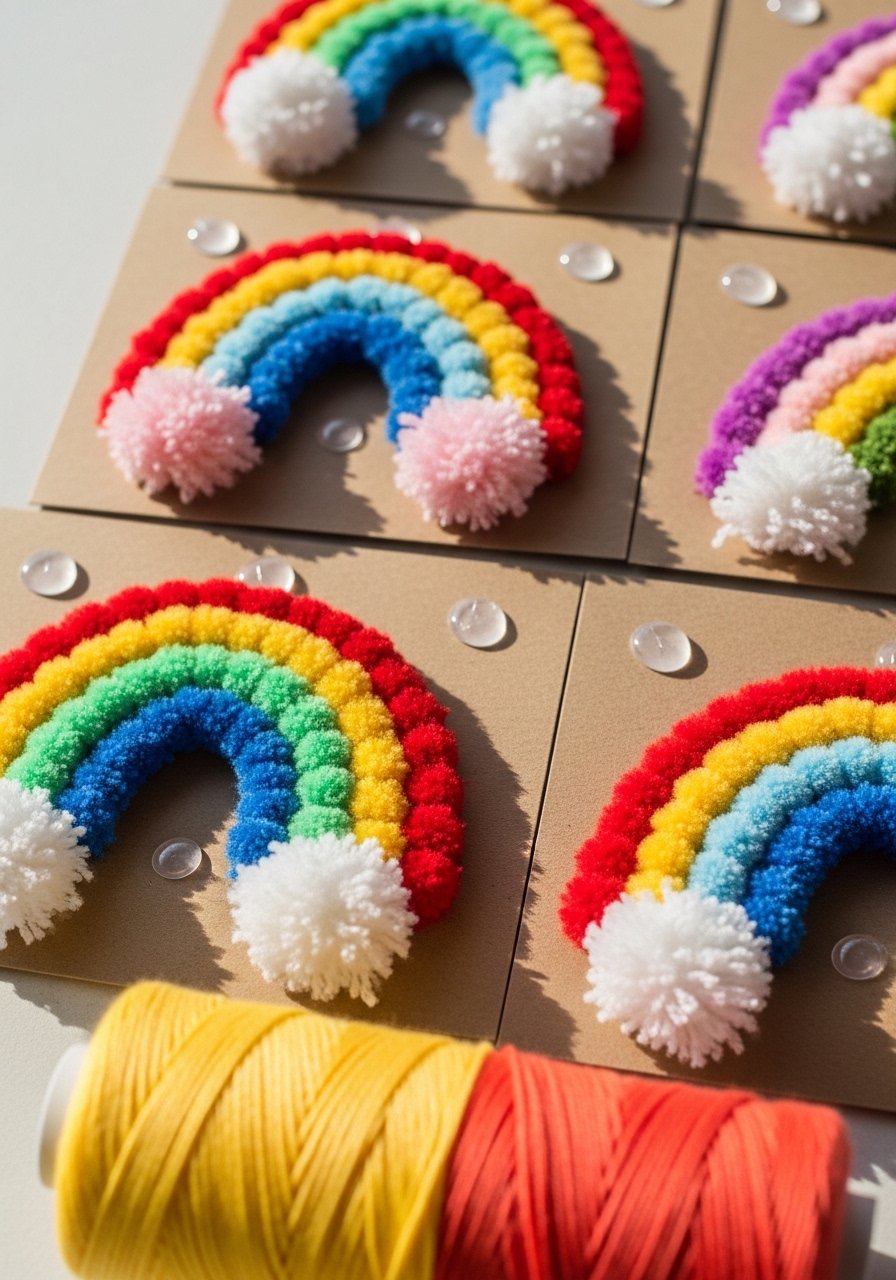
These simple rainbows use pre-made pom-poms or rolled yarn. They’re tactile and excellent for fine motor practice.
Materials
- Mini pom-poms, assorted color bag (300 pieces)
- Blank cards, 10 (4×6 inches)
- Tacky glue, 8 oz
- Tweezers (optional)
- Pencil for sketching arc
Instructions
- Lightly pencil a rainbow arc on each card.
- Apply small dots of tacky glue along the arcs.
- Press pom-poms into glue in color order.
- Fill arcs completely; press gently for 10 seconds.
- Allow to dry overnight (8 hours) for full bond.
- Trim any stray fibers for a neat edge.
How to Display or Gift It
Write uplifting notes inside and give as classroom valentines or thank-you cards. Keep extra pom-poms sorted in a small bead organizer.
- Painted Wooden Name Plaques (Group Craft)
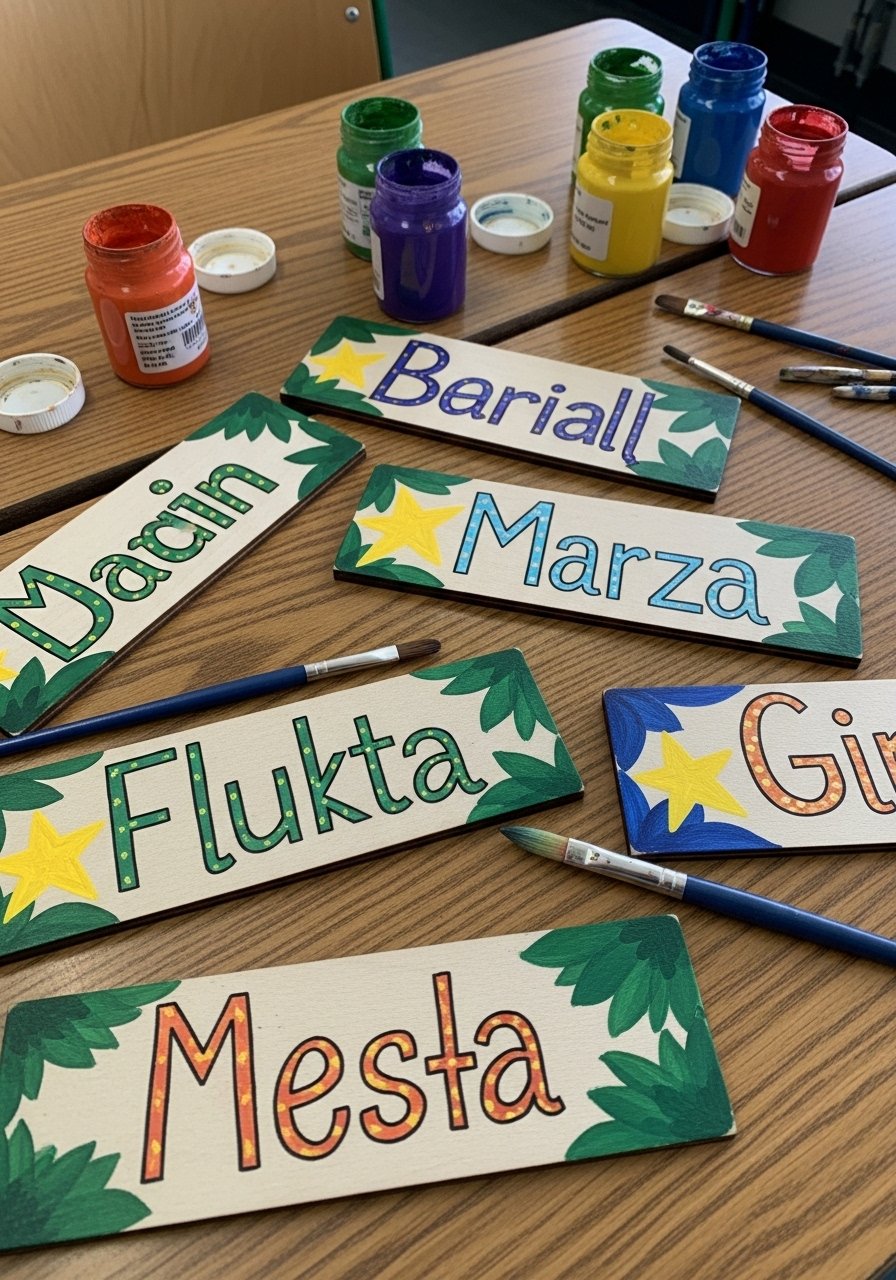
This lets students personalize their desk space. Use pre-cut wooden blanks and paint pens for tidy lettering. It’s craft-focused and doubles as a keepsake.
Materials
- Wooden plaque blanks, 12 (6×2 inches)
- Acrylic paint pens, fine tip (8 colors)
- Acrylic paints, small palette (6 colors)
- Flat foam brushes, 4
- Sandpaper, fine grit (for smoothing)
- Clear satin Mod Podge, 8 oz
Instructions
- Lightly sand plaque edges and wipe dust.
- Prime with a thin coat of acrylic; dry 20 minutes.
- Sketch names in pencil and trace with paint pens.
- Add small motifs and accents with thin brushes.
- Seal two thin coats of Mod Podge, 15 minutes between coats; cure 24 hours.
- Check for tackiness—fully dry surface should be firm.
How to Display or Gift It
Attach plaques to cubby fronts with Command strips or use small wooden easels for display. Wrap a finished plaque in tissue paper and tuck into a kraft box as a student gift.
- Nature Print Rubbings (Outdoor Prep)

Take kids outside for leaf and bark rubbings. It’s a calm, observational craft that connects them to nature and provides textured art.
Materials
- Drawing paper pads, 12 sheets (9×12 inches)
- Crayon packs, 12 small (peel off wrappers)
- Collection bags, small (for leaves)
- Tape to secure paper
- Clipboard to hold sheets while rubbing
Instructions
- Go outside and collect leaves and small bark samples.
- Tape paper over specimen on a flat surface.
- Use the side of a crayon to rub across paper until texture appears.
- Encourage layering with different colors for depth.
- Let finished rubbings sit flat 5 minutes to avoid smudging.
- Create a mini-gallery by stapling works to a bulletin board.
How to Display or Gift It
Bind sheets together for an outdoor texture book. Frame special rubbings in inexpensive frames and label with the date and location.
- Glue Resist Watercolor Cards
Glue-resist teaches negative space and is forgiving for beginners. Using white glue or a white wax crayon creates shapes that repel watercolor for a magical reveal.
Materials
- Watercolor paper, 12 sheets (5×7 inches)
- White glue in a fine-tip bottle
- Watercolor pan set, 12 colors
- Round water brushes, 6
- Paper towels
- Small cups for water
Instructions
- Draw shapes or patterns with white glue and let dry 30 minutes.
- Wet brush and apply watercolor wash over glue area.
- Watch the painted color flow around the glue lines.
- Rinse brush and layer more color for depth; dry 20 minutes.
- Once dry, add fine pen details if desired.
- Store cards flat until ready to send or display.
How to Display or Gift It
Make sets of four cards and tie with twine for teacher appreciation. Store in a flat craft organizer until sending.
- Yarn-Wrapped Letters
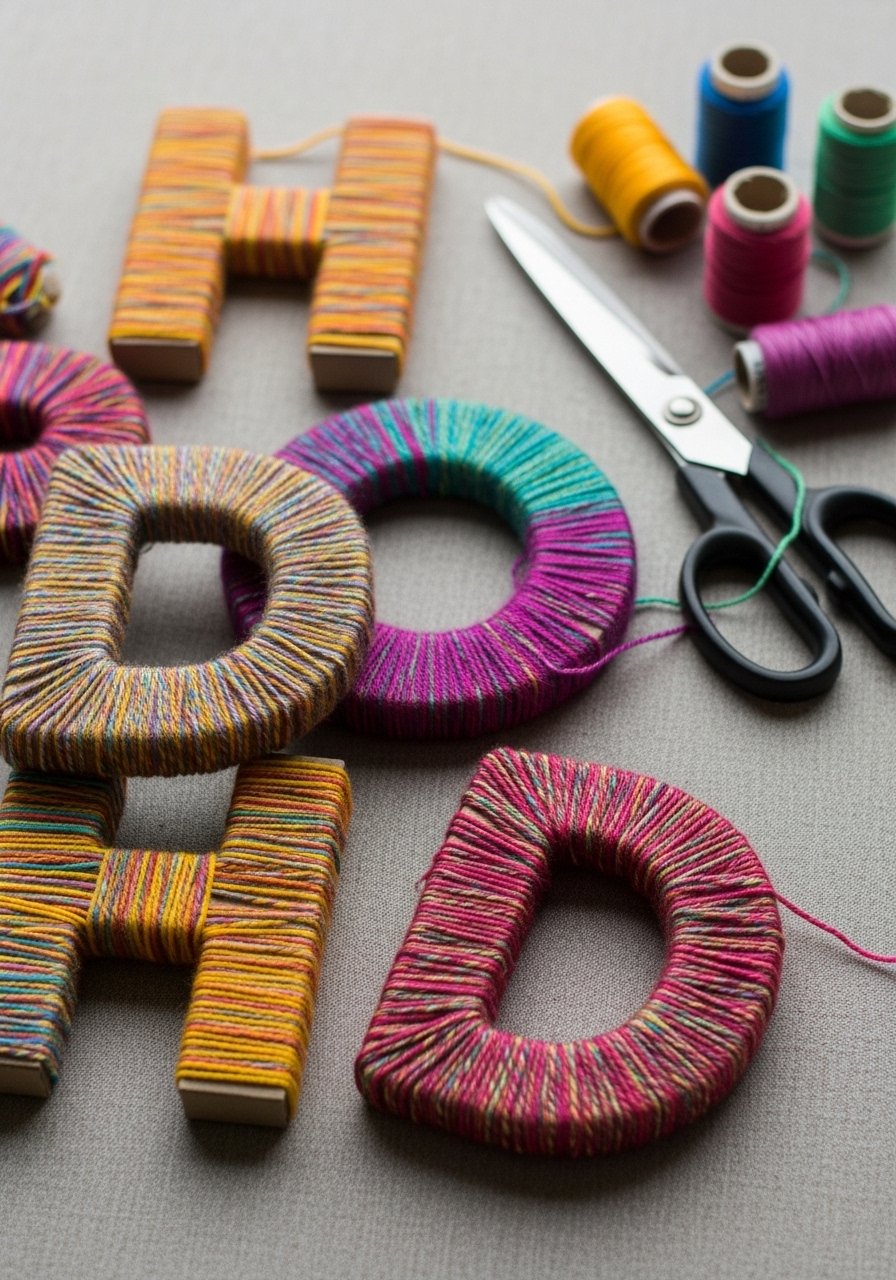
Cut cardboard letters are inexpensive and offer a satisfying wrapping rhythm. Colours create a bold bulletin header or classroom door sign.
Materials
- Pre-cut cardboard letters, set for classroom name (1 set)
- Acrylic yarn, 6 skeins assorted
- Hot glue gun and glue sticks
- Scissors
- Ruler
Instructions
- Start by hot-gluing the yarn end to the back of the letter.
- Wrap yarn tightly around the letter, covering edges and front.
- Switch colors by gluing the end under the wrapped yarn.
- For neat corners, twist yarn and glue a secure stitch.
- Trim and glue the final end to the back; press for 10 seconds.
- Let glue cool 5 minutes before handling.
How to Display or Gift It
Mount letters on the classroom door or above reading nooks with Command strips. For gifting, set letters on a wooden plaque using a small tack.
- Salt Dough Ornaments (Bake & Paint)
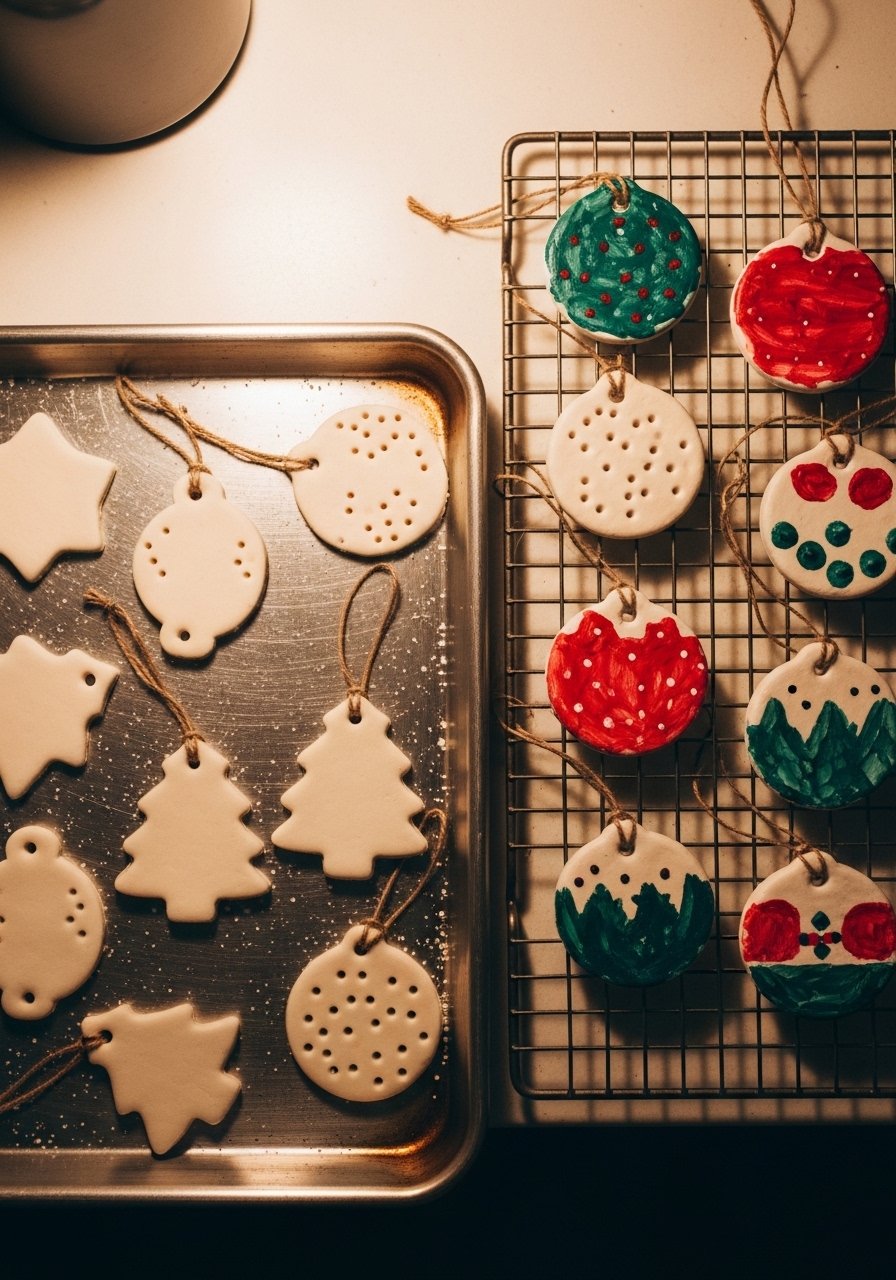
Salt dough is cheap and tactile. Kids shape ornaments, bake under adult supervision, then paint and seal. It’s great for holidays or year-round decor.
Materials
- All-purpose flour, 2 cups
- Salt, 1 cup
- Warm water, 1 cup (adjust)
- Acrylic paints, small set
- Small cookie cutters for shapes
- Baking sheet, parchment paper
- Clear glossy sealer, 1 can
Instructions
- Mix 2 cups flour and 1 cup salt; slowly add warm water until dough forms.
- Knead 5 minutes until smooth.
- Roll dough to 1/4-inch thickness and cut shapes.
- Use straw to make a hanging hole.
- Bake at 200°F (95°C) for 2–3 hours until fully hard.
- Cool, paint, and seal with clear gloss; allow sealer to cure 24 hours.
How to Display or Gift It
Thread twine and hang on classroom branches or a seasonal display. Keep unpainted ornaments flat in a craft organizer until decorating day.
- Collage Portraits (Identity Activity)
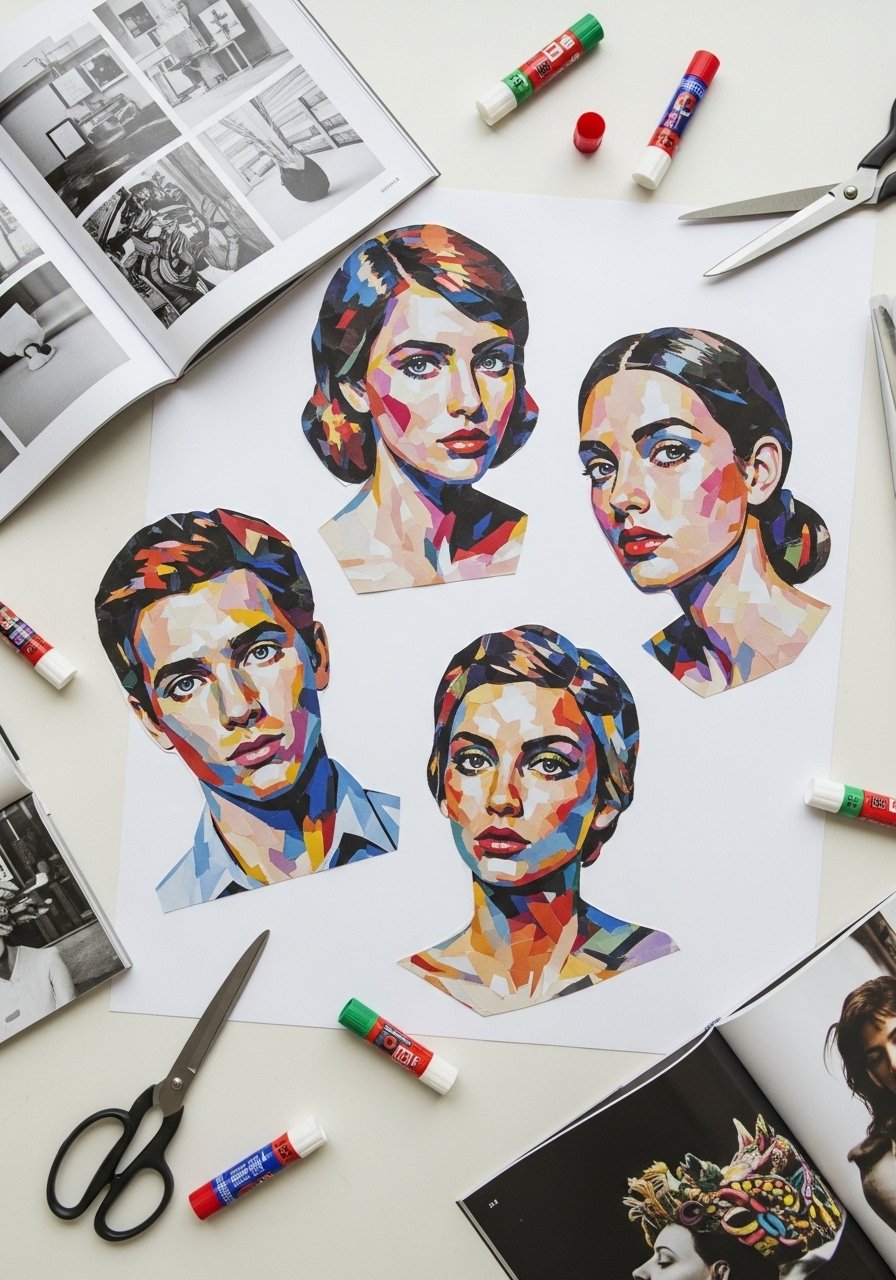
This is a reflective project—kids create self-portraits from magazine cut-outs and patterned paper. It’s inclusive and great for social-emotional learning.
Materials
- White drawing paper, 12 sheets (9×12 inches)
- Old magazines or patterned scrap paper, variety
- Glue sticks, 6-pack
- Scissors
- Black marker, fine tip
- Optional: craft knife (adult use)
Instructions
- Ask kids to pick shapes/colors that represent them.
- Cut and arrange collage elements on paper before gluing.
- Glue pieces from background to foreground to avoid overlap issues.
- Add drawn details with black marker for facial features.
- Let glue dry 15 minutes flat.
- Add a name and a short descriptive sentence at the bottom.
How to Display or Gift It
Create a hallway identity gallery or assemble into a classroom booklet. Store leftover magazines in a labeled bin for future collages.
- Button-String Bracelets (Fine Motor)
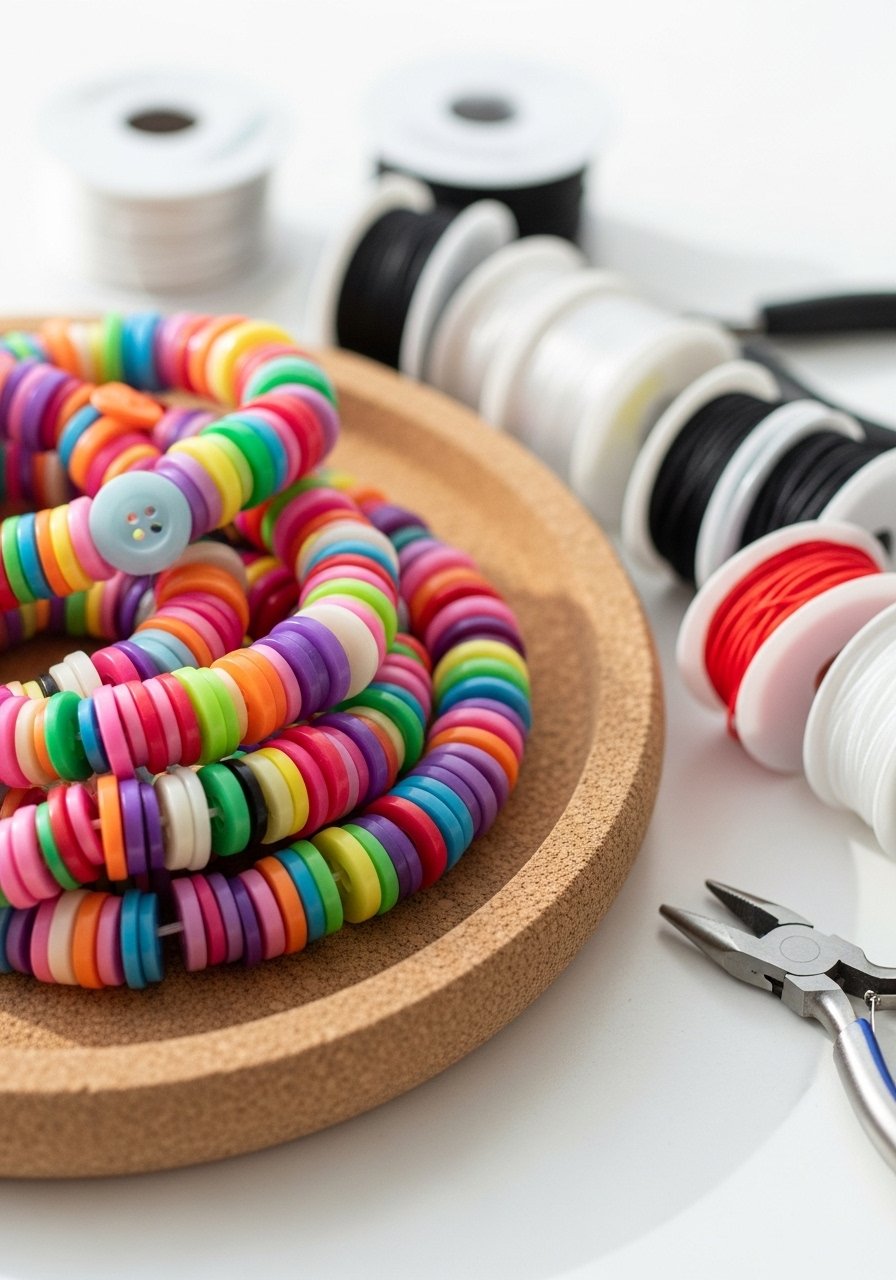
These simple beading projects strengthen fine motor skills. Use elastic cord for kids to easily finish bracelets without knots.
Materials
- Elastic cord, 10 yards (0.8mm)
- Assorted buttons, 500-count small bag
- Scissors
- Clear nail polish (to secure knots)
- Small bead tray (for sorting)
- Measuring tape
Instructions
- Measure wrist and cut elastic 1.5 times wrist length.
- Thread buttons in pattern; leave 1 inch at ends.
- Tie a secure surgeon’s knot and add a drop of clear nail polish.
- Trim excess elastic after polish dries 10 minutes.
- Stretch gently to ensure knot holds.
- Make multiple bracelets for sharing.
How to Display or Gift It
Place bracelets on cardboard cards and tie with ribbon for classroom party favors. Store spare buttons in a divided bead organizer.
- Magnetic Shape Puzzles
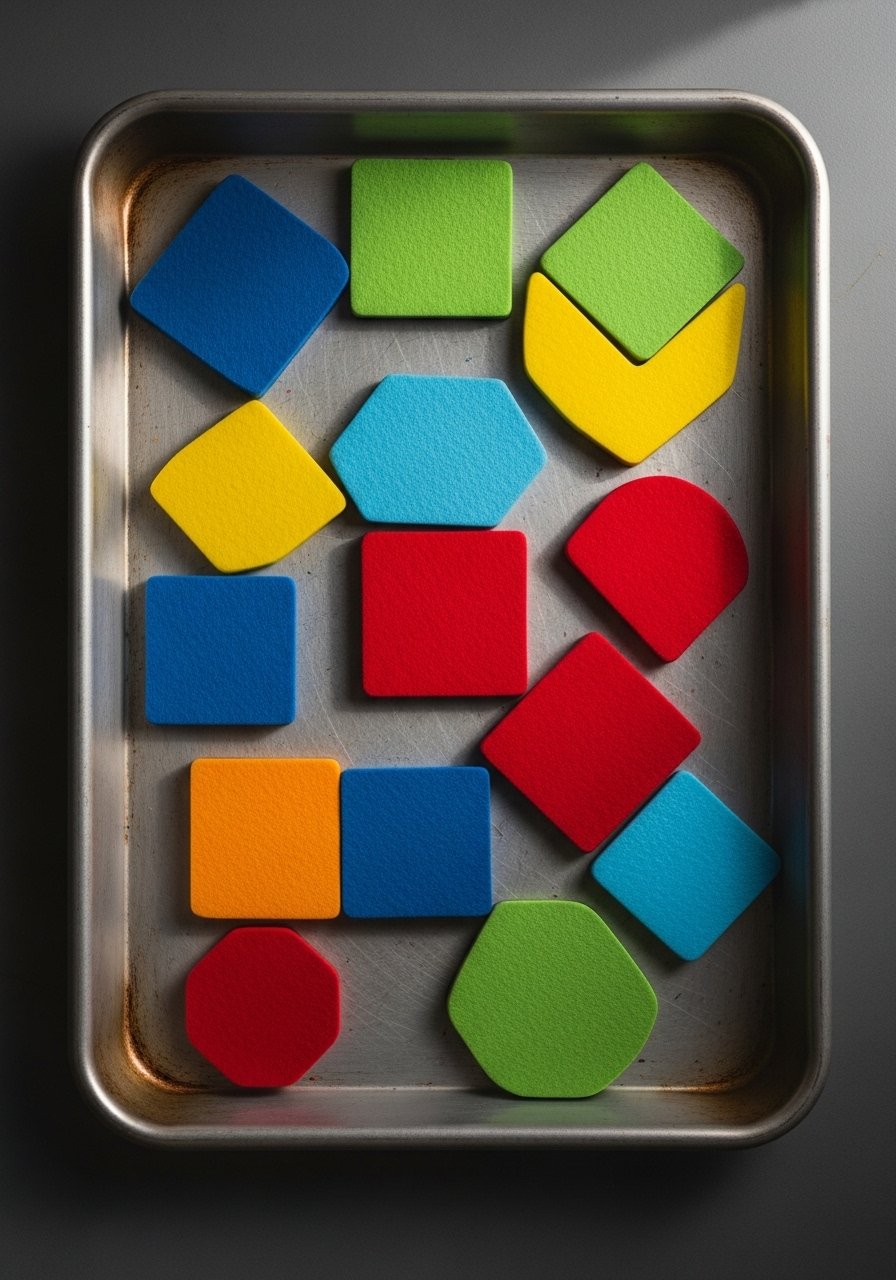
These puzzles are reusable and easy to prep. Cut foam shapes and attach magnet strips for quick learning activities.
Materials
- Foam sheets, 6 colors (9×12 inches)
- Magnetic strips, adhesive-backed (12 inches)
- Scissors
- Cardboard backing or metal cookie sheet (for play)
- Marker for tracing
- Template shapes (circle, square, triangle)
Instructions
- Trace and cut foam shapes using templates.
- Cut magnetic strip pieces and adhere to back of foam.
- Arrange shapes on cookie sheet to form patterns.
- Encourage matching by shape, color, or size.
- Store pieces in a small box or magnet-safe pouch.
- Inspect magnets periodically for adhesion; replace if loose.
How to Display or Gift It
Keep a set at each table for independent math centers. For gifting, package with a small metal tray and instruction card.
- Friendship Paper Chain (Kindness Activity)
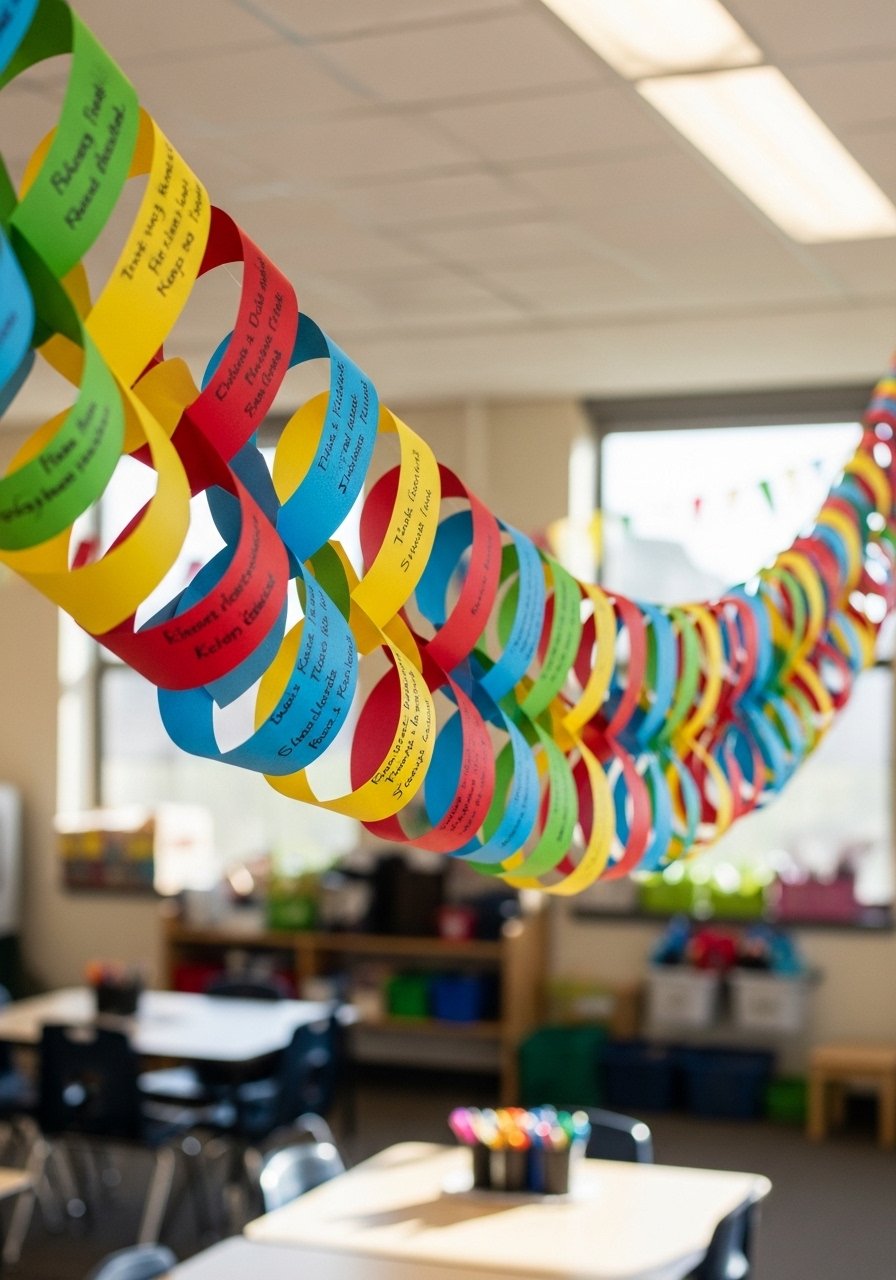
This is a collaborative craft where each child adds a link with a kind note. It builds community and is instantly satisfying.
Materials
- Colored construction paper, 12 sheets (varied colors)
- Glue sticks, 2
- Markers, assorted
- Scissors
- Hole punch (optional for added decoration)
Instructions
- Cut paper into 1-inch by 8-inch strips.
- Each child writes a kind note or compliment on a strip.
- Loop a strip and glue the ends; link the next strip through it.
- Continue until the chain reaches desired length.
- Hang across the classroom wall or ceiling.
- Reinforce kindness by reading a few links weekly.
How to Display or Gift It
Drape the chain on a bulletin board or across reading corners. To gift, shrink a segment into a small loop and tuck into a thank-you card.
- Tin Can Lanterns (Recycled Metalwork)
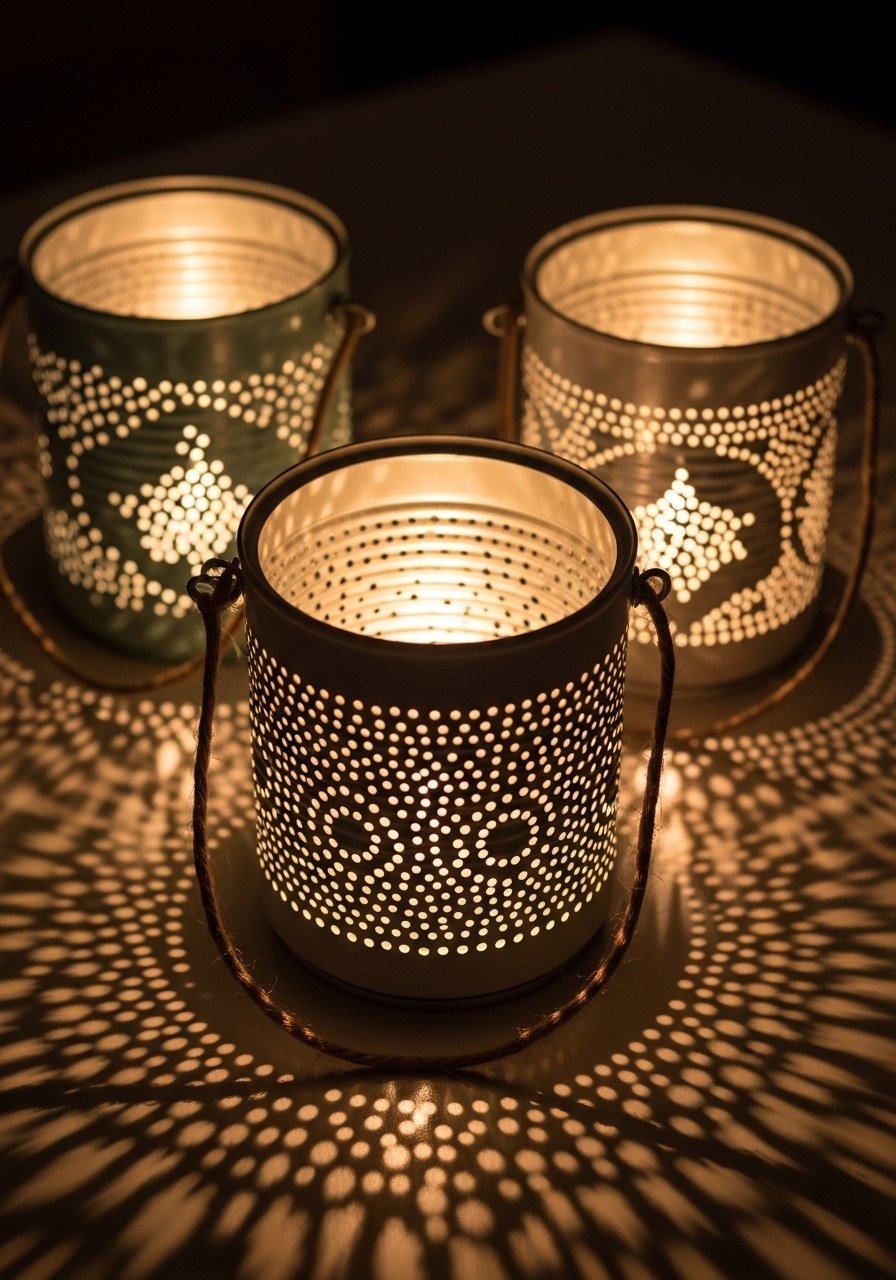
Turn cleaned tin cans into safe lanterns by punching simple patterns and painting them. Use LED tealights for safety and long-lasting displays.
Materials
- Empty tin cans, cleaned, 12
- Hammer and nail (adult use)
- Spray primer, 1 can
- Acrylic spray paint, 2 cans (color choice)
- LED tealights, pack of 12
- Twine for handles (optional)
Instructions
- Prime cans with spray primer and let dry 30 minutes.
- Tape a pattern on the can, and with adult help, hammer holes through using a nail.
- Shake off metal flakes and spray paint can; dry 20–30 minutes.
- Thread twine through holes for handles and knot securely.
- Place LED tealight inside and test glow.
- Let final paint cure 24 hours before extended display.
How to Display or Gift It
Cluster lanterns on tables for storytime evenings. For gifts, nest an LED tealight inside and wrap with tissue in a small box.
- Mini Terrarium Jars (No-Sew)

Terrariums are tiny, low-maintenance science crafts. Use air plants or faux succulents for classrooms where live plants aren’t allowed.
Materials
- Small glass jars with lids, 12 (4 oz)
- Small pebbles, 2 cups
- Activated charcoal, 2 tbsp
- Potting soil, 4 cups (if using real plants)
- Mini succulents or faux plant assortment, 12
- Tweezers or chopsticks for placement
Instructions
- Add a 1/2-inch layer of pebbles to each jar.
- Add 1/4 tsp activated charcoal to keep the jar fresh.
- Spoon 1–2 inches of potting soil for real plants.
- Place the plant or faux piece with tweezers into the jar.
- Lightly mist real plants and close the lid; real terrariums need indirect light.
- Water sparingly—small terrariums need one teaspoon of water every 2–3 weeks.
How to Display or Gift It
Arrange jars on a sunny shelf or give as teacher appreciation gifts. Store unused jars upright in a sturdy box.
You made it through 24 low-cost, classroom-friendly projects you can run with minimal prep and big group appeal. There’s a mix of sensory, fine-motor, eco-friendly, and keepsake ideas so you can pick activities that match your class size, age group, and weekly theme. Pin this list for later so you can pull ideas quickly during busy planning weeks.
If one tool helps across many of these projects, it's a good hot glue gun with temperature control—I use one like this and it speeds up assembly without the mess. Which project will you try first with your group? Share a photo or save this pin to swap ideas with other teachers and volunteers.


