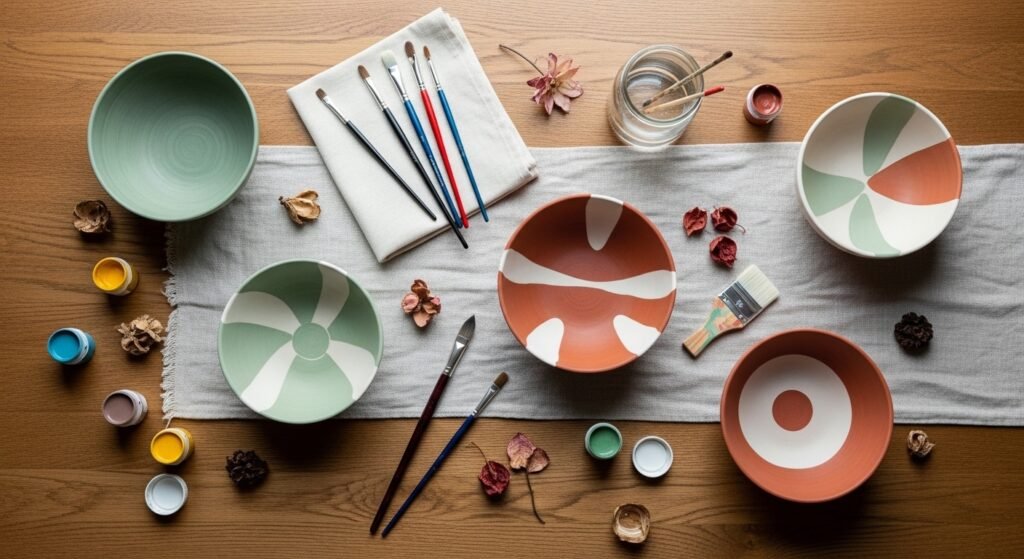
Brighten a shelf, table, or entryway with handmade charm — one small painted bowl can change a room’s mood. These 29 ceramic bowl painting ideas for home decor are practical, playful, and approachable whether you’re a painting rookie or an experienced crafter. You’ll find projects that lean farmhouse, boho, japandi, and cottagecore, plus easy kid-friendly designs and gift-ready options.
I’ll walk you through materials, exact quantities, drying and curing times, and common pitfalls. Grab a basic acrylic paint set or a chalk finish set to start — I like using an acrylic paint set for color variety, and a pack of foam brushes for clean base coats. Each project lists realistic drying times, helpful tool tips, and simple display or gifting ideas. Pin your favorites and try one this weekend — you’ll love how much personality a painted bowl adds to your home.
1. Speckled Earthware Bowl (kid-friendly dots)
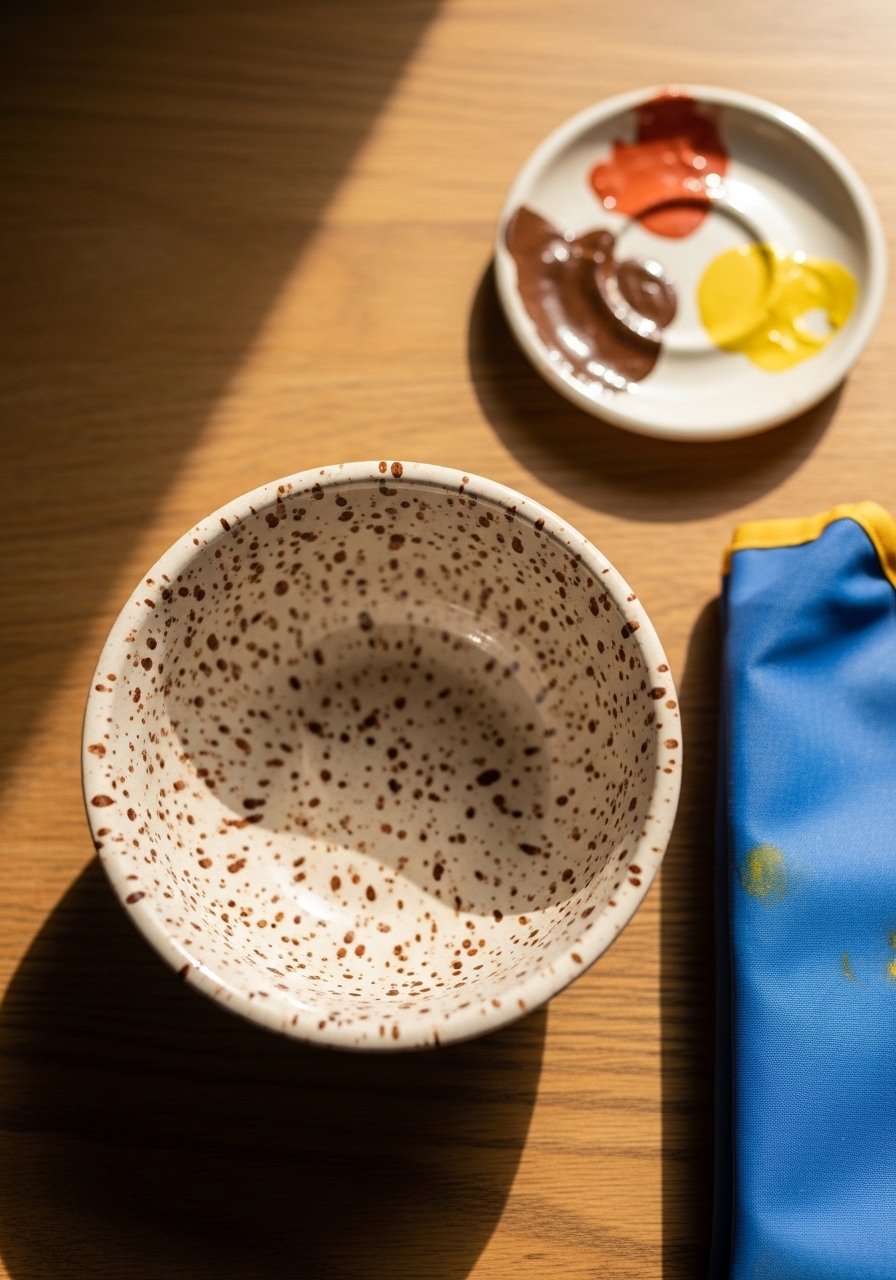
This speckled bowl uses a toothbrush flick technique for a playful, handcrafted finish. It's tactile, matte-looking, and great for fruit or keys. Kids and beginners will love the control-free approach — imperfections read as charm. Use a toothbrush for the speckle action, and seal with a food-safe spray if you’ll use it for snacks.
Materials
- 1 plain ceramic bowl (6–7" diameter)
- Acrylic craft paint in brown and terracotta, 2 oz each
- White gesso or primer, 2 oz
- Old toothbrush (stiff bristles)
- Disposable palette or ceramic saucer
- Latex gloves
- Clear food-safe spray sealer, 10 oz
- Soft cloth
Instructions
- Clean bowl with isopropyl alcohol and let dry fully (10 minutes).
- Apply a thin coat of gesso with a flat foam brush. Let dry 30 minutes.
- Mix paint slightly with water to a milky consistency (about 1 part water to 4 parts paint).
- Load the toothbrush bristles with paint, point toward the bowl, and flick bristles with your thumb. Practice on scrap paper first.
- Repeat with second color for layered speckles. Allow 30 minutes dry between layers.
- Once fully dry (at least 2 hours), apply two light coats of clear food-safe spray sealer outdoors. Let cure 24 hours before use.
How to Display or Gift It
This speckled bowl looks lovely on a wooden tray with linen napkins. For gifting, wrap in kraft tissue and tuck a dried lavender sprig inside. Store unused sealed bowls in a stackable craft organizer to avoid scratches. For long-term display, place on a small wooden easel so the speckle pattern reads from multiple angles.
2. Coastal Ombre Ceramic Bowl — ceramic bowl painting ideas for home decor
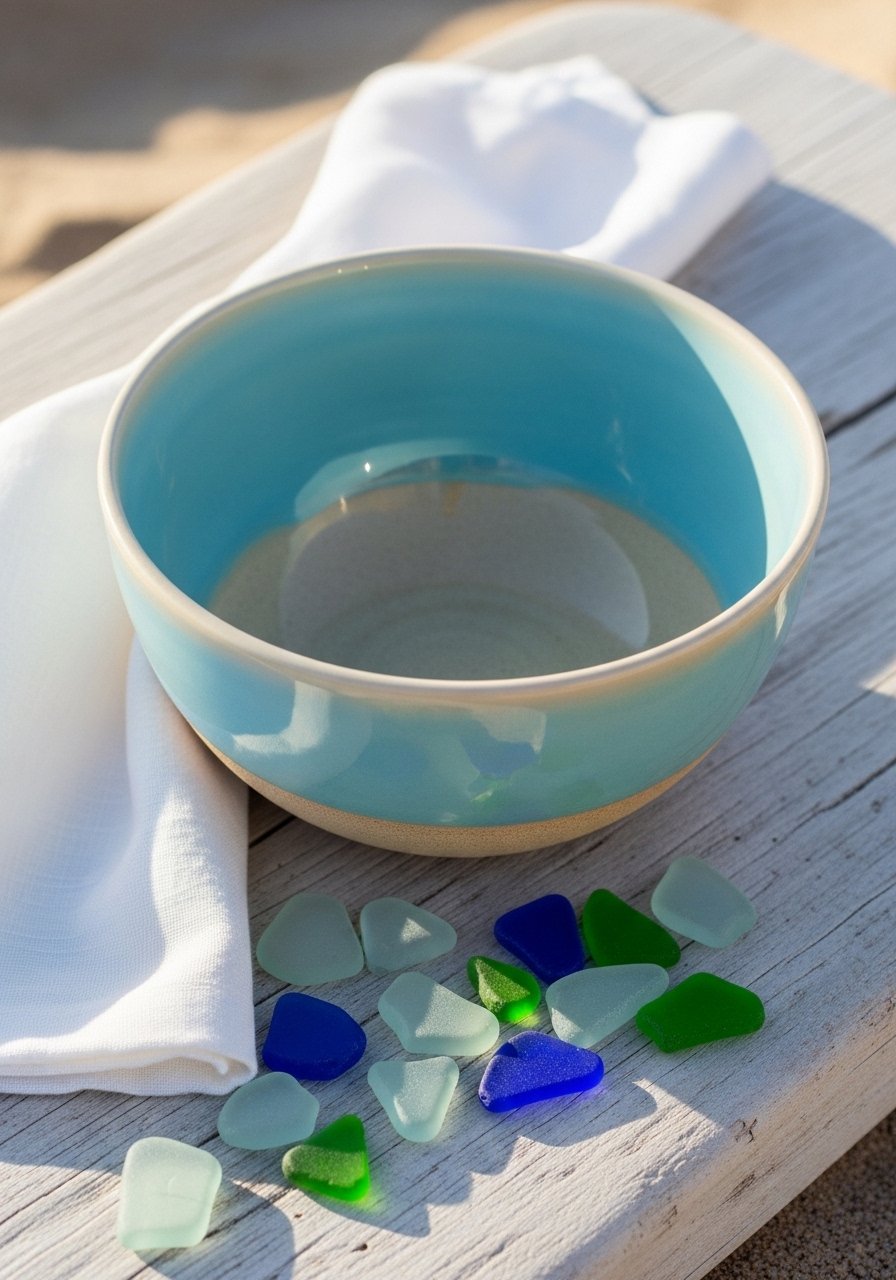
This ombre finish gives a calm, coastal look to any shelf. The smooth gradient is buildable with thin coats and a soft blending brush. Beginners will enjoy the meditative brush strokes. Use a soft synthetic brush for a streak-free blend.
Materials
- 1 ceramic bowl, 7–8" diameter
- Acrylic paints: sky blue, deep aqua, sand beige — 1 oz each
- Paint thinner or water (for flow), small jar
- Soft synthetic blending brush, size 2 inch
- Foam brush for base coat
- Palette
- Clear matte acrylic sealer, 6 oz
- Paper towels
Instructions
- Clean the bowl and sand any glossy areas lightly with fine sandpaper.
- Apply one thin base coat of sand beige with a foam brush. Dry 30 minutes.
- On the palette, create 3 mixes: sand beige, mid-aqua (50/50), and sky blue.
- Starting at the rim, paint the sky blue in thin horizontal strokes. Work downward blending into mid-aqua, then into sand beige.
- Feather the joins with the dry edge of the synthetic brush for a seamless gradient.
- Let dry 45 minutes between coats. Apply a second thin coat if needed.
- Cure 24 hours, then spray two light coats of matte sealer. Full cure 48 hours.
How to Display or Gift It
Place the bowl with a shell cluster on a console table for instant coastal styling. Stack with other ombre pieces for a layered vignette. If gifting, nest a small bag of local coffee beans inside and wrap in cellophane with twine.
3. Japandi Minimalist Two-Tone Bowl
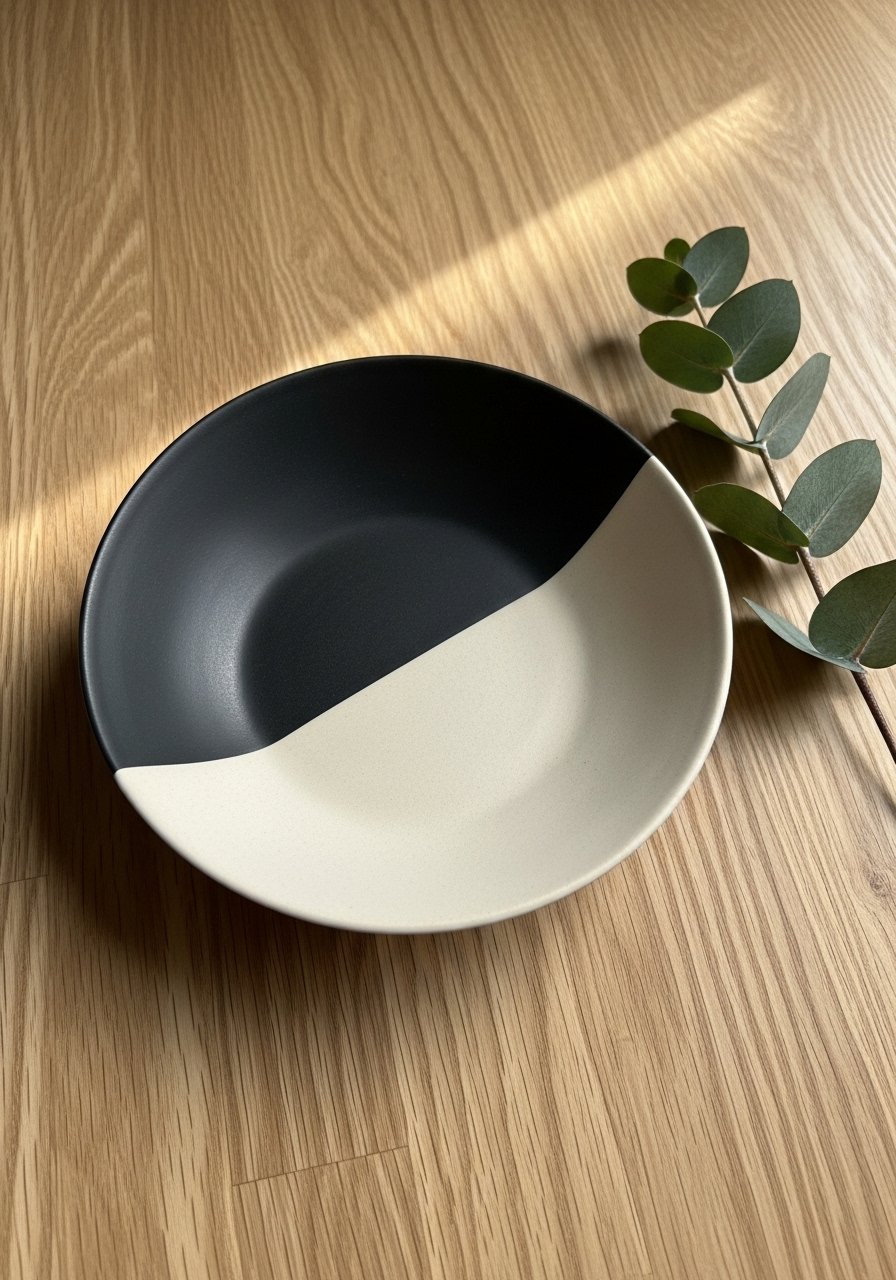
This Japandi-friendly two-tone bowl balances warm and cool neutrals. The diagonal split feels modern and intentional. Painter’s tape is your best friend here; press firmly for a crisp line.
Materials
- 1 ceramic bowl, 6" diameter
- Chalk paint in matte black and ivory — 1 oz each
- Painter’s tape, 1/2" width
- Foam brush and small round detail brush
- Sandpaper, 220 grit
- Clear matte varnish, 6 oz
- Rubbing alcohol for degreasing
Instructions
- Sand bowl slightly, wipe with alcohol, and let dry.
- Use painter’s tape to create a diagonal mask. Press edges firmly.
- Paint one side matte black using a foam brush. Dry 45 minutes.
- Remove tape carefully. Re-tape over the black edge, exposing the other half.
- Paint ivory. Dry 45 minutes.
- Remove tape, touch up with a detail brush if needed.
- Apply two light coats of matte varnish, 30 minutes apart. Cure 24–48 hours.
How to Display or Gift It
Display alone on a console or in a neutral credenza. Pair with a wooden spoon set for kitchen use. For storage, lay in a fabric-lined drawer divider to avoid rubbing.
4. Terracotta Clay-Glow Bowl (antique wash)

Imitate baked terracotta without the weight. This antiqued wash technique brings a sunbaked feel. A diluted white paint wash settles into crevices for natural aging.
Materials
- 1 ceramic bowl, 7" diameter
- Terracotta acrylic paint, 2 oz
- Titanium white acrylic, 1 oz
- Small jar of water
- Stiff-bristled dry brush
- Sanding sponge
- Clear satin sealer, 6 oz
Instructions
- Prime and paint bowl terracotta. Let dry 45 minutes.
- Mix 1 tsp white paint with 2 tbsp water for a thin wash.
- Using the dry brush, dip in wash and wipe most off on paper towel.
- Lightly brush across raised areas so white catches edges.
- Let dry 20–30 minutes. Sand lightly for a worn look.
- Repeat wash if desired. Seal with satin sealer, two coats, 30 minutes apart. Cure 24 hours.
How to Display or Gift It
Fill with seasonal dried botanicals or potpourri. Tie a kraft tag around the rim for gifting. Store stacked with paper between bowls to protect finish.
5. Marbled Swirl Serving Bowl (epoxy-friendly)
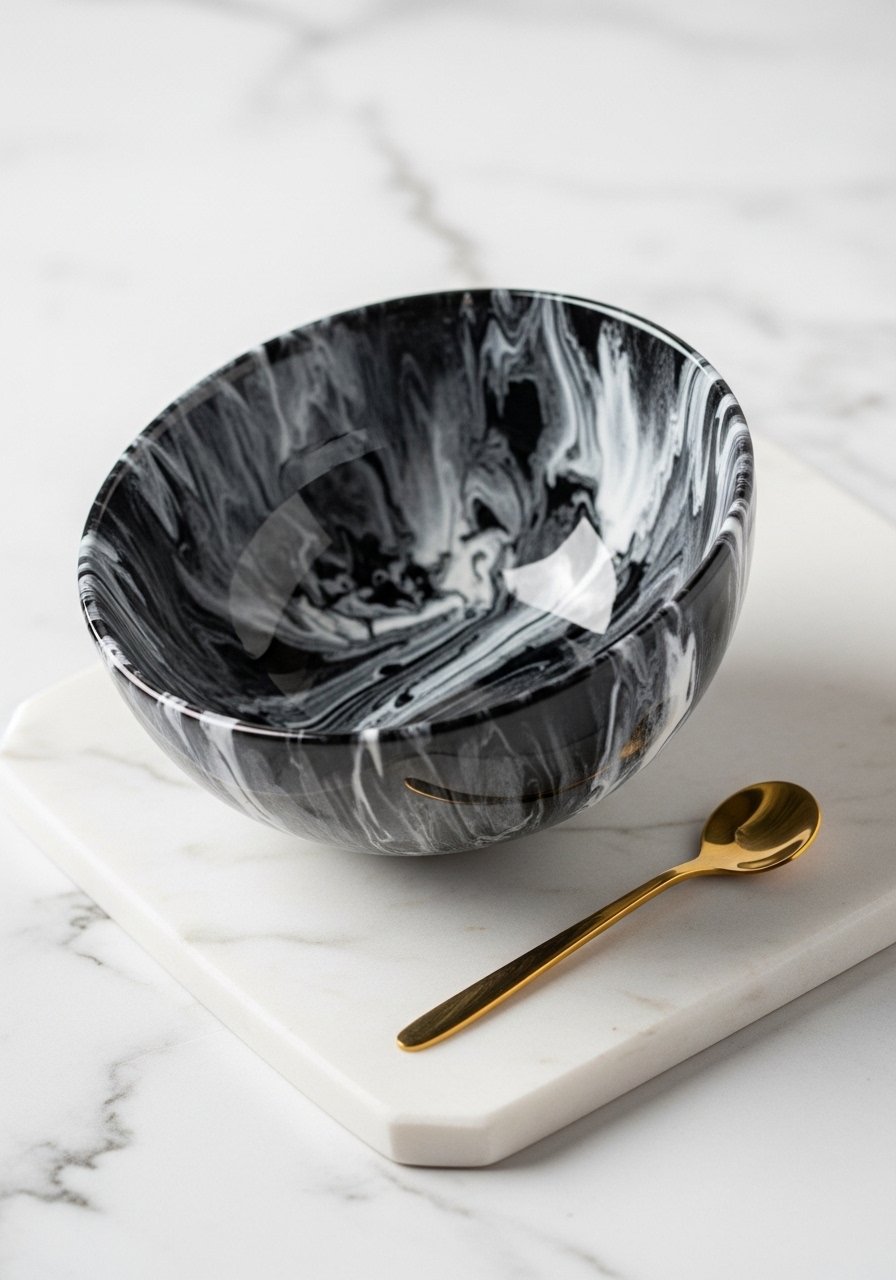
For table-worthy shine, this marbling uses fluid acrylics topped with epoxy resin. Work quickly and wear gloves. A heat gun helps pop bubbles during curing.
Materials
- 1 ceramic bowl, 8" diameter
- Fluid acrylic paint: black, white — 1 oz each
- Pouring medium 2 oz
- Disposable cups and stir sticks
- 2-part epoxy resin kit, 8–16 oz
- Heat gun
- Nitrile gloves
Instructions
- Prep bowl and mix 1 oz paint with 1 oz pouring medium in cups.
- Pour alternating colors into a cup, then flip onto bowl interior and swirl.
- Tilt bowl to move paint; wipe excess from underside.
- Let acrylic cure 4–6 hours until tack-free.
- Mix epoxy per kit instructions. Pour thin even coat over interior.
- Use heat gun for 5–10 seconds to remove bubbles. Let cure flat 24–48 hours.
- Lightly sand underside if resin drips hardened. Full cure 7 days.
How to Display or Gift It
Marbled bowls are show-stoppers for serving candy or as jewelry catchalls. Ship carefully: use a cushioned gift box and bubble wrap. For display, place on a mirrored tray to amplify the gloss.
6. Hand-Lettered Quote Bowl

Add a tiny note of inspiration inside a bowl. Use a fine-tip paint pen for crisp lettering. Ideal for gifts or bedside jewelry dishes.
Materials
- Small ceramic bowl, 5–6" diameter
- Black paint pen, fine tip
- Pencil and eraser
- Clear satin sealer, 6 oz
- Rubbing alcohol
- Paper towel
Instructions
- Clean bowl and wipe with alcohol.
- Lightly pencil your quote around rim. Keep letters sized to bowl curvature.
- Trace with black paint pen. Let dry 20–30 minutes.
- Apply a second coat if pen skips.
- Seal with two light coats of satin sealer, 30 minutes apart. Cure 24 hours.
How to Display or Gift It
Pair with a small candle or sachet for a cozy gift set. Wrap in tissue and place in a small kraft box. Store stacked with felt separators to protect lettering.
7. Botanical Stamp Imprint Bowl

Stamped botanicals create repeating pattern without fine painting. Use a soft rubber stamp and pigment ink or thin acrylic. Great for adding cottagecore charm.
Materials
- Ceramic bowl, 7" diameter
- Small rubber botanical stamp
- Pigment ink pad or acrylic paint applied to stamp
- Clear matte varnish, 6 oz
- Foam pad
- Paper towel
Instructions
- Wipe bowl clean. Practice stamping on paper.
- If using acrylic, apply thin coat to stamp and press gently.
- Stamp around rim, aligning pattern. Let dry 30–45 minutes.
- Touch up any gaps with a detail brush.
- Spray two light coats of matte varnish. Cure 24 hours.
How to Display or Gift It
Use as a planter for faux succulents (use base liner). For gifting, nest in a small wicker basket with a plant starter. Store stamps flat in a craft organizer.
8. Metallic Rim Accent Bowl

A thin metallic rim adds polish without fuss. Use a metallic paint pen for control. This works on matte or gloss bowls.
Materials
- 1 ceramic bowl, 6–8" diameter
- Gold metallic paint pen
- Painter’s tape
- Rubbing alcohol
- Clear gloss sealer, 6 oz
- Soft cloth
Instructions
- Clean rim with alcohol and let dry.
- Apply painter’s tape just below rim line.
- Carefully run the gold paint pen along the exposed rim. One steady pass.
- Wait 20 minutes. Remove tape slowly.
- If desired, touch up. Seal with one light coat of gloss sealer. Cure 24 hours.
How to Display or Gift It
Metallic rim bowls look chic on a bedside table. Pair with a small jewelry tray or candle. Wrap in tissue and tuck a ribbon through a kraft tag when gifting.
9. Geometric Block Print Bowl
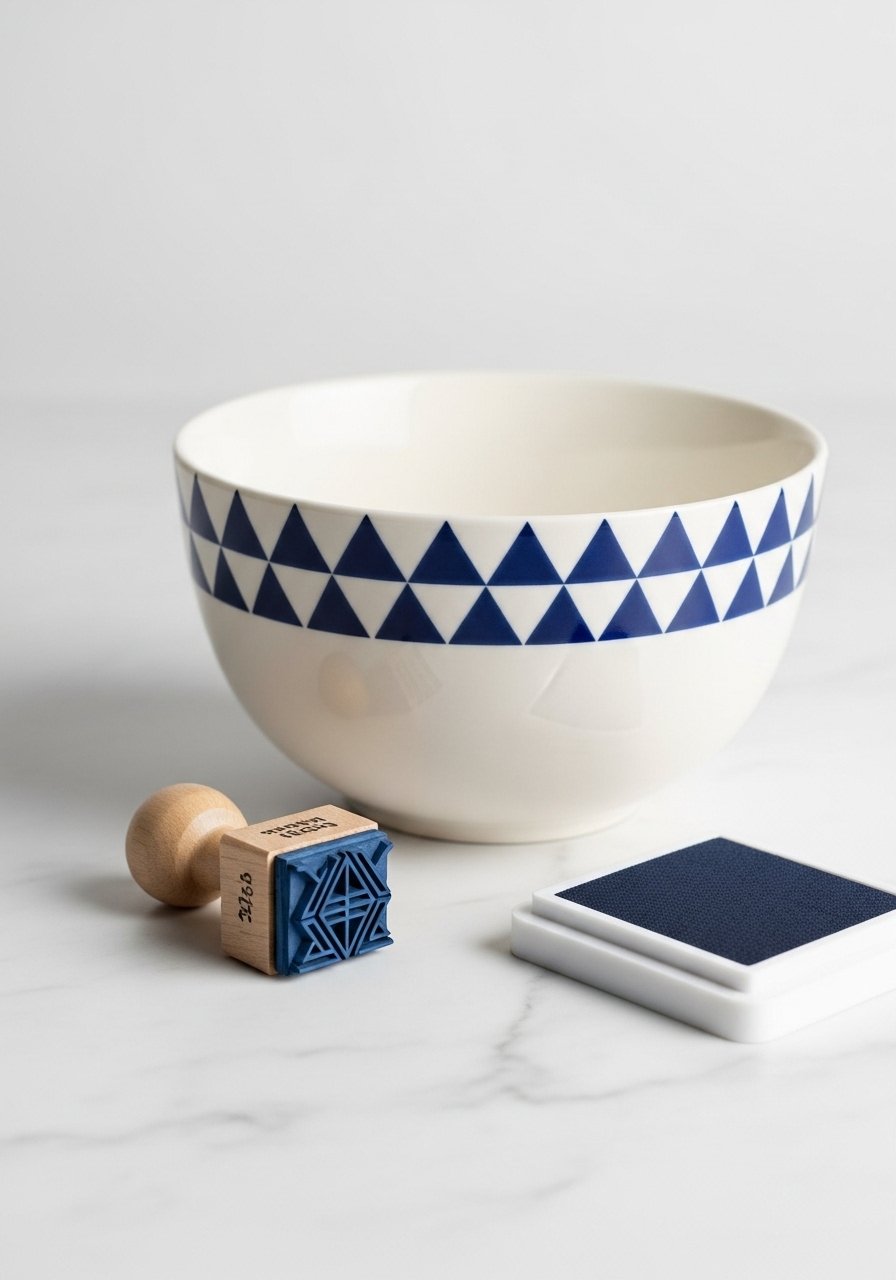
Block printing gives repeatable geometry that’s striking in contrast tones. Use a ruler and light pencil guide to keep patterns even.
Materials
- Ceramic bowl, 7" diameter
- Wooden block stamp or linoleum cut
- Acrylic pigment or fabric ink
- Ruler and pencil
- Clear satin varnish, 6 oz
- Foam brush
Instructions
- Draw faint pencil guide marks evenly spaced around bowl rim.
- Practice stamping on paper. Apply small amount of ink to block.
- Stamp along pencil lines, keeping pressure even.
- Erase visible pencil marks once dry.
- Seal with two light coats varnish. Cure 24 hours.
How to Display or Gift It
Pair with a wooden spoon for kitchen display. Store in a drawer divider to prevent rubbing. For gifting, pack in a small wooden crate lined with tissue.
10. Boho Aztec Pattern Bowl — ceramic bowl painting ideas for home decor
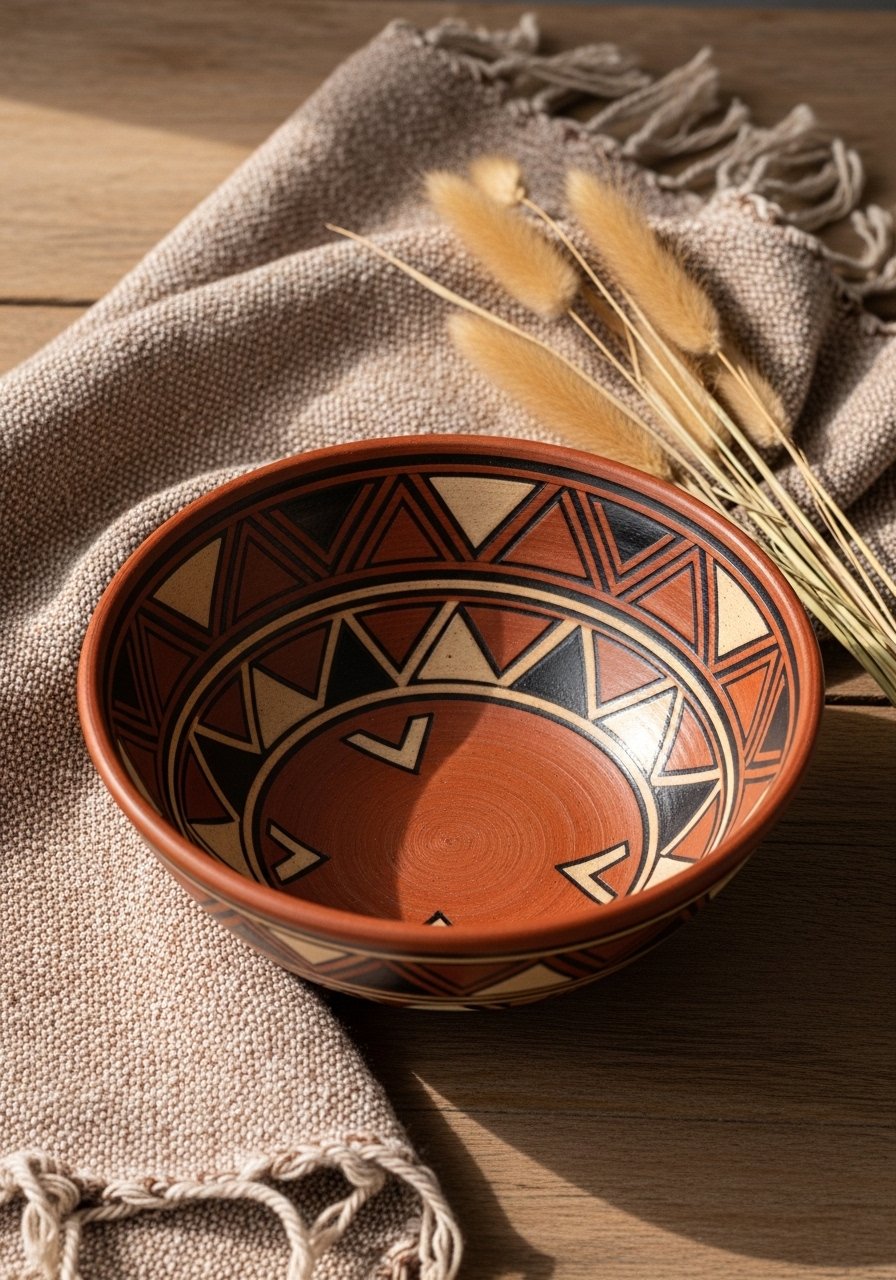
This boho Aztec design brings tribal patterns and warm hues to your shelves. Use a fine liner brush for sharp lines. People who love eclectic and boho styling will reach for this one.
Materials
- 1 ceramic bowl, 7–8" diameter
- Acrylic paints: rust, black, cream — 1 oz each
- Fine liner paint brush
- Pencil and ruler
- Clear matte sealer, 6 oz
- Palette
Instructions
- Clean bowl and pencil lightly-drawn pattern guides.
- Paint pattern with fine liner brush, starting with cream base dots or lines.
- Fill larger shapes with rust then outline in black for contrast.
- Let each color dry 20–30 minutes to avoid smudging.
- Apply two coats of matte sealer. Cure 24–48 hours.
How to Display or Gift It
This pairs well with woven textiles and rattan trays. For gifting, tuck in a small bundle of incense or a mini amber bottle. Store in a craft drawer with felt layers.
11. Chalky Pastel Dessert Bowl
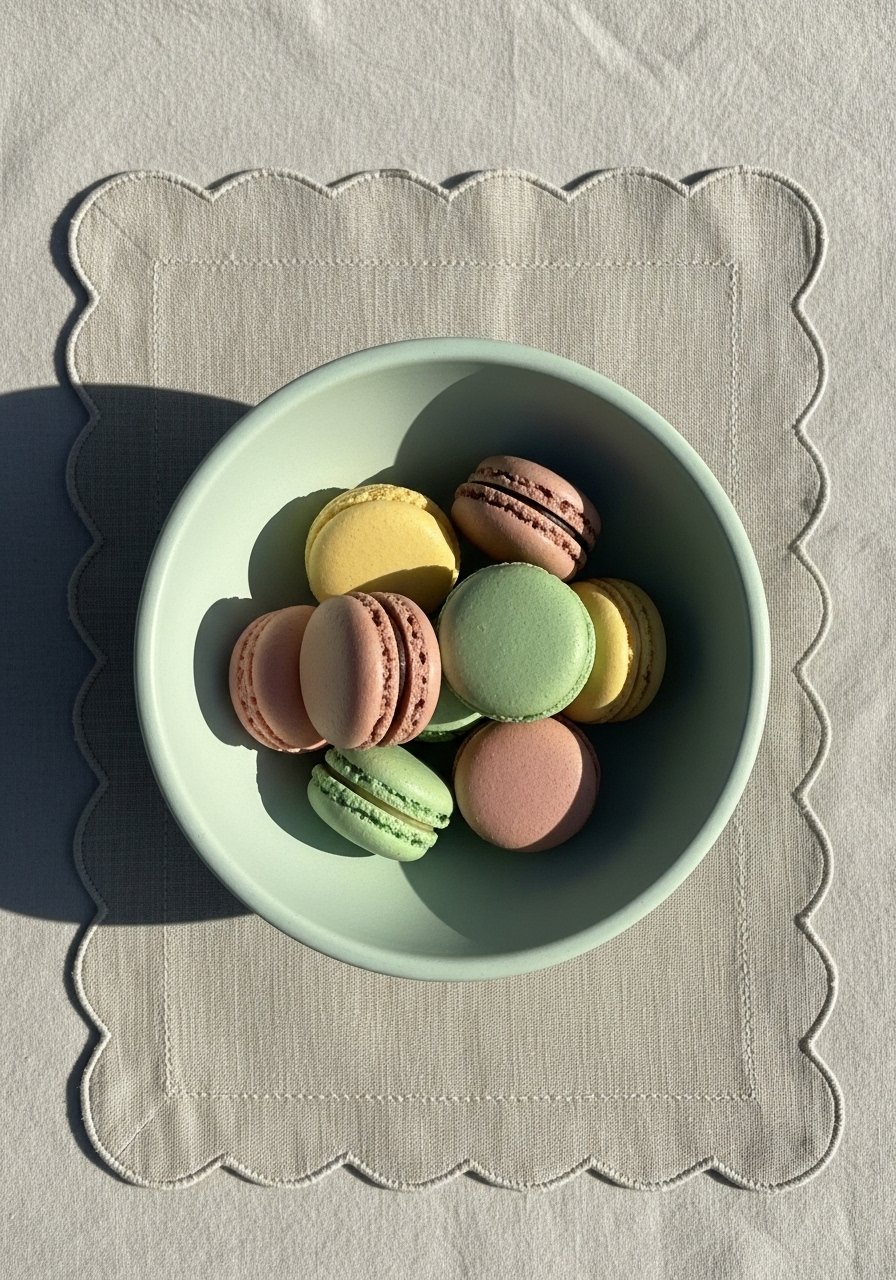
Chalk paint gives a soft, velvety finish perfect for pastel palettes. This work-friendly paint adheres nicely to ceramic with light sanding.
Materials
- Ceramic bowl, 6" diameter
- Chalk paint in mint — 2 oz
- Fine sandpaper, 220 grit
- Foam brush
- Clear matte wax or sealer, 6 oz
- Soft rag
Instructions
- Clean bowl and sand lightly to scuff surface.
- Apply two thin coats of chalk paint, 30 minutes between coats.
- Lightly sand between coats for ultra-smooth finish.
- Apply a thin layer of matte wax or sealer. Let cure 24 hours.
How to Display or Gift It
Display with macarons or sugar cookies. Wrap in cellophane and tie with a pastel ribbon for gifting. Store stacked with tissue layers.
12. Stenciled Floral Edge Bowl
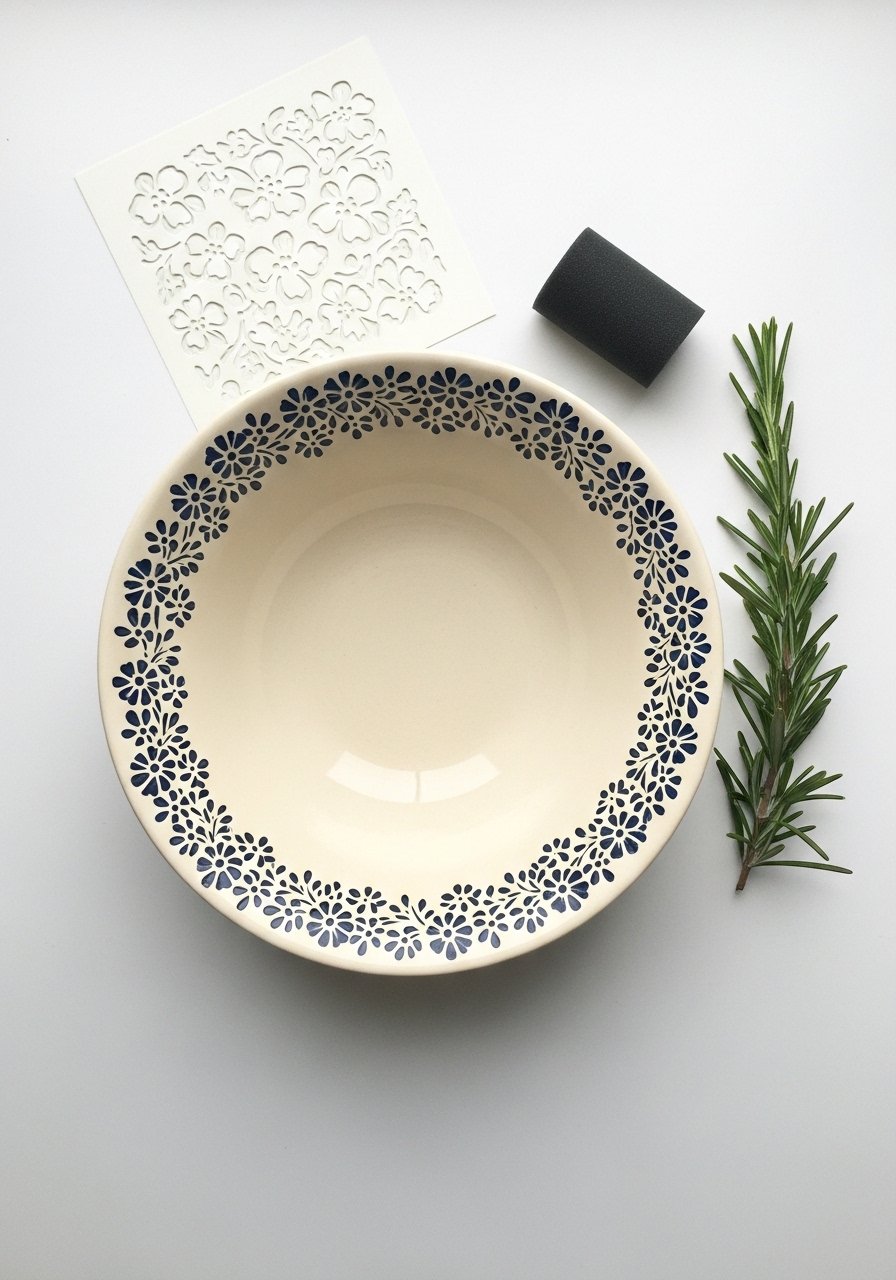
Stenciling ensures repeatable, crisp florals. A foam dauber prevents paint bleed. Ideal for adding a vintage touch without hand-painting every petal.
Materials
- 1 ceramic bowl, 7" diameter
- Reusable floral stencil
- Acrylic paint in navy, 1 oz
- Foam dauber
- Painter’s tape
- Clear satin sealer, 6 oz
Instructions
- Secure stencil to bowl rim with painter’s tape.
- Dab foam dauber into paint, offload on paper, then apply through stencil.
- Lift stencil carefully. Repeat around rim.
- Allow 45 minutes dry. Touch up with small brush if needed.
- Seal with two coats satin sealer. Cure 24 hours.
How to Display or Gift It
Nest with matching mugs for gift sets. Store stencils flat in a dedicated sleeve. For display, pair with fresh herbs in small jars.
13. Retro Polka Dot Snack Bowl
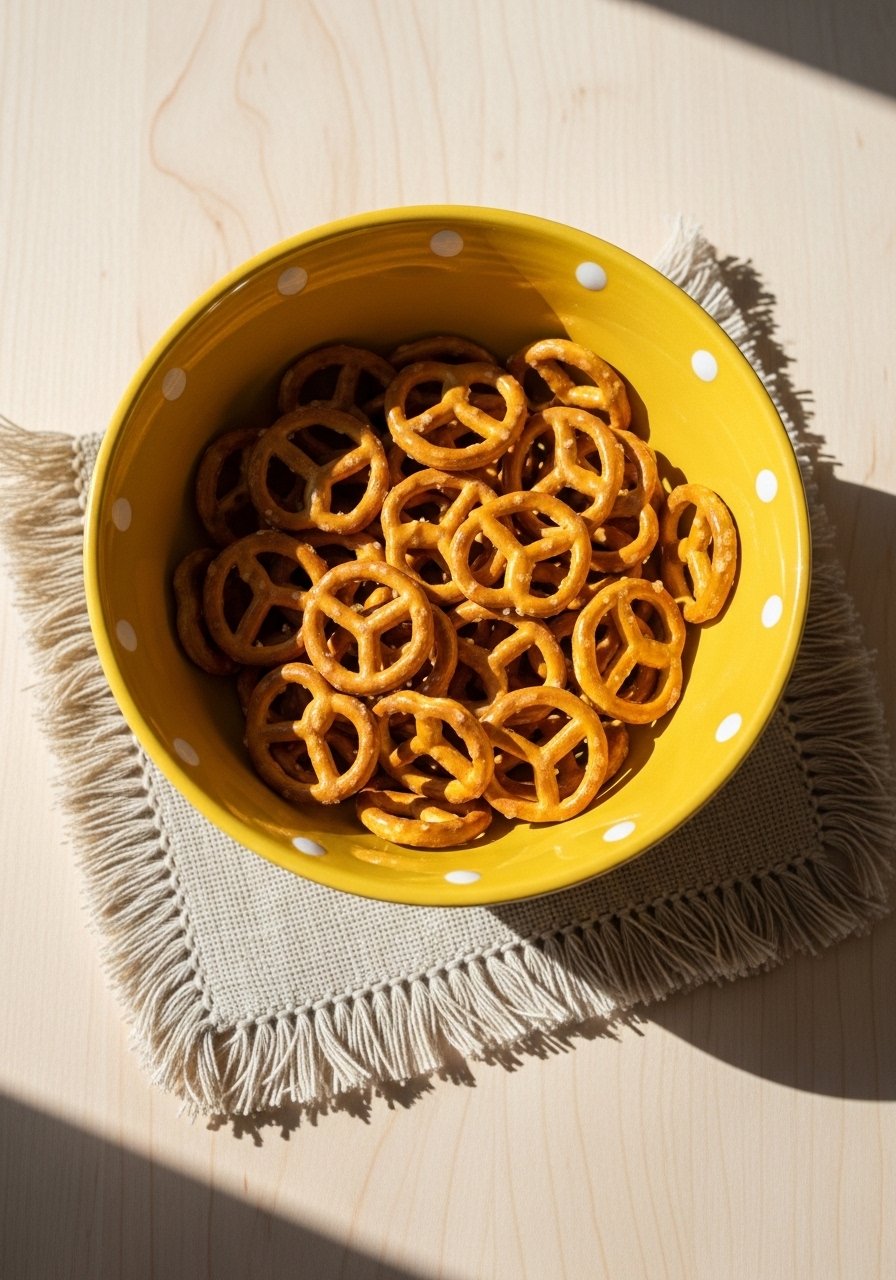
Polka dots are cheerful and retro. Use a round-tipped pencil eraser or paint pen to get consistent dots. Great for parties or kid snacks.
Materials
- Ceramic bowl, 6–7" diameter
- Acrylic paint: mustard and white — 1 oz each
- Paint pen or pencil eraser for dotting
- Ruler and pencil
- Clear gloss sealer, 6 oz
Instructions
- Paint base coat mustard. Dry 45 minutes.
- Mark dot centers faintly with pencil in a grid pattern.
- Dip eraser in white paint and stamp dots. Reapply paint as needed.
- Allow 60 minutes to dry. Apply two light coats of gloss sealer. Cure 24 hours.
How to Display or Gift It
Use as a snack bowl for retro-themed parties. Wrap with a party napkin and cellophane for gifting. Store in a pantry shelf away from heavy items.
14. Minimalist Dot & Line Salad Bowl
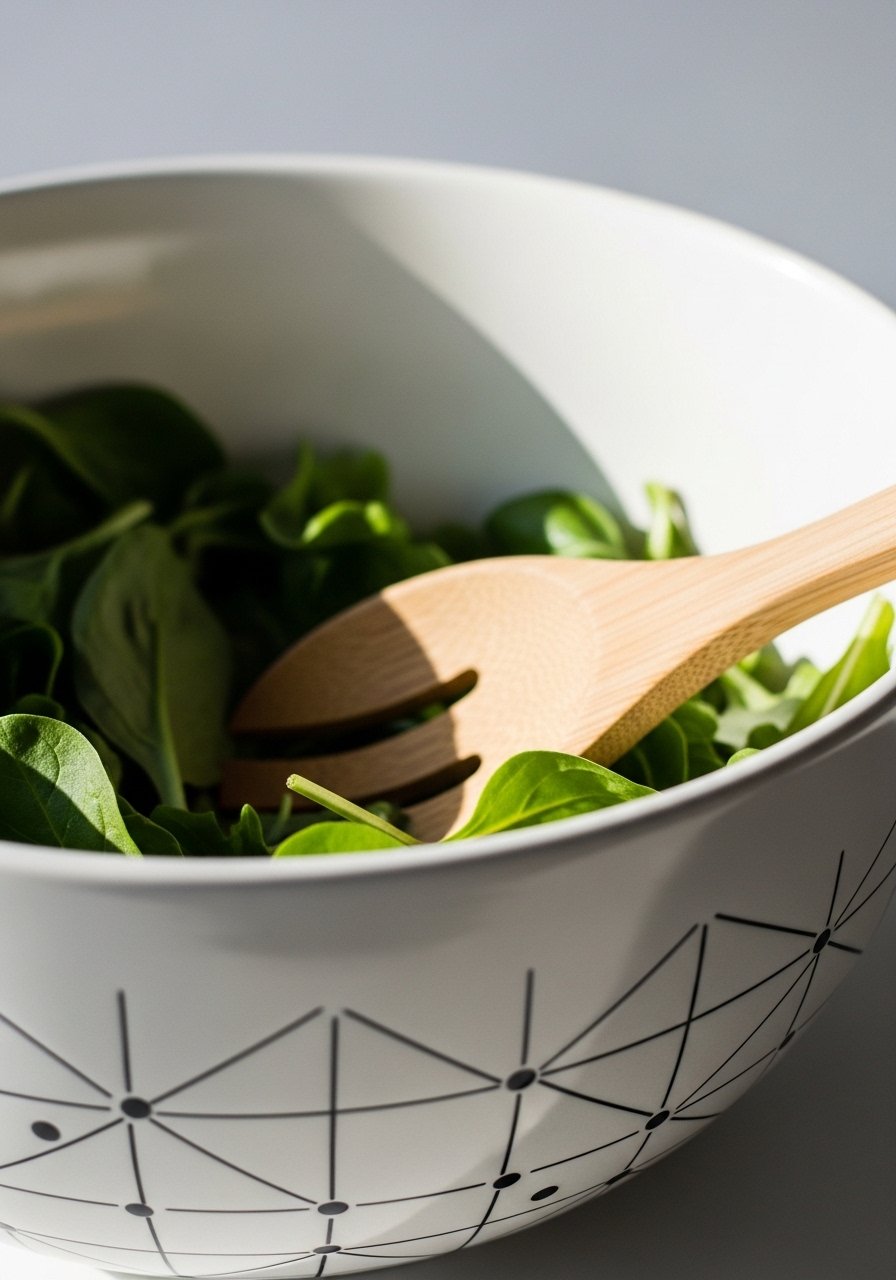
Understated but modern, the dot-and-line pattern suits minimalist kitchens. A fine detail brush makes clean lines. This design is forgiving and quick.
Materials
- 1 ceramic salad bowl, 9–10" diameter
- Acrylic paint: black, 1 oz
- Fine detail brush
- Pencil
- Clear satin varnish, 8 oz
Instructions
- Clean bowl and plan design with pencil.
- Paint dots first, then connect with thin lines using light-handed strokes.
- Let dry 30–45 minutes between elements.
- Seal with two coats satin varnish. Cure 48 hours.
How to Display or Gift It
Display at the center of a dining table with salad servers. For making ahead, store in a tall cabinet to avoid scratches. Gift with a recipe card tucked inside.
15. Mosaic Painted Bowl (faux tile)
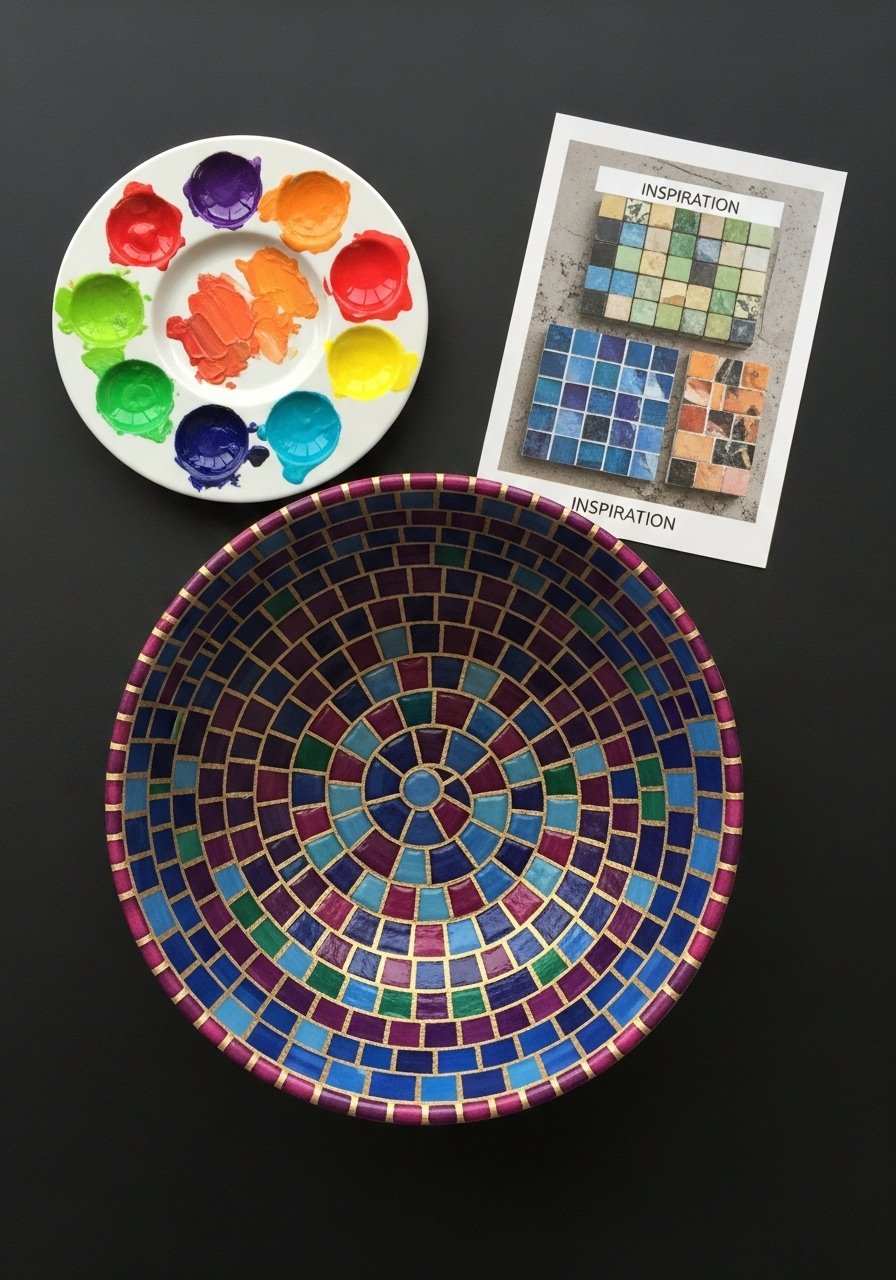
Create the look of tessellated tiles using small painted blocks and a grout-colored background. The visual texture is eye-catching though the surface stays smooth.
Materials
- 1 ceramic bowl, 8" diameter
- Acrylic paints in jewel tones — 5 colors, 1 oz each
- Neutral grey paint for grout
- Small square sponge or brush
- Fine liner brush
- Clear gloss sealer, 8 oz
Instructions
- Paint base with grout-grey. Dry 45 minutes.
- Using a small square sponge, stamp colored "tiles" in rows.
- Outline tiles with a fine liner to simulate grout lines.
- Let dry fully (2–3 hours). Seal with gloss sealer. Cure 48 hours.
How to Display or Gift It
This looks great on a mantle or entry console. Wrap in kraft paper and tie with twine for gifting. Store in a protective crate if transporting.
16. Monochrome Brushstroke Bowl
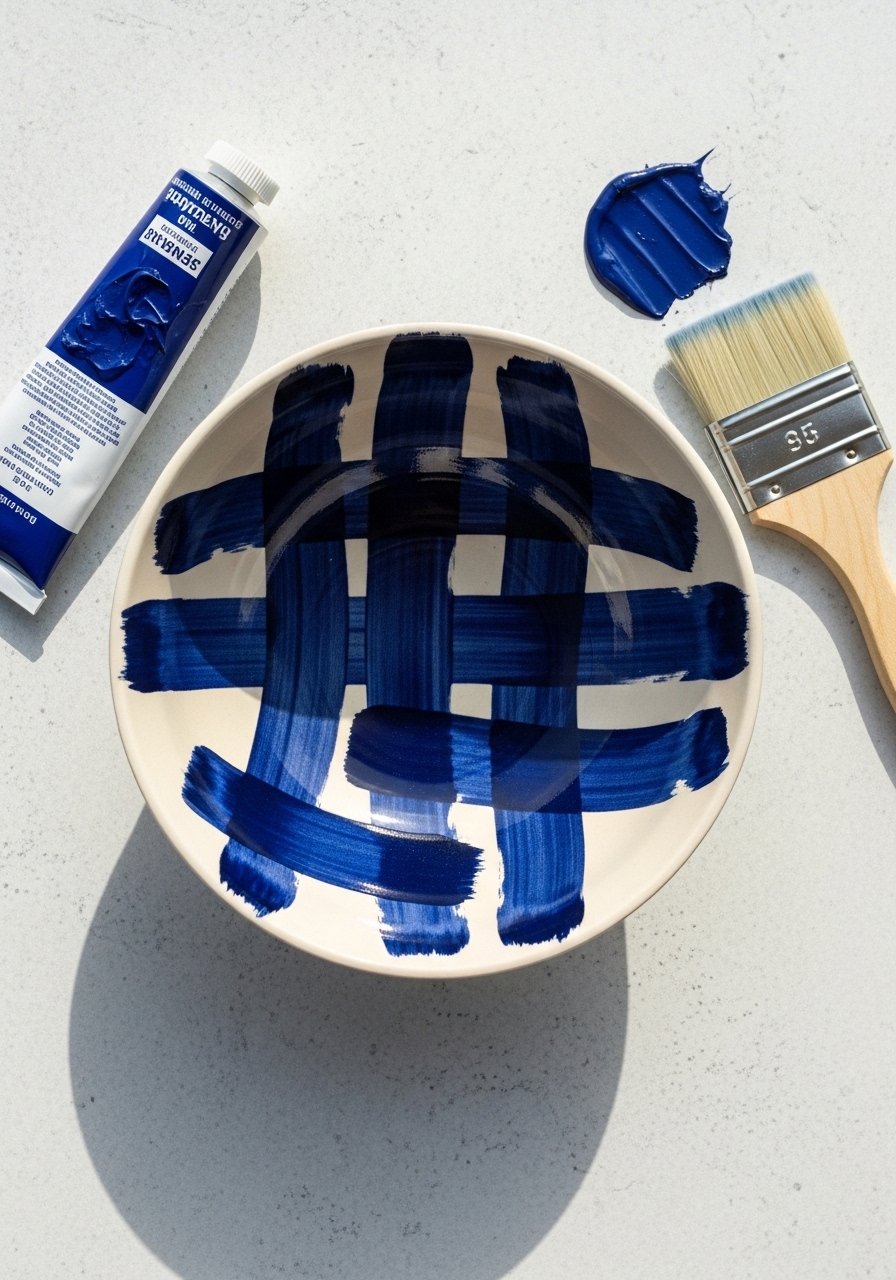
Show expressive brushwork with confident strokes. One or two bold colors create modern impact. Use a wide flat brush for visible texture.
Materials
- 1 ceramic bowl, 7" diameter
- Acrylic paint in navy, 2 oz
- Wide flat brush (1-inch)
- Palette
- Clear matte varnish, 6 oz
- Rag for blending
Instructions
- Prime bowl if glossy. Apply base cream if needed.
- Load brush with paint and make long, confident strokes around bowl exterior.
- Vary pressure to create thick and thin marks.
- Let dry 30–45 minutes. Apply a second pass for depth.
- Seal with matte varnish. Cure 24 hours.
How to Display or Gift It
Place on an open shelf with other brushstroke pieces. For gifting, include a small note about the color inspiration. Store stacked with paper separators.
17. Gradient Speckle Trinket Bowl
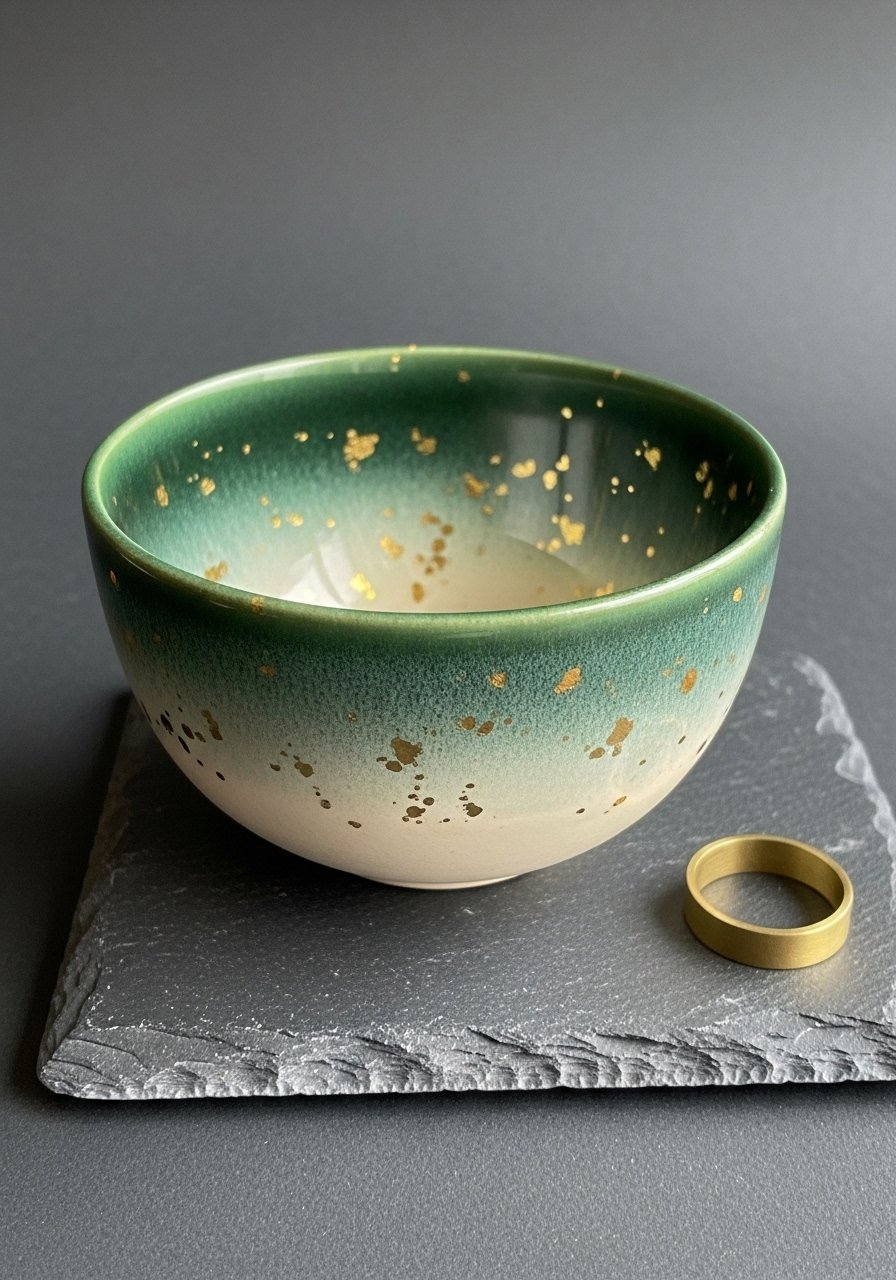
This tiny bowl combines ombre and speckle techniques. Add metallic specks for a touch of glam. Great for jewelry and bedside tables.
Materials
- Small trinket bowl, 4–5" diameter
- Acrylic paints: forest green, cream — 1 oz each
- Gold metallic paint, 0.5 oz
- Toothbrush and foam brush
- Clear gloss sealer, 4–6 oz
Instructions
- Paint cream base. Dry 30 minutes.
- Blend green into rim with thin coats and a soft brush.
- Thin gold paint slightly; use toothbrush to speckle lightly.
- Let dry 45 minutes. Seal with gloss sealer. Cure 24 hours.
How to Display or Gift It
Display on a bedside table with a velvet ring dish. Gift in a small jewelry box lined with tissue. Store in a jewelry drawer or organizer.
18. Chalkboard Message Bowl
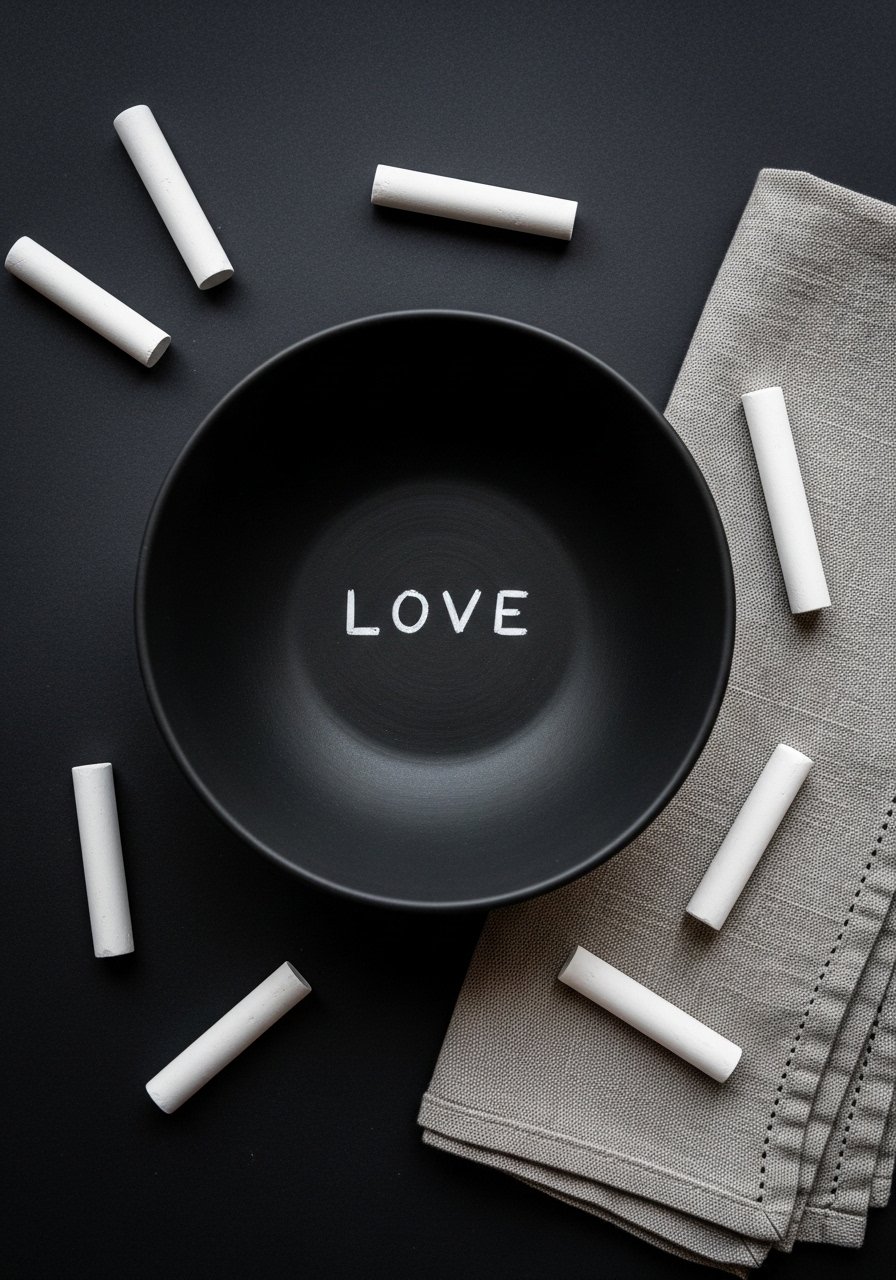
Turn a bowl into a tiny message board. Chalk paint allows you to change notes. Great for leaving reminders or rotating greetings.
Materials
- Ceramic bowl, 6" diameter
- Chalkboard paint, 2 oz
- Chalk sticks
- Foam brush
- Clear matte sealer (optional if you want permanent finish)
- Cloth
Instructions
- Paint interior with two thin coats of chalkboard paint. Dry 1 hour between coats.
- Let cure 24 hours.
- "Prime" chalkboard by rubbing chalk over surface and wiping.
- Write messages with chalk. If you want permanence, trace with white paint pen and seal.
How to Display or Gift It
Keep on an entryway table for grocery notes. For gifting, pair with a small chalk bundle and instruction card. Store chalk in a small jar nearby.
19. Vintage Script Bowl — ceramic bowl painting ideas for home decor
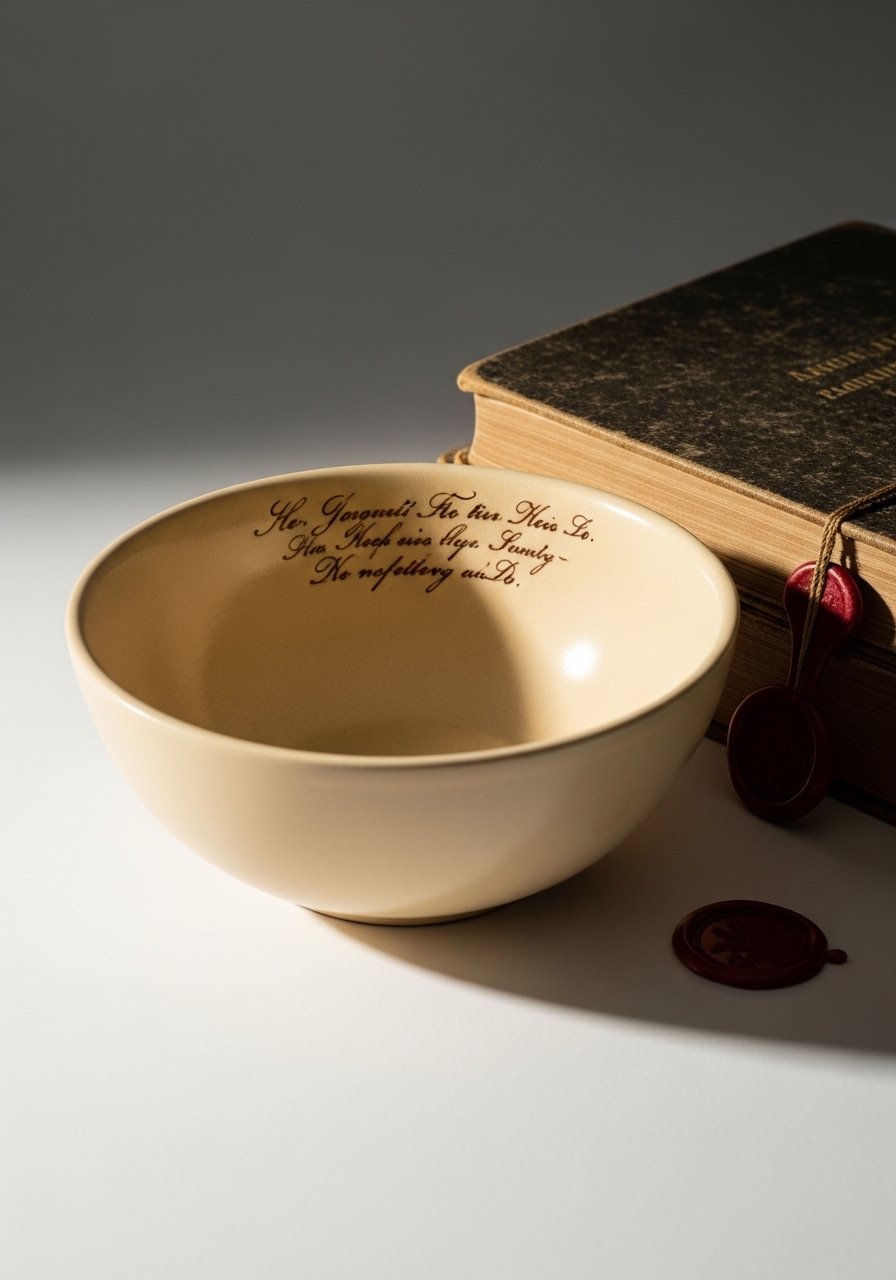
A vintage script motif adds romantic antique flair. Transfer printed script using graphite transfer or freehand for a looser look. Ideal for shabby-chic decor.
Materials
- 1 ceramic bowl, 7" diameter
- Sepia-toned acrylic paint or paint pen
- Printed script template
- Graphite transfer pencil
- Fine liner brush
- Satin sealer, 6 oz
Instructions
- Clean bowl. Tape printed script to bowl and trace with graphite pencil.
- Remove paper and paint over transferred lines with fine liner brush.
- Work slowly in short sections. Allow 20–30 minutes drying between lines if layering.
- Seal with two coats satin sealer. Cure 24–48 hours.
How to Display or Gift It
Display with vintage postcards or keys to lean into the aesthetic. Gift in a kraft box with a wax-sealed tag. Store with padded separators to protect the script.
20. Sgraffito Etched Bowl (scratch-through)
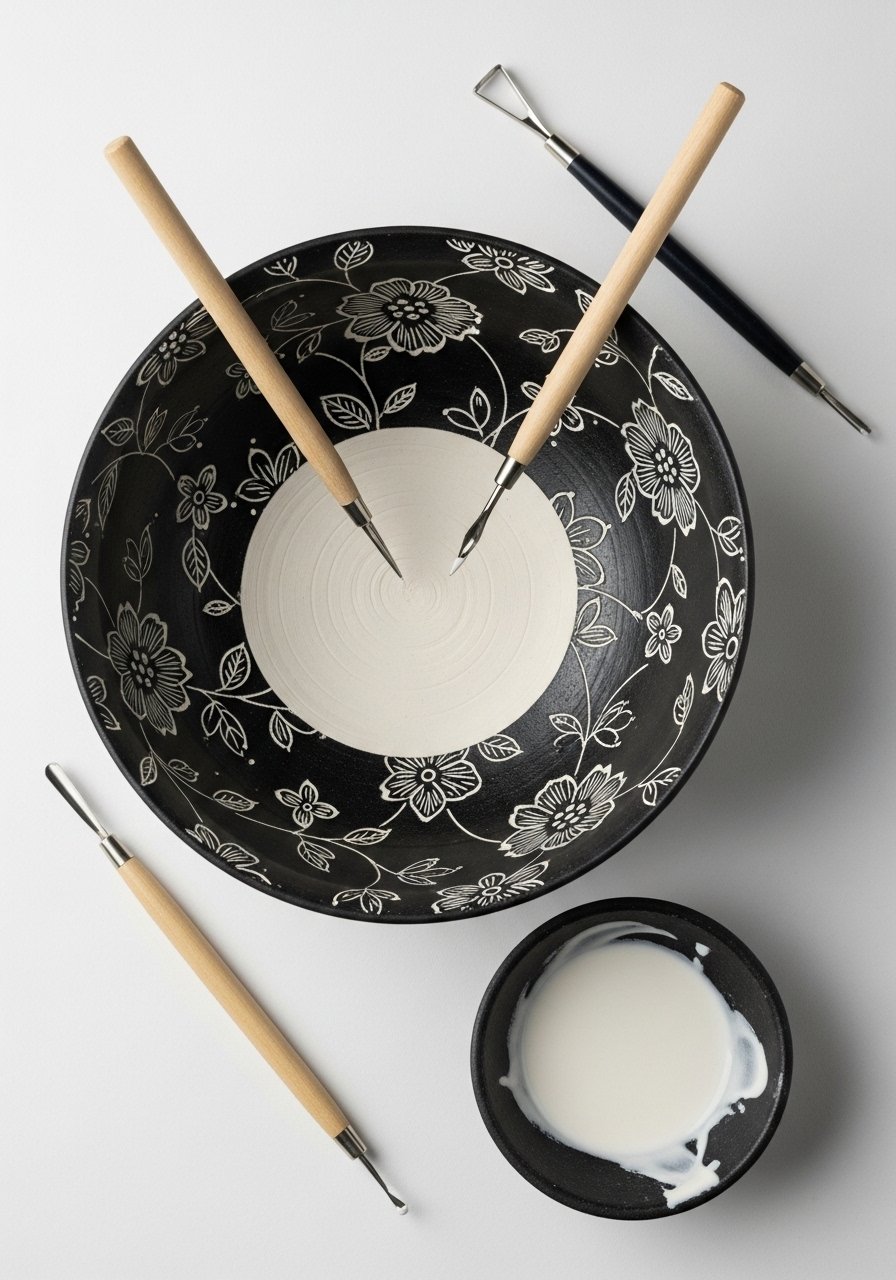
Sgraffito involves scratching a top layer to reveal color beneath. Use underglaze or paint layers and a carving tool for delicate lines.
Materials
- Ceramic bisque bowl (unglazed) or primed bowl
- Underglaze or black acrylic, 2 oz
- White underglaze or acrylic, 2 oz
- Sgraffito tools or sharp wooden stylus
- Foam brush
- Clear food-safe sealer (if using acrylics), 6–8 oz
Instructions
- Paint bowl with underglaze black. Let dry 1 hour.
- Apply white layer over black. Let dry until slightly tacky (about 30 minutes).
- Use stylus to scratch design revealing black beneath.
- Wipe with soft cloth to remove dust.
- Seal with appropriate sealer. Cure 24–48 hours.
How to Display or Gift It
Sgraffito bowls are artful centerpieces. For gifting, include a small note about the technique. Store upright on a shelf to protect etched surface.
21. Rainbow Rim Dip Bowl
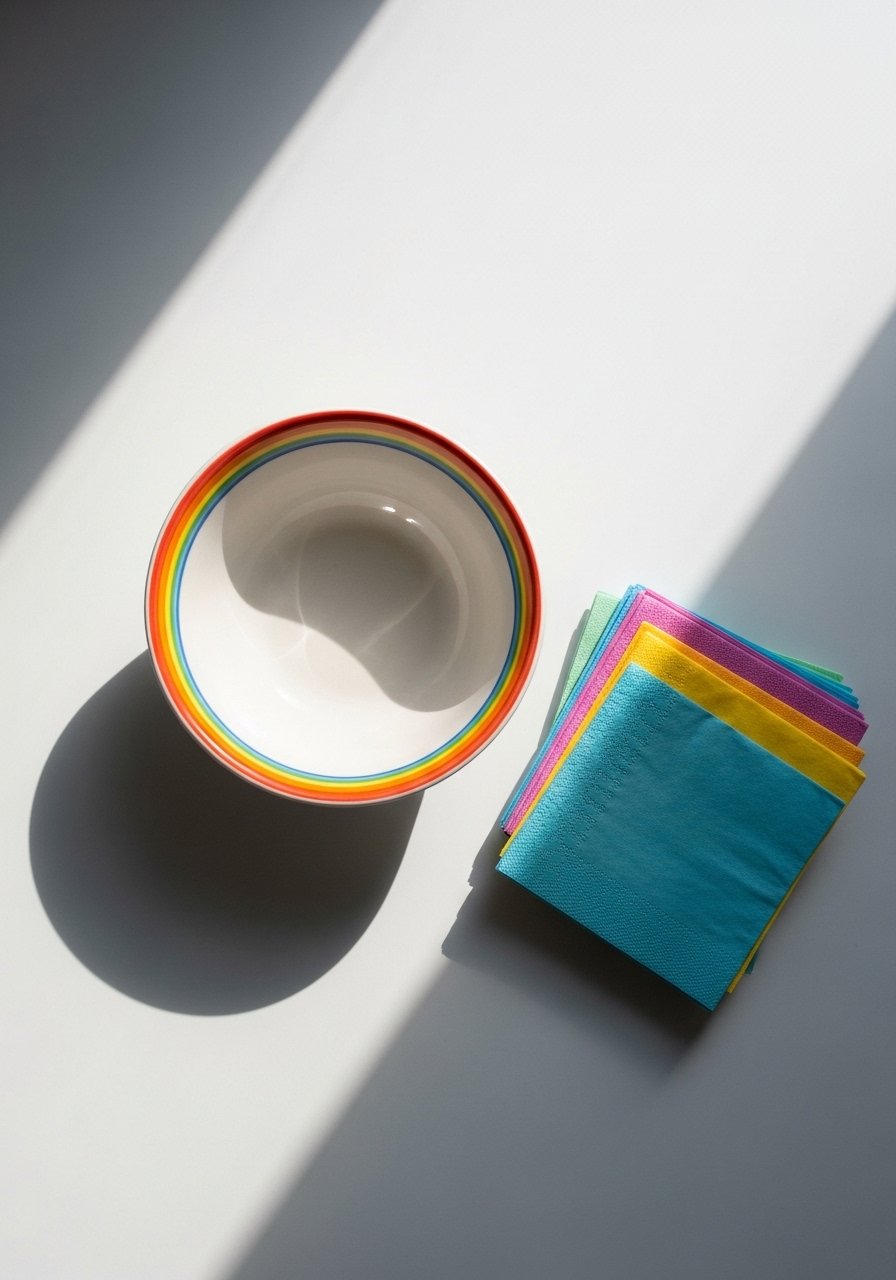
A thin rainbow ring injects delight with minimal effort. Use paint pens or thin brushes for control. Great for children’s rooms or cheerful kitchens.
Materials
- Ceramic bowl, 6–7" diameter
- Acrylic paint pens in rainbow colors
- Painter’s tape (optional)
- Rag
- Clear gloss sealer, 6 oz
Instructions
- Clean rim and mark a faint pencil guide.
- Use paint pens to draw narrow band of color around inner rim.
- Let dry 30 minutes between colors.
- Seal with gloss sealer. Cure 24 hours.
How to Display or Gift It
Pair with colorful serving spoons for kid-friendly meals. Wrap in kraft paper with a bright ribbon for gifting. Store in a bright shelf to reflect the colors.
22. Rustic Brush-Fade Bowl
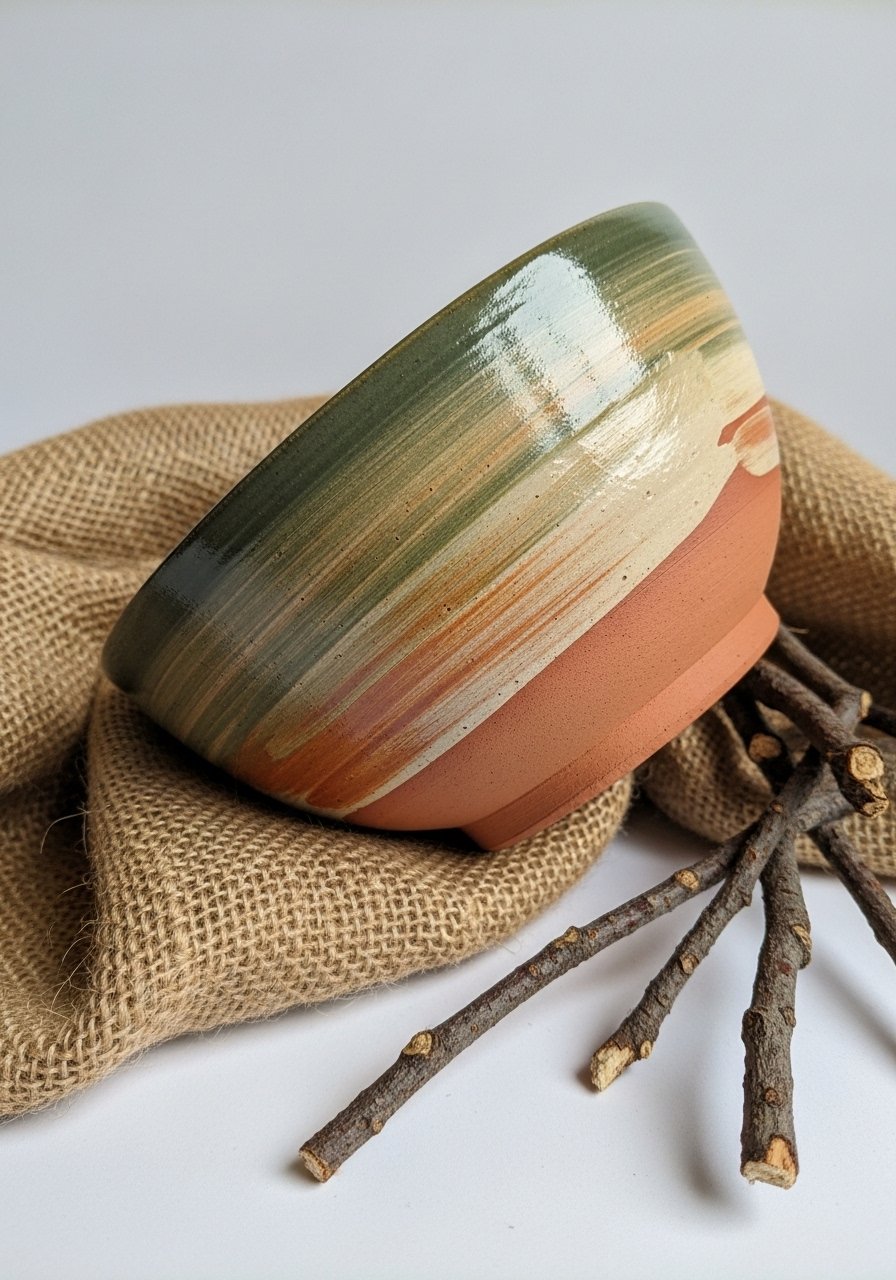
Let brush marks show for a relaxed farmhouse vibe. Thin paint and drag to create faded bands. This finish feels handmade and warm.
Materials
- Ceramic bowl, 8" diameter
- Acrylic paint in warm brown, 2 oz
- Flat brush
- Water for thinning
- Clear satin sealer, 8 oz
Instructions
- Thin paint with 1 tbsp water per 1 oz paint.
- Apply horizontally with flat brush, dragging to create streaks.
- Wipe some paint off with rag for faded areas.
- Repeat until desired look. Dry 30–45 minutes between layers.
- Seal with satin sealer. Cure 24 hours.
How to Display or Gift It
Use as fruit bowl or planter for faux plants. For gifting, pair with a small wooden spoon. Store in a low-traffic shelf.
23. Pastel Drip Bowl
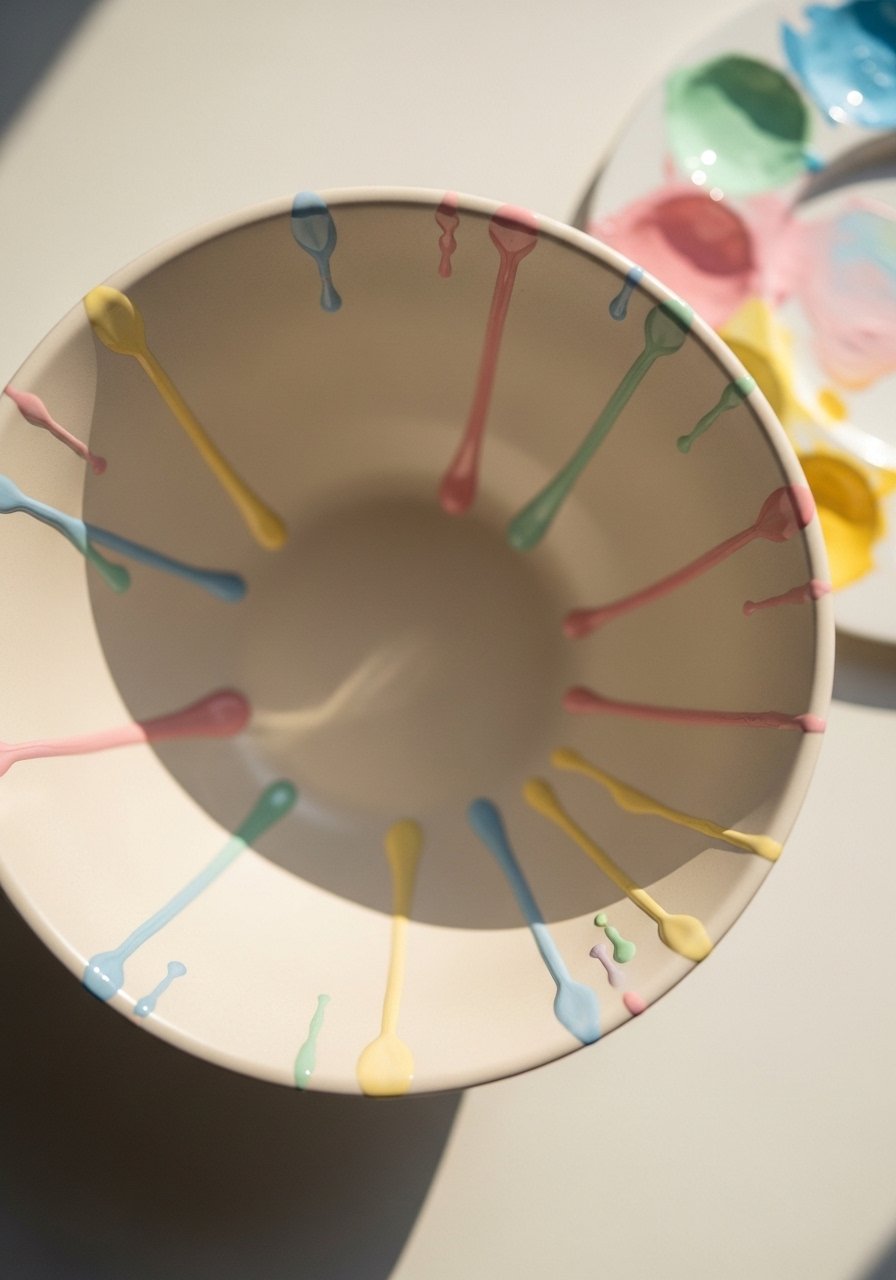
Create dreamy drips by thinning paint and letting gravity pull color. Rotate the bowl for varied drip lengths.
Materials
- Ceramic bowl, 6–7" diameter
- Acrylic paints in pastel tones — 3 colors, 1 oz each
- Water for thinning
- Dropper or small brush
- Clear gloss sealer, 6 oz
Instructions
- Mix pastels with water until runny.
- Use dropper to place drops at rim edge and tilt bowl slightly to encourage drips.
- Control length by stopping tilt or dabbing with paper towel.
- Let dry 2 hours. Seal with gloss sealer. Cure 24–48 hours.
How to Display or Gift It
Display on a vanity with soaps or jewelry. Wrap in tissue and place in a small gift box for a sweet present. Store upright in a display cabinet.
24. Ink-Blot Symmetry Bowl
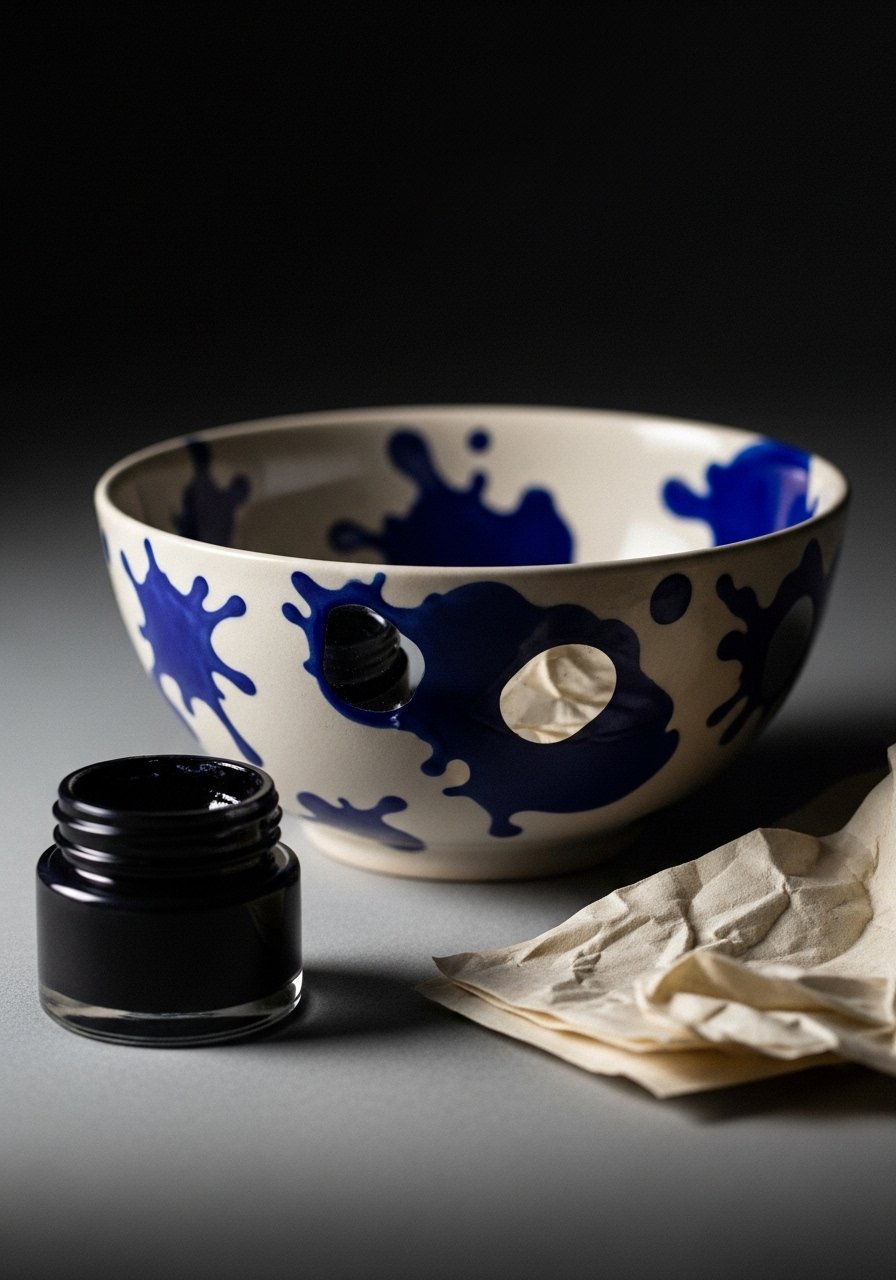
Make symmetrical abstract forms by folding paint on paper, then transferring simplified motifs around the bowl. The result feels high-end and artistic.
Materials
- Ceramic bowl, 7" diameter
- Fluid acrylic ink in indigo, 1 oz
- Small foam brush
- Paper for practice
- Clear matte sealer, 6 oz
Instructions
- Practice ink-blots on paper to pick shapes.
- Use foam brush to paint shape inside bowl; mirror on opposite side.
- Work quickly; allow ink to flow for organic edges.
- Let dry 1–2 hours. Seal with matte sealer. Cure 24 hours.
How to Display or Gift It
This design suits modern art shelves. Gift with a small print reproducing the motif. Store in a dust-free cabinet.
25. Lace Transfer Bowl
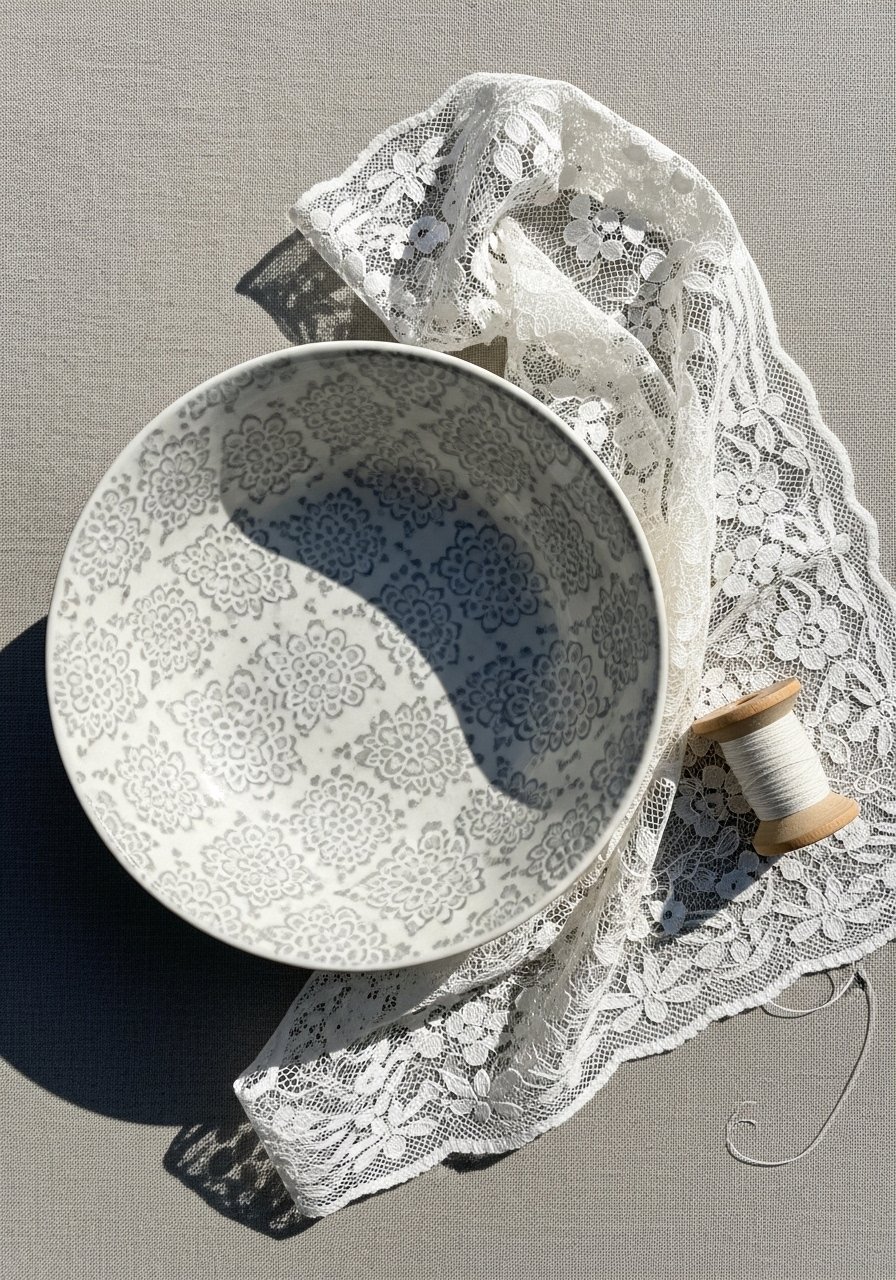
Use real lace and a transfer medium to imprint delicate textures. This creates intricate patterns with no hand-painting.
Materials
- Ceramic bowl, 7" diameter
- Piece of lace fabric
- Acrylic medium for transfer, 2 oz
- Foam brush
- Clear satin sealer, 6 oz
- Scissors
Instructions
- Trim lace to fit rim area.
- Brush acrylic medium on bowl, lay lace, press smooth.
- Allow to dry to tacky (about 30 minutes), then carefully peel lace.
- Touch up any gaps with a fine brush.
- Seal with satin sealer. Cure 24 hours.
How to Display or Gift It
Perfect for bridal shower gifts or vintage-themed decor. Wrap in tissue with a small spool of thread. Store in a drawer lined with fabric.
26. Pebbled Texture Bowl (use of texture paste)
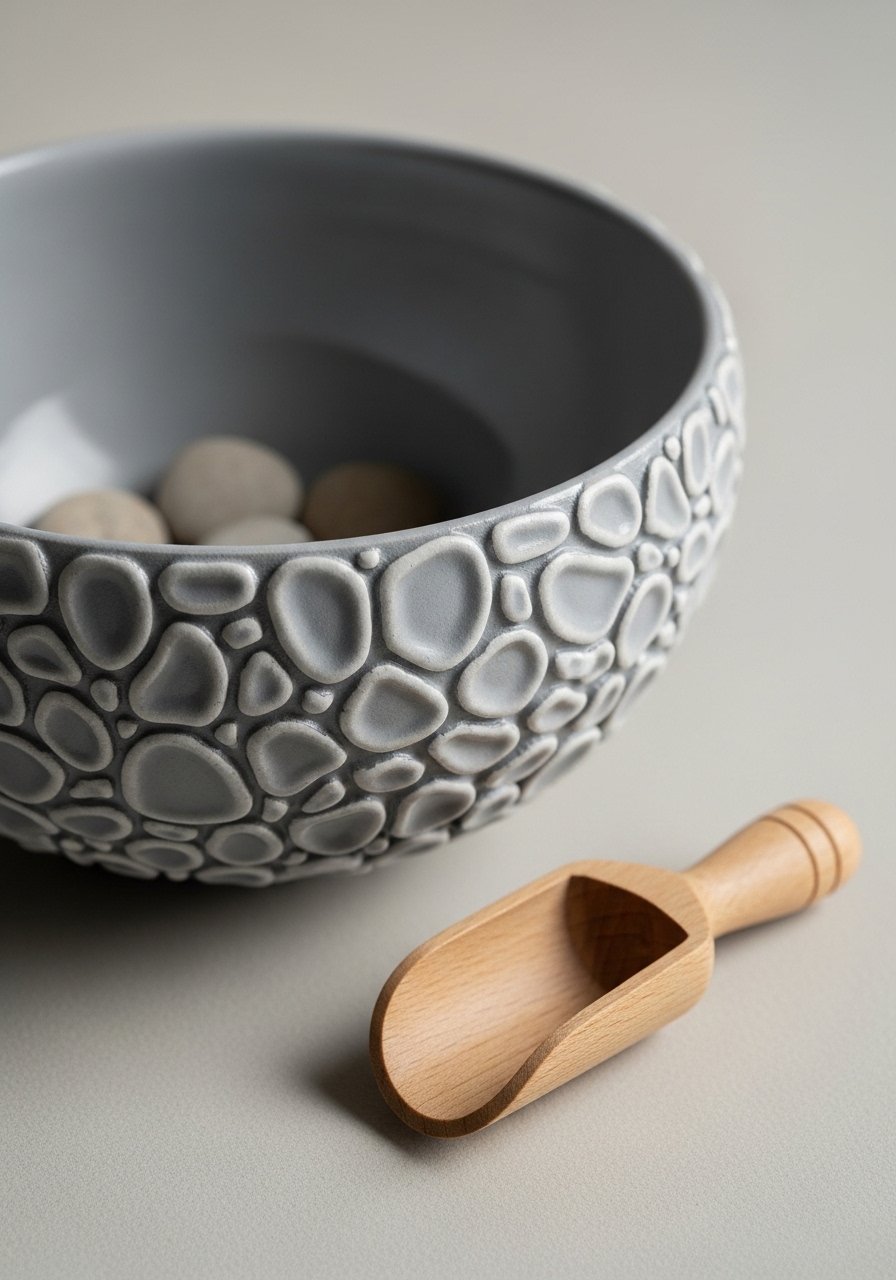
Texture paste creates tactile interest. Paint over the paste for a stone-like finish. Use a palette knife to form pebbles.
Materials
- Ceramic bowl, 8" diameter
- Texture paste, 4 oz
- Palette knife
- Acrylic paint in stone grey, 2 oz
- Foam brush
- Clear matte sealer, 8 oz
Instructions
- Apply small dollops of texture paste around exterior with palette knife to form pebbles.
- Let paste dry 12–24 hours.
- Paint over with stone grey acrylic. Dry 45 minutes.
- Seal with matte sealer. Cure 24–48 hours.
How to Display or Gift It
Use as a decorative object on shelves. For gifting, include a care card suggesting gentle dusting. Store in a deep shelf or box to avoid crushing texture.
27. Color-Blocked Ceramic Planter Bowl

Color-blocking modernizes a humble planter. Use painter’s tape to keep clean bands. Add drainage layer if using live plants.
Materials
- Wide ceramic bowl, 8–9" diameter
- Acrylic paints in three colors — 1 oz each
- Painter’s tape
- Foam brush
- Small rocks for drainage
- Clear matte sealer, 8 oz
Instructions
- Tape off first band and paint. Dry 30–45 minutes.
- Repeat for remaining bands.
- Remove tape and touch up edges with fine brush.
- If planting live plants, add rocks for drainage and a plastic liner.
- Seal exterior with matte sealer. Cure 24 hours.
How to Display or Gift It
Use as a planter on windowsills or porches. For gifting, include a small succulent and care card. Store in a cool dry spot.
28. Night Sky Constellation Bowl
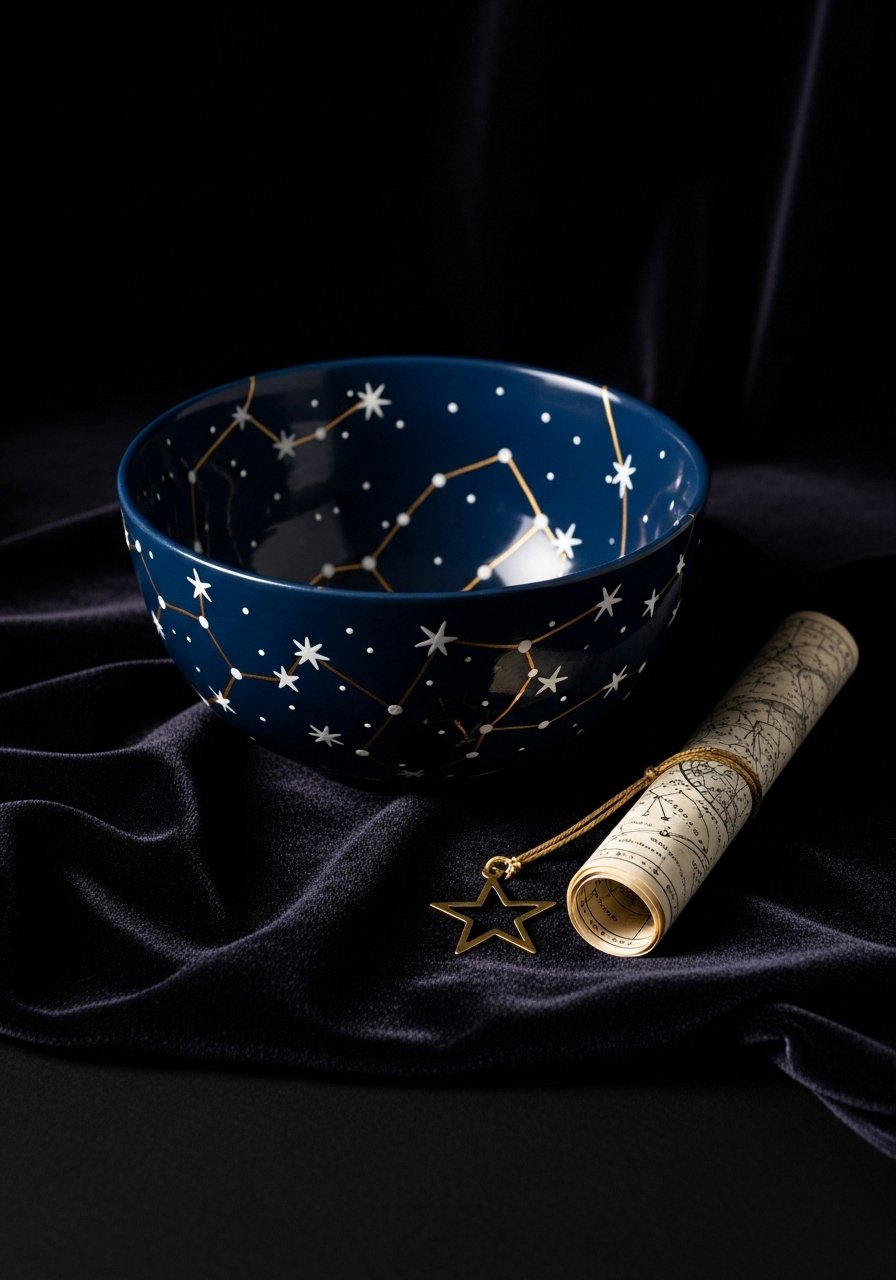
Paint tiny stars and link them for constellations. Add gold dots for starbursts. This is dreamy for evening table corners.
Materials
- Ceramic bowl, 7" diameter
- Acrylic paint: navy base, white, gold — 1 oz each
- Fine liner brush and dotting tool
- Foam brush
- Clear gloss sealer, 6–8 oz
Instructions
- Paint bowl interior navy with two coats. Dry 45 minutes.
- Use a dotting tool to add white stars across interior.
- Connect some stars with thin gold lines using fine liner brush.
- Add a few gold specks with toothbrush flick if desired.
- Seal with gloss sealer. Cure 24–48 hours.
How to Display or Gift It
Display under a small LED tea light to emulate starlight. Gift with a miniature star map. Store in a dark cabinet to protect deep colors.
29. Personalized Name & Date Commemorative Bowl
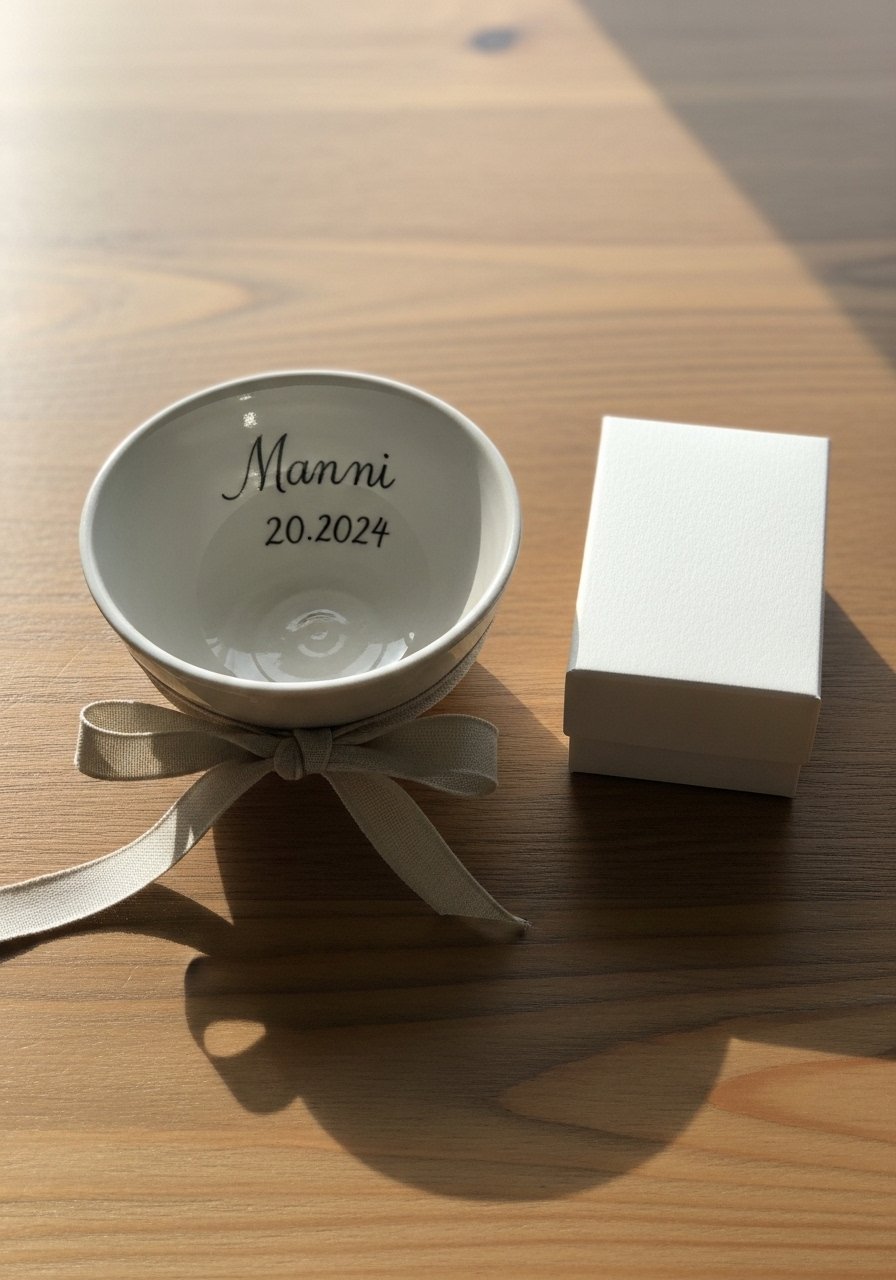
Personalizing a bowl makes a thoughtful gift for weddings, housewarmings, or milestones. Use a steady paint pen or fine liner brush for crisp letters.
Materials
- Small ceramic bowl, 5–6" diameter
- Fine-tip paint pen in black or metallic
- Pencil for layout
- Ruler
- Clear satin sealer, 4–6 oz
Instructions
- Lightly pencil name and date inside bowl using ruler for placement.
- Trace with paint pen, go slowly for steady lines.
- Allow 30 minutes dry. Apply second pass if needed.
- Seal with two coats satin sealer. Cure 24 hours.
How to Display or Gift It
Place in a small gift box lined with tissue and a ribbon. Attach a handwritten note explaining the personalization. Store with care to maintain finish.
You made it through 29 painted ideas — from speckled kid-friendly bits to glossy epoxy showpieces and delicate transfers. There’s a mix of quick weekend makes and projects that call for more curing time. Try one that fits your style and schedule, then pin a few more for later. Which of these ceramic bowl painting ideas for home decor are you trying first? Share your favorite and send a photo when you’ve finished — friends will love a handmade gift, too.
Trust me, having a reliable hot glue gun and a self-healing cutting mat made a lot of these steps faster and neater across projects. Happy painting — you’re adding real personality to your home, one bowl at a time.





