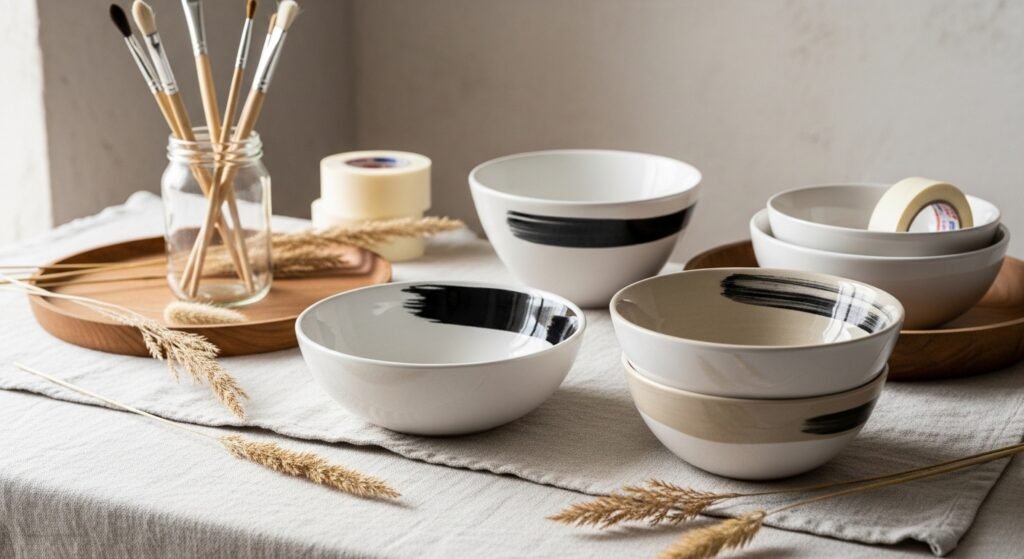
If you love quiet, thoughtful craft projects that make everyday items feel curated, these 25 minimalist ceramic bowl painting ideas are exactly for you. You’ll find simple linework, soft speckles, warm japandi tones, and clean geometric looks that read calm and modern on your shelf or breakfast table. These projects are designed for makers who want elegant results with approachable techniques and realistic drying and cure times.
I lean on a few trusted tools that speed up every project—my Cricut Joy cutting machine for precise vinyl stencils, and painter’s tape for clean edges. Most bowls here use ceramic-specific paints like Pebeo Porcelaine or craft acrylics sealed for decorative use; I’ll note food-safety steps where those matter. You’ll get full materials lists, step-by-step instructions, and styling ideas for each bowl. Pin the ones that match your home and let’s paint something quiet and beautiful.
- Soft Monochrome Line Bowl

This bowl keeps things serene: one continuous charcoal line around the interior creates a calming, handmade feel. It’s perfect for mornings when you want simple beauty. Beginners will like that the line can be forgivingly corrected before curing.
Materials
- 1 plain ceramic bowl (6–7" diameter), unglazed or factory-glazed
- 20–45 ml tube of Pebeo Porcelaine 150 in black
- Size 0 round detail brush (3 mm)
- Rubbing alcohol, lint-free cloth
- Painter’s tape (1/2" width)
- Oven for curing (see step 6)
Instructions
- Clean bowl with rubbing alcohol; remove oils and let dry 10 minutes.
- Use painter’s tape to mark a guide line on the outside or a pencil lightly on the rim if needed.
- Load a size 0 brush with a thin line of paint—less is easier to control.
- Paint one continuous stroke around the interior rim. If wobbly, wipe and redo within 5 minutes while wet.
- Let air-dry 24 hours until tack-free.
- Bake in a cold oven at 150°C (300°F) for 35 minutes following manufacturer instructions; cool in oven completely (about 1–2 hours).
- Test surface—firm to the touch and not tacky.
How to Display or Gift It
- Place on a wooden tray with dried grasses to emphasize texture.
- Stack two monochrome bowls for a cozy shelf vignette.
- Wrap in kraft tissue and tie with twine for a calm handmade gift.
- Store in a craft organizer drawer if making a batch; separate with soft tissue to avoid scratches.
- Minimalist Dot Cluster Bowl

A cluster of tiny dots looks intentional but takes minutes. This design reads modern and slightly boho—great for filler pieces or jewelry bowls. Use a fine dotting tool for uniform results.
Materials
- 1 ceramic bowl (5–6" diameter)
- 20–45 ml acrylic ceramic paint (black)
- Dotting tool set (0.5–3 mm)
- Cotton swabs for corrections
- Fine sandpaper (400 grit) if needed to scuff glossy glaze
- Paper towels
Instructions
- Scuff glossy bowls lightly with 400-grit sandpaper; wipe clean.
- Plan cluster location with a pencil dot guide.
- Dip the smallest dotting tool into paint; press lightly to create 2–3 mm dots.
- Vary spacing to make the cluster feel organic.
- Allow 24 hours air-dry; cure per paint instructions (typically oven-bake or air-cure 24–72 hours depending on product).
- If sealing for decorative-only use, apply one thin coat of gloss Mod Podge and dry 24 hours.
How to Display or Gift It
- Use as a jewelry bowl on a bedside table.
- Pair with a small wooden dish and a linen napkin for a gift set.
- Store in a shallow craft box with tissue for shipping.
- minimalist ceramic bowl painting ideas: Single Gold Edge
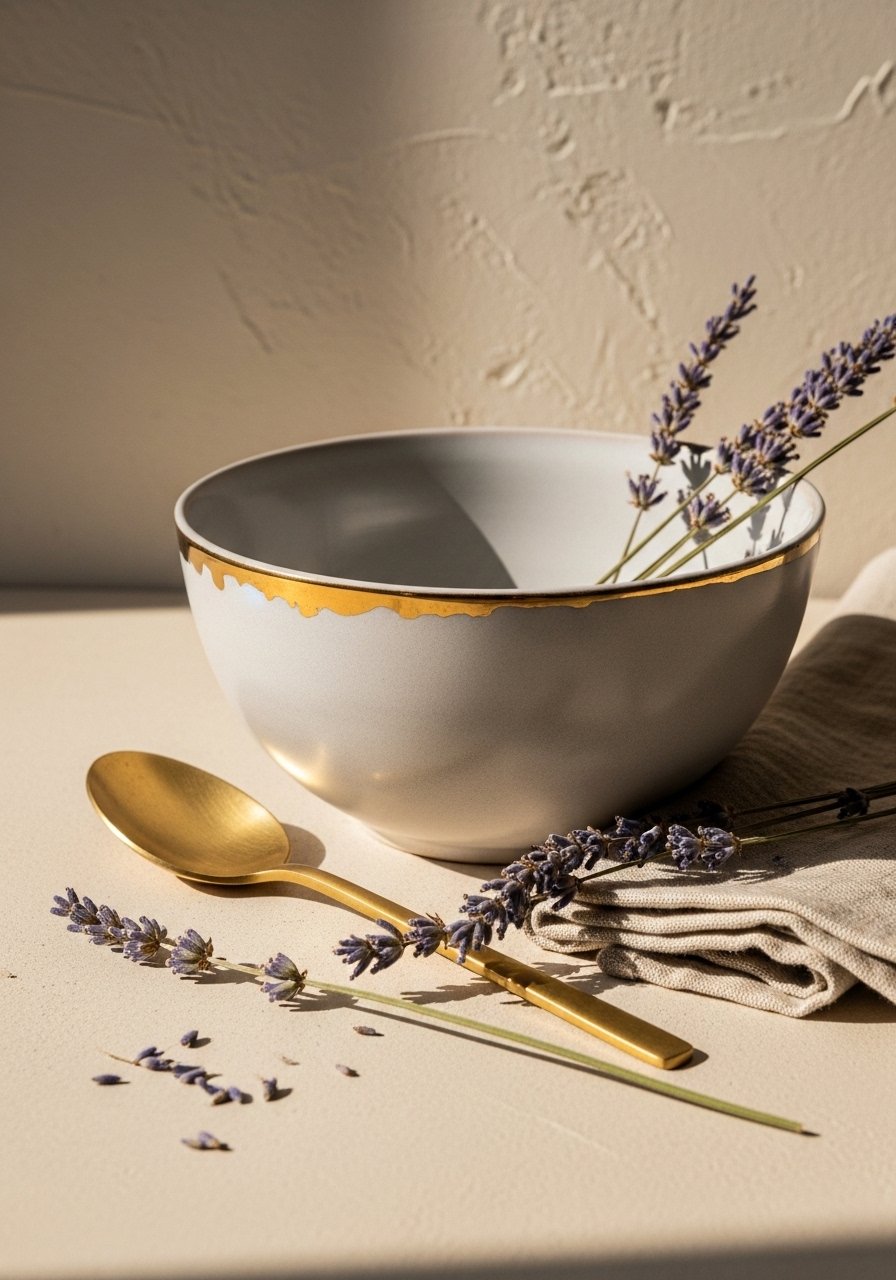
A crisp gold rim feels refined and minimal. It’s an elegant accent that reads luxe without fuss. Use a gold leaf pen for precision and low mess.
Materials
- 1 ceramic bowl (6–8" diameter)
- Gold leaf pen or gold ceramic paint pen (1–2 mm tip)
- Rubbing alcohol, lint-free cloth
- Painter’s tape (1/4" width)
- Small foam brush
- Optional: clear sealer (food-safe if needed)
Instructions
- Clean rim with alcohol; dry 5 minutes.
- Apply painter’s tape just below the rim to protect the bowl.
- Use the gold pen to draw a steady line around the exposed rim.
- Let dry 15–30 minutes; inspect for breaks and touch up.
- If using gold paint, air-dry 24 hours and cure if manufacturer requires.
- Remove tape carefully; if using a sealer, apply a single thin coat and allow 24 hours to cure.
How to Display or Gift It
- Stack with matching plain bowls to highlight the edge.
- Tuck a dried lavender sprig under a twine bow for gifting.
- Keep in a divided gift box for safe transport.
- Speckled Stoneware Look Bowl
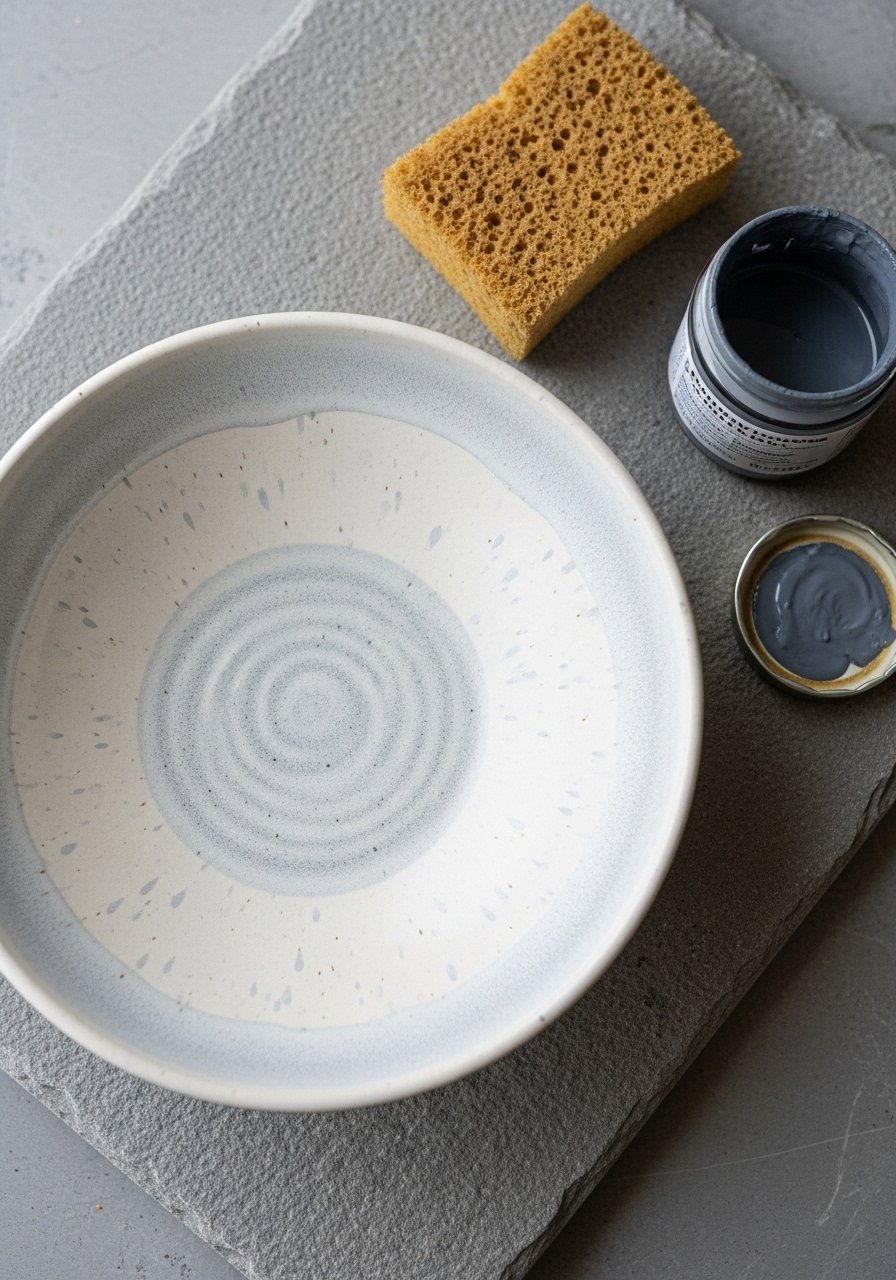
Speckling gives bowls that cozy, cottagecore vibe while staying minimalist. It’s forgiving—small mistakes blend into the texture—so it’s great for beginners.
Materials
- 1 plain ceramic bowl
- 30 ml acrylic craft paint in gray and cream
- Natural sponge (cut into a 1" cube)
- Disposable palette
- Gloves, paper towels
- Clear matte sealer (optional)
Instructions
- Thin the gray paint with a few drops of water to a splatter-friendly consistency.
- Dip sponge in gray paint and lightly dab on a clean palette to remove excess.
- Tap sponge over bowl for small, random speckles. Vary pressure for size differences.
- Repeat lightly until satisfied; let air-dry 1–2 hours between layers.
- Apply a matte sealer if desired; allow 24 hours cure.
- For decorative-only bowls, no oven bake is needed; for semi-permanent finish, use a ceramic-specific paint and follow its cure instructions.
How to Display or Gift It
- Pair with neutral linen placemats for a farmhouse breakfast table.
- Wrap in tissue paper with a sprig of dried oregano for a kitchen gift.
- Store in stackable craft trays to avoid rub marks.
- Brushstroke Minimal Bowl

A single, confident brushstroke feels effortless and chic. The textured mark shows the hand of the maker and works well with japandi or modern farmhouse styles.
Materials
- 1 ceramic bowl (7–8" diameter)
- 45 ml acrylic ceramic paint in charcoal
- 1 flat foam brush (1" wide)
- Palette, paper towels
- Gloves
Instructions
- Wipe bowl clean; plan stroke direction visually.
- Load foam brush with paint; remove excess on palette.
- With one confident motion, sweep the brush across the bowl’s exterior.
- Smooth any drips immediately with a clean brush.
- Let air-dry 24 hours then cure per paint brand if required.
- For decorative pieces, seal with matte Mod Podge and dry 24 hours.
How to Display or Gift It
- Sit on open shelving with wooden bowls to balance textures.
- Gift as a set with a matching mug wrapped in kraft tissue.
- Keep in a shallow craft drawer separated by soft fabric.
- Minimal Grid Lines Bowl
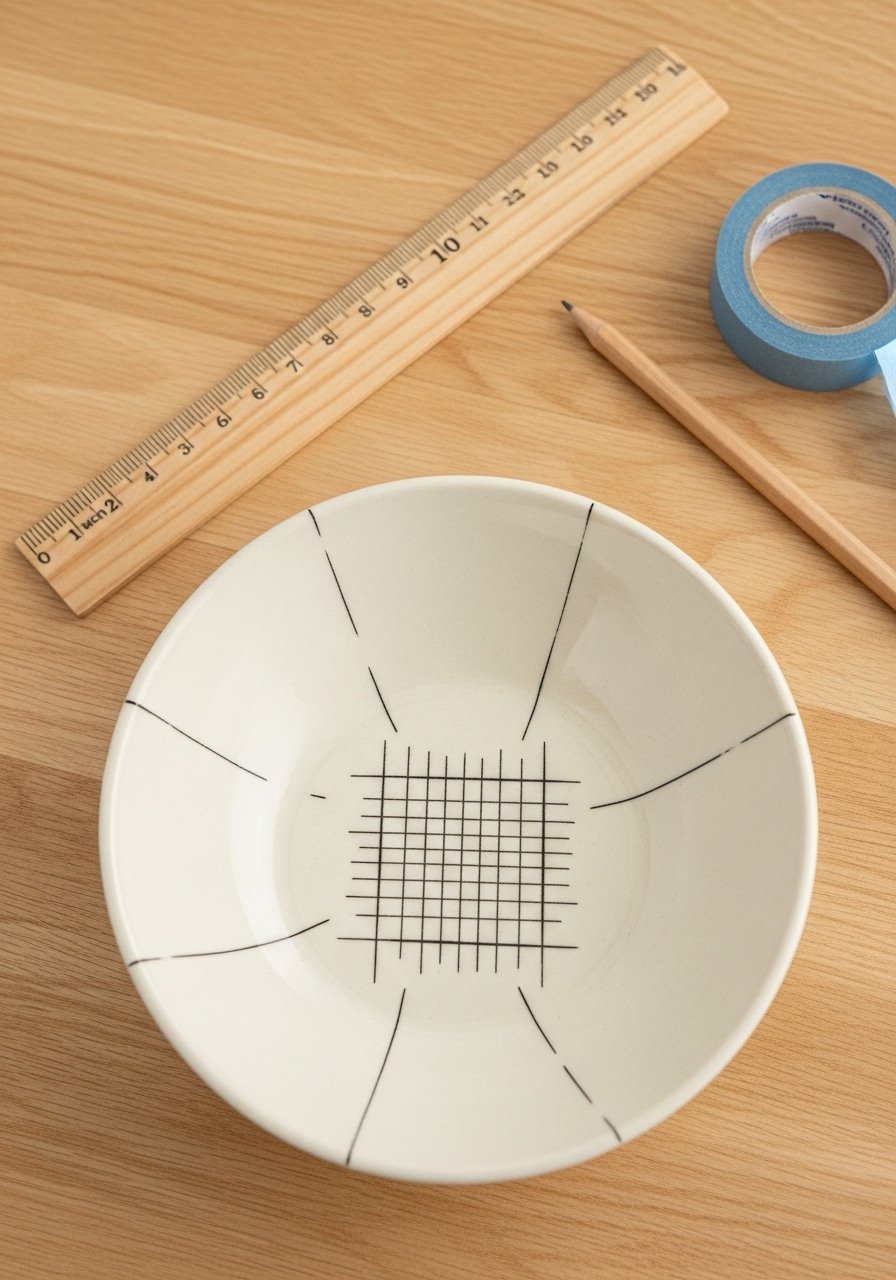
Grid lines add architectural interest while staying minimal. It’s great for lovers of clean geometry and works well as a decorative catchall.
Materials
- 1 ceramic bowl (6" diameter)
- 20–45 ml black ceramic paint (fine-tip bottle or pen)
- Ruler and pencil for marking
- 1/8" painter’s tape
- Fine detail brush (size 0)
Instructions
- Lightly mark grid points with pencil.
- Use painter’s tape for straight outer edges if helpful.
- Paint lines with a steady hand or fine-tip bottle.
- Wait 10–15 minutes between intersecting strokes to avoid drag.
- Air-dry 24 hours; bake or cure per paint instructions.
- Erase any visible pencil after full cure.
How to Display or Gift It
- Display on a small wooden easel for a gallery shelf.
- Combine with a minimalist tray and brass spoon for gifting.
- Store flat in a craft organizer with felt separators.
- Two-Tone Half Dip Bowl

The half-dip look is simple and Scandinavian-inspired. Sharp halves are easy using painter’s tape and give a bold yet minimal statement.
Materials
- 1 ceramic bowl (7" diameter)
- 30 ml acrylic ceramic paint in terracotta
- Painter’s tape (1/2" width)
- Flat foam brush (1")
- Sandpaper (400 grit), cloth
Instructions
- Clean bowl and scuff glossy surfaces if needed.
- Measure and mark the halfway point; tape off the bottom half.
- Apply two thin coats of terracotta with a foam brush; 10 minutes between coats.
- Remove tape while paint is still slightly tacky for a crisp edge.
- Air-dry 24 hours and cure if using ceramic-specific paint.
- Seal lightly for decorative-only bowls and allow 24 hours curing.
How to Display or Gift It
- Stack with neutral-toned linens for a modern table set.
- Wrap several bowls together in tissue and kraft box for a hostess gift.
- Store in a lidded craft container to prevent dust accumulating while sealing cures.
- minimalist ceramic bowl painting ideas: Thin Brush Stroke Interior
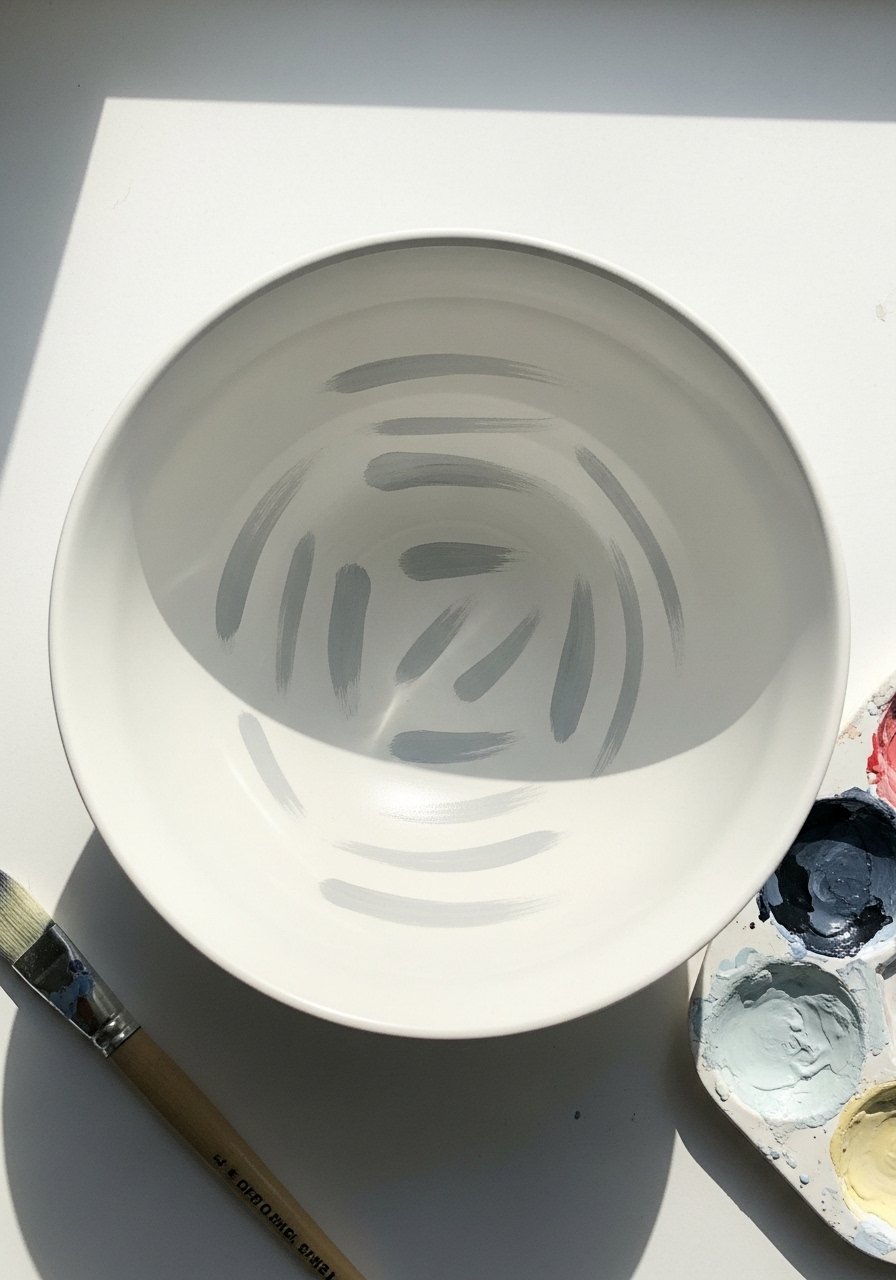
Delicate interior strokes feel artisan and quiet. The look pairs well with cottagecore and warm neutral decor, adding a soft focal point to breakfast bowls.
Materials
- 1 ceramic bowl (6–7" diameter)
- 20–30 ml Pebeo Porcelaine 150 in soft gray
- Size 0 and 2 round brushes
- Palette
- Rubbing alcohol and cloth
Instructions
- Clean surface and plan stroke length.
- Load a tiny brush and pull short, uneven strokes across the interior.
- Allow strokes to breathe—don’t overcrowd the bowl.
- Air-dry 24 hours, then oven-cure at 150°C (300°F) for 35 minutes if using Pebeo.
- Cool in the oven fully before handling.
- Check for firmness; re-bake if tacky per product instructions.
How to Display or Gift It
- Nest with plain bowls to highlight painted interiors.
- Add a small wooden spoon and tie with twine for gifting.
- Keep in a shallow craft drawer for batch storage.
- Minimal Terracotta Band Bowl

A horizontal band in an earthy terracotta gives a grounded minimalist look. It's great for modern farmhouse kitchens and pairs beautifully with wood accents.
Materials
- 1 ceramic bowl (7" diameter)
- 30 ml terracotta acrylic ceramic paint
- 1" painter’s tape
- 1" foam brush
- Paper plate palette
Instructions
- Tape a horizontal band around the bowl’s center.
- Paint two thin coats with the foam brush, drying 10 minutes between coats.
- Remove tape carefully; touch up any bleed with a small brush.
- Air-dry 24 hours, then cure per paint brand as needed.
- Seal for decorative use after full cure; allow 24 hours.
How to Display or Gift It
- Pair with wooden serving spoons for a natural set.
- Gift as part of a kitchen welcome set in a kraft box with tissue.
- Minimal Terrazzo Speckle Bowl
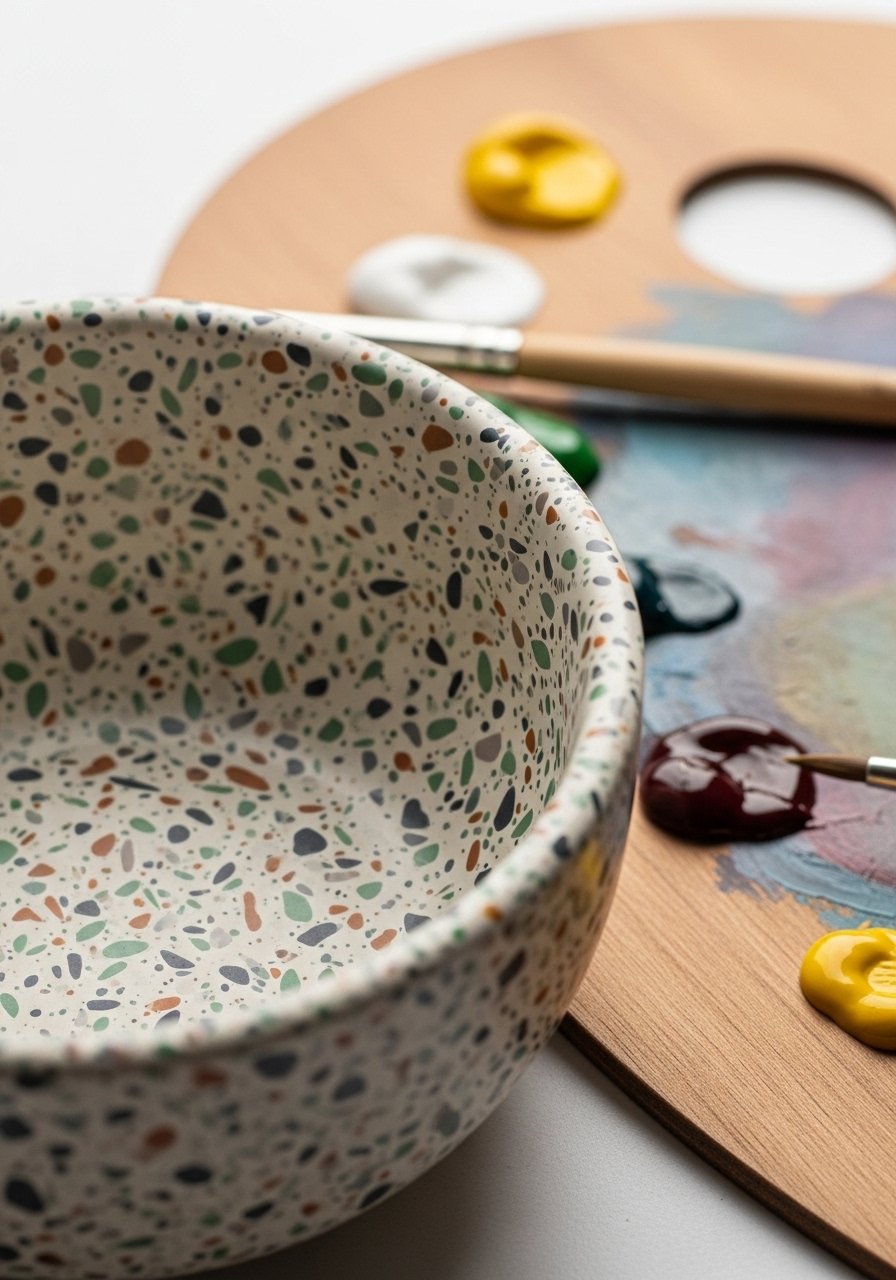
Terrazzo patterns read modern but quiet when you use a limited palette. This technique translates to minimal aesthetic while offering texture and interest.
Materials
- 1 ceramic bowl (6–7" diameter)
- 3–5 colors of acrylic paint (10–15 ml each)
- Small fan brush or toothpick for speckling
- Palette, paper towels
- Matte sealer (optional)
Instructions
- Thin paints slightly for splatter control.
- Load brush or toothpick and flick lightly toward bowl from a distance.
- Layer colors sparingly for a restrained terrazzo look.
- Allow 1–2 hours between layers.
- Air-dry 24 hours; seal if desired and allow 24 hours.
How to Display or Gift It
- Style with matching neutral linens and a simple vase.
- Pack in a shallow gift box with kraft tissue for shipping.
- Minimalist Ceramic Bowl Painting Ideas: Subtle Ombre Interior

A subtle ombre adds depth while staying understated. This approach is ideal for those who like gentle color transitions rather than bold graphics.
Materials
- 1 ceramic bowl (7" diameter)
- 30 ml ceramic-safe paint in taupe
- Large flat brush (1/2")
- Water for thinning (if acrylic)
- Palette
Instructions
- Mix paint to a thin wash consistency.
- Start at the rim and brush inward, adding water to thin as you move to the center.
- Blend quickly to avoid hard lines.
- Let air-dry 24 hours and cure if manufacturer requires.
- Apply sealant if piece is decorative-only and allow 24 hours.
How to Display or Gift It
- Place on open shelving with neutral ceramics.
- Gift as a calming breakfast set wrapped with linen.
- Minimal Outline Botanical Bowl
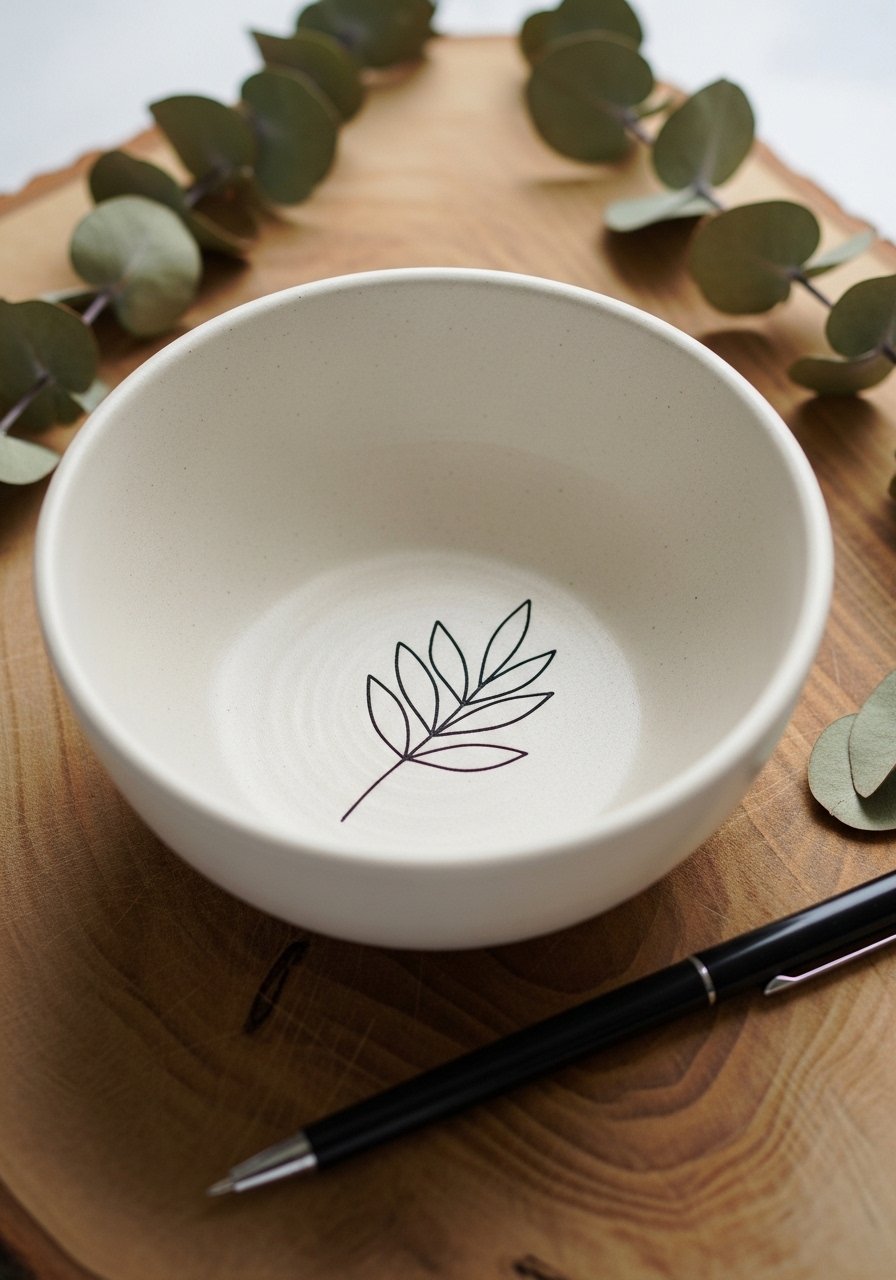
A single-line botanical sketch reads soft and modern. It’s perfect for makers who enjoy drawing and want a wearable, understated design.
Materials
- 1 ceramic bowl (6–7")
- Black porcelain pen (0.5 mm)
- Pencil for sketching
- Eraser
- Rubbing alcohol
Instructions
- Lightly sketch a single-line leaf with pencil.
- Trace with the black porcelain pen; allow 10–15 minutes between strokes.
- Erase any visible pencil once fully dry.
- Cure per pen instructions (may require oven-bake 35 minutes at 150°C).
- Cool completely before handling.
How to Display or Gift It
- Place with a matching mug for a botanical gift set.
- Tuck a small dried eucalyptus sprig under ribbon when gifting.
- Negative-Space Minimal Stripes
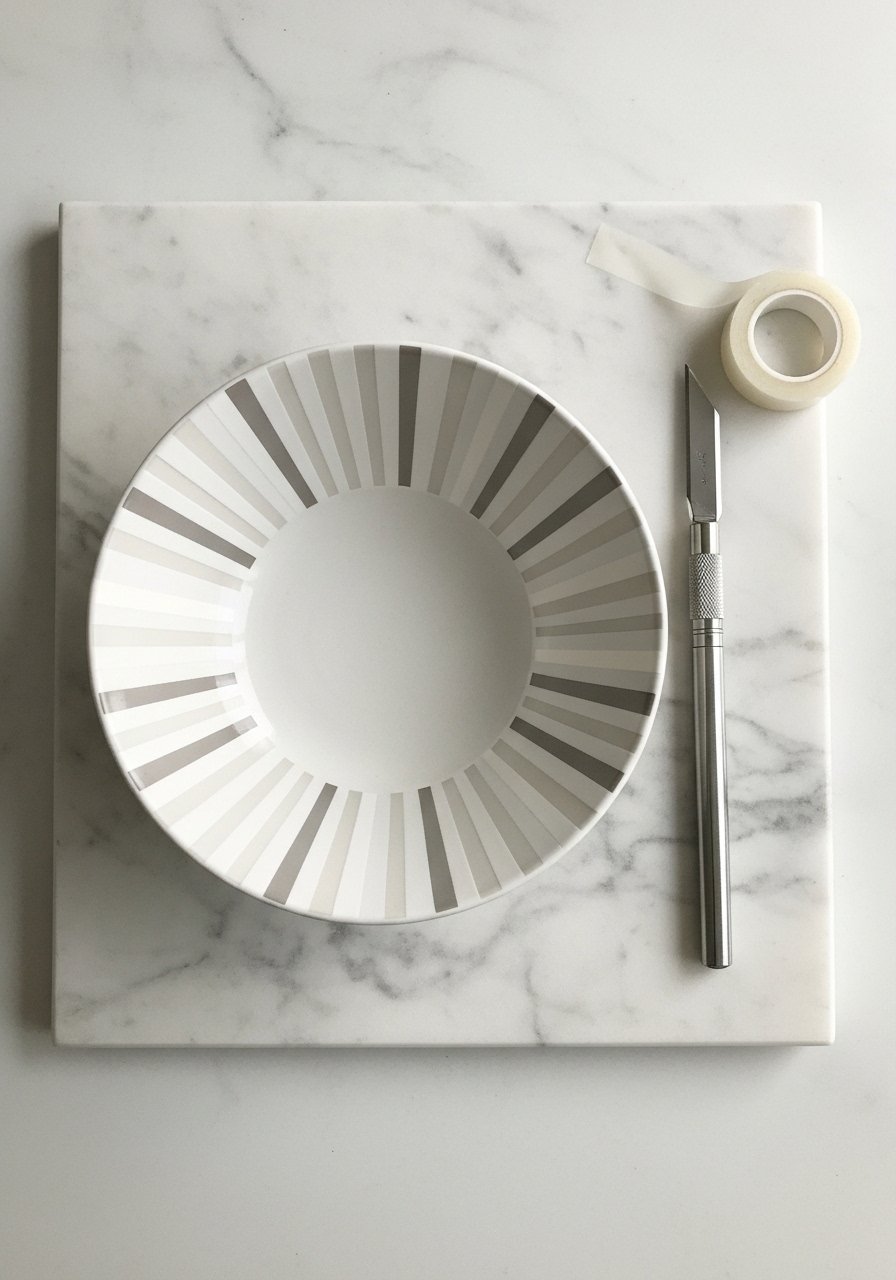
Negative-space stripes feel fresh and airy. Masking off stripes gives precise results and a modern look.
Materials
- 1 ceramic bowl (6–8")
- Painter’s tape (1/8" for thin stripes)
- 45 ml matte ceramic paint in soft gray
- Small foam brush
- Sandpaper (400 grit)
Instructions
- Mark off equal stripes with tape.
- Paint exposed stripes with two thin coats; 10 minutes between coats.
- Remove tape while paint is still tacky for clean edges.
- Air-dry 24 hours; cure if required by paint maker.
- Buff lightly with 400-grit if needed for uniform matte finish.
How to Display or Gift It
- Display on a small wooden easel or shelf.
- Make a set of three with varying stripe widths for a coordinated gift.
- Minimalist Ceramic Bowl Painting Ideas: Fine Calligraphy Rim
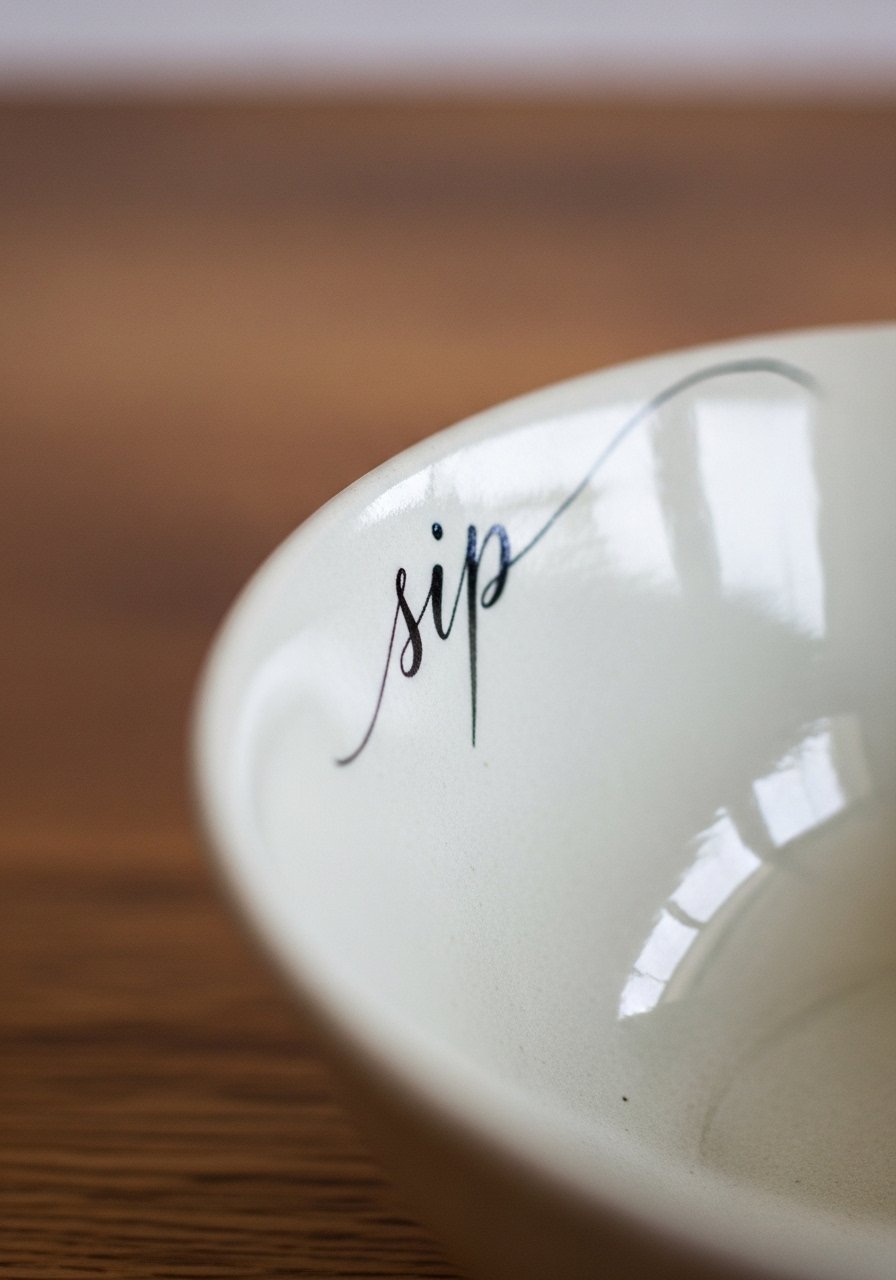
Adding a tiny hand-lettered word to the rim is minimal and personal. It’s a lovely way to customize a gift.
Materials
- 1 ceramic bowl (6–7")
- Fine porcelain marker or size 00 brush
- Pencil for placement guide
- Rubbing alcohol
- Sealant if decorative-only
Instructions
- Clean rim and lightly pencil your word placement.
- Use a fine marker or brush to write the word in one flowing motion.
- Correct tiny errors with a damp cotton swab quickly.
- Air-dry 24 hours; cure in oven if using porcelain paint that requires it.
- Seal for decorative uses and allow 24 hours.
How to Display or Gift It
- Pair with a matching napkin and tuck in a card.
- Display in a gift box with kraft paper for an intimate present.
- Minimal Block Color Base Bowl
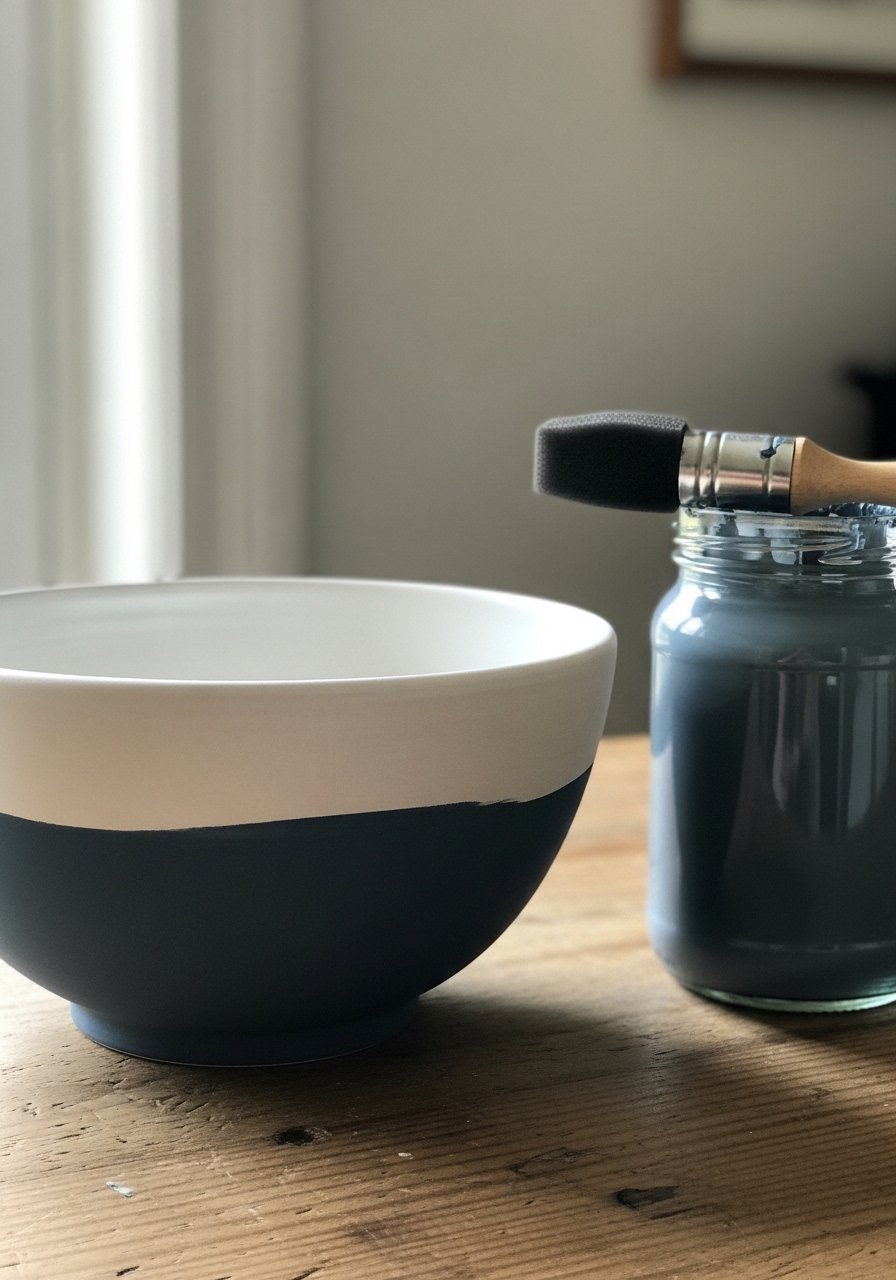
Painting the base block color anchors the bowl visually. It’s a quiet statement that works in modern or farmhouse kitchens.
Materials
- 1 ceramic bowl (7–8")
- 30 ml slate acrylic ceramic paint
- 2" foam brush
- Painter’s tape
- Sandpaper (400 grit)
Instructions
- Tape to mark the base area.
- Apply two thin coats of slate paint, letting 10 minutes between coats.
- Remove tape while slightly tacky.
- Air-dry 24 hours; follow curing instructions when needed.
- Seal for decorative use and let cure 24 hours.
How to Display or Gift It
- Style on open shelving with white ceramics.
- Create a set in three complementary colors for a boxed gift.
- Minimal Geometric Corner Accent
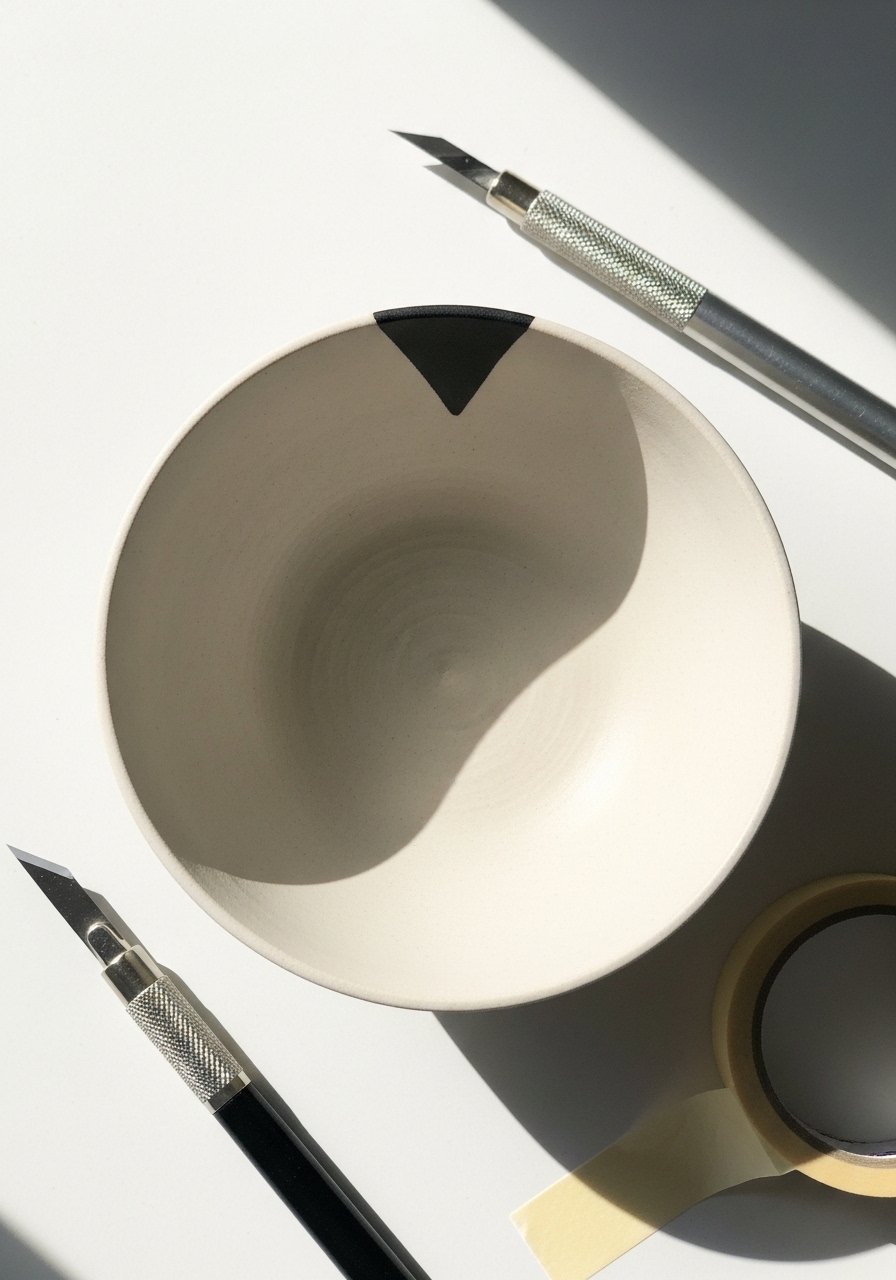
A tiny geometric accent gives a modern edge without overwhelming the bowl. It’s a beginner-friendly way to introduce shapes.
Materials
- 1 ceramic bowl (6")
- 20 ml ceramic paint in chosen accent color
- Painter’s tape and craft knife
- Small angled brush
- Palette
Instructions
- Cut a small triangle stencil from painter’s tape and place at interior edge.
- Paint two thin coats inside the stencil; 10 minutes between coats.
- Remove tape while paint is tacky.
- Air-dry 24 hours and cure if necessary.
- Seal if decorative and allow 24 hours.
How to Display or Gift It
- Pair with a set of matching cup accents.
- Store flat in a craft organizer between painting sessions.
- Minimal Two-Spot Contrast Bowl
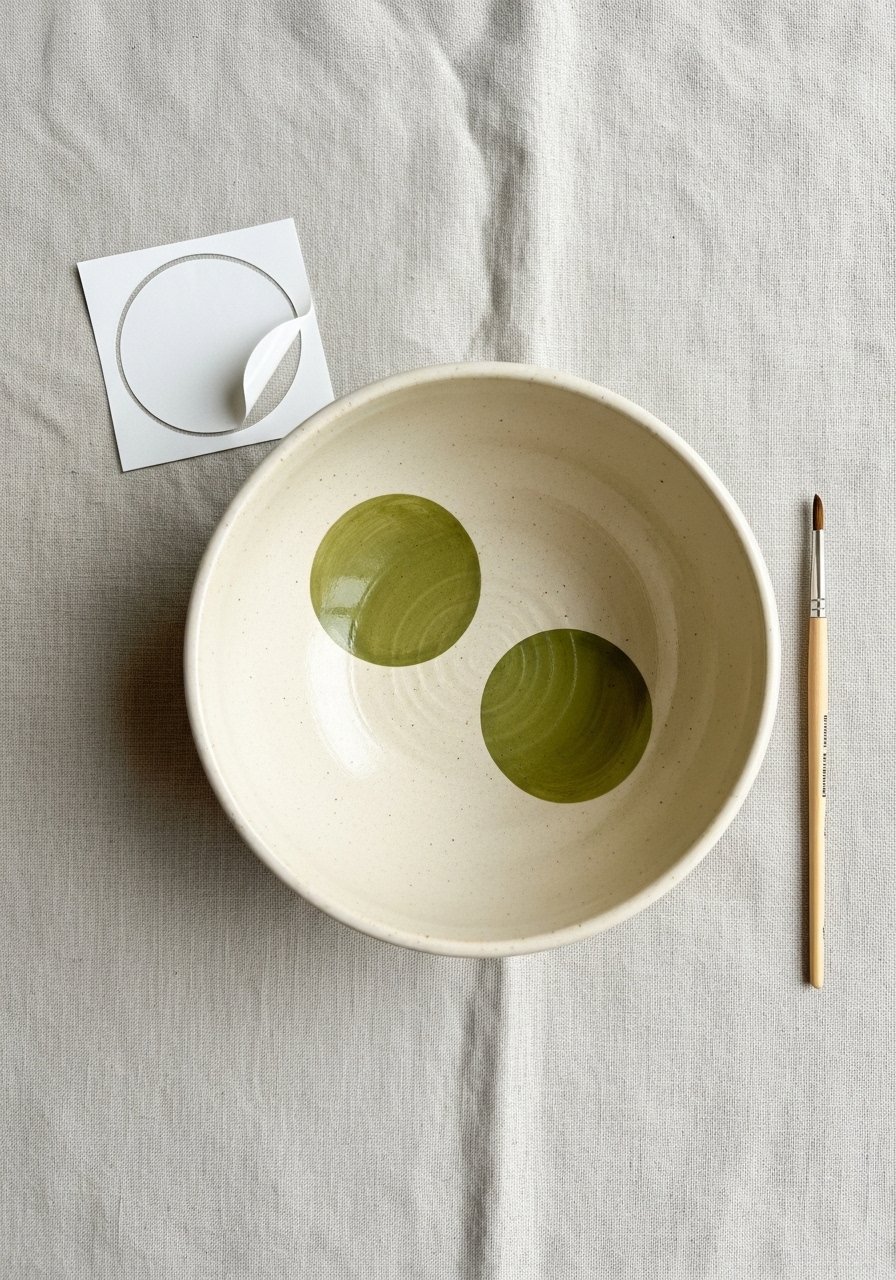
Two contrasting spots are playful but restrained. They add personality while keeping a minimalist layout.
Materials
- 1 ceramic bowl (6")
- 20–30 ml ceramic-safe paint in olive
- Circle punch stickers (1" and 2")
- Detail brush
- Rubbing alcohol
Instructions
- Place circle stickers where you want the spots.
- Paint inside the stickers with two thin coats.
- Remove stickers while paint is tacky.
- Air-dry 24 hours; cure if needed.
- Apply sealer for decorative pieces and allow 24 hours.
How to Display or Gift It
- Nest with neutral napkins and twine.
- Store in small stackable boxes for batches.
- Minimal Painted Clay Rim

Painting only the rim leaves the natural clay tone visible and minimal. This works beautifully with earthy or japandi palettes.
Materials
- 1 clay or earthenware bowl (unglazed) approx 7"
- Matte black ceramic paint (30 ml)
- Small round brush
- Sanding cloth
- Clear matte sealer
Instructions
- Sand rim if needed and wipe clean.
- Paint rim with small rounds, two thin coats 10 minutes apart.
- Let air-dry 24 hours; cure per paint brand.
- Seal with matte sealer and allow 24 hours.
How to Display or Gift It
- Pair with wooden utensils and neutral linens for rustic gifting.
- Keep in a shallow craft drawer until fully cured.
- Minimal Brush Dot Ring Bowl
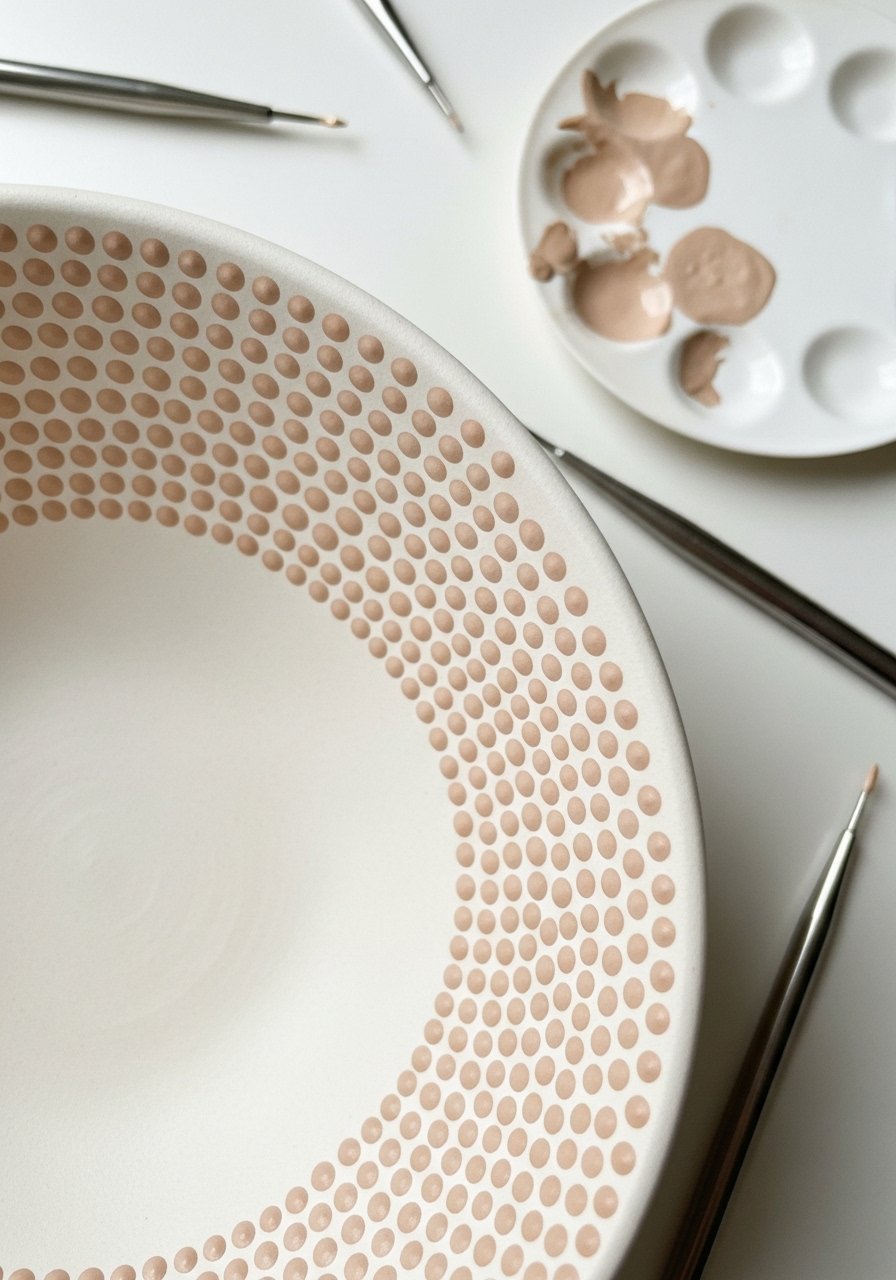
A ring of brush dots is structured but soft. The small scale feels refined and pairs well with modern decor.
Materials
- 1 ceramic bowl (6–7")
- 20 ml paint in soft beige
- Dotting tool (1–2 mm)
- Pencil for light guide
- Sealant (optional)
Instructions
- Lightly pencil a guide ring near the rim.
- Use a dotting tool to place uniform dots along the guide.
- Air-dry 24 hours; cure if necessary.
- Seal for decorative pieces; allow 24 hours.
How to Display or Gift It
- Place on a minimalist tray with a small candle.
- Wrap as a single-item gift with a linen ribbon.
- Minimal Abstract Line Bowl
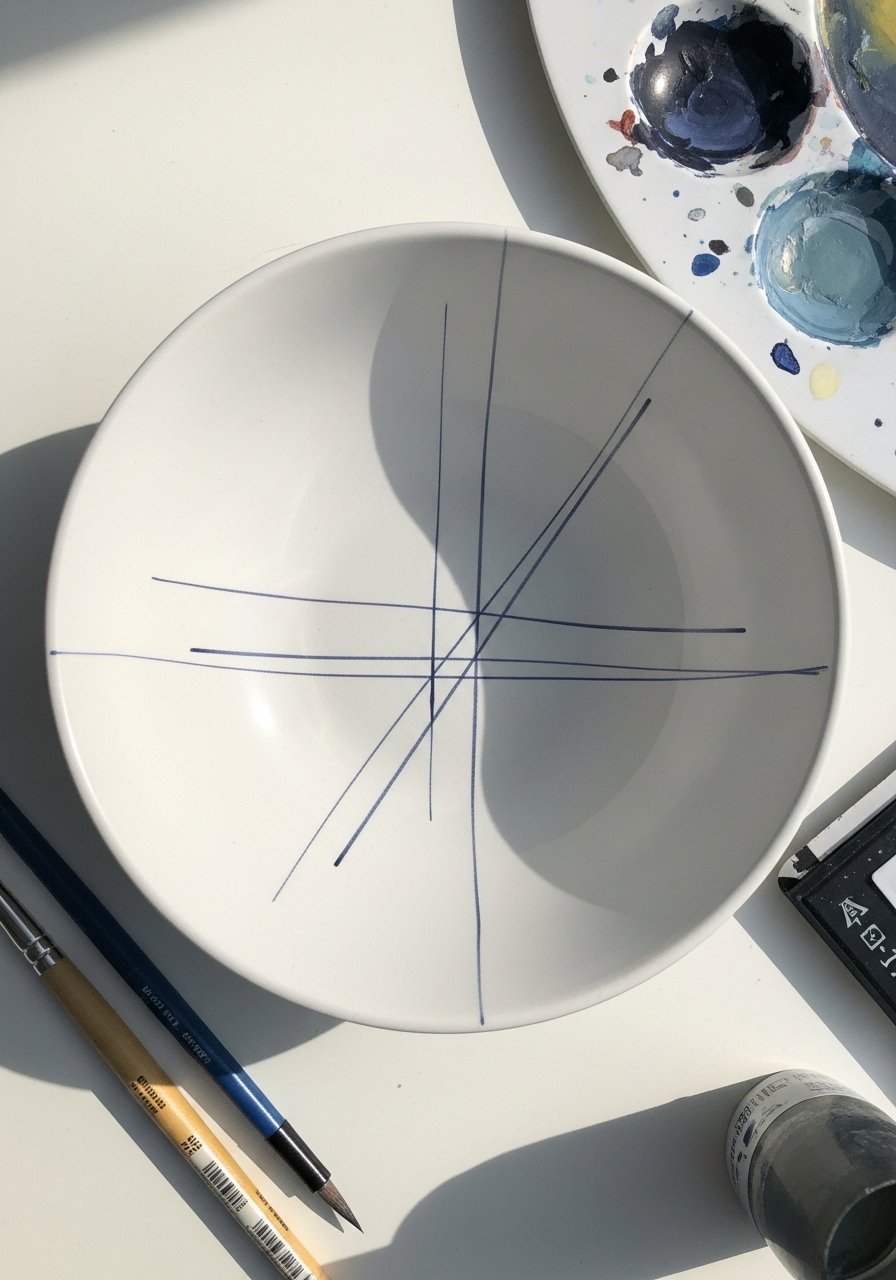
Abstract lines let you play with composition while keeping the design minimal. It's great for makers who enjoy freer work without strict templates.
Materials
- 1 ceramic bowl (7")
- 20–30 ml porcelain paint in navy
- Size 0 round brush
- Rubbing alcohol
- Palette
Instructions
- Sketch abstract line directions with pencil.
- Paint lines with a steady hand; pause between strokes.
- Air-dry 24 hours; bake/air-cure per product.
- Seal if decorative and allow 24 hours.
How to Display or Gift It
- Style with light wood shelves and muted decor.
- Gift in a foam-lined box to protect delicate lines.
- Minimal Chalky Matte Bowl
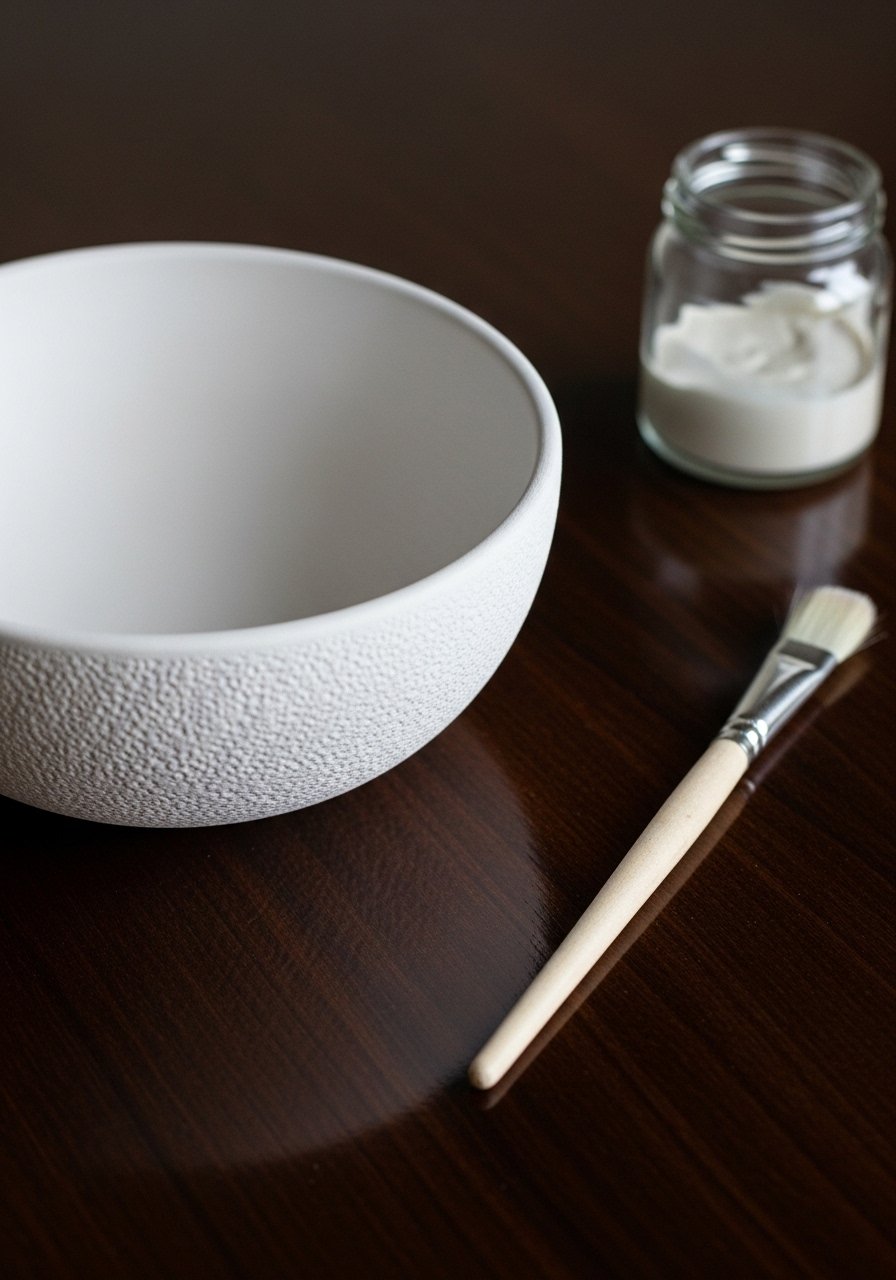
A chalky matte finish turns a simple bowl into a tactile object. This finish fits cottagecore, farmhouse, and calm modern interiors.
Materials
- 1 ceramic bowl (7")
- Chalk paint (Matte, 60 ml)
- Foam brush
- Fine sandpaper (400–600 grit)
- Matte sealer
Instructions
- Apply one thin coat of chalk paint; let dry 30 minutes.
- Lightly sand for a worn look; apply a second coat if needed.
- Finish with matte sealer and allow 24 hours cure.
- For extra durability, follow sealer directions for full cure times.
How to Display or Gift It
- Pair with linen napkins and a sprig of dried wheat.
- Store stacked with soft tissue between bowls.
- Minimal Marble Vein Accent Bowl
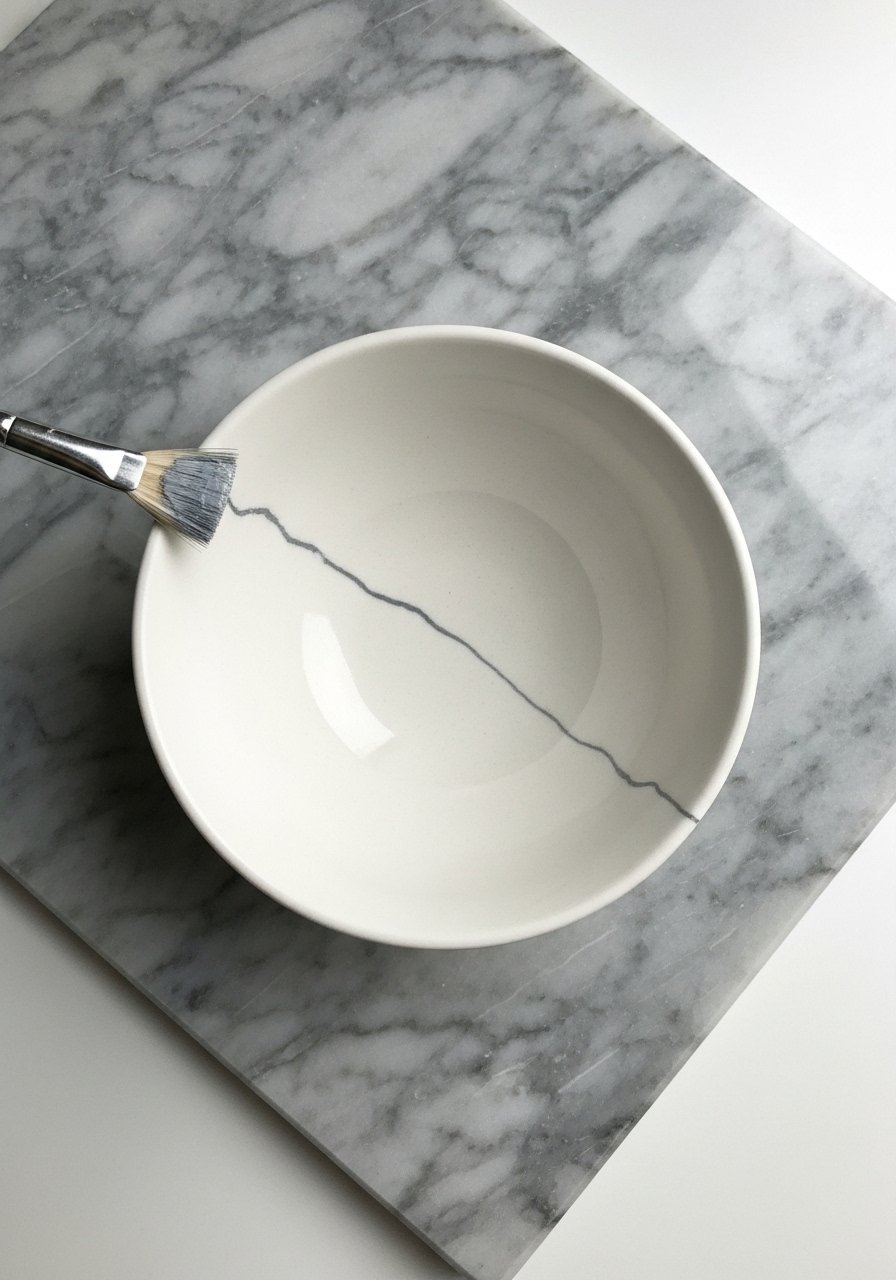
A single marble vein suggests luxury without fuss. It works well with neutral, minimalist palettes.
Materials
- 1 ceramic bowl (6–7")
- 20 ml gray ceramic paint
- Fine fan brush
- Rubbing alcohol, palette
Instructions
- Lightly plan the vein curve with pencil.
- Load fan brush with paint and drag in a soft curving motion.
- Soften edges with a clean dry brush if needed.
- Air-dry 24 hours; cure if required.
- Seal for decorative pieces; allow 24 hours.
How to Display or Gift It
- Style with marble-coordinated surfaces and brass accents.
- Gift as a luxe-feeling single piece in a small box.
- Minimal Concentric Circle Bowl
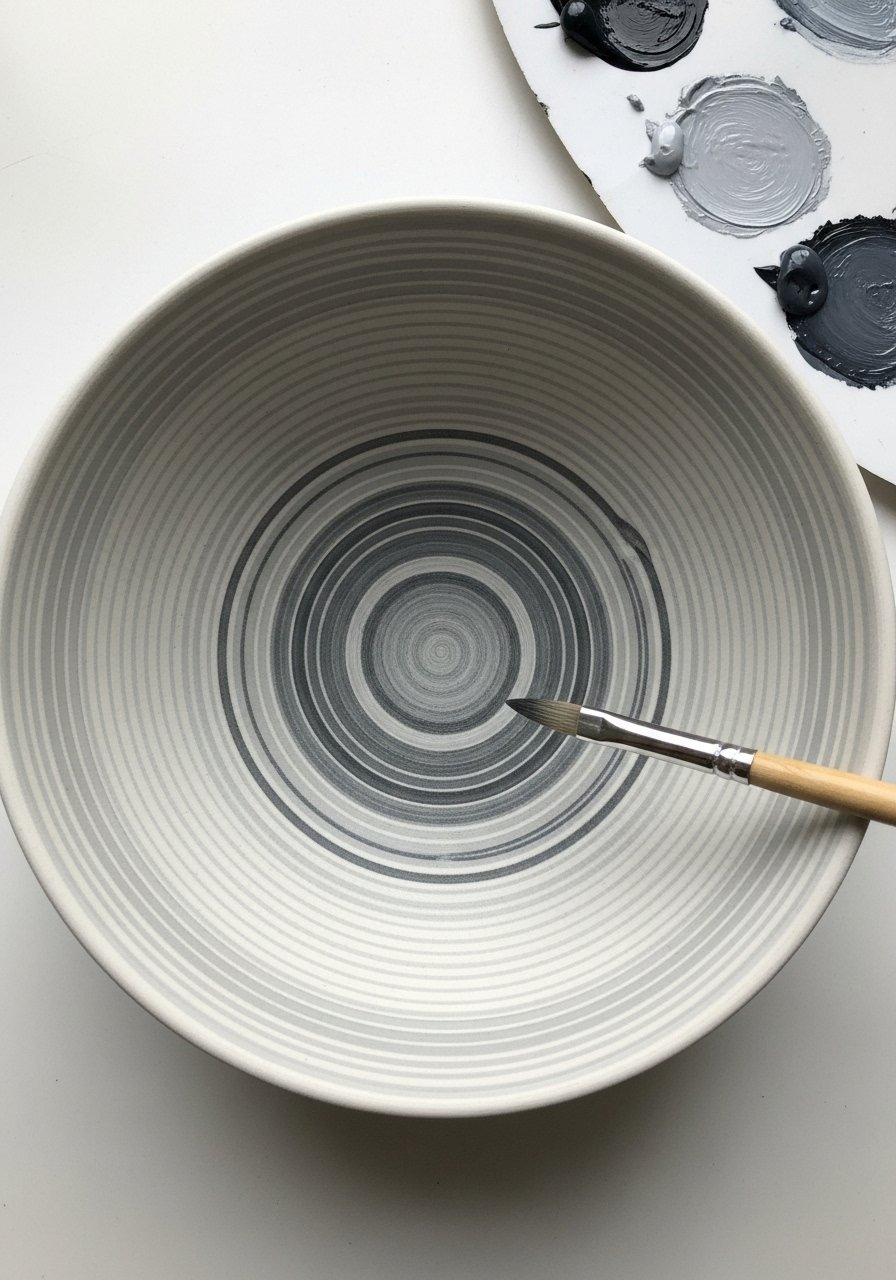
Concentric circles create a meditative focal point. Keep spacing even and use a steady hand for a refined finish.
Materials
- 1 ceramic bowl (6–8")
- Set of gray paints (light to dark, 10–15 ml each)
- Size 0 round brush
- Compass or round guide (optional)
- Rubbing alcohol
Instructions
- Mark faint concentric guides with pencil or round guides.
- Paint rings from lightest to darkest, letting each ring dry 10–15 minutes before the next.
- Air-dry 24 hours and cure per paint instructions.
- Seal for decorative use and allow 24 hours.
How to Display or Gift It
- Stack with bowls that have contrasting interiors.
- Gift as a calming set with a small candle.
- Minimal Matte Black Exterior Bowl
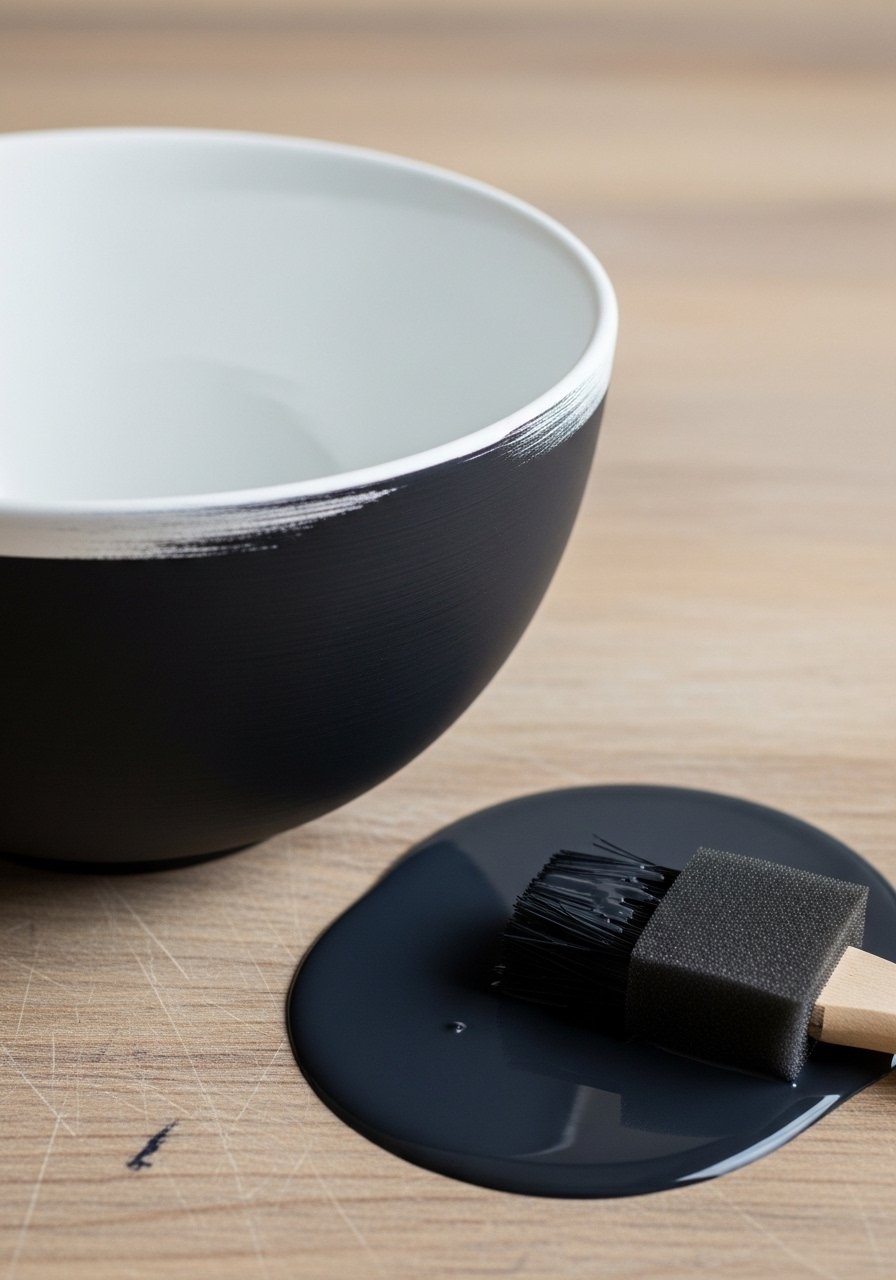
A full matte exterior reads bold and sculptural while staying minimal. It pairs beautifully with light interiors and wood textures.
Materials
- 1 ceramic bowl (7–8")
- Matte black ceramic paint (60 ml)
- 2" foam brush
- Sandpaper (400 grit)
- Matte sealer
Instructions
- Sand exterior lightly and wipe clean.
- Apply two thin coats of matte black, 10 minutes between coats.
- Let air-dry 24 hours; cure if paint requires.
- Seal with matte sealer and allow 24 hours to fully cure.
How to Display or Gift It
- Use as a sculptural piece on open shelving.
- Pack in a sturdy box with kraft paper for gifting.
- Minimal Polished Rim with Resin Accent

A glossy resin stripe adds contrast to a matte bowl. Use resin only on exterior decorative pieces (not food-contact areas) and follow safety guidelines.
Materials
- 1 ceramic bowl (decorative-only) 6–7"
- 2-part epoxy resin kit (enough for thin stripe, ~25 ml mixed)
- Fine mixing cups and stir sticks
- Heat gun for bubble removal
- Painter’s tape to mask stripe area
- Nitrile gloves
Instructions
- Tape off a thin stripe area.
- Mix epoxy per manufacturer directions; stir slowly to reduce bubbles.
- Pour or brush a thin stripe of resin in the taped area.
- Use a heat gun for 2–5 seconds to pop surface bubbles.
- Let cure 24–48 hours depending on resin—follow kit instructions.
- Remove tape carefully; sand tiny drips after full cure if needed.
How to Display or Gift It
- Display as a decorative accent on a shelf.
- Wrap in tissue and place in a rigid box for gifting; label as decorative only.
I hope that spread of clean, elegant approaches gave you a few favorites you want to try. These 25 minimalist ceramic bowl painting ideas range from quick dot patterns to slightly more advanced resin accents, so you can pick projects by time, skill, and style. Save or pin the designs you love for later, and try mixing techniques—speckled interiors with a gold rim, or a matte exterior with a single brushstroke—so pieces coordinate as a set. Which minimal style will you try first? Share a picture with a friend or pin it to your craft board.
Trust me, picking up a quality precision craft knife and a roll of painter’s tape will make many of these projects easier and cleaner.





