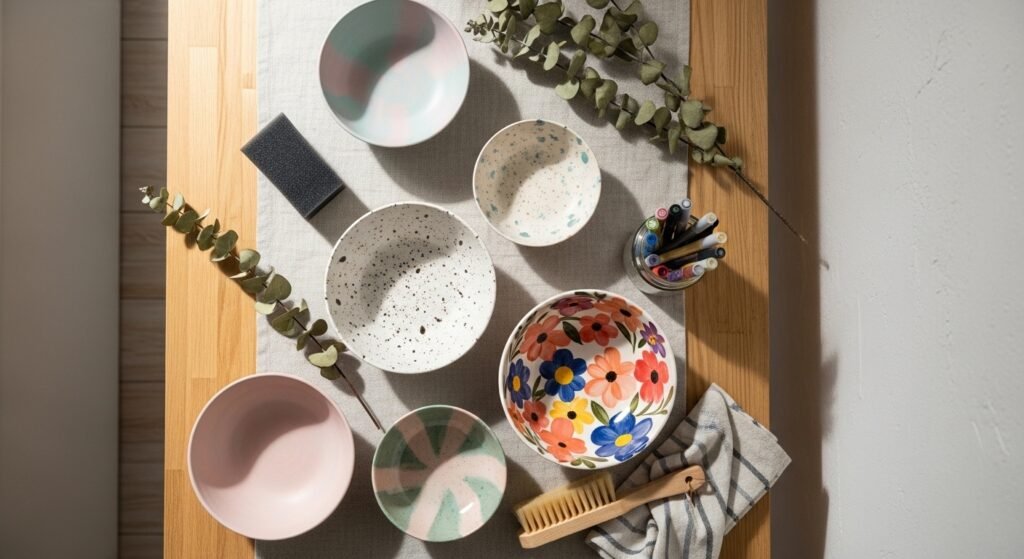
Have a plain ceramic bowl staring at you and a free hour? These easy ceramic bowl painting ideas are made for exactly that — fast, forgiving projects that look so polished you’ll want to keep one and gift three. You’ll find styles from cottagecore speckles to sleek japandi lines, simple dot motifs for kids, and techniques that keep steps beginner-friendly.
I’ll walk you through 27 different bowl designs with realistic materials, measurements, drying times, and troubleshooting tips. Many use basic supplies like acrylic craft paint and paint pens, while a few show how to use ceramic-specific paints if you want dishwasher-safe results. Grab a set of Posca paint pens for crisp details, and a pack of foam brushes for buttery smooth coverage. Each project lists exact steps, curing notes, and a styling idea so your finished bowl looks like a pro-made piece.
Ready? Let’s paint some bowls.
- Soft Speckle Breakfast Bowl
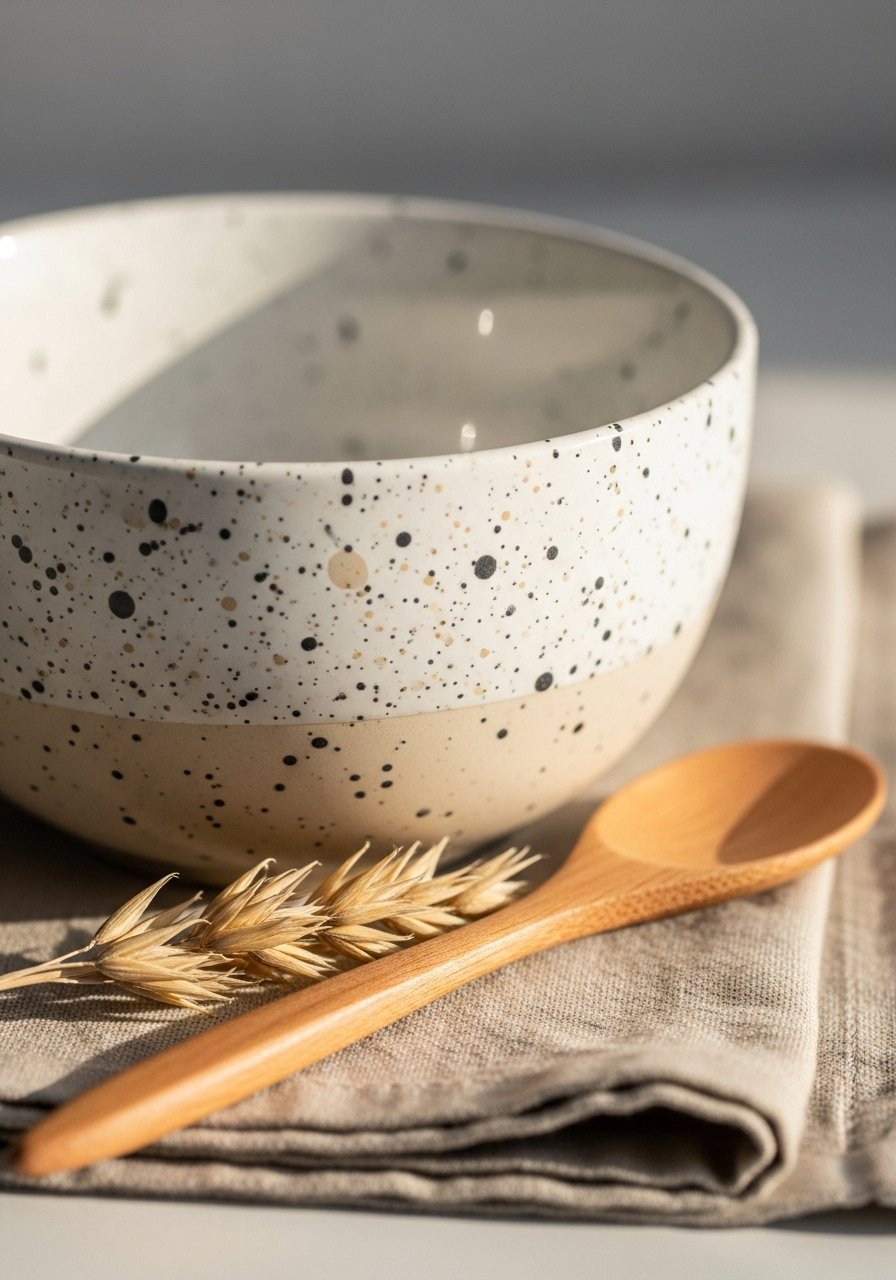
This simple speckled finish gives bowls a handmade pottery vibe with minimal skill. The texture reads tactile and cozy, perfect for cereal or granola. Beginners love this because imperfections look intentional. The speckles feel organic and add a cottagecore touch to plain white ware. For best results, use a medium-size stiff toothbrush or a stiff fan brush to flick pigment.
Materials
- 1 plain ceramic bowl, 6–7 inches diameter
- 2 oz white acrylic base (if needed)
- 1/2 oz burnt sienna acrylic paint (thinned)
- 1/2 oz charcoal acrylic paint (thinned)
- Small stiff toothbrush or fan brush
- 1 silicone paint palette or disposable plate
- Paper towels and rubbing alcohol
Instructions
- Wipe bowl with rubbing alcohol and let dry for 5 minutes.
- Apply a thin base coat if bowl isn’t bright white. Let dry 30 minutes.
- Mix 1 tsp paint with 1 tbsp water in palette to thin (should flick easily).
- Dip toothbrush into paint, hold close to bowl, and flick bristles with thumb. Practice on paper first.
- Alternate sienna and charcoal speckles until satisfied. Let dry 30 minutes between colors.
- Seal with two thin coats of water-based sealer, 15 minutes apart; cure 24 hours.
How to Display or Gift It
Stack a set of two speckled bowls on a small wooden tray. Tie with natural twine and tuck in a dried oat sprig for gifting. Store in a craft organizer with felt dividers if making ahead. For display, use a small wooden easel to prop a single bowl from the side.
- Minimal Japandi Two-Tone Rim

Hard-edge color blocking gives a calm, modern feel inspired by japandi style. It’s all about clean lines and a neutral palette. Painter’s tape makes this one practically foolproof, so it’s excellent for beginners who like crisp geometry. A foam brush ensures smooth coverage without brushstrokes.
Materials
- 1 ceramic bowl, 5–7 inches
- Painter’s tape (1/2 inch)
- 1 oz matte gray chalk-style paint
- 1 oz matte cream chalk-style paint
- Foam brush (flat 1-inch)
- Sanding pad (220 grit)
- Paper towels
Instructions
- Lightly sand rim where paint will go; wipe dust off.
- Apply painter’s tape around bowl to mark the two-tone edge. Press firmly.
- Use foam brush to apply cream to lower half in thin coats. Let each dry 20 minutes.
- Remove tape, reposition to protect lower half, and paint rim gray. Two thin coats, 20 minutes apart.
- Let fully cure 24 hours.
- Apply matte varnish if desired; cure 24 hours.
How to Display or Gift It
Pair with neutral linen napkins and raw wooden spoons for a minimalist gift set. Wrap in kraft tissue and use a kraft ribbon. Store flat to avoid chipping edges.
- Folk Floral Hand-Painted Bowl

Tiny florals add a sweet, vintage feel—think farmer’s market pottery. This technique uses tiny brushes and dotting tools. It’s great for crafters who enjoy detail work and makes lovely gifts for gardeners or tea lovers.
Materials
- 1 shallow ceramic bowl, 6 inches
- Fine detail brush set
- 3 small acrylic colors (cobalt blue, alizarin crimson, sap green)
- Palette or mixing tray
- Paper towel
- Sealant: Mod Podge gloss
Instructions
- Clean bowl with alcohol; let dry.
- Sketch floral placements lightly with pencil.
- Paint shapes with small brushes; use the tip for thin stems.
- Let paint set 30 minutes between layers.
- Touch up edges for opacity; two coats usually suffice.
- Cure per paint instructions and seal with one coat of Mod Podge; dry 24 hours.
How to Display or Gift It
Display on open shelving with matching tea cups. Wrap with tissue paper and tuck in a seed packet for gifting. Keep extras stacked in a craft organizer until sealed.
- Sahara Dots Boho Bowl
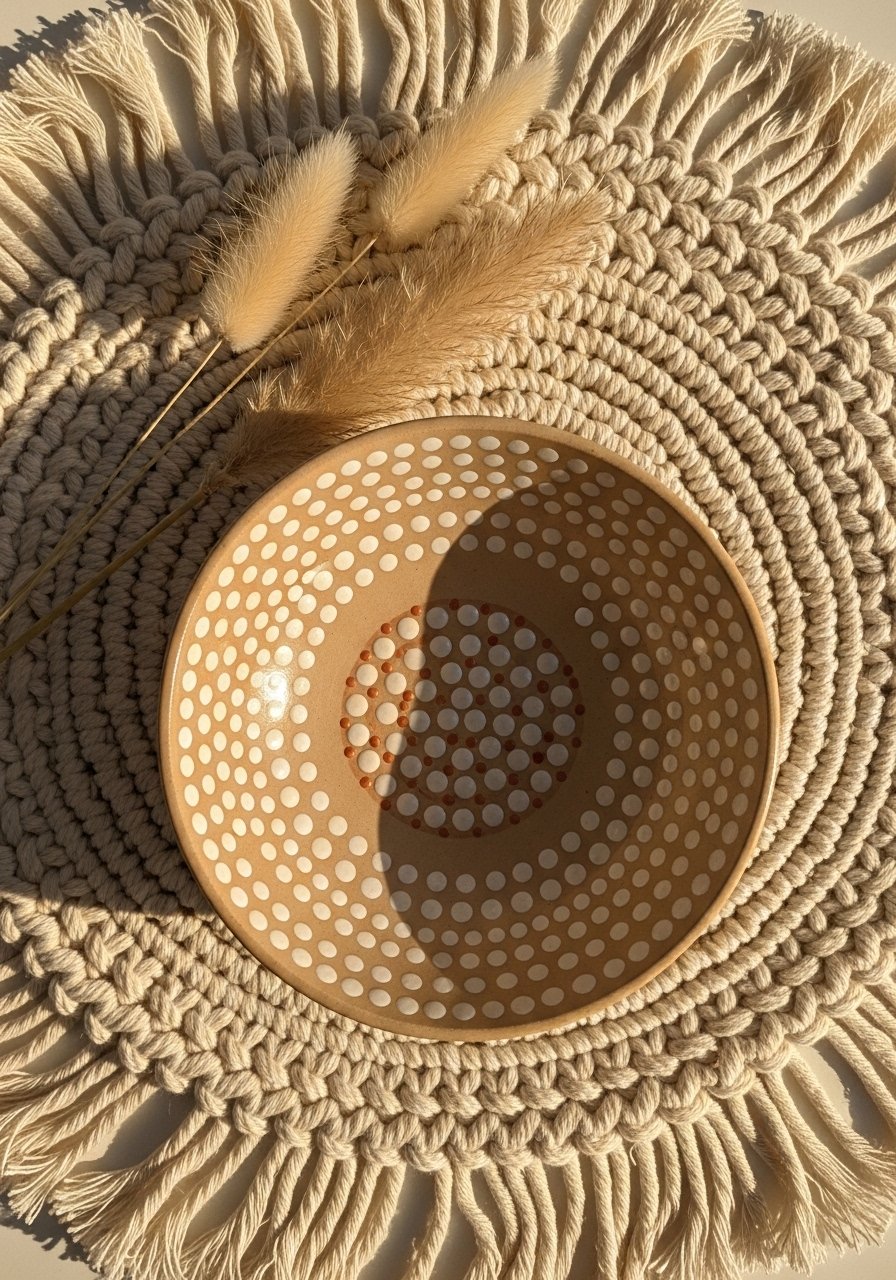
Dotting creates a boho, pottery-inspired look. It’s meditative and forgiving, so it’s perfect for kids or new painters. Use wooden dowel ends or paint pens for consistent dots.
Materials
- 1 ceramic bowl, 6–8 inches
- Posca paint pens or wooden dowel for dotting
- 2 paint colors (terracotta and off-white)
- Ruler and pencil for spacing
- Mod Podge or clear varnish
Instructions
- Wipe bowl clean and mark concentric rings lightly with a pencil.
- Use paint pen or dowel to place dots evenly; rotate bowl as you work.
- Let dry 20 minutes between colors.
- Add a final ring around the rim for a finished look.
- Seal with clear varnish; cure 24 hours.
How to Display or Gift It
Lens of boho with rattan chargers or hang near plants. Tuck two bowls together and wrap with twine for a cozy gift.
- Monet-Inspired Watercolor Bowl
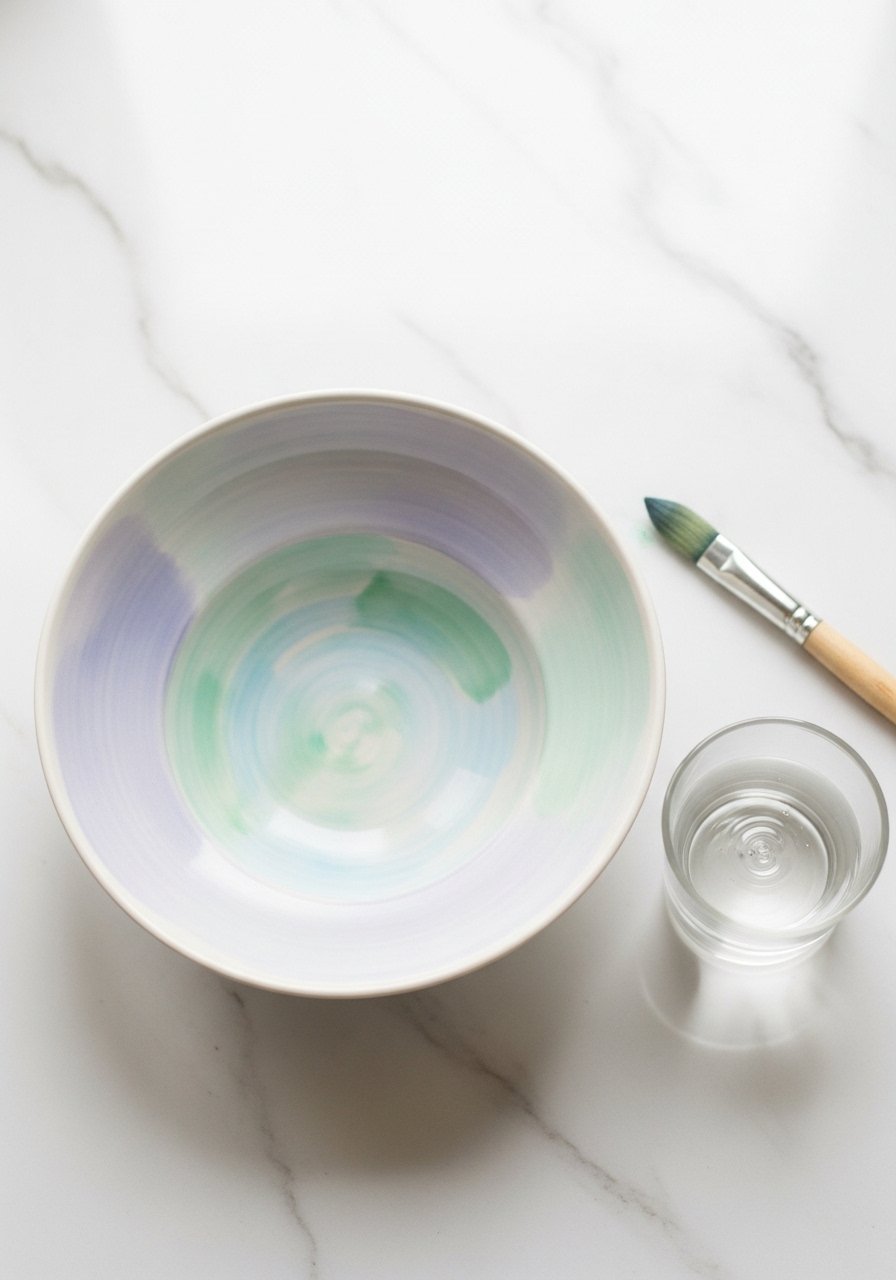
Watercolor effects give an artsy, painterly vibe without needing glazing skills. You’ll thin acrylics to a wash and layer. This one’s forgiving because overlaps build depth rather than looking like mistakes.
Materials
- 1 wide ceramic bowl, 7–8 inches
- acrylic craft paint set
- Silicone palette and water jar
- Soft round brush size 6
- Paper towels
- Matte varnish
Instructions
- Clean bowl, wipe with alcohol.
- Thin paint with water to wash consistency (approx 1 part paint : 2–3 parts water).
- Apply a light wash; blot with paper towel to soften edges.
- Layer additional washes after 10–15 minutes for depth.
- Let dry 1 hour after final wash.
- Seal with matte varnish; cure 24 hours.
How to Display or Gift It
Pair with linen napkins in pastel hues. Display on a shelf with a small framed print. Wrap in tissue and add a small brush as a gift accent.
- Graphic Black & White Stripe Bowl
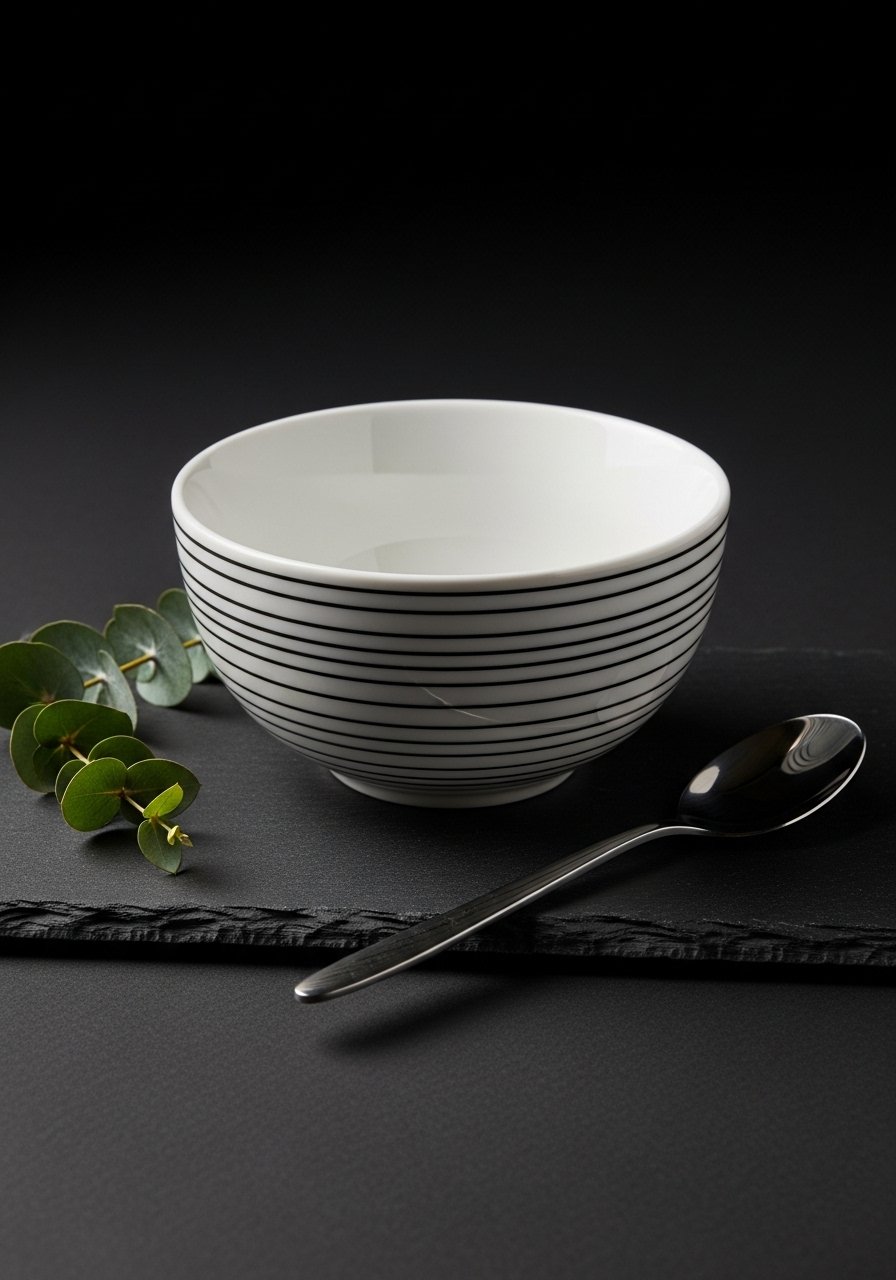
High-contrast stripes feel modern and work in many decor schemes. Painter’s tape plus a steady hand makes this project quick. A small foam roller or flat brush helps lay down even coats.
Materials
- 1 glossy ceramic bowl, 6 inches
- Painter’s tape (1/4 inch or 1/2 inch)
- Black acrylic (matte or gloss)
- Foam roller or 1-inch flat brush
- Ruler and pencil
- Clear gloss varnish
Instructions
- Lightly sand any glossy area to help adhesion; wipe off dust.
- Mark stripe spacing with pencil and ruler.
- Tape edges of stripes tightly.
- Roll paint in thin coats; wait 20 minutes between coats.
- Remove tape carefully after paint is tacky.
- Let cure 24 hours, then top with gloss varnish.
How to Display or Gift It
Use with monochrome kitchen styling or as a dipping sauce bowl on a charcuterie board. Wrap with black-and-white baker’s twine for gifting.
- Gold-Dipped Luxe Rim Bowl

A metallic rim makes any bowl feel luxe. Use metallic ceramic paint or gilding leaf for extra shine. This design is great for gifting or holiday tables.
Materials
- 1 ceramic bowl, 5–7 inches
- Metallic gold ceramic paint or leaf
- Small flat brush or gilding brush
- Painter’s tape
- Sealant (if using paint)
- Soft cloth
Instructions
- Clean rim area well; tape below rim.
- Apply gold paint in thin coats; 2 coats recommended, 15 minutes apart.
- If using leaf, apply adhesive size, wait tacky, lay leaf, and burnish.
- Remove tape carefully when slightly tacky.
- Cure/bake per paint instructions or let adhesive set 24 hours.
- Seal with clear varnish for longevity.
How to Display or Gift It
Place on a velvet-lined gift box or pair with matching spoons. Store in a padded craft organizer to protect the metallic finish.
- Child-Friendly Animal Face Bowls

These are quick, charming projects perfect for kids or beginner painters. Use paint pens for eyes and mouths for clean lines. Great for making mealtime fun.
Materials
- 2 small ceramic bowls, 4–5 inches
- Posca paint pens
- Soft round brushes
- Pencil for sketching
- Paper towels
- Clear food-safe sealer (check label)
Instructions
- Sketch simple face features with pencil.
- Fill large color areas with paint and let dry 20 minutes.
- Use paint pens for fine details like eyes and whiskers.
- Allow to dry 24 hours; consider light baking if using ceramic markers.
- Seal per product instructions to protect finish.
- Hand wash recommended.
How to Display or Gift It
Wrap each bowl in colorful tissue with a matching kid’s spoon. These are great first-projects for little makers.
- Marbled Alcohol Ink Bowl (Decor Only)

Alcohol inks create glossy marbling that looks like studio pottery. This technique is decorative-only unless sealed and cured per resin or sealer instructions. Use on bowls meant for display.
Materials
- 1 ceramic bowl (display-only), 5–7 inches
- Alcohol ink set (teal, navy, gold)
- Blending solution or isopropyl alcohol
- Small pipettes
- Gloves and disposable surface protector
- Clear epoxy resin for sealing (optional)
Instructions
- Clean bowl thoroughly and work on protected surface.
- Drip inks across the bowl interior and add blending solution to move colors.
- Tilt bowl slowly to encourage flow.
- Add metallic ink dots for veins. Let alcohol evaporate 30–60 minutes.
- Seal with clear epoxy resin following kit directions; cure 24–72 hours.
- Display only; not food-safe unless epoxy is rated and cured fully per manufacturer.
How to Display or Gift It
Present on a decorative tray or use as a jewelry catchall. Wrap with tissue in a sturdy box and label as decorative.
- Geometric Masked Triangles
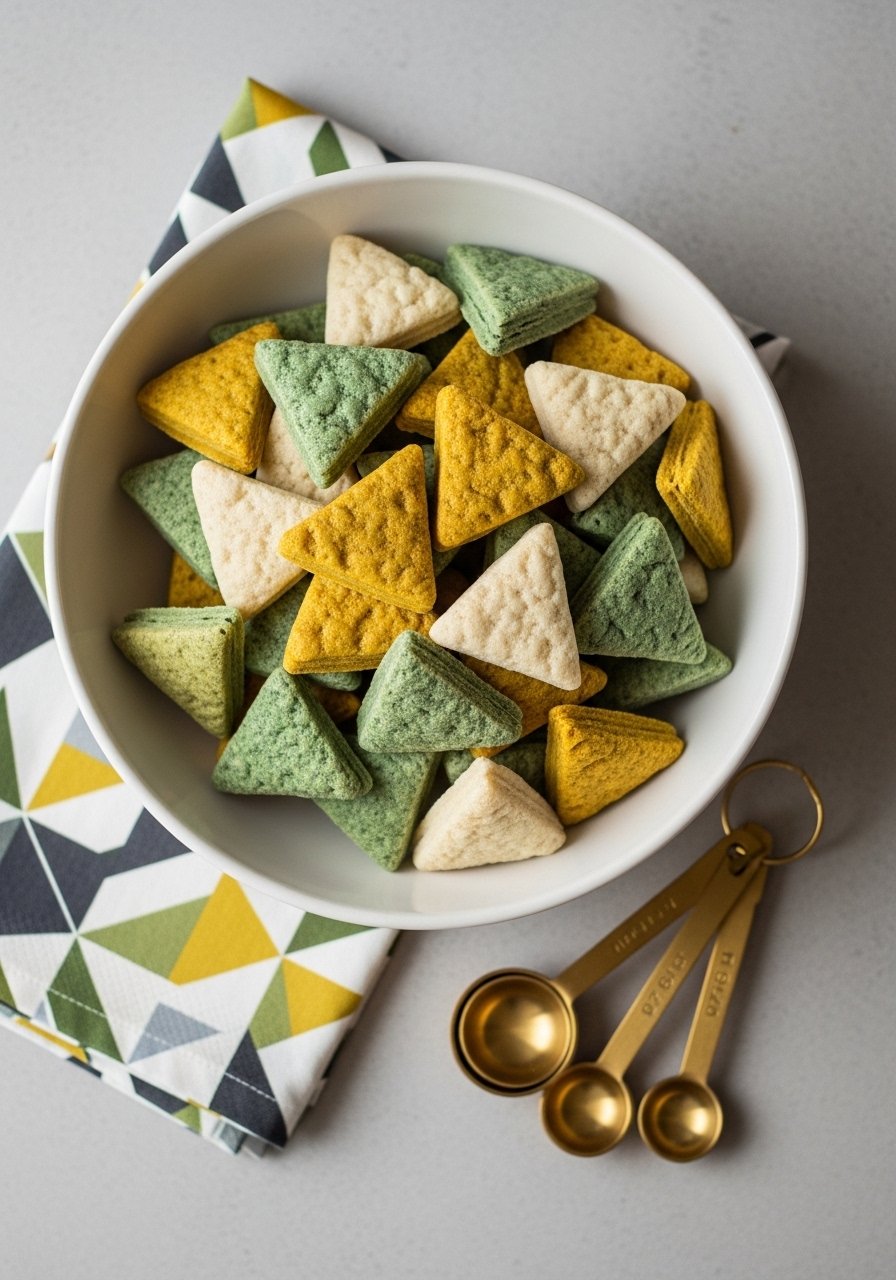
Geometric painting is modern and repeatable. Stenciling or precise painter’s tape work best. Great for pairing with contemporary table settings.
Materials
- 1 ceramic bowl, 6 inches
- Painter’s tape and removable craft vinyl for stencils
- Cricut Joy cutting machine or scissors
- 3 small acrylic colors
- Small foam brush
- Clear varnish
Instructions
- Plan triangle layout and mask off with tape or cut vinyl.
- Apply paint in thin coats; remove tape while paint is tacky.
- Repeat for additional colors, letting each dry 20 minutes.
- Touch up edges with a small brush if needed.
- Let cure 24 hours.
- Seal with varnish following label directions.
How to Display or Gift It
Group similar geometric bowls for a modern kitchen gift. Wrap in kraft paper with a color-block ribbon.
- Rustic Ombre Glaze Effect

Ombre glazing mimics pottery glazes without kiln firing. Layer thinned acrylics or ceramic glazes for a smooth blend. Use a soft sponge or brush for seamless transitions.
Materials
- 1 ceramic bowl, 6–8 inches
- 3 shades of one color family
- Soft sponge or blending brush
- Mixing cups and water
- Clear gloss sealer or ceramic glaze (per product)
Instructions
- Clean bowl and plan gradient direction.
- Thin each paint shade slightly; keep the center color more opaque.
- Apply darkest shade at rim, then mid tone, then lightest.
- Blend joining areas with damp sponge working quickly.
- Allow to dry 1 hour then add a second coat if needed.
- Seal with gloss; cure 24 hours.
How to Display or Gift It
These look lovely stacked with wooden utensils. Put in a gift box cushioned with tissue and a sprig of green.
- Scandinavian Minimal Brushstroke (easy ceramic bowl painting ideas)

Loose brushstrokes give a modern Scandinavian vibe. This approach is forgiving—larger marks look intentional. Great for beginners seeking a simple statement.
Materials
- 1 shallow ceramic bowl, 6–7 inches
- 1 oz navy acrylic
- Large flat brush (1/2 inch or wider)
- Water and palette
- Matte varnish
Instructions
- Wipe bowl; plan stroke locations with a pencil.
- Load brush with paint and remove excess on palette.
- Make confident, single strokes; let dry 20 minutes between strokes.
- Add dimension with a second light stroke if desired.
- Let cure 24 hours and seal with matte varnish.
- Hand wash recommended.
How to Display or Gift It
Pair with plain white plates for a Nordic look. Bundle two brushstroke bowls with linen napkins for gifting.
- Tiny Polka Heart Ring Bowl

A tiny ring bowl is a sweet, quick gift. Hearts painted with a toothpick or fine pen are easy and charming. Great for bridal shower favors.
Materials
- 1 small ring bowl, 3–4 inches
- Posca paint pens
- Toothpick for tiny dots
- Pencil
- Clear sealer (food-contact safe if used bedside)
Instructions
- Sketch heart pattern lightly.
- Fill hearts with paint pen; use toothpick for tiny dots.
- Let dry 30 minutes then add a second pass for opacity.
- Seal if desired; cure 24 hours.
- Avoid dishwasher unless labeled safe.
How to Display or Gift It
Nestle in a small kraft box with cotton filler and a note. These make cute little bridesmaid gifts.
- Retro Sunburst Serving Bowl

Sunburst motifs feel playful and retro. Use a ruler and pencil to map rays, then fill with vibrant hues. Works well as a statement serving piece.
Materials
- 1 serving bowl, 8–10 inches
- Pencil and ruler
- 3–4 acrylic colors
- Small flat brush and fine liner brush
- Matte or gloss varnish
Instructions
- Draw sunburst lines from center to rim.
- Block in colors with flat brush; keep edges neat.
- Touch up with fine liner for crisp rays.
- Let dry 30–60 minutes between layers.
- Apply varnish; cure 24 hours.
- Hand wash advised.
How to Display or Gift It
Fill with fresh citrus for a centerpiece. Wrap with tissue and a handwritten recipe for gifting.
- Speckled Japandi Neutral Bowl (keyword included once)

Combining speckles with neutral japandi colors gives a peaceful, organic bowl. This technique uses a toothbrush or small stipple brush for fine marks.
Materials
- 1 bowl, 6–8 inches
- Neutral chalk paints (beige and taupe)
- Stiff toothbrush
- Sanding pad
- Matte varnish
Instructions
- Apply base coat in light beige; let dry 30 minutes.
- Thin darker paint slightly, flick speckles with toothbrush.
- Let set 20–30 minutes then add more for density.
- Sand very lightly for a softer look.
- Seal with matte varnish; cure 24 hours.
How to Display or Gift It
Style with simple wooden utensils and dried herbs. Stack carefully when storing.
- Leaf Print Nature Bowl

Leaf printing is an easy way to add botanical charm. Real leaves or leaf-shaped stencils both work. Press paint thinly for crisp edges.
Materials
- 1 bowl, 6 inches
- Real leaves or vinyl leaf stencil
- Acrylic paint (sage green)
- Small foam brush and brayer roller
- Palette and paper towels
- Sealant
Instructions
- Clean bowl; arrange leaves or stencil.
- Apply a thin layer of paint to leaf and press firmly.
- Lift carefully to reveal print.
- Touch up gaps with a fine brush.
- Let dry 30 minutes and seal.
- Hand wash to preserve print.
How to Display or Gift It
These pair beautifully with potted plants. Wrap with jute twine and include a plant clipping.
- Night Sky Constellation Bowl
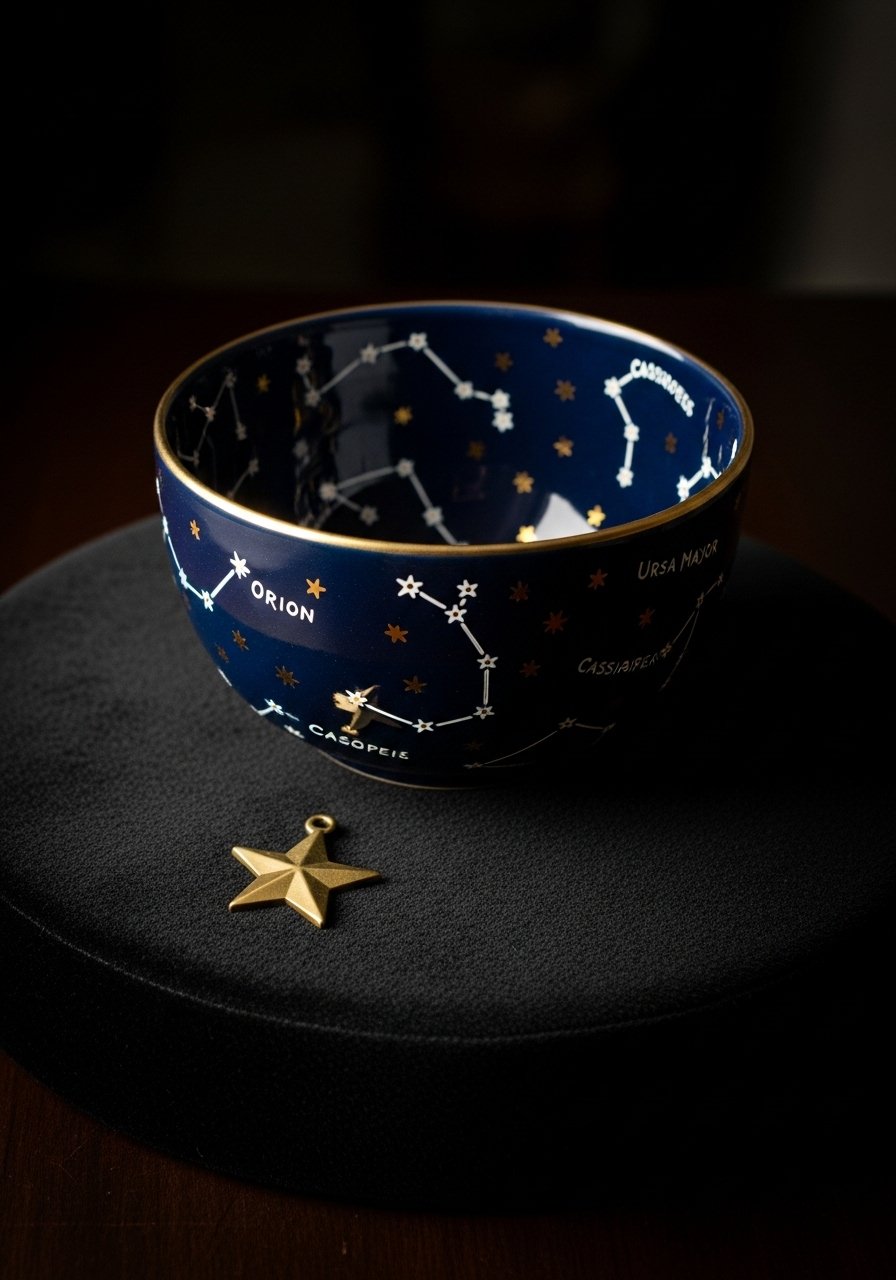
Constellation bowls are dreamy and surprisingly simple. Use gold paint or a fine metallic pen for stars and lines. Great as an evening trinket dish.
Materials
- 1 small bowl, 4–6 inches
- Navy acrylic paint
- Posca paint pens in white and gold
- Fine detail brush
- Sealant with UV protection
Instructions
- Paint interior navy in two thin coats; dry 30 minutes.
- Sketch constellation layout lightly.
- Dot stars with white pen, add gold details.
- Connect stars with thin lines using fine brush.
- Let cure 24 hours and seal with UV-protectant varnish.
- Avoid prolonged sun to protect colors.
How to Display or Gift It
Use as a bedside catchall or jewelry bowl. Gift with a small printed star map.
- Chalkboard Painted Label Bowl
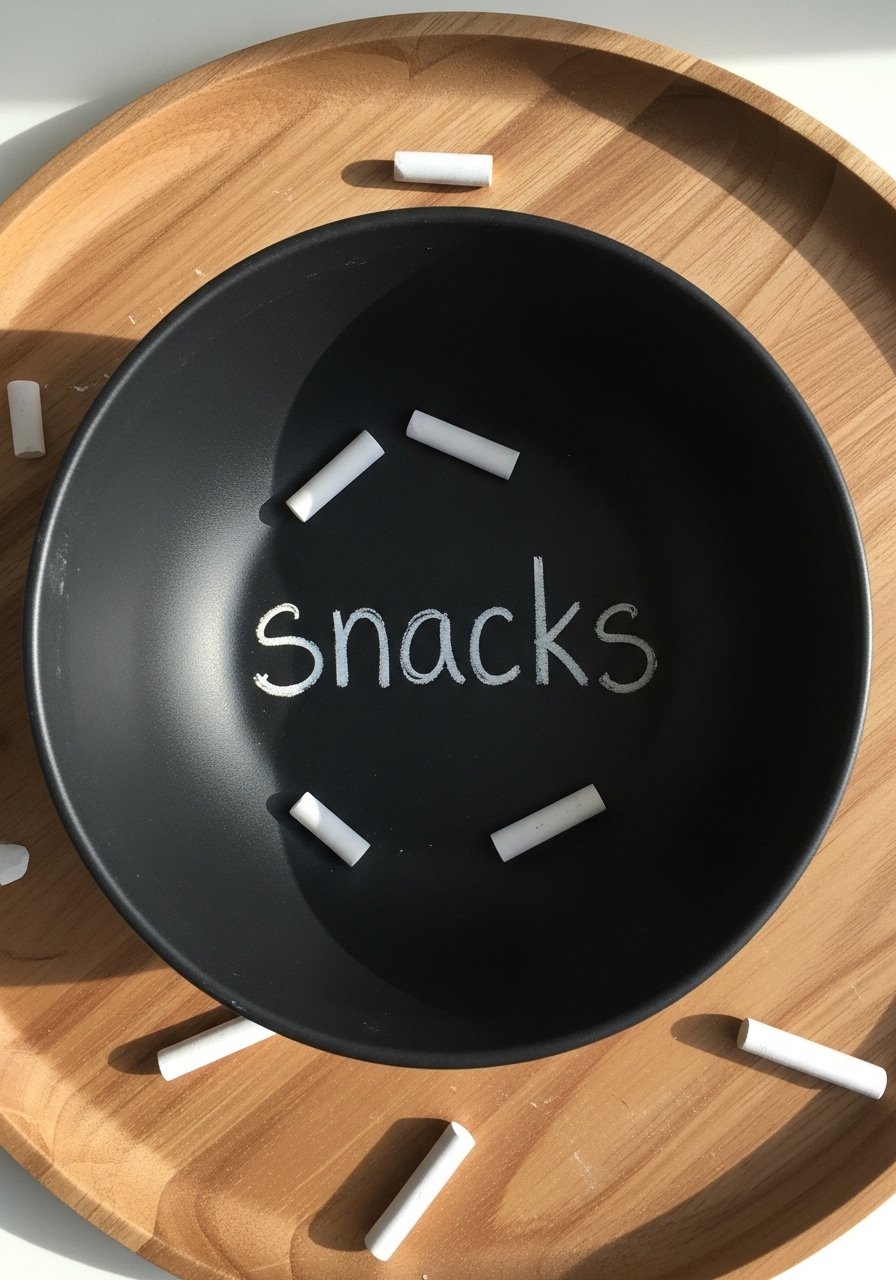
Chalkboard paint turns bowls into customizable pieces. Great for parties and labeling contents. Use chalk markers for neat handwriting.
Materials
- 1 ceramic bowl, 6–8 inches
- Chalkboard paint (enamel for ceramics)
- Chalk marker or white paint pen
- Foam brush
- Sanding pad
Instructions
- Sand and clean bowl area to be painted.
- Apply two thin coats of chalkboard paint, 30 minutes apart.
- Cure per product instructions (often 24 hours).
- Season surface by rubbing chalk then wiping clean.
- Write labels with a chalk marker.
- Hand wash gently.
How to Display or Gift It
Perfect for party food stations. Wrap with a set of mini chalk markers for gifting.
- Terracotta-Inspired Matte Finish

A matte terracotta finish brings warmth and an earthy feel to plain bowls. Use chalk paint for that soft, unfired clay look.
Materials
- 1 bowl, 6–8 inches
- Terracotta chalk paint (1 oz)
- Small sanding sponge
- Dry brush (for textured rim)
- Matte varnish
Instructions
- Apply two thin coats of terracotta chalk paint; dry 30 minutes between.
- Dry-brush a darker shade along rim for texture.
- Lightly sand random spots for character.
- Seal with matte varnish; cure 24 hours.
- Hand wash recommended.
How to Display or Gift It
Works well with woven chargers and leather napkin rings. Pack in a cushioned box for gifting.
- Pastel Polka Ombre Bowl

Combining ombre and polka dots creates a delicate, spring-ready bowl. Dotting tools make consistent marks and speed things up.
Materials
- 1 bowl, 6 inches
- Pastel acrylics in 3 shades
- Dotting tools or dowels
- Palette and water jar
- Gloss varnish
Instructions
- Paint a light ombre base using thinned paints; dry 20 minutes.
- Use dotting tool to add polka dots in gradient colors.
- Fill until satisfied; let dry 30 minutes.
- Seal with gloss varnish; cure 24 hours.
- Hand wash to protect finish.
How to Display or Gift It
Perfect for baby shower gifts or brunchware. Wrap with a pastel ribbon and include a handwritten note.
- Minimal Line Drawing Bowl

Continuous line drawings feel modern and artsy. Use a fine-tip paint pen or steady brush for smooth strokes.
Materials
- 1 ceramic bowl, 6 inches
- Black paint pen (fine tip)
- Pencil for planning
- Eraser
- Clear matte sealer
Instructions
- Plan design on paper; transfer faint guidelines to bowl.
- Trace final line with black paint pen in one continuous motion where possible.
- Go back to touch up thickness as needed.
- Let dry 30 minutes and seal.
- Cure 24 hours before light use.
How to Display or Gift It
Bundle with a small sketchbook as a creative gift set. Store gently to avoid scuffs.
- Coastal Shell Imprint Bowl

Imprinting with small shells adds a tactile coastal charm. Press items gently into slightly wet clay-like paint or use stencils for consistent results.
Materials
- 1 bowl, 6–8 inches
- Lightweight modeling paste or thick acrylic medium
- Small collected shells or silicone shell stamps
- Soft brush for washing color
- Clear sealer
Instructions
- Apply thin layer of modeling paste to rim.
- Press shells lightly to create shallow imprints; remove.
- Once dry 1–2 hours, wash light blue glaze over surface and wipe to highlight textures.
- Add second glaze coat if needed.
- Seal with varnish; cure 24 hours.
How to Display or Gift It
Fill with wrapped soaps or potpourri for a beachy gift. Keep out of heavy moisture.
- Splatter Paint Party Bowl

Splatter painting is messy but joyful. Use this for celebration-themed dishes or as an accent piece. Mask the outside if you want to control the mess.
Materials
- 1 bowl, 6 inches
- Bright acrylics thinned with water
- Old toothbrush or stiff-bristle brush
- Drop cloth and gloves
- Clear gloss varnish
Instructions
- Protect work surface; wear gloves.
- Thin paint slightly for splatter.
- Use toothbrush to flick paint from edge toward bowl interior.
- Repeat with colors, letting each dry 10–15 minutes.
- Seal with gloss varnish; cure 24 hours.
- Not recommended for food-contact unless sealed appropriately.
How to Display or Gift It
Great for party decor or a colorful gift. Pair with a matching platter.
- Tile Mosaic Decal Bowl
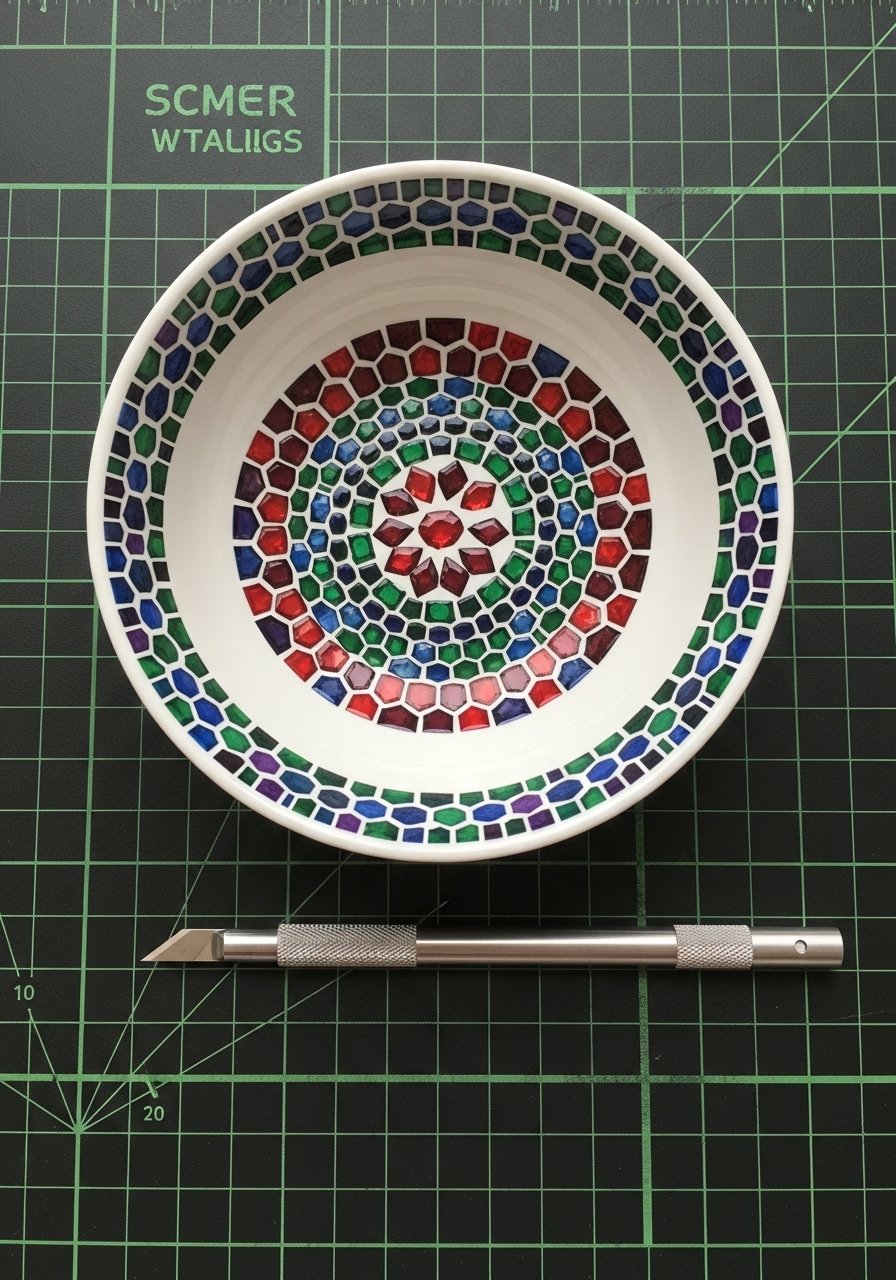
Mosaic decals give a tiled look without grout. Cut vinyl pieces using a cutting machine or by hand. This is an easy way to add geometric texture.
Materials
- 1 bowl, 6–8 inches
- Vinyl sheets or craft vinyl
- precision craft knife
- Tweezers and transfer tape
- Clear varnish for sealing
Instructions
- Plan mosaic layout and cut small tiles from vinyl.
- Clean bowl and apply tiles with transfer tape.
- Press firmly and remove transfer tape.
- Seal with a light coat of varnish to protect edges.
- Let cure 24 hours.
- Treat as decorative unless using food-safe vinyl and sealant.
How to Display or Gift It
Use as a jewelry or key bowl. Present in a box with a small adhesive tool.
- Metallic Speckle Bowl (gold and copper)
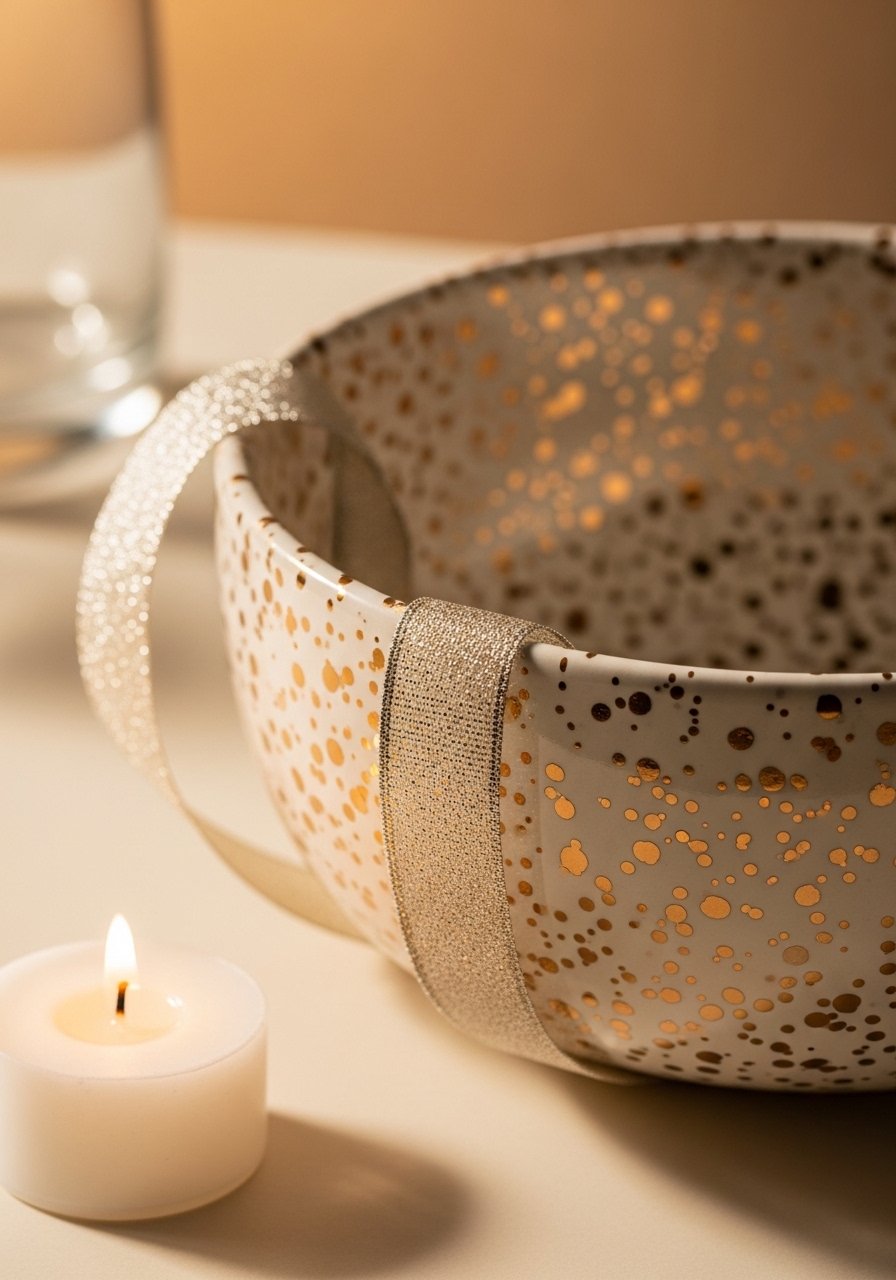
Metallic speckles add subtle glam. Use metallic acrylic thinned slightly for splatter. Works beautifully for holiday and hostess gifts.
Materials
- 1 bowl, 6 inches
- Gold and copper metallic acrylics
- Toothbrush or small stiff brush
- Palette and water
- Soft cloth for buffing
Instructions
- Apply base coat and dry 30 minutes.
- Thin metallic paints and splatter gently with toothbrush.
- Allow metallics to dry 30 minutes.
- Buff lightly with soft cloth to enhance shine.
- Seal with clear gloss; cure 24 hours.
- Hand wash to maintain metallic finish.
How to Display or Gift It
Pair with metallic-handled cutlery or candles for hostess gifting. Wrap in tissue and tie with metallic ribbon.
- Stenciled Mandala Inner Bowl
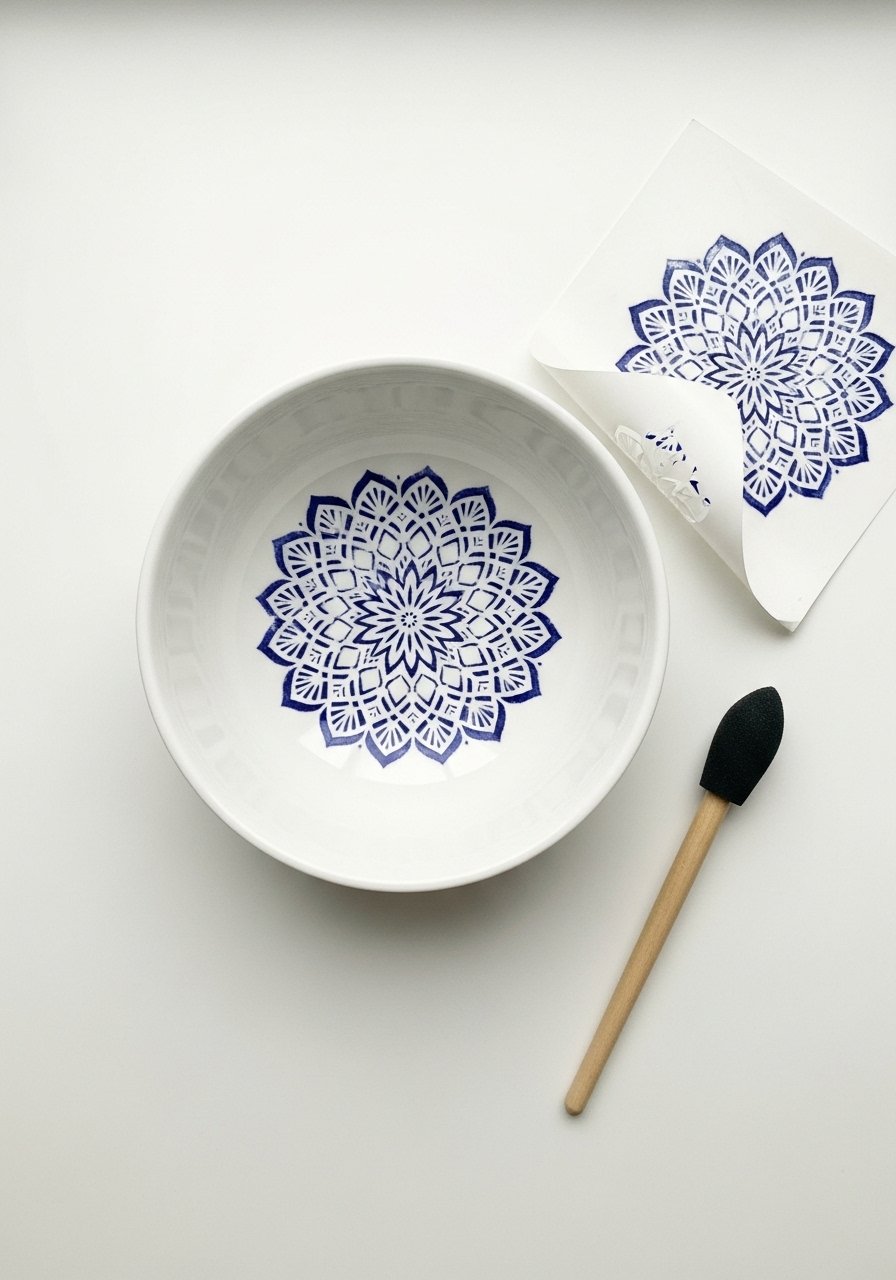
Mandala stencils give a detailed look without freehand skill. Use a pouncer brush and stencil adhesive for crisp edges.
Materials
- 1 bowl, 6–7 inches
- Mandala stencil and repositionable spray adhesive
- Pouncer brush or stipple brush
- Indigo acrylic paint
- Palette and paper towels
- Sealant
Instructions
- Clean bowl; position stencil and fix with spray adhesive.
- Load pouncer lightly and dab paint through stencil.
- Remove stencil carefully to avoid smudges.
- Touch up tiny gaps with a fine brush.
- Let dry 30–60 minutes and seal.
- Cure per sealer instructions 24 hours.
How to Display or Gift It
Use as a meditation or jewelry bowl. Gift with a small tealight and matchbox.
- Epoxy River Inlay Bowl (decor only)
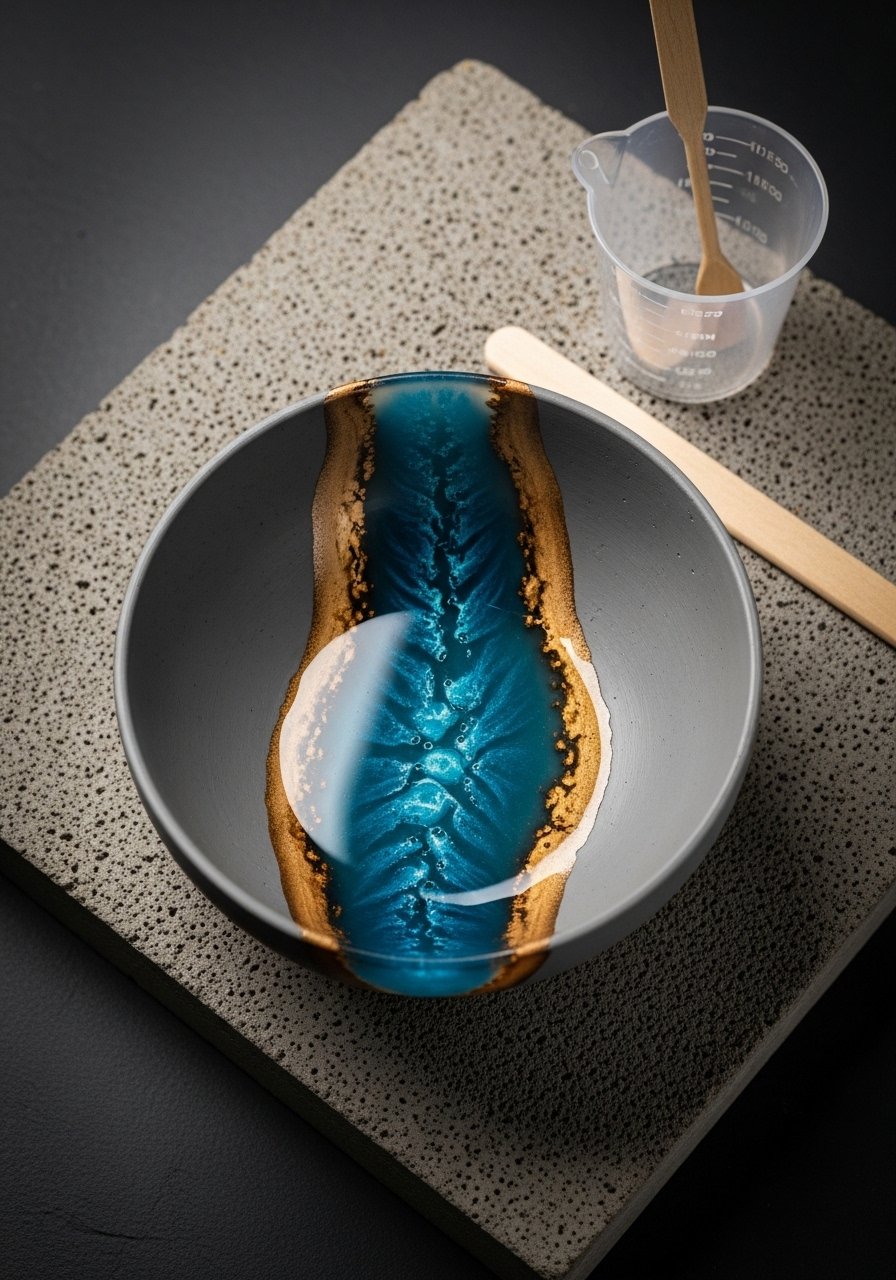
An epoxy inlay creates a dramatic, glossy river effect. This project is decorative-only unless using food-safe epoxy and following strict cure instructions.
Materials
- 1 bowl (deep), 7–9 inches
- epoxy resin kit
- Pigment powders or mica flakes
- Painter’s tape and small mixing cups
- Heat gun to remove bubbles
- Nitrile gloves and respirator
Instructions
- Prep bowl and mask off areas where epoxy shouldn’t sit.
- Mix epoxy per kit directions, adding pigments.
- Pour epoxy river slowly into prepped channel.
- Use heat gun for five seconds to pop bubbles.
- Let cure 24–72 hours depending on kit.
- Sand edges if necessary and polish for shine.
How to Display or Gift It
Show as a centerpiece bowl or jewelry catchall. Label as decorative. Use a sturdy gift box for shipping.
Enjoy painting bowls? A few final tips and a tool I love.
You now have 27 easy ceramic bowl painting ideas to try, from quick speckles to epoxy inlays. These projects span decorative pieces, kid-friendly crafts, and more durable ceramic-paint options if you plan to bake pieces for food use. Save this list to your favorite Pinterest board so you can return the next time you spot a blank bowl at a thrift shop.
If you’ll be doing lots of cutting or vinyl stencils, a small cutting machine like the Cricut Joy cutting machine speeds prep time. For sealing and finishing across these projects, I reach for a trusty gloss or matte varnish and a set of foam brushes to apply thin, even coats without brush marks. Which style will you try first — speckled cottagecore, modern japandi, or dreamy watercolor? Pin it, make a few, and don’t forget to gift one to a friend.
Trust me, picking up a quality hot glue gun with temperature control changed how every single one of these projects turned out — no more stringy mess, no more burns.





