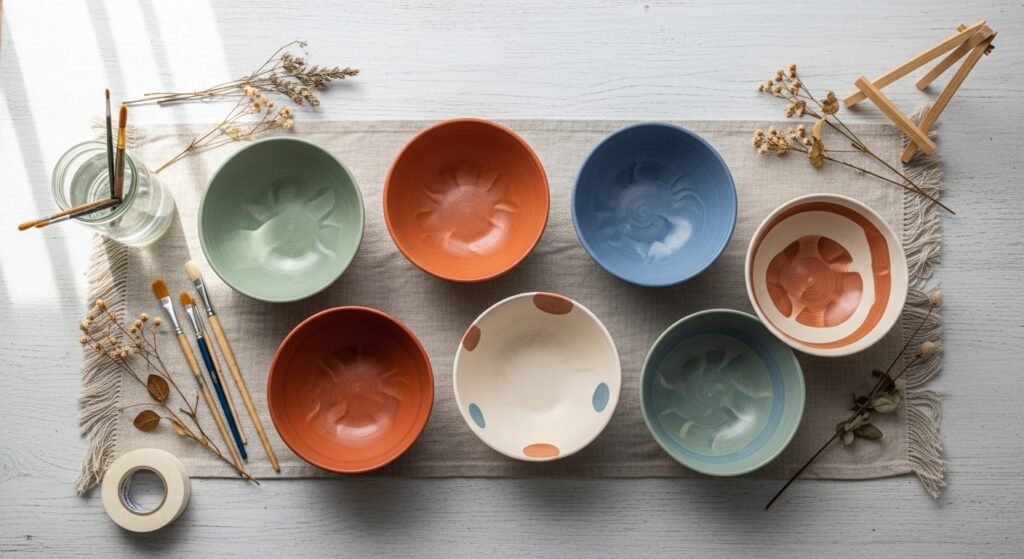
Painting a plain ceramic bowl into something you actually love is one of the simplest ways to refresh your home or give a thoughtful handmade gift. These 25 ceramic bowl painting ideas show styles for every skill level—beginner-friendly dot work, mid-level tape resist geometrics, and techniques that mimic real glazes for more ambitious makers.
I’ll walk you through step-by-step materials and exact drying or curing times for each project, and point out realistic troubleshooting tips so your paint won’t flake or peel. You’ll find projects that match cottagecore, japandi, boho, farmhouse, and coastal aesthetics. Keep a set of small brushes on hand and a bottle of Matte Mod Podge for sealing casual pieces. If you want to bake-on paints for long-lasting dishwasher resistance, try Pebeo Porcelaine 150 paints for easy oven curing.
Scroll, pin, and pick a few that match your mood. Each project includes a clear materials list, step-by-step instructions with drying times, and ideas for displaying or gifting the finished bowl.
- Japandi Minimalist Matte Rim

This Japandi-inspired bowl keeps things calm and refined. A single matte rim makes a bowl feel handmade and elevated. Smooth matte edges pair beautifully with neutral ceramics and natural textures—perfect for minimalists and beginners.
I use a small round detail brush and a steady hand, but a painter’s tape guard works if you want a perfect line.
Materials
- 1 plain ceramic bowl (6–8" diameter)
- Pebeo Porcelaine 150 paint (black), 10 ml
- Small round synthetic detail brush size 1 or 2
- Rubbing alcohol and lint-free cloth (for degreasing)
- Painter’s tape, 1/2" width
- Fine-grit sandpaper (220 grit), 1 sheet
- Oven (for baking Porcelaine 150) or air-dry sealer
- Soft cotton gloves (optional)
Instructions
- Clean bowl with rubbing alcohol and dry. Remove fingerprints and dust.
- Lightly sand the rim with 220 grit to give the paint key. Wipe clean.
- Measure 1/4" from the lip and apply painter’s tape all the way around. Press edges firmly.
- Stir the Porcelaine 150 paint. Load a small round brush and paint a thin rim in one smooth stroke. Avoid over-brushing.
- Let paint air dry 15 minutes, then apply a second thin coat for opaque coverage.
- After 24 hours air-dry, bake following Porcelaine 150 directions: place in a cool oven, heat to 300°F (150°C), bake 35 minutes, then cool inside oven.
- Remove tape slowly for a crisp edge. Cure is complete when the paint is firm and scratch-resistant.
How to Display or Gift It
This bowl looks lovely on a wooden tray or nested with plain bowls in a kitchen open shelf. Wrap for gifting in kraft tissue and tie with twine. For storage, stack bowls with thin felt liners between them to protect the painted rim.
- Cottagecore Wildflower Border

Tiny floral borders give bowls a sweet cottagecore vibe. This is a great afternoon project for painters who like detail work. Use a fine tip paint pen for consistent dots and tiny petals.
I like using a waterproof fine-tip paint pen set for the blooms.
Materials
- 1 ceramic bowl (5–7" diameter)
- Acrylic ceramic paint pens (fine tip) or Porcelaine 150 pens (black, mauve, green)
- Pencil and eraser
- Small round brush size 0
- Matte acrylic sealer or dishwasher-safe sealer, 1 spray can
- Palette or paper plate
- Cotton swabs, jar of water
Instructions
- Lightly sketch a repeating floral motif around the bowl rim with pencil. Keep motifs small (1/4"–1/2").
- Trace with a fine-tip paint pen for petals and centers. Let each color dry 10–15 minutes before layering.
- Add green leaves with a tiny round brush. Two thin coats usually give solid color—allow 15 minutes between coats.
- When paint is fully dry (24 hours), apply two thin coats of matte acrylic sealer, 15 minutes between coats.
- Let sealer cure 24 hours before light use. For oven-cured pens, follow manufacturer baking directions if applicable.
- Check for tackiness; fully cured sealer will be firm to the touch.
How to Display or Gift It
Fill with wrapped candies or potpourri and place on a windowsill. Wrap the bowl in kraft tissue and tuck a dried sprig inside for a rustic gift. Store in a stackable craft organizer when making multiples.
- Boho Drip Glaze — ceramic bowl painting ideas for color lovers
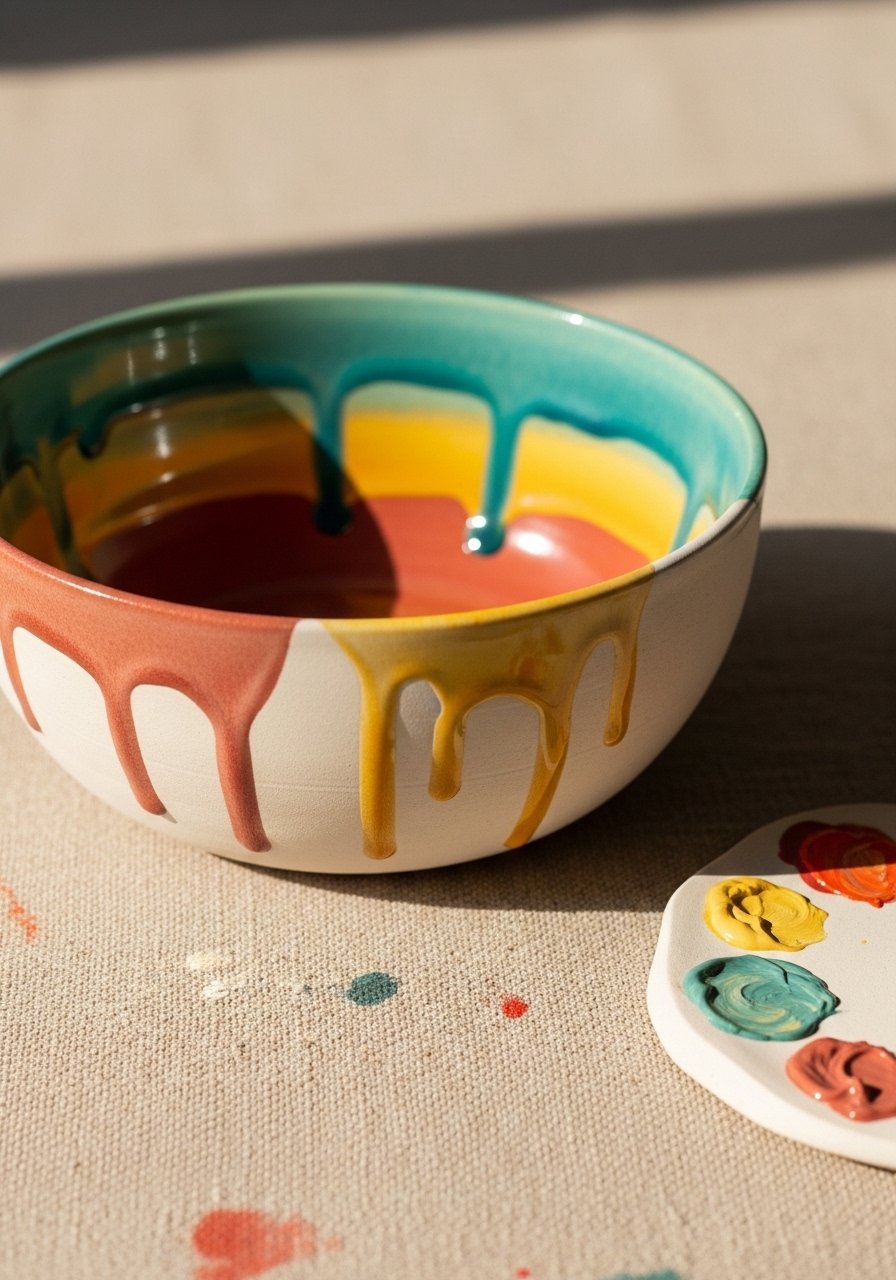
This playful drip technique mimics studio glazes without a kiln. The effect feels boho and handmade. Use a fluid acrylic or glaze medium to get controlled drips.
I pull drips using a squeeze bottle or a small paint applicator bottle set.
Materials
- Ceramic bowl (6–9" diameter)
- Fluid acrylic paints (squeeze bottles) in 3 colors + white
- Gloss varnish or epoxy resin for a glassy finish (optional)
- Palette knife, stir sticks
- Painter’s tape (to protect underside), rag
- Paper towel and jar of water
Instructions
- Wipe bowl clean and lightly sand the rim. Protect underside with painter’s tape.
- Thin your fluid acrylics with a little water or flow medium to reach pourable consistency. Test drips on paper first.
- Starting at the rim, squeeze a line of color and let it drip down. Work in sections, layering colors so drips overlap.
- Let drips settle and dry 2–4 hours to be touch-dry. Add a second pass for more depth.
- Once fully dry (24 hours), seal with a gloss varnish (two coats) or mix and pour epoxy resin following kit directions; typical ArtResin cure is 72 hours.
- If using resin, rotate the bowl on a stand to allow even coating and pop bubbles with a heat gun briefly.
How to Display or Gift It
A glossy drip bowl is a display piece—use a small wooden easel or nest it inside a shallow glass display box. Wrap in tissue and tuck a ribbon for a colorful housewarming gift.
- Subtle Ombre Satin Finish

Ombre gradients look delicate and refined. This satin finish works for modern and farmhouse kitchens. A foam brush or sponge makes blending effortless.
I blend colors with a foam brush set.
Materials
- Ceramic bowls (set of 2), 6" and 8"
- Acrylic craft paints (cream, mid-blue, dusty blue)
- Flat foam brushes, 1", and 2"
- Palette or paper plate
- Sanding block, 220 grit
- Matte-satin varnish, 1 small spray can
Instructions
- Clean and sand the exterior lightly. Wipe dry.
- Mix intermediate shades on your palette to create at least 3–4 gradient steps.
- Start with the lightest color at the rim. Use horizontal strokes with a 1" foam brush. Work quickly while paint is wet.
- Blend into the next shade by overlapping strokes. Use a slightly damp sponge to soften harsh lines.
- Apply a second thin coat for even coverage. Let dry 30 minutes between coats.
- Once fully dry (24 hours), spray two thin coats of satin varnish, 15 minutes apart.
How to Display or Gift It
Stack nested ombre bowls on open shelving or group with wooden utensils. For gifting, place bowls in a shallow kraft box with shredded paper and a ribbon.
- Speckled Stoneware Look

Speckled finishes imitate stoneware glaze and add an artisanal feel. It's perfect for low-effort charm and great for gifting.
For fine speckles, I use an old toothbrush or a paint splatter brush set.
Materials
- Ceramic bowl, 7" diameter
- Acrylic paint (dark graphite or navy), 10–15 ml
- White base acrylic if needed
- Old toothbrush or stiff-bristle brush
- Masking tape to protect outer rim
- Matte sealer spray
Instructions
- Paint bowl interior with base color (cream) if needed. Let dry fully (30–60 minutes).
- Thin darker paint slightly with water to create splatter consistency. Test on scrap.
- Load toothbrush, hold close to bowl, and flick bristles with your thumb to create speckles. Vary distance for larger/smaller dots.
- Work in short bursts to avoid pooling. Let paint dry 30 minutes, then add a second pass if desired.
- Seal with two thin coats of matte sealer, 15 minutes apart. Fully cure 24 hours.
How to Display or Gift It
Speckled bowls look great stacked or paired with linen placemats. Wrap with kraft paper and a twine bow for a simple, charming gift.
- Painterly Brushstroke Texture

Visible brushwork gives bowls an organic, painterly look—great for boho or artsy kitchens. Use a flat bristle brush for texture.
A set like this detail brush set helps create varied strokes.
Materials
- Ceramic bowl, 6–9" diameter
- Acrylic craft paint in two colors (base + accent)
- Flat synthetic brush 3/4" and a fan or dry brush
- Palette for mixing
- Matte varnish (brush-on)
Instructions
- Prime bowl with a base coat; let dry 30–60 minutes.
- Load your flat brush with undiluted paint and apply loose strokes in one direction. Don’t overblend.
- Use a dry brush to drag a second color lightly across for contrast. Work quickly for lively strokes.
- Allow paint to dry 1–2 hours between layers if adding texture.
- When satisfied, apply two thin coats of matte varnish and allow 24 hours cure.
How to Display or Gift It
Display on open shelves paired with hand-thrown pottery. For gifting, nest the bowl with a linen napkin inside a kraft box and add a handwritten note.
- Sgraffito Carved Motif — ceramic bowl painting ideas with etching

Sgraffito is the scratched-line technique that reveals a contrasting base color. This faux-sgraffito is achievable with layered paints and a carving tool.
I use a fine carving tool set for steady lines.
Materials
- Ceramic bowl (preferably white glaze), 7" diameter
- Terracotta or rust-toned acrylic paint (base), 20 ml
- White acrylic or slip-color top coat, 20 ml
- Sgraffito tool or wooden skewer
- Sandpaper 220 grit
- Sealer (matte)
Instructions
- Paint the bowl interior with the terracotta base. Two thin coats, dry 30 minutes between.
- Apply a full opaque white coat over the base. Let it dry until tacky but not fully cured (10–15 minutes).
- Use the sgraffito tool to scratch away the white layer to reveal the terracotta beneath. Work patiently.
- Clean away dust with a soft brush. If edges are rough, sand lightly and touch up.
- Let fully dry 24 hours, then seal with matte varnish.
How to Display or Gift It
Sgraffito bowls pair beautifully with wooden serving spoons. Wrap with kraft tissue and a thin twine for gifting. Store stacked with protective felt disks.
- Sharp Geometric Tape-Resist

Tape-resist geometrics give a clean, modern look—ideal for makers who like crisp edges. A metal ruler and quality painter’s tape are your best friends.
Use a reliable painter’s tape for sharp lines.
Materials
- Ceramic bowl, 7–9" diameter
- Acrylic paints (two contrasting colors + metallic gold)
- Painter’s tape, 1/4" and 1/2"
- Metal ruler and craft knife
- Small flat brush
- Clear gloss sealer
Instructions
- Clean the bowl and mark angles lightly with pencil. Plan your pattern.
- Apply painter’s tape firmly along guidelines. Burnish edges to prevent bleed.
- Paint sections one color at a time. Allow each color to dry 20–30 minutes before removing or re-taping.
- Remove tape slowly at a 45-degree angle once paint is dry to the touch.
- Add metallic accents with a small brush if desired. Apply two coats of gloss sealer and cure 24 hours.
How to Display or Gift It
Geometric bowls look great with contemporary decor. Display on a small wooden easel. Wrap in a box with kraft tissue and a ribbon for a modern gift.
- Hand-Lettered Quote Bowl

Personalized message bowls are special keepsakes. Choose short quotes or names. A steady hand and a paint pen can achieve crisp lettering.
I use a fine-tip paint pen set for lettering.
Materials
- Ceramic bowl, 6–8" diameter
- Fine-tip paint pen (black), 1
- Pencil and transfer paper (optional)
- Small eraser
- Clear satin varnish
Instructions
- Sketch your quote lightly with pencil or use transfer paper to trace a printed font.
- Trace over pencil with a fine-tip paint pen in smooth strokes. For thicker strokes, apply slight pressure on downstrokes.
- Allow ink to dry 30–60 minutes. Add a second pass for opacity if needed.
- Erase stray pencil marks after ink is fully dry.
- Seal with two thin coats of satin varnish; allow 24 hours cure.
How to Display or Gift It
Use these bowls as jewelry dishes or bedside catchalls. Wrap with tissue and tuck a small handwritten note inside for gifting.
- Cute Animal Motifs — ceramic bowl painting ideas kids will love
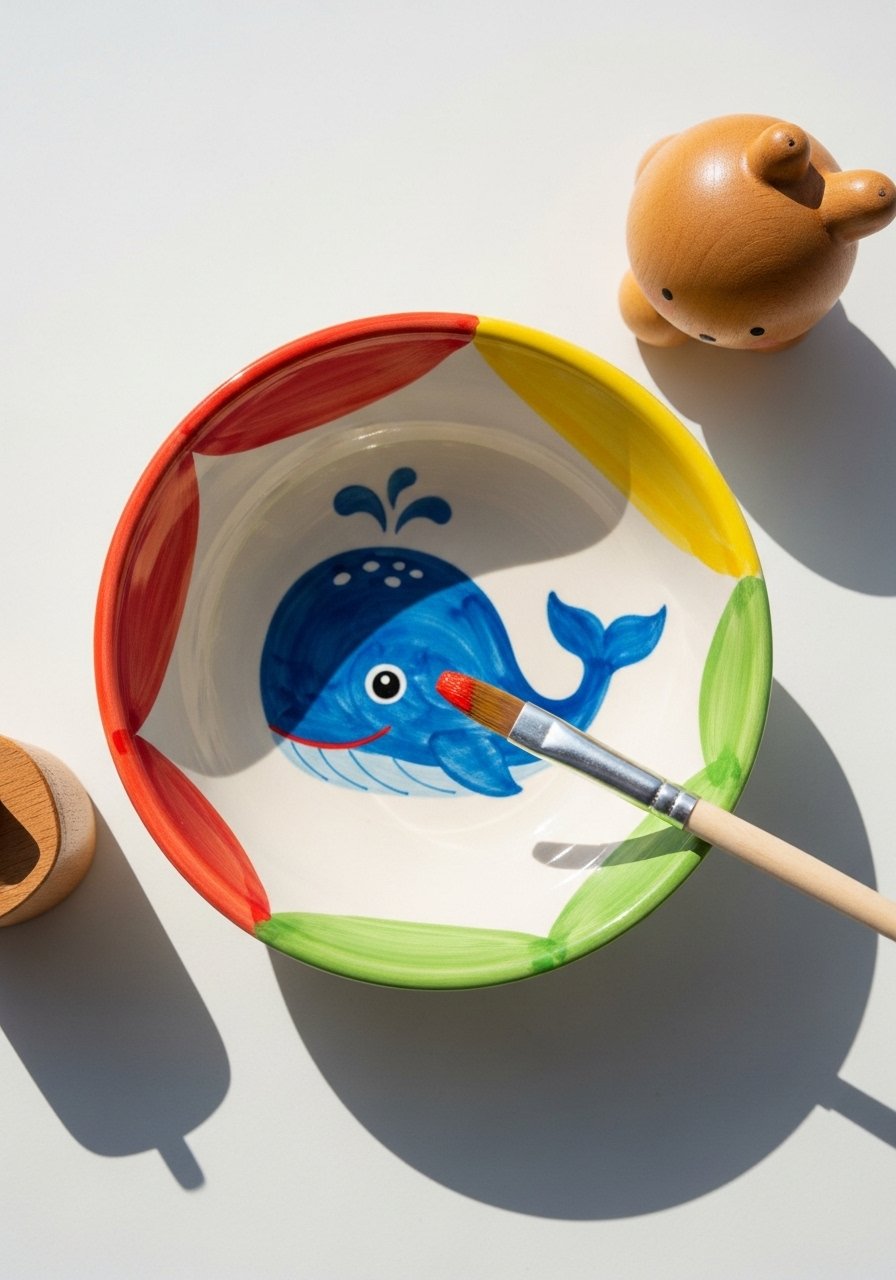
Animal motifs are playful and easy to scale. Kids and gift-givers love personalized animal bowls. Use non-toxic acrylics and simple shapes.
Try a washable acrylic paint set for kid-friendly projects.
Materials
- Small ceramic bowl (4–6")
- Washable acrylic paints, assorted
- Round brushes sizes 0 and 4
- Pencil and eraser for sketching
- Small sponge for blending
- Non-toxic clear sealer (matte)
Instructions
- Sketch a simple animal silhouette lightly with pencil. Keep shapes bold.
- Fill large areas with a size 4 round brush. Use a size 0 for details like eyes or whiskers.
- Let paint dry 15–30 minutes between colors. Layer as needed for opacity.
- Once dry, outline details with a fine brush or paint pen.
- Seal with two coats of non-toxic matte sealer. Cure 24 hours before use.
How to Display or Gift It
This is a great party activity—make multiples and gift at birthdays. For storage, keep in a craft bin until sealer has cured fully.
- Gold Luster Rim for Special Occasions
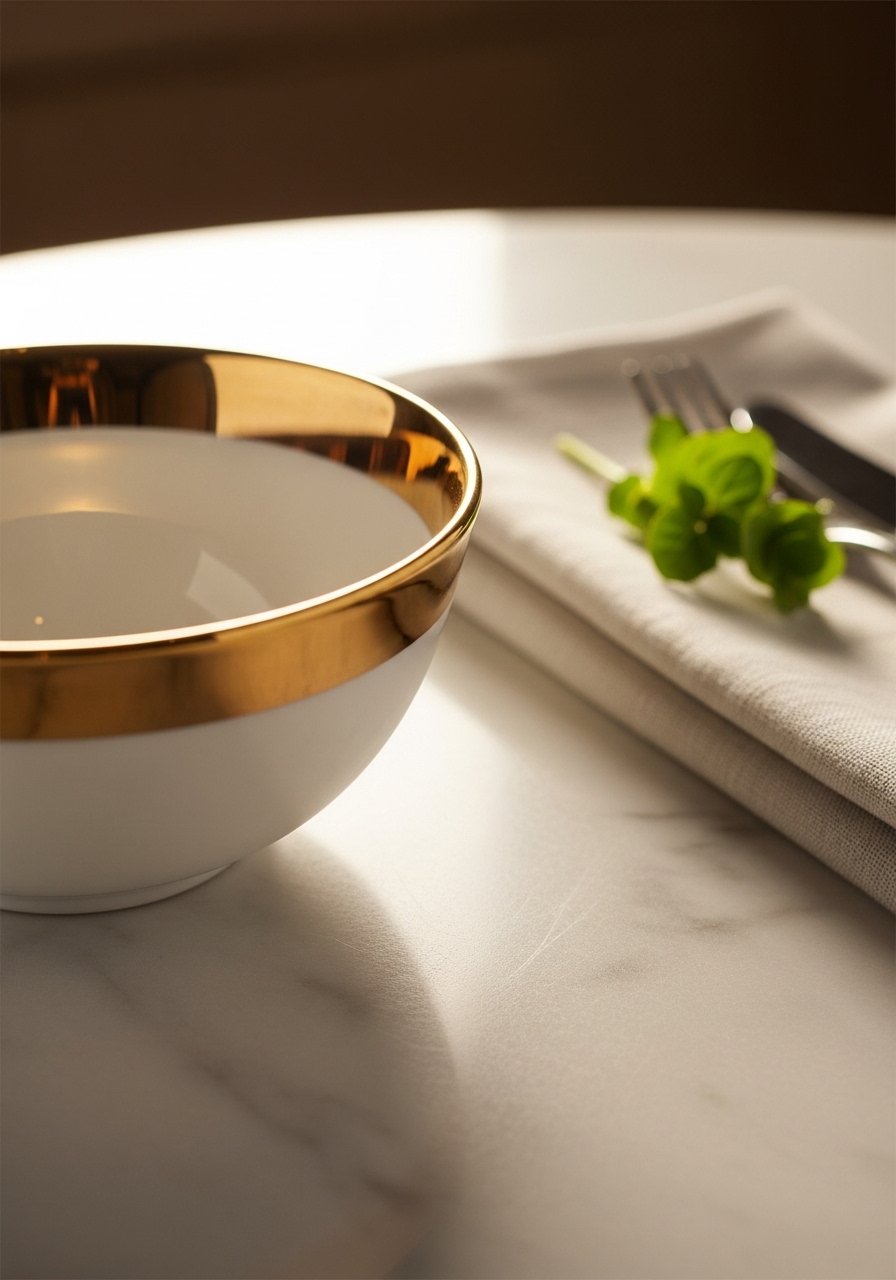
A thin gold luster rim instantly dresses up any bowl for dinner parties. Use a luster pen or liquid gold paint and allow ample curing.
I reach for a gold luster pen like this gold paint pen for detail work.
Materials
- Ceramic bowl, any size
- Gold luster pen or liquid gold (small)
- Fine artist brush size 0
- Isopropyl alcohol for cleaning
- Soft cloth
- Sealer suitable for metallics (check manufacturer)
Instructions
- Clean bowl rim thoroughly with alcohol. Let dry.
- Apply gold luster in thin even strokes using the pen or brush. Multiple light passes are better than one heavy pass.
- Allow luster to dry per manufacturer instructions—often 24–72 hours. Some lusters require baking; follow product directions.
- Avoid abrasive scrubbing over luster; hand wash gently.
How to Display or Gift It
These bowls make elegant hostess gifts—nest in tissue and place in a small gift box. Add a linen napkin and a sprig of rosemary.
- Crackle Glaze Faux Finish

Crackle finishes add vintage character. You can create a faux crackle with a crackle medium layered between colors.
Use a crackle medium designed for acrylics.
Materials
- Ceramic bowl, 6–8"
- Base color acrylic paint (dark)
- Crackle medium, 1 small jar
- Top color acrylic (light), 10–15 ml
- Flat brush and soft rag
- Matte varnish
Instructions
- Paint base color and let dry 24 hours.
- Apply an even layer of crackle medium and let become tacky (follow product times—typically 15–30 minutes).
- Paint the top color over the medium in one smooth stroke. Cracks will appear as it dries.
- Allow 24 hours to fully develop crackle. Seal with matte varnish.
How to Display or Gift It
Crackle bowls suit vintage or cottage decor. Wrap in tissue and include care instructions for gentle hand washing.
- Underglaze Watercolor Wash

Watercolor-style underglaze gives a dreamy translucent look. Use very diluted acrylics or Inktense-like pigments for soft washes.
Try a watercolor brush set like this watercolor brush set.
Materials
- Ceramic bowl, 6–8"
- Thinned acrylics or water-soluble inks
- Large soft round brush sizes 6–10
- Spray bottle for misting
- Paper towels
- Satin sealer
Instructions
- Wet the interior of the bowl slightly with a spray bottle.
- Load a soft brush with highly diluted paint (like a wash). Apply in sweeping strokes, letting colors blend.
- Use a paper towel to lift color and create highlights.
- Let wash dry completely 1–2 hours. Repeat for deeper color.
- Seal with satin varnish after 24 hours.
How to Display or Gift It
Pair with natural linens for a soft table setting. For gifting, include care instructions and recommend hand washing.
- Textured Brush Stabbing — ceramic bowl painting ideas with tactile finish
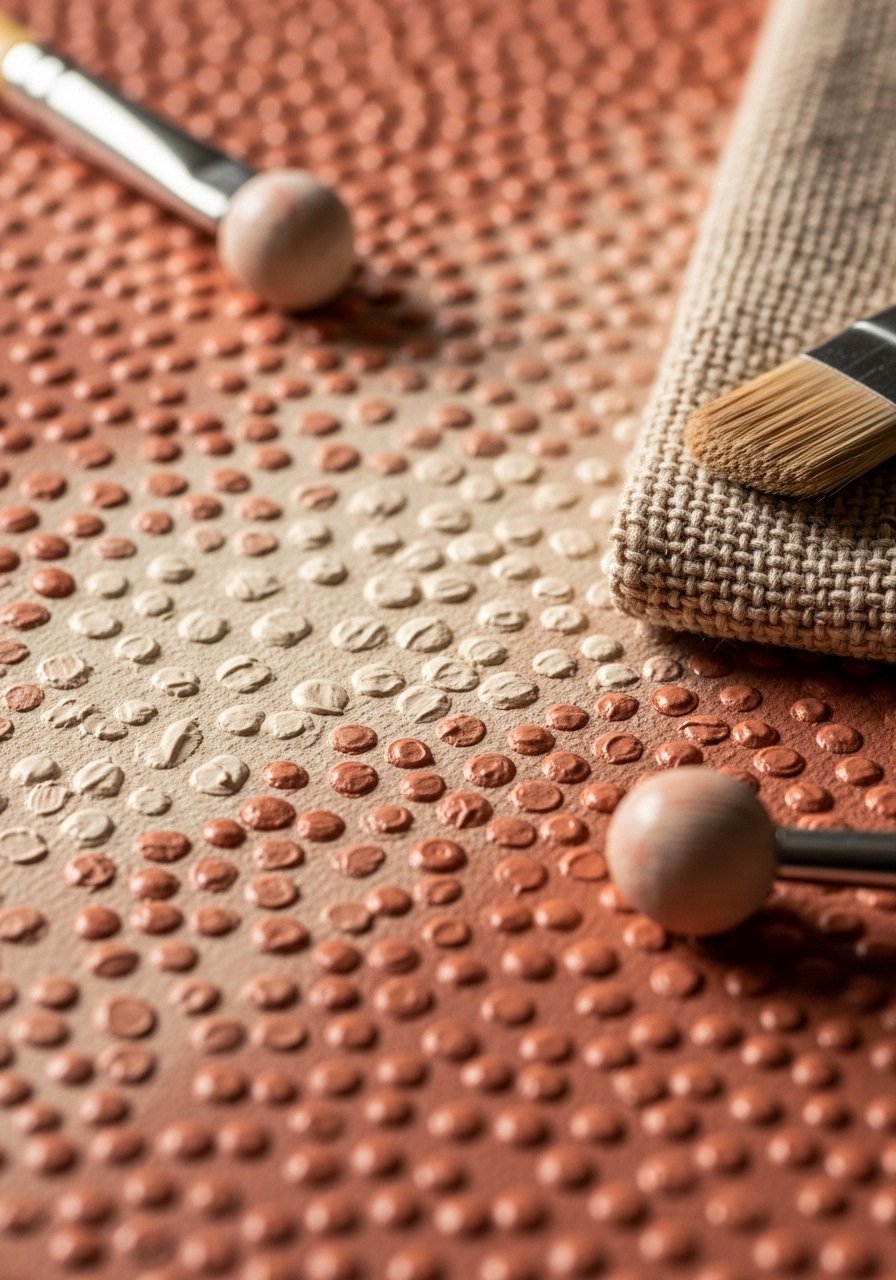
Tactile brush-stabbing creates a raised, hand-built surface. It’s both visual and touchable—great for those who like texture in their ceramics.
Use a heavy-body acrylic like Liquitex Basics heavy-body for texture.
Materials
- Ceramic bowl, 7" diameter
- Heavy-body acrylic paint (terracotta), 20 ml
- Stiff round brush size 6
- Palette knife
- Sandpaper, 220 grit (for light smoothing)
- Gloss varnish
Instructions
- Apply a base coat and let dry 1 hour.
- Use a stiff round brush to “stab” small dabs of heavy-body paint into the surface. Hold brush perpendicular and press firmly.
- Work in sections and vary pressure for organic texture. Let dry 2–4 hours.
- If edges are sharp, sand lightly and touch up base color.
- Seal with gloss varnish for durability; allow 24 hours cure.
How to Display or Gift It
Tactile bowls are beautiful as decorative catchalls. For gifting, wrap with cotton batting in a shallow box to protect raised texture.
- Botanical Leaf Imprint
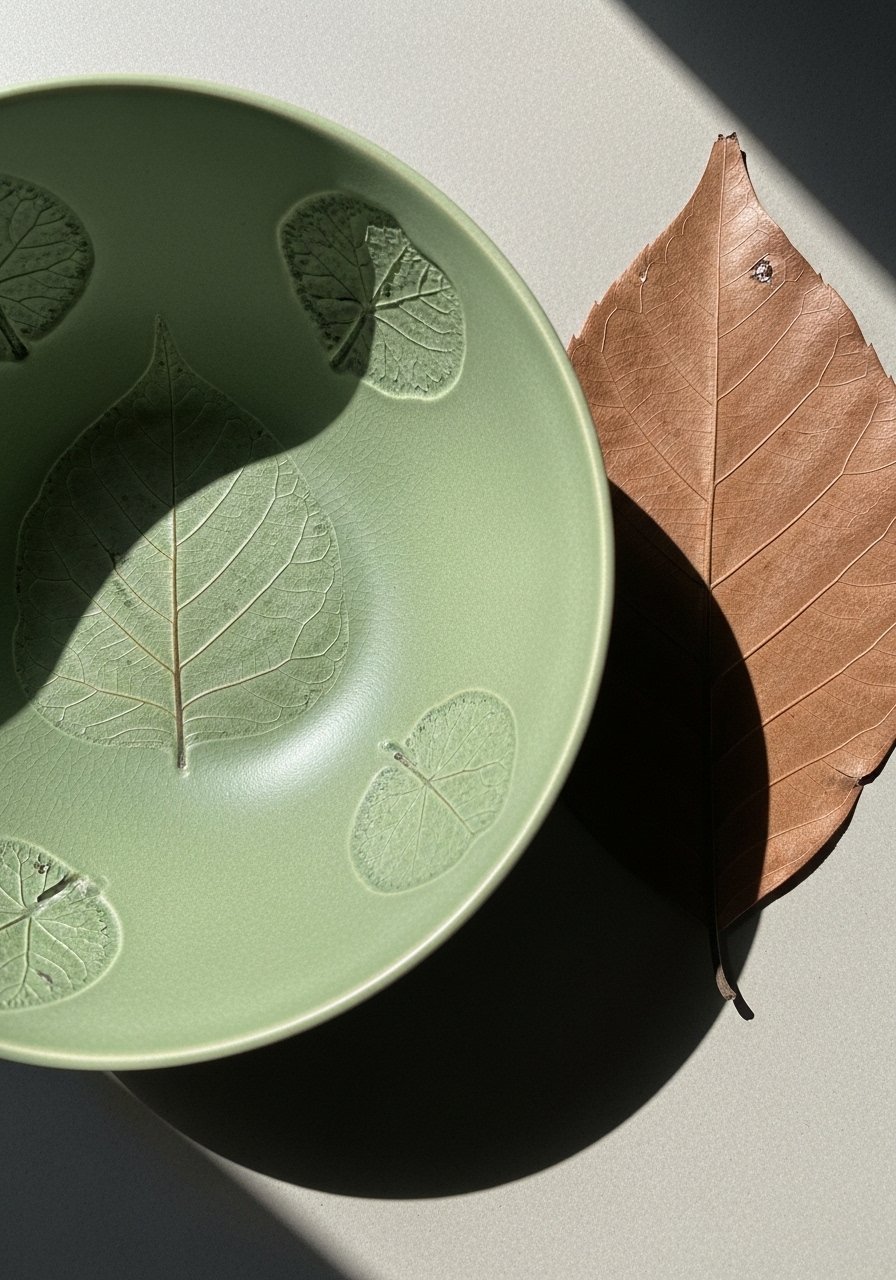
Imprinting real leaves gives organic patterns that feel hand-pressed. Use thin leaves and gently press them into a wet paint layer.
I press leaves and then roll them with a small brayer roller to ensure good transfer.
Materials
- Ceramic bowl, 7–8"
- Acrylic paint thinned slightly
- Fresh or dried thin leaves
- Small brayer roller
- Palette and cloth
- Matte sealer
Instructions
- Paint a thin base color and let it become tacky (10–15 minutes).
- Apply a thin layer of contrasting paint where you’ll place the leaf. Place the leaf paint-side down and roll gently with a brayer.
- Remove leaf slowly to reveal imprint. Repeat around the bowl as desired.
- Allow full dry 1–2 hours and seal with matte varnish.
How to Display or Gift It
Pair with potted herbs or use as a soap dish on a bathroom shelf. Wrap in tissue and add a dried sprig for gifting.
- Night Sky Galaxy Bowl

Galaxy bowls are dramatic and magical. Layer dark blues, purples, and speckled white stars for a cosmic feel.
A small starburst brush or toothbrush helps create star splatter.
Materials
- Ceramic bowl, 7–9"
- Acrylics: deep navy, indigo, purple, black
- White acrylic or acrylic ink for stars
- Small sponge and toothbrush
- Gloss varnish or epoxy resin for depth
Instructions
- Base coat with black or deep navy. Let dry completely (30–60 minutes).
- Sponge in layers of indigo and purple, blending softly.
- Flick white paint with a toothbrush to create stars. Add clusters with a fine brush.
- For a glassy night-sky finish, seal with epoxy resin and cure 72 hours. If not using resin, use gloss varnish and allow 24 hours.
How to Display or Gift It
These look fantastic on bedside tables or as statement centerpieces. Gift in a deep-box with tissue and a handwritten star map.
- Terrazzo-Inspired Dots
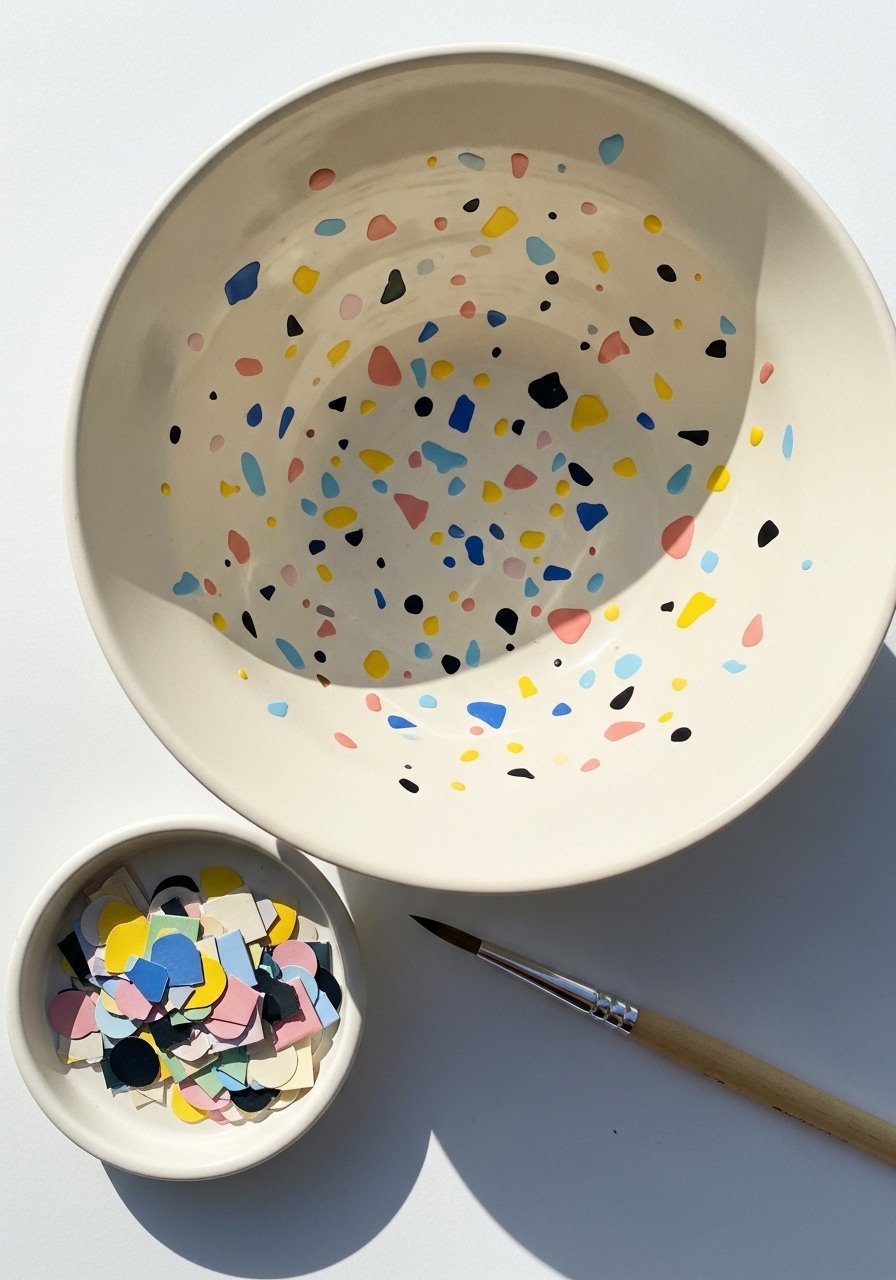
Terrazzo dots are modern and playful. Paint tiny, irregular chips in contrasting colors for a terrazzo effect.
A dotting tool set speeds up consistent shapes.
Materials
- Ceramic bowl, 6–8"
- Assortment of acrylic paint colors (4–6)
- Dotting tool or fine round brush size 1
- Palette
- Matte sealer
Instructions
- Paint base color and allow to dry 30–60 minutes.
- Using dotting tools or a size 1 brush, paint small irregular chips across the surface. Vary colors and sizes.
- Allow pieces to dry 30–60 minutes and fill gaps as needed.
- Seal with matte varnish and allow 24 hours cure.
How to Display or Gift It
Terrazzo bowls add a pop to neutral kitchens. Store flat in a craft drawer until varnish fully cures.
- Metallic Splatter — ceramic bowl painting ideas for glitz

Metallic splatter gives a celebratory feel without being over the top. Use metallic paints and a toothbrush or splatter brush.
I use a metallic acrylic set for consistent shimmer.
Materials
- Ceramic bowl, 6–8"
- Metallic acrylic paints (gold, copper), 10–15 ml each
- Old toothbrush or splatter brush
- Painter’s tape to protect underside
- Gloss sealer or resin for extra shine
Instructions
- Paint base color. Let dry 30–60 minutes.
- Thin metallic paint slightly for splattering and test on scrap.
- Flick paint with toothbrush to create fine splatters. For larger droplets, hold brush further away.
- Allow paint to dry 1 hour, then apply gloss sealer or resin and cure 72 hours for resin.
How to Display or Gift It
A metallic-splattered bowl makes a festive gift. Pair with gourmet chocolates and place in a small gift box with tissue.
- Farmhouse Gingham Trim
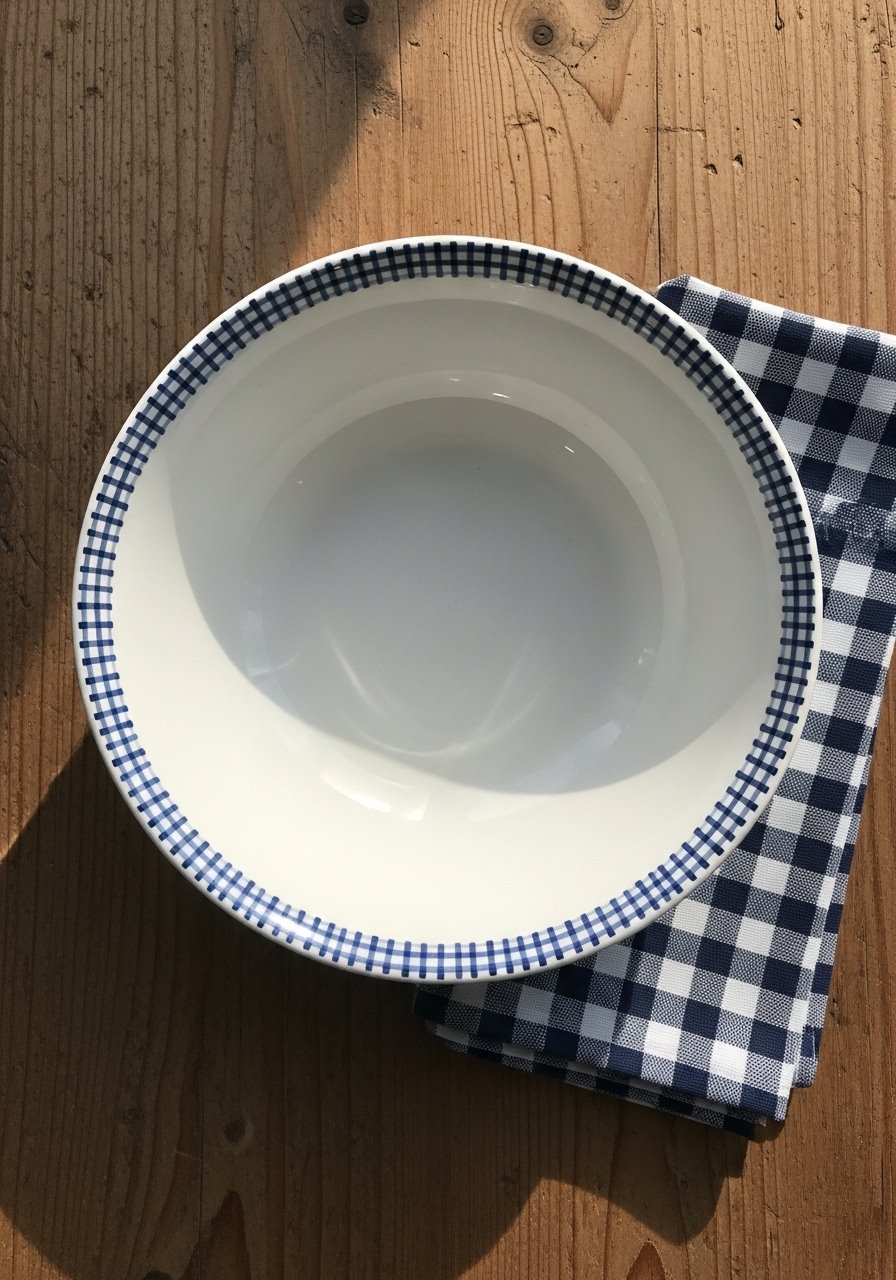
Gingham trim adds cozy farmhouse charm. Small checks require steady painting but are forgiving.
A small grid stencil set helps if you want perfect squares.
Materials
- Ceramic bowl, 7" diameter
- Acrylic paints: navy and white
- Tiny flat brush size 0
- Pencil and ruler or small grid stencil
- Matte sealer
Instructions
- Mark rim grid lightly with pencil or align stencil.
- Paint alternating squares with navy. Let dry 15–30 minutes.
- Fill white squares as needed for crisp contrast. Touch up edges.
- Seal with matte sealer and allow 24 hours cure.
How to Display or Gift It
Gingham bowls are great for brunch tables. Wrap with tissue and a gingham ribbon for gifting.
- Coastal Sea Glass Wash

Sea glass washes create soothing coastal vibes. Layer translucent glazes and finish with satin varnish.
Use a translucent glaze medium for soft blending.
Materials
- Ceramic bowl, 7–9"
- Acrylic paints (aqua, seafoam, pale blue)
- Glaze medium or flow medium
- Soft flat brush sizes 6 and 10
- Satin varnish
Instructions
- Mix each color with glaze medium for translucency.
- Apply thin washes starting from the rim and blend inward. Work quickly to avoid harsh lines.
- Layer 2–3 washes, allowing 15–30 minutes between layers.
- Seal with satin varnish after 24 hours for a soft sheen.
How to Display or Gift It
Pair with seashells for a coastal vignette. For gifting, include a small sachet of sea glass.
- Faux Clay Finish (Matte Terra)

Create a clay-like surface on factory-made ceramics with layered matte paints and light sanding. The result feels earthy and handcrafted.
I use satin-to-matte acrylics for this technique.
Materials
- Ceramic bowl, 8" diameter
- Matte terra paint, 30 ml
- Fine sanding sponge
- Flat foam brush
- Matte sealer (non-gloss)
- Lint-free cloth
Instructions
- Apply a thick base coat of terra color with a foam brush. Let dry 1 hour.
- Sand gently to remove sheen and create a clay-like texture. Wipe clean.
- Apply a thin second coat, then sand lightly for surface variation.
- Seal with matte sealer and allow 24 hours cure.
How to Display or Gift It
These bowls fit well with woven placemats and wooden serving tools. Wrap with kraft tissue and a twine bow.
- Kid-Friendly Dot Mandala
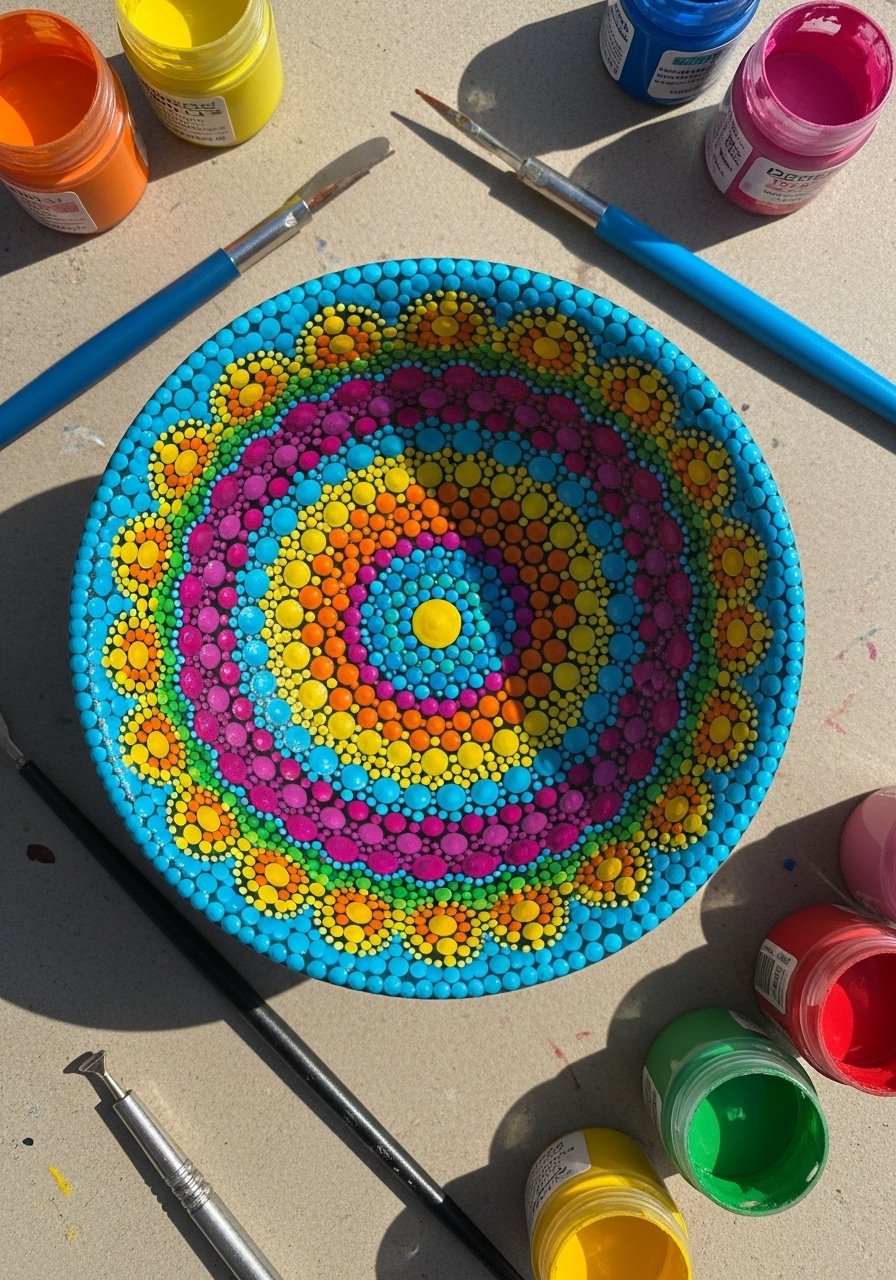
Dot mandalas are therapeutic and simplify complex-looking results into repeatable dot patterns. A perfect weekend craft with kids.
Try a dotting tool set like this dotting tool set.
Materials
- Small ceramic bowl, 4–6"
- Assorted acrylic paints
- Dotting tools (various sizes)
- Pencil and ruler to mark concentric circles
- Matte varnish
Instructions
- Mark central point and concentric rings lightly with pencil.
- Dip dotting tool in paint and press dots along rings. Start center and work outward.
- Vary dot sizes for pattern interest. Allow 10–20 minutes drying between color changes.
- Seal with matte varnish and allow 24 hours cure.
How to Display or Gift It
These make adorable party favors. Pack in small kraft boxes with a ribbon and a mini paint set for recipients.
- Monogrammed Initial Bowl
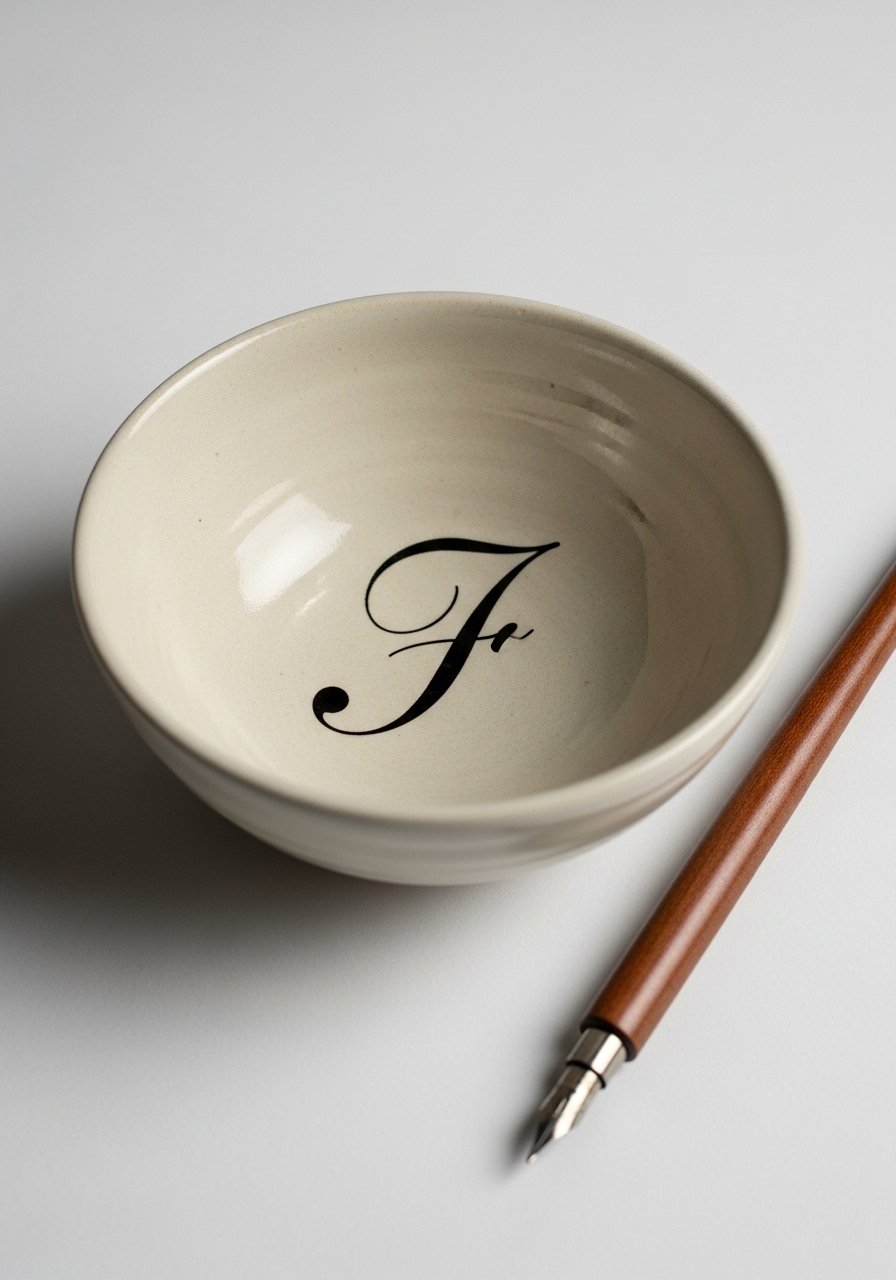
Monogrammed bowls are timeless gifts for weddings or housewarmings. Combine calligraphy with subtle decoration for a boutique look.
I like using a calligraphy paint pen for crisp initials.
Materials
- Ceramic bowl, 6–8"
- Calligraphy paint pen or fine-tip paint pen
- Pencil and carbon transfer paper (optional)
- Ruler for placement
- Satin varnish
Instructions
- Center and pencil your chosen initial. Use transfer paper if tracing a font.
- Trace with the calligraphy paint pen in one confident stroke. Allow 30–60 minutes to dry.
- Touch up as needed and wait until fully dry.
- Seal with satin varnish and cure 24 hours.
How to Display or Gift It
Monogram bowls make lovely bridal or graduation gifts—wrap in a kraft box with tissue and a handwritten card.
- Seasonal Pumpkin Spice Bowl (Autumn)
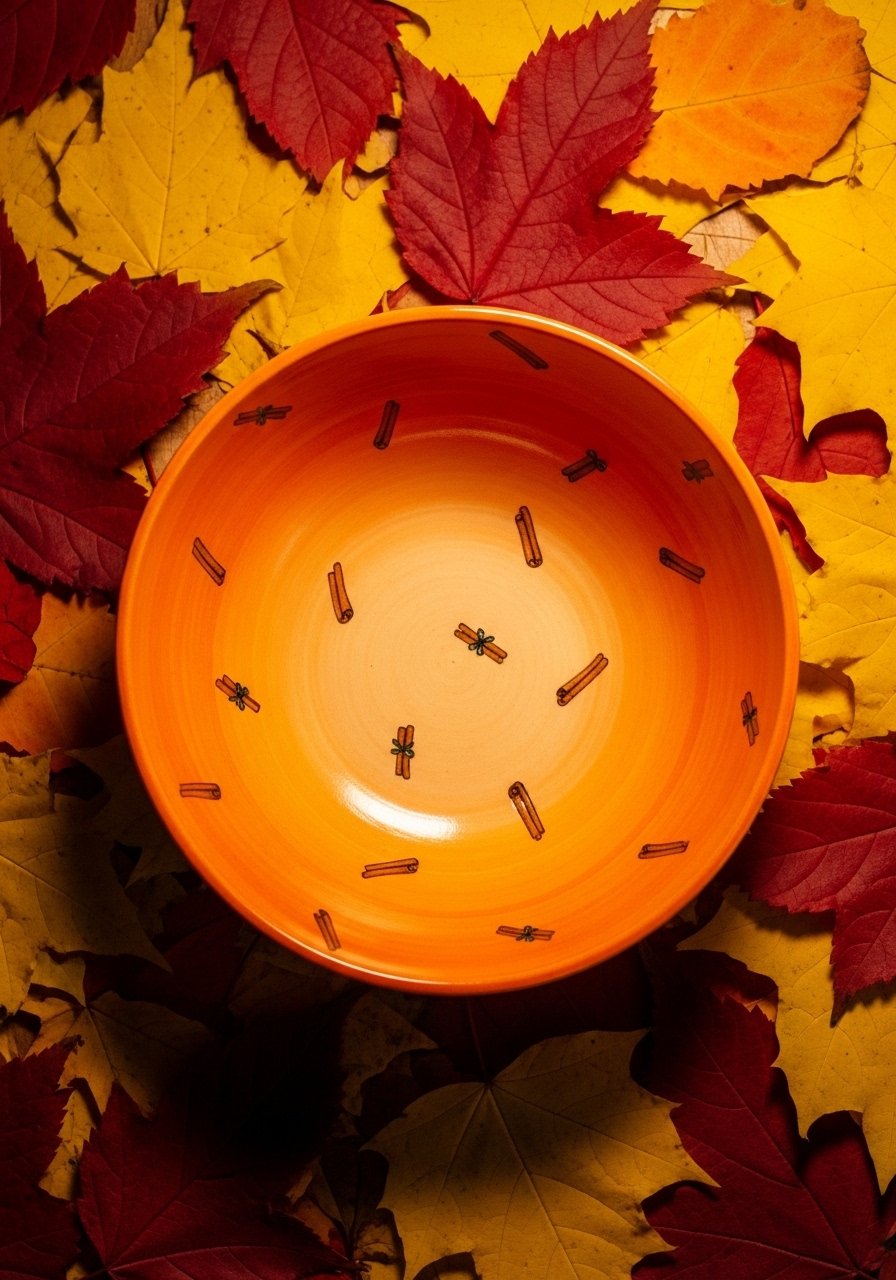
Celebrate fall with warm tones and little seasonal motifs. This bowl is cozy for serving nuts, candies, or small sides.
Use a warm acrylic set like this autumn acrylic paint set for rich hues.
Materials
- Ceramic bowl, 6–8"
- Acrylic paints: pumpkin orange, cinnamon brown, cream
- Small round brushes sizes 0 and 2
- Palette
- Matte sealer
Instructions
- Paint an ombre base from cream to pumpkin; let dry 30–60 minutes.
- Add cinnamon stick motifs with a size 0 brush. Layer for depth.
- Allow paint to dry 1–2 hours, then seal with matte varnish. Cure 24 hours.
How to Display or Gift It
Fill with seasonal candies or a small candle (battery-operated) for a fall hostess gift. Wrap in kraft tissue with a cinnamon stick tucked in.
- Resin River Inlay Bowl

For makers comfortable with resin, an inlay creates a high-end look. Use a two-part epoxy resin mixed 1:1 by volume and follow safety directions.
I recommend a clear epoxy like ArtResin epoxy kit for ease of use.
Materials
- Ceramic bowl, 8–10"
- Two-part epoxy resin kit (1:1 mix), enough for surface inlay
- Pigment powders or alcohol inks for color
- Mixing cups and stir sticks
- Disposable gloves and respirator mask
- Small torch or heat gun to pop bubbles
- Painter’s tape and foam support to level bowl
Instructions
- Clean and level the bowl. Tape underside to protect. Create a shallow trough if desired using painter’s tape as a dam.
- Mix resin 1:1 by volume per kit instructions for 3–5 minutes, scraping sides and bottom. Add pigments.
- Pour resin carefully into the trough. Use a stir stick to guide flow.
- Remove bubbles with a small torch passed quickly or a heat gun for five seconds.
- Let cure undisturbed for 24–72 hours depending on resin. Sand and polish edges if necessary.
- Final cure is achieved after 72 hours; piece will be firm and glassy to the touch.
How to Display or Gift It
Resin-inlay bowls are statement pieces—display on an easel or pedestal. For gifting, include care instructions to avoid microwave or dishwasher use.
Thank you for exploring 25 creative ceramic bowl painting ideas—you’ve just seen simple painted rims, textured brushwork, stenciled geometrics, dishwasher-friendly baked-on paints, and show-stopping resin inlays. There’s a project here for every mood and skill level, whether you like delicate cottagecore florals or bold galaxy art. Save or pin this list for later so you can come back when a blank bowl calls your name.
Which style are you trying first? Share a photo or save this pin for gifting ideas. If you’re stocking a starter kit, a versatile detail brush set and a reliable painter’s tape make many of these projects faster and prettier — I reach for them all the time.





