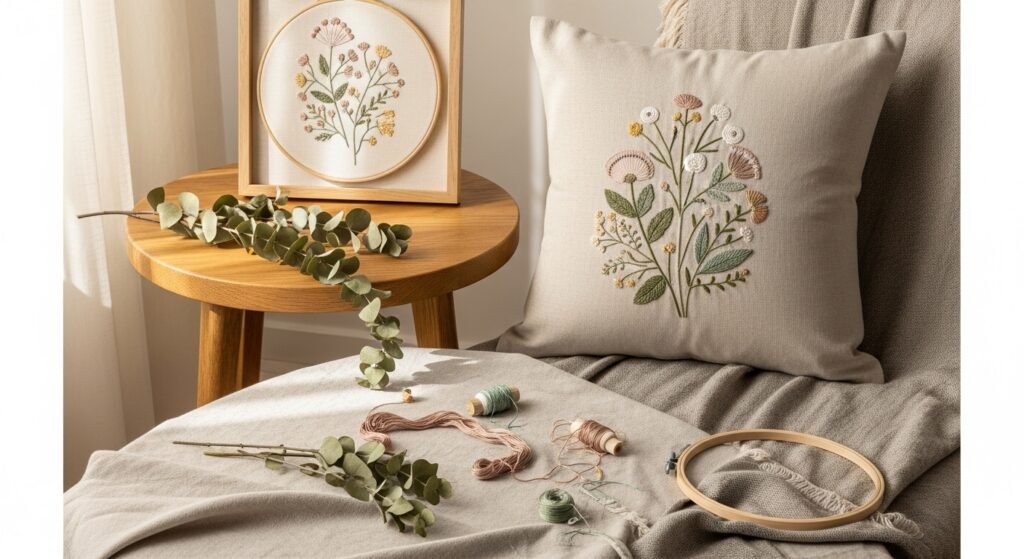
Brightening a room with handcrafted details is one of the simplest ways to make a house feel like yours. These 29 magical projects use computer embroidery designs for home decor to add personality, texture, and color to every corner. Whether you're working from a digitized design on a hoop or embellishing a hand-sewn piece with a machine, you'll find ideas from quick kitchen swaps to heirloom-worthy gifts.
I start many projects by stabilizing fabric and loading a crisp design into my embroidery machine. For small cuts I keep a precision craft knife nearby and for finishing seams I favor a temperature-control hot glue gun for tidy joins. Read on for step-by-step instructions, exact materials, and styling tips so you can stitch pieces that look boutique-level but feel very much like you.
- Linen Floral Throw Pillow (Computer Embroidery Accent)

This pillow pairs a clean linen cover with a detailed computer embroidery floral motif. The embroidery gives crisp lines and professional fill stitches, perfect for a sofa or guest bed. Beginners will like the forgiving linen texture; advanced stitchers will appreciate custom colorways.
Materials
- 1 pre-washed natural linen pillow cover 18 x 18 in
- 1 computer embroidery design (200–300 mm width)
- 1 piece tear-away stabilizer 10 x 10 in
- Embroidery thread (rayon or polyester), 50 wt, assorted colors (6–8 floss colors)
- Bobbin thread, white, polyester
- 1 180–200 mm embroidery hoop
- Polyester pillow insert 18 x 18 in
- Water-soluble fabric marker
- Small scissors and snips
Instructions
- Center the design on the front panel and mark with a fabric marker. Test placement by hooping a scrap of linen first.
- Hoop the linen with tear-away stabilizer under it. Tighten until fabric is drum-tight.
- Load design into your embroidery machine and thread with the first color. Use 50 wt polyester thread for sheen and durability.
- Stitch following the machine prompts. Change bobbin as needed. Typical stitch time: 12–20 minutes depending on density.
- When finished, carefully remove hoop and tear stabilizer away. Trim jump threads and secure thread ends with small knots or a drop of fabric glue.
- Press over a cloth at low heat to remove hoop marks; avoid steaming directly on dense satin stitches.
- Insert the pillow form and close the cover (zipper or hidden seam).
How to Display or Gift It
- Style on a layered sofa with one solid pillow behind it and a knitted lumbar piece in front.
- Wrap as a gift in kraft paper and tie with twine; tuck in a dried lavender sprig.
- Store extra pillow forms in a breathable fabric storage tote to keep them plump.
- For cleaning, spot-wash with gentle detergent; avoid machine agitation over dense embroidery.
- Monogram Hoop Art for Gallery Wall
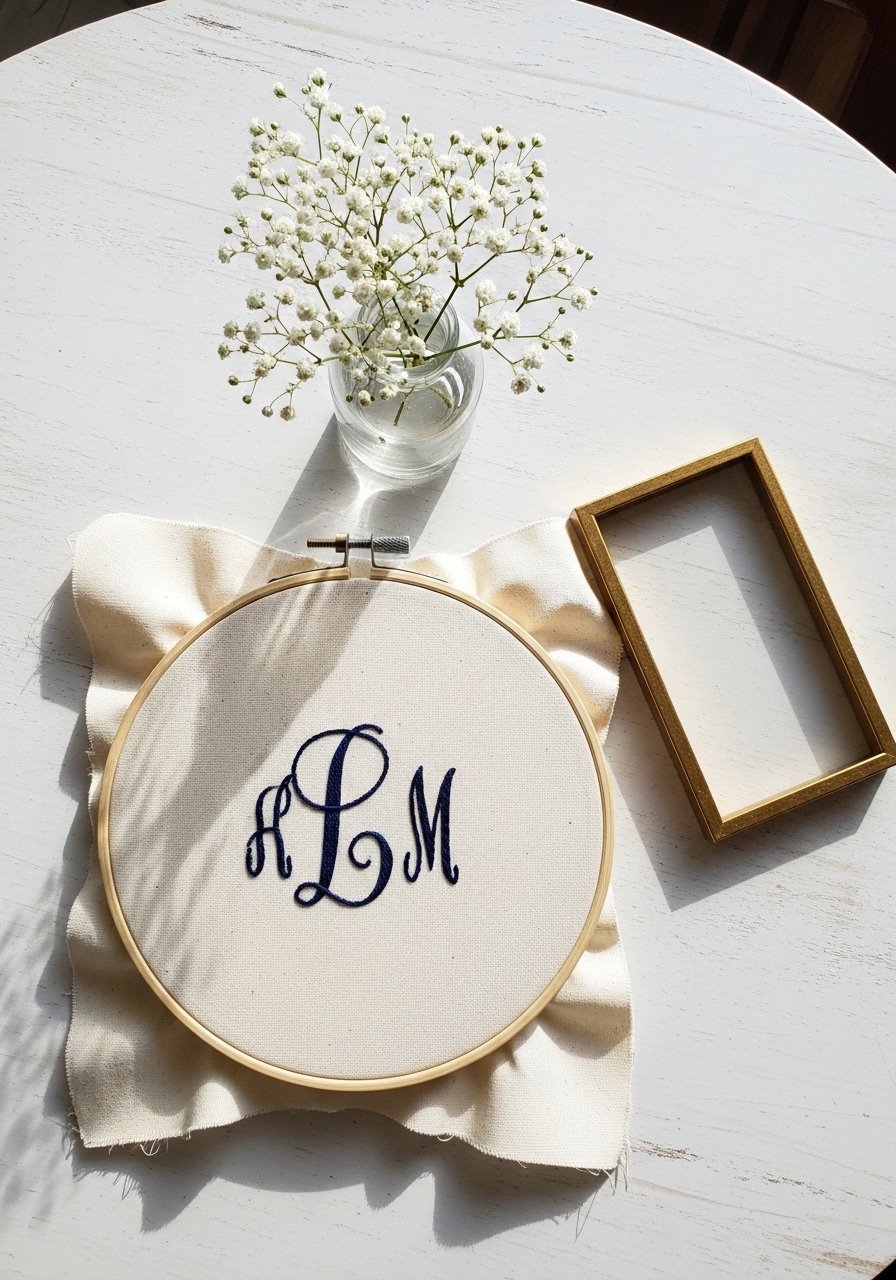
A classic monogram hoop with a computer-embroidered script adds personalized charm to a gallery wall. Machine lettering gives even satin stitches that read cleanly at a distance. Great for gift-givers or new homeowners.
Materials
- 1 cotton fabric square 10 x 10 in
- 1 wooden embroidery hoop 8 in (inner diameter)
- Computer monogram design (approx 150 mm height)
- Tear-away stabilizer 12 x 12 in
- Embroidery thread 40–50 wt (1–2 colors)
- Small embroidery scissors
- 3M Command strip picture hanger (for wall)
- Optional: thin batting square 8 in for slight puff
Instructions
- Hoop fabric with stabilizer and align monogram to hoop center.
- Load design and stitch at recommended density. Use satin stitch for bold letters and running stitch for decorative outlines.
- Remove from hoop, trim stabilizer. If you used batting, place behind fabric and smooth.
- Re-tighten fabric in the hoop for display, trimming excess cloth to 1 in and securing with hot glue to the inside of the hoop.
- Press lightly on the front to remove creases without flattening satin stitches.
How to Display or Gift It
- Arrange several sizes and finishes on a wall for a layered look.
- Attach a small hanging loop to the hoop back or use a picture hanger.
- Wrap in tissue and present in a slim kraft box for a high-end feel.
- Embroidered Tea Towels with Botanical Motifs
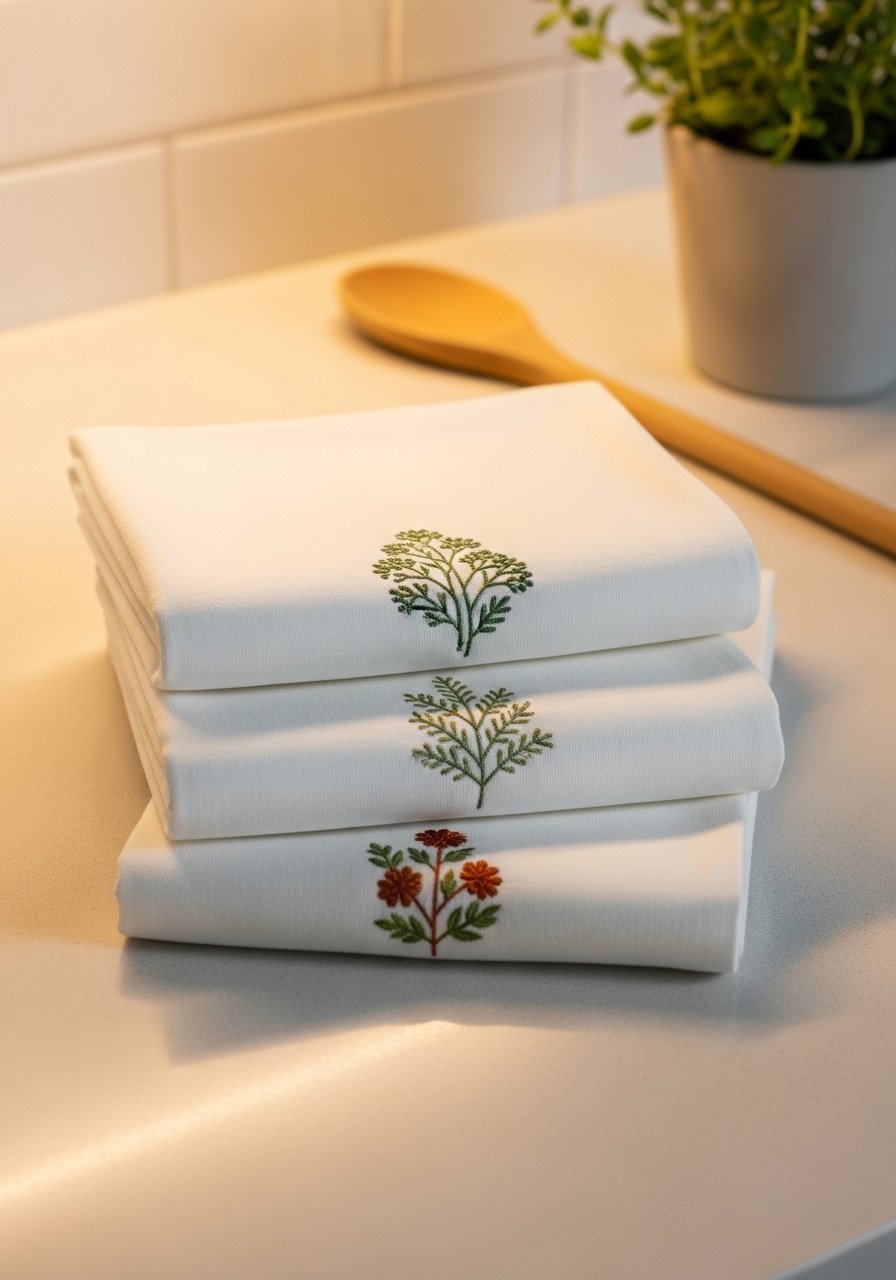
Embroidered tea towels are quick to stitch and instantly upgrade a kitchen. Computer embroidery designs give consistent motifs across multiple towels—great for sets.
Materials
- 3 cotton tea towels (18 x 28 in)
- Tear-away stabilizer 18 x 8 in
- Embroidery thread set 50 wt (greens and neutrals)
- Crosswise placement ruler
- 1 medium hoop 130–160 mm
- Iron and pressing cloth
- Thread snips
Instructions
- Pre-wash towels and press flat. Mark designs 2 in from hem and centered.
- Hoop towel section with stabilizer; you may need to stitch in the machine’s hoop arm (use a smaller motif).
- Stitch motifs—each should take 6–12 minutes.
- Remove stabilizer; press gently from the back through a cloth to avoid flattening texture.
- For sets, repeat the process using the same design file to ensure uniformity.
How to Display or Gift It
- Fold and tie with ribbon; tuck a wooden spoon into the ribbon for gifting.
- Hang on a towel bar or wooden peg rail to show off stitching.
- Store flat in a linen drawer to keep embroidery crisp.
- Seasonal Quote Pillow Panel
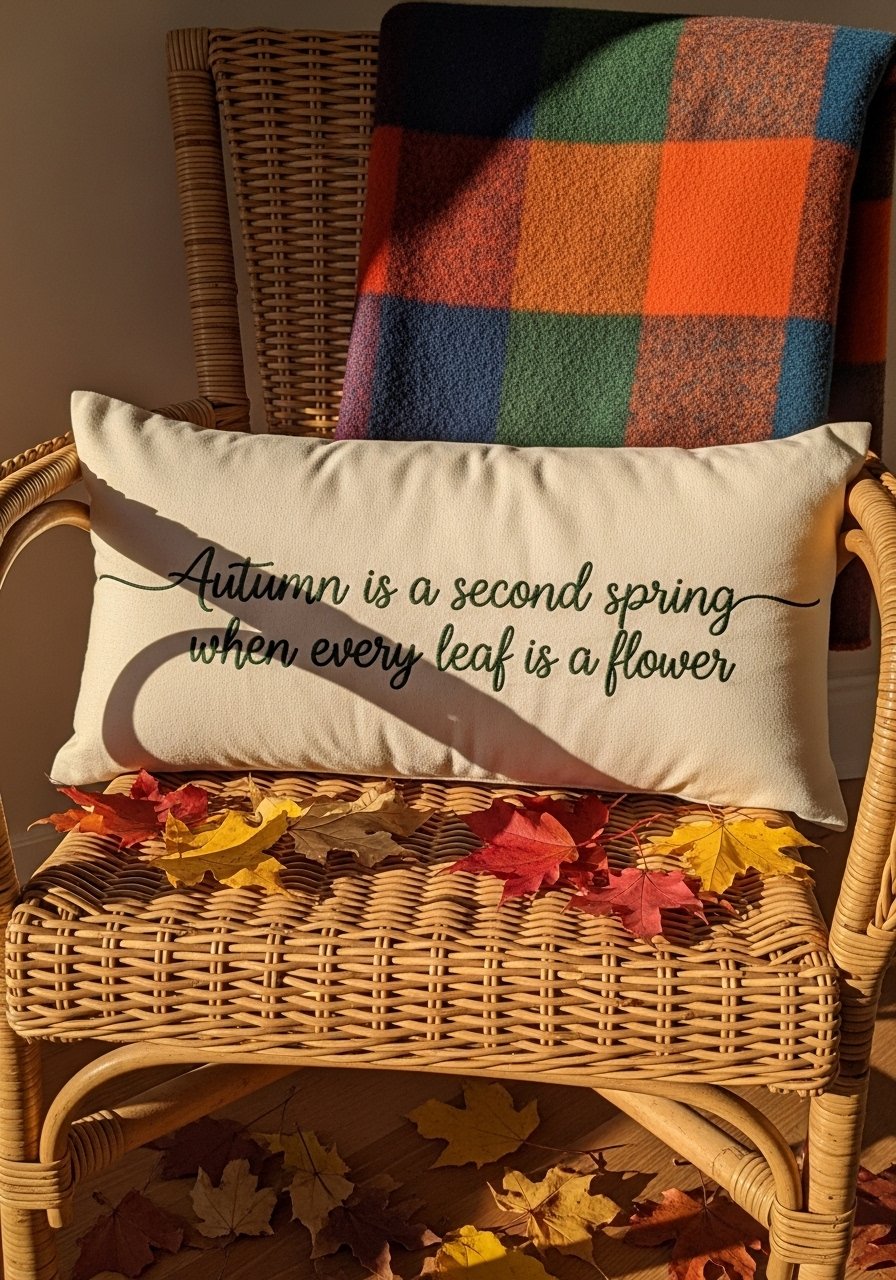
A quote pillow gives seasonal flair. Computer embroidery keeps lettering consistent and legible even in script fonts.
Materials
- Pillow panel 12 x 20 in (front only)
- Computer quote design (150–250 mm width)
- Tear-away stabilizer 12 x 20 in
- Embroidery thread 50 wt in 1–2 colors
- Fabric pen for centering
- Zipper or envelope back closure 12 in
Instructions
- Choose a short phrase (8–12 words max). Center-mark the fabric.
- Hoop with stabilizer and stitch. Watch for dense lettering which may need a topping layer.
- Check that satin stitches are smooth; if puckering appears, switch to a heavier stabilizer.
- Attach back and finish seams. Insert pillow form.
How to Display or Gift It
- Mix with textured pillows for seasonal vignette.
- Add a removable pillow cover option for laundry.
- Gift with a matching tea towel set.
- Botanical Wall Hanging on Driftwood

Combine neutral canvas with embroidered botanicals for a relaxed, cottagecore vibe. Driftwood adds organic texture.
Materials
- Canvas strip 10 x 24 in
- Driftwood or wooden dowel 24 in
- Computer wildflower set (3–5 small motifs)
- Tear-away stabilizer 12 x 26 in
- Cotton embroidery thread set
- Jute twine for hanging 2 ft
- Fabric glue or hot glue
Instructions
- Plan motif spacing: place three or five motifs evenly down the canvas.
- Hoop and stitch each motif, re-hooping as needed, using the same stabilizer type.
- After stitching, press from the back and trim excess stabilizer.
- Fold top of canvas over dowel and glue or sew a channel. Insert driftwood.
- Tie jute twine for hanging.
How to Display or Gift It
- Hang above a reading nook or entryway bench.
- Pair with a framed pressed flower.
- Ship flat in a rigid mailer if gifting.
- Embroidered Linen Napkin Set
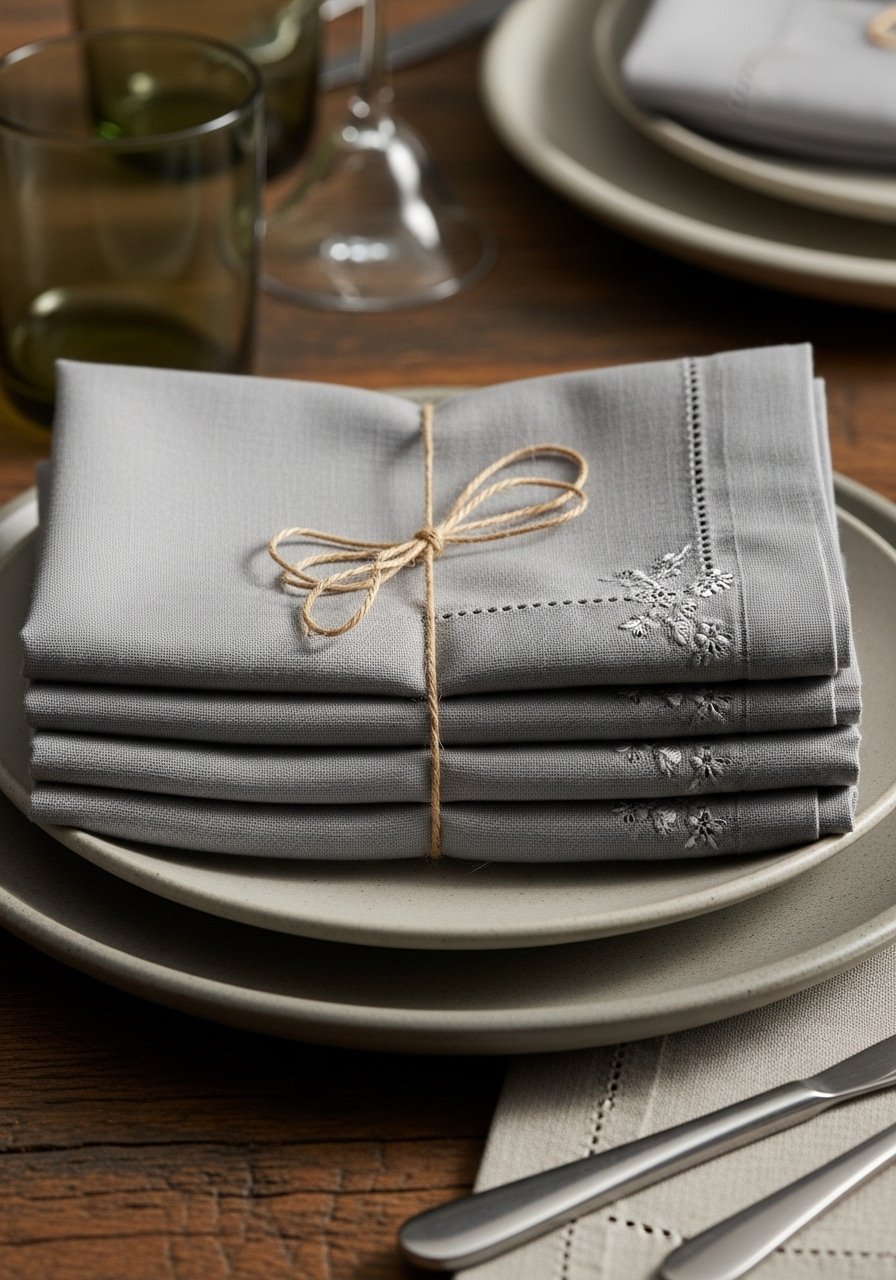
Small corner embroideries on linen napkins bring quiet luxury to the table. Machine embroidery speeds up creating matching sets.
Materials
- 4 pre-washed linen napkins 20 x 20 in
- Tear-away stabilizer 8 x 8 in per corner
- Small corner motif design 40–60 mm
- Embroidery thread 50 wt
- Iron and starch (optional)
- Clips or pins for hooping narrow fabric
Instructions
- Press napkins and mark corner placement 1 in from edges.
- Hoop each corner using a small hoop or use a magnetic hoop for thick linen.
- Stitch motifs; a simple motif should finish in 3–6 minutes each.
- Remove stabilizer and press with steam if linen allows.
- Stack neatly and tie with twine if gifting.
How to Display or Gift It
- Pair with simple ceramic dinnerware for a farmhouse table.
- Store flat to avoid fold creases in embroidery.
- Make sets for seasonal color swaps.
- Rustic Basket Labels (Embroidered)

Label storage baskets with embroidered tags for organized, pretty shelves. Computer embroidery gives neat text across multiple tags.
Materials
- Cotton canvas strips 3 x 6 in (6 tags)
- Computer font design or word files (40–60 mm)
- Tear-away stabilizer 4 x 6 in
- Eyelets and setter kit (optional)
- Jute twine 1 mm, 6 x 6 in lengths
- Hot glue and small scissors
Instructions
- Draft words and size to fit tags. Hoop each canvas with stabilizer.
- Stitch names using a clear, single-color thread for readability.
- Apply eyelets or fold and glue ends before threading twine.
- Secure with a small dot of hot glue to keep tags flat.
How to Display or Gift It
- Attach to woven bins on open shelving or closet baskets.
- Use as gift tags on handmade baskets.
- Store extra tags flat between cardboards.
- Framed Geometric Hoop Art

Geometric designs look modern in frames. Computer embroidery ensures perfect angles and fill consistency.
Materials
- Cotton fabric 8 x 8 in
- Computer geometric design (approx 150 mm)
- Hoop for stitching and a frame 8 x 8 in
- Tear-away stabilizer
- Black polyester thread 50 wt
- Small wooden frame backing or matboard
Instructions
- Hoop fabric, center design, and stitch. Back with light batting if you want depth.
- Trim fabric to fit frame, secure to matboard with spray adhesive or glue.
- Insert into frame and close.
How to Display or Gift It
- Combine with botanical hoops for a mixed gallery.
- Use a small wooden easel for shelf display.
- Wrap in tissue and place in a slim gift box.
- Nursery Animal Embroidery Panel

Child-safe, machine-stitched animal panels make sweet nursery decor. Choose designs with low-density stitches for washability.
Materials
- Muslin panel 12 x 16 in
- Child-friendly embroidery design (100–150 mm)
- Tear-away stabilizer
- Polyester thread (washable) 50 wt
- Soft wooden dowel and cord for hanging
- Fray-check fabric adhesive
Instructions
- Use washable polyester thread and medium stabilizer to ensure durability through laundering.
- Stitch design. Avoid metallic threads or beads for baby items.
- Trim backing and finish edges with fray-check if muslin unravels.
- Hem top to insert dowel and hang.
How to Display or Gift It
- Hang above a changing table or bookshelf.
- Wash on gentle cycle before gifting and include care card.
- Store in cotton gift bag for transport.
- Personalized Door Name Plaque

Textile name plaques combine wood and embroidery for an approachable customized sign. Computer lettering looks crisp against painted wood.
Materials
- Wooden plaque blank 8 x 12 in
- Cotton fabric label 6 x 10 in
- Computer name design (200 mm width)
- Tear-away stabilizer
- Acrylic paint (chalk finish) and brush
- E6000 glue or wood glue
- Hanging hardware and twine
Instructions
- Paint plaque and allow 24 hours cure time for chalk paint before handling.
- Hoop and stitch name on fabric, press, and secure to plaque with glue.
- Add hanging hardware and let glue cure 24 hours.
How to Display or Gift It
- Hang on bedroom door or nursery wall.
- Pair with matching embroidered key rack.
- Pack in kraft box with tissue paper for gifting.
- Velvet Accent Pillow with Metallic Thread
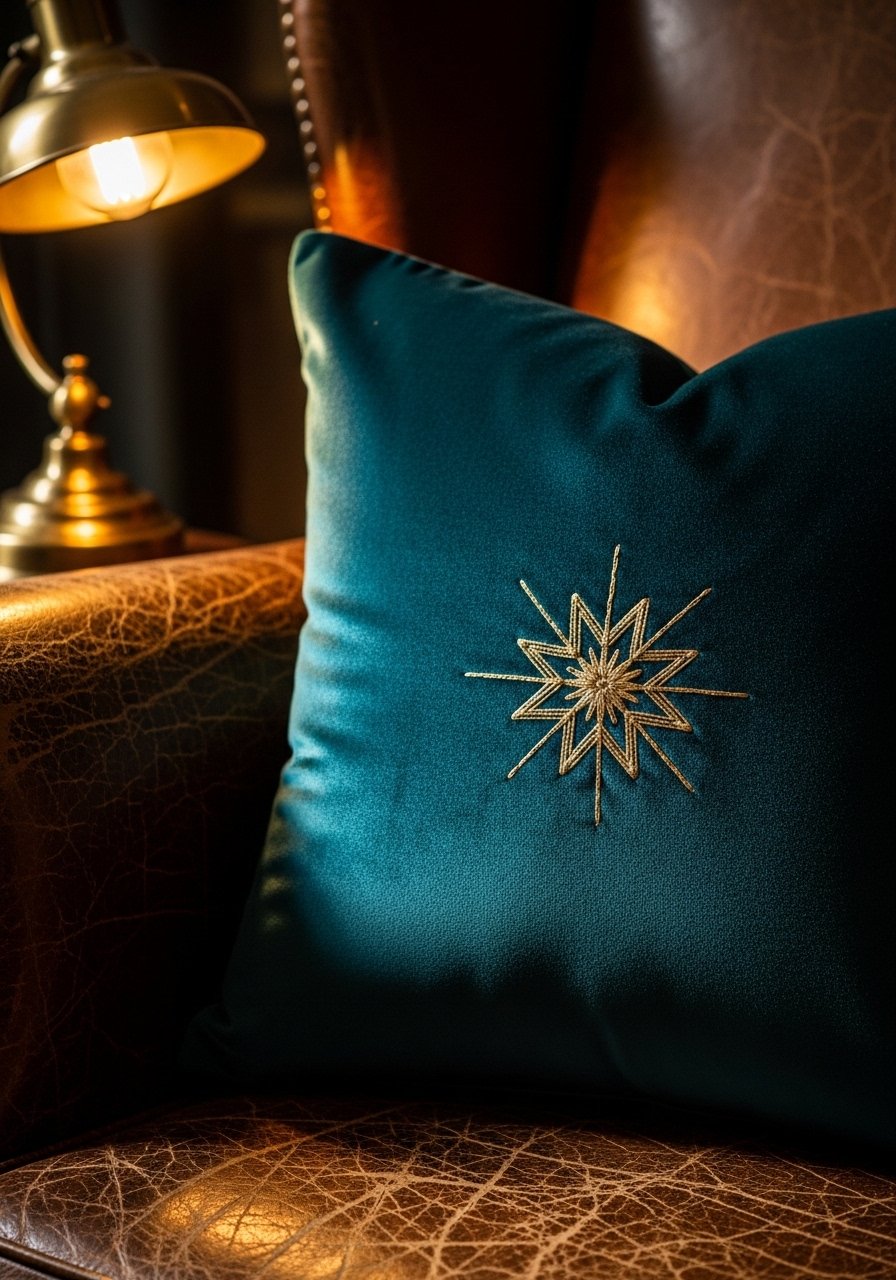
Velvet with metallic embroidery feels luxe. Use a topping to prevent thread sinking.
Materials
- Velvet fabric pillow cover 16 x 16 in
- Metallic embroidery thread (polyester metallic) 40 wt
- Tear-away stabilizer and topping (water-soluble)
- Embroidery design (80–120 mm)
- Small lint roller and pressing cloth
- Pillow insert 16 x 16 in
Instructions
- Hoop using tear-away stabilizer beneath and a water-soluble topping on top of the velvet.
- Stitch slowly with metallic thread tension adjusted to prevent breakage.
- After stitching, remove topping with warm water and blot; let dry 1–2 hours.
- Press from the back through a cloth.
How to Display or Gift It
- Pair with linen pillows to balance sheen.
- Store velvet pillows in breathable bags to avoid crushing pile.
- Embroidered Patch Quilt Block

Use embroidered blocks as focal points in patchwork quilts. Computer embroidery yields consistent centers across blocks.
Materials
- Cotton quilt block 12 x 12 in pre-cut
- Embroidery design centered at 80–100 mm
- Tear-away stabilizer
- Quilt batting and backing fabrics
- Sewing machine for piecing
- Rotary cutter and ruler
Instructions
- Hoop the block center and stitch design.
- Trim stabilizer and piece block into the quilt top.
- Layer with batting and backing; quilt as desired—straight line or echo quilting around motif.
- Bind and finish.
How to Display or Gift It
- Use as a baby quilt gift; wash on gentle cycle.
- Store quilts rolled in cotton sleeves.
- Label the back with maker and date using embroidery.
- Embroidered Lampshade

Adding embroidery to a lampshade creates subtle ambient interest when lit. Keep stitch density low to let light pass.
Materials
- Plain fabric drum lampshade cover 12 x 10 in
- Lightweight embroidery design runners (repeat motifs)
- Water-soluble stabilizer topping
- Polyester thread 50 wt
- Heat-resistant spray adhesive
- Craft scissors
Instructions
- Remove lampshade fabric if possible. Hoop small sections and use a water-soluble topping to stabilize.
- Stitch motifs spaced evenly around shade. Low-density fill or running stitches keep light glowing.
- Rinse away topping and reattach fabric with heat-resistant spray adhesive.
- Let adhesive cure 24 hours before turning lamp on.
How to Display or Gift It
- Use in a bedside lamp for soft patterned light.
- Gift as a paired set with a matching pillow.
- Table Runner with Prairie Motifs

A long runner shows off repeat embroidery designs beautifully. Computer embroidery ensures motifs align perfectly.
Materials
- Linen table runner 14 x 72 in
- Prairie motif set (repeatable at 60–80 mm)
- Tear-away stabilizer for each motif
- Glue basting or pins for hooping sections
- Iron, pressing cloth
Instructions
- Mark centerline and spacing for motifs every 6–8 in.
- Hoop each section and stitch, re-hooping along the runner as you progress.
- Press with steam; press each stitched motif from the back.
- Finish runner edges with double-fold hem and stitch.
How to Display or Gift It
- Use with neutral stoneware and sprigs of eucalyptus.
- Roll and tie with baker’s twine to gift.
- Embroidered Wooden Tray Insert
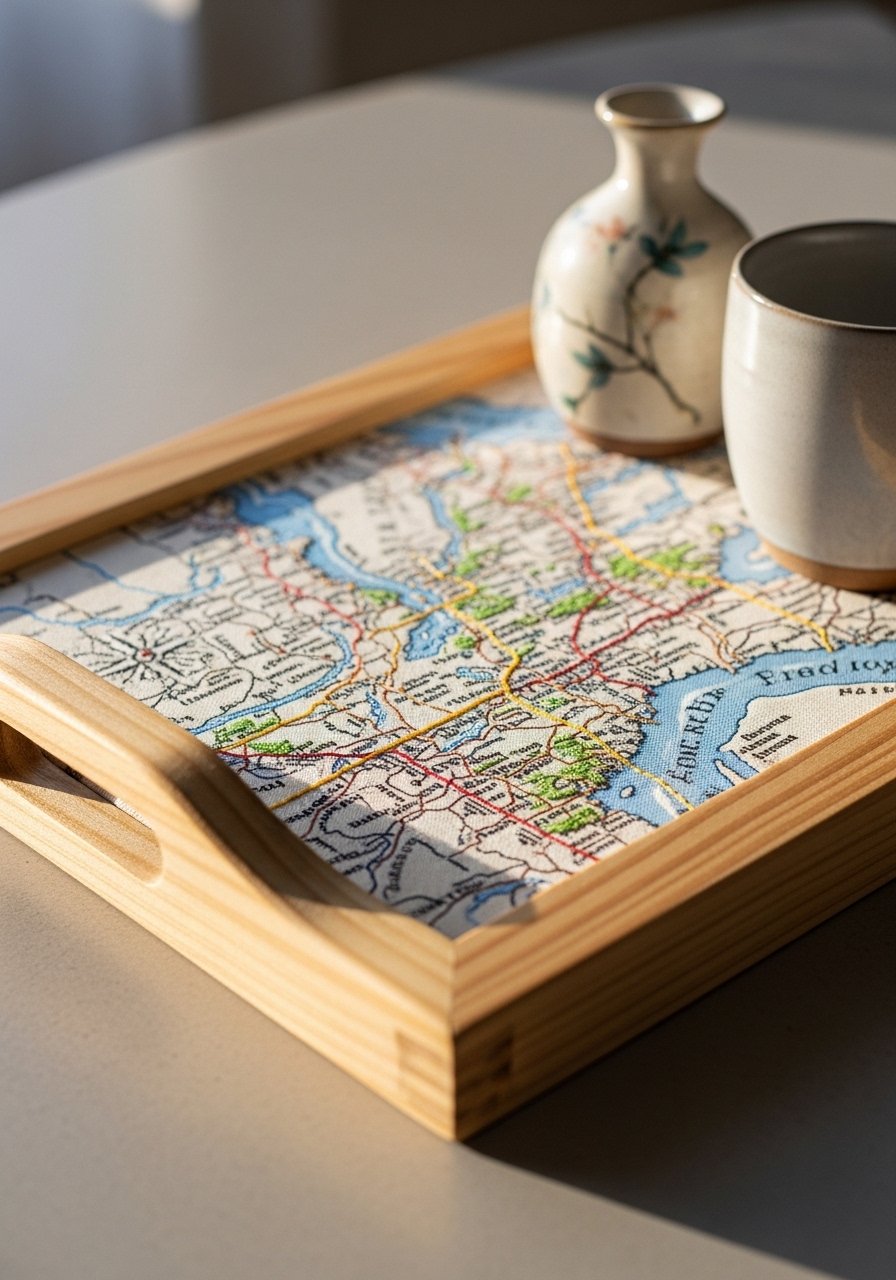
Create a removable fabric insert for a wooden tray to personalize serving pieces. Epoxy or Mod Podge secures the fabric if you want permanent protection.
Materials
- Wooden tray blank 14 x 10 in
- Cotton fabric insert 13 x 9 in
- Embroidery design (map or pattern) 200 mm
- Tear-away stabilizer
- Mod Podge (matte or satin) or epoxy resin kit (optional)
- Foam brush
Instructions
- Hoop fabric and stitch design. Trim stabilizer.
- If permanent, apply a thin coat of Mod Podge and smooth fabric into tray; let dry 24 hours with light weight. For epoxy, follow kit directions and cure times (24–72 hours).
- For removable inserts, hem edges and tuck into tray.
How to Display or Gift It
- Use as a breakfast tray or coffee table accent.
- Wrap tray and tie with ribbon for hostess gifts.
- Vintage Lace Shadow Box with Embroidery

Combine lace and modern embroidery in a shadow box for contrast. Computer embroidery allows small, precise motifs.
Materials
- Shadow box frame 6 x 8 in
- Vintage lace doily
- Small embroidery motif 40–60 mm
- Water-soluble topping
- Acid-free mounting board
- Fabric-safe adhesive dots
Instructions
- Stitch small motif on a scrap of fine cotton with topping.
- Mount motif on acid-free board and layer the doily around it.
- Fit into shadow box and close. Use dots to secure.
How to Display or Gift It
- Add to a mantel grouping with vintage finds.
- Gift as a little keepsake for a friend.
- Embroidered Coasters Set
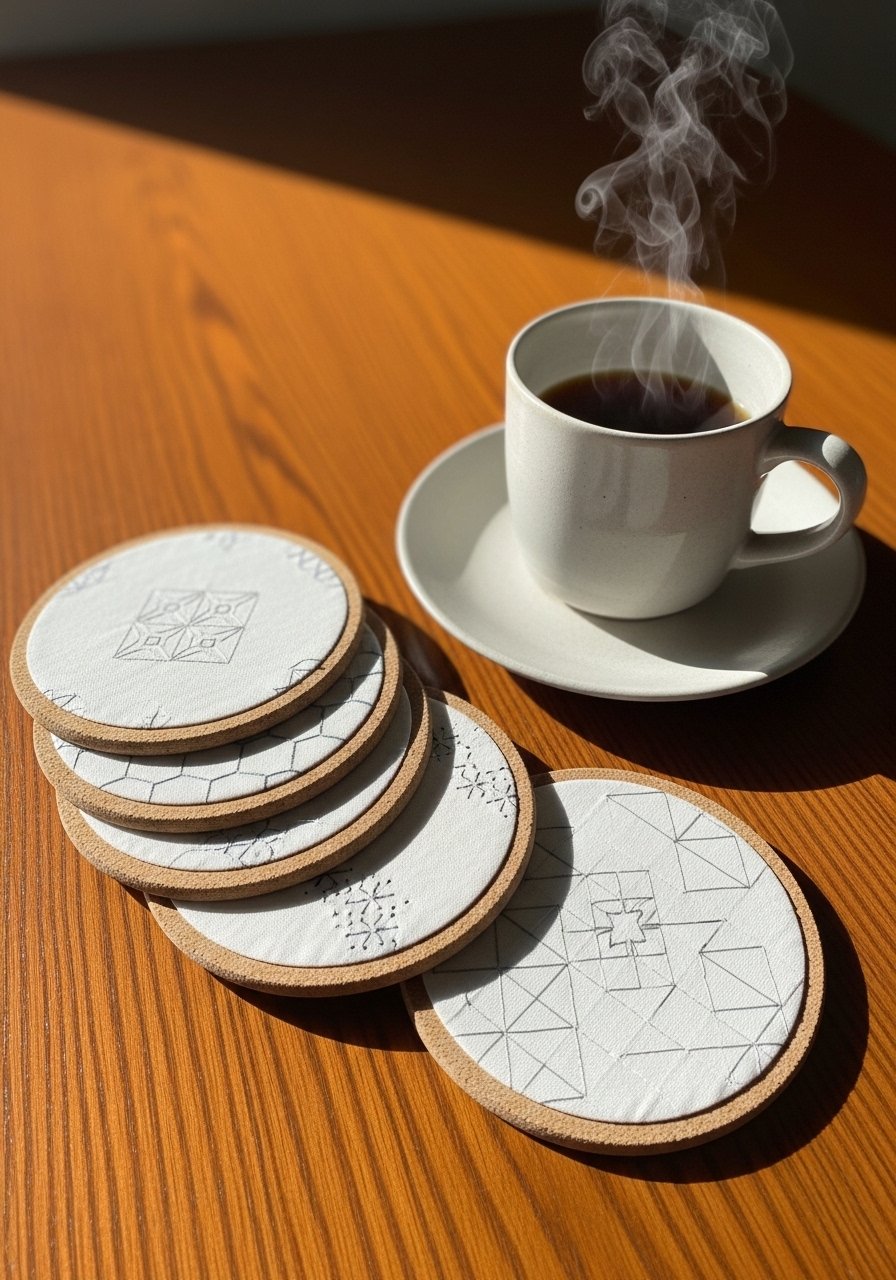
Coasters are a quick project with big visual payoff. Use stabilizer and backing to keep them flat.
Materials
- Cotton/coaster blanks 4 x 4 in or pre-cut coaster circles
- Computer coaster designs 40 mm
- Tear-away stabilizer and lightweight batting rounds
- Rotary cutter and circle template (if cutting)
- Fabric-safe glue or hot glue gun
Instructions
- Hoop coaster fabric with stabilizer and stitch small motif centered.
- Layer batting and backing; stitch around edge with zigzag for durability.
- Trim to shape and press.
How to Display or Gift It
- Tie sets with ribbon, include a small coaster storage box.
- Store flat; avoid stacking while wet.
- Felt and Embroidered Seasonal Garland

Make a seasonal garland with felt flags embroidered for quick swaps across the year.
Materials
- Felt flags 12 (3 x 5 in)
- Computer icon set (approx 30–50 mm)
- Tear-away stabilizer or cut-away depending on stitch density
- Jute twine 6 ft
- Hot glue gun
- Small wooden beads (optional)
Instructions
- Hoop small felt pieces with a stabilizer that suits the stitch density—cut-away for dense designs.
- Stitch icons, attach flags to twine with glue or by sewing a top channel.
- Add wooden beads between flags for spacing.
How to Display or Gift It
- Drape across a mantel or doorway.
- Store flat in a shallow box when out of season.
- Curtain Tiebacks with Embroidered Medallions
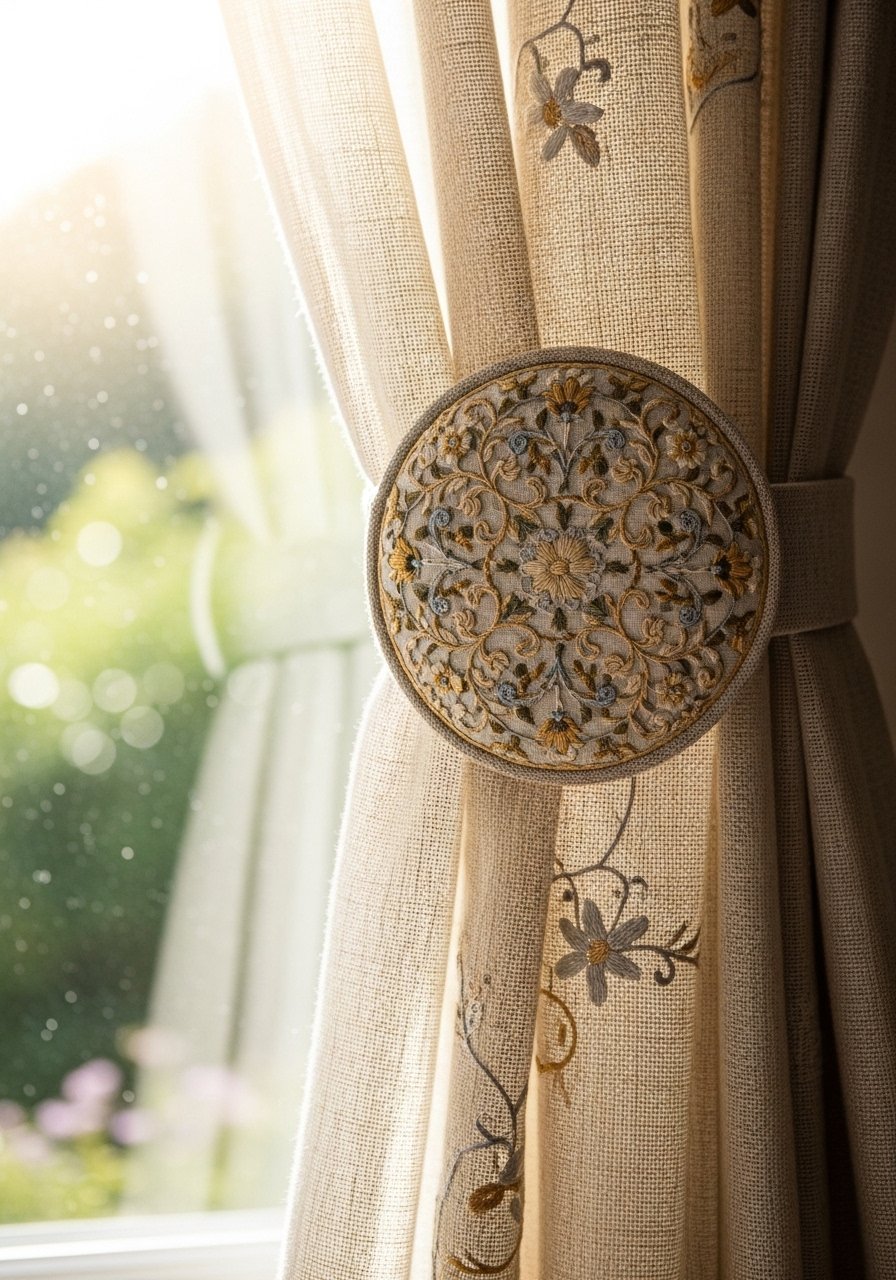
Add embroidered medallions to cloth tiebacks for window detail. Use dense but small motifs.
Materials
- Linen tieback strips 3 x 30 in (2)
- Small round medallion design 70–80 mm
- Tear-away stabilizer and topping
- Hook and loop tape or button closures
- Embroidery thread and needle
Instructions
- Hoop medallion fabric and stitch. Back with felt for stiffness.
- Attach medallion securely to tieback strip with stitches.
- Add closures—buttons or hook-and-loop.
How to Display or Gift It
- Use for light-blocking curtains or decorative panels.
- Package pairs in a linen gift bag.
- Fabric Book Covers with Embroidered Spine

Embroidered spines add library charm. Make covers removable so books remain usable.
Materials
- Cotton fabric 50 x 20 cm per cover
- Narrow continuous design for spine 40–120 mm
- Tear-away stabilizer
- Sewing machine for seams
- Fabric marking ruler
Instructions
- Measure book and cut fabric leaving 1 cm seam allowance.
- Hoop spine area and stitch vertical motif before assembling cover.
- Sew cover and slip onto book.
How to Display or Gift It
- Use as a gift wrap for special books.
- Keep covers removable for cleaning.
- Planter Wraps with Embroidered Labels

Label planters with embroidered wraps so houseplants look intentional and tidy.
Materials
- Canvas strips 4 x 20 in
- Plant name designs 50 mm
- Tear-away stabilizer
- Velcro or snap closures
- Clear fabric protector spray
Instructions
- Hoop canvas and stitch plant names. Trim and finish edges.
- Attach Velcro or snaps and wrap around pots.
- Apply fabric protector and let cure 24 hours.
How to Display or Gift It
- Great as party favors for plant-lovers.
- Store wraps flat in a craft drawer.
- Appliqué Wall Pocket Organizer with Embroidery

Combine appliqué and machine embroidery for an organizer that’s pretty and practical.
Materials
- Cotton canvas panel 12 x 24 in
- Small motif and label designs (50–80 mm)
- Appliqué fabric scraps
- Tear-away and cut-away stabilizers
- Sewing machine for pocket seams
Instructions
- Hoop pocket area and stitch appliqué shapes, then add label text.
- Sew pocket seams and attach to backing panel.
- Add grommets and hang.
How to Display or Gift It
- Use in entryways, craft rooms, or nurseries.
- Package rolled in kraft paper for gifting.
- Embroidered Mirror Frame Mat

A fabric mat around a mirror softens a vanity and lets you incorporate pattern.
Materials
- Small round tabletop mirror 8 in
- Fabric mat ring 10 in outer diameter
- Embroidery design set for runners
- Tear-away stabilizer and batting
- Hot glue and craft adhesive
Instructions
- Hoop fabric strips and stitch repeated motif.
- Layer batting and fabric, insert behind mirror, and secure with glue.
- Allow glue to set 24 hours before use.
How to Display or Gift It
- Present as vanity set paired with matching coaster.
- Store flat to prevent mat distortion.
- Embroidered Piped Cushion Insert
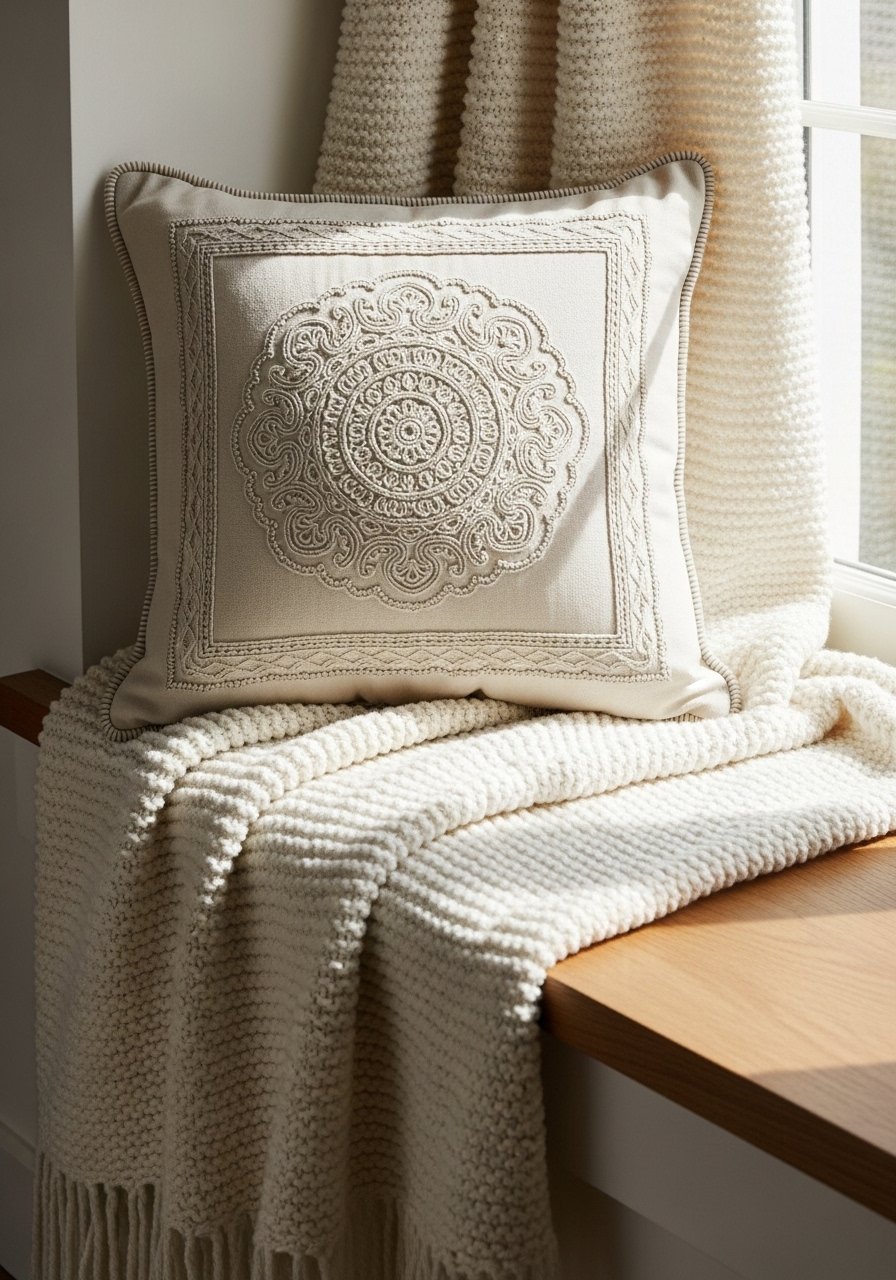
Add piping for a professional finish. Machine embroidery centers flush with piping edges.
Materials
- Cushion cover 20 x 20 in with piping channel
- Piping cord 2 mm and fabric tape
- Embroidery medallion design 100 mm
- Tear-away stabilizer
- Pillow insert 20 x 20 in
Instructions
- Hoop cover front and stitch medallion taking placement into account for piping.
- Add piping during seam assembly; machine-stitch close to cord for crisp line.
- Insert pillow and close.
How to Display or Gift It
- Display on a window seat or bench.
- Use color-coordinated piping to tie room palette together.
- Recipe Tea Towel (Embroidered Family Recipe)

Digitize a favorite handwritten recipe and stitch it onto a tea towel for a sentimental gift.
Materials
- Cotton tea towel 18 x 28 in
- Digitized handwriting file scaled to 200–250 mm width
- Tear-away stabilizer
- Polyester embroidery thread 50 wt
- Iron and press cloth
Instructions
- Scan handwriting and have it digitized to an embroidery file.
- Hoop towel and stitch the recipe—dense lettering may take 30–60 minutes.
- Remove stabilizer; press and wash on gentle to ensure colorfastness.
How to Display or Gift It
- Frame as a kitchen keepsake or fold and tie with ribbon.
- Include care instructions to preserve stitches.
- Embroidered Fabric Bunting for Parties

Custom bunting is festive and reusable. Computer embroidery keeps letters uniform.
Materials
- Cotton bunting triangles 12 (7 x 9 in)
- Alphabet design set (40–60 mm)
- Tear-away stabilizer
- Bias tape for bunting stringing
- Hot glue and wooden beads (optional)
Instructions
- Hoop and stitch letters on each triangle.
- Attach triangles to bias tape, spacing evenly.
- Add beads at ends for weight.
How to Display or Gift It
- Store folded in a craft box between parties.
- Pair with matching coasters or napkins for a party set.
- Showcase Hoop: Computer Embroidery Designs for Home Decor Sampler
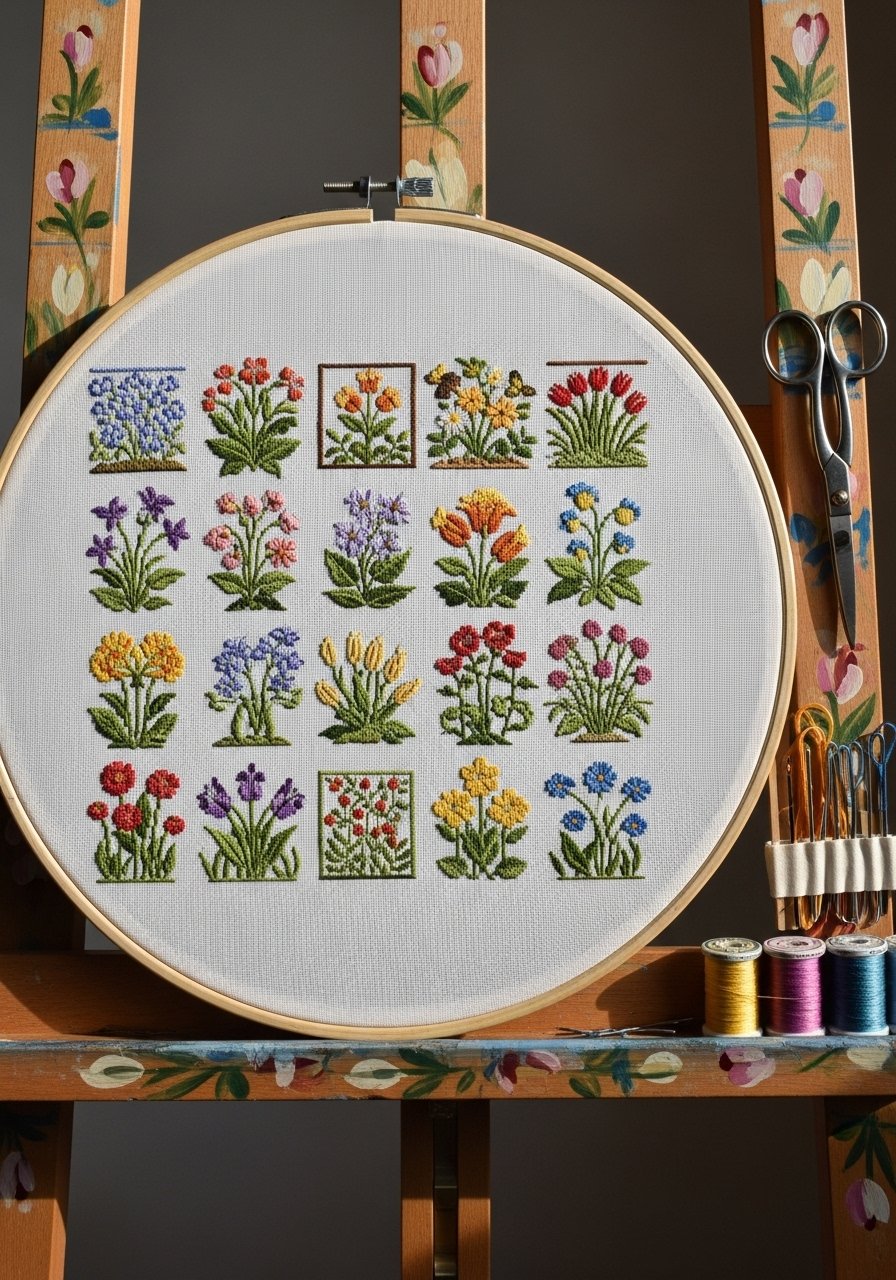
A sampler hoop is a perfect way to display a collection of computer embroidery designs for home decor. It shows stitch variety and color options in one artful piece.
Materials
- Large fabric hoop 300 mm (12 in)
- Assortment of small embroidery designs (20–60 mm each)
- Cut-away stabilizer for dense motifs
- Assorted thread colors 50 wt
- Small embroidery snips and tweezers
Instructions
- Plan layout on fabric using a disappearing fabric pen and ruler.
- Hoop central area with cut-away stabilizer if you have dense areas.
- Stitch designs one at a time; leave small printed gaps between motifs.
- Trim and secure backing, then tighten hoop for final display.
How to Display or Gift It
- Prop on a small easel for a shelf or hang on a gallery wall.
- Include a small label with the design names and stitch counts.
- Cozy Throw Blanket with Computer Embroidery Designs for Home Decor
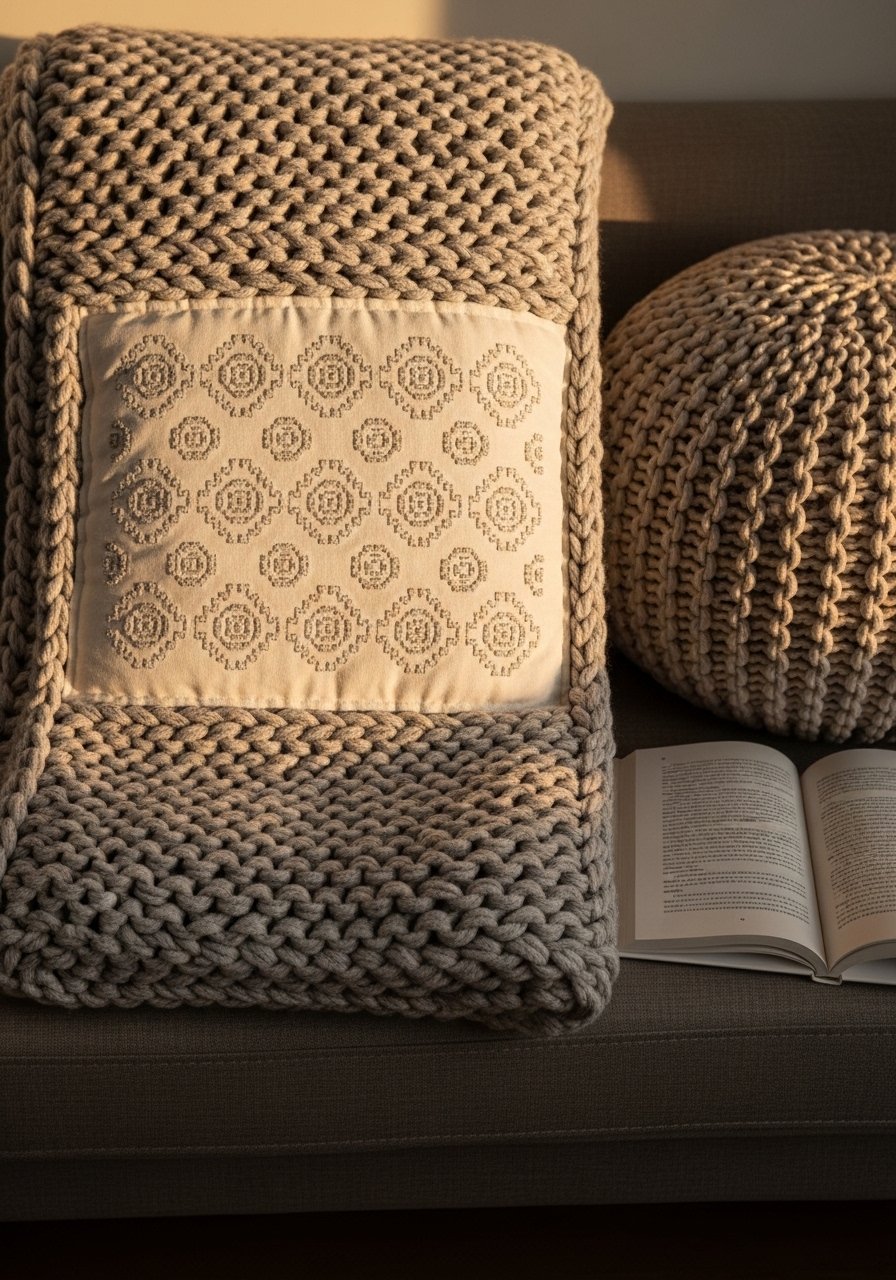
Add an embroidered panel to a throw blanket for a cozy personalized layer. Use sturdy linen or cotton for patch panels.
Materials
- Knit or woven throw 50 x 60 in
- Cotton/linen panel 12 x 18 in
- Computer embroidery design repeat (100–200 mm)
- Cut-away stabilizer
- Sewing machine needle for knits (ballpoint) if attaching to knit throw
Instructions
- Stitch panel on a stable fabric and press.
- Baste panel to throw using a zigzag stitch or topstitch close to the edge.
- For knit throws, use stabilizer under sewing area to prevent stretching.
How to Display or Gift It
- Drape over a reading chair or sofa arm.
- Bundle with hot cocoa mix for a winter gift set.
- Curated Gallery Wall of Computer Embroidery Designs for Home Decor

Create a full gallery wall using multiple small embroidered pieces. Computer embroidery designs for home decor let you match themes and stitch counts for a cohesive look.
Materials
- Assorted hoops and frames (mix of 4–12 in)
- Multiple digitized designs (floral, geometric, script)
- Acid-free mats and backing boards
- Mounting hardware and picture hooks
- Level and measuring tape
Instructions
- Plan layout on the floor using frames and hoops, spacing 2–3 in apart.
- Create a variety of stitched pieces in the same color story.
- Frame or hoop each piece and mount on wall using appropriate anchors.
- Step back and adjust spacing for visual balance.
How to Display or Gift It
- Use a consistent thread palette to unify different motifs.
- Store spare hoops and backup stitched pieces in a craft organizer.
You made it through 29 projects that show how computer embroidery designs for home decor can be used across rooms, textiles, and gifting projects. Try one small hoop first if you’re new to machine embroidery, then scale to pillows and runners. Save or pin this list so you can return when planning seasonal swaps or handmade gifts. Which room will you stitch for first? Share a photo with friends or start a stitch night to make a few pieces together — and consider a reliable temperature-control hot glue gun for finishing touches; it changed how my trims and tags stay put with less fuss.





