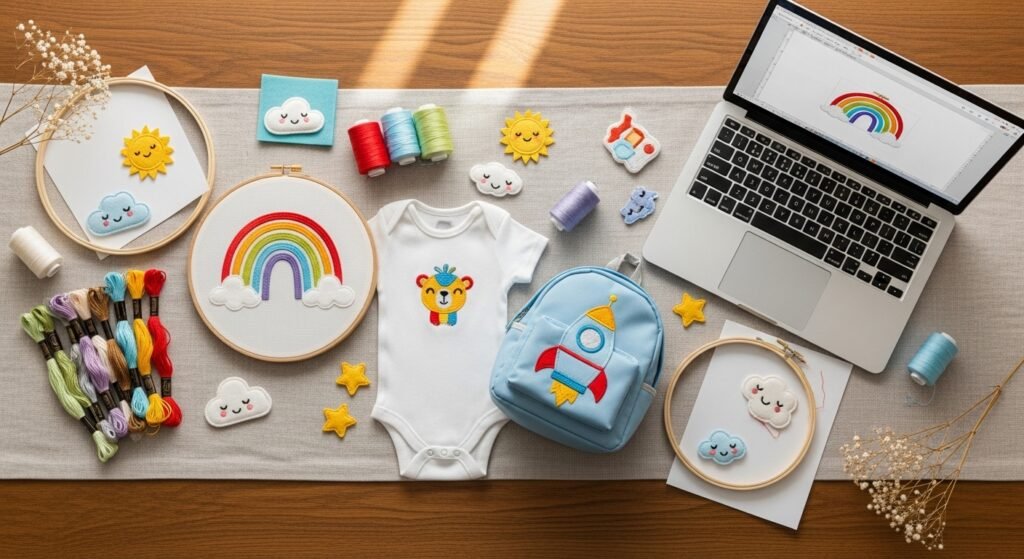
Bright, kid-friendly embroidery designs are a cozy way to make clothes, toys, and nursery décor feel personal. If you’ve ever opened an embroidery software file and wondered how to turn that cute cartoon into a durable patch or a tiny onesie motif, this list is for you. I’ll show 25 complete projects using kids computer embroidery designs that are colorful, washable, and adorable on everything from backpacks to pillowcases.
You’ll find step-by-step instructions, exact material amounts, realistic drying/setting times, and friendly troubleshooting tips for common issues like puckering, thread breaks, and stabilizer warping. I recommend starting with a reliable embroidery hoop and some good-quality stabilizer—my go-to is an 8" wooden hoop and tear-away stabilizer for small projects. Grab a set of embroidery stabilizer sheets and your favorite embroidery thread set before you begin, and let’s stitch some magic.
- Rainbow Animal Applique Onesie

This cheerful rainbow elephant applique is perfect for baby showers. The computer embroidery design makes the curves crisp, so even beginners get neat edges. It has a soft satin stitch finish and feels smooth against baby skin. Parents and gift-givers will love the bright palette; kids will smile every time they spot the little elephant.
Materials
- 1 plain cotton onesie, size 0–6 months
- 2 layers tear-away stabilizer, 6" square
- Embroidery thread: 6 colors, 100 m each (rayon or polyester)
- Water-soluble adhesive spray, 2–3 sprays
- Small embroidery hoop, 6–8"
- Applique cotton fabric, 4" x 4" scrap
- Embroidery needle (machine): size 75/11
- Fabric scissors and small trimming scissors
- Pressing cloth and iron (low heat)
Instructions
- Hoop the onesie with stabilizer under the fabric; center the chest area. Use a 6–8" hoop to avoid stretching.
- Load the kids computer embroidery design (elephant applique) into your machine. Test size: 3" wide x 2.5" high.
- Spray adhesive lightly onto applique fabric; place scrap over the marked area.
- Start the embroidery with the applique tack-down first. Monitor thread tension—lower to avoid puckering on lightweight cotton.
- After the tack-down, trim excess applique fabric close to the stitch line with sharp scissors.
- Continue the satin stitch outline and detail fills. If thread breaks, rethread and re-run the short segment.
- Remove hoop and tear away stabilizer carefully from the back.
- Press gently with a low-heat iron through a pressing cloth for 5–8 seconds to flatten stitches.
How to Display or Gift It
- Pair the onesie with a muslin swaddle and tuck both into a kraft gift box. Use a pack of kraft gift boxes for a neat presentation.
- Wash inside out on a gentle cycle at 30°C; air dry or tumble dry low.
- Make-ahead tip: stitch 2–3 extra onesies in an afternoon—each design takes about 30–45 minutes on a home machine.
- Store spare embroidered pieces flat in a shallow craft tray until gifting.
- Alphabet Hoop Sampler for Nursery (kids computer embroidery designs)
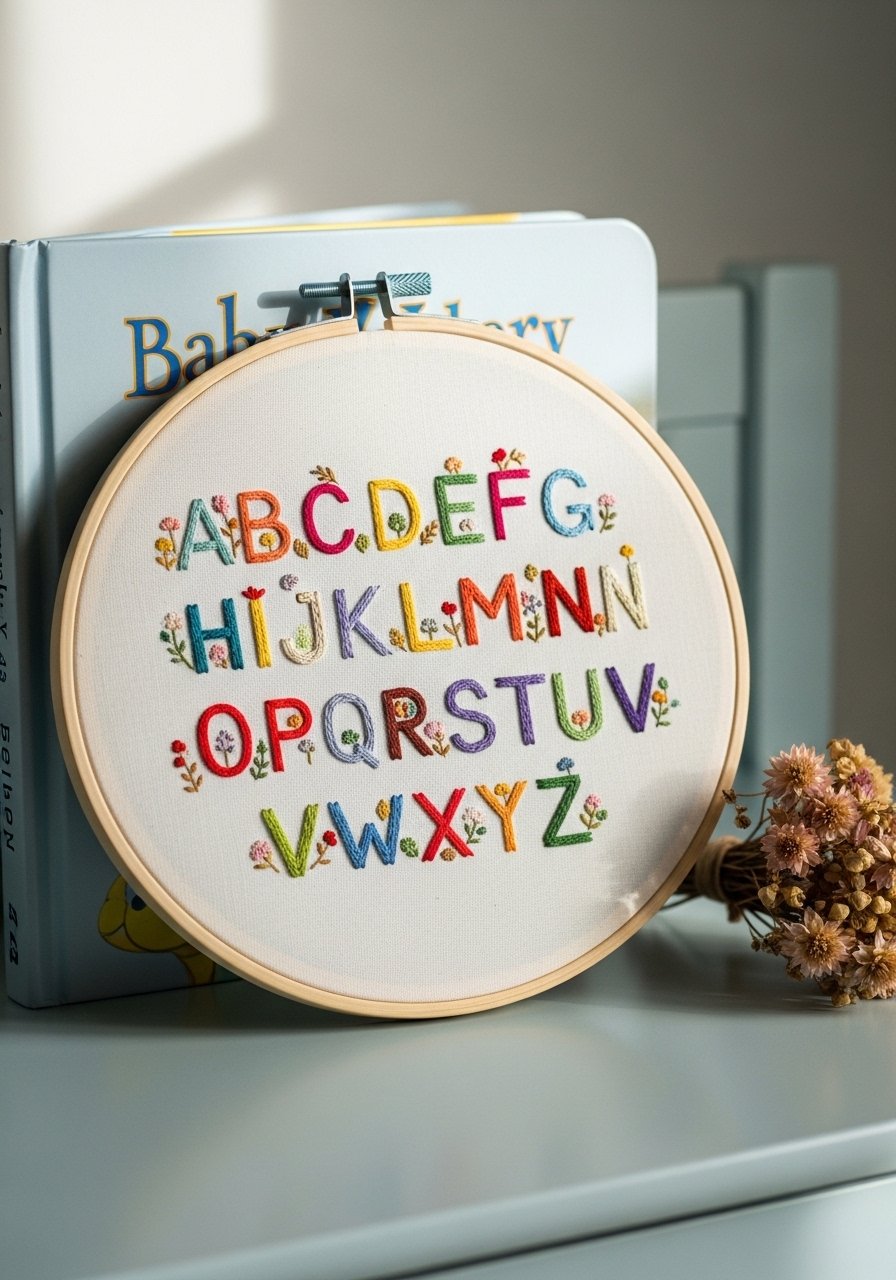
This mini hoop set turns computer-stitched letters into a cohesive nursery display. The font is playful and the tiny motifs (stars, animals) add personality to each letter. Perfect for practicing density settings and spacing on your machine—beginners will appreciate the predictable stitch counts.
Materials
- 5 wooden embroidery hoops, 6"
- Soft cotton fabric (muslin), 12" x 12" total
- Tear-away stabilizer, 6 sheets, 6" squares
- Embroidery thread set, pastels, 8 colors
- Embroidery machine or home machine with embroidery module
- Temporary fabric marker
- Small embroidery scissors
- Hanging hardware or mini easel
Instructions
- Cut fabric into five 6" squares and hoop each with stabilizer beneath.
- Load each letter design from your kids computer embroidery designs set into the machine; size each to 2.5" tall.
- Stitch letters and small motifs. Use a medium stitch density for soft cotton.
- Trim stabilizer from the back once cool to the touch; avoid pulling.
- Tighten fabric in hoop edges and trim excess fabric to 1/2" around hoop.
- Glue inner hoop back with a thin bead of fabric glue if desired; let dry 30 minutes.
How to Display or Gift It
- Hang three across the crib wall and two elsewhere for a gallery effect.
- For gifting, nest hoops in tissue-lined boxes. Use a stackable craft organizer for storage until display time: craft organizer drawers.
- Monster Backpack Patch Set (kids computer embroidery designs)

Tiny monsters with friendly smiles are ideal for personalizing backpacks. These machine-embroidered patches are durable and have a sew-on or iron-on backing. The textured fills give the monsters a cuddly look. This project helps you practice appliqué and post-stitch finishing.
Materials
- Denim mini backpack
- Heat-seal applique backing, 3 sheets, 3" circles
- Felt for patch backing, 3 pieces 3"
- Embroidery thread—8 bright colors
- Tear-away stabilizer, 3 squares 5"
- Temporary adhesive spray
- Embroidery needles and small sewing needle
- Mini iron or household iron
Instructions
- Hoop stabilizer and stitch monster design with heat-seal tack-down step included.
- Attach heat-seal backing per design instructions; press for 8–10 seconds at medium heat.
- Trim patch close to satin edge and fuse to felt backing for a clean edge.
- Hand-sew the felt backing to the denim with small whipstitches for extra hold.
- If using iron-on directly to bag, press through a pressing cloth for 10 seconds, allow 5 minutes to cool.
- Check edges after two washes; re-stitch if lifting occurs.
How to Display or Gift It
- Attach a small enamel pin nearby for extra flair.
- Tuck the patched bag into a kraft bag with tissue for gifting. A set of cotton twine bow finishes it nicely.
- Space Rocket Nap Mat Name Patch

A personalized nap mat patch with a rocket design is both functional and fun. The rectangular patch has reinforced satin borders so it stands up to napping wear. This project is great for school drop-offs and sleepovers.
Materials
- Nap mat (store-bought), 60" x 20"
- Medium-weight canvas fabric, 6" x 10" for patch
- Cut-away stabilizer, 6" x 10"
- Embroidery thread: navy, red, silver
- Iron-on backing (optional)
- Fabric marker for name text
- Sewing machine and thread for topstitching
- Fusible web, 1 sheet
Instructions
- Design patch at 4" x 2.5" with name text and rocket motif.
- Hoop canvas with cut-away stabilizer beneath.
- Stitch design using medium stitch density for canvas.
- Remove stabilizer per instructions; for high-wear patches, leave a small amount of cut-away for stability.
- Turn under edges and topstitch patch onto nap mat using 1/8" seam allowance.
- For machine sewing, use a topstitch needle and polyester thread for strength.
How to Display or Gift It
- Add a small fabric loop with a carabiner for easy hanging.
- Wrap the rolled mat in a cotton strap and tuck in a note card. Use a small wooden clothespin set to attach tags.
- Dino Hooded Towel Corner Embroidery
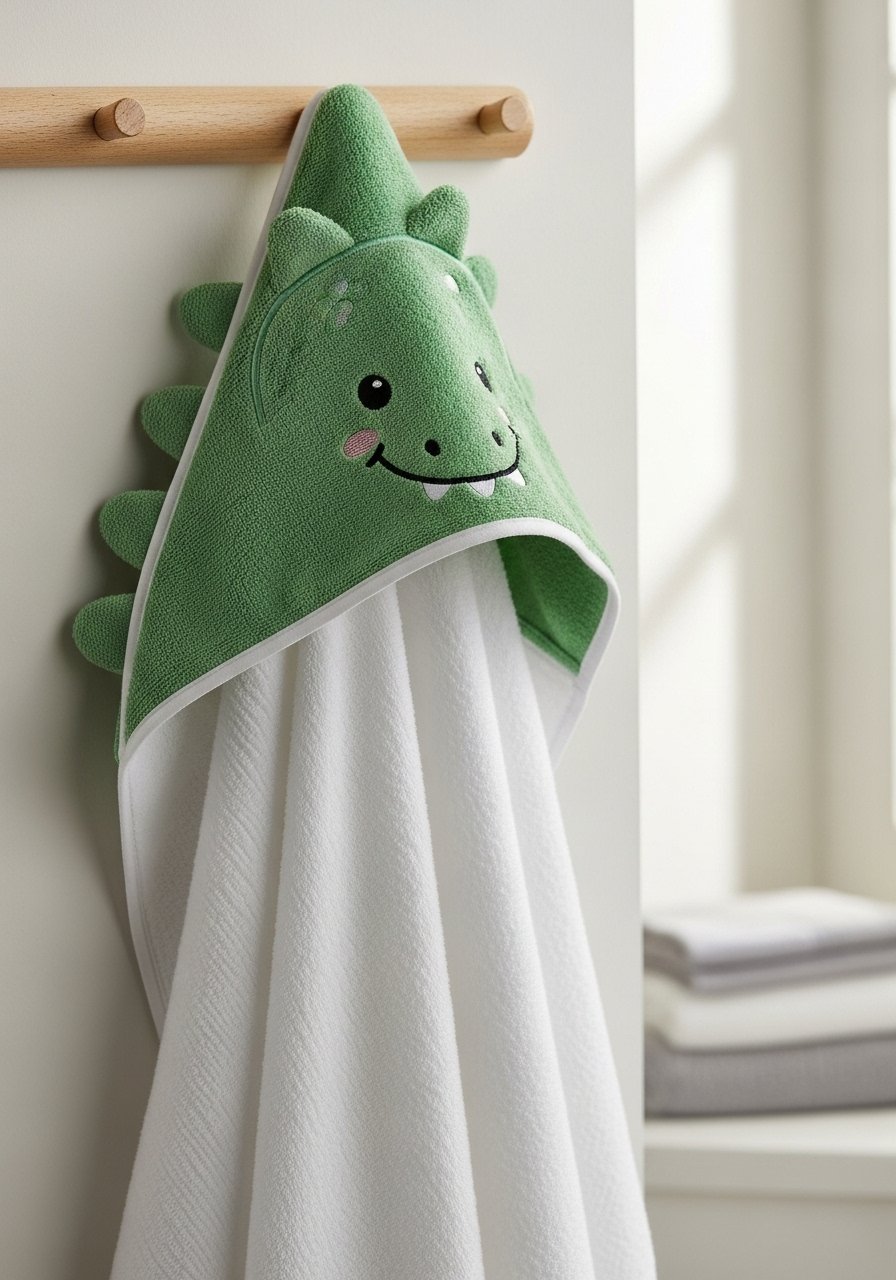
Corner hoods are perfect for showing off a bold computer embroidery motif. The dino’s raised satin stitches look sculptural and survive many washes. Great for bath time and pool days.
Materials
- Hooded towel, standard kids size (approx. 30" x 50")
- Cut-away stabilizer, 8" x 8"
- Embroidery thread, green shades + accent colors
- Embroidery machine or hoop and machine combo
- Walking foot sewing machine for attaching spikes (if adding applique)
- Felt for spikes, 8" strip
- Fabric glue (washable) for temporary placement
Instructions
- Center design on hood; hoop towel plus stabilizer beneath.
- Stitch dino design at 4" tall; use medium-high density for terry towels.
- If adding felt spikes, applique felt triangles and topstitch with zigzag.
- Remove stabilizer only after machine cools; terry can trap heat.
- Wash on gentle cycle; tumble dry low.
- If stitches look loose after first wash, re-press through a damp cloth.
How to Display or Gift It
- Roll towel with a ribbon and tuck in a bath toy.
- Store folded in a humid-free area—use a mason jar with silica packets for long-term storage of spare embroidered towels.
- Mermaid Tail Play Pouch
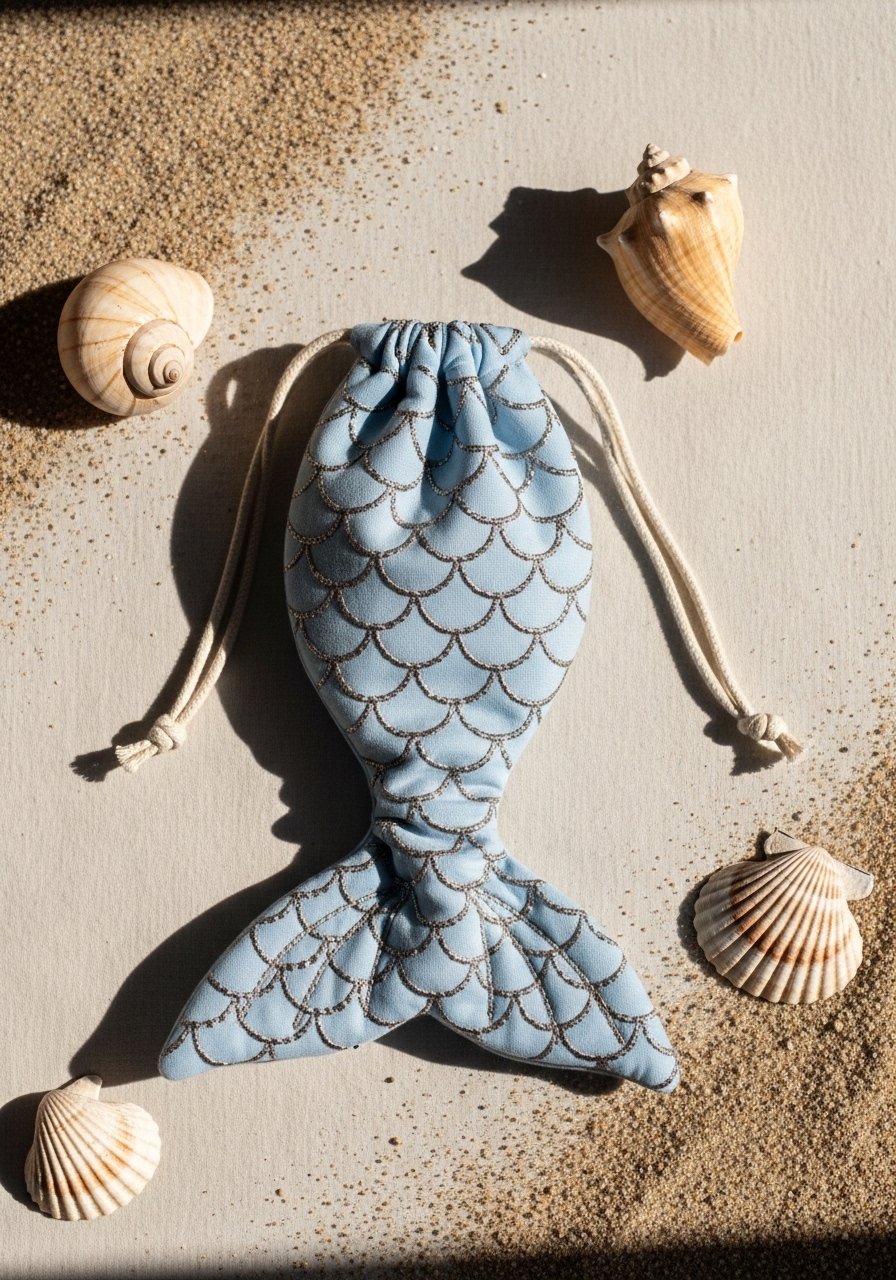
This mermaid pouch combines surface embroidery fills with metallic thread highlights for shimmer. It’s a delightful project for storing small toys or crayons, and sewing the drawstring casing builds useful machine skills.
Materials
- Cotton canvas, 12" x 14"
- Drawstring cord, 1 yard
- Embroidery stabilizer: cut-away, 12" x 12"
- Metallic embroidery thread, 1 spool + regular thread
- Embroidery design file (scale to 4" tall)
- Sewing machine, thread to match
- Safety pin for threading cord
Instructions
- Hoop canvas and stitch mermaid scale panel at 4" x 5".
- Trim panel leaving 1/2" seam allowance.
- Fold canvas into pouch, press, and stitch sides leaving top open.
- Create a 1" casing at top, leaving a small opening to feed the cord.
- Thread 1 yard of cord using a safety pin; knot ends.
- Test drawstring smoothness; reinforce stitching at cord opening.
How to Display or Gift It
- Pair with bath-friendly crayons or a small storybook.
- Store several stacked in a drawer organizer. A small fabric storage bin keeps pouches tidy.
- Forest Friends Bib Trio (kids computer embroidery designs)
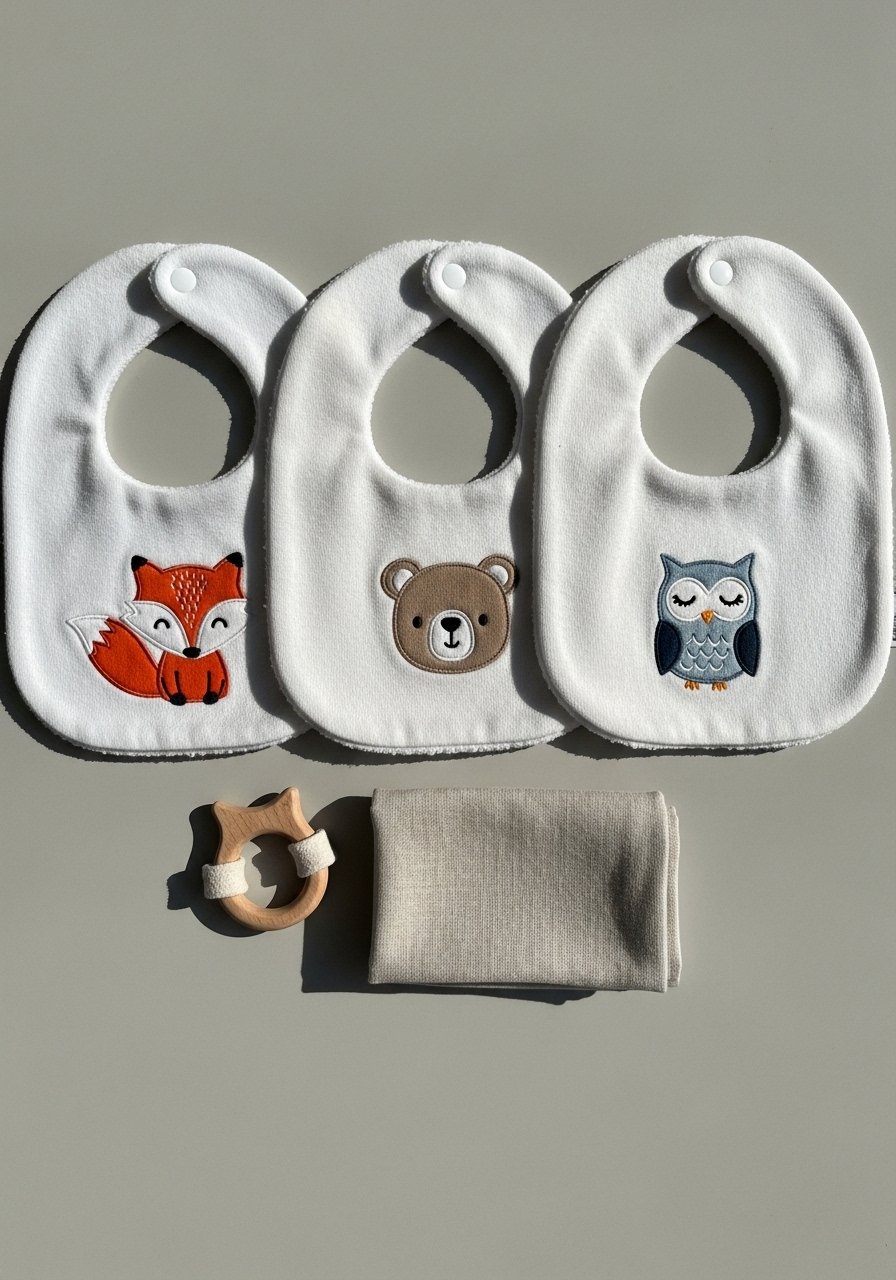
A set of embroidered bibs is ideal for baby registries. The computer designs keep motifs tiny and delicate without thread build-up against skin. Use a soft, absorbent cotton and a lightweight tear-away stabilizer.
Materials
- 3 cotton bibs
- Absorbent terry backing, 3 pieces 6" x 6"
- Tear-away stabilizer, 3 squares
- Embroidery thread set—earth tones
- Velcro or snap closures, 6 pieces
- Embroidery hoop, 5–6"
- Washable fabric marker
Instructions
- Mark placement about 2" below neckline.
- Hoop bib with stabilizer under fabric.
- Stitch each forest friend at 2.25" tall using light density.
- Remove stabilizer and trim threads.
- Attach snaps or Velcro per original bib construction if replacing.
- Launder on delicate before first use to remove any markings.
How to Display or Gift It
- Wrap trio in a muslin square and tie with twine.
- Store extras in a divided craft box so patterns don’t tangle. Use a small craft organizer.
- Space Name Pillow with Satin Letters

Satin letters stitched by computer look crisp and store well in daily use. This pillow uses a medium-weight linen look fabric and a durable cut-away stabilizer so the cushion survives play.
Materials
- Pillow cover, 12" x 18", cotton-linen blend
- Pillow insert, 12" x 18"
- Cut-away stabilizer, 12" x 12"
- Embroidery thread, 4–6 colors
- Embroidery design for alphabet (satin style)
- Sewing machine, standard presser foot
- Seam ripper (for inserting pillow)
Instructions
- Hoop pillow cover with enough slack; center name across middle at 6" wide.
- Stitch letters using satin stitch; reduce density slightly for linen-blend to avoid stiffness.
- Add small planets or stars as accents.
- Replace or re-hoop as needed to stitch long names—use registration marks.
- Trim stabilizer as instructed, leaving a little cut-away for durability.
- Press lightly and insert cushion.
How to Display or Gift It
- Place on a reading nook chair or toss on a bed.
- For gifting, slip into a clear gift pillow bag with a ribbon.
- Animal Face Sleep Mask Set

These plush sleep masks are tiny but packed with detail. The embroidered faces rest on a soft velour for comfort, and computer designs ensure symmetry across both eyes.
Materials
- Velour fabric, 10" x 8"
- Quilt batting, 10" x 8"
- Tear-away stabilizer, 10" x 8"
- Elastic, 1/4" width, 18" per mask
- Embroidery thread, black and accent colors
- Embroidery hoop, 4–5"
- Fabric glue (optional for quick basting)
Instructions
- Hoop velour with stabilizer beneath; stitch animal face at 3.5" wide.
- Back with quilt batting for softness; stitch perimeter with a 1/4" seam allowance.
- Attach elastic ends inside seam and secure with a backstitch.
- Topstitch all around for durability.
- Evaluate fit and adjust elastic length to 16–18 inches for kids.
- Spot clean; do not submerge velour for long periods.
How to Display or Gift It
- Stack three masks with a ribbon and tuck into a small gift box.
- Store flat in a drawer using a drawer organizer tray.
- Cute Critter Felt Finger Puppets

Finger puppets are fast, portable, and great for storytelling. The computer embroidery designs stitch tiny facial features that are uniform across a set. Felt base keeps the puppet lightweight and sturdy.
Materials
- Wool blend felt sheets, assorted colors, 5" x 5" each
- Embroidery thread, small amounts
- Tear-away stabilizer, 5 pieces, 4" x 4"
- Fabric glue for quick assembly
- Scissors and small snips
- Embroidery design files scaled to 1.5"–2"
Instructions
- Hoop stabilizer and stitch facial features on felt squares.
- Cut felt around design leaving 1/4" seam.
- Fold into cylinder and glue or hand-stitch seam.
- Add felt ears or tiny noses with glue.
- Let glue cure 30 minutes before play.
- Test fit on a finger and trim if bulky.
How to Display or Gift It
- Bundle five in a mini muslin pouch for gifting.
- Store in a small wooden box or mason jar on a shelf.
- Rainbow Sunburst Hood Patch (kids computer embroidery designs)
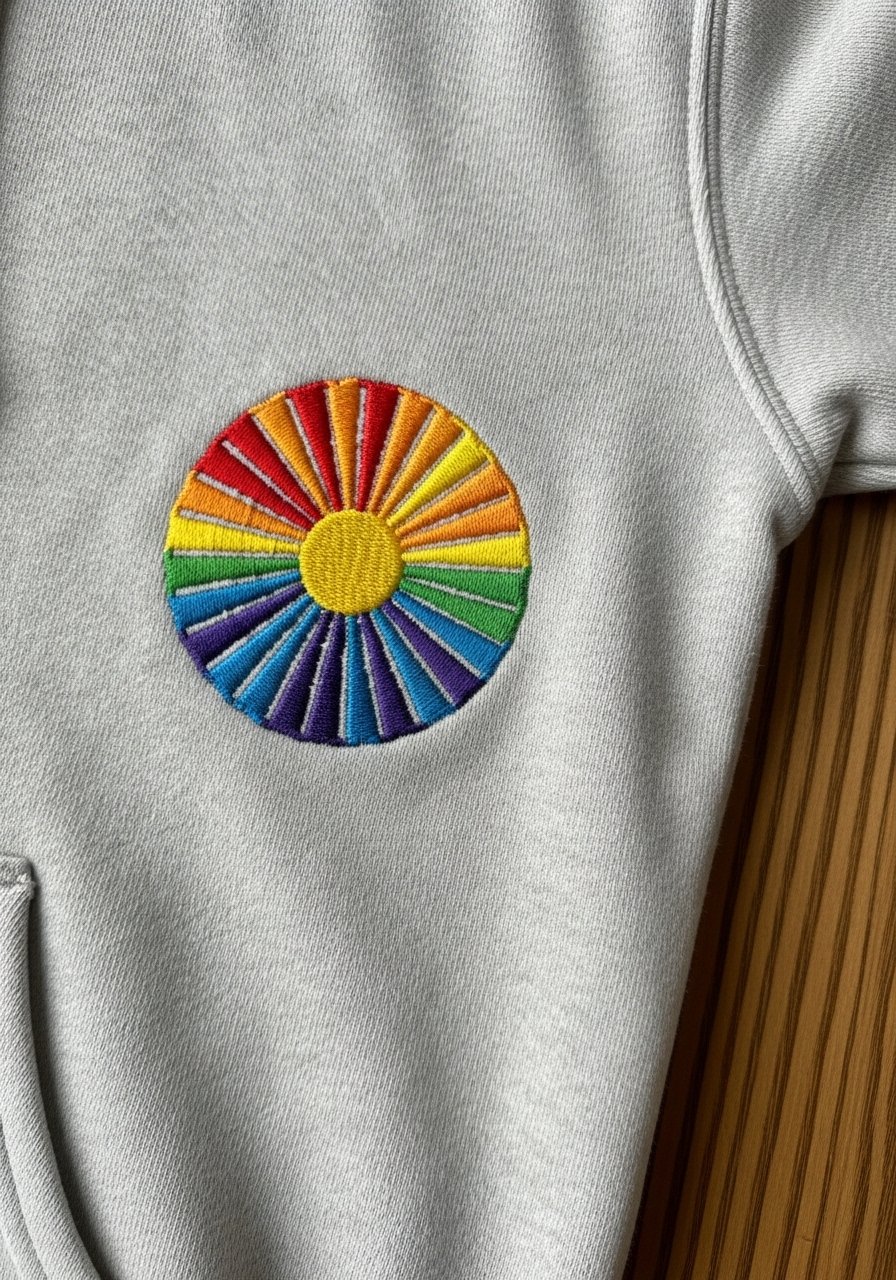
A sunburst patch adds instant charm to a plain hoodie. The layered fill stitches create a tiny textured medallion that resists wear. This one is playful for both boys and girls.
Materials
- Hoodie, children's medium
- Fusible backing, 3" circle
- Embroidery thread, rainbow set
- Cut-away stabilizer, 4" square
- Embroidery needle (machine)
- Small iron
Instructions
- Position patch on left chest or sleeve; hoop with stabilizer below.
- Stitch sunburst at 3" diameter, using alternating fill directions for texture.
- Apply fusible backing and press for 8 seconds, cool 2 minutes.
- Trim close and hand-stitch an edge if desired for security.
- Wash on cold, tumble low.
How to Display or Gift It
- Layer the hoodie with a coordinating tee.
- For gifting, include a matching beanie. Store embroidered garments in a breathable hanging garment bag: garment bag.
- Ocean Creatures Soft Book Panels
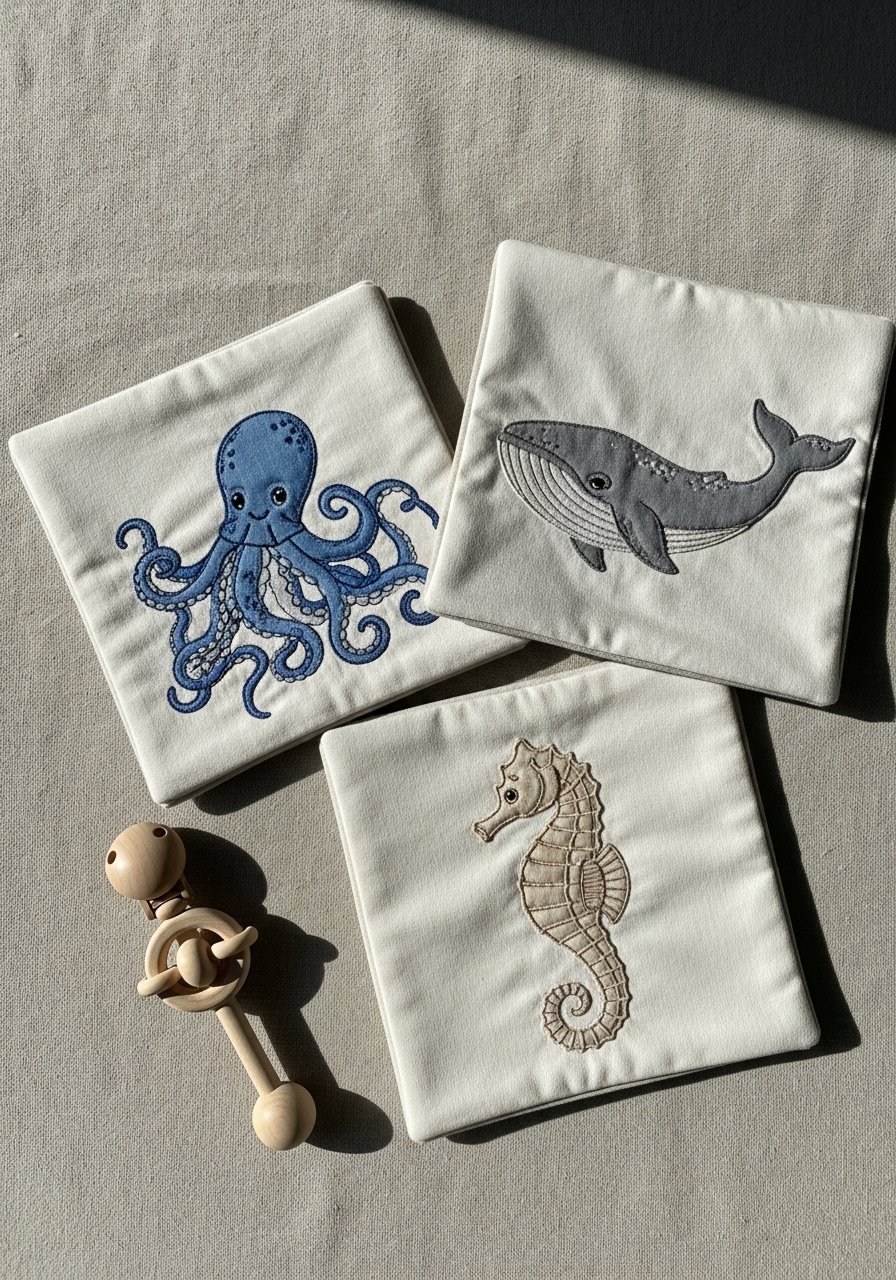
A soft book with embroidered panels is a tactile learning toy. Computer-stitched motifs are perfect for uniformity across pages and can include crinkly bits or small squeakers if sewn in.
Materials
- Cotton fabric, 12" x 36" (three panels)
- Quilt batting, 12" x 36"
- Tear-away stabilizer, three 6" x 6"
- Embroidery thread
- Small squeaker (optional)
- Sewing machine
- Crinkle material, 6" x 6" optional
Instructions
- Hoop each panel and stitch creature designs at 4"–5" tall.
- Sandwich batting and stitch around edge to create page.
- Insert squeaker or crinkle material before closing if desired.
- Topstitch pages together with 1/4" seam for book spine.
- Edge finish with binding tape or zigzag machine stitch.
- Spot-clean only if using squeaker.
How to Display or Gift It
- Present as a first-book set with a gift card.
- Store flat in nursery shelf or a fabric storage bin.
- Circus Animal Teether Bandana
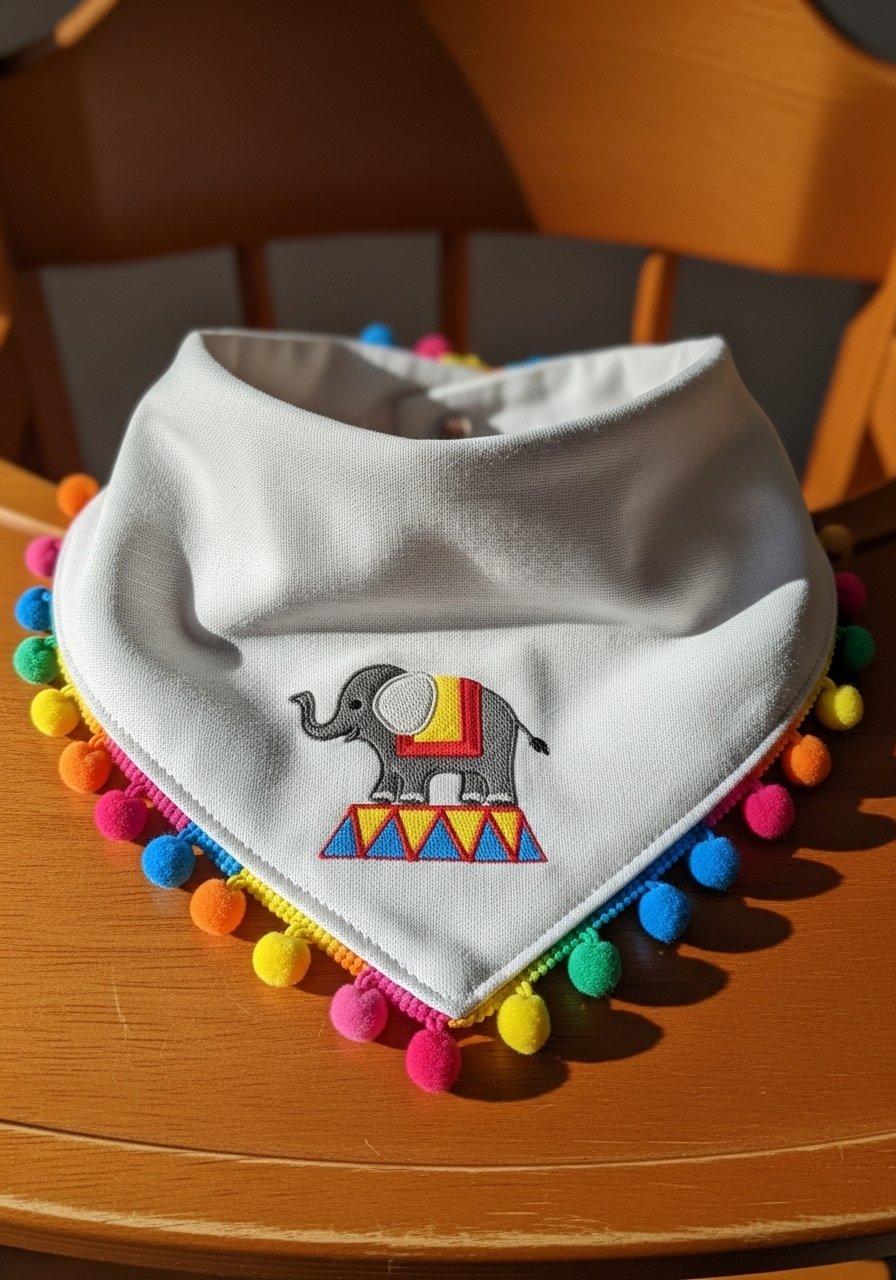
This bandana bib doubles as a teething companion when you stitch on a small silicone teether loop. Use a soft cotton exterior and waterproof lining for drool.
Materials
- Cotton bandana bib, 12" x 12"
- Waterproof lining fabric, 12" x 12"
- Embroidery thread, bright colors
- Tear-away stabilizer
- Silicone teether ring
- Small carabiner for attachment, optional
Instructions
- Hoop the top layer with stabilizer and stitch circus motif at 3" wide.
- Assemble bib with waterproof lining and topstitch.
- Attach teether ring to a small loop stitched into seam and reinforced with bar tack.
- Heat-seal any raw edges and test durability.
- Wash on gentle; air dry.
How to Display or Gift It
- Include a matching teether and pack in a small cloth bag.
- Store bibs flat or rolled in a diaper caddy organizer.
- Robot T-Shirt Pocket Embroidery

Place an embroidered motif peeking out of a real pocket for a playful peekaboo effect. Machines stitch neat detail with no puckering when stabilized properly.
Materials
- Cotton T-shirt, child size
- Small pocket fabric, 4" x 4"
- Tear-away stabilizer
- Embroidery thread: metallic accent for robot
- Topstitching thread
- Sewing machine
Instructions
- Stitch robot design at 2.5" tall centered on pocket face before sewing pocket to shirt.
- Attach pocket with 1/8" topstitch to keep robot looking like it’s peeking.
- Reinforce pocket corners with small bar tacks.
- Press seam allowances flat.
- Wash inside-out on gentle cycle to prolong metallic threads.
How to Display or Gift It
- Pair with robot-themed stickers and wrap in tissue.
- For storage, fold shirts and place in a breathable drawer organizer.
- Cupcake Patch All-Over Jacket
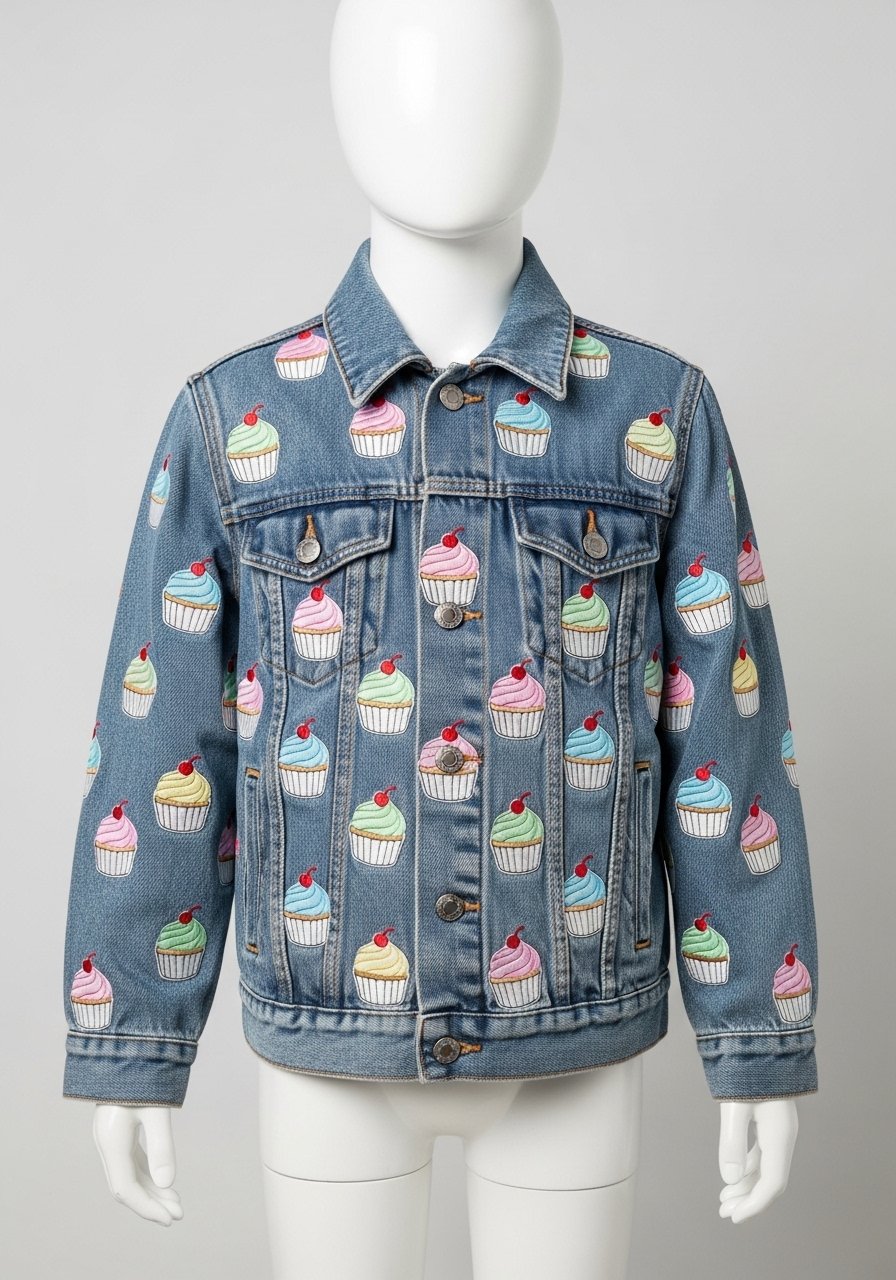
An all-over patch jacket turns a thrifted denim find into a candy-sweet statement piece. Small, repeatable computer designs make quick work of uniform placement.
Materials
- Denim jacket, child size
- Heat-seal backing, multiple 2" circles
- Embroidery thread, pastel set
- Cut-away stabilizer, multiple small pieces
- Mini iron
- Fabric glue (optional for temporary placement)
Instructions
- Plan patch layout: 12–16 patches, each 2" diameter.
- Stitch patches on stabilizer, fuse heat-seal backing.
- Trim and apply to jacket with moderate heat for 8–10 seconds, then cool.
- Hand-stitch a few key patches for extra durability.
- Wash cold; tumble low.
How to Display or Gift It
- Present with matching hair accessories.
- Hang coat on a child-sized wooden hanger to keep shape: child wooden hanger.
- Farm Animal Crib Mobile Panels

Mini embroidered panels form a gentle mobile above the crib. Use cut-away stabilizer and lightweight fabric to keep panels from sagging.
Materials
- Cotton panels, 4 pieces, 5" x 5"
- Embroidery thread
- Cut-away stabilizer, 4 pcs, 5" squares
- Wooden embroidery hoop, 6"
- Thin cotton cord, 6 feet
- Small wooden beads, 8 pcs
Instructions
- Hoop each panel and stitch animal designs at 3"–3.5".
- Back panels with a second fabric for neatness and topstitch.
- Attach cords to hoop evenly spaced; add beads for weight balance.
- Hang mobile 30" above crib mattress surface to meet safety spacing.
- Inspect regularly for wear and re-tie cords if fraying.
How to Display or Gift It
- Hang mobile near a reading nook for visual interest.
- Store flat between uses in a large plastic craft container.
- Fairy Garden Shoe Labels
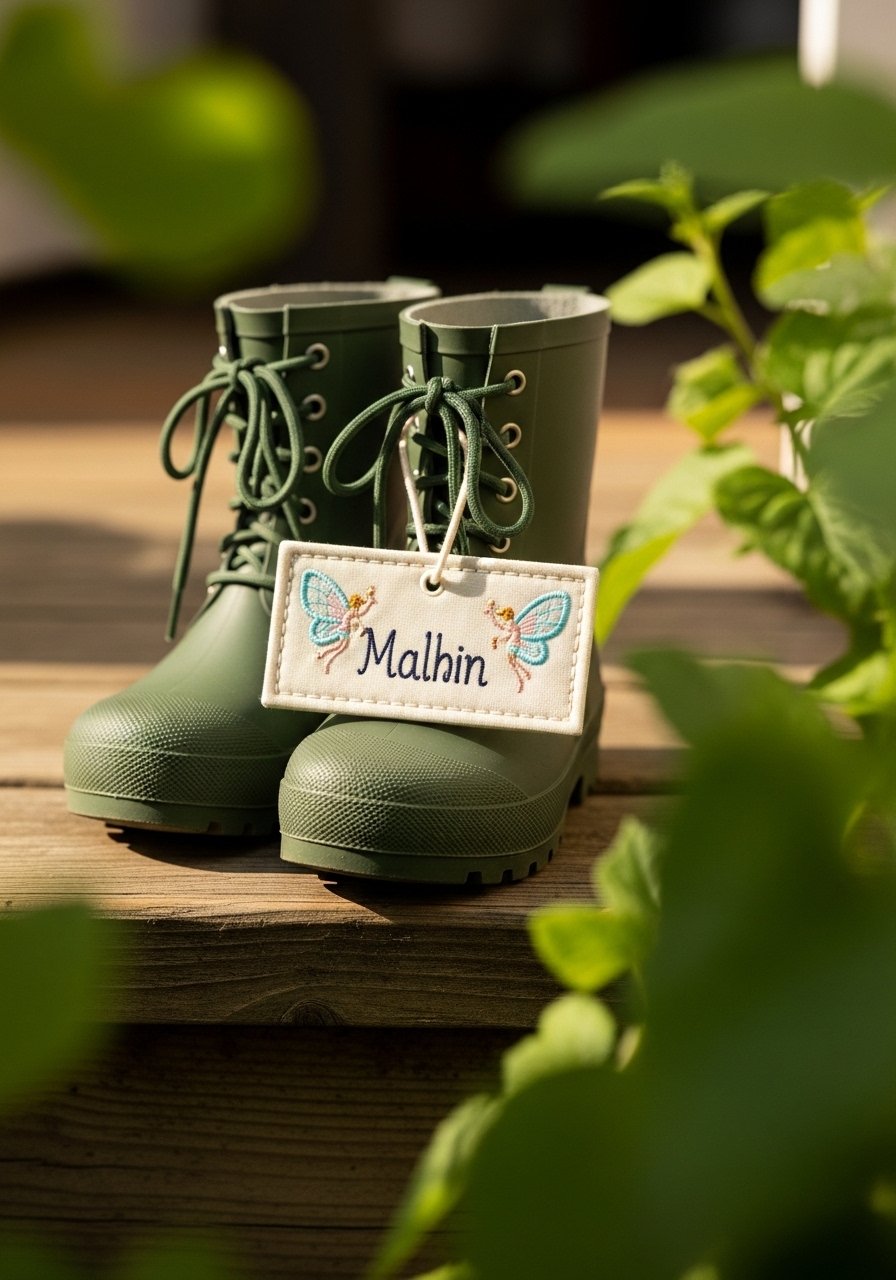
Shoe labels help keep boots and shoes organized for outdoor play. These small stitched labels are weather-resistant when backed properly.
Materials
- Waterproof fabric rectangles, 2" x 1"
- Heat-seal backing
- Embroidery thread
- Cut-away stabilizer
- Small snap fasteners
- Sewing machine or hand-sewing needle
Instructions
- Hoop waterproof fabric with stabilizer; stitch fairy wing design with name at 1.5" wide.
- Attach snap fasteners to label ends and secure to shoes.
- Test on one pair outdoors for a week to confirm durability.
- Replace snaps as needed.
How to Display or Gift It
- Keep labels in a small tin by the door for quick use.
- Store spare snaps and labels in a mini tackle box.
- Jungle Hoop Play Mat Edge Trim

Add embroidered hoops around a round play mat edge for a pop of whimsy. These stitched medallions are decorative and double as sensory focus points.
Materials
- Round play mat, 36" diameter
- Cotton fabric strips for hoops, 4" wide
- Embroidery thread
- Cut-away stabilizer
- Sewing machine
- Heat-press adhesive tape for hems
Instructions
- Mark positions every 3–4" around mat edge.
- Hoop strip pieces and stitch jungle motifs at 2.5" diameter.
- Topstitch onto mat edge with 1/8" seam allowance.
- Reinforce with an extra row of stitching on high-traffic areas.
- Spot-clean; avoid submerging mat.
How to Display or Gift It
- Fold mat and pair with a board book for gift sets.
- Store rolled in a breathable cotton strap.
- Rocket Crayon Roll Organizer
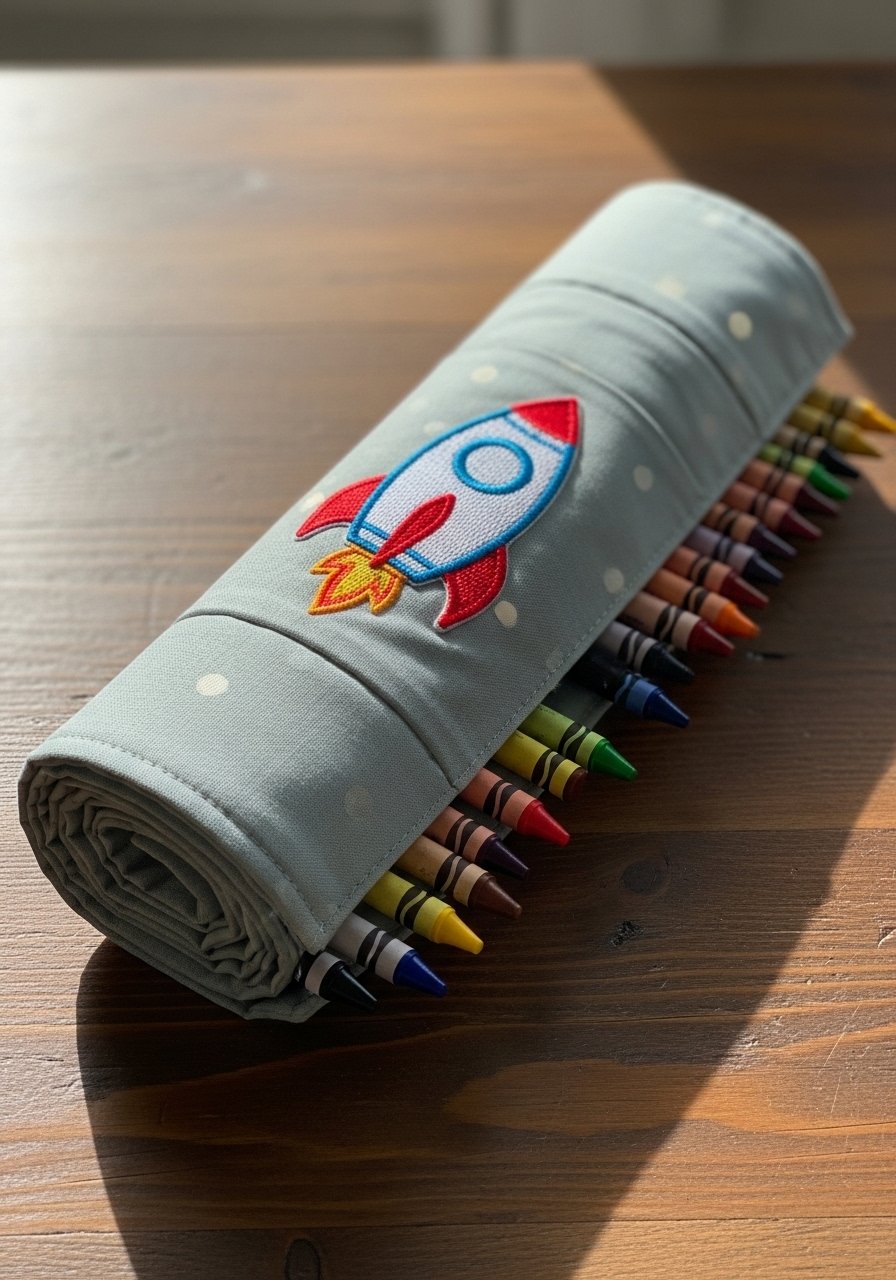
A crayon roll keeps art supplies organized and portable. The embroidered rocket adds personality, while slots keep crayons in order.
Materials
- Canvas fabric, 12" x 14"
- Quilt batting, 12" x 14"
- Embroidery thread
- Cut-away stabilizer
- Ribbon for ties, 24"
- Sewing machine
Instructions
- Hoop canvas and stitch rocket patch at 3" x 2".
- Sew batting to back and stitch channels for crayons (1" slots).
- Topstitch edges and add ribbon tie.
- Test fit with crayons; adjust slot width if needed.
- Wash carefully; let air dry.
How to Display or Gift It
- Roll with a small sketchbook and tuck in a gift bag.
- Store flat in an art supply box or a portable craft caddy.
- Puppy Paw Pajama Set

Repeat small motif down seams adds movement and charm to pajama sets. Use soft thread and low-density fills so fabric stays comfy.
Materials
- Pajama set (cotton), child size
- Tear-away stabilizer
- Embroidery thread, neutral tones
- Embroidery machine or hoop
- Seam ripper (if adding to existing seam)
- Walking presser foot for sewing machine
Instructions
- Mark motifs along sleeve and ankle cuff positions at 1.25" spacing.
- Hoop area with stabilizer and stitch paw prints at 1" each.
- If motif on seam, stitch before final assembly or carefully hoop post-seam.
- Trim stabilizer and press seam allowances.
- Wash on gentle to test threads.
How to Display or Gift It
- Fold set with a matching bedtime book.
- Store pajamas in a dedicated drawer with a fabric drawer organizer.
- Butterfly Hair Clip Felt Accents

Tiny embroidered butterflies attached to snap clips create a durable and pretty hair accessory. Computer designs allow for tiny, consistent results.
Materials
- Felt circles, 1.5" diameter x 6
- Embroidery thread
- Tear-away stabilizer
- Snap hair clips, 6
- Hot glue sticks (low-temp)
- Small pliers for snipping clip edges
Instructions
- Hoop felt with stabilizer and stitch butterfly designs at 1" width.
- Trim and glue to snap clips with low-temp hot glue; hold 10 seconds to set.
- Add a tiny dab of glue on clip top for extra hold.
- Let cures for 15 minutes before use.
- Test clips for grip; replace glue if loose.
How to Display or Gift It
- Attach to a small card with a ribbon for a boutique presentation.
- Store in a small compartmentalized jewelry tray.
- Solar System Quilt Block

Add one embroidered quilt block to a larger quilt for a playful educational piece. The stitches create durable detail that survives quilting and washing.
Materials
- Quilt block fabric, 12" square
- Quilt batting
- Cut-away stabilizer
- Embroidery thread, metallic accents
- Rotary cutter and ruler
- Sewing machine with quilting foot
Instructions
- Hoop block center with stabilizer and stitch planets at 6" wide total spread.
- Quilt layers together with a walking foot.
- Add binding and finish per standard quilt technique.
- Wash cold; press on low.
How to Display or Gift It
- Use as a wall hanging or lap quilt.
- Store folded in a breathable cotton quilt bag.
- Llama Lunchbox Patch
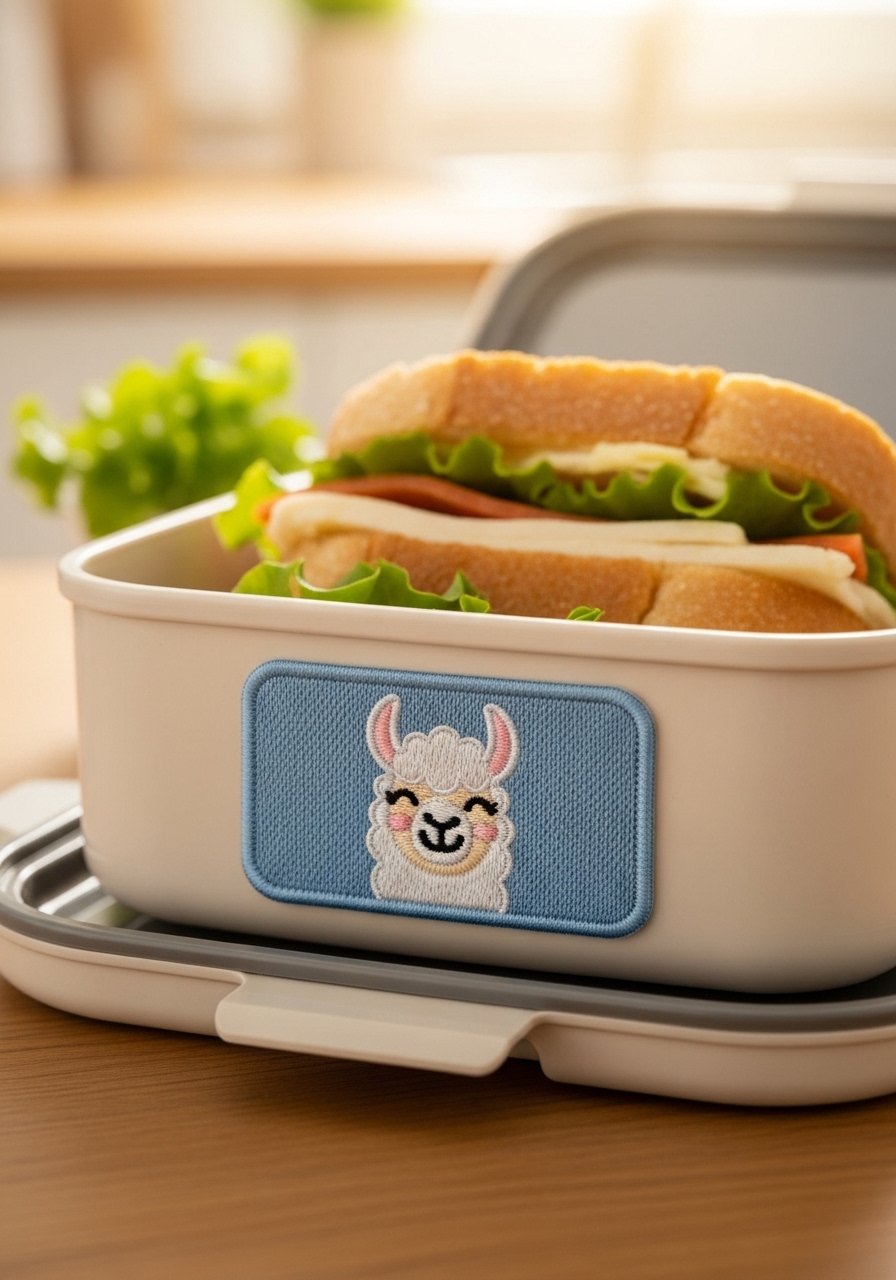
A durable lunchbox patch brightens a meal break. Use cut-away stabilizer and topstitch for long-term wear.
Materials
- Lunchbox (nylon) to attach patch
- Heat-seal backing, 3" rectangle
- Embroidery thread, bright colors
- Cut-away stabilizer
- Small sewing needle and thread for reinforcement
Instructions
- Stitch llama design at 3" on stabilizer-backed fabric.
- Apply heat-seal and attach to the lunchbox with firm press for 10 seconds.
- Hand-stitch two opposite edges for extra durability where pressure is highest.
- Wipe clean rather than submerge.
How to Display or Gift It
- Pair with a reusable snack bag.
- Store spare patches in a small magnetic tin.
- Dinosaur Hooded Blanket Corner Embroidery
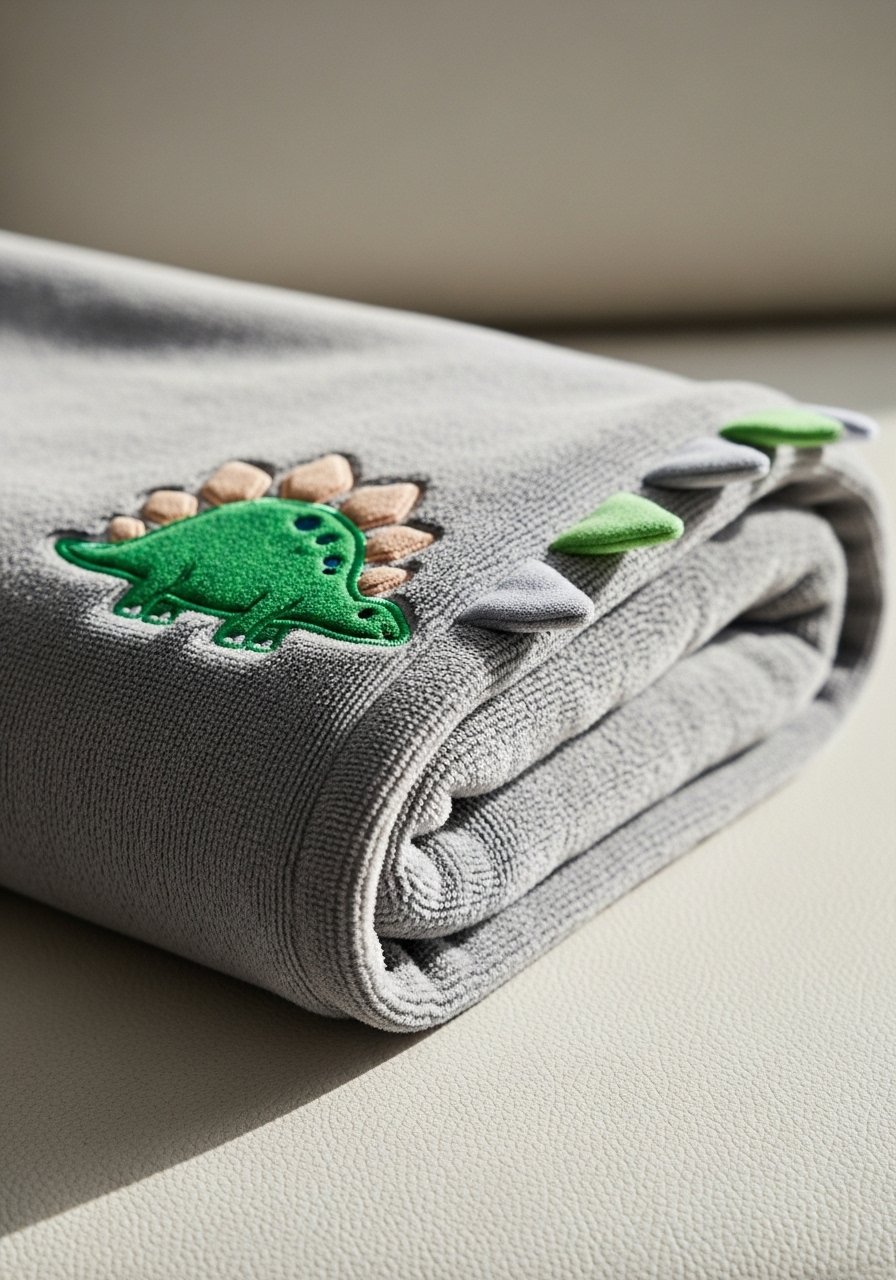
A larger scale dino motif pairs with felt spikes for tactile fun. Reinforce seams to keep spikes from pulling out.
Materials
- Hooded blanket, fleece or minky, child size
- Felt for spikes, several strips
- Cut-away stabilizer
- Embroidery thread, green shades
- Sewing machine
- Fabric glue for temporary placement
Instructions
- Position design at hood center; hoop with stabilizer.
- Stitch dino motif at 5" tall for good coverage.
- Cut felt spikes and sew into hood seam or topstitch in place.
- Reinforce spikes with bar tack stitches.
- Wash gentle; allow to air dry.
How to Display or Gift It
- Roll in a ribbon and tuck a bedtime book inside the roll.
- Store blankets folded in a lidded storage bin.
- Night Sky Glow-in-the-Dark Tee

Use specialty glow thread sparingly with regular embroidery to create a safe, nighttime motif. Test a sample first; glow thread can be slightly stiffer.
Materials
- Navy cotton T-shirt, child size
- Glow-in-the-dark embroidery thread, 1 spool
- Regular embroidery thread
- Tear-away stabilizer
- Embroidery hoop, 6"
- Fabric marker
Instructions
- Hoop T-shirt with stabilizer; plan design at 3" diameter.
- Stitch base shapes with regular thread, adding glow thread for accents.
- Avoid dense fills with glow thread to limit stiffness.
- After stitching, charge glow areas under a light source for 10–20 seconds to test effect.
- Wash cold inside out to preserve glow fibers.
How to Display or Gift It
- Fold and place in a night-themed gift box with a small flashlight.
- Store tees flat to prevent glow-thread bending.
Thanks for stitching through all 25 kid-friendly projects—what a creative haul! From tiny finger puppets to cozy hooded blankets, these kids computer embroidery designs let you make personalized keepsakes that stand up to play and washing. Pin this list so you can return when you’re ready for a weekend sewing burst, and share your favorites with a friend who loves handmade gifts.
Trust me, picking up a quality hot glue gun with temperature control changed how every single one of these projects turned out — less stringing and cleaner glue spots. If you’re stocking up, consider a temperature-controlled hot glue gun and keep your thread collection handy with a thread organizer box. Which project will you try first?





