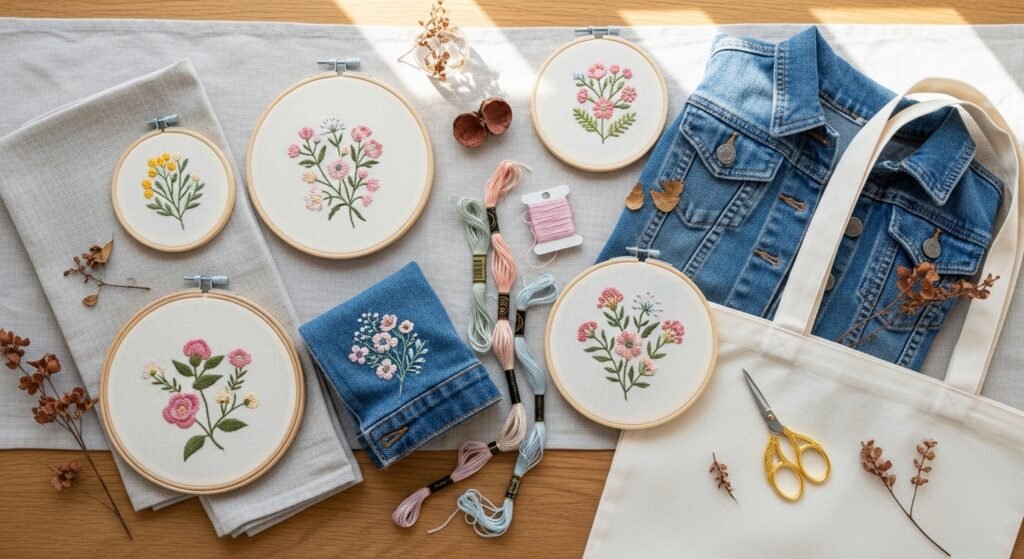
If you love the crisp look of stitched florals but want consistent, repeatable results, floral computer embroidery designs are your secret weapon. Picture tiny posies on a kitchen towel, a single-line blossom on a shirt pocket, or a cottagecore bouquet on a pillow—stitched perfectly every time thanks to machine digitized designs. You’ll find projects here that range from beginner-friendly single-color motifs to layered, multi-thread pieces you’ll be proud to gift.
I’ll walk you through 20 simple projects that work on cotton, linen, denim, and canvas. Each project includes an exact materials list, clear steps, drying or setting times where relevant, and styling ideas. If you’re setting up for machine embroidery, I run my smaller files on a 5×7 hoop and use Sulky Tear-Away Stabilizer for light fabrics. For trimming and finishing, a sharp pair of gold embroidery scissors makes life easier.
Ready to stitch? These floral computer embroidery designs are gentle, pretty, and made to work on the fabric you love. Let’s start with a handful of easy finishes and build toward layered, textured florals.
- Petite Posy Tea Towel — floral computer embroidery designs for kitchen linens
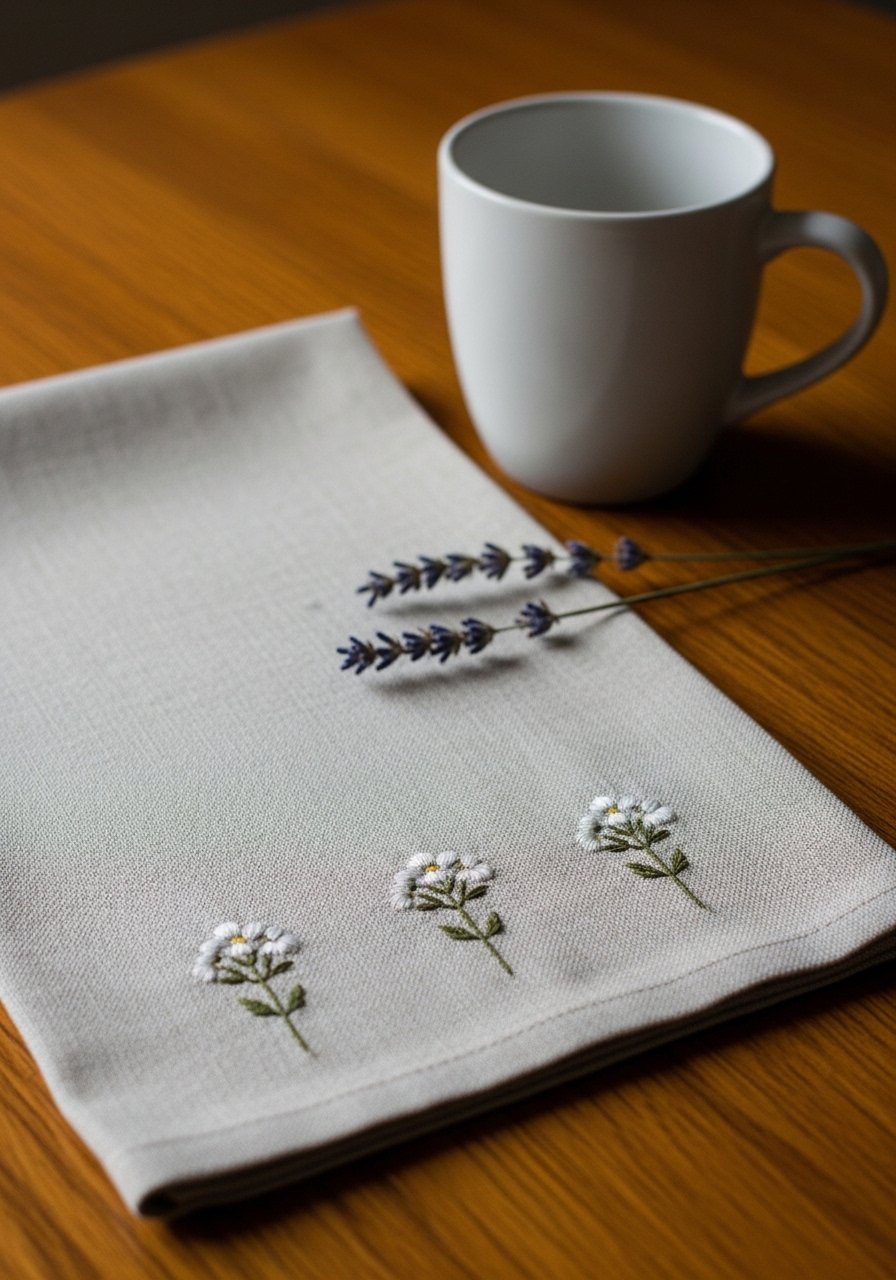
This tiny posy trio is perfect if you’re new to machine embroidery. Clean lines and two-color fills give a delicate, handmade look without heavy density. It’s a lovely addition to farmhouse and cottagecore kitchens and makes quick, sweet gifts.
Materials
- 1 natural linen tea towel, 18 x 28 inches
- 3 floral computer embroidery designs (small posy, 1.5" diameter each)
- 1 sheet Sulky Tear-Away Stabilizer, 8.5 x 11 inches
- Madeira rayon embroidery thread, 2 colors, 40 wt, 100 m each
- Embroidery needle 75/11 (machine)
- Embroidery hoop 5 x 7 inches
- Temporary spray adhesive, 3-second bond, 1 can
- Small gold embroidery scissors
Instructions
- Prewash the tea towel and press lightly. Mark placement with a water-erasable fabric pen.
- Hoop the stabilizer only (for small designs) and spray a light mist of temporary adhesive on the stabilizer.
- Smooth the tea towel over the hooped stabilizer so the design area is flat and wrinkle-free.
- Load the floral computer embroidery design sized to 1.5 inches into your machine and thread with color A.
- Stitch the outline and fill steps. Change to color B for accents when prompted by the design file.
- Once stitching finishes, remove from hoop and tear away stabilizer gently. Trim jump threads with scissors.
- Press gently from the back with a warm iron to set stitches, about 8–10 seconds; avoid steam.
How to Display or Gift It
Fold the towel neatly and tie with linen ribbon and a dried lavender sprig. Display on a wooden peg rail or drape over a kettle for a cottage kitchen vibe. For gifting, tuck it inside a kraft box with tissue paper and a small soap bar. Store extra towels flat in a shallow craft organizer to avoid creasing.
- Single Stem Pocket Accent — delicate embroidered blossom for shirts
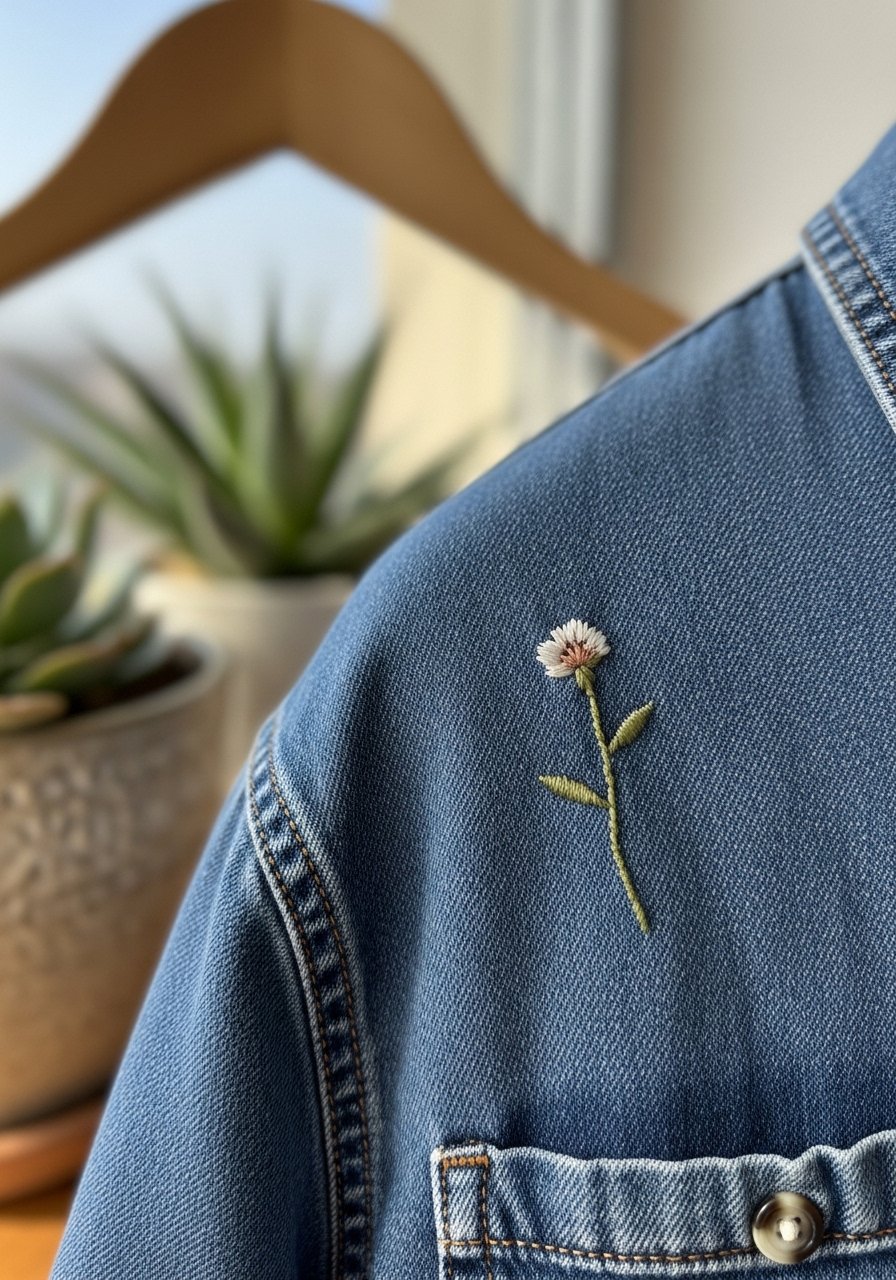
A single stem over a shirt pocket reads understated and modern. This project uses a low-density design that won’t weigh fabric down, so it’s great for lightweight shirts and blouses.
Materials
- Cotton chambray shirt, size as worn
- Floral computer embroidery design: single stem, 2.0 inches tall
- Sulky Cut-Away Stabilizer, 8.5 x 11 inches
- Madeira cotton thread, 40 wt, 1 spool neutral + 1 spool accent
- Embroidery machine needle 75/11
- Temporary adhesive spray
- Water-erasable fabric marker
Instructions
- Mark placement centered on pocket top edge. Remove pocket if your machine requires hooping off-garment.
- Hoop stabilizer and use temporary adhesive to attach fabric or pocket.
- Load design and stitch using a single light fill and outline. Keep stitch density at ~0.25mm for lightweight fabric.
- If hooping on-garment, check that seams are not pulling before stitching.
- Trim stabilizer—leave 1/4 inch on reverse if using cut-away for better stability.
- Press from the inside for 5–8 seconds to flatten stitches and remove any faint marker lines with water.
How to Display or Gift It
Wear it as a subtle detail or gift to a friend who loves minimalist style. For gifting, place in a garment bag with tissue and a small note. Store shirts on comfortable padded hangers to avoid stretching embroidered areas.
- Tiny Posy Napkin Set — matching embroidered napkins for casual tables
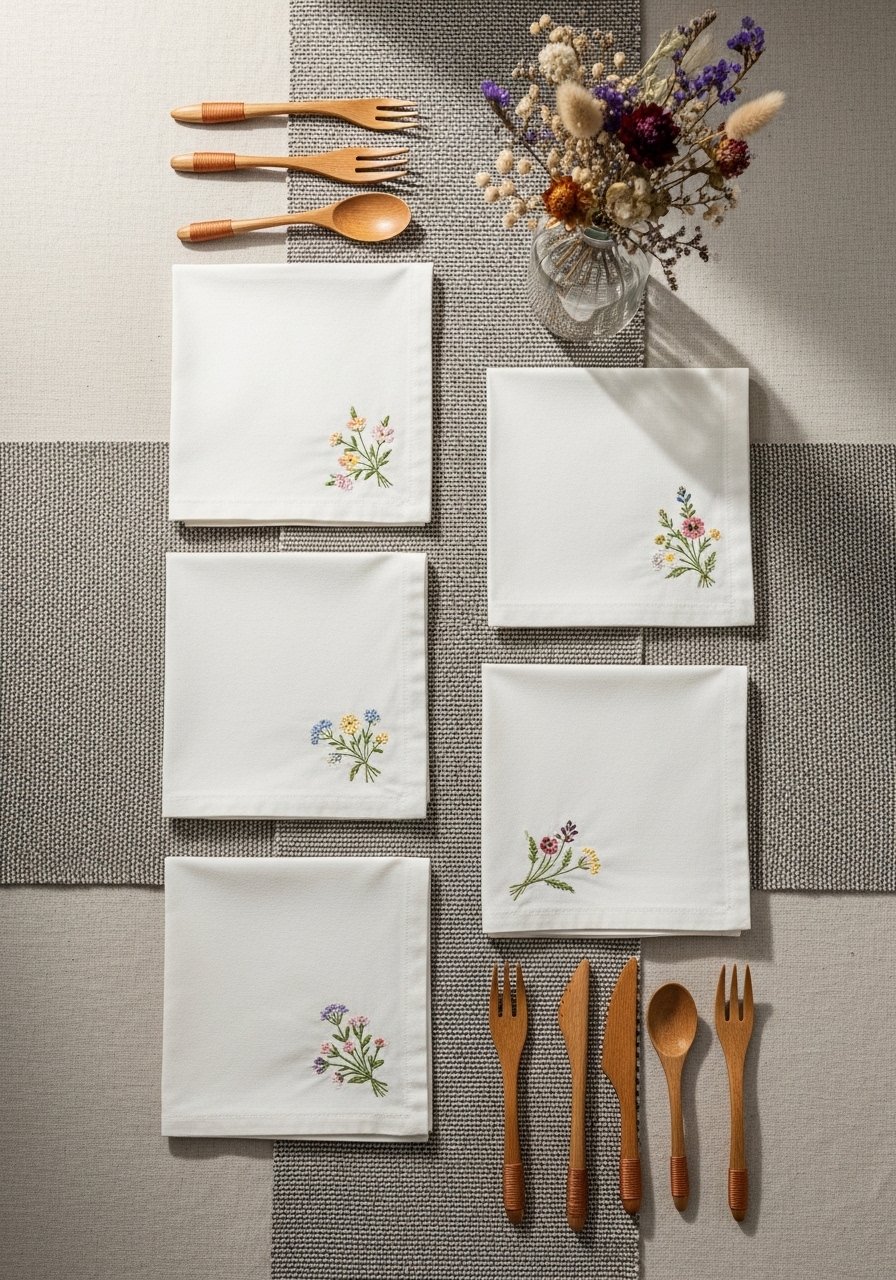
Make a set of embroidered napkins that feel boutique-made. These floral computer embroidery designs are small enough to stitch quickly and keep fabric soft through washes.
Materials
- 4 cotton napkins, 18 x 18 inches
- Floral computer embroidery designs: posy corner motif sized 1.25 inches
- Sulky Tear-Away Stabilizer, sheets 4
- Madeira rayon thread 3 colors, 30 m each
- Embroidery needles 80/12 if using heavier thread
- Iron and pressing cloth
- Sewing clips
Instructions
- Prewash napkins to preshrink. Press and mark placement on lower right corner, 1 inch from edge.
- Hoop stabilizer and attach napkin corner with temporary spray adhesive.
- Stitch design on each napkin; swap threads as required.
- After stitching, tear away stabilizer, trim threads, and press with a pressing cloth for 10 seconds.
- Topstitch a narrow hem if edges fray—turn 1/4 inch and stitch.
- Wash once on gentle cycle to ensure design stays soft; hang dry.
How to Display or Gift It
Stack with kraft twine and tuck a dried sprig in the bow. These napkins pair beautifully with wooden chargers and mason-jar flower arrangements. Store flat in a shallow drawer or linen chest.
- Linen Bookmark Blossoms — dainty embroidered bookmarks for readers
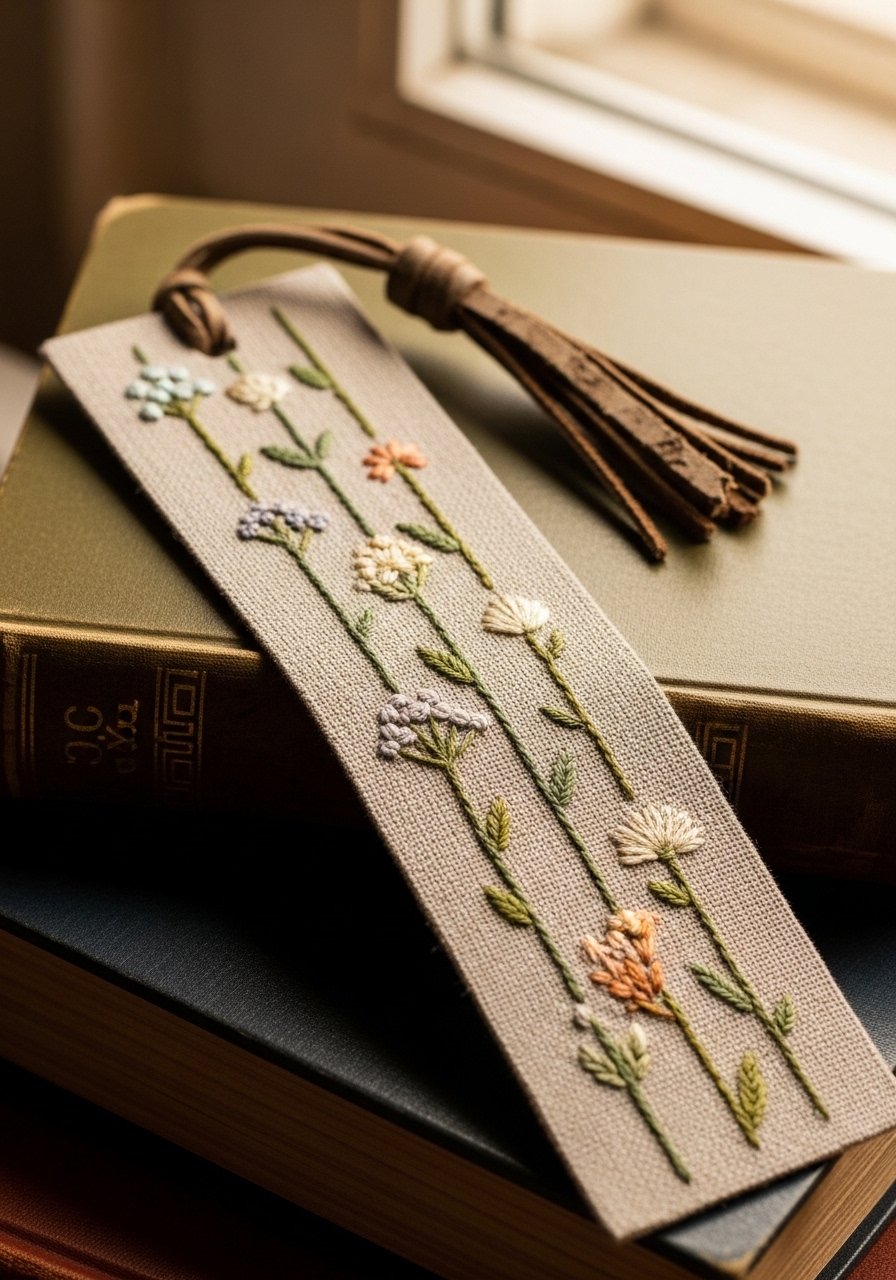
Bookmarks are a fast, gratifying project. Use lightweight linen and a simple vertical design that slips easily between pages. They’re great for book club gifts.
Materials
- 3 linen strips, 2 x 7 inches each, hemmed
- Floral computer embroidery design: vertical stem, 1.5 x 5.5 inches
- Sulky Tear-Away Stabilizer 3 sheets
- Madeira cotton thread 2 colors
- Leather tassels 3
- Eyelet punch and small eyelets (optional)
- Sewing machine or hand stitch for edge finish
Instructions
- Hem bookmark edges turning 1/8 inch twice. Press.
- Hoop stabilizer, attach bookmark with temporary adhesive, centering design.
- Stitch the floral stem and leaves. Use a light stitch density so bookmark remains flexible.
- Remove from hoop and tear stabilizer away.
- Attach leather tassel with an eyelet or by small hand stitch at top center.
- Press lightly and leave to rest for 1 hour before use.
How to Display or Gift It
Slide into a hardcover for a polished gift. You can laminate a small care card on how to wash (gentle hand wash) and include the bookmark in a clear sleeve. Store with bookmarks flat in a small organizer.
- Baby Onesie Bouquet — soft floral embroidery for baby clothes
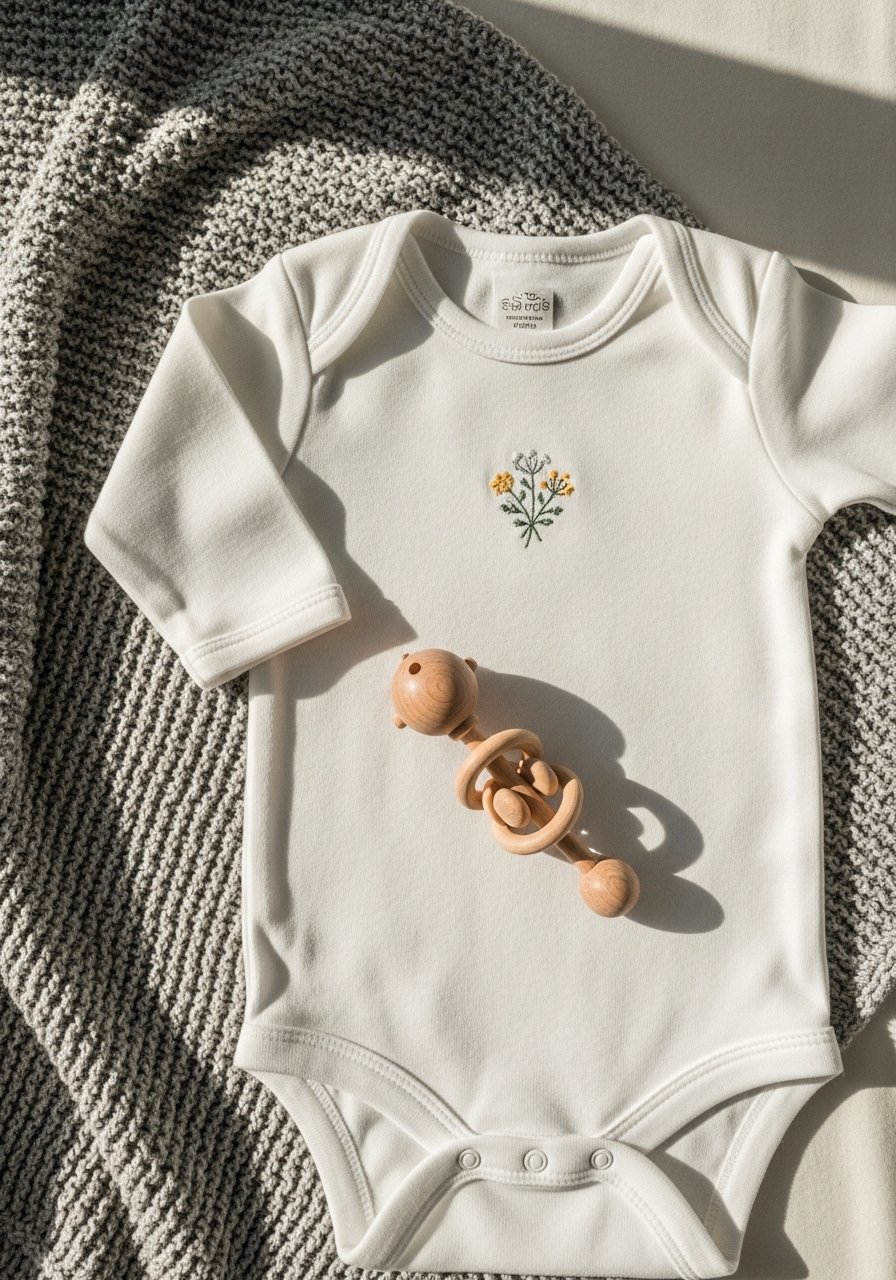
For delicate baby skin, choose low-density designs and prewash everything. This bouquet adds charm without irritating texture.
Materials
- Cotton baby onesie, 0–6 months
- Floral computer embroidery design: small bouquet, 2.5 inches wide
- Sulky Cut-Away Stabilizer, 8.5 x 11 inches
- Madeira rayon thread 3 pastel colors
- Embroidery needle 75/11
- Temporary adhesive spray
- Mild detergent for washing
Instructions
- Prewash onesie and press. Mark chest center.
- Hoop stabilizer and attach onesie using temporary adhesive with area taut but not stretched.
- Stitch the bouquet on a low-density setting; avoid dense satin fills.
- Trim stabilizer leaving 1/4 inch if using cut-away, or tear-away if preferred for quick removal.
- Press from inside with a warm iron for 6–8 seconds.
- Wash separately in cold water on delicate cycle before gifting.
How to Display or Gift It
Fold and place in a small gift box with organic cotton tissue and a tiny safety-pinned card. Recommend washing instructions on a gift tag. Store baby clothes flat to prevent strain on the embroidered area.
- Hoop Art Mini — framed floral machine embroidery hoop art
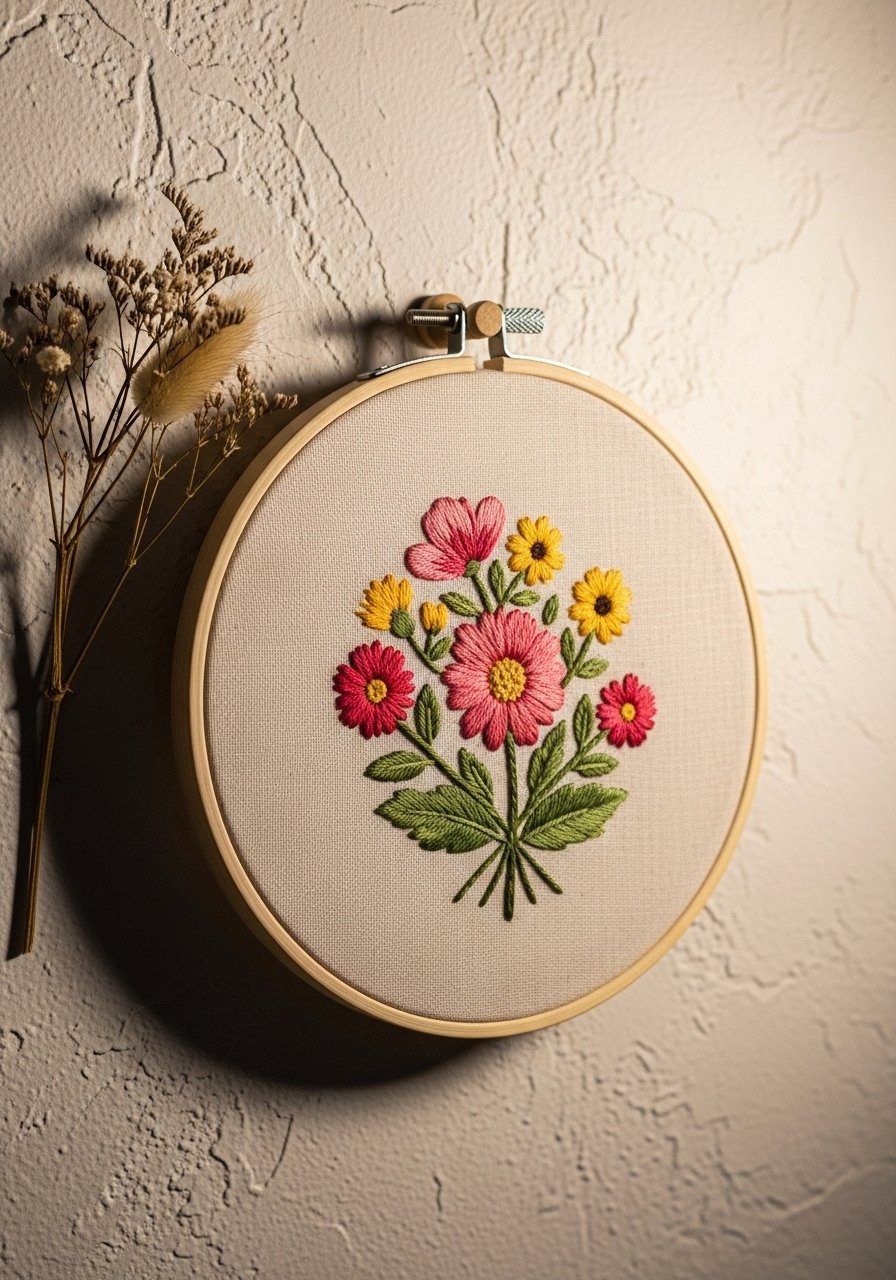
Turn a simple design into instant wall art. These hoops look lovely in clusters and suit boho or japandi shelves.
Materials
- Embroidery hoop 6 inches, wooden
- Cream linen fabric 10 x 10 inches
- Floral computer embroidery design: centered motif 4 inches
- Sulky Tear-Away Stabilizer 1 sheet
- Madeira embroidery thread 2–3 colors
- Foam brush for pressing edges (optional)
- Small wooden easel or wall nail
Instructions
- Hoop stabilizer and center linen over hoop area with temporary adhesive.
- Stitch the floral motif sized to 4 inches.
- Tear away stabilizer and trim fabric to 1 inch beyond hoop edge.
- Pull fabric taut to the back and trim evenly. Apply a bit of craft glue to the back to secure (optional) and let dry 10–15 minutes.
- Smooth hoop screw and press lightly from the front if needed.
- Hang or place on a small easel.
How to Display or Gift It
Group several hoop sizes for a gallery wall. Wrap the back in matching fabric or leave raw for a rustic look. Store unused hoops flat in a craft bin to avoid warping.
- Minimal Stem Trio — floral computer embroidery designs for modern linens
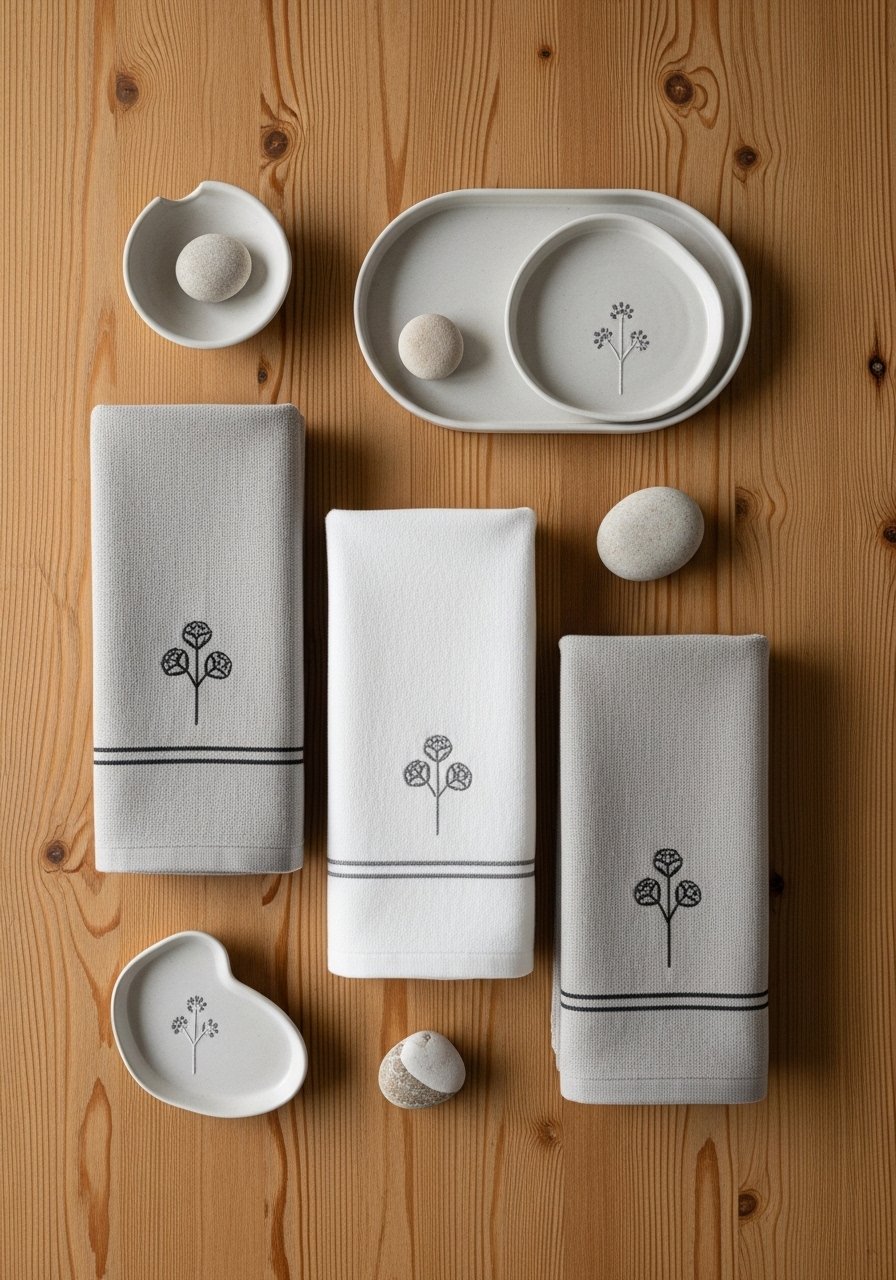
Clean lines and negative space are very on-trend. These minimalist stem trios have light stitch density and suit modern, Japandi, and farmhouse aesthetics.
Materials
- 3 linen hand towels, 16 x 26 inches
- Floral computer embroidery designs: stem trio, 2.5 inches tall
- Sulky Tear-Away Stabilizer 3 sheets
- Madeira rayon thread 1 spool neutral + 1 spool black
- Embroidery needle 80/12
- Precision craft scissors
Instructions
- Prewash towels and press. Mark placement symmetrically 2 inches from hem.
- Hoop stabilizer and secure towel corner with temporary adhesive.
- Stitch each stem trio in a single color or two-tone as desired.
- Remove hoop, tear away stabilizer, and trim threads.
- Press from the back with a warm iron for 8 seconds to avoid flattening linen texture.
- Wash once on gentle to test color fastness.
How to Display or Gift It
Stack with a simple cotton ribbon and include a care tag. These towels pair well with matte ceramic dishware and wooden utensils. Store folded in a drawer with breathable dividers.
- Appliqué Flower Pocket — layered floral appliqué with machine embroidery
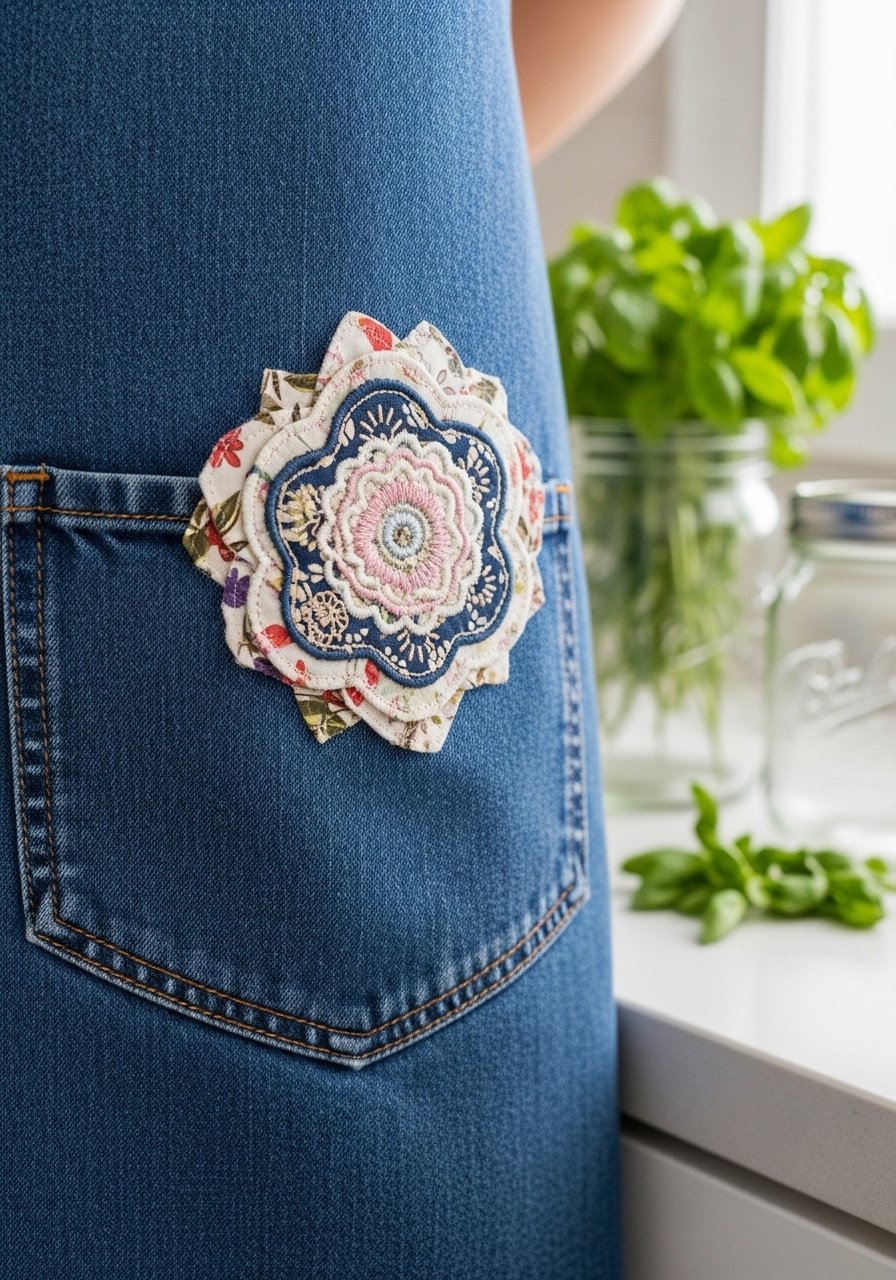
Combine small printed fabric appliqués with embroidered details to add depth without extra stitch density. This works well on aprons and tote pockets.
Materials
- Denim apron with front pocket
- Floral computer embroidery design with appliqué step, 3 inches
- Lightweight cotton scraps for petals 3 x 3 inches each
- Sulky Tear-Away Stabilizer 1 sheet
- Temporary adhesive spray
- Madeira rayon thread 3 colors
- Embroidery scissors and tweezers
Instructions
- Place cotton scrap over pocket and secure with temporary adhesive where appliqué will be.
- Hoop stabilizer and position pocket area over hoop.
- Load design that includes tack-down, applique placement, and satin-stitch edge.
- Stitch tack-down, place cut petal fabric, then continue machine steps for edge stitching.
- Trim excess fabric closely after tack-down and before final satin stitch if pattern requires.
- Tear away stabilizer and press gently; allow 15 minutes for any adhesive to set.
How to Display or Gift It
Wear the apron while baking or create a set with matching tea towel. For gifting, fold neatly with a small recipe card and tie with twine. Store aprons on hooks to avoid creasing appliqué.
- Denim Jacket Blossom Patch — delicate cluster on a jacket cuff
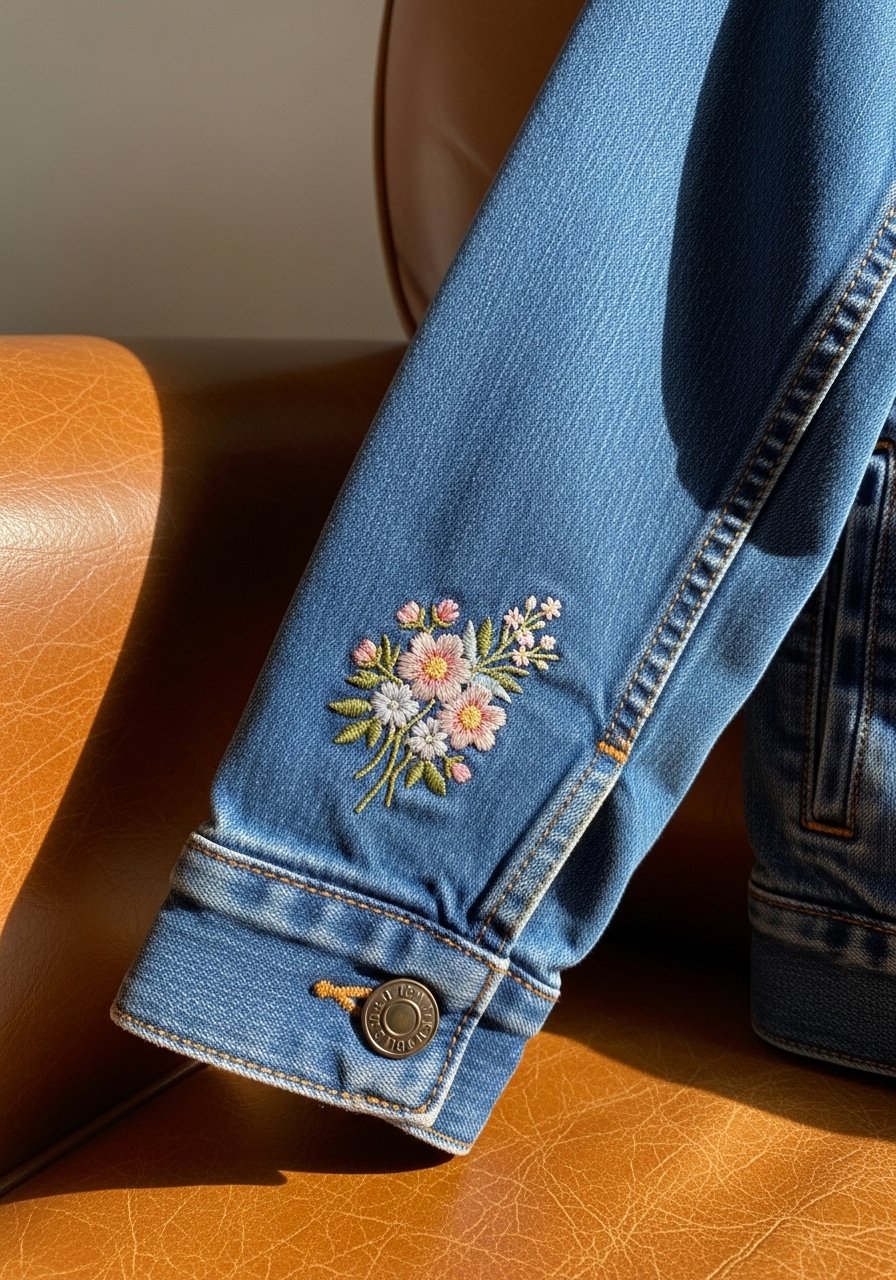
Embroidered patches can be stitched directly onto denim or made separately and sewn on. The design resists heavy wear if you use a stabilizer appropriate for denim.
Materials
- Denim jacket sleeve or cuff
- Floral computer embroidery design: cluster 3 inches
- Sulky Cut-Away Stabilizer, heavy-duty
- Madeira polyester thread 3 colors
- Embroidery needle 90/14
- Small hand-sewing needle and thread to tack patch (if necessary)
Instructions
- Choose a heavy cut-away stabilizer for denim to prevent pull-through.
- Hoop stabilizer and secure jacket area with temporary adhesive. If impossible, stitch a separate denim patch and sew it on later.
- Stitch the cluster design, using heavier needles and higher tension if required.
- Trim stabilizer close to the stitches for a neat underside.
- Press from the inside for 10 seconds.
- If you made a patch, hand-stitch the edges onto the jacket using matching thread.
How to Display or Gift It
Styling: layer over knit sweaters for a boho look. Patches make easy gifts; include a care card reminding to wash inside-out on gentle cycle. Store patched jackets on sturdy hangers.
- Canvas Market Tote Bouquet — floral cluster on a sturdy tote
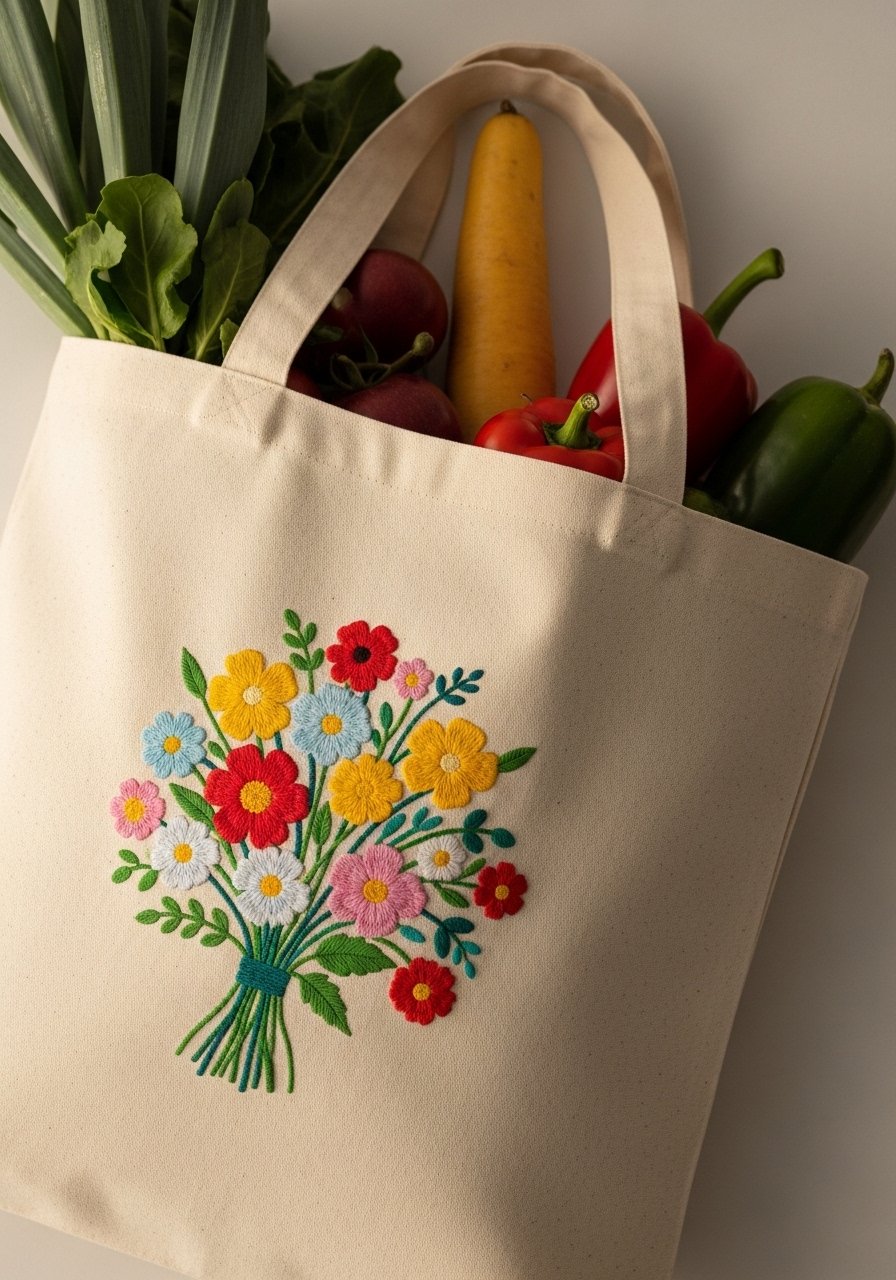
A bold bouquet looks fantastic on canvas. Use polyester thread for durability, as market totes are washed often.
Materials
- Canvas tote bag, 14 x 16 inches
- Floral computer embroidery design: bouquet 4 x 4 inches
- Sulky Cut-Away Stabilizer, heavy
- Madeira polyester thread 4 colors
- Embroidery needle 90/14
- Fabric marker for placement
Instructions
- Mark placement about 3 inches from top edge.
- Hoop stabilizer and attach tote with temporary adhesive; ensure handles are out of the way.
- Stitch bouquet; check under-stitching after first color for puckering.
- Trim stabilizer and press inside to flatten.
- Reinforce if desired with a topstitch around the embroidered area.
- Let rest 30 minutes before filling with groceries to avoid any adhesive transfer.
How to Display or Gift It
Use as a farmer’s market bag or gift filled with locally made goods. Store tote folded in a breathable cotton organizer.
- Felt Pouch Posy — embroidered felt coin pouch or clutch
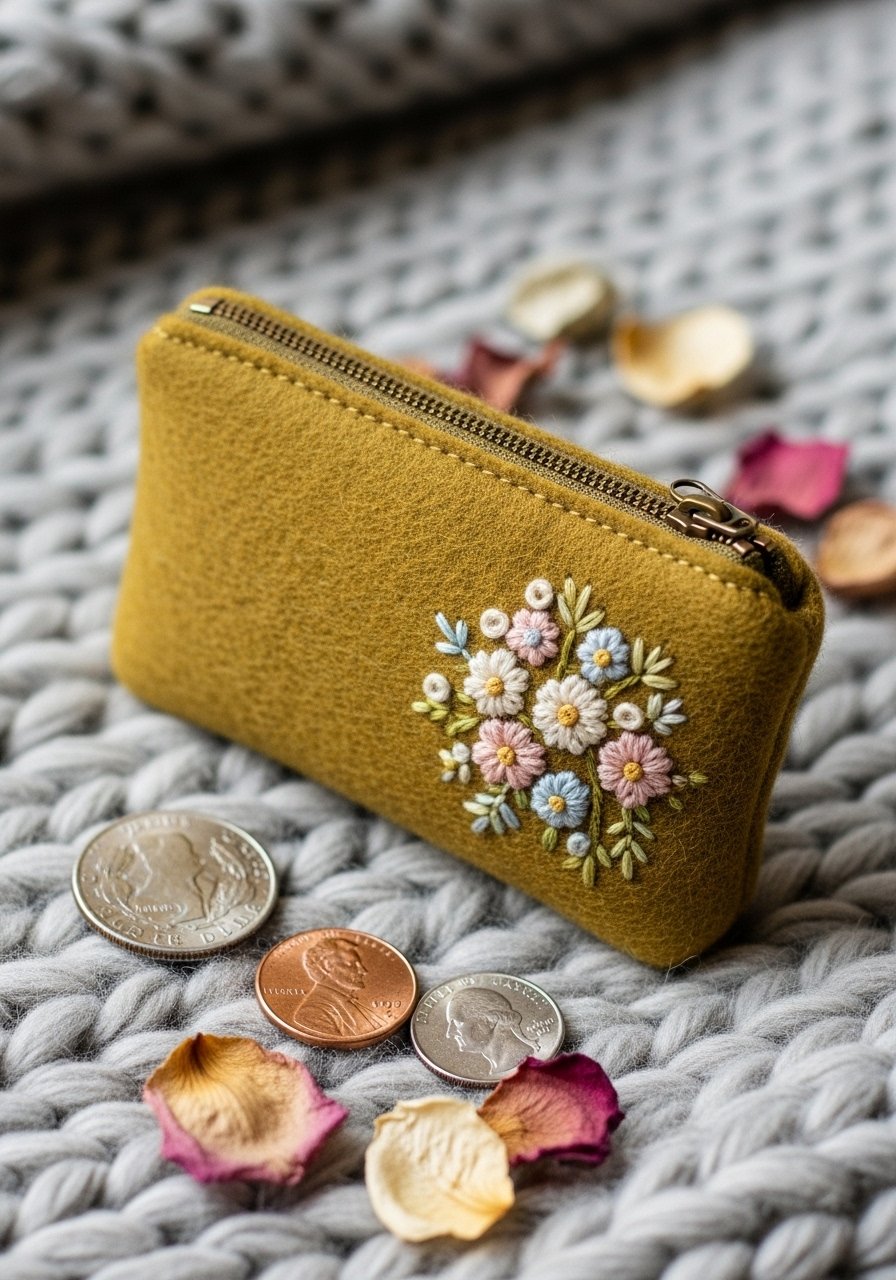
Wool felt makes the embroidery pop and gives soft structure. Keep stitch densities moderate to avoid puckering.
Materials
- Wool felt pouch, 6 x 4 inches
- Floral computer embroidery design: posy 2.5 inches
- Sulky Tear-Away Stabilizer, 1 sheet
- Madeira rayon thread 2 colors
- Embroidery needle 80/12
- Small zipper pouch or pre-made pouch blank
Instructions
- Hoop stabilizer and attach felt pouch with temporary adhesive.
- Stitch design, using a low-density fill to keep pouch flexible.
- Remove stabilizer and trim excess.
- If stitches pull felt, add a small backing patch to reinforce.
- Press gently from the inside for 6–8 seconds.
- Allow glue used in pouch construction to cure 24 hours before heavy use.
How to Display or Gift It
Fill the pouch with gift card and tuck into a birthday card. Store small embroidered pouches in a drawer divider to keep from crushing.
- Floral Napkin Rings — embroidered linen rings for dinner parties
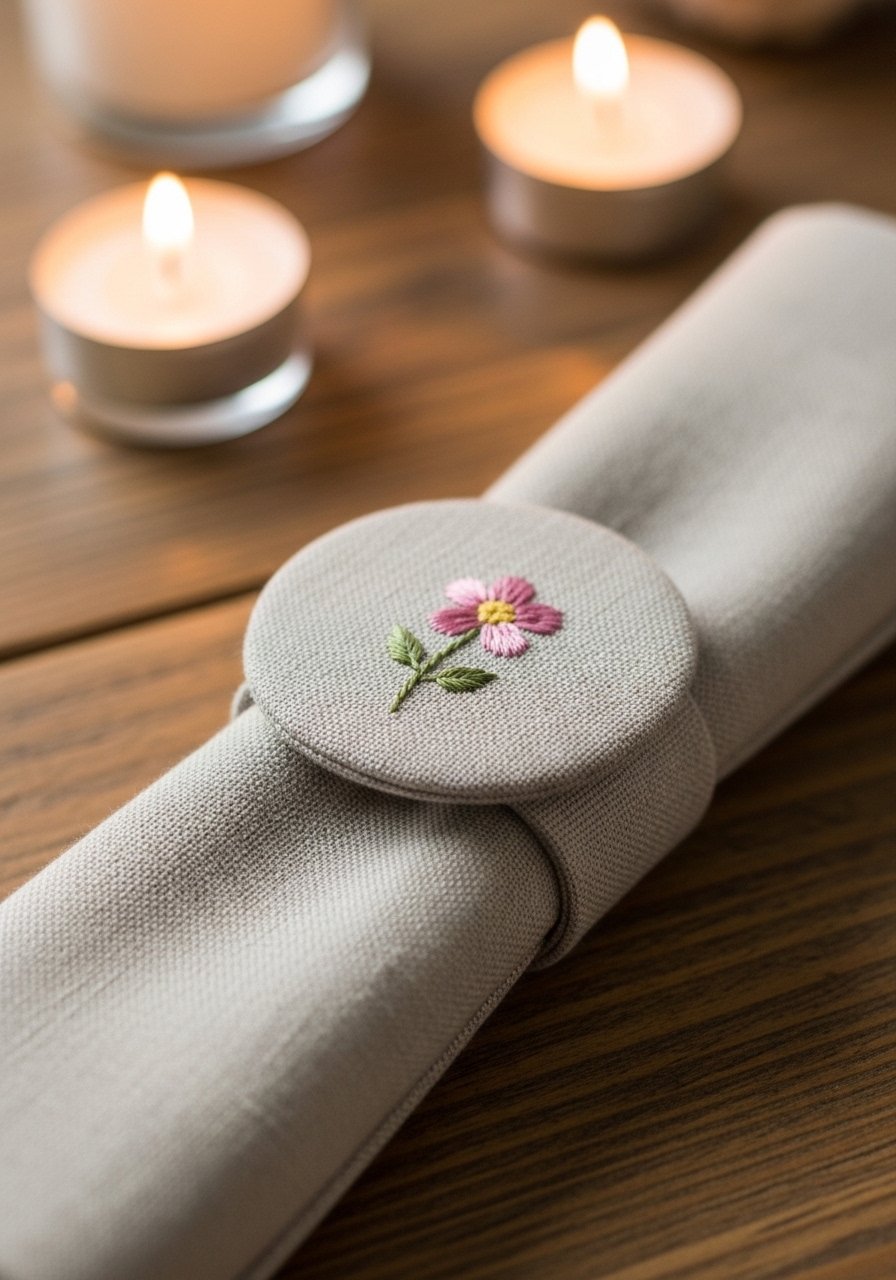
Napkin rings are small, fast, and elegant. They’re perfect for seasonal table settings—try muted pastels for spring or warm tones for fall.
Materials
- Linen napkin rings blanks, 1.5 x 3 inches (flat)
- Floral computer embroidery design: single blossom 1 inch
- Sulky Tear-Away Stabilizer pack
- Madeira cotton thread 2 colors
- Hot glue gun (low-temp recommended)
- Small wooden dowel for shaping
Instructions
- Hoop stabilizer and secure napkin ring flat with adhesive.
- Stitch blossom and remove stabilizer.
- If rings need shaping, wrap around dowel and use a dab of hot glue inside seam; let cool 2 minutes.
- Press lightly on low heat if glue is used—avoid melting threads.
- Repeat to make matching sets.
- Let any glue fully set 30 minutes before stacking.
How to Display or Gift It
Pair with folded cloth napkins and a sprig of rosemary for a simple table centerpiece. Store napkin rings in a small craft tray.
- Boho Blossom Denim Pocket — floral computer embroidery designs for denim
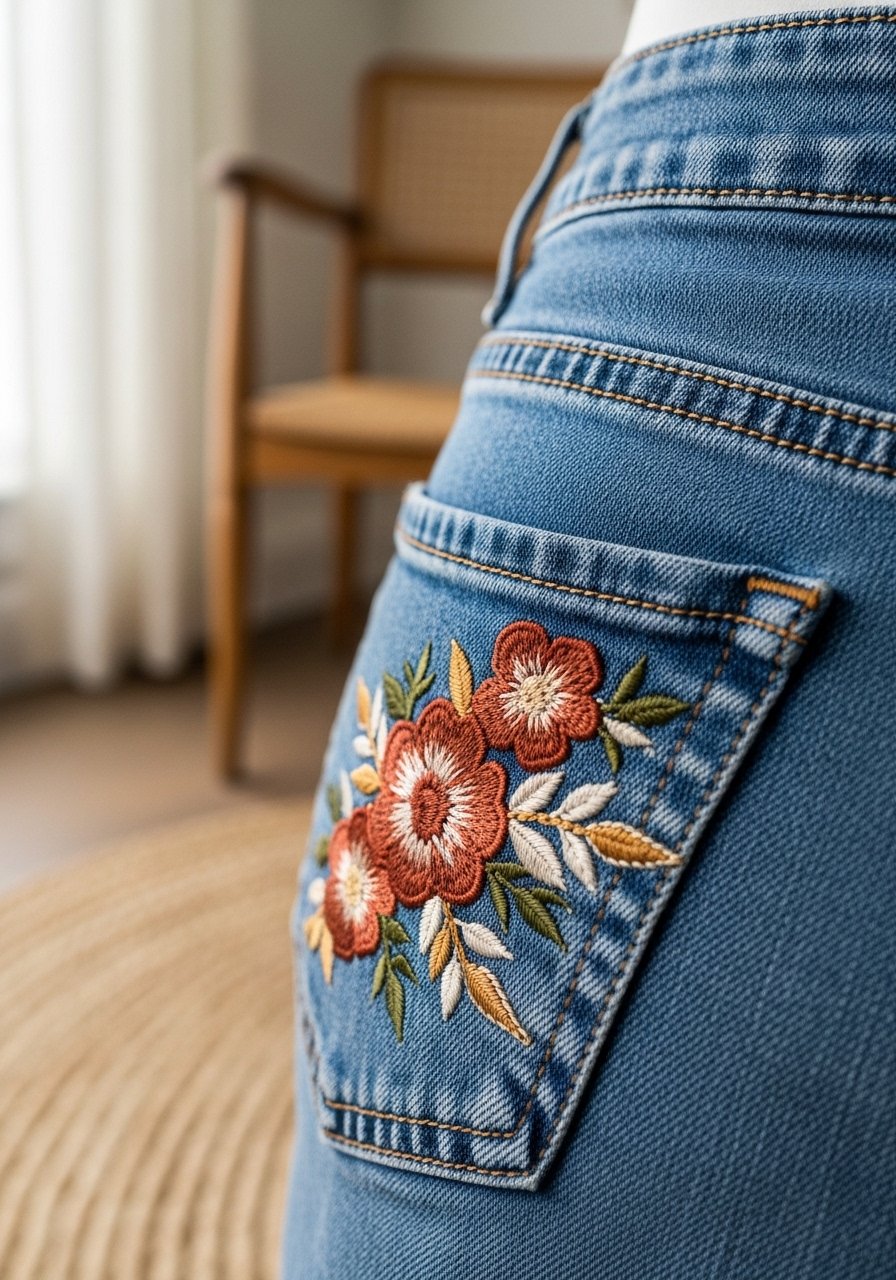
Boho florals on denim are big this season. This layered cluster mixes satin stitches and light fills to give texture without bulk.
Materials
- Pair of denim jeans or jean pocket
- Floral computer embroidery design: boho cluster 3.5 inches
- Sulky Cut-Away Stabilizer heavy
- Madeira rayon and polyester threads 3 spools
- Embroidery needle 90/14
- Small seam ripper (if removing pocket)
Instructions
- If needed, remove pocket for hooping; mark position before removal.
- Hoop heavy cut-away stabilizer and attach denim or pocket.
- Stitch the boho cluster, switching thread types as called for in design.
- Trim stabilizer close to back of stitches and resew pocket if removed.
- Press from inside for 10 seconds.
- Wash inside-out on cold before wearing to check longevity.
How to Display or Gift It
This makes a thoughtful upcycle gift—pair with a small card explaining how to care for embroidered denim. Store denim items on strong hangers.
- Linen Pillow Blossom — single large floral on a throw pillow
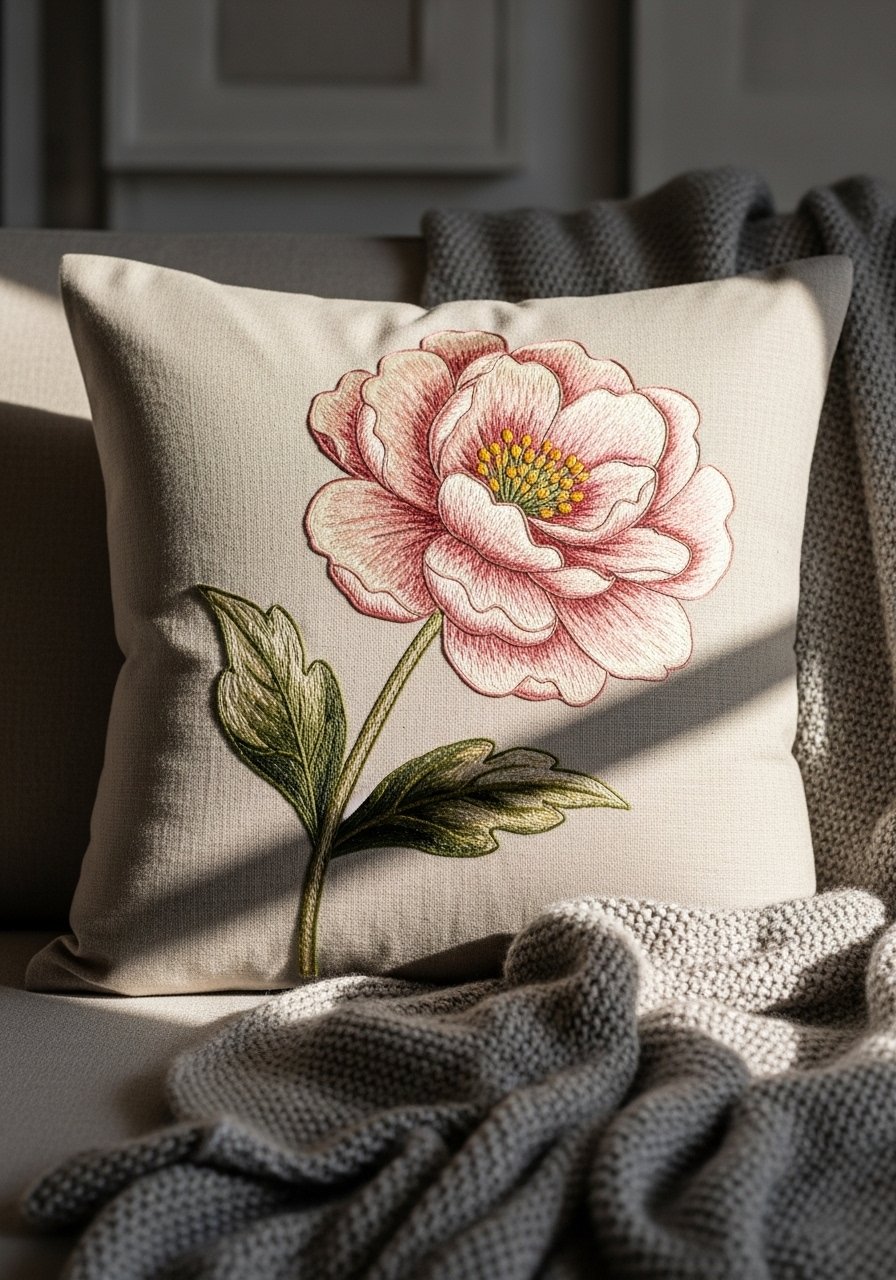
A single large blossom anchors a pillow beautifully. Use medium-density fills and a stabilizer suited for home decor projects.
Materials
- Linen throw pillow cover, 18 x 18 inches
- Floral computer embroidery design: large blossom 7 inches
- Sulky Cut-Away Stabilizer heavy duty
- Madeira polyester thread 4 colors
- Embroidery needle 90/14
- Pillow insert 18 x 18 inches
Instructions
- Mark placement slightly off-center for visual interest.
- Hoop stabilizer and attach pillow cover; if removing zipper, turn cover inside-out to hoop.
- Stitch large blossom. Use slow stitch speed for larger fills to avoid needle heat.
- Trim stabilizer leaving 1/4 inch if using cut-away. Press from inside for 12 seconds.
- Insert pillow form and fluff. Let seam glue or finishing stitches rest 30 minutes if used.
- Vacuum gently or spot clean; wash cover only on gentle cycle if needed.
How to Display or Gift It
Pair with textured throws or a woven basket on a sofa. For gifting, wrap pillow in kraft paper and tie with ribbon. Store covers flat to avoid creasing.
- Tea Cozy Posy — embroidered cozy for teapot
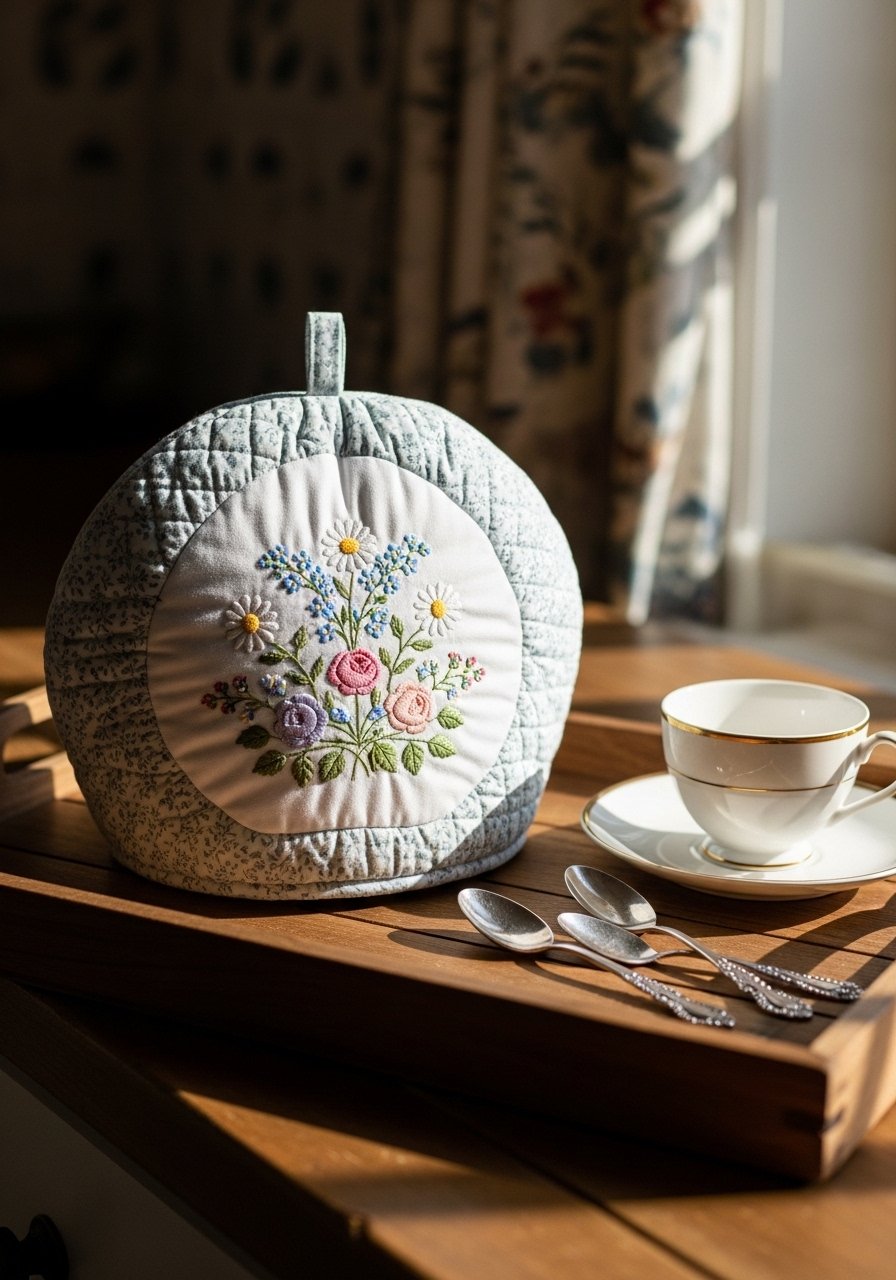
A tea cozy is both functional and pretty. Use heat-resistant stabilizer and secure threads against steam and moisture.
Materials
- Quilted tea cozy blank, fits standard teapot approx. 8 inches tall
- Floral computer embroidery design: posy 3 inches
- Sulky Heat-Resistant Stabilizer (or heavy cut-away)
- Madeira polyester thread 3 colors
- Embroidery needle 90/14
- Steam-safe pressing cloth
Instructions
- Hoop stabilizer and attach cozy area with temporary adhesive.
- Stitch the posy with polyester thread for washability.
- Trim stabilizer close to stitches and press with steam-safe cloth for 8–10 seconds.
- Let cozy air for 24 hours before using to ensure any adhesives are fully set.
- Spot clean only; avoid machine washing unless cozy blank specifies it’s washable.
- Re-press lightly before use if needed.
How to Display or Gift It
Set on a saucer with matching tea towels and a small packet of loose tea. Store the cozy in a dry cupboard away from heat sources.
- Linen Table Runner Garland — repeated floral border embroidery
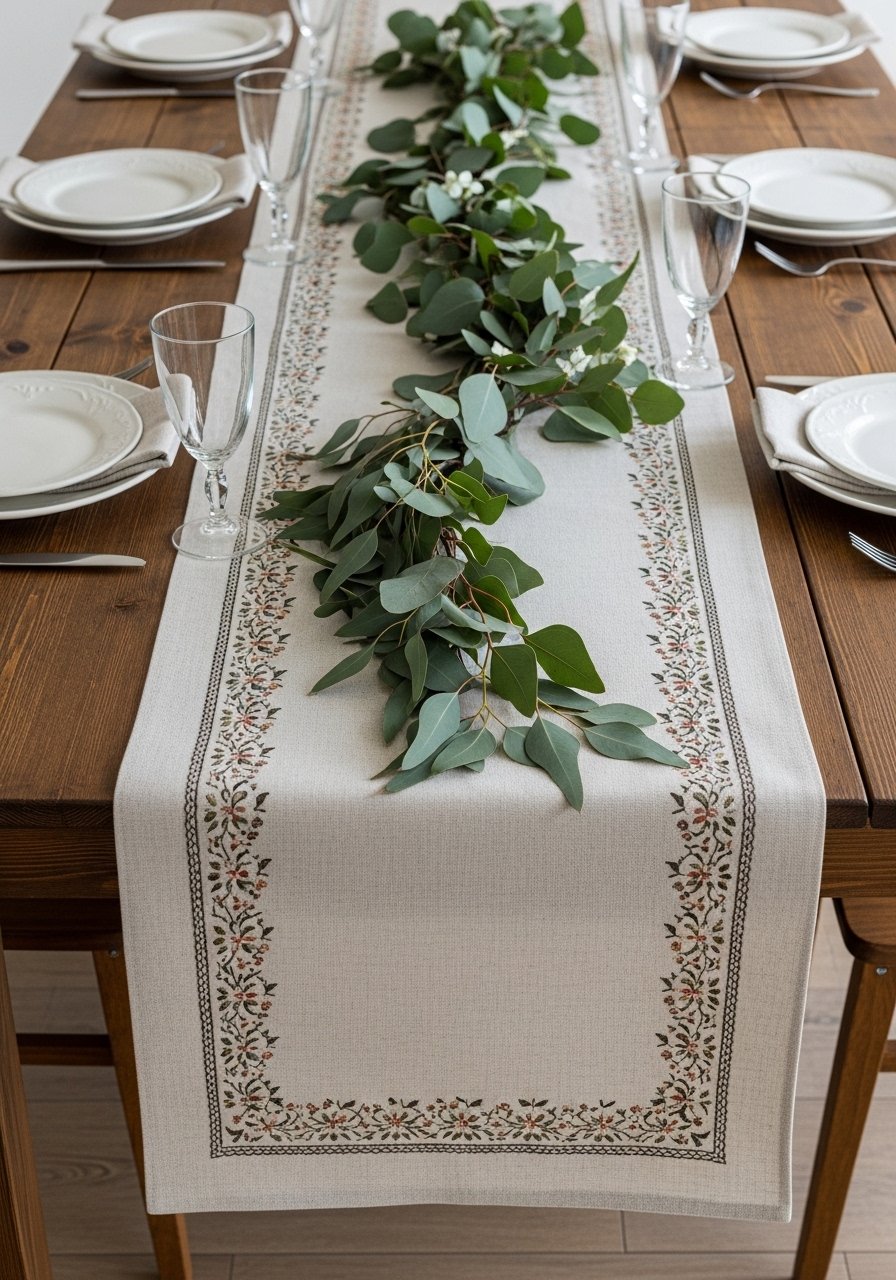
A repeated border design creates a coordinated table look. Work left to right for efficient hooping and consistent spacing.
Materials
- Linen table runner, 14 x 72 inches
- Floral computer embroidery design: repeat border motif 2 inches
- Sulky Tear-Away Stabilizer multiple sheets
- Madeira rayon thread 3 colors
- Measuring tape and fabric pen
- Embroidery hoop 5 x 7 inches
Instructions
- Measure and mark repeat placements every 4 inches down the runner edge.
- Hoop stabilizer and align runner edge with design; use temporary adhesive to secure.
- Stitch motif, then move hoop, aligning next placement carefully to maintain consistent spacing.
- Tear away stabilizer after each section and press lightly for 8 seconds.
- After all repeats, press entire runner and allow to rest flat 1 hour.
- Hand wash in cold and lay flat to dry before placing on table.
How to Display or Gift It
Use for seasonal tablescapes; tie with matching napkins for gifts. Store rolled in acid-free paper to prevent creases.
- Satin Rose Jacket Panel — dense floral embroidery for outerwear
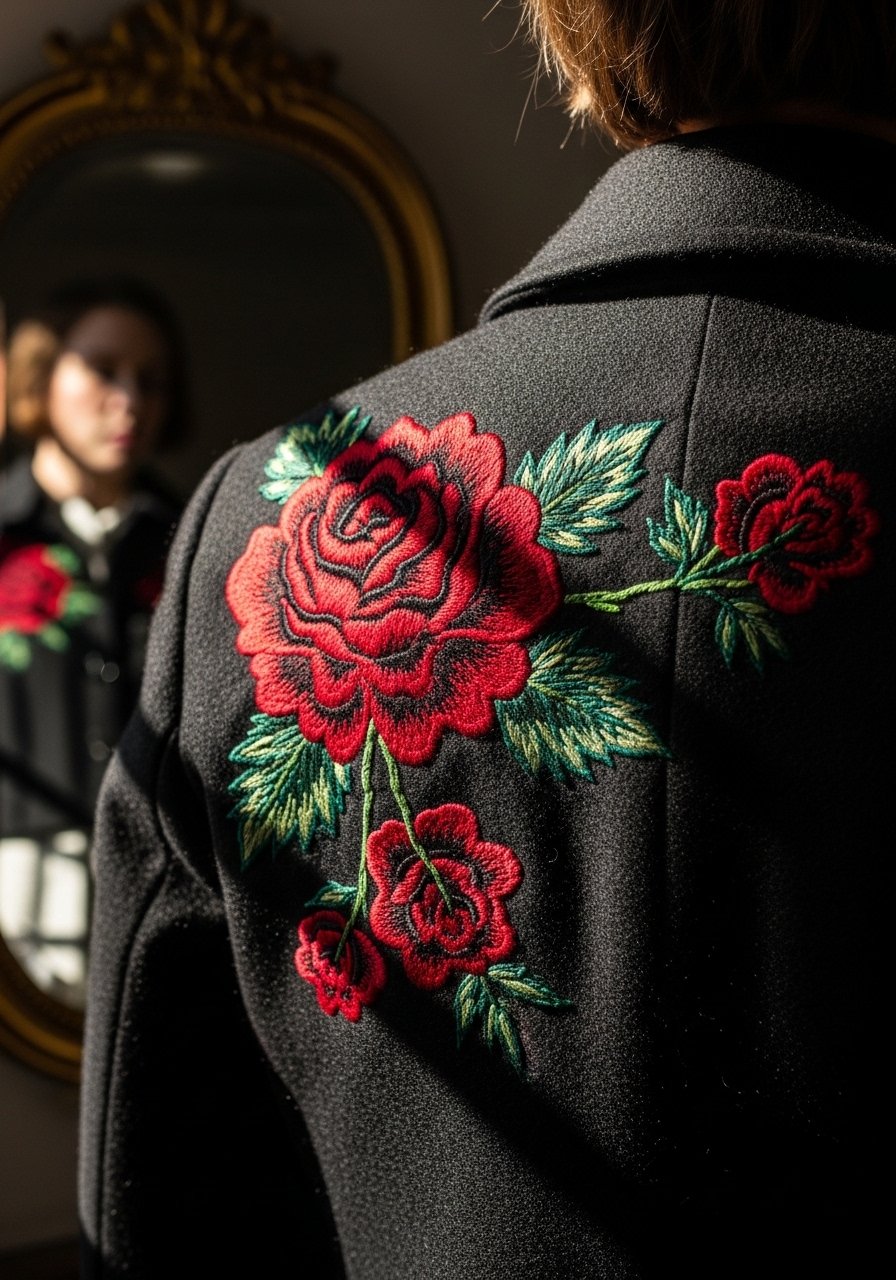
A richer, denser design like a satin rose needs heavy stabilizer. Use polyester threads to withstand outerwear wear.
Materials
- Wool jacket back panel or removable panel
- Floral computer embroidery design: satin rose 5 inches
- Sulky Cut-Away Stabilizer heavy-duty
- Madeira polyester thread 3 spools
- Embroidery needle 100/16
- Pressing cloth for wool
Instructions
- Remove panel if possible; mark center placement.
- Hoop heavy cut-away stabilizer and secure jacket fabric with adhesive.
- Stitch at a slower machine speed for dense satin fills to avoid skipped stitches.
- Trim stabilizer leaving 1/4 inch for stability, or leave full cut-away.
- Press through a cloth on low heat for 10 seconds to avoid flattening wool.
- Reattach panel and give a final press after 24 hours.
How to Display or Gift It
Layer the jacket over simple outfits to let the embroidery stand out. For gifting, include a garment care card recommending professional cleaning.
- Romper Ruffle Florals — delicate florals on baby romper ruffles
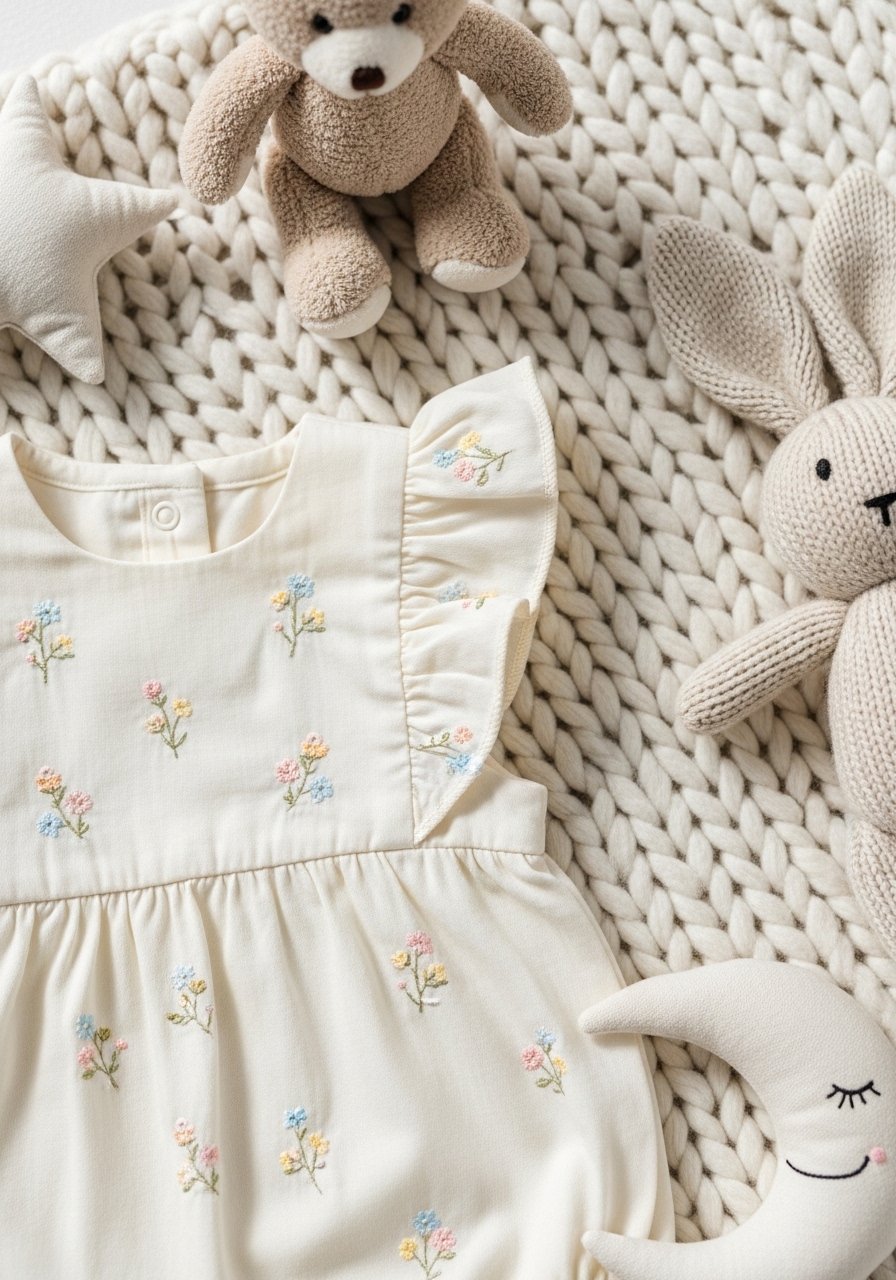
Ruffle edges add charm but present handling challenges. Use a narrow hoop and temporary adhesive to keep ruffle flat.
Materials
- Cotton baby romper with ruffle sleeves
- Floral computer embroidery design: tiny sprig 0.75 inches
- Sulky Tear-Away Stabilizer pack
- Madeira rayon thread 3 pastel spools
- Small embroidery hoop 3 x 4 inches
- Gentle detergent
Instructions
- Flatten ruffle and secure with temporary adhesive on top of stabilizer.
- Stitch the tiny sprig carefully at low speed.
- Tear away stabilizer and trim any excess.
- Press inside-out for 6 seconds and cool.
- Wash once on delicate to test seam stability before gifting.
- Allow to air dry completely before folding overnight.
How to Display or Gift It
Pair with knitted socks in a small gift box. Store rompers flat and avoid stacking heavy items on top.
- Quilted Floral Throw Accent — embroidered motif on quilt block
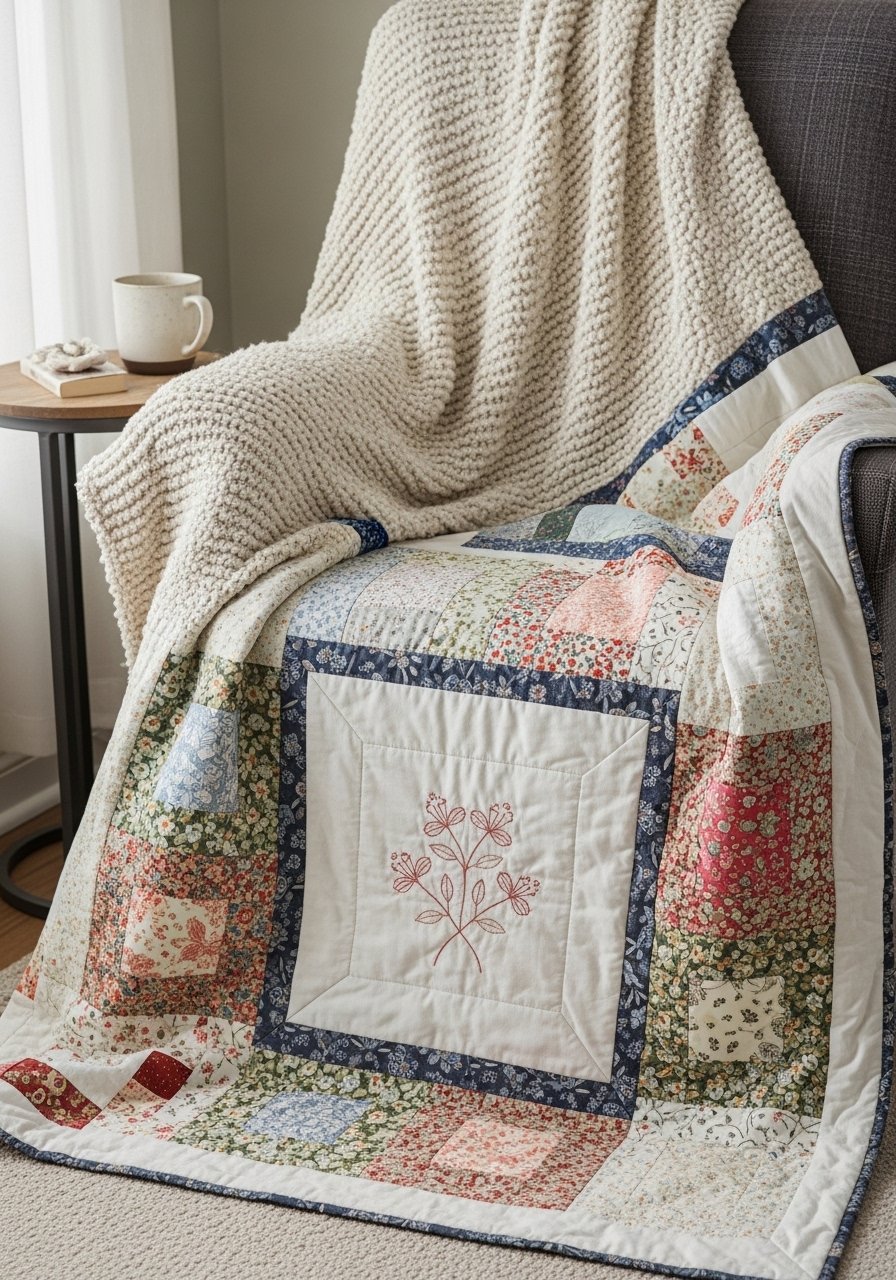
Add a machine-embroidered motif to a quilt block to give a focal point. Match stabilizer to batting thickness.
Materials
- Quilt block 12 x 12 inches
- Floral computer embroidery design: motif 3 inches
- Sulky Tear-Away or Cut-Away depending on batting
- Madeira rayon thread 3 colors
- Quilting batting cotton, 12 x 12 inches
- Rotary cutter and ruler
Instructions
- Prepare quilt sandwich and press block flat.
- Hoop stabilizer and baste block area with temporary adhesive if needed.
- Stitch motif; use tear-away for thin batting, cut-away for thicker batting.
- Trim stabilizer and press on low for 10 seconds.
- Continue quilting assembly per your pattern.
- Wash quilt according to batting and thread recommendations after all finishing is complete.
How to Display or Gift It
Drape across a sofa or cedar chest. For gifting, include a small card with laundering instructions. Store quilts rolled with acid-free paper.
- Linen Cosmetic Pouch — floral cluster on a zipper pouch
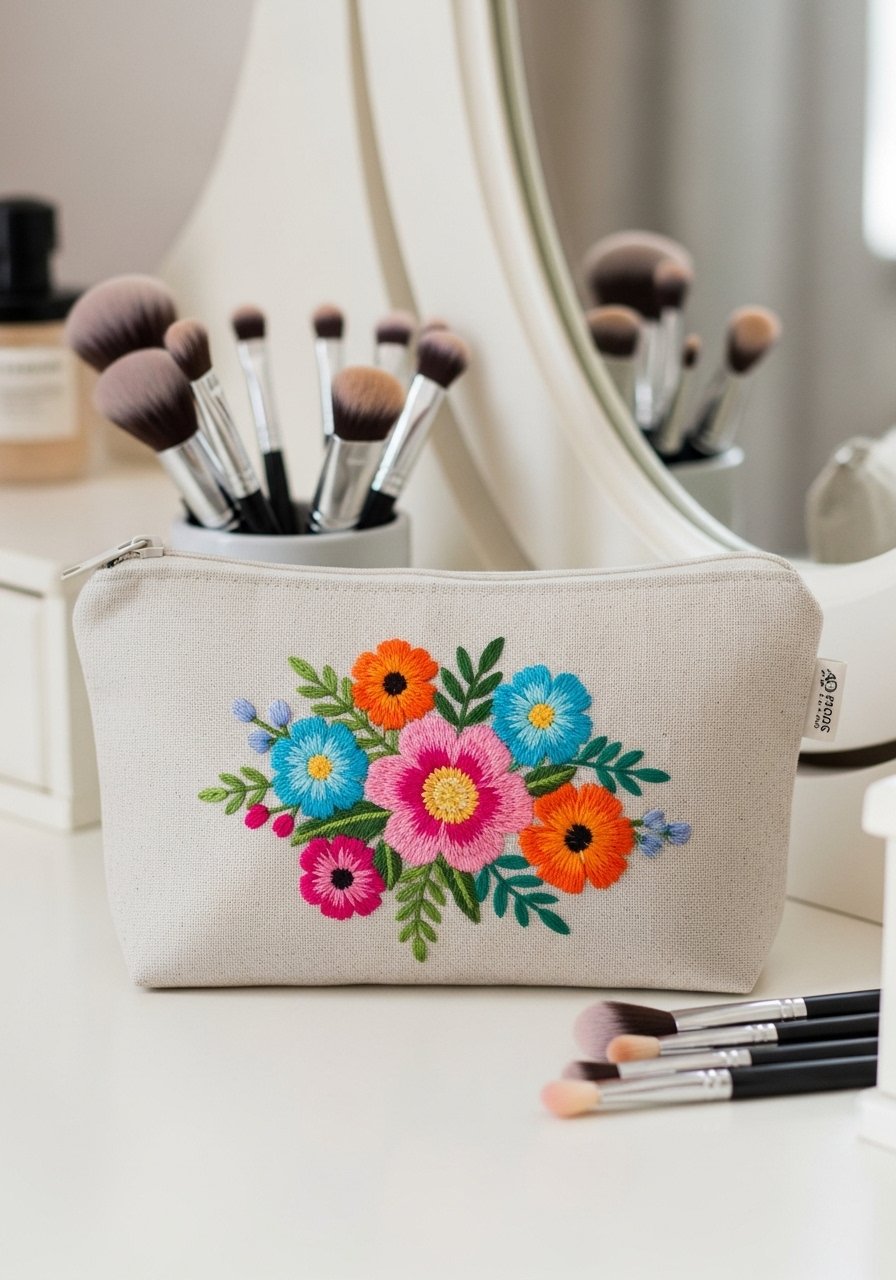
A cosmetic pouch is a practical canvas for florals. Use polyester thread for colorfastness against makeup.
Materials
- Linen zipper pouch, 8 x 5 inches
- Floral computer embroidery design: cluster 3.5 inches
- Sulky Tear-Away Stabilizer 1 sheet
- Madeira polyester thread 3 colors
- Zipper pouch blank or DIY zipper kit
- Lint roller for finishing
Instructions
- Hoop stabilizer and attach pouch front with temporary spray adhesive.
- Stitch the floral cluster, using polyester thread to resist bleaching or makeup oils.
- Tear away stabilizer and press lightly for 8 seconds.
- If pouch is lined, ensure lining is out of hoop or stitch on front only.
- Clean any stray fibers with a lint roller and let rest 30 minutes.
- Test zipper function before filling and gifting.
How to Display or Gift It
Fill with travel-size skincare items and wrap in a small gift bag. Store pouches flat in a drawer organizer to avoid crushing embroidery.
Thanks for stitching along—what a lovely range of floral computer embroidery designs to try. You’ve got single-stem minimal pieces, layered boho clusters, appliqué accents, and practical items like totes and napkins. Pick one that fits your skill level, and remember the basics: secure your stabilizer, use the correct needle size, and test stitch density on a scrap before committing to your final fabric.
If you’re equipping a starter embroidery toolkit, consider a reliable hoop set and quality stabilizer like Sulky Tear-Away Stabilizer. For cutting and prep, I often reach for a Cricut Explore cutting machine when I make multiple appliqué pieces. Trust me, a good set of embroidery scissors speeds up finishing—this gold embroidery scissors set is my go-to.
Which of these floral computer embroidery designs will you try first? Pin this for later so you can come back to favorite projects, and share the ones you finish with a friend who loves handmade gifts. Happy stitching!





