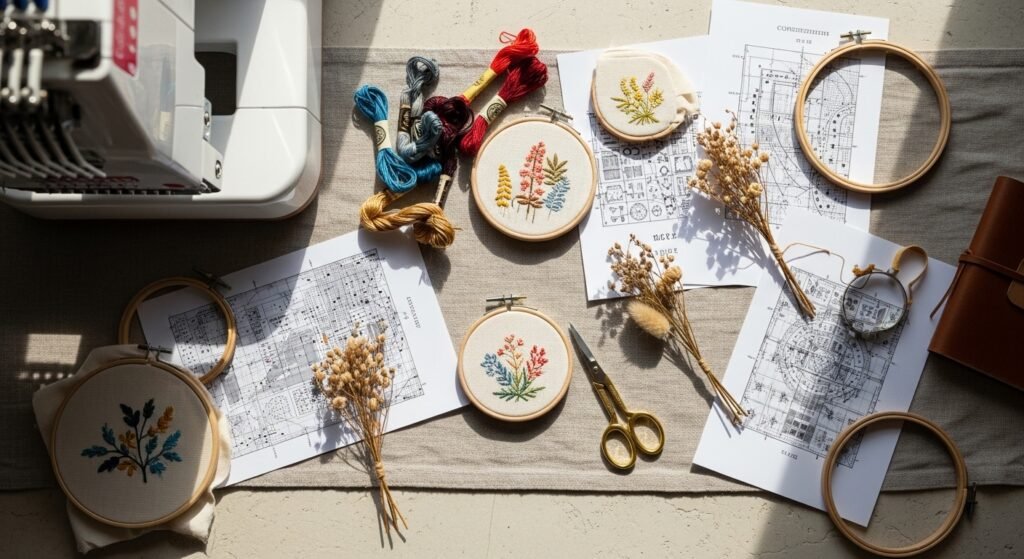
If you love the look of precise, repeatable stitch work but also crave handmade charm, computer embroidery designs open a whole world. They let you add intricate motifs—lace fills, delicate florals, geometric trims—to everything from denim jackets to linen napkins, all with consistent, professional results. You’ll find projects here that show how to use those designs in fresh, on-trend ways across cottagecore, boho, and farmhouse styles.
You’ll see 25 complete projects with step-by-step instructions, exact material amounts, realistic drying and hooping times, and troubleshooting tips for common hiccups like puckering and thread breaks. I often run small motifs on my Brother SE600 embroidery machine and stabilize with a quality tear-away stabilizer for crisp results. Grab your hoop and let these computer embroidery designs inspire your next project.
- Delicate Floral Hoop Art
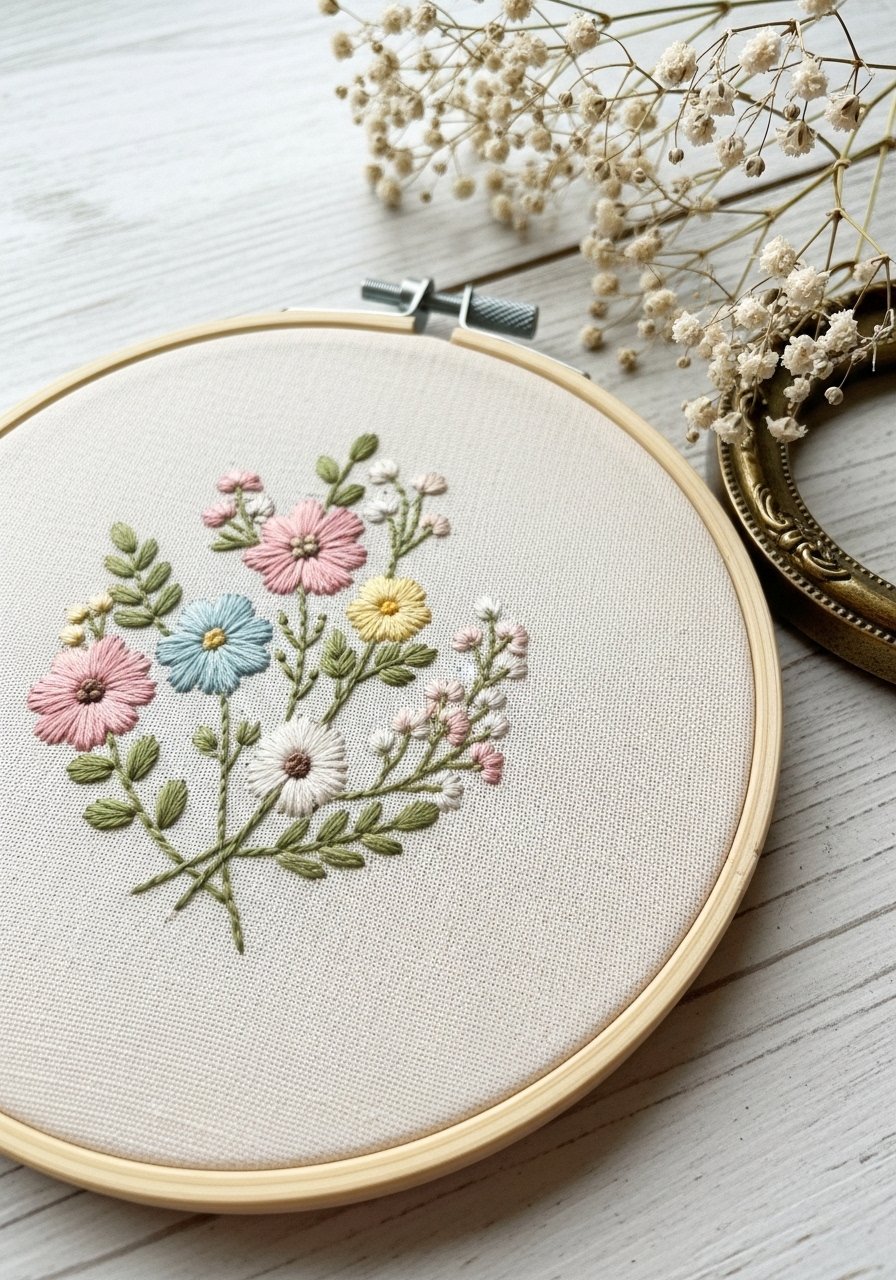
This hoop showcases a layered floral design from a computer embroidery file. It feels airy and cottagecore—soft petals, subtle shading, and a matte finish. Ideal for beginner-to-intermediate stitchers who want a polished piece without hand-drawing each motif. The texture is slightly raised and soft to the touch when you use polyester embroidery thread and medium stabilizer. I use a 6-inch wooden hoop for that classic frame.
Materials
- 6-inch wooden embroidery hoop, sanded smooth
- 8" x 8" cream linen (100% linen) pre-washed
- Tear-away stabilizer, 8" square
- Polyester embroidery thread set, 6-strand (20–30 colors), 3–4 skeins
- Computer embroidery design floral file (DST/PES)
- Embroidery needles size 75/11 for machine use
- Low-tack removable fabric spray adhesive, 2–3 sprays
- Small scissors (embroidery snips)
- Optional: lightweight backing felt, 6" round
Instructions
- Hoop the linen with the tear-away stabilizer behind it. Center design area; spray a light mist of adhesive between fabric and stabilizer.
- Load the floral computer embroidery design into your embroidery machine and check stitch count and thread color order.
- Thread the machine with the first color and stitch the outline. Watch for thread tension; adjust tension by 1/2 turn if loops appear.
- Continue with fill stitches. Pause after each color change to trim jump threads with snips.
- Once stitching finishes, gently tear away stabilizer from the back; avoid pulling under dense fills—trim close with scissors.
- Press from the back with a cloth at low-medium heat for 5–8 seconds to remove hoop marks. Let cool until firm to touch.
How to Display or Gift It
Hang the hoop directly on a nail or place it in a small gallery wall cluster. Add a light dab of craft glue around the inner hoop to keep fabric taut. Tuck a circle of felt behind the stitches for a neat back finish and protect against snagging. Wrap it in tissue and slip into a small kraft box for gifting. For storage, stack finished hoops flat in a shallow craft organizer tray.
- Monogram Tea Towels (Computer Embroidery Designs)
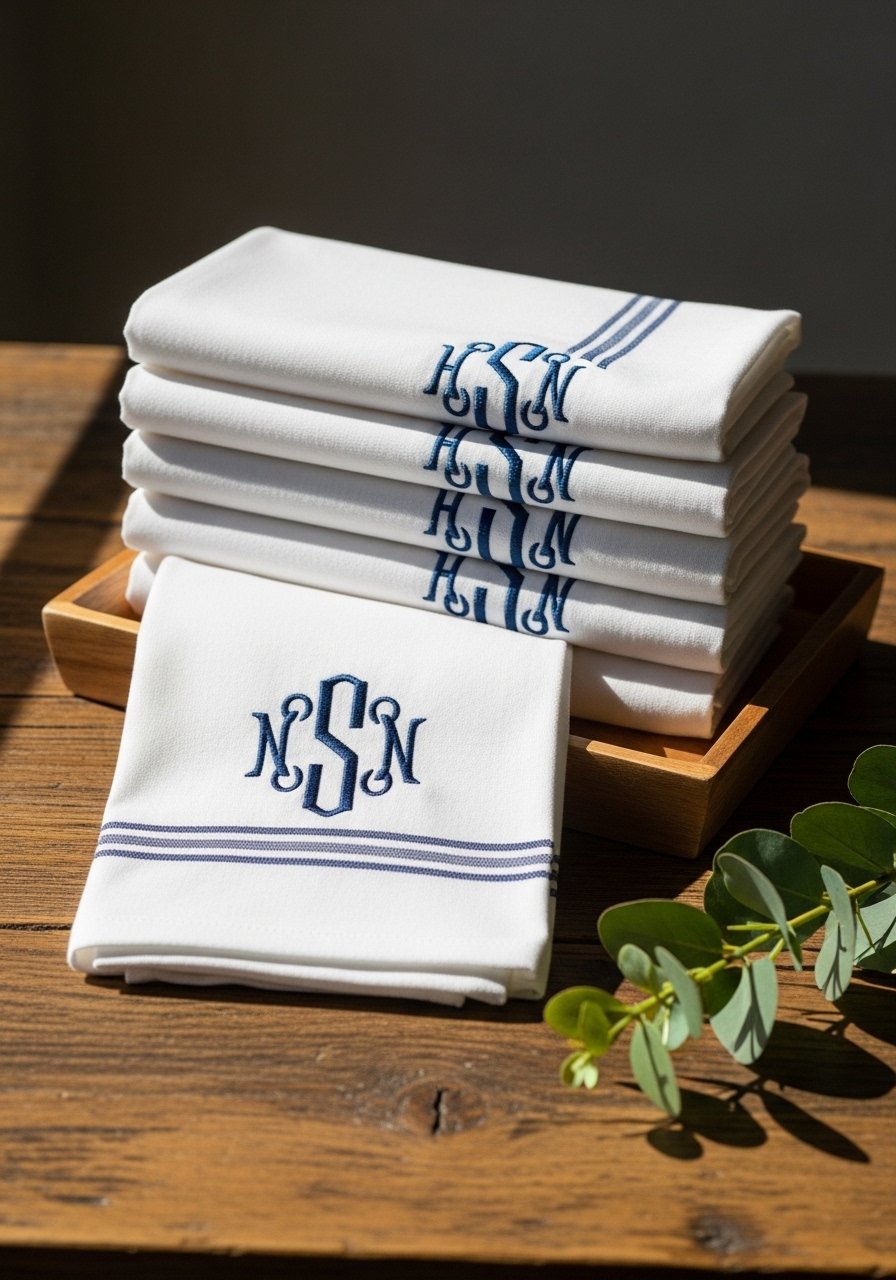
A classic monogram brings instant polish to a kitchen. Using computer embroidery designs means crisp lettering every time, even on narrow weaves. These towels have a soft hand thanks to pre-washing and will keep their shape after repeated laundering when stabilized correctly. Great for gift-givers and new homeowners.
Materials
- 18" x 28" white linen-cotton blend tea towels, 2–4
- Tear-away stabilizer, 18" x 8" strips
- Computer embroidery design monogram alphabet (4–6" tall)
- Polyester embroidery thread (contrast color), 2 skeins
- Embroidery hoop or machine hoop sized for towel
- Water-soluble marking pen, fine tip
- Iron and ironing board
- Optional: spray starch for crisp finish
Instructions
- Pre-wash towels and press flat; mark monogram placement 2.5" from bottom edge with a water-soluble pen.
- Hoop towel with stabilizer or use a machine hoop; ensure fabric smooth, not stretched.
- Load your monogram computer embroidery designs and preview size on screen; resize to 4" height max.
- Stitch slowly for dense fonts to prevent puckering. Reduce stitch density by 5–10% if your software allows.
- Trim jump threads and remove stabilizer; for dense monograms, trim stabilizer close but don’t pull.
- Press from the back through a pressing cloth for 8–10 seconds to set stitches.
How to Display or Gift It
Fold towels and tie with natural twine and a dried sprig for a farmhouse look. Store finished towels flat in breathable linen bins to avoid creases. For gifting, pair with a small wooden cutting board and wrap in kraft paper.
- Denim Jacket Patch Set — computer embroidery designs for jackets
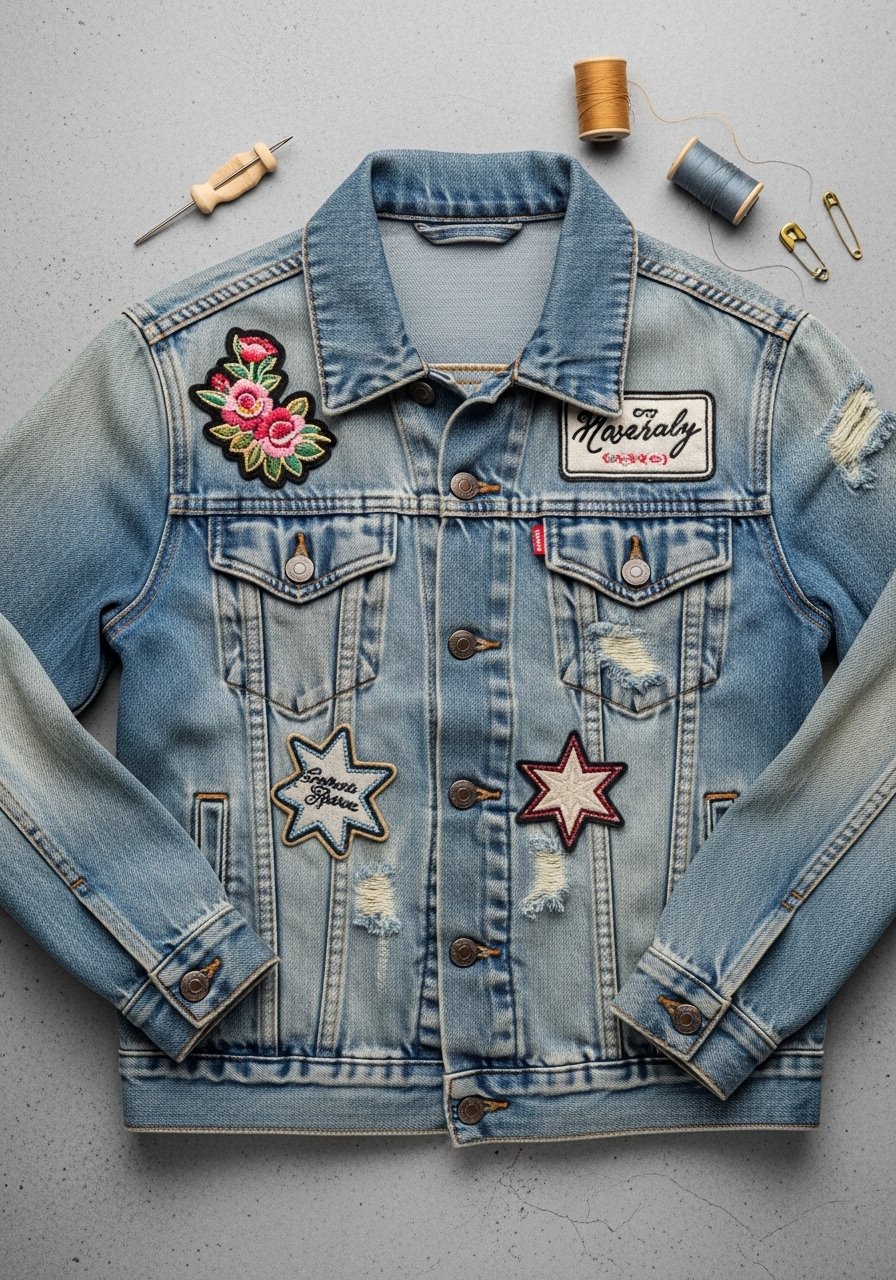
Patches made from computer embroidery designs let you add consistent motifs to jean jackets and bags. These patches use a cut-away stabilizer and sew-on backing for durability. They feel slightly stiff at first but soften after washing, blending perfectly with worn denim. Perfect for teens and makers reworking thrifted pieces.
Materials
- Assorted patch size bases (2.5"–4" felt or twill), 6 pieces
- Cut-away stabilizer, 6" squares
- Computer embroidery designs patch set (multiple DST/PES files)
- Polyester thread (assorted colors), 4–6 skeins
- Fusible sew-on backing or iron-on web, 6 pieces
- Heat press or iron
- Embroidery adhesive spray (light)
- Scissors and pinking shears
Instructions
- Hoop a patch base with cut-away stabilizer. Spray a light adhesive to keep base in place.
- Load the computer embroidery design and stitch the patch motif. Use a satin border stitch for clean edges.
- After stitching, apply fusible backing following manufacturer heat settings (usually 10–15 seconds at medium-high heat).
- Trim the patch close to the satin border with pinking shears for a finished look.
- Let fuse cool for 1 minute until firm. Remove stabilizer by trimming close—do not pull.
- Attach to jacket with a short zig-zag stitch around the edge or iron-on then tack with a few hand stitches for longevity.
How to Display or Gift It
Arrange a set of patches on a jacket sleeve or across the back panel for a curated look. Store unused patches flat in a small craft organizer or magnetized tin. Wrap multiple patches in tissue, tie with ribbon, and include a sewing needle and thread for a thoughtful gift.
- Baby Blanket with Embroidered Corner Motifs
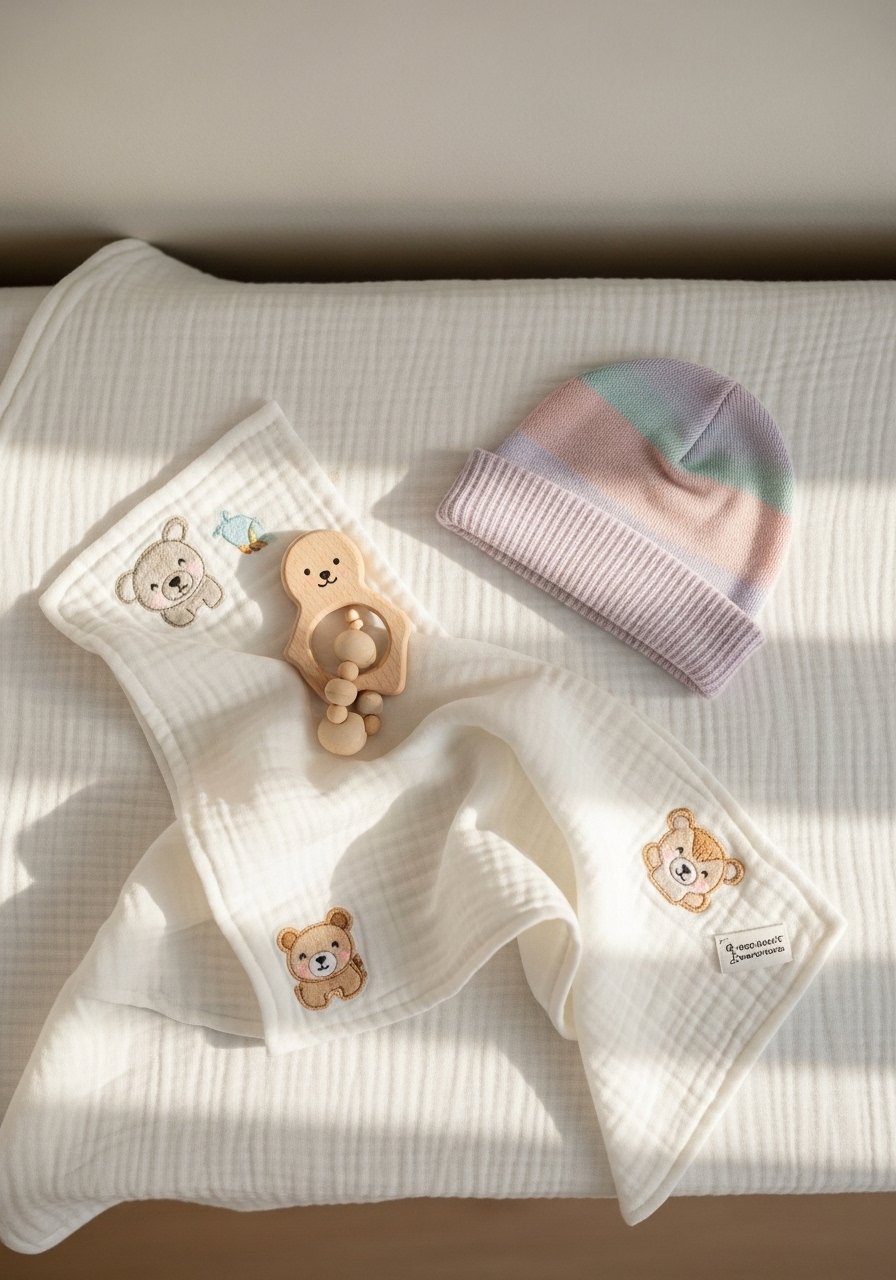
Tiny repetitive motifs from computer embroidery designs look precious on baby blankets because they’re uniform and gentle. Use soft cotton muslin and light stabilizer so the blanket stays cuddly. Keep stitch density low to avoid stiff patches. New parents and baby shower hosts will adore this heirloom-style gift.
Materials
- 40" x 40" cotton muslin blanket, pre-washed
- Tear-away stabilizer, 6" squares per motif
- Computer embroidery designs small animals set (1.5"–2.5")
- Cotton embroidery thread (soft colors), 2 skeins
- Embroidery machine needles 75/11
- Rotary cutter and mat
- Fabric-safe pressing cloth
Instructions
- Wash and press blanket. Mark motif positions 3" from each corner.
- Hoop each corner with stabilizer so fabric is flat but not stretched.
- Load design and stitch at 1,000–3,000 stitches per motif depending on size—keep under 5,000 for softness.
- Trim jump threads and tear stabilizer away gently.
- Press motifs from the back with cloth at low heat for 3–5 seconds.
- Let the blanket rest 24 hours before first wash. Machine wash cold on gentle cycle.
How to Display or Gift It
Fold with the embroidered corners on top and tie with a cotton ribbon. Store unfolded in a breathable cotton bag to avoid crushing stitches. For gifting, add a matching knit hat and place in a sturdy kraft box.
- Linen Napkin Set with Corner Lace Motif
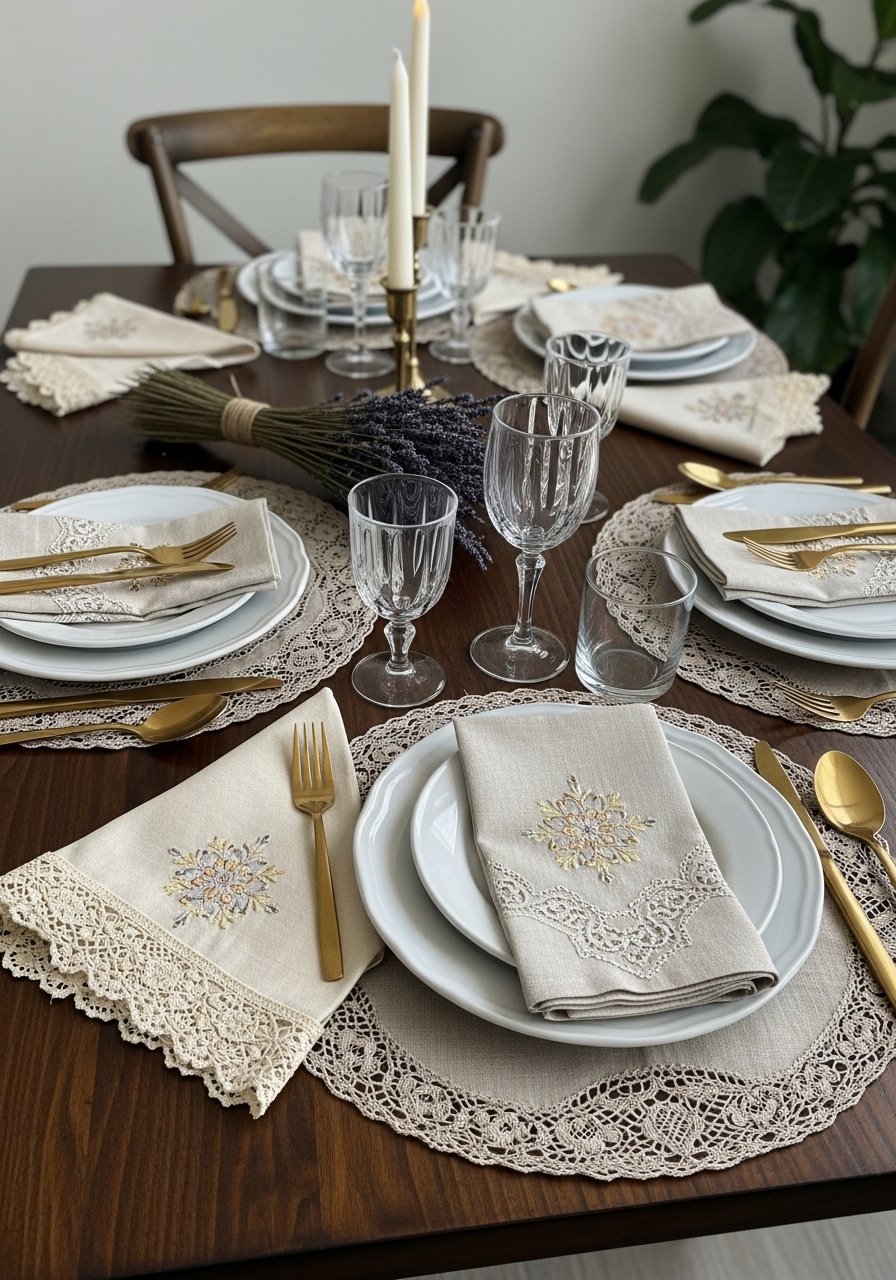
Computer embroidery designs recreate tiny lace motifs on napkins to make a casual table feel curated. These napkins are washable and we recommend using a light tear-away stabilizer since napkin fabric can be thin. They add a subtle cottagecore or vintage touch.
Materials
- 18" x 18" linen napkins, 4
- Tear-away stabilizer, 4 squares 6" x 6"
- Computer embroidery design lace corner motif, sized 1.25"–2"
- Rayon or polyester thread (neutral), 1 skein
- Small round embroidery hoop or machine hoop
- Iron and pressing cloth
- Optional: spray starch
Instructions
- Pre-wash and press napkins. Position hoop and stabilizer so the corner motif centers 1" from edges.
- Load the lace corner design set to 1.5" size. Stitch at medium speed.
- After stitching, trim stabilizer close and press with cloth at medium heat for 5–7 seconds.
- Optionally, apply a thin coat of fabric starch and press for crispness.
- Repeat for remaining napkins, rotating hoop placement for speed.
- Allow hang-dry or tumble on low; starch may wash out after first wash—reapply if desired.
How to Display or Gift It
Stack napkins, tie with twine and tuck in a sprig of lavender. Display in a linen drawer or folded on plates for dinner. Store flat in a shallow craft organizer to avoid creasing.
- Personalized Zip Pouch with Lace Panel
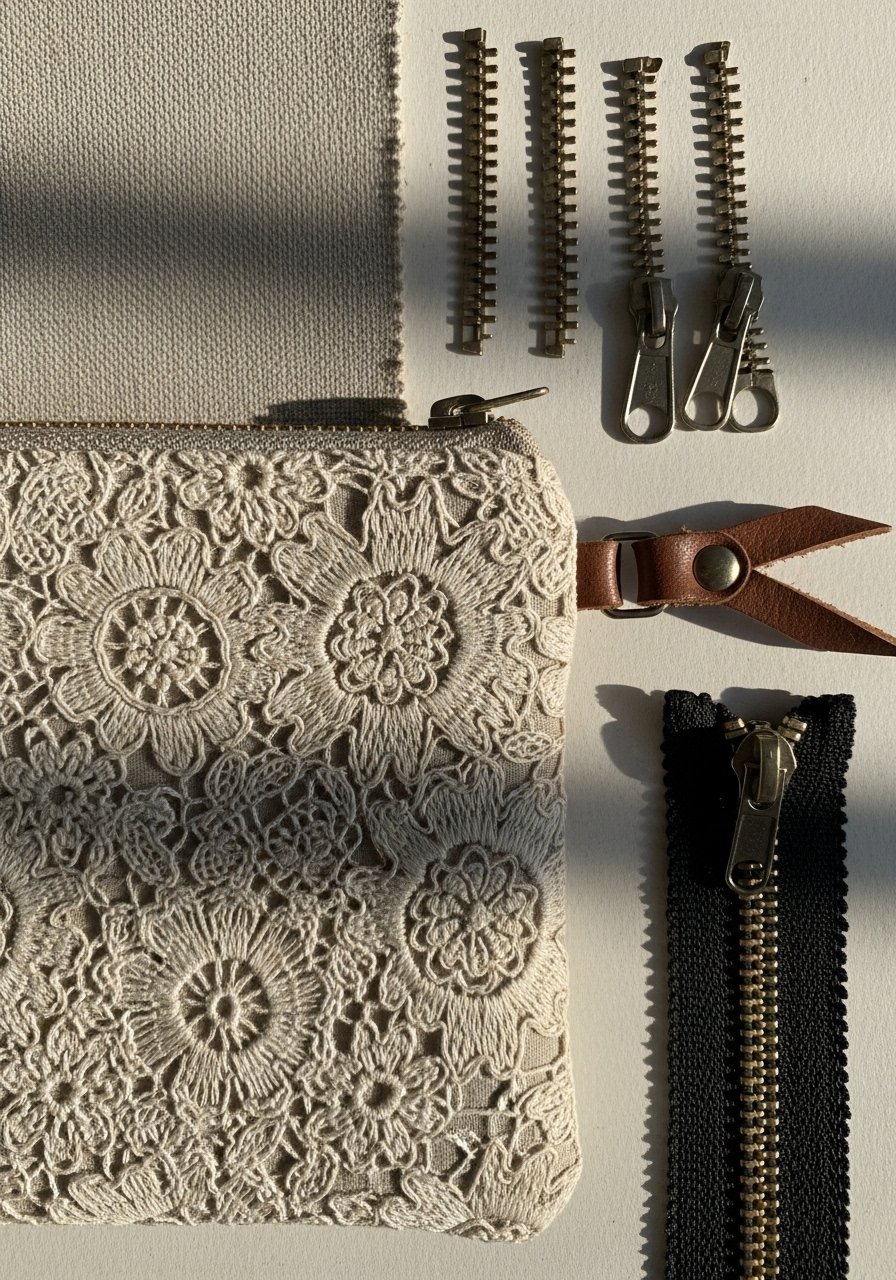
A zip pouch with a machine-stitched lace panel becomes a chic pouch for makeup or sewing notions. Computer embroidery designs give the lace uniformity across the front panel. Use a medium-weight stabilizer for good stitch definition and a nylon zipper for durability.
Materials
- 8" x 6" cotton canvas for exterior
- 8" x 6" quilting cotton for lining
- Cut-away stabilizer, 8" x 6"
- Computer embroidery design lace panel (6" wide)
- 8" nylon zipper, color-matched
- Sewing thread (polyester), 1 spool
- Pliers and zipper foot for machine
- Iron
Instructions
- Hoop the exterior canvas with stabilizer. Align and stitch the lace panel centered horizontally.
- Trim stabilizer and press. Square the panel to 8" x 6".
- Attach the zipper by sewing the right sides of exterior and zipper with a zipper foot. Repeat for lining.
- Sew pouch sides with 1/4" seam allowance, leaving a 3" opening in lining to turn.
- Turn pouch right-side out through lining opening, press seams, and hand-stitch lining opening closed.
- Let rest 12 hours for any remaining thread settling before filling with items.
How to Display or Gift It
Fill with small toiletries or sewing supplies, wrap in tissue, and place in a small kraft gift box. Store pouches in a drawer divider or small organizer box to keep shapes crisp.
- Denim Pocket Repair Embroidery (computer embroidery designs)
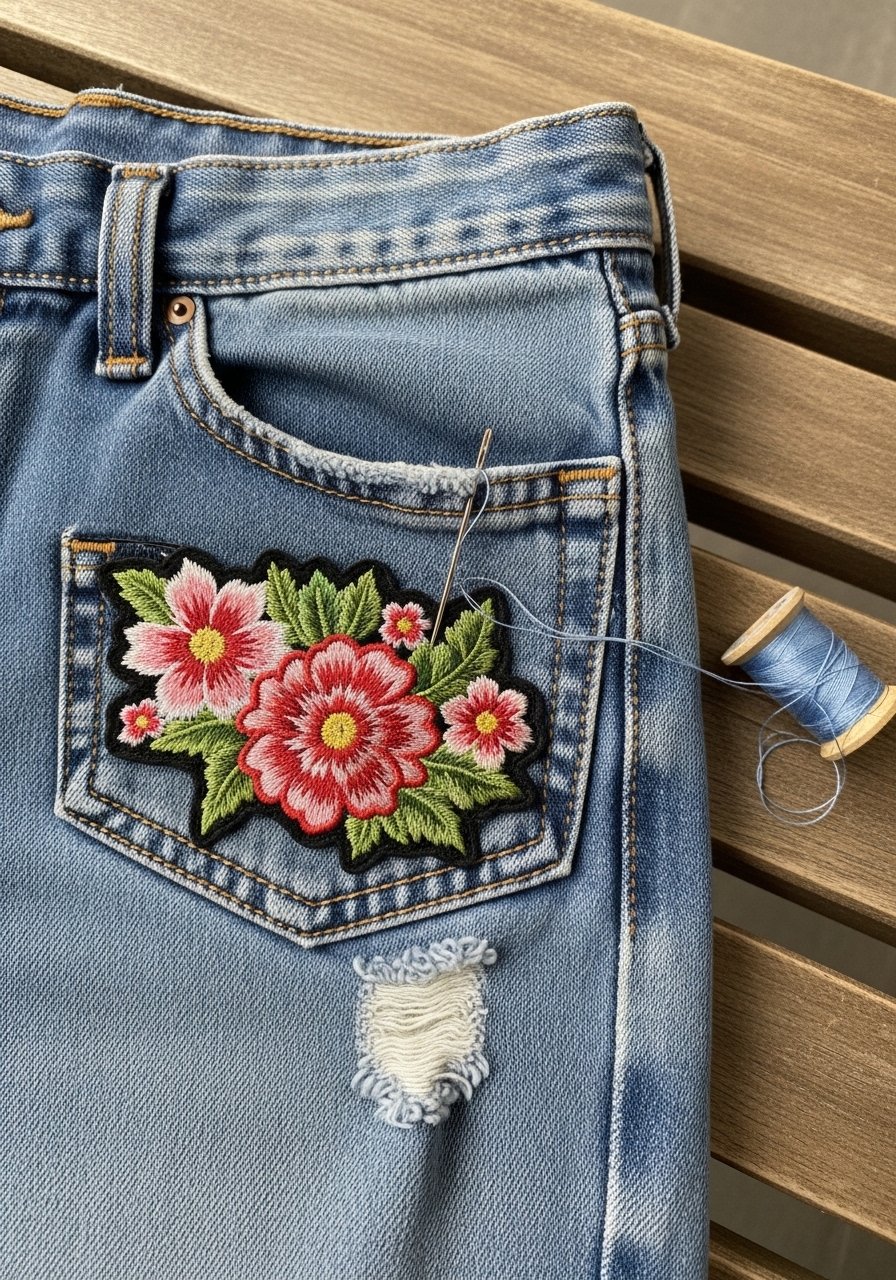
Repairing with embroidery turns flaws into features. Computer embroidery designs give consistent patch shapes and add personality. Use a tight satin border and cut-away stabilizer for strength. This approach is great for upcycling thrifted denim.
Materials
- Denim patch fabric (twill or matching denim), 5" x 5"
- Cut-away stabilizer, 6" square
- Computer embroidery design repair motifs (2.5"–4")
- Polyester thread (contrast or tone-on-tone), 2 skeins
- Fabric glue pen (light tack)
- Embroidery scissors
- Optional: iron-on mending tape
Instructions
- Prep the repair area by trimming frayed edges and pressing flat.
- Hoop the patch fabric with stabilizer and stitch the motif using computer embroidery designs sized to cover the hole.
- Trim close to the satin border and fuse patch to denim with fabric glue pen or iron-on tape for temporary hold.
- Topstitch around the patch edge with a short zig-zag for extra strength.
- Wash denim on gentle to ensure patch adherence; re-stitch edges if edges lift.
- Allow 24 hours for adhesive to cure if used.
How to Display or Gift It
A repaired denim jacket makes a great gift for a teen or as a personalized upcycling present. Store patched denim folded with tissue to protect embroidery and prevent snags.
- Burlap Table Runner with Geometric Insets
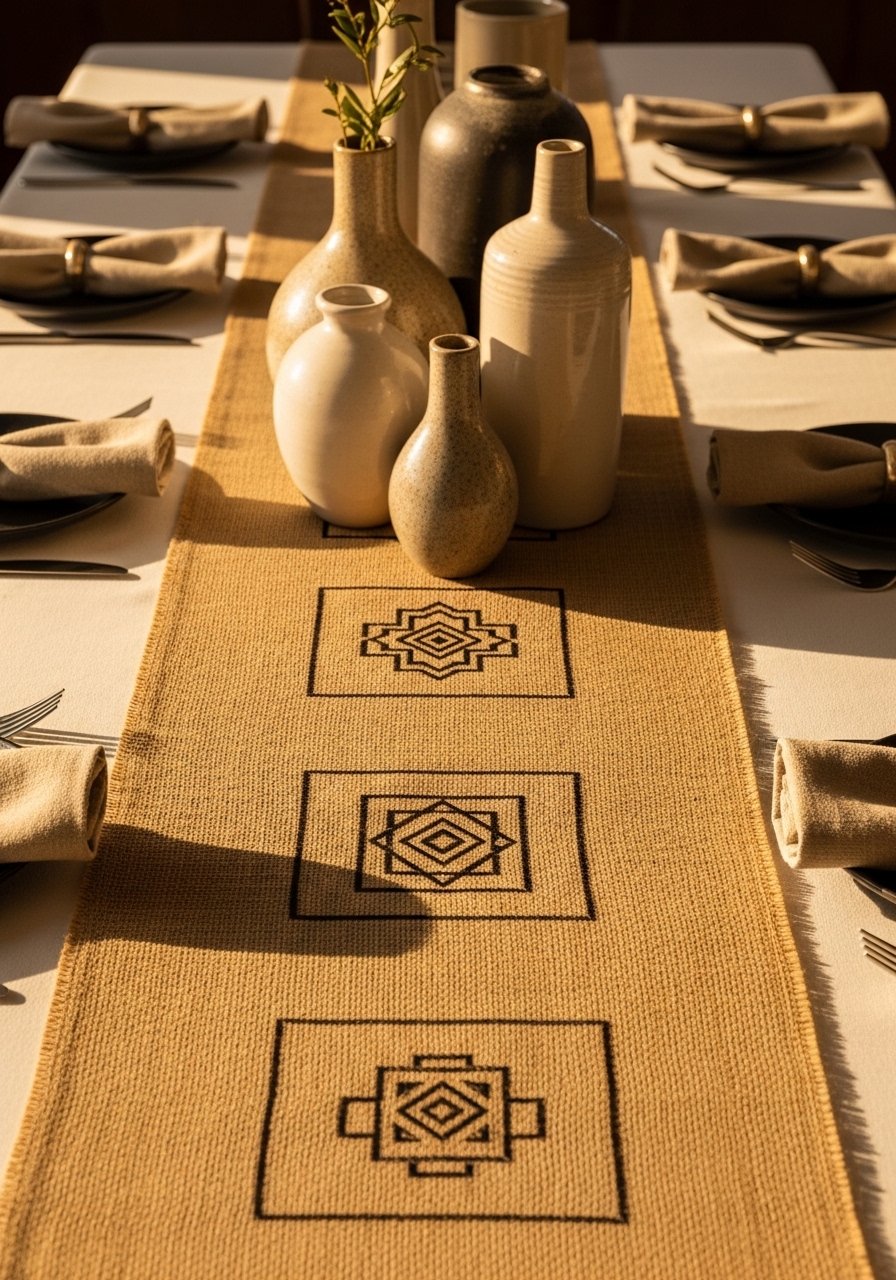
Burlap’s coarse texture contrasts beautifully with fine machine embroidery. Use heavier stabilizer to avoid puckering, and select low-density fill designs to prevent stiff patches. This runner brings a farmhouse or japandi vibe depending on color choices.
Materials
- 14" x 60" burlap runner, pre-cut and hemmed
- Cut-away stabilizer, 6" x 6" per inset, 4 pieces
- Computer embroidery designs geometric panels (3" x 3")
- Polyester embroidery thread, 2–3 skeins
- Sewing machine for hemming
- Fray check liquid to seal edges
- Iron on low with pressing cloth
Instructions
- Test-stitch a sample on burlap with stabilizer. Set stitch density to lower setting by 5–10%.
- Mark inset locations 6" apart center to center. Hoop and stitch each geometric panel.
- Trim stabilizer close and apply fray check to runner raw edges. Let dry 30 minutes.
- Press lightly from the back with cloth for 5 seconds. Let cool.
- If runner wasn’t pre-hemmed, fold 1/2" edges twice and topstitch with heavy-duty thread.
- Allow 24 hours before folding to store.
How to Display or Gift It
Lay runner down a rustic table and pair with ceramic vases and linen napkins for warm texture. Roll and tie with twine for gifting. Store flat or gently rolled to avoid deep creases.
- Felt Ornament Set with Embroidered Motifs
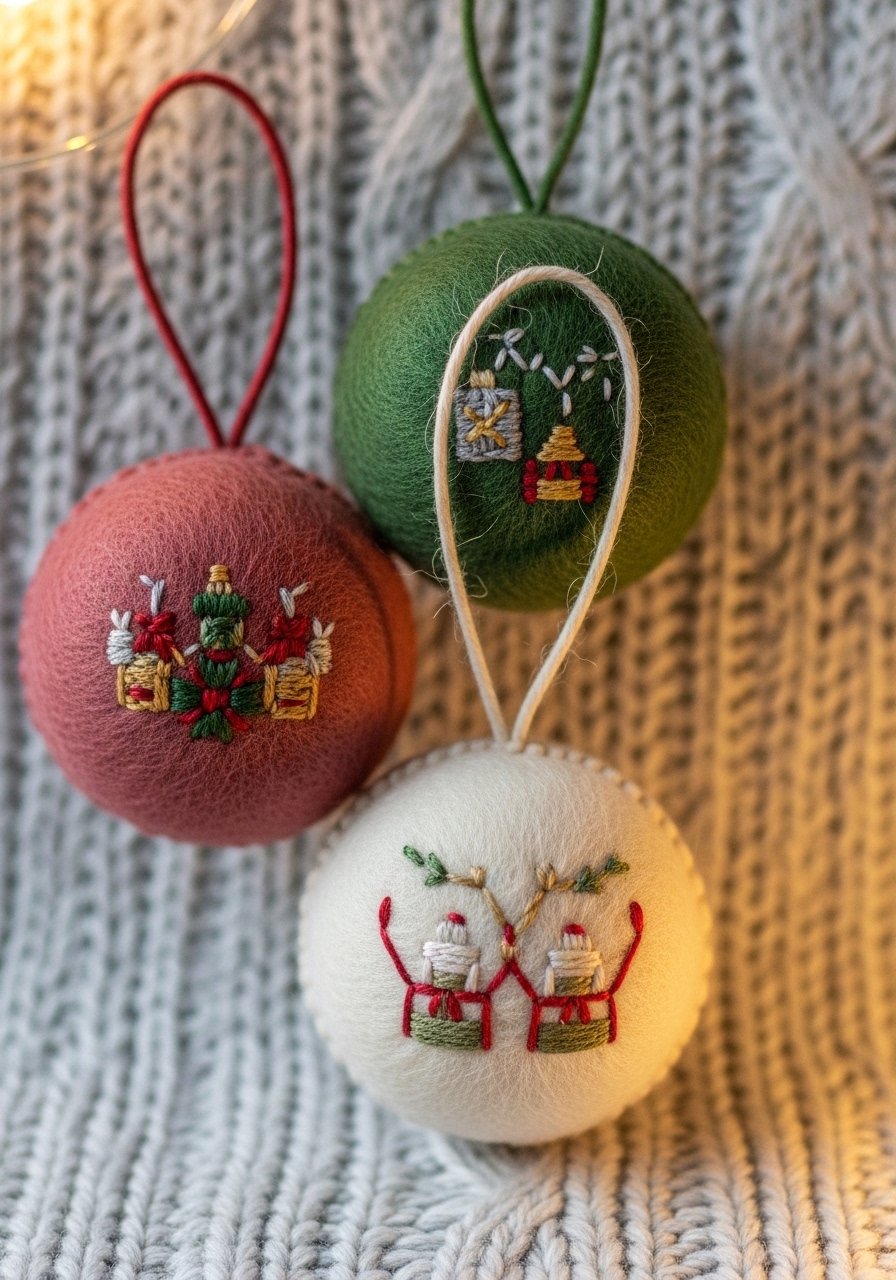
Small felt ornaments stitch quickly and make great gifts or market items. Computer embroidery designs let you repeat the same motif across a batch for a cohesive set. Use water-soluble topping for fuzzy felt and a firm stabilizer behind to maintain shape.
Materials
- Wool felt circles, 3" diameter, 12 pieces
- Cut-away stabilizer, 12 squares 4" x 4"
- Computer embroidery designs ornament set (1.25"–1.5")
- Polyester thread, 2 skeins
- Thin ribbon or twine for hanging, 12 pieces 6" each
- Water-soluble topping
- Hand-sewing needle and thread for closing
Instructions
- Hoop felt with cut-away stabilizer and place water-soluble topping on top to prevent fuzz from catching stitches.
- Stitch ornament designs at low speed. Trim topping with a damp cloth once dry.
- Stack two felt circles wrong side together and blanket stitch by hand around the edge, leaving a small gap for inserting ribbon.
- Insert ribbon loop before finishing stitch. Tie a small securing knot inside.
- Trim threads and let ornament rest 12 hours before storing.
- Avoid heavy pressure or crushing—felt holds shape best when stored flat.
How to Display or Gift It
Hang on a small decorative tree, bundle several in a clear bag with a tag, or use as package toppers. Store flat in a shallow craft box with tissue layers between ornaments.
- Quilted Pillow with Embroidered Medallions
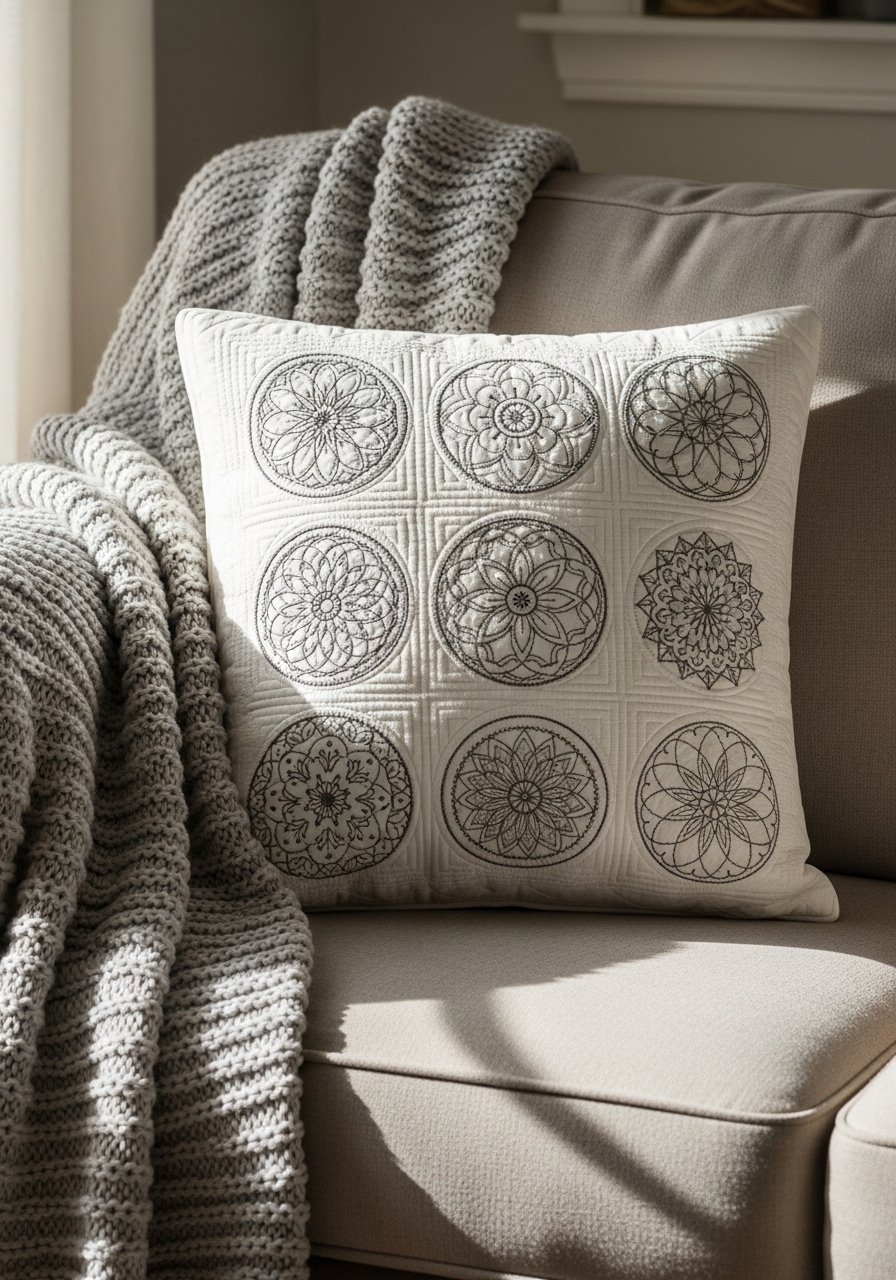
Medallions stitched with computer embroidery designs add a high-end look to patchwork pillows. Use medium-weight cotton batting and a stabilizer that’s removed after quilting to keep the pillow soft. This project pairs well with boho or cottagecore styles.
Materials
- 18" x 18" cotton pillow front and back, pre-cut
- Cotton batting, 18" square
- Tear-away stabilizer, medallion-size pieces
- Computer embroidery designs medallion set (3"–4")
- Polyester thread (matching), 3 skeins
- Sewing machine and walking foot
- Zipper or envelope back supplies
- Quilting pins
Instructions
- Layer pillow front, batting, and stabilizer. Mark medallion centers.
- Hoop and stitch each medallion. For batting, stitch through all layers with appropriate needle.
- Remove tear-away stabilizer and press from back for 8–10 seconds.
- Quilt additional lines or echo stitching around medallions for texture.
- Construct pillow back with zipper or envelope method and insert pillow form.
- Let pillow rest 24 hours before use to allow batting to relax.
How to Display or Gift It
Place on a couch or bed as a focal piece. Tie with a ribbon for gifting and include care instructions (wash cold, gentle cycle). Store pillows uncompressed in cotton storage bags.
- Cotton Tote with Botanical Panel (computer embroidery designs)
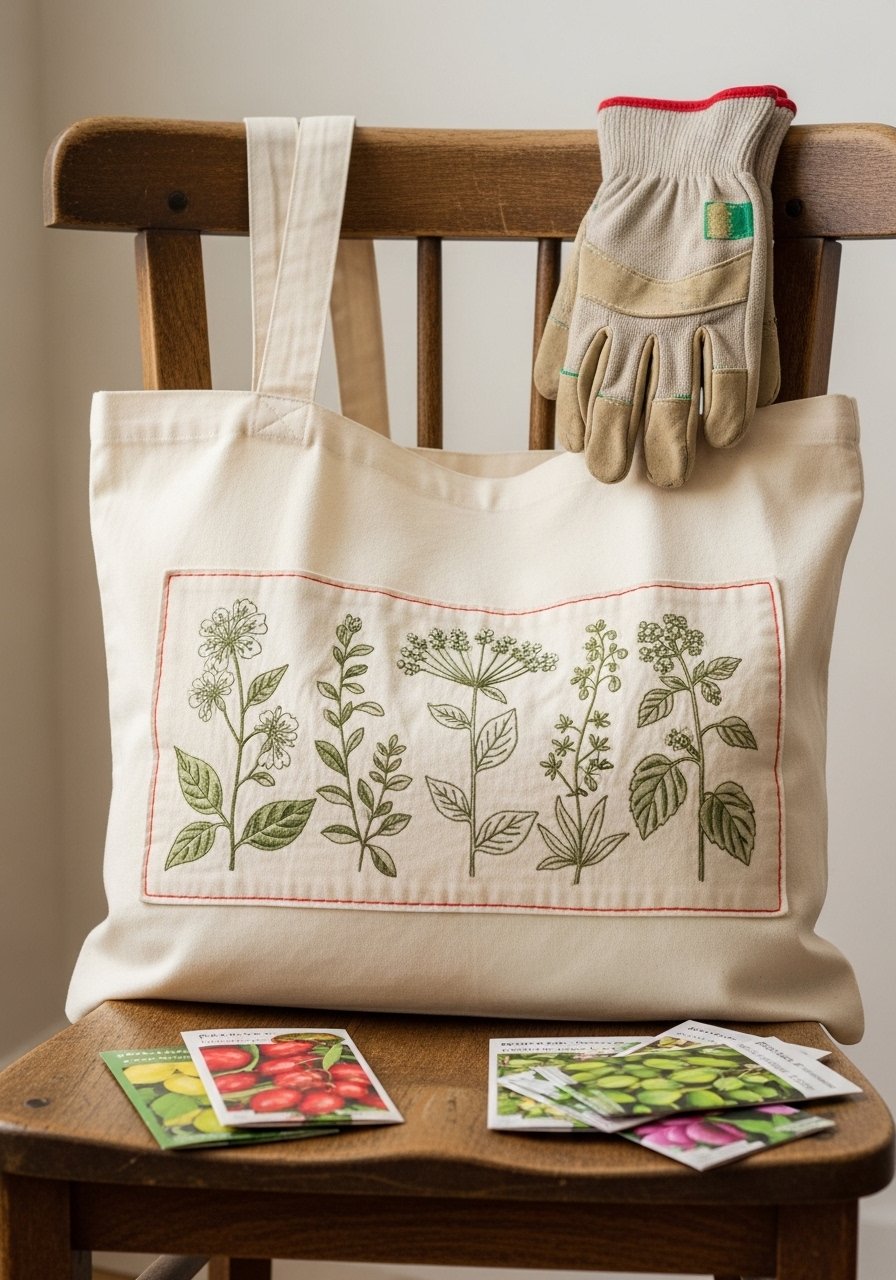
A tote with an embroidered botanical panel is practical and pretty. Computer embroidery designs give you detailed leaves and shading that hand embroidery would take hours to match. Use a firm stabilizer and denim or heavy cotton tote for durability.
Materials
- Natural cotton tote bag, 12" x 14"
- Cut-away stabilizer, 8" x 6"
- Computer embroidery designs botanical panel (6" wide)
- Rayon thread for sheen, 2 skeins
- Embroidery needles 90/14 for heavier fabric
- Painter’s tape to keep seams out of the hoop
Instructions
- Mark panel placement on tote, 3" down from top edge.
- Hoop tote with stabilizer; use painter’s tape to smooth seams.
- Stitch botanical panel at medium speed. Use a stronger needle if you hear popping.
- Trim stabilizer and press from the back for 5–8 seconds.
- Touch up any loose threads and optionally topstitch around panel edge for reinforcement.
- Let tote rest 12 hours before carrying to allow threads to settle.
How to Display or Gift It
Fill with market finds or gardening tools and tie straps with a ribbon for gifting. Store totes flat to protect the embroidered panel.
- Leather Key Fob with Embroidered Patch
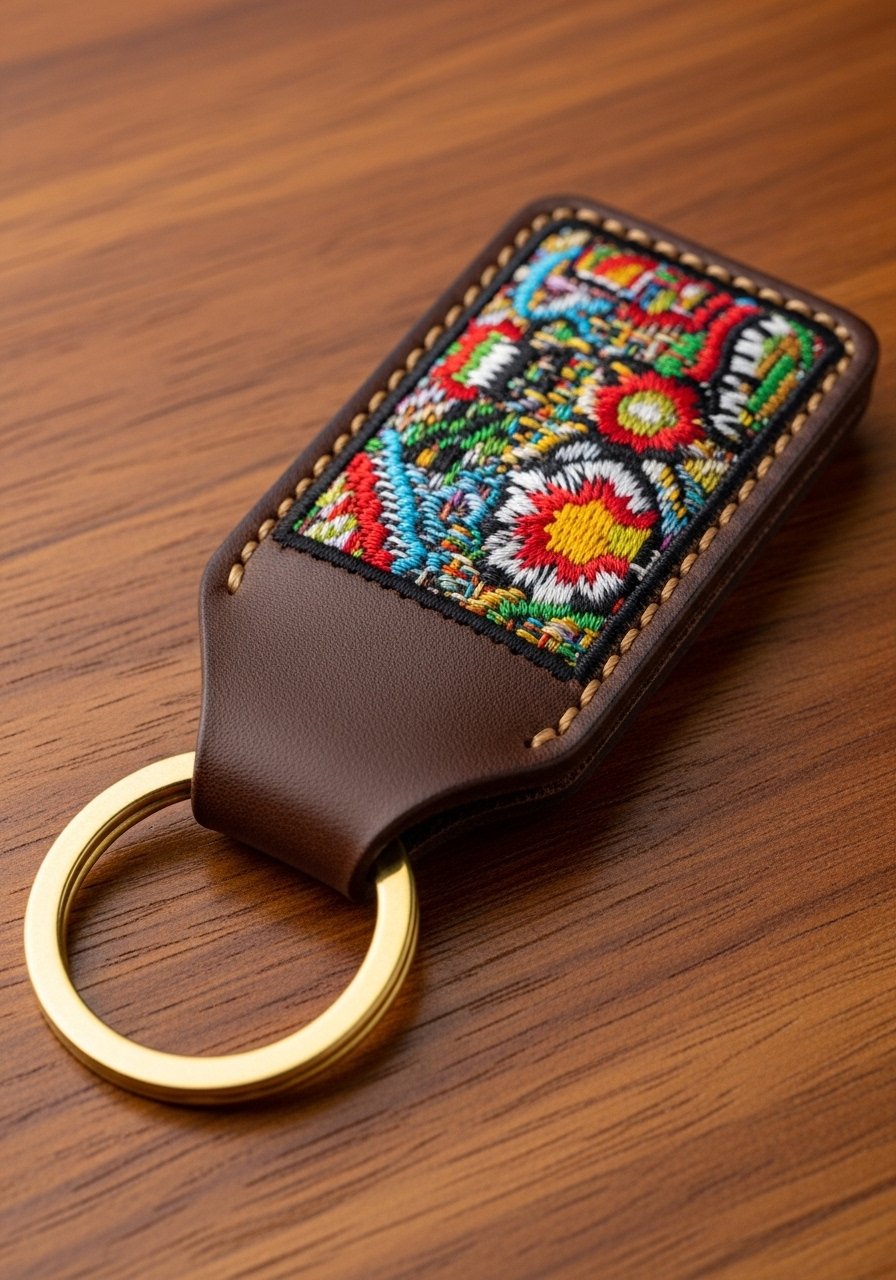
Tiny embroidered patches translate beautifully to leather accessories. Use a sturdy stabilizer and a slightly lower stitch density to avoid perforating thin leather. Finish edges with a burnishing tool for a polished look.
Materials
- 2" x 1.5" leather strips, 2 pieces
- Cut-away stabilizer, 3" x 3"
- Computer embroidery design small emblem or monogram
- Polyester thread, 1 skein
- Keyring hardware and rivet set
- Leather adhesive and burnishing tool
Instructions
- Hoop a thin fabric or interfacing on stabilizer and place leather on top using adhesive for temporary hold.
- Stitch the small emblem at low speed with an embroidery needle appropriate for leather.
- Trim stabilizer and finish leather edges with a burnishing tool and small amount of edge paint if desired.
- Fold leather around keyring and secure with rivet following manufacturer instructions (usually press for 10–15 seconds).
- Let adhesive cure 24 hours before use.
- Test rivet strength by gently tugging; re-secure if loose.
How to Display or Gift It
Attach to a set of keys and present in a small kraft gift box. Store spare key fobs flat in a small organizer box.
- Cotton Baby Bibs with Cute Computer Embroidery Designs
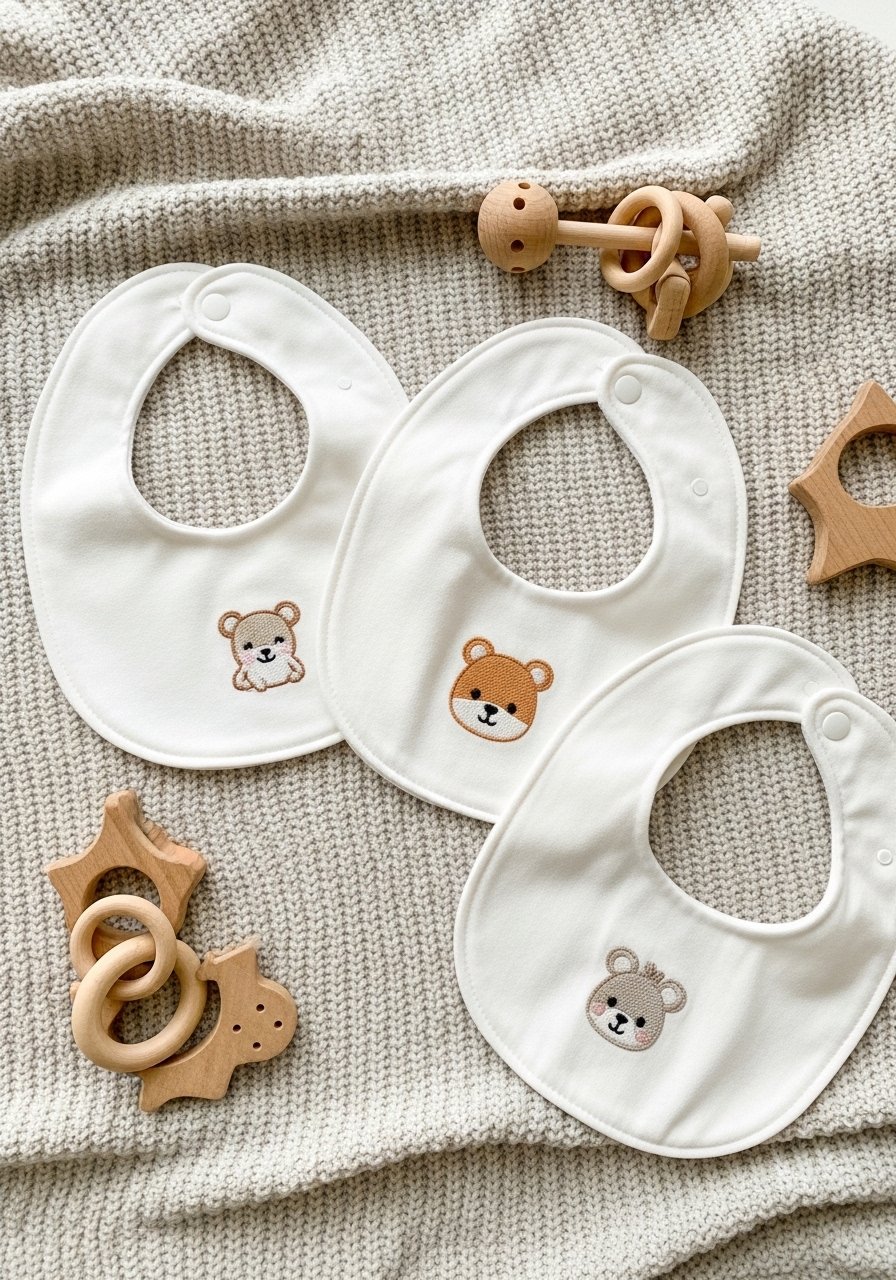
Embroidered baby bibs are practical keepsakes. Use a soft terry back and low-density designs so the bib remains absorbent. Snap closures or Velcro make them user-friendly. Machine-safe fonts and motifs ensure repeatable, polished results.
Materials
- Cotton front bibs, 3 pieces 10" x 10"
- Terry cloth backing, 3 pieces same size
- Tear-away stabilizer, 3 squares 6" x 6"
- Computer embroidery designs baby animals, 2"–3"
- Polyester thread (soft pastels), 2 skeins
- Snap fastener kit or Velcro strips
- Sewing machine and overlocker (optional)
Instructions
- Hoop bib front with stabilizer. Stitch motif centered 2" from top edge.
- Trim stabilizer and assemble front and terry back, right sides together.
- Sew around edges with 1/4" seam allowance, leaving 2" gap to turn.
- Turn right-side out, topstitch edges, and attach snap or Velcro per kit instructions.
- Press lightly and test absorbency by sprinkling water—bib should remain soft.
- Wash before first use on gentle; air-dry or tumble low.
How to Display or Gift It
Roll bibs and tie with soft ribbon for baby shower gifts. Store in a shallow drawer organizer to keep snaps from tangling.
- Linen Book Cover with Embroidered Title Band
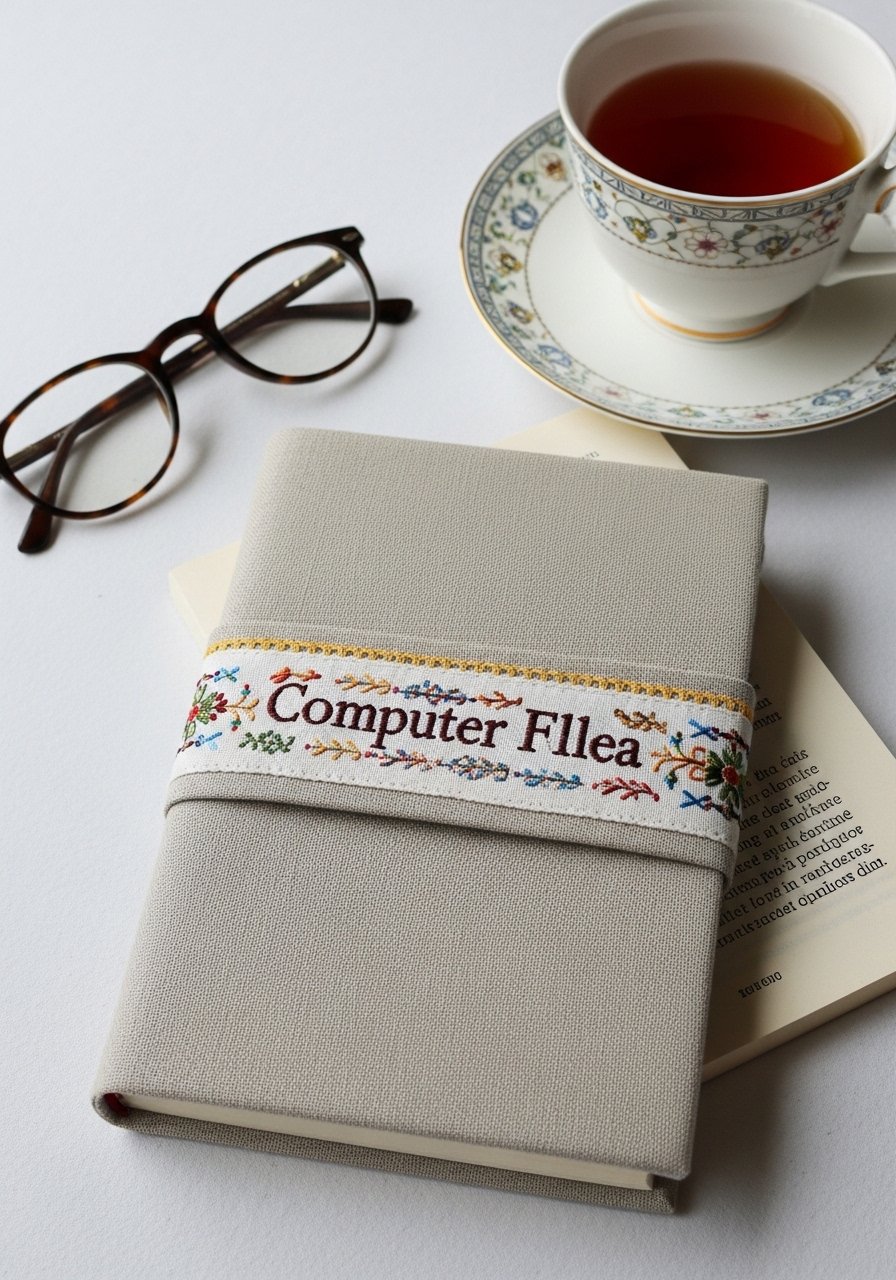
A book cover with a stitched title band adds personality to your home library. Computer embroidery designs let you repeat a decorative band across different book sizes. Use lightweight stabilizer and test fit on a sample sleeve first.
Materials
- Linen book cover sleeve, size to fit paperback
- Tear-away stabilizer, 6" x 4" for band
- Computer embroidery designs title/band elements
- Polyester thread, 1–2 skeins
- Fabric glue pen (optional)
- Rotary cutter and ruler
Instructions
- Measure band width to match your book spine—typically 1"–1.5".
- Hoop sleeve or stitch band on a removable fabric strip and then appliqué to sleeve.
- Stitch the band using computer embroidery designs at low speed to avoid shifting.
- Trim stabilizer and press the band with cloth for 5–8 seconds.
- If attached separately, fuse with fabric glue and topstitch for security.
- Let adhesive cure 24 hours before sliding book in and out.
How to Display or Gift It
Slide over a favorite paperback and wrap with twine for gifting. Store covers flat or on a bookshelf to maintain shape.
- Monogrammed Wooden Tea Box Liner
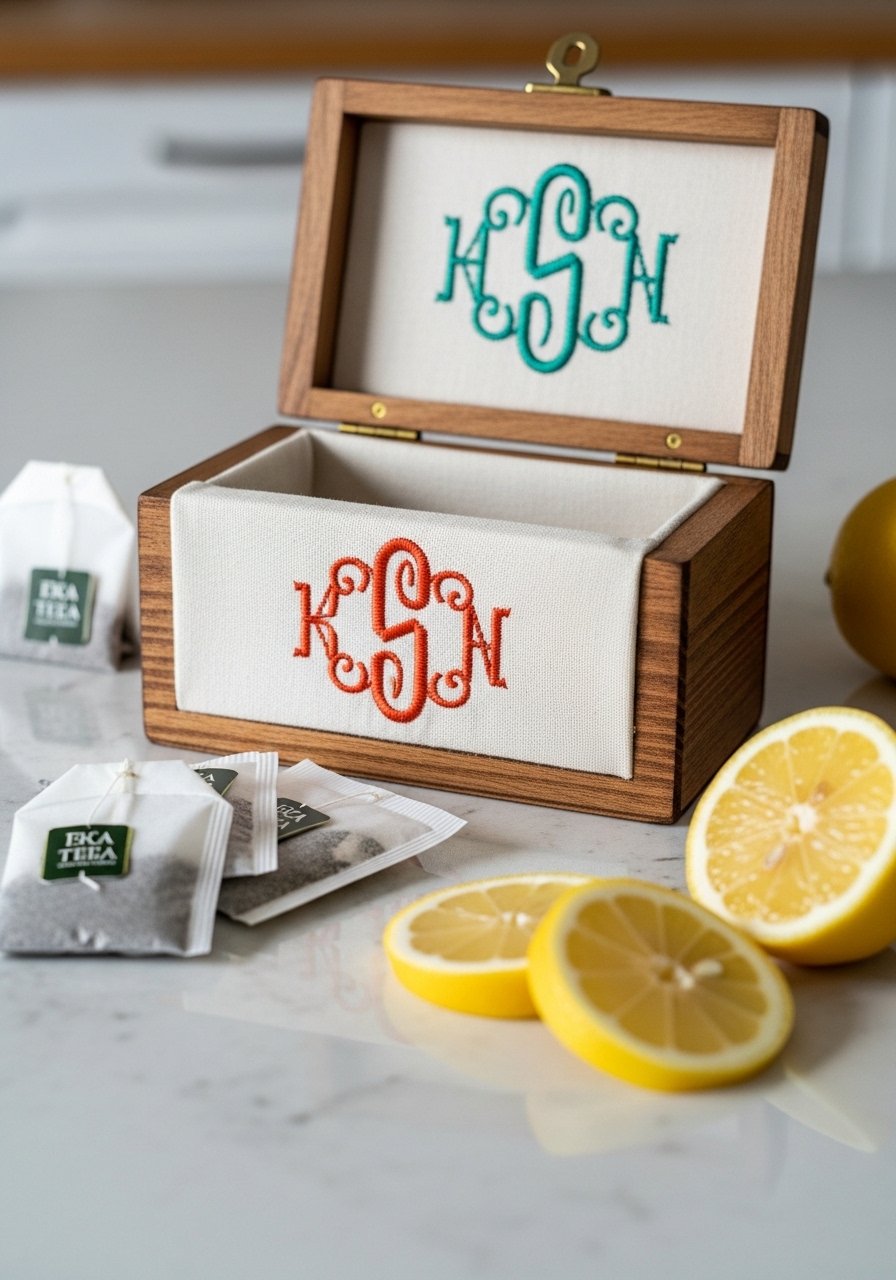
A fabric liner embroidered with a monogram adds a custom touch to wooden boxes. Use lightweight cotton and a tear-away stabilizer; the fabric should be slightly smaller than internal dimensions for a snug fit.
Materials
- Wooden tea box (6-slot) interior dimensions
- Cotton liner fabric, cut to interior size minus 1/8"
- Tear-away stabilizer, liner-size
- Computer embroidery design small monogram
- Polyester thread, 1 skein
- Craft glue for lining
- Small paintbrush to apply glue
Instructions
- Measure box interior and cut liner cotton slightly smaller.
- Hoop liner with stabilizer and stitch monogram centered.
- Trim stabilizer and press gently for 5 seconds.
- Apply thin glue layer inside box and smooth liner into place with brush.
- Let glue cure 12–24 hours before inserting tea.
- Clean up any excess glue promptly with damp cloth.
How to Display or Gift It
Fill with assorted tea bags and tie with ribbon. Store liners flat when not in use to avoid creasing.
- Appliqué Canvas Sneakers with Embroidered Accents
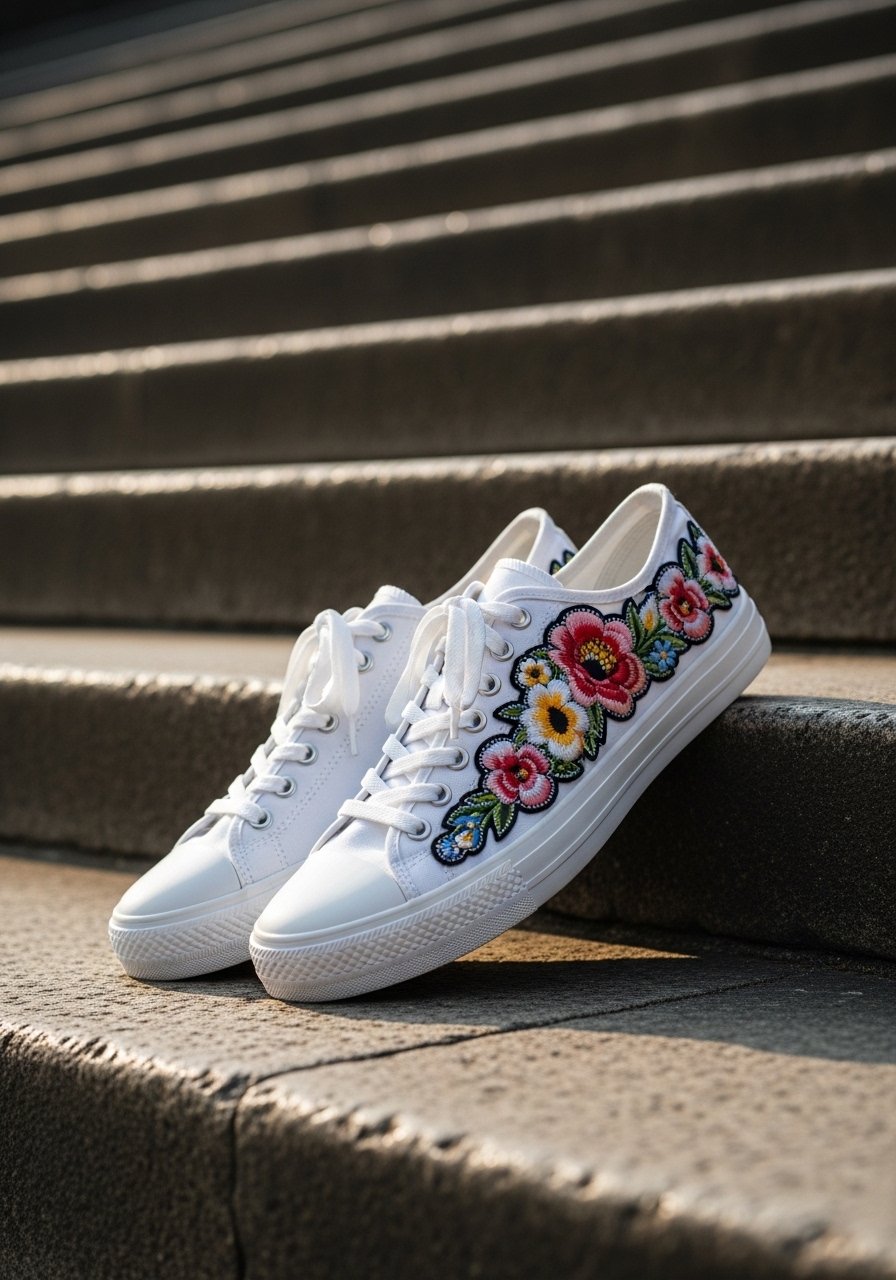
Add small embroidered appliqués to sneakers for a playful, personalized pair. Use thin canvas patches and a spray adhesive to keep pieces steady while stitching. Seal edges with a clear fabric glue to prevent fraying.
Materials
- White canvas sneakers
- Canvas appliqué patches, cut to small sizes (2"–3")
- Cut-away stabilizer, 4" x 4"
- Computer embroidery designs small motifs
- Polyester thread, 2 skeins
- Fabric glue (clear)
- Painter’s tape to mask areas
Instructions
- Create appliqué patches by hooping patch fabric and stitching motif. Trim close to the satin border.
- Position patch on sneaker and spray a light adhesive to temporarily hold.
- Stitch patch onto sneaker using a short satin stitch around edge. Go slow to avoid needle slipping.
- Apply a thin bead of clear fabric glue around the edge to seal.
- Let glue cure 24 hours before wearing.
- Spot clean as needed; avoid machine washing.
How to Display or Gift It
Present in a shoebox with tissue and a care note. Store in a cool, dry place to preserve adhesive.
- Velvet Pouch with Metallic Thread Crest
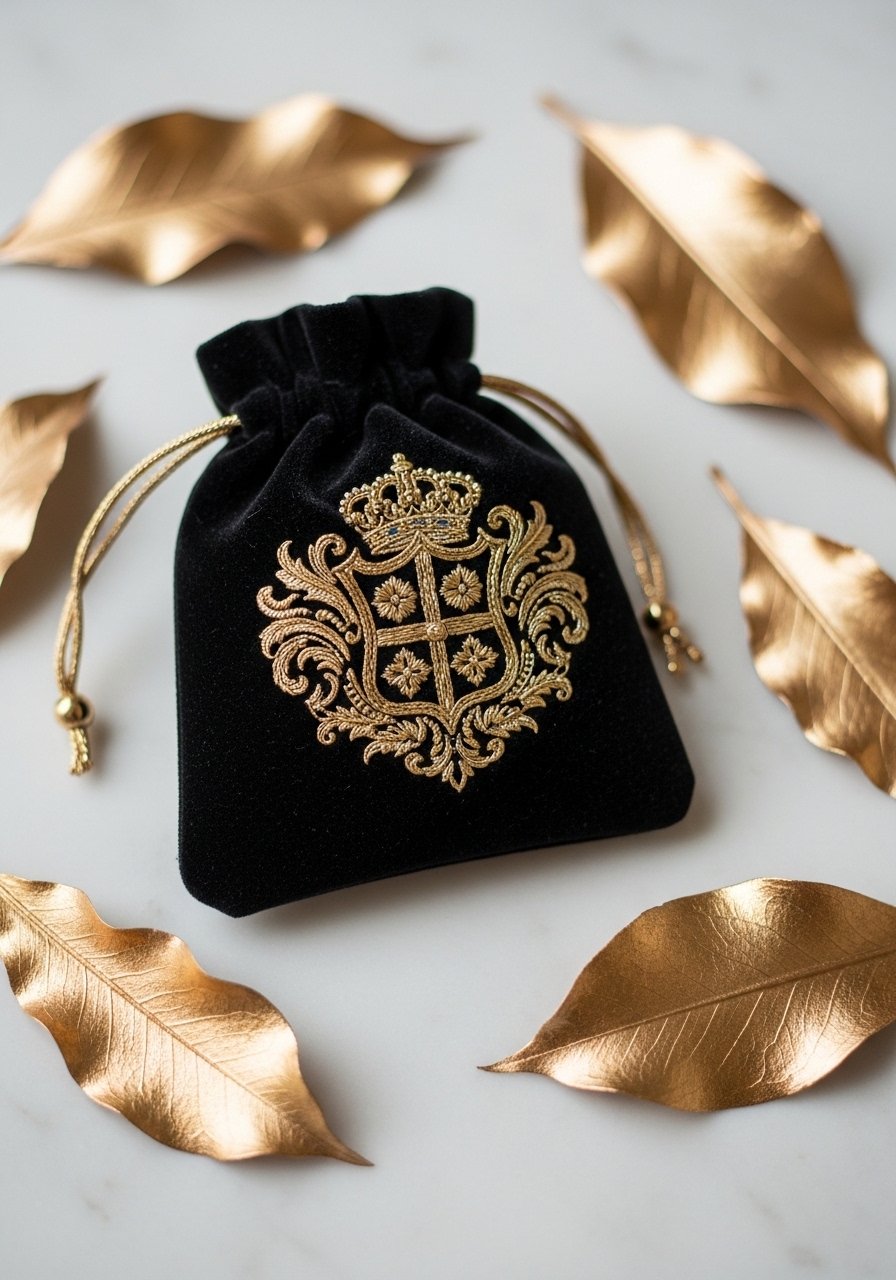
Metallic threads add a luxe note to velvet pouches. Use a topper (water-soluble) to keep threads from sinking and stabilize heavily. Stitch slowly—metallic threads can snap more easily than polyester.
Materials
- Velvet fabric pouch, 6" x 8"
- Water-soluble topping
- Cut-away stabilizer
- Computer embroidery designs small crest, 2"–3"
- Metallic embroidery thread, 1 spool
- Embroidery needle for metallics
- Thread net (optional)
Instructions
- Hoop pouch with stabilizer and place water-soluble topping over area to stitch.
- Load design and stitch using slow speed and metallic needle.
- Remove topping with cool water or according to product instructions; let air-dry 30 minutes.
- Trim stabilizer and press from back for 5 seconds with cloth.
- Let pouch sit 12 hours to ensure metallic fibers settle.
- Spot clean only; advise recipients to handle gently.
How to Display or Gift It
Fill with small jewelry or keepsakes and tuck into a small ring box. Store velvet pouches flat to avoid crushing pile.
- Felted Wool Coasters with Embroidered Motifs
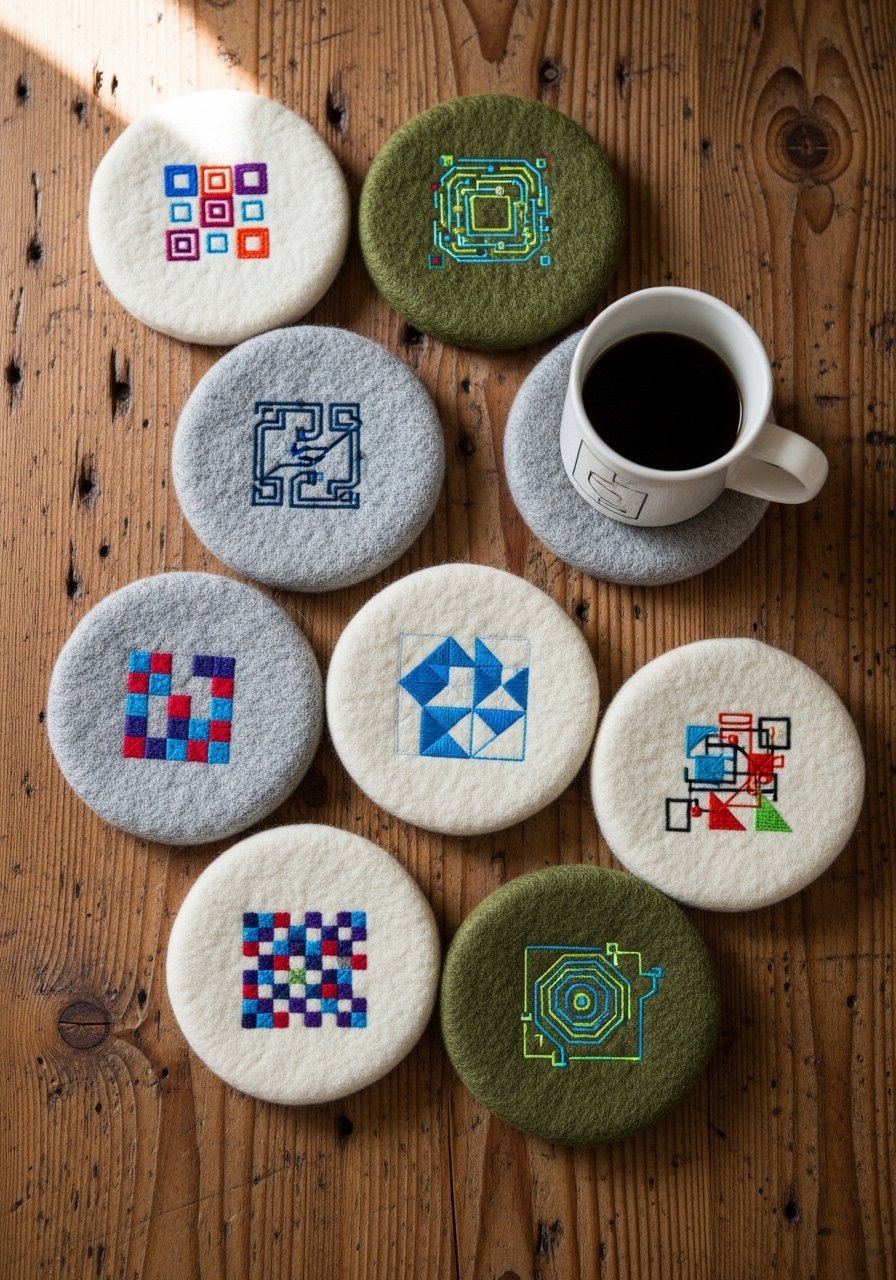
Felted wool coasters gain texture from low-density stitched motifs. Use a dense felt and reduce stitch density for best results. These are quick to stitch and hold up well to cups and mugs.
Materials
- 3.5" round felted wool coasters, 6 pieces
- Tear-away stabilizer, 4" squares
- Computer embroidery designs small geometrics, 1"–1.5"
- Polyester thread, 1 skein
- Fabric glue for edge reinforcement (optional)
- Lint roller to remove fibers before hooping
Instructions
- Clean coasters with lint roller so embroidery sits flat.
- Hoop coaster with stabilizer. Stitch design at reduced density.
- Trim stabilizer close and press from back for 3–5 seconds.
- Optionally, apply a thin bead of fabric glue around the underside edge to resist fraying.
- Let coasters rest 12 hours before first use.
- Spot clean as needed; avoid submerging in water.
How to Display or Gift It
Tie a stack with ribbon and tuck a care note. Store coasters flat to preserve shape and embroidery.
- Felted Wool Headband with Embroidered Medallion
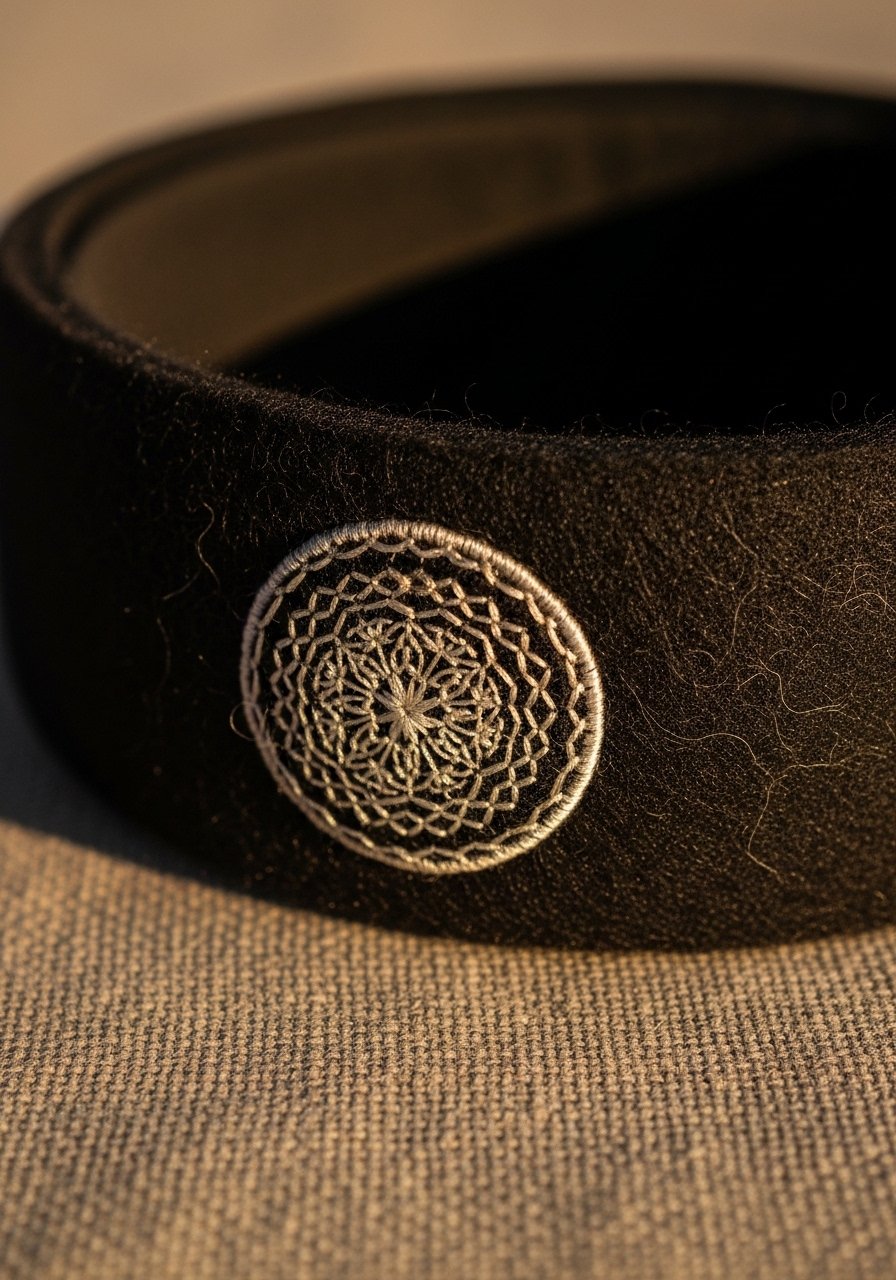
A small medallion centered on a headband elevates a simple accessory. Felted wool is forgiving, but use a light tear-away stabilizer and test stitch density. This is a quick make and a thoughtful handmade gift.
Materials
- Felted wool headband base, 1
- Tear-away stabilizer, 3" square
- Computer embroidery design medallion, 1.25"–1.5"
- Polyester thread, 1 skein
- Fabric glue for securing medallion (optional)
- Small round hoop or machine hoop
Instructions
- Hoop a small fabric patch with stabilizer and stitch medallion.
- Trim and press. Attach to headband with fabric glue or whip stitch.
- Let glue cure 12–24 hours if used.
- Check for comfort—trim any rough edges on the back.
- Repeat for matching set if desired.
- Store flat to prevent warping.
How to Display or Gift It
Place in a small kraft box with tissue and a ribbon. Store in a drawer organizer to keep shape.
- Kitchen Apron with Script Name (computer embroidery designs)
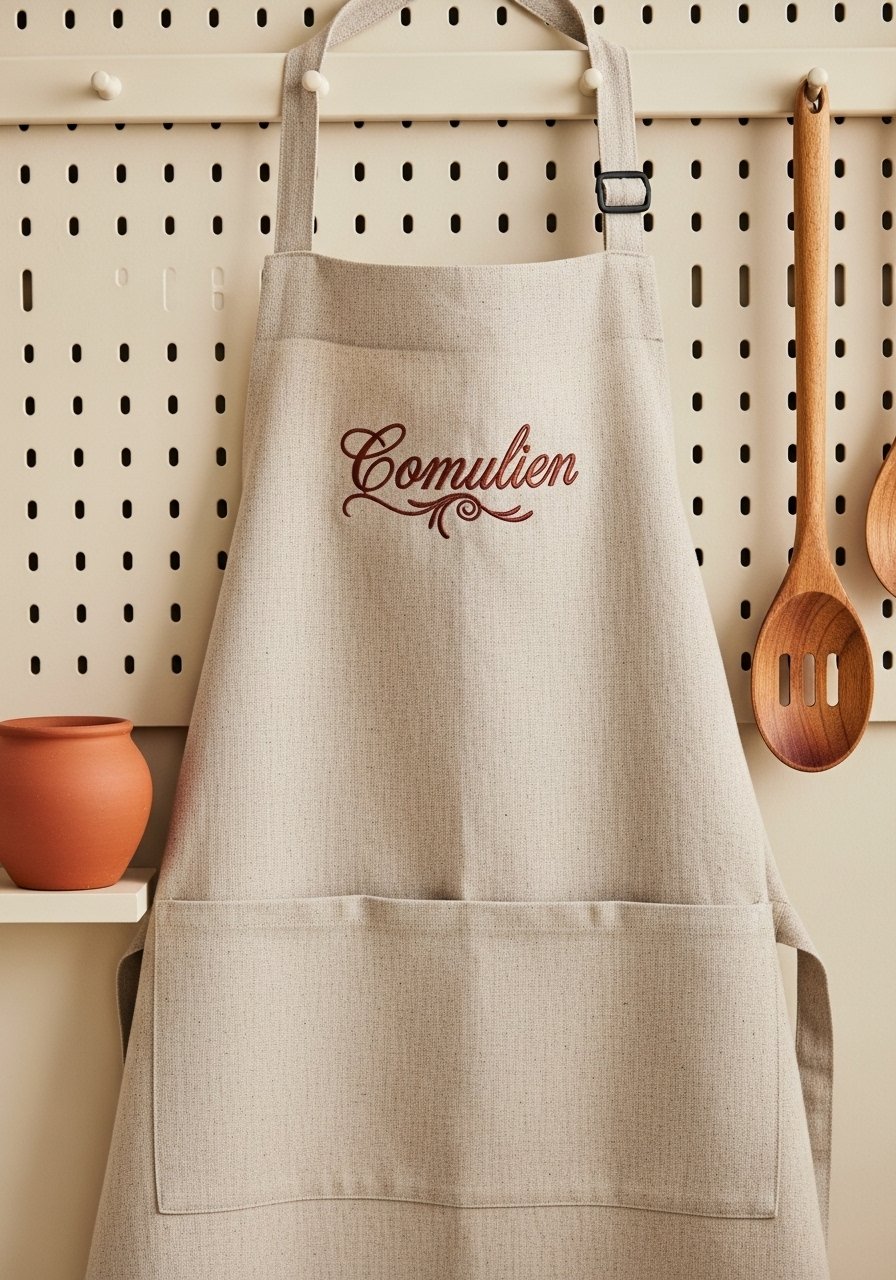
A custom apron with script lettering feels personal and practical. Use tear-away stabilizer and keep script size under 3" height for legibility. Pre-wash apron fabric to avoid later shrinking distortions.
Materials
- Linen kitchen apron, full size
- Tear-away stabilizer
- Computer embroidery designs script alphabet
- Polyester thread, 1 skein
- Painter’s tape to mark placement
- Pressing cloth
Instructions
- Pre-wash and iron apron. Measure chest area and mark center with painter’s tape.
- Hoop with stabilizer and align script to 2.5" height for readability.
- Stitch at medium speed. Trim jump threads and remove stabilizer.
- Press from back for 8–10 seconds.
- Wait 24 hours before washing. When washing, use cold gentle cycle and reshape while damp.
- Store folded with tissue inside to prevent creasing of letters.
How to Display or Gift It
Wrap with kitchen utensils and tie with baker’s twine for a bridal shower gift. Store aprons on padded hangers to preserve shape.
- Velvet Lampshade Trim with Metallic Embroidery

A narrow embroidered band along a lampshade edge adds subtle glamour. Use water-soluble topping and a cut-away stabilizer to support metallic threads and velvet pile. Stitch slowly and remove topping carefully to preserve sheen.
Materials
- Velvet lampshade trim strip, length to fit shade (usually 60" total)
- Water-soluble topping
- Cut-away stabilizer
- Computer embroidery designs narrow border
- Metallic thread, 1 spool
- Clear fabric glue for attachment
- Small paintbrush
Instructions
- Hoop trim sections with stabilizer and water-soluble topping. Stitch border designs at slow speed.
- Rinse topping per instructions and air-dry for 30 minutes.
- Press from back for 3–5 seconds with cloth.
- Attach trim to lampshade edge using thin line of clear fabric glue; press gently for 10–15 seconds.
- Allow glue to cure 24 hours before turning on lamp.
- Avoid direct high heat bulbs near metallic thread.
How to Display or Gift It
Pair with a small lamp and place on a bedside table or gift wrapped with bulb and bulbs-care note. Store trim rolled on a cardboard tube to prevent creases.
- Burlap Wall Pocket with Embroidered Label
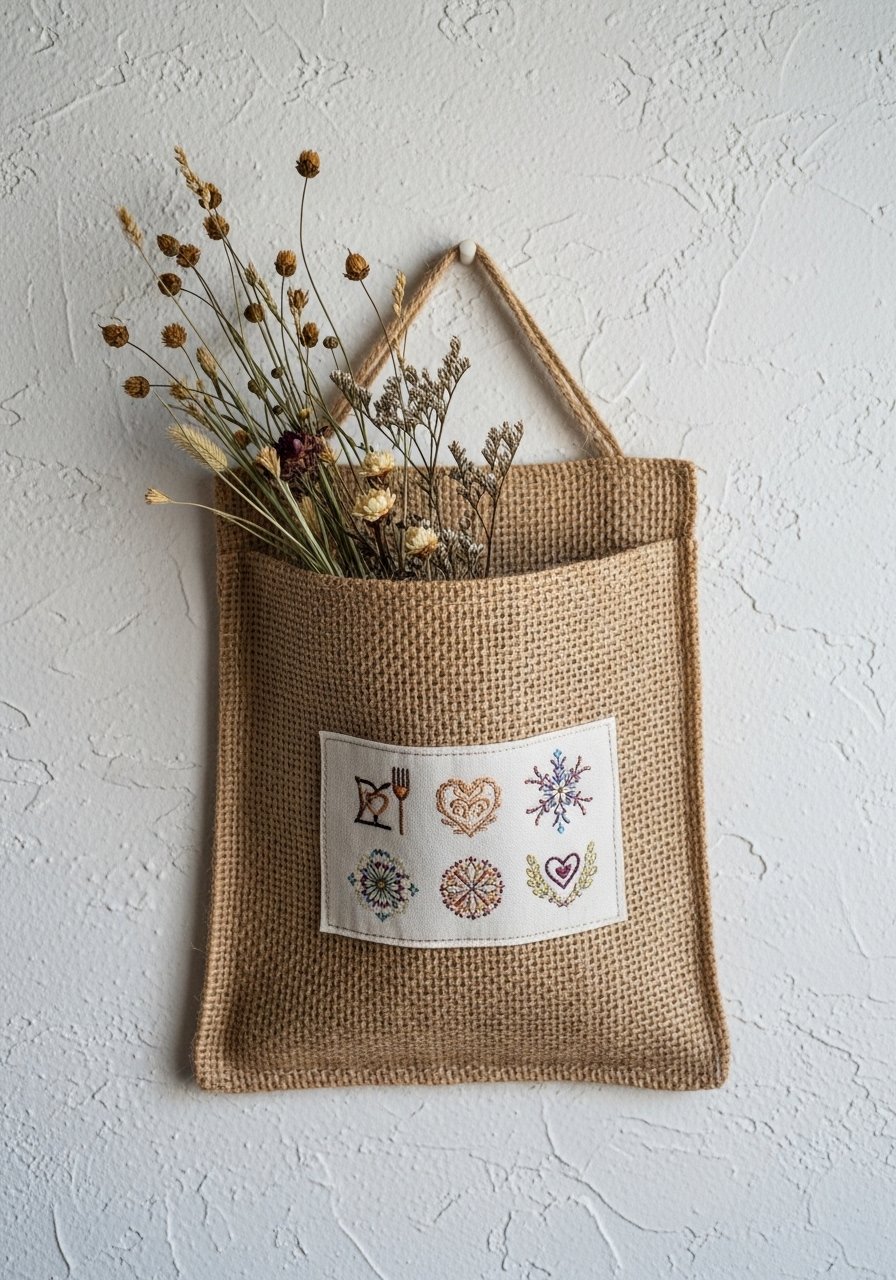
Wall pockets gain a neat look with a stitched label. Computer embroidery designs keep labels consistent across sets. Use a firm stabilizer to prevent sagging and topstitch around label for strength.
Materials
- Hanging burlap pocket, 8" x 12"
- Cut-away stabilizer
- Computer embroidery designs small label fonts
- Polyester thread, 1 skein
- Small wooden dowel and twine for hanging
- Topstitching thread for reinforcement
Instructions
- Hoop label section with stabilizer and stitch name or motif.
- Trim stabilizer and press from back.
- Topstitch around label and attach pocket to dowel with looped twine.
- Let stitches settle 12 hours before hanging.
- Avoid overloading pocket; maximum weight recommendation 1 lb.
- Store on a pegboard when not in use.
How to Display or Gift It
Fill with mail or dried florals and hang in an entryway. For gifting, roll and tie with a ribbon and include hanging instructions.
- Leather Patch Journal with Embroidered Cloth Insert
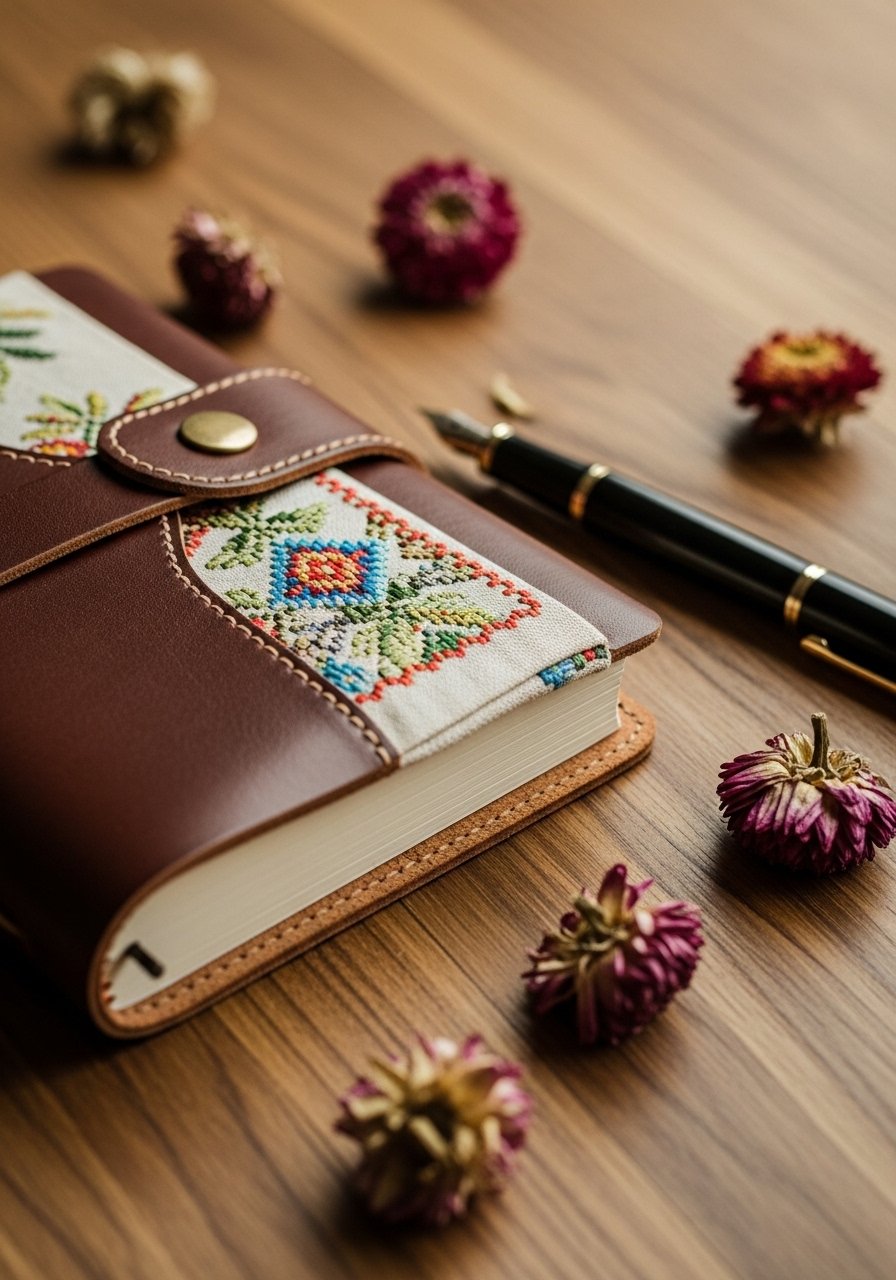
A cloth insert embroidered with a small motif adds a handcrafted accent to leather journals. Stitch on lightweight cotton and slip inside a removable leather cover so the fabric doesn’t suffer wear.
Materials
- Leather journal cover
- Cotton insert, 5" x 7"
- Tear-away stabilizer
- Computer embroidery designs small emblem
- Polyester thread, 1 skein
- Bone folder for smooth insertion
Instructions
- Hoop cotton insert with stabilizer and stitch emblem centered.
- Trim stabilizer and press for 5–8 seconds.
- Slip insert into leather cover; use a bone folder to press edges flat.
- Let insert sit 12 hours to relax before writing.
- Replace insert when worn; embroider backups to rotate.
- Store journal upright on a bookshelf to preserve cover.
How to Display or Gift It
Pair journal with a quality pen and wrap in kraft paper. Store spare inserts in a craft drawer.
- Dog Bandana with Paw Motif (computer embroidery designs)
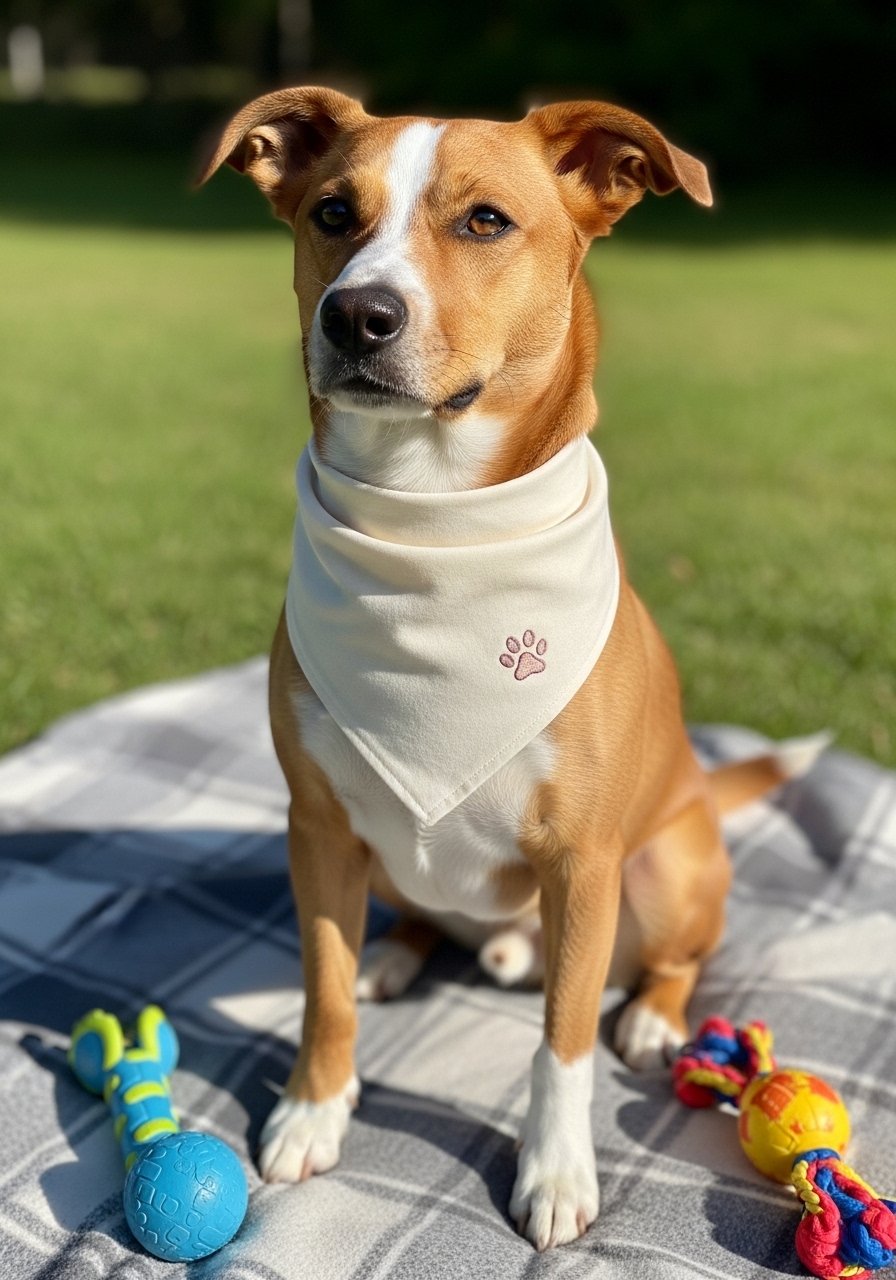
Dog bandanas make quick, adorable projects. Use medium-weight cotton and a tear-away stabilizer. Keep designs compact—1.5"–2"—so dogs stay comfortable. Machine stitches handle active wear well when stabilized properly.
Materials
- Cotton triangle bandana, medium size
- Tear-away stabilizer
- Computer embroidery designs paw print or name
- Polyester thread, 1 skein
- Snap or Velcro closure kit (optional)
- Fabric-safe adhesive for temporary holding
Instructions
- Hoop bandana corner with stabilizer and mark placement 2" from tip.
- Stitch paw motif at low-medium speed. Trim stabilizer and press for 3–5 seconds.
- Attach snap or Velcro if desired following kit instructions.
- Let cure 12 hours before first wear.
- Machine wash on gentle when needed; reshape while damp.
- Store bandanas flat or rolled to avoid creasing.
How to Display or Gift It
Roll bandana and tie with pet-safe ribbon; include a small treat. Store in a pet-organizer drawer.
- Mini Hoop Magnets with Tiny Computer Embroidery Designs
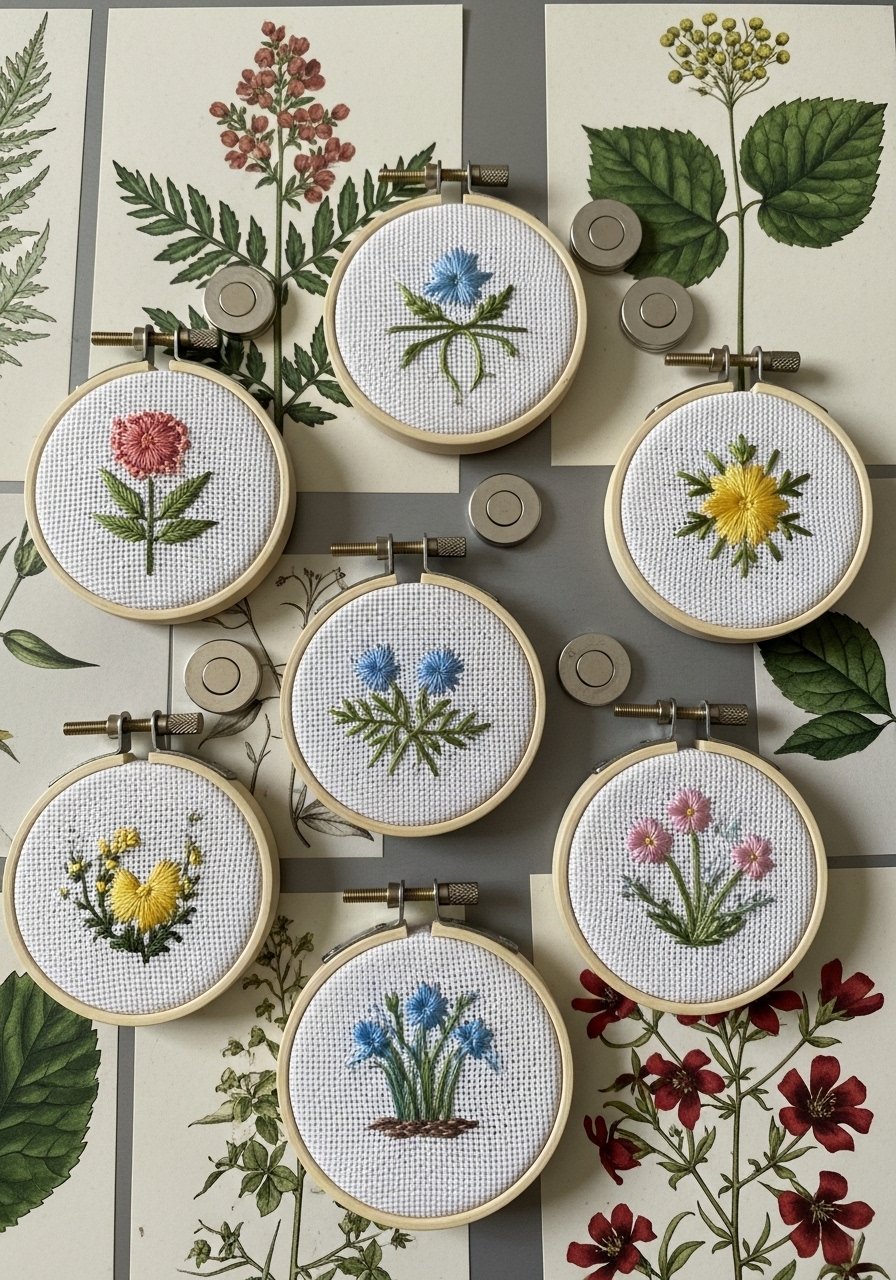
Tiny hoops become fridge art with micro designs from your computer embroidery library. Use thin stabilizer and small hoops, and attach magnets on the back with strong craft glue.
Materials
- 2-inch mini wooden hoops, 6 pieces
- Thin cotton fabric, scraps for each hoop
- Tear-away stabilizer, small pieces
- Computer embroidery designs micro motifs (0.5"–1")
- Polyester thread, 1 skein
- Strong craft glue (E6000 alternative)
- Small round magnets, 6 pieces
Instructions
- Hoop small fabric and stabilizer and stitch micro motif at low speed.
- Trim stabilizer and fabric to 2" circle, leaving margin to tuck under hoop.
- Assemble hoop, tuck raw edges, and secure back with a small dab of craft glue.
- Attach magnet centrally with a strong adhesive and let cure 24 hours.
- Avoid heavy magnets that could pull loose; use tested glue for a firm hold.
- Display on a fridge; avoid placing near credit cards or electronics.
How to Display or Gift It
Place in a small organza bag or tie to a notebook for gifting. Store spare magnets in a small craft drawer.
Thanks for making it to the end of this long list—what a creative ride! From heirloom baby blankets to small hoop magnets, these 25 projects show how computer embroidery designs can bring professional detail to everyday items. Try one project this week and pin the ones you want to tackle later. Which design are you most excited to stitch—monograms, lace panels, or tiny micro motifs?
If you’ll be stitching multiple pieces, a reliable hot glue gun with adjustable temperature made my finishing steps easier—less stringing, cleaner backings. Happy stitching, and don’t forget to share your finished projects with friends or on Pinterest so others can get inspired.
Trust me, picking up a quality hot glue gun with temperature control changed how every single one of these projects turned out — no more stringy mess, no more burns. Here’s a glue gun to check out: Hot glue gun variable temperature





