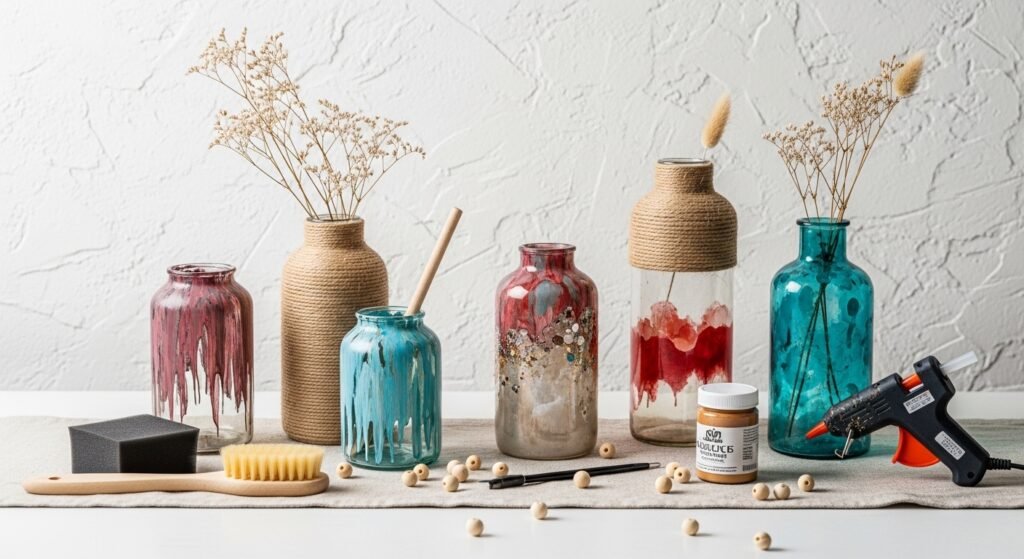
You’ve got a plain vase and a few spare minutes — what if you turned it into something that looks like it came from a boutique? These vase decorating ideas for beginners are all about simple steps, satisfying finishes, and supplies you probably already have. Whether you like cottagecore florals or clean japandi lines, you’ll find approachable techniques here that give major style without complex skills.
I’ll walk you through 21 easy projects with real measurements, drying times, and tools I reach for again and again. I use a self-healing cutting mat and precision craft knife for trims, but a cutting machine speeds things up if you’ve got one. Try my favorite Cricut Joy cutting machine for crisp vinyl shapes, or keep it simple with a craft knife and ruler.
Grab your hot glue gun and a flat foam brush and let’s make that plain vase sing. Each project has a full materials list, step-by-step instructions, and tips for display or gifting.
- Chalky Painted Cottage Vase — vase decorating ideas for beginners
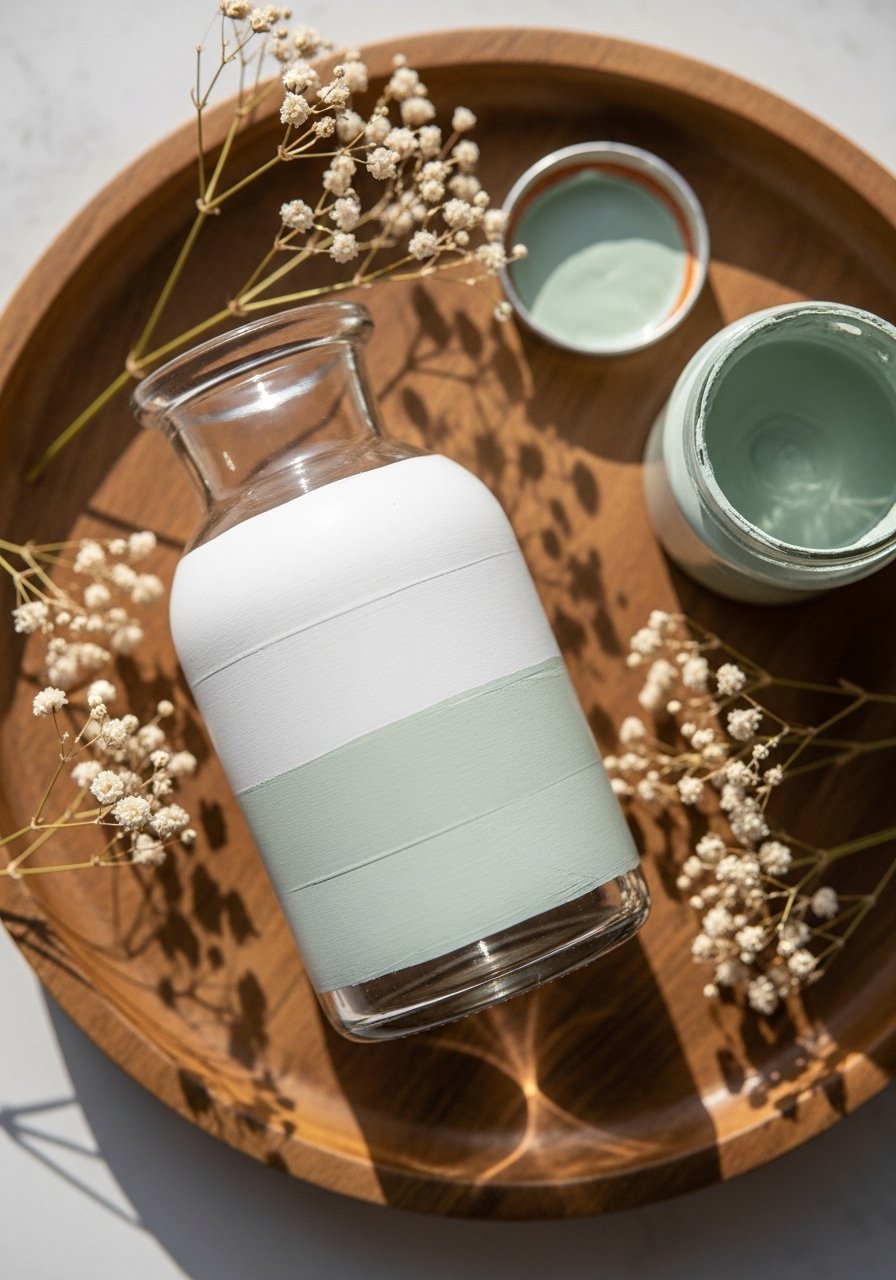
This soft, chalk-painted vase feels like a fresh thrift-store find. The chalk paint gives a velvety matte finish that’s forgiving of brush marks, so it’s perfect for beginners. It reads cottagecore when paired with dried flowers and is tactile in your hands.
Materials
- 1 small glass vase (8–10 oz)
- 120 ml chalk paint (matte white)
- 60 ml chalk paint (sage or pastel color)
- 1 flat 1/2" foam brush
- 1 roll painter’s tape (1/2" wide)
- Sandpaper 220 grit, one sheet
- Paper towel and rubbing alcohol for cleaning
- Clear matte sealer spray, 6–8 inches, single coat
Instructions
- Clean the vase with rubbing alcohol and let it dry thoroughly. A clean surface ensures paint adhesion.
- Lightly sand the glass with 220-grit sandpaper until the surface feels slightly dull to the touch.
- Tape off any areas for crisp lines. Press painter’s tape firmly along edges.
- Apply the first thin coat of white chalk paint with the foam brush. Let dry 30 minutes.
- Apply a second coat to reach full opaque coverage. Dry 30–45 minutes.
- Add the sage band: remove tape, reposition, and brush two thin coats, drying 20–30 minutes between coats.
- Let everything cure 24 hours before sealing.
- Spray one light coat of clear matte sealer from 6–8 inches, hold 10 seconds per sweep. Dry 1 hour.
How to Display or Gift It
This vase sits beautifully on a bedside table with a single stem or on a stacked book vignette. Tie a thin jute bow around the neck for gifting. Store extra chalk paint in an airtight jar inside a craft organizer to keep it fresh.
Product tip: Use a flat foam brush set for smooth chalk paint application.
- Twine-Wrapped Rustic Vase
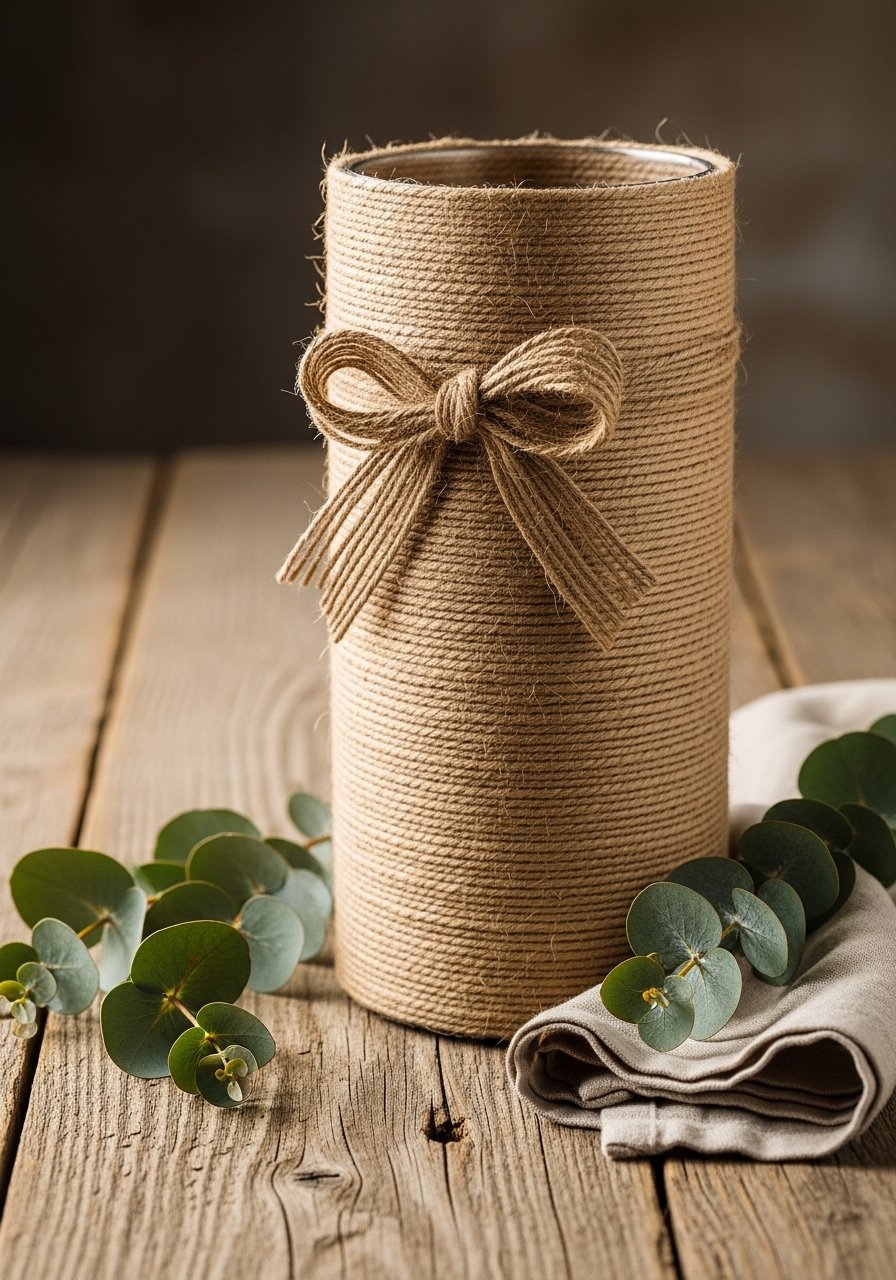
Textural and tactile, wrapping twine around a vase creates warm farmhouse charm. The method is patient but meditative — great when you want a hands-on, repetitive craft.
Materials
- 1 glass vase, 8–12" tall
- 50 yards natural jute twine (2mm)
- 1 high-temp hot glue gun + 10 glue sticks
- Scissors
- Ruler
- Optional: wooden bead garland (6–10 beads)
Instructions
- Plug in the hot glue gun and prep your workspace on a heat-resistant mat.
- Start at the base: apply a 1" line of hot glue and press the twine into it.
- Wrap tightly in a spiral, applying a dot of glue every 1–1.5" to secure.
- Keep tension even to prevent gaps; trim twine when you reach the top.
- Tuck the end into a final glue dot and press firmly until set (about 30 seconds).
- Add a small twine bow or string wooden beads onto a short twine tail and glue at the neck.
How to Display or Gift It
Pair with dried pampas or wheat for a natural vignette. Wrap the finished vase in kraft tissue for gifting and include a little care note about avoiding water if the twine is glued over the mouth.
Grab a reliable temperature-controlled hot glue gun for fewer stringy bits.
- Painter’s Tape Geometric Vase — vase decorating ideas for beginners
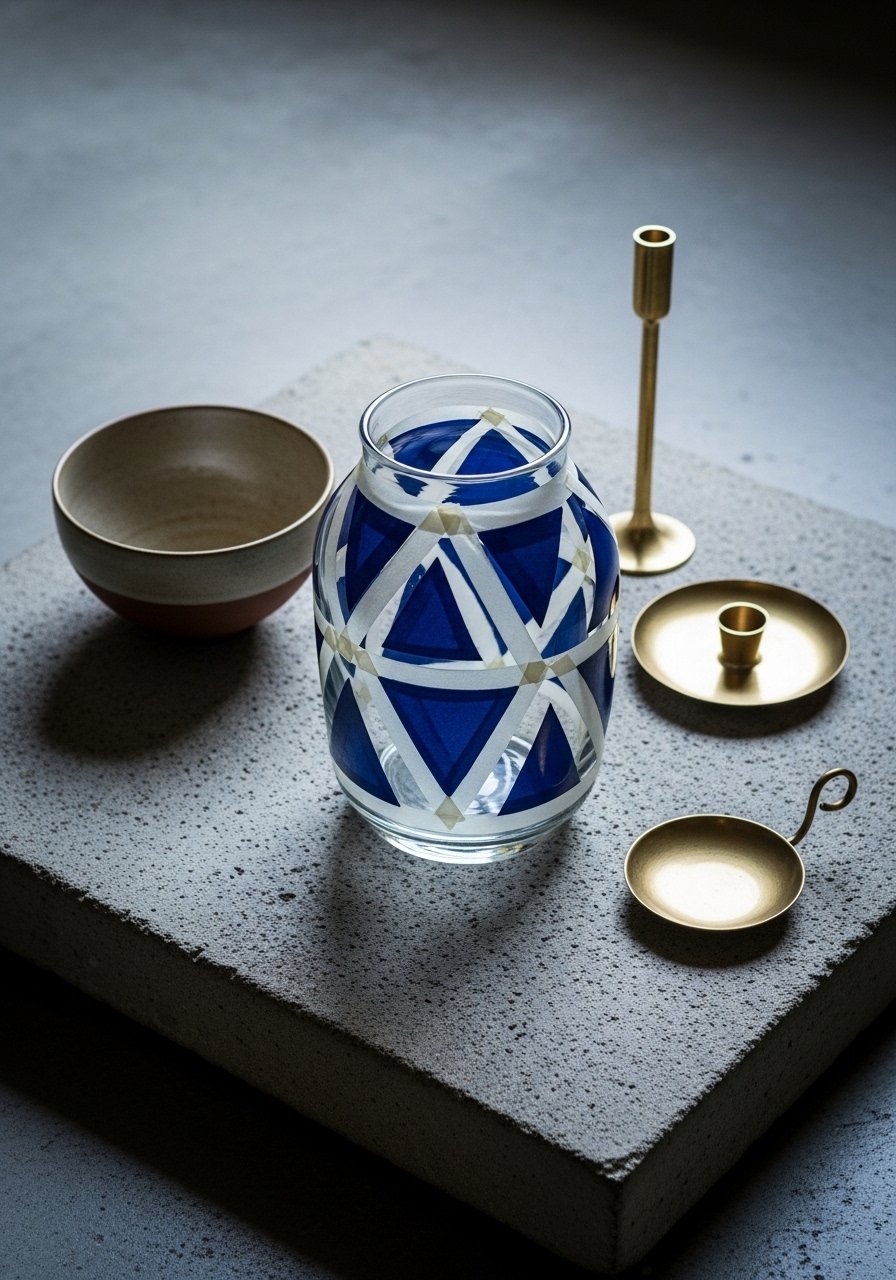
Geometric patterns are clean and modern. Painter’s tape gives razor-sharp edges so even beginner brushstrokes look polished. This is great for a minimalist room or as a gift for someone who likes clean lines.
Materials
- 1 medium glass vase (10–14 oz)
- 2 acrylic craft paints: 50 ml navy and 50 ml cream
- Painter’s tape (1/4" and 1/2")
- 2 flat synthetic brushes (1" and 1/4")
- 1 foam roller (2" brayer) for even paint
- Clear gloss sealer, 1 spray can
Instructions
- Clean vase with rubbing alcohol. Dry.
- Plan your geometric layout; mark faint pencil points if needed.
- Apply painter’s tape to create shapes. Press edges firmly.
- Use the foam roller to apply a thin coat of paint. Dry 20–30 minutes.
- Add a second coat for opacity. Dry 30 minutes.
- Carefully remove tape when paint is dry to the touch (not fully cured).
- Cure 24 hours, then spray one light coat of clear gloss. Dry 1 hour.
How to Display or Gift It
Group with ceramic trays or brass candlesticks; the navy pairs well with warm woods. To gift, place in a shallow box cushioned with tissue and include a small care card.
I like a small brayer roller to avoid brush streaks.
- Decoupage Napkin Vase (Floral Collage)
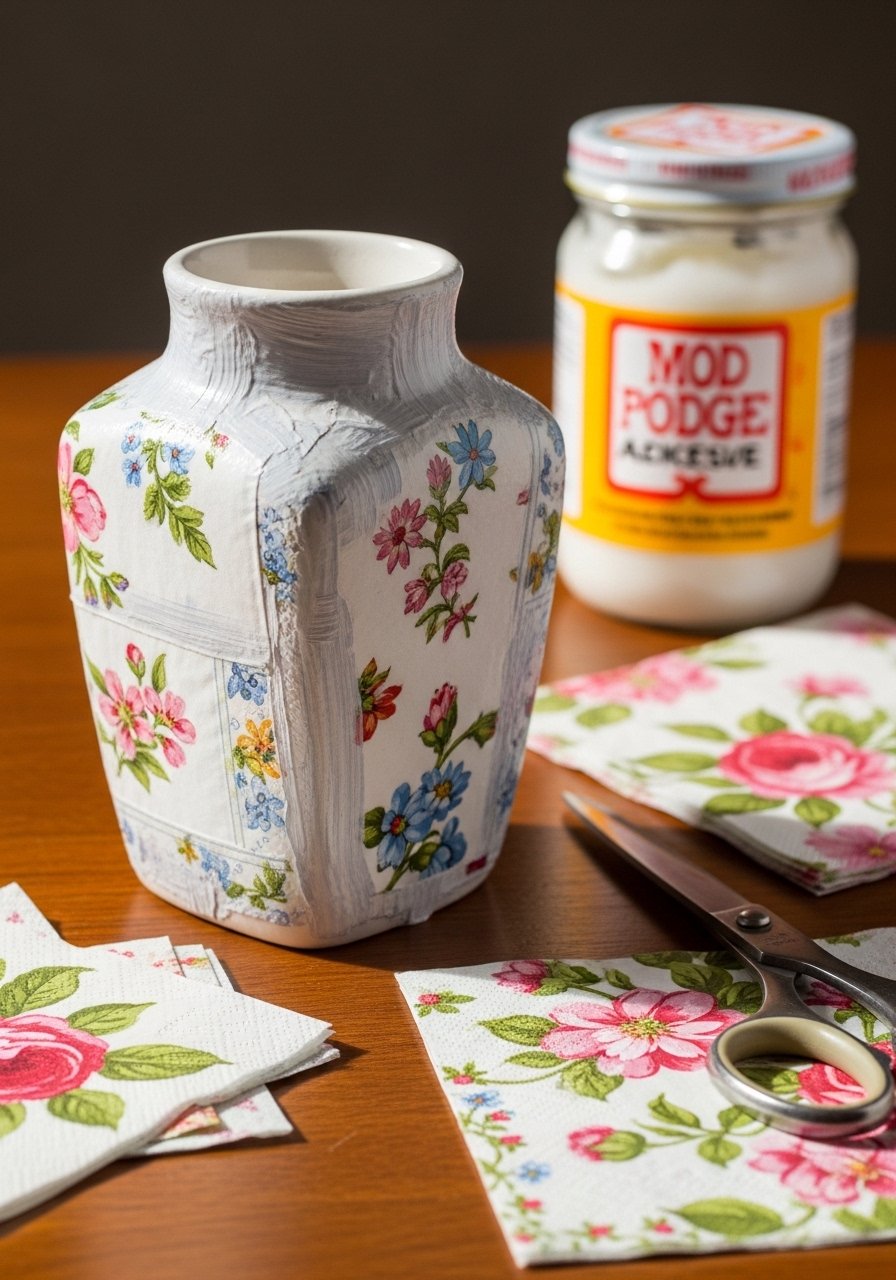
Decoupage is forgiving and instantly gives pattern to plain glass. Using napkins or tissue paper keeps projects light and dimensional. This is a perfect beginner-friendly craft for personalized gifts.
Materials
- 1 glass vase, 6–8" tall
- 5 lightweight paper napkins (single ply floral)
- Mod Podge matte, 237 ml
- 1 foam brush (1/2")
- Scissors
- Sanding sponge, fine
- Clear acrylic sealer (matte), 1 spray
Instructions
- Separate napkin plies; use the top printed layer only.
- Cut floral motifs out with scissors, leaving small margin.
- Wipe vase with rubbing alcohol.
- Brush a thin coat of Mod Podge where a motif will sit.
- Lay motif gently, smooth with a dry brush outward to remove air bubbles.
- Brush a thin coat of Mod Podge over the motif. Let dry 20 minutes.
- Repeat until vase is covered. Add two coats over entire surface, drying 30 minutes between coats.
- Cure 24–48 hours, then spray one light coat of acrylic sealer. Dry 1 hour.
How to Display or Gift It
Fill with fresh-cut flowers or battery-operated fairy lights for a cozy glow. Store flat or upright in a craft organizer until fully cured. For gifting, include a packet of extra napkin motifs.
This project shines with Mod Podge Matte.
- Metallic Leaf Accent Vase

Gold leaf adds instant polish without heavy tools. The slightly imperfect edges make the finish feel artisan-made — great for gifting or table centerpieces.
Materials
- 1 glass vase, 8–12" tall
- Gold leaf sheets, 25 sheets (size 3" x 3")
- Gold leaf adhesive (size), 30 ml
- Soft squirrel hair brush or soft bristle brush
- Lint-free cloth
- Clear gloss sealer, one spray
Instructions
- Clean vase with alcohol, then mask any areas you want untouched.
- Brush a thin coat of gold leaf adhesive on targeted areas. Wait 10–15 minutes until tacky.
- Gently press gold leaf sheet onto tacky areas. Use brush to smooth.
- Remove excess leaf with a soft brush.
- For layered texture, repeat adhesive and leaf in places.
- After 24 hours cure, spray a clear gloss sealer to protect leaf.
- Allow 24 hours before filling with water.
How to Display or Gift It
Pair with dried white stems for a modern glam look. Slip into a velvet-lined gift box for a luxe present.
I reach for a fine soft brush set to handle delicate leaf.
- Glass Etching Frosted Vase
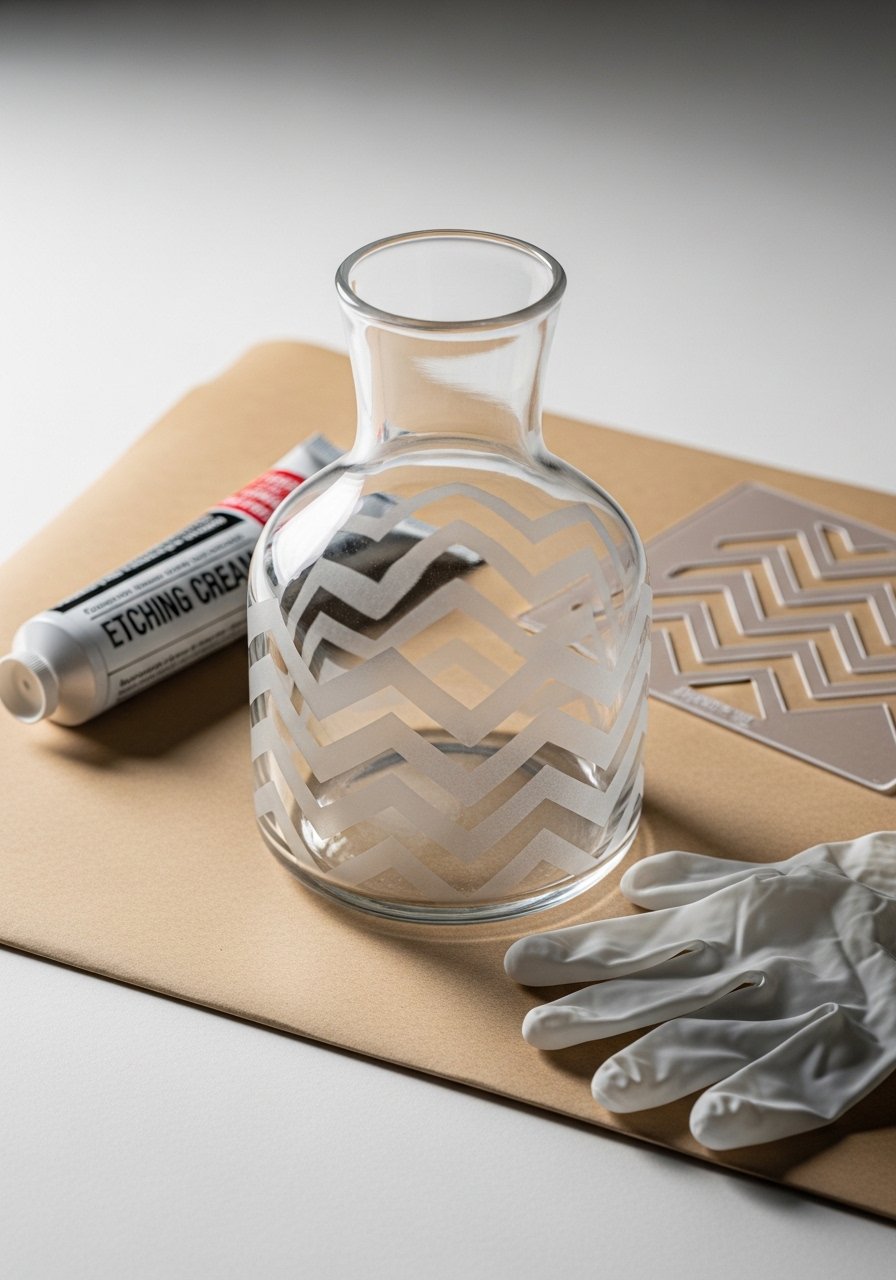
Etching creates permanent frosted designs and feels very grown-up. It looks like custom glassware but uses basic stencils — perfect for making matching sets.
Materials
- 1 glass vase
- Glass etching cream, 50 ml
- Vinyl stencil (pre-cut or cut with machine)
- Painter’s tape
- Latex gloves
- Plastic scraper
- Rinsing bowl and water
Instructions
- Clean glass with rubbing alcohol; dry.
- Apply vinyl stencil and secure edges with painter’s tape.
- Put on gloves and apply a thick, even layer of etching cream over exposed glass.
- Wait 5–10 minutes (follow cream instructions exactly).
- Rinse under running water while removing the cream with a plastic scraper.
- Peel stencil, dry, and inspect for even frost. Repeat small touch-ups if needed.
- Let cure 24 hours before filling.
How to Display or Gift It
Etched vases are ideal for wedding favors or kitchen counters. Wrap in bubble wrap for shipping and label as fragile.
If cutting stencils yourself, try a Cricut Explore cutting machine.
- Painted Ombre Vase (Dip-Paint Technique)
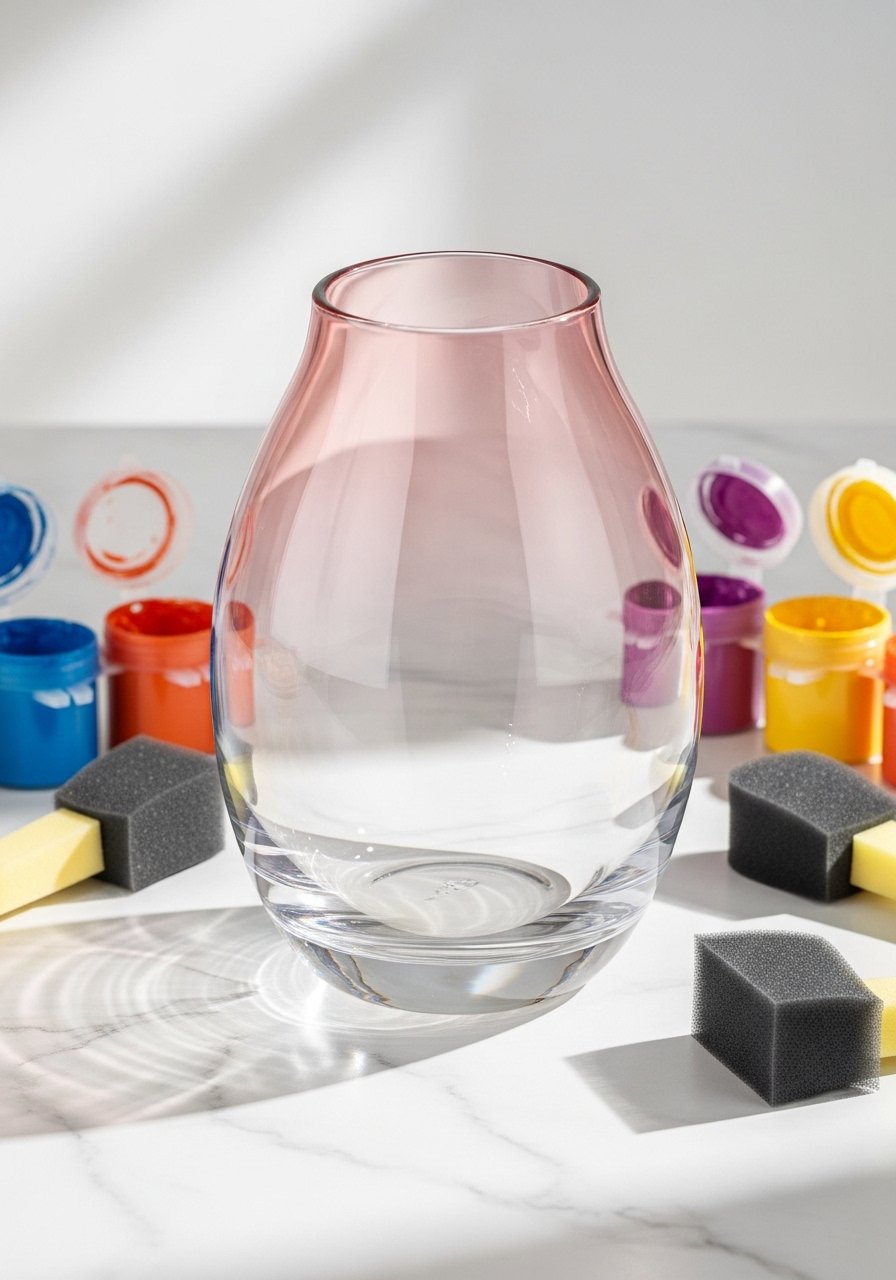
Ombre gives a hand-painted, gradient feel that's easy to achieve with thinned acrylics. It’s forgiving and looks professional even with simple blending.
Materials
- 1 vase (glass or ceramic)
- 3 x 30 ml acrylic paints (light, mid, dark of same hue)
- 1 cup of water for thinning
- 3 sponge brushes, small
- Palette tray
- Clear gloss sealer, 1 spray can
- Paper towels
Instructions
- Clean vase. Prepare paint in three cups, thin each with 10–15% water for flow.
- Start at the top with the darkest shade; dab on with a sponge brush and blend downward.
- Quickly work the mid shade just below, overlapping slightly; blend with light strokes.
- Finish with the lightest shade toward the base. Smooth transitions while paint is wet.
- Let dry 30 minutes, add second pass if needed for richer color.
- Cure 24 hours, spray one light coat of gloss sealer. Dry 1 hour.
How to Display or Gift It
Pair with a matching painted tray or bundle multiple sizes for an ombre set. For gifting, place in a box with shredded kraft.
A set of sponge brushes helps achieve smooth blending.
- Pressed Flower Resin Vase Accent

Use resin to encase pressed petals on the surface of a vase for a preserved, glossy accent. This project requires patience for curing, but results are heirloom-quality.
Materials
- 1 vase (flat-sided works best)
- Epoxy resin kit, clear, 200 ml
- Pressed flowers (20–30 small petals)
- Mixing cups and wooden stir sticks
- Gloves and disposable apron
- Small torch or heat gun
- Fine sandpaper (320 grit) for smoothing edges
Instructions
- Arrange pressed flowers on vase where you want them; take a photo as a reference.
- Mix epoxy resin per kit instructions at 1:1 or 2:1 ratio; stir slowly to avoid bubbles for 2–3 minutes.
- Brush a thin coat of resin where flowers will go.
- Lay flowers gently, then pour a thin layer of resin to cover them.
- Use the torch or heat gun briefly to pop bubbles (5–10 seconds, keep moving).
- Let cure 24–48 hours depending on resin. Sand lightly and add a second thin topcoat if needed. Cure another 24 hours.
How to Display or Gift It
Keep resin vases out of direct sunlight to avoid yellowing. For gifting, include a note about hand-washing only. Store leftovers in a sealed container.
I use a clear epoxy resin kit for smooth finishes.
- Washi Tape Striped Vase — vase decorating ideas for beginners

Washi tape makes instant pattern with zero drying time. It’s removable, so you can change your look seasonally. Kids can join this one easily.
Materials
- 1 vase (any size)
- 10–12 rolls of washi tape (assorted widths)
- Scissors
- Ruler
- Optional: clear matte sealer spray
Instructions
- Clean vase and decide stripe direction.
- Measure and mark faint pencil points as guides.
- Apply washi tape strips smoothly, overlapping slightly for complete coverage.
- Trim edges with scissors or a precision craft knife on a cutting mat for crisp ends.
- If you want permanence, add one light coat of clear matte sealer and dry 30 minutes.
How to Display or Gift It
Washi tape vases are perfect for a bright desk or kid’s room. To gift, wrap with a ribbon and include a roll of coordinating washi tape.
For precise trims, I keep a self-healing cutting mat handy.
- Mosaic Tile Vase (Broken Ceramic Look)
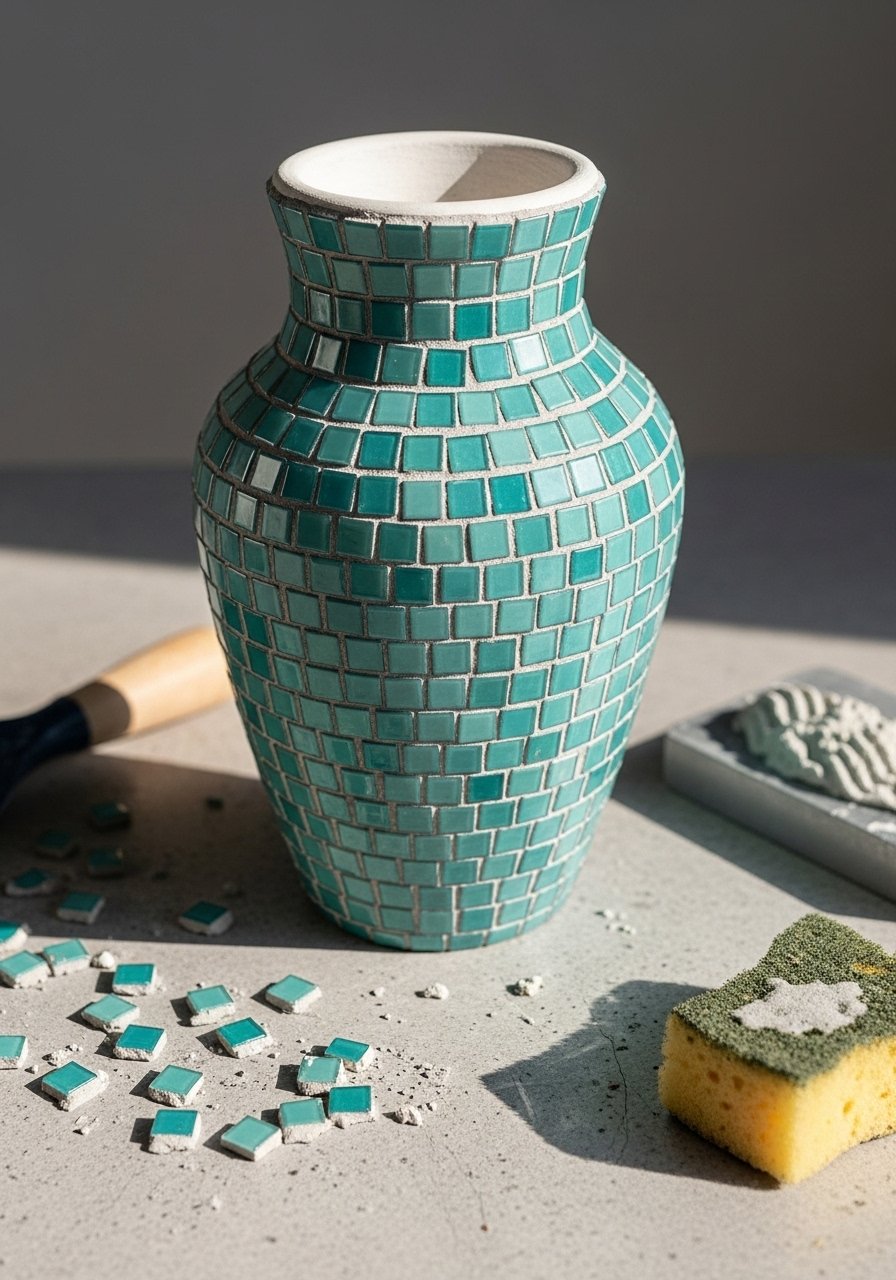
Mosaicing a vase gives texture and color. Use small tiles or broken thrift-store ceramics for a boho, collected feel. Grouting seals everything and makes it durable.
Materials
- 1 ceramic or terracotta vase
- 200 g mosaic tiles or broken ceramic pieces
- Tile adhesive, 100 g
- Grout, sanded, 200 g
- Grout float and sponge
- Safety glasses and gloves
Instructions
- Clean vase surface. Plan mosaic pattern.
- Apply tile adhesive to small sections with a palette knife.
- Press tiles into adhesive, leaving 1–2 mm gaps.
- Let adhesive set 24 hours.
- Mix grout and spread over tiles with grout float, working diagonally.
- Wipe excess with damp sponge. Allow grout to cure 48 hours.
- Buff tiles with a dry cloth.
How to Display or Gift It
Mosaic vases feel at home on a sunporch or patio. Wrap in bubble wrap for shipping. Keep extra grout in a sealed bag for touch-ups.
A compact grout float set makes application smoother.
- Yarn-Wrapped Cozy Vase
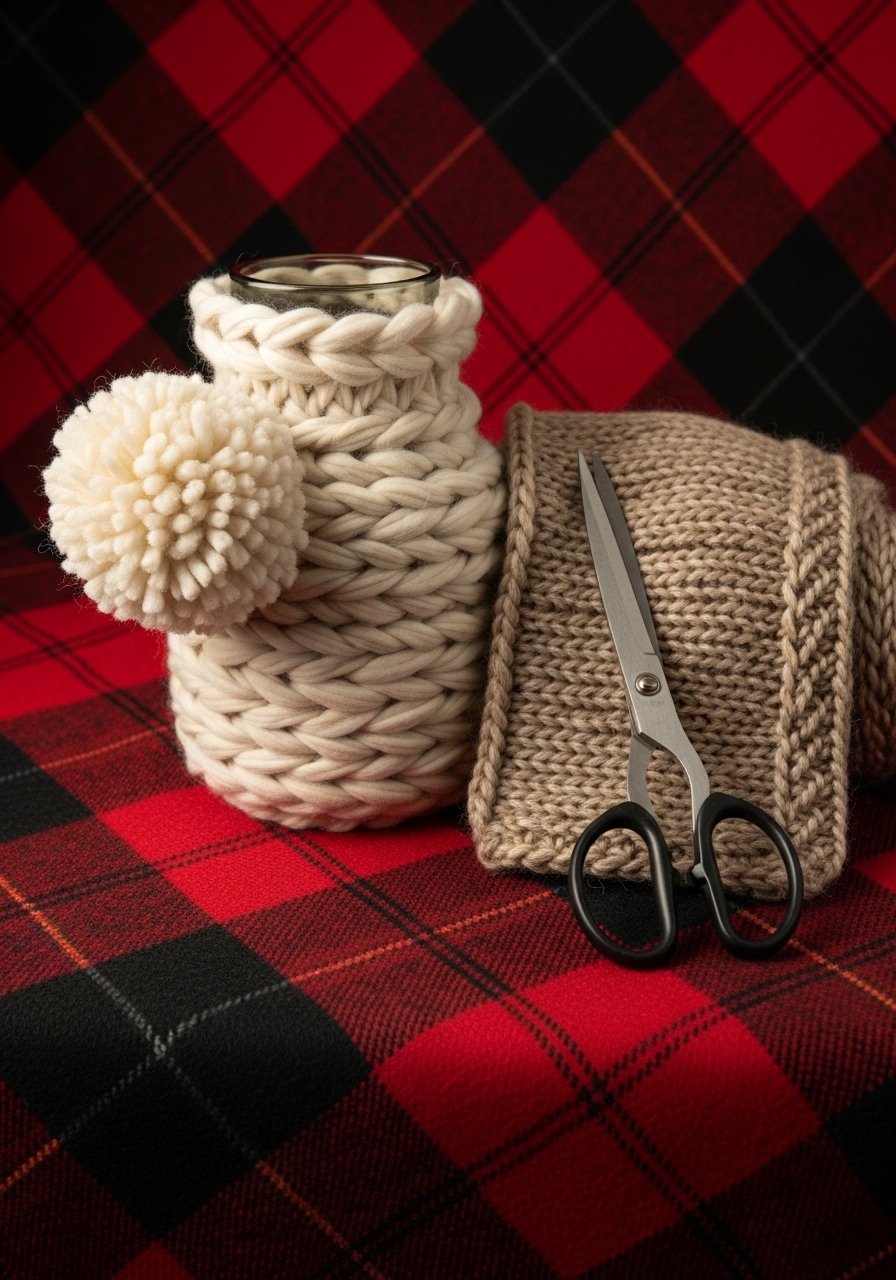
Yarn wrapping is soft and tactile. Use bulky yarn for a chunky look or thin yarn for delicate stripes. It’s a quick way to add color and warmth.
Materials
- 1 vase (any size)
- 100 g bulky wool yarn (one color) or 3 skeins for stripes
- Hot glue gun and 5 glue sticks
- Scissors
- Ruler
Instructions
- Start with a dab of hot glue at the base and press yarn end down.
- Wrap tightly and evenly, applying a small glue dot every 1–2".
- Change colors by gluing the new yarn end over the previous wrap.
- Finish at the rim with a firm glue dot and tuck end.
- Add a pom-pom glued to the neck if desired.
How to Display or Gift It
This vase makes a sweet seasonal gift; fill with dried flowers. Store extra yarn in a craft bin to keep it dust-free.
A soft bulky yarn set gives cozy texture.
- Stenciled Chalkboard Vase (Label It)

Turn a vase (or jar) into a writable chalkboard container for herbs or seasonal notes. Chalkboard paint is forgiving and practical.
Materials
- 1 glass jar or vase
- 120 ml chalkboard paint
- Painter’s tape
- Stencils (letters or shapes)
- 1 foam brush
- Chalk pen for writing
Instructions
- Clean and sand the area to be painted.
- Tape off edges and apply two thin coats of chalkboard paint, drying 30 minutes between coats.
- Remove tape when paint is dry to touch.
- Season the surface by rubbing full chalk across and wiping clean.
- Use stencils and a chalk pen to add labels or designs.
How to Display or Gift It
Label with the herb name and place in a sunny kitchen window. For gifting, include a small packet of seeds and a chalk pen in a kraft bag.
Try a chalk pen set for crisp writing.
- Painted Ceramic Look with Clay Appliqués
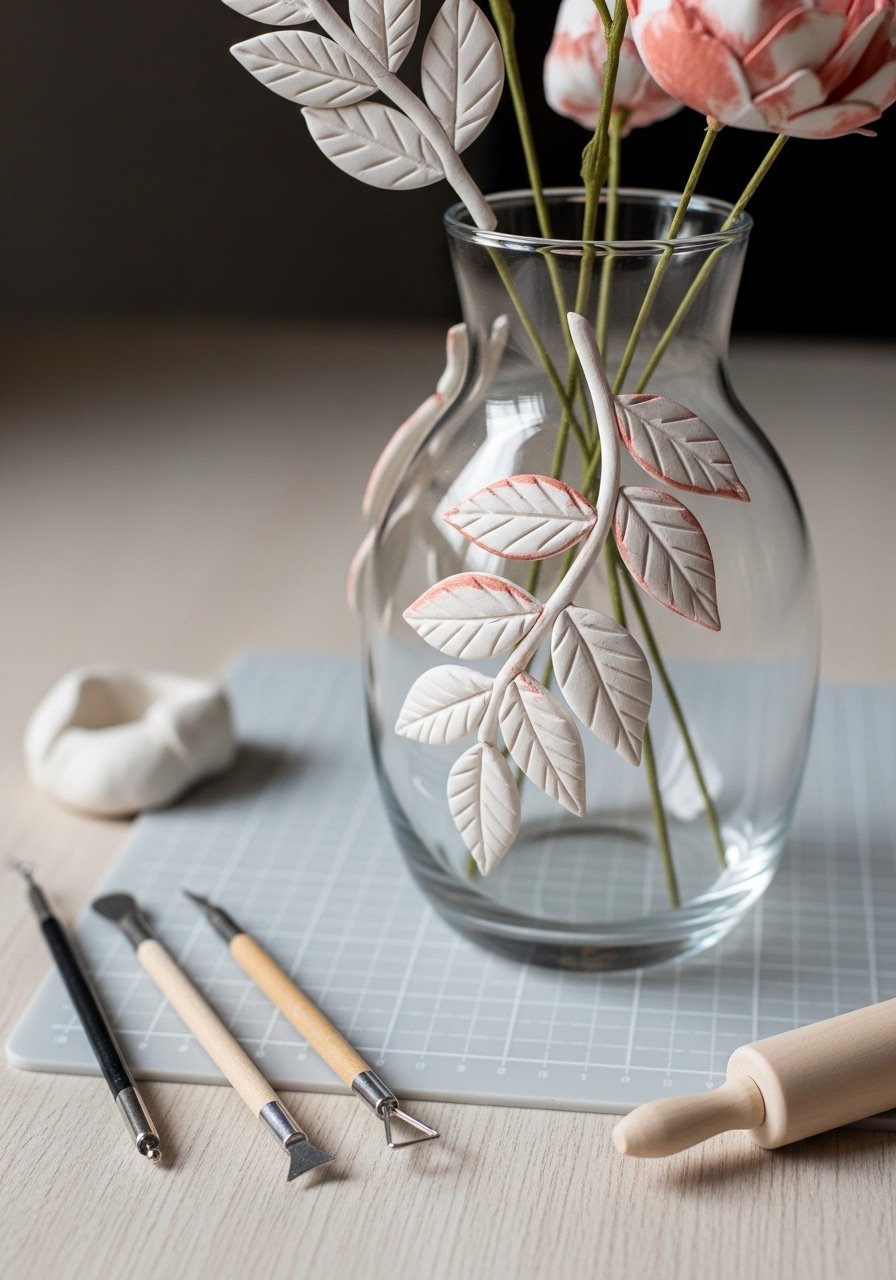
Adding lightweight clay appliqués adds dimension and a handmade ceramic vibe. Air-dry clay is easy for beginners and sticks well with craft glue.
Materials
- 1 glass vase
- 200 g air-dry clay
- Clay tools (roller, shaping tools)
- Craft glue (E6000 or tacky glue), 30 ml
- Acrylic paint (terracotta), 30 ml
- Foam brush
- Sandpaper 220 grit
Instructions
- Roll clay to 3–4 mm thickness and cut leaf shapes.
- Let them firm slightly (10–20 minutes) so they’re not too sticky.
- Attach leaves with a thin bead of craft glue; press gently.
- Let glue set 1 hour, then paint appliqués with acrylic paint. Dry 30 minutes.
- Add a second coat if needed. Allow full cure 24 hours.
- Lightly sand any rough edges.
How to Display or Gift It
Place with pampas or eucalyptus for a natural palette. Wrap in tissue and include a small care card warning not to submerge in water.
I like using a small air-dry clay kit for consistent results.
- Alcohol Ink Marble Vase

Alcohol ink creates fluid, watery marbling on glass that’s dramatic and modern. It’s fast and satisfying, but needs a ventilated space.
Materials
- 1 glass vase (white or clear)
- 3 alcohol ink colors (10 ml each)
- 1 blending solution (10 ml)
- Cotton swabs and paper towels
- Nitrile gloves
- Clear gloss sealer, spray, 1 can
Instructions
- Clean vase and wear gloves.
- Drop alcohol ink onto the vase and add blending solution to spread.
- Tilt and rotate the vase to move color; use swabs to pull veins.
- Let dry 10–15 minutes; add accents carefully.
- Cure 24 hours, then spray with clear gloss to protect. Dry 1 hour.
How to Display or Gift It
Marbled vases pair well with modern black or brass accents. For gifting, place in a shallow box with tissue to show off the marbled top.
A small alcohol ink set gives vibrant color choices.
- Glitter-Dipped Vase — vase decorating ideas for beginners
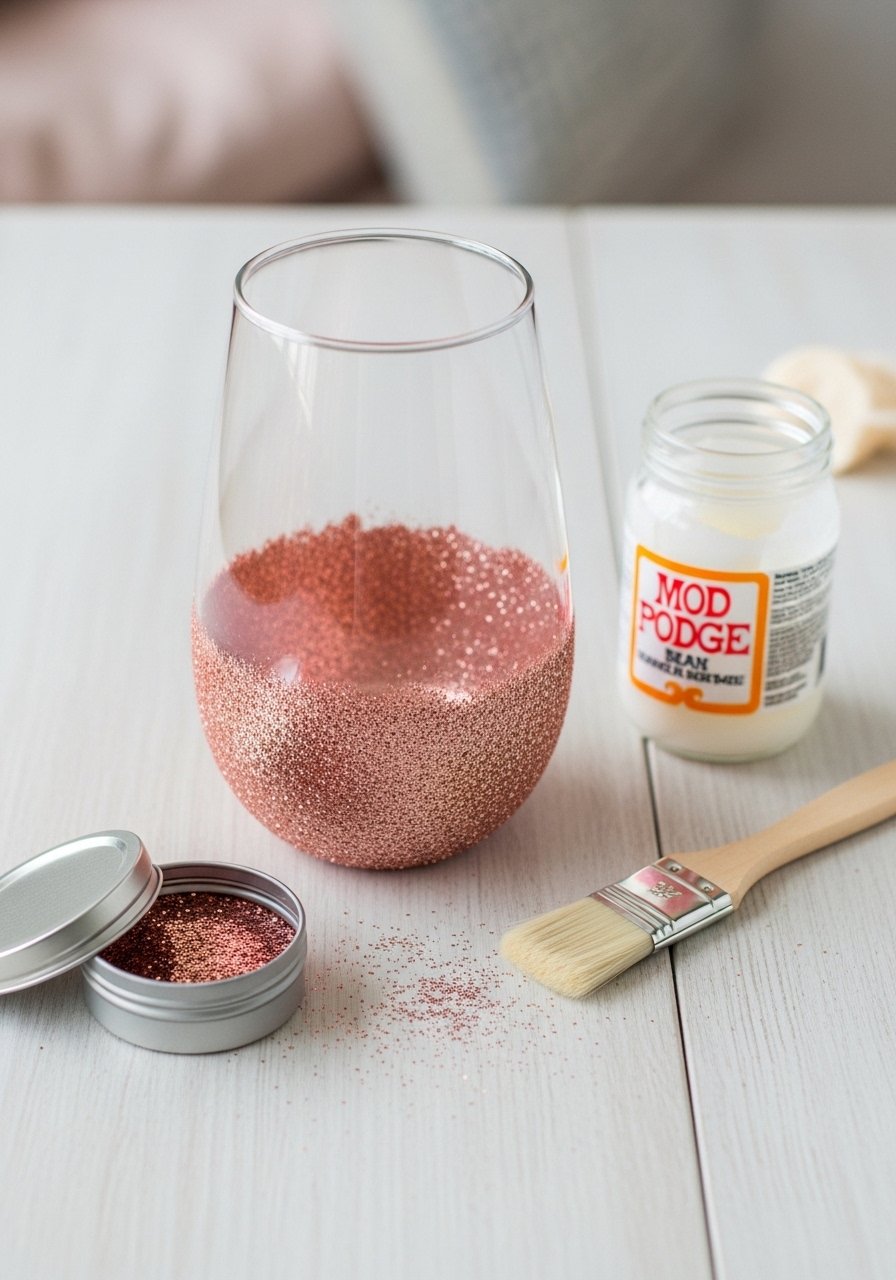
Glitter-dip is instant party energy and surprisingly simple. Seal it well and you’ll have sparkle without the shedding.
Materials
- 1 vase
- 60 ml Mod Podge (gloss)
- 40 g fine glitter (rose gold)
- Foam brush
- Clear gloss sealer, 2 light coats
- Disposable tray
Instructions
- Brush a generous coat of Mod Podge where you want glitter.
- Sprinkle glitter from a height of 6–8 inches, rotate vase to coat evenly.
- Tap off excess, apply a second coat of Mod Podge to seal; dry 30–45 minutes.
- Spray two light coats of clear gloss sealer, drying 30 minutes between sprays.
- Cure 24 hours before handling.
How to Display or Gift It
Glitter vases are perfect for party centerpieces or bridesmaid gifts. Wrap in tissue and tuck in a small note.
A reliable fine glitter pack gives consistent sparkle.
- Macramé Sleeve Vase
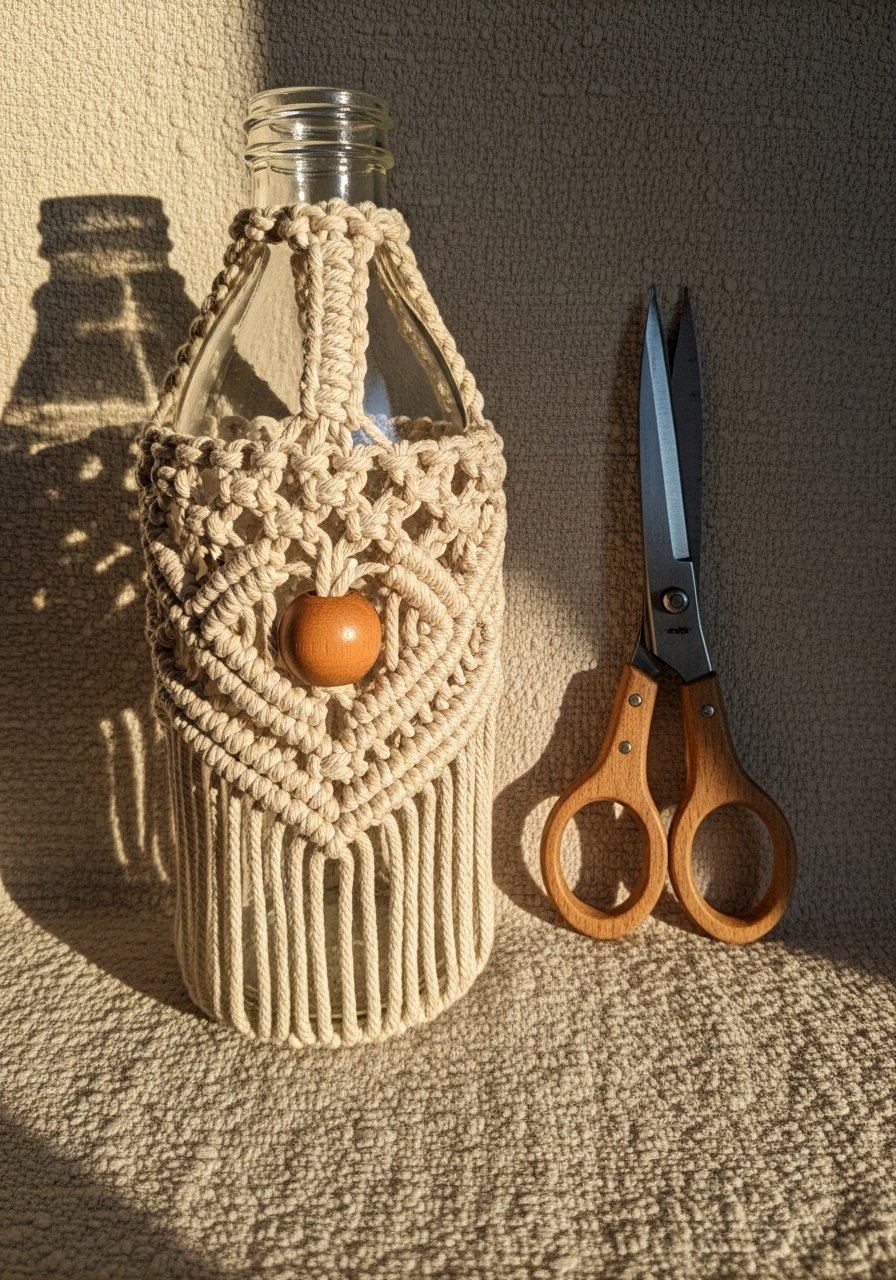
Macramé adds boho texture and is great for repurposing bottles. Beginners can learn simple square knots and make adjustable sleeves.
Materials
- 1 bottle or vase
- 10 m macramé cord (3mm)
- Wooden bead(s), 1–3 (20 mm)
- Scissors
- Measuring tape
- T-pins and foam board for holding knots
Instructions
- Cut 8 cords at 1.5x the vase height plus extra for fringe; reserve 40 cm for top loops.
- Attach cords to a top ring and secure to foam board with T-pins.
- Tie a row of square knots across the top. Continue pattern until sleeve reaches base.
- Insert wooden beads on cords before closing the bottom.
- Trim fringe to desired length.
How to Display or Gift It
Macramé vases look great with single stems or pampas. Store cords in a sealed bag to keep them dust-free. For gifting, include care instructions about spot cleaning.
I recommend a 3mm macramé cord spool.
- Painted Dot Mandala Vase
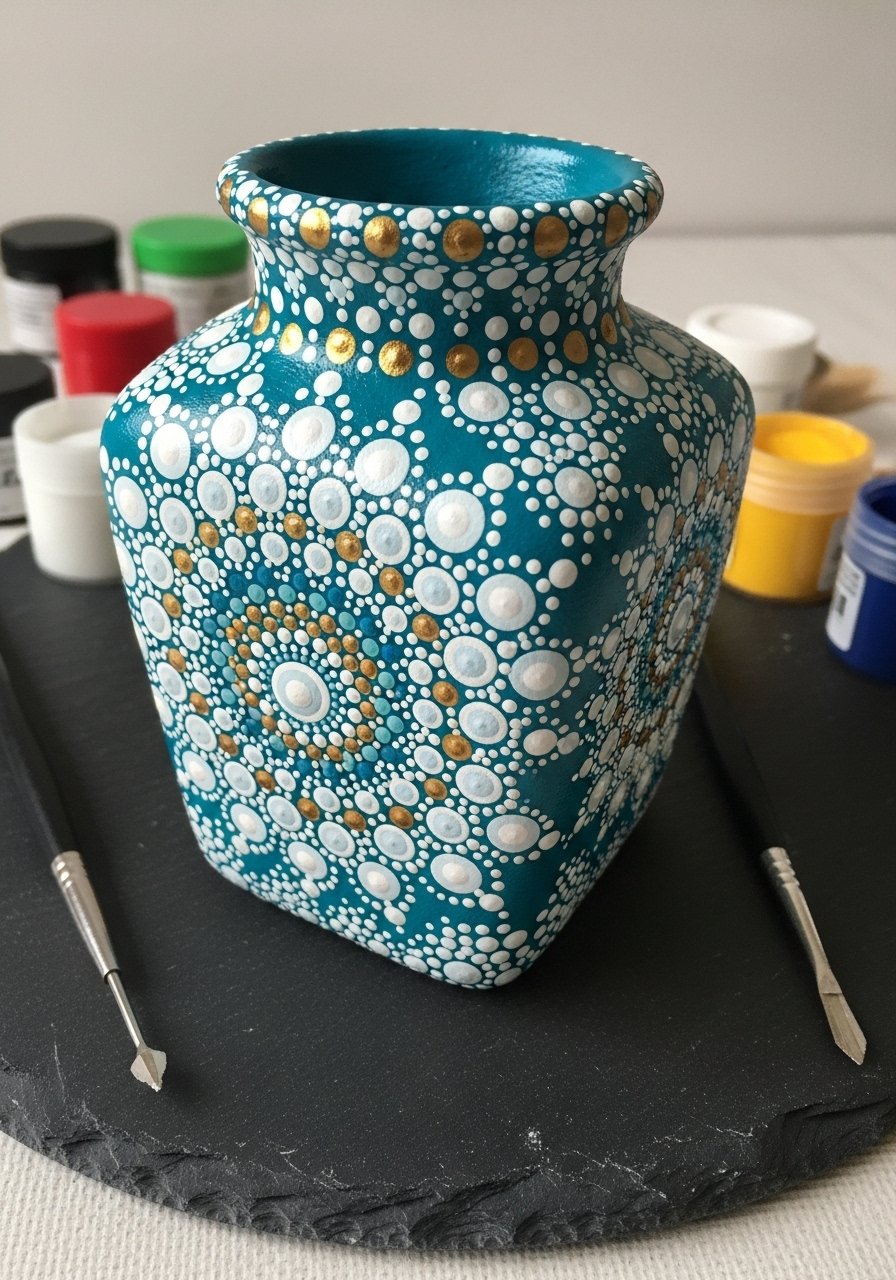
Dot painting is meditative and forgiving. Using dotting tools gives uniform dots and a striking boho look that’s easy for beginners to replicate.
Materials
- 1 small vase
- Acrylic paints (teal base + white/gold), 30 ml each
- Dotting tool set (various sizes)
- Foam brush
- Clear matte sealer, spray
Instructions
- Paint vase base color with two thin coats; dry 30 minutes between coats.
- Plan mandala center and use dotting tools to apply concentric circles of dots.
- Clean dotting tools between colors on a paper towel.
- After paint fully dries 24 hours, spray with matte sealer. Dry 1 hour.
How to Display or Gift It
Pair with small succulents or use as a pencil cup. To gift, include a little instruction card on dotting technique.
A dotting tool kit makes perfect dots easier.
- Fabric-Wrapped Boho Vase
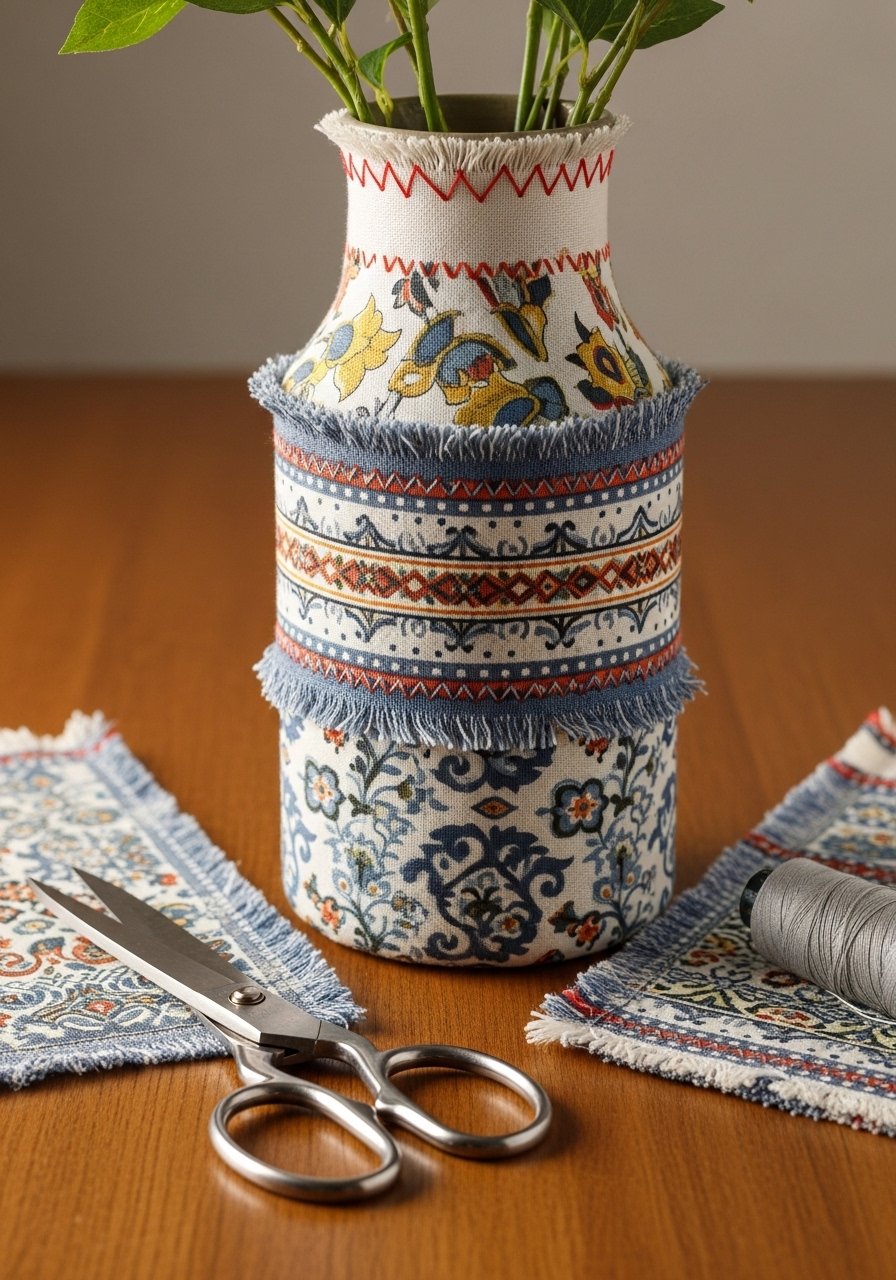
Fabric wrap is soft and customizable. Use scraps from old garments for zero-waste charm. Fabric glue or stitch will hold it in place.
Materials
- 1 vase
- 30 cm x height patterned cotton fabric strip
- Fabric glue or needle & thread
- Scissors
- Fray check (optional)
- Twine for finishing knot
Instructions
- Measure and cut fabric to wrap around vase with 2 cm overlap.
- Apply fabric glue along the overlapped edge or stitch with a running stitch.
- Wrap fabric tightly, smoothing wrinkles as you go.
- Secure top and bottom edges with small glue dots.
- Trim and seal edges with fray check if desired.
How to Display or Gift It
This works well for seasonal swaps—change fabric per season. For gifting, include a coordinating ribbon or twine.
A small fabric glue tube is perfect for non-sewers.
- Wash-and-Weatherproof Outdoor Rope Vase
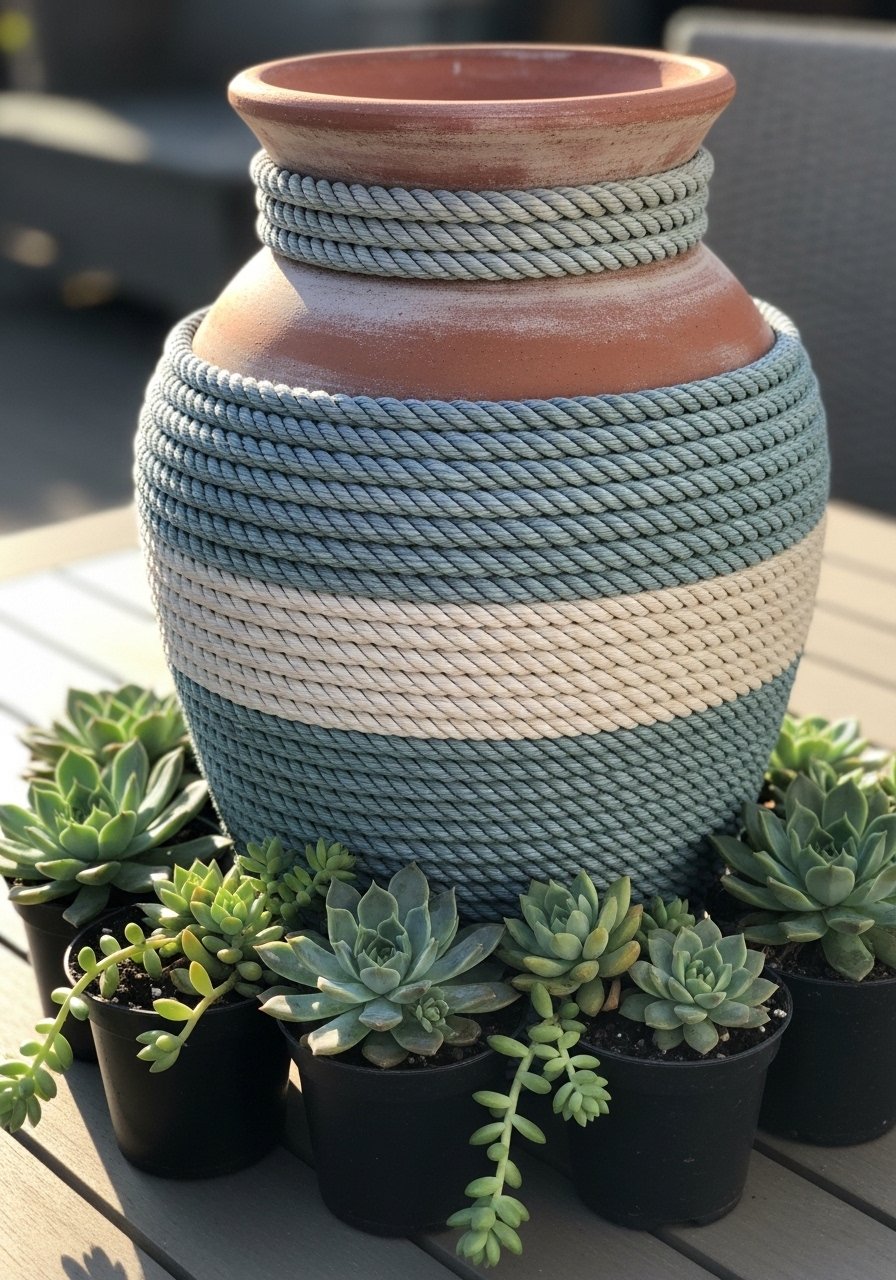
Make a weatherproof vase for porch decor by using outdoor rope and waterproof glue. It’s resilient to light weather and perfect for planters.
Materials
- 1 terracotta or ceramic vase
- 10 m outdoor polypropylene rope (4mm)
- Exterior-grade adhesive (marine glue)
- Scissors
- Rubbing alcohol
Instructions
- Clean vase and plan start point.
- Apply a small bead of marine glue and press rope into glue.
- Wrap rope tightly, adding glue every 2 cm to secure.
- Trim and anchor rope with a generous glue dot at the lip.
- Let cure 48 hours before outdoor use.
How to Display or Gift It
Place on a covered porch or deck. For gifting, present with a small potted succulent and care note.
An outdoor polypropylene rope spool will resist mildew.
- Minimalist Matte Spray-Painted Vase

Spray paint can deliver a flawless finish in minutes. Matte finishes are modern and hide minor imperfections. Perfect when you want high impact fast.
Materials
- 1 vase
- 1 can matte spray paint (color of choice)
- Painter’s tape
- Protective mask
- Newspaper or drop cloth
Instructions
- Work outside or in a ventilated area. Mask any rim you want left clear.
- Shake can 1–2 minutes. Hold 10–12" from vase and spray in light passes.
- Apply 3 light coats, 10 minutes between coats.
- Let cure 24 hours before handling.
How to Display or Gift It
Matte vases suit modern interiors and pair with sculptural dried stems. For gifting, place in a fitted box with protective tissue.
A matte spray paint can in a neutral tone is an easy go-to.
- Rhinestone Glam Vase (Budget Luxe)
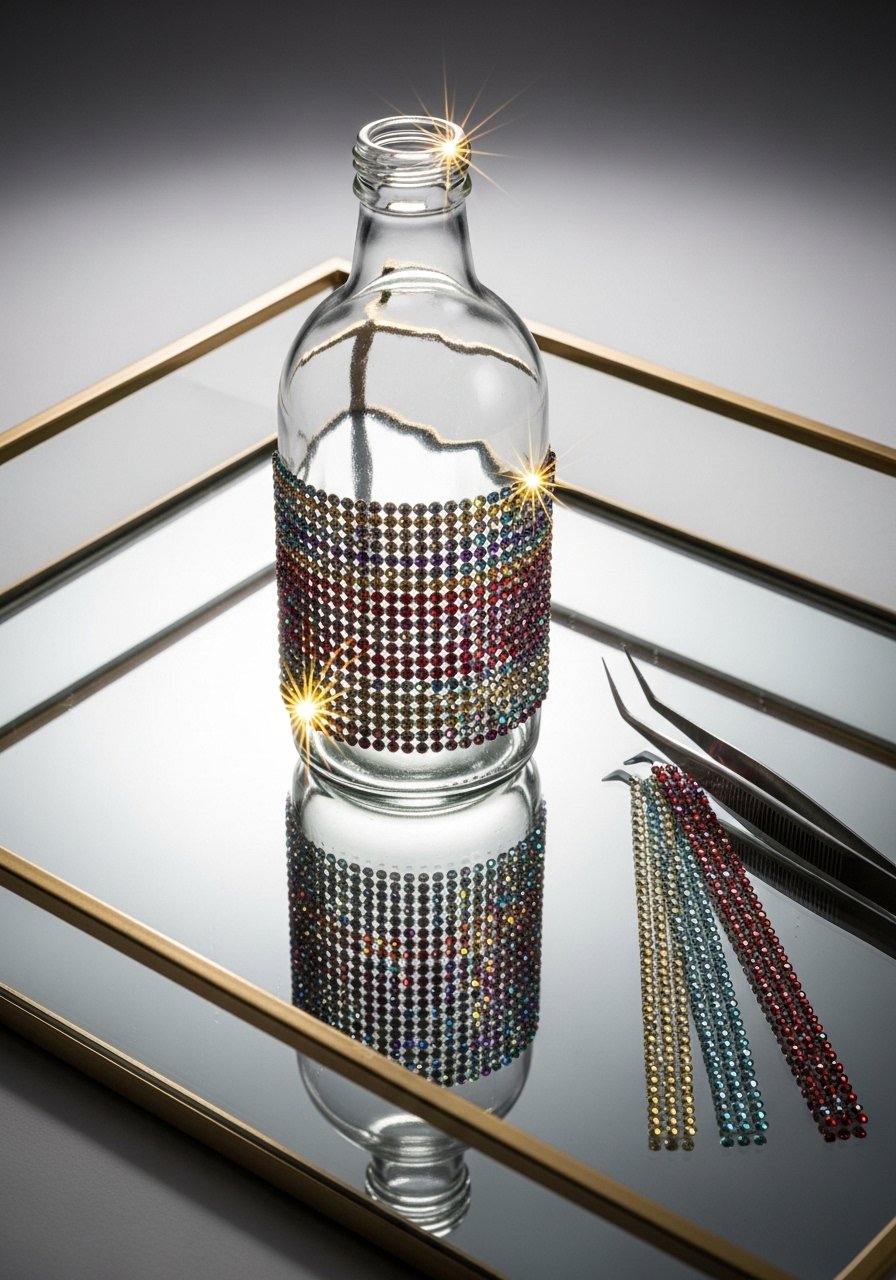
For party-ready sparkle, rhinestones applied in a band look luxe without being excessive. Tweezers and adhesive sheets speed the process.
Materials
- 1 glass vase
- 1 rhinestone adhesive strip roll or rhinestone sheet
- Tweezers
- Scissors
- Clear topcoat spray (optional)
Instructions
- Clean vase and plan rhinestone placement.
- Cut adhesive strip to length and press onto vase, smoothing with fingers.
- Add additional rhinestones by hand with tweezers if gaps show.
- Seal lightly with clear spray if desired. Allow 24 hours cure.
How to Display or Gift It
Rhinestone vases are party-ready and great bridesmaid gifts. Wrap in tissue and place in a glossy gift box.
A pack of rhinestone adhesive strips simplifies placement.
You made it to the end — and now your vase options range from rustic twine to glossy resin and everything in between. These vase decorating ideas for beginners cover a range of styles (boho, cottagecore, japandi, modern glam) and most projects use basic tools like a hot glue gun, foam brush, or a small cutting mat. Try one technique, then mix elements—paint a vase before adding macramé, or add metallic leaf accents to an ombre piece.
Save or pin this list so you can pull an idea when a plain vase crosses your desk. Which style are you trying first — textural twine, marbled alcohol ink, or pressed-flower resin? Share what you make with a friend or gift a set — handmade vases are one of those small things that feel thoughtful and boutique.
Trust me, picking up a quality temperature-controlled hot glue gun changed how every single one of these projects turned out — fewer strings, better control, and safer handling.


