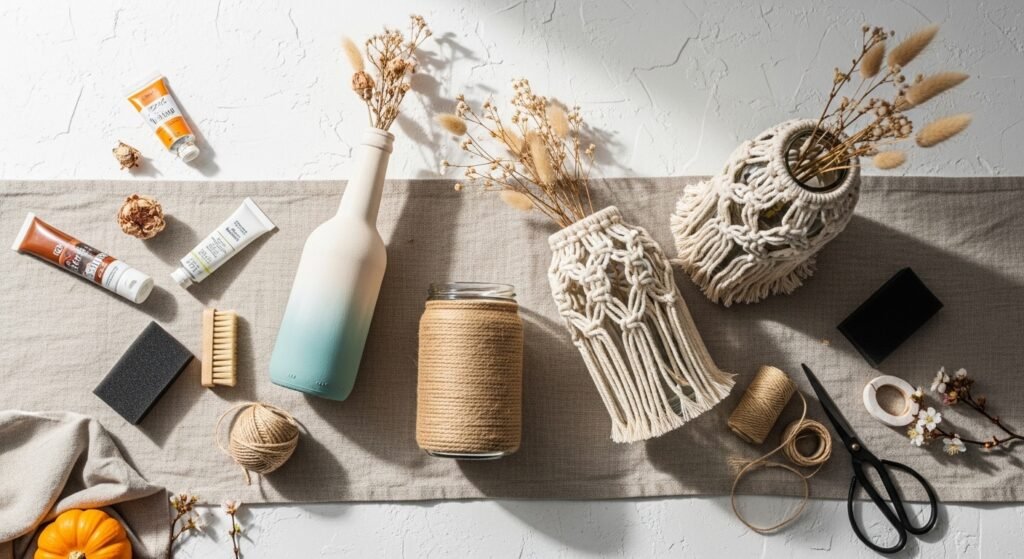
Spring into cozy corners and holiday tabletops with fresh seasonal vase decorating ideas you’ll actually make. Whether you love cottagecore dried blooms or crisp japandi minimalism, these 23 projects give you simple ways to refresh vases all year long. I’ll walk you through quick techniques—paint, twine, resin, clay, and fiber—that work on thrift-store glass, thrifted jars, or new ceramic vases.
You’ll see projects that are beginner-friendly, some that use a Cricut for cut vinyl, and others that call for a heat gun or a resin kit when you want a glossy finish. I use my Cricut Explore cutting machine for perfect vinyl labels and a temperature-control hot glue gun when I need fast, neat bonds. These seasonal vase decorating ideas are designed so you can mix and match techniques across seasons and styles.
Ready to pin, shop a few tools, and make something you’ll actually display? Let’s start crafting.
1. Seasonal Vase Decorating Ideas: Painted Ombre Spring Vase
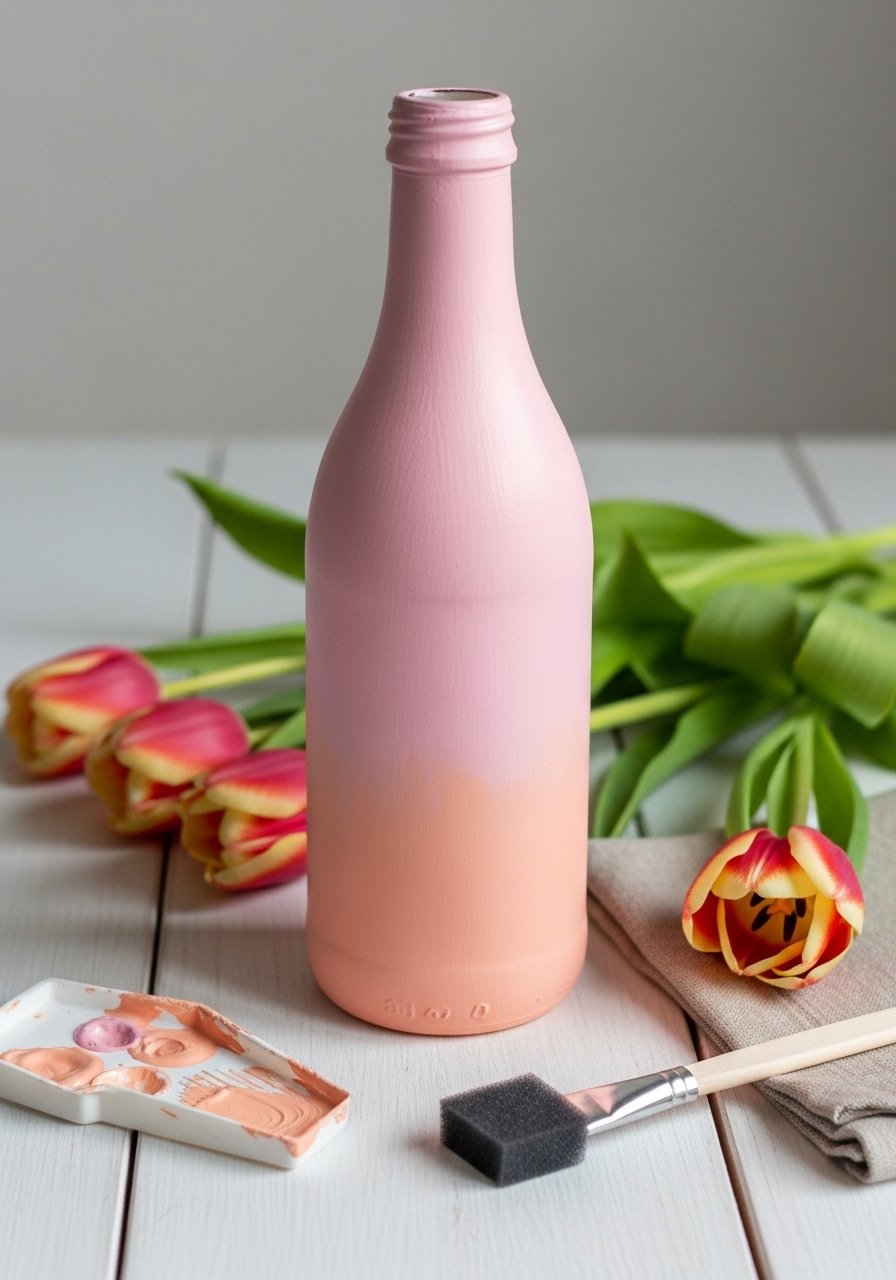
This soft ombre finish turns a plain bottle into a spring-ready statement. It’s smooth, forgiving, and gives that soft gradient look without advanced skills. Ideal for beginners and those who like a gentle, hand-painted feel. The finish is slightly matte and looks lovely with tulips or dried bunny tails.
Materials
- 1 clear glass bottle or vase (16–20 oz)
- Acrylic craft paint in three tones (e.g., pale peach, blush, and soft pink) — 2 oz each
- Flat foam brush, 1-inch
- Sanding sponge, fine grit
- Paper plate for mixing
- Painter’s tape, 1-inch
- Water jar for rinsing
- Clear matte Mod Podge, 2 oz
Instructions
- Clean the glass with rubbing alcohol until no fingerprints remain.
- Lightly sand the surface with a fine sanding sponge so paint adheres.
- Tape off the rim if you want a clean lip. Remove tape later for a raw edge.
- Apply the base color (lightest) with a foam brush in thin, even strokes. Let dry 30 minutes.
- Load a second foam brush with the mid-tone and paint the middle third, overlapping the base by 1 inch. Blend with horizontal strokes.
- Apply the darkest tone to the top third and blend downward into the mid-tone. Work while paint is tacky for smooth blending.
- Let the paint dry 1 hour, then apply a second coat if coverage looks thin. Final dry 2 hours.
- Seal with a thin coat of matte Mod Podge using a foam brush. Let cure 24 hours until firm to the touch.
How to Display or Gift It
- Style with a small bunch of tulips or foraged branches on a windowsill.
- Tie a thin jute bow around the neck for gifting.
- Store unused painted vases upright in a craft box until fully cured.
- If gifting, wrap in tissue and place in a kraft gift box with a care note.
- A small set of foam brushes will keep your edges crisp for repeat projects: flat foam brush set.
2. Twine-Wrapped Rustic Mason Jar
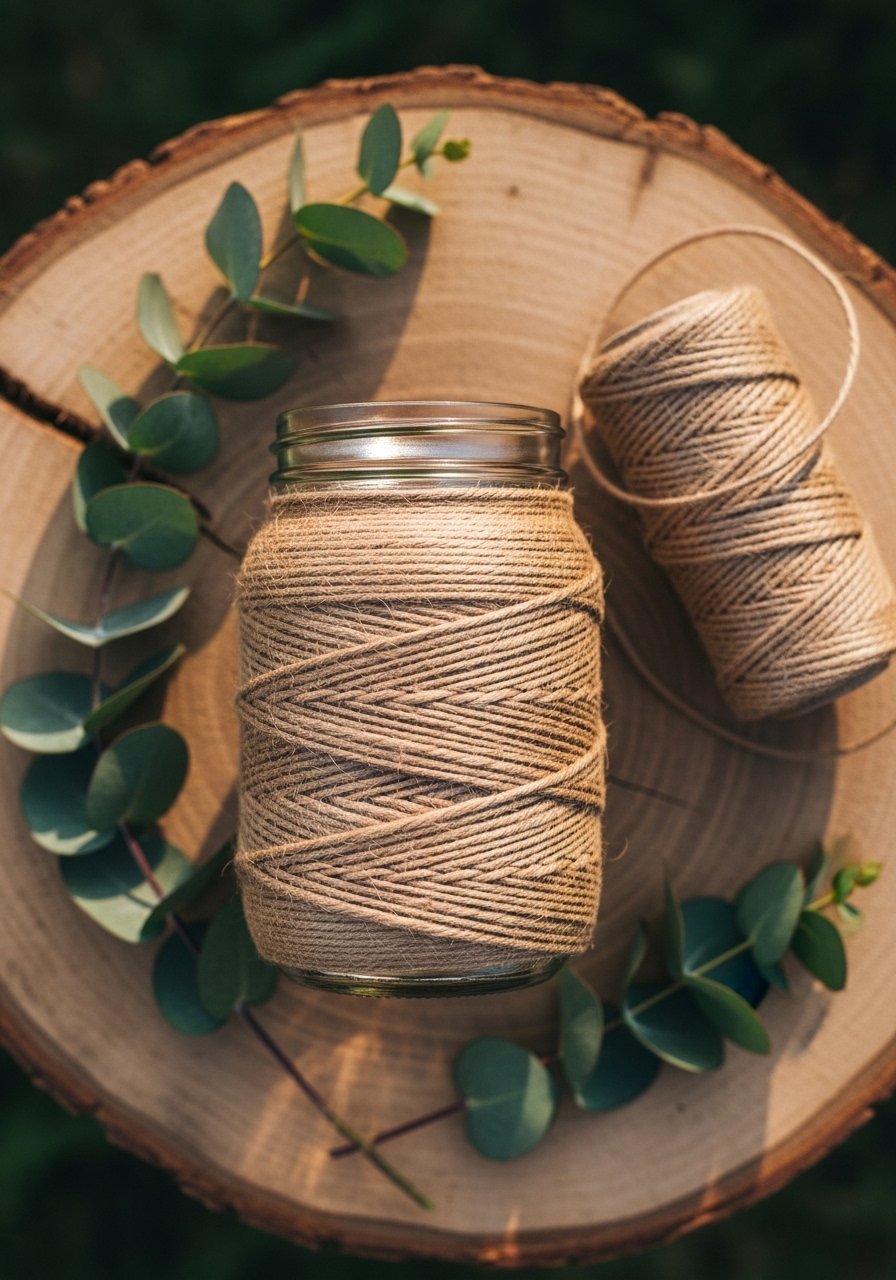
Twine-wrapping gives a cozy farmhouse look and hides imperfect glass. It’s tactile and simple—great for quick centerpieces or party decor. Kids can help wrap, and the final texture adds earthy warmth to faux or dried blooms.
Materials
- 1 wide-mouth mason jar, 16 oz
- Natural jute twine, 100 ft (3 mm)
- Hot glue sticks, full-size, 12 pieces
- Temperature-control hot glue gun
- Scissors
- Decorative tag (optional)
- Clear craft sealer spray, matte, 6 oz
Instructions
- Heat your hot glue gun. Apply a dot of glue near the jar’s lip and press twine end firmly.
- Wrap the twine tightly around the jar, placing a thin dot of hot glue every 2–3 inches to secure.
- Continue wrapping until you reach the jar base; cut twine and glue the end down.
- For a neat bottom, snip the final end, tuck under nearby wraps, and add glue.
- Optional: add a tag or ribbon near the neck with a dab of glue.
- Spray with a light coat of matte sealer 10 inches away. Let dry 10 minutes, then a second coat and cure 30 minutes.
How to Display or Gift It
- Fill with dried lavender for a fragrant kitchen accent.
- Cluster several twine jars of different heights on a wooden tray.
- Store spools of twine and finished jars in stackable craft organizers: craft organizer tray.
- Batch-make for rustic wedding centerpieces; wrap time about 8–10 minutes per jar.
3. Seasonal Vase Decorating Ideas: Mini Macramé Cozy for Bud Vases
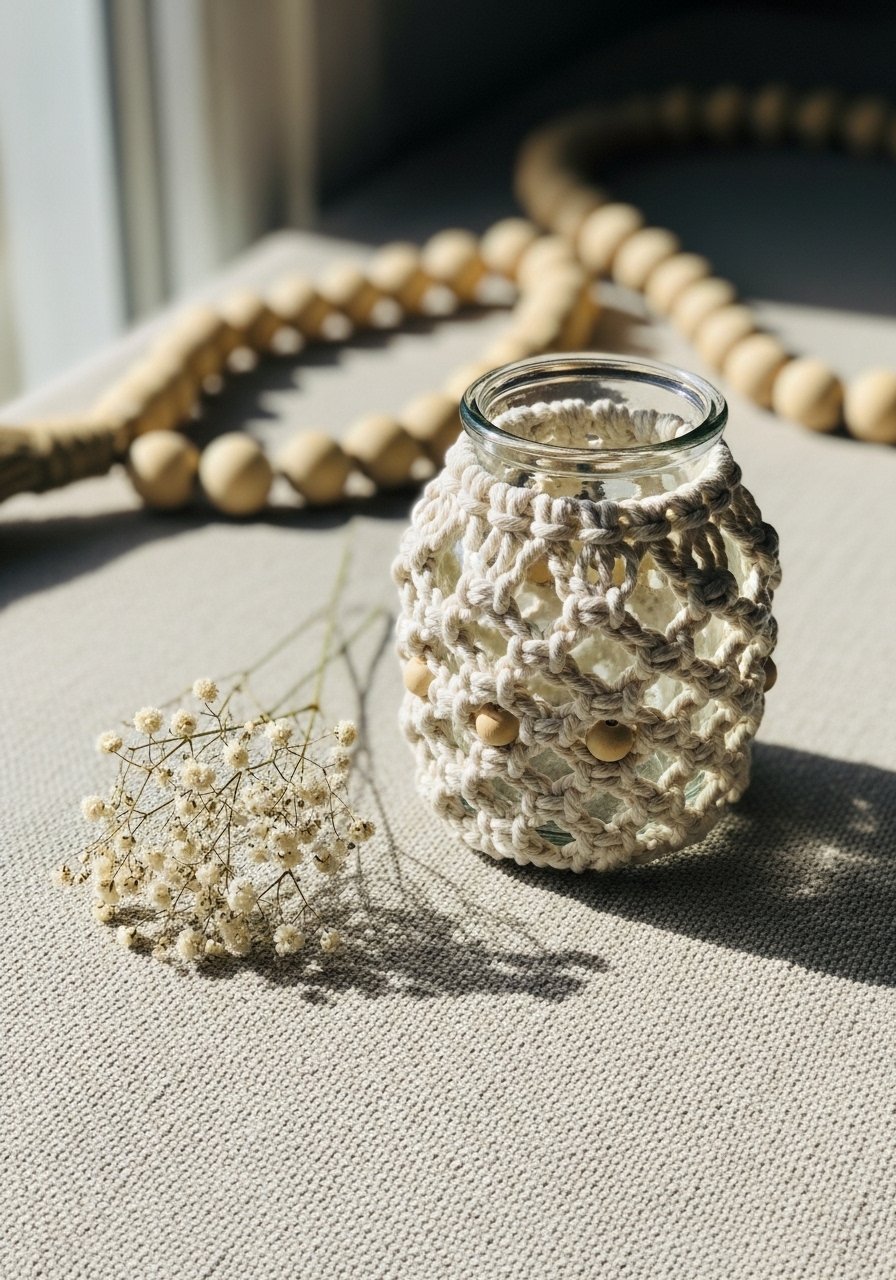
Macramé cozies add boho texture and are perfect for single-stem arrangements. This small-scale knotting project is satisfying and portable—great for beginners who want to practice square knots. It feels soft in your hands and adds movement to a shelf or table.
Materials
- 3mm cotton macramé cord, 30 ft
- 1 glass bud vase, 4–6 oz
- Wooden beads, 6 pieces (10 mm)
- Scissors
- Measuring tape
- Small clipboard or tape to hold cords while knotting
Instructions
- Cut four cords of 7 ft each. Fold in half and attach to a ring or directly to the vase mouth with a lark’s head knot.
- Measure down 3 inches and work a row of square knots around the vase.
- Add wooden beads to each pair of cords; slide up to the knot and tighten.
- Continue another 2 inches of square knots for full coverage.
- Finish with gathering knot: wrap a short piece of cord tightly around the cords, apply a dab of clear craft glue, let dry 30 minutes.
- Trim ends to 1.5 inches for a tassel finish.
How to Display or Gift It
- Pair with a single ranunculus for gift-giving.
- Hang several on a windowsill with small suction cup hooks.
- Keep macramé cord and small beads in divided craft drawers: small craft storage drawers.
- Make multiples in different colors for hostess gifts.
4. Chalkboard Label Holiday Jars (Fall & Winter)
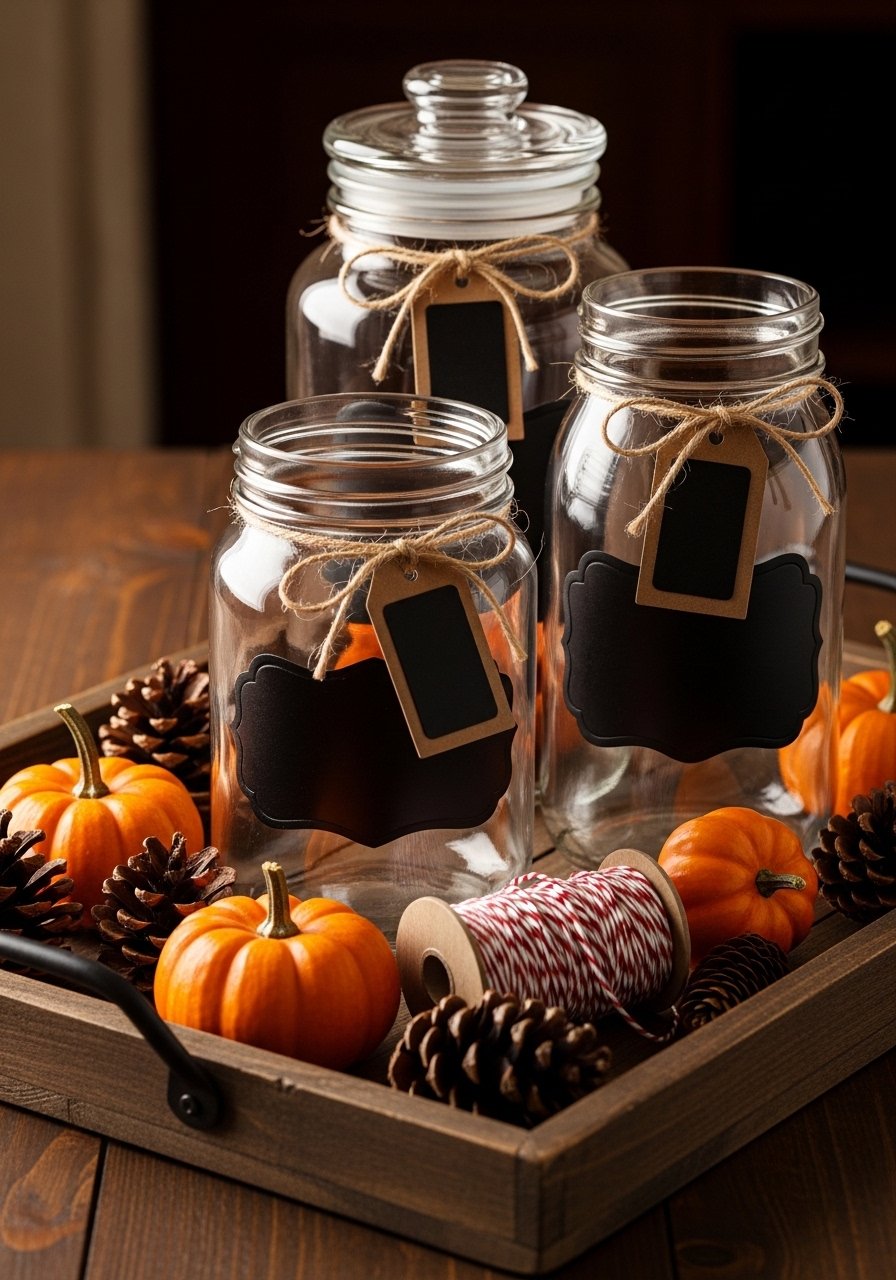
Chalkboard labels let you change the message for every season—“Pumpkin Spice” in fall, “Joy” at Christmas. This project uses liquid chalkboard paint and a steady hand. It’s perfect for reusable vases and gift jars.
Materials
- Mason jar, 16 oz
- Liquid chalkboard paint, 2 oz
- 1-inch painter’s tape
- Foam brush, 1-inch
- Sanding sponge, fine
- Baker’s twine, 20 ft
- Liquid chalk marker
Instructions
- Clean jar with rubbing alcohol. Tape a rectangle shape using painter’s tape.
- Lightly sand taped area. Apply chalkboard paint in thin coats.
- Let dry 30 minutes between coats. Apply 2 coats total.
- Remove tape carefully after final coat while paint is still tacky for a sharp edge.
- Cure paint 24 hours. Prime by rubbing coarse chalk sideways and wiping off.
- Write messages with chalk marker. Add baker’s twine and small tag.
How to Display or Gift It
- Use labeled jars as place cards at holiday dinners.
- Fill with seasonal stems: pampas for fall, evergreen clippings for winter.
- Store markers and paint in a craft caddy for quick seasonal swaps: craft caddy organizer.
- Make sets for hostess gifts with a tied bundle of chalk and twine.
5. Decoupage Floral Napkin Wrap (Easter/Spring)
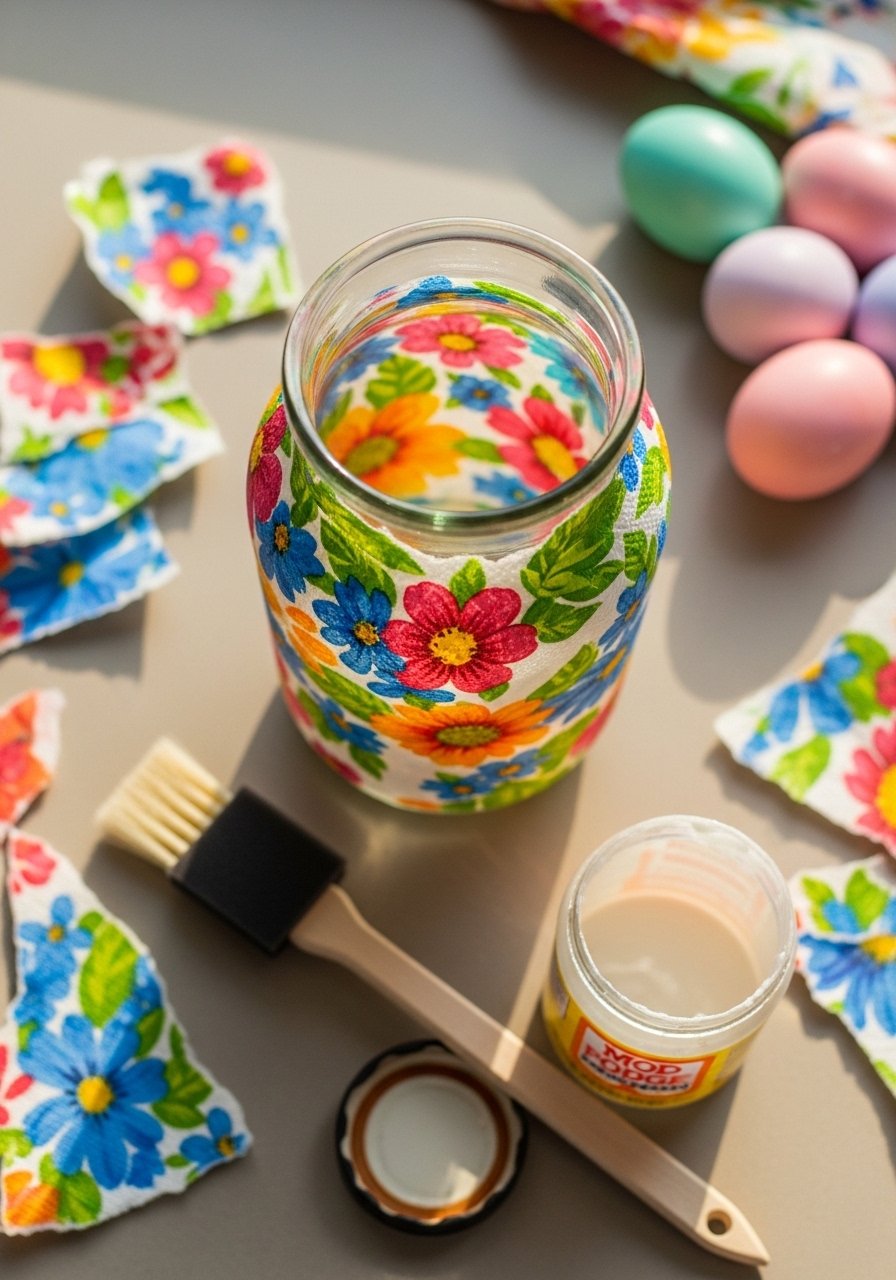
Decoupaging with patterned napkins is a quick way to layer color and pattern for spring. The finish is smooth, slightly glossy, and works well with faux florals. This is forgiving; trimming and sealing hides edges.
Materials
- Clear glass vase, 20 oz
- Paper napkins with floral print, 2 sheets
- Mod Podge gloss, 4 oz
- Flat foam brush
- Scissors
- Small bowl of water
- Brayer roller (optional for smoothing)
Instructions
- Separate napkin plies; use only the printed top ply.
- Cut napkin into desired shapes. Clean vase with rubbing alcohol.
- Brush a thin coat of Mod Podge where you’ll place the first napkin piece.
- Lay napkin on glue and smooth gently with a brayer or brush from center outward.
- Continue layering pieces, overlapping for a collage look.
- Let dry 20 minutes, then seal with 1–2 thin coats of Mod Podge. Final cure 24 hours.
How to Display or Gift It
- Pair with pastel tulips for Easter brunch décor.
- Wrap in tissue and kraft paper for gifting.
- Use a small brayer for bubble-free smoothing: brayer roller.
- Make matching napkin-wrapped vases for a coordinated table.
6. Coastal Shell Mosaic Vase (Summer)
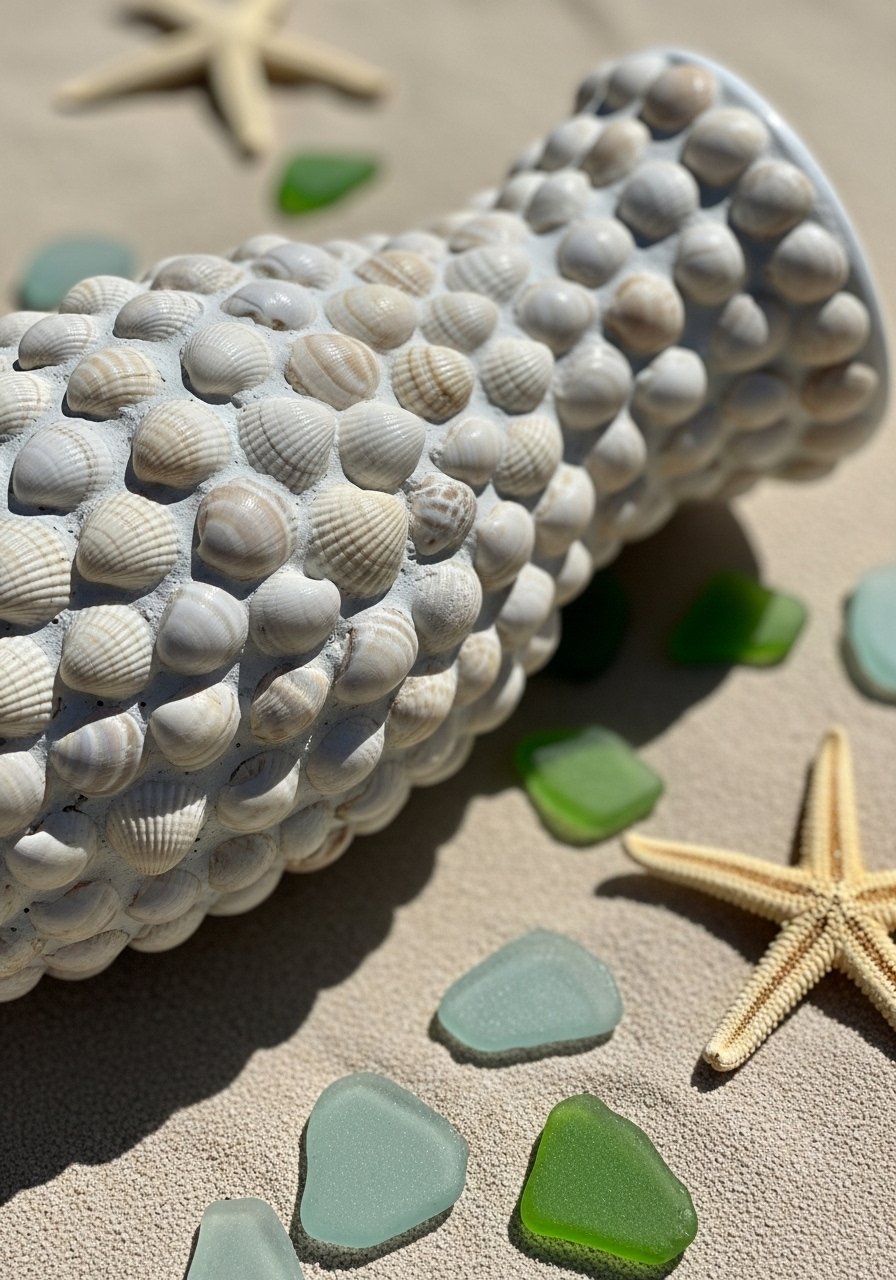
A shell mosaic adds seaside charm to a vase. You’ll glue shells and sea glass in a pattern, then grout between pieces for texture. It’s a tactile, sun-warmed look that suits coastal decor and summer parties.
Materials
- Glass vase, 24 oz
- Assorted shells and small sea glass, 1 cup total
- E6000 clear adhesive, 1 oz
- Grout, sanded, 4 oz
- Rubber gloves
- Small spatula or toothpicks
- Damp sponge
Instructions
- Plan your design by arranging shells on the vase first.
- Glue each shell with a small bead of E6000. Let set 1–2 hours to tack.
- Mix grout per package to a toothpaste consistency.
- Use a spatula or gloved finger to press grout into gaps between shells.
- Wipe excess grout with a damp sponge. Let cure 24 hours.
- Buff with a dry cloth to remove haze.
How to Display or Gift It
- Fill with coastal stems or faux reeds for a porch table.
- Pair with a low tray of sand and votives for a summer vignette.
- Store leftover shells in clear craft bins for quick repairs: clear craft storage bins.
- Great for beach-house gifts—wrap in kraft paper and tie with twine.
7. Japandi Minimalist Painted Stripe Vase
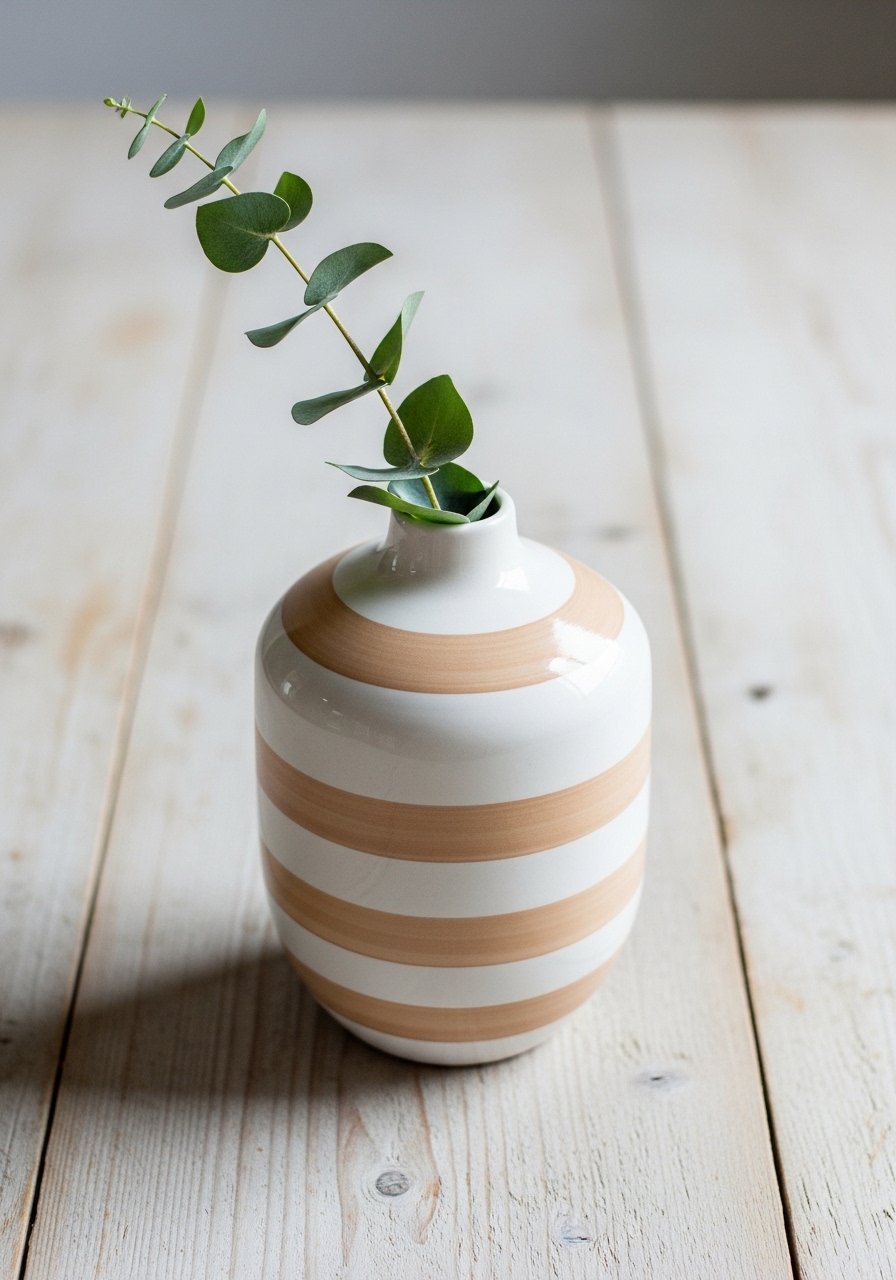
Japandi favors calm, neutral stripes and clean forms. Painter’s tape gives crisp lines; chalk or acrylic paint keeps a soft hand-painted look. This suits minimalist decor and pairs well with simple foraged stems.
Materials
- Unglazed ceramic vase, 10–12 oz
- Chalk paint, two complementary neutrals (2 oz each)
- 1/4-inch painter’s tape
- Foam roller, small
- Sandpaper, 220 grit
- Clear matte sealer spray, 6 oz
Instructions
- Sand ceramic lightly to remove dust. Wipe clean.
- Mark stripes with a ruler and apply painter’s tape.
- Use a foam roller to apply thin, even coats of paint. Two coats may be needed—dry 30 minutes between.
- Remove tape when paint is tacky for crisp edges.
- Lightly sand edges for a soft line if desired.
- Spray with matte sealer and cure 2 hours.
How to Display or Gift It
- Use a single eucalyptus sprig or slender branch for a serene mantle piece.
- Cluster with small ceramics in similar tones.
- Pack finished vases in bubble wrap inside a durable gift box: kraft gift boxes.
- Make sets in varying stripe widths for a shelf display.
8. Metallic Leaf Accented Vase (Holiday Glam)
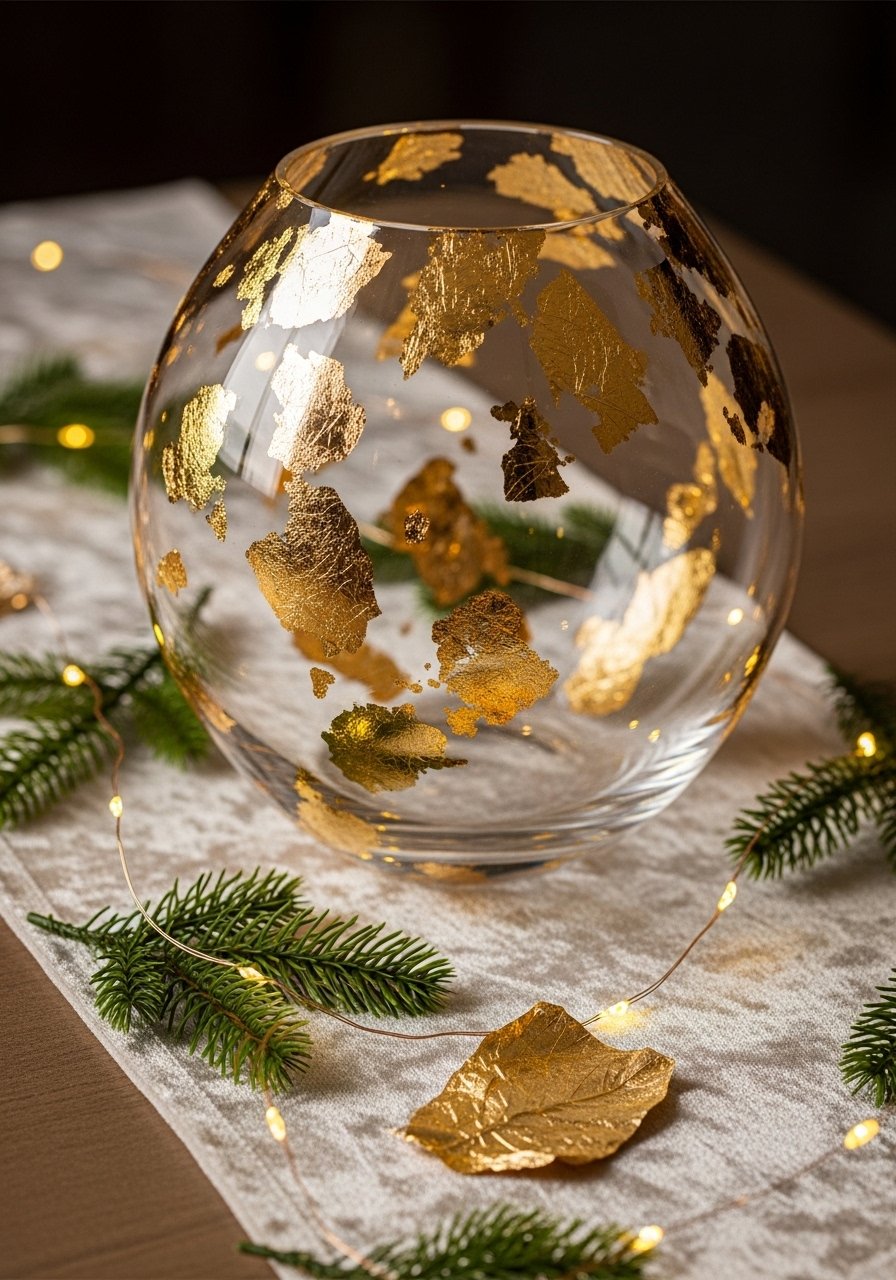
Metallic leaf adds festive sparkle for holidays. Use adhesive size and a soft brush to apply leaf. The result is delicate shimmer that reads luxe without heavy glitter.
Materials
- Glass or ceramic vase, 12–20 oz
- Gold leaf sheets, 25 sheets (6 x 6 in)
- Gold leaf adhesive size, 2 oz
- Soft taklon brush
- Soft cotton cloth
- Clear gloss sealer, 2 oz
Instructions
- Clean the vase and plan leaf placement.
- Brush size where you want leaf; wait until tacky (per product: 10–15 minutes).
- Gently lay a leaf sheet over the tacky area and press with a soft cloth.
- Use the soft brush to brush away excess leaf flakes.
- Slight gaps are charming; seal lightly with gloss sealer. Cure 24 hours.
How to Display or Gift It
- Perfect for holiday centerpieces with white roses or amaryllis.
- Tuck fairy lights inside for a glowing vignette.
- Keep extra leaf sheets in sealed packaging to prevent drying: gold leaf sheets.
- Wrap in tissue and a ribbon for a luxe handmade gift.
9. Felt Flower Cozy for Valentine’s Day
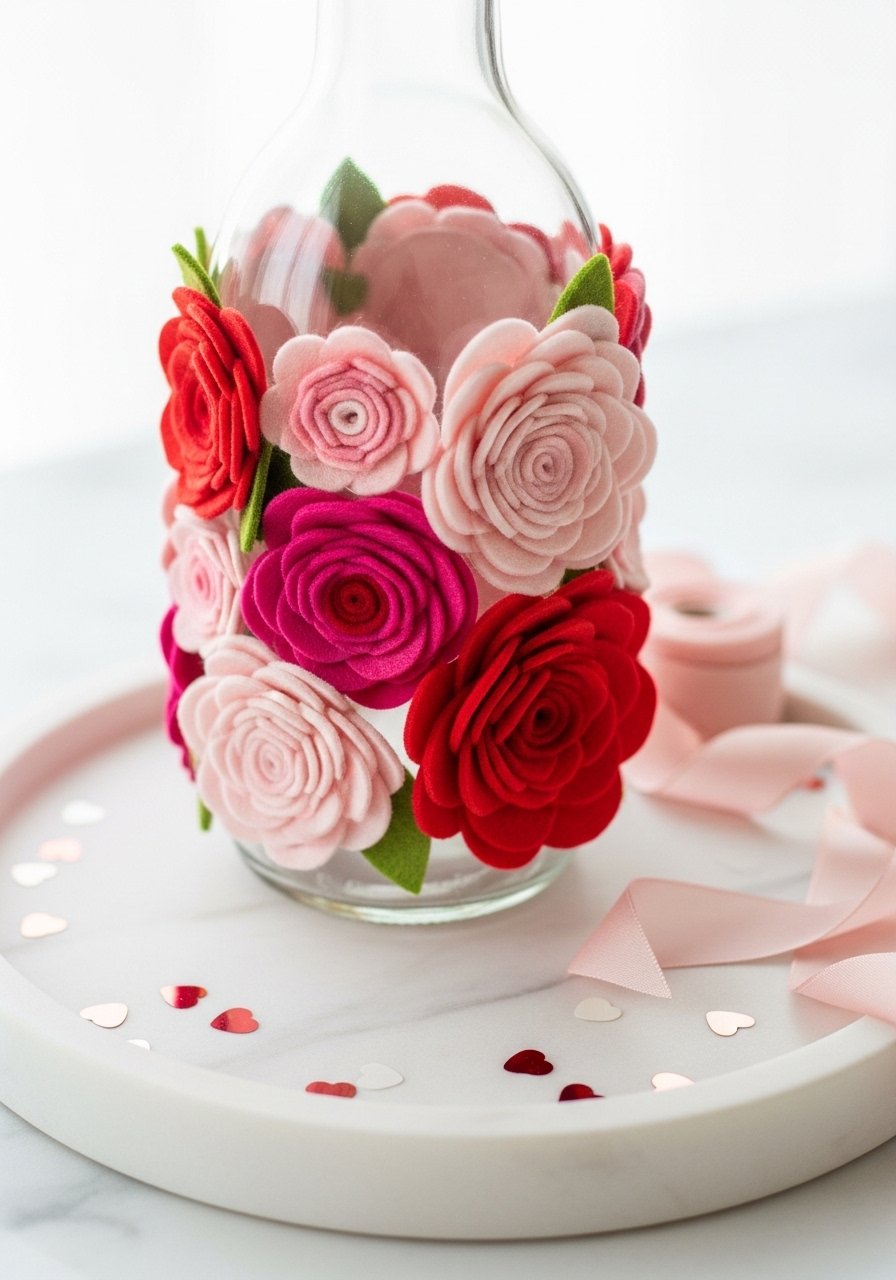
Felt flowers give a plush, romantic cover that lasts beyond cut flowers. This glue-and-layer technique is great for crafting with kids or making keepsake gifts for Valentine’s Day.
Materials
- Glass bottle, 16 oz
- Wool felt sheets, 6”x9”, 3 colors (one sheet each)
- Sharp scissors
- E6000 glue, 1 oz
- Hot glue gun (low-temp for kids)
- Ribbon, 1 yd
Instructions
- Trace small flower shapes (3 sizes) onto felt and cut out.
- Layer small to large petals, glue in center with hot glue.
- Make enough flowers to cover the vase circumference (about 8–12 small flowers).
- Glue flowers onto the bottle starting at the center and working outwards.
- Finish with a ribbon tied at the neck. Let E6000 cure 24 hours if used for structural parts.
How to Display or Gift It
- Fill with a long-stemmed rose or leave empty as a keepsake.
- Package in a small box with tissue paper for gifting.
- Store leftover felt in stackable craft organizers: felt sheets pack.
- Make matching felt flower cards for a coordinated gift set.
10. Resin-Encased Botanicals Vase (Summer Keepsake)
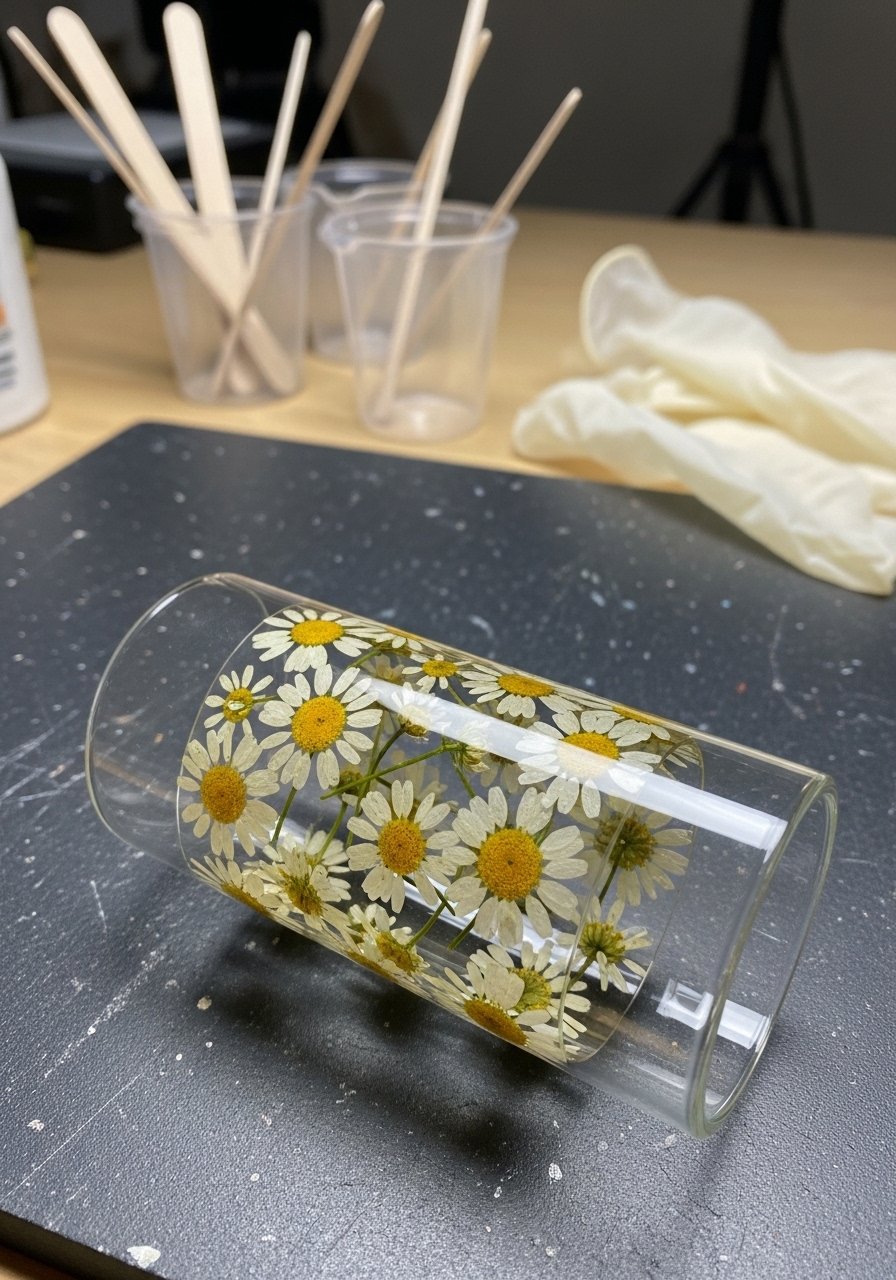
Resin lets you encapsulate pressed florals for a permanent, glossy accent. It looks like a polished collectible. This project needs careful measuring and a dust-free spot but creates a heirloom-quality vase.
Materials
- Clear glass vase, 10–16 oz
- Epoxy resin kit, 8 oz (A+B)
- Press-dried flowers, 1–2 small stems
- Disposable mixing cups
- Stir sticks
- Rubber gloves
- Painter’s tape and plastic wrap
- Heat gun (to remove bubbles)
Instructions
- Press and dry flowers at least 1 week in advance.
- Clean vase well; tape off area to receive resin band.
- Mix resin according to kit ratios (1:1 or per manufacturer) for 3 minutes, scraping cup sides.
- Pour a thin layer and place dried flowers with tweezers.
- Add additional thin resin layers until desired thickness. Use a heat gun briefly to remove bubbles.
- Let cure 24–48 hours per kit instructions before handling.
How to Display or Gift It
- Use as a keepsake for a wedding or festival bouquet.
- Wrap in bubble wrap for safe gifting.
- Store extra mixing cups and nitrile gloves in a craft drawer: disposable nitrile gloves.
- Label with a small tag noting flower type and pressing date.
11. Boho Pom-Pom Fringe Vase Wrap
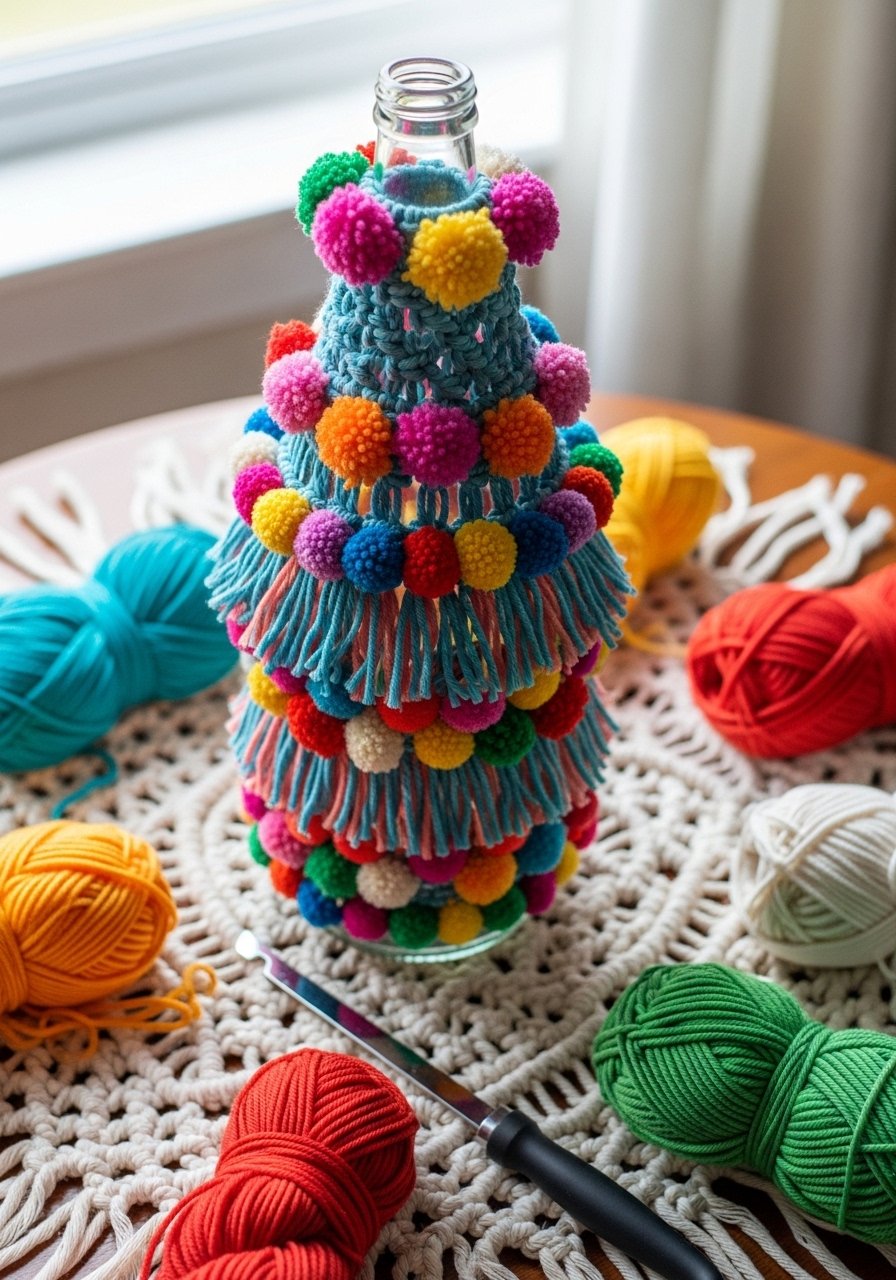
Pom-pom fringe adds playful texture and color—perfect for boho summer patios. Use a pom-pom maker for consistent sizes and a hot glue gun for quick adhesion. It’s tactile and fun to make while watching a show.
Materials
- Glass bottle, 16 oz
- Wool yarn, assorted colors, 100 g each
- Pom-pom maker (2-inch)
- Hot glue gun and sticks
- Scissors
- Measuring tape
Instructions
- Make pom-poms in desired colors using the pom-pom maker. Trim to uniform size.
- Arrange pom-poms on the bottle to determine spacing.
- Glue each pom-pom to the bottle with a dot of hot glue.
- For fringe, wrap yarn around the bottle neck and let tassels hang down; secure with glue.
- Trim any stray fibers for a polished look.
How to Display or Gift It
- Pair with dried pampas grass for a boho mantel.
- Pack in a kraft box with tissue for a colorful gift.
- Keep extra pom-poms and yarn in a clear storage bin: clear project storage bin.
- Make a set in seasonal colorways for thoughtful gifts.
12. Painted Chalky Matte “Sweater” Cozy (Winter)
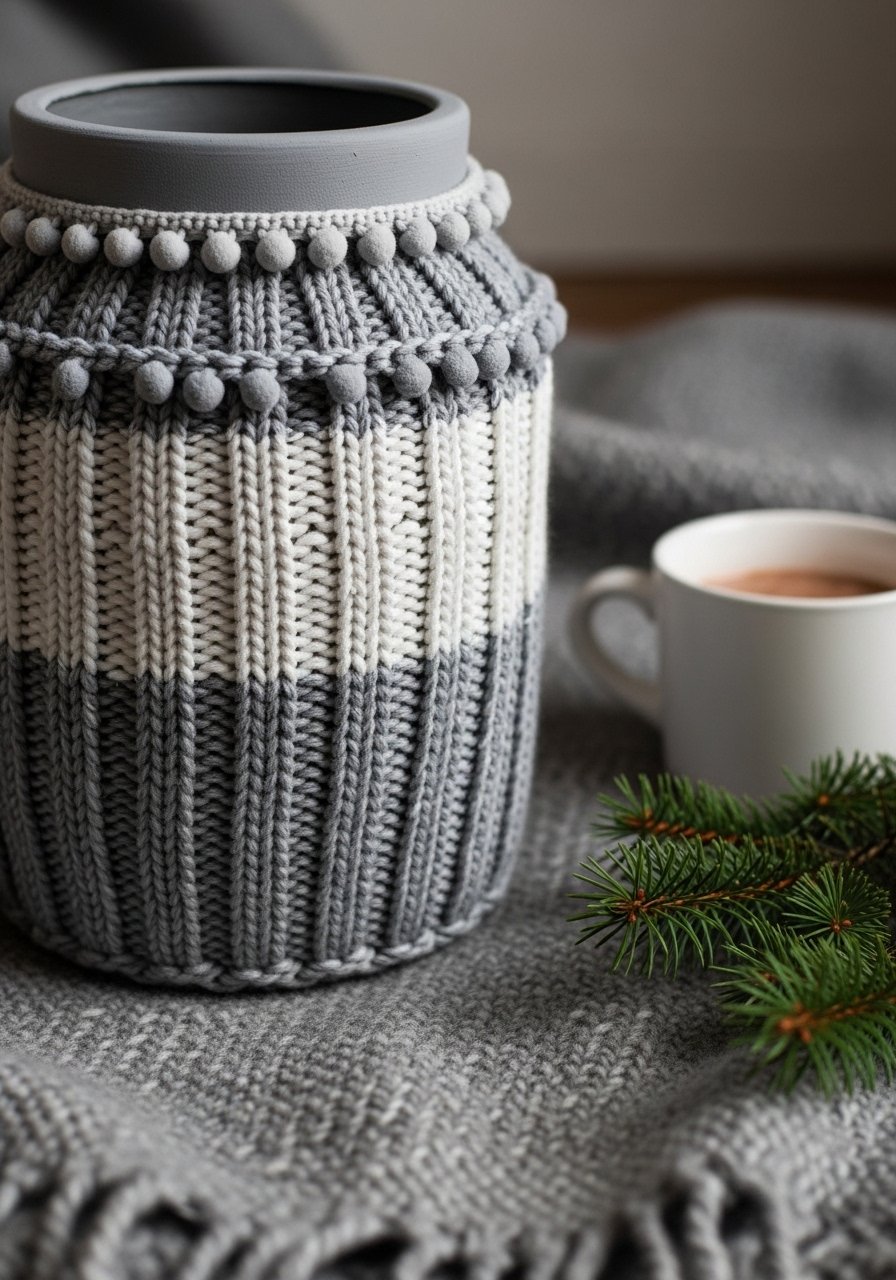
A sweater cozy mimics knitted covers and keeps a cozy winter vibe. This version uses thrifted knit sleeves slipped over vases and fixed with glue. It reads cozy and handcrafted without knitting.
Materials
- Glass or ceramic vase, 12 oz
- Thrifted sweater sleeve cut to length
- Fabric glue, 2 oz
- Hot glue gun
- Trim or pom-poms, 1 yd
- Scissors
- Safety pin
Instructions
- Cut the sweater sleeve to fit the vase height leaving 1 inch overlap.
- Slide sleeve over the vase and mark seam.
- Glue seam using fabric glue and secure with safety pin until dry (30 minutes).
- Add pom-pom trim at the top with hot glue.
- Let adhesives cure 24 hours before filling with water or faux stems.
How to Display or Gift It
- Fill with clippings from evergreen or paperwhites.
- Wrap in cellophane and tie with ribbon as a winter gift.
- Store small trims and glue in a sewing kit: fabric glue.
- Make a set using different sweater textures for a cozy display.
13. Minimal Bamboo Collar Vase (Japandi & Summer)
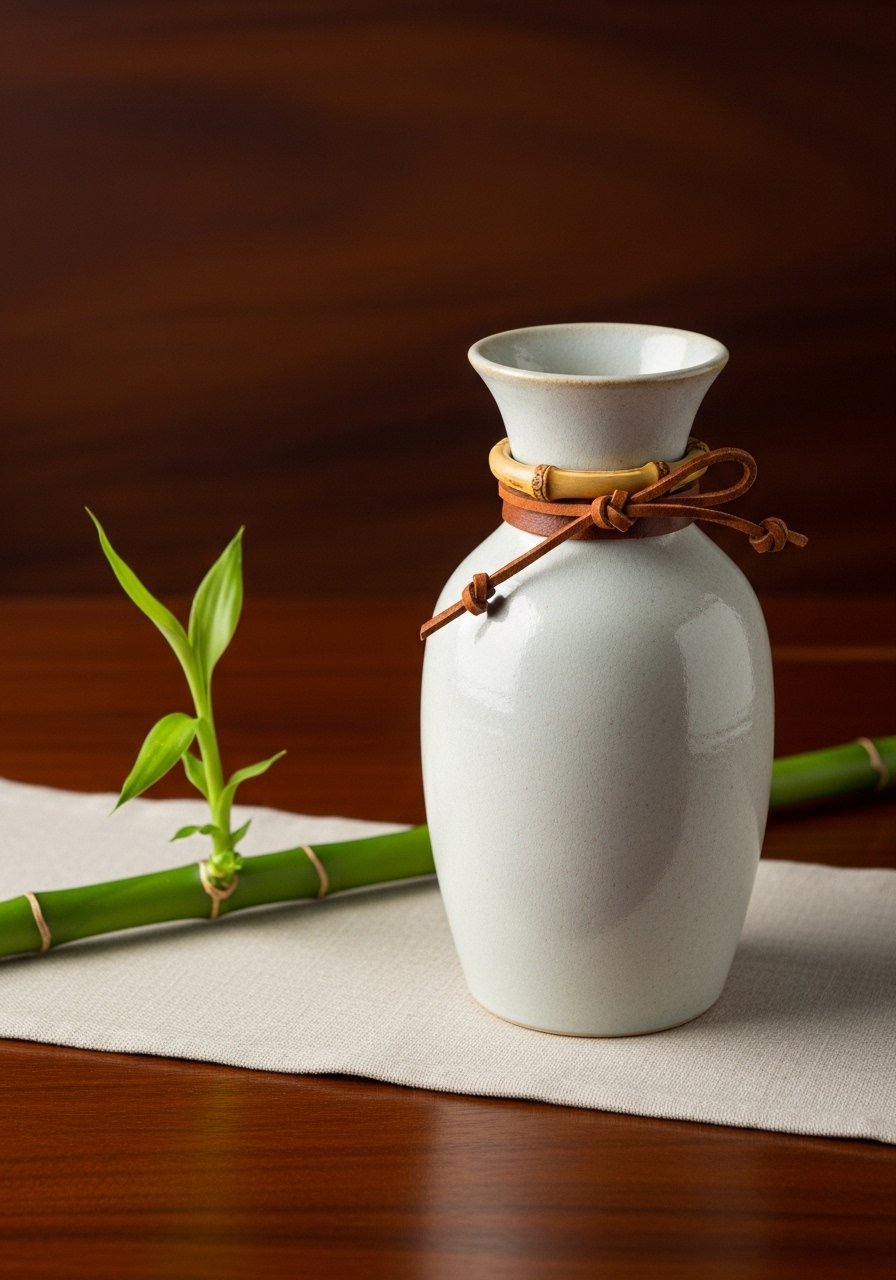
A bamboo collar brings subtle natural contrast, perfect for japandi and minimal décor. It’s quick to make and adds an architectural silhouette. The leather cord keeps it understated.
Materials
- Small ceramic bud vase, 6–8 oz
- Thin bamboo strip, 1/4-inch x 12 inches
- Leather cord, 18 inches
- Clear craft glue, 1 oz
- Scissors
- Sandpaper, fine
Instructions
- Cut bamboo strip to fit around the vase neck with slight overlap.
- Sand edges lightly for smoothness.
- Apply a thin line of clear craft glue along inner edge and press on vase.
- Tie leather cord around the seam, secure with a knot and trim.
- Let glue set 1 hour and cure 24 hours fully before display.
How to Display or Gift It
- Use a single stem of jasmine or bamboo for a zen corner.
- Tuck a small care card into the leather knot for gifting.
- Store bamboo and cords flat in craft drawers: craft drawer organizer.
- Batch-make collars to swap seasonally.
14. Seasonal Vase Decorating Ideas: Pressed Citrus & Herb Garland Vase

Pressed citrus slices and herbs give a sunny, fragrant look ideal for summer and holiday centerpieces. Use a strong adhesive and clear sealer to preserve color. It smells fresh and looks like a designer piece.
Materials
- Tall glass vase, 24 oz
- Thinly pressed citrus slices (lemon/orange), 8–10 slices
- Pressed herbs (rosemary/sage), small sprigs
- Clear contact adhesive, 2 oz
- Clear acrylic sealer spray, 6 oz
- Tweezers
- Paper towels
Instructions
- Press citrus slices and herbs in a book for 3–5 days until dry.
- Arrange pieces on the vase to plan composition.
- Apply small dabs of contact adhesive and press pieces with tweezers.
- Let set 1 hour then lightly spray with acrylic sealer. Cure 24 hours.
- Avoid filling with water; use faux stems or place a small glass tube with water inside for fresh flowers.
How to Display or Gift It
- Use as a kitchen centerpiece with fresh herbs.
- Pair with citrus-scented candles for gifting.
- Keep spare pressed botanicals in labeled craft envelopes: archival envelopes.
- Great for bridal showers or summer hostess gifts.
15. Mosaic Tile Painted Vase (Fall Accent)
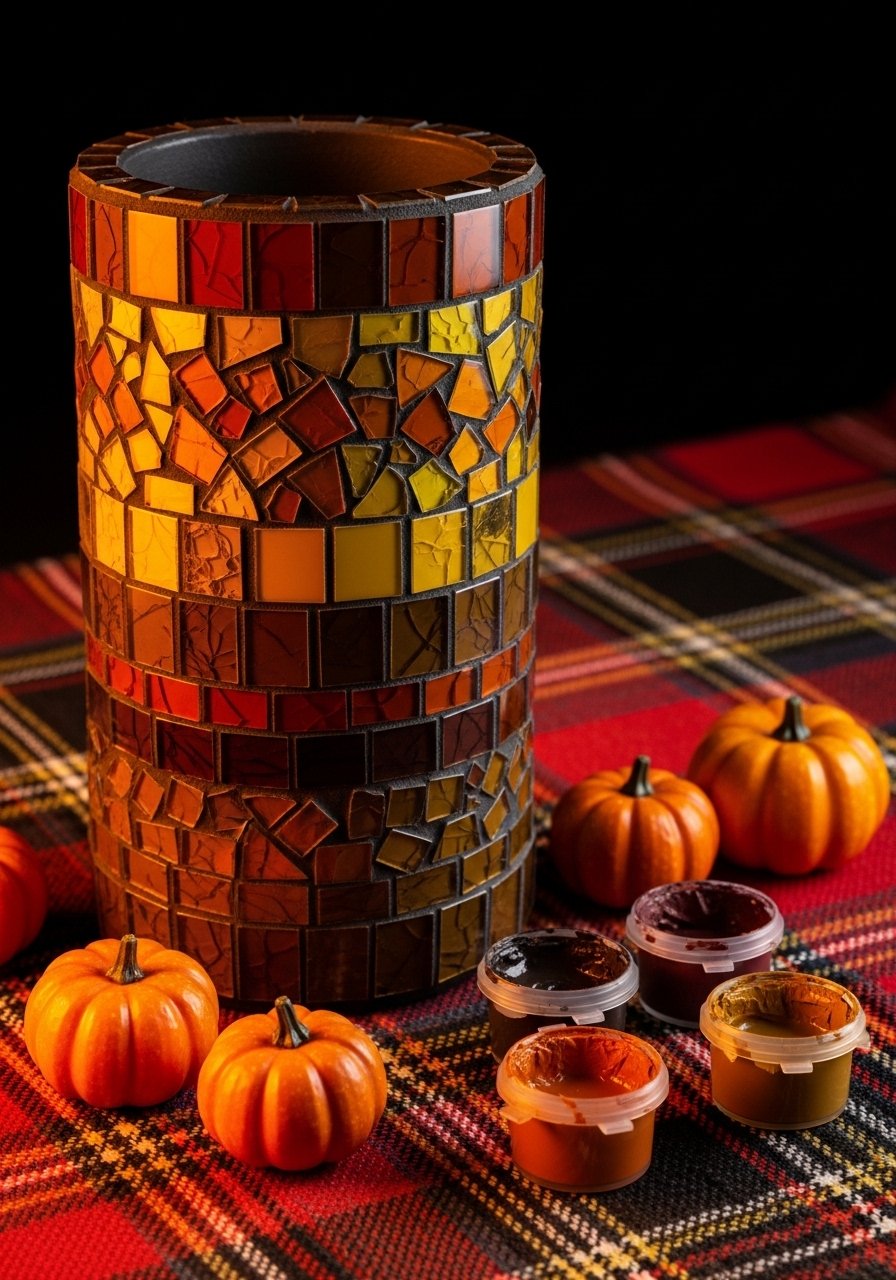
Hand-painting painted “tiles” on a vase gives a mosaic effect without grout. It adds color and structure for fall arrangements and is forgiving for freehand brush marks.
Materials
- Ceramic vase, 12 oz
- Acrylic paint set in fall tones (8 colors), 2 oz each
- Fine detail paintbrush
- Ruler and pencil
- Clear gloss sealer, 2 oz
- Paper towel
Instructions
- Lightly sketch a grid on the vase with pencil.
- Paint small squares in alternating fall colors.
- Use a fine brush to outline squares with a darker paint for “grout” lines.
- Let dry 30 minutes between layers if adding shading.
- Seal with a gloss sealer and cure 24 hours.
How to Display or Gift It
- Fill with sunflowers or goldenrod for a fall table.
- Pack in a sturdy box with cushioning for gifting.
- Keep paint and brushes in a compact carry case: craft paint set.
- Make matching candle holders for a coordinated centerpiece.
16. Stenciled Holiday Pattern Vase (Christmas/New Year)

Stenciling gives precise seasonal motifs—trees, stars, or snowflakes—without freehand painting. Use repositionable stencil adhesive and a small foam pouncer for crisp edges.
Materials
- Ceramic or glass vase, 16 oz
- Reusable stencil (holiday motifs), 5 x 7 in
- Stencil adhesive spray, 2 oz
- Foam pouncer brush
- Acrylic craft paint, green and gold, 1 oz each
- Paper towels
Instructions
- Secure stencil to vase with stencil adhesive spray.
- Dip pouncer lightly into paint, offload on paper towel to avoid bleed.
- Tap paint through stencil gently until opaque. Multiple thin layers work best.
- Remove stencil carefully when paint is tacky.
- Let dry 30 minutes between layers. Seal with clear spray and cure 24 hours.
How to Display or Gift It
- Use with evergreen clippings or faux pine for holiday tables.
- Tuck a small gift card into a ribbon for gifting.
- Store stencils flat in a stencil folder: stencil storage folder.
- Create a set for hostess gifts in matching motifs.
17. Leather Strap & Stud Vase (Modern Rustic)
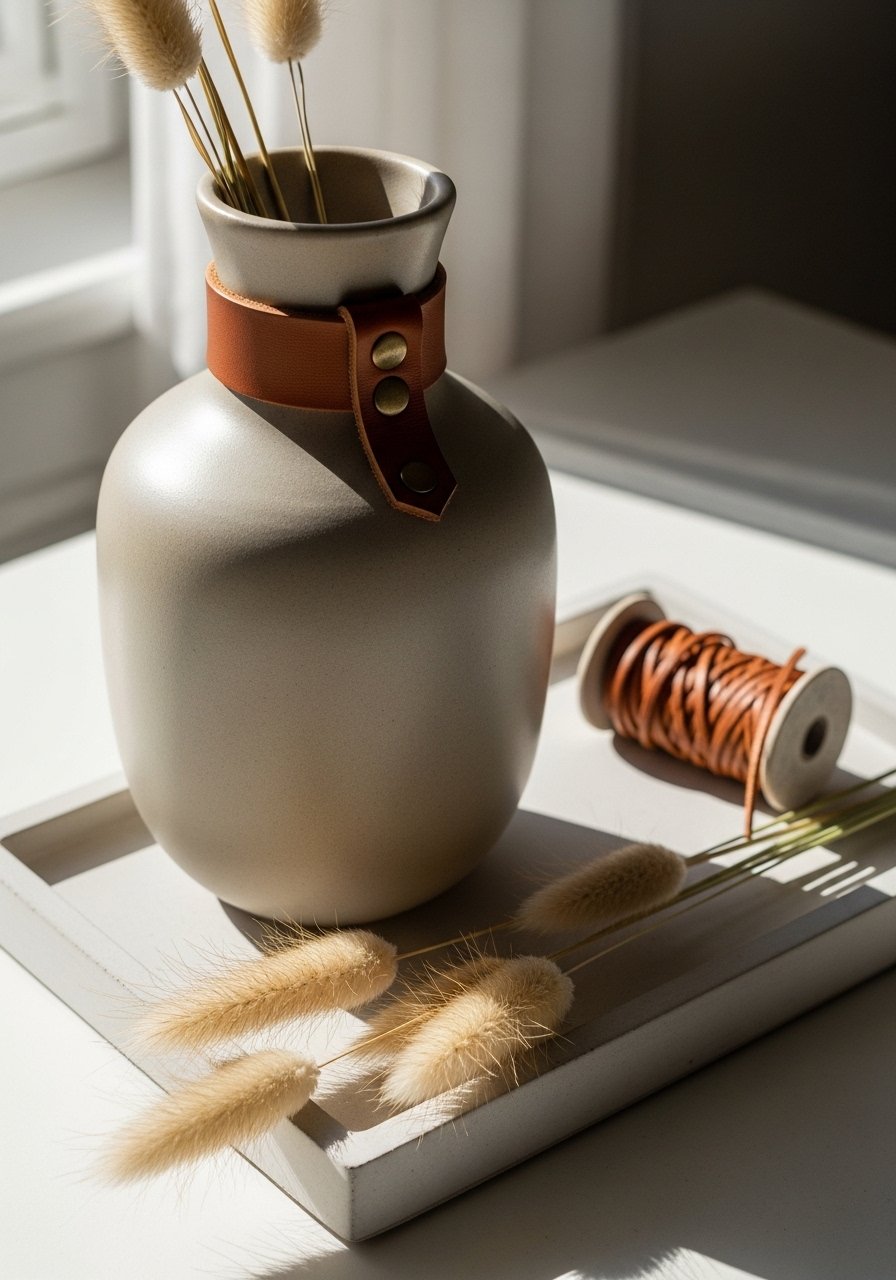
A leather strap adds industrial-chic detail without heavy alteration. Use small brass studs or rivets for a secure, stylish finish—great for modern rustic homes.
Materials
- Matte ceramic vase, 10–12 oz
- Vegetable-tanned leather strip, 1/2-inch x 12 inches
- Brass rivets/studs, 6–8 pieces
- Leather punch
- Ruler and pencil
- Clear craft glue
Instructions
- Measure leather around vase neck and mark rivet holes.
- Punch holes with a leather punch.
- Affix rivets according to manufacturer instructions.
- For extra hold, add a dab of clear craft glue on the leather back.
- Let glue cure 24 hours before filling.
How to Display or Gift It
- Pair with neutral dried grasses for a modern mantel.
- Pack in a small kraft box with tissue for a masculine gift.
- Store leather scraps and rivets in divided jars: small parts organizer.
- Make sets with different stud finishes.
18. Glitter-Dipped Celebration Vase (New Year & Birthdays)

A glitter-dipped base is festive and perfect for parties. Use mod podge for adhesion, and seal with spray to prevent shedding. It adds sparkle without overwhelming the whole piece.
Materials
- Glass bottle or vase, 24 oz
- Fine craft glitter, 2 oz
- Mod Podge gloss, 4 oz
- Foam brush
- Painter’s tape
- Clear spray sealer, satin, 6 oz
Instructions
- Tape off the drip line using painter’s tape.
- Brush Mod Podge on the lower third of the vase.
- Sprinkle glitter generously or dip the vase into a tray of glitter.
- Let dry 30 minutes, then tap off excess and apply a second glue layer over glitter.
- Seal with a clear spray and cure 24 hours.
How to Display or Gift It
- Fill with celebratory blooms or metallic-dipped branches.
- Wrap the neck with ribbon for gifting to party hosts.
- Keep glitter in a lidded jar to avoid spills: fine glitter set.
- Make several in different colors for event décor.
19. Air-Dry Clay Tagged Vase (Mother’s Day)
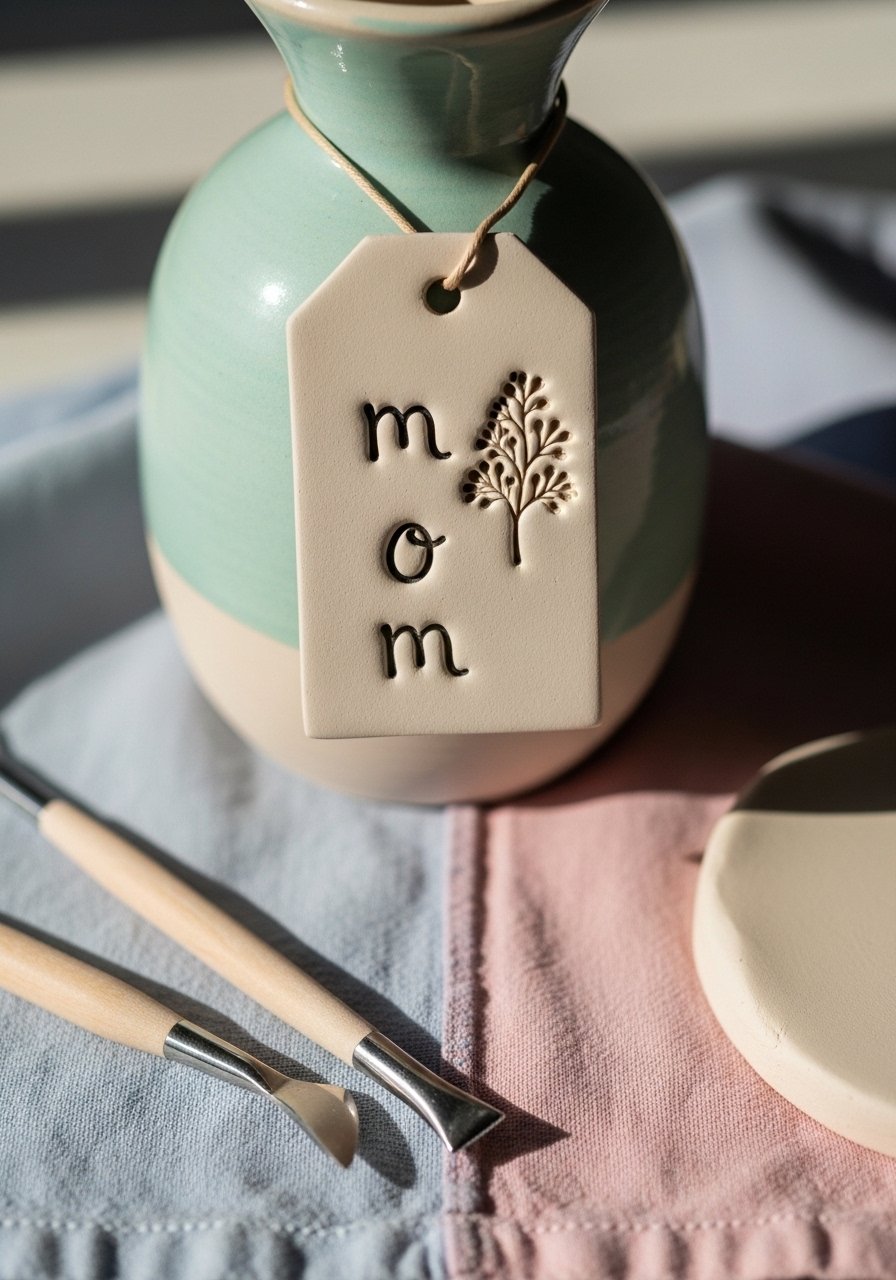
Air-dry clay tags personalize vases for gifting. You can imprint names or dates and paint the tags for a boutique feel. It’s tactile and meaningful for Mother’s Day or birthdays.
Materials
- Glass or ceramic vase, 12 oz
- Air-dry clay, 4 oz
- Clay rolling pin
- Alphabet stamps
- Acrylic paint, small set
- Twine or ribbon, 18 inches
- Fine sandpaper
Instructions
- Roll clay to 1/8-inch thickness.
- Cut tag shapes and stamp letters or impressions.
- Poke a hole for twine. Let air-dry 24–48 hours until hard.
- Sand edges lightly and paint details. Let paint dry 30 minutes.
- Tie tag around vase neck with twine.
How to Display or Gift It
- Tie a small sprig of lavender to the tag for scent.
- Pair with a printed poem or recipe card inside the gift box.
- Keep clay tools in a small craft case for reuse: clay tool set.
- Make sets for a mother-daughter gift exchange.
20. Frosted Glass Spray Snow Vase (Winter)
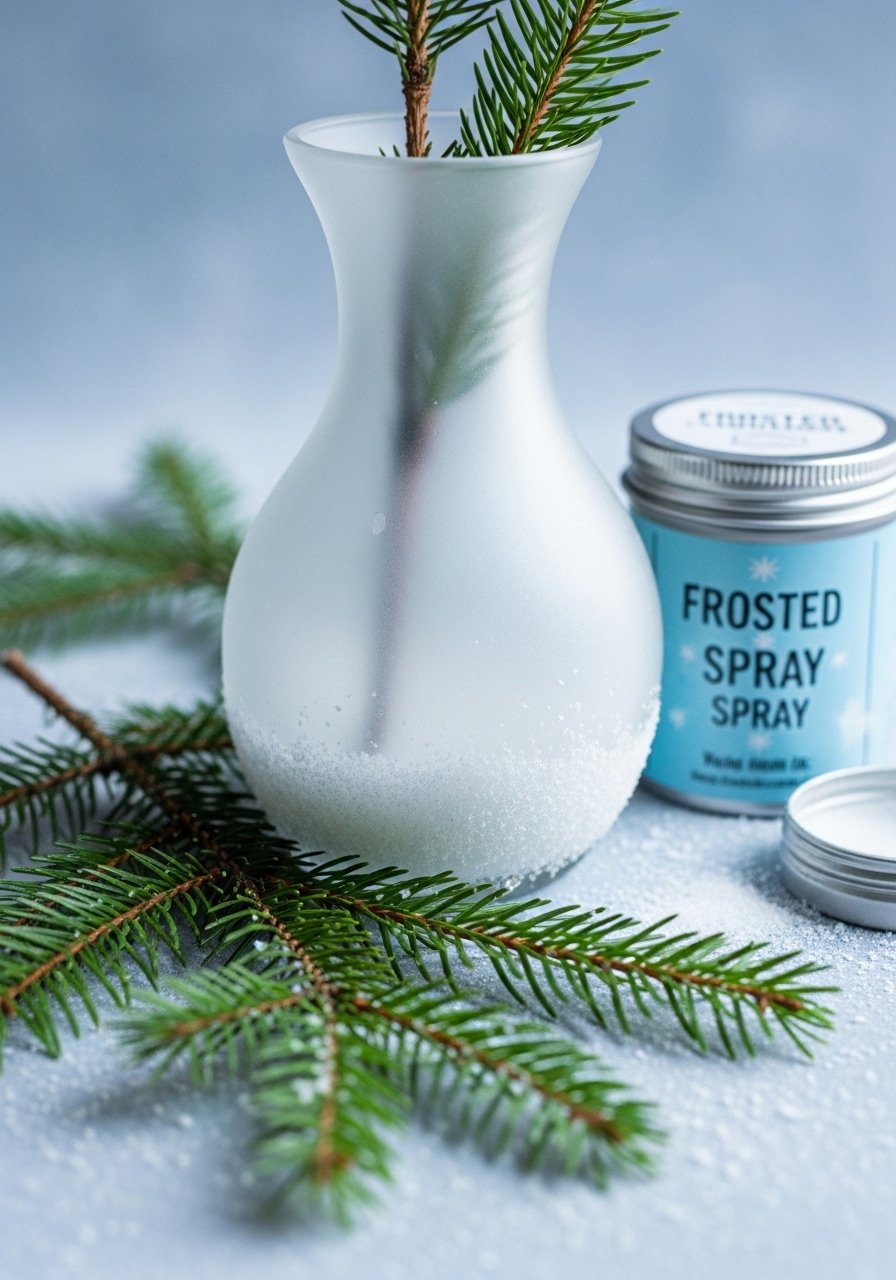
Frost spray creates soft translucent finishes for winter scenes. It’s fast and forgiving and gives the impression of a chilly morning. Perfect for sculptural stems and candlelight.
Materials
- Glass vase, 16–24 oz
- Frosted glass spray, 6 oz
- Painter’s tape
- Newspaper for protection
- Optional faux snow spray, 3 oz
Instructions
- Mask off areas you want to keep clear with painter’s tape.
- Spray light coats from 8–10 inches away, sweeping steadily.
- Let each coat dry 10 minutes. Two to three coats usually suffice.
- Add faux snow spray to the base for texture. Dry 30 minutes.
- Cure 24 hours before filling.
How to Display or Gift It
- Fill with white branches and fairy lights for a winter mantel.
- Pop into a decorative box with tissue for gifting.
- Store spray cans upright in a cool area: spray paint storage rack.
- Make small frosted votive holders as matching accents.
21. Dried Citrus & Cinnamon Stick Bundle Vase (Autumn)
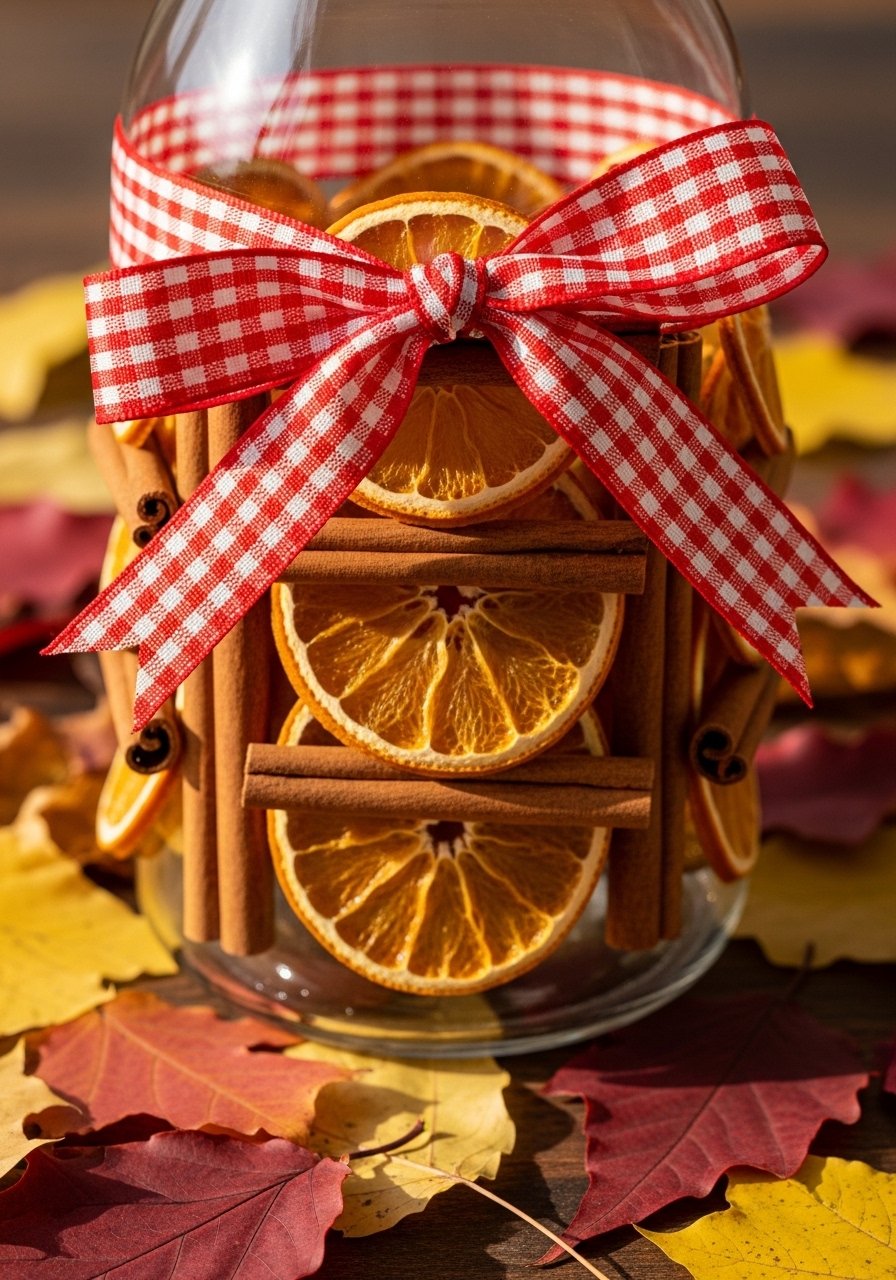
This aromatic bundle gives warmth and scent for fall. Cinnamon and dried citrus are simple to prep and make any room feel cozy. The texture and scent are the real stars.
Materials
- Glass jar or vase, 16 oz
- Dried orange slices, 10 slices
- Cinnamon sticks, 10 sticks (3–4 in)
- Hot glue gun
- Baker’s twine or gingham ribbon, 2 yd
- Small dowel to prop during gluing
Instructions
- Dry citrus slices in oven at 200°F for 2–3 hours, flipping halfway.
- Arrange slices and cinnamon in the desired pattern.
- Glue cinnamon stick and citrus onto the jar with hot glue, alternating.
- Tie a ribbon over the seam to hide glue lines.
- Let glue cool and set 30 minutes.
How to Display or Gift It
- Fill with amber-colored faux leaves or dried flowers.
- Add a small tag with scent notes and gifting instructions.
- Store dried citrus in airtight containers to preserve scent: airtight food storage jars.
- Batch for holiday potpourri gifts.
22. Leather-Dipped Vases with Brass Edge (Autumn/Winter)

Leather-dipping adds luxe texture to simple vases. Pairing leather with a brass rim makes the finish feel crafted and elevated. It’s tactile and suits cozy interiors.
Materials
- Small glass bud vases, set of 3
- Vegetable-tanned leather, thin sheet (6 x 9 in)
- E6000 adhesive, 1 oz
- Brass edge trim, 3 ft
- Scissors
- Ruler
Instructions
- Measure vase base circumference and cut leather piece.
- Glue leather to vase base and press to secure.
- Attach brass edge trim at the top of the leather for a finished look.
- Let adhesive cure 24 hours before handling.
How to Display or Gift It
- Cluster on a side table with warm tea-light glow.
- Wrap in kraft paper with a leather twine accent for gifting.
- Keep leather scraps and glue in a small parts organizer: adhesive storage box.
- Mix and match leather colors for seasonal swaps.
23. Fairy Light-Filled Frosted Bottle (All-Season Accent)
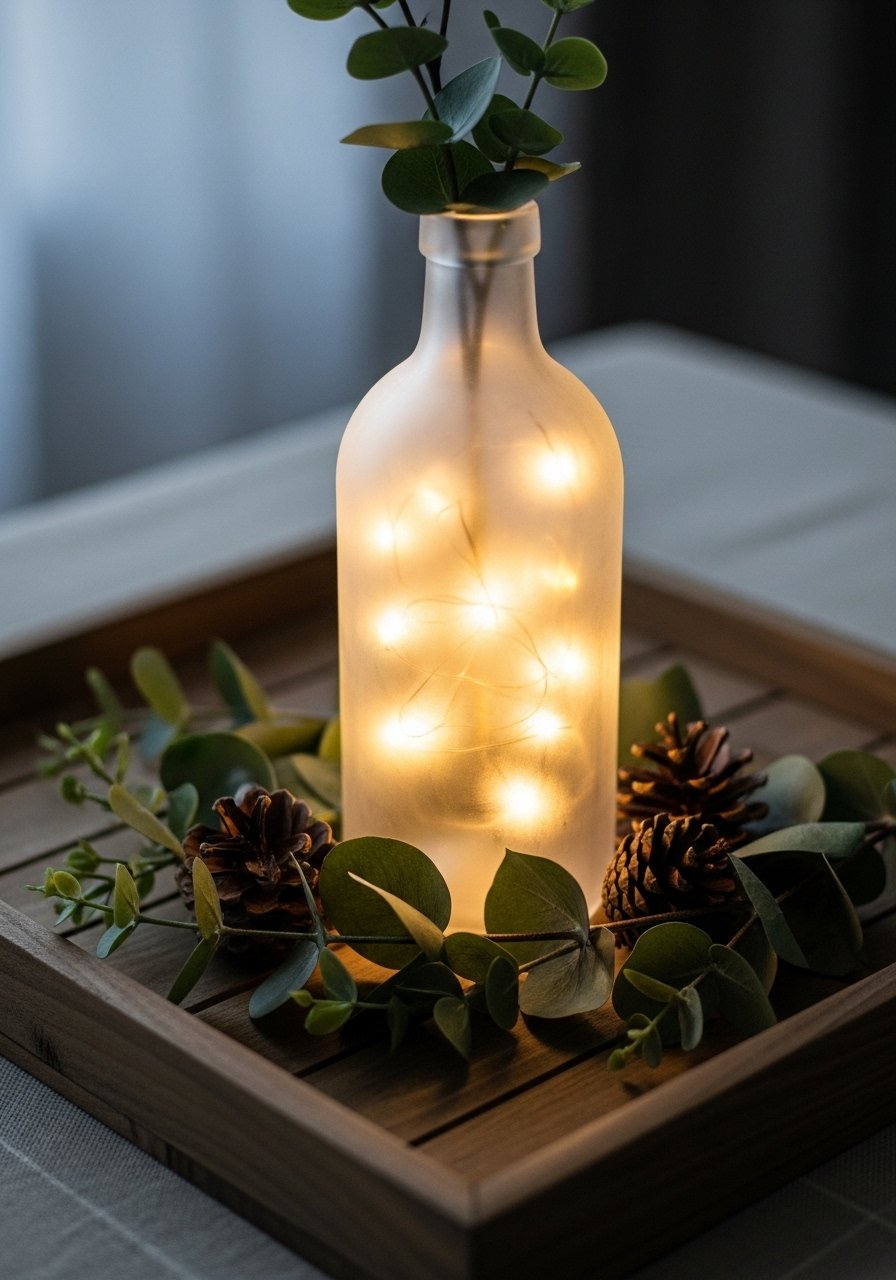
Fairy lights inside a frosted bottle create ambient mood for any season—fairy-lit spring nights, cozy winter corners, or outdoor summer dinners. It’s simple, battery-powered, and endlessly versatile.
Materials
- Clear glass bottle, 24 oz
- Battery-operated LED fairy lights, 1 string (20–30 lights)
- Frosted glass spray, 6 oz (optional)
- Small battery pouch (comes with lights)
- Ribbon or twine for decoration
Instructions
- Frost bottle if desired with light spray; dry 30 minutes.
- Insert fairy lights and feed battery pack into bottle neck or behind it.
- Conceal battery pack with floral foam or behind a shelf.
- Turn lights on and test; replace batteries as needed.
How to Display or Gift It
- Use as a table centerpiece or nightlight.
- Gift with batteries included and a small instruction card.
- Store lights neatly in a small craft organizer when not in use: LED fairy lights set.
- Make a set with different frosted colors for seasonal rotations.
These 23 seasonal vase decorating ideas give you a full year of fresh looks to swap onto shelves, tables, and mantelpieces. Try a few techniques that match your seasonal mood—ombre for spring, twine and citrus for fall, resin keepsakes for summer weddings, and metallics for holidays. Pin this guide so you can return when the next season rolls around and gather a small stash of the tools I mentioned, like a reliable hot glue gun or a Cricut Explore cutting machine, to speed up future projects.
Which look will you try first? Share a photo or tag a friend who’d love to make a set of seasonal vases for entertaining. Trust me, grabbing a temperature-control hot glue gun changed how every single one of these projects turned out — no more stringy mess, no more burns.


