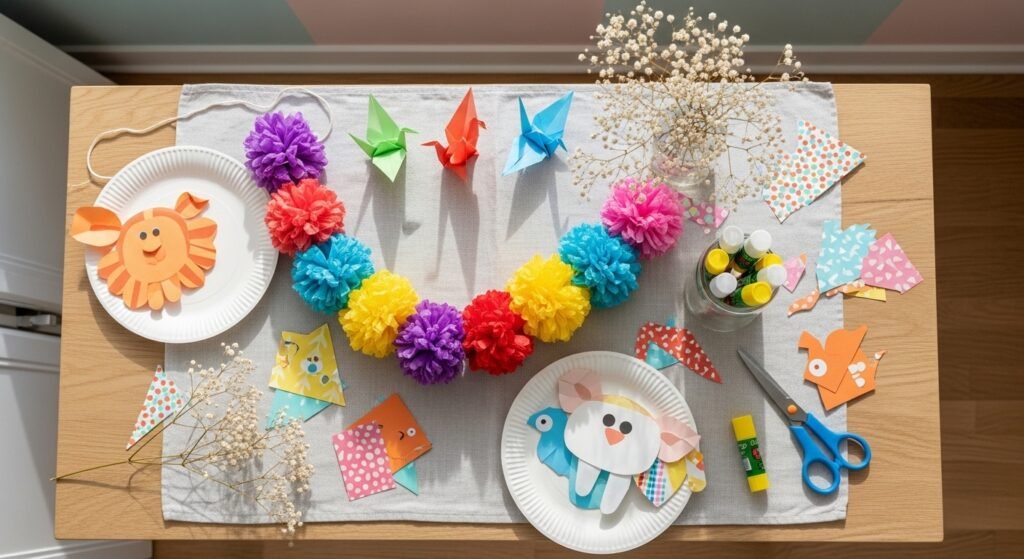
Bright, colorful, and perfectly simple—these paper craft ideas for kids are the kind of projects that keep little hands busy and grown-ups smiling. You’ll find quick rainy-day activities, classroom-friendly projects, and sweet gifts that look handmade-but-polished. Each idea is kid-tested for doable steps, realistic material lists, and helpful troubleshooting tips so you won't be standing over a puddle of glue wondering what went wrong.
I start many projects by cutting shapes with my Cricut Joy cutting machine for neat, repeatable pieces, but a simple craft knife and a self-healing cutting mat work just as well for at-home crafting. You’ll see tools and brands sprinkled naturally through the steps so you can choose what suits your space and budget.
Dive into these 22 ideas—perfect for toddlers with supervision, school-aged kids, and crafty parents who love bright palettes and tactile textures. Each project includes exact materials, step-by-step instructions, drying times where needed, and sweet display or gifting tips.
1. Rainbow Paper Plate Fish
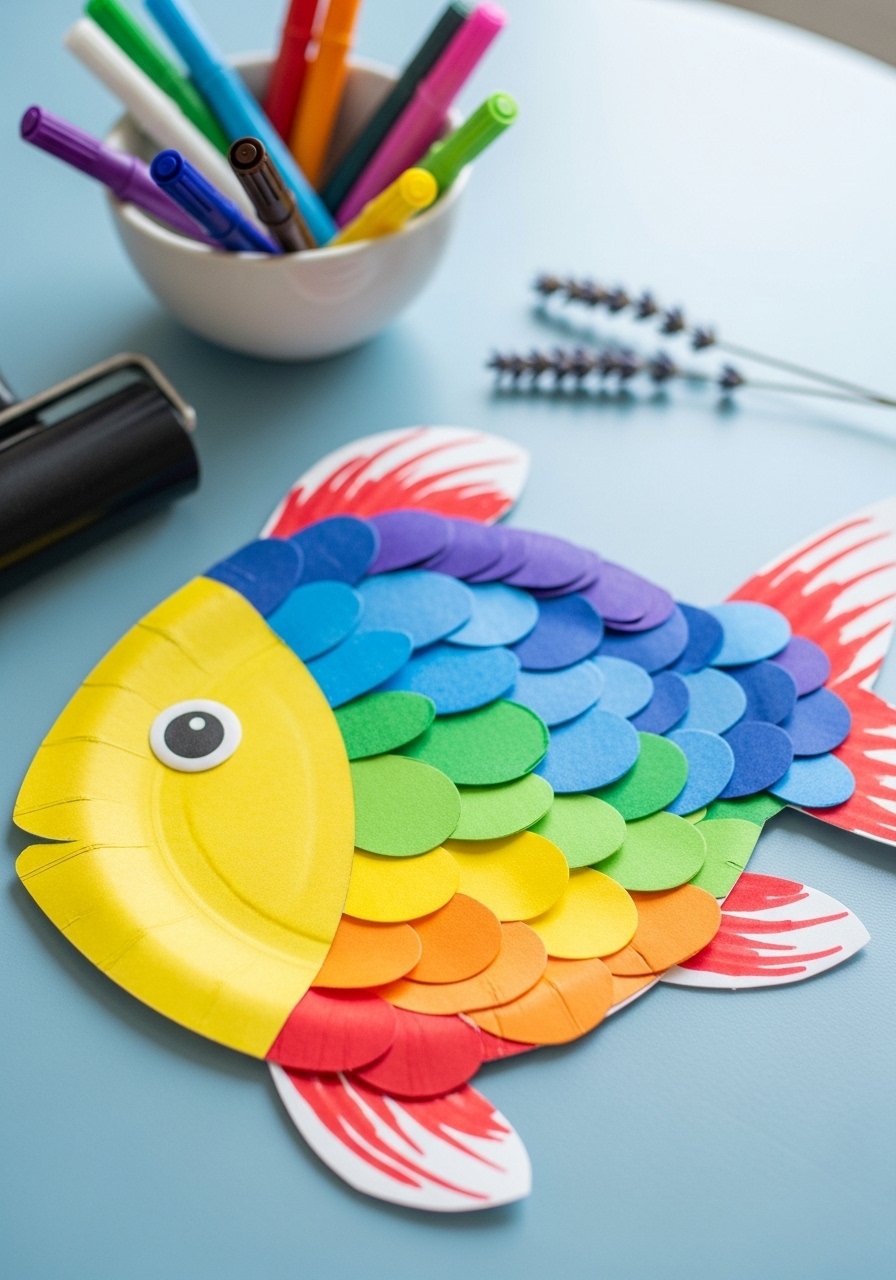
This little fish is bold, tactile, and excellent for cutting practice. Kids love layering scalloped scales and adding googly eyes. It dries instantly and makes a cheerful wall display or mobile element.
Materials
- 1 paper plate (9-inch), plain white
- Colorful cardstock or construction paper, 6–8 sheets (assorted colors)
- 6 googly eyes (12 mm)
- 1 glue stick (solid)
- 1 hole punch
- 1 wooden skewer or straw for hanging (8 inches)
- Optional: acrylic paint (small jar) for plate base
Instructions
- Flatten the paper plate. Paint the center with 1 thin coat of acrylic if you want a colored base. Let dry 20 minutes.
- Draw scalloped half-circles on cardstock using a pencil and cut 6–8 strips about 1.5 inches tall.
- Glue strips across the plate from bottom to top, overlapping by 1/4 inch to create scales.
- Trim excess paper along the plate edge with scissors.
- Glue a googly eye on each fish head; add a paper fin cut from a contrasting color.
- Punch a hole at top and thread a skewer or straw as a handle. Let adhesive set 10–15 minutes.
How to Display or Gift It
- Hang several fish on a string for a bright mobile.
- Mount on a small wooden easel for a kid’s desk display.
- Wrap a set of three in tissue paper and tie with twine for a simple handmade gift.
- Store extra cardstock flat in a craft organizer box to keep edges crisp. Consider a craft organizer tray for supplies.
2. Tissue-Paper Flower Pom-Pom Garland
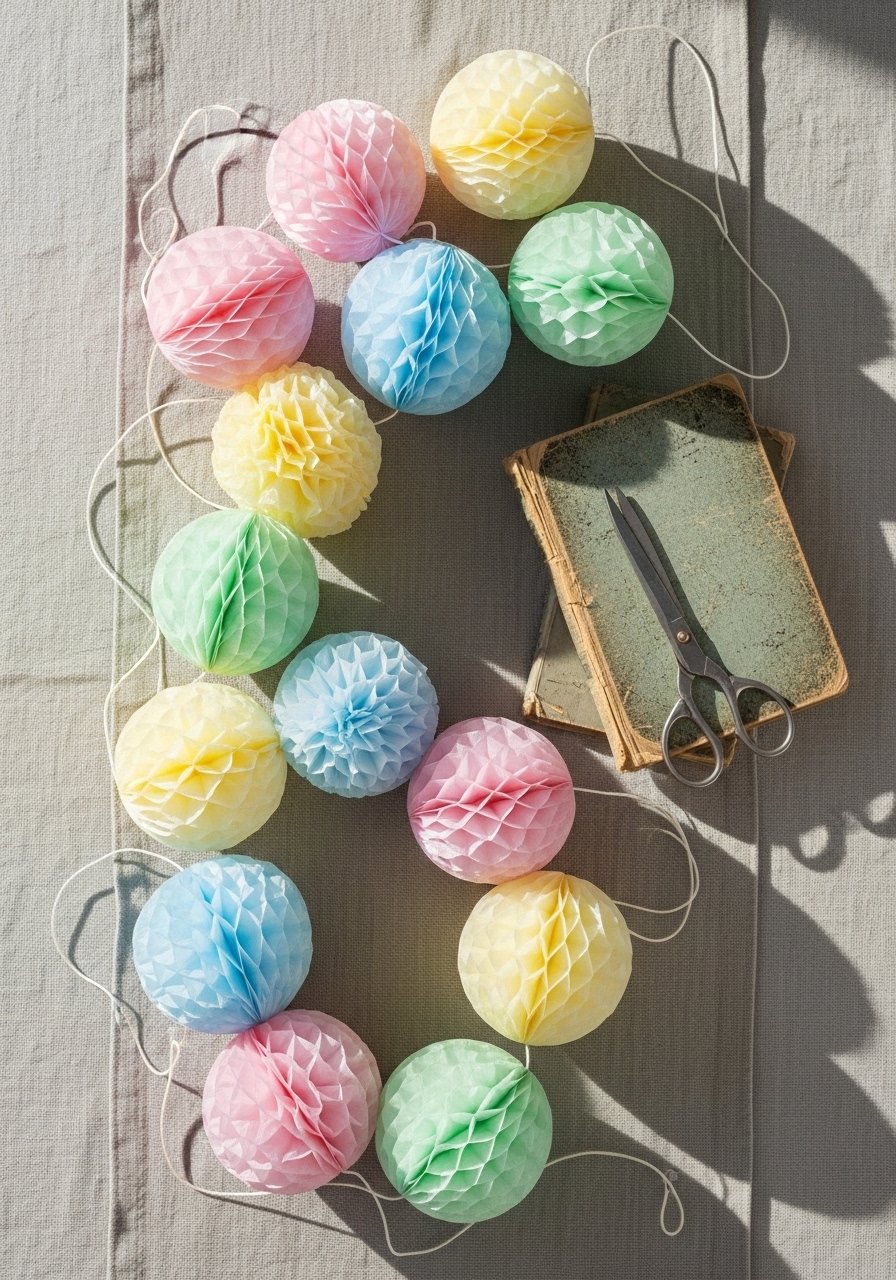
Fluffy, soft, and excellent for fine-motor practice, tissue-paper flowers brighten bedrooms and parties. Kids learn folding and looping while you teach patience with gentle fluffing.
Materials
- Tissue paper sheets, 12 x 20 inches, 12 sheets (assorted pastels)
- Floral wire or thin twine, 5 yards
- Scissors (child-safe)
- Ruler
- Optional: small dot of glue to secure center
Instructions
- Stack 3–4 sheets of tissue. Fold accordion-style in 1.25-inch pleats.
- Twist a 4-inch piece of floral wire around the center, leaving tails to tie to twine.
- Trim ends into rounded petals or points.
- Carefully separate each layer, pulling up toward the center to fluff. Repeat for all pom-poms.
- Space pom-poms about 6–8 inches apart on twine and tie floral wire tails to secure.
- Trim stray edges for a tidy look.
How to Display or Gift It
- Drape across a child’s canopy bed or party table for a boho vibe.
- Store flattened in a shallow box to keep them crisp until the event.
- Pair with kraft gift boxes for a charming present wrap. Try a kraft gift box set.
3. Simple Origami Animal Bookmarks (paper craft ideas for kids)
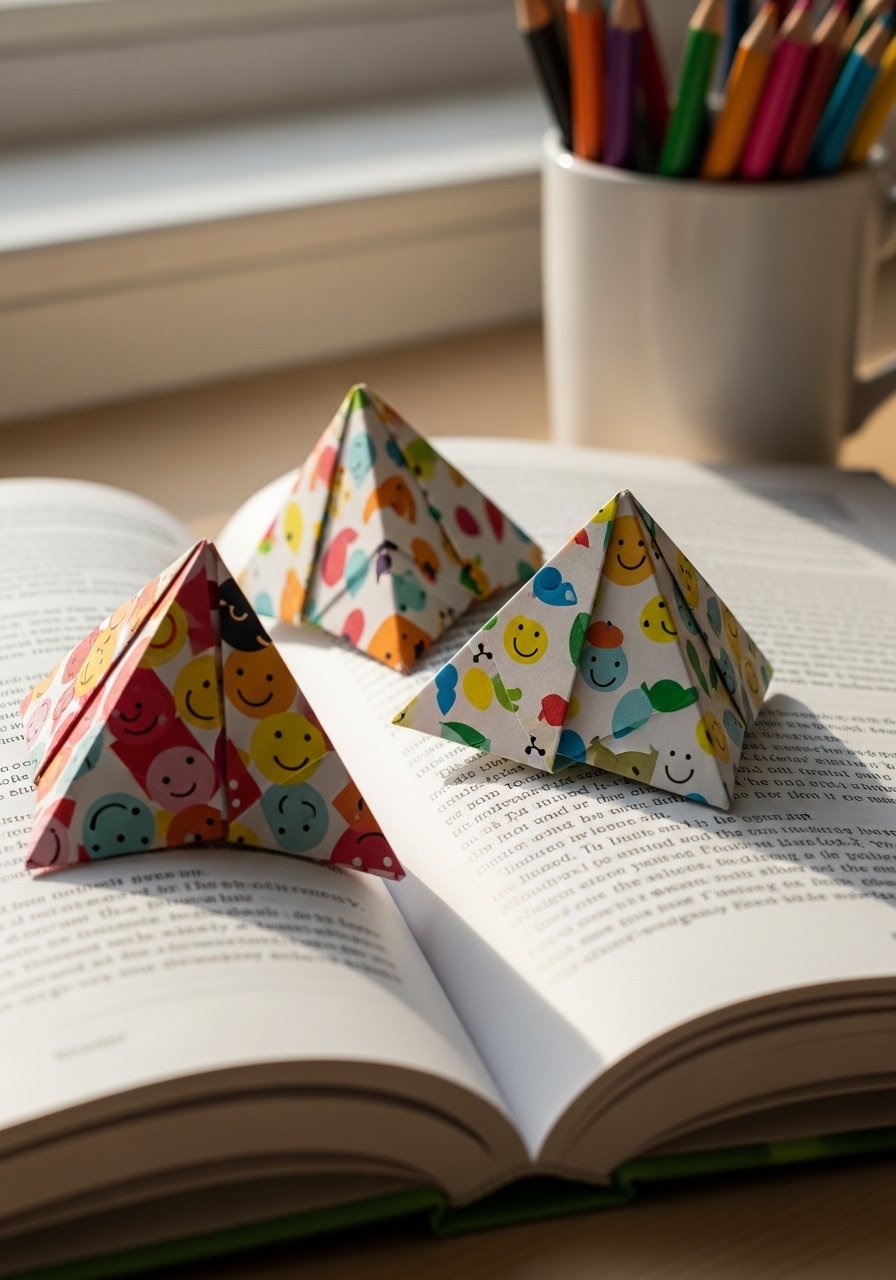
Origami bookmarks teach folding precision and are useful too. These little corner bookmarks make reading more fun and build patience. Use patterned paper for instant charm.
Materials
- Patterned origami paper, 6-inch squares, 12 sheets
- Pencil and fine-tip marker for faces
- Bone folder or ruler (for crisp folds)
- Optional: small sticker eyes
Instructions
- Fold a square in half diagonally to form a triangle.
- Fold the top corner down about 1 inch and unfold to create a crease.
- Fold the two bottom corners up to meet the top corner, tucking one into the pocket.
- Use a marker to draw eyes and a smile. Add sticker eyes if desired.
- Repeat for different animals and patterns.
- Smooth seams with a bone folder for a crisp finish.
How to Display or Gift It
- Bundle a set of three with a ribbon and tuck into a paperback.
- Store in a small clear box so folds don't get crushed. A small clear storage box works well.
- Pair with a reading log for a school prize.
4. Puffy Paint Puffy Clouds (sensory paper craft)
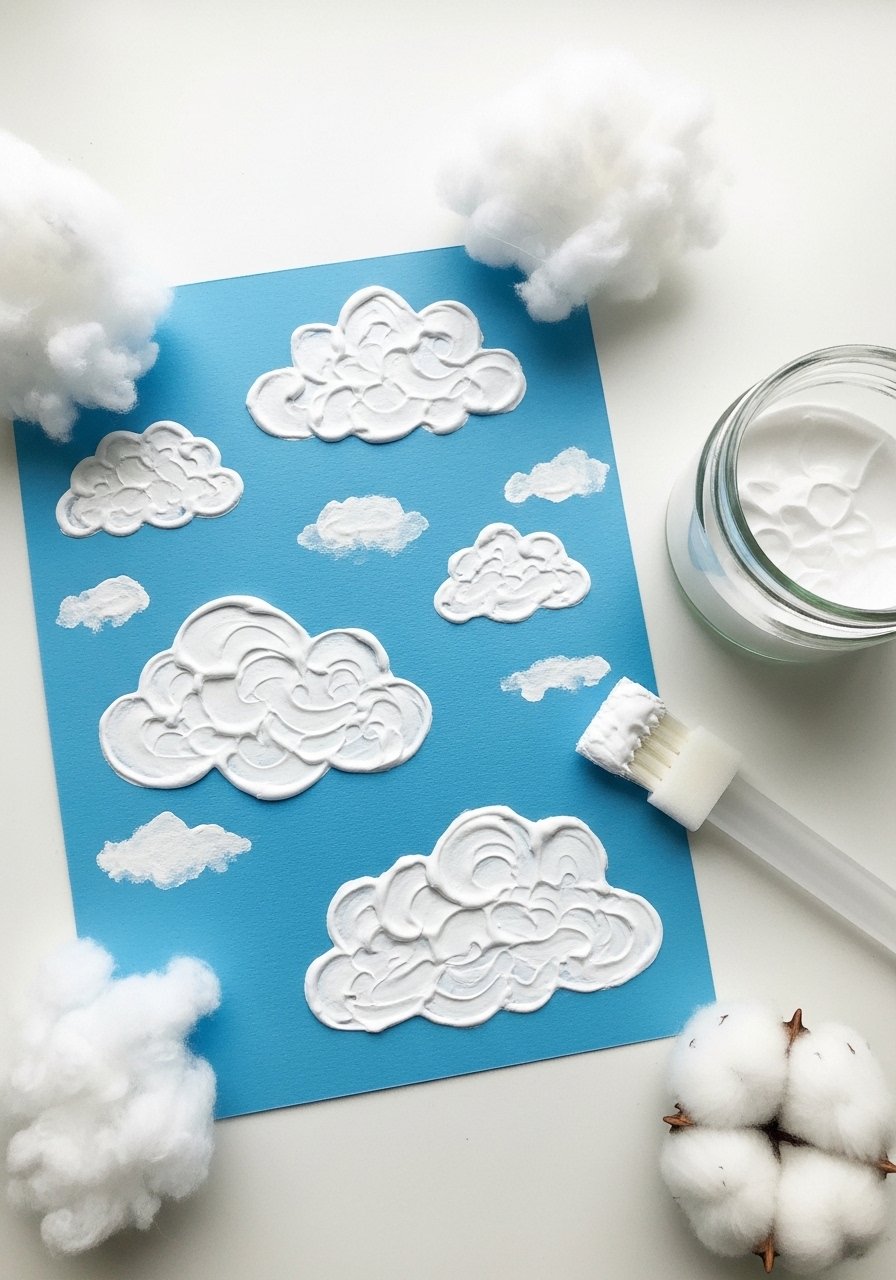
Puffy paint gives craft time a tactile twist. Kids squeeze, swirl, and watch texture form. This project uses a safe microwave puffy-paint recipe and feels squishy when dry.
Materials
- 1 cup baking soda
- 1/2 cup white glue (PVA)
- 1/2 cup shaving cream
- Blue cardstock, 1 sheet per child, 9 x 12 inches
- Foam brushes
- Optional: glitter (non-toxic) 1 tsp
Instructions
- Mix baking soda, glue, and shaving cream in a bowl until fluffy.
- Add glitter if desired.
- Use foam brushes or squeeze bottles to apply cloud shapes to blue cardstock.
- For puffier texture, build layers and let each set dry 15–20 minutes before adding more.
- Fully cure overnight; puffiness stabilizes as the mixture sets.
- If any edges look saggy, gently pat with a dry brush after 12 hours.
How to Display or Gift It
- Mount finished sheets in inexpensive frames for a nursery wall.
- Store flat until completely dry inside a flat document box.
- Make a set for a baby shower gift and tuck a ribbon around the stack.
5. Paper Roll Butterfly Puppets
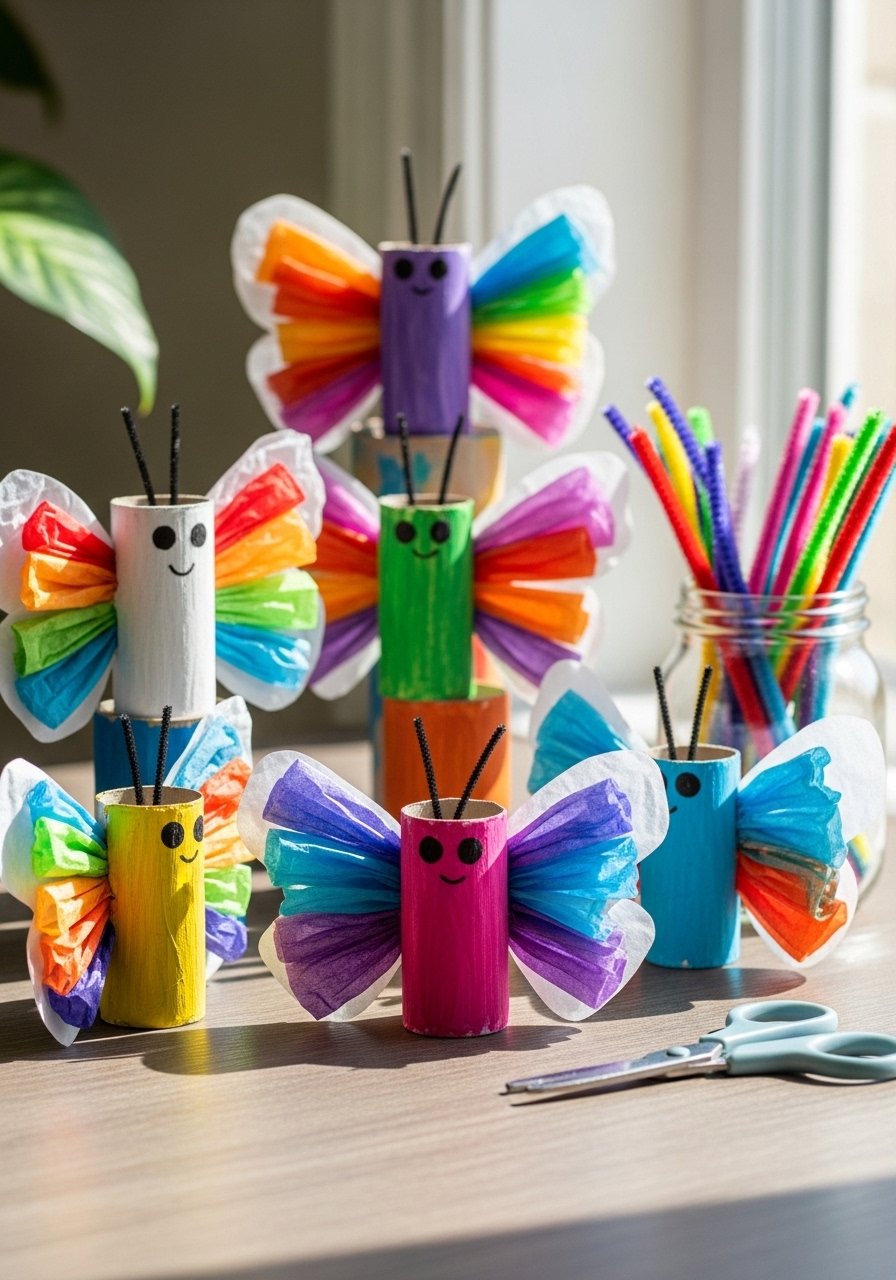
Turn empty paper rolls into playful puppets. Painting the roll gives a smooth base while tissue wings keep things light and fluttery. Great for storytime and imaginative play.
Materials
- Empty toilet paper rolls, 4
- Acrylic paint (small set)
- Tissue paper sheets, assorted colors (6 sheets)
- Pipe cleaners, 6
- Glue stick and craft glue (small bottle)
- Googly eyes, 8
- Paintbrushes (size 6 and detail)
Instructions
- Paint each roll in a solid color. Let dry 30 minutes.
- Cut wings from two layers of tissue into teardrop shapes 4 x 3 inches.
- Glue wings to the inside back of the roll, overlapping slightly.
- Twist pipe cleaners into antennae and insert small holes at top, securing with a dab of glue.
- Add googly eyes and draw a smile with a marker.
- Let glue set 15 minutes before play.
How to Display or Gift It
- Put puppets on a small dowel or popsicle stick for performance.
- Store in a shallow craft box to keep antennae intact.
- Pair with a homemade storybook for a personalized gift; consider a small wooden easel for display.
6. Folded Paper Rainbow Wall Hanging
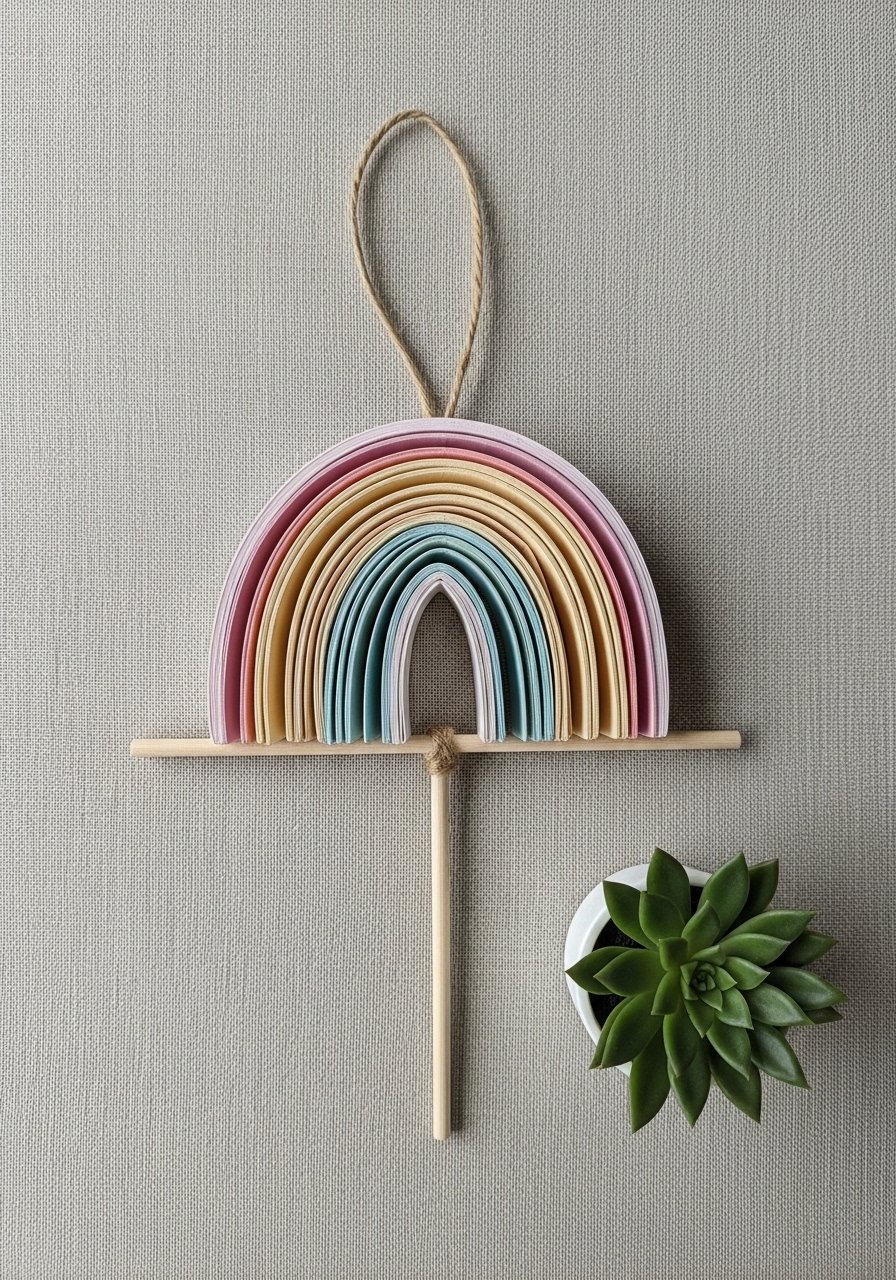
This folded rainbow brings a modern, Japandi-friendly palette to kids' rooms. It's sturdy and easy to make in parts, so kids can assemble arcs in sequence.
Materials
- Cardstock in rainbow colors, 6 colors, 9 x 12 inches each
- Wooden dowel, 12 inches
- Twine, 2 feet
- Hot glue gun and low-temp sticks
- Scissors and ruler
- Pencil and hole punch
Instructions
- Cut each cardstock color into arcs approximately 1.25 inches wide, lengths descending from 12 inches to 4 inches.
- Fold each arc into a rounded crease every 1/2 inch to add texture.
- Stack arcs largest to smallest and glue each layer along the back center.
- Attach the top arc to the dowel with hot glue and let cool 5 minutes.
- Tie twine to ends of dowel for hanging.
- Trim edges to make arcs even.
How to Display or Gift It
- Hang above a bed or reading nook for a soft pop of color.
- Make several in different palettes for seasonal swaps.
- Gift with a kraft box and tissue; a roll of twine looks charming with handmade pieces.
7. Friendly Paper Cup Monsters
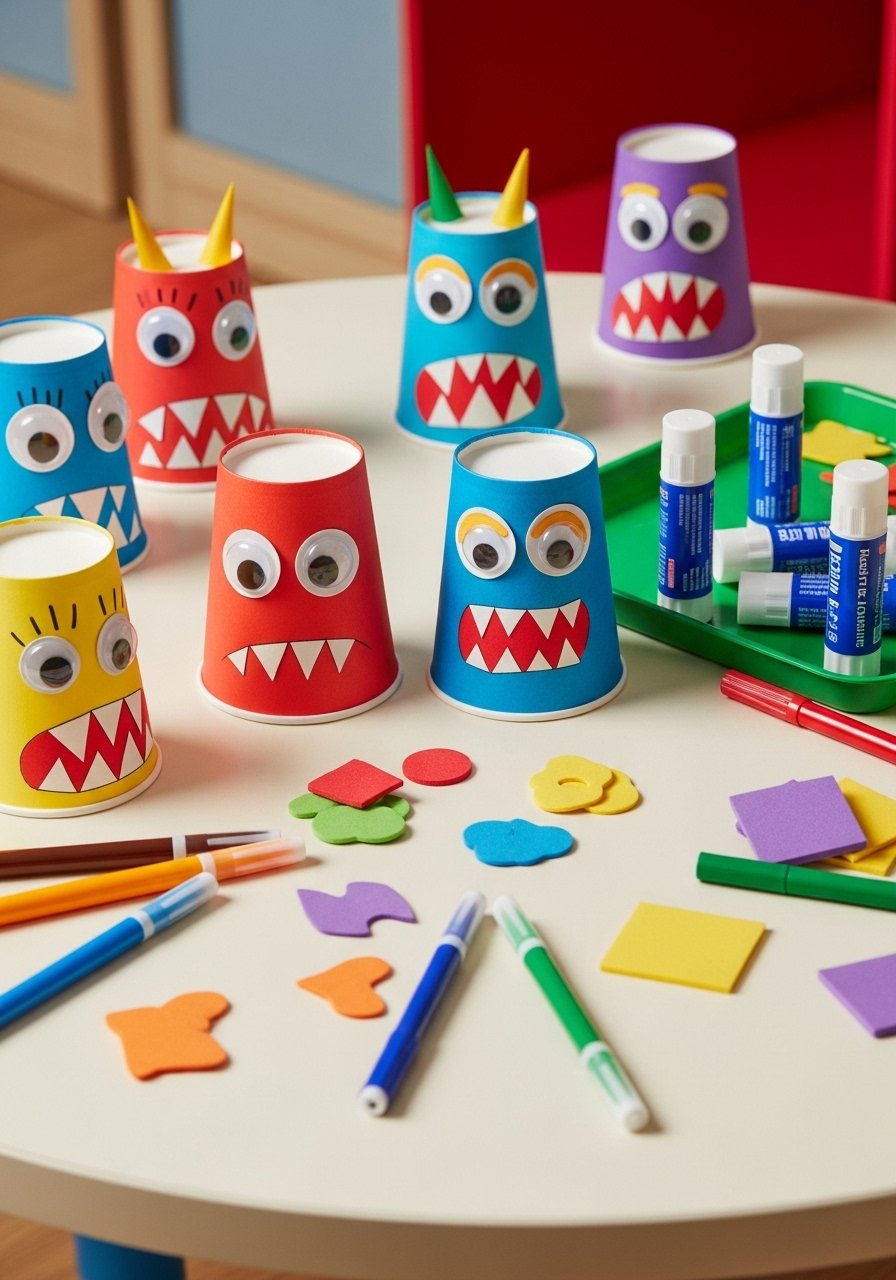
Paper cups are a cheap, sturdy base for monster puppets. Kids personalize faces and textures with tissue, foam, and markers—great for small-group crafts.
Materials
- Paper cups, 8 (white)
- Colored cardstock scraps, assorted
- Googly eyes, 16
- Glue sticks and craft glue
- Scissors and markers
- Adhesive foam shapes pack (optional)
Instructions
- Decorate cups with markers and glue on cardstock teeth or horns.
- Add googly eyes—single or paired.
- Use glue stick for large areas, craft glue for small foam bits; set 10 minutes.
- Make fur by gluing fringed tissue paper strips around the rim.
- For puppetry, cut a thumb hole at bottom and slide hand in.
- Let all glue dry 15–20 minutes before play.
How to Display or Gift It
- Set them on a shelf for a quirky vibe.
- Pack into a gift bag with a note from the maker.
- Store extra eye packs in a small bead organizer for reuse.
8. Cute Paper Plate Ladybugs

Rounded and bold, paper plate ladybugs are forgiving for little hands. A small brayer roller helps smooth painted areas for even coverage.
Materials
- Paper plates, 4
- Red and black acrylic paint
- Foam brush and small flat brush
- Black cardstock for spots (or paint)
- Pipe cleaners, 4 for antennae
- Glue and scissors
Instructions
- Paint plates red with a foam brush; let dry 20 minutes.
- Paint a vertical black line for the center; add spots with a brush or cut dots from cardstock.
- Glue pipe cleaners twisted for antennae on the back rim.
- Allow paint to cure 24 hours for firmness.
- If using cardstock spots, press with a brayer for secure adhesion.
- Trim edges for a neat shape.
How to Display or Gift It
- Hang on a classroom bulletin board with clothespins.
- Use a small wooden clothespin pack for mounting.
- Make a set and tie with baker’s twine as party favors.
9. DIY Paper Stamps and Prints
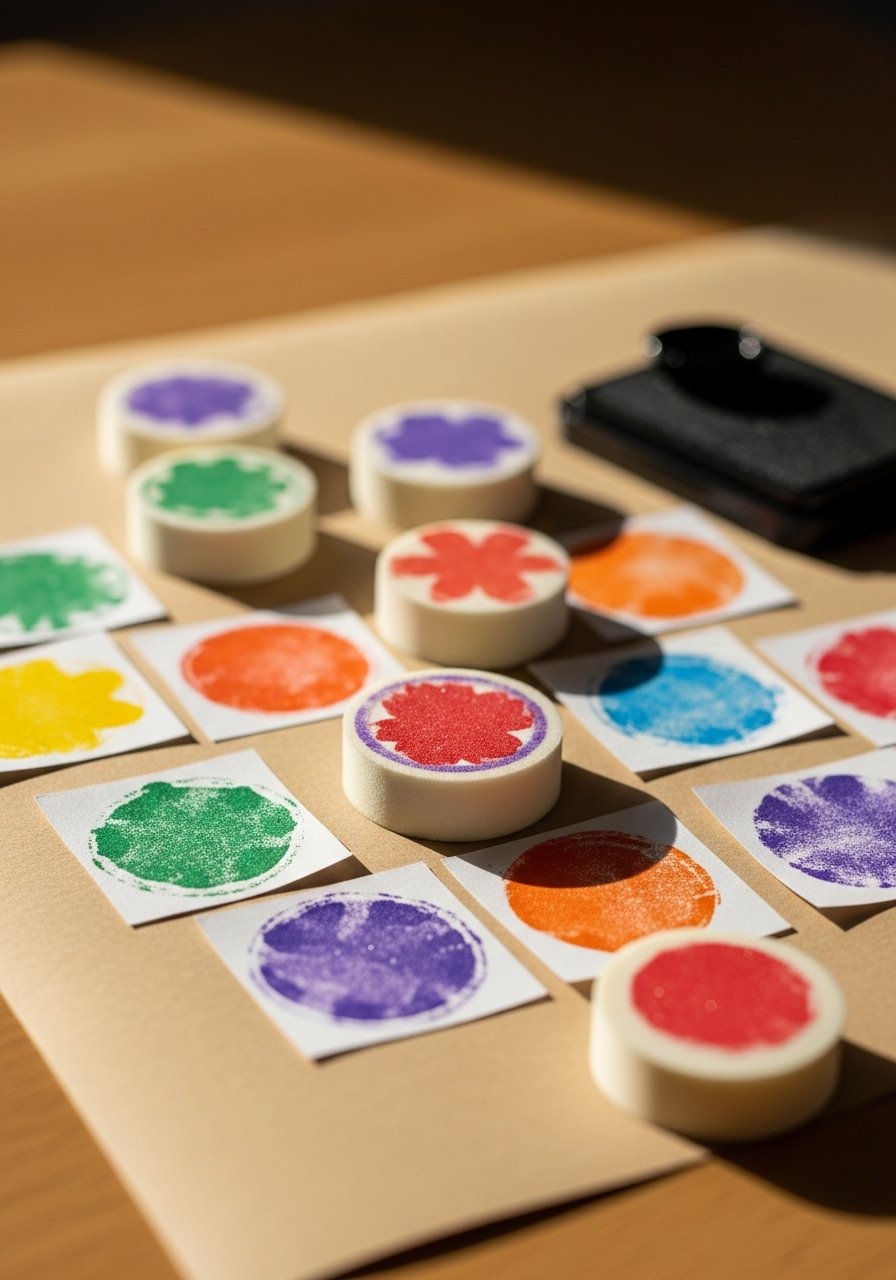
Carving stamps from craft foam is a safe, low-mess way to teach pattern-making. Kids press stamps into ink pads to produce repeated motifs—perfect for gift wrap.
Materials
- Craft foam sheets, 6 (1 mm)
- Scissors and a precision craft knife (adult use)
- Ink pads (washable), 3 colors
- Plain kraft paper, 2 sheets
- Ruler and pencil
Instructions
- Draw simple shapes on foam and cut them out with scissors.
- Press foam shapes onto an ink pad and then onto kraft paper.
- Repeat patterns, rotating stamps for variety.
- Let ink dry 10–15 minutes.
- For sturdier stamps, glue foam to small wooden blocks; let dry 1 hour.
- Clean foam stamps by pressing on scrap paper until ink lifts.
How to Display or Gift It
- Use printed kraft as gift wrap or greeting cards.
- Store stamps in a flat compartment of a craft organizer drawer.
- Pair with a set of pens for a gift pack.
10. Accordion Paper Fans

Accordion fans are fast, decorative, and teach careful folding. They’re great for summer camp projects or party décor and dry instantly.
Materials
- Decorative cardstock or double-sided scrapbook paper, 8.5 x 11 inches, 6 sheets
- Glue stick or hot glue (adult)
- Ribbon, 3 feet
- Bone folder or ruler for crisp folds
- Optional: wooden sticks for handles
Instructions
- Fold a sheet accordion-style in 1-inch folds using a bone folder.
- Fold the finished strip in half and glue the inner edges to form a fan.
- Attach a ribbon or wooden stick handle with hot glue; let cool 5 minutes.
- For layered fans, glue smaller fans on top of larger ones.
- Trim scalloped edges with decorative scissors for flair.
- Fans are ready to hang immediately.
How to Display or Gift It
- Cluster fans on a wall for party backdrops.
- Pack flat and re-fluff right before the event.
- A roll of washi tape can give edges a pretty finish.
11. Felt and Paper Mixed-Media Cards
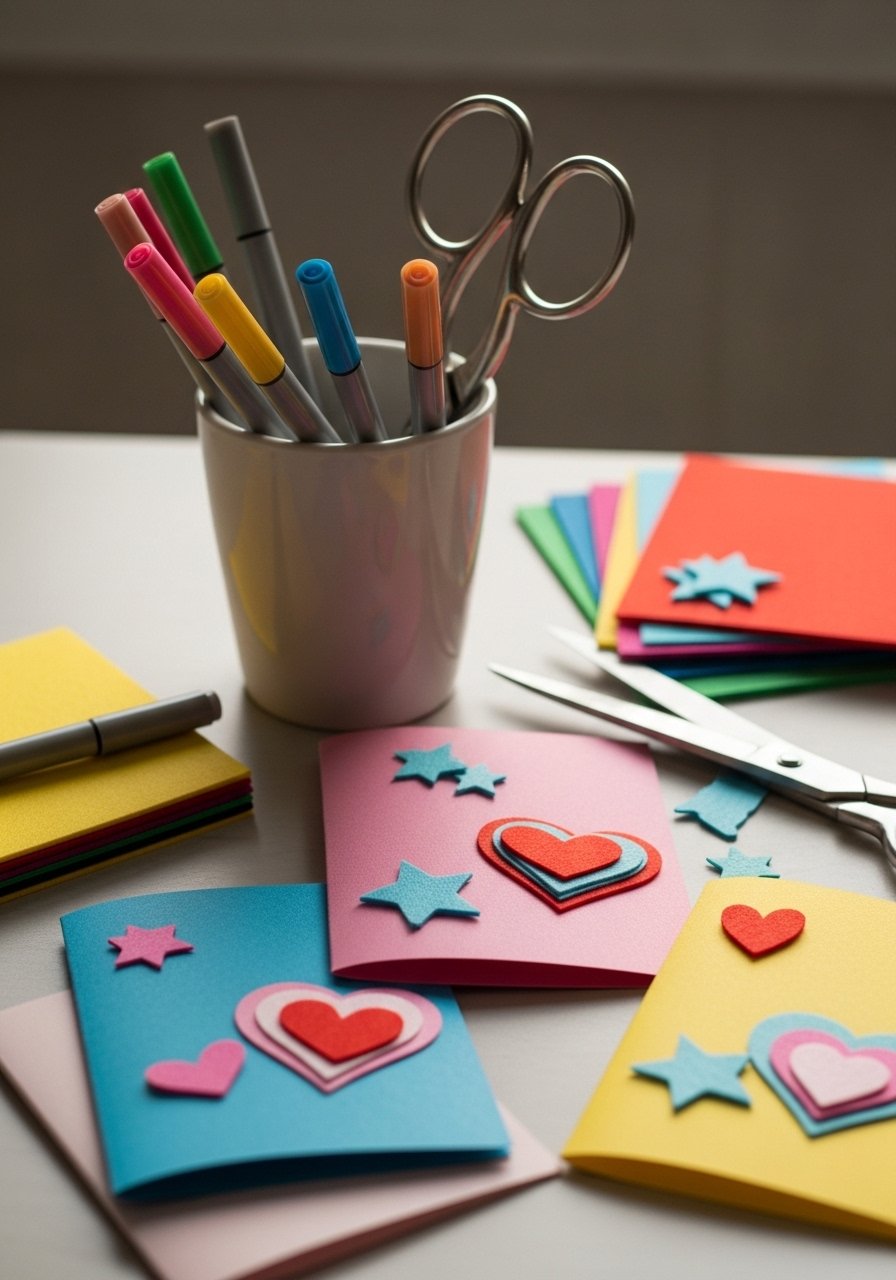
Combining felt with paper adds tactile interest perfect for kids to gift. Felt is forgiving and adds a cozy texture to simple card layouts.
Materials
- Blank cardstock cards, A2 size, 6
- Small felt sheets, 6 x 9 inches, assorted
- Fabric glue or craft glue
- Scissors (detail)
- Markers and stickers
Instructions
- Plan a simple layout and trace felt shapes onto felt sheets.
- Cut felt shapes and glue them to the card front; press for 10 seconds.
- Add marker accents or sticker details.
- Let glue dry 30 minutes for firm adhesion.
- Write a message inside when fully dry.
- Make sets by repeating patterns for multiple cards.
How to Display or Gift It
- Tuck cards into a kraft card box set for gifting.
- Store leftover felt in a small bin to prevent dust.
- Pair with colorful envelopes for postage-ready gifts.
12. Paper Mosaic Owl
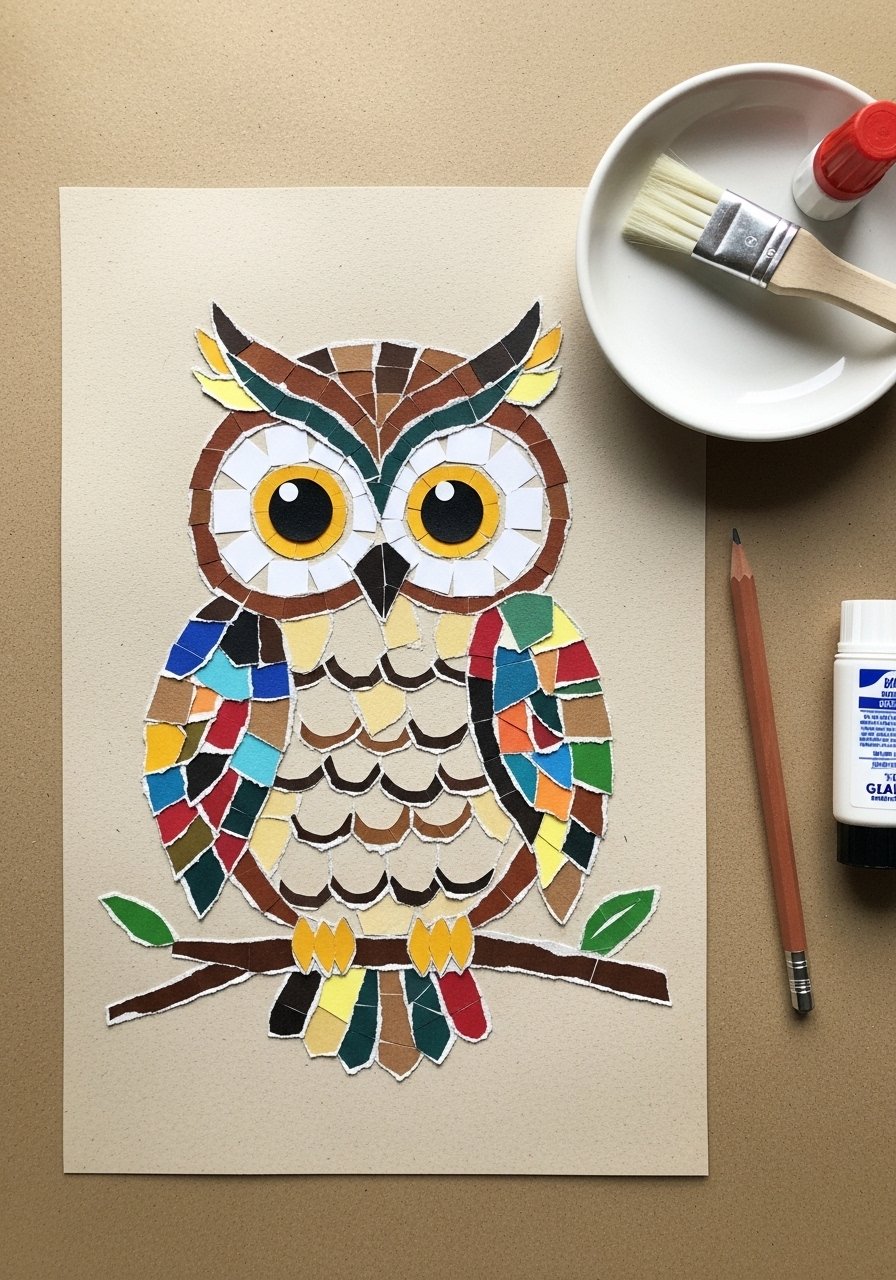
Tearing paper to make mosaics is soothing and builds hand strength. The owl pattern is forgiving, so kids can layer torn pieces without worry.
Materials
- Kraft cardstock, 9 x 12 inches, 1
- Colored construction paper, 8 sheets, assorted
- Mod Podge (matte) or craft glue, 1 jar
- Foam brush for application
- Pencil and scissors (optional)
Instructions
- Draw a simple owl outline on kraft paper.
- Tear colored paper into 1/2–1 inch pieces.
- Brush glue onto a small area and press torn pieces in place.
- Continue layering until the owl is filled.
- Seal with a thin coat of Mod Podge; dry 30 minutes.
- Add an extra coat if you want a harder finish; dry 24 hours.
How to Display or Gift It
- Frame in an inexpensive frame for a kid’s wall.
- Store finished mosaics flat until fully cured.
- For framing supplies try a standard 8×10 frame.
13. Colorful Paper Chain Countdown
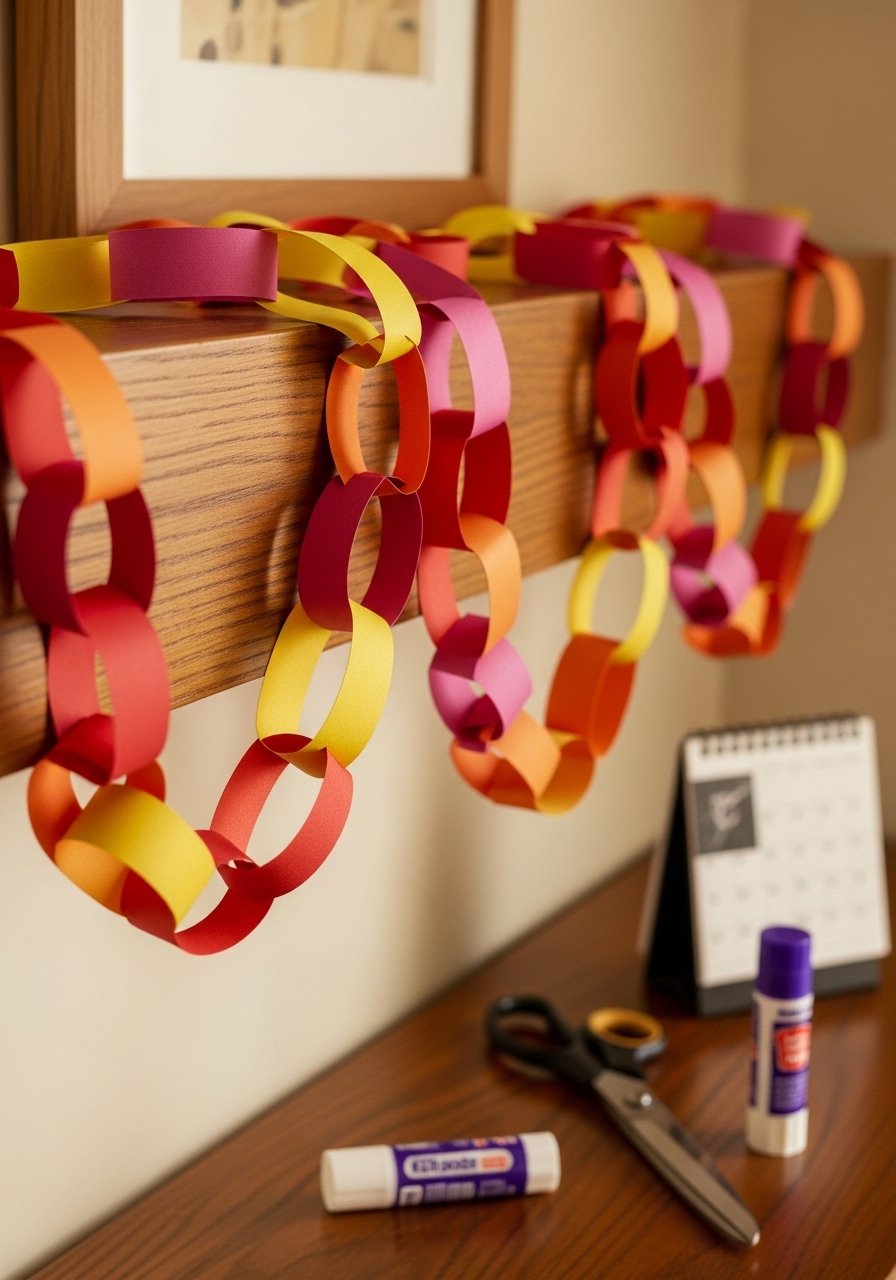
A paper chain countdown teaches sequencing and is a reusable tradition. Use patterned paper for texture and longevity.
Materials
- Colored cardstock or scrapbook paper, 1 pack (12 colors)
- Ruler and pencil
- Glue stick or double-sided tape
- Scissors
- Marker for numbering (optional)
Instructions
- Cut strips 1 inch x 8 inches.
- Loop one strip and secure with glue; thread the next strip through it to create a chain.
- Repeat until you reach desired length.
- For countdowns, write numbers on each link with a marker.
- Chains are ready to hang immediately.
- For durability, coat links lightly with Mod Podge and let dry 20 minutes.
How to Display or Gift It
- Drape across a window or mantel for seasonal decor.
- Store labeled by occasion in a storage container.
- Gift a rolled-up chain to a friend as a party favor.
14. Paper Lanterns with Cut-Out Shapes
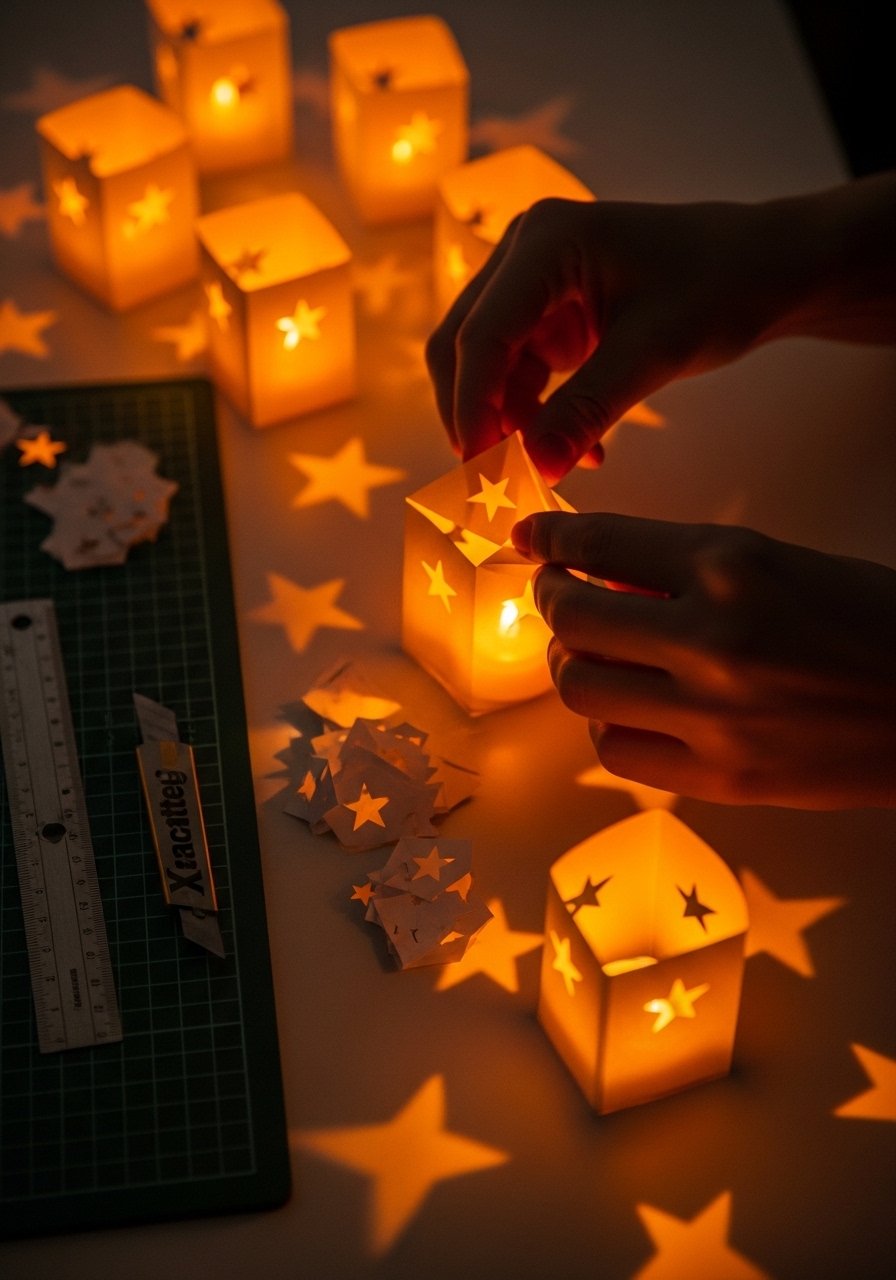
These safe, battery-lit lanterns are cozy and make excellent nightlight decorations. Paper choice and precise cuts make the light pattern magical.
Materials
- Colored cardstock, 8.5 x 11 inches, 4 sheets
- Battery-operated tealights, 4
- Craft knife (adult) and self-healing mat
- Ruler and pencil
- Double-sided tape or glue
Instructions
- Fold cardstock in half lengthwise.
- Mark slits every 1 inch from the fold, leaving 1 inch border at both ends.
- Cut slits and unfold; roll the paper so slits create lantern texture.
- Secure with tape and place a tealight inside.
- If cutting shapes, trace first and cut on a self-healing mat (adult).
- Lanterns are safe to light immediately with battery tealights.
How to Display or Gift It
- Line up lanterns on a mantel for soft mood lighting.
- Store flat to avoid creases.
- Pair with a pack of battery tealights in a gift box.
15. Simple Pop-Up Greeting Cards

Pop-up cards add surprise to a simple note. This basic heart pop-up teaches kids spatial thinking with satisfying results.
Materials
- Cardstock for card base, A6 size, 4
- Colored paper for pop-up shapes
- Pencil and ruler
- Scissors and craft knife (adult)
- Glue stick
Instructions
- Fold the card base in half.
- On a scrap piece, draw half a heart that crosses the fold and cut it out.
- Make two parallel cuts into the fold about 1 inch apart and push the tab forward to form the pop-up ledge.
- Glue heart to the tab; close card to check alignment.
- Decorate the rest of the card with markers or stickers.
- Allow glue to dry 10 minutes before mailing.
How to Display or Gift It
- Slip in an envelope and mail for a personal surprise.
- Store extra blank bases in a cardstock pack for future notes.
- Make a batch for birthdays and tuck into a gift basket.
16. DIY Paper Crowns (party paper craft ideas for kids)
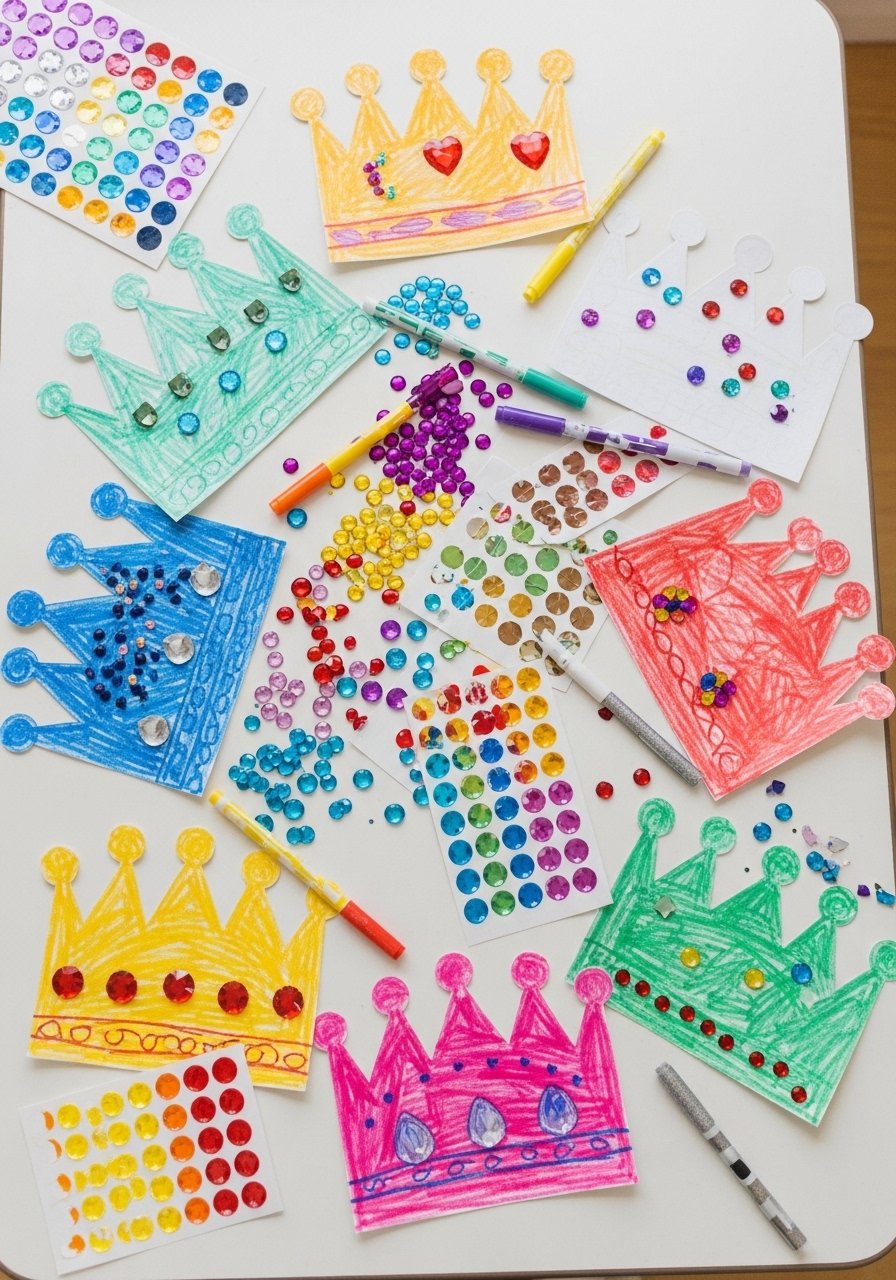
Paper crowns are instant party winners and teach pattern placement. Reinforce edges with a strip for sturdiness if kids will wear them.
Materials
- Gold and colored cardstock, 9 x 12 inches, 2 sheets
- Adhesive foam jewels
- Glue stick and double-sided tape
- Ruler and pencil
- Stapler or washi tape for sizing
Instructions
- Measure child’s head and cut a crown strip 2.5 inches high and appropriate length.
- Sketch a pointed crown top and cut through both layers for sturdiness.
- Decorate with foam jewels and glitter pens.
- Join ends with a stapler or overlap and secure with tape.
- If worn often, reinforce seam with double-sided tape.
- Let any wet glue set 20 minutes before wearing.
How to Display or Gift It
- Stack in a party organizer for easy distribution.
- Store in a shallow box to retain shape.
- A pack of adhesive foam jewels makes decorating fast.
17. Paper Straw Weaving Loom (textured paper craft)
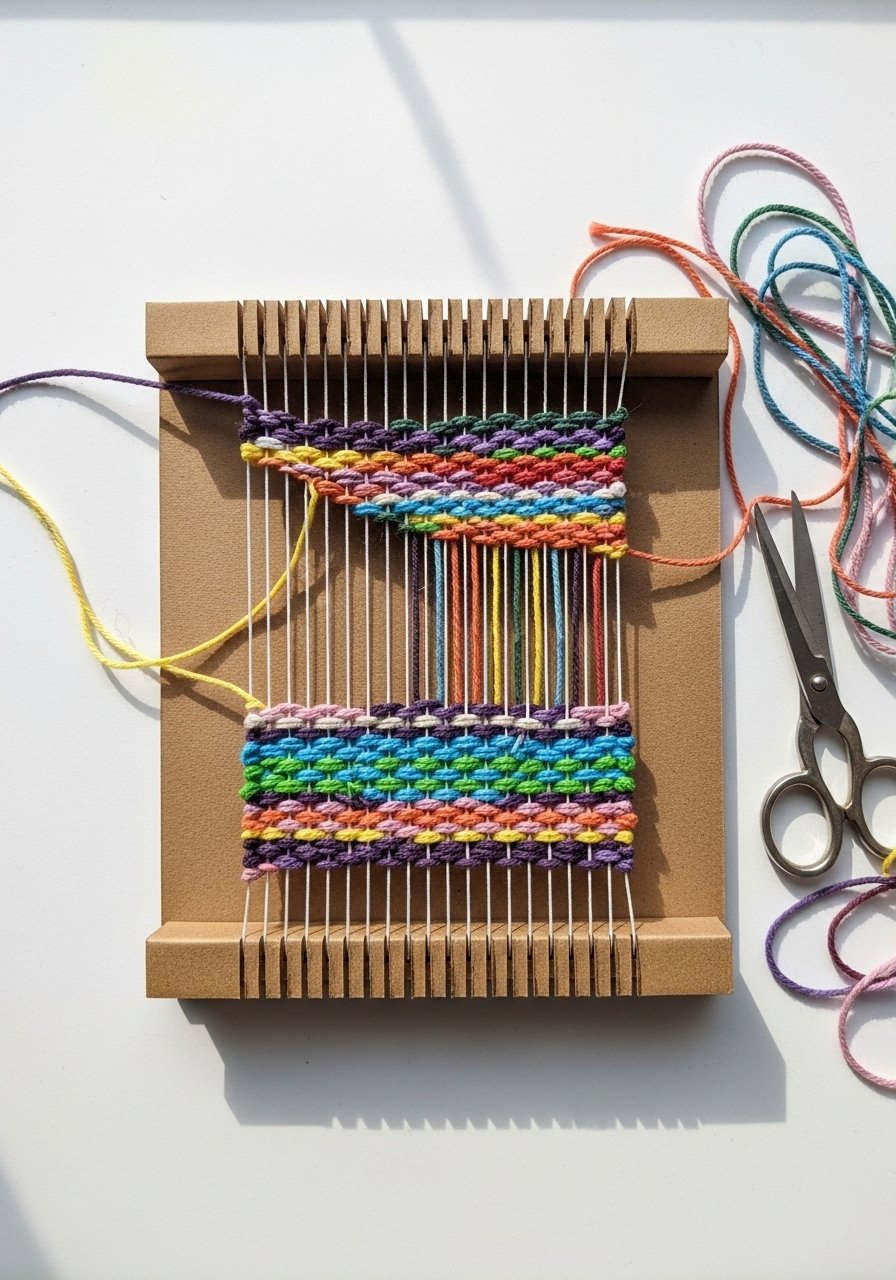
Simple looms made from cardstock let kids explore weaving patterns without a full loom purchase. They learn rhythm and color play with accessible materials.
Materials
- Cardboard or thick cardstock, 1 piece per loom, 8 x 10 inches
- Craft knife (adult) to cut notches
- Paper straws, 20
- Yarn or ribbon for weaving, assorted
- Tape and ruler
Instructions
- Cut notches every 1/2 inch along two opposite edges to hold warp.
- Insert paper straws into notches as the warp.
- Weave yarn over and under the straws, packing rows gently with a ruler.
- Change colors every 6 rows for stripes.
- Tie off ends and trim excess.
- For display, glue weaving to a backing and frame if desired; let glue dry 30 minutes.
How to Display or Gift It
- Hang finished pieces on a peg or small dowel for wall art.
- Keep extra yarn in a yarn organizer.
- Make sets as tactile classroom projects.
18. Paper Mosaic Picture Frames
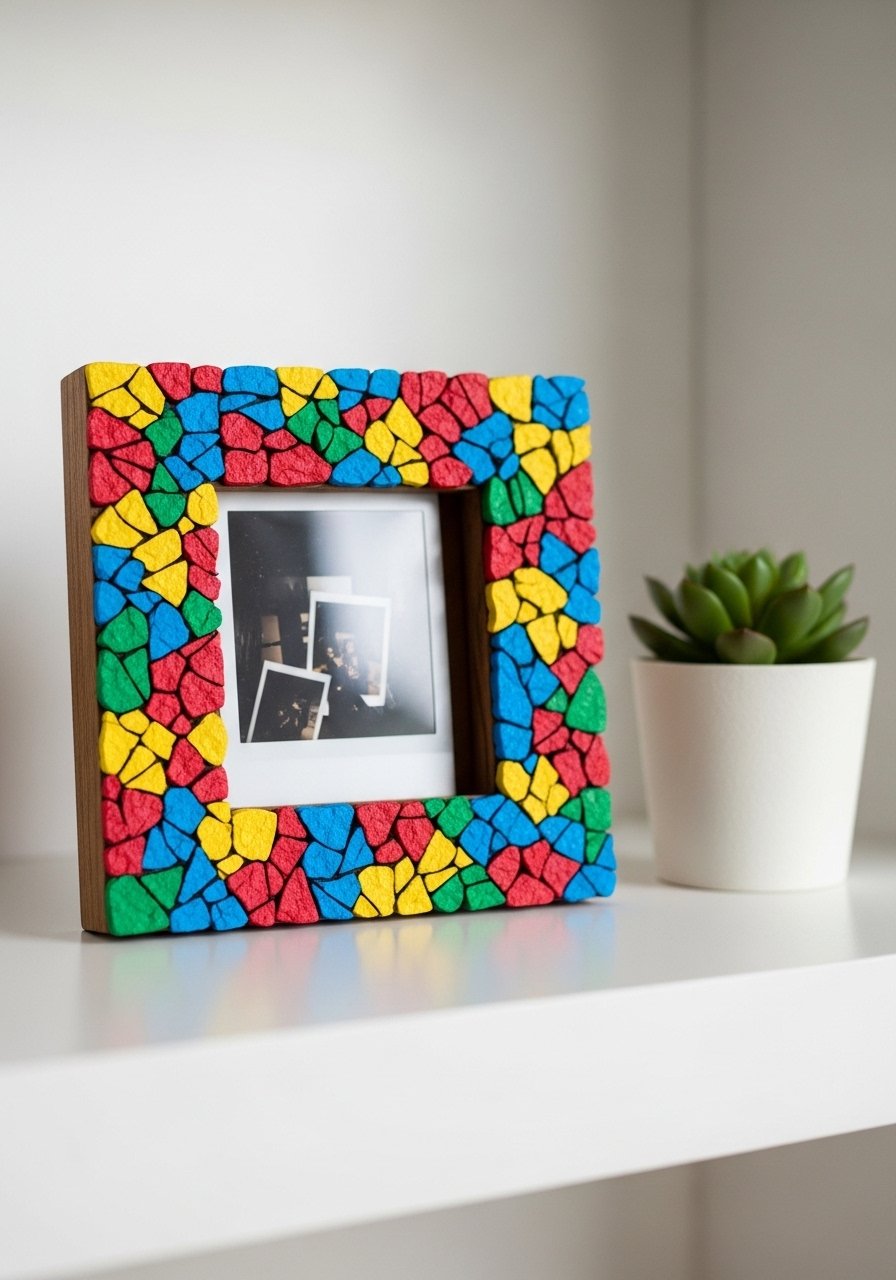
Decorate cheap wood frames with paper tile mosaics for a personalized gift. Sealing with Mod Podge protects edges against wear.
Materials
- Plain wooden frames, 4 x 6 inches, 1
- Colorful paper scraps, torn into 1/2 inch pieces
- Mod Podge (gloss or matte), 1 jar
- Foam brush
- Scissors and a craft knife (adult)
Instructions
- Remove glass and photo from frame.
- Apply Mod Podge to a small area and press paper tiles in place.
- Continue until entire frame is covered.
- Seal with 1 thin coat of Mod Podge; dry 30 minutes.
- Add a second coat for durability; dry 24 hours.
- Reassemble the frame once fully cured.
How to Display or Gift It
- Insert a family photo for a heartfelt present.
- Wrap in tissue and tuck into a gift box.
- Store unfinished frames flat until sealant cures.
19. Paper Straw Stars (holiday-friendly)
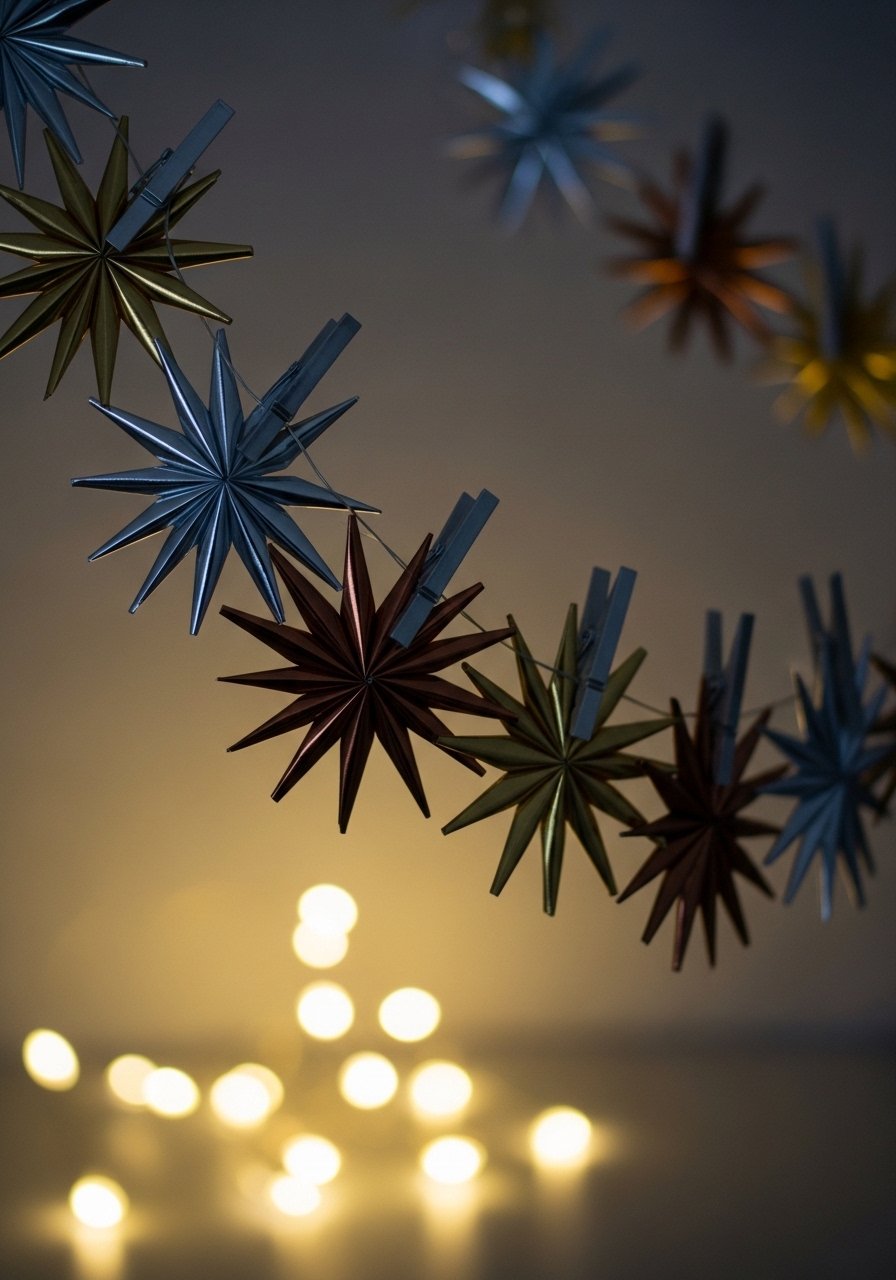
Straw stars are sturdy, sparkly, and great for holiday displays. Use metallic straws or wrap plain straws in washi tape for shimmer.
Materials
- Paper straws (metallic or patterned), 12
- Scissors
- Hot glue gun (adult) and sticks
- Twine for hanging, 2 feet
- Needle for threading (adult)
Instructions
- Cut straws into 1.25 inch segments.
- Arrange five segments into a star shape and glue joints with a small dab of hot glue.
- Repeat to make multiple stars.
- Thread stars onto twine with a needle to space them evenly.
- Hang immediately; glue sets within 2 minutes.
- For extra sparkle, add glitter glue and let dry 30 minutes.
How to Display or Gift It
- Drape across a mantel or window.
- Store in a shallow box to prevent crushing.
- Use metallic stars as gift toppers for a festive touch.
20. Paper Sun Catchers with Tissue and Wax
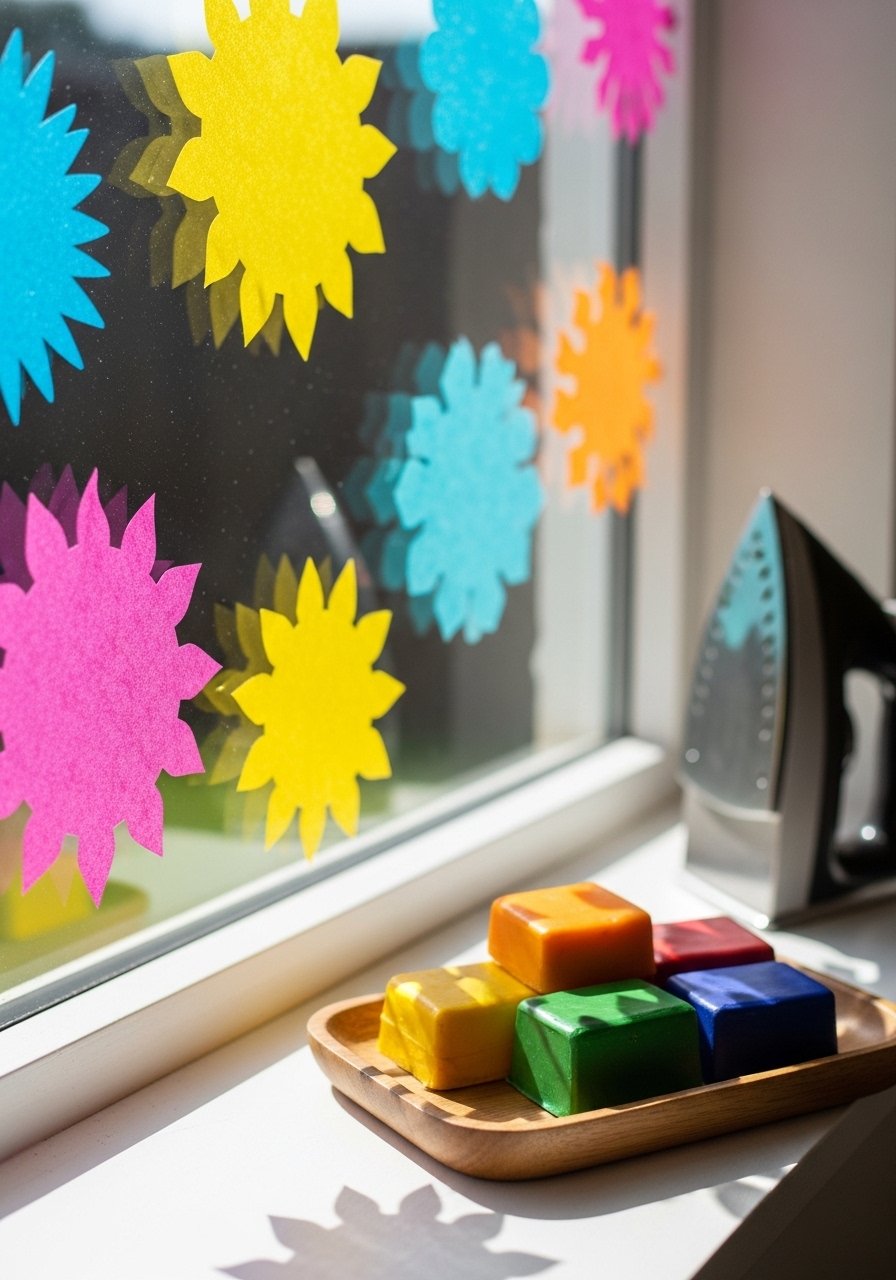
Sun catchers blend tissue and wax for stained-glass effects. Adult help with the warm iron is required, but the final pieces delight with saturated color.
Materials
- Tissue paper squares, assorted, 30
- Clear contact paper, 1 roll
- Beeswax crayons or wax paper for sealing (adult iron use)
- Scissors
- Hole punch and string for hanging
Instructions
- Cut contact paper into circles or shapes and peel off the backing.
- Stick tissue pieces randomly onto the sticky side.
- Top with another piece of contact paper and press smooth.
- For extra sheen, place between scrap paper and run a warm iron over (adult only) for 5–8 seconds—do not overheat.
- Punch a hole and hang in a sunny window.
- Trim edges neatly; pieces are ready to hang immediately.
How to Display or Gift It
- Hang in windows for a bright pop of color.
- Package flat in a flat mailer for gifting.
- Make seasonal color palettes (autumn, spring).
21. Paper Plate Sunflowers (farmhouse style)
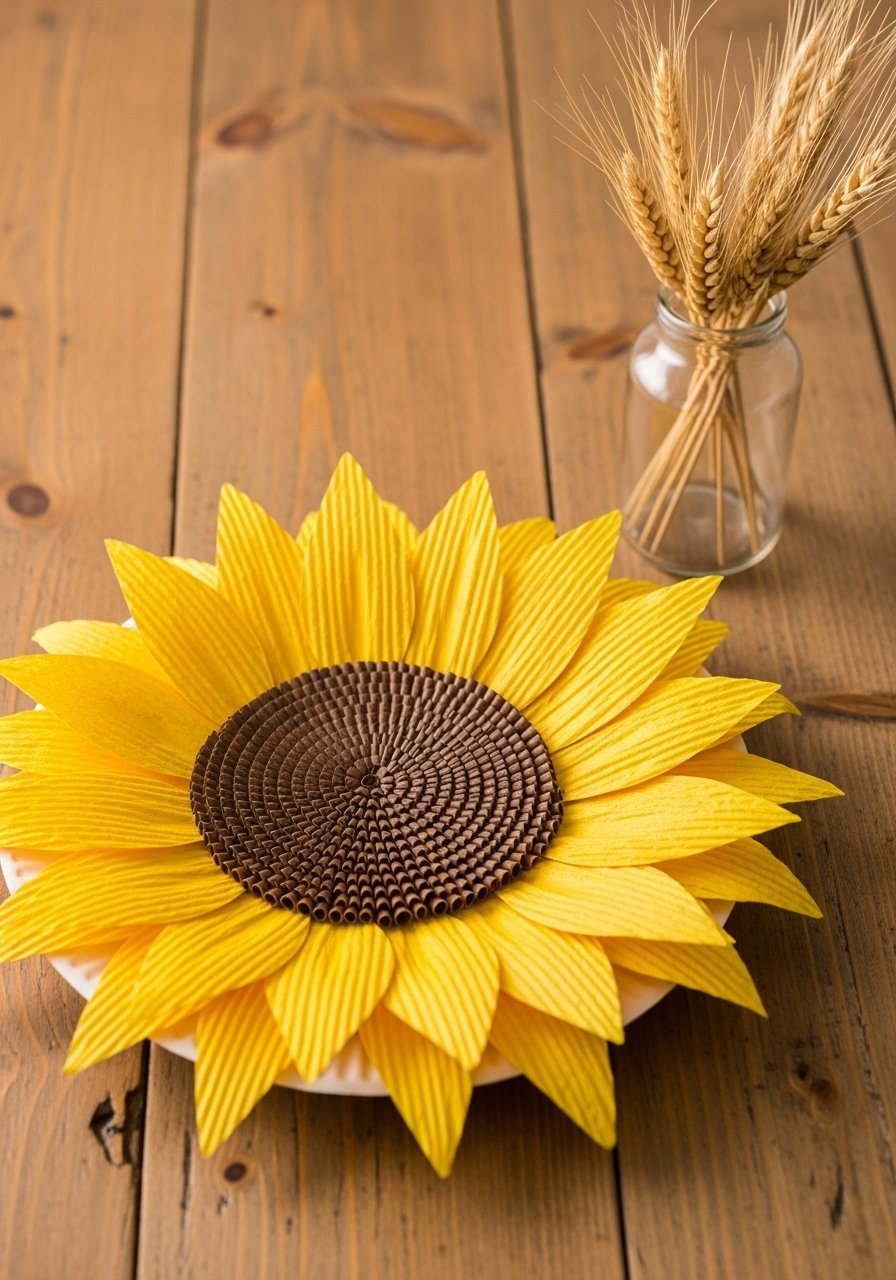
These sunflower crafts have a farmhouse feel and big texture kids love. Crinkled petals add dimension and are forgiving to assemble.
Materials
- Paper plates, 2
- Yellow crepe paper or tissue, several strips
- Brown construction paper for center
- Glue stick and craft glue
- Scissors and a pencil
- Green cardstock for leaves
Instructions
- Cut one plate into petal shapes around the rim.
- Crinkle yellow crepe strips and glue them behind each petal for volume.
- Cut a brown circle for the center; glue on top.
- Add green leaves cut from cardstock and glue to the back.
- Secure a dowel or straw to the back as a stem if desired.
- Let glue set 20 minutes before displaying.
How to Display or Gift It
- Arrange in a small mason jar for a cheerful centerpiece.
- Store extra crepe paper in a sealed bag to keep it crisp.
- A bundle of wooden skewers can serve as stems when gifting.
22. Mini Storybook Flip Book (creative paper craft ideas for kids)
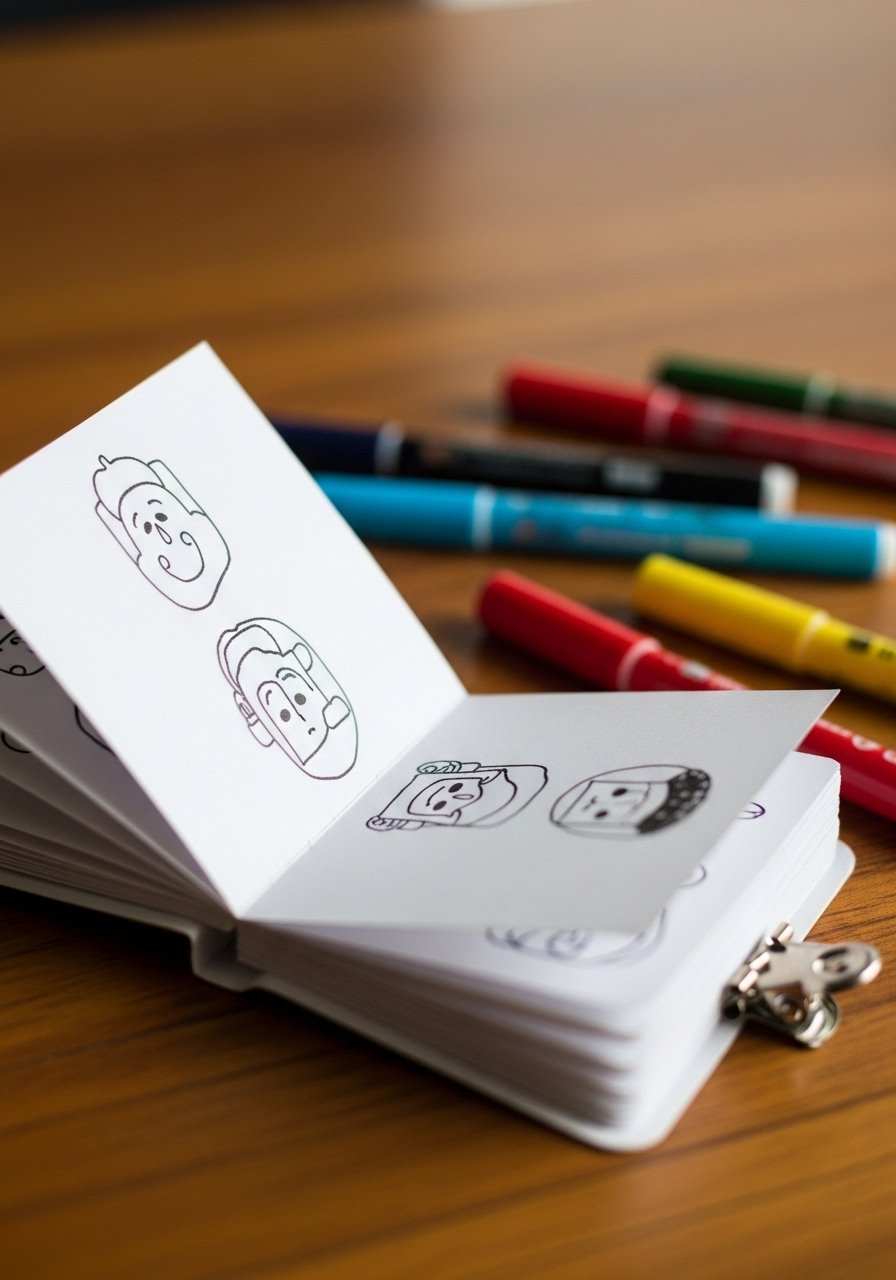
Flip books teach sequencing and narrative basics. Kids draw simple frames, staple them, and enjoy animated motion when flipping pages.
Materials
- Printer paper, 10 sheets per book (cut to 3 x 5 inches)
- Stapler or binder clip
- Pencil and markers
- Ruler and eraser
- Optional: small washi tape for reinforcement
Instructions
- Stack 10 small sheets and staple them along the short edge.
- Draw the first and last frame lightly to plan motion.
- Fill each page with incremental motion—small changes per page create the animation.
- Test by flipping; adjust drawings as needed.
- Reinforce the spine with washi tape if pages feel loose.
- Flipbooks are ready to play immediately.
How to Display or Gift It
- Bundle a set of flipbooks for school art swaps.
- Store in a small box to prevent bent corners.
- Pair with a tiny cloth bag for gifting.
Bright paper, a few smart tools, and patient hands are all you need to make these projects sing. From origami bookmarks to pop-up cards and tissue pom-poms, you’ve got options for quiet afternoons, party prep, and thoughtful gifts. Save or pin this list so you can return when you need fresh activities for rainy days, classroom crafts, or birthday favors.
Trust me, picking up a quality hot glue gun with temperature control improved how many of these projects turned out — fewer strings, neater joins, and faster work. Which project will you try first? Share a photo with friends or make a few to give away.


