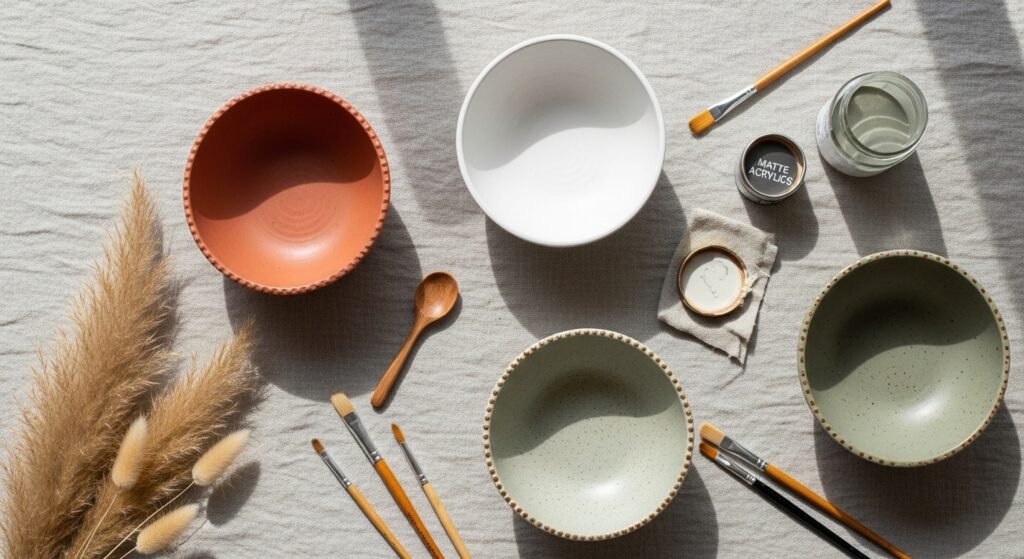
You know that cozy moment when a simple bowl turns into the star of your shelf? These 22 boho ceramic bowl painting ideas bring that same quiet, textured charm to life—perfect for rustic shelves, coffee tables, or thoughtful handmade gifts. Whether you love matte terracotta, speckled glazes, or tactile, carved sgraffito lines, you’ll find projects here that feel handmade and modern-boutique at once.
I’ll walk you through every project with exact materials, measurements, drying times, and troubleshooting tips. Expect textured finishes like speckle, crackle, and salt-reactive washes plus techniques like resist, gold-leaf rims, and mica highlights. Keep a set of quality brushes and a foam roller on hand—my go-to is a 2-inch flat foam brush set for smooth base coats and an even finish.
Grab a cup of tea and your favorite ceramic bowl (new or thrifted). These boho ceramic bowl painting ideas are designed so you can mix, match, and make a shelf full of earthy, textured bowls in a weekend.
- Terracotta Speckle Bowl — a classic boho ceramic bowl painting ideas starter

This terracotta speckle technique gives that lived-in boho look with minimal fuss. It’s tactile, rustic, and perfect for breakfast fruit or display. The speckle comes from thinning acrylic paint and flicking with a stiff-bristled brush for random, organic dots. Beginners will love how forgiving the pattern is; you can layer speckles for depth.
Materials
- 1 unglazed terracotta bowl (6–8" diameter)
- Acrylic craft paint in burnt sienna (30 ml)
- Acrylic craft paint in ivory (30 ml)
- Stiff toothbrush or paint splatter brush
- 2-inch flat foam brush
- Fine-grit sandpaper (220 grit)
- Clear matte sealer spray, 2 coats
- Protective gloves
Instructions
- Sand the outside of the bowl lightly with 220 grit to remove dust and help paint adhesion. Wipe with a damp cloth.
- Stir 1 tablespoon burnt sienna paint with 1 tablespoon water to thin (for base coat).
- Use the 2-inch foam brush to apply an even base coat to the exterior. Let dry 30–45 minutes, then add a second thin coat if coverage is patchy.
- Mix 1 teaspoon ivory paint with 2 teaspoons water for speckle. Load a stiff toothbrush or splatter brush.
- Hold the brush over the bowl and pull the bristles with your thumb to flick paint. Work in short bursts and build up speckles gradually.
- For darker speckles, repeat with a 1:1 mix of burnt umber paint and water.
- Let dry 1–2 hours until firm to the touch.
- Seal with 2 light coats of clear matte sealer, allowing 15 minutes between sprays and 24 hours cure.
How to Display or Gift It
- Pair with dried lavender and a linen napkin for a rustic hostess gift.
- Display on open shelving with other terracotta pieces.
- Store bowls in a stackable craft organizer while sealer cures, like a plastic craft drawer.
- Matte White Clay Bowl with Carved Sgraffito Lines

Sgraffito is carving through a colored layer to reveal the clay underneath. On a ceramic bowl, it creates graphic boho textures that feel handcrafted. This is great if you like tactile finishes—you're literally drawing with a tool. Use a rubber carving tool for consistent lines.
Materials
- 1 bisque-fired white ceramic bowl (6–8")
- Underglaze in warm gray (30 ml)
- Rubber loop carving tool set
- Fine pointed stylus
- Soft dust brush
- Clear glossy food-safe ceramic glaze (single coat)
- Small sponge and water
Instructions
- Clean the bisque bowl and wipe it dry.
- Apply 1 even coat of warm gray underglaze with a foam brush. Let dry 20–30 minutes.
- Lightly dampen the surface with a sponge so carving is smooth.
- Use a rubber loop tool to carve horizontal sgraffito lines—apply even pressure for consistent depth.
- Brush away dust with a soft dusting brush and rinse lightly if needed.
- Fire according to the underglaze manufacturer’s instructions (typically cone 06–04 for low-fire). If you don't have a kiln, use a pre-glazed bowl and skip firing—carve into undercoat paint instead for decorative only.
- Once fired/glazed, apply a thin final coat of clear food-safe glaze if the piece will be used for food.
- Allow glaze to cure per instructions—usually 24 hours cooling.
How to Display or Gift It
- Showcase on a wooden pedestal or small easel for a gallery feel.
- Wrap in kraft tissue and ribbon for a boutique gift.
- For storage between steps, keep in a covered craft box to avoid dust.
- Speckled White-on-Terracotta Rim Bowl

The contrast of terracotta and a crisp speckled rim reads boho-minimalist. This technique uses painter's tape to protect the base and create a clean edge—perfect when you want a neat band but still handcrafted texture. Painter’s tape keeps lines crisp.
Materials
- 1 terracotta bowl (6–9")
- Painter’s tape (1/2" width)
- Acrylic white paint (50 ml)
- Ivory speckle mix (1 tsp paint + 2 tsp water)
- Small angled detail brush
- Foam roller for base smoothness
- Clear matte spray sealer
Instructions
- Clean and dry bowl. Sand rim lightly.
- Apply painter’s tape around the bowl to mark off the rim band (leave 1/2–1" exposed).
- Roll a thin coat of white acrylic along the exposed rim with a foam roller. Dry 30 minutes.
- Thin ivory paint for speckle and flick with a toothbrush to add speckling over the white band.
- Remove tape carefully once paint is tacky but not fully dry (about 10–15 minutes) for clean edges.
- Touch up any bleeds with an angled brush if necessary.
- Let dry 1 hour then seal with matte sealer—2 light coats, 15 minutes apart.
- Fully cure 24 hours before use.
How to Display or Gift It
- Stack with a coordinating napkin set and tuck a handwritten tag under the rim.
- Use as a fruit bowl on a wooden table to show off the terracotta warmth.
- Salt-Textured Ashen Bowl

Salt texture gives unpredictable, cratered finishes that scream boho pottery. It reacts with diluted paints to create pitting and variation—great if you like organic surfaces that feel like studio ceramics. Use coarse sea salt for the best effect.
Materials
- 1 ceramic bowl (bisque or pre-primed) 6–8"
- Acrylic craft paint, diluted (50 ml)
- Coarse sea salt (2 tablespoons)
- Soft sponge
- 1-inch flat brush
- Clear satin sealer spray
Instructions
- Apply a thin base coat of thinned acrylic paint (mix 1 part paint to 2 parts water).
- While still wet, sprinkle coarse sea salt over areas where you want texture.
- Let paint dry fully 2–3 hours (salt will stick and create pits).
- Gently brush off salt and dab residue with a damp sponge.
- If desired, highlight craters with a glaze wash: 1 tsp darker paint + 2 tsp water applied then wiped away.
- Allow 1 hour to dry.
- Seal with 2 coats of clear satin sealer, 15 minutes apart. Cure 24 hours.
How to Display or Gift It
- Fill with assorted dried citrus slices for seasonal display.
- Bundle with a small jar of sea salt and a handwritten note for a thoughtful hostess gift.
- Japandi-Inspired Neutral Lines — boho ceramic bowl painting ideas for calm spaces

This Japandi-leaning pattern blends Japanese minimalism and Scandinavian warmth. Thin, hand-painted lines give a refined boho feel. A fine liner paint pen makes steady strokes simpler—perfect for steady, clean lines without a ruler.
Materials
- 1 matte bisque bowl (7")
- Black paint pen (0.7 mm tip)
- Beige acrylic paint (20 ml)
- Fine liner brush (size 0)
- Ruler or washi tape for guide (optional)
- Clear matte sealer spray
Instructions
- Wipe the bowl surface clean.
- Practice line spacing on scrap paper. Mark faint pencil guides on the bowl if you want exact spacing.
- Use a fine liner brush for beige lines and let dry 20 minutes.
- Go over selected lines with the black paint pen for contrast.
- For imperfect, handcrafted lines, vary pressure slightly to add character.
- Allow full cure 1–2 hours.
- Spray with clear matte sealer, two coats, 15 minutes apart.
- Let cure 24 hours.
How to Display or Gift It
- Pair with neutral woven placemats for a serene tabletop.
- Wrap in tissue and tuck an origami note inside as a simple gift.
- Gold-Leaf Rim Boho Bowl
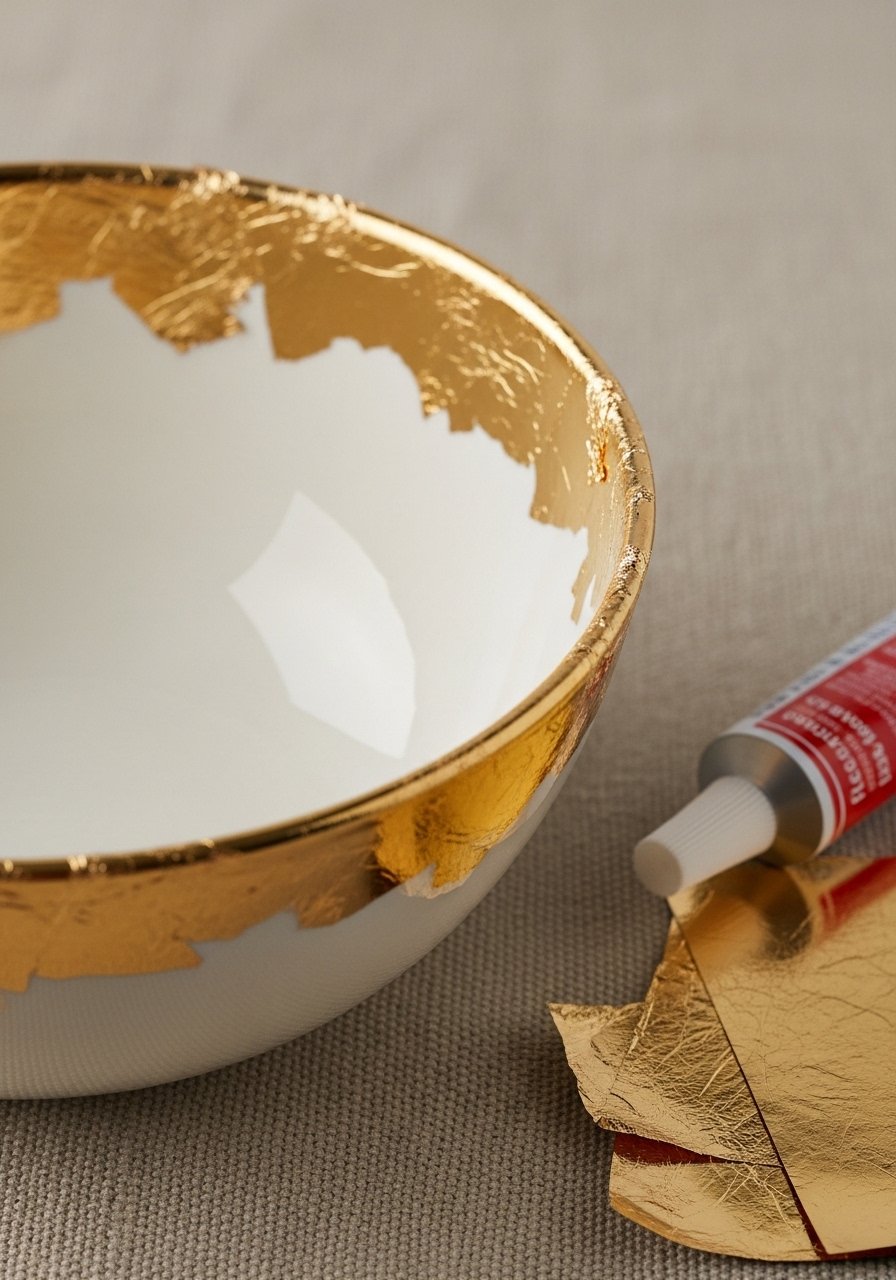
A thin gold rim elevates a raw, earthy bowl into a refined boho accent. Use gold leaf size adhesive and 23K imitation gold leaf sheets. It’s surprisingly easy—apply adhesive, press leaf, and seal. Works best on a smooth painted or primed rim.
Materials
- 1 matte ceramic bowl (any color)
- Gold leaf sheets (imitation or real)
- Gold leaf adhesive size (1 oz)
- Small soft brush for pressing leaf
- Clear water-based sealer
- Masking tape to protect areas
Instructions
- Paint or prime the rim if needed and let it cure 1–2 hours.
- Mask off the rest of the bowl.
- Apply a thin coat of gold leaf size adhesive and wait until it feels tacky (about 10–15 minutes).
- Lay gold leaf sheets over the tacky area and press gently with a soft brush.
- Remove excess with a dry, soft brush.
- Seal with a thin coat of water-based sealer to protect the leaf.
- Allow sealer to cure 24 hours.
How to Display or Gift It
- Display on a floating shelf with a small LED candle inside for shimmer.
- Pack in a small craft box with tissue and a satin ribbon for gifting.
- Textured Rope-Wrapped Exterior Bowl

Wrapping a bowl’s exterior in rope adds instant boho texture and tactile interest. Use hot glue to secure the rope—work in small sections for neatness. This is best for decorative bowls rather than food use.
Materials
- 1 unpainted ceramic bowl (8")
- Natural jute twine (3mm, 10 yards)
- Hot glue gun and glue sticks
- Scissors
- Clear matte fabric sealant spray
- Small wooden beads (optional)
Instructions
- Clean the bowl and mark where the rope will start (usually at the base).
- Heat your hot glue gun.
- Apply glue in 2–3" sections and press rope into the glue, wrapping tightly.
- Continue wrapping up to desired height, trimming rope and securing tail with glue.
- Add a small jute bow or wooden beads to the tie area for decoration.
- Spray fabric sealant over rope to reduce fraying. Let dry 1–2 hours.
- Avoid putting food directly against rope-wrapped areas.
How to Display or Gift It
- Use as a planter liner or for dry items like keys.
- Wrap in kraft paper and add a handwritten tag for gifting.
- Mica-Powder Highlighted Rim Bowl

Mica powders add pearlescent shimmer without being flashy—perfect for boho bowls that catch light. Mix mica with a clear glaze or sealer for controlled application. The effect is soft and luxe.
Materials
- 1 white ceramic bowl (6–8")
- Mica powder (pearl or gold, 1–2 grams)
- Small spatula and mixing dish
- Clear gloss medium or sealer (15 ml)
- Soft makeup brush for application
- Gloves
Instructions
- Mix 1/4 teaspoon mica powder with 1 teaspoon clear gloss medium.
- Use a soft brush to apply the mixture along the rim and any textured areas.
- Buff gently after 2–3 minutes to soften edges.
- Add a second layer for stronger shimmer, drying 20 minutes between layers.
- Seal with a final thin coat of clear gloss for durability. Cure 24 hours.
How to Display or Gift It
- Pair with soft linen napkins and a matching tray for gifting.
- Keep finished pieces in a stackable craft organizer until the sealer fully cures.
- Layered Ombré Clay Bowl

Ombré bowls bring subtle color transitions into boho palettes. This technique uses thin layers of paint, blended with a damp sponge or brayer for soft gradients. Drying time between layers keeps pigments from muddying.
Materials
- 1 bisque bowl (7")
- Three acrylic paints in terrace, blush, and cream (20 ml each)
- Small foam sponge and 2-inch foam brush
- Palette for mixing
- Clear satin sealer
Instructions
- Prepare three thinned paints (1 part paint to 1 part water).
- Start with the darkest color at the base and dab with sponge upward.
- Blend where colors meet using a damp sponge to soften edges.
- Let each layer dry 20–30 minutes before adding the next.
- Repeat until desired depth is achieved (2–3 layers).
- Seal with 2 coats satin sealer, 15 minutes apart.
- Fully cure 24 hours.
How to Display or Gift It
- Use as a decorative bowl on a console table or for dried botanicals.
- Nest smaller bowls for a coordinated gift set.
- Lace-Imprint Textured Bowl

Pressing lace into a wet paint layer creates delicate, boho textures reminiscent of vintage textiles. This works well on matte paint bases and gives a soft, tactile finish.
Materials
- 1 ceramic bowl (6–8")
- Matte acrylic paint (cream, 30 ml)
- Piece of lace fabric (6" square)
- Small brayer roller
- Damp cloth
- Clear matte sealer
Instructions
- Apply a thin coat of matte paint to the bowl and keep it tacky.
- Stretch lace over the painted area and press with a brayer for even contact.
- Leave lace in place until paint is dry to the touch 30–45 minutes.
- Peel away lace carefully to reveal imprint.
- Fill any gaps with a tiny brush.
- Seal with matte sealer, two coats, 15 minutes apart. Cure 24 hours.
How to Display or Gift It
- Pair with vintage linens for a nostalgic gift.
- Store in a padded craft box to prevent imprint damage if stacking.
- Salt-and-Pepper Speckle with Burnished Edge

This dense speckle pattern mimics studio ceramics and gives a playful boho vibe. Burnishing the rim with sandpaper after painting reveals subtle warmth beneath and softens the look.
Materials
- 1 ceramic bowl (7")
- Black and white acrylic paint (10 ml each)
- Stiff brush or toothbrush for speckle
- Fine sandpaper (320 grit)
- Soft cloth
- Clear satin sealer
Instructions
- Apply a light mid-tone base coat and let dry 30 minutes.
- Thin black paint (1:2 paint to water) and flick with toothbrush for heavy speckle.
- Repeat with white speckle to add dimension.
- Once dry, lightly sand the rim for a burnished look.
- Wipe clean and apply 2 coats satin sealer, 15 minutes apart.
- Cure 24 hours.
How to Display or Gift It
- Display with other speckled ceramics for coordinated shelves.
- Wrap in tissue and place in a shallow box for gifting.
- Feathered Brushstroke Bowl — boho ceramic bowl painting ideas with painterly flair

Brushy, painterly strokes are expressive and fit boho sensibilities. Use a wide brush and fluid paint to create visible, textured strokes that feel handmade. Great for confident, loose crafters.
Materials
- 1 ceramic bowl, pre-primed (7")
- Acrylic fluid medium (10 ml)
- Ochre and sage acrylic paints (20 ml each)
- Wide flat brush (1-inch)
- Palette knife for mixing
- Clear matte sealer
Instructions
- Thin paints with a drop of acrylic fluid medium to improve flow.
- Load the wide flat brush and stroke from rim inward, letting strokes overlap.
- Work quickly so strokes remain visible; blend minimally.
- Allow to dry 30–45 minutes.
- Add a second layer for depth if needed.
- Seal with matte sealer, 2 coats. Cure 24 hours.
How to Display or Gift It
- Use as a statement fruit bowl or decorative piece.
- Tie with a ribbon and include a small paintbrush as a playful gift tag.
- Minimal Dot Pattern Bowl

Tiny dots create a simple, rhythmic boho pattern. Use a dotting tool or the end of a paintbrush for consistent dots. This is low-effort but high-impact.
Materials
- 1 ceramic bowl (6–8")
- Navy acrylic paint (20 ml)
- Dotting tool or skewer
- Pencil for faint guides
- Paper towel
- Satin sealer spray
Instructions
- Lightly mark dot positions with a pencil.
- Dip dotting tool in paint and press gently to make dots.
- Work slowly for even spacing.
- Allow dots to dry 20–30 minutes.
- Apply a second coat to dots if they look thin.
- Seal with satin sealer, 2 coats and 24-hour cure.
How to Display or Gift It
- Stack with matching dot mugs for a set gift.
- Store finished pieces in a padded craft drawer until cured.
- Monoprint Botanicals on Clay Bowl
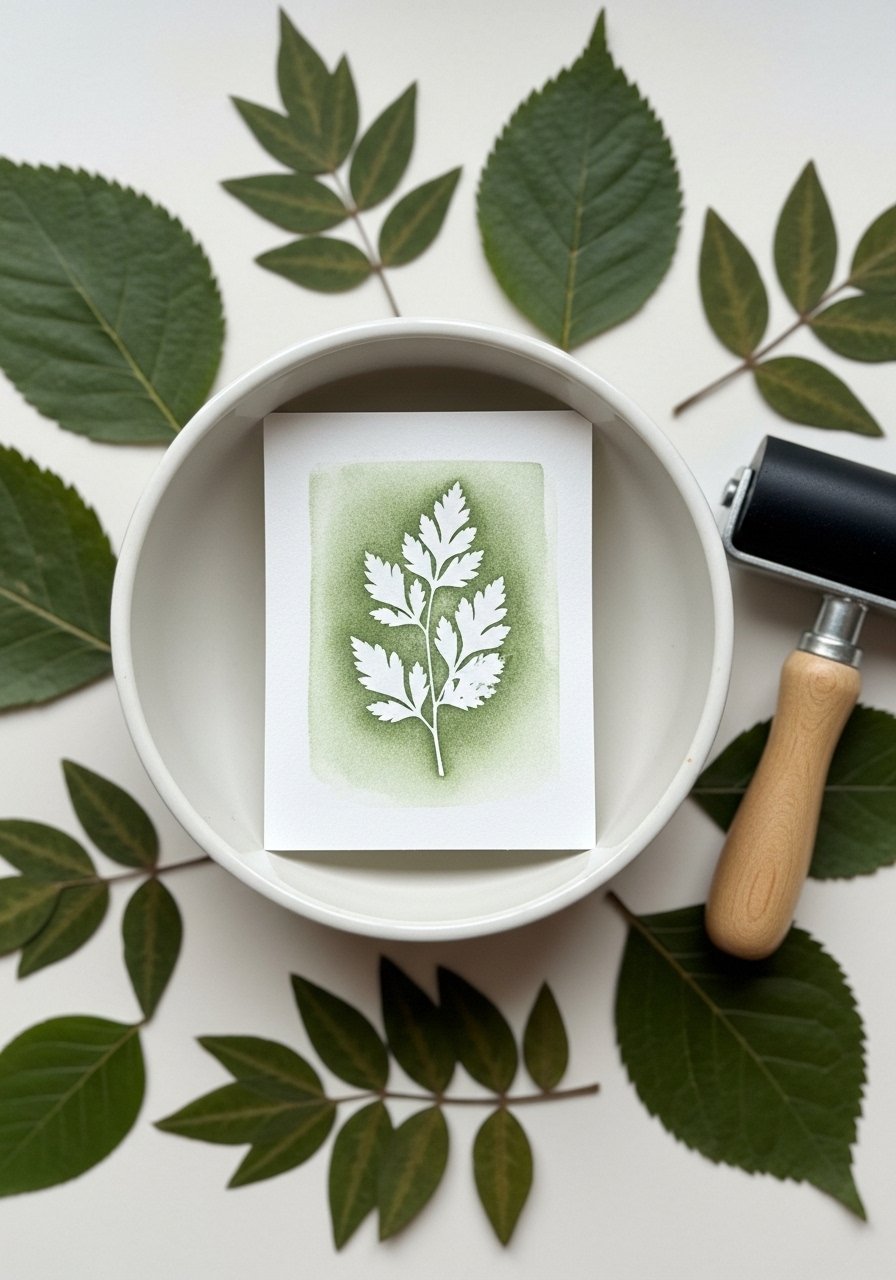
Monoprinting uses real leaves and a brayer to transfer botanical silhouettes. It gives a delicate natural pattern perfect for cottagecore boho styles.
Materials
- 1 shallow ceramic bowl (7")
- Soft green acrylic paint (20 ml)
- Small brayer roller
- Pressed eucalyptus or fern leaves
- Palette for paint
- Clear matte sealer
Instructions
- Apply a thin paint layer on a palette and roll it out with a brayer.
- Lay a leaf over the painted area and roll again to transfer paint to the leaf’s surface.
- Press the painted leaf against the bowl and rub gently with fingers or a soft cloth.
- Peel leaf to reveal the print.
- Repeat with different leaves for layered effect. Dry 30–45 minutes.
- Seal with matte sealer, two coats, cure 24 hours.
How to Display or Gift It
- Pair with a bouquet of dried eucalyptus for gifting.
- Use as a catchall on an entryway table.
- Resist Wax Pattern Bowl
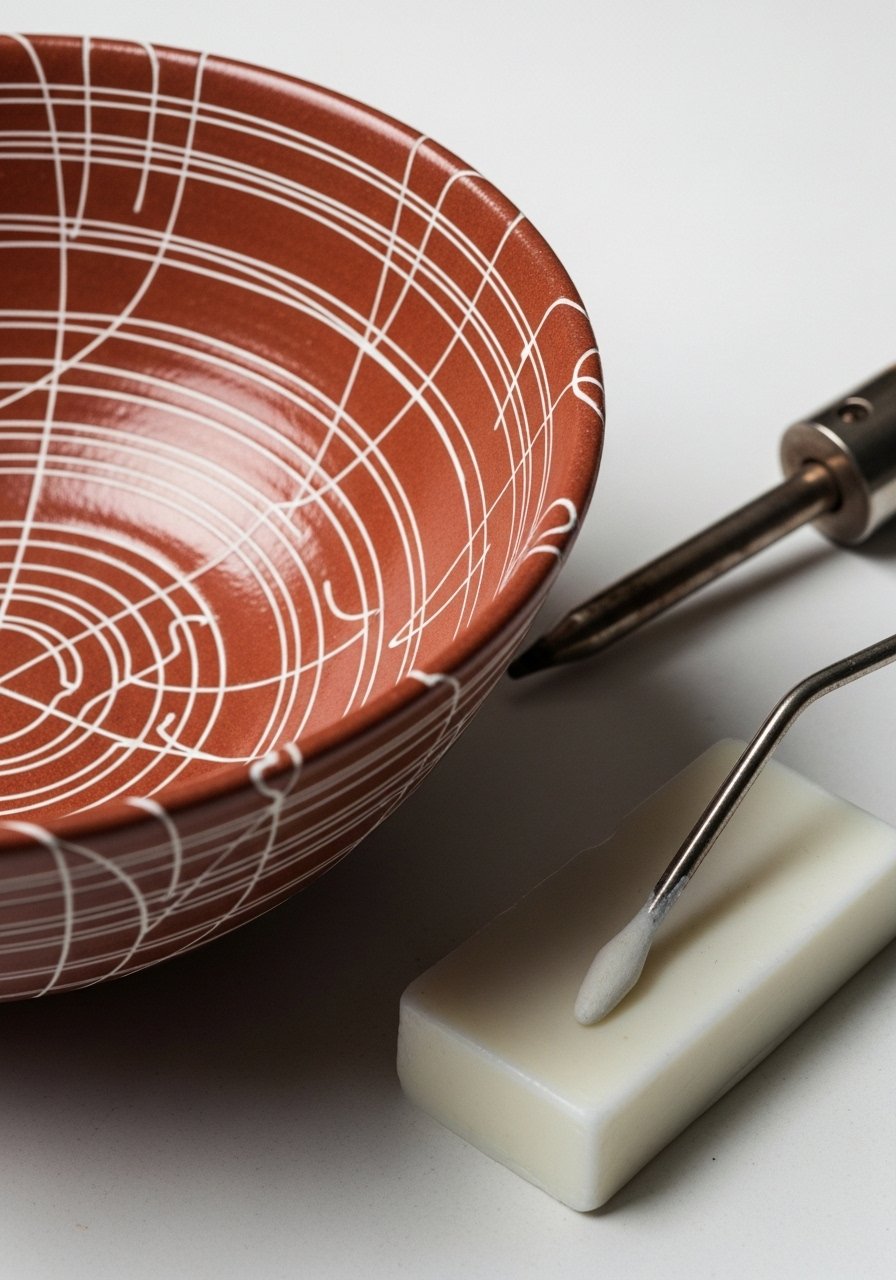
Wax resist lets you paint over it; removing the wax reveals the base color beneath. It produces crisp, handcrafted patterns that fit boho textures. Use a low-heat tool to melt wax if needed.
Materials
- 1 ceramic bowl (6–8")
- Paraffin or artist block wax
- Small soldering iron or heat tool
- Paints for base and overlayer
- Soft cloth to buff
- Clear glaze or sealer
Instructions
- Apply base color and let dry fully 1 hour.
- Draw resist lines with the softened wax.
- Paint over with a contrasting color.
- Once topcoat is dry, gently warm wax lines with a heat tool and wipe away.
- Buff lightly for clean revealed lines.
- Seal with final gloss or matte as desired.
How to Display or Gift It
- Display as a centerpiece with a single dried sprig.
- Wrap in kraft tissue and add a small sample wax block for a ritual gift.
- Marbled Swirl Bowl with Shaving Cream Technique

Shaving cream marbling is surprisingly effective for ceramics. The result is soft, swirling color that reads high-end. It’s low-cost and fun for group craft nights.
Materials
- 1 ceramic bowl (7")
- Shaving cream (single-use bowl)
- Acrylic paints in 2–3 colors (10 ml each)
- Wooden skewer
- Metal spatula to scrape
- Clear gloss sealer
Instructions
- Spray a shallow dish with shaving cream and smooth it into a flat layer.
- Drop small dots of paint into the cream and swirl with a skewer.
- Gently press the bowl’s exterior onto the cream pattern.
- Lift and scrape off excess cream with a spatula.
- Allow to dry 1–2 hours.
- Rinse lightly to remove residue and dry fully.
- Seal with clear gloss to protect the marbling. Cure 24 hours.
How to Display or Gift It
- Make a set in complementary colors for a hostess gift.
- Keep in a shallow craft box until sealer cures.
- Chalky Cottagecore Bowl with Distressed Edges

Chalk paint creates soft, velvety surfaces perfect for cottagecore boho. Distressing reveals layers and adds age. Use fine sandpaper to gently bring out the base clay tone.
Materials
- 1 ceramic bowl (6–8")
- Chalk paint (50 ml)
- Fine sandpaper (220 grit)
- Soft cotton cloth
- Clear wax finish or matte sealer
Instructions
- Apply 1–2 coats of chalk paint, drying 30 minutes between coats.
- Once dry, sand edges lightly for distressing.
- Wipe dust with a cloth.
- Apply clear wax or matte sealer and buff for a soft sheen.
- Let cure 24 hours.
How to Display or Gift It
- Pair with linen napkins and a small bar of soap wrapped in twine for a cozy gift.
- Store in a padded craft drawer if stacking.
- Thumbprint Boho Bowl (Textured Dots)

Thumbprint textures are charmingly imperfect and tactile. Use a glaze or paint and press your thumb consistently for rhythm. Great for making multiples with a handmade signature.
Materials
- 1 ceramic bowl (7")
- Dark glaze or acrylic (30 ml)
- Small sponge for cleaning
- Rubber gloves (optional)
- Clear overglaze if using acrylic
Instructions
- Dip thumb lightly into glaze or paint.
- Press evenly around rim, spacing about 1/2" apart.
- Continue until pattern completes a ring.
- Clean excess with sponge and allow to dry 30–45 minutes.
- Seal as appropriate for the medium (glaze firing or sealer).
- Cure per materials used—24 hours for sealer.
How to Display or Gift It
- Add a small handwritten card with your "maker" thumbprint date.
- Display as part of a handmade ceramics collection.
- Brush-Dabbed Pebble Bowl
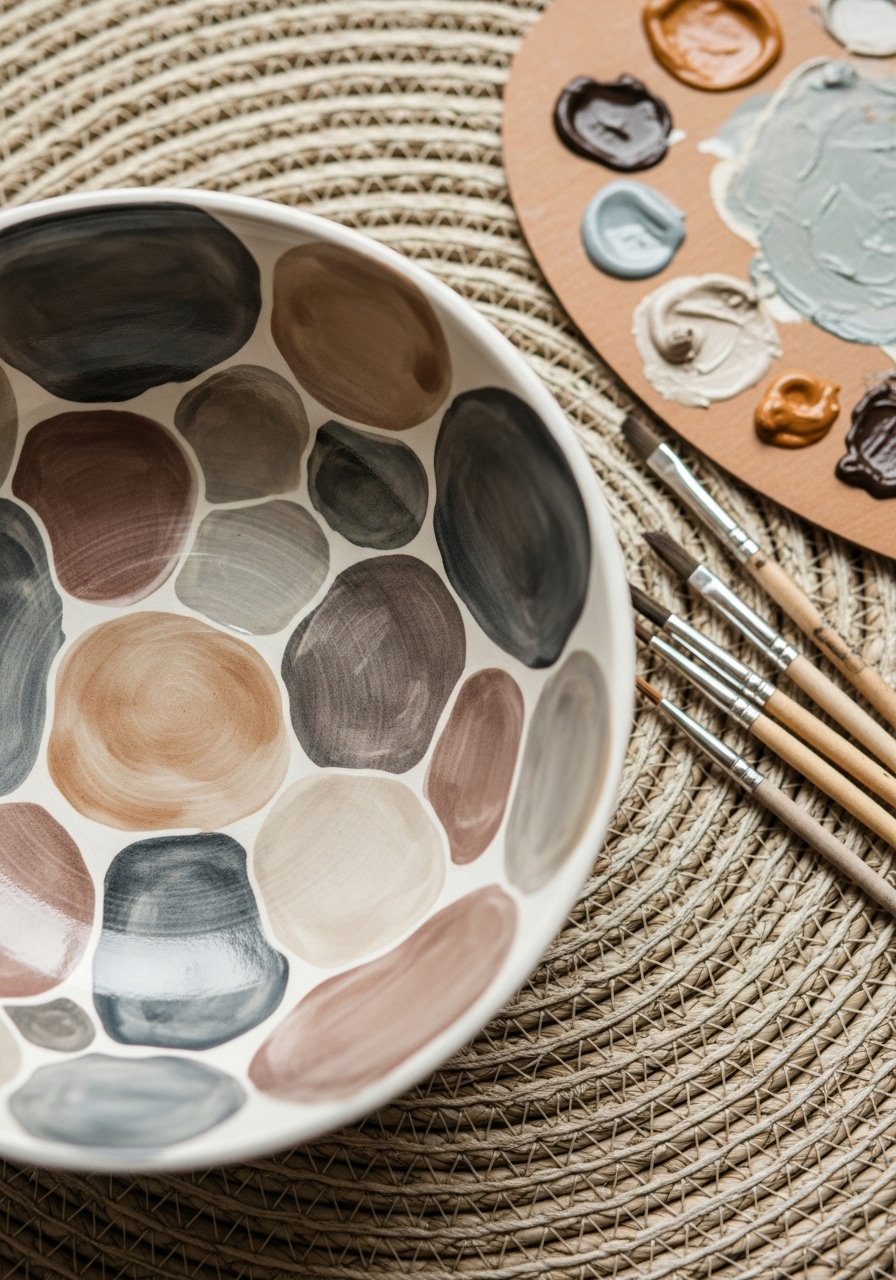
This pebble motif uses brush dabs in layered earth tones to evoke river stones. It’s painterly, forgiving, and very boho-friendly.
Materials
- 1 bowl (7")
- Acrylic paints in 3 earth tones (20 ml each)
- Round brush (size 6)
- Palette for mixing
- Clear matte sealer
Instructions
- Paint pebble shapes by dabbing with the round brush.
- Layer tones for depth—light, medium, dark.
- Allow layers to dry 20 minutes before overlapping.
- Fill gaps until pattern feels balanced.
- Seal with matte sealer, two coats. Cure 24 hours.
How to Display or Gift It
- Nest with solid color bowls for a coordinated set.
- Package in a kraft box and tuck in a small care card.
- Metallic Rim with Patina Wash

Create an aged metal rim by painting metallic paint and washing with a patina mix. The result is warm, rustic, and very boho. Use sparingly for subtle effect.
Materials
- 1 ceramic bowl (7")
- Metallic acrylic paint (gold or bronze, 15 ml)
- Patina wash (mix of green acrylic and water, 1:4)
- Soft brush and cloth
- Clear protective gloss
Instructions
- Paint the rim with metallic paint; let dry 20 minutes.
- Apply a thin patina wash over metallic and wipe back with cloth.
- Repeat to achieve desired age.
- Seal with clear gloss to protect finish.
- Cure 24 hours.
How to Display or Gift It
- Pair with raw linen and dried botanicals for a rustic gift.
- Store in padded dividers if shipping.
- Embossed Bead Detail (Add-On Accent)

Adding small beads creates tactile accents that catch light. Glue beads then paint or stain over them for an integrated look. This is best for decorative bowls.
Materials
- 1 ceramic bowl (7")
- Small wooden or clay beads (20–30)
- E6000 adhesive (5 ml)
- Acrylic paint or stain (20 ml)
- Fine brush for touch-ups
- Clear matte sealer
Instructions
- Plan bead placement and glue each bead with E6000. Let adhesive set 24 hours.
- Paint over beads and bowl for a unified color.
- Allow paint to dry 1 hour between coats.
- Seal with matte sealer, 2 coats. Cure 24 hours.
- Avoid washing beads directly with water if adhesive is solvent-based.
How to Display or Gift It
- Use as jewelry or trinket bowl on a dresser.
- Include care notes for adhesive longevity.
- Resin-Filled Inlay Bowl Accent
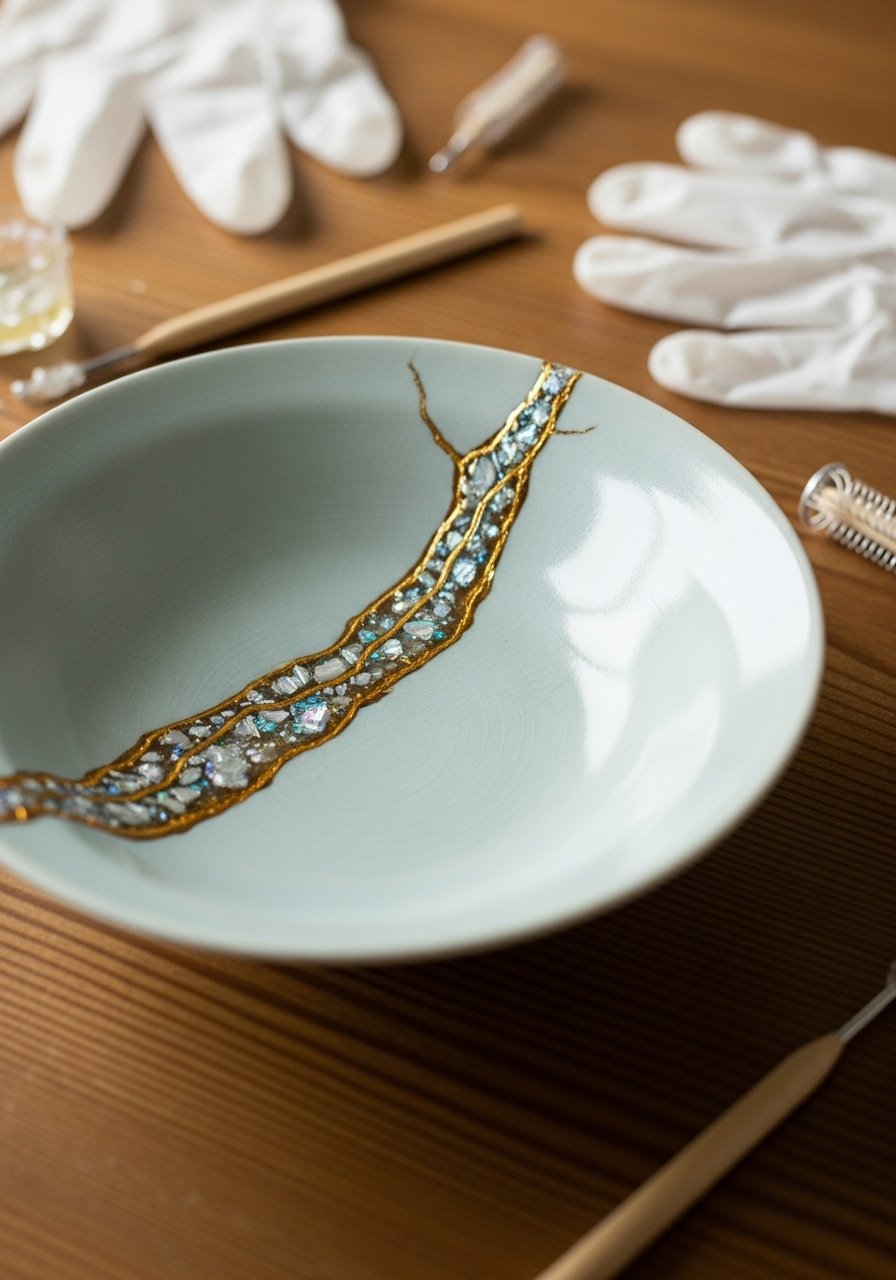
For a luxe boho touch, fill shallow carved lines with resin and mica. It creates durable, glossy accents that contrast matte finishes. Use a clear epoxy resin and follow safety guidelines.
Materials
- 1 ceramic bowl (6–8")
- 2-part epoxy resin kit (small, 25 ml)
- Mica flakes or pigment (tiny pinch)
- Small mixing cups and stir sticks
- Masking tape and toothpick for inlay
- Nitrile gloves and a well-ventilated workspace
Instructions
- Carve a shallow channel in the bowl exterior (or use existing crack).
- Tape edges to prevent overflow.
- Mix a 2:1 ratio of resin according to kit instructions and add mica flakes.
- Pour carefully into the channel, using a toothpick to guide.
- Pop air bubbles with a small heat gun (5–10 seconds).
- Let cure 12–24 hours per resin instructions.
- Sand any raised edges with fine sandpaper and buff.
- Clean and display.
How to Display or Gift It
- Gift as a statement piece—wrap in padded box.
- Note resin cure instructions and care for recipient.
Your creative shelf just leveled up with 22 earthy, textured, boho ceramic bowl painting ideas you can actually make at home. From speckle and sgraffito to metallic rims and resin inlays, these projects cover beginner-friendly techniques and a few more advanced finishes so you can grow your skills. Save this collection to your crafts board, try one this weekend, and tag a friend who’d love a handmade bowl for their kitchen.
If you’re stocking a craft kit, pick up a reliable hot glue gun with temperature control—I use mine for gluing rope and beads and it’s improved every project’s finish. Keep experimenting with textures; that natural, imperfect look is what makes the boho pieces feel personal and warm.
Which bowl are you trying first? Share your progress and swap tips—I'd love to see your finished shelves.
Trust me, picking up a quality hot glue gun with temperature control changed how every single one of these projects turned out — no more stringy mess, no more burns.





