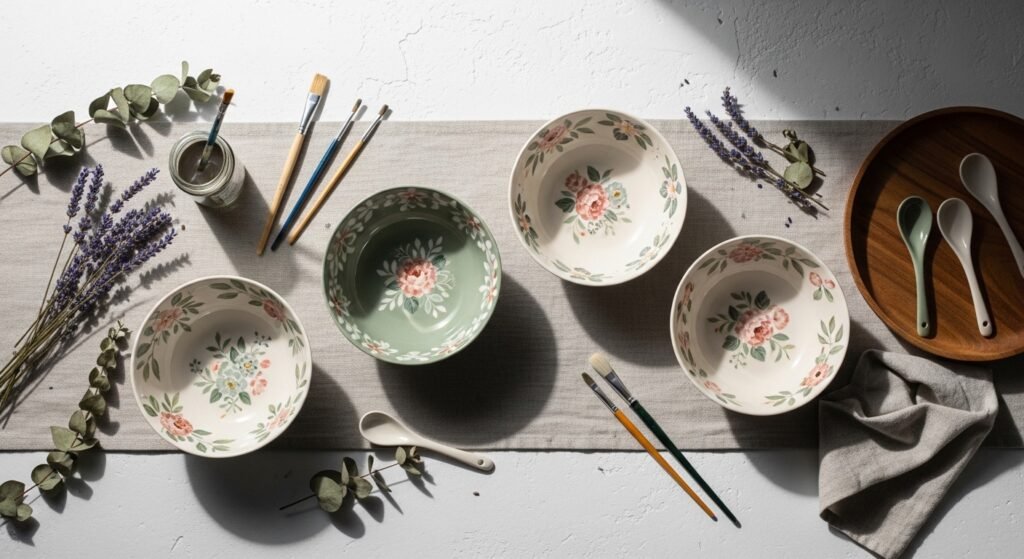
If you love delicate hand-painted decor, these floral ceramic bowl painting ideas are perfect for adding a soft, handmade touch to your kitchen or gifting to a friend. Picture Sunday mornings with a stack of bowls in calming cottagecore hues, or a modern japandi set with tiny minimalist blossoms—there’s a style here for every aesthetic and skill level.
You’ll find 22 complete projects below, each with a clear materials list, step-by-step instructions, drying times, troubleshooting tips, and styling or gifting suggestions. I like to keep a small set of fine round brushes and a pack of Posca-style paint pens on hand for detail work—grab a set of fine detail brushes to make petals and stems neat and easy. Each project also suggests one helpful tool or product so you can shop as you go.
Ready to paint? Keep a damp cloth nearby, protect your workspace with craft paper, and let’s get into 22 fresh, delicate floral ceramic bowl painting ideas that are truly eye catching.
- Tiny Meadow Dot Bowls
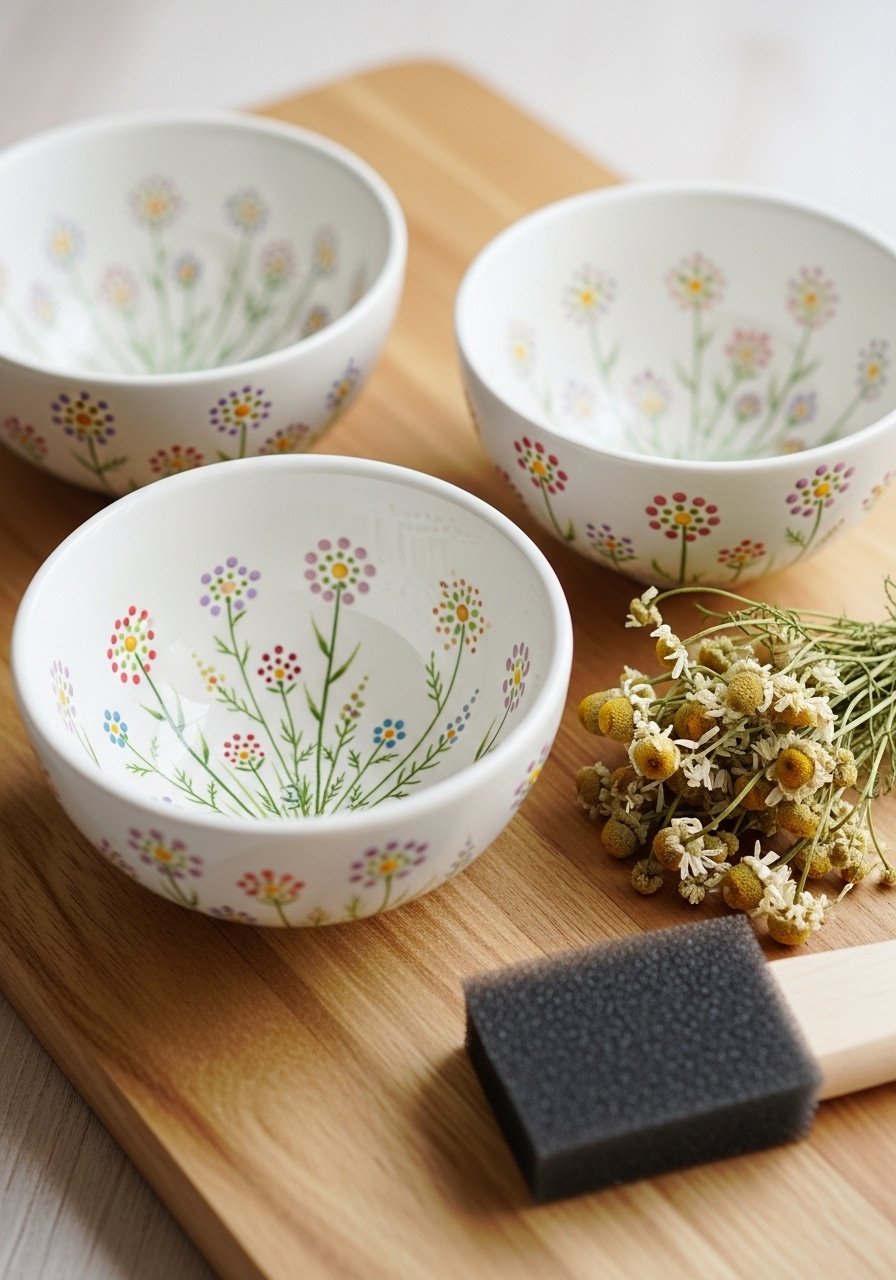
These sweet bowls feature tiny dot clusters that read as wildflowers from a distance. The texture is soft and matte, perfect for cottagecore or farmhouse displays. Beginners and kids will love the dotting process—it's forgiving and relaxing. Use a round-tipped paint pen for consistent dots.
Materials
- 3 plain white ceramic bowls, 12 oz each
- Acrylic ceramic paint in sage, dusty rose, mustard, white, black
- Fine-point paint pen (0.7–1.0 mm) for dots
- Round detail paint brush size 0 (optional)
- Foam brush for base cleaning
- Paper towels and rubbing alcohol
- Oven (for heat-setting) or air-dry sealer
Instructions
- Wash bowls with warm soapy water; dry thoroughly. Wipe inside rim with rubbing alcohol.
- Plan your dot clusters—visualize small 3–6 dot flowers spaced irregularly.
- Use the fine-point paint pen to place a center dot (3–4 mm). Add 5–6 surrounding dots with a slightly different color.
- Vary cluster sizes: some clusters should be 6–10 mm across. Leave negative space for a delicate look.
- Allow paint to dry 30–60 minutes between colors.
- If using acrylic ceramic paint, bake according to paint directions (commonly 30 minutes at 300°F then cool) or let cure 72 hours and seal with a food-safe air-dry sealer.
- Check coverage—dots should be fully opaque; add a second pass if needed and dry again.
How to Display or Gift It
- Stack as a set and tie with natural twine and a sprig of dried chamomile.
- Display on a wooden tray for farmhouse breakfast styling.
- Store unused bowls in a stackable craft organizer to prevent chips.
- For gifting, tuck them in a kraft box with tissue paper and a small wooden spoon.
- Consider a small set of wooden spoons as an add-on.
- Watercolor Wash Floral Bowls

These bowls mimic watercolor paintings using diluted ceramic glazes or thinned acrylics. The blooms are loose and blendy, lending a soft romantic vibe—perfect for brunch or wedding gifts. A synthetic wash brush helps pull pigment into soft edges.
Materials
- 1 shallow ceramic bowl, 8–9 inches diameter
- Acrylic glaze medium or diluted ceramic underglaze (1:1 water:paint)
- Round wash brush 10–14 mm
- Palette and small water jar
- Paper towels and toothpicks
- Soft matte clear ceramic sealer (food-safe if needed)
Instructions
- Clean bowl with rubbing alcohol; let dry.
- Mix glaze: thin paint to a light wash (about cream consistency) on palette.
- Load brush with wash, touch it to the bowl, then tilt bowl slightly to let color bleed.
- Build layers: let each wash dry 15–20 minutes before adding another to deepen centers.
- Use a pointed brush or toothpick to suggest stamens or leaf veins.
- Allow full cure 48–72 hours before sealing. If you use a low-temp oven bake according to glaze instructions, follow packaging.
- Apply 1–2 coats of matte sealer, letting each coat dry 60 minutes.
How to Display or Gift It
- Nest these with linen napkins for a bridal shower gift.
- Set on a shallow wooden bowl stand or easel for a tabletop accent.
- Wrap in tissue paper inside a shallow kraft box and include a drying time note.
- Store flat in a padded craft drawer to avoid scuffs.
- Tiny Gold-Edged Posy Bowls
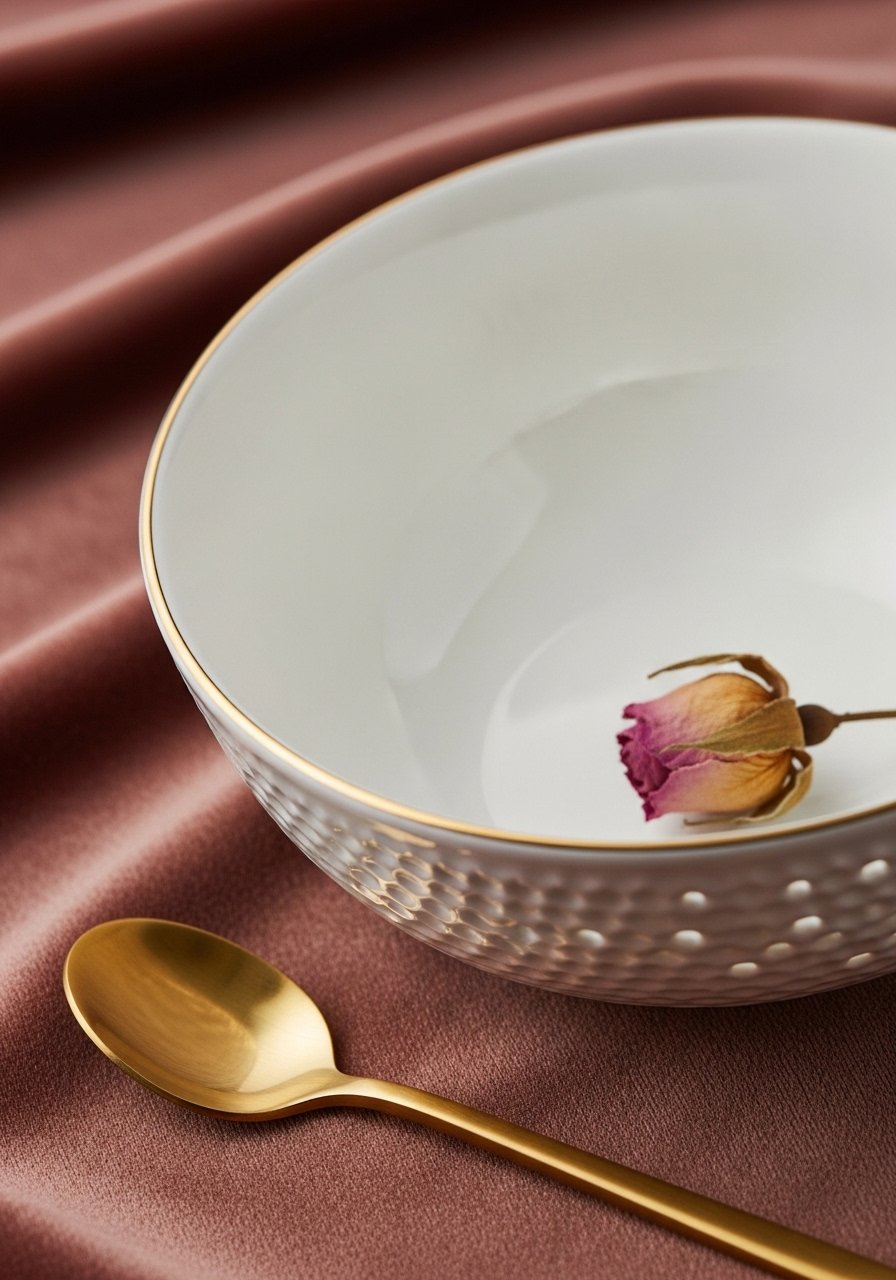
This project mixes delicate florals and a metallic rim for a luxe yet understated look. Fine detail brushes and a metallic paint pen give crisp edges. Ideal for gifts or dressing up shelved dishes.
Materials
- 1 white ceramic bowl, 10 oz
- Fine liner brush size 00
- Gold paint pen (metallic, oil-based)
- Acrylic paints in blush, fern green, cream
- Round stipple brush for tiny flowers
- Painter’s tape for masking rim
- Matte or gloss ceramic sealer
Instructions
- Mask rim with painter’s tape, pressing edge firmly.
- Use a gold paint pen to draw a thin rim line; let dry 10–15 minutes.
- Paint tiny posies with a size 00 brush: center dot, then 5–6 tiny petals using stippling motion.
- Let paint dry 30 minutes; remove tape slowly for a clean edge.
- Add tiny leaf accents with a fine liner brush.
- Cure as paint manufacturer recommends or seal after 48 hours.
- Inspect for tackiness; if tacky, allow longer cure before sealing.
How to Display or Gift It
- Set on a small marble coaster for a luxe tabletop vignette.
- Pack with shredded tissue and a handwritten care card stating "hand wash only."
- Add a small set of metallic paint pens for gifting to a friend who paints.
- Modern Minimalist Single Stem Bowls
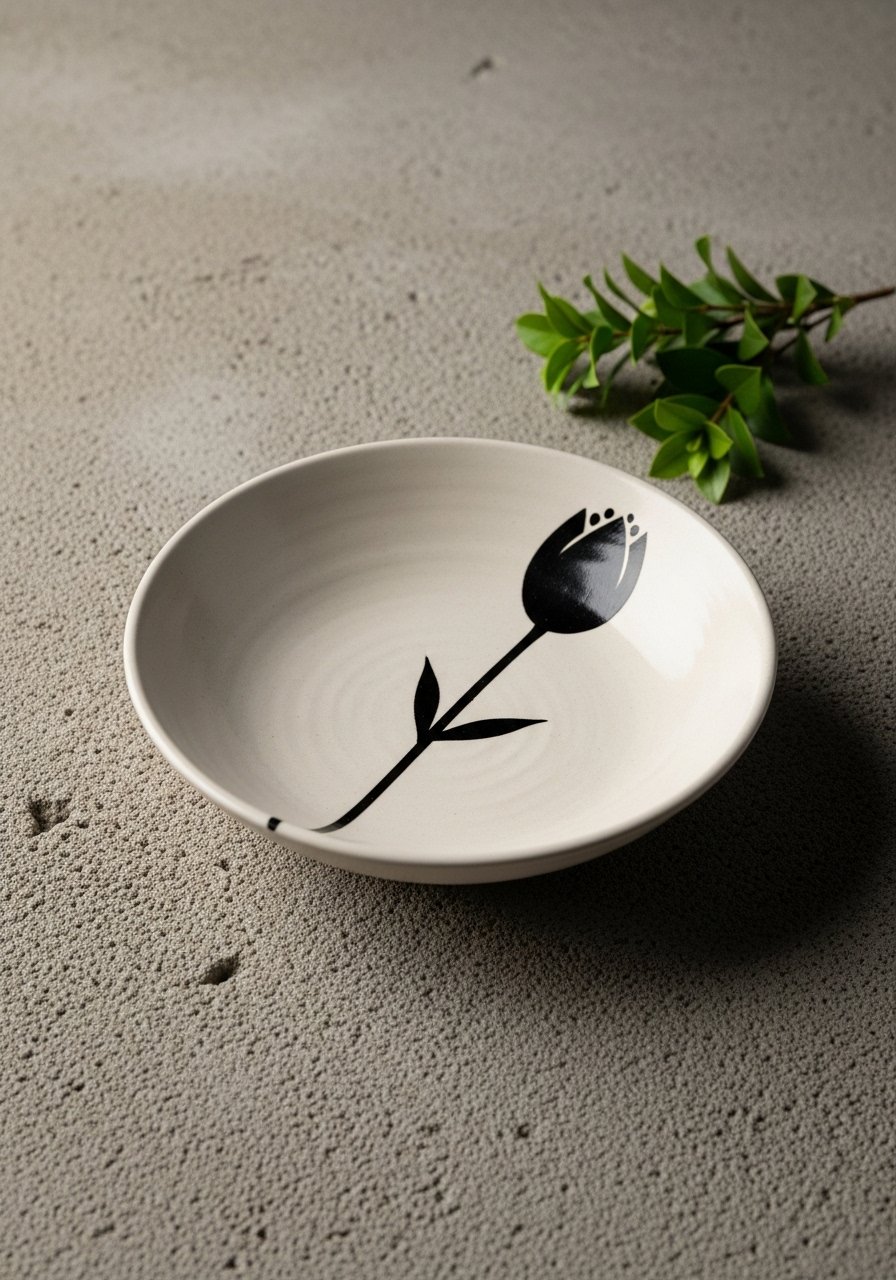
If you like japandi or modern minimal decor, this simple single-stem design is serene and sophisticated. It emphasizes negative space and is great if you prefer crisp brushwork. Use a size 1 round brush and a steady hand.
Materials
- 1 matte white ceramic bowl, 9 inches
- High-quality acrylic in carbon black
- Round brush size 1
- Pencil for light sketching (non-permanent)
- Ruler or bone folder to steady your hand (optional)
- Matte sealer
Instructions
- Sketch a faint stem and bud in pencil. Keep lines organic.
- Dip brush and pull one confident stroke for the stem from rim toward center.
- Paint the bud in one or two strokes—avoid overworking.
- Let paint dry 20–30 minutes; do a second pass if patchy.
- Wipe away any visible pencil marks with a soft eraser (lightly).
- Cure per paint instructions or let dry 48 hours then seal.
- Check for firm-to-touch finish before using.
How to Display or Gift It
- Pair with neutral ceramics for a minimalist shelf display.
- Tuck into a small kraft box with a tag that lists hand-wash care.
- For storage, use stackable drawer inserts to protect edges.
- Vintage Transfer-Inspired Rose Bowl
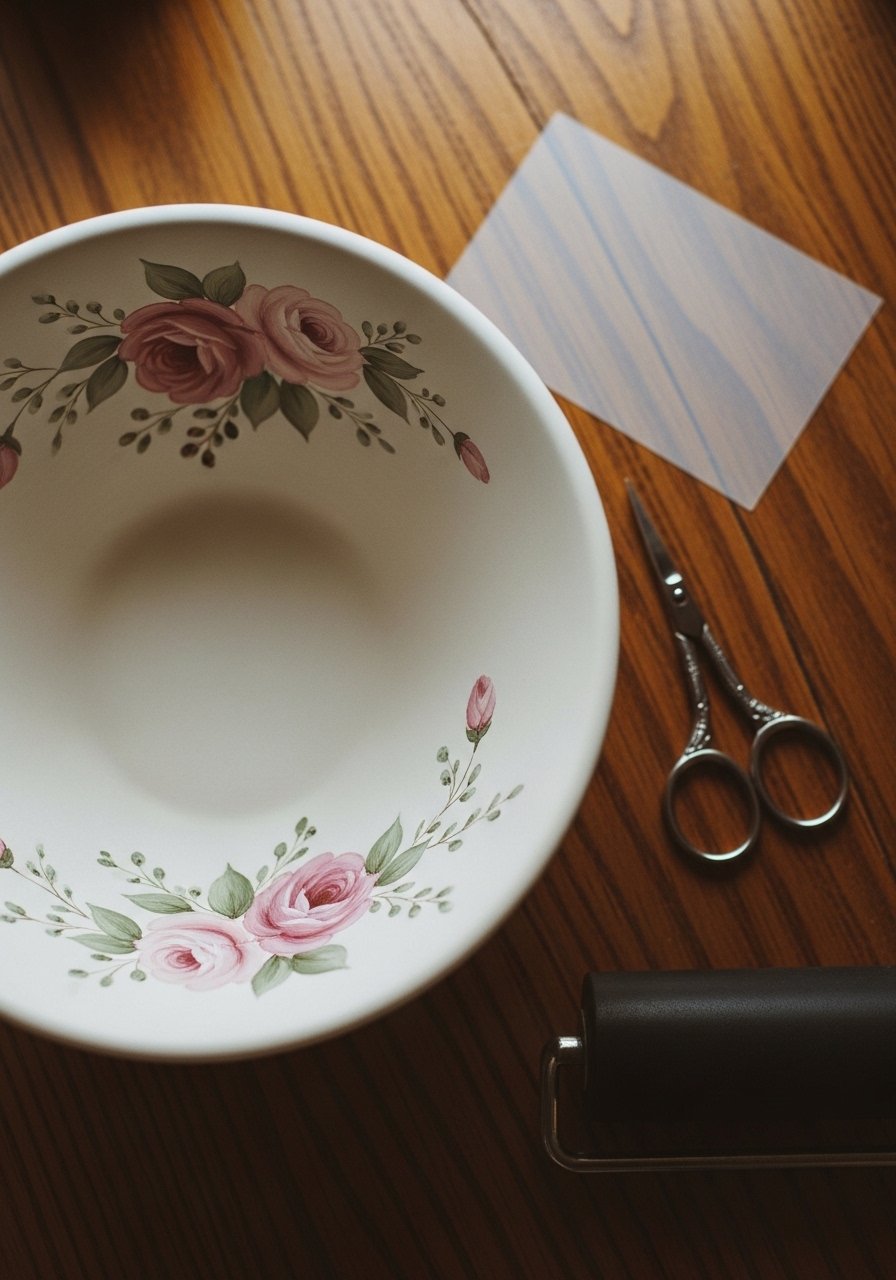
This look mimics vintage ceramic transfers without full decal tools. It uses layered stamp and brushwork to achieve an antique feel. Great for antique-lovers and anyone after a shabby-chic set.
Materials
- 1 white ceramic bowl, 8 inches
- Floral rubber stamp set or foam stamp
- Archival ink pad suitable for ceramics (if using stamps)
- Acrylic paints in muted rose, sage, cream
- Soft brayer or foam roller
- Fine liner brush for detailing
- Matte glaze/sealer
Instructions
- Clean bowl; plan stamp placement lightly in pencil.
- Ink stamp lightly or apply diluted paint to stamp for softer edges.
- Press stamp gently onto bowl, rolling if needed for full contact.
- Use fine liner brush to add highlights and connect motifs.
- Allow 30–60 minutes drying between layers.
- If adding tiny hand-painted dots or veins, let each detail cure 20 minutes.
- Seal with matte glaze after 48–72 hours cure or follow manufacturer directions.
How to Display or Gift It
- Style with vintage linens and an old silver spoon.
- Gift as part of a tea set, wrapped in tissue and tied with lace ribbon.
- Store in a padded craft organizer or padded boxes.
- Petite Botanical Monogram Bowls

Personalized bowls make thoughtful gifts. Floral wreaths around a monogram feel boutique and handmade. Use a fine liner brush for lettering, or trace a printed letter if you’re not confident freehanding.
Materials
- 1 ceramic bowl, 10 oz
- Pencil and printed monogram template
- Fine liner brush size 00
- Acrylic paints: forest green, blush pink, deep indigo
- Water jar and paper towel
- Small paint pen for initials (optional)
- Gloss sealer if desired
Instructions
- Transfer monogram: place printed monogram in bowl and trace lightly.
- Paint the initial with a steady hand using a fine liner brush or paint pen.
- Paint a wreath of tiny leaves and buds around the letter; let dry 20 minutes.
- Touch up any shaky edges with a damp brush.
- Cure per paint instructions or let dry 48 hours before sealing.
- Add a 1–2 mm white highlight to the initial for dimension.
- Seal if you prefer extra durability.
How to Display or Gift It
- Wrap individually in kraft tissue and tie with twine.
- Include a small care card and display on a miniature wooden easel.
- Consider a small set of kraft gift boxes for batch gifting.
- Boho Wildflower Band Bowls

A continuous floral band around the bowl’s exterior creates a cozy boho feel. Use warm earth tones and a small flat brush for petals. This works well as a decorative piece or a fruit bowl.
Materials
- 1 ceramic bowl, 10–12 inches
- Acrylic paints: burnt sienna, ochre, sage, cream
- Small flat brush 1/4 inch
- Round brush for dots
- Masking tape for a clean top/bottom line
- Matte sealer
Instructions
- Tape a guide line around the bowl where the band will sit.
- Paint the background band lightly; let dry 20–30 minutes.
- Add simplified wildflower shapes with flat brush strokes.
- Use round brush to add centers and tiny dots.
- Remove tape after paint is tack-free.
- Allow full cure 48–72 hours then seal.
- Buff lightly with a soft cloth after sealing to remove dust.
How to Display or Gift It
- Pair with woven placemats and neutral linens.
- Bundle with a jar of dried wildflower mix for gifting.
- Store bowls stacked with protective felt discs between them.
- Stenciled Meadow Pattern Bowls

Stencils give crisp, repeatable patterns—great when you want a set to match. Use a stencil brush and stippling motion to prevent paint bleed.
Materials
- Set of 2–4 ceramic bowls, 8–10 oz
- Mylar floral stencil (small motif)
- Stencil brush or foam pouncer
- Painter’s tape to secure stencil
- Acrylic ceramic paint in chosen palette
- Palette and paper towel
- Sealer
Instructions
- Secure stencil to bowl with painter’s tape.
- Load stencil brush with paint; offload excess on paper towel.
- Stipple paint in light layers; build opacity with 2–3 passes.
- Carefully lift stencil and reposition for next repeat.
- Let paint dry 20–30 minutes between layers.
- After final pass, allow 48 hours to cure before sealing.
- Inspect edges: if feathering appears, touch up with a fine liner brush.
How to Display or Gift It
- Create a coordinated set for gifting; nest bowls with tissue.
- Display on open shelving for a cohesive kitchen vignette.
- Keep unused stencils stored in a flat stencil folder.
- Tiny Impression Flower Bowls (Sponge Technique)

Using a small sponge to stamp flowers creates charming texture. This technique is fast and forgiving—great for batch-making several bowls.
Materials
- Ceramic bowls, 8–10 oz (set of 4 recommended)
- Natural sea sponge cut into coin-sized pieces
- Acrylic paints in layered colors
- Palette knife for mixing
- Fine brush for centers
- Sealer
Instructions
- Cut small sponge pieces (~1 inch diameter).
- Lightly dab sponge into paint and press onto bowl to create petal clusters.
- Use two to three colors layered—drier first color, then a darker center for depth.
- Add tiny centers with a fine brush.
- Let dry 20–30 minutes between layers.
- Cure 48–72 hours; seal if desired.
- Clean sponge stamps and store flat.
How to Display or Gift It
- Stack as a colorful cottagecore set.
- Tie together with jute and add a dried flower.
- For storage, separate with felt pads.
- Mid-Century Floral Burst Bowl
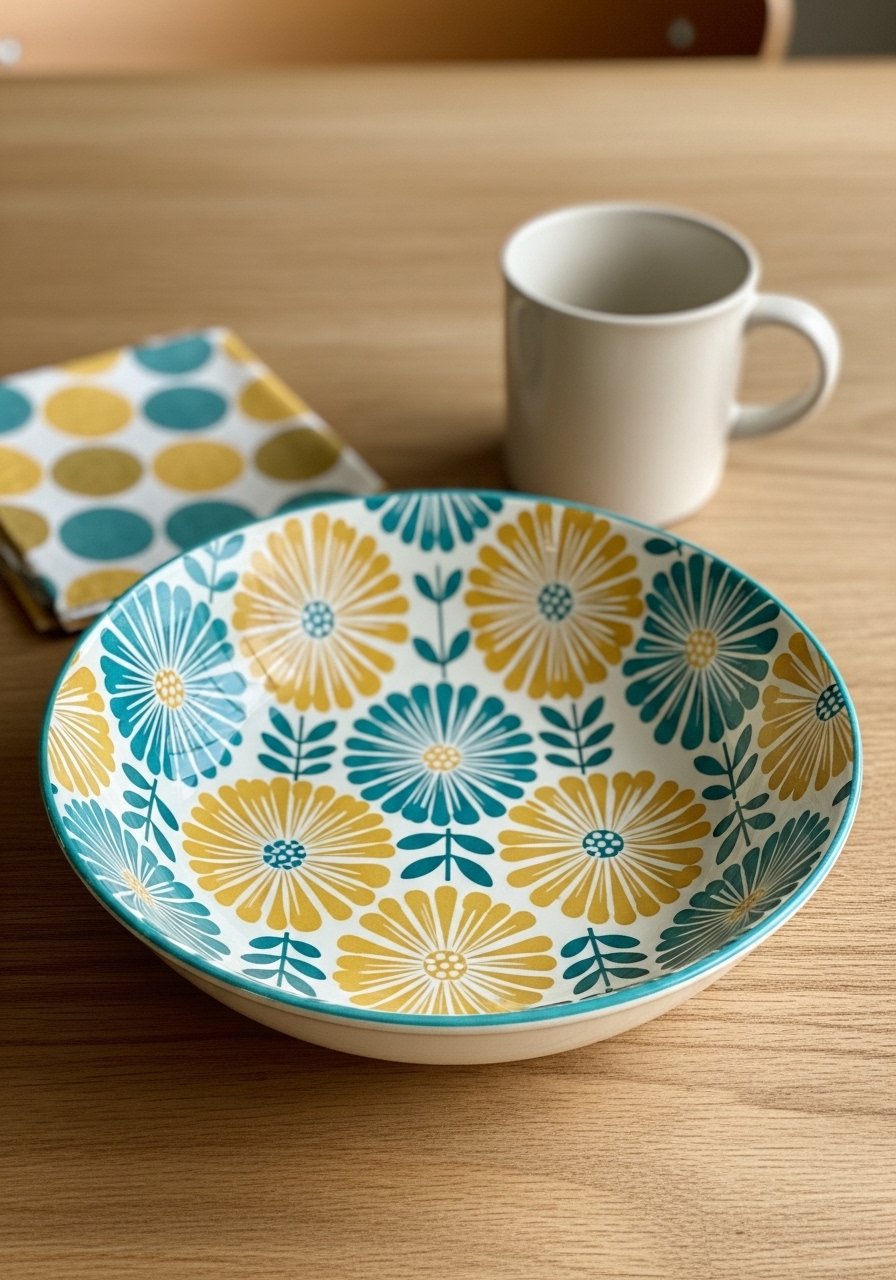
Channel mid-century modern with geometric flower bursts and bold colors. Use a small round brush for crisp petal edges and retro color combos.
Materials
- 1 ceramic bowl, 9–10 inches
- Acrylic paints: mustard, teal, charcoal
- Round brush size 2
- Pencil for layout
- Fine liner for small accents
- Gloss sealer for vintage sheen
Instructions
- Sketch burst motifs lightly around bowl.
- Fill shapes with flat color using a round brush.
- Add small petal lines and dots after initial color dries 15–20 minutes.
- Use charcoal to outline tiny elements if desired.
- Let cure 48 hours, then apply 1 coat of gloss sealer.
- Re-check for tackiness; re-seal if needed for extra sheen.
- Clean brush with warm soapy water after use.
How to Display or Gift It
- Pair with teak or walnut serving pieces for a mid-century table.
- Wrap in retro-patterned tissue paper for a themed gift.
- Store on a small wooden easel when not in use.
- Cottage Rose Cluster Interior Bowl
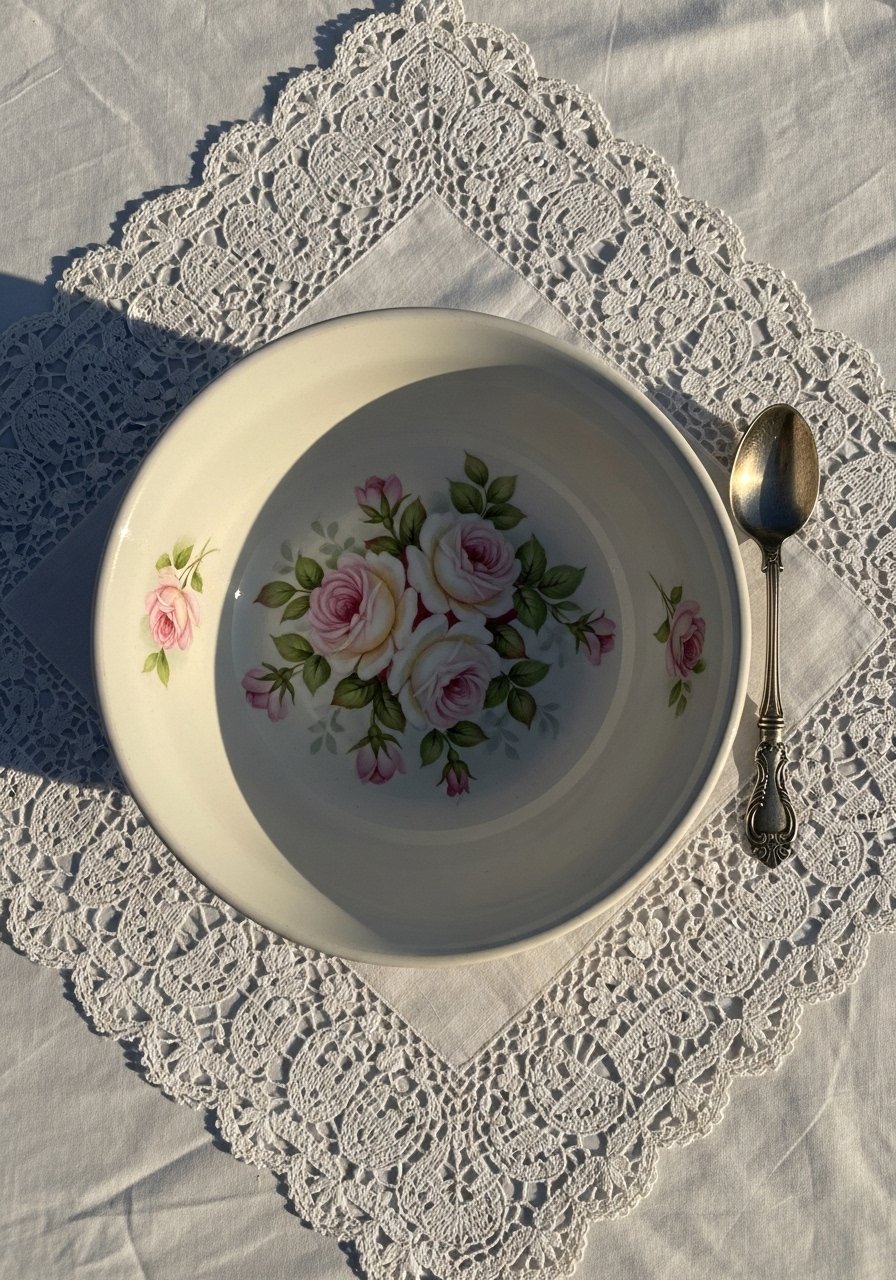
A loose cluster of roses in the center makes a romantic centerpiece bowl. Petal layering gives depth without fuss. A round synthetic brush keeps edges soft.
Materials
- 1 shallow ceramic bowl, 8–9 inches
- Acrylic paints: blush, deep rose, sage, cream
- Round brush size 4
- Palette and toothpick for tiny accents
- Matte sealer
Instructions
- Paint a soft blush wash in the center as base; dry 15 minutes.
- Block in rose shapes with deep rose, leaving highlight spaces.
- Add cream highlights and tiny sage leaves.
- Soften edges with a clean damp brush if needed.
- Allow 30–60 minutes dry before sealing.
- Cure fully 48–72 hours before regular use.
- Touch up any details after initial seal if desired, then reseal.
How to Display or Gift It
- Use as a fruit or bread bowl on a wooden dining table.
- Gift with a homemade jam jar and kraft label.
- Keep in a padded craft drawer for extra protection.
- Blue Delft-Inspired Floral Bowl

Delft-style florals feel timeless and elegant. Use a cobalt blue paint and small round brushes for fine linework. This style reads classic and pairs with navy linens.
Materials
- 1 white ceramic bowl, 10 inches
- Cobalt blue ceramic paint or high-pigment acrylic
- Round brush size 1
- Ruler for symmetry (optional)
- Gloss glaze for a porcelain look
Instructions
- Sketch floral elements lightly in pencil.
- Paint thin lines and delicate petals using small round brush.
- Build layers for deeper blue in the centers; dry 15–20 minutes between layers.
- When satisfied, apply a kiln or oven cure if paint allows, or air cure 72 hours then glaze.
- If glazing, follow glaze instructions for firing or cold-seal for decorative use.
- Polish lightly with a soft cloth after sealant dries.
- Avoid heavy scrubbing when washing.
How to Display or Gift It
- Pair with blue-and-white china for a themed collection.
- Wrap in blue tissue and include a matching napkin.
- Store upright on a small wooden easel to show the artwork.
- Tiny Succulent Motif Bowls
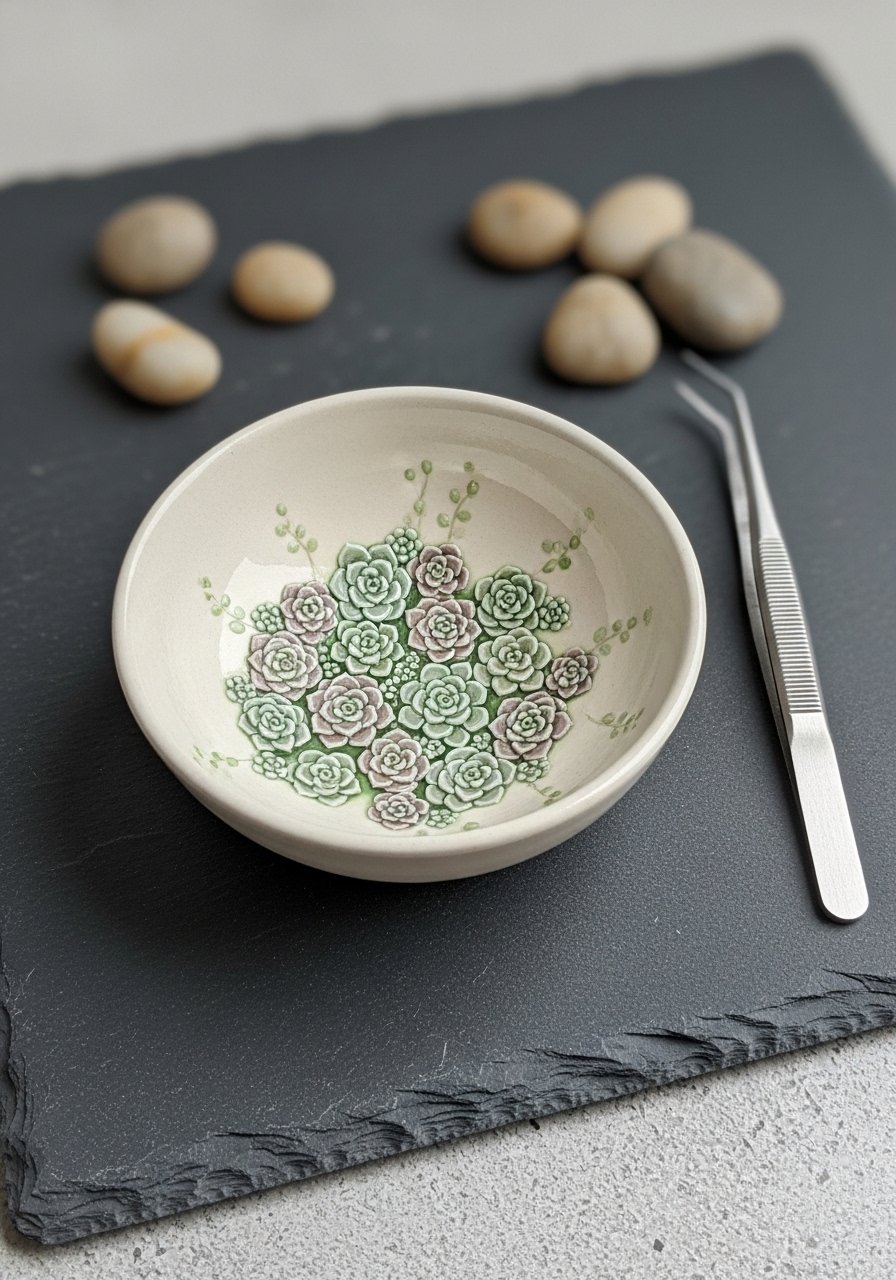
Painted succulents are trendy and work well in neutral or boho kitchens. Use layered greens and a small detail brush to form rosette shapes.
Materials
- Shallow ceramic bowl, 7–8 inches
- Acrylic paints: sage, olive, mauve, cream
- Round detail brush size 0
- Toothpick for tiny dots
- Matte sealer
Instructions
- Plan succulent layout with faint pencil dots.
- Paint central rosette with sage; add outer leaves in olive.
- Add mauve tips and cream highlights using a toothpick.
- Let dry 20–30 minutes and add a second pass if desired.
- Cure 48 hours, then seal with matte finish.
- Avoid heavy scrubbing; hand wash only.
- Store stacked with felt pads to protect raised paint.
How to Display or Gift It
- Use as a decor piece on a plant shelf.
- Pair with a small air plant in packaging for gifting.
- Consider a clear gift box with shredded kraft filler.
- Folk-Art Tiny Tulip Set
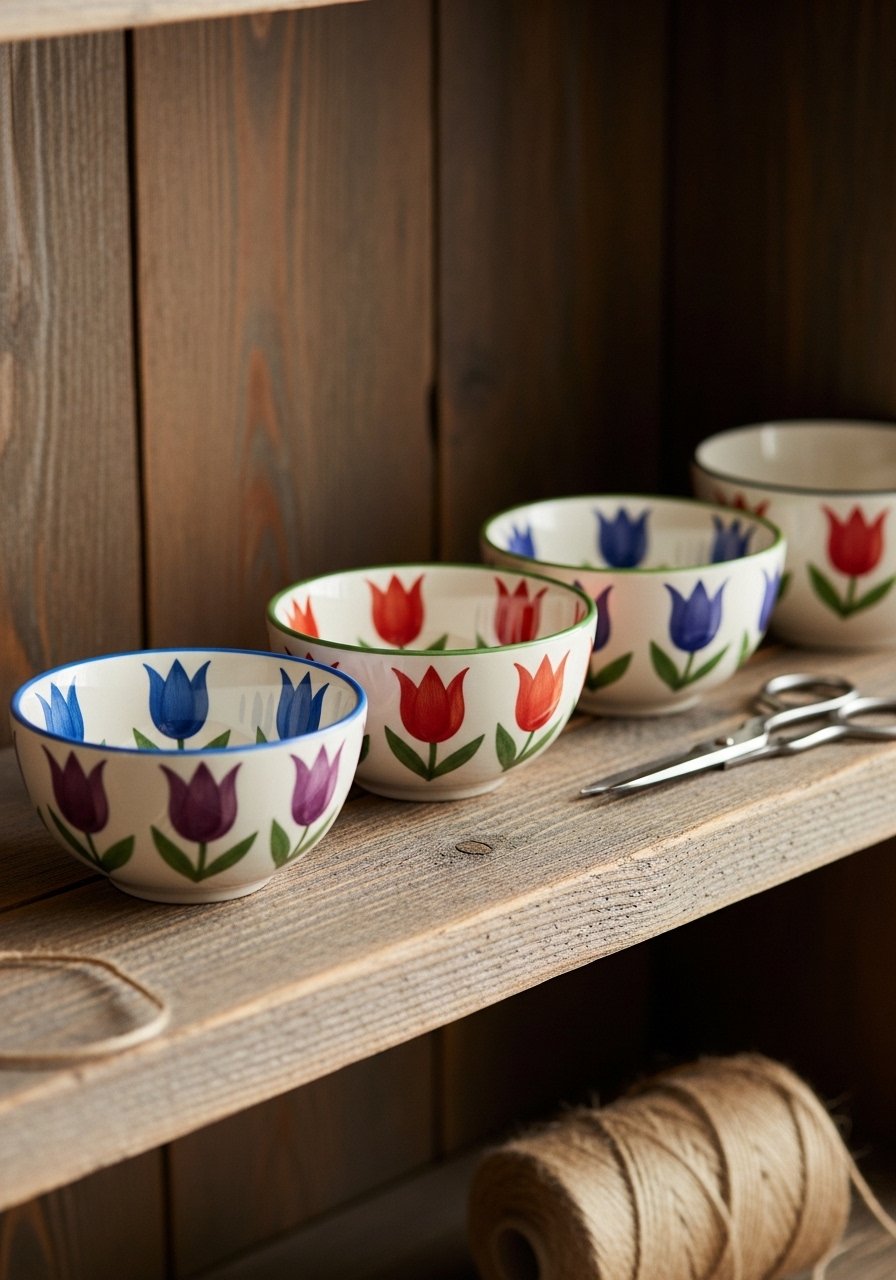
Folk-art motifs feel handcrafted and cheerful. This is a great beginner-friendly pattern that repeats beautifully across sets.
Materials
- Set of 4 small ceramic bowls, 6–8 oz
- Acrylic paints: red, mustard, leaf green, cream
- Flat brush 1/4 inch and round brush size 0
- Pencil for layout
- Matte sealer
Instructions
- Sketch tulip motifs evenly spaced.
- Paint tulip petals with flat brush strokes.
- Add stems and leaves with a round brush.
- Allow 15–20 minutes drying between colors.
- Repeat pattern on each bowl for a matching set.
- Cure 48–72 hours then seal.
- Touch up any gaps or bleed with a fine brush.
How to Display or Gift It
- Arrange as a set on open shelving or in a glass-front cabinet.
- Wrap as a hostess gift with a tied ribbon and small bouquet.
- Pack in a set box with kraft paper and a note.
- Pressed Flower Impression Bowl (Resin Accent)

This hybrid project uses tiny pressed flowers sealed in a thin resin band for a high-end delicate effect. It requires careful resin mixing and a heat gun to remove bubbles.
Materials
- 1 ceramic bowl
- Tiny pressed flowers (pre-dried)
- Epoxy resin kit (clear) mix per kit ratios
- Painter’s tape and foam brush
- Small mixing cups and stir sticks
- Heat gun or small torch for bubbles (use briefly)
- Gloves and respirator mask
Instructions
- Tape off the area where resin will sit; make a shallow dam with tape.
- Lay pressed flowers face down as desired.
- Mix resin per kit instructions (commonly 1:1 or 2:1 depending on kit).
- Pour a thin layer (1–2 mm) over flowers; use heat gun for 2–3 seconds to remove bubbles.
- Let resin cure 12–24 hours; add a second layer if needed and cure fully 72 hours.
- Remove tape carefully; sand any sharp edges with fine sandpaper.
- Clean bowl and hand wash only.
How to Display or Gift It
- Pair with a small jar of tea or a candle for gifting.
- Store upright to avoid pressure on resin band during cure.
- Use a small epoxy resin kit recommended for crafts.
- Tiny Line Art Bloom Bowls
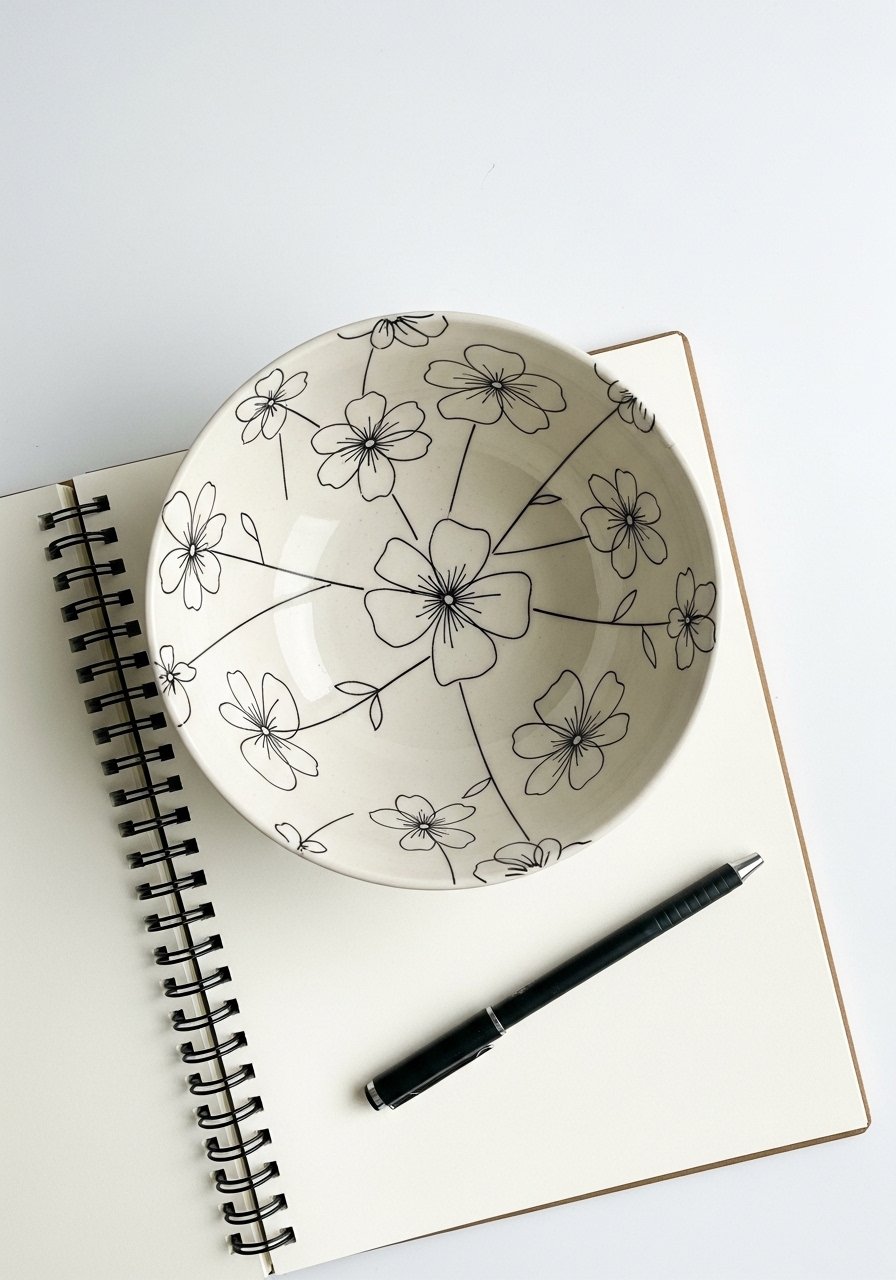
Single-line florals are modern and minimalist. A steady hand and fine liner paint pen give crisp, continuous lines.
Materials
- 1 cream ceramic bowl
- Black fine-line paint pen (oil-based)
- Pencil for light sketching
- Small eraser
- Matte sealer
Instructions
- Sketch single-line flower motifs lightly.
- Trace with a black paint pen in one continuous motion when possible.
- Let ink dry 10–20 minutes; go over any faint spots.
- Remove pencil traces gently.
- Allow full cure 48 hours, then seal if desired.
- Avoid scrubbing the lines when washing.
- Store carefully to prevent scratches.
How to Display or Gift It
- Display on open shelves for a modern gallery look.
- Pair with monochrome linens for a cohesive aesthetic.
- Gift with a sketchbook and pen for a creative friend.
- Ombre Petal Bowl
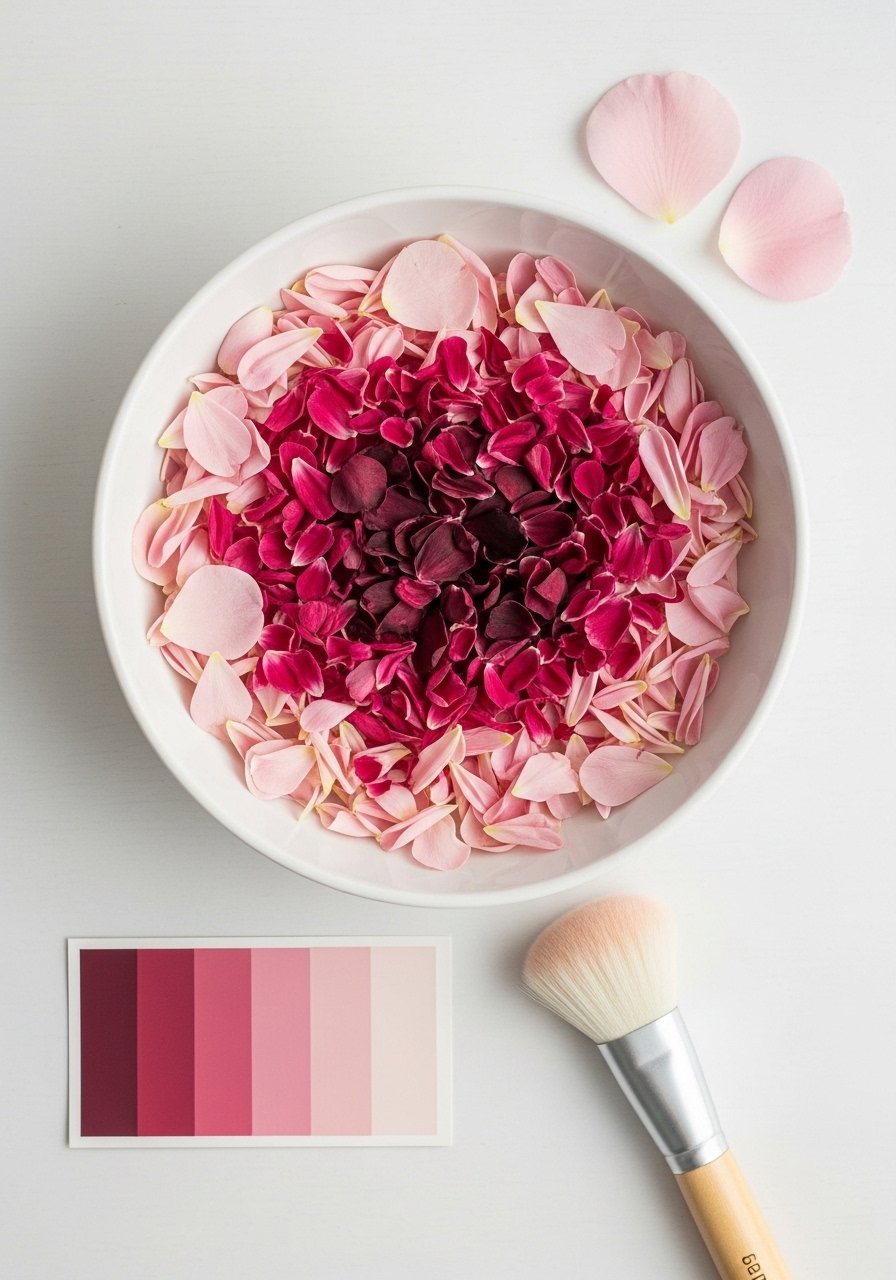
Ombre petals add drama while staying delicate. Use a blending brush and quick layering to achieve smooth transitions.
Materials
- 1 ceramic bowl
- Acrylic paints: deep berry, rose, blush
- Blending brush or sponge
- Palette and water jar
- Matte or gloss sealer
Instructions
- Plan color gradient from center outward.
- Paint innermost petals in deep berry; while wet, blend outward into rose.
- Use a clean blending brush to soften transitions into blush.
- Work quickly to keep edges blendable; dry 15–20 minutes between passes.
- Add final highlights with a small brush.
- Cure 48–72 hours then seal.
- Handle gently until fully cured.
How to Display or Gift It
- Place on a cake stand for tablescapes.
- Wrap with tissue and include care instructions.
- Store stacked with protective padding.
- Tiny Wildflower Spoon Rest Bowl

Turn a practical spoon rest into a floral focal point. Small repeated blooms keep the pattern charming and functional.
Materials
- 1 ceramic spoon rest, standard size
- Acrylic paints in small tubes: lavender, yellow, green
- Round brush size 0
- Toothpick for tiny dots
- Sealer
Instructions
- Sketch small flower positions.
- Paint tiny blooms with a round brush; add centers with a toothpick.
- Let dry 10–15 minutes; add a second pass for opacity.
- Allow 24–48 hours to cure then seal.
- Avoid hot-soap abrasives; hand wash only.
- If paint chips, touch up and re-seal.
- Use a small foam brush to apply sealer evenly.
How to Display or Gift It
- Gift with a wooden spoons set for a kitchen present.
- Keep near the stove as a functional art piece.
- Store upright in a drawer with padding.
- Floral Ring Inside Bowl (Fine Dot Technique)
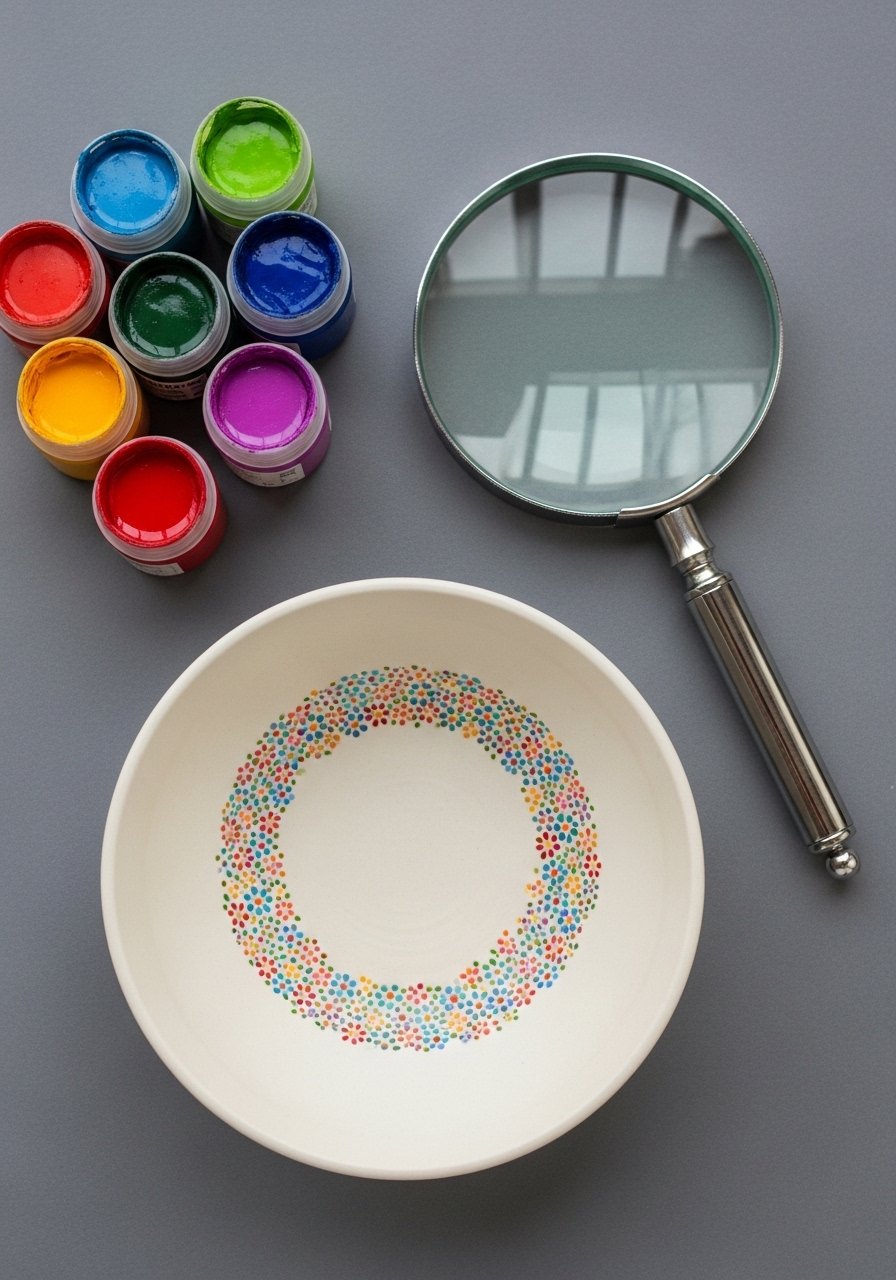
This delicate dotted floral ring looks intricate but is simple when you work in sections. A fine dotting tool keeps dots consistent.
Materials
- 1 ceramic bowl
- Dotting tool set or fine paint pen
- Acrylic paints: pastel palette
- Pencil for light guide marks
- Matte sealer
Instructions
- Lightly draw concentric guide ring(s) with pencil.
- Use dotting tool to place flower centers equidistant along ring.
- Add surrounding petal dots in alternating colors.
- Work in small sections to maintain symmetry.
- Dry 15–30 minutes, then add a second layer if needed.
- Cure 48 hours and seal.
- Store in a padded organizer to keep dots from abrasion.
How to Display or Gift It
- Nest with matching saucers for a coordinated set.
- Offer as a personalized trinket bowl with jewelry.
- Include a small dotting tool set if gifting to a beginner.
- Paint-Pen Folk Heart Bowls
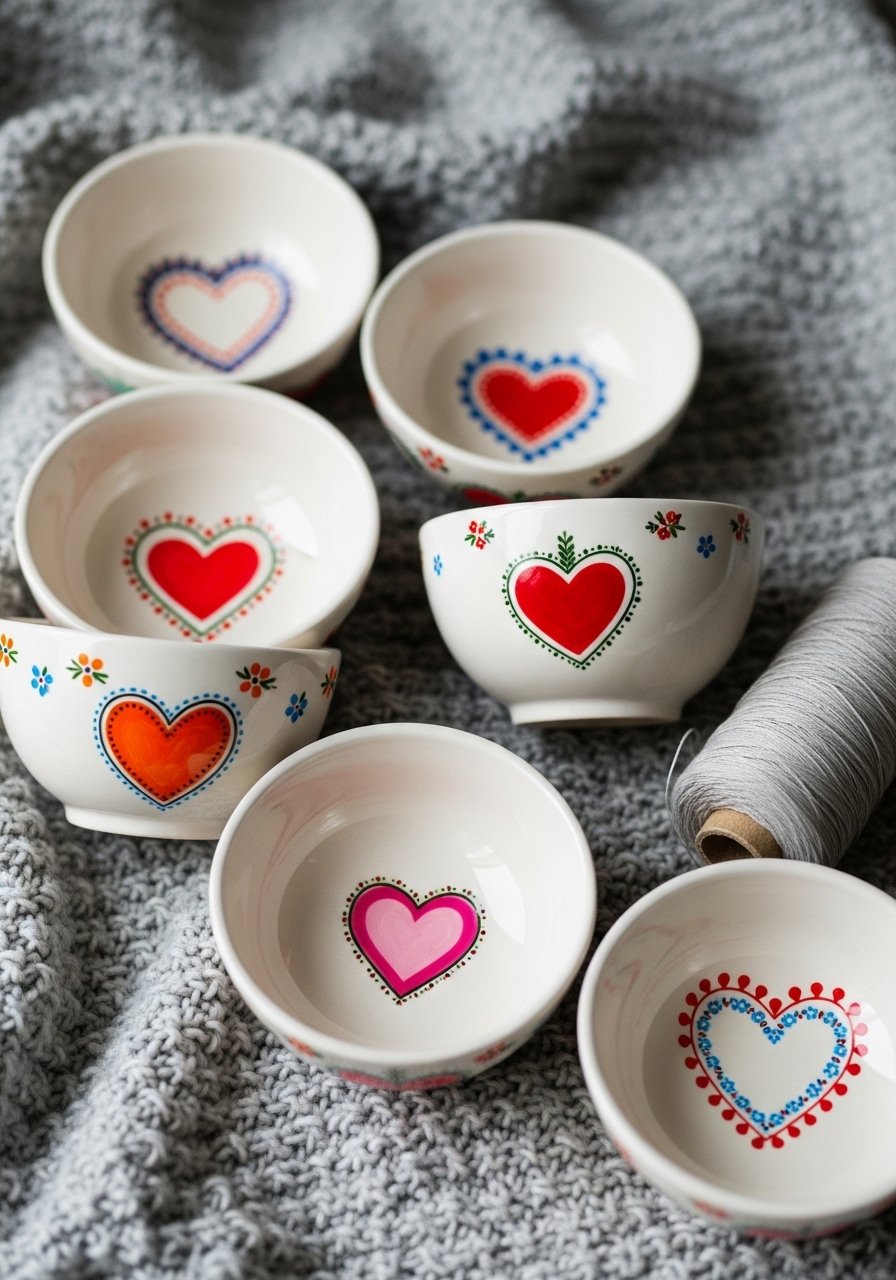
Paint pens make folk shapes bright and effortless—no brush control required. Great for crafting with limited time.
Materials
- Set of 3 small bowls
- Paint pens in assorted colors (0.7–1.0 mm tips)
- Pencil for layout (optional)
- Sealer
Instructions
- Sketch heart and floral layouts if desired.
- Use paint pens to draw hearts and fill in with floral accents.
- Allow pen paint to dry 15–30 minutes between colors.
- Add outlines last for definition.
- Cure 24–48 hours, then apply sealer if desired.
- Avoid dishwasher; hand wash only.
- Store with felt pads between bowls.
How to Display or Gift It
- Bundle as a cheerful housewarming gift.
- Pair with a small jar of colorful candies for a cute presentation.
- Use a small paint pen set for gifting.
- Layered Petal Textured Bowl (Impasto Technique)

For a tactile piece, impasto strokes give petals a sculptural look. Use heavy-bodied acrylic and a palette knife or stiff brush to build texture.
Materials
- 1 ceramic bowl
- Heavy-body acrylic paints (titanium white base for mixing)
- Palette knife and stiff flat brush
- Mixing palette
- Sealer suitable for textured surfaces
Instructions
- Mix slightly thick paint—use heavy-body acrylic straight from tube.
- Apply petals with palette knife or thick brush using short strokes.
- Build up layers, letting each layer firm 20–30 minutes before next.
- Create highlights by adding white to outer petal edges.
- Allow full cure 72 hours because of thicker application.
- Seal with a heavier coat; be sure sealant covers crevices.
- Handle gently until fully cured; clean with soft cloth.
How to Display or Gift It
- Display on a stand so texture is visible.
- Gift as an art piece with a note about gentle care.
- Store individually in padded boxes to protect raised paint.
- Seasonal Mini Poppy Bowl (Spring Palette)

Poppies brightened with a spring palette bring cheer. Small, bold blooms are quick and impactful—perfect for seasonal sets.
Materials
- 1 small bowl, 6–8 oz
- Acrylic paints: poppy red, orange, leaf green, black
- Round brushes sizes 0 and 2
- Toothpick for centers
- Matte sealer
Instructions
- Sketch poppies lightly where desired.
- Paint base petal shapes in poppy red; add orange inner tones.
- Add tiny black centers with a toothpick.
- Paint leaves with leaf green; let dry 15–20 minutes between steps.
- Cure 48 hours then apply sealer.
- If paint chips, touch up and reseal.
- Store with tissue padding between pieces.
How to Display or Gift It
- Gift as a seasonal hostess present with small soap bars.
- Pair with fresh flowers for a springtime table.
- Keep in a shallow drawer lined with soft cloth.
Thanks for staying with all 22 of these floral ceramic bowl painting ideas—there’s a mix of minimalist, boho, cottagecore, and modern looks to match your style and skill level. Try one pattern as a single statement piece or make a coordinated set for gifts; either way, these projects are made to be enjoyed and shared. Pin your favorites so you can come back when you’re ready to paint, and tell me which style you tried—did you go minimalist or full cottagecore florals?
If one tool could help across most projects, a reliable temperature-controlled hot glue gun changed how I handle mixed-media elements like pressed flowers and small trims—less stringing, better control, and cleaner results.





