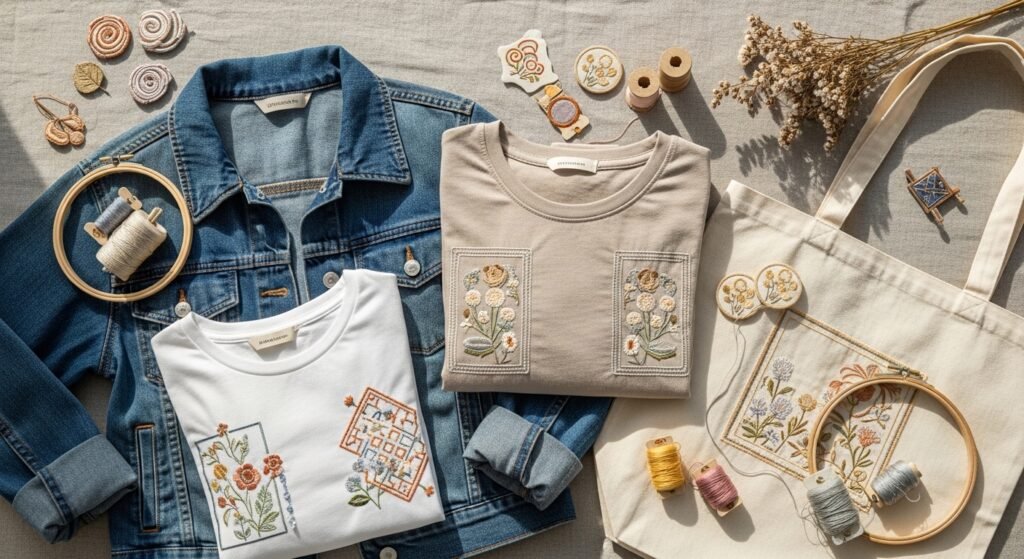
You pull open your closet and wish each piece had a little personality. Computer embroidery designs for clothing let you add consistent, crisp motifs across tees, jackets, and even collars — without hand-stitching every stitch. Whether you have an embroidery-capable sewing machine or use pre-cut patches, these ideas help you refresh garments you already love.
This list includes 21 practical projects using common materials like stabilizer, rayon thread, and fusible backing. I’ll mention handy tools as we go — like my go-to self-healing cutting mat and a budget-friendly heat press alternative for small patches — so you’ll know what really helps. Each project has a full materials list, step-by-step instructions, drying or setting notes, and styling ideas so you can stitch with confidence.
You’ll find modern cottagecore florals, minimalist line-art, vintage sailor motifs, and seasonal ideas that work across sizes. Dive into these computer embroidery designs for clothing and give every garment a little personality.
- Tiny Floral Sleeve Motif
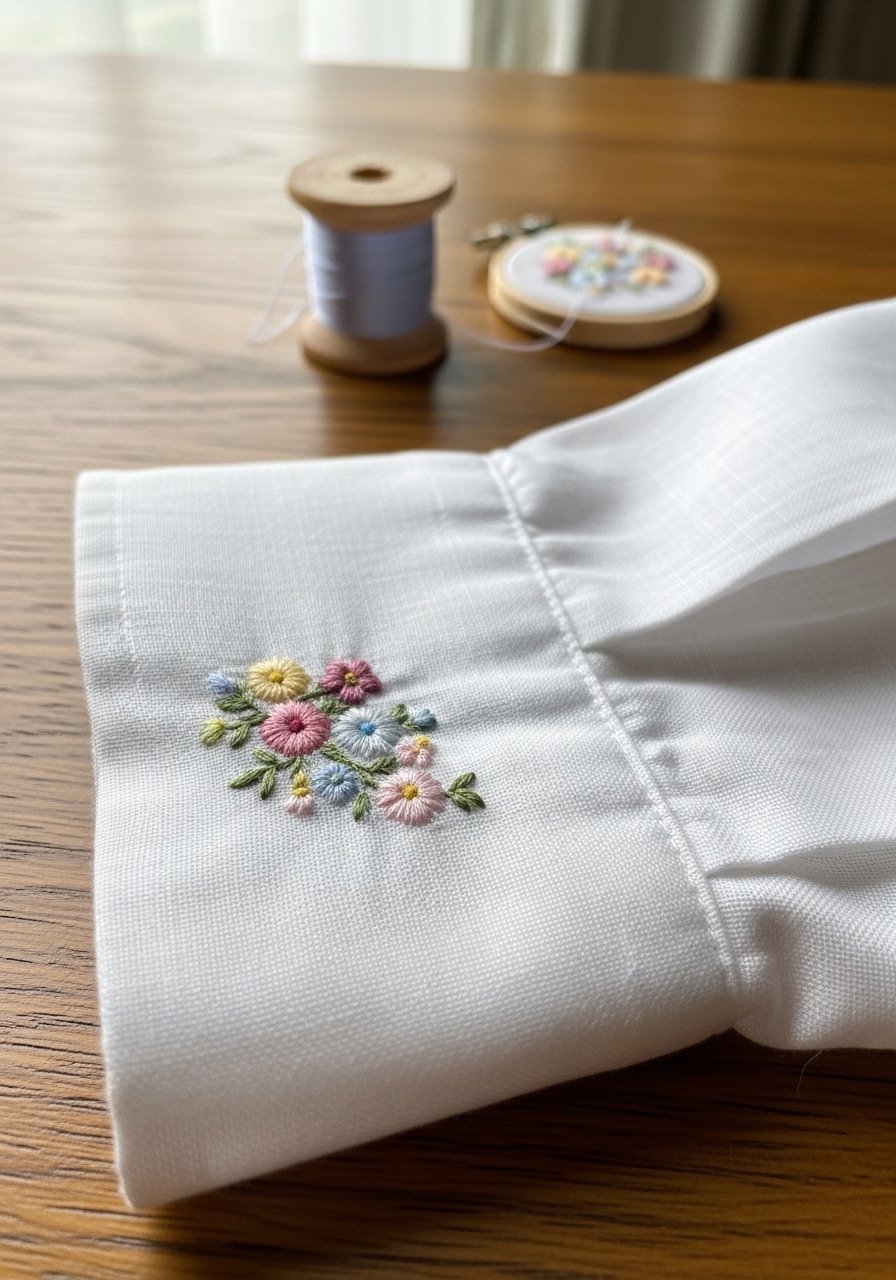
This tiny floral sleeve motif adds a dainty, cottagecore feel to a plain blouse. The small scale (about 2.5" wide) looks hand-stitched but is made with crisp computerized satin stitches. Beginners love this because it’s quick and forgiving.
Materials
- 2.5" wide floral embroidery design (digitized for your machine)
- Lightweight tear-away stabilizer, 8" x 10"
- Rayon embroidery thread set (pastel pack), 6 spools
- Size 75/11 embroidery needles, 2
- White linen blouse or shirt sleeve
- Water-soluble marking pen
- Small embroidery hoop, 4"
- Spray adhesive (temporary)
- Small pair of snips
Instructions
- Pre-wash and iron the blouse to remove sizing; let dry completely.
- Mark the placement on sleeve with a water-soluble pen, about 1" above cuff.
- Hoop the stabilizer only and spray with light temporary adhesive.
- Bring the garment over the hoop and re-hoop if needed so the stabilizer sits behind fabric.
- Load the digitized design into your machine, choose matching thread color.
- Stitch slowly at 800–900 SPM for cleaner satin edges.
- Trim jump threads and remove hoop. Tear away stabilizer gently.
- Press from the wrong side with a steam iron for 5–7 seconds to set stitches.
How to Display or Gift It
- Pair the shirt with a linen skirt for a soft, layered outfit.
- For gifting, fold into a kraft box with tissue and a dried lavender sprig.
- Store unstitched shirts flat in a craft organizer until you’re ready to embroider.
- Use a small wooden hanger and a dab of fabric-safe starch for crisp sleeves when gifting.
- Monogrammed Pocket Patch (Classic Serif)

A monogrammed pocket patch gives a tailored look to shirts and denim. Choose a classic serif for a timeless vibe. This patch method is forgiving—good for beginners and fast to reproduce on multiple garments.
Materials
- Monogram computer embroidery file, 2.25" circle
- Fusible woven interfacing, 3" x 3" per patch
- Iron-on backing (heat-activated), 1 sheet
- Medium-weight cotton shirt or denim shirt
- Matching rayon thread, 2 spools
- Embroidery needle size 75/11
- Small pressing cloth
- Heat press or iron
Instructions
- Cut interfacing and backing slightly larger than design (3" square).
- Hoop stabilizer with backing and stitch the monogram design onto the interfacing.
- Trim patch to shape leaving 1/8" around stitches.
- Use a pressing cloth and heat set the patch to the pocket at the recommended setting (cotton/linen) for 10–12 seconds.
- Secure edges with a tight applique stitch if desired.
- Allow 24 hours for adhesive to cure fully before washing.
How to Display or Gift It
- Sew a set of patches onto matching shirts for a family reunion gift.
- Pack shirts in kraft boxes with twine and a personalized tag.
- Keep leftover patches flat in a craft organizer drawer until used.
- Computer Embroidery Designs for Clothing: Petite Chest Patch
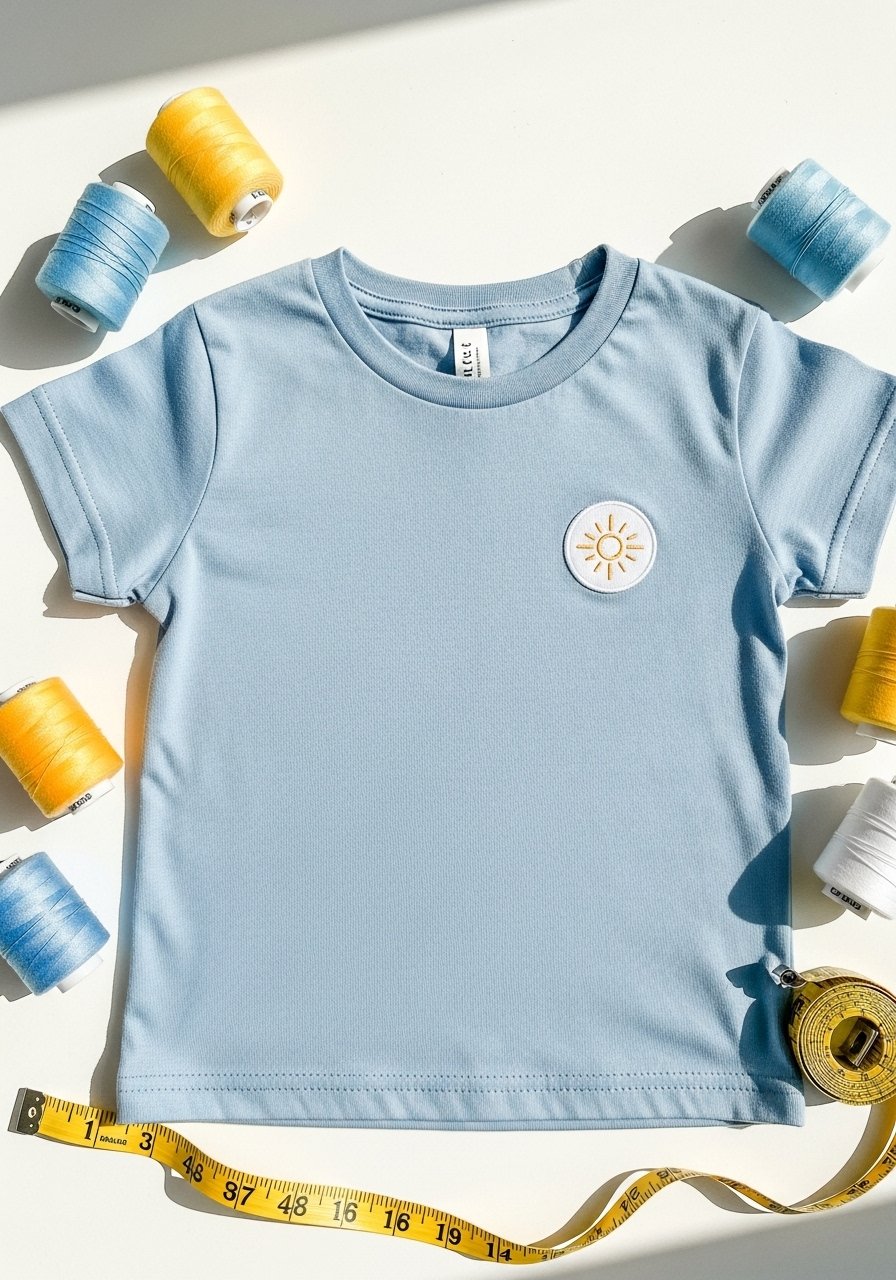
A petite chest patch (about 3") adds a subtle brand-like detail to tees. These small motifs look polished when digitized with clean fill stitches. Great for small-batch apparel lines or adding a signature mark.
Materials
- 3" round sun embroidery design file
- Lightweight tear-away stabilizer, 10" x 12"
- Cotton tee (pre-washed), any size
- Rayon thread in sun tones, 3 spools
- Size 75/11 needles
- Small round hoop, 5"
- Tape measure
- Tiny snips
Instructions
- Pre-wash tee and press flat.
- Measure center chest placement: 4" down from collar seam for adult small.
- Hoop stabilizer, place tee fabric over stabilizer.
- Use spray adhesive sparingly to hold fabric.
- Stitch design at 750 SPM for balanced fill.
- Clip thread tails and tear stabilizer.
- Press on reverse with low steam for 5 seconds.
How to Display or Gift It
- For gift sets, pair the tee with a matching embroidered cap.
- Fold and tuck with a band of washi tape and a printed care card.
- Store tees flat or on hangers to avoid creasing the motif.
- Denim Jacket Back Panel – Nautical Crest
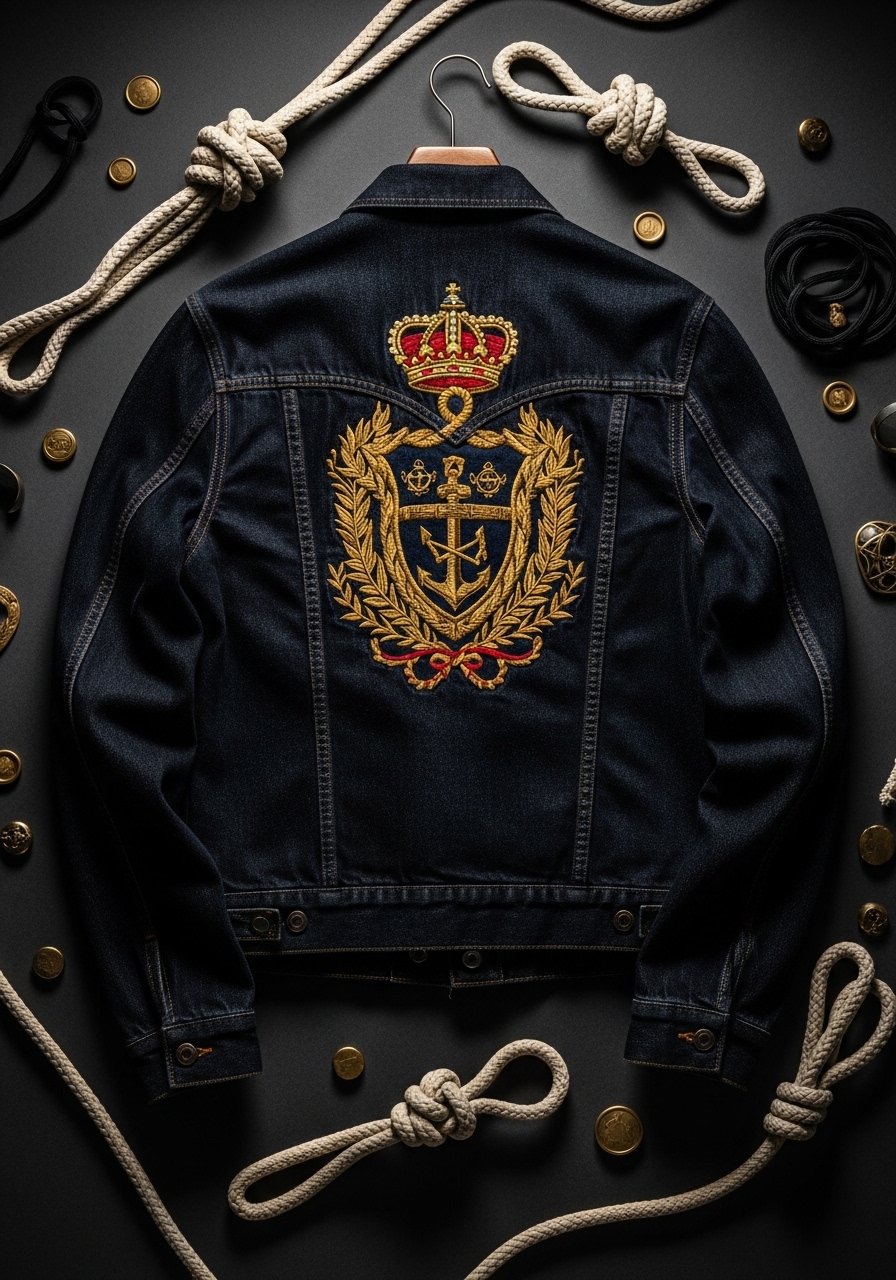
A large back-panel crest turns an ordinary denim jacket into a statement piece. Use medium-weight cutaway stabilizer and stitch in sections if your hoop can't accommodate the full width. This is a weekend project for intermediate crafters.
Materials
- Nautical crest digitized file, 10" wide
- Heavy cutaway stabilizer, 18" x 12"
- Denim jacket (pre-washed), adult medium
- Rayon thread (navy, cream, gold), 5 spools
- Size 90/14 embroidery needles, 2
- Large oval hoop (or stitch in panels)
- Tailor’s chalk
- Seam ripper (to remove topstitching if needed)
Instructions
- Stabilize the jacket back with heavy cutaway; secure with safety pins.
- Mark center back and align design so crest sits between shoulder blades.
- If hoop is too small, split design into left/right panels and overlap 1/4".
- Stitch at 700–800 SPM, using a walking foot if available for feed.
- After stitching, trim excess stabilizer and press from the inside for 10 seconds.
- Re-topstitch any seam areas removed earlier.
How to Display or Gift It
- Hang on a sturdy wooden hanger for display.
- Pair with corduroy pants for a vintage Americana look.
- For gifting, include a care card suggesting gentle machine wash cold.
- Lined Collar Embroidery – Tiny Vine Repeat

Embroider along a lined collar for a subtle, polished detail. The repeating vine (about 0.25" high) adds texture without bulk. This project is great for shirts and light jackets.
Materials
- Tiny vine repeat embroidery design (seamless), 0.25" height
- Lightweight tear-away stabilizer, 8" x 10"
- White button-down shirt with lined collar
- Green rayon thread, 1 spool
- Size 70/10 embroidery needles
- Small hoop 3" x 4"
- Transparent ruler and fine-tip pen
Instructions
- Unpick the collar stay if necessary; press collar flat.
- Hoop stabilizer and align fabric so vine repeats evenly.
- Use a slow stitch speed and stitch across the collar edge.
- Repeat on other collar side, matching spacing precisely.
- Remove stabilizer, reinsert collar stay, and press lightly.
How to Display or Gift It
- Display on a padded hanger with a ribbon bow for gifting.
- Pair with a matching embroidered pocket square for cohesive styling.
- Store finished shirts in a breathable garment bag to protect the stitching.
- Baby Onesie—Tiny Animal Trio
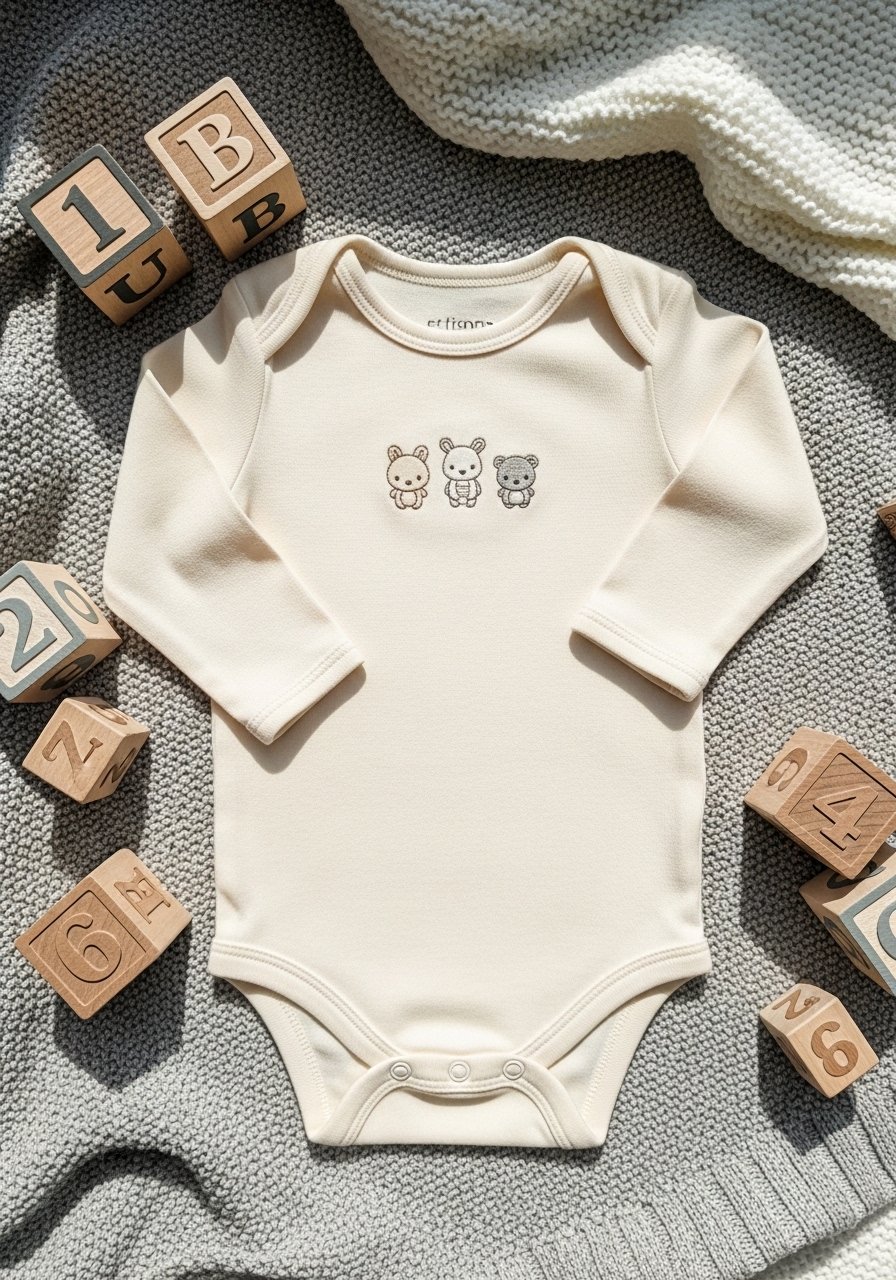
A tiny animal trio on a onesie is a sweet handmade baby gift. Keep stitches low-profile and use a lightweight stabilizer. This is fast—most machines complete the trio in under 10 minutes.
Materials
- Three small animal designs (1.5" each)
- Water-soluble stabilizer, 6" x 8"
- 100% cotton onesie, size 0–3 months
- Soft rayon thread pastels, 3 colors
- Size 70/10 embroidery needles
- Small hoop 4"
- Gentle fabric wash
Instructions
- Pre-wash onesie; lay flat and mark center chest at 3" below neckline.
- Hoop water-soluble stabilizer; place onesie fabric over it.
- Stitch each animal with slow speed, trimming jumps between motifs.
- Rinse stabilizer under cool water to remove residue and air-dry 1–2 hours.
- Press gently from the inside.
How to Display or Gift It
- Fold with a small ribbon and a handwritten note.
- Package in a baby kraft box with tissue paper.
- Advise parents to turn garment inside out before washing to protect embroidery.
- Computer Embroidery Designs for Clothing: Denim Jean Cuff Patch
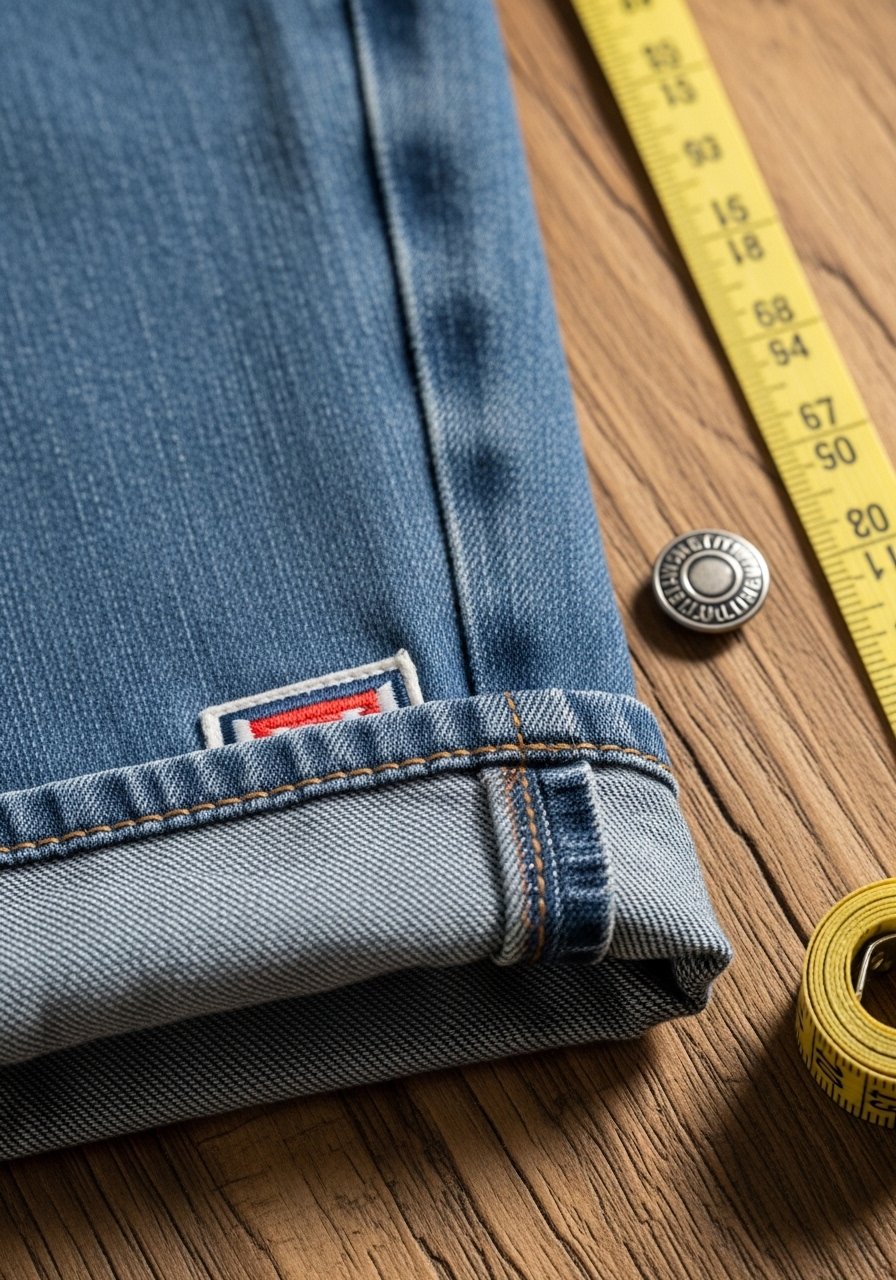
Add a cuff patch to jean hems for a subtle designer-detail. These small rectangular patches (about 1.5" x 2.5") are durable when fused and topstitched. Ideal for casual or streetwear looks.
Materials
- Rectangular denim patch design file 1.5" x 2.5"
- Fusible denim interfacing, 2" x 3" per patch
- Pre-washed jeans
- Matching polyester thread, 1 spool
- Heavy-duty sewing needle size 100/16 for topstitching
- Iron and pressing cloth
- Tailor’s chalk
Instructions
- Determine cuff location: cuffed hem shows 1" of patch when rolled.
- Stitch design onto interfacing, trim to shape.
- Fuse to inside cuff using medium heat for 12 seconds with a pressing cloth.
- Topstitch around edges with a 3.0 mm stitch to secure.
- Press seam allowances and check for firm adhesion.
How to Display or Gift It
- Pair with a chambray shirt for a coordinated denim look.
- Wrap as a casual gift with kraft twine and a denim-themed tag.
- Store patched jeans folded to prevent creasing the cuff detail.
- Minimalist Line-Art Tee (Single-Needle Look)

Single-line motifs mirror hand-drawn artwork using long, straight stitches. The minimalist effect suits modern wardrobes and requires careful digitizing for continuous satin or running stitches.
Materials
- Single-line face embroidery file, 2.75" wide
- Tear-away stabilizer 8" x 10"
- Cotton-poly tee
- Polyester embroidery thread black, 1 spool
- Size 75/11 embroidery needles
- Small hoop 5"
- Pointed snips
Instructions
- Stabilize tee and mark placement at left chest 3.5" below collar.
- Hoop stabilizer and add fabric, securing gently.
- Stitch at a slower speed to maintain line quality.
- Clip jump threads and remove stabilizer.
- Lightly press on reverse.
How to Display or Gift It
- Wear layered under an open cardigan for gallery-ready minimalism.
- Gift with a small printed note explaining care: wash cold, gentle cycle.
- Store tees on non-slip hangers to keep the line-art crisp.
- Embroidered Hood Trim—Boho Tassel Motifs

A hood trim with repeating tassel motifs adds boho texture to a sweatshirt. Use a stretch-stitch setting or a knit-friendly machine stabilizer to prevent puckering.
Materials
- Repeating tassel motif design, 0.5" high
- Cut-away stabilizer for knits, 12" x 10"
- Hoodie (pre-washed)
- Rayon thread in terra cotta and cream, 2 spools
- Ballpoint embroidery needles size 80/12
- Small hoop 3"
- Knit-friendly spray adhesive
Instructions
- Mark hood seam allowance and placement.
- Hoop stabilizer and adhere hood fabric using knit-friendly spray adhesive.
- Stitch repeating motifs along the hood edge, keeping designs 1/4" apart.
- Trim stabilizer leaving a slight margin and clip carefully.
- Press from the inside using low heat for 5 seconds.
How to Display or Gift It
- Pair with a matching knit scarf or beanie for a set.
- Store hoodies folded to avoid stretching the embroidered edge.
- Wrap as a cozy, handmade gift in a cotton drawstring bag.
- Sleeve Cuff Bar—Sporty Pinstripe
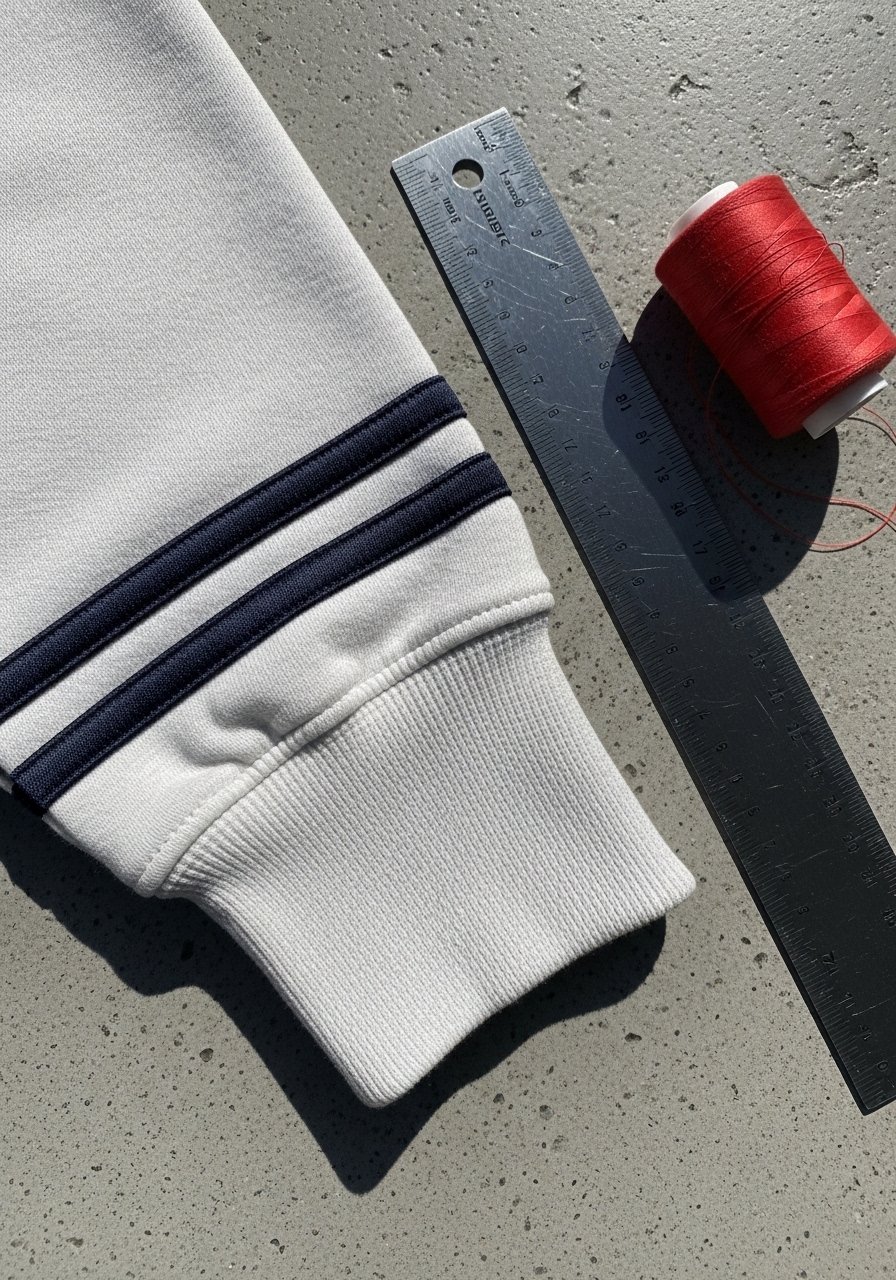
A three-bar cuff detail gives sweatshirts and athletic jackets a retro athletic edge. Use stabilizer and low-profile stitches.
Materials
- Three-bar stripe design each 0.25" high
- Tear-away stabilizer 8" x 10"
- Sweatshirt sleeve
- Polyester thread (contrasting color), 1 spool
- Size 80/12 embroidery needle
- Small hoop 4"
- Pressing cloth
Instructions
- Mark placement about 1.5" above cuff seam.
- Hoop stabilizer and align sleeve fabric.
- Stitch bars, keeping tension even to prevent puckering.
- Remove stabilizer and press lightly from inside.
How to Display or Gift It
- Display on a vintage-style hanger for a sporty look.
- Pair with joggers for a coordinated outfit.
- Store folded or rolled in a drawer to preserve cuff alignment.
- Computer Embroidery Designs for Clothing: Yoke Detail for Summer Dress

Add a horizontal yoke band to a summer dress for subtle structure. Computer embroidery designs for clothing let you repeat motifs precisely across the width of the garment.
Materials
- Geometric yoke band design, 12" wide
- Lightweight cutaway stabilizer 14" x 6"
- Cotton sundress or fabric panel
- Rayon thread in two contrasting colors, 3 spools
- Size 75/11 needles
- Long oval hoop or hoop in sections
- Tailor’s chalk
Instructions
- Measure yoke width and center design accordingly.
- Hoop in sections if necessary, matching overlap by 1/8".
- Stitch at moderate speed; check alignment after first pass.
- Remove stabilizer carefully and press from wrong side for 8 seconds.
How to Display or Gift It
- Style the dress with a woven belt and leather sandals.
- Bundle as a summer gift with a straw hat and ribbon.
- Store hanging to avoid creasing the yoke detail.
- Repaired Denim Knee Patch with Floral Motif
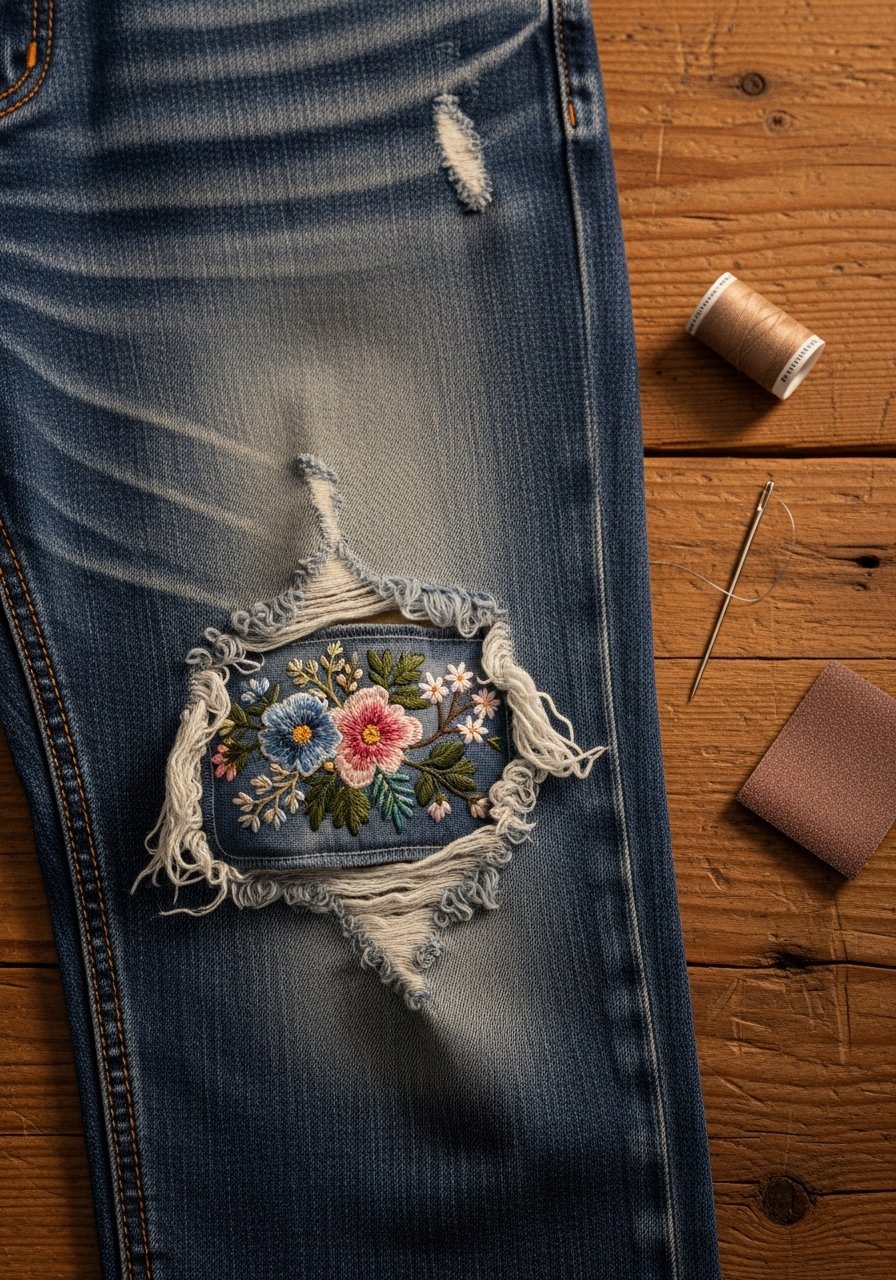
Turn worn knees into floral focal points by embroidering patches that also reinforce the fabric. This technique uses heavy interfacing for durability.
Materials
- Floral knee patch design 5" diameter
- Heavy fusible denim interfacing 6" round
- Pre-washed jeans with knee wear
- Polyester thread for strength, 2 spools
- Size 100/16 topstitching needle
- Pressing cloth
- Sewing machine for topstitching
Instructions
- Trim frayed edges and press area flat.
- Stitch design onto interfacing; trim and fuse to inside knee.
- Topstitch around patch edge with a 3.5 mm stitch for strength.
- Press and check for secure adhesion.
How to Display or Gift It
- Pair with a matching embroidered jacket for coordinated denim.
- Gift as a repair-and-style denim refresh.
- Store patched jeans folded to avoid bending the patched knee.
- Hoodie Kangaroo Pocket—Whimsical Animal Face
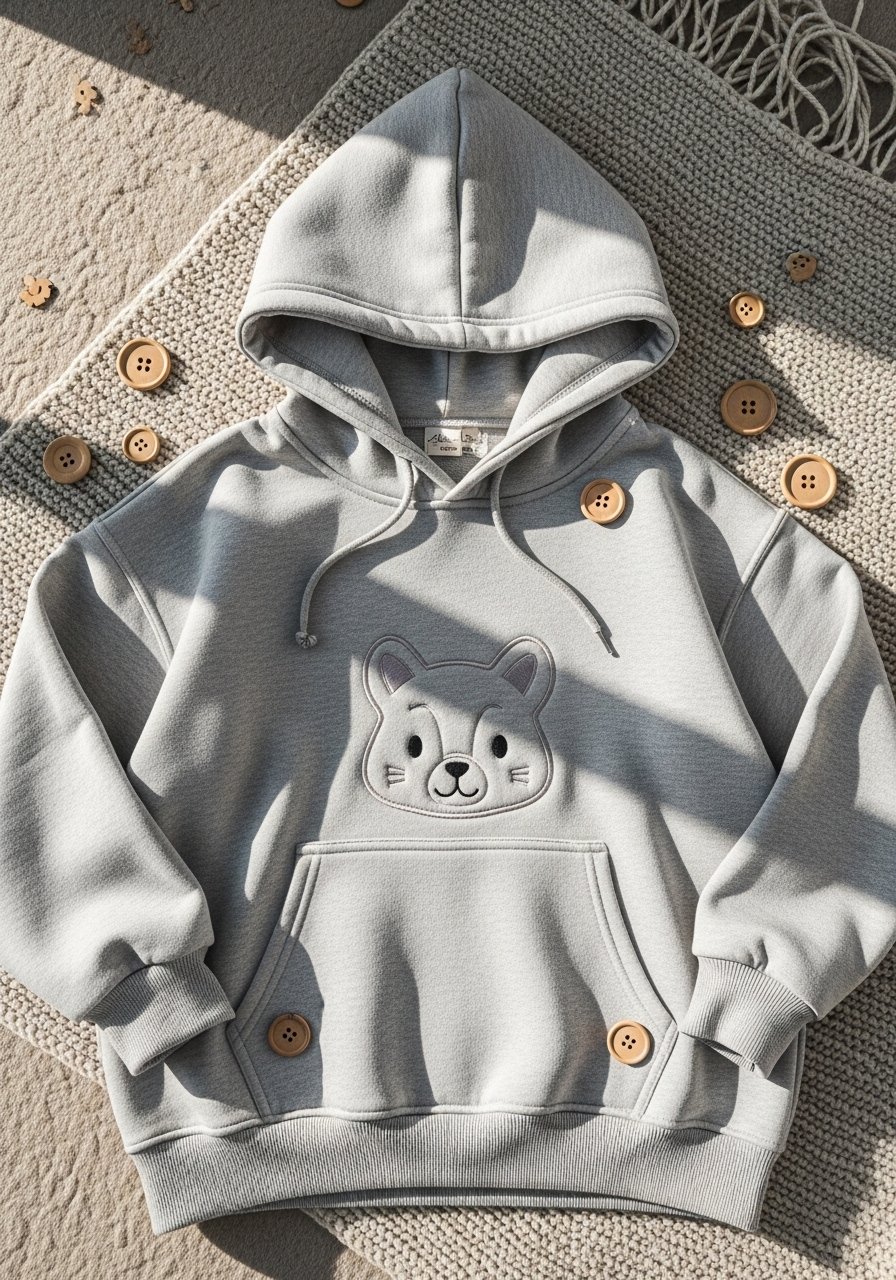
Center an animal face on a kangaroo pocket for a playful touch kids love. Use tear-away stabilizer for easy removal and choose low-bulk stitches for comfort.
Materials
- Animal face design 4" wide
- Tear-away stabilizer 10" x 10"
- Hoodie with kangaroo pocket
- Soft rayon thread, 3 spools
- Size 75/11 needles
- Small hoop 5"
- Pointed snips
Instructions
- Mark center of pocket and align design.
- Hoop stabilizer and position fabric carefully.
- Stitch at slow speed to keep seams flat.
- Tear stabilizer gently and trim loose threads.
- Press from inside for 5 seconds.
How to Display or Gift It
- For kids’ gifts, bundle hoodie with a small stuffed animal.
- Recommend washing inside out on gentle cycle to preserve the face.
- Store folded in a breathable bin to keep the pile soft.
- Linen Skirt Hem—Botanical Vine Running Border

A running vine along a skirt hem adds organic movement and pairs well with boho or japandi wardrobes. Use a light cutaway to stabilize linen’s uneven weave.
Materials
- Running botanical vine design repeat unit 1.25"
- Lightweight cutaway stabilizer length of hem + 2"
- Linen skirt (pre-washed)
- Rayon thread green tones, 2 spools
- Size 80/12 needles
- Long hoop or stitch in segments
- Tailor’s chalk
Instructions
- Measure and mark a straight line 1" from skirt hem.
- Hoop stabilizer and align fabric; stitch in segments to match the flow.
- Trim stabilizer and press from the wrong side for 8 seconds.
- Let skirt rest 24 hours before dry-cleaning if necessary.
How to Display or Gift It
- Pair with a tucked-in linen top and sandals.
- Wrap as a summer gift with a ribbon and dried lavender sprig.
- Store hanging to preserve the hem’s straight fall.
- Computer Embroidery Designs for Clothing: Appliqué Patch Hoodie Logo

Appliqué patches combine fabric fill with embroidered edges for texture. Computer embroidery designs for clothing make repeatable, crisp logos for casual wear or merch.
Materials
- Appliqué logo file 4" x 3"
- Fusible web (HeatnBond), 5" x 4"
- Fabric scrap for appliqué (cotton/linen)
- Cutaway stabilizer 10" x 8"
- Rayon thread (contrast and base), 3 spools
- Embroidery needles size 90/14
- Small iron and pressing cloth
- Precision snips
Instructions
- Fuse fabric scrap to fusible web and cut to shape slightly larger than design.
- Hoop stabilizer and stitch placement lines.
- Lay appliqué fabric over placement and tack-steam into place with the iron for 8–10 seconds.
- Stitch final embroidered edge and fill.
- Trim excess fabric and remove stabilizer as instructed.
How to Display or Gift It
- Package with a matching beanie or tote bag for a merch-style set.
- Recommend washing hoodies inside out to protect appliqué edges.
- Store finished items folded to avoid stressing the patch.
- Sailor Collar Anchor—Contrast Trim

A small anchor near a sailor collar gives a nod to vintage maritime style. Place the motif slightly off-center for character.
Materials
- Anchor design 1.75" high
- Lightweight tear-away stabilizer 8" x 8"
- Navy blouse or top with sailor collar
- Rayon thread navy/white, 2 spools
- Size 75/11 needles
- Small hoop 4"
- Pressing cloth
Instructions
- Mark placement on collar and hoop stabilizer.
- Stitch anchor and remove stabilizer.
- Press gently for 5 seconds on low heat.
- Check for secure stitches and clip threads.
How to Display or Gift It
- Wear with high-waisted trousers for retro styling.
- Gift as part of a nautical-themed set with a striped scarf.
- Store shirts on hangers to keep collar shape.
- Sleeve Elbow Patch—Heritage Shield
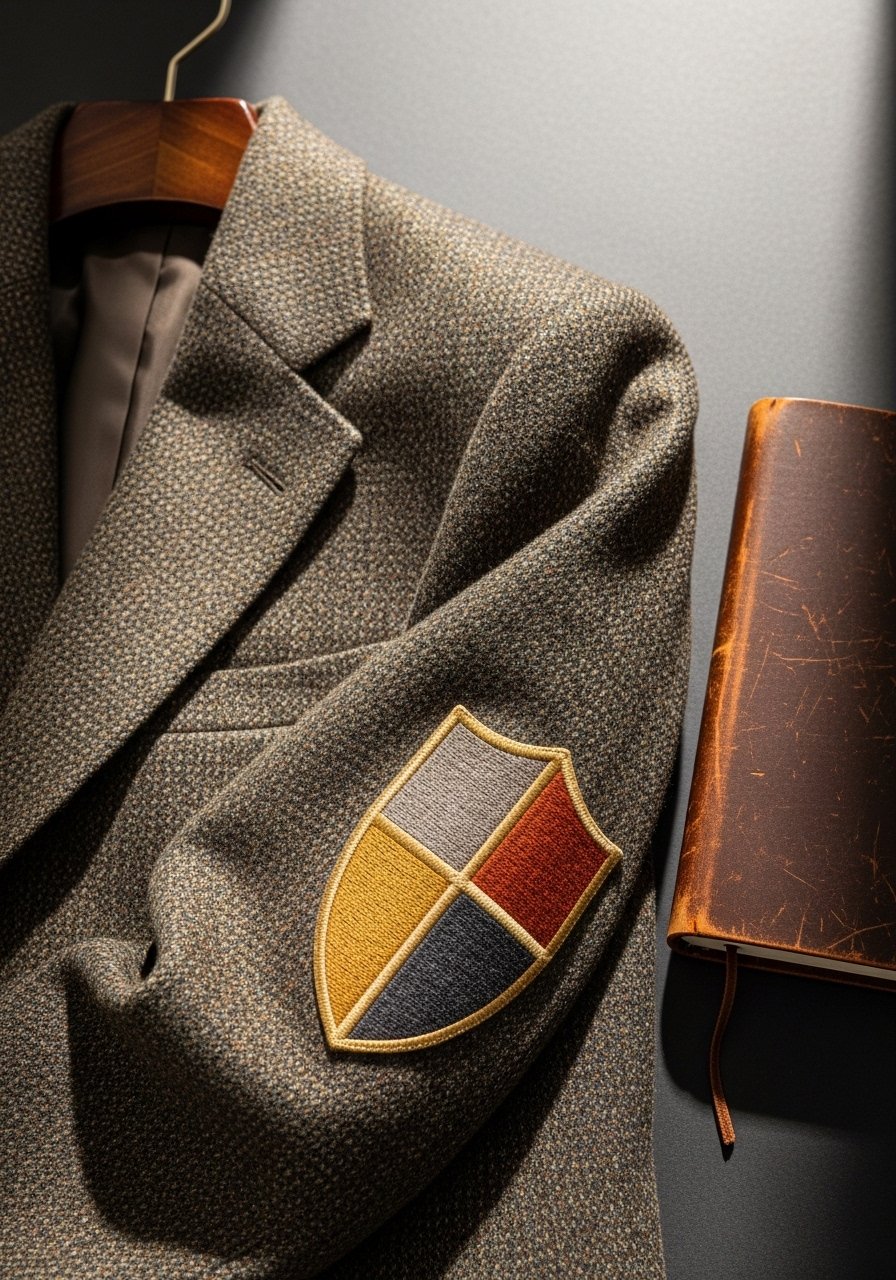
An embroidered shield makes elbow patches feel heritage and intentional. Use fusible interfacing inside the sleeve to reinforce wear areas.
Materials
- Shield elbow patch design 3.25" diameter
- Heavy fusible interfacing 4" round
- Blazer or cardigan sleeve
- Polyester thread for durability, 1 spool
- Size 90/14 needles
- Iron and pressing cloth
- Sewing machine for topstitching
Instructions
- Turn sleeve inside out and fuse interfacing to the inside of the elbow area.
- Stitch design onto interfacing from the outside.
- Topstitch around the patch edge for extra strength.
- Press and allow adhesive to cure 24 hours before wear.
How to Display or Gift It
- Pair the blazer with chinos or a skirt for a smart casual look.
- Wrap as a thoughtful updated-garment gift in tissue and twine.
- Store on a padded hanger to maintain elbow shape.
- Crop Top Bust Panel—Geometric Medallion

A centered medallion on a crop top reads modern and handcrafted. Keep the medallion size balanced with garment proportions—about 4–5".
Materials
- Geometric medallion file 4.5" diameter
- Lightweight cutaway stabilizer 10" x 10"
- Linen crop top or panel
- Rayon thread neutrals, 3 spools
- Size 80/12 needles
- Hoop 6"
- Pressing cloth
Instructions
- Measure bust center and mark placement.
- Hoop stabilizer and place fabric tautly.
- Stitch design at moderate speed and check tension.
- Remove stabilizer and press from wrong side.
How to Display or Gift It
- Style with high-waisted jeans for a summer-ready outfit.
- Gift with a printed care card and a matching scrunchie.
- Store on a hanger to keep the medallion flat.
- Computer Embroidery Designs for Clothing: Maternity Panel—Heart Repeat

Maternity pieces get extra care, so use soft stabilizers and low-bulk stitches. Computer embroidery designs for clothing make it easy to repeat motifs evenly across stretchy panels.
Materials
- Small heart repeat design 0.5" each
- Fusible stretch stabilizer width of panel + 2"
- Maternity tee or dress panel
- Soft polyester thread, 2 spools
- Ballpoint embroidery needles 80/12
- Long hoop or stitch in sections
- Knit-friendly spray adhesive
Instructions
- Place stretch stabilizer across the panel and fuse according to product directions.
- Stitch hearts in rows, allowing 1/4" spacing.
- Remove any excess stabilizer and press lightly from the inside.
- Allow 24 hours before laundering to let adhesive settle.
How to Display or Gift It
- Package as a baby shower gift with a matching hat.
- Recommend washing on gentle cycle and laying flat to dry.
- Store folded in a breathable garment bag.
- Vintage-Inspired Apron Bib—Script Nameplate
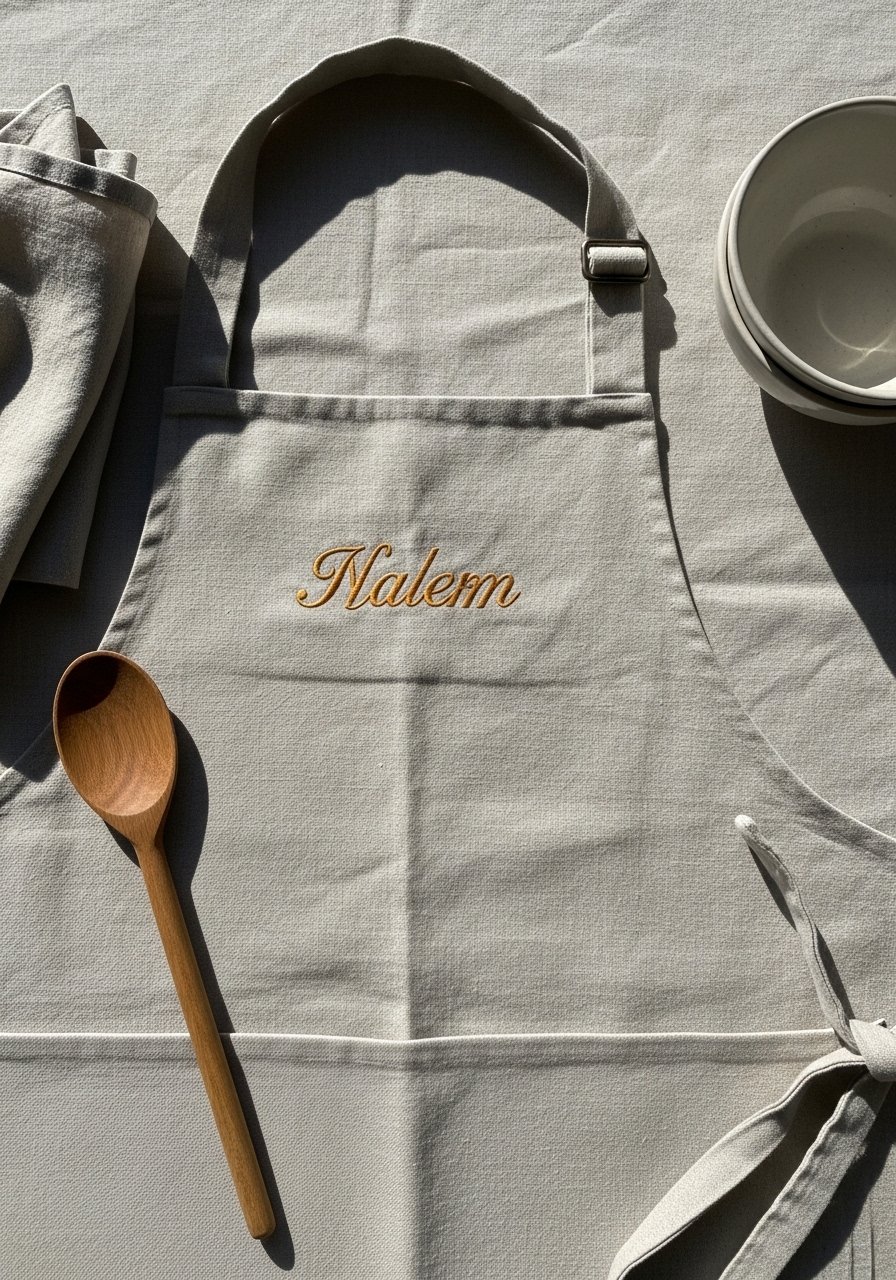
A script nameplate on an apron brings a vintage artisan vibe. Use a satin stitch for the script and choose a soft, matte rayon to avoid shine.
Materials
- Script nameplate file (name up to 12 characters, 5" wide)
- Lightweight cutaway stabilizer 8" x 10"
- Linen apron bib
- Satin-finish rayon thread, 2 spools
- Size 75/11 needles
- Small hoop 5"
- Pressing cloth
Instructions
- Confirm name spelling and center on bib.
- Hoop stabilizer and align fabric; stitch slowly for crisp script edges.
- Remove stabilizer and press from the back for 8 seconds.
- Wait 12 hours before first wash to set stitches.
How to Display or Gift It
- Roll apron and tie with twine and a wooden spoon for gifting.
- Pair with a recipe card for a heartfelt present.
- Store hanging by the neck loop to avoid fold lines on the bib.
- Knit Beanie Logo Patch—Slouchy Badge
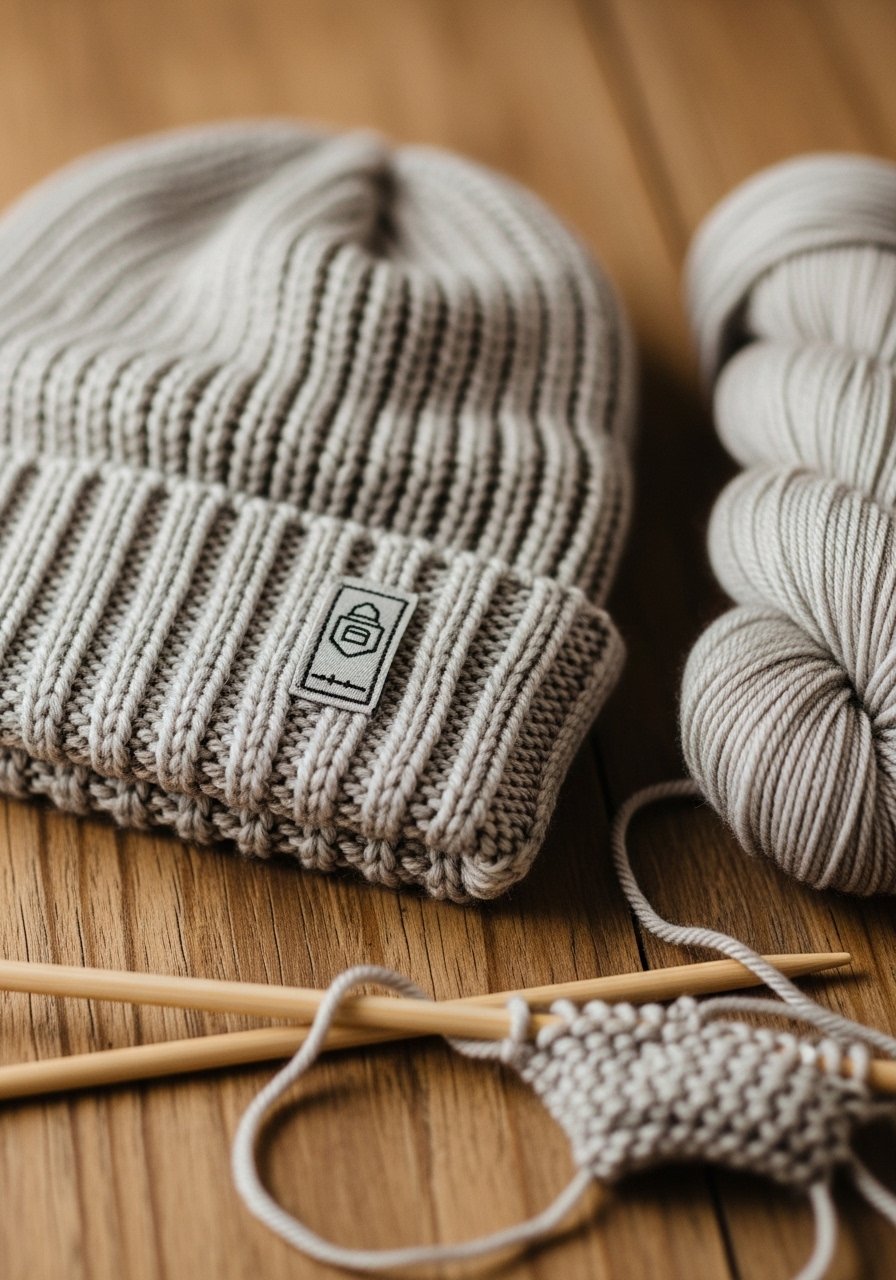
Add a custom logo patch to a knit beanie. Keep patch edges soft to prevent rubbing. Use a stretchy fusible if available and hand-sew for security.
Materials
- Small badge design 2" diameter
- Fusible knit-friendly interfacing 2.5" round
- Knit beanie
- Polyester thread, 1 spool
- Size 90/14 needle for hand or machine
- Hand-sewing needle for final tack
- Small scissors
Instructions
- Stitch badge onto interfacing and trim.
- Fuse gently to the beanie fold for placement (low heat).
- Hand-tack the edges with small whip stitches for durability.
- Let patch sit 24 hours before wear.
How to Display or Gift It
- Pair a beanie with a knit scarf for a winter gift set.
- Wrap in tissue paper inside a small kraft box.
- Store beanies flat to avoid flattening the badge.
Thanks for stitching through all 21 ideas — from tiny chest patches to large back-panel crests. You now have a mix of classic monograms, cottagecore florals, minimalist line art, and practical repairs that show how versatile computer embroidery designs for clothing can be. Pin this for later and try one small project this week; quick wins like a sleeve motif or pocket patch build confidence fast.
Which project will you try first? Share a photo of your favorite finished piece or tag a friend who’d love a DIY refresh. Trust me, a heat-setting tool like a small handheld heat press or a reliable self-healing cutting mat makes repeating these projects smoother and faster — and that matters when you’re stitching a batch.
Happy stitching!





