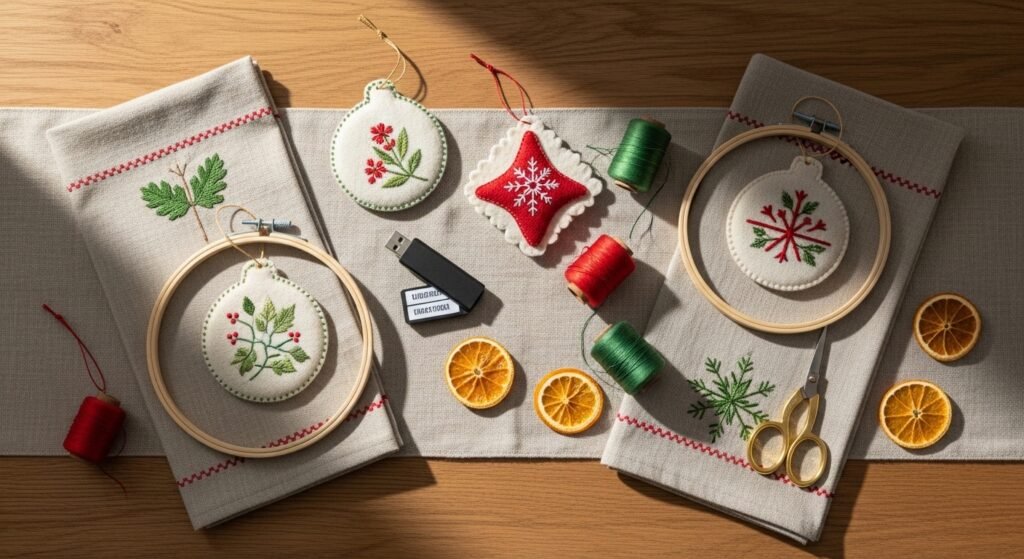
You know the thrill of pulling a finished embroidered piece out of the hoop—threads catching the light, stitches crisp and seasonal. If you love machine embroidery, these 28 jaw-dropping holiday computer embroidery designs will help you make gifts that feel handmade and boutique-ready. From velvet holiday stockings to mini felt ornaments, each project uses a digital embroidery file and is sized, stitched, and finished with real-life tips so you won't waste stabilizer or thread.
You'll find projects for beginners and advanced stitchers, clear materials lists with exact quantities, precise stitch and dry times, and tools I use like my Brother SE600 embroidery machine and a sticky hoop for tricky fabrics. Pin the whole list and pick a few to batch for holiday markets or personal gifting.
- Vintage Floral Wreath Tea Towel (holiday computer embroidery designs)
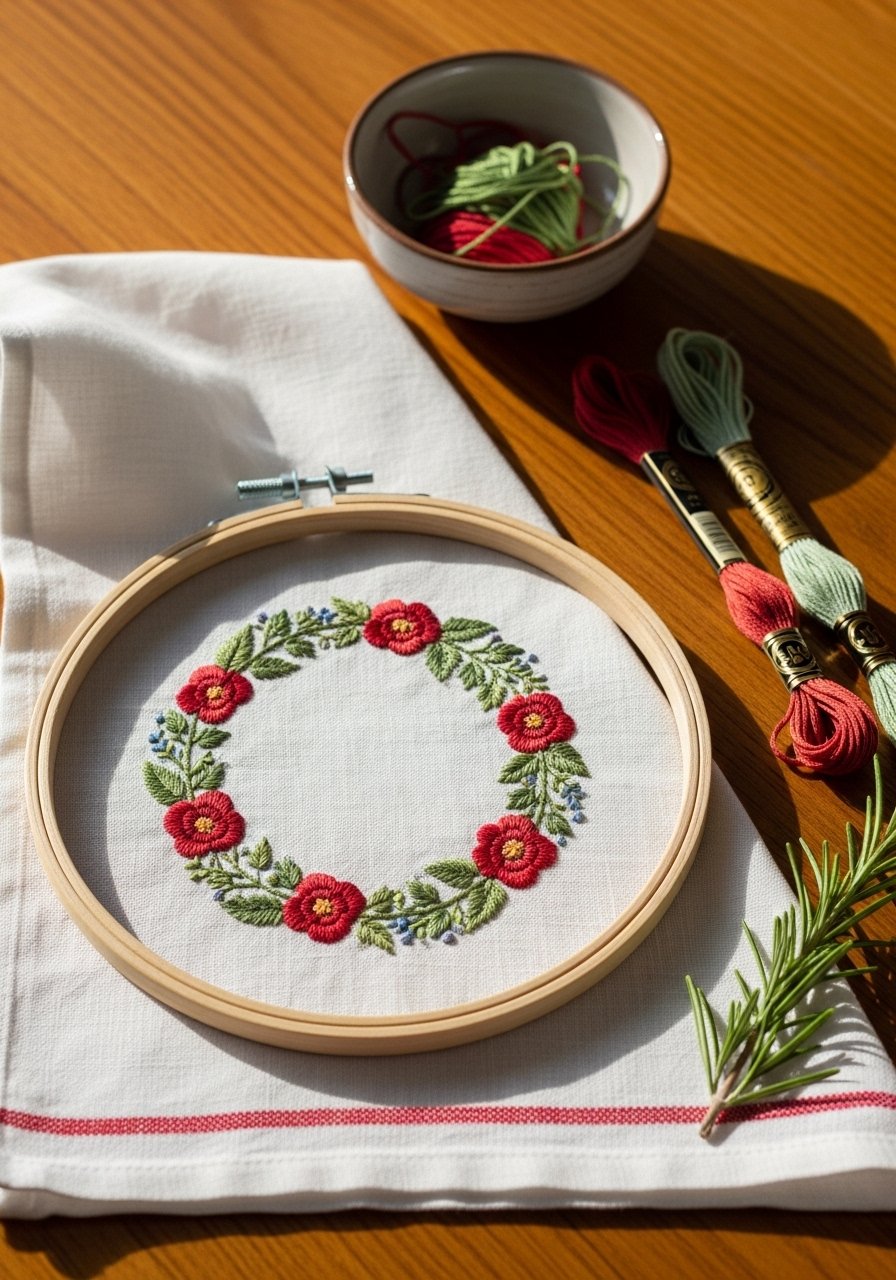
This tea towel uses a small wreath design that feels nostalgic and farmhouse-cottagecore. The stitches are dense enough to show texture but light enough to keep the towel soft. Beginners will love the forgiving linen base and simple placement guide. I run the design from a USB into my machine and hoop with sticky stabilizer for no-slip stitching.
Materials
- 1 white linen tea towel, 18" x 28"
- Holiday wreath embroidery file, 3.5" diameter (computer design)
- Tear-away stabilizer, 8" x 8"
- Embroidery thread: 6 spools (red, deep green, sage, gold metallic, brown, cream)
- #75 embroidery needle, 1 pack
- Embroidery hoop, 5" (for design)
- Water-soluble fabric marker
- Small pair of snips
Instructions
- Pre-wash and press the tea towel; avoid fabric softener. Press until flat.
- Mark center with water-soluble marker and align design center on towel.
- Hoop a 5" sticky stabilizer with the towel fabric taut but not stretched.
- Load the wreath file sized to 3.5". Thread machine with top color and begin stitching.
- Change thread colors as design prompts; clip jump threads to 1/8" after each color change.
- When stitching finishes, remove from hoop, gently tear stabilizer away. If residue remains, press under cloth with warm iron.
- Trim loose threads and press with steam for a crisp finish.
How to Display or Gift It
- Fold neatly and tie with natural twine and a dried orange slice for gifting.
- Display in a kitchen on a bar towel holder or drape over a wooden ladder for a farmhouse look.
- Store flat in a fabric organizer until gifting. For markets, bundle with matching embroidered napkins.
- Mini Velvet Stocking Ornament

Velvet gives this ornament rich color and a plush feel. The snowflake design uses a satin stitch that pops on velvet when stitched slowly. Use a cutaway stabilizer to support the dense fills and a small embroidery hoop (or sticky hoop) to hold the velvet in place.
Materials
- Velvet fabric, 6" x 8"
- Stocking embroidery file, 2.5" height
- Cutaway stabilizer, 6" x 6"
- Embroidery thread: metallic gold and white
- Small ribbon loop, 4"
- Polyester stuffing, tiny pinch
- Sewing needle and matching thread
- Small iron-on hem tape
Instructions
- Cut velvet to 6" x 8" and fuse cutaway stabilizer to wrong side with a low-heat press.
- Hoop using a 3" hoop or sticky hoop; position design and set size to 2.5".
- Stitch snowflake slowly; metallic thread benefits from a slower machine speed.
- After stitching, trim stocking shape leaving 1/4" seam allowance. Clip curves carefully.
- Turn right side out, stuff lightly, and slip-stitch top closed or add hem tape and press.
- Attach ribbon loop and securing stitch. Trim threads and press carefully from the wrong side.
How to Display or Gift It
- Tie onto a gift box or hang as a set on the tree.
- Store flat in a compartmented craft box between tissue layers to keep metallic thread from tangling.
- For a vintage look, add a small brass jingle bell on the ribbon.
- Nordic Gnome Mug Rug

This 5" x 7" mug rug uses a bold outline gnome design with simple fills—perfect for small gift sets. Use a wash-away stabilizer for crisp edges and a medium hoop for stability. I recommend using a wool-blend felt backing for absorbency and texture.
Materials
- Linen mug rug blank, 7" x 5"
- Gnome embroidery file, 4.5" x 3.5"
- Water-soluble stabilizer, 7" x 5"
- Embroidery thread: red, white, gray
- Wool-blend felt for backing, 7" x 5"
- Fusible adhesive strip, 7" length
- Spray starch (optional)
Instructions
- Pre-press linen; spray light starch to reduce puckering.
- Hoop linen with water-soluble stabilizer beneath and set design at 4.5" x 3.5".
- Stitch following color changes; use a size 75 needle.
- After stitching, remove hoop, rinse residue stabilizer under warm water and let dry flat for 30 minutes.
- Fuse felt backing with fusible adhesive strip and topstitch edge with a 1/8" seam.
- Press lightly from the back and let flat for 20 minutes before stacking.
How to Display or Gift It
- Pair with a matching hand-stitched mug cozy and a bag of holiday tea.
- Tuck into a kraft gift box with shredded kraft paper.
- Store stacked flat in a shallow drawer or small craft bin.
- Scandinavian Felt Ornament Trio
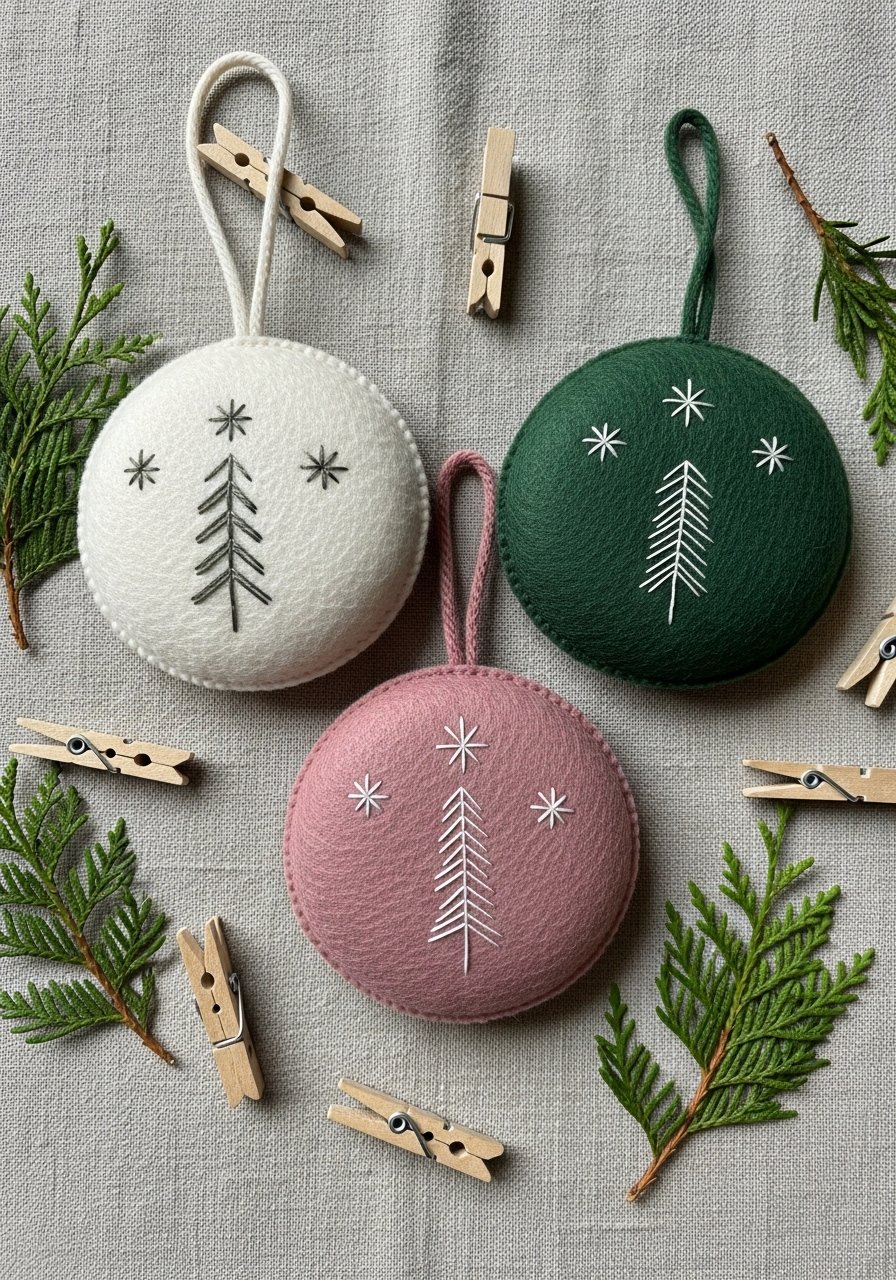
This trio is a quick stitch-a-thon and perfect for beginner machine embroiderers. Use felt as your base to avoid raw edges and a thin cutaway stabilizer so the machine can handle the dense satin stitches without puckering.
Materials
- Wool felt circles, 3 each of 3" diameter
- 3 ornament embroidery files (tree, star, heart), sized 2.5"
- Cutaway stabilizer, 6" x 6"
- Embroidery thread: forest green, cream, dusty pink, gold
- Thin ribbon loops, 3 x 3"
- Small snap fasteners (optional)
- Sewing needle and hand-sewing thread
Instructions
- Hoop felt with cutaway stabilizer and center design. Set size to 2.5".
- Stitch each ornament; swap thread as required.
- After stitching, trim felt to 1/8" outside stitch line if desired.
- Sandwich two felt circles right-sides together and hand-stitch around edge with a ladder stitch, leaving top open for ribbon.
- Insert ribbon loop and finish closing seam.
- Add a tiny jingle bell sewn into the interior if you like.
How to Display or Gift It
- Group in a sheer organza bag for gifting.
- Clip to packages with mini clothespins or hang by a window for a boho look.
- Store flat in a shallow box with tissue to protect felt pile.
- Holiday Computer Embroidery Designs: Monogram Velvet Gift Pouch
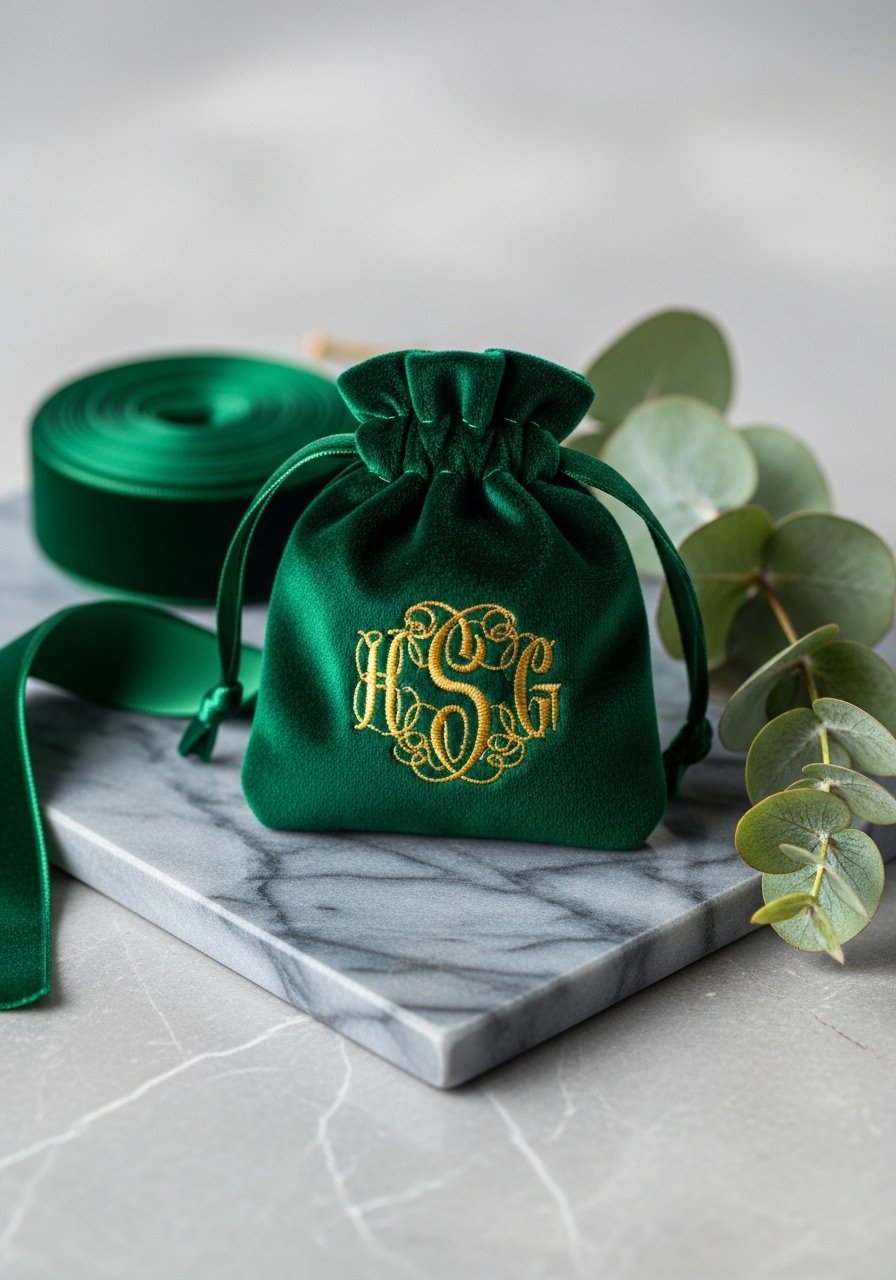
Monogram pouches feel boutique and personal. This project uses a monogram computer embroidery design at 2.8" tall, stitched on velvet with cutaway stabilizer. Use a precision sewing foot to sew pouch seams after embroidery for clean edges.
Materials
- Velvet yardage, 10" x 10"
- Monogram embroidery file, 2.8" height
- Cutaway stabilizer, 8" x 8"
- Embroidery thread: metallic gold
- 1/4" velvet ribbon, 12"
- Sewing thread matching velvet
- Small zipper (optional), 5" (if making zip pouch)
Instructions
- Fuse cutaway stabilizer to wrong side of velvet using low heat.
- Hoop stabilizer and velvet; center and size monogram to 2.8".
- Stitch at slow speed for metallic thread; use a size 75 metallic needle.
- After finishing, trim excess stabilizer close to stitch but leave backing to stabilize pouch seams.
- Cut pouch pieces and sew right sides together leaving top open. Insert ribbon as drawstring or stitch zipper.
- Press carefully from wrong side to avoid crushing velvet nap.
How to Display or Gift It
- Fill with small jewelry or a gift card and tie with ribbon.
- Use a small jewelry box and place pouch inside for extra protection.
- Store pouches flat in a fabric drawer to prevent flattening.
- Embroidered Linen Napkin Set (4-pack)
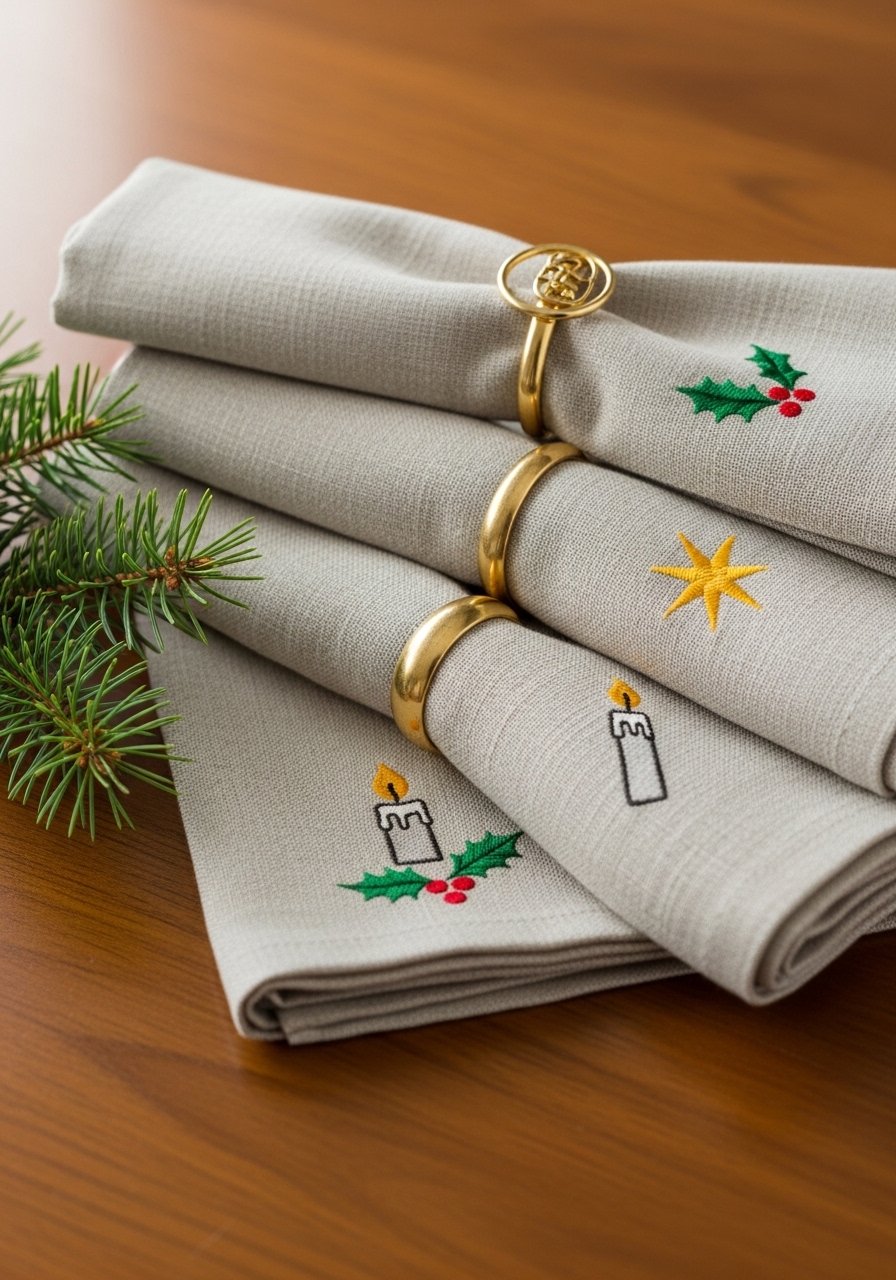
A coordinated napkin set is a quick way to create a cohesive table. Stitch four napkins using a single hoop size and the same stabilizer for consistency. Use pre-washed linen and press between stitches for crisp edges.
Materials
- 4 linen napkins, 16" x 16"
- Four embroidery files, each 2.2" x 2.2"
- Tear-away stabilizer, 6" x 6"
- Embroidery thread set: red, green, gold, brown
- Iron and pressing cloth
- Flat foam brush (to apply lightweight fabric starch)
Instructions
- Pre-wash napkins and press. Light starch if desired.
- Hoop napkin with tear-away stabilizer under fabric and set motif centers 1.5" from one corner.
- Stitch each motif; let thread cool before removing from hoop.
- Tear away stabilizer carefully, press with a cloth on top.
- Repeat for remaining napkins, ensuring same placement on each.
- Stack and tie with ribbon for gifting.
How to Display or Gift It
- Pair with simple ceramic dinner plates or wooden chargers.
- Wrap in kraft paper and tuck a sprig of dried rosemary.
- Store flat in a cotton-lined box to avoid creasing.
- Embroidered Burlap Gift Tags
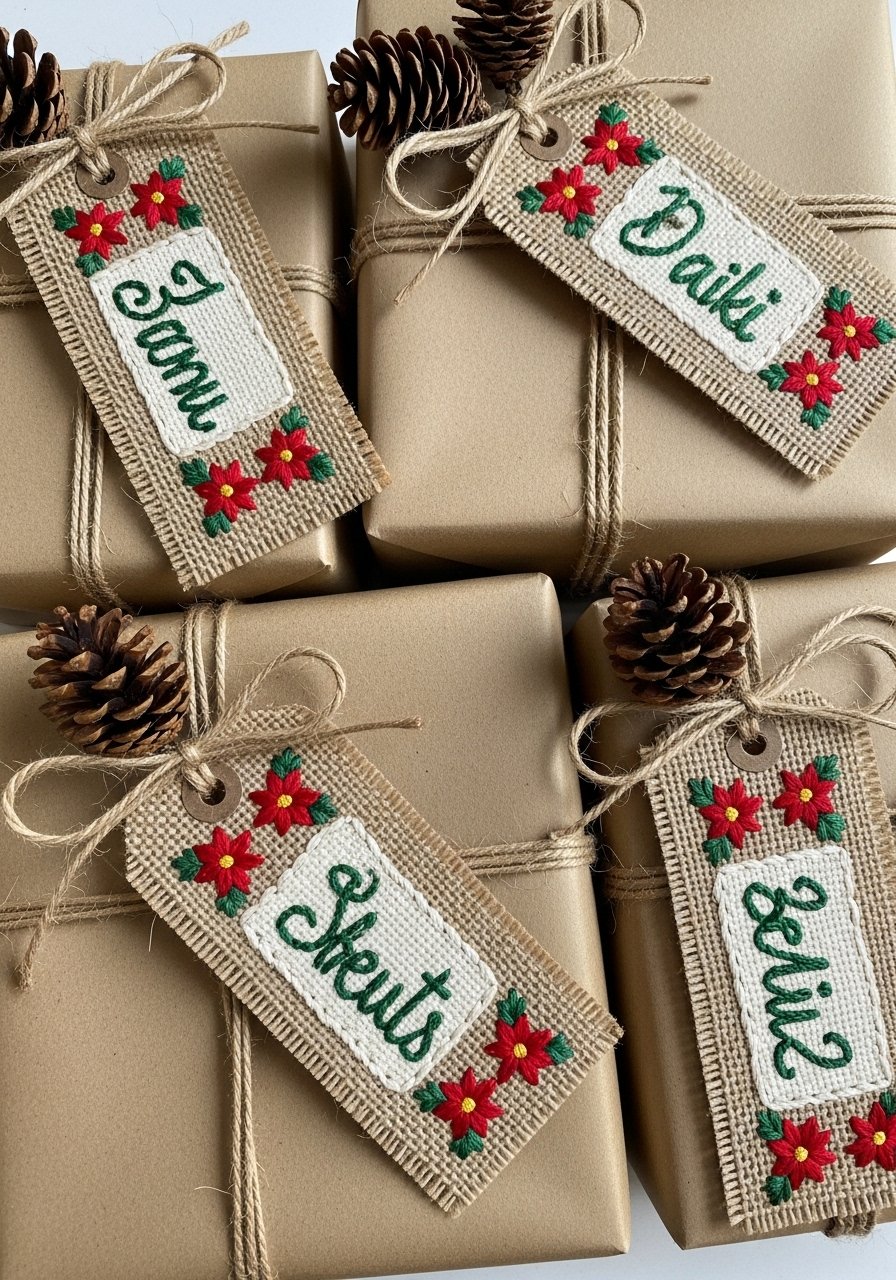
Burlap adds texture and pairs with farmhouse or rustic holiday wrap. Use a tight satin stitch and cutaway stabilizer to prevent pull-through. Trim edges with a pinking rotary cutter to reduce fraying.
Materials
- Burlap, 6" x 12"
- Gift tag embroidery files, 2.0" width
- Cutaway stabilizer, 6" x 6"
- Embroidery thread: cream, red, green
- Jute twine, 6' total
- Pinking rotary cutter or scissors
- Hole punch (for tags)
Instructions
- Iron burlap lightly; hoop with cutaway stabilizer under fabric.
- Center tag design and size to 2.0".
- Stitch slowly to prevent snagging; clip threads and leave backing intact.
- Cut tags leaving 1/8" seam; punch hole and attach jute.
- If burlap frays, lightly seal edges with fray check and let dry 10 minutes.
- Label on the back with a fabric pen if desired.
How to Display or Gift It
- Attach to simple kraft packages or wine bottles.
- Tie sets of tags with twine and offer as small stocking stuffers.
- Store flat in a sealed envelope to keep dust off burlap.
- Heirloom Felt Advent Garland

Make a reusable advent garland with embroidered numbers. Each pocket is small—about 3" x 3"—so designs should be sized to 1.2"–1.5". Use wool-blend felt for structure and a fusible interfacing for the backing.
Materials
- Wool-blend felt sheets, 24 pieces, 4" x 4"
- Number embroidery files 1–24, at 1.4" height
- Cutaway stabilizer, 8" x 10"
- Embroidery thread: metallic gold and contrasting colors
- 1/4" twill tape for garland base, 6 ft
- Heat-seal fusible web, 24 x 2" strips
- Small candies or notes to fill pockets
Instructions
- Hoop felt with cutaway stabilizer and stitch numbers sized to 1.4".
- After stitching, fuse a felt backing with fusible web.
- Fold each into a pocket and topstitch sides with a 1/8" seam allowance.
- Attach pockets to twill tape evenly spaced (every 2.5").
- Let glue cure 24 hours if using craft glue on appliqué.
- Fill with small treats and hang.
How to Display or Gift It
- Hang across a mantel, staircase, or child's bedroom wall.
- For gifting, fill with tiny chocolates and wrap the garland in tissue paper.
- Store pockets flat in a fabric organizer between holidays.
- Metallic Snowflake Quick Patch Set
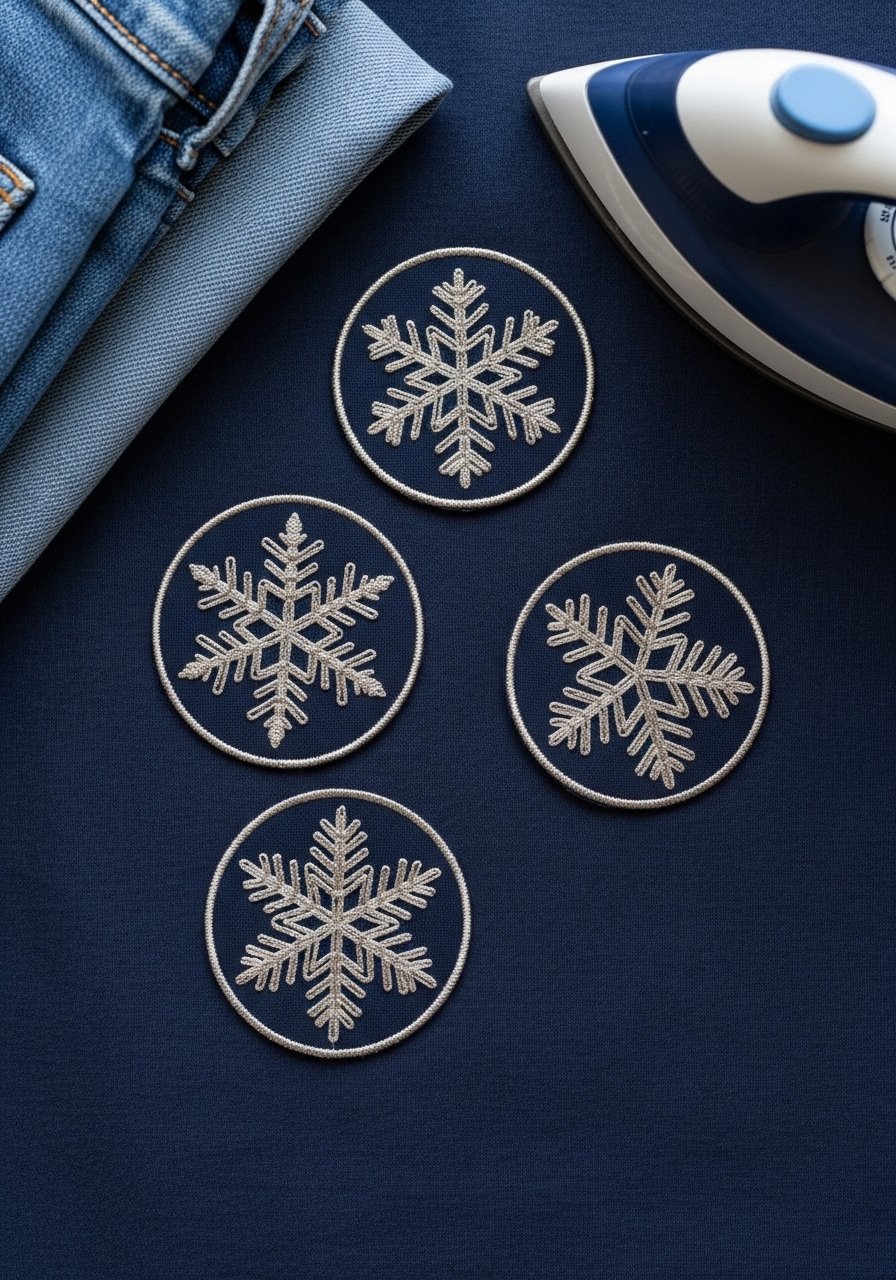
Turn designs into quick patches for coats, jean jackets, or gift wrapping accents. Use iron-on adhesive backing and a wash-away stabilizer for crisp stitches. Metallic thread looks striking on dark backgrounds.
Materials
- Navy cotton fabric, 6" x 6"
- Snowflake embroidery files, 2.0" diameter, three variations
- Water-soluble stabilizer, 6" x 6"
- Metallic silver thread spool
- Iron-on adhesive sheets, 3" circles
- Heat-press or household iron
- Scissors and snips
Instructions
- Hoop cotton with water-soluble stabilizer and center design at 2.0".
- Stitch each snowflake slowly; rinse stabilizer and let dry 20 minutes.
- Trim patch to 2.5" circle, fuse iron-on adhesive to the back following adhesive instructions.
- Peel liner and press onto garment or wrap with a protective cloth for 15 seconds at medium heat.
- Allow to cool before handling.
- For permanent use, topstitch around the edge after applying.
How to Display or Gift It
- Include a set of three on a card as "DIY patch" gift.
- Use on backpacks, cozy sweaters, or aprons.
- Store extra patches flat in an accordion craft organizer.
- Holiday Computer Embroidery Designs: Cashmere-Look Embroidered Scarf Tag

Add a stitched tag to a scarf for a luxe, handmade presentation. Use a tight satin script file sized to 3.0" wide and choose embroidery thread that blends with the scarf for subtlety.
Materials
- Knit scarf, 60" x 8"
- Tag embroidery file, 3.0" width
- Tear-away stabilizer, 4" x 6"
- Embroidery thread: soft cream or taupe
- Small safety pins or fabric glue for temporary placement
- Sewing machine or hand-sewing needle
Instructions
- Place tear-away stabilizer on the wrong side of scarf where tag will go.
- Hoop as flat as possible and set design to 3.0" width.
- Stitch slowly to avoid stretching knit; lower machine speed and use ballpoint needle if sewing through knit.
- After stitching, tear away stabilizer and gently press with low heat.
- Use small pins or a few hidden hand stitches to secure tag edges.
- Let rest flat for 30 minutes before folding or packaging.
How to Display or Gift It
- Wrap scarf around a cardboard insert and tie with ribbon over the tag.
- Store wrapped in a breathable cotton bag until gifting.
- Pair with a pair of gloves for a coordinated set.
- Peppermint Candy Hoop Art (5" hoop)

Hoop art is easy to sell or gift. This small hoop is bright and cheerful and stitches up quickly. Use a dense satin fill for candy stripes for a glossy look.
Materials
- Cotton fabric for hoop, 8" square
- Peppermint embroidery file, 3.5" diameter
- Tear-away stabilizer, 6" x 6"
- Embroidery thread: red and white
- 5" wooden embroidery hoop
- Small bit of batting (optional) for dimension
Instructions
- Hoop fabric with tear-away stabilizer and center design to 3.5".
- Stitch at normal speed; change bobbin color if needed to avoid show-through.
- After stitching, trim excess fabric leaving 1/2" seam and press.
- If adding batting, glue in place before tightening hoop.
- Trim back fabric and secure with a neat running stitch or glue on the inside hoop.
- Add a hanging loop or ribbon and press lightly.
How to Display or Gift It
- Group in threes on a small gallery wall or give as individual stocking stuffers.
- For gifting, wrap in tissue and add a small candy cane.
- Store small hoops stacked flat in a shallow box.
- Rustic Wood Slice Ornament with Embroidered Linen
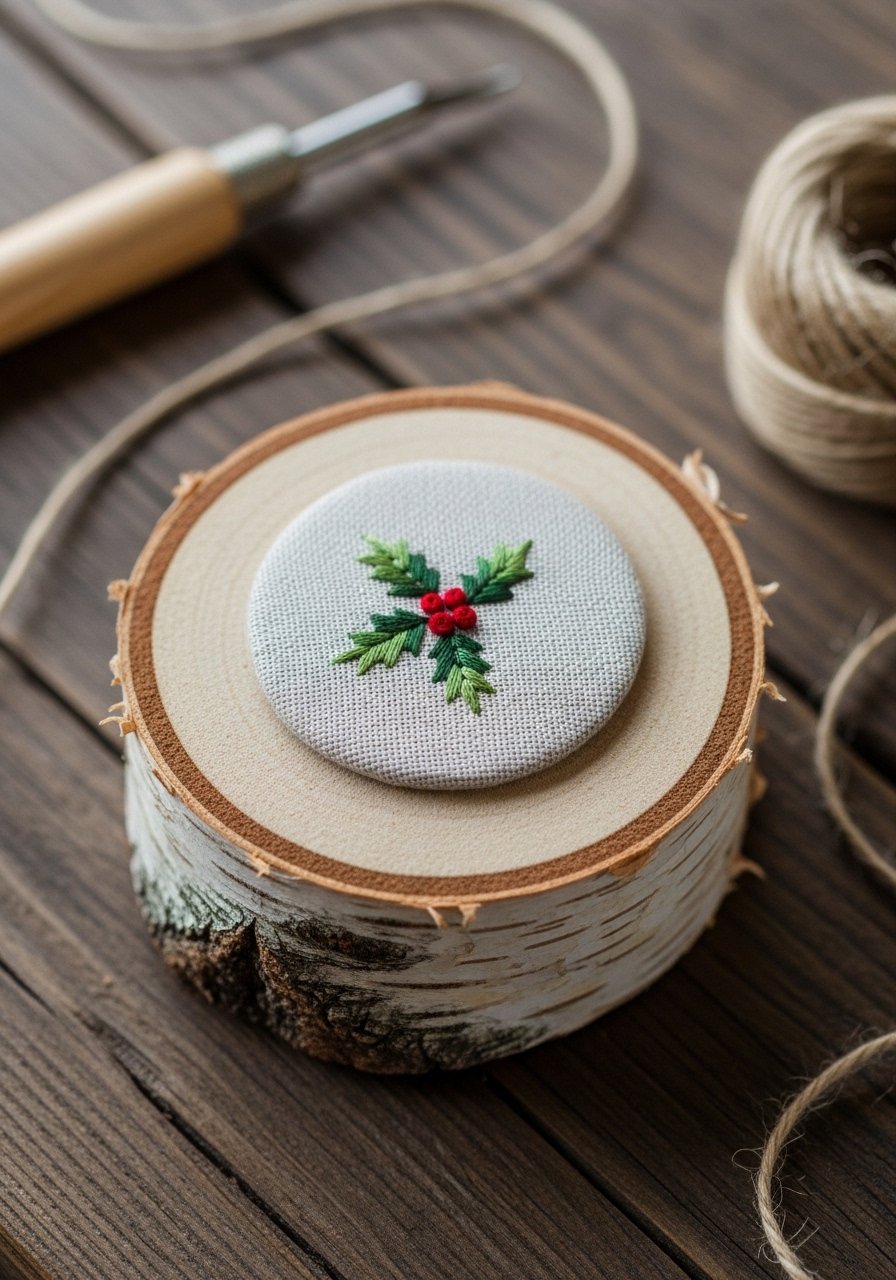
Combine natural wood with embroidery for a rustic ornament. Glue a finished embroidered linen circle to a sanded wood slice and finish edges with beeswax for longevity.
Materials
- Birch wood slices, 2.5" diameter
- Linen circles embroidered with holly, 2.0" diameter
- Cutaway stabilizer, 4" x 4"
- Embroidery thread: green and red
- E6000 or tacky craft glue, small tube
- Fine sandpaper, 120 grit
- Small drill for hanging hole (if needed)
Instructions
- Hoop linen with cutaway stabilizer and stitch design at 2.0".
- Trim linen circle carefully and sand wood slice edges smooth.
- Glue embroidered linen onto wood slice with a thin layer of E6000; press and wipe excess.
- Let glue cure 24 hours before handling.
- Drill or string ribbon through pre-existing hole or glue ribbon loop on back.
- Seal wood with a thin coat of beeswax or clear matte spray and let dry 30 minutes.
How to Display or Gift It
- Tie onto a wreath or package for a natural look.
- Place in a boxed set of ornaments lined with tissue.
- Store flat in a hard box to protect the wood and stitches.
- Festive Table Runner with Holiday Computer Embroidery Designs
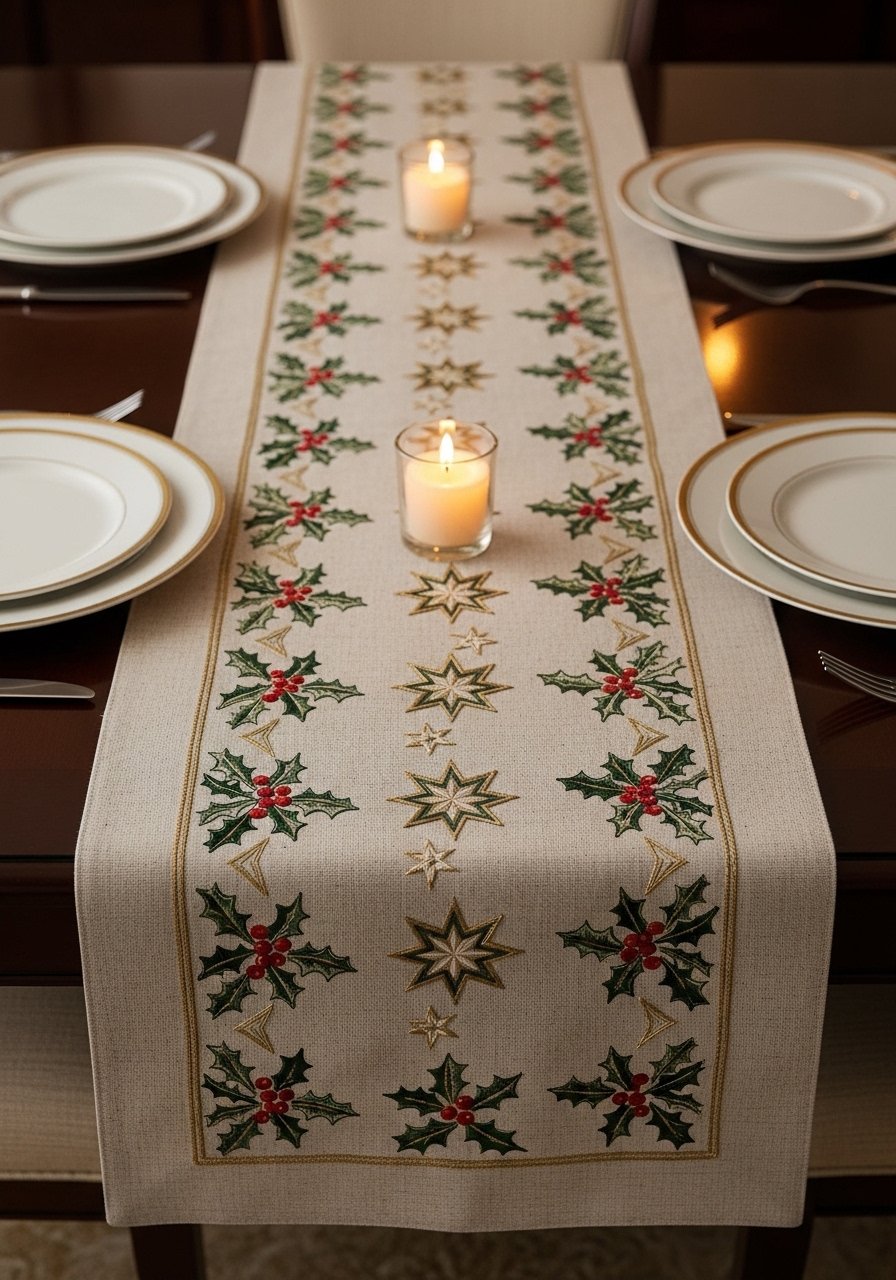
This runner showcases repeatable embroidery designs aligned down the center. Use a long hoop or re-hoop carefully and measure between motifs for even spacing. The runner finished size here is 72" x 14".
Materials
- Linen table runner blank, 72" x 14"
- Four to six embroidery files repeated, each 3.0" x 3.0"
- Tear-away stabilizer strips, 12" long
- Embroidery thread set: green, red, gold
- Long straight ruler and fabric chalk
- Iron and pressing cloth
Instructions
- Mark the runner centerline and spacing with chalk; designs spaced 6" apart.
- Hoop area with tear-away stabilizer and align first design at the starting spot sized to 3.0".
- Stitch first motif and then re-hoop for each subsequent motif, matching placement carefully.
- After stitching all motifs, remove stabilizer and press runner with steam.
- Edge hem the runner with a 1/4" turned hem or serge raw edges.
- Let rest flat for 1 hour to remove any hoop marks.
How to Display or Gift It
- Pair with embroidered napkins for a table set.
- Roll and wrap with a ribbon for gifting.
- Store rolled in acid-free tissue to prevent creases.
- Holiday Pet Bandana with Paw Print Design

Pet gifts are always a hit. Use a medium-density file sized to 3.5" and choose non-scratch threads. Back with a thin cotton interfacing so the bandana stays crisp but comfy.
Materials
- Cotton bandana blank, 14" x 14" (tri-fold style for small pets)
- Paw print embroidery file, 3.5" width
- Tear-away stabilizer, 6" x 6"
- Embroidery thread: white and black
- Iron-on lightweight interfacing, 6" x 6"
- Sewing machine for finishing
Instructions
- Fuse lightweight interfacing to wrong side of bandana area.
- Hoop bandana with tear-away stabilizer and set design to 3.5".
- Stitch at moderate speed; avoid heavy fills that add stiffness.
- Remove stabilizer and press with low heat.
- Fold bandana into triangle and topstitch top edge 1/8" from edge.
- Let sit flat 15 minutes before folding for packaging.
How to Display or Gift It
- Pair with a small pet treat jar and tag as a gift set.
- Store flat or hung on a small hanger to avoid creases.
- For batch-making, stitch multiple bandanas and tag each with size.
- Embroidered Candle Wraps (set of 3)

Embroidered bands around candles add a soft touch without sewing on wax. Wrap embroidered linen around pillar candles and secure with ribbon. Use a lightweight tear-away stabilizer for crisp stitches.
Materials
- Linen strips, 12" x 3", three strips
- Holly embroidery file, 2.0" width
- Tear-away stabilizer, 6" x 6"
- Embroidery thread: green and red
- Satin ribbon, 18" total
- Double-sided tape
Instructions
- Hoop linen with tear-away stabilizer and stitch motif sized to 2.0".
- Trim to fit around candle, leaving 1/2" overlap.
- Wrap around candle and secure with double-sided tape or tie with ribbon.
- Avoid placing wrapped band near the flame—use as decorative outer layer only.
- For gifting, wrap candle in cellophane and tie, keeping band removable.
- Store bands flat until gifting.
How to Display or Gift It
- Group three wrapped candles in a decorative tray with potpourri.
- Label and store in a candle-safe box for gifting.
- For markets, sell as detachable sets with safety instructions.
- Retro Toy Soldier Pillow Cover

A stitched pillow cover makes a bold holiday statement. Use a cutaway stabilizer for dense areas and stitch the soldier at 6.0" height for a 16" pillow. Choose rayon thread for subtle sheen.
Materials
- Linen pillow cover, 16" x 16"
- Toy soldier embroidery file, 6.0" height
- Cutaway stabilizer, 10" x 10"
- Embroidery thread set: red, navy, gold, black
- 16" pillow insert
- Zipper or envelope backing material
Instructions
- Hoop linen with cutaway stabilizer and align center. Size design to 6.0" height.
- Stitch using rayon thread; change bobbin color as needed.
- After finishing, trim stabilizer to 1/8" outside the stitching.
- Sew pillow cover with zipper or envelope back and insert pillow.
- Press from wrong side to maintain texture.
- Let rest flat 30 minutes before fluffing pillow.
How to Display or Gift It
- Pair with a coordinating throw or smaller lumbar pillow.
- Wrap in kraft paper with twine for gifting.
- Store pillow in a breathable cotton bag when not in use.
- Playful Kids' Stocking with Santa Patch

Kids love personalized stockings. Use a patch-style Santa design sized to 3.5" and iron-on patch backing for durability. Stitch onto felt stocking with a small zigzag for extra hold.
Materials
- Red felt stocking blank, 12" length
- Santa embroidery file patch, 3.5" width
- Cutaway stabilizer, 6" x 6"
- Embroidery thread: red, white, black, pink
- Iron-on patch backing
- Hot glue gun for attaching small bells
Instructions
- Hoop felt or stabilizer and stitch Santa patch sized to 3.5".
- Apply iron-on backing per instructions and trim patch.
- Position on stocking cuff and press with medium heat for 20 seconds.
- Topstitch with small zigzag to secure edges.
- Add bells or pom-poms with hot glue and let set 10 minutes.
- Inspect seams and reinforce any weak spots.
How to Display or Gift It
- Hang on a wooden peg or stair garland.
- Fill with small toys and a personalized note.
- Store hanging in a closet or on a peg to keep shape.
- Embroidered Gift Card Wallet

Make gift cards feel thoughtful with a stitched wallet. This small pouch uses a 2.2" motif and lightweight interfacing. Finish edges with a decorative border stitch.
Materials
- Linen rectangle, 8" x 4"
- Poinsettia embroidery file, 2.2" width
- Tear-away stabilizer, 6" x 6"
- Embroidery thread: red and green
- Lightweight interfacing, 8" x 4"
- Snap fastener or Velcro dot
Instructions
- Fuse interfacing to wrong side of linen.
- Hoop and center design at 2.2" and stitch.
- Fold linen into wallet shape and topstitch edges 1/8" from edge.
- Attach snap or Velcro at 1/2" from fold line.
- Press gently to flatten seams.
- Let sit 15 minutes before inserting a gift card.
How to Display or Gift It
- Tuck into a holiday card or place inside a small box.
- Bundle with a small gift card and candy for teachers.
- Store flat in a small craft drawer.
- Hand Towel with Decorative Hemstitch and Embroidery

Combine a decorative hemstitch with corner embroidery to create a luxe hand towel. Hemstitching takes time—use a sewing machine foot for a faux hemstitch if you're short on time.
Materials
- Cotton hand towel, 16" x 26"
- Poinsettia corner embroidery file, 3.0"
- Tear-away stabilizer, 6" x 6"
- Embroidery thread: crimson, dark green
- Hemstitch needle or hemstitch sewing foot
- Iron and pressing cloth
Instructions
- Finish towel edge with real or faux hemstitch method before embroidering.
- Hoop towel with stabilizer and align corner motif sized to 3.0".
- Stitch and then remove stabilizer; press corner.
- Topstitch a decorative border 1/8" from embroidered area.
- Wash gently and press; drying time overnight if stitched with starch.
- Store folded or hang on a towel ring for gifting.
How to Display or Gift It
- Pair with artisanal soap and a small wooden dish.
- Wrap in cellophane with a ribbon and tag.
- Store in a shallow linen drawer to maintain hemstitch detail.
- Mini Quilted Ornament with Embroidered Center

Combine quilting and machine embroidery for a textured mini ornament. Use a small square—3.5" finished—and a lightweight batting for puff.
Materials
- Cotton front and back squares, 4" x 4", two pieces
- Mini mitten embroidery file, 2.0"
- Lightweight batting, 4" x 4"
- Tear-away stabilizer, 6" x 6"
- Embroidery thread: red and cream
- Sewing machine for quilting lines
Instructions
- Hoop top fabric with stabilizer and stitch mitten at 2.0".
- Layer batting and backing and quilt lines 1/2" apart.
- Trim to 3.5" and bind edges with small bias tape.
- Add a small ribbon loop and secure with hand stitches.
- Press and let batting settle 4 hours before packing.
- Add a tiny label on the back with year embroidered.
How to Display or Gift It
- Cluster on a small tree or add to a napkin ring for place settings.
- Pack in a small padded envelope for shipping.
- Keep in a fabric-lined box between holidays.
- Embroidered Linen Cosmetic Pouch
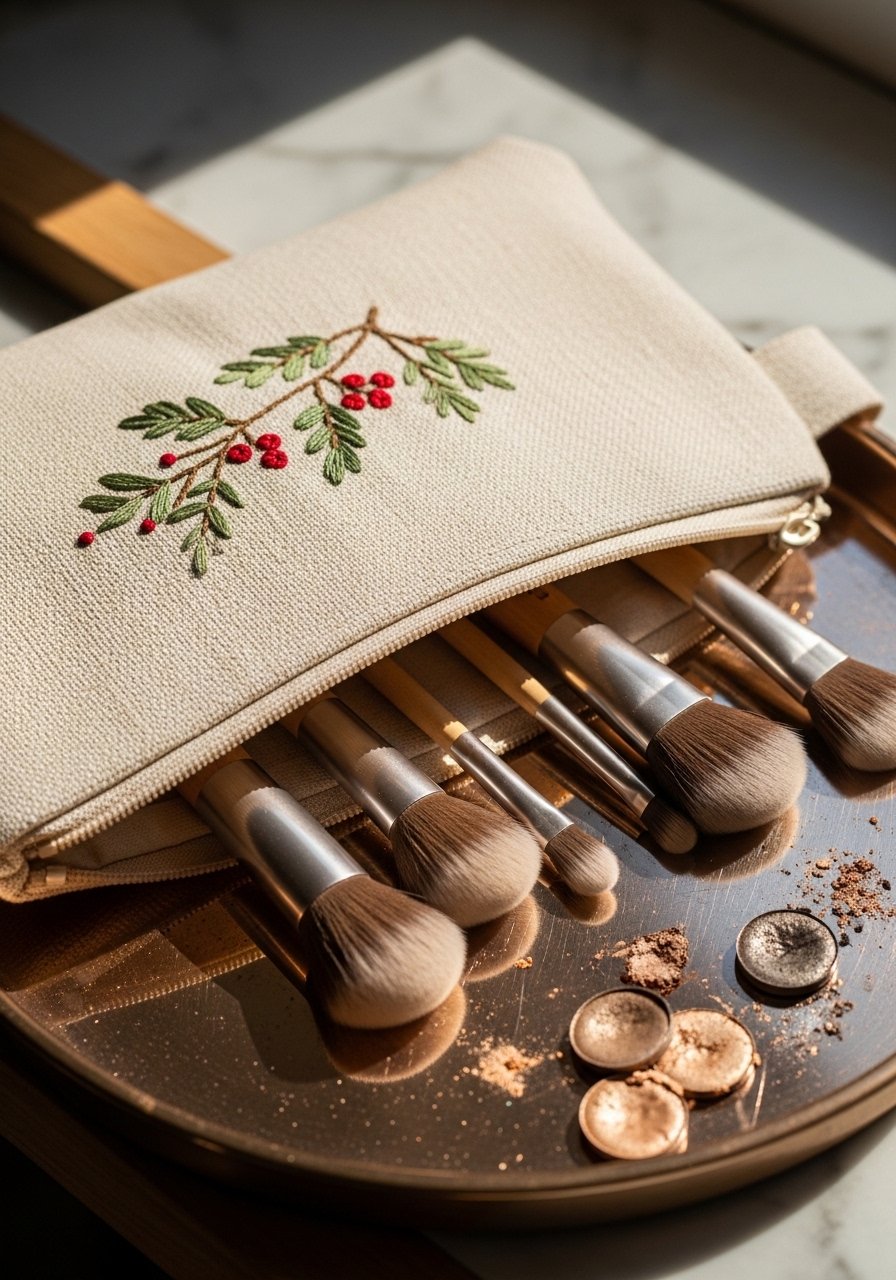
A handy pouch is practical and pretty—the design is stitched at 4.0" and placed off-center for a modern look. Use a zipper foot for neat finishing.
Materials
- Linen pouch blank, 8" x 5" (with zipper)
- Sprig embroidery file, 4.0" width
- Cutaway stabilizer, 8" x 8"
- Embroidery thread: olive and cranberry
- Zipper (if replacing), 8"
- Small keyring or charm (optional)
Instructions
- Hoop linen front panel with cutaway stabilizer and stitch at 4.0".
- Trim stabilizer and sew pouch with zipper if assembling yourself.
- Topstitch zipper area for neat finish.
- Press from wrong side on low heat.
- Allow zipper adhesive to cure 12 hours if glued.
- Fill or gift as is.
How to Display or Gift It
- Pair with travel-size cosmetics and a gift card.
- Store pouches stacked in a small craft organizer.
- Offer a set with matching embroidered hand towel.
- Embroidered Linen Bookmark Set

Bookmarks are quick stitches and great for batch gifting. Each design is tiny—about 1.0" x 2.5"—and stitched on linen with tear-away stabilizer.
Materials
- Linen strips, 8" x 2", three pieces
- Small motif files, 1.0" x 2.5"
- Tear-away stabilizer, 6" x 6"
- Embroidery thread: gold, green, red
- Thin ribbon for tassel, 6" each
- Stiffener spray or light interfacing
Instructions
- Stabilize linen and hoop for small designs sized to 1.0" x 2.5".
- Stitch motifs and remove stabilizer.
- Apply light interfacing or stiffener spray and let dry 20 minutes.
- Fold top and add ribbon tassel.
- Round corners with scissors if desired.
- Pack in sets of three with a small cardstock backing.
How to Display or Gift It
- Tuck into holiday cards or bookshop bundles.
- Store flat in a small envelope to keep ribbons from tangling.
- For markets, display in a wooden vintage book crate.
- Embroidered Linen Apron Pocket
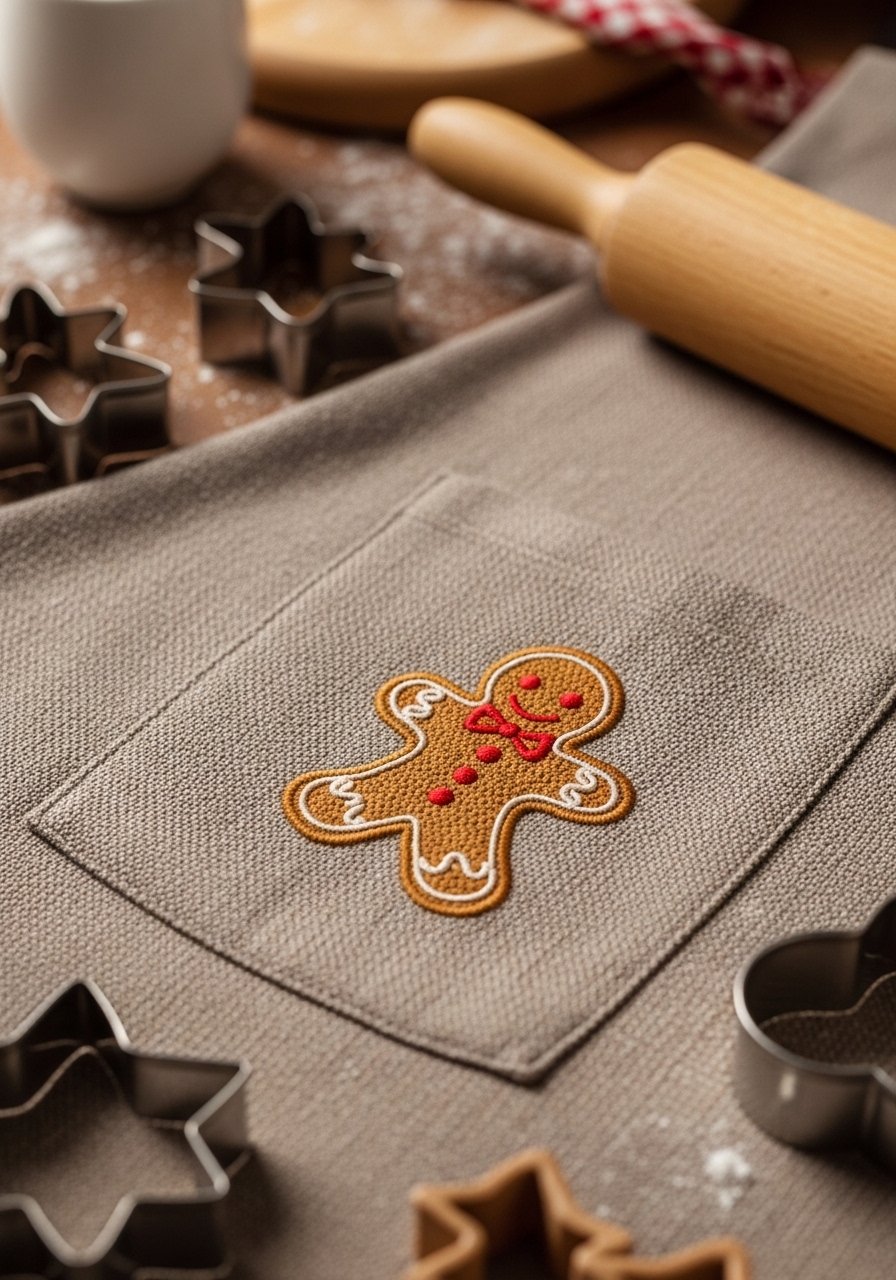
Personalize an apron with a stitched pocket for baking friends. Use cutaway stabilizer and choose cotton threads for kitchen-safe durability.
Materials
- Cotton apron with pocket, standard size
- Gingerbread embroidery file, 4.0" width
- Cutaway stabilizer, 8" x 6"
- Embroidery thread: brown, cream
- Straight ruler and fabric chalk
- Steam iron
Instructions
- Mark pocket center and hoop apron with stabilizer.
- Stitch design sized to 4.0" and remove stabilizer.
- Press pocket flat and topstitch edges to secure.
- Let cool 10 minutes before folding.
- Wash apron on gentle cycle to test durability.
- Re-press and package.
How to Display or Gift It
- Pair with a baking kit — cookie mix in a jar and wooden spoon.
- Fold and place in a small apron box with a printed recipe.
- Store hanging to maintain shape.
- Embroidered Oven Mitt Hanging Loop

Update a plain oven mitt by embroidering the hanging loop or cuff. Small files (1.5"–2.5") work best and keep the mitt flexible.
Materials
- Oven mitt, standard
- Hanging loop embroidery file, 2.0" width
- Tear-away stabilizer, 6" x 6"
- Embroidery thread: brown and cream
- Sewing needle and thread (if attaching loop)
- Heat-resistant fabric for reinforcement (optional)
Instructions
- Stabilize area and hoop carefully so mitt lays flat but not stretched.
- Stitch when loop area is supported and size to 2.0".
- Remove stabilizer and press from wrong side.
- Reinforce loop with heat-resistant fabric if needed.
- Let cool 30 minutes before use.
- Test with a warm oven to ensure stitching holds.
How to Display or Gift It
- Pair with a set of embroidered tea towels and a recipe card.
- Hang on a pot rack as kitchen decor.
- Store in a kitchen drawer with tissue to protect stitches.
- Festive Embroidered Coasters (set of 6)
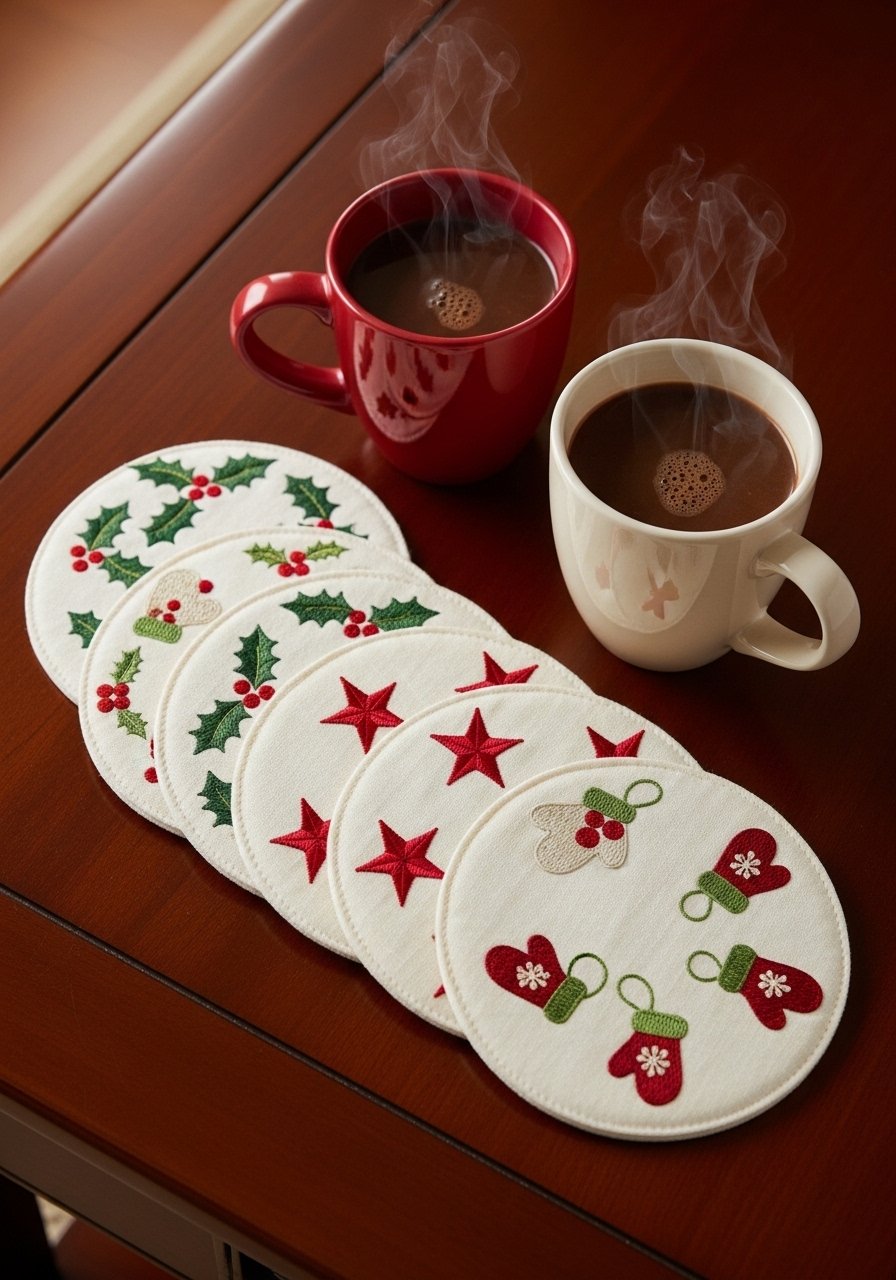
Coasters are great for markets. Use cork backing and cotton tops; designs sized to 3.25" diameter. Seal cork with a clear spray to prevent moisture.
Materials
- Cotton circles, 4" diameter, six pieces
- Cork rounds, 4" diameter, six pieces
- Embroidery files, 3.25" each
- Tear-away stabilizer, 8" x 8"
- Embroidery thread: green, red, navy
- Fabric glue or topstitching thread
Instructions
- Hoop cotton with stabilizer and stitch each motif sized to 3.25".
- Fuse or glue cotton to cork backing; topstitch to seal edges.
- Seal cork with clear spray and let cure 24 hours.
- Trim threads and press edges.
- Stack and tie with twine for gifting.
- Advise customers to avoid long exposure to wet cups.
How to Display or Gift It
- Bundle in sets of two or three in small kraft boxes.
- Suggest pairing with a tea sampler.
- Store stacked flat in a small drawer.
- Holiday Computer Embroidery Designs: Needle Minder Ornament
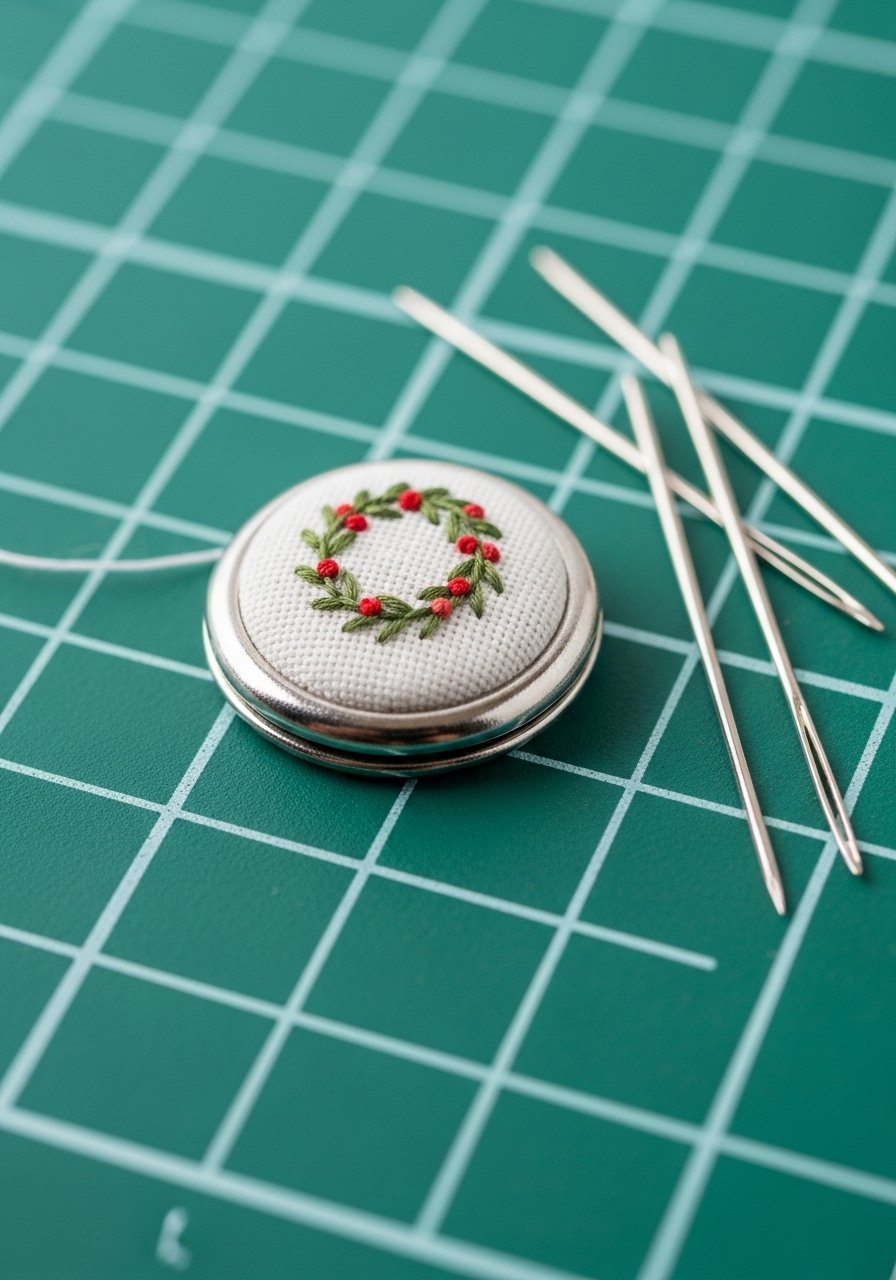
Needle minders are a small but practical gift for stitchers. Lightweight designs (1.0"–1.5") work best. Affix to a magnetic base for function.
Materials
- Fabric circle, 1.5" diameter
- Tiny wreath embroidery file, 1.0" diameter
- Water-soluble stabilizer, 3" x 3"
- Embroidery thread: green and red
- Small round needle minder magnet set
- Strong craft glue
Instructions
- Hoop fabric with water-soluble stabilizer and stitch tiny wreath at 1.0".
- Rinse away stabilizer and dry 10 minutes.
- Glue embroidered circle to needle minder base and press magnet on back.
- Let adhesive cure 24 hours.
- Test with a couple of needles before packaging.
- Package with a small card explaining use.
How to Display or Gift It
- Package as a mini gift for fellow stitchers.
- Store flat in a small tin to protect magnet.
- Include with a kit of embroidery needles and a tiny threader.
- Joyful Embroidered Wreath Cushion Tag

Make a soft gift tag that doubles as a miniature ornament. A cushion tag is about 2.5" and stuffed lightly for puff. Use a washable stuffing and secure with a hidden ladder stitch.
Materials
- Cotton circles, 3" diameter, two per tag
- "Joy" wreath embroidery file, 2.2" diameter
- Tear-away stabilizer, 6" x 6"
- Embroidery thread: dark green and crimson
- Polyester stuffing, pinch per tag
- Ladder stitch needle for finishing
Instructions
- Hoop top circle with stabilizer and stitch at 2.2".
- Place two circles right sides together and stitch leaving a 1/2" opening.
- Turn right side out, stuff lightly, and close with ladder stitch.
- Add ribbon loop and press gently.
- Let stuffing settle 12 hours before packing.
- Attach tag to gift with twine.
How to Display or Gift It
- Tie to a wrapped box as a reusable tag.
- Hang on tree or use as mini-wreath accent.
- Store with other fabric tags in a small craft bin.
- Embroidered Holiday Tote with Full-Size Panel

A large tote showcases a full-size computer embroidery design (10" width). Use a heavy-duty cutaway stabilizer and consider using an embroidery arm or large hoop. This is a weekend project but makes a memorable gift.
Materials
- Canvas tote bag, 15" x 15"
- Full-panel village embroidery file, 10.0" width
- Heavy cutaway stabilizer, 14" x 10"
- Embroidery thread set: multiple colors for the scene
- Size 90/14 embroidery needle for canvas
- Long-arm or large hoop (12" or 14")
- Tailor's chalk and ruler
Instructions
- Mark placement and hoop heavy cutaway stabilizer large enough to cover the panel.
- Attach tote to stabilizer snugly and use a long hoop or frame.
- Load the 10" file and stitch in color order; rotate bobbins as needed and change needles if thread becomes blunt.
- Remove excess stabilizer leaving 1/4" margin if desired.
- Press from the wrong side and re-shape tote.
- Inspect for any skipped stitches; re-stitch small gaps by hand.
How to Display or Gift It
- Pack tote with a coordinating kitchen towel or wrapped goodies.
- For gifting, fold gently and tie with wide ribbon.
- Store flat or hang by handles; avoid crushing the embroidered panel.
Thanks for making it to the end—what a creative run! You’ve got 28 wearable or giftable projects that use holiday computer embroidery designs in different ways: ornaments, textiles, accessories, and home decor. Try batching simple motifs (like the felt ornaments or burlap tags) for quick production days, and save larger pieces (like the tote or runner) for slower, cozy afternoons.
Pin this list so you can come back when you're planning gift sets, and tell me which project you want step-by-step photos for next. Trust me, picking a quality hot glue gun with temperature control changed how tidy my finishing looked across half these projects — no stringy mess, no burns.
Brother SE600 embroidery machine | Tear-away stabilizer | Cutaway stabilizer | Metallic embroidery thread | 5-inch wooden embroidery hoop





